By: dorketh and vazellea
Updated for 3.8
Table of Contents
Introduction
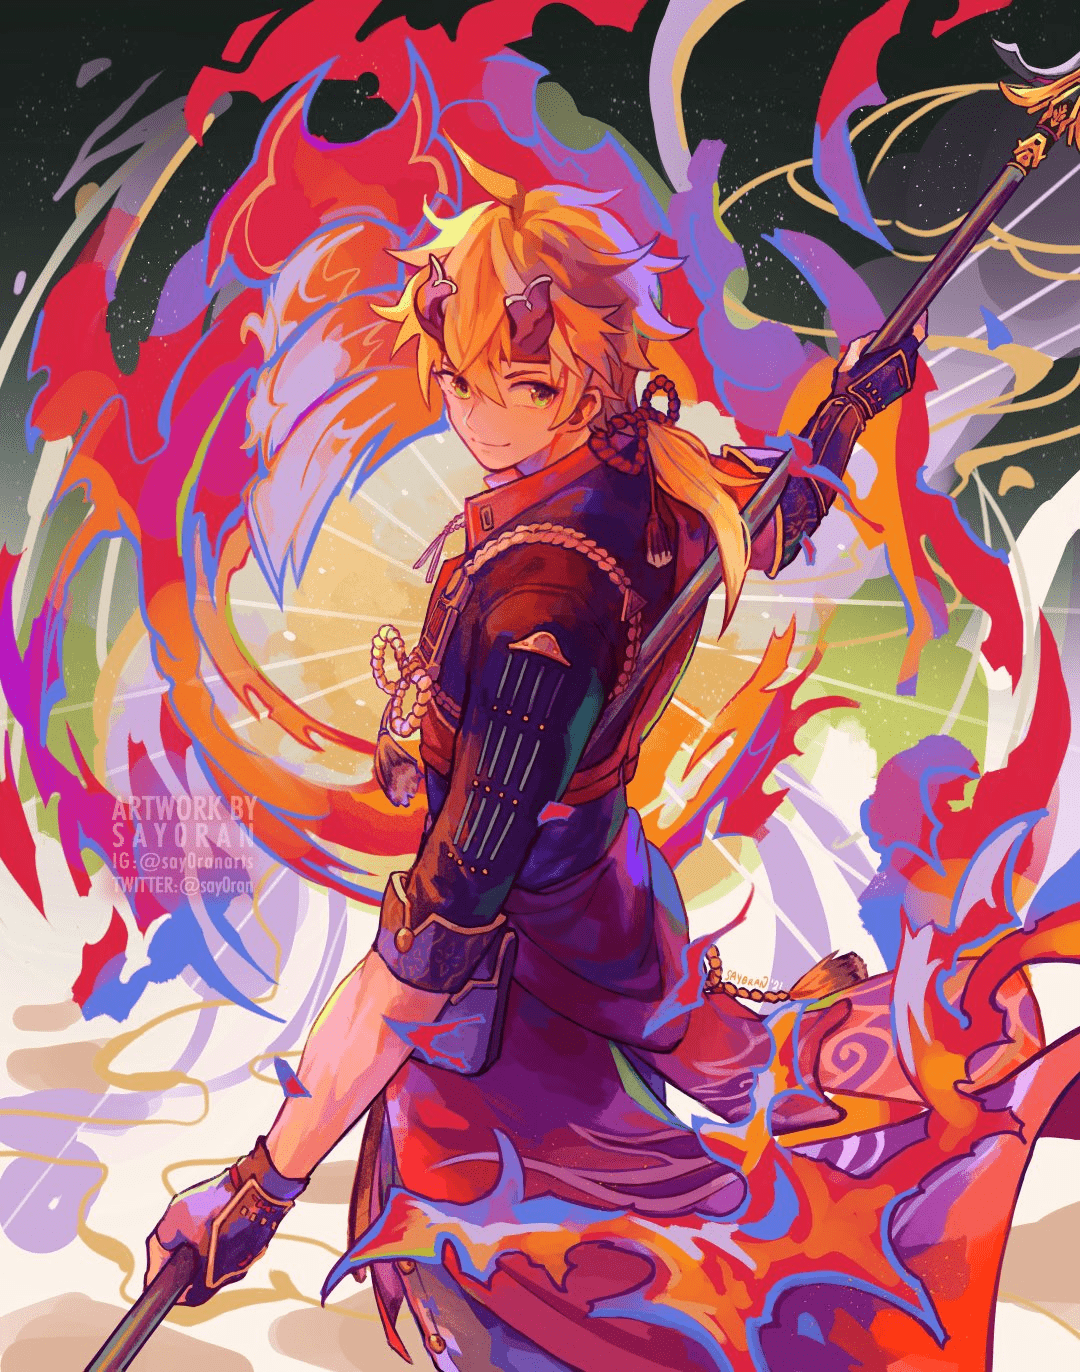
Ahoy there! Welcome to the all-encompassing guide for the Chief Retainer of the Kamisato Clan, Thoma, written by dorketh and vazellea of Thomains.
Within this guide, you will find anything and everything you need or want to know about our beloved fixer including his Talents, Constellations, ER requirements, builds, and much more!
If you are looking for a quick guide to Thoma, please see the infographics below or the quick guide.
It’s good to meet you at last, Traveler. I’ve been hearing about you for a long time now. I’m your new buddy, Thoma — as long as that’s okay with you, of course!
Glossary
| Term | Definition |
| E | Shorthand for Elemental Skill. |
| Q | Shorthand for Elemental Burst. |
| N#, C, D, J | N followed by a number refers to how many Normal Attacks (NAs) a character is doing per attack string, while C refers to a Charged Attack. For example, N1C refers to one NA followed by a Charged Attack. Additionally, D refers to dash canceling while J refers to jump canceling. |
| Fiery Collapse | The cones of AoE Pyro DMG that are activated by NAs during Thoma’s Burst. |
| Shield Support (build) | A support build whose main purpose is to provide a shield for the team. |
| Hybrid (build) | A version of Off-Field Pyro DPS and Burgeon Thoma where while you are actively building HP to strengthen his shield, you’re also focusing on his CRIT/ATK (Off-Field Pyro DPS) or EM (Burgeon). |
| Snapshot | Refers to all the phenomenon where an ability takes into account the stats and buffs during its cast for the entire duration of the ability. For example, Xiangling’s Burst will take into account Bennett’s ATK buff throughout the entire duration of her Burst if she activates it within his Burst, even if the latter disappears. |
| ICD | Short for Internal Cooldown, which refers to how often a character can apply an Elemental aura or trigger an Elemental Reaction. Standard ICD is an application every 2.5s/3 hits. |
| Proc | Activating or triggering a certain passive, set effect, reaction, etc. |
| DPS | An acronym for damage per second. It can refer to the specific acronym or a damage dealing character. |
| AoE | An acronym for Area of Effect. Refers to damage dealt in an area as opposed to a single enemy. |
| ER | Energy Recharge |
| TotM | Tenacity of the Millelith artifact set |
| EoSF | Emblem of Severed Fate artifact set |
| CWoF | Crimson Witch of Flames artifact set |
| NO | Noblesse Oblige artifact set |
| VV | Viridescent Venerer artifact set |
| HoD | Heart of Depth artifact set |
| Deepwood | Deepwood Memories artifact set |
| VG | Vourukasha’s Glow artifact set |
| DMC | Dendro Main Character, aka Dendro Traveler |
| XQ | Xingqiu |
Why play Thoma?

Before we get into the main body of this section, a lot of the information here will be repeated in the “FAQ” section as well as the entirety of this guide. While redundant, it is important information to understand, and our goal is to ensure the knowledge is as clear as possible.
| Pros | Cons |
| • Shield sustainability • Excellent Interruption Resistance • 2nd strongest shield in the game at C0 with stacks • Low investment needed for Shield Support • Standard ICD ensures consistent Burgeon triggers • Perfect Husband Material | • High Energy Cost and long cooldowns • Limited number of teams where he is “Best in Slot” as Shield Support • Low Talent multipliers compared to other Pyro damage dealers |
Pros
Shield Sustainability
Due to the way Thoma’s shield works, he is able to keep a strong shield without relying on only one Talent. He can start and end a fight with a significantly strong shield without having to activate his Skill again because he is able to stack his shield during his Burst. For a more in-depth explanation of how Thoma’s shield works, please see the Blazing Barrier: How Thoma’s Shield Works section.
Interruption Resistance
Thoma’s shield is amazing for units that perform Normal Attacks (NAs) often and are extremely vulnerable to interruption during their DPS window. Even if Thoma’s shield breaks, he can easily create another one when the on-field character uses Normal Attacks during his Burst, preventing the DPS from getting staggered. Essentially, Thoma’s shield keeps on-field units NA-ing instead of being smacked around and losing a significant amount of DPS.
2nd Strongest Shield at C0
The only shield better than our beloved Thoma’s at C0 and max stacks is none other than Rex Lapis’ himself. However, this is with full stacks on Thoma’s shield. Without full stacks, Thoma’s shield from his Skill falls behind Layla’s and Diona’s. For reference, it takes Skill+6 Fiery Collapses for Thoma’s shield to reach Diona’s Hold Skill and about Skill+7-8 Fiery Collapses to reach Layla’s Skill. At C1, Layla’s shield can become better than Thoma’s.
Standard ICD for Consistent Burgeon Triggers
Although this may sound like a con in most DPS scenarios, for Burgeon Thoma this is extremely helpful. Thoma’s ICD allows him to reliably proc Burgeon without interfering too much with Dendro Core creation. Additionally, Thoma’s ICD does not matter for triggering Burgeon, as each Dendro Core counts as a separate entity.
Low Investment Shield Support
A lot of people undervalue Thoma as a shielder primarily due to not understanding how his shield’s stacking mechanic works (therefore thinking it’s weak), and/or being scared away by his ER requirements. The first is easily remedied with a simple explanation, and the second is easily mitigable if you take into consideration the build options you have. For example, using a 5-star ER Sands, 2-piece EoSF, and a level 90 Fav Lance brings your ER to 202.4% even without any ER substats on artifacts. For more information about ER, please see the ER requirements chart within each build section.
Perfect Husband Material
He cooks, cleans, and doesn’t raise an ancient god from the Archon War to try and steal the Geo Archon’s Gnosis. What more could you ask for?
Cons
High Energy Cost & Long Cooldowns
These two cons go hand in hand, but as mentioned earlier in the Low Investment Shield Support section, you can work around them by making sure you have enough ER coupled with good rotations. In addition to this, his Constellation Lv. 1 (C1) reduces his cooldowns and his Constellation Lv. 4 (C4) reduces his Energy requirement.
Limited “Best in Slot” Teams for Shield Support
Thoma is able to provide teams with a good shield and very good Interruption Resistance due to his ability to quickly create a new shield even if a pre-existing Blazing Barrier breaks. This can be very helpful in teams that include Ayato, Hu Tao, Yoimiya, or Xiao, as they naturally incorporate NAs in their DPS windows. However, Thoma does not synergize well with units like Ayaka due to his lengthy off-field Pyro application which interferes with Freeze uptime, or Ganyu, as his Fiery Collapses don’t proc from Charged Attacks. Moreover, due to Thoma being a Pyro character and a shielder, he has stiff competition with other strong supports like Bennett and Zhongli due to other support capabilities they can bring to a team.
Low Talent Multipliers
Thoma is not Xiangling, Hu Tao, Diluc, or Klee– he does not have great multipliers, which decreases his damage potential quite a bit. That being said, Genshin is a team-based game. You are able to play the character you want as long as you put some work into them and build a team that supports their specific needs. Because of Thoma’s lower scaling, you will need to invest resources into him, in addition to a strong team in order for his damage to become significant.
On the flip side of this, the DPS role where Thoma shines the most is Burgeon, where talent multipliers don’t matter!
Genshin isn’t the hardest game to play – end-game content does not require the best team comps to clear. Yes, it may be harder depending on the enemies and buffs present, but you don’t need an extremely strong and optimized team to 36* Abyss. Just make sure you build a team around your DPS. Play who you want and who you enjoy!
FAQ
How much ER should I run?
Short Answer: Thoma as a Shield Support needs about 220%+ ER before C4 and about 190%+ after C4.
Long Answer: See the ER requirements chart in each build section.
How does Thoma’s shield work and how do I stack it?
See the Blazing Barrier: How Thoma’s Shield Works section.
How do I trigger a Fiery Collapse?
Fiery Collapses are triggered on NA animations (much like Xingqiu’s rain swords) and NOT on NA damage. This means Thoma is able to proc his Collapses without physically hitting an enemy and Raiden Shogun can trigger Collapses during her Elemental Burst state.
Why Thoma over other shielders?
Sustain: If played right, Thoma’s shield has 100% uptime. Unlike other shielders, he has the capability to quickly recover from a broken shield, as he can create another in an instant within his Burst duration.
VV Proc: Thoma provides the option to double Swirl Pyro and Hydro for a number of Vape teams. This is most viable within Hu Tao and Yoimiya comps but can also be used elsewhere.
Cleanse: Thoma provides a small cleanse to himself with his Skill, meaning he can remove Elemental auras from himself by briefly applying Pyro to himself. An example would be Thoma being able to cleanse himself from the Engulfing Storm (Electro) debuff with his Skill.
Do I need C4 to play Thoma?
No, you do not. It does decrease the amount of ER he needs, but it is by no means needed, as you can also mitigate his ER requirements with weapons like Favonius Lance and Kitain Cross Spear.
Does Thoma infuse himself with Pyro during his Burst?
No. His Burst creates Fiery Collapses every 1 second while the active character is using Normal Attacks. This is a separate instance of Pyro DMG, NOT an Infusion.
Does Thoma’s Burst snapshot?
No.
What is Thoma’s ICD?
Thoma has standard ICD (2.5s) on his Elemental Burst as well as his infused NAs.
Talents & Kit
 Normal Attack | Swiftshatter Spear
Talent Description
Normal Attack
Performs up to four consecutive spear strikes.
Charged Attack
Consumes a certain amount of Stamina to lunge forward, dealing damage to opponents along the way.
Plunging Attack
Plunges from mid-air to strike the ground below, damaging opponents along the path and dealing AoE DMG upon impact.
A beautiful set of Normal Attacks — however, you usually don’t see them too often if you’re playing Thoma’s more popular playstyles such as Shield Support or Burgeon.
This is the main source of damage for Physical Thoma and a significant amount of damage for On-Field Pyro Thoma. Thoma’s recommended NA string for these playstyles is N4D/N4J for Stamina management as well as the stagger provided by his final Normal Attack.
 Elemental Skill | Blazing Blessing
Talent Description
Thoma vaults forward with his polearm and delivers a flame-filled flying kick that deals AoE Pyro DMG, while also summoning a defensive Blazing Barrier.
At the moment of casting, Thoma’s Elemental Skill applies Pyro to himself.
The DMG Absorption of the Blazing Barrier scales off Thoma’s Max HP.
The Blazing Barrier has the following traits:
- Absorbs Pyro DMG 250% more effectively.
- When a new Blazing Barrier is obtained, the remaining DMG Absorption of an existing Blazing Barrier will stack and its duration will be refreshed.
The maximum DMG Absoprtion of the Blazing Barrier will not exceed a certain percentage of Thoma’s Max HP.
His skill applies an initial hit of AoE Pyro DMG that summons a Blazing Barrier, Thoma’s shield. Thoma’s Blazing Barrier lasts for 8 seconds if not refreshed, and absorbs Pyro DMG 250% more effectively. The percentage of Thoma’s HP that contributes to the DMG Absorption of the Blazing Barrier at max stacks is dependent on Thoma’s Skill Talent Level. For more information on how Thoma’s Blazing Barrier works, see the ‘Blazing Barrier: How Thoma’s Shield Works’ section.
Thoma’s Skill cooldown is 15 seconds (12 seconds with C1) and produces 3-4 particles at a 1:1 ratio– 50% chance to get 3 particles and 50% chance to get 4 particles. Additionally, activating his Skill applies Pyro to himself, cleansing all Elements excluding Pyro.
 Elemental Burst | Crimson Ooyoroi
Talent Description
Thoma spins his polearm, slicing at his foes with roaring flames that deal AoE Pyro DMG and weave themselves into a Scorching Ooyoroi.
Scorching Ooyoroi
While Scorching Ooyoroi is in effect, the active character’s Normal Attacks will trigger Fiery Collapse, dealing AoE Pyro DMG and summoning a Blazing Barrier.
Fiery Collapse can be triggered once every 1s.
Except for the amount of DMG they can absorb, the Blazing Barriers created in this way are identical to those created by Thoma’s Elemental Skill, Blazing Blessing:
- Absorbs Pyro DMG 250% more effectively.
- When a new Blazing Barrier is obtained, the remaining DMG Absorption of an existing Blazing Barrier will stack and its duration will be refreshed.
The maximum DMG Absorption of the Blazing Barrier will not exceed a certain percentage of Thoma’s Max HP.
If Thoma falls, the effects of Scorching Ooyoroi will be cleared.
An integral part of Thoma’s kit in every playstyle except Physical, but it comes at a high cost of 80 Energy. Thoma’s Burst has an initial hit of AoE Pyro DMG which creates a Scorching Ooyoroi, a pair of flaming armor plates that spin around the active character for the duration of Thoma’s Burst. The Scorching Ooyoroi is not a shield. Additionally, Thoma does not create a Blazing Barrier upon his Burst initial hit.
The Scorching Ooyoroi will create Fiery Collapses, cones of AoE Pyro DMG in front of the active character when they use Normal Attacks, up to once per second. These NAs don’t need to hit an enemy to proc a Fiery Collapse.
Each Fiery Collapse creates another Blazing Barrier that stacks onto the existing Blazing Barrier. For more information on Thoma’s shielding mechanic, please see the ‘Blazing Barrier: How Thoma’s Shield Works’ section.
The final Fiery Collapse may activate after the visual effect of the Scorching Ooyoroi has disappeared. Here is an example of this—the 15th and final Fiery Collapse comes out after the armor has disappeared.
Thoma’s Burst lasts for 15 seconds at C0 and 18 seconds at C2. His Burst’s cooldown may be reduced from 20 seconds to 17 seconds with C1.
 Ascension 1 Passive | Imbricated Armor
Talent Description
When your current active character obtains or refreshes a Blazing Barrier, this character’s Shield Strength will increase by 5% for 6s.
This effect can be triggered once every 0.3 seconds. Max 5 stacks.
A decent Ascension Passive for Shield Support Thoma that allows the on-field party member to gain Shield Strength when protected by a Blazing Barrier. This Shield Strength does not persist after swapping characters so it’s important to stack your shield while your DPS is on-field.
 Ascension 4 Passive | Flaming Assault
Talent Description
DMG dealt by Crimson Ooyoroi’s Fiery Collapse is increased by 2.2% of Thoma’s Max HP.
Introduces dual scaling to Thoma’s Fiery Collapses. Generally inconsequential for Shield Support Thoma due to his low multipliers, but does provide a nice damage buff for Hybrid Thoma.
 Utility Passive | Snap and Swing
Talent Description
When you fish successfully in Inazuma, Thoma’s help grants a 20% chance of scoring a double catch.
If you don’t have “The Catch” R5—first of all, what are you doing, and second of all, not to worry—Thoma can help you with his Passive Talent! There are some special notes about this Passive:
- Any bonus fish from this Passive do not count towards the Ding Ding Ding! Achievement (Catch 100/500/2000 fish successfully).
- It will work on Ornamental Fish, meaning if the Passive procs when you fished up an Ornamental Fish, you will get two Ornamental Fish.
Blazing Barrier: How Thoma’s Shield Works
Thoma’s Blazing Barrier can be created in two different ways: with his Skill and with the Fiery Collapses produced by his Burst. His Skill will produce a strong Blazing Barrier in one instant; however, in order to strengthen it further, you’ll need to stack it through his Burst. This can be done as follows:
Every time a Fiery Collapse is triggered, you gain a new Blazing Barrier whose DMG Absorption stacks, or combines, with the existing Blazing Barrier. When you stack a new Blazing Barrier, it refreshes the duration of the existing Blazing Barrier, meaning that the shield’s duration will reset to 8 seconds every time you gain a new shield.
His fully stacked shield is 2nd in terms of Max DMG Absorption, only behind Zhongli’s. However, the shield produced by his Skill alone is significantly weaker and falls behind Diona’s.
In order to get the max amount of stacks on Thoma’s Blazing Barrier, you need to use his Skill and proc 10-11 Fiery Collapses depending on your Talent Levels. With his Skill and 6-7 Fiery Collapses, Thoma’s shield becomes better than Diona’s Hold Skill.
Here is an additional explanation from dorketh about how Thoma’s shield works.
TL;DR: Always use your Skill and Burst together, then NA with your DPS to create a strong Blazing Barrier.
Constellations
 Constellation 1 | A Comrade’s Duty
Constellation Description
When a character protected by Thoma’s own Blazing Barrier (Thoma excluded) is attacked, Thoma’s own Blazing Blessing CD is decreased by 3s, while his own Crimson Ooyoroi’s CD is decreased by 3s.
This effect can be triggered once every 20s.
This Constellation can make it easier to build rotations around Thoma’s long cooldowns. However, it does not affect Pyro/Physical Thoma, as it only procs when Thoma is off-field. Additionally, this constellation does have a 20 second cooldown so if you have a shorter rotation, it may not consistently proc every rotation.
This Constellation is also able to be triggered by some characters’ Skills and Bursts without taking damage as shown in the following table:
| Thoma C1 Interactions | |
| Consistently Procs C1 | Anemo MC: E (both variants), Q Bennett: Hold E Dori: Q Kazuha: E (both variants), Q Kujou Sara: Q, C2 (within radius) Sayu: Hold E Yaoyao: E/Q (Jade Radish explosions) |
| Inconsistently Procs C1 | Kujou Sara: E Sucrose: Q |
For Sucrose, standing directly under or by the center of her Burst will have the greatest effect on triggering Thoma’s C1, but even then it is unreliable. For Sara, after using her Charged Shot, you must stand in the center or close to the center of the subsequent explosion from the Charged Shot to proc Thoma’s C1.
 Constellation 2 | A Subordinate’s Skills
Constellation Description
Crimson Ooyoroi’s duration is increased by 3s.
Once again, another Constellation that makes it easier to build rotations around Thoma’s cooldowns by extending his Burst uptime. This Constellation extends DPS time, and provides a small quality-of-life adjustment for Shield Support Thoma.
 Constellation 3 | Fortified Resolve
Constellation Description
Increases the Level of Blazing Blessing by 3.
Maximum upgrade level is 15.
Some nice Talent Levels for his Skill that make it easier to maintain Thoma’s shield throughout his Burst by giving a stronger base and a higher Max DMG Absorption.
 Constellation 4 | Long-Term Planning
Constellation Description
After using Crimson Ooyoroi, 15 Energy will be restored to Thoma.
Thoma’s best Constellation by far. While not required to play him, it does lower his ER requirements by quite a bit (~25-30%). This allows ER substats to be reinvested into HP for Shield Support Thoma, or into CRIT/EM subs for DPS Thoma.
 Constellation 5 | Raging Wildfire
Constellation Description
Increases the Level of Crimson Ooyoroi by 3.
Maximum upgrade level is 15.
More of a buff to Thoma’s Fiery Collapse DMG than increasing the DMG Absorption created by each Fiery Collapse. This Constellation is very similar to C3 as it makes it easier to maintain Thoma’s shield.
 Constellation 6 | Burning Heart
Constellation Description
When a Blazing Barrier is obtained or refreshed, the DMG dealt by all party members’ Normal, Charged, and Plunging Attacks is increased by 15% for 6s.
Thoma’s second-best Constellation. Provides a nice buff for the on-field unit in Shield Support teams and in off-field DPS Thoma teams, while also increasing Pyro and Physical Thoma’s own damage.
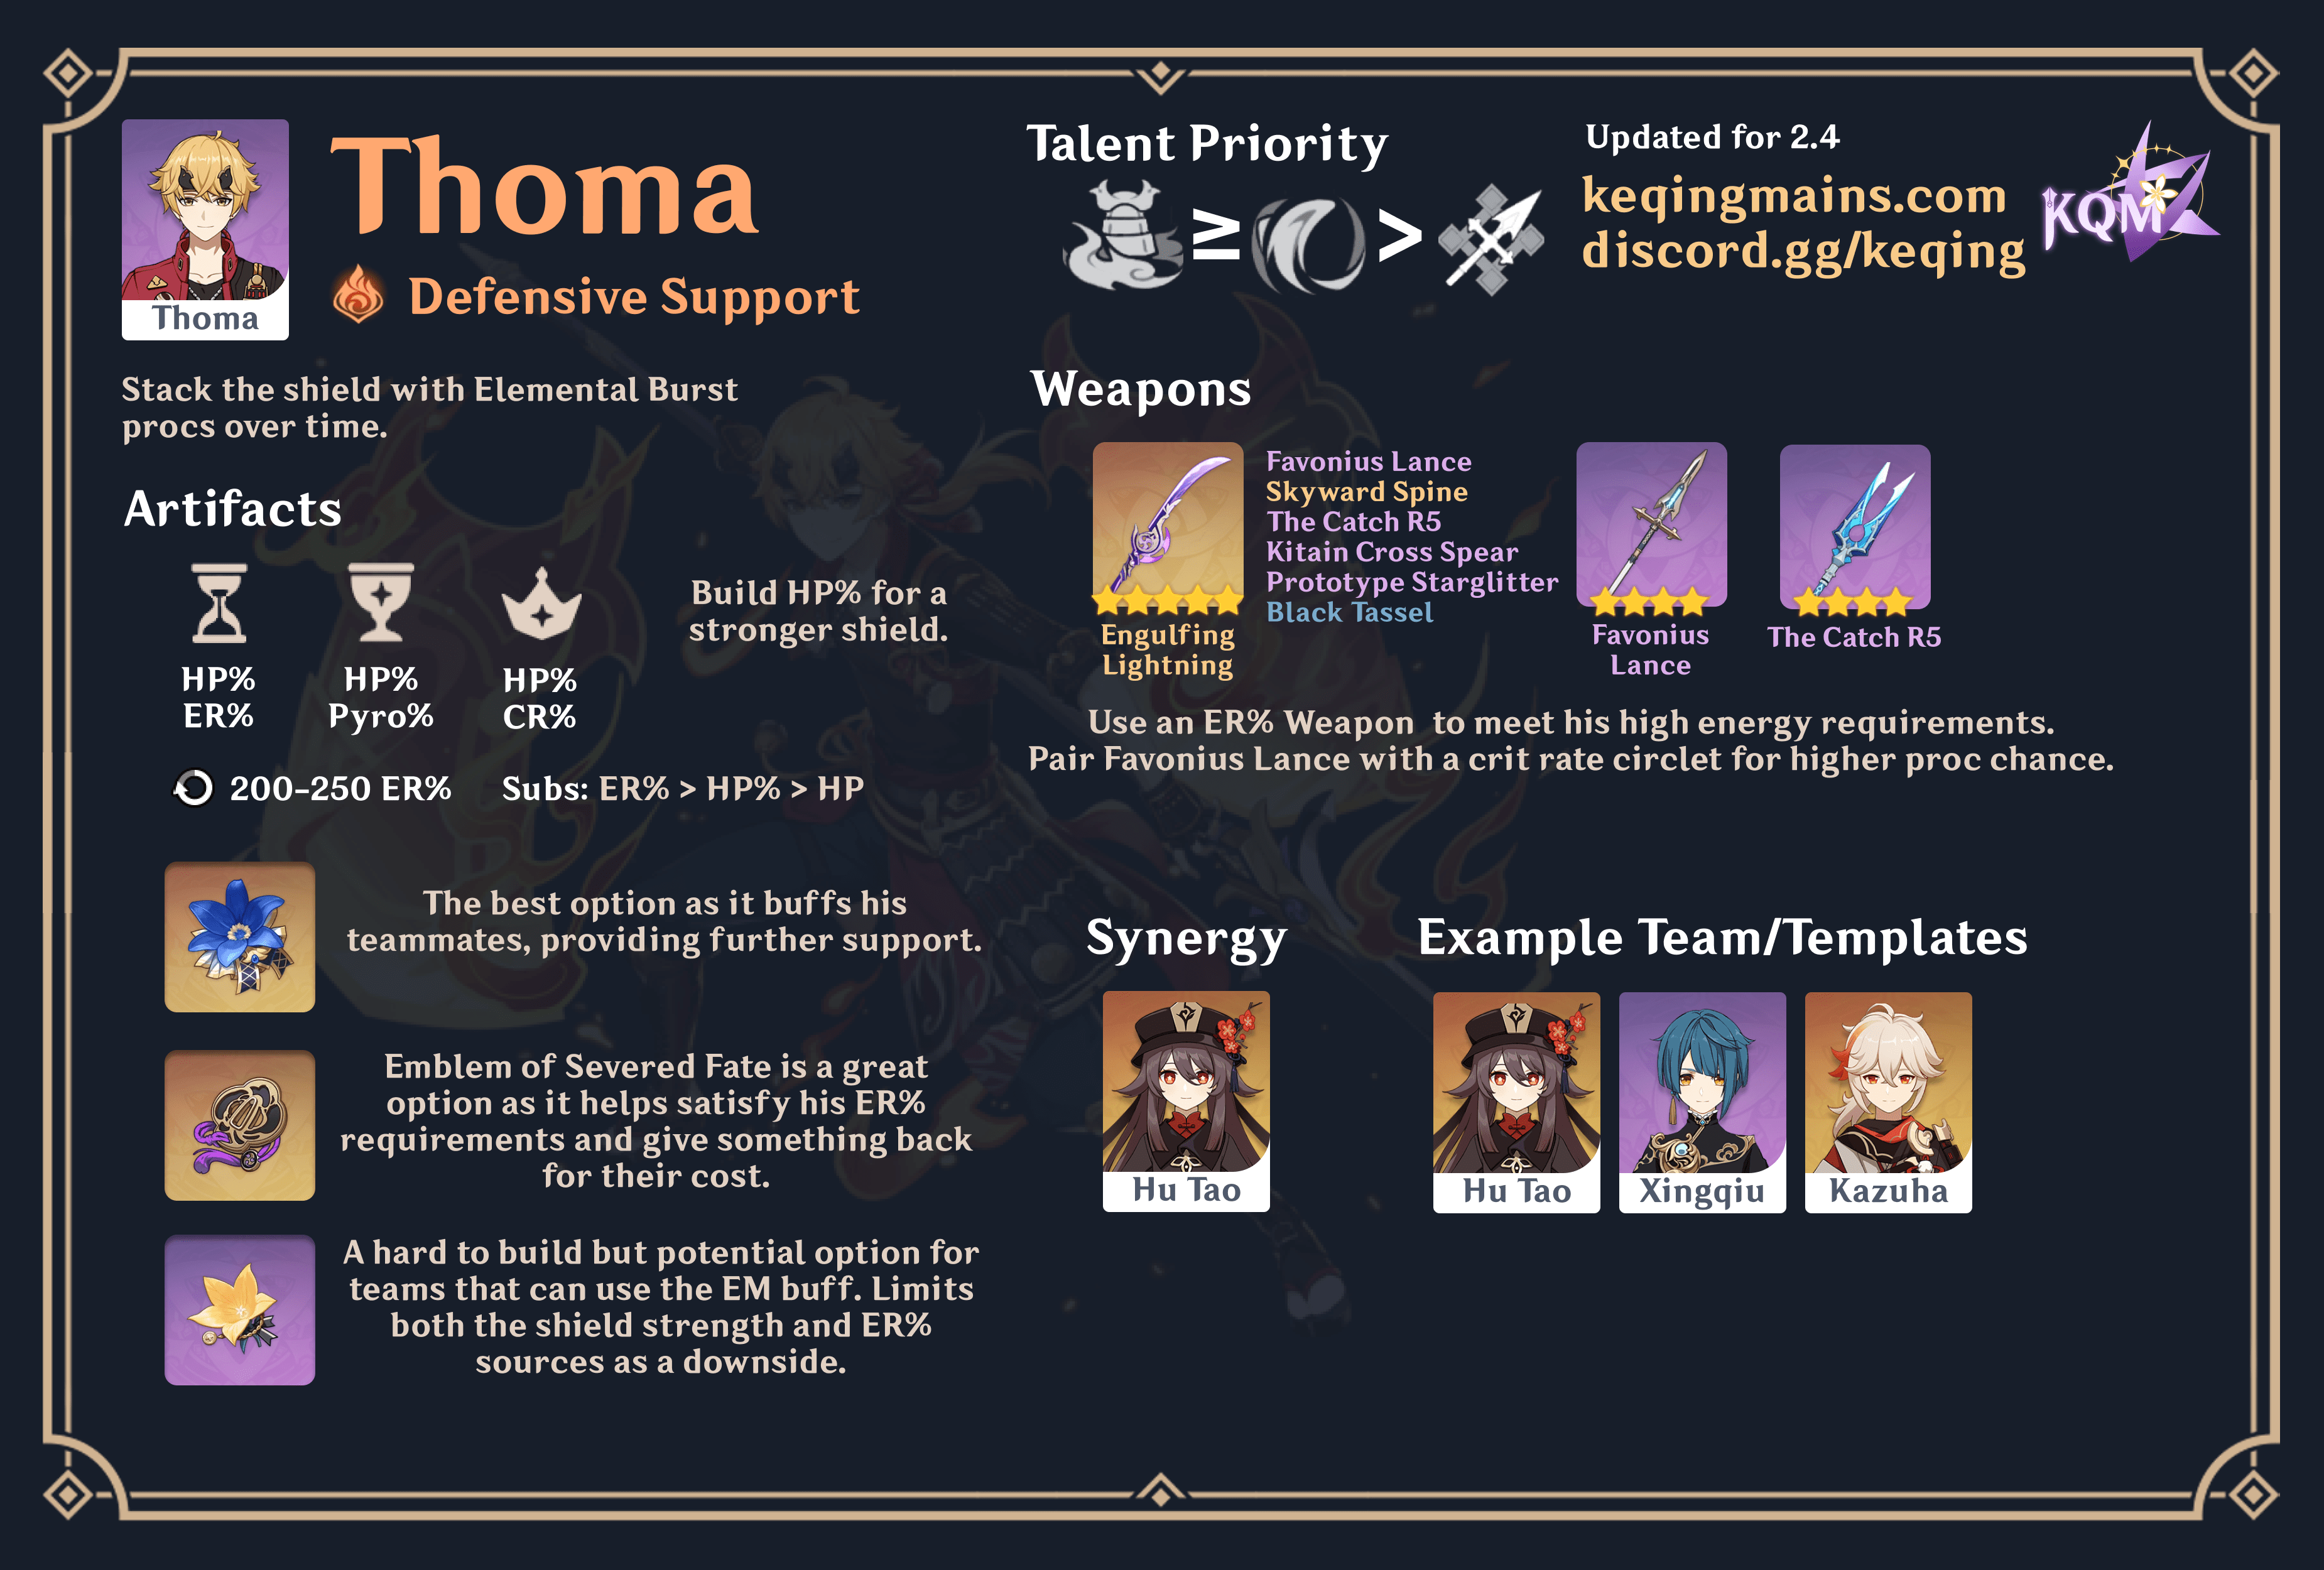
Shield Support
One of Thoma’s most common builds. The most important thing to note about this playstyle is that Thoma is not a set-it-and-forget-it shield like other shielders in the game. You will need to NA to keep his shield up.
Weapons
| Weapon | Notes |
Favonius Lance | The closest weapon to a Sacrificial Lance. Provides extra particles to help with Thoma’s ER requirements while also providing some Energy for the team. Comes with the cost of needing to build some CRIT Rate on Thoma. Much better at higher refinements; using this weapon at R1 or R2 is not recommended, due to Fav proc rate being less reliable at these refinements. As for how much CRIT Rate you should stack, 40-45% is a good number to shoot for. You are able to go with more CRIT Rate for comfier gameplay or less if you’re willing to weave in more NAs to proc the passive. However, as a general rule of thumb, have at least 30% CR. For a visualization of CRIT Rate vs Favonius passive proc chance, see this Favonius Proc Calculator by Mr. Pillow#0065. |
Engulfing Lightning | An amazing ER stat stick that can turn Thoma’s ER requirements into damage as well. However, this weapon is generally not worth putting on Shield Support Thoma. It is much better utilized on a DPS. |
“The Catch” | The best F2P option for Thoma with an ER substat; however, the passive is wasted on him as a Shield Support. As with Engulfing Lightning, this weapon is much better suited on a DPS. |
Kitain Cross Spear | Another great F2P option for Shield Support Thoma, which has the capacity to lower his ER requirements; however, the EM substat is useless. As with Favonius Lance, this weapon gets much better at higher refinements but unlike Favonius, Kitain is still viable at R1. With Kitain, you will have to change your rotation slightly to Burst before Skill with Thoma. However, if you have high ping (180ms+) you are able to Skill before you Burst (if done so immediately) due to Kitain having a delay before draining your Energy. Please note that changing your rotation may incur a risk of not collecting Thoma’s Skill particles on-field, so be aware of that when you are switching characters. |
Prototype Starglitter | The 3rd best F2P option for Shield Support Thoma. Essentially an ER stat stick as the passive effect is useless. |
Skyward Spine | The same as Prototype Starglitter but with less ER. |
Black Tassel | The only HP substat Polearm. Only recommended once you have enough ER on your artifacts. Theoretically, this is the best Polearm for pure Shield Strength. It is not recommended to use 4 EoSF in tandem with this weapon as this weapon has extremely low Base ATK and therefore decreases Thoma’s DMG even more, making the 4-piece EoSF effect virtually useless. |
Staff of (T)Homa | As good as this Polearm looks on him, it is much better used on a DPS. If you still would like to use this weapon on him and want a strong shield, try out Hybrid Off-Field Pyro DPS. |
Artifacts
Main Stats
 Sands |  Goblet |  Circlet |
| ER% or HP% | HP% | HP% or CRIT Rate* |
*For Favonius Lance ONLY.
ER% or HP% Sands?
Almost always ER%. If you are able to get enough ER% with just your substats and your weapon, then you can switch to an HP% Sands. Otherwise, it is not worth it as you will not be able to get Thoma’s Burst back on cooldown.
Substats
| Pure Shield |
| ER% >> HP% > Flat HP |
| With Fav Lance |
| ER% >> CRIT Rate% > HP% > Flat HP |
ER Requirements
Energy Recharge is something that changes drastically depending on a number of factors such as rotations, team composition, the enemies you’re fighting, etc. For a good estimate on ER for your specific needs, see this ER calculator made by Zakharov#5645. Below is a baseline ER measurement for each main Constellation and weapon combination that will affect Thoma specifically. You may need more or less ER depending on numerous factors.
| Constellation 0-3 | Constellation 4-6 |
| Base: 220%+ | Base: 190%+ |
| Fav: 200%+ | Fav: 170%+ |
| R1 Kitain: 215%+ | R1 Kitain: 185%+ |
| R5 Kitain: 195%+ | R5 Kitain: 165%+ |
As shown above, C4 lowers ER requirements by ~25-30% across the board while each refinement of Kitain Cross Spear lowers ER requirements by ~5%. Favonius Lance is a bit harder to quantify as it is based on chance but if you can proc the passive every Skill, it can lower ER requirements by ~20%.
Favonius Lance vs Kitain Cross Spear
Even though Kitain has slightly lower ER requirements across the board, R3+ Favonius Lance is the better option in nearly every scenario.
Favonius Lance supports the entire team as it gives particles, not Flat Energy. Therefore, its passive is affected by your unit’s ER, a stat that Thoma runs a significant amount of. Favonius Lance does, however, require building CRIT Rate (~40-45%) on Thoma and its passive is RNG dependent. Because of this, it is generally not recommended to use Favonius Lance below R3.
On the other hand, as shown above, Kitain allows you to run lower ER in general. Additionally, as a craftable weapon, it may be easier to obtain. However, Kitain may extend rotation times due to needing to Burst before Skill at low ping, and may make it harder to Swirl Pyro depending on the situation. Regardless of refinement, it’s much more reliable when compared to an R1 or R2 Fav Lance.
What if you have an R5 Fav Lance and an R5 Kitain? If so, here are some questions to ask yourself: Do you have problems with your team’s Energy as a whole? Fav Lance. Do you have a problem with Thoma’s Energy in particular? Kitain. Do you have a good support set with CRIT Rate substats? Fav Lance. Do you hate resetting the Abyss if your passive doesn’t proc? Kitain.
As mentioned before, more than anything, make sure you test your ER and see what works for your playstyle.
Artifact Sets
| Artifact | Notes |
4 Noblesse Oblige | Universally one of the best support artifact sets in the game. The 4-piece provides a nice ATK buff for the entire team, while the 2-piece provides a little more damage for Thoma’s Fiery Collapses. Although this set will have some downtime, it is negligible as it is outside of the DPS window. |
2 HP/2 EoSF | The best option for pure shield strength on Shield Support Thoma. Despite being the best set for Thoma, it is not the best set for the team as it provides no utility. HP helps strengthen Thoma’s shield while EoSF helps meet his Energy requirements. Please keep in mind that although we are recommending 2-piece TotM here, 4-piece TotM is NOT recommended for Shield Support Thoma under any circumstance, as it only works with Skill damage, while Thoma’s Fiery Collapses are from his Burst. Additionally, 4-piece VG is essentially useless in a shield support build and should not be used. |
4 Instructor | Although Instructor is 3rd in the ranking for Shield Support Thoma, it is only recommended in reaction-based teams, and even then, with caveats. The 2-piece is generally inconsequential, but the 4-piece allows the entire team to receive a boost in EM. This does require Thoma to proc some Elemental Reactions, but he will likely proc some during set-up. The one caveat with this set is that it is a 3/4-star set, which will cause Thoma’s shield to be considerably weaker and make it harder to get the ER he needs to spam his Burst on cooldown. To avoid this, it is recommended to use a 5-star ER Sands and an ER substat weapon. |
4 EoSF | As mentioned before, 2-piece EoSF is great for reaching Thoma’s high Energy Costs. The 4-piece provides some extra damage; however, this set is much better used on a damage-focused Thoma than on a shield-focused Thoma, as the extra damage on the latter is inconsequential. |
2 EoSF/2 Other | Combining the 2-piece EoSF set with another 2-piece, or just simply using the 2-piece alone is also a viable placeholder set for Shield Support Thoma. |
2 The Exile/2 Scholar | A pre-AR 45 set to maximize the amount of ER Thoma gets and decrease reliance on ER substats. |
Talent Priority
≥ >> 
Elemental Skill ≥ Elemental Burst
Normal Attacks are negligible
How much HP should Shield Support Thoma have?
As a general benchmark, 28-30k HP is a good amount; however, you may find that you need more or can get away with less. If you want to know exactly how much damage your shield can take, see this Shield Calculator by vazellea.
Team Compositions
Generally, Shield Support Thoma can be used as a shield support for any team with an on-field Normal Attacker if you don’t have Zhongli/Diona/Layla or are already using either shielder on another team. He may also act as a Noblesse user for said teams.
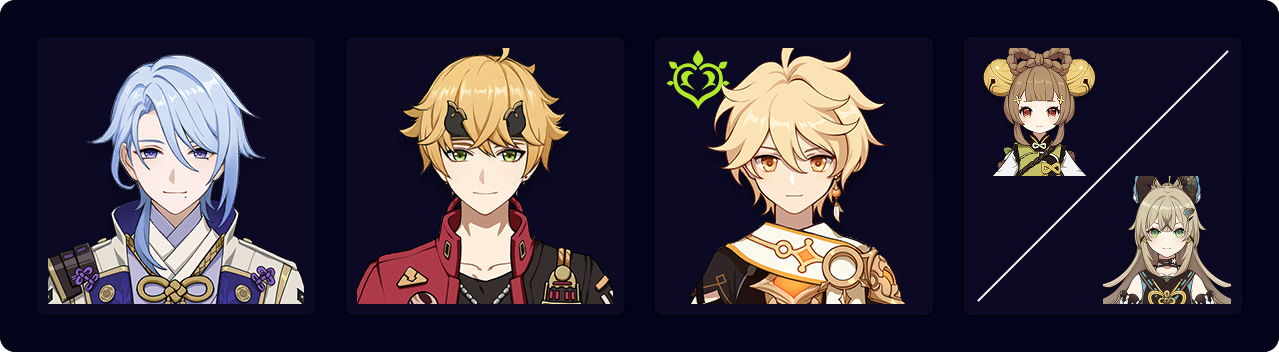
VV Hu Tao
This team allows Hu Tao to utilize an Anemo support with the VV set without Bennett as an enabler. Bennett is the typical choice for a Pyro DPS VV enabler; however, he would keep Hu Tao’s HP above 50% and therefore sacrifice her Ascension 4 Pyro DMG Bonus.
Alternatively, you can run Shieldfei, a Yanfei build that relies on her C4 shield; however, this is locked behind Constellations and therefore not accessible to everyone. Additionally, Shieldfei requires 200%+ ER, a Prototype Amber (which may heal Hu Tao to above 50% HP), and she cannot run 4 Instructor without severely decreasing her shielding capabilities.
Compared to the Double Geo and Double Hydro comps, Thoma takes up the spot of Zhongli as the shielder in the comp while also providing a NA/CA buff at C6. Hu Tao’s N1C combos allows Thoma’s shield to be stacked and remain strong for the entirety of the fight while minimizing the number of Vapes stolen by Thoma. This team is best utilized with the Anemo slot filled by Sucrose and the Hydro slot filled by Xingqiu, but Kazuha and Yelan are also viable alternatives.
Rotations
Within this team composition, there are a few caveats. Without C6 Xingqiu, you may run a higher risk of Thoma stealing Vapes from Hu Tao, especially if you are using N2C Combos on her. Losing her Vapes decreases the overall damage of this team. With C6 Xingqiu, this issue is alleviated.
This same problem of Thoma stealing Hu Tao’s Vapes is also present with pre-C2 Yelan, and alleviated with C2+ Yelan. Additionally, Yelan is generally not recommended as the solo Hydro unit pre-C2.
Below are two variations of this team’s rotation with Sucrose and Kazuha, but there are many more. Yelan is virtually interchangeable with Xingqiu in the following rotations.
Hu Tao with Kazuha
XQ E Q (E) > Thoma E Q > Kazuha Q N1 tE > Hu Tao N1CJ
Hu Tao with Sucrose/Heizou
XQ E Q (E) N1 > Thoma E N1 Q > Sucrose N1 E > Hu Tao N1CJ
Yoimiya—Thoma

Because of Thoma’s ability to provide Interruption Resistance, Pyro Resonance, and an NA buff at C6, he is an extremely valuable member in Yoimiya teams. Even if his shield shatters, he is able to prevent knockback by simply creating another shield without having to switch off from Yoimiya and losing her infusion.
The two main versions of the team above are VV Vape Yoimiya with an Anemo unit such as Sucrose or Kazuha in the flex slot, or Yoimiya with Yun Jin in the flex slot to act as an NA buffer.
For VV Yoimiya, you are able to avoid Thoma stealing Vapes altogether if Yoimiya is far enough (or close enough, although this is rare; video from EdisonsMathsClub#6469) because Thoma’s Fiery Collapses will not reach the enemy. Even so, when you’re outside melee range but inside Fiery Collapse range, Yoimiya will not have any Vapes stolen as long as she’s paired with a C6 Xingqiu.
Rotations
With Yun Jin
Thoma E Q > Hydro E Q (E) > Yun Jin E Q > Yoimiya E N5 for E duration
With Sucrose
Hydro E Q (E) > Thoma E Q > Sucrose N1 E > Yoimiya E N5 for E duration
Xiao/Wanderer Double Pyro
Within this team, Thoma acts as a shielder for Xiao and Wanderer. Additionally, he acts as the 2nd Pyro team member with Bennett to trigger Pyro Resonance. At C6, Thoma is also a damage buffer.
Due to the way Thoma’s shield works, it is extremely important to use NA cancels on Xiao, otherwise Thoma’s shield will break fairly easily. For more information on how to NA cancel, please go to the Xiao Guide.
Cyno Aggravate/Quickburn
A type of “reaction soup” team. Thoma is an ideal shielding unit for Cyno as his shield is able to last throughout the entirety of Cyno’s Burst. Additionally, at C6, Thoma is able to buff Cyno’s NAs. Unlike other Shield Support Thoma teams, you also have the option to run 4-piece Gilded Dreams on Thoma to gain some extra damage. The ideal options for the Electro and Dendro slots are Fischl and Nahida, respectively.
Rotation:
Nahida E > Fischl E > Thoma E Q > Cyno E Q N5, E when Endseer stance is active
Itto Triple Geo
Thoma acts as a shielder and a buffer at C6 for Itto. If Zhongli is unavailable for the 3rd spot, Thoma makes it possible for this team to effectively utilize Geo Resonance as well. For the maximum potential of this comp, the Geo unit would be Albedo.
Other Team Comps
Although Thoma shines most in the teams listed above, he is a flexible shield unit; just make sure your on-field character is using Normal Attacks.
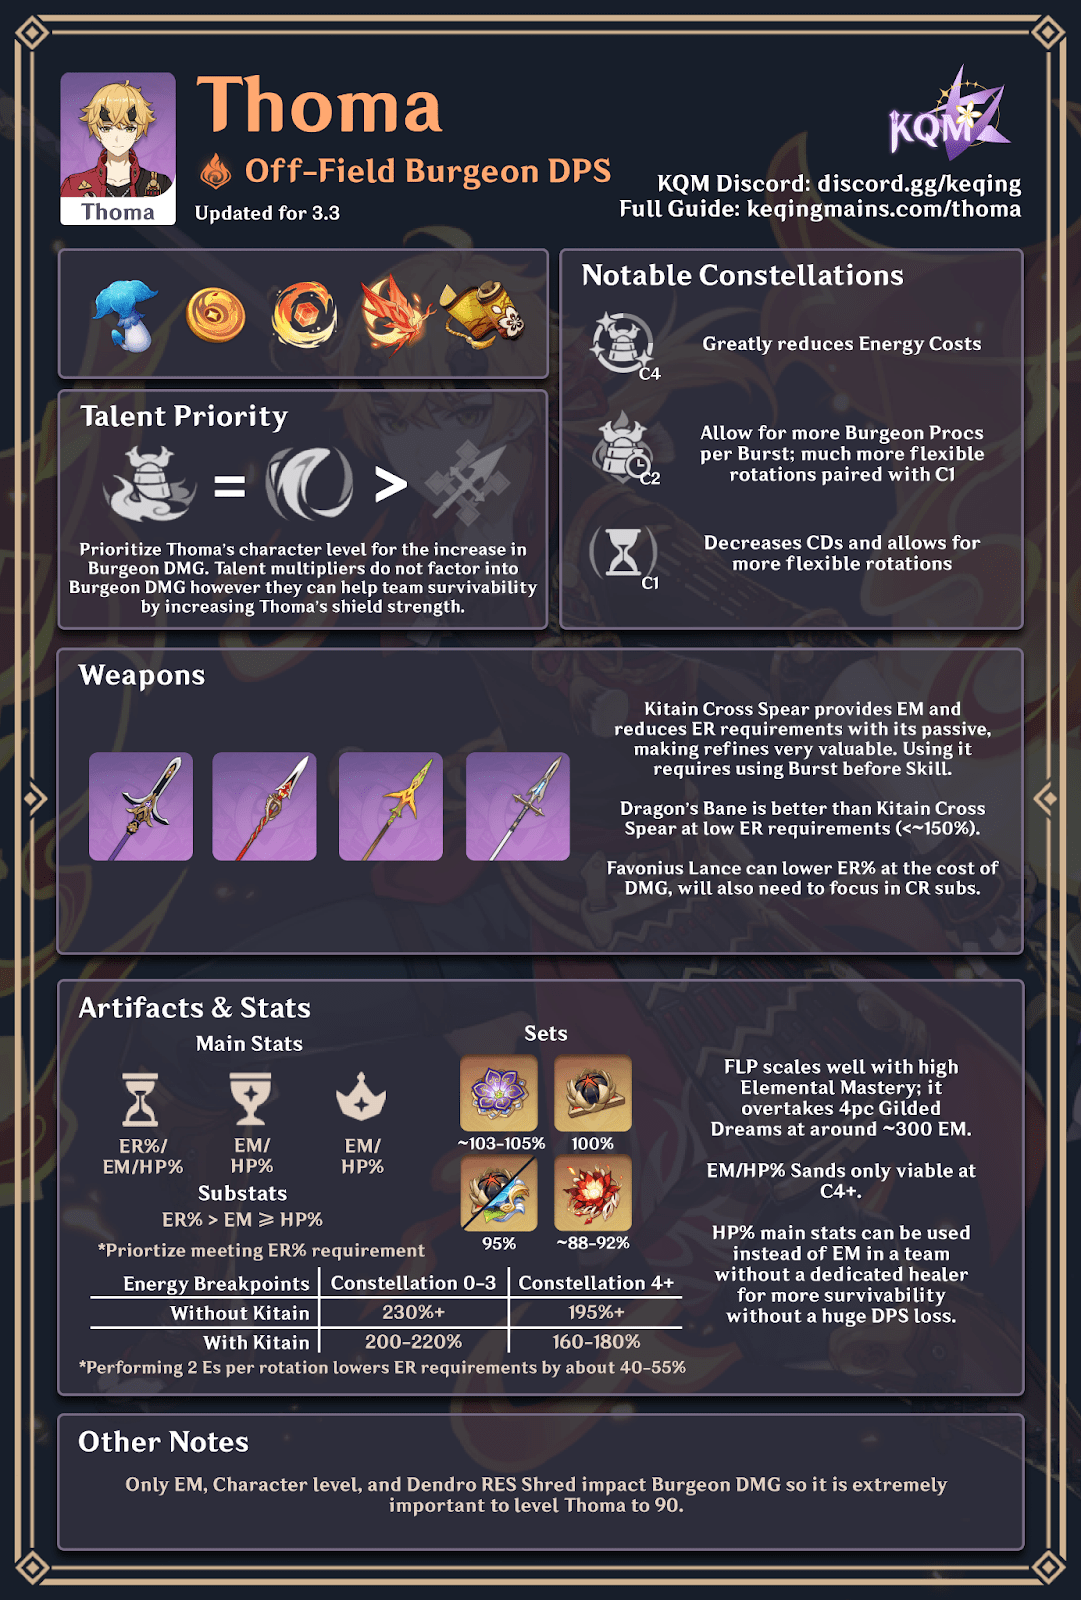
Burgeon / Overload
The best role for a DPS Thoma. Due to Burgeon being a Transformative Reaction, EM and character level are the only things that affect damage. ATK and Talent Levels do not factor into Burgeon reactions and they cannot crit. It is also possible to run Hybrid Thoma for a stronger shield to combat Burgeon self-DMG and enemy attacks while still dealing a good amount of damage.
Although this section is primarily targeted towards Burgeon, the build recommendations are interchangeable with Overload as both are Transformative Reactions. As such, Overload teams will be included in the Team Compositions section along with Burgeon teams.
What is Burgeon?
Burgeon is one of the more complex Elemental Reactions in Genshin to proc, as it requires 3 Elements in a specific order in order to proc reliably. However, once you get the hang of how Burgeon works, it’s pretty easy to constantly trigger!
What Elements do you need?
Before you can proc Burgeon, you will need to create a Dendro Core, which is created by triggering the Bloom reaction with Dendro and Hydro. You can also proc this reaction by inflicting Hydro on a unit with the Quicken effect (Dendro and Electro), although you will only see this happen in Thoma teams if you are using an Electro unit in your flex spot.
Once you have your Dendro Core from your Bloom reaction, apply Pyro to the Core to proc Burgeon—an explosion of AoE Dendro DMG. This explosion multiplies the base Bloom DMG by 1.5x. These explosions will hit every enemy within their radius, making Burgeon particularly effective in AoE scenarios.
What contributes to Burgeon DMG?
As mentioned before, Burgeon is a Transformative Reaction, meaning its damage will only take into account your Pyro unit’s (in this case, Thoma’s) EM and character level. Because of this, it is extremely important to level your Thoma to 90. There is about a 34% difference between the Burgeon damage from a Level 90 and a Level 80 character. Additionally, Burgeon DMG is affected by enemy RES, so shredding an enemy’s resistance does factor into your damage. As Burgeon deals AoE Dendro DMG, it is affected by Dendro RES Shred, such as that of the 4 Deepwood Memories set or Zhongli’s Skill.
Burgeon Self DMG and Limits
Although Burgeon does a lot of damage to the enemy, it will also inflict 5% of that damage onto your on-field character. However, this damage can be mitigated with a shield, which Thoma can provide. There are some other properties of Burgeon self-DMG that should be mentioned: Burgeon self-DMG is 5% of the Burgeon DMG with your character’s (not enemy) resistance taken into account, and this self-DMG does include any Burgeon reaction DMG Bonuses. Xingqiu’s damage reduction does not decrease Burgeon self-DMG.
Additionally, there may only be 2 instances of Burgeon DMG every 0.5 seconds, however, it is generally inconsequential as you will likely never have more than 2 Dendro Cores in the area except for your initial setup.
Weapons
| Weapon | Notes |
Kitain Cross Spear | Arguably the best Polearm for Burgeon Thoma. Not only does it have an EM substat which directly contributes to Burgeon DMG, it also has a passive that helps Thoma’s ER requirements. This allows you to focus on other stats, rather than worrying about ER as much. As mentioned in Shield Support, with Kitain, you will have to change your rotation slightly to Burst before Skill with Thoma. However, if you have high ping (180ms+) you are able to Skill before you Burst (if done so immediately) due to Kitain having a delay before draining your Energy. |
Dragon’s Bane | The highest EM substat polearm in the game. The weapon passive does NOT add to the damage done by the Burgeon reaction. Additionally, this weapon will require you to build more ER to maintain Thoma’s Burst uptime. |
Moonpiercer | This weapon allows Thoma to add some additional utility to his Burgeon build by dropping a leaf that gives ATK to your on-field character but does not affect Thoma’s Burgeon DMG. This weapon will also require a lot of ER to maintain Thoma’s Burst uptime. |
Favonius Lance | If the other options are unavailable, this weapon can also be used in a Burgeon Thoma build, but it really only helps with ER requirements. Though Thoma doesn’t need CRIT Rate for a Burgeon build, this weapon will need you to build some to reliably proc the passive. |
Artifacts
As mentioned before, you can build Burgeon Thoma in two main ways: DMG or Shield (or somewhere in between!). You can focus on pure EM for the most damage, or on HP% to have a strong shield and deal considerable damage. You can also use this Thoma Burgeon and Shield Calculator by vazellea to help you decide how much EM and HP to stack. Do not neglect your HP for EM if you do not have a healer on your team.
Main Stats
Sands | Goblet | Circlet |
| ER% or EM or HP% | EM or HP% | EM or HP% |
Substats
| Pure DMG |
| ER% > EM > HP% > Flat HP |
| Shield Hybrid |
| ER% > HP% > EM > Flat HP |
HP or EM?
Depending on the team comp you’ve decided to use with Burgeon Thoma, he can be built accordingly. In a team that lacks a healer or another shielder, Thoma can be built with more focus on his HP, so he can provide the team with survivability and still deal a considerable amount of damage. If you plan on running a healer or another shielder on your team, Thoma can be built with more focus on EM for higher Burgeon DMG at the cost of his shield strength. Below is a comparison of Burgeon DMG with a mix of different EM and HP main stats to showcase how you can still build HP while dishing out substantial damage.
| Artifact Main Stats (HP, EM) | Burgeon DMG |
| ER/EM/EM (21768 HP, 722 EM) | 27969 |
| ER/EM/HP (25557 HP, 575 EM) | 25099 |
| ER/HP/HP (29346 HP, 428 EM) | 21902 |
If ER requirement is met, ER Sands can be switched out for either EM or HP.
TL;DR:
You can’t deal damage if you’re dead.
How much EM should I run?
This depends entirely on your team and how you’d personally like to run your Thoma. 350 EM with 4 Gilded (3 EM stacks) and 4 Deepwood is the approximate cut-off for 20k Burgeons which is a good starting point. If you’re running a full EM Thoma, you can shoot for more than that but 350 is great for Hybrid Thoma.
ER Requirements
Burgeon Thoma has slightly different ER requirements from other DPS Thoma variations, as he will not be run with another Pyro unit. This often increases his ER needs. However, Kitain Cross Spear is a great choice for Burgeon Thoma, since it not only lowers his ER requirements but also provides EM with its substat. Additionally, most Burgeon Thoma teams will be run with at least one teammate that holds a Favonius weapon, which can also help lower ER demands.
These values are a baseline for you to go off of—you may need less or more depending on numerous factors.
| One Thoma Skill per Rotation | |
| Constellation 0-3 | Constellation 4-6 |
| Base: 230%+ | Base: 195%+ |
| R1 Kitain: 220%+ | R1 Kitain: 175%+ |
| R5 Kitain: 200%+ | R5 Kitain: 160%+ |
| Two Thoma Skills per Rotation | |
| Constellation 0-3 | Constellation 4-6 |
| Base: 175%+ | Base: 145%+ |
| R1 Kitain: 160%+ | R1 Kitain: 130%+ |
| R5 Kitain: 150%+ | R5 Kitain: 120%+ |
Please note that different team members will require different ER thresholds so it is very important to double-check your requirements with the ER calculator.
Artifact Sets
| Artifact | Notes |
4 Flower of Paradise Lost | Overall the best set for Burgeon Thoma but only slightly (~2-5%) better than 4-piece Gilded Dreams. Performs worse than 4-piece Gilded at lower EM (<300 EM). |
4 Gilded Dreams | This set gives 230 EM with the 4-piece and the 2-piece set effects, freeing up room for some ER substats. Additionally, it is much more resin efficient than Flower of Paradise Lost. |
2 EM/2 EM | A nice flat 160 EM buff but generally not preferred. Only use this if your 4-piece Gilded Dreams isn’t available. |
4 CWoF | Crimson Witch has the ability to buff Burgeon DMG with its 4-piece set; however, there are better options that will increase Thoma’s damage output. |
2 EM/2 Other | The two main options for the “other” option would be 2-piece EoSF to help reach Thoma’s ER requirements or 2 HP to help strengthen Thoma’s shield. Any other 2-piece (besides another 2 EM which is shown above) is virtually useless in Burgeon team comps. |
Artifact Ranking

Talent Priority
≥ >>
Elemental Skill ≥ Elemental Burst
Normal Attacks are negligible
Although Talent Levels are not factored into Burgeon DMG, Thoma’s Burst and Skill are still important for a strong shield and, therefore, survivability.
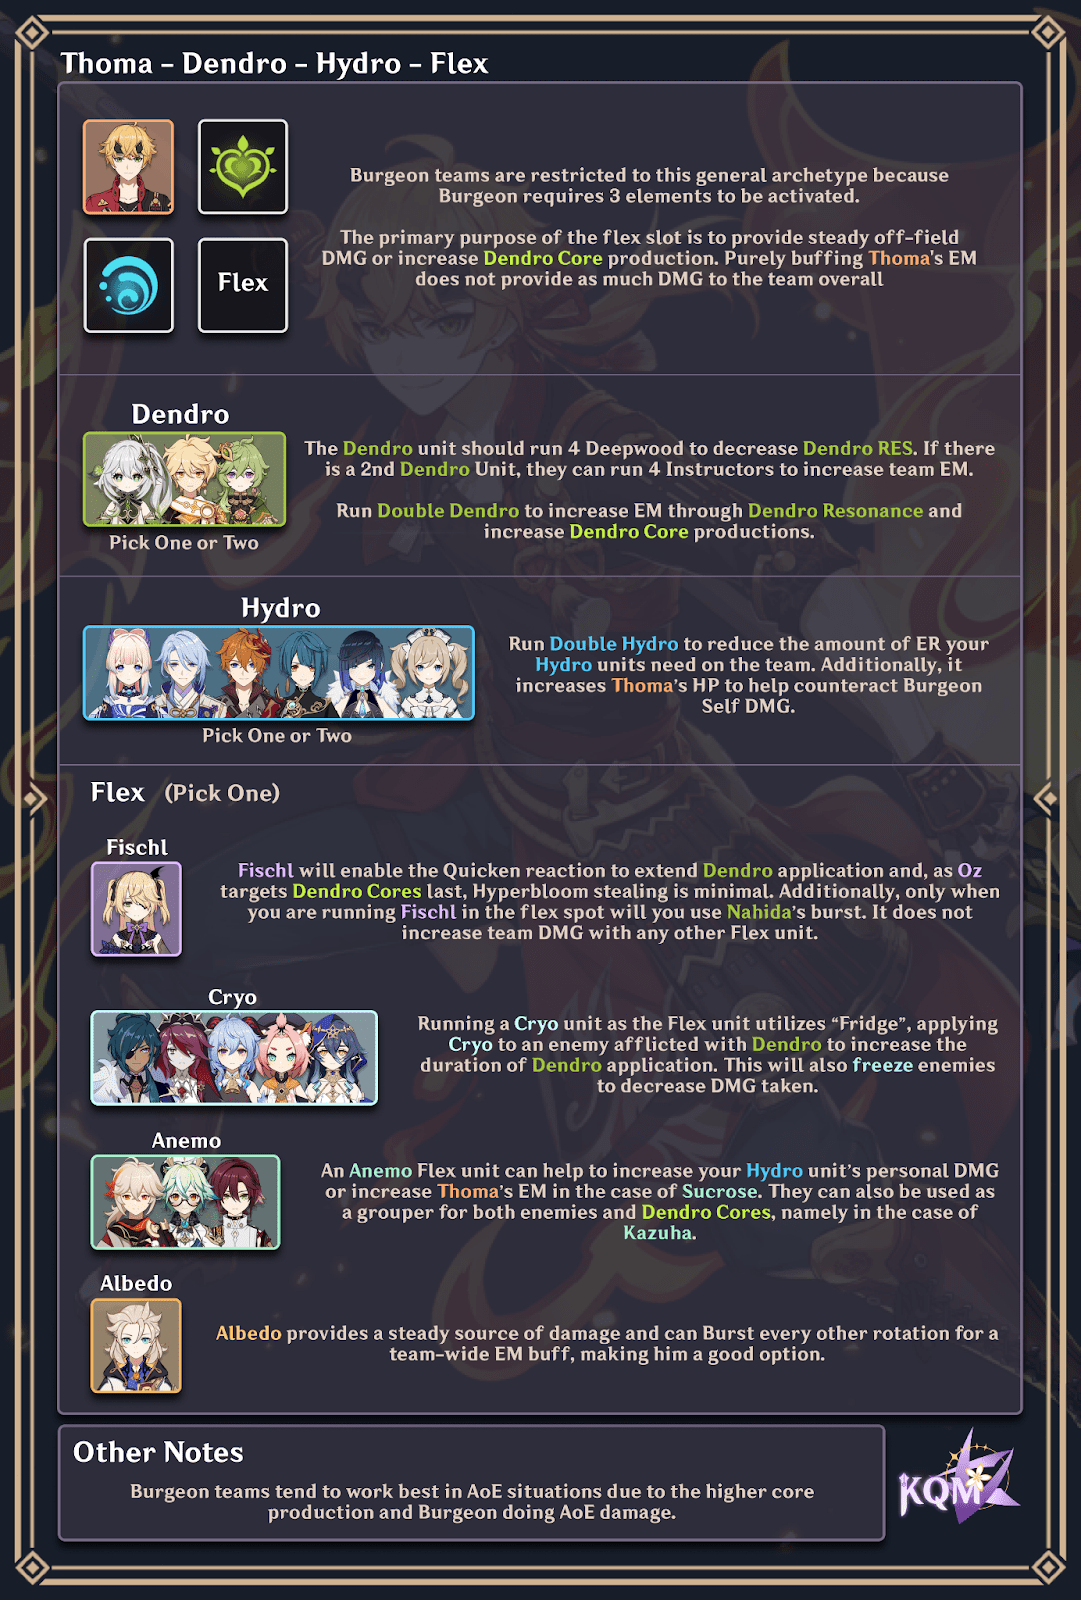
Team Compositions
Due to the nature of Burgeon requiring 3 Elements to proc, there is one main team composition for Burgeon Thoma. Further on, we go into depth on the options for every flex slot in this team. We will also include a list of noteworthy teams with rotations. There will also be Overload teams at the end which share the same artifacts and weapons as Burgeon Thoma.
Burgeon-Focused

| Dendro Slot | ||
| Character | Ranking | Notes |
 |
S | Nahida The best Dendro support for Burgeon. Nahida applies considerable off-field Dendro application without relying on her Burst. It is generally not recommended to Burst with Nahida at all unless you’re running an Electro character. Weapons: Off-field: A Thousand Floating Dreams, Sacrificial Fragments, Mappa Mare On-field: A Thousand Floating Dreams, Kagura’s Verity, Lost Prayer to the Sacred Winds, Solar Pearl, The Widsith, Sacrificial Fragments, Mappa Mare Artifacts: 4 Deepwood |
| S | Baizhu As a support, Baizhu does many things that are incredibly important for a Thoma Burgeon team, mainly providing healing, an additional shield, and buffing Thoma’s Burgeon damage with his A4. As an on-field unit, Baizhu excels at these while also providing more Dendro application. While it is not as extensive as Nahida’s, it is able to keep up well with Thoma’s Burgeon procs to minimize Vaporizing and/or Burning. Off-field, Baizhu falls a bit behind and simply acts as a healer and shielder with little Dendro application. If running off-field, there should be another Dendro unit on the team. Weapons: Jadefall’s Splendor, A Thousand Floating Dreams, Favonius Codex, Prototype Amber Artifacts: 4 Deepwood, 4 Instructors OR 2HP/2HP (If 2nd Dendro) |
|
 |
A | Dendro MC (DMC) Their Burst has a decent duration to apply off-field Dendro application. The downside to DMC is that their Dendro application is limited to their Burst duration and they need a considerable amount of ER to Burst every rotation. Additionally, it can be tricky to infuse their Burst with Hydro/Electro and not explode it with Thoma. Weapons: Favonius Sword, Sacrificial Sword, Sapwood Blade Artifacts: 4 Deepwood, 4 Instructor (if 2nd Dendro) |
 |
A | Yaoyao A great unit for teams that would otherwise lack a healer, (i.e. Ayato/Tartaglia teams). Yaoyao does require on-field time for her Q to be active but provides a great amount of healing to mitigate enemy damage as well as Burgeon self-DMG. However, it is generally not recommended to use her as the only Dendro unit on the team due to her rather lackluster Dendro application. Weapons: Favonius Lance, Black Tassel, Staff of Homa, Engulfing Lightning Artifacts: 4 Deepwood, 4 Instructors (if 2nd Dendro) |
 |
A | Kirara A good unit when used off-field; Kiara provides great survivability with her shield which allows Thoma to run a more EM-focused build when in a team without a healer. Due to her lack of Dendro application from off-field, she is not recommended as the only Dendro unit on a Burgeon team. Weapons: Favonius Sword, Key of Khaj-Nisut, Sacrificial Sword Artifacts: 4 Deepwood, 4 Instructor (if 2nd Dendro) |
 |
A | Collei Much like DMC, she provides off-field Dendro application with her Burst; however, her Burst has a lower cost and shorter uptime. Collei is generally not recommended as the only Dendro unit as she forces shorter rotations, which are difficult for Thoma and his long cooldowns. Weapons: Elegy for the End, Favonius Warbow Artifacts: 4 Deepwood, 4 Instructor (if 2nd Dendro) |
| B | Kaveh An interesting on-field option for a Burgeon team. Kaveh provides self-healing and interruption resistance however, his Skill and Burst may steal Dendro Core procs. With an emphasis on timing, you may be able to avoid stealing these Burgeons. Additionally, Kaveh himself has extensive ER issues, making energy management in a Kaveh-Thoma Burgeon team much more of a problem. Kaveh is explicitly not recommended if you have him at C6. Weapons: Skyward Pride, Makhaira Aquamarine, Mailed Flower, Favonius Greatsword, Rainslasher Artifacts: 4 Deepwood |
|
 |
B | Alhaitham An on-field Dendro unit that dishes out considerable damage however, his personal damage in Burgeon teams is a downgrade from his Spread teams. Because of Alhaitham’s ample Dendro application, it is not recommended to run Alhaitham with another Dendro unit as you will trigger Burning often. This requires Alhaitham to run 4 Deepwood (if the other two units cannot) which negatively impacts his own personal damage. In order to lessen the cons above, Alhaitham may be run with Fischl as a flex unit to negate Burning and allow him to Spread as well. Weapons: Light of Foliar Incision, Mistsplitter Reforged, Primordial Jade Cutter, Iron Sting, Black Sword, Toukabou Shigure, any other standard DPS weapons Artifacts: 4 Gilded, 4 Deepwood (if no other holders) |
| Hydro Slot | ||
| Character | Ranking | Notes |
 |
S | Ayato Provides a good amount of damage, Hydro application, and can apply Hydro while off-field. His Burst can help with infusing DMC’s Burst with Hydro. Additionally, his Skill allows for flexible rotations that include two Thoma Skills which, therefore, decreases Thoma’s ER requirements. Weapon: Haran Geppaku Futsu, Primordial Jade Cutter, Amenoma Kageuchi, The Black Sword, any other standard DPS weapons Artifacts: 4 HoD, 4 Gladiator’s Finale, 4 Echoes of An Offering |
 |
S | Kokomi Can provide both on-field and off-field Hydro application with her Skill and Normal/Charged Attacks, while also dishing out additional damage during her Burst and with Ocean-Hued Clam. One of the easiest units to infuse DMC’s Burst with Hydro. Additionally, she provides ample healing, making it possible to run full EM Thoma with no worries. Weapon: Everlasting Moonglow, Prototype Amber, Thrilling Tales of Dragon Slayers Artifacts: 4 Ocean-Hued Clam, 2 HP/2 HP |
 |
A | Childe Has excellent on-field AoE Hydro application and damage. However, Childe relies on utilizing Charged Shots when out of Melee Stance to maintain Hydro application, and otherwise has periods without any application. When used with DMC, C2+ Thoma is recommended to Vape his Burst as it allows Thoma to burst first in the rotation with his longer Burst uptime. Weapon: Any 5* CRIT Bow, but there are many great 4* options. Artifacts: 4 HoD, 2 HoD/2 ATK, 2 ATK/2 ATK Please note that 2 NO/2 WT is not recommended with Burgeon as Childe does not utilize any Burst buffs within these teams. |
 |
A | Xingqiu Can apply Hydro while off-field, provide damage, and give damage reduction. His Hydro application is mostly single-target, which conflicts with Burgeon’s multi-target nature. Weapon: Favonius Sword, Sacrificial Sword Artifacts: 4 EoSF, 2 HoD/2 NO |
 |
A | Yelan Can apply Hydro off-field while contributing to team damage. Although she can buff the on-field character’s damage, the buff is generally not used in Burgeon team comps. As with Xingqiu, her Hydro application is mostly single-target. Weapon: Aqua Simulacra, Favonius Warbow, Elegy for the End Artifacts: 4 EoSF, 2 HoD/2 NO |
 |
B | Barbara Can apply Hydro both on-field and off-field but may require “hugging” your enemy for optimal Hydro application. Additionally, her healing is helpful for keeping the team alive. Weapon: Everlasting Moonglow, Prototype Amber, Thrilling Tales of Dragon Slayers Artifacts: 4 Ocean-Hued Clam, 2 HP/2 HP |
 |
C | Mona She applies Hydro. That’s it. The DMG Bonus from her Burst does not increase Burgeon DMG. Weapon: Skyward Atlas, Favonius Codex Artifacts: 4 EoSF, 2 HoD/2 NO, 4 NO, 4 Instructor |
Flex Slot
Fundamentally, Burgeon teams are a 3-person team: a Pyro unit, a Hydro unit, and a Dendro unit. The flex slot in Burgeon teams primarily acts as a unit to deal off-field damage that does not affect Dendro Cores significantly OR that increases the number of Dendro Cores produced. You will not want to focus on purely buffing your Thoma’s EM – an off-field DPS provides much more damage to the team.
Please take note that certain flex characters shine well in specific teams so the rankings here are generalized. See the notable team section for the most optimal flex utilization.
| Character | Ranking | Notes |
 | S | 2nd Dendro Generally, a 2nd Dendro character can produce more Dendro Cores and enables the added bonus of 100 EM from Dendro Resonance. Your primary Dendro unit should be running 4 Deepwood, while your secondary unit can run 4 Instructor or 2 Deepwood/2 Other to improve their personal damage. |
 | S | Fischl An off-field DPS that dishes out significant single-target damage while applying a Quicken (Or Electro-Charged to Quicken in the case of DMC) aura to extend Dendro application and create more Dendro Cores. Fischl is preferred over other Electro units as Oz targets Dendro Cores last. It should be noted that she may steal Burgeons due to her A4 or proc Overload which can launch enemies out of your range but this is generally inconsequential and does not happen often. Weapons: Elegy for the End, Polar Star, Aqua Simulacra, Skyward Harp, Thundering Pulse, The Stringless Artifacts: 2 Thundering Fury/2 ATK |
 | A | Albedo A great option for steady off-field damage. Generally, even though his Burst does increase the party’s EM, you do not want to Burst with him as it is an overall team damage decrease. Weapons: Cinnabar Spindle, Harbinger of Dawn Artifacts: 4 Husk of Opulent Dreams |
 | A | Cryo Unit With a Cryo unit, you are able to “Fridge” with Dendro. This is a simultaneous aura Reaction involving Freeze and Bloom that takes advantage of the fact that Hydro will react with Cryo before it reacts with Dendro, allowing you to use the Freeze Reaction to reduce the amount of Hydro that consumes Dendro when triggering Bloom. This essentially makes the Dendro aura stay longer on an enemy, allowing for more Dendro Cores to be generated. Additionally, your opponent will be Frozen for a period of time, allowing you to forgo a healer with more confidence. Notable Units (Not ranked): Ganyu, Rosaria, Kaeya, Diona, Layla |
 | A | Kazuha A great option for grouping enemies and the Dendro Cores created. Kazuha can also provide a DMG% buff to the Hydro character of choice when the Element is Swirled. Weapons: Freedom-Sworn, Favonius Sword, Sacrificial Sword, Iron Sting Artifacts: 4 VV, 4 Instructor |
 | A | Sucrose Can provide grouping and a very nice EM boost to Thoma, allowing him to deal more Burgeon DMG at the cost of fewer Burgeons overall when on-field. Weapon: Sacrificial Fragments, Thrilling Tales of Dragon Slayers Artifacts: 4 VV, 4 Instructor |
 | A | 2nd Hydro When running either Childe or Ayato, this position is usually open to a healer like Kokomi or Barbara, if wanting to run a full EM Thoma. You can also go for either Yelan or Xingqiu when running an on-field Hydro unit to lessen ER requirements. Yelan is also a nice option in this role with an on-field Nahida. |
 | A | Zhongli Produces a very reliable shield and gives -20% RES Shred, buffing Thoma’s Burgeon DMG, but provides no damage himself. Weapons: Favonius Lance, Staff of Homa, Black Tassel Artifacts: 4 TotM, 4 Instructor, 4 Deepwood |
 | B | Jean Can be run in a Burgeon team to provide healing along with some Burst damage and buffing capabilities. Weapons: Favonius Sword, Sacrificial Sword, Festering Desire Artifacts: 4 VV, 4 Instructor |
 | B | Sayu Similar to Jean but can perform better in multi target scenarios. Weapons: Favonius Greatsword Artifact: 4 VV, 4 NO, 4 Instructor |
 | B | Venti Mainly acts as a grouper for a Burgeon team and can buff your on-field Hydro unit by Swirling Hydro with 4 VV. Venti can raise Dendro Cores above Thoma’s Fiery Collapses’ range, preventing him from triggering Burgeon. Weapons: Elegy for the End, The Stringless, Favonius Warbow Artifacts: 4 VV |
 | B | Heizou Can be used as an on-field DPS when having an off-field Hydro applier. Heizou can group enemies, deal good damage, and give EM to the entire team. Weapons: Skyward Atlas, Lost Prayer to the Sacred Winds, Memory of Dust, The Widsith, Solar Pearl Artifacts: 4 VV |
Noteworthy Teams and Rotations
These teams will be separated by the on-field unit. These rotations are often the same regardless of the unit used in the flex slot.
This is not an exhaustive list of teams, but merely a list of some notable sample comps.
Baizhu—Thoma

An on-field Baizhu team where Thoma is able to comfortably run full EM. The one major downfall to this team would be the ER requirements, however, this can be mitigated with Baizhu running Favonis Codex (which he can proc up to 3 times a rotation) along with Xingqiu and Yelan running Favonius/Sacrificial weapons. The only downside to the Favonix Codex approach with Baizhu is a decrease in healing as you will have to focus on CRIT Rate, but it is usually negligible.
Rotation
Baizhu E Q > XQ E Q (E) > Thoma Q E > Yelan hE Q > Baizhu E N3 until E is off CD
Ayato—Thoma
There are two main versions of Ayato Burgeon teams: teams with Fischl as your Flex slot and teams with Yaoyao/Kiara as your Flex slot.
Ayato—Fischl

This team allows for a relatively easily infusible DMC Burst within Ayato’s Burst. Due to the lack of a healer in this team, Thoma will be run with a more HP-focused build. For more info on how much a Thoma built with full HP can do with Burgeon, check the “HP or EM?” section. If you run Nahida, you will want her to Burst in this team due to Skill gaining more procs when there is an Electro character in the team.
Rotation with DMC
Ayato Q > DMC E Q > Fischl Q or E > Thoma Q E > Ayato E N15 > DMC E N1 > Fischl Q or E N1 > Thoma E > Ayato E N15
Rotation with Nahida
Nahida hE Q > Ayato Q > Thoma QE N1 > Fischl E > Ayato E N15 > Nahida hE > Thoma E N1 > Fischl Q > Ayato E N15
Ayato—Yaoyao/Kirara
Compared to the Fischl teams above, Yaoyao and Kirara allow Thoma to run a full EM build without worrying about Burgeon self-DMG or having to dodge every single enemy hit. With two Dendro characters, DMC is a better option here than Nahida to avoid Burning. Yaoyao and Kirara’s burst are not required for this team but can be used as needed.
Rotation
Ayato Q > DMC E Q > Yaoyao/Kirara tE > Thoma Q E > Ayato E N15 > DMC E N1 > Yaoyao/Kirara tE > Thoma E > Ayato E N15
Kokomi—Thoma
A team where full EM Thoma is completely acceptable. Kokomi acts as the on-field unit within this team and also as a healer to sustain Burgeon self-DMG as well as damage from external sources.
This team’s flex slot is extremely versatile. Some of the most viable options are a 2nd Dendro unit, Fischl, Albedo, and a Cryo unit for Fridge. A 2nd Dendro unit will likely be the best option, but the others don’t fall too far behind. Xingqiu and Yelan are also possible options here to lower Kokomi’s ER requirements when used with DMC, but generally produce less Dendro Cores as Dendro application is generally the limiting factor when it comes to Dendro Core production. Xingqiu and Yelan are not recommended with Nahida due to how Nahida’s Skill triggers on reaction.
Rotation with DMC and Collei
Kokomi E > DMC E Q > Collei E Q > Thoma Q E > Kokomi N1 Q N3 for DMC Q duration
Rotation with Nahida and DMC
Kokomi E > Nahida hE > DMC Q E > Thoma Q E > Kokomi N1 Q N3 for Thoma Q duration
Childe—Thoma

Thoma’s lengthy off-field Pyro application combined with Childe’s consistent and flexible on-field Hydro application creates a powerful multi-target oriented team. Thoma’s C2 is often recommended here, as the longer Burst duration allows using Thoma before Childe to establish a Pyro aura and Vaporize Childe’s Ranged Burst.
Thoma can be built either with full EM or HP with EM substats, depending on who the other units are. Diona is a strong option here, as Cryo application enables higher Dendro Core generation and she is one of the few units who can comfortably allow Thoma to build full EM in a Childe Burgeon team.
Childe—Thoma—DMC—Diona/Rosaria
It is highly recommended to use C2+ Thoma when using DMC and Childe.
When using DMC in these teams, turn around and place DMC’s Burst behind you and away from the Burning enemies, so as to not transform the Burst with Pyro. If the Burst comes in contact with Pyro, you must reset. Childe’s ranged Burst (rQ) can hit behind him and transform the Burst.
Rotation with Diona
Thoma Q E > DMC E Q > Childe rQ > Diona hE N1 Q > Childe E (11s melee) > Thoma E > DMC E (catch particles) > Diona tE > Childe CS * 2 > DMC E (catch particles) > Diona tE > Childe CS
Rotation with Rosaria
Thoma Q E > DMC E Q > Childe rQ > Rosaria E Q > Childe E (11s melee) > Thoma E > DMC E (catch particles) > Rosaria E > Childe CS * 2 > DMC E (catch particles) > Rosaria E > Childe CS
Childe—Thoma—Nahida—Kazuha
Kazuha’s Burst is used in the downtime, in order to trigger more Blooms with Childe’s Charged Shots.
Rotation
Nahida hE > Thoma Q E > Childe rQ E (11s melee) > Nahida tE or hE > Thoma E > Kazuha tE Q > Childe CS * 3 > Kazuha tE
Nahida—Thoma
Nahida will want to mainly be on-field in these types of teams, though it’s okay to have other characters on-field due to this team’s flexibility. Thoma can have a more HP-focused build so he can protect the team while still contributing considerable damage with the Burgeon reaction. Nahida will want to use her Burst in these teams, since she can take advantage of the extra EM gained from her A1 and/or the Electro buff gained from Burst if running Fischl.
Rotation with Fischl
Nahida hE Q > Xingqiu Q E > Thoma Q E > Fischl E > Nahida NA’s and E if needed
Rotation with Yelan
Nahida hE Q > Xingqiu Q E > Thoma Q E > Yelan E Q > Nahida NA’s and E if needed
Sucrose—Thoma
A Thoma Burgeon team with Sucrose as the on-field Normal Attacker (driver). Similar to Taser Sucrose teams but slightly more complex due to the process of triggering Burgeon. C6 Sucrose is able to buff Xingqiu/Yelan’s off-field damage by absorbing Hydro in her Burst. Please note you will need to spread out Sucrose’s Skill uses to make sure her A4 buff has 100% uptime during Thoma’s Burst. Sucrose may also be replaced with Heizou for more focus on personal damage instead of buffing.
Rotation with DMC
Sucrose Q > XQ/Yelan (E) Q E > DMC E Q > Thoma E Q > Sucrose E N3 for DMC Q duration (E as needed)
Rotation with Nahida
Sucrose Q > XQ/Yelan (E) Q E > Nahida hE > Thoma E Q > Sucrose E N3 for Thoma Q duration (E as needed)
Overload Focused
A majority of Overload Thoma teams involve Raiden as shown below, but there is the possibility for other options with Beidou, though they will not be covered fully in-depth within this guide.
Please note that Overload focused teams face more drawbacks compared to Burgeon teams as Overload 1) has a 2x reaction multiplier compared to Burgeon’s 3x, 2) causes enemies to get knocked back which can cause stamina problems, and 3) has lackluster scaling in AoE compared to Burgeon.
Raiden—Thoma

This team is mainly an Overload-focused team where Thoma will be triggering Overload during Raiden’s Burst, while the Anemo flex unit acts as a Viridescent Venerer holder and an EM Buffer (Sucrose) or DMG% buffer (Kazuha). The flex slot can be someone used to buff Raiden’s damage such as Kujou Sara or Bennett.
Rotation
The following rotation is for Sucrose and Bennett filling the flex spots, but it can be modified as needed for other team members to maximize Raiden’s Resolve.
Raiden E > Thoma E Q > Sucrose N1 E Q > Bennett E Q > Raiden Q N3C for Q Duration
Overvape/Fireworks Thoma
There are three main variations of this team: Raiden—Xingqiu—Thoma, Taser Thoma, and Ayato—Thoma. With all of these variations, you can build your Thoma with the typical EM build or with the Off-Field Pyro DPS Thoma build.
Raiden—Xingqiu
A variation of the popular Raiden team consisting of Thoma in the place of Xiangling. The Anemo slot in this team can be filled by Sucrose, Kazuha, or even Bennett to buff Raiden’s on-field damage.
Rotation with Bennett
Raiden E > XQ E Q E > Thoma E Q > Bennett E Q > Raiden Q
Taser Thoma
A Taser-like Thoma team. The Anemo slot may be filled by either Sucrose or Heizou, although Sucrose generally provides more damage. Fischl is also replaceable in this team by Kuki if you need a dedicated healer, or possibly Beidou (although generally not recommended as she will need lots of ER) but overall, Fischl is the best option.
Rotation
XQ (E) Q E > Fischl E > Thoma E Q > Anemo N5 (10 sec- Use Q as needed and E when off cooldown/max Declension stacks)
If using Heizou, use N1C as your on-field combo.
Ayato—Thoma
Mainly a Taser team where Thoma can provide a shield and some damage through the Overload reaction. Anemo options may be Sucrose/Kazuha. Electro option would mainly be Fischl, but Raiden can be considered.
Rotation
Ayato Q > Fischl Q > Kazuha E Q > Thoma Q E > Ayato E N15 > Fischl E > Kazuha tE > Thoma E > Ayato E N15
Off-Field Pyro DPS
A build where Thoma acts as an off-field Pyro DPS. Thoma is only able to vape about 1/3rd of his Burst due to his ICD and hence you will want to focus on generally buffing Thoma’s DMG in this build, not just his Vaporizes. Compared to Burgeon Thoma, Off-Field Pyro DPS Thoma requires much higher investment due to his low multipliers compared to other off-field DPS units.
Weapons
| Weapon | Notes |
Staff of (T)Homa | A beautiful weapon on Thoma both aesthetics and utility-wise. It helps balance out Thoma’s HP for his shield and still provides offensive stats to help with his damage. This weapon allows Thoma to run a full damage build that can be classified as a Hybrid one as well. Note that this weapon is only better than Calamity when Thoma is <50% HP. |
Calamity Queller | An amazing weapon that increases Thoma’s ATK by a dramatic amount with no passive downtime. Thoma’s Burst is not able to snapshot, so the long uptime on the passive is fully taken advantage of as well as the increased damage off-field. |
“The Catch” | An excellent F2P weapon that helps with Thoma’s ER requirements and gives a nice bonus to his Fiery Collapse damage. The best 4 star weapon, only outdone by R5 Wavebreaker, and performs better than many 5 star options. Use it if it’s available. |
Engulfing Lightning | A very solid weapon that helps with Thoma’s high ER needs, while also providing a nice ATK bonus along with ER. This weapon performs much better pre-C4. |
Staff of the Scarlet Sands | Although you will not have full uptime on its passive, this weapon is still a good option by focusing on buffing his Vaped Fiery Collapses. Generally recommended to focus a bit more on EM substats with this weapon. |
Skyward Spine | A good weapon for Thoma with its ER and high Base ATK. Passive won’t be used except for a trace amount of CRIT Rate. |
Wavebreaker’s Fin | If fortunate enough to obtain this weapon, it can be very nicely utilized by Thoma. At R5, Wavebreaker performs on par with and even better than many 5-stars. |
Vortex Vanquisher | Being mostly off-field, Thoma will not take advantage of its passive; however, in general, Thoma appreciates high ATK weapons, so you are still able to deal considerable damage with this weapon. |
Primordial Jade Winged-Spear | A weapon with high Base ATK and CRIT Rate. Mainly only good on Off-Field Pyro DPS Thoma as a stat stick. Passive won’t be utilized. |
Deathmatch | A nice weapon with its high CRIT Rate substat along with the ATK bonus. |
Favonius Lance | Helps to lower team ER requirements as well as Thoma’s own ER Requirements. Much better suited on a support based Thoma. |
Kitain Cross Spear | The 2nd best F2P option however Kitain falls much farther behind it’s other F2P counterpart, “The Catch”. Only use if you have no other options and “The Catch” isn’t available |
Dragon’s Bane | Full uptime on the passive with a Vaporize team, but due to Thoma not Vaping a significant portion of his damage, the EM substat is not as useful. |
Artifacts
Main Stats
Sands | Goblet | Circlet |
| ER% or ATK% or HP% | Pyro DMG or HP% | CRIT Rate/CRIT Damage |
When to pick HP% Main Stats?
Generally, you would want to have Kazuha or other DMG% buffs on the team while Thoma has an HP% Goblet to make up for the lack of Pyro DMG Bonus. If you are able to Burst off cooldown without an ER% Sands, it is favorable to use an HP% Sands instead of an HP% Goblet.
Substats
| Pure DMG |
| ER% > CRIT > ATK% > EM |
| Shield Hybrid |
| ER% > CRIT > HP% > ATK% > EM |
ER Requirements
Because of the inclusion of a second Pyro unit in the team (usually Bennett) who can funnel particles, Off-Field Pyro DPS Thoma will have lower ER requirements than Shield Support and Burgeon Thoma. That being said, it is generally not recommended to use weapons like Favonius Lance or Kitain Cross Spear on Off-Field Pyro DPS Thoma so he does not have those options to lower his ER requirements. Below is a table that shows ER baselines for Off-Field Pyro DPS Thoma.
These values are a baseline for you to go off of—you may need less or more depending on numerous factors.
| Constellation 0-3 | Constellation 4+ |
| Base: 200%+ | Base: 180%+ |
| With funneling from a Pyro character: 190%+ | With funneling from a Pyro character: 170%+ |
Artifact Sets
| Artifact | Notes |
4 EoSF | The best set for Off-Field Pyro DPS Thoma; 4 Emblem benefits Thoma greatly by turning his ER requirements into significant damage. |
2 EoSF/2 CWoF | A combination of artifact sets that assists with reaching Thoma’s ER requirements while also buffing his damage. Generally used as placeholder while farming for 4 EoSF. |
2 CWoF/2 NO | A good option to boost Thoma’s Skill and Burst damage. However, you would need to get enough ER from substats. |
2 CWoF/2 ATK | A good overall option to increase Off-Field Pyro DPS Thoma’s damage output. |
4 CWoF | Boosts Thoma’s Pyro DMG, although he can’t effectively proc the full 4-piece set effect. Thoma also has standard ICD and won’t Vape as much to utilize the 4 CWoF effect. |
2 CWoF/ 2 EM | Primarily used to buff Thoma’s Vaped Fiery Collapses. Like CWoF, due to his ICD, he will not utilize this combination the best. |
| 2 EoSF/2 Other | Notable sets: 2 EoSF/2 18% ATK; 2 EoSF/2 NOMainly can be used as a placeholder until you’ve gained a good 4 Emblem set. |
Talent Priority
> >>
Elemental Skill > Elemental Burst
Normal Attacks are negligible
Team Compositions
Xiangling? Never heard of her.
A variation of a Reverse Vape team comp with Thoma instead of Xiangling. Alternatively named Husbandos Over Meta.
Hydro Slot
The two main units that are used in this slot are Ayato and Childe. Both are extremely good units and perform well in this role. Generally, Ayato allows for more flexibility as he has a set cooldown, while your rotations will affect Childe’s cooldown. However, Childe does have Riptide procs, which scale quadratically in AoE scenarios.
TL;DR: Both are good. Choose which one you like!
What about Xingqiu/Yelan?
Xingqiu and Yelan are options for this team; however, it is generally not recommended. Ayato and Childe will provide more damage for the team comparatively. Thoma, Xingqiu, and Yelan need an on-field Normal Attacker to proc their Bursts. None of the other units in this team would be equipped to do so while providing meaningful damage. Alternatively, you may run Heizou as your on-field unit to Normal Attack, although this is a damage decrease from Childe/Ayato.
Anemo Slot
Sucrose and Kazuha are the two main units used in this slot. Because of Thoma’s ICD and his inability to snapshot, Kazuha is the better option to both provide RES Shred with 4 Viridescent Venerer and a long lasting Pyro DMG Bonus (without on-field interruption) with his Burst; however, Sucrose is still viable for stronger Vapes.
Rotations
Ayato—Sucrose
Extremely similar to Childe—Sucrose; however, it allows for much more flexibility as you do not have to manage Ayato’s cooldowns as with Childe.
Ayato Q > Thoma E Q > Sucrose N1 E > Bennett E Q > Ayato E N15
Ayato—Kazuha
As with above, this team is pretty flexible in rotations, and you don’t have to follow this rotation strictly 100%.
Ayato Q > Thoma E Q N1 > Bennett Q E > Kazuha N1 hE Q > Ayato E N15 > Kazuha tE > Bennett E > Thoma E Q N1 > Bennett Q E > Kazuha N1 hE Q > Ayato Q E N15 (Q if possible)
Childe—Sucrose
This team comp is mainly focused on buffing Thoma’s Vaped Fiery Collapses while Childe provides a steady amount of on-field damage. It takes a bit more effort to Swirl both Pyro and Hydro in this team (hence the two Sucrose appearances on field), but if you have to Swirl one, make sure you are Swirling Pyro, which is quite easy in Bennett’s Burst. Sucrose’s Burst is not too important here, even if you have C6, as infusing her burst is quite unreliable. Throw it in wherever you need to.
Childe CA* > Sucrose N2 > Thoma E Q > Sucrose E > Bennett E Q > Childe E N2C (9-11s)
*can be replaced with Childe E N3
OR
Thoma E Q > Sucrose E > Bennett E Q > Childe E N2C (9-11s)
Childe—Kazuha
This team is extremely similar to the Childe-Xiangling-Kazuha-Bennett team, excluding the fact that Thoma’s Burst does not snapshot. Out of the options here, it is arguably the best for AoE.
Childe E > Bennett Q > Kazuha E Q > Thoma E Q > Childe Q E N2C 9-11s > Kazuha tap E > Bennett E (repeat till Thoma has Burst back while switching to Thoma so he catches particles) > Childe CA
On-Field Pyro DPS
Within this role, Thoma is acting as an on field normal attacker with C6 Bennett infusion. This role is viable without C6 Bennett, but it will be a noticeable damage decrease. As with Off-Field Pyro DPS Thoma, this role does require high investment on your Thoma.
Should you C6 your Bennett?
This has been a topic of debate for a lot of people in the Genshin community, but this section is here to make the choice of C6-ing your Bennett a bit easier. Before we begin, if you love playing Physical characters (namely Eula, Physical Keqing, or Razor) or characters with overridable Infusions with your Bennett, DO NOT C6 your Bennett. It will ruin the possibility of playing your Bennett with them in the future. That being said, here is a non-exhaustive list of characters in terms of C6 Bennett’s effect on them with their typical/popular builds.
| C6 Bennett’s Effect On Character | |
| Great Hindrance | Eula, Keqing, Razor |
| Somewhat of a Hindrance | Chongyun, Kamisato Ayaka, Kaeya, Rosaria |
| Does Not Affect | Albedo, Alhaitham, Aloy, Amber, Arataki Itto, Baizhu, Barbara, Beidou, Candace, Collei, Cyno, Diona, Dori (Non-C6), Faruzan, Fischl, Ganyu, Gorou, Jean, Kaedehara Kazuha, Kamisato Ayato, Kirara, Kujou Sara, Kuki Shinobu, Layla, Lisa, Mona, Nahida, Nilou, Ningguang, Noelle, Qiqi, Raiden Shogun, Sangonomiya Kokomi, Sayu, Shenhe, Shikanoin Heizou, Sucrose, Childe, Tighnari, Traveler, Venti, Wanderer, Xiao, Xingqiu, Xinyan, Yae Miko, Yaoyao, Yelan, Zhongli |
| Somewhat Benefits | Hu Tao, Klee, Yanfei, Yoimiya, Xiangling |
| Greatly Benefits* | Bennett, Diluc, Thoma |
As shown above, a great number of characters are not affected by C6 Bennett. Many characters who gain an Infusion, such as Noelle, Itto, and Xiao within their Bursts, are not able to be overridden by C6 Bennett. However, this is not always the case as with Ayaka’s Cryo Infusion after she sprints; always be sure to check within the description of the Talent that grants the Infusion to see if it can be overridden. In general, C6 Bennett is really only a problem for Physical builds.
So, should you C6 your Bennett? If you play a character that greatly benefits from it often, then generally yes. If you play any character in the ‘Great Hindrance’ or ‘Somewhat of a Hindrance’ section, then probably not.
If you’re still on the fence, then it’s generally a good idea not to C6 him until we can (hopefully) toggle Constellations.
Weapons
| Weapon | Notes |
| Staff of (T)Homa | Despite not activating it’s full passive you won’t be getting under 50% HP with, it is still a very good weapon on Thoma in general. In addition to this, it also helps strengthen Thoma’s shield. |
| Staff of the Scarlet Sands | Another good option that takes advantage of On-Field Thoma Vaping more often. Like with Off-Field Pyro DPS, the passive will not be up at all times, but with C1, the downtime is relatively inconsequential, since you use your Skill off cooldown with On-Field Thoma. |
| Primordial Jade Winged-Spear | A great option for On-Field Thoma due to him being able to proc and maintain the full passive of the weapon easily. Extra ATK and DMG Bonus is very much appreciated. Most importantly, it matches his eyes. 🙂 |
| Calamity Queller | Although Thoma gets more value from this weapon off-field, it is still an extremely good weapon for on-field Thoma, as he always appreciates the extra ATK. |
| Vortex Vanquisher | With Thoma being a shielder, Vortex becomes a much more valuable weapon, as the passive will have little downtime, giving Thoma a huge ATK buff which he very much appreciates due to his low Base ATK. |
Engulfing Lightning | Engulfing is able to help Thoma meet his ER requirements while also converting it into damage. Since Thoma will be on-field, he will need less ER than usual, so the passive may not be as impactful compared to the Off-Field Pyro DPS build. |
| Deathmatch | As long as you’re using this weapon with Bennett, it’s a great option. Very high CRIT Rate but low Base ATK. Overall a very nice weapon for Thoma. |
“The Catch” | As always, “The Catch” is a great weapon due to it increasing the damage of his Fiery Collapses, his Burst damage is not as impactful with this build, making “The Catch” fall quite a bit behind compared to Off-Field Pyro DPS Thoma. |
| Dragon’s Bane | This weapon has essentially 100% uptime, but still does not stack up to its F2P counterparts. |
| Skyward Spine | Essentially just a stat stick for Thoma. Depending on your rotation, you may be able to increase the number of Normal Attacks you do per rotation. |
| Wavebreaker’s Fin | Wavebreaker’s Fin falls behind within On-Field Pyro Thoma for the same reasons as “The Catch”, his burst is important but does not make up the entirety of his damage in this build. |
Artifacts
Main Stats
Sands | Goblet | Circlet |
| ER% or ATK% | Pyro DMG | CRIT Rate/CRIT Damage |
Substats
| ER% > CRIT > ATK% > EM > Flat ATK |
What about his HP scaling?
Unlike Zhongli, Thoma’s HP scaling is pretty negligible. This is particularly unhelpful with On-Field Thoma as his HP scaling only applies to one thing in his kit: his Fiery Collapses. In addition, Thoma has relatively moderate Base HP compared to a unit like Zhongli, so he does not get as much value in general with HP main stat artifacts.
ER Requirements
With the exception of Physical Thoma, On-Field Thoma is the build with the lowest ER requirements. Thoma will be spending most of his DPS time on-field and will be run with a second Pyro unit (Bennett), so he is able to run lower ER comfortably.
These values are a baseline for you to go off of—you may need less or more depending on numerous factors.
| Constellation 0-3 | Constellation 4+ |
| Base: 190%+ | Base: 170%+ |
| With funneling from Bennett: 180%+ | With funneling from Bennett: 160%+ |
With all of this in mind, you will rarely ever play On-Field Thoma without funneling.
Artifact Sets
| Artifact | Notes |
| 4 CWoF | A great set for On-Field Thoma. Thoma is not able to utilize the passive to its full potential as he can only use one stack but it is still a good set to utilize. |
| 4 EoSF | Although his Burst isn’t the only portion of damage On-Field Thoma deals, 4 EoSF is still an extremely well performing set due to Thoma’s ER requirements. |
4 Gladiator’s Finale | Great for consistent damage to on-field Normal Attackers. The ATK from the 2-piece and the 4-piece buff to Thoma’s NAs is very nice, especially if he is run with Yun Jin. |
| 2 CWoF/2 ATK | An overall good option if you don’t have a good full CWoF set. |
| 2 CWoF/2 NO | A good combination that balances between adding Pyro DMG and increasing the power of his Burst, but is much more suited for Off-Field Pyro DPS Thoma. |
4 Retracing Bolide | An option if you’re looking for a strong shield along with some more damage, but generally not worth farming. |
2 ATK/2 ATK | A general DPS set; only to be used intermittently while you’re farming for 4 CWoF or 2 CWoF/2 Other. |
Talent Priority
= >
Normal Attacks = Elemental Burst > Elemental Skill
Team Compositions
Vape Thoma

This team allows Thoma to take advantage of Bennett’s Burst, which infuses Thoma’s NAs with Pyro. A fast Hydro applier like Xingqiu is appreciated here due to them allowing Thoma to Vape many of his hits. With Xingqiu, the team becomes very tanky and safe to play due to Thoma’s shield, Xingqiu’s damage reduction, and the healing from both Xingqiu and Bennett. This comp faces minor difficulty against highly mobile enemies like Maguu Kenki, due to Thoma wanting to be inside Bennett’s Burst while fighting, but if played right, this team can still manage in those fights.
For this comp, Yelan can also be an option as an off-field Hydro applicator. The team will gain more damage but will have less survivability without Xingqiu’s damage reduction and healing. Though with Thoma and Bennett on the team, survivability should be a small issue. Yelan may use her Burst after Thoma’s if she substitutes Xingqiu, since she has a shorter Burst duration than him.
Rotation
Xingqiu E Q E > Thoma E Q N1 > Bennett E Q > Kazuha N1* E Q > Thoma N4 > Kazuha E > Bennett E > Xingqiu E Q E > Thoma Q > Bennett E Q > Kazuha N1 E Q > Thoma N4
For Thoma’s N4 section, you should use NAs until Bennett’s Burst expires. During this time, you will also want to use Thoma’s Skill off cooldown.
*Kazuha N1 is important to apply Pyro with Thoma Collapse to Swirl Pyro
Thoma—Yun Jin

A build more focused around Thoma’s Pyro-infused Normal Attacks. With this team, you’d likely run 4 Glad or 4 Bolide as opposed to 4 CWoF. There are a couple of options for the flex spot but mainly, you can use Kazuha for RES Shred and Pyro DMG Bonus, Xingqiu/Yelan for Vaporize, or Zhongli for Geo Resonance and additional shielding.
Rotation with Kazuha
Thoma E Q > Kazuha E Q > Yun Jin E Q > Bennett E Q > Thoma N4 for Bennett Q Duration
Mono Pyro

Mono Pyro is one team where Thoma does not need as much ER by virtue of there being 3 Pyro characters. Like the team above, this team particularly shines with C6 Bennett. The rotation of this team is fairly simple: just make sure to snapshot Xiangling’s Burst with Bennett’s Burst and Kazuha’s A4 if Kazuha is used in the Anemo slot. Beyond that, the rotation of this team is fairly flexible, just be sure to weave in some Normal Attacks from Thoma on Bennett’s Burst.
Physical DPS

Physical Thoma is extremely hard to build. Being a Pyro character makes Superconduct extremely hard to proc unless you never use your Skill or Burst. That being said, although this build will likely not give you 36 stars in the Abyss without extremely high investment, if you want to play it, we encourage you to do what makes you happy!
Weapons
| Weapon | Notes |
| Vortex Vanquisher | Do you like ATK? Because Thoma sure does and this weapon gives a lot of it. With Thoma being a shielder, Vortex becomes a much more valuable weapon, as the passive will have little downtime. Coupled with a unit like Zhongli, the passive has virtually zero downtime. Because of this, Physical Thoma really appreciates this weapon. |
| Staff of (T)Homa | An amazing overall weapon for any damage-focused Thoma. While boosting his damage, Homa also buffs his shield for more comfortable gameplay. The increased HP helps with Thoma’s A4 and also boosts its own passive. With this weapon, you may want to focus more on HP% substats than you typically would. |
| Primordial Jade Winged-Spear | A solid weapon for any on-field Polearm character. Provides both a nice ATK buff and DMG% buff with a CRIT Rate main stat. |
| Calamity Queller | Although this weapon is more geared towards off-field damage dealers or buffers who scale on ATK, the passive is still quite good for on-field characters. However, with Physical Thoma, the Elemental DMG Bonus goes to waste. |
| Deathmatch | One of the better Battle Pass weapons that give lots of CRIT Rate with its passive as well as some ATK with its passive. The Low ATK however isn’t great for Thoma when paired with his own low Base ATK. This weapon gets much better with refinements. |
Crescent Pike | The F2P weapon for Physical Thoma. This weapon’s passive will not be of much use to Thoma due to lack of significant multi-hits. Fischl can be used for steady Elemental Particles in order to boost the passive’s uptime. |
Artifacts
Main Stats
Sands | Goblet | Circlet |
| ATK% | Phys DMG | CRIT Rate/CRIT Damage |
Substats
| CRIT > ATK% > Flat ATK |
Artifact Sets
| Artifact | Notes |
2 Pale Flame/ 2 Bloodstained Chivalry | A generalist Physical build artifact set combination that works great on Thoma. The consistent DMG Bonus is much more appreciated than ATK% or any other buffs. 4 Pale Flame is not recommended due to Thoma’s long Skill cooldown, which means the stacks of the buff will expire before he can use his Skill again to gain more stacks. |
2 PHYS/2 ATK | A mix of the two artifact sets that are most accessible for Physical Thoma. Less damage than PF/BC but still usable. |
| 4 Gladiator’s Finale | Not really a 4-piece you should shoot for on Physical Thoma, as the 2-piece combinations are better, but it is still viable if you have a set lying around. |
2 PHYS/2 Other | Can be used as a placeholder till you’re able to get one of the other sets or pairings above. |
2 ATK/2 Other | As with the above, a placeholder until you’re able to get another set. |
Talent Priority
> >
Normal Attacks > Elemental Skill > Elemental Burst
Team Compositions
Superconduct

A typical team for Physical units: Rosaria to provide Cryo application as well as Phys RES Shred at C6 and Fischl to provide constant Electro application with her Skill along with additional damage and particles. The flex spot for this team can go to a Pyro user such as Bennett for an ATK buff, or Xinyan for Phys DMG Bonus, both with the addition of ATK from Pyro Resonance. However, you can also slot in a healer instead, as no other unit in the team heals, making Bennett the ideal unit for this slot.
Rotation w/ Bennett
Fischl E > Rosaria E Q > Bennett E Q > Thoma N4
Double Geo
A preferable team composition to Superconduct as you do not have to worry about Pyro taking off the Cryo or Electro for Superconduct. Yun Jin is used to buff Thoma’s Normal Attacks and for Geo Resonance. The ideal unit for the Geo spot is Zhongli with his Phys RES Shred on his shield, but Albedo is also a nice alternative to provide off-field damage. The Pyro slot can be either Bennett or Xinyan for the reasons listed above.
Rotation
Zhongli Hold E > Yunjin E Q > Bennett E Q > Thoma N4
Conclusion
Acknowledgments
Thank you to all of those who helped with this guide – your contribution no matter the form is greatly appreciated. A special thank you to all the Thomains staff, mystathi, cuzimori, idkanonymized, jukoist, and miannes for reviewing this document and providing valuable feedback. Another thank you to raven9205, cuzimori (again), and latiwings for their work on the previous Thoma guide which was used as a basis for our Shield Support section.
Thank you for placing your trust in me. Your kindness warms my heart more than the brightest flame ever could. But not to worry, I’ve figured out what I want to do now. My strength is your shield, and I will always be here to protect you.
Resources and Calcs
Team Comp/Artifact Pictures
Energy Recharge Calculator by Zakharov29229
Thoma Mastersheet by vazellea
Thoma Shield Calculator by vazellea
Thoma Burgeon Calculator by vazellea
Appendix
Thoma Ascension Materials by @deviltakoyaki on Twitter
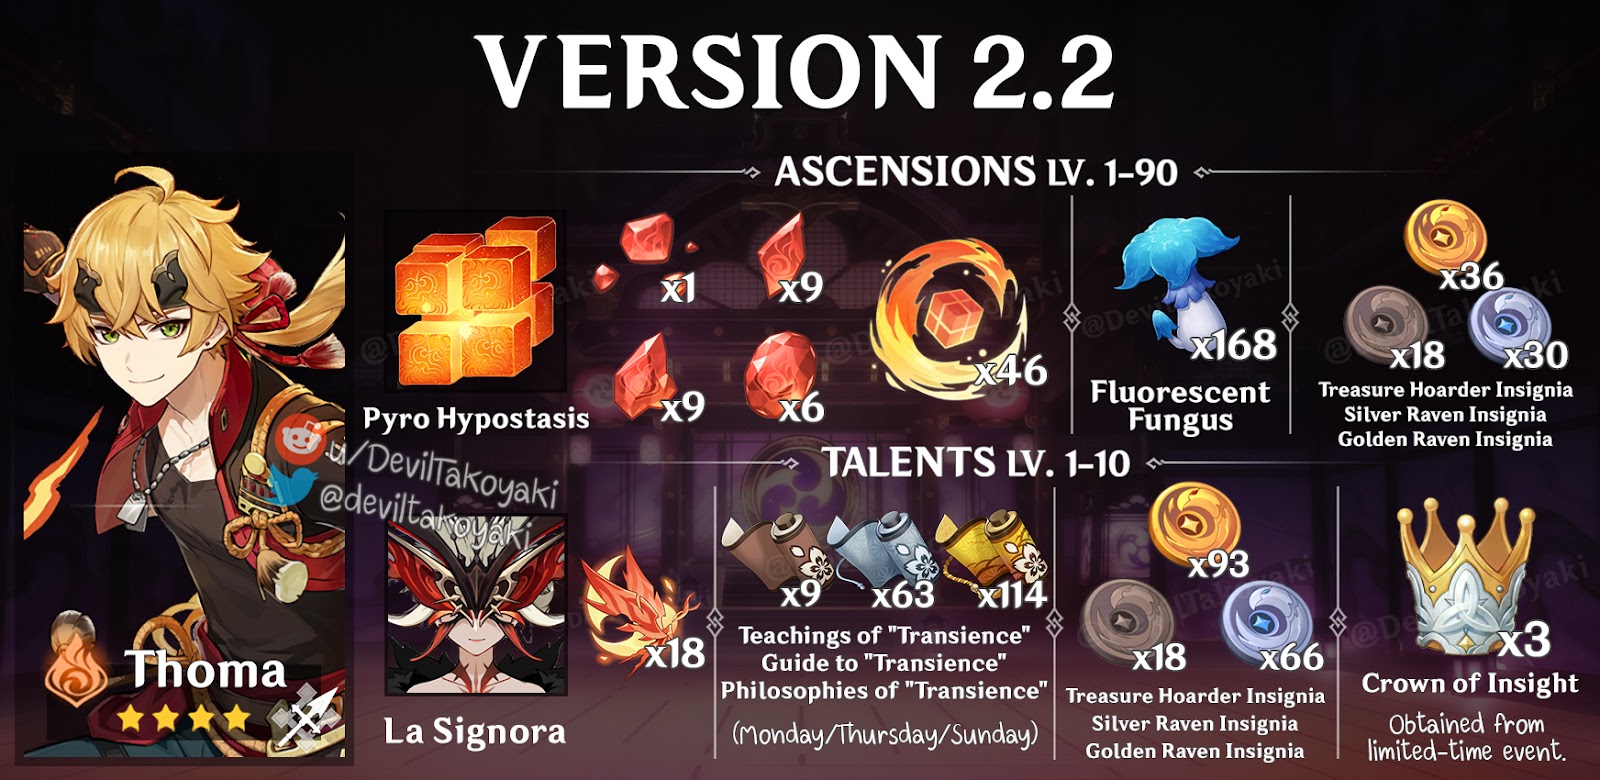
- Fluorescent Fungus Farming Video by KingSef Games on YouTube
- Florescent Fungus Route Post/Map by u/TheGamerJC on Reddit
- Treasure Hoarder Insignia Farming Video by KingSef Games on YouTube
- Treasure Hoarder Insignia Route Post/Map by u/TheGamerJC on Reddit