For more information on what the KQM Guide Skeleton is, please read here.
[Character] Guide: [Subtitle]
Updated for Version [#]
A [Character] Guide
Written by [author discord tag(s)]
Here is a quote. We can change the font.
Table of Contents
Introduction
[Introduction with SEO stuff] This guide will review [Character]’s best weapons, best artifact sets, best teams, Talent priority, combos, preferred artifact stats, and more!
The introduction should be a way to hook readers into a guide. The amount of time that people spend on our guides is already frighteningly low; you don’t want to scare them off with a lot of technical terminology right off the bat. Instead, you should focus on slowly easing people into the guide - who is this character? What is their purpose/niche in Genshin? Why ever play them? Etc.
The introduction is highly flexible. If you’re writing the Kazuha guide, you’ll be writing the intro in a different way than if you are writing the introduction for the Thoma guide. Generally, the introduction should aim to give an accurate overview of a character, explaining what the character’s strengths and weaknesses are and when you would play the character. The introduction shouldn’t aim to sell the character, but it should discuss them with the assumption that the reader wants to find ways to use them.
Why Play [Character]?
Here is a quote. We can change the font.
Pros
- Pro 1
- Pro 2
- etc.
Cons
- Con 1
- Con 2
- etc.
TL;DR
Glossary
FAQ
This section is optional. Title this section however you prefer.
Question 1
Answer 1
Question 2
Answer 2
Question 3
Answer 3
Talents
The Talents section should cover everything related to the character’s kit. Dissect the character’s kit and explain all the relevant mechanics here.
If the explanation of a certain mechanic is very extensive/detailed, you should place it in a standalone sub-section and link to that section from the relevant Talent.
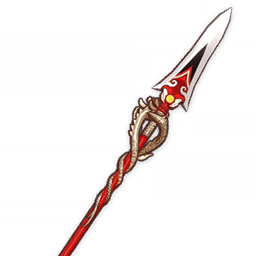
 Normal Attack | Gleaming Spear: Guardian Stance
Talent Description
Normal Attack
Performs up to 4 consecutive spear strikes.
Charged Attack
Consumes a certain amount of Stamina to lunge forward, dealing damage to opponents along the way.
Plunging Attack
Plunges from mid-air to strike the ground below, damaging opponents along the path and dealing AoE DMG upon impact.
[Analysis]
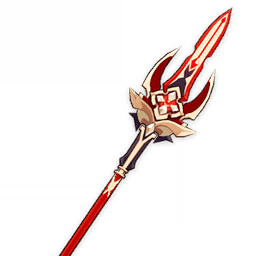
 Elemental Skill | Sacred Rite: Heron’s Sanctum
Talent Description
Candace's fighting style is capable of warding off an entire tide of foes.
Tap
Rushes forward with her shield, dealing Hydro DMG to opponents in front of her.
Hold
Raises her shield to block incoming attacks from nearby opponents, forming a barrier that absorbs DMG based on her Max HP and absorbs Hydro DMG 250% more effectively. This barrier lasts until the Elemental Skill is unleashed.
After holding for a certain period of time, Candace will finish charging, and when the Skill button is released, the Skill duration expires, or when the barrier is broken, she will perform a leaping strike that deals Hydro DMG to opponents in front of her.
[Analysis]
Candace Perfect Counter Example by Aftermath
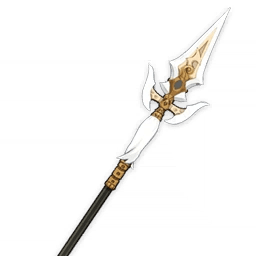
 Elemental Burst | Sacred Rite: Wagtail’s Tide
Talent Description
Raising her weapon on high, Candace calls upon a divine blessing that deals AoE Hydro DMG based on her Max HP and continuously confers the Prayer of the Crimson Crown on your active character.
Prayer of the Crimson Crown
This effect has the following properties:
- Characters deal increased Elemental DMG with their Normal Attacks.
- Whenever a character takes the field, they will unleash a rippling wave of water that deals Hydro DMG to nearby opponents. There is a limited number of waves that can be triggered in the duration of this Skill.
- Sword, Claymore, and Polearm characters under this effect will obtain a Hydro Infusion.
[Analysis]
 Ascension 1 Passive | Aegis of Crossed Arrows
Talent Description
If Candace is hit by an attack in the Hold duration of Sacred Rite: Heron's Sanctum, that Skill will finish charging instantly.
[Analysis]
 Ascension 4 Passive | Celestial Dome of Sand
Talent Description
Characters affected by the Prayer of the Crimson Crown caused by Sacred Rite: Wagtail's Tide will deal 0.5% increased DMG to opponents for every 1,000 points of Candace's Max HP when they deal Elemental DMG with their Normal Attacks.
[Analysis]
 Utility Passive | To Dawn's First Light
Talent Description
Decreases climbing Stamina consumption for your own party members by 20%.
Not stackable with Passive Talents that provide the exact same effects.
[Analysis]
[Level and] Talent Priority
You should use “Level and Talent Priority” if character levels are important to the character.
Talent icons are optional. You may provide Talent priority in text-only form.
> ≥
Normal Attack > Skill ≥ Burst
Constellations
Similar to the Talents section, dive into the character’s Constellations here and explain all the relevant mechanics. Try to provide Constellation DPS increase if applicable. Note that the icons for C3 and C5 are different from the corresponding Skill and Burst icons!
 Constellation 1 | Fortress of Fantasy
The Shield Absorption of the Curtain of Slumber generated by Nights of Formal Focus is increased by 20%.
Additionally, when unleashing Nights of Formal Focus, she will generate a shield for any nearby party members who are not being protected by a Curtain of Slumber. This shield will have 35% of the absorption of a Curtain of Slumber, will last for 12s, and will absorb Cryo DMG with 250% effectiveness.
[Analysis]
| DPS Increase from C0: 0% | Shield HP Increase from C0: 20% |
 Constellation 2 | Light’s Remit
When Shooting Stars from Nights of Formal Focus strike opponents, they will each restore 1 Energy to Layla. Each Shooting Star can restore Energy to her in this manner once.
[Analysis]
| DPS Increase from C1: 0-12% | Shield HP Increase from C1: 0-3% |
| Total DPS Increase from C0: 0-20% | Total Shield HP Increase from C0: 20-23% |
 Constellation 3 | Secrets of the Night
Increases the Level of Nights of Formal Focus by 3.
Maximum upgrade level is 15.
[Analysis]
| DPS Increase from C2: 2% | Shield HP Increase from C2: 23% |
| Total DPS Increase from C0: 2-22% | Total Shield HP Increase from C0: 40-46% |
 Constellation 4 | Starry Illumination
When Nights of Formal Focus starts to fire off Shooting Stars, it will grant all nearby party members the Dawn Star effect, causing their Normal and Charged Attack DMG to increase based on 5% of Layla’s Max HP.
Dawn Star can last up to 3s and will be removed 0.05s after dealing Normal or Charged Attack DMG.
[Analysis]
| DPS Increase from C3: 0% | Shield HP Increase from C3: 0% |
| Total DPS Increase from C0: 2-22% | Total Shield HP Increase from C0: 40-46% |
 Constellation 5 | Stream of Consciousness
Increases the Level of Dream of the Star-Stream Shaker by 3.
Maximum upgrade level is 15.
[Analysis]
| DPS Increase from C4: 14% | Shield HP Increase from C4: 0% |
| Total DPS Increase from C0: 16-36% | Total Shield HP Increase from C0: 40-46% |
 Constellation 6 | Radiant Soulfire
Shooting Stars from Nights of Formal Focus deal 40% increased DMG, and Starlight Slugs from Dream of the Star-Stream Shaker deal 40% increased DMG.
Additionally, the interval between the creation of Night Stars via Nights of Formal Focus is decreased by 20%.
[Analysis]
| DPS Increase from C5: 38% | Shield HP Increase from C5: 0% |
| Total DPS Increase from C0: 54-74% | Total Shield HP Increase from C0: 40-46% |
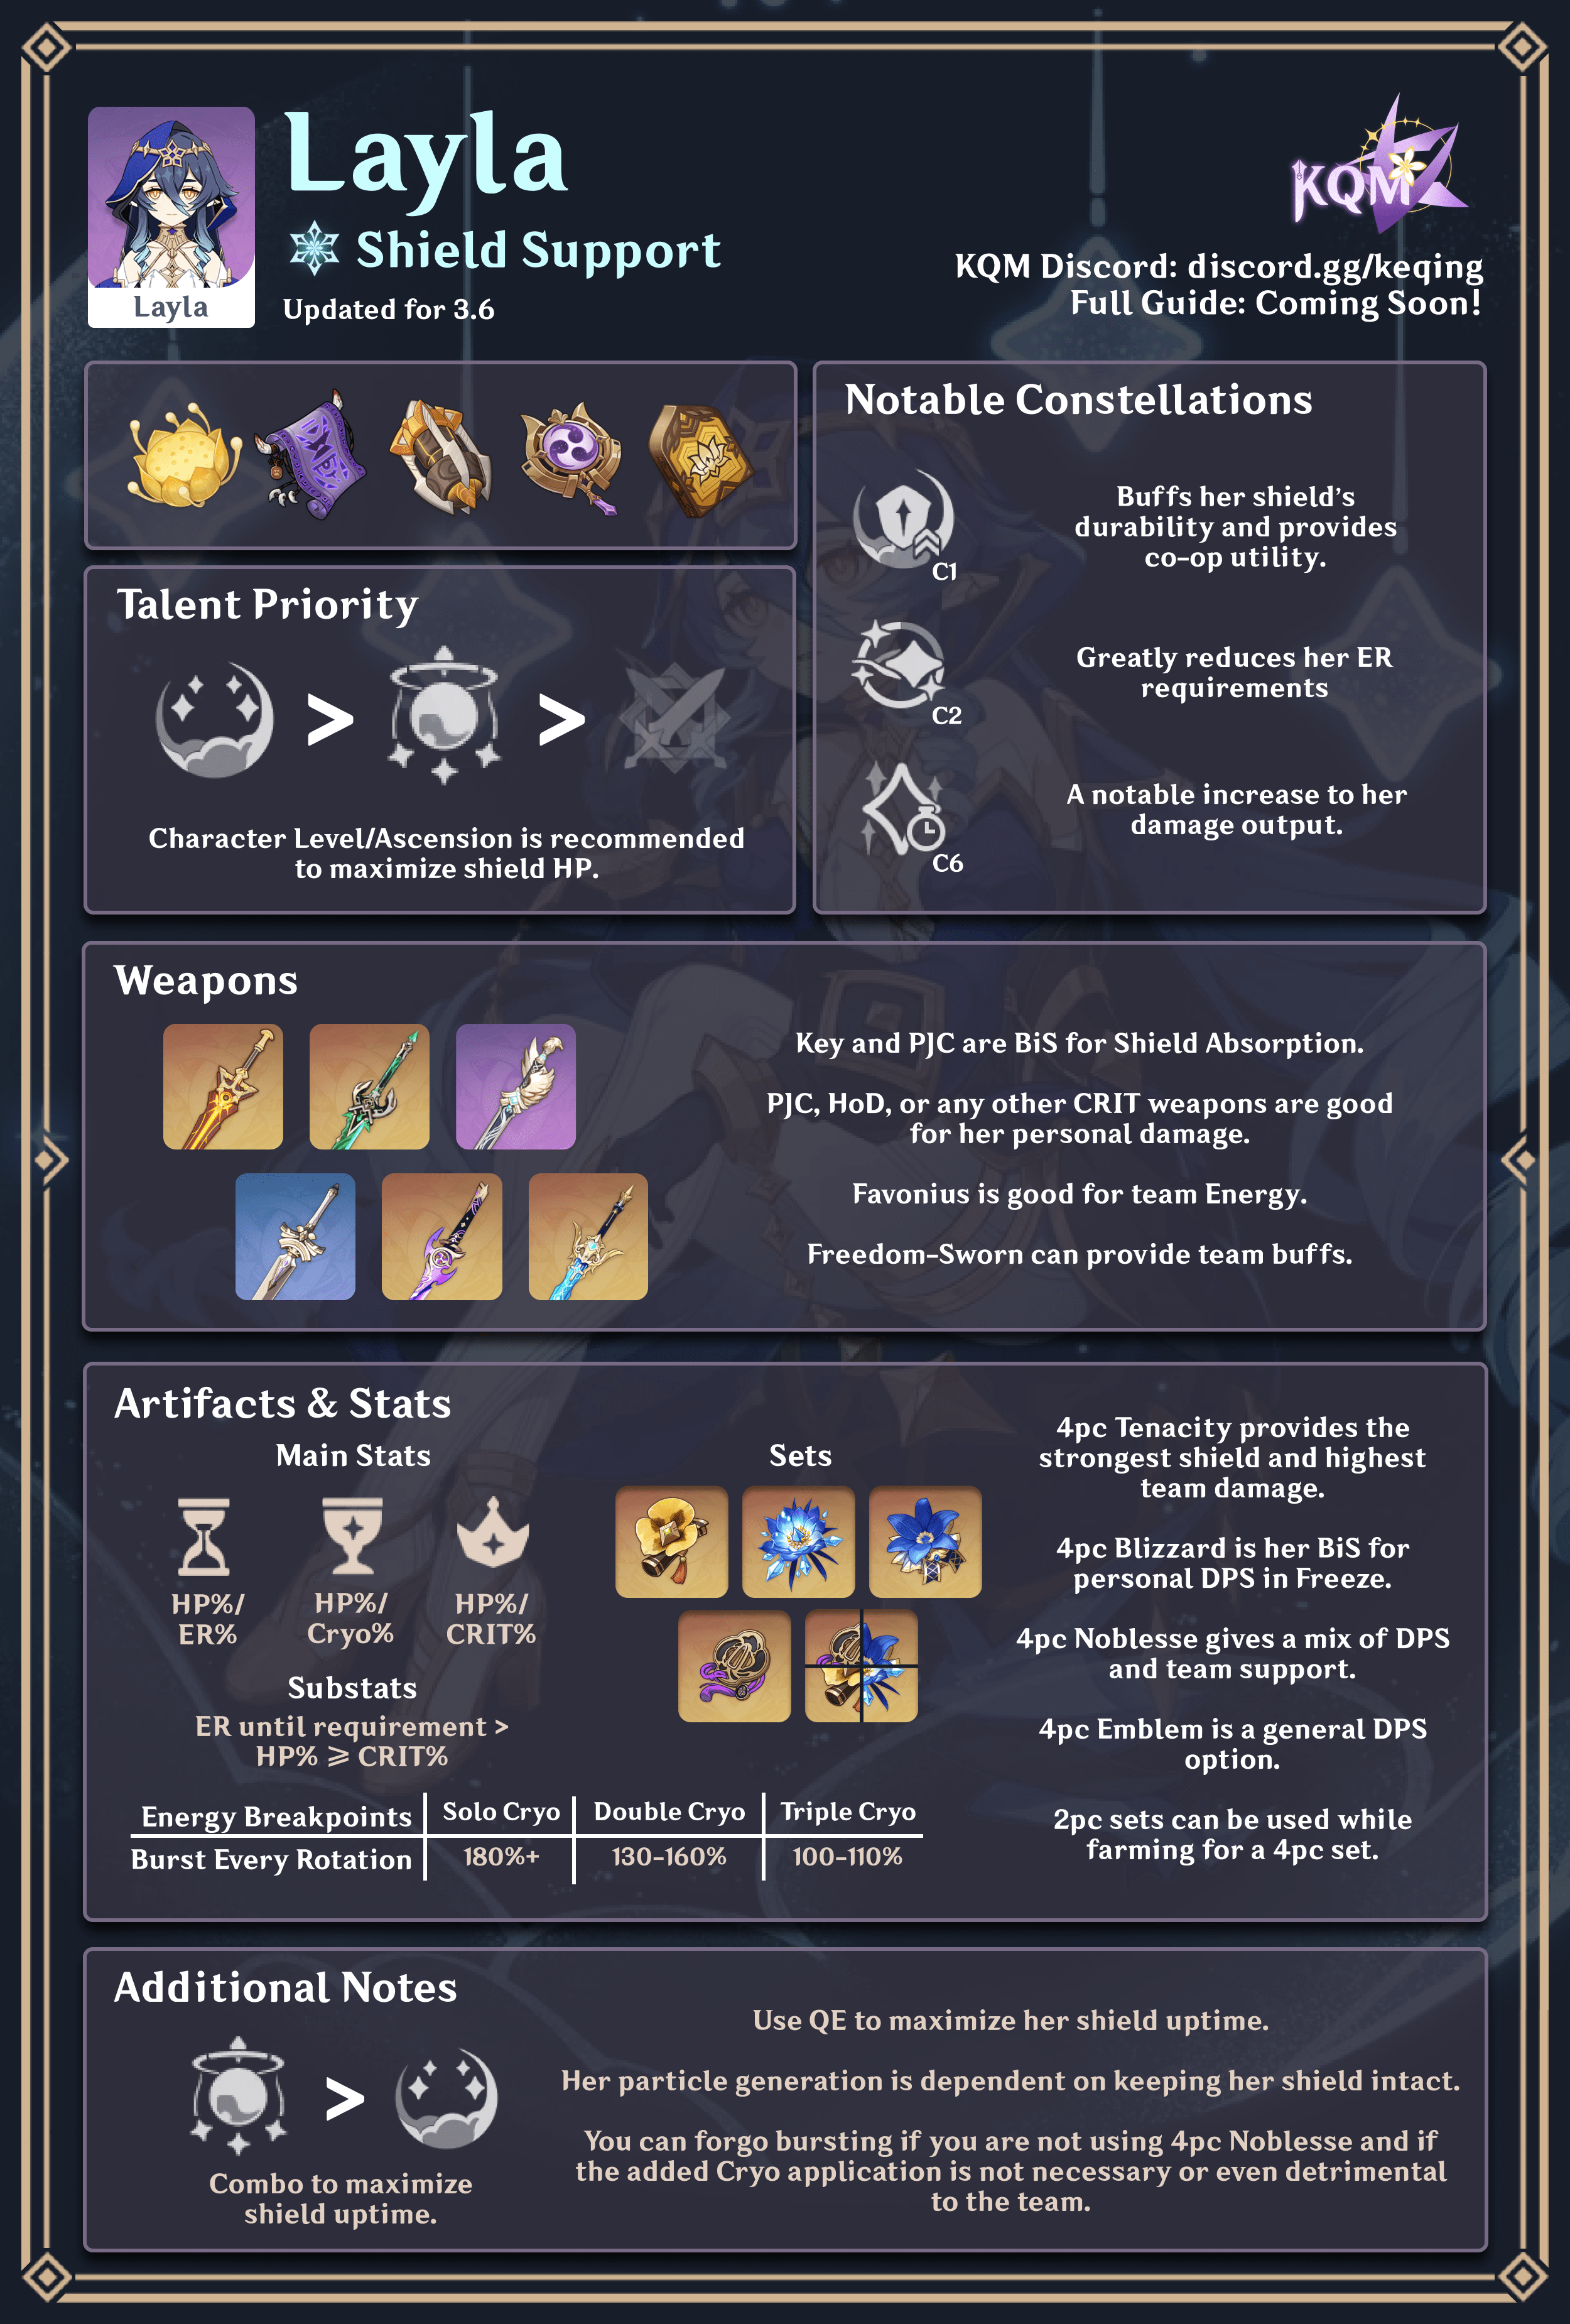
Builds / Playstyles
Title this section and the sections that follow however you prefer.
Here is a quote. We can change the font.
If the character has multiple playstyles, these sections can be laid out as follows:
- Builds / Playstyles
- Playstyle 1
- Pros & Cons
- Artifacts
- Weapons
- Combos, mechanics, and whatever else you want to add.
- Team compositions can be discussed under each playstyle if the team compositions between each playstyle are distinct enough. (See below for details on how a Team Composition section should be arranged.)
- Playstyle 2
- …
- …
- …
- Playstyle 1
If you choose not to discuss separate playstyles for the character, then set up these sections however flows best. For example:
- Artifacts
- Weapons
- Combos, mechanics, and whatever else you want to add.
ER Requirements
[Discussion.] These numbers are approximate; ER requirements will vary depending on team and context. For a more accurate estimate of your ER requirements, use the Energy Recharge Calculator.
| Scenario | ER Requirements |
| A | XXX-XXX% |
| B | YYY-YYY% |
| C | ZZZ-ZZZ% |
| D | WWW-WWW% |
Assumptions: [one line is enough; bullets if in-depth]
• Assumption 1
• Assumption 2
Use as many rows and columns as necessary to convey sufficient info about the character's ER requirements.
Favonius weapons reduce [unit’s] ER needs by approximately [10-20]% per proc.
Playstyle 1
[Introduction to playstyle]
Pros & Cons
Pros
- Pro 1
- Pro 2
- etc.
Cons
- Con 1
- Con 2
- etc.
Artifacts
Artifact options for this playstyle. Format this however you want to.
 Sands |  Goblet |  Circlet |
| ATK% | Cryo DMG% | CRIT DMG/Rate |
Keep in mind that a 1:2 CRIT Rate to CRIT DMG ratio is optimal when choosing artifacts. 4pc Blizzard Strayer (BS) with Cryo Resonance already provides enough CRIT Rate for Kaeya, so use a CRIT DMG Circlet to maximize his personal damage. You can use a CRIT Rate Circlet instead if he uses 4pc Noblesse Oblige (NO) with Favonius Sword.
Substat Priority:
(ER% until requirement) > ATK% > CRIT DMG > CRIT Rate
DPR/DPS% columns are optional.
If you are presenting DPR/DPS% under different assumptions, you may prefer to have a single table with artifact icons and blurbs, and then additional tables for calcs only.
See KQM Hu Tao guide for examples: https://keqingmains.com/hu-tao/
Assumptions: [one line is enough; bullets if in-depth]
• Assumption 1
• Assumption 2
| Artifact | DPS% | Notes |
4pc Tenacity of the Millelith (TotM) | 100% | [Blurb] Lorem ipsum dolor sit amet, consectetur adipiscing elit, sed do eiusmod tempor incididunt ut labore et dolore magna aliqua. Ut enim ad minim veniam, quis nostrud exercitation ullamco laboris nisi ut aliquip ex ea commodo consequat. Duis aute irure dolor in reprehenderit in voluptate velit esse cillum dolore eu fugiat nulla pariatur. Excepteur sint occaecat cupidatat non proident, sunt in culpa qui officia deserunt mollit anim id est laborum |
4pc Noblesse Oblige (NO) | 77% | [Blurb] |
2pc TotM + 2pc Vourukasha’s Glow | 83% | [Blurb] |
| 2pc TotM + 2pc Emblem of Severed Fate (EoSF)  | 81% | [Blurb] |
4pc Deepwood Memories | 77% | [Blurb] |
Split artifact icons can be created using the KQM Team Portrait Generator Tool.
Weapons
Weapon options for this playstyle. Format this however you want to.
DPR/DPS% columns are optional.
If you are presenting DPR/DPS% under different assumptions, you may prefer to have a single table with weapon icons and blurbs, and then additional tables for calcs only.
See KQM Hu Tao guide for examples: https://keqingmains.com/hu-tao/
| Weapon | DPS% | Notes |
 Staff of Homa | [Blurb] Lorem ipsum dolor sit amet, consectetur adipiscing elit, sed do eiusmod tempor incididunt ut labore et dolore magna aliqua. Ut enim ad minim veniam, quis nostrud exercitation ullamco laboris nisi ut aliquip ex ea commodo consequat. Duis aute irure dolor in reprehenderit in voluptate velit esse cillum dolore eu fugiat nulla pariatur. Excepteur sint occaecat cupidatat non proident, sunt in culpa qui officia deserunt mollit anim id est laborum | |
 Staff of the Scarlet Sands | [Blurb] | |
 Dragon’s Bane | [Blurb] | |
 Deathmatch | [Blurb] | |
 White Tassel (R5) | [Blurb] |
Playstyle 2
[See Playstyle 1 formatting above]
Mechanics
Pretty self explanatory. Special mechanics and combos go into this section, alongside whatever else you want to add.
Teams & Synergies
This section can be titled differently based on the section layout you choose to follow.
The Teams/Synergies section(s) should dive into the different teams you could run with your character, as well as how your character synergizes with other characters. For teams with no flex options (Sucrose - Kokomi - Xiangling - Fischl for example), you don’t have to list flex options. However, you should clarify that X team has no flex slots and can only be played with XYZ characters.
You can format this section in two different ways:
Option 1 — You can list synergies before going into specific team archetypes.
- Character Synergies
- Per Element, for example:
- Hydro
- Cryo
- Pyro
- Geo
- …
- Or per role, for example:
- Off-field DPS
- Drivers
- Shielders
- …
- Per Element, for example:
- Team Compositions
- Team Example 1
- Team Description
- Flex options
- Rotation demonstration
- Team Example 2
- …
- …
- …
- Team Example 1
Option 2 — You can skip character synergies and dive straight into team archetypes or specific teams.
- Team Compositions
- Team Example / Archetype 1
- Team Description
- Flex options
- Rotation demonstration
- Team Example / Archetype 2
- …
- …
- …
- Team Example / Archetype 1
Character Synergies
Your character synergies section can be laid out like this (taken from the Yoimiya Guide):
Pyro
| Character | Pros and Cons | Notes |
|---|---|---|
Bennett Synergy: S Role: Support, Battery Gearing: High base ATK sword 4-pc Noblesse Oblige (prioritize ER) Visit the Bennett Guide for more information. | Pros - Consolidates many roles in one kit; generally a good unit in most Yoimiya teams - Requires relatively low investment to perform his roles well - Easily accessible as he’s available in the shop Cons - Highly contested character for other Abyss teams (such as a Childe-Xiangling team) - Yoimiya’s Burst does not snapshot Bennett’s ATK buff | Bennett is arguably the best Support for Yoimiya: he provides Energy, significant ATK buffs, and healing. The value Bennett brings to Yoimiya teams cannot be stressed enough, and players should always try to use him when playing her, unless the other Abyss team benefits more from him. |
Thoma Synergy: A Role: Support Gearing: Weapon with ER/HP substat 4-pc Noblesse Oblige or Instructor (prioritize ER). Visit the Thoma Guide for more information. | Pros - Provides a fairly strong shield, which Yoimiya appreciates - Can enable easy Pyro VV setup. Works with TTDS Sucrose to make up for the loss of not running Bennett - Does not frequently steal Vapes Cons - Does not provide much other than shielding. Can usually be replaced with another character - Poor Energy generation and personal damage | Thoma is a nice comfort pick for Yoimiya, as his shield, when stacked up, provides enough protection for her to finish her NA string uninterrupted. Thoma also works with TTDS Sucrose to set up Pyro VV, boosting Yoimiya’s damage, which is a viable option for players not using Bennett and Zhongli. Note that Bennett and Zhongli will still be easier to play and will yield higher damage. |
C4 Yanfei Synergy: B Role: Support Gearing: R5 Prototype Amber 4-pc Noblesse Oblige, 2-pc Tenacity of the Millelith/Emblem of Severed Fate (prioritize ER) | Pros - Decent shield and minor healing with R5 Prototype Amber Cons - Requires heavy investment to work consistently (C4, R5 Prototype Amber, large amounts of ER) - Offers little to no buff to Yoimiya - Better as an on-field DPS in her own team | C4 Yanfei is a usable option, though it is difficult to recommend her without noting the major caveats. Only recommended if players can satisfy the requirements needed to use her consistently. |
Hydro
| Character | Pros and Cons | Notes |
|---|---|---|
Yelan Synergy: S Role: Off-field DPS, Enabler Gearing: Favonius Bow, Aqua Simulacra (depending on team) 4-pc Emblem of Severed Fate | Pros - Provides off-field damage and Hydro application, plus a DMG% buff - Forms a strong double Hydro core with Xingqiu to provide high single-target damage Cons - Often has high ER needs if not run with another Hydro unit - Does not provide any defensive utility compared to Xingqiu | Yelan, a strong off-field DPS, functions in a somewhat similar role to Xingqiu. Her Hydro application through Burst is consistent enough for Yoimiya to Vaporize N3 and N5, and her passive Talent offers a significant damage boost to the on-field character. Overall, Yelan is a viable choice for players not using Xingqiu with Yoimiya, though she has her own drawbacks that can be more difficult to build around when compared to Xingqiu. |
Xingqiu Synergy: S Role: Off-field DPS, Enabler Gearing: Weapon with ER subtat (Favonius Sword, Sacrificial Sword, etc.) 4-pc Emblem of Severed Fate Visit the Xingqiu Guide for more information. | Pros - Offers consistent and significant off-field damage, plus Damage Reduction, Interruption Resistance, and minor healing - Enables Yoimiya to Vaporize her hardest hitting Normal Attacks through his Elemental Burst Cons - Hydro application and damage are limited to single target. Unable to make up for the poor performance of Yoimiya in AoE scenarios - Hydro application may be unreliable for Yoimiya to Vaporize N3 and N5 - Often has high ER needs - Is a high demand unit on many teams | Xingqiu, the premier Hydro enabler, is a valuable teammate for Yoimiya. He synergizes with her well, providing a boost to her performance, while delivering consistent damage himself. A staple unit in many of her teams. |
Kokomi Synergy: B Role: Support, Enabler Gearing: TTDS, 4-pc Tenacity of the Millelith Visit the Kokomi Guide for more information. | Pros - Offers consistent healing and buffs - Provides some Hydro application with her Jellyfish for Yoimiya to Vaporize, but this is inconsistent - Frees up Xingqiu and Bennett for a second Abyss team Cons - Slower Hydro application compared to Xingqiu. Unable to enable Yoimiya to Vaporize all of her important hits without additional support (i.e. Kazuha) - Little to no personal damage when used mainly for her Elemental Skill - Restricts movement due to the range on her Jellyfish | Kokomi is a solid teammate for Yoimiya due to the support she provides. It is not recommended to rely on her Hydro application for Vaporize, as it cannot keep up with Yoimiya’s attacks. However, Kokomi still slots in nicely in a Yoimiya - Beidou - Fischl team with the value she brings in her consolidated roles. |
Electro
| Character | Pros and Cons | Notes |
|---|---|---|
Beidou Synergy: S Role: Off-field DPS, Enabler Gearing: Offensive claymores (Serpent Spine, Wolf’s Gravestone, Akuoumaru) 4-pc Emblem of Severed Fate, 2-pc Thundering Fury/Noblesse Oblige Visit the Beidou Guide for more information. | Pros - Offers impressive damage against multiple targets, Electro application and Damage Reduction - Yoimiya procs Beidou’s Elemental Burst well with her NA string Cons - Often has high ER needs, though having Fischl on the team alleviates this requirement - Yoimiya’s arrows can miss targets knocked back by Overload | Beidou is another one of Yoimiya’s best off-field DPS teammates. She provides remarkable damage in multi-target scenarios with her Elemental Burst, alongside Damage Reduction that pairs nicely with Xingqiu’s Rain Swords. Using Fischl with Beidou is highly recommended. |
Fischl Synergy: S Role: Off-field DPS, Enabler Gearing: Offensive bows (Skyward Harp, The Stringless, Fading Twilight) 2-pc Thundering Fury/Gladiator’s Finale/Shimenawa’s Reminiscence | Pros - Strong off-field damage and Electro application, alongside Particle generation - Good synergy overall: Yoimiya triggers Fischl’s C6 well and can consistently trigger Fischl’s A4 Cons - Purely single-target damage. Cannot make up for Yoimiya’s poor performance in multi-target situations - May require a second Electro unit (Beidou is recommended) to keep up the Electro aura for Yoimiya to trigger Overload - Yoimiya’s arrows can miss targets knocked back by Overload | Fischl continues to hold up her position as one of the premiere off-field DPS units. She pairs nicely with Yoimiya to dish out consistent single-target damage, and acts as a battery for Beidou. Always build Fischl for damage instead of utility — her contribution is far greater than what the ATK% buff from 4-pc Tenacity of the Millelith can bring. |
Lisa Synergy: B Role: Off-field DPS, Enabler Visit the Lisa Guide for more information. | Pros - Free-to-play; all players have access to Lisa - Can provide potent buffs with her ability to shred DEF and hold TTDS - Doesn’t require much investment to do the majority of her job Cons - Generally a worse option than Fischl and Beidou because of her lack of damage - Cannot be used as a solo Electro because of her 80 cost Burst - Constellations are very difficult to obtain | Lisa is another option for an Electro unit in Yoimiya’s teams. She does have the issue of requiring Fischl to satisfy her Energy needs, but she can provide a potent ATK buff along with DEF shred. The issue with using LIsa with Yoimiya is that she is relatively inflexible for Yoimiya teams. She doesn’t provide any survivability and requires Fischl, which requires the fourth slot in the team to provide survivability for Yoimiya. Using Zhongli in this slot is a massive decrease to team DPS compared to Bennett, but using Bennett makes the team lack shielding. |
Cryo
| Character | Pros and Cons | Notes |
|---|---|---|
Diona Synergy: B Role: Support Gearing: 2-pc Tenacity of the Millelith/Emblem of Severed Fate/Ocean-Hued Clam Favonius Warbow Visit the Diona Guide for more information. | Pros - Provides a decent shield, healing and Energy (when holding Favonius Warbow) - Offers EM buff at C6 to boost Yoimiya’s Reaction damage - Does not require heavy investment to perform her role well Cons - Buffs provided are negligible - Relatively weak shield with low uptime | Diona condenses the role of shielder and healer into one kit, while sprinkling on extra buffs and utility depending on her gear and Constellation level. Overall, she’s a safe pick for Yoimiya, but rarely an ideal one. |
Anemo
| Character | Pros and Cons | Notes |
|---|---|---|
Kazuha Synergy: S Role: Support Gearing: Favonius Sword, Freedom Sworn, Iron Sting 4-pc Viridescent Venerer Visit the Kazuha Guide for more information | Pros - Provides strong buffing and crowd-control for both Yoimiya and the whole team - Has good damage in multi-target scenarios, which can make up for Yoimiya’s performance in said situations Cons - Demands long field time if using Elemental Skill and Burst. Can potentially cause loss of Beidou’s and Xingqiu’s Burst procs - Can absorb Elemental Burst with Pyro when used with Bennett if players perform his rotation incorrectly, leading to a few lost Vapes for Yoimiya - Has very difficult double VV setups | Kazuha provides extremely potent buffing and utility, and brings his own share of damage. Note that when Kazuha is used with units that snapshot (e.g. Beidou and Fischl), players need to plan out team rotations to make sure his buff is applied correctly. |
Sucrose Synergy: S Role: Support Gearing: TTDS, Sacrificial Fragments 4-pc Viridescent Venerer Visit the Sucrose Guide for more information. | Pros - Offers buffs and some crowd control - Elemental Burst, when paired with Yoimiya triggering Overload, can deal non-negligible fall damage to small enemies Cons - Has high ER needs if using Burst every rotation - Grouping range is limited - Difficult to slot in a Yoimiya team; does not provide defensive utility | Sucrose brings EM share, enemy debuff, and ATK% buffs when used as a pure support unit. While these utilities are valuable to Yoimiya and her teammates, Sucrose is generally not the first pick, due to Yoimiya’s specific needs for strong off-field damage and protection. |
Venti Synergy: A Role: Support Gearing: The Stringless, Favonius Warbow, Elegy of the End 4-pc Viridescent Venerer Visit the Venti Guide for more information | Pros - Offers significant AoE damage and crowd control. Shines in mobbing scenarios and can compensate for Yoimiya’s performance in said situations - Yoimiya’s Normal Attacks, plus off-field DPS units commonly run in her teams (Xingqiu, Beidou, Fischl), can all hit enemies lifted by Venti’s Burst Cons - AoE damage and crowd control value falls off in single target scenarios. Can be non-synergistic considering Yoimiya specializes in dealing with these scenarios - Often brings more value to other teams (e.g. Freeze Ganyu) | Venti is able to solve Yoimiya’s issue of being a purely single target unit, as he provides unmatched crowd control and incredible AoE damage. The Energy refund tied to his A4 passive is also a notable utility for any Energy-hungry unit on the team. However, Venti is still a less than ideal pick for Yoimiya, due to their strengths lying in different areas. |
Heizou Synergy: A Role: Support Gearing: TTDS 4-pc Viridescent Venerer | Pros - Provides buffs and non-negligible personal damage - Low ER requirement Cons - Better suited as an Quickswap DPS or on-field driver - Buffs provided are often inferior to Anemo options listed above | Heizou trades in worse a team-wide EM buff Sucrose possesses for more personal damage, which can be appreciated in a Yoimiya team due to the downtime it often has in a rotation. Nevertheless, he will still be a sidegrade to, if not worse than Sucrose, and is better off in other teams. |
Jean Synergy: A Role: Support Gearing: Favonius Sword, Amenoma Kageuchi, Skyward Blade 4-pc Viridescent Venerer/Noblesse Oblige Visit the Jean Guide for more information | Pros - Fulfills different roles in one kit, allowing for flexible team building - Using Jean can free up Bennett for the other Abyss team Cons - Healing is often less important than Interruption Resistance for Yoimiya - Generally a worse option than Bennett | Jean offers damage, buffs and healing — all of which are appreciated by Yoimiya. At C2, she also offers ATK SPD increase, which benefits Yoimiya quite substantially. Jean’s mix of abilities lets her act as a replacement for Bennett and frees him up for another team, though she will still be an inferior pick. |
Geo
| Character | Pros and Cons | Notes |
|---|---|---|
Zhongli Synergy: S Role: Support Gearing: Shield-focused: Black Tassel 4-pc Tenacity of the Millelith, 4-pc Instructor Damage-focused: Staff of Homa, The Catch, Wavebreaker’s Fin 4-pc Emblem of Severed Fate/Noblesse Oblige Visit the Zhongli Guide for more information. | Pros - Offers the strongest shield in the game with full uptime when built for shield strength - Provides Universal RES shred, which benefits Yoimiya and any off-field DPS units on the team - Can deal non-negligible AoE damage when built for maximizing Burst damage. Also covers downtime in Yoimiya teams Cons - Stone Stele can consume Hydro aura, though not likely - Other units may demand his Shield more (e.g. Melt Ganyu, Xiao) | The Geo Archon is an amazing teammate for Yoimiya, as his shield is undeniably the best in the game, providing unmatched comfort for Yoimiya to finish her NA string. Zhongli can also be built for damage when used with Yoimiya, as her teams often have downtime that allows Zhongli to cast his Burst and cover some AoE damage. |
Yun Jin Synergy: S Role: Support Gearing: ER weapons (Favonius Lance, Prototype Stargliter) 4-pc Husk of Opulent Dreams/Noblesse Oblige/Archaic Petra Visit the Yun Jin Guide for more information | Pros - Provides massive Normal Attack DMG buffs with Elemental Burst, which Yoimiya appreciates - Easy to build - Works well at C0, but gets better with Constellations Cons - Only boosts Yoimiya’s damage. Provides little to no other utility | Yun Jin is the first unit to specifically buff Normal Attacks, and her buff is as unique as it is potent, making her an incredibly powerful teammate for Yoimiya. It is worth noting that Yun Jin’s buff is comparable to Bennett’s for Yoimiya, while Yun Jin herself is less of a high demand unit. The synergy here cannot be understated: Yoimiya uses the buff stacks efficiently, making Yun Jin’s contribution in a team more significant than it seems. Highly recommended to use the two together. |
Albedo Synergy: A Role: Off-field DPS Gearing: Cinnabar Spindle, 4-piece Husk of Opulent Dreams | Pros - Extremely easy to play; only requires players to press E (and sometimes Q) per rotation - Provides 125EM on Burst, boosting Yoimiya’s reaction damage - Can be used for Geo resonance along with Zhongli and Yun Jin, two fantastic Yoimiya supports Cons - Poor placement will lead to his flower being destroyed, leading to a large damage loss - Is Geo and does not enable any reactions - Generally a worse choice than other buffers or off-field DPS units or buffers like Xingqiu, Yun Jin, and Zhongli | Albedo is an off-field DPS unit who can provide free, easy off-field damage. He also has some supporting capability through his Ascension 4 Talent, which provides Yoimiya with 125 EM, and through his ability to provide Geo Resonance. However, he will generally be a worse choice than Yoimiya’s best supports such as Bennett and Yun Jin, especially with Constellations. |
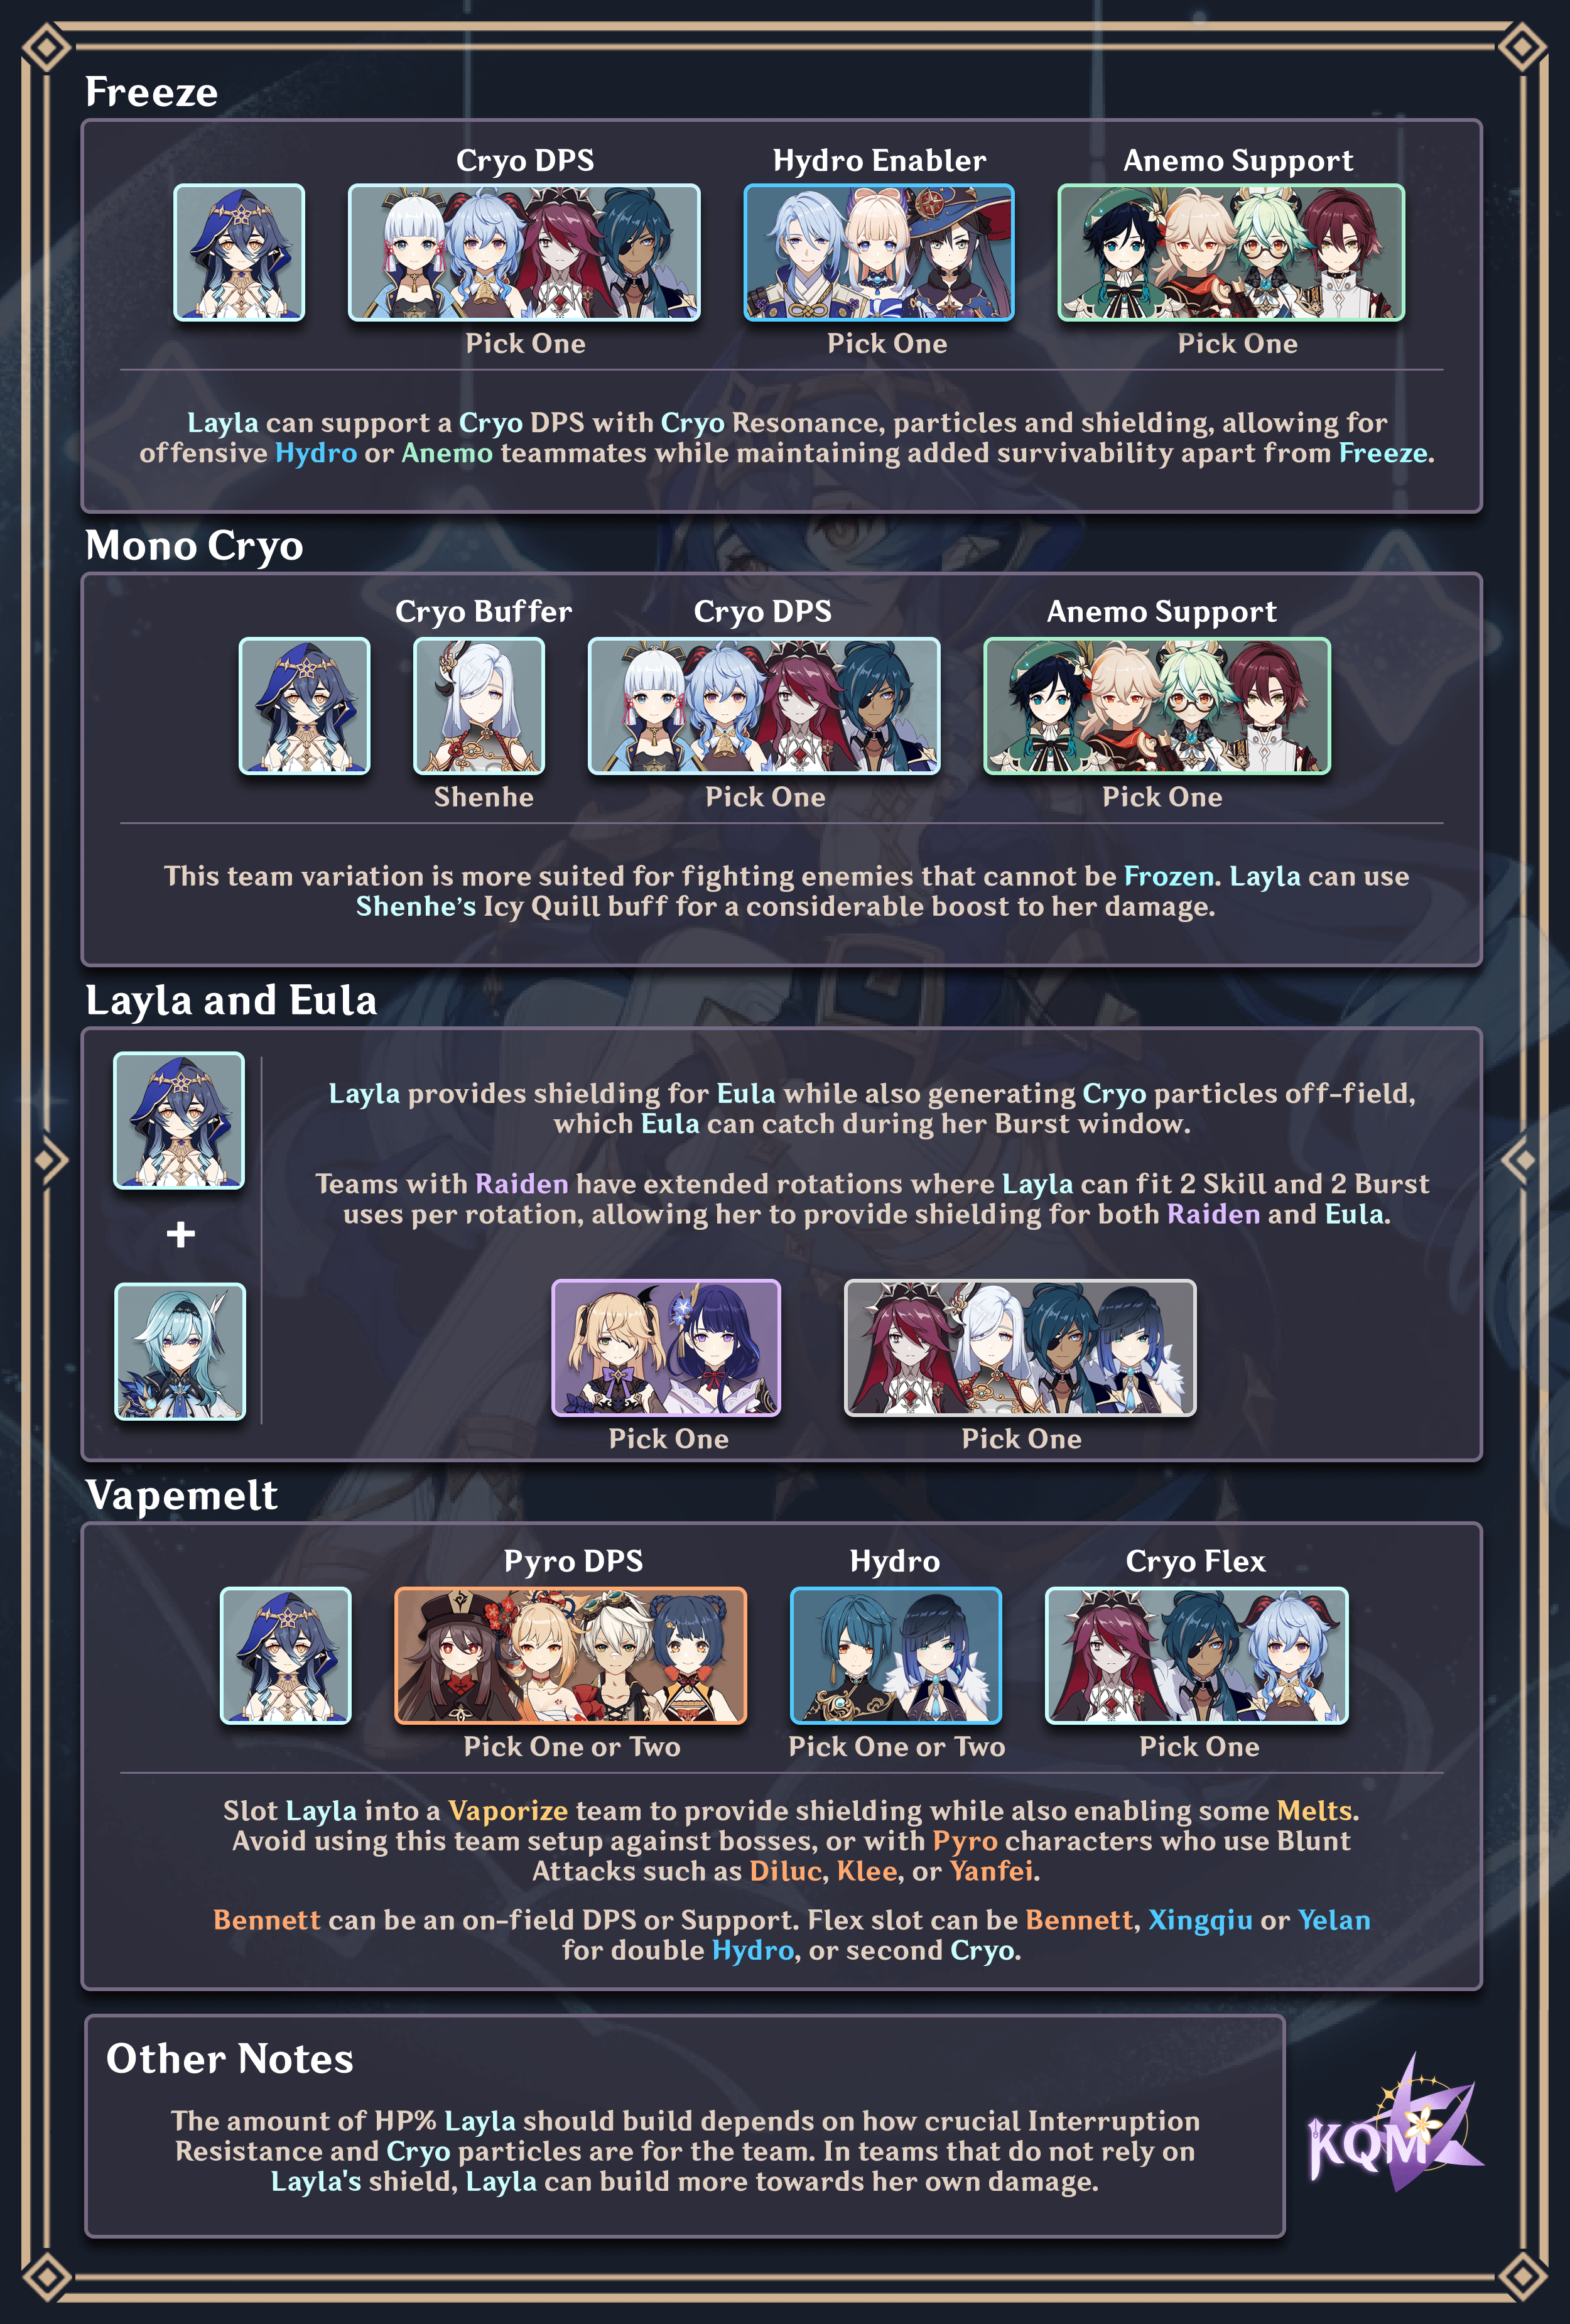
They can also be laid out like this (taken from Layla Guide):
Cryo
 Ayaka | Ayaka is a potent Cryo damage dealer who makes good use of external buffs as her Burst front-loads much of her damage and can snapshot buffs. She also appreciates Layla’s off-field Cryo Particle generation to help recharge her 80-cost Burst. Ayaka can also utilize Layla’s C4 buff well, as her Charged Attack is composed of several AoE attacks that hit in quick succession. |
 Ganyu | Ganyu’s Burst can deal immense damage to tightly grouped enemies due to its quadratic scaling, especially since it can snapshot buffs. She can also fill in rotation gaps with her enhanced Charged Attacks, which gain some benefit from Layla’s C4 buff. Note that it is not possible to buff both the initial Frostflake Arrow and the subsequent Frostflake Bloom. In AoE scenarios, it can be beneficial to intentionally miss the initial hit, as the buff can apply to every damage instance of the Frostflake Bloom. This is particularly the case under the following conditions: Layla has high Max HP, Ganyu has relatively low ATK, and there are 3+ enemies that can be hit. |
 Rosaria | Rosaria functions as an off-field or quickswap Cryo DPS, who also provides a potent CRIT Rate team buff and good particle generation with her short cooldown Skill. It is also much easier to keep enemies inside her Burst AoE with Freeze. Teams running both Layla and Rosaria function best in a quickswap playstyle to make frequent use of her Skill, or in conjunction with a Hydro on-field DPS like Ayato. |
 Kaeya | A free-to-play alternative to Rosaria, Kaeya trades her CRIT Rate share for improved particle generation thanks to his A4 Passive. His Burst follows the active character, which can be useful for chasing enemies, but has a short range. |
Hydro
 Mona Mona | Mona is a staple choice in Freeze teams, as the reaction can extend the duration of her Burst's Omen debuff, which makes up for the team's lack of damaging reactions. She can also provide offensive buffs with Thrilling Tales of Dragon Slayers (TTDS) and 4pc Noblesse Oblige (NO). However, her Skill and Burst’s minimal Hydro application can have difficulty in keeping enemies permanently Frozen, leaving periods of vulnerability. Layla’s shielding can mitigate this issue by protecting the team while enemies are not Frozen. Prototype Amber provides minor healing to the team, but it may not be enough for some players. |
| Kokomi | Kokomi acts as a more comfortable alternative to Mona, trading the Omen debuff for more consistent off-field AoE Hydro application, healing, and high 4pc TotM uptime. This can free up Layla for an off-field DPS build. Her healing in conjunction with constant Freeze can make the protection offered by Layla’s shield unnecessary. |
 Barbara Barbara | Barbara acts as a free-to-play alternative to the 5-star Hydro Catalyst users if they are not available; she can also carry TTDS and provide some off-field AoE Hydro application. However, her lack of particle generation increases the entire team’s Energy needs and makes using her own Burst regularly practically impossible. Her Skill also has a very long cooldown and short range, which significantly reduces Freeze uptime especially in Ganyu teams. |
 Ayato Ayato | Ayato acts as a “dual-carry” in Freeze teams alongside the Cryo DPS. His Burst is useful for providing off-field AoE Hydro application to keep enemies Frozen, and he can spend time on-field to deal further AoE damage with his Skill. The gaps between his Skill uses allow teammates to frequently use short cooldown Skills. In longer rotations where Ayato uses his Skill twice, Layla can recast her Skill and Burst for greater uptime on shielding, TotM buffs, damage, and Cryo Particle generation. |
 Xingqiu Xingqiu | Xingqiu is a decent option in Freeze, able to apply Hydro off-field with his Burst and Rain Sword orbitals. However, he can have difficulty maintaining Freeze uptime in AoE. He is not recommended in Ganyu teams, as she can not trigger his Burst with her Aimed Shots. |
Tartaglia | Childe functions as an on-field Hydro DPS in Freeze teams, but his lack of consistent off-field Hydro application and strict field time requirements make him much more awkward to use than Ayato. His damage is also somewhat unimpressive without hyperinvestment, especially as he cannot Vaporize his Burst in this team. Freeze does allow for more consistent enemy grouping to exploit the quadratic scaling of his Riptides. |
Anemo
 Kazuha Kazuha | Kazuha provides a powerful Cryo DMG% buff with his A4 in addition to VV Shred. He also provides instantaneous grouping with his Elemental Skill. If in a team with Mona, beware that using his Elemental Skill’s Plunging Attack triggers Shatter on Frozen enemies and allows them to escape from Burst AoEs if Freeze is not reapplied immediately after. |
| Venti’s Burst has unparalleled crowd control in Freeze teams, as even heavy enemies such as Ruin Guards are pulled towards it while they are Frozen. He also provides a nifty Energy refund with his A4, which can greatly reduce the ER requirements of Layla and the team’s Cryo DPS. His Burst’s tight grouping can even allow Layla’s Burst to hit multiple targets with each Starlight Slug, improving her damage potential in AoE scenarios. | |
 Sucrose Sucrose Heizou Heizou | Sucrose and Heizou fill the role of Anemo grouper in Freeze teams if neither Venti nor Kazuha are available. They can also hold TTDS to provide an ATK% buff to the Cryo damage dealer. Both of their EM buffs are wasted in this team archetype. Sucrose provides a Cryo DMG% buff with her C6; however, absorbing her Burst with Cryo can be inconsistent in practice. Heizou has better personal damage if well invested, but he does not provide team buffs (with his base kit) and has worse grouping. |
Team Compositions
[Archetype 1]
Insert an appropriate team portrait from the KQM Team Portrait Generator Tool.
[Discussion]
Notable Teammates
For each character, use official emotes or character portraits with transparent backgrounds from the KQM Team Portrait Generator Tool.


Electro Support


[Archetype 2]

[Discussion]
Rotation
Provide combat notation and hyperlinked video reference if available. Youtube videos may be embedded. Do not use .gif formats.
With Nahida
Nahida EQ > Xingqiu EQ > Fischl E > Wanderer CA E [preferred NA/CA combo] Q
Nahida and Wanderer Burst every other rotation.
Rotation Video (with Nahida)
With DMC
Xingqiu EQ(E) > DMC EQ > Fischl E > Wanderer E 4N3C > Fischl Q > DMC E > Wanderer QE N3C
Rotation Video (with DMC)
Credits
Include whatever categories of credits make sense.
Writing: [credit individuals with their Discord tags or whatever identifiers they prefer]
Calculations: [credits]
Line Editing: [credits]
Copy Editing: [credits]
TC Contributors: [credits]
Transcribers: [credits]
[etc.]
References
[Link each reference document (e.g. calc sheets) with credits.]