Updated for Version 3.0
Table of Contents
Preface
Glossary
| Additional Elemental DMG | Cryo/Pyro/Hydro/Electro DMG dealt by an Anemo ability when it absorbs one of those Elements. |
| Area of Effect (AoE) | Range. |
| Buff | To increase a stat (usually character ATK, DMG Bonus, etc.) |
| Crowd control (CC) | Ability to pull enemies closer to the player. |
| Debuff | To decrease a stat (usually enemy resistance, defense, etc.) |
| Elemental Absorption [TCL] | When an Anemo ability turns into the color of Cryo/Pyro/Hydro/Electro as a result of coming into contact with one of those Elements. Absorption itself does not deal damage as it only indicates the state of the Anemo ability. |
| Elemental Mastery | Stat that increases the damage dealt by Elemental Reactions. |
| Energy Recharge (ER) | Stat that increases the amount of Energy gained from Elemental Particles. |
| Internal Cooldown (ICD) [TCL] | Hidden timer that indicates how often an Element can be applied by a Talent. |
| Interruption Resistance [TCL] | Vulnerability to being staggered, when a character or enemy is staggered they can’t perform any actions. |
| Off-field DPS | Character that deals damage with Skills and/or Bursts even when they are swapped off. |
| On-field DPS | Character that deals damage with Normal, Charged, and/or Plunging Attacks; and spends more time on-field than the rest of the team. |
| Quickswap DPS | Character that deals damage by swapping in only to use Skill and Burst off cooldown. |
| RES Shred | Debuff that decreases resistance. |
| Snapshot [TCL] | To keep the character’s stats at the time of casting when using an ability that does multiple instances of damage. |
| Swirl [TCL] | Transformative Reaction that deals Cryo/Pyro/Hydro/Electro DMG when Anemo DMG comes into contact with one of those Elements. |
Despite being the first playable character of the game, Anemo Traveler is often a very underrated character. While any character can be thrown into DPS showcases with high enough investment, Anemo Traveler has a lot of utility that can amplify the damage output of a lot of teams in addition to their personal damage. However, it needs to be mentioned that Anemo Traveler under no circumstances should be treated or expected to perform like a 5-star character.
Pros
- Can heal themselves a little bit
- F2P friendly, all 6 Constellations are free and the last one is the same as Venti’s C6
- Good at absorbing Cryo with Skill/Burst when there are multiple Elements present
- Has increased Interruption Resistance and damage reduction while casting the Elemental Skill
- Can decrease up to 60% enemies’ Elemental RES by using the 4-Piece Viridescent Venerer artifact set and their C6
- Can trigger Swirl reasonably well
Cons
- Hard to take full advantage of the Elemental Burst
- Doesn’t have a lot of crowd control
- The Elemental Burst brings small enemies away and can’t actually hit large enemies more than 2-3 times reliably
- Can do some of everything—damage dealing, crowd control, self-healing—but not the best at any one thing
- There is always another Anemo character that is more specialized at doing one of the things that Anemo Traveler can do
Character Breakdown

Art credit: ༺くろてり༻ on pixiv [original post]
Every Element of the Traveler is like a different character, with Talents that are leveled up separately using different materials, as well as Constellations that are obtained in different ways.
Talents
Talent Priority
Elemental Skill > Elemental Burst > Normal Attack
 Normal Attack | Foreign Ironwind
Talent Description
Normal Attack
Perform up to 5 rapid strikes.
Charged Attack
Consumes a certain amount of Stamina to unleash 2 rapid sword strikes.
Plunging Attack
Plunges from mid-air to strike the ground below, damaging opponents along the path and dealing AoE DMG upon impact.
The generic Normal Attack Talent with relatively slow attacks and low multipliers. It’s not recommended to level up this Talent unless you’re building Anemo Traveler as an on-field DPS, which has significantly less damage potential than building them as a quickswap DPS.
 Elemental Skill | Palm Vortex
Talent Description
Grasping the wind’s might, you form a vortex of vacuum in your palm, causing continuous Anemo DMG to opponents in front of you.
The vacuum vortex explodes when the skill duration ends, causing a greater amount of Anemo DMG over a larger area.
Hold
DMG and AoE will gradually increase.
Elemental Absorption
If the vortex comes into contact with Hydro/Pyro/Cryo/Electro, it will deal additional elemental DMG of that type.
Elemental Absorption may only occur once per use.
Pressing the Elemental Skill will do one instance of Anemo DMG, this is good if you just want to get the 4-Piece set bonus of Viridescent Venerer and generate some Elemental Particles. Holding it takes longer to cast and does up to 7 instances of Anemo DMG, with the last one being a lot stronger than the rest. Generally, it’s recommended to hold the Skill for 3 hits instead of pressing it or holding it for all 7 hits, since this method has the most value given the time it takes to cast.
Anemo Traveler is currently the only Anemo character with a different Elemental Absorption Priority, being Cryo > Pyro > Hydro > Electro. This means that when more than 1 of those Elements is present, the Traveler absorbs one of them based on this priority; this is independent from which Element gets Swirled. Another thing to keep in mind is that both the Initial Storm DMG and the Max Storm DMG can knock small enemies back, sometimes causing Fall Damage.
Basic Properties
| Attribute | Press | Hold |
|---|---|---|
| CD | 5s | 8s |
| Particles | 2 | 3-4 (it’s random, but with a 2:1 ratio) |
| Anemo DMG | Initial Storm DMG | Initial Cutting DMG x2, Max Cutting DMG x4, Max Storm DMG x1 |
| Additional Elemental DMG | None | 5-6 instances (also random), this can crit separately from the Anemo DMG |
The press version is fairly straightforward and easy to understand, the hold version is where it starts to get complicated. It can be canceled by releasing the Elemental Skill button any time after 1 to 6 hits, and if the last hit is Initial Cutting DMG, it will turn into Initial Storm DMG instead; likewise if the last hit is Max Cutting DMG, it will turn into Max Storm DMG instead.
Another property is that if it only deals Initial DMG (Cutting and/or Storm), the CD, AoE, and particle generation are the same as the press version of the Skill. It’s also possible to animation cancel by dashing or jumping, however if you don’t cancel at exactly the right time, there will be no Elemental Particles and the Cutting DMG won’t turn into Storm DMG. The timing is very tight, with only a few frames to spare; therefore if you want to cast the Elemental Skill faster and still get the majority of the damage, it’s recommended to practice letting go of the Hold button right after 3 hits, in order to get Max Storm DMG. Although keep in mind that the longer you hold the more it’s able to pull enemies in, and sometimes it’s necessary to hold for longer in order to get weapon stacks.
The Additional Elemental DMG (of the absorbed Element) does the equivalent of 25% of the corresponding Anemo DMG; why this isn’t displayed in-game on the Talent page is unknown. This is different from Swirl DMG (which is a Transformative Reaction that only scales off of character level and EM), an Element can be absorbed when there is an aura on the enemies or the Traveler, this means that when Elemental Skill absorbs an Element, it will turn from Anemo color to the color of said Element. This ability can Swirl up to 3 times due to the ICD, while the absorption doesn’t have a cooldown and starts on either the 2nd or 3rd hit of Anemo DMG (it seems to be random).
Neither the Anemo DMG nor the Additional Elemental DMG snapshots, this means that when using weapons with stacking passives—such as Freedom-Sworn or Iron Sting—Anemo Traveler can not only gain stacks while holding the Skill, but its damage will increase dynamically.
 Elemental Burst | Gust Surge
Talent Description
Guiding the path of the wind currents, you summon a forward-moving tornado that pulls objects and opponents towards itself, dealing continuous Anemo DMG.
Elemental Absorption
If the tornado comes into contact with Hydro/Pyro/Cryo/Electro, it will deal additional elemental DMG of that type.
Elemental Absorption may only occur once per use.
The Elemental Burst, also commonly known as the tornado or the blender, sounds good on paper by having high multipliers (up to a total of 1904.4% at Talent Level 12), but in reality it’s very rare to get all 9 hits. In fact, most of the time against enemies that can’t be displaced, it only does 1-2 hits since it moves away fairly quickly; this means its purpose will mostly be debuffing the enemies with the power of C6, and not to do damage per se.
Just like the Elemental Skill, the Elemental Burst can also absorb an Element with the same priority which is Cryo > Pyro > Hydro > Electro, and the Additional Elemental DMG (of that absorbed Element) will do the equivalent of 30.6% of the Anemo DMG on each tick, but with a smaller AoE. This is again different from Swirl DMG. With C6, the Elemental Burst can provide RES Shred for both Anemo and the Element that is absorbed, while the 4-Piece Viridescent Venerer artifact set provides RES Shred to the Element that is Swirled. When the tornado absorbs an Element, it will turn into the color of that Element; and when it Swirls an Element, the word “Swirl” will appear along with a damage number in the color of that Element. Oftentimes it’ll Swirl and absorb the same Element, but keep in mind that there is the possibility of it being different Elements. This ability can Swirl up to 4 times.
There are some interesting interactions with the Burst. First, it can be stopped in place by multiple things such as a wall or a Geo Construct, but not by any enemies. Second, it can pick up deployables such as Xiangling’s Guoba or Amber’s Baron Bunny, which can be effective in providing a Melt or Vaporize combo with either of these in a Cryo or Hydro absorbed tornado.
 Ascension 1 Passive | Slitting Wind
Talent Description
The last hit of a Normal Attack combo unleashes a wind blade, dealing 60% of ATK as Anemo DMG to all opponents in its path.
Adds an extra no-hitlag Anemo attack to the end of the Normal Attack string. The damage from this ability is non-negligible but it isn’t enough to warrant using Normal Attacks with Anemo Traveler. This instance of damage has the Normal Attack tag, which means that it’s able to trigger the Mistsplitter Reforged passive: “Normal Attacks deal Elemental Damage” and its damage is affected by Yun Jin’s Elemental Burst.
 Ascension 4 Passive | Second Wind
Talent Description
Palm Vortex kills regenerate 2% HP for 5s. This effect can only occur once every 5s.
This Talent provides a small heal upon killing an enemy with the Skill. It heals a total of 10% Max HP. This heal is still in effect when Anemo Traveler is off-field but it is not worth going out of your way to get a kill with the Skill just to make use of the Passive.
Constellations
As with all Traveler Constellations, they are completely free and can be obtained by progressing through the game. Anemo Traveler’s Constellations come from completing Prologue: Act II and Act III of the Archon Quest, reaching AR 27, 37, and 46, as well as one that’s available for purchase in Marjorie’s Souvenir Shop in Mondstadt.
 Constellation 1 | Raging Vortex
Palm Vortex pulls in opponents and objects within a 5m radius.
This Constellation adds a lot of utility to the hold version of the Elemental Skill by providing more crowd control, which makes it easier to hit more enemies.
 Constellation 2 | Uprising Whirlwind
Increases Energy Recharge by 16%.
Provides a permanent 16% ER bonus to Anemo Traveler on top of the base ER which can help to get the Burst back more quickly. This means that they will always have at least 116%.
 Constellation 3 | Sweeping Gust
Increases the Level of Gust Surge by 3.
Maximum upgrade level is 15.
This is just a simple DPS increase to the Elemental Burst.
 Constellation 4 | Cherishing Breezes
Reduces DMG taken while casting Palm Vortex by 10%.
A Constellation that isn’t necessary but provides some utility by reducing the damage taken and increasing Interruption Resistance, which is especially helpful during the long cast time when holding the Elemental Skill.
 Constellation 5 | Vortex Stellaris
Increases the Level of Palm Vortex by 3.
Maximum upgrade level is 15.
Similar to C3, this is a DPS increase to the Elemental Skill.
 Constellation 6 | Intertwined Winds
Targets who take DMG from Gust Surge have their Anemo RES decreased by 20%.
If an Elemental Absorption occurred, then their RES towards the corresponding Element is also decreased by 20%.
By far the most important Constellation that Anemo Traveler has. It decreases the enemies’ resistance to Anemo by 20% as well as another 20% to the absorbed Element if applicable. This means it can provide up to 60% RES Shred to Cryo/Pyro/Hydro/Electro when using the 4-Piece Viridescent Venerer artifact set. This effect lasts for 10 seconds so it is possible to have 100% uptime as long as the Elemental Burst hits an enemy at least 5 seconds after being casted (either by lifting small enemies up or being stopped by a construct to hit large enemies multiple times). Another thing to note is that the RES Shred affects the enemies’ stats, not the characters’, which means that even though the Elemental Burst snapshots, this 20% Anemo RES Shred will still apply to the 2nd hit and onwards since the 1st hit activates it.
Playstyles and Builds

Art credit: ♠Sea on pixiv [original post]
Quickswap DPS
This is the most common and recommended way to play Anemo Traveler, by focusing on using their Skill and Burst as much as possible. Their Normal and Charged Attacks are not used at all, therefore the first Talent can be left at Lv. 1. Ideally, Traveler is swapped in to cast a quick 3-hit Skill for damage and Elemental Particles every 8 seconds. When fighting non-displaceable enemies, the goal is to apply the Element of another DPS (Cryo, Pyro, Hydro, or Electro) then cast the Burst for RES Shred. However when fighting displaceable enemies, unfortunately you would need to either spend time and Stamina chasing it or bring another character that can place down a Geo Construct.
Support
Similar to the quickswap playstyle, but focusing more on utility instead of damage. It is still recommended to use 3-hit Skills because holding the Skill produces more particles than pressing it. Although doing so increases the CD from 5s to 8s, it shouldn’t affect the rotation significantly since it’s unrealistic to swap to the same support every 5s anyway. The Burst is mainly used for RES Shred, meaning it’s highly recommended to fight against non-displaceable enemies. Since when using Traveler as a support the team is not built around them, and adding another character just to stop the tornado could potentially be anti-synergistic.
On-Field DPS
Needless to say, this is not recommended if you want to maximize the overall team damage, especially for challenging content such as the hardest floors of the Spiral Abyss. Anemo Traveler’s kit mainly revolves around the Skill and Burst. While it is possible to build them with more offensive stats as an on-field DPS, it is generally less effective than using them as a quickswap DPS or support.
Builds
When it comes to building Anemo Traveler, the level of investment makes quite a lot of difference. Weapons and artifacts will be explained in more detail below, but in summary you can either build them for buffing the team or for buffing the team and dealing damage, with the playstyle remaining similar between quickswap DPS and support. Just like all Anemo characters, Anemo Traveler performs much better in multi-target scenarios due to how the Swirl Reaction works. Generally you want to give them as much Elemental Mastery as possible, because 60%~80% of their damage comes from Swirl. A low investment Anemo Traveler only needs C6 and 4-Piece Viridescent Venerer to buff the team by shredding enemy RES, as well as some ER in order to cast their Elemental Burst off CD if needed, which is easily obtainable. Meanwhile, a high investment Anemo Traveler is a lot more complicated, and needs certain stats to boost their damage. Keep in mind that the amount of buffs they provide to the team is exactly the same, the only difference is in how much personal damage they do (which includes Anemo DMG, Additional Elemental DMG, and Swirl DMG).
With that said, play Traveler however you want. This guide focuses on optimizing Anemo Traveler’s damage for the Spiral Abyss, but there are definitely other viable builds; they’re just not the absolute best. If you’re only looking to use the Anemo Traveler in the Overworld, Domains, or Quests, there is no need to stress over their damage output; any of the weapons or artifacts mentioned in this guide will work just fine.
Weapons

Art credit: @minami_iko on Twitter [original post]
The most important factor in deciding what weapon to use is based on whether or not you have enough ER to cast the Elemental Burst off CD. Anemo Traveler’s Burst is very important and if it can’t be used as soon as the CD ends, the best choice is to opt for a weapon with an ER substat. Generally, Anemo Traveler needs around 160%~180% ER; you can use the Energy Recharge Calculator to figure out exactly how much they need in your team.
These are the similarities and differences between the best weapons for Anemo Traveler, not an exact ranking. All the stats are at Level 90, but please keep in mind that the actual damage output depends on a lot of things; a higher stat doesn’t necessarily make a weapon better, the passives matter too.
Damage
These weapons allow Anemo Traveler to do the most damage, the ones with an EM substat are better in multi-target situations and the ones with a CRIT Rate/DMG substat are better in single-target situations, while the ones with an ATK substat are somewhat stuck in the middle.
 | 5★ Freedom-Sworn Base ATK: 608 Substat: Elemental Mastery 198 The overall Best in Slot (BiS) weapon. Not only does it provide the highest damage potential for Anemo Traveler, but it also buffs the whole team. The first part of the passive offers a DMG Bonus that applies to all Elements. The second part is a great team buff which Anemo Traveler can easily activate with a Hold Skill (of which the biggest part of its damage will also receive the buff due to its dynamic nature). Unfortunately, the buffs from the passive have a 20 second cooldown, meaning maximum uptime is not possible in teams with shorter rotations. Nonetheless, it is their uncontested BiS. |
 | 4★ Iron Sting Base ATK: 510 Substat: Elemental Mastery 165 The F2P alternative to Freedom-Sworn since it’s craftable. It is not worth it to refine this weapon at all, as it’s mostly used for the substat; however, do note that it’s possible to get full stacks with just one Elemental Skill. This is generally the best 4-Star option. |
 | 5★ Primordial Jade Cutter Base ATK: 542 Substat: CRIT Rate 44.1% The Base ATK isn’t very high for a 5-Star weapon, but it provides a lot of CRIT Rate as the substat and some Flat ATK as part of the passive. This weapon is commonly known as a “stat stick”, and it does a good job at providing the necessary stats for Anemo Traveler, since their Base Stats are low. |
 | 5★ Haran Geppaku Futsu Base ATK: 608 Substat: 33.1% CRIT Rate This is a solid weapon, but due to the majority of Anemo Traveler’s damage coming from their Elemental Skill and Swirls, other characters will most likely make better use of it. |
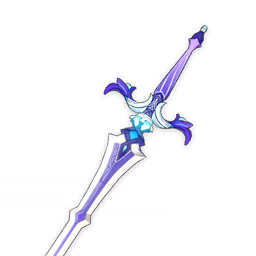
 | 5★ Mistsplitter Reforged Base ATK: 674 Substat: CRIT DMG 44.1% This weapon performs similarly to Primordial Jade Cutter, but provides 44.1% CRIT DMG as opposed to CRIT Rate, and has a higher Base ATK. The passive offers a lot of Elemental DMG Bonus as well. However, you can only get 2 stacks consistently, since dealing Elemental DMG with Normal Attacks would mean either infusing the weapon with an Element (such as with Chongyun’s Elemental Skill or C6 Bennett’s Elemental Burst) or using all 5 Normal Attacks to get the Anemo DMG on the 5th hit, which is generally not worth it. |
 | 5★ Summit Shaper Base ATK: 608 Substat: ATK 49.6% This is also a stat stick, but for ATK instead. It has a high Base ATK, an ATK% substat, and even more ATK% in the passive. It takes one hold version of the Skill plus either 2 hits of the Burst or 3 hits of another Skill to get all 5 stacks. Although having a shield doubles the amount of ATK gained from the passive stacks, this weapon is very much viable without a shield. |
 | 5★ Aquila Favonia Base ATK: 674 Substat: Physical DMG Bonus 41.3% Purely used for the high Base ATK as well as even more ATK from the passive. Overall it provides a little bit less ATK than Summit Shaper, but the passive can also do some damage and heal a bit every time the Traveler takes damage, with a CD of 15s. The substat doesn’t add any value even though it might be tempting to use those Normal or Charged Attacks. It’s a DPS loss to do Physical DMG with Anemo Traveler. Usually Bennett can use this better, but it’s not a bad weapon by any means. |
 | 4★ Lion’s Roar Base ATK: 510 Substat: ATK 41.3% Only works well when the passive is active, meaning there needs to be either a Pyro or an Electro character on the team that applies said Element frequently. Anemo Traveler can trigger Swirl Reactions and spread Pyro/Electro to keep the passive active, but do keep in mind that their Elemental Absorption priority is Cryo > Pyro > Hydro > Electro, which means that it’s easier to keep Pyro applied on the enemies rather than Electro. Refinements aren’t necessary but they definitely help. When used correctly in single-target situations, it can outperform Iron Sting. |
 | 3★ Dark Iron Sword Base ATK: 401 Substat: EM 141 Obtainable via talking to Chen the Sharp in Liyue Harbor, there is only one copy of this weapon in each world as of Version 3.0. Even with the 20% ATK from the passive its overall ATK is still too low, and it performs worse than the CRIT weapons even with a Triple EM build. |
 | 3★ Harbinger of Dawn (R5) Base ATK: 401 Substat: CRIT DMG 46.9% This weapon is only used for the CRIT DMG substat and the CRIT Rate from the passive. It’s isn’t a good option against Corrosion as you need to stay above 90% HP to keep the passive active. Only use this when none of the other weapons are available. |
Energy
Generally not as good as the weapons mentioned above for damage, but if you don’t have enough ER you need to either use an ER Sands or a weapon with an ER substat.
 | 4★ Sacrificial Sword Base ATK: 454 Substat: Energy Recharge 61.3% The good thing about this weapon is that when the passive gets triggered, you can use the Skill followed by the Burst, then the Skill again right away. This saves time since you only need to switch to Anemo Traveler once every rotation. Despite being placed in the Energy category, its damage is comparable to Summit Shaper when the passive gets triggered. |
 | 4★ Favonius Sword Base ATK: 454 Substat: Energy Recharge 61.3% Similar to Sacrificial Sword, but it generates 3 Clear Particles every time Anemo Traveler crits, which not only lowers their own ER requirement, but also the whole team’s. Refinements are very helpful for this weapon since they not only decrease the CD, but they also increase the chance of the Clear Particles being generated. However, refinements are not necessary, since you can always reset a Spiral Abyss chamber when the passive isn’t triggered. |
 | 4★ Festering Desire (R5) Base ATK: 510 Substat: Energy Recharge 45.9% This is a limited event weapon and it’s not available anymore. The ER substat is very useful, as it allows for more offensive substats on the artifacts. It’s important to get enough ER before trying to get any CRIT, ATK%, or EM. Not only does it have a decent amount of ER, but it also increases Elemental Skill DMG and Elemental Skill CRIT Rate, making it a very good 4-Star option for Anemo Traveler since the majority of their damage comes from the Elemental Skill, in fact it often performs better than a few of the 5-Star weapons in single-target. |
 | 4★ Amenoma Kageuchi Base ATK: 454 Substat: ATK 55.1% Another F2P craftable weapon; it has a lot of ATK, which is good, but not necessarily useful for Anemo Traveler. However, the passive lowers their ER requirement, meaning you can get more offensive artifact stats instead. This is generally better than Favonius Sword, but not as good as Sacrificial Sword because it still requires Anemo Traveler to be switched in twice in a rotation. |
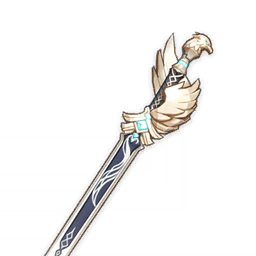
 | 5★ Skyward Blade Base ATK: 608 Substat: Energy Recharge 55.1% The worst out of all the 5-Star weapons for Anemo Traveler. It has some of everything, a high Base ATK, a decent amount of ER, some CRIT Rate, movement speed and attack speed increase, and Normal and Charged Attacks do more damage. Most of these buffs aren’t useful for Anemo Traveler. |
 | 4★ Sapwood Blade Base ATK: 565 Substat: Energy Recharge 30.6% Although Anemo can’t react with Dendro directly, Swirls can; but triggering the passive with an Anemo character could be tricky and unreliable. It also has the lowest ER out of all the previous weapons and it doesn’t have any utility in terms of Energy. If you are going to craft a weapon for Anemo Traveler, go with Amenoma Kageuchi instead. Even though Sapwood has a higher Base ATK, Amenoma’s ATK substat makes up for it. |
Other
Out of all the weapons that were compared for this guide, these did the worst. That’s not to say they’re necessarily bad weapons, they just don’t perform as well as the other ones due to how the passives work, but are still better than all the weapons that aren’t even mentioned.
 | 4★ The Alley Flash Base ATK: 620 Substat: Elemental Mastery 55 Very high Base ATK for a 4-Star weapon, but the passive is tricky to keep up with. Anemo Traveler is vulnerable for about 2.5s while casting a 7-hit Skill, and since it doesn’t snapshot they will most likely lose the DMG Bonus for the last and most important hit. If you use this weapon, it’s recommended to bring a Shielder. |
 | 4★ Blackcliff Longsword Base ATK: 565 Substat: CRIT DMG 36.8% This weapon can be bought from Paimon’s Bargains for 24 Masterless Starglitter. While the substat and passive might look good, it’s hard to get stacks consistently. Anemo Traveler is usually not the one getting the kills, and even when they do, it’s hard to keep track of the stacks. Overall not recommended to use. |
 | 4★ The Black Sword Base ATK: 510 Substat: CRIT Rate 27.6% This is the Battle Pass weapon, the CRIT Rate is helpful in an ATK%/Anemo/CRIT build but the passive doesn’t add any value to the typical Anemo Traveler build. This would be a good option for Physical DPS Traveler, but that’s for another day. Also not a recommended weapon. |
Artifacts
Art credit: Makis Manga on pixiv [original post]
Anemo Traveler generally serves the role of a RES Shredder, meaning their stats don’t really matter if you’re just using them for that, as long as you have enough ER and are using 4-Piece Viridescent Venerer. However, if you do want to build Anemo Traveler for damage, and thus increase the overall team damage output, this section will explain just that.
Unlike Kazuha or Sucrose, none of Anemo Traveler’s Talents scale off of EM, but their multipliers aren’t the highest. Since they are able to trigger a decent amount of Swirls with their Elemental Skill and Burst, the majority of their damage will come from Swirls. Like all Transformative Reactions, Swirl only cares about character level, EM, and the enemies’ Elemental RES. This means that EM is the focus when it comes to artifact stats. It’s also recommended to level up Anemo Traveler to 90, as well as the weapon (especially if it has an EM substat).
Main Stat Priority
Triple EM is overall the best option, ATK%/Anemo/CRIT can only perform better at a high investment level when facing a single enemy and using ATK buffs. With that said, keep in mind that Anemo DMG appears in the Anemo color, while Swirl DMG appears in the color of the Element that is swirled. Just because you’re seeing smaller Anemo DMG numbers with a triple EM build doesn’t mean that Anemo Traveler is doing less damage, in fact it’s the opposite.
 | Elemental Mastery or ATK% These 2 options are very similar in terms of damage output. Apart from using ER% when you don’t have enough to use the Elemental Burst off CD, use whichever one has better substats. Keep in mind that an artifact substat can’t be the same as the main stat, so if an EM Sands has 3+ rolls into the ATK% substat or vice versa, use it. |
 | Elemental Mastery or Anemo DMG Bonus These two are relatively interchangeable, depending on the situation. Anemo DMG Bonus will perform better in single-target situations, while Elemental Mastery will perform better in multi-target situations (for which you usually want to bring Anemo Traveler). |
 | Elemental Mastery, CRIT Rate, or CRIT DMG It’s not a good idea to use a CRIT Circlet when using EM on any of the other pieces. If you are using a 5-Star weapon with a CRIT substat—and are able to get a good ratio—it can, however, work well enough. EM is still highly recommended for the Circlet. |
Substat Priority
Always make sure to get enough ER first, whether it’s from the weapon or artifacts. Only go for the other substats after you have enough ER, and don’t go overboard, there’s no point getting more ER than what is needed. As for the other substats, the more the better.
ER% > EM > ATK% > CRIT Rate = CRIT DMG > ATK
Recommended Sets
 | 4-Piece Viridescent Venerer: The Best in Slot artifact set for Anemo Traveler, which not only increases Anemo DMG, but also increases Swirl DMG and decreases enemy RES to the Element that is Swirled. This is generally recommended regardless of Anemo Traveler’s role, main stats, or substats. |
 | 2-Piece Viridescent Venerer + 2-Piece 18% ATK: An alternative to 4-Piece Viridescent Venerer for players that don’t have good substats yet. While it might look better for a DPS build, Anemo Traveler relies on Swirl DMG quite a lot, meaning 4-Piece Viridescent Venerer should always be the goal. Early game players (pre AR 45) can also use 2-Piece Viridescent Venerer + 2-Piece Scholar/Exile for more ER. |
 | 4-Piece Noblesse Oblige: This is a niche option in the case that Anemo Traveler is purely used as a support for an Anemo, Geo, or Dendro DPS character; and only when there is no other character on the team using this set because it does not stack when multiple characters are using it. The Burst DMG Bonus is nice but you need to learn how to control the tornado properly, and of course the 20% ATK buffs the whole team. |
Teams and Synergies

Art credit: 失学少女捞 on pixiv [original post]
A team should never be built around Anemo Traveler. Instead, Anemo Traveler should be seen as a character that fills 3rd or 4th slot on teams as a potential Support that also does damage. However, there are specific teams and characters that Anemo Traveler pairs very well with.
Synergies
Any Cryo/Pyro/Hydro/Electro character
Slotting Anemo Traveler into a team like this is a great idea because it enables the most benefit from C6 and the 4-Piece Viridescent Venerer set bonus. Anemo Traveler can provide these characters with a massive boost in damage.
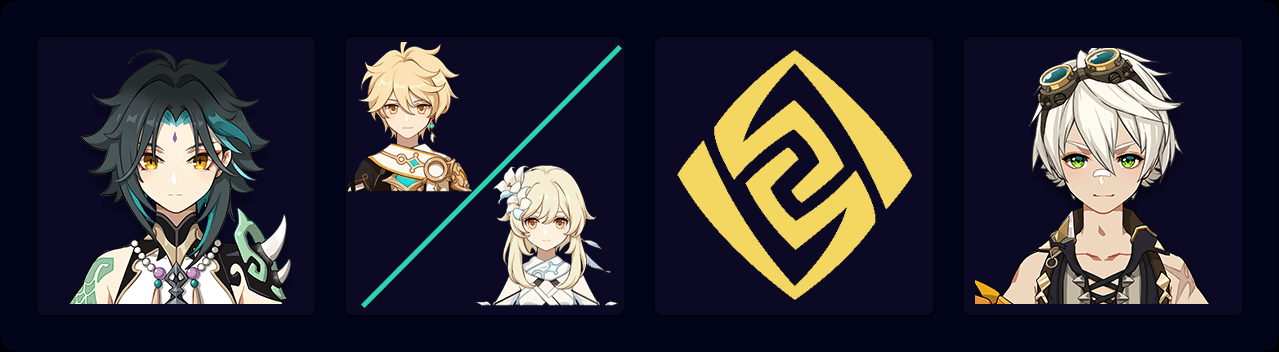
Xiao
Anemo Traveler is a strong support in a Xiao hypercarry team due to being the only F2P source of Anemo RES Shred, providing Anemo Particles to battery Xiao’s Burst, and providing Anemo Resonance for the team. As an added bonus, Xiao’s Elemental Skill after a normal jump can reach mobs inside Anemo Traveler’s tornado, meaning that you can make use of the grouping. Do note that you should not use Xiao’s normal jump followed by his Elemental Skill if you are pre-funneling particles for his Elemental Burst because you will likely miss the particles during the time it takes Xiao to drop back down.
Zhongli
Zhongli pairs very well with Anemo Traveler because of the pillar and bonus 20% RES Shred. Not only does Zhongli buff Anemo Traveler’s damage, he also provides Universal RES Shred (which includes Physical and all Elements), providing a damage boost to the whole team. The pillar can be used to stop the tornado and have it spin in place, which is useful for actually dealing DMG with the Burst because it will keep displaceable enemies close and do more than just 1 or 2 hits to non-displaceable enemies.
Ningguang/Geo Traveler (Co-Op Only)
The edges of Ningguang’s Jade Screen and Geo Traveler’s meteorite can also stop the tornado. However, neither of them synergize well with Anemo Traveler apart from stopping the tornado and it’s usually not a good idea to run a Geo character on the team just to get the Elemental Burst to do more damage. Sadly, Albedo’s Solar Isotoma cannot stop the tornado; it’s a flower after all.
Team Examples
All images are generated with Genshin Portraits by muakasan#2792 and edited with permission to include Anemo Aether and Lumine.
Bennett, Chongyun, Traveler, Flex

This is a Forward Melt team that only works with pre-C6 Bennett, with him being the on-field DPS that uses Normal Attacks to apply Cryo using Chongyun’s field in-between his own Elemental Skill, triggering Melt frequently. The last slot can be any character, another Cryo character will increase the team’s CRIT Rate, if it’s Rosaria the team will get even more CRIT Rate. It can also be a Shielder or Healer.
Kazuha, Traveler, Xiangling, Bennett

One of the strongest teams that Anemo Traveler can be in, they take the usual Venti slot and buff the team more through their extra RES Shred but sacrificing the Energy that Venti provides (assuming pre-C6 Venti). Xiangling is the off-field DPS, getting buffs from Bennett’s Burst, Kazuha’s A4 Passive, 4-Piece Viridescent Venerer, and Anemo Traveler’s C6. Overall, these characters benefit from each other’s buffs, spend roughly the same amount of time on-field, and catch their own particles (except for Xiangling, she gets Bennett’s particles).
Xiao, Traveler, Geo, Bennett
If you can’t use a better character to battery Xiao, Anemo Traveler is a good option as they can provide 20% Anemo RES shred and some crowd control. Zhongli is also able to provide 20% more Anemo RES Shred. Not only can Zhongli buff the team directly, but he also generates a very strong shield and can keep Anemo Traveler’s tornado in place, allowing it to do more damage. Note that in this team, if Anemo Traveler is using Freedom-Sworn, the damage that Xiao can output due to the buffs from the sword and from Traveler’s C6 will actually be better than Sucrose with TTDS. However, Xiao will need more ER and the rotation will require more practice to perform well.
Cryo, Hydro, Traveler, Cryo

This is the typical Freeze team, with a Cryo DPS character using 4-Piece Blizzard Strayer and a Hydro enabler. For example, Ganyu pairs well with Mona or Kokomi, and Ayaka pairs well with Mona, Kokomi, Xingqiu, or Yelan. Anemo Traveler is mostly doing the job of providing 60% Cryo RES Shred. The last Cryo character can be an off-field DPS, Buffer, Shielder, and/or Healer. Note that due to Cryo having the highest Absorption Priority for the Traveler, the tornado will not have any problem decreasing the Cryo RES by another 20% on top of the 40% Cryo RES Shred from 4-Piece Viridescent Venerer.
Beidou, Fischl, Xingqiu, Traveler
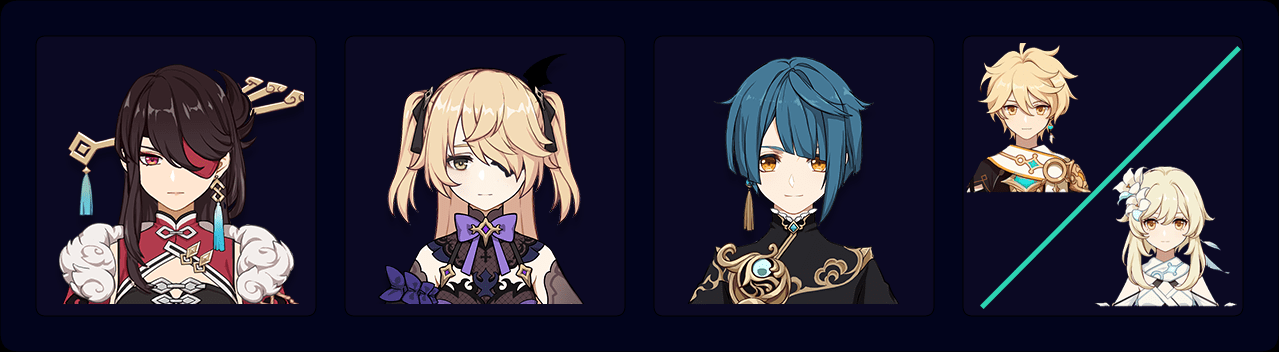
One of the best Electro-Charged (aka Taser) teams that’s relatively easy to build and to play. Fischl is Beidou’s battery and an off-field DPS using Oz, while Xingqiu (or Yelan) and Anemo Traveler can self-sustain by generating particles of their own. Barbara or Kokomi can also be used as the Hydro enabler, as well as healing and providing the TTDS buff to Beidou. Since Hydro has a higher Elemental Absorption Priority than Electro and these are the only 2 Elements that can co-exist on enemies, it’s important to apply Electro with Beidou or Fischl first, use Anemo Traveler’s Skill and Burst, then use Xingqiu or Yelan’s Skill and activate their Burst.
Tartaglia, Xiangling, Bennett, Traveler
A variation of the standard Xiangling Reverse Vaporize team that makes good use of the synergies between its members. Anemo Traveler’s Burst can pick up Guoba, allowing him to hit displaceable enemies consistently and maximize the duration of the Pyro RES Shred if Xiangling has C1. Tartaglia can Vaporize Charged Attacks against trapped opponents while his Skill is on cooldown. Note that in this team, Anemo Traveler with 4-Piece Viridescent Venerer can shred both Hydro and Pyro RES through their Elemental Skill hitting an opponent afflicted by Hydro, then gaining a Pyro absorption from Bennett’s Elemental Burst. This results in 40% Hydro RES Shred and 60% Pyro RES Shred (or 75% if Xiangling is C1).
Resources
![]() Single-target ADC weapon calcs
Single-target ADC weapon calcs![]() Single-target EDE weapon calcs
Single-target EDE weapon calcs![]() 2-target triple EM weapon calcs
2-target triple EM weapon calcs![]() Artifact calcs
Artifact calcs![]() Talent and Constellation images
Talent and Constellation images
Credits
In nothing other than alphabetical order:
3b00d_09#7473
Ayzel#7399
Bobrokrot#0111
CellistiaCat#1700
Charisma#5567
Fluffy#5580
Longing#8998
Mcpie#8672
pai#3602
paimonbukeyi#4732
Rathalos#2875
Tithus#9995
Changelog
Apr. 18th, 2021: Published the first version by Fluffy#5580.
Jan. 9th, 2022: Created the updated version by by pai#3602.
Jan. 25th, 2022: Published the updated version.
Mar. 10th, 2022: Added the Tartaglia, Xiangling, Bennett, Traveler team, as well as Barbara and Kokomi as possible replacements for Xingqiu in the Taser team.
Mar. 30th, 2022: Added Haran Geppaku Futsu and changed “2-Piece Gladiator’s Finale/Shimenawa’s Reminiscence” to “2-Piece 18% ATK”; with Gladiator’s Finale as the icon that represents 18% ATK artifacts.
May 29th, 2022: Reordered the weapon tables and added Dark Iron Sword.
Aug. 25th, 2022: Edited the Pros and Cons section; rewrote the Playstyles section; added Sapwood Blade; added Yelan as an alternative to Xingqiu.
Aug. 27th, 2022: Added the glossary.