Written by mystathi
with help from mct9017, risuke, irokei, polomo, chasing_haze, and more.
Updated for Version 4.6
Table of Contents
Introduction
Tartaglia, a.k.a. Childe, is a 5-star Hydro Bow on-field enabler and DPS unit in Genshin Impact. He offers fast Hydro application combined with sustained damage in his Melee Stance and a high-scaling Elemental Burst. Childe excels at rapidly applying large amounts of Hydro, using flexible rotations to fit enemy scenarios, and front-loading the team’s damage to quickly clear the Abyss. This guide reviews Childe’s best builds, best teams, best weapons, best artifacts, synergies, Talents, Constellations, and more!
Glossary
Strengths and Weaknesses
Strengths
- Personal damage that scales with more enemies (stronger in AoE scenarios)
- Strong front-loaded damage
- Fast Hydro application
- Downtime that can be used to battery high Energy Cost characters
- Low ER requirements with Ranged Burst
- Not Constellation-reliant
- Flexible team combinations and rotations
- Strong team synergy with off-field damage dealers and supports
Weaknesses
- Weaker performance in single-target encounters
- Potentially long downtime at the end of rotations
- Technical rotations that are subjectively hard to play
- Kit that is not optimized to be a hypercarry or sole damage dealer
Why Play Childe?
Childe’s quadratic scaling and AoE abilities allow his teams to focus on AoE damage and multi-target scenarios. His strong front-loaded Vaporized Burst allows for fast clears, and his fast Hydro application in Melee Stance supports his off-field teammates’ damage. Furthermore, his Melee Stance downtime can be used to regain Energy on characters and prepare for the next damage window. Childe himself has a low ER requirement if he uses his Ranged Burst, which further increases the team’s damage.
Childe is not inherently reliant on Constellations, which some may see as a weakness, but it lets players with limited Primogem investment play Childe near his damage ceiling. Childe’s flexible teams and rotations work well at a variety of investment levels.
Whilst Childe teams often excel in AoE scenarios, they often struggle more in single-target or boss encounters. Childe’s front-loaded damage and long rotations mean that the downtime at the end of Childe’s melee period can feel quite long, with limited damage dealt during this time. Childe’s rotations have a learning curve since they often involve reaction setups and careful management of his cooldowns; he requires practice to get the most out of his teams.
TL;DR
Design: euphorysm & cegewinne
Content: irokei & mysthathi
Kit
Talents
Bow Stance (Normal Attack)
 Cutting Torrent
Normal Attack: Perform up to six consecutive shots with a bow.
Charged Attack: Perform a more precise Aimed Shot with increased DMG. While aiming, the power of Hydro will accumulate on the arrowhead. An arrow fully charged with the torrent will deal Hydro DMG and apply the Riptide status.
Riptide: Opponents affected by Riptide will suffer from AoE Hydro DMG effects when attacked by Tartaglia in various ways. DMG dealt in this way is considered Normal Attack DMG.
- Riptide Flash: A fully-charged Aimed Shot that hits an opponent affected by Riptide deals consecutive bouts of AoE DMG. Can occur once every 0.7s.
- Riptide Burst: Defeating an opponent affected by Riptide creates a Hydro burst that inflicts the Riptide status on nearby opponents hit.
Plunging Attack: Fires off a shower of arrows in mid-air before falling and striking the ground, dealing AoE DMG upon impact.
This guide does not examine Childe’s Physical DPS playstyle, so his Normal Attacks are not discussed. However, Childe’s Hydro-infused Charged Shots in his Ranged Stance are relevant since they are often incorporated into his rotations.
Hydro Damage
In his Ranged Stance, Childe can deal high-powered Charged Shots and inflict a Riptide mark on opponents. Childe’s Charged Shots are optional during his downtime to generate Hydro Particles (see Energy) and deal damage that is Vaporized in some teams. They can also enable 4pc Viridescent Venerer RES Shred when his Elemental Skill is on cooldown.
Do I have to use Charged Shots with Childe?
Some teams or rotations do not require Charged Shots, instead only using them as filler options during downtime. Charged Shots can decrease Childe’s ER requirements and set up for the next rotation, but here are some examples with potentially better uses of downtime:
- Using Bennett to funnel Pyro Particles to Xiangling
- This lowers Xiangling’s ER requirements substantially.
- Childe can still fit in a Charged Shot due to Bennett’s Skill cooldown in a pattern like Bennett tE > Xiangling (collect particles) > Childe C > repeat.
- Perfect parrying with Beidou to generate more Electro Particles
- This lowers her ER requirements significantly.
- Using Kazuha’s Tap Skill to trigger Favonius Sword’s passive
- This lowers the team’s ER requirements.
- Using Albedo’s Elemental Skill and a Normal Attack to generate Geo Particles
- This is only relevant if you use Albedo’s Burst every rotation.
Generally speaking, characters with higher damage, particle production, or reliance on batterying can use rotation downtime more effectively. However, Childe’s ER requirements increase as a result.
Riptide Flash
Riptide Flash occurs when Childe’s Charged Shot hits an enemy already afflicted with Riptide. It consists of 3 hits of weak Hydro damage, with each hit having 10% of the scaling of the triggering Charged Shot. Riptide Flash has standard ICD, so only one Riptide Flash hit applies Hydro or triggers reactions. This is enough to overcome some auras because of the combined Hydro application from the Charged Shot and Riptide Flash hit.
Riptide Burst
Riptide Burst occurs when an enemy afflicted with Riptide is defeated. It is an instance of AoE Hydro damage that applies a Riptide mark to enemies hit. Riptide Burst does not deal notable damage, so it only shines in scenarios with many enemies closely grouped.
Melee Stance (Elemental Skill)
 Foul Legacy: Raging Tide
Unleashes a set of weaponry made of pure water, dealing Hydro DMG to surrounding opponents and entering Melee Stance.
In this Stance, Tartaglia’s Normal and Charged Attacks are converted to Hydro DMG that cannot be overridden by any other elemental infusion and change as follows:
- Normal Attack: Perform up to 6 consecutive Hydro strikes.
- Charged Attack: Consumes a certain amount of Stamina to unleash a cross slash, dealing Hydro DMG.
- Riptide Slash: Hitting an opponent affected by Riptide with a melee attack unleashes a Riptide Slash that deals AoE Hydro DMG. DMG dealt in this way is considered Elemental Skill DMG, and can only occur once every 1.5s.
After 30s, or when the ability is unleashed again, this skill will end. Tartaglia will return to his Ranged Stance and this ability will enter CD. The longer Tartaglia stays in his Melee Stance, the longer the CD. If the return to a Ranged Stance occurs automatically after 30s, the CD is even longer.
Notation used in this section
| m | Indicates that the attack is done in Melee Stance. |
| N# | Indicates the amount of Normal Attacks performed in the string. |
| C | Indicates to perform a Charged Attack. |
| D / J | Indicates to perform a dash (D) or jump (J) cancel. |
Example: mN2CD is 2 melee Normal Attacks followed by a Charged Attack and canceled with a dash.
Childe’s Skill allows him to enter his Melee Stance, where his ranged Bow attacks are replaced with special Hydro-infused Melee attacks. His Melee Stance contributes more than half of his personal damage. However, it is the most misunderstood aspect of his kit. The variable cooldown punishes bad gameplay and is daunting to players who are new to Childe.
Stance Change
Childe’s stance change is an amazing ability. It is highly recommended to use Childe’s Skill stance change when in motion (sprinting or walking) since it completely skips the animation. This allows for quicker Hydro application and a faster transition into his Melee Stance.
This video shows the time difference between skipping the animation and not.
Childe’s stance change applies 2U of Hydro, easily establishing a Hydro aura and enabling 4pc VV setups. However, at C0, it is recommended to set up a Hydro aura with Childe’s stance change in the first rotation only, as his Skill cooldown requires extended downtime for subsequent rotations. Instead, Childe’s Charged Shots are needed for Swirl setups in subsequent rotations. At C1, it can be possible to repeat the first rotation’s setup for subsequent rotations.
Melee Cooldown
Childe’s Skill cooldown is of approximately [Childe melee duration] + 6s. There are certain lengths of melee time and cooldown that are considered most optimal; however, Childe’s cooldown flexibility means that his melee uptime and consequent cooldown can be adjusted to fit rotations for other units. For example, Childe’s melee duration is around 9s long in a team with Xiangling and Bennett so you have time to battery Xiangling and set up for Childe’s next melee duration. The downtime results in 24–27s rotations when executed properly.
Here is a table of Childe’s melee time, cooldown, and minimum rotation length.
Melee Attack Strings
Childe’s melee inputs come in the form of Normal Attacks and Charged Attacks, both of which are important to use. Charged Attacks provide more damage than Normal Attacks but come at a Stamina cost. At least one Normal Attack is required before a Charged Attack; however, the fewer Normal Attacks you perform per Charged Attack, the faster you run out of Stamina.
Stamina management primarily determines which melee string you should use.
You can mix and match melee strings with different DPS and Stamina efficiency to lower the net Stamina loss compared to high-cost strings. 3[mN2C] + 2[mN3C] with cancels lasts around 9s, and if the mN2C combos are used first, the highest-damage strings are done when Childe has more buffs, whilst the mN3C combos (lower damage) are used when Childe has fewer buffs.
It is recommended to learn to use mN2C and either mN3C or mN5C since different melee strings come in handy in different scenarios and deal comparable damage. Dash and jump cancels are explained after this combo table.
mN2C
(2 melee Normal Attacks followed by a Charged Attack)
- Highest damage output regardless of weapon
- Highest Hydro application in a string, which can be helpful for re-establishing a Hydro aura early into Childe’s melee
- Incredibly Stamina-inefficient
- Recommended only with good Stamina management
- 6[mN2CD] is the maximum string that can be performed without stamina buffs and leaves you with 0 Stamina
mN2CD and mN2CJ are Stamina-negative.
mN3C
(3 melee Normal Attacks followed by a Charged Attack)
- Second-highest damage output for every weapon except Rust and Thundering Pulse
- A strong default option in both short and longer melee periods
mN3CD is Stamina-negative.
mN3CJ is Stamina-neutral.
mN5C
(5 melee Normal Attacks followed by a Charged Attack)
- Second-highest damage output for Rust and Thundering Pulse (Bows that buff Normal Attack damage)
- Good Stamina conservation, useful for longer melee periods
m5NCD is slightly Stamina-negative.
mN5CJ is Stamina-positive.
mN4
(4 melee Normal Attacks followed by a dash or jump cancel)
- The highest damage output without Charged Attacks (when properly canceled)
- Only recommended if you do not have enough Stamina to perform Charged Attacks or if Childe’s Charged Attacks can separate groups of enemies
- You should adequately manage your Stamina so you don’t have to use this string
Melee Attack Cancels
When canceling a Charged Attack, you can dash or jump, both of which require the same timing. Childe’s Charged Attack is complicated to cancel, as the visuals are desynced with the actual hits — it should be canceled as soon as the visual for the first hit comes out. If you are worried about canceling the Charged Attack too early, aim to cancel it later, like during the visual for the second Charged Attack hit. It is better to be slightly slower than to lose a hit entirely.
Dash (D) Cancel
- Fastest option
- Invincibility frames mid-dash
- Flexible positioning
- Consumes Stamina
Jump (J) Cancel
- Stamina-free
- Slower when performing a moving jump than when jumping in place
- Longer recovery time when hit during a jump
You should alternate between dash canceling and jump canceling depending on your current Stamina.
When starting to play Childe, you should maintain about 1 to 1.5 bars of Stamina (around half of total Stamina) during Melee Stance, and try to recover as much Stamina as possible during downtime. This extra Stamina serves as a safety net that allows you to dodge multiple times in a row without running out of Stamina. As you become more familiar with Childe, you can gradually push for higher damage by consuming more Stamina on higher-damage melee strings.
Your Stamina needs depend on your investment, your team composition, and your enemy scenario. For example, you can consume more Stamina when using characters like Zhongli (because of his shield) or Kazuha (because of his Stamina consumption Utility Passive and ability to dodge and group enemies).
Melee Duration
Most commonly, a short melee period of around 9s is recommended for Childe. This means that his cooldown will be 15s long, and rotations will be at least 24s long (but often longer when swap times and longer setups are taken into account). This melee period also takes into account buff and off-field DPS uptimes, as most buffs will run out midway or near the end of Childe’s melee duration if it is 9s long, and most teammate abilities last slightly longer than this.
Some circumstances may force Childe to adjust his melee duration on the fly to better fit an encounter. Usually this is the case with enemies that have specific damage windows, or if you need to extend Childe’s melee period to finish off an enemy. In these situations, a longer or shorter duration than usual is used, and it is often down to the player to decide how long they should stay in melee stance. To effectively match your melee period to your needs, it is recommended to know multiple different melee strings and to both dash and jump cancel.
Note that Childe’s melee duration is affected by his C1. See Constellations for more details.
Counting Melee Duration
There are two main ways to keep an eye on Childe’s melee duration without counting time: using visual clues and counting melee strings.
Visual Cues
Visual cues are incredibly team-dependent, but commonly used cues include:
- Childe’s Burst cooldown — If you used a Ranged Burst into Melee Stance, you are at 9s duration when your Burst has 6s of cooldown left.
- C0–C3 Xiangling — If you Ranged Burst > Xiangling Q E > Childe melee, you are at 9s when Xiangling’s Burst ends.
- C0–C5 Fischl — If you Fischl E/Q > Beidou EQ > Childe melee, you are at 8.5s when Oz disappears. If you Fischl E/Q > Childe melee, you are at 10s when Oz disappears.
Counting Melee Strings
Counting melee strings is less team-dependent but requires more concentration. If you know how many melee strings you can perform in your designated melee time, you can count them to know when to finish.
9s Melee Strings
6[mN2C D/J]
3[mN2C D/J] + 2[mN3C D/J]
4[mN3C D/J]
3[mN5C D/J]
11s Melee Strings
7[mN2C D/J]
3[mN2C D/J] + 3[mN3C D/J]
5[mN3C D/J]
3[mN5C D/J] + mN2C
Note that these strings are only suggestions and not indicative of how Childe should always be played. You can consult this melee duration calculator to estimate how long other strings take.
Ending Melee Stance
There are three ways to end Childe’s Melee Stance:
- Use his Skill again. This doesn’t apply Hydro or deal damage, and its animation can be skipped the same way as entering the Melee Stance.
- Swap out. This immediately ends Childe’s Melee Stance and begins his cooldown.
- N2 Swap. After your final string is dash or jump canceled, you can perform two Normal Attacks before swapping out. This is the most recommended way to end Childe’s melee string, as it slightly increases your damage output with barely any extra time spent in Childe’s Melee Stance.
Riptide Slash
Riptide Slash is one of Childe’s most notable abilities. It is triggered by any of Childe’s melee attacks on an enemy with Riptide Mark (with a 1.5s ICD). Riptide Slash is an AoE hit that has an independent cooldown for each enemy, so the more enemies there are, the more Riptide Slashes can occur. In AoE scenarios, this makes a big impact on Childe’s Hydro application since the Riptide Slashes overcome almost any applied aura.
Elemental Bursts
 Havoc: Obliteration
Performs different attacks based on what stance Tartaglia is in when casting.
- Ranged Stance: Flash of Havoc: Swiftly fires a Hydro-imbued magic arrow, dealing AoE Hydro DMG and applying the Riptide status. Returns a portion of its Energy Cost after use.
- Melee Stance: Light of Obliteration: Performs a slash with a large AoE, dealing massive Hydro DMG to all surrounding opponents, which triggers Riptide Blast.
Riptide Blast: When the obliterating waters hit an opponent affected by Riptide, it clears their Riptide status and triggers a Hydro Explosion that deals AoE Hydro DMG. DMG dealt in this way is considered Elemental Burst DMG.
Childe’s Elemental Burst can deal 30–40% of his total damage when Vaporized, although this largely depends on buffs. It is worth using for its damage in any team, and it can be handy to help with setting up buffs in the rotation even when not Vaporized.
Ranged or Melee Burst?
| Ranged Burst | Melee Burst | |
| Use Cases |
|
|
| Pros |
|
|
Riptide Blast
Riptide Blast is only triggered by a Melee Burst, so it is not commonly seen. It removes the Riptide mark when triggered and deals AoE Hydro damage, making it very strong but requiring subsequent Riptide mark application if enemies are not defeated. Riptide Blast can be Vaporized alongside the Elemental Burst, but doing so requires precise Pyro application timing.
Passive Talents
 A1 Passive: Never Ending
Extends Riptide duration by 8s.
 A4 Passive: Swords of Torrent
When Tartaglia is in Foul Legacy: Raging Tide’s Melee Stance, on dealing a CRIT hit, Normal and Charged Attacks apply the Riptide status effects to opponents.
 Utility Passive: Master of Weaponry
Increases your own party members’ Normal Attack Level by 1.
A4 Note: CRIT Hits do not increase the frequency of Riptide Slash triggering. They only apply Riptide status and trigger an initial Riptide Slash.
Childe’s A1 and A4 Passives provide a small increase to quality of life. His A1 forgives long downtimes or fewer Charged Shots, whilst his A4 lets Childe apply and refresh Riptide without relying on Charged Shots or his Ranged Burst. Childe’s Utility Passive is a minimal damage increase in his standard team compositions for its boost to his Charged Shot and Riptide Burst damage.
Energy
Childe generates Hydro Particles by triggering Riptide Slash or Riptide Flash, with a 3s particle generation cooldown. However, Childe usually generates particles every 3.5–4s due to attack animations and other factors.
Riptide Slash requires a melee attack to hit an enemy marked with Riptide and triggers at minimum every 1.5s. A hit that applies (but does not refresh) Riptide mark in Melee Stance (via Childe’s A4) also triggers Riptide Slash. Thus, approximately every other Riptide Slash generates a particle, starting from the first one.
Riptide Flash requires a Charged Shot to hit any enemy marked with Riptide. A Charged Shot takes 1.5–2s to perform, meaning particles are generated every other Charged Shot if you perform them consecutively.
Childe’s C2 regenerates Flat Energy for himself, which is unaffected by ER%.
Constellations
 Constellation 1 | Foul Legacy: Tide Withholder
Decreases the CD of Foul Legacy: Raging Tide by 20%.
Childe’s C1 provides rotation flexibility that situationally increases his damage. This comes mainly in two forms: reducing the downtime between two melee periods, or increasing the duration of uptime periods without increasing downtime length.
Reducing Downtime (Shorter Rotation)
C1 Childe can melee for the same amount of time as C0 and reduce downtime to create a shorter rotation. This often means that ER requirements increase since there is less downtime to battery your team. Reducing downtime is most helpful when a Boss or wave encounter has harder phases to work around. In variable encounters with immunity phases or wave content, this can be a damage increase over C0.
Increasing Melee Uptime (Longer Enabling)
C1 Childe can better match the uptime of certain off-field DPS units (like Beidou and C4+ Xiangling) by increasing melee uptime without increasing downtime. This technique is best utilized against damage sponges and in scenarios without enemy waves or phases.
DPS Gain: ?%
 Constellation 2 | Foul Legacy: Understream
When opponents affected by Riptide are defeated, Tartaglia regenerates 4 Elemental Energy.
Childe’s C2 does not reduce Childe’s ER requirements significantly, if at all. In scenarios where you can trigger this Constellation, it usually isn’t even needed since enemies produce a large amount of particles themselves. In single-target scenarios, this Constellation is insignificant as it does not trigger until after the encounter is over.
DPS Gain: 0%
 Constellation 3 | Abyssal Mayhem: Vortex of Turmoil
Increases the Level of Foul Legacy: Raging Tide by 3.
Maximum upgrade level is 15.
This Constellation gives a 22% increase to the damage of Childe’s Melee Stance. Over a 28s rotation where Childe Vaporizes his Ranged Burst, this increases his personal damage by 10–12%.
DPS Gain: 10–12%
 Constellation 4 | Abyssal Mayhem: Hydrospout
If Tartaglia is in Foul Legacy: Raging Tide’s Melee Stance, triggers Riptide Slash against opponents on the field affected by Riptide every 4s, otherwise, triggers Riptide Flash. Riptide Slashes and Riptide Flashes triggered by this Constellation effect are not subject to the time intervals that would typically apply to these two Riptide effects, nor do they have any effect on those time intervals.
Childe’s C4 increases his damage by up to 7% in a 28s rotation. The first Riptide Slash is triggered 4s after the mark is applied. Note: if you do not use highly specific aura timing (mainly used for Vaporizing), then Childe’s C4 can only be beneficial to you.
This Constellation can be harmful to an on-field DPS Childe by potentially ruining his Vaporized Burst and making Pyro harder to Swirl. However, this rarely affects the first rotation in teams, and it may not be something you experience at all since the window for it to affect auras in subsequent rotations is small.
Childe’s C4 notably allows Childe to become an off-field Hydro applier for Freeze, Hyperbloom, Bloom, or Burgeon teams; however, it doesn’t fully solve Childe’s lack of Hydro application during downtime.
DPS Gain: 0–7%
 Constellation 5 | Havoc: Formless Blade
Increases the Level of Havoc: Obliteration by 3.
Maximum upgrade level is 15.
This Constellation increases Childe’s Elemental Burst damage by 17%. For a Childe that also performs melee attacks, this Constellation increases his total personal damage by 5% if the Elemental Burst is Vaporized.
DPS Gain: 5%
 Constellation 6 | Havoc: Annihilation
When Havoc: Obliteration is cast in Melee Stance, the cooldown of Foul Legacy: Raging Tide is reset. This effect will only take place once Tartaglia returns to his Ranged Stance.
Childe’s final Constellation lets him use his Melee Burst as an opener and allows more room for error during Melee Stance. Consistently using Melee Burst is not sustainable without higher ER% investment on Childe — significantly higher than if he were using Ranged Burst. The need to drop damaging stats for ER% may decrease the value that C6 may provide for you.
Childe’s C6 does not solve issues a player may have with his C0–C5 teams, as those teams are built around his cooldown and do not see a damage increase from adjusting the rotation for C6.
This Constellation does allow him to be played in Dendro teams that need a lot of Hydro application, with downtime only required for refreshing other character’s abilities. Childe’s personal damage is often sacrificed here in favor of his supportive Hydro-application abilities with an ER% Bow.
DPS Gain: ?%
Builds
Read this guide on how to use Genshin Optimizer for Childe.
Talent Priority
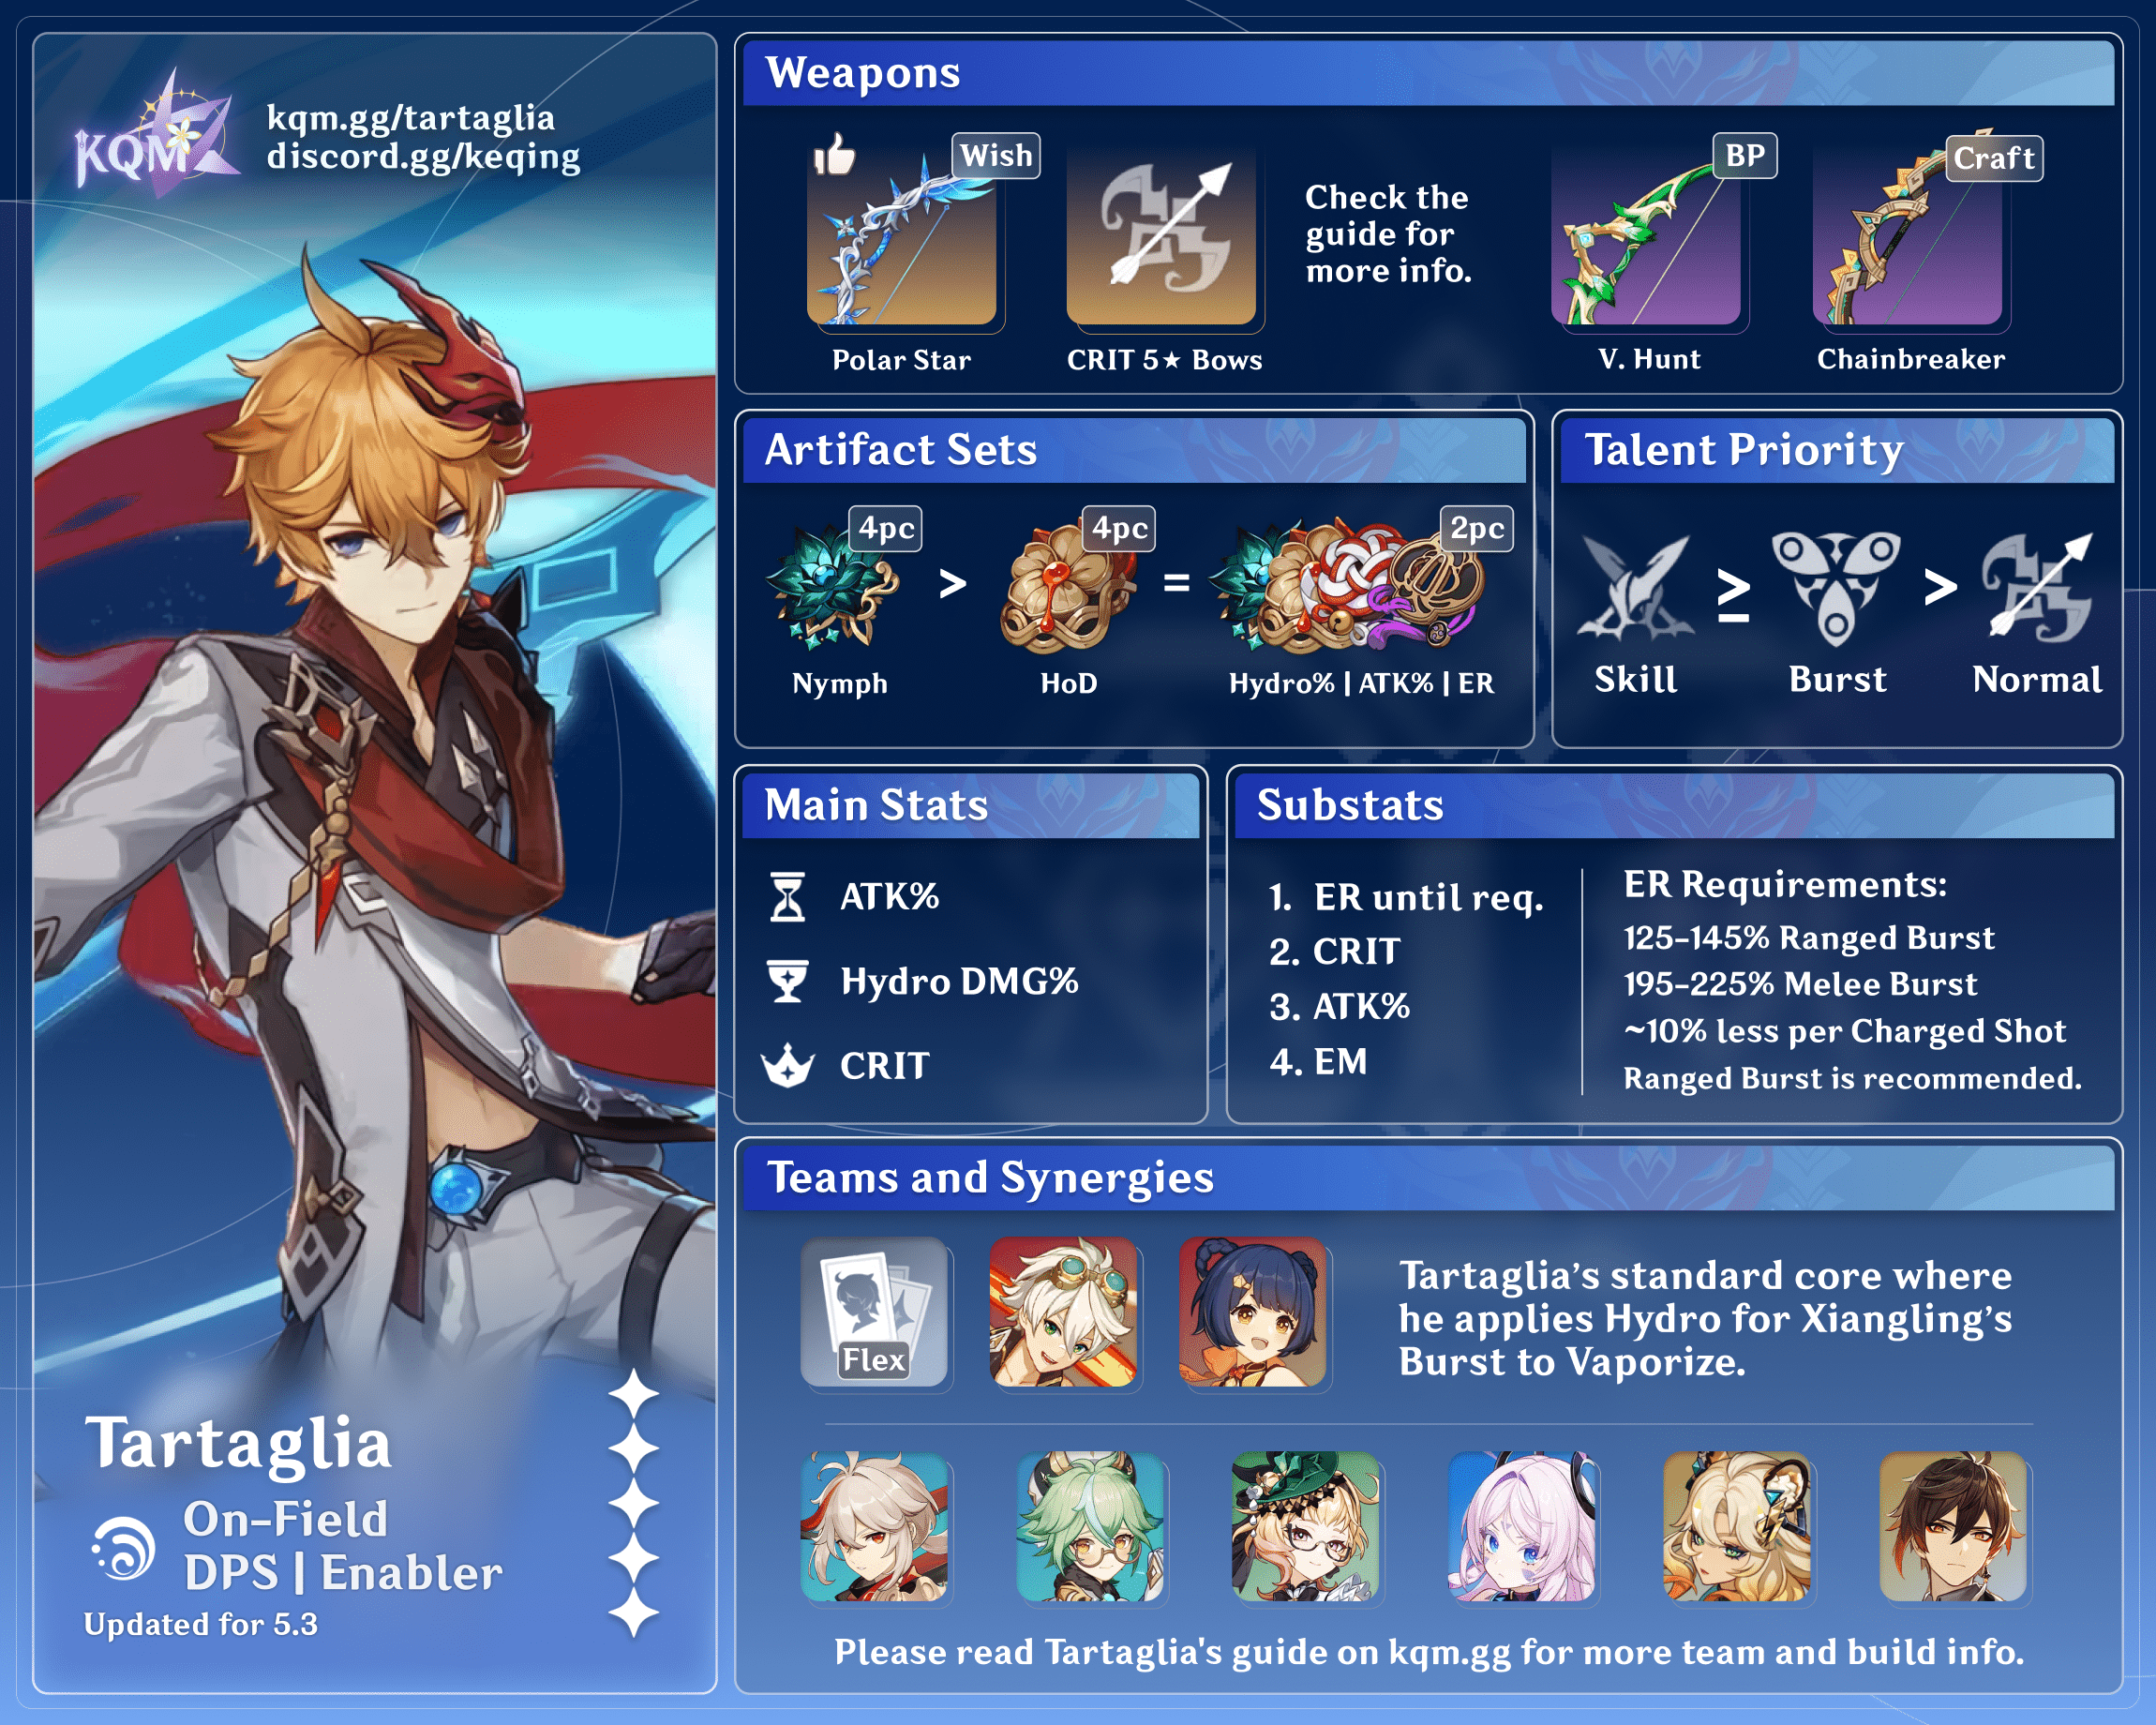
≥ >
Elemental Skill ≥ Elemental Burst > Normal Attack
Childe’s Talent priority depends on his playstyle. Most players focus on melee Childe, so his Elemental Skill is prioritized. However, against weaker content or in speedruns, Childe’s Elemental Burst becomes more important, so you can level them evenly. Childe’s Normal Attack should never be ignored since it increases Charged Shot and Riptide damage, but it is a lower priority than his other Talents.
Artifacts
You should generally choose artifacts for Childe with this priority:
Main Stat > Substat > Set Bonus
This order prioritizes the attributes of artifacts that provide the greatest increase to Childe’s damage.
Artifact Stats
Mainstats
 Sands |  Goblet |  Circlet |
| ATK% | Hydro DMG Bonus | CRIT Rate or CRIT DMG |
An ATK% Sands is almost always better than an EM Sands for Childe, except when he uses Hunter’s Path or in a Burst-only Vaporize build. Use Genshin Optimizer to figure out which is best for your situation.
Substats
ER% (until requirement) > CRIT > ATK% > EM > Flat ATK
| Ranged Burst | Melee Burst (Not Recommended) | |
| No Charged Shots (Not Recommended) | 125–145% | 195–225% |
| 1 Charged Shot | 115–130% | 180–205% |
| 2 Charged Shots | 110–120% | 165–190% |
| 3 Charged Shots | 100–110% | 155–175% |
- Favonius weapons on a teammate lower ER requirements by ~10–15% with each trigger.
- Increasing melee uptime to 11s lowers ER requirements by ~10–15%.
- A second Hydro unit in the team lowers ER requirements by up to ~60%.
- Use the Energy Recharge Calculator to determine exact requirements for your team and rotation.
Artifact Sets
You should farm or strongbox the recommended artifact sets. You can use the viable sets if you obtained them from farming for other characters, but they are generally weaker than the recommended options. You should not use any of the unrecommended sets since they are weak or have significant downsides.
Recommended
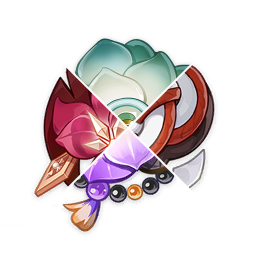
- 4pc Nymph’s Dream
- 2pc Hydro DMG%
- 2pc ATK%
Viable
- 4pc Emblem of Severed Fate
- 4pc Heart of Depth
- 4pc Wanderer’s Troupe
- 2pc EM
- 2pc Emblem of Severed Fate
- 2pc Marechaussee Hunter
- 2pc Noblesse Oblige
Unrecommended
- 4pc Echoes of an Offering
- 4pc Golden Troupe
- 4pc Shimenawa’s Reminiscence
- 2pc Golden Troupe
- 4pc Blizzard Strayer is strong only in Freeze teams.
- 4pc Thundersoother is strong only in Electro-Charged teams.
Recommended

Nymph’s Dream
4pc Nymph’s Dream is practically made for Childe, having buffs that operate very similarly to Polar Star. If you pre-stack Nymph’s Dream, it is undoubtedly Childe’s BiS set bonus.
Pre-stacking this set works the same as with Polar Star; however, the stack duration is shorter than Polar Star. So, in some situations you may need to move Childe’s Ranged Elemental Burst earlier in the rotation to maintain its stacks. This is most notable in a team with Xiangling, Bennett, and Kazuha.
Check out the Childe Mains Theorycrafting Library for information on how to pre-stack 4pc Nymph’s Dream.

2pc Hydro DMG%
- Heart of Depth
- Nymph’s Dream
2pc Hydro DMG% buffs all of Childe’s damage and is slightly stronger than 2pc ATK%. It is generally a very good option.
2pc ATK%
- Echoes of an Offering
- Gladiator’s Finale
- Shimenawa’s Reminiscence
- Vermillion Hereafter
- Nighttime Whispers in the Echoing Woods
- Fragment of Harmonic Whimsy
- Unfinished Reverie
2pc ATK% is never a bad choice, since it provides buffs to Childe’s entire kit. It is consistently a strong option and can be paired with another 2pc ATK% as well.
Viable

Emblem of Severed Fate
Emblem of Severed Fate is recommended on Childe only when he has an ER requirement of at least 120%. Its 4pc effect only buffs Childe’s Elemental Burst, but its bonuses can be quite useful for some builds.

Heart of Depth
Heart of Depth’s 4pc effect only buffs Childe’s Normal and Charged Attacks, which constitute only around half of his kit when he Vaporizes his Elemental Burst. It is generally comparable in damage to 2pc combinations of Hydro DMG% or ATK%, so prioritize the option that has the best substats.

Wanderer’s Troupe
4pc Wanderer’s Troupe is not the strongest 4pc set for Childe, but if you already have a set with good substats, its EM and Charged Attack DMG Bonus are appreciated. However, check if your 2pc + 2pc set combinations have better substats.

2pc EM
- Gilded Dreams
- Wanderer’s Troupe
- Flower of Paradise Lost
2pc EM can be a powerful option when Childe Vaporizes his Burst. It loses all value when Childe cannot Vaporize any damage.
2pc Emblem of Severed Fate (EoSF)
EoSF’s 2pc bonus provides 20% ER, which is beneficial if you do not have enough through substats. It is not recommended at ER requirements below 120% or if Childe does not Vaporize his Burst.

2pc Marechaussee Hunter (MH)
2pc MH is not the best option for Childe, since it only buffs his Normal and Charged Attack damage, but it is nonetheless a decent option if you have good substats.

2pc Noblesse Oblige (NO)
2pc NO is a good option for Childe’s Vaporized Burst, but it loses significant value when his Burst is not Vaporized. This is a good 2pc combination for a Burst-focused or Burst-only build.
Unrecommended

Echoes of an Offering
The 4pc bonus for Echoes of an Offering is difficult for fast attackers like Childe to utilize since they suffer more from latency issues, even at lower ping. As such, it is not recommended on Childe due to its inconsistent procs and Normal Attack–only buff.

4pc and 2pc Golden Troupe
Golden Troupe buffs Elemental Skill DMG%, which is only a portion of Childe’s kit. Other sets buff larger shares of his damage.
Shimenawa’s Reminiscence
Shimenawa’s Reminiscence has significant issues that hold it back from being a strong artifact set for Childe. Since most rotations want him to use his Burst, he requires far more ER% to function on this set than with a usual build, which reduces how strong the set is. There are ways to evade the Energy tax, but these can often be impractical. As such, the only scenario where 4pc Shimenawa’s Reminiscence may be a good option is when his Burst is not Vaporized nor required every rotation.
Niche Options

Blizzard Strayer
Blizzard Strayer is the strongest option for Childe in Freeze teams as long as Frozen uptime is maintained. Inconsistent Frozen uptime makes this set weaker. Additionally, it is difficult to balance the 4pc CRIT Rate buff with CRIT Rate weapons.

Thundersoother
4pc Thundersoother is a strong option for Childe in teams where an Electro aura can be kept on the enemy. This usually requires having Fischl and losing Vaporize on his Burst. A very niche set.
Weapons
With Bennett
| Best | Polar Star ≥ Aqua Simulacra = Hunter’s Path = Skyward Harp = Thundering Pulse > The First Great Magic |
| Great | Amos’ Bow = Viridescent Hunt ≥ Scion of the Blazing Sun |
| Good | Mouun’s Moon = Prototype Crescent (pre-stacked) > Fading Twilight = Blackcliff Warbow ≥ The Stringless = King’s Squire |
| Average | Elegy for the End = Rust = Hamayumi |
| Weak | Alley Hunter = Prototype Crescent |
- Rotation: Q E + 3[mN2C] 2[mN3C] (%Riptide Slash).
- Buffs assume a generalized rotation
- Weapon Calcs [Notice: These calcs could not be verified by KQM since they were performed in Python. They are included here for your interest, but please do not screenshot them or use them to support claims about a weapon’s exact viability or performance level.]
Best

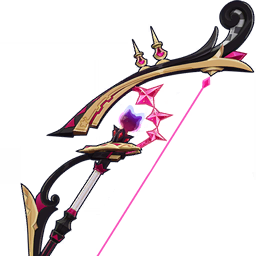
Polar Star
Polar Star is Childe’s BiS Bow when you pre-stack its passive, which is usually the case. Even on a second rotation or forced shorter setup, Polar Star is still one of his best options. Note that you typically cannot pre-stack on the second rotation due to his Skill cooldown, although this can change with C1.
Check out the Childe Mains Theorycrafting Library for information on how to pre-stack Polar Star.

Aqua Simulacra
Aqua Simulacra’s CRIT DMG secondary stat makes it a strong option for all builds. However, its low Base ATK causes it to perform worse without ATK buffs. Also note that the passive may not always be active for Childe’s Elemental Burst and ranged Charged Shots, since enemies may be too far away.

Hunter’s Path
Hunter’s Path’s low Base ATK makes it perform worse without ATK buffs. It is strong even if an EM buffer isn’t used, but it shines with high EM. If Charged Shots are used in downtime, it is recommended to perform a Charged Shot as early as possible so the passive goes on cooldown and comes back in time for Childe’s next melee period.
Note: EM Sands perform on par with ATK% Sands with Hunter’s Path if you Vaporize Childe’s Burst, so pick whichever has better substats.

Skyward Harp
Skyward Harp is comparable to other 5-star CRIT Bows. Notably, its high Base ATK scales well with 2pc ATK% set bonuses, to the point that 2pc ATK% + 2pc ATK% can be better than 2pc Hydro DMG% + 2pc ATK%. Skyward Harp provides a large amount of CRIT, and its passive effect contributes decent Physical damage.

Thundering Pulse
Thundering Pulse is a good option that performs on par to other 5-star CRIT Bows. Its passive’s Normal Attack DMG Bonus is not incredibly helpful in most teams, but its ATK% buff is valuable especially when Childe receives fewer ATK buffs.
The First Great Magic
The First Great Magic is a strong 5-star Bow for Childe, although it is slightly weaker than other 5-star CRIT Bows. It is strongest in teams with other Hydro characters, which aren’t usually his best. Without other Hydro characters, the passive gives only a small amount of ATK% and a lot of Movement SPD, which is not especially strong.
Great

Amos’ Bow
Amos’ Bow is weaker than the 5-star Bows that provide CRIT but stronger than every 4-star Bow except the Viridescent Hunt. Its projectile flight time effect does not activate on melee Charged Attacks, but it can be helpful for ranged Charged Shots in downtime.

The Viridescent Hunt
The Viridescent Hunt is one of the strongest 4-star options for Childe, but it can only be obtained by buying the Battle Pass. It is considerably stronger than Amos’ Bow if you can deal fall damage to enemies. Notably, its refinements are not a relevant improvement, so you only need one copy if you want to use it.
Scion of the Blazing Sun
Scion of the Blazing Sun is not recommended.
Scion is worse than Viridescent Hunt even in scenarios where grouping is not helpful. This Bow tends to perform worse with ATK buffs due to its lower CRIT Rate and higher Base ATK.
Good
Mouun’s Moon
Mouun’s Moon is incredibly strong for Burst builds, but it is only attainable from the weapon banner. It is one of the strongest 4-star Bows when Childe’s Burst is Vaporized.

Prototype Crescent
Prototype Crescent is the strongest craftable Bow when you can activate its passive, so you should trigger it before starting the rotation. It requires a Charged Attack on a weak point, which is not possible on some enemies. Childe’s melee Charged Attack can activate the passive on certain enemies, such as Ruin Graders and Vishaps. Although Aimed Shots do not need to be fully charged to trigger the passive, they aren’t always practical.

Fading Twilight
Fading Twilight can be stronger than other low-refinement 4-star Bows despite having an ER% secondary stat. It offers high Base ATK and provides a DMG% buff, but the state switching can be confusing and inconsistent across multiple rotations. Use with caution.
Blackcliff Warbow
Blackcliff Warbow costs Starglitter and doesn’t give much return for the cost. It can outshine other 4-star Bows at high stacks; however, Childe is already strong in multi-target scenarios, so its passive doesn’t help that much.

The Stringless
The Stringless is very strong for Childe’s Burst. It is one of the better 4-star options for Childe when he can Vaporize his Burst and receive ATK buffs.
King’s Squire
King’s Squire is the strongest craftable weapon for Childe if you can Vaporize his Burst and cannot trigger Prototype Crescent’s passive. However, you cannot use Childe’s Elemental Skill to set up Swirls, since that wastes the Bow’s passive.
Average

Elegy for the End
Elegy for the End is not recommended on Childe.
In Vaporize teams, Xiangling cannot snapshot the buff, and Childe’s personal damage takes a massive hit. Adjusting the rotation for Elegy to buff Xiangling still results in less damage.

Rust
Rust is not a strong weapon for Childe even though it looks good on him. A lot of Childe’s damage is in his Charged Attacks, Elemental Skill, and Burst, so its buff to Normal Attack damage and debuff Charged Attack damage are weak.
Hamayumi
Childe cannot activate Hamayumi’s full passive, since he should almost always use his Burst. Nonetheless, it is a better option than Prototype Crescent if you cannot trigger Prototype Crescent’s passive.
Weak
Alley Hunter
Alley Hunter is not recommended on Childe.
Alley Hunter’s passive is complex and regaining stacks is hard for Childe. The Bow is decent in the first rotation when you can start with max stacks, but it falls off after.
Other Bows
If the Bow is not listed here, it is either new or not strong on Childe and should be replaced by another Bow as soon as possible. New players may use Slingshot on Childe, but it should be replaced with a craftable Bow when possible. Weapons that rely on healing like Range Gauge and Song of Stillness are inconsistent with Bennett, so they are generally not recommended on Childe.
Team Compositions
Tartaglia Guide Page 2 is currently in the process of being updated (last updated: Version 2.7). Please join the KQM Discord for more information.
Page 1 Credits
Writing: mystathi, mct9017, risuke
Calculations: mystathi, risuke
TC Contributors: mystathi, ioannesfifth, mct9017, risuke, chasing_haze
Editing: irokei, polomo
Transcriber: chasing_haze
Page 1 References
- Childe Optimizer Guide
- Energy Recharge Calculator
- Melee Cooldown Table
- Melee Duration Calculator
- Polar Star and Nymph’s Dream Stacking Methods
- Weapon Calcs [Notice: These calcs could not be verified by KQM since they were performed in Python. They are included here for your interest, but please do not screenshot them or use them to support claims about a weapon’s exact viability or performance level.]