Please refer to the Amber Quick Guide for now!
The current Extended Guide is extremely out of date, but we’re working on an update. Join our Discord to take part in the theorycrafting process!
Table of Contents
Overview
The echoing sentiment is that Amber is a useless bunny, good only for her visual appeal. That’s not necessarily true.
Playing Amber rewards quick reflexes, long-term planning and thinking out of the box. This is the reason for her questionable reputation, and her main downfall. To get the best results, a certain amount of effort must be put into it, unlike any other character in the game.
But it’s not all doom and gloom. Despite having a deceitfully simple kit, Amber can be played in multiple ways. She can be a full time on-field carry, a dedicated support, or a burst damage dealer, performing in all these roles admirably.
Pros
- One of the best thighs in the game;
- Single-target damage on par with poster 5* carries;
- Long range and a lot of mobility on-field;
- Flexibility in builds and team compositions.
Cons
- Utility, QoL upgrades and some build options are locked behind cons;
- Lack of heavy AoE damage;
- Gameplay is unique and requires some finesse.
1 Amber alone relies on consistently hitting monster weakspots.
——————
Builds
Melt
This is the most common on-field2 Amber build. The idea behind it is simple. Most monsters have a weakspot. Usually, it is the head of the monster. Hitting this weakspot with a charged shot automatically scores a critical strike. Using the ‘Melt’ elemental reaction, damage done can be further amplified.
Following the above brings up 2 conditions:
— First, Amber has to fully charge a shot. It takes roughly a second and a half to do so, and it is very easy to interrupt it. Amber can sidestep monster attacks, use a shield to tank the damage, or use taunts to flat out ignore monsters. Baron Bunny is in Amber’s kit for precisely this reason.
— Second, an off-field3 source of Cryo aura must be present. There are 4 different characters to choose from for this, all with different flavours and unique strengths and weaknesses.

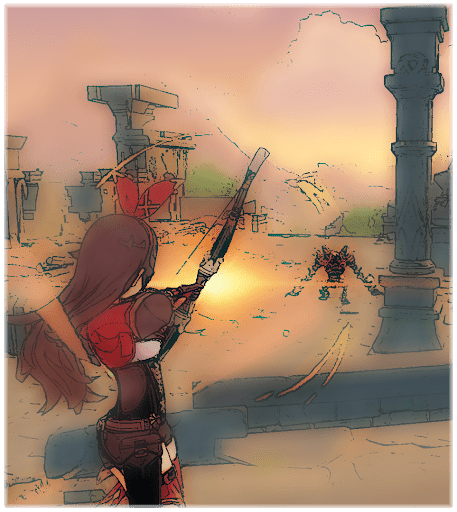
Figure 1. Melt Amber gameplay.
Fiery Rain, the Elemental Burst, is not that important. It will deal less damage then a single proper charged shot. But it is the one of the few AoE abilities Amber has and it can clean up packs of weak monsters like Treasure Hoarders/Hilichurls.
This build is as strong at C0 as it is at C6. Constellations do not significantly impact damage output, they are just quality of life upgrades. The second you get Amber in the game, you’re good to go.
Tag [Melt] will be used when referring to this build.
2 On-field in this context means that the character spends majority of the time being an active character on the screen doing normal or charged attacks.
3 Off-field in this context means that the character spends a minimal amount of time as an active character, usually just to use Elemental Skill and/or Elemental Burst.
4 At low AR it is not even necessary to use Melt, as Amber will one-shot most monsters regardless.
——————
Phys
This is the ‘solo’ on-field Amber build, made famous by YouTube. It utilizes advanced animation cancelling mechanics to unleash a flurry of arrows. The easiest cancel to use is hold-release cancel. By holding LMB for at least 1/5th of a second the game automatically enters Aim Mode, and at this point instantly releasing LMB will fire a quick aimed shot. Rinse, repeat. It is hard to do it at first, but practice makes perfect.
Due to some quirks in the Aim Mode, the aiming reticule will drift slightly to the side if animation cancelling is done fast enough. Small adjustments after every arrow fired are likely. This further complicates things and takes some time getting used to.

Figure 2. Phys Amber gameplay.
In good enough hands5 it achieves one of the highest MV/s values in the game. It is also particularly suited to take advantage of characters like Beidou and Electro Traveler due to the extreme amount of attacks done per second, fully unleashing the potential they have. As all damage done by Amber in this case is physical, their Electro element also helps to set up the ‘Superconduct’ elemental reaction to increase her personal damage.
Baron Bunny and Fiery Rain are used exactly in the same roles as in [Melt] set-up.
This build particularly shines with C1. In [Melt], an extra arrow barely does anything, but in [Phys] it is a straight 20% output increase. Cons beyond C1 don’t add anything dramatic to the table damage wise.
Tag [Phys] will be used when referring to this build.
5My hands are not good enough. I recommend checking out n1tr0t0m’s youtube channel for inspiration. He is one of the best Archer players in the world.
——————
Support
What can off-field Amber provide to the team? Taunts, shieldbreak and buffs. Let’s talk about this in order.

Figure 3. Support Amber gameplay.
Baron Bunny, the taunting toy, can be viewed as an alternative to shielding. The role is the same: prevention of taking damage, just in an alternative way. In some cases, a better way.
Fundamentally, monsters hit the active character even when he’s shielded. Any negative side effects of monster attacks — like applying elemental auras, summoning blazing orb of doom, increasing cooldown of player’s abilities — still go through. Monsters also crowd around the active character, further reducing safe space and increasing damage taken.
Baron Bunny and all other taunts are free from these limitations. No negative effects of enemy attacks will bring any harm. Monsters will also crowd around the taunt, letting active character easily slip behind and happily backstab. Some abilities with narrow hitboxes — like Hu Tao’s charged attack — can be utilized to hit whole rows of monsters stacked around the Bunny because of this.
There are downsides to taunts. Taunts do not work on boss enemies like Azhdaha or Andrius. And every single taunt in the game shares the same effect radius of 5 meters. That’s quite small and requires getting used to.
Another feature of Amber is her on-demand Pyro aura application. Her charged shot always applies strong pyro aura, and her elemental burst for 2 seconds applies weak pyro aura up to 7 times. This can be used to absolutely devastate enemy Cryo shields and seriously damage all other non-Pyro shields. Extreme Pyro aura application on her Elemental Burst can be also used to hard reset monster aura to be Pyro, which can be beneficial if you want to swirl/infuse specifically Pyro element.
Lastly, there are buffs. They mostly come from artifacts and weapons. There is some variety in what can be used.
This build is the one that significantly improves with constellations. C4 makes it possible to chain throw Bunnies and constantly keep monsters under wraps, while C6 markedly improves the quality of buffs Amber provides to the team.
Tag [Support] will be used when referring to this build.
——————
Bunny Bomber
This is the last, but not the least, way to play Amber, and the one directly locked behind C2. It focuses on one and only thing — building up Baron Bunny manual detonation damage and Amber as a burst damage dealer that stays for the most part off-field.
Manual detonation provides a rather extreme increase in damage. When used in conjunction with the ‘Melt’ elemental reaction, it can reliably one-shot all but the toughest monsters in the game.
As Baron Bunny is an Elemental Skill, it has no energy requirements. It can be cast on demand, without requiring Energy Recharge or elemental particle funneling. This gives it a decisive edge compared to all other burst damage dealers, as they all use Elemental Bursts to achieve the same role. First, more stats can be allocated into damage. Second, in scenarios where team energy generation is bad, energy is drained in some way or it is outright impossible to generate energy at all, Baron Bunny can be freely used every cooldown.
To manually detonate Baron Bunny, a fully charged shot must hit the ground Bunny stands on, not the foot like the flavour text implies. It is really easy to do this even in the heat of combat, especially with Bunny taunting the enemies to let Amber charge a shot easier.
Unfortunately, the detonation radius is quite small. The bunny must be thrown directly underneath the target, or the explosion might miss the mark.

Figure 4. Bunny Bomber gameplay
This build specifically requires C2 to even function, and C4 dramatically increases the overall potential. C5 is also remarkably impactful. It is not better than other builds due to being locked behind cons; it is a completely different playstyle altogether.
Tag [Bomber] will be used when referring to this build.
——————
Gearing
——————
Melt
In a [Melt] build Amber has very unique stat priorities. Her Crit Rate directly depends on the player’s skill, as weakspot hits are auto-crits. If the player is good enough, it is 100%. This strikingly contrasts with all other characters, who have to invest roughly 24-33 artifact substats worth of value to get the same result. Amber can invest it all into sheer damage, extraordinarily exceeding what her raw talent values may imply.
Thus, building Crit Rate is pointless. All focus has to be put into amassing Crit Damage, Elemental Mastery and ATK% in that order of priority. There are no specific ratios and it all depends on the weapon, but aiming for 250 Crit Damage, 250 Elemental Mastery and 100 ATK% is a good starting point before playing with optimizers. All other stats you can get from artifacts are for the most part useless.
Another stat that is distinctively important is Movement Speed. The game is balanced around characters moving at 100% MvS. Merely getting another 25% on top of it completely changes everything. It is no longer necessary to dash. At this speed the character can just sidestep the enemy. Monsters become unable to hit the moving character, at all, and Amber can move around the battlefield freely and fluidly, fully taking advantage of it.
Equipment
Headpiece is always Crit Damage, goblet is always Pyro DMG%. ATK% ones can be used as surrogates, but they sharply reduce the potential damage output.
Sands can be either ATK% or EM. EM sands are conditionally better, but ATK% ones are still competitive. For the most part, it is a matter of personal choice.
Exactly the same situation is with artifact sets. There are 2 main options, 4p Shimenawa’s Reminiscence or 4p Wanderer’s Troupe. 4p Shimenawa’s Reminiscence is conditionally better, and the downtime you get between procs is right enough time to rotate supports. 4p Wanderer’s Troupe is permanently active and only slightly weaker.
Wanderer’s Troupe is very expensive to farm, but the pieces accumulate passively just by killing bosses for ascension materials. Shimenawa’s Reminiscence has its own dedicated domain and can be easily farmed. Once again, a matter of individual preference overall.
As far as weapons go, they can be separated into three distinctive groups, Group A, Group B and Group C. Weapons in the same group offer very similar performance6. Some are conditional, some have no conditions and always operate at full power, but for the most part they are equal. Switching between weapons of the same group is pointless. But Group A weapons surpass Group B weapons in power, and Group B weapons surpass Group C in turn. Group A weapons are basically Best in Slot for the respective build.
- Group A — Amos’ Bow
- Group B — Thundering Pulse
- Group C — Sharpshooter’s Oath, Prototype Crescent, Hamayumi, Blackcliff Warbow, Windblume Ode, Skyward Harp, Elegy for the End.
6This video is a good showcase of how close most weapons in the same Group are.
——————
Phys
Due to the high concentration necessary to keep doing animation cancels at full speed, aiming for weakspots becomes a liability, unless the monster has an enormous weakspot hitbox. But this time Amber has raw MV/s to back her up.
So in this build the stats to focus are traditional Crit Rate, Crit Damage and ATK%. As all damage done is PHYS, EM is pointless. Consider getting 80 Crit Rate, 180 Crit Damage and 100 ATK% before playing with optimizers.
It is much harder to utilize mobility and MvS, but it is still a very valuable stat.
Equipment
Headpiece is either Crit Rate or Crit Damage, goblet is Phys DMG, sands are ATK%. Very standard stuff.
Artifact sets are quite simple. 2p Bloodstained Chivalry + 2p Pale Flame is a combination of choice. 4p Shimenawa’s Reminiscence can be also used to great effect.
Weapons will use the same three groups, with exactly the same logic behind them.
- Group A — Skyward Harp
- Group B — Thundering Pulse, Viridescent Hunt, Amos’ Bow, Polar Star
- Group C — Slingshot, Blackcliff Warbow, Prototype Crescent, Compound Bow
——————
Support
This build is unique, because Amber doesn’t really need any offensive stats. Any extra damage she will deal is certainly appreciated, but it’s not crucial. Her main value is in the utility she can provide.
Baron Bunny directly copies Amber’s DEF and RES values, so even these stats can serve some purpose, though actually using artifacts to boost those is questionable. Baron Bunny can survive his 7.5 seconds lifespan tanking multiple monsters quite comfortably even with fully offensive gear.
Some Energy Recharge to easily burst every cooldown is all Amber really needs in this build. Roughly 50-60 ER.
Equipment
As said before, offensive stats are not crucial. Using what random pieces the game throws is good enough, as long as the artifact set is complete.
And the artifact sets are the main source of party buffs. There are two choices here. 4p Instructor or 4p Noblesse Oblige. Noblesse offers a weaker buff, but it lasts for 12 seconds. Instructor offers a much stronger buff, but it lasts only for 8 seconds. Both can be triggered on demand.
There are only 2 weapons that really support this build. Elegy for the End is nuts. It provides exceptional party-wide buffs that Amber can easily keep triggering, but it is a rare 5* weapon. Favonius Warbow on the other hand just offers some party-wide energy regeneration. Not terrible, but not great either.
- Group A: Elegy for the End
- Group B: none
- Group C: Favonius Warbow
——————
Bunny Bomber
This time the stats to focus on are traditional Crit Rate, Crit Damage, Elemental Mastery and ATK%. It’s really self explanatory.
Stats to aim for are 75 Crit Rate, 150 Crit Damage, 180 EM and 75 ATK%. After this point, it’s a good idea to play around with optimizers.
Equipment
Headpiece can be either Crit Rate or Crit Damage. Sands should be EM. ATK% ones can be used as substitutes, but are not optimal.
Goblet though is a niche case. Due to the way C2 works7, ATK% goblet can be actually superior to Pyro DMG% goblet. Both are very viable options.
There are no artifact sets in the game that really support this build. Any combination of 2p Gladiator, 2p Shimenawa’s Reminiscence, 2p Wanderer’s Troupe or 2p Crimson Witch of Flames works. Using a full 4p Crimson Witch of Flames set is also an option.
No weapon can take full advantage of this build either and push it to the limit. But there are multiple options to choose from what the game offers you.
- Group A: Skyward Harp, Thundering Pulse, Polar Star
- Group B: Viridescent Hunt, Alley Hunter, Stringless
- Group C: Prototype Crescent, Blackcliff Warbow, Amos’ Bow, Elegy for the End, Windblume Ode
7Basically, C2 adds 200 Pyro DMG% bonus to the manually exploded Bunny.
——————
Team Composition
——————
Melt
Building [Melt] Amber team is not a complicated affair. The only thing you absolutely need is a character for continuous off-screen cryo aura application, to enable Melt. There are 4 options to choose from: Kaeya, Diona, Rosaria and Ganyu.
| Kaeya | Offers the highest Cryo aura application rate and, but he is extremely short ranged. |
| Rosaria | Offers good enough Cryo aura rate and is relatively self sufficient, as well as sharing some of her Crit Rate with the team, which can help with weakspot-less monsters. |
Diona | Offers the slowest Cryo aura rate, but can provide multiple buffs and healing. Combining Diona with another Cryo character is a very solid foundation. |
| Ganyu | Offers a huge area of slow Cryo aura application as well as another taunt. |
The other 2 slots can be anything you want, they are flex slots.

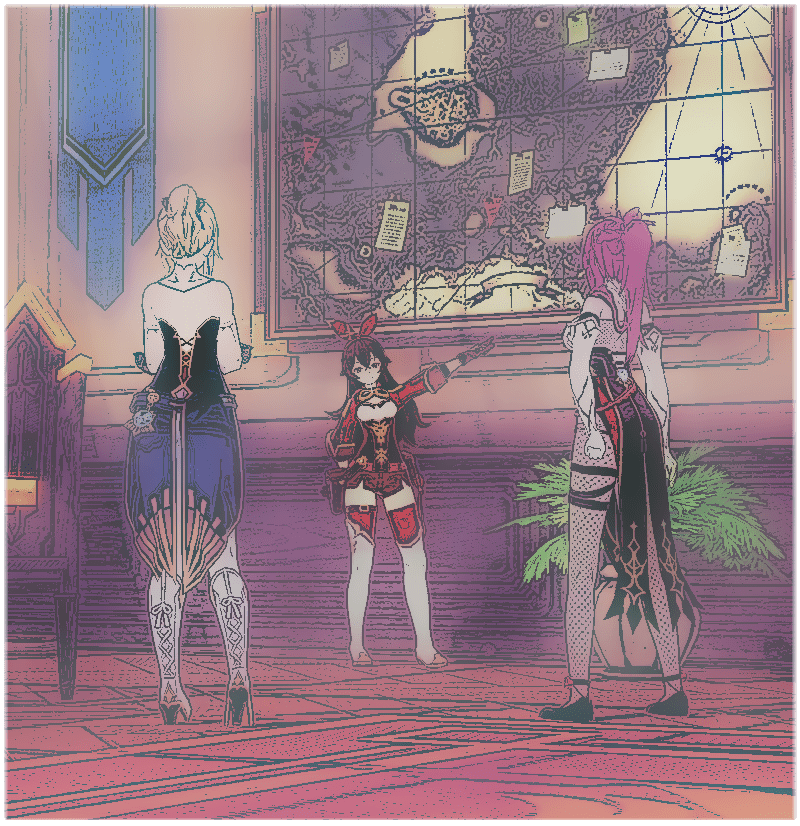
Figure 5. Melt Amber team set-up.
Below are a few sample team compositions. By no means these are set in stone, so change things to suit your own tastes. As long as cryo is applied steadily off-screen, anything goes.
- Amber — Rosaria — Diona — Bennett
Simple and easy team to play. Diona shields Amber, allowing her to stay in Bennett circle without issues while Rosaria provides off-field cryo aura. - Amber — Ganyu — Kazuha — Bennett
Highest ceiling team, but has energy issues requiring very high ER. Take care to never burst on Kazuha, or he will absorb pyro.
——————
Phys
Building a team for [Phys] Amber is as straightforward as it gets. Cram as many characters doing off-screen damage as you physically can. [Phys] Amber doesn’t care about aura application, neither does she care about enemies flying around from Overload explosions and the like. As long as it deals damage, anything goes.
Ideally, you’d want to have superconduct going off behind the scenes, to shred physical resistance and increase Amber’s damage this way, but it is not absolutely mandatory. Slamming more characters that deal a lot of damage in a team might be superior.

Figure 6. Phys Amber team set-up.
Again, I’ll provide a few examples:
- Amber — Beidou — Fischl — Diona
Very straightforward team. Diona once again shields and triggers Superconduct, while Beidou and Fischl just do a lot of damage off-screen. - Amber — Albedo — Zhongli — Bennett
Another uncomplicated team. Zhong Li shreds RES and shields to stay in Bennett circle and Albedo just deals a lot of damage in the background.
Experiment and see what works best for you. There is no rigid rule like “must have off-screen cryo” in [Melt] Amber’s case.
——————
Support
There are no set teams for [Support] Amber. She can be freely slotted in any team that might enjoy extra survivability, shieldbreak and buffs she can provide.

Figure 7. Support Amber team set-up.
That being said, some teams will particularly enjoy her addition due to versatility taunts have, specifically other on-field bow and catalyst carries.
Example teams would be:
- Hu Tao — Xingqiu — Sucrose — Amber
This team uses Fiery Rain’s overwhelming pyro aura application to make it very simple for Sucrose to swirl pyro, enhancing Hu Tao’s vaporize damage.
Given how open the team composition is, it is quite possible to use fully built [Melt] Amber in the support role, effectively making a so-called “Double Carry” team. Rosaria — Diona — Kazuha — Amber is an example of it. Kazuha together with Amber can provide enough Pyro for Rosaria to Melt lesser enemies with ease, while bosses can be obliterated with a few well-placed Charged Shots.
——————
Bunny Bomber
All that Amber needs is a momental source of Cryo Aura. Because of this, there are multiple ways to use her as a Bunny Bomber. You can build a one-shot team focused purely on Baron Bunny or bring her along for the ride with Cryo teams.

Figure 8. Bunny Bomber team set-up.
Rather than just adding [Bomber] Amber as a flex slot, it is also viable to build the team completely around Amber one-shot’ing stuff.
As an example:
- Amber — Sucrose — Diona — Bennett
Is a basic one-shot team. Sucrose pulls enemies in Baron Bunny one-shot range, Diona provides cryo and shields, Bennett circle does Bennett circle things.
Due to C2 manual detonation mechanics, characters that provide DMG% bonuses(Kazuha and Mona for example) have very diminished effects on Bunny damage.
——————
Afterword
It is hard to use Amber effectively. Spending extra effort for the same end result is questionable. Many ignore her precisely for this reason. But fundamentally, she is not broken. Her abilities work fine, her kit is well designed, and she deals competitive damage.
There’s no need for MHY to rework or change her abilities. Amber is the epitome of the “easy to learn, hard to master” trope. Play hard — work hard. But some quality of life adjustments would be nice.
If you still want to use her, I can only offer you, the reader, my best wishes on your adventures with Amber. Don’t bully her too much, she’s precious.
——————
Credits
Amber Mains subreddit and discord server for providing me ideas and helping me write this.
Keqing Mains discord and all the awesome theorycrafters there who also helped me write this.
/gig/
Special thanks, in no specific order, to:
n1tr0t0m
PapaP90
Timteee
brz_bro
Megazeru
Gabriel
ygg
Andiot
Algoinde
Hail
Kleeful
Robin
Bobrokrot
Khulaine
Artesian
Zanto
Monoturbo
Recovent
Peekays
ItzSomebody
Hyperflick
Anonymous
3b00d_09
——————
Changelog
04.08.2021 — version 0.1c. Writedown of introduction to Amber complete.
If you’re wondering what happened to the Gospel, I’m in the process of completely re-writing it from scratch. It was too badly written and beyond repair. The new and improved Gospel will be finished soon™, hopefully much better than before.
