Written By: CQLQRS#7853
Updated for Patch 2.5
Feel free to read Barbara’s Quick Guide, also written by CQLQRS#7853.
Art by Kai1UP
Table of Contents
Preface
Welcome to the KQM guide to Barbara! This guide will cover everything players need to know about Mondstadt’s idol: from basic mechanics to team comps, and everything in between! Barbara isn’t only a healer and I hope this guide can show that. Without further ado, let the show begin!
Introduction
Barbara is a free 4 star Hydro Catalyst user, available to players after completing the quest ‘A Long Shot’ at AR 18. She excels at healing teammates in dire moments and can serve as a DPS option when the situation calls for it.
Why should you play Barbara?
Pros
- Cheap source of Hydro Application
- Elemental Burst is great for emergency healing
- Versatile and can be fit in many teams
- Can hold Thrilling Tales of Dragon Slayers (TTDS) for the team’s Main DMG dealer
- Relatively easy to gear due to decent weapon access
- Great F2P option for corrosion
- Can revive fallen teammates with her C6
Cons
- Elemental Burst cannot be expected in every rotation
- Substantial potential locked behind constellations
- Hydro application is limited and inconsistent
- Elemental Skill applies Hydro to the on-field character which makes them vulnerable to being frozen
- DPS Barbara requires the use of animation cancels

Art by BACHU
“Tada! *giggles* Barbara is here~ Leave the healing to me, I will not disappoint you!” – Barbara
Talents
Talent Priority: Elemental Skill = Elemental Burst > Normal Attack
Talent Overview
 Normal Attack | Whispers of Water
Talent Description
Normal Attack: Perform up to 4 water splash attacks that deal Hydro DMG.
Charged Attack: Consumes a certain amount of Stamina to deal AoE Hydro DMG after a short casting time.
Plunge Attack: Gathering the might of Hydro, Barbara plunges towards the ground from mid-air, damaging all opponents in her path. Deals AoE Hydro DMG upon impact with the ground.
This is the least important part of her kit. Deciding on whether to raise her Normal Attacks depends on the chosen playstyle for Barbara. For DPS Barbara, her Normal Attacks are her main source of damage and should be leveled to at least T8. For Support Barbara, the player will generally use her Normal Attacks and Charged Attacks to trigger her Elemental Skill’s healing and C4. Hence, for Support Barbara, it is not recommended to upgrade her Normal Attacks.
 Elemental Skill | Let the Show Begin ♪
Talent Description
Summons water droplets resembling musical notes that form a Melody Loop, dealing Hydro DMG to surrounding opponents and applying the Wet status to them.
Melody Loop:
- On hit, Barbara’s Normal Attacks heal your own party members and nearby teammates for a certain amount of HP which scales with Barbara’s Max HP.
- On hit, Barbara’s Charged Attack generates 4 times the amount of healing.
- Periodically regenerates the on-field character’s HP which scales with Barbara’s Max HP.
- Applies the Wet status to the character and opponents who come into contact with them.
Barbara’s Elemental Skill allows her to heal teammates when she is off-field and is amplified when she is on-field. It is recommended to level this talent to T6 as 3 additional levels can be obtained through her C5. Her Elemental Skill also has downsides that should be considered:
- Off-field healing only triggers in intervals of 5s
- There are only two instances of damage at 0.5s and 1s after casting
- Does not generate particles
- Has a very short range of Hydro application that only triggers when the on-field character is ‘hugging’ the enemy
- Hydro is applied to the on-field character, making them vulnerable to being frozen
 Elemental Burst | Shining Miracle ♪
Talent Description
Energy Cost: 80
Heals your own party members and nearby teammates for a large amount of HP that scales with Barbara’s Max HP.
Her Elemental Burst serves as insurance and can prove incredibly clutch, especially at higher difficulty instances such as the Spiral Abyss. Similar to her Elemental Skill, it is recommended to level up this talent to T6 as 3 levels can be obtained from her C3.
 Ascension 1 Talent | Glorious Season
Talent Description
The Stamina consumption of characters within Let The Show Begin ♪’s Melody Loop is reduced by 12%.
Complements her Elemental Skill, which requires the use of Charged Attacks for more potent healing. Its usefulness heavily depends on the Main DPS of the team.
 Ascension 4 Talent | Encore
Talent Description
When your active character gains an Elemental Orb/Particle, the duration of the Melody Loop of Let the Show Begin ♪ is extended by 1s.
The maximum extension is 5s.
Barbara’s A4 talent is utilized to its full potential when Barbara is on-field. Every Normal or Charged Attack done in the period of extension would contribute to more heals. For an off-field Barbara, achieving the maximum extension will result in 1 additional off-field heal if the on-field character is a catalyst-user. If the on-field character is affected by hitlag, the Skill can be extended up to 2-3s, allowing for at most 1 additional Charged Attack for heals or 1-2 Normal Attacks to proc the 4 piece Ocean-Hued Clam bonus. Triggering this talent would require funneling particles to an on-field Barbara, or using a combination of Elemental Skills to obtain 5 particles. Favonius Weapons will also make triggering this passive much easier.
 Passive Talent | With My Whole Heart ♪
Talent Description
When a Perfect Cooking is achieved on a dish with restorative effects, Barbara has a 12% chance to obtain double the product.
Allows the player to have a chance of cooking more dishes that heal or revive a fallen character. While this talent is shared by Diona and Jean, it is still valuable on Barbara as she is way more accessible in the earlier stages of the game.
Constellations
 Constellation 1 | Gleeful Songs
Constellation Description
Barbara regenerates 1 Energy every 10s.
Provides very minute help to Barbara’s Energy requirements.
 Constellation 2 | Vitality Burst
Constellation Description
Decreases the CD of Let the Show Begin♪ by 15%. During the ability’s duration, your active character gains a 15% Hydro DMG Bonus.
This Constellation makes Barbara more versatile and consistent. It allows Barbara to heal the team more often by reducing her Elemental Skill CD by 4.8s, while also providing her with the role of a buffer, both for herself and for the team’s Hydro DPS.
 Constellation 3 | Star of Tomorrow
Constellation Description
Increases the Level of Shining Miracle♪ by 3.
Maximum upgrade level is 15.
Levels on Barbara’s heals are very welcomed.
 Constellation 4 | Attentiveness Be My Power
Constellation Description
Every opponent Barbara hits with her Charged Attack regenerates 1 Energy for her. A maximum of 5 energy can be regenerated in this manner with any one Charged Attack.
This Constellation helps Barbara with her Energy issues as players will already be using her Charged Attacks for amplified healing.
 Constellation 5 | The Purest Companionship
Constellation Description
Increases the Level of Let the Show Begin♪ by 3.
Maximum upgrade level is 15.
Levels on Barbara’s heals are very welcomed.
 Constellation 6 | Dedicating Everything to You
Constellation Description
When Barbara is in the party but not on the field, and one of your party members fall:
- Automatically revives the fallen character
- Fully restores the revived character’s HP to 100%
This effect can only occur once every 15 mins.
The Main Star of Barbara’s kit as a healer. When healing is insufficient on the team, this Constellation gives players a second chance, allowing them to avoid resetting in high difficulty instances such as The Spiral Abyss. Her C6 does have caveats that players should take note of:
- The 15 mins time lock applies to the Spiral Abyss, meaning the revive does not reset between chambers and floors.
- Her C6 can contribute to the healing cap on 4 Ocean-Hued Clam (4OHC) as well.
- The revive for that character WILL NOT TRIGGER if the character dies at the same time the player switches. More information on this can be found here. Also see footage below.
C6 Barbara Interaction
Both Qiqi and Aloy died, but the swap caused Qiqi to be revived instead of Aloy.
Video by yolitme0#0579

Art by Mr2D
“My dream is to bring a smile to the faces of all the people in my life! As long as I can help you on your journey, I’m happy~” – Barbara
Playstyles Overview
Support Barbara
Barbara’s primary role in teams is to act as a healer, one that is able to provide sustained healing as well as a large burst of it in emergencies. This playstyle is generally easy to gear compared to her DPS counterpart.
DPS Barbara
A complex and niche role for Barbara. DPS Barbara is a playstyle with many nuances and factors that players have to consider. It builds on Barbara’s fast animation cancels and access to Vaporize while aiming to maximize her field time.
Support Barbara
Artifact Stats
Building Support Barbara is straightforward. The main stats that players will look for are HP%/HP%/Healing Bonus%. Building ER is not recommended as her Burst will only be used as a last resort and should not be expected in a rotation.
Artifact Sets
 4 Maiden Beloved | Support Barbara’s Best in Slot (BiS). It maximizes the healing done by off-field Barbara but it is a very Resin inefficient artifact set and players should not intentionally farm for it. |
 2 Maiden Beloved / 2 Ocean-Hued Clam / 2 ToM | Alternative set. Any of these 3 artifact sets can be used in combination with each other. The difference between Hybrid and 4 Maiden Beloved is insignificant, making this much more resin efficient. Note that Ocean-Hued Clam and Maiden Beloved are more valued as their set bonuses are not available as substats. |
 4 Instructor | Alternative set. Hydro Application from Barbara’s Skill can be used to proc an Elemental Reaction and buff the team’s Elemental Mastery, which is a valuable stat in teams centered around Amplification Reactions. |
4OHC is also unsuitable for Support Barbara as her off-field healing ticks are relatively low and only occur every 5s. 4OHC lowers her already low healing further and does not give high enough damage to make it worthwhile either.
Weapons
| Weapons | Notes |
 Not PJC (Everlasting Moonglow) | Everlasting Moonglow gives Barbara all the stats she wants. The Donut is only a stat stick and its passive cannot be utilized by Support Barbara who plays off-field. The HP% from its substat and Healing Bonus% from its passive makes it easier to reach the healing cap of 4OHC. A more DPS-oriented build (HP%/Hydro DMG%/HB% or ATK%/HP%/HB%) can be used instead. |
 Prototype Amber | It is a craftable weapon that mirrors what Moonglow provides. The Energy refund and team heals also scale well with refinements. Like The Donut, it becomes easier to hit the healing cap for 4OHC, but to a lesser extent compared to Moonglow. As a result, Barbara shouldn’t use a more DPS-oriented build. |
 Thrilling Tales of Dragon Slayers R5 | Similar to other support Catalyst users, TTDS is Barbara’s BiS for support. The 48% ATK buff provides great utility on top of it having a HP% secondary stat that Barbara can make use of. Like The Donut, it becomes easier to hit the healing cap for 4OHC, but to a lesser extent compared to Moonglow. As a result, Barbara shouldn’t use a more DPS-oriented build. |
Hydro Application
Barbara can fill the role of applying Hydro when other options are not available, most notably in Freeze comps. This should only be considered if there are no alternatives as her Hydro application has a very long cooldown and very limited range which prevents the player from keeping Freeze uptime.
Art by 日下氏
“Thank you for being with me all for all this time, I can feel that I’m getting closer to my dream. Hope we can keep this up in the future~!” – Barbara
DPS Barbara
Playstyle Overview
DPS Barbara is a complex build with many nuances. Players will have to optimize both Barbara’s personal damage through animation cancels and specific Normal Attack strings and team rotations, which can be a tall order without much practice. DPS Barbara has 2 main playstyles, 4OHC and Vaporize.
Animation Cancels
Animation canceling is crucial for optimizing DPS Barbara. As mentioned previously, she has one of the fastest animation cancels of all Catalyst users, allowing for a fluid playstyle.
Normal Attacks
Barbara’s Normal Attacks are relatively simple to cancel. The moment a Hydro visual appears in front of the Normal Attack, it can be canceled. Barbara can cancel her Normal Attacks by jumping or using an Elemental Skill.
N1J Cancel
Video by Risuke#6743
N2J Cancel
Video by Risuke#6743
N3J Cancel
Video by Risuke#6743
N4J Cancel
Video by Risuke#6743
Elemental Skill Cancel
Video by Risuke#6743
Charged Attacks
Like most Catalyst users, Barbara’s Charged Attack animations are long. They can be canceled once Barbara lifts her hands into the air. Barbara can cancel her Charged Attacks by jumping or swapping to another character..
N0CJ Cancel
Video by Risuke#6743
Character Swap Cancel
Video by Risuke#6743
4OHC Barbara
This playstyle has been made possible with the addition of the new Ocean-Hued Clam set. It is highly recommended for Barbara in Electro-Charged team comps, but it can still be played in other teams. The damage from the new 4OHC set bonus is one of DPS Barbara’s highest damage floors and ceilings.
Electro-Charged vs 4OHC
Prior to 4OHC, the DPS ceiling for EC Barbara was from Physical damage from weapon passives. Players can still choose to play the traditional EC Barbara comp, but it is recommended to use 4OHC, even if the player is using Barbara in an EC comp due to a higher damage ceiling. In comparison, EC has higher single-target damage while 4OHC has higher multi-target damage.
Artifact Stats
4OHC Barbara will be using HP%/HP%/Healing Bonus% to maximize 4OHC bubble damage. HP%/HP%/HP% and ATK%/Hydro DMG%/CRIT are weaker possible variants, as Barbara’s healing is lower and her personal damage is not high enough to rival that of 4OHC.
Assumptions: Barbara C6 Lvl. 90/90 T9/12/12, Prototype Amber R1 Lvl. 90/90, 100 ER requirement, 20 fluid subs KQMC standards, 4NO buff.
| Artifact Stats | N2C Total Damage | vs HP%/HP%/Healing Bonus% |
| HP%/HP%/Healing Bonus% | 27,919 | 100% |
| HP%/HP%/HP% | 23,918 | 85.67% |
| ATK%/Hydro DMG%/CRIT | 22,206 | 79.54% |
Weapons
Assumptions: Barbara C6 Lvl. 90/90 T9/12/12, Weapons Lvl. 90/90, 100 ER requirement, 20 fluid subs KQMC standards, 4NO buff.
| Weapon | Damage Breakdown | vs Prototype Amber R1 | Notes |
Not PJC R1 | N2C: 4,478 Bubble: 24,300 Total: 28,778 | 103.8% | Gives the highest personal damage. Unlike her support counterpart, 4OHC Barbara is able to capitalize on everything The Donut provides. Using this increases her own personal damage, maximizes her healing, and helps out with some Energy generation. |
Prototype Amber R1 | N2C: 3,619 Bubble: 24,300 Total: 27,919 | 100.00% | Same explanation found in the Support Barbara section. |
Thrilling Tales of Dragon Slayers R5 | N2C: 3,188 Bubble: 24,110 Total: 27,299 | 97.78% | Gives the highest team damage. Lower personal damage than Prototype Amber but more than makes up for it due to the 48% ATK Buff. |
 Hakushin Ring R1 | N2C: 3,837 Bubble: 22,258 Total: 26,094 | 93.46% | Niche option that is only applicable in EC teams. While it has slightly lower Bubble damage, it increases team damage by buffing the Electro DPS in the team, most notably Beidou. Generally not worth crafting since it’s not versatile. |
Rotations and Attack Strings
Optimizing 4OHC can be a very daunting task. Its high damage ceiling requires an equally high amount of skill to achieve. Barbara will use different attack strings depending on the level of investment. From low to high, the attack strings are N3C, N2C and in some cases, N1C. These team rotations can be simplified into 4 levels.
Level 0: Using Normal Attacks only
Barbara remains on-field and uses her Normal Attacks until she needs to be swapped off.
Level 1: Using Normal Attacks only with Swap Weaving
This is the simplest usage of 4OHC. Barbara is essentially an on-field driver that only makes use of Normal Attacks before being swapped off. Level 0 is the better option as opposed to Level 1 due to less time being wasted. It must be noted that Level 1 rotations can struggle to proc the maximum amount of damage from 4OHC passive.
Level 2: Including Charged Attacks
Level 2 rotations are quite demanding in terms of player skill. Players need to know how the enemy AI works, have good stamina management while maintaining good positioning to hit as many targets as possible with Barbara’s Charged Attacks. Level 2 rotations are well worth it, especially in multi-target scenarios as the maximum amount of damage from 4OHC passive can be achieved much more easily than with Level 1 rotations.
Level 3: Including Charged Attacks and Swap Cancels
Level 3 rotations are essentially Level 2 rotations but with the addition of Swap Cancels. The player now desyncs both rotations and Barbara’s attack strings. These rotations are the ones that give the highest damage, at the cost of being the most challenging to carry out. What makes Level 3 rotations exceptionally difficult is the fact that there is a lot of memorizing to be done. Between each swap, players need to memorize how many hits of field time are required to resync rotations. Normal Attacks count as 1 hit while Charged Attacks count as 4 hits. A combination of both must be used and there is no room for error. On top of this, the player will need to accommodate the 5s heal interval the Elemental Skill has. It is thus recommended for players to use the Level 2 rotations and use the extra time saved from swap canceling as a margin for error.
Team Compositions
Team images generated using Muakasan’s Team Portrait Generator.
4OHC Barbara teams are played in a quickswap manner. However, unlike traditional quickswap teams whereby characters swap in to use their Elemental Skills and Burst before swapping out (A>B>C), 4OHC Barbara teams require Barbara to be slotted in with those actions (Barbara+A > Barbara+B > Barbara+C). 4OHC Barbara will also run 1 Electro and 1 Cryo unit to proc Superconduct, which buffs 4OHC damage.
Barbara | Flex | Flex | Flex

4OHC Barbara teams are very flexible. Electro and Cryo Flex options are the best low investment options as they can proc Electro-Charged and Superconduct, which buffs the Physical damage from 4OHC. At high investments, the player can run virtually any character as long as they are suited for the content the player is facing.
Barbara | Fischl | Beidou | Rosaria
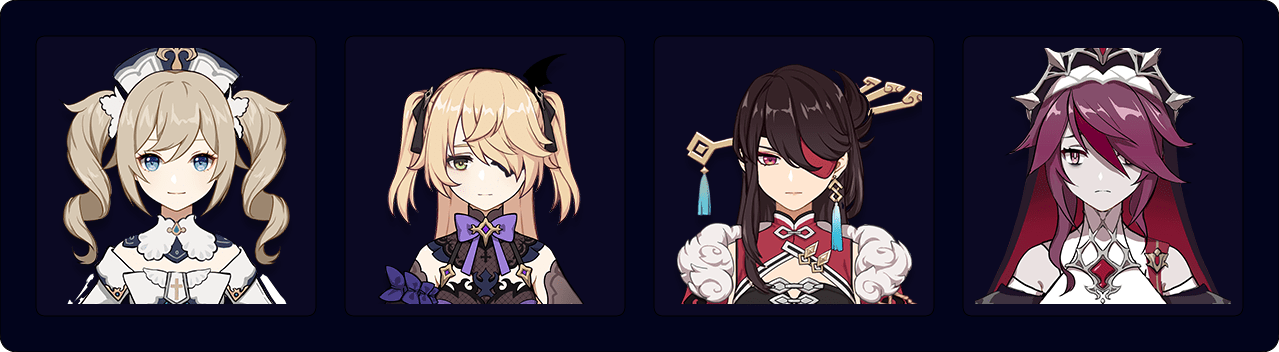
Beidou and Fischl provide a significant amount of constant off-field damage as well as Electro application. This pair also has a great synergy that makes them self-sufficient. Rosaria provides a CRIT Rate buff to the team as well as Cryo application to proc Superconduct.
Team Demonstration Video
Team demonstration by Risuke#6743
Vaporize Barbara
Vape Barbara relies on using her Charged Attacks to proc Vaporize reactions. She has the 3rd highest Charged Attack MV amongst Catalyst users, allowing for some ridiculously high damage, leading to it being DPS Barbara’s damage ceiling.
Artifact Stats
The main stats that players will look for are ATK%/DMG%/CRIT. EM can be viable but it is a very niche option. Only Xiangling can allow Barbara to fully make use of the EM due to her Pyronado, which has no ICD. As mentioned previously, building for ER is not recommended as her Burst will only be used as a last resort and should not be expected in a rotation.
Artifact Sets
Assumptions: Barbara C6 Lvl. 90/90 T9/12/12, Dodoco Tales Lvl. 90/90, 100 ER requirement, 20 fluid subs KQMC standards, 4NO buff, 4VV Shred.
| Artifact Set | Vape CA Damage | vs 4WT | Notes |
 4 Wanderer’s Troupe | 27,577 | 100% | Vape Barbara’s BiS Set. Heavily buffs her main source of damage and provides some EM to amplify Vaporize reactions. |
 4 Heart of Depth | 23,758 | 86.15% | Alternative Set. Provides Barbara with Hydro DMG% and buffs her Normal and Charged Attacks after using her Elemental Skill, which also reduces the amount of Stamina needed to cast a Charged Attack. |
 2 Heart of Depth / 2 Shimenawa’s Reminiscence | 23,079 | 83.69% | Hybrid Set. A combination of these 2 sets provide an ATK% buff and Hydro DMG% buff. Good substats on this hybrid set can allow it to perform better than the aforementioned 4 piece sets. |
 4 Shimenawa’s Reminiscence | 22,962 | 83.27% | Alternative Set. Similar to 4HoD, after using her Elemental Skill, Barbara receives a buff to her Normal, Charged and Plunging Attacks. However, Barbara needs to have 15 Energy when casting her Skill for this passive to work. On top of that, Barbara immediately loses 15 Energy, making casting her Elemental Burst much more difficult. |
Weapons
Assumptions: Barbara C6 Lvl. 90/90 T9/12/12, Weapon Lvl. 90/90, 100 ER requirement, 20 fluid subs KQMC standards, 4NO buff, 4VV Shred.
| Weapon | Vape CA Damage (No Physical Damage) | vs Dodoco Tales R5 | Notes |
 Skyward Atlas R1 | 33,023 | 119.75% | Vape Barbara’s BiS weapon. Provides a hefty amount of Hydro DMG% and serves as an ATK% stat stick. Favor of the clouds provides some extra damage as well. |
 Lost Prayer to the Sacred Winds R1 | 31,956 | 115.88% | Provides increasing amounts of Hydro DMG% the longer Barbara remains on-field and serves as a fantastic CRIT Rate stat stick. Can potentially overtake Skyward Atlas but requires a lot of Barbara field time to do so. |
 Memory of Dust R1 | 30,819 | 111.76% | Similar to Lost Prayer, Barbara will need to have a lot of field time to maximize the passive. Overall a very good ATK% stat stick that performs best when Barbara has a shield. |
 The Widsith R1 | ATK% Buff: 29,400 EM Buff: 29,970 DMG% Buff: 29,315 No Buff: 27,365 | ATK% Buff: 106.61% EM Buff: 107.95% DMG% Buff: 106.3% No Buff: 99.23% | Vape Barbara’s BiS 4 star weapon. Unlike some Catalyst users, Barbara can benefit from every buff provided by The Widsith, making it a very good option. Also a CRIT DMG stat stick. |
 Mappa Mare R1 | 28,877 | 104.71% | Vape Barbara’s BiS F2P weapon. Provides some EM to buff Vaporize reactions. Barbara is able to keep a long uptime on the maxed Hydro DMG% buff provided, as she will be constantly proccing Vaporize, making this a good complement to Vape Barbara. |
 Dodoco Tales R5 | 27,577 | 100.00% | Vape Barbara will be able to utilize this free weapon to its fullest potential as she will be doing combinations of Charged Attacks and N2C while she is on field. A very good option for her and is highly recommended. |
 Blackcliff Agate R1 | 27,365 | 99.23% | CRIT DMG stat stick that buffs Barbara’s ATK% for every enemy she defeats. Not worth the Starglitter which could have been a Bennett or Xingqiu. |
 Solar Pearl R1 | 27,076 | 98.18% | CRIT Rate stat stick that buffs Barbara’s Normal Attacks after using her Elemental Skill. Barbara cannot fully utilize this weapon’s passive and it is likely better used on other Catalyst users. |
 Frostbearer R1 | 26,752 | 97.01% | Free weapon that serves as an ATK% stat stick with some extra external damage from the passive. Not worth crafting if the player doesn’t already have the weapon. |
 Eye of Perception R1 | 26,166 | 94.88% | A stronger version of Frostbearer due to higher damage dealt by the passive. |
Not PJC R1 | 26,166 | 90.93% | Support option. Slightly buffs Barbara’s Normal Attack damage and ensures higher healing. |
Prototype Amber R1 | 25,075 | 82.61% | Support option. Similar to The Donut, players should only use it if they do not want to lose out on Barbara’s healing. |
 Favonius Codex R1 | 22,782 | 82.61% | Support option. Barbara can crit, unlike Kokomi, making her a possible Favonius holder, but there are always better options for holders in a team. |
Thrilling Tales of Dragon Slayers R5 | 19,910 | 72.20% | Support option. Significantly reduces Barbara’s personal damage in exchange for the 48% ATK buff. The trade off may not be worth it. |
Rotations and Attack Strings
The biggest downside to this playstyle is Stamina dependence. Each Charged Attack has a cost of 50 Stamina points, which is lowered to 44 when used in tandem with her Elemental Skill, thanks to her A1 passive. It can be tempting to do 5 Vaporize Charged Attacks that deal ~50k damage each at the cost of being hit, but Barbara is at the lowest in terms of her survivability in this playstyle, making this very difficult without risking her dying if Barbara does not have a sturdy shield or a ton of unwanted HP or DEF stats in her artifacts.
Charged Attack Spam
This is Vape Barbara’s Primary Attack String. This string of Charged Attacks will maximize damage output in a short period of time, but players will have to be mindful of her Stamina and the fact that she is vulnerable to animation cancels that do not deal damage but drain Stamina (knockback or dodging).
Regardless of whether the Charged Attack costs 44 or 50 stamina points, the player should stop at the 3rd or 4th Charged Attack to ensure that Barbara has sufficient Stamina to dodge incoming attacks.
N2CJ
This is Vape Barbara’s Secondary Attack String. It is used to trigger reverse Vaporize reactions after the 3rd or 4th Charged Attack in her Primary Attack String, to help her regenerate Stamina while ensuring decent performance and safety from incoming attacks.
With Anemo characters, multiple sources of Pyro application can be obtained which allows for some forward Vaporize reactions from time to time as well. This attack string is also generally recommended when going against enemies that stagger, knockback or hit hard.
N4J
This is Vape Barbara’s Stamina Regeneration Attack String. It is generally used when Barbara has used up all her stamina. In this case, there are 2 options—swap Barbara out, or use this attack string and continue having her on-field.
The former is preferable to the latter as it offers room to charge up her Elemental Burst and for any other intermediate aspects that happen in between rotations.
Generally speaking, the optimal way to play Vape Barbara would be to use a combination of Charged Attack Spam and N2CJ. N4J should be avoided as much as possible and should only be used in situations where Barbara has run out of Stamina and swapping to another character does more harm than good.
Team Compositions
Team images generated using Muakasan’s Team Portrait Generator.
Vape Barbara’s teams are fairly simple and flexible. She will need either 2 Pyro units for sufficient Pyro application, or 2 Anemo units to absorb the Pyro element for Barbara to proc Vaporize with. The player can also choose to replace the Anemo unit with a shielder to increase the team’s survivability at the cost of 4VV shred and possible crowd control.
If the player wants to further optimize Vape Barbara, there are added steps to achieve this. Between each Charged Attack, Barbara can swap to another character to use their Elemental Skill/Burst before swapping back for another Vape Charged Attack. Depending on how long each action takes, Barbara becomes Stamina positive (has more Stamina than before swapping off) or Stamina neutral (has the same amount of Stamina compared to before swapping off) as opposed to being Stamina negative (has lower Stamina than before swapping off).
Examples:
1) Xiangling E > Barbara CA > Bennett E > Xiangling Funnel > repeat is Stamina positive
2) Barbara CA > 2 swaps > Barbara CA is Stamina positive
3) Barbara CA > Bennett Hold 1 E (or C4) > Barbara CA is Stamina neutral
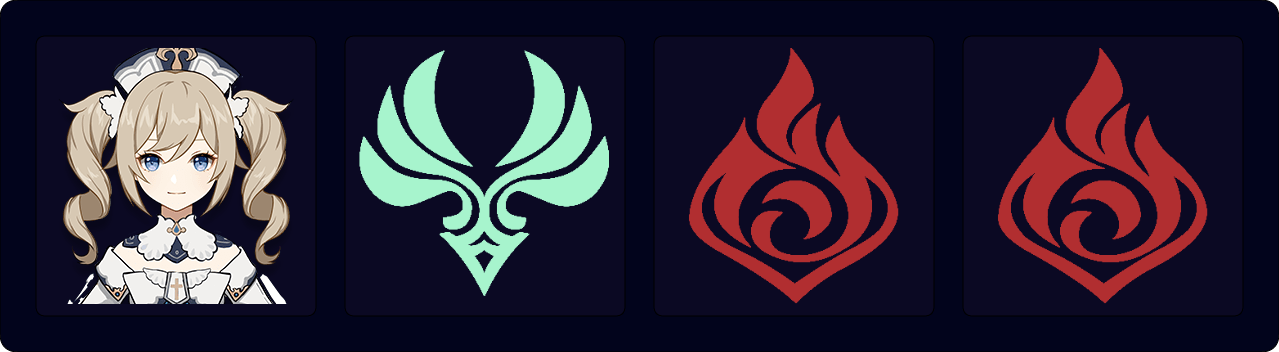
Barbara | Anemo | Pyro | Pyro
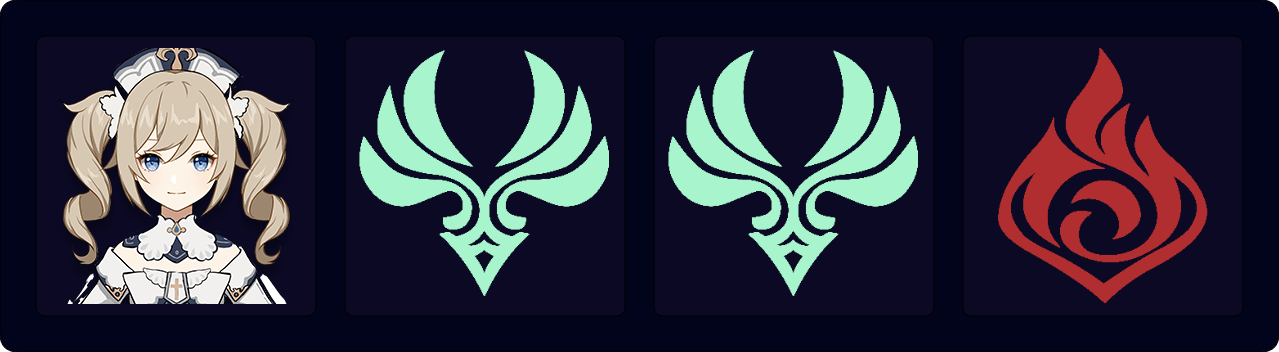
Barbara | Anemo | Anemo | Pyro
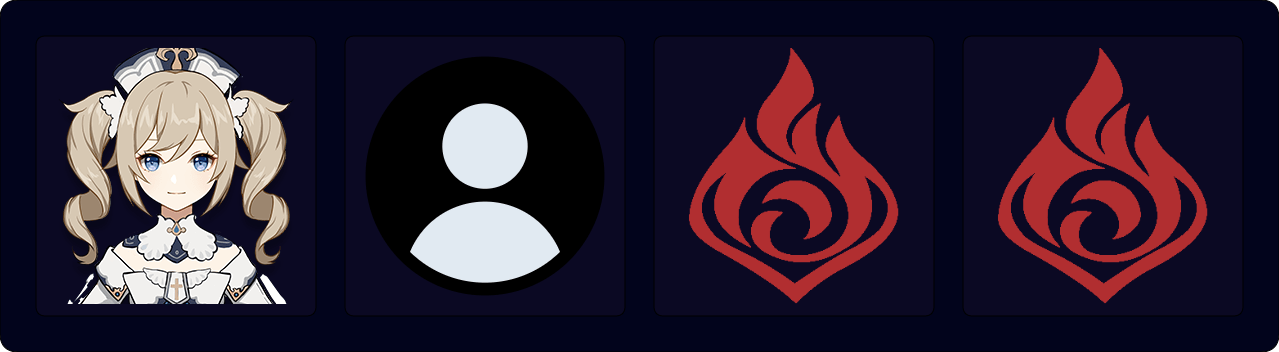
Barbara | Shielder | Pyro | Pyro
Anemo Flex
| Character | Rating | Notes |
 Kazuha | S | – Pretty Boy – Low CD on Elemental Skill and Burst – Strong grouping – 4VV – Elemental DMG% Buff and EM buff at C2 – Viable Fav Holder |
 Sucrose | S | – Strong grouping – 4VV – Significant EM Buff and Elemental DMG% buff to absorbed element when C6 |
 Venti | A+ | – Very strong grouping – 4VV – Energy refund – Elegy Holder Venti needs Elegy for the End to compete with Sucrose, which makes him significantly more expensive to gear. However, in situations such as mobbing, Venti can be the better option which means that choosing between the two entirely depends on content. |
 Jean | B+ | – Anemo Mommy – Sunfire Jean is a good source of Pyro – 4VV – Viable Fav Holder Fall damage from her Elemental Skill and healing from her Elemental Burst will have diminished value because proccing fall damage takes more field time and Barbara already provides healing. Video on Sunfire Jean by Terrapin#8603 |
 Sayu | F | Requires too much field time to contribute to the team. Healing is already provided by Barbara as well. |
Pyro Flex
| Character | Rating | Notes |
 Bennett | S | – BOUKEN DA BOUKEN – Significant ATK Buff – Sunfire Jean – Low Elemental Skill and Burst CD – 4NO holder – Very good synergy with Xiangling – Viable Fav Holder |
 Xiangling | S | – Pyronado has no ICD meaning constant off-field Pyro application – Significant personal damage |
 Diluc | B | – Has decent Pyro application – Burst can deal decent damage and serve as a source of Pyro – Slightly delays Barbara’s stamina timer |
 Thoma | D | – Inconsistent Pyro application in AoE – Needs a significant amount of ER (>200%) – Strongest shield for a non-Zhongli unit – Best to be paired with another Pyro unit |
 Xinyan | D | – Skill has to hit a certain number of enemies before her shield becomes usable – Requires a high amount of skill to be used effectively – Requires high investment to be usable in Abyss F12 – Best to be paired with another Pyro unit |
Shielder
| Character | Rating | Notes |
 Zhongli | S | – Remembers the taste of Osmanthus Wine – Strong CC with Elemental Burst – Universal Shred – Possible replacement for an Anemo unit when using 4 Archaic Petra |
Thoma | A | – Inconsistent Pyro application in AoE – Needs a significant amount of ER without C4 (>200%) – Strongest shield for a non-Zhongli unit – C6 buffs party members’ NAs, CAs and Plunges. – Best to be paired with another Pyro unit |
 Yanfei | B | – Nice hat – Strong shield – Needs a significant amount of ER (>200%) – Best to be paired with another Pyro unit – Needs C4 to work as a shielder |
Xinyan | C+ | – Skill has to hit a certain number of enemies before her shield becomes usable – Requires a high amount of skill to be used effectively – Requires high investment to be usable in Abyss F12 – Best to be paired with another Pyro unit |
 Diona | C+ | – Buffs movement speed – Has a Stamina conservation passive that helps Barbara dish out more CAs – Strong shield Slightly worse option than Xinyan even though she has more pros because running Diona means running 2 healers. Furthermore, Diona is Cryo while Xinyan is Pyro, which means that Diona will steal Vapes to Melt and not convert it into meaningful damage, while Xinyan has the ability to enable Vape Barbara. |
Afterword
…And that’s it! I think I have addressed everything that I wanted to talk about and this is as comprehensive as it gets. Hopefully it has convinced you to try out different playstyles with Barbara or at the very least, help you optimize her in your current team. Do check back regularly as the guide will be updated with new artifacts and weapons when they are released. Anyways, that’s it from me. Until next time! -CQLQRS#7853
Special Thanks
- Risuke#6743
- Alerine#1519
- Raven#9205
- Ai#7362
- Prévisible#7440
References
Risuke’s Weapon and Artifact Calculations:
https://docs.google.com/spreadsheets/d/1PvqQKre8GTd01gIMnoIUbEIb72F3wGiyuuNgDMbukp4/edit?usp=sharing