Written by Cuzimori#1535
Updated for v3.3
Credit to @kurisucurry on Twitter
Table of Contents
Infographic
Credits to: euphorysm, cegewinne, lostguide, haafr, baloopy, and KQM Staff
Glossary
| Explanation of terms used (in context of this guide) | |
| Term | Meaning |
| DPS | Refers to units who are responsible for a respectable bulk of the damage on a team. |
| Support | Refers to units who can provide utility such as buffing and healing in order to allow the DPS options to function properly. |
| Single-Target | Refers to damage that is highly, if not totally concentrated on one enemy. |
| AoE | Refers to damage that can hit multiple enemies simultaneously. |
| ICD | Generally refers to any non-visible timers in the game on a particular event. More information on the KQM TCL here. |
| Snapshotting | Property by which an ability uses the stats present on a character during the casting of the ability throughout its duration. More information on the KQM TCL here. |
| BiS | Best in Slot. Refers to the best option for a given composition. |
Introduction

Credit to @Ruiwen_art on Twitter!
The Tianquan of the Liyue Qixing, to many, does not appear as the sort to strike awe on the battlefield—after all, Genshin has many powerful DPS units and Ningguang’s popularity as one, especially as a 4* unit, seems to pale in comparison. This notion, however, is rather misleading. While it is true she lacks the raw strength of most carries, Ningguang’s kit is flexible, fluid, and capable of offering a high mix of burst and sustained damage alike at a good range. Additionally, her ability to adapt her playstyle so variably allows her to use the teammates she is paired with to their fullest potential, not stifling their own strengths as many other carries might do.
Make no mistake, the de facto queen of Liyue tides over all matters of business, and combat is no exception to where she asserts her ruthless command—and any doubts to the matter are easily dispelled watching enemies be executed in volleys of glowing gemstones.
Why Play Ningguang?

Pros
✧ High single-target damage.
✧ Able to deal damage at a significant range.
✧ Can fluidly adjust rotations and field time to accommodate for enemy types and teammates.
✧ While not reliant, her constellations are still impactful.
✧ Not reliant on reactions, making damage highly consistent.
✧ Extremely versatile and has a multitude of teams and roles.
✧ Extremely attractive.
Cons
✧ Damage is almost entirely constrained to a single target.
✧ Requires proper usage of Geo Constructs.
✧ Best Geo supports are relatively hard to get.
✧ Requires investment into both herself and her teammates to fully shine.
✧ Her base Attack is pitifully low for an Attack scaling carry.
✧ While not needed, constellations are very helpful for her damage.
✧ Will turn you into an elitist because you’ll feel so elegant playing her.
Talents
Credit to @Velinxi on Twitter!
Talent Priority

All of Ningguang’s Talents contribute to her damage profile, and thus it is best to level all her talents. However, her Burst is the most significant contributor and consequently should take priority, especially pre-C6, as well as in rotations where she cannot use many Charged Attacks. In sustained gameplay and at C6, Ningguang’s Star Jades and Charged Attacks also form a sizable part of her damage. Ningguang’s Skill, while not negligible, is the weakest part of her kit and can be leveled last.
![]() Normal Attack: Sparkling Scatter
Normal Attack: Sparkling Scatter
Description
Normal Attack
Shoots gems that deal Geo DMG.
Upon hit, this grants Ningguang 1 Star Jade. Ningguang can possess a maximum of 3 Star Jades obtained this way.
Charged Attack
Consumes a certain amount of stamina to fire off a giant gem that deals Geo DMG.
If Ningguang has any Star Jades, unleashing a Charged Attack will cause the Star Jades to be fired at the enemy as well, dealing additional DMG.
Plunging Attack
Gathering the might of Geo, Ningguang plunges towards the ground from mid-air, damaging all opponents in her path. Deals AoE Geo DMG upon impact with the ground.
Ningguang’s Normal Attacks themselves are extremely lackluster because of their low multipliers. In comparison, her Charged Attacks are quite strong—with the caveat that they are essentially single-target. Furthermore, using Normal Attacks gives Ningguang Star Jades, with any accumulated Star Jades being fired alongside her Charged Attack, adding a nice bonus to her damage. It should be noted that these Star Jades count as Charged Attack damage and will scale with buffs accordingly. Her first Ascension Passive further allows Ningguang to fire Charged Attacks at no stamina cost when she possesses a Star Jade—which is a huge boon and completely absolves the drawbacks other catalyst users possess when using their high scaling Charged Attacks.
While generally not the largest share of her damage, Ningguang’s Charged Attacks and Star Jades contribute significantly to her overall damage contribution, particularly at C6. Further, they offer her flexibility in situations where rotations cannot be properly followed due to enemy mobility or mechanics such as Energy drain. While it is not worth deviating or extending rotations solely for them, their significant damage allows her to adapt to these situations in a way not many units can.
It is important to cancel Ningguang’s animations while casting, as their cast time is otherwise sluggish and risks extending rotations. Ningguang’s animation cancels are incredibly simple: simply hold forward while casting her Normal Attacks, and stop holding when casting her Charged Attacks. While further optimizations exist via paying attention to the kind of animation Ningguang performs, these are frankly unnecessary at best and actively detrimental at worst. Below is a table of Ningguang’s various combos. While Ningguang’s combos are generally interchangeable, there are some rare occasions when using combos with more Normal Attacks is worse (due to the longer cast time) or better (due to triggering effects that occur on casting/hitting Normal Attacks).
Combo and Notes
| Combo | Notes |
| CA Spam Link | This is extremely stamina-intensive, and is only viable in rotations where Ningguang only uses 1-2 CAs and will still require proper stamina management. Only recommended for those who find Ningguang’s cancels unplayable. |
| N1C Link | One Normal Attack immediately followed by a Charged Attack. This is Ningguang’s best combo in melee situations, where her Star Jade will generate before firing her CA. |
| N2C Link | This is the best general-purpose combo, applicable in almost any situation, and is the most recommended to practice. Further, this combo is also best for triggering effects that occur when Normal Attacks are casted. |
| N3C | This combo, and any others, are much worse than the aforementioned options and will generally only be used when a mistake is made or dodging is needed in the middle of previous combos. |
![]() Elemental Skill: Jade Screen
Elemental Skill: Jade Screen
Description
Ningguang creates a Jade Screen out of gold, obsidian and her great opulence, dealing AoE Geo DMG.
Jade Screen
✧ Blocks opponents’ projectiles.
✧ Endurance scales based on Ningguang’s Max HP.
Jade Screen is considered a Geo Construct and can be used to block certain attacks, but cannot be climbed. Only one Jade Screen may exist at any one time.
While Ningguang’s Elemental Skill is commonly treated as a tool for its Particle generation and a boost to her Burst, this Skill has a high multiplier and is the only notable source of AoE damage present in her kit. Thus, it warrants investment alongside her other Talents—especially with C2, where she can often cast it twice a rotation. While seemingly simple, there are many caveats attached to properly using the Skill that are not mentioned in the talent description.
Firstly, Ningguang’s Jade Screen spawns by placing a central beam, with its own hitbox, directly in front of her in the direction she is facing. This beam then extends outwards in both directions, with each end of the Jade Screen also having its own hitbox. If any of these hitboxes are obstructed by something, the Screen will immediately shatter. Therefore, to make sure Ningguang functions properly — particularly against large bosses — it is crucial to be aware of her positioning when casting this Skill. The table below shows ways in which to cast Ningguang’s Skill such that it properly spawns against enemies where the screen might break on cast. Ultimately, however, spawning the screen properly is simply an avenue for extra damage – though highly recommended, for those uncomfortable with learning the methods below it is fine to simply invest into Ningguang to the point where tricks for maximization are not necessary.
Method and Video
| Method Video | Description |
| Method 1 | The first, and most universally consistent option, is to dash next to an enemy, turn to face the opposite direction from them, then spawn the screen. This will almost always deal damage to the enemy as shown in the video and offers room for correction if the screen misses or breaks on cast with C2. |
| Method 2 | Only applicable after C2. While the first method is usually more universally applicable, the second method is useful as a way to recover from an imperfect execution from the first method, or in situations where gaining the Energy from both of Ningguang’s Skill uses isn’t necessary (more information below). One screen is spawned after dashing away from the enemy, then another screen is placed so that it hits them regardless of whether it remains intact or breaks in order to generate Particles. |
| Method 3 | The third method is more tricky, as learning it often requires more practice and intuitive understanding of enemy hitboxes and positioning. While it is not recommended, it can be learnt for the sake of flexibility. By maintaining a fixed distance from the target, one can spawn the screen directly in front of them whilst hitting the enemy without it shattering. |
Secondly, Ningguang’s Skill is unique in that it has a hidden cooldown of 6 seconds on its Particle generation. This means that if her Skill is used consecutively, it will not generate two sets of Particles. This makes her a clunky battery for other units, and also can increase her Energy requirements significantly in most rotations. This is due to the fact that in extended rotations, even with C2, using her Burst less than 18 seconds apart will cause one of her Bursts to only receive the Energy from one Skill. This is illustrated by the sample rotation below if using the Burst off cooldown:
Skill -> Burst -> 6s -> Skill -> 6s -> Burst -> Skill -> 12s -> Repeat
From this rotation, it can be seen one of her Bursts will only benefit from the Energy of one Skill use. This can be rectified in two ways:
- By building her gear and team around only needing one Skill to meet her ER requirements and just using her Skill consecutively. Highly preferred.
- Extending rotations long enough such that she is able to use her Skill twice and generate Particles from both uses. This is an option when the rotation time is already gated by other teammates, as it is not worth extending the rotation solely for this reason.
While other tech exists by which Ningguang can work around her Particle generation ICD, these are generally not worthwhile. The rotations provided in the Rotation Guidelines and Sample Compositions section presents multiple examples of rotations that already account for which is best, including niche techs applicable for highly specific teams and situations.
![]() Elemental Burst: Starshatter
Elemental Burst: Starshatter
Description
| Gathering a great number of gems, Ningguang scatters them all at once, sending homing projectiles at her opponents that deal massive Geo DMG. If Starshatter is cast when a Jade Screen is nearby, the Jade Screen will fire additional gem projectiles at the same time. |
Ningguang’s Burst is, ironically, the star of her kit, capable of huge amounts of single-target damage. It is important to note that the damage it deals almost doubles if cast when a Jade Screen is on the field, and as such it is crucial to ensure this is the case as much as possible by practicing her positioning properly as illustrated above. Still, in practical gameplay, it is usually more worthwhile to simply stick to the rotation even if a Jade Screen shatters before the Burst can be cast instead of extending the rotation to accommodate for this. The gems from this talent appear in roughly two “waves” — 6 are generated immediately when the Burst is cast, and 6 more are formed from a nearby Jade Screen, shattering it in the process. Gems from the first wave will have all buffs applied from when the Burst is cast, whereas gems in the second wave will use buffs that were on Ningguang when the Jade Screen they form from was generated.
Generally, due to auto-targeting mechanics, about 10 of these gems are assumed to hit, with each gem being able to hit one target. This is also, however, her biggest downfall — that the two most major sources of her damage, her Burst and Charged Attacks, are all locked entirely to hitting one target, thus severely weakening her in AoE scenarios. Still, the sheer power of this talent is not to be underestimated. Additionally, Starshatter will trigger her Constellation 2, as the Jade Screen is destroyed for the additional gems to fire, as well as activate her Constellation 6 — further increasing its importance.
![]() 1st Ascension Passive: Backup Plan
1st Ascension Passive: Backup Plan
Description
When Ningguang is in possession of Star Jades, her Charged Attack does not consume Stamina.
This is a straightforward passive that makes Ningguang much more comfortable to pilot by completely eliminating the biggest drawback of most catalyst users: their 50 stamina cost when using Charged Attacks.
![]() 4th Ascension Passive: Strategic Reserve
4th Ascension Passive: Strategic Reserve
Description
A character that passes through the Jade Screen will gain a 12% Geo DMG Bonus for 10s.
While the bonus from this passive is nice, providing free buffs for herself and situationally for Geo teammates, players should not go out of their way to get the buff in situations where it is difficult. Still, when possible, it is quite beneficial to dash through her Jade Screen after casting it.
![]() Utility Passive: Trove Of Marvelous Treasures
Utility Passive: Trove Of Marvelous Treasures
Description
Displays the location of nearby ore veins used in forging on the mini-map.
A highly useful exploration passive, unfortunately outclassed by interactive maps.
Constellations
Art by @chelswwels on Twitter!
Ningguang does not need her constellations to be effective as a carry. However, her constellations massively improve her flexibility and team options and provide a good damage increase. As a 4* unit, her constellations are also highly accessible. Thus, they are absolutely worth getting wherever possible.
![]() C1: Piercing Fragments
C1: Piercing Fragments
Description
When a Normal Attack hits, it deals AoE DMG.
While this constellation is nice — in particular, allowing her to both make use of certain buffers such as Yun Jin and mine ores effectively in the overworld — it is generally unimportant, as her Normal Attack scalings are extremely poor.
![]() C2: Shock Effect
C2: Shock Effect
Description
When Jade Screen is shattered, its CD will reset. Can occur once every 6s.
This constellation can range from anywhere to a simple damage increase (due to being able to cast her Skill again after using her Burst) to being instrumental in lowering her ER requirements in certain teams. Further, it provides a massive quality-of-life boost in most rotations as you get a second chance to cast her Skill if it shatters unexpectedly.
![]() C3: Majesty be the Arrays of Star
C3: Majesty be the Arrays of Star
Description
Increases the level of Starshatter by 3.
A talent level increase to the most significant part of her kit, simple as it is effective.
![]() C4: Exquisite be the Jade, Outshining All Beneath
C4: Exquisite be the Jade, Outshining All Beneath
Description
Jade Screen increases nearby characters’ Elemental RES by 10%.
A largely useless constellation, as even in situations where it is applicable, the survivability it provides is generally low.
![]() C5: Invincible be the Jade Screen
C5: Invincible be the Jade Screen
Description
Increases the level of Jade Screen by 3.
While her Jade Screen is hardly the most significant aspect of her kit, any extra damage it deals is highly welcomed.
![]() C6: Grandeur of the Seven Stars
C6: Grandeur of the Seven Stars
Description
When Starshatter is used, Ningguang gains 7 Star Jades.
This constellation is a very good damage increase, allowing Ningguang to immediately fire a Charged Attack after using her Burst to launch 7 additional Star Jades. This is particularly significant the more often Ningguang uses her Burst, and is overall an excellent capstone constellation.
Gearing
Credits to @iztea_ on Twitter!
Ningguang’s Artifact sets are generally so close together that it is generally recommended to farm for whichever option serves to be most resin efficient. Therefore, it is always encouraged to use tools such as Genshin Optimizer for those who seek to maximize damage. The stats, sets and weapons covered below were calculated using assumed rotations and values and should not be used out of the context of this guide.
Artifact Stats
Ningguang will always use an Attack% Sands, Geo Damage% Goblet and Crit Circlet—either Crit Rate or Crit Damage depending on which balances her stats better. If using such pieces is not optimal, it is recommended to farm until such a set is obtained. In terms of substats, Ningguang will have the following general priority:
ER until requirements > Crit Damage = Crit Rate > Atk% >> ER >> Other Stats
Ningguang’s ER requirements will vary a fair bit depending on what team she is put in. The below table has rough ER values to shoot for depending on the situation, however it is always recommended to use the Energy Recharge Calculator to find exact values for a particular team. “Skill” for the below table refers to Elemental Skill uses that also generate Particles.
| Situation | Recommended ER |
| Burst every 12s, 1 Skill, 2/3 Other Geo Units | 110-130% |
| Burst every 15s, 1 Skill, 1 Other Geo Unit | 120%-140% |
| Burst every 15s, 1 Skill, 2 Other Geo Unit | 110%-120% |
| Burst every 12s, 2 Skill, 1 Other Geo Unit (Needs highly specific setup, not recommended) | 120%-140% |
| Burst every 20s, 2 Skill, 1 Other Geo Unit | 100%-110% |
Artifact Sets
Rotation:
Albedo Skill -> Bennett Skill -> Burst -> Fischl Skill -> Ningguang Skill -> Burst -> Skill -> CA -> Bennett Skill -> Ning N2C -> Bennett Skill -> [Repeat] (15s)
Assumptions:
130% ER requirement, full Bennett uptime (1000 Attack, 20% Attack Buff), full uptime on Geo resonance, Dodoco Tales R5, C6 Ningguang, A4 has 100% uptime except on the first E of every rotation, Substats are distributed according to KQMC
| Set | % vs 2pc AP/2pc Atk% | Notes |
| 4pc Thundersoother 4pc Lavawalker  | 104.82% | Assumed 100% uptime. Only works with Electro on enemies, and is equal to Lavawalker with Pyro on enemies. Conditional, but powerful—though usually not worth farming. Worth considering if one already has a set and using Fischl (for Thundersoother) or Xiangling (for Lavawalker) to assure uptime. |
| 2pc Archaic Petra 2pc Emblem of Severed Fate | 102.9% | All sets using 2pc Emblem of Severed Fate, while highly competitive at the assumed 130% ER requirement, fall off quickly compared to other options where the ER is not needed. |
| 4pc Emblem of Severed Fate | 102.4% | While 4pc EoSF can be a strong option, it not only faces the same caveat as using 2pc Emblem as a part of it, but its buff to Burst Damage means it performs worse in situations where Ningguang uses more Charge Attacks than normal. |
| 4pc Husk of Opulent Dreams | 100.1% | An option for those who already have a good set due to the Geo Damage Bonus—Defense is a wholly useless stat for Ningguang’s damage. |
| 2pc Archaic Petra 2pc ATK% | 100% | A good generalist set whose raw stats improve all aspects of her damage. Despite being treated as the baseline, it is generally resin-inefficient to farm for Archaic Petra. |
| 2pc Archaic Petra 2pc Noblesse Oblige 2pc ATK% Combinations 2pc EoSF | 96.8%–99.9% | Ningguang’s artifact choices are generally so close to each other it is generally best to choose the combination with the best substats. Note that EoSF retains its drawback of dropping off in situations where the ER is unnecessary, and Noblesse providing only Burst Damage% makes it worse in situations where Ningguang uses more Charged Attacks than assumed values. |
| 4pc Archaic Petra | 96.15% | Due to how Ningguang’s teammates often contribute significantly to team damage and Ningguang’s on-field status makes picking up shards usually trivial, 4pc Archaic Petra tends to be a BiS option for team damage in many cases for a very minor hit to personal damage—focusing on Ningguang’s flexibility in bringing out the best of her teammates even as an on-field carry. Unfortunately, Archaic Petra is an extremely resin-inefficient domain to farm, and is usually not worthwhile. |
Weapons
Rotation:
Albedo Skill -> Bennett Skill -> Burst -> Fischl Skill -> Ningguang Skill -> Burst -> Skill -> Charged Attack -> Bennett Skill -> Ningguang N2C -> Bennett Skill -> [Repeat] (15s)
Assumptions:
Buffed: 130% ER requirement, full Bennett uptime (1000 Attack, 20% Attack Buff) Full uptime on Geo resonance, 2AP 2Glad, Ningguang C6, A4 has 100% uptime except on the first E of every rotation, 15s between Bursts, Substats are distributed according to KQMC
Unbuffed: 12s between Bursts, 140 ER% req, N1 E dash Q C N2C, 2 Geo% 2 ATK%, Zhongli shield 100% uptime, C6, Substats are distributed according to KQMC
| Weapon | Unbuffed % vs Dodoco R5 | Buffed % vs Dodoco R5 | Notes |
| Memory of Dust R1 | 121.7% | 113% | Assuming 100% uptime with shield. Memory of Dust proves itself as a surprisingly strong option, particularly in the lack of Attack buffs due to Ningguang’s abysmal Base Attacks. For those unlucky enough to have one, Ningguang can make excellent use of it. |
| Skyward Atlas R1 | 116.7% | 113.9% | Skyward Atlas is a solid general-purpose catalyst, and Ningguang is no exception—it is among her best available options and should always be considered. |
| Lost Prayer to the Sacred Winds R1 | 112.8% | 118.4% | Calculated with one stack. Lost Prayers serves as a stat stick as Ningguang lacks the field time to make full use of its passive. Nonetheless, the stats it provides are potent, and its Crit substat makes Ningguang easier to build due to not diminishing the value of Attack% substats as much as the above options. |
Tulaytullah’s Remembrance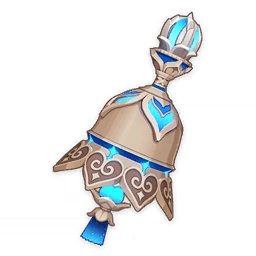 | 112.79% | 110.19% | Assumes 3s for the first set of NAs, 4s + NA buff on the second. The passive, though not useless, is relatively insignificant as very little of Ningguang’s damage stems from her Normal Attacks. That said, it does serve as a solid stat stick—albeit generally worse than most other 5* weapons, especially with buffs. |
| Eye of Perception R5 | 110.7% | 112.6% | Assumed Passive procs between two targets. While at high refines Eye of Perception becomes a strong option with at least 2 targets, due to the consistency with which Ningguang can activate the passive, this also means it is only strongest with multiple targets—which is Ningguang’s weakest matchup. As such, other options are more strongly advised. |
| Widsith R5 Average | 109.5% | 115.1% | 50% Uptime, with buffs averaged across all three options. Even when considering the EM buff, a high refine Widsith is one of her best 4* weapons, even competitive with 5* selections—and assuming players reset when receiving the EM buff, it has even higher potential. However, it can be inconsistent – particularly when not following rotations, as the buff uptime can fall outside her DPS windows, causing the weapon to fall off. |
| Kagura’s Verity R1 | 109% | 114.4% | No uptime on all Elemental DMG buff in buffed situations, and full uptime after three Skill uses considered for unbuffed situations. While her Elemental Skill is a relatively small part of her kit, causing this weapon to serve mostly as a stat stick, it is nonetheless a premier pick. |
| Solar Pearl R5 | 106.3% | 115.5% | At maximum refinements, Solar Pearl competes as one of Ningguang’s best weapons 4* weapons, and is undoubtedly the most consistent among them. When using this weapon, it is recommended to add a Normal Attack before casting Ningguang’s other abilities. Despite being impactful, refinements are not recommended to buy. |
| Wine and Song R5 | 106.1% | 104.5% | 100% uptime, worse with more ER subs. Recommended to add a dash before casting other abilities. While Wine and Song is strong on paper at max refinements, it becomes significantly worse in teams with lower ER needs, or with ER subs on artifacts. |
| Widsith R1 Average | 101.7% | 108.6% | 50% Uptime. Even at R1, the Widsith is a solid choice. |
| Oathsworn Eye R5 | 101.2% | 101.4% | Similar to Wine and Song, its ER passive causes it to fall off in certain situations. Still, it serves as a solid F2P option. |
| Eye of Perception R1 | 100.8% | 102.5% | A decent weapon, albeit maintaining all the caveats of its higher refinement counterpart. |
| Solar Pearl R1 | 100.3% | 109% | Similar to Widsith, it remains a strong contender even at R1 and the reason why refinements are not worth purchasing. |
| Dodoco Tales R5 | 100% | 100% | Ningguang’s default F2P option, and a solid one. When using this weapon it is recommended to move a Charged Attack Combo (eg. N2C) that would normally be used after Ningguang’s Burst to be used before. This weapon picks up further value in situations where Ningguang uses more Charged Attacks. |
| Hakushin Ring R5 | 98.8% | 103.4% | 100% Uptime, worse with more ER subs. While it is generally worse and has significantly more caveats than other F2P options due to its ER stat, its team buff allows it to be a powerful contender, as Ningguang’s teammates often constitute a good portion of her team’s damage. That said, if there are no Electro characters on the team, this weapon is not worth using. |
| Wine and Song R1 | 98% | 99.5% | 100% Uptime. This weapon is not worth using at low refinements. |
| Mappa Mare R5 | 95% | 101.1% | 2 Stacks. For those unlucky enough to have accidentally crafted an R5 Mappa Mare, it serves as a usable—albeit relatively poor—option for Ningguang. |
| Blackcliff Agate R1-R5 | 94% | 102.1% | Passive is not considered due to how unreliable it is to get—further, the passive is only feasible at all in mobbing situations, where Ningguang is at her weakest. Without its passive, this weapon is merely a mediocre stat stick. Furthermore, your Starglitter may have a better use for other items such as Constellations. |
Playstyles
Credit to @kurisucurry on Twitter!
All synergies and sample teams discussed below will be with respect to On-Field DPS Ningguang. Other variations will be discussed here.
Synergies
Ningguang is an extremely flexible unit and can be slotted into many teams and roles with varying mileage, depending on content faced. As such, she can be used with units far beyond the list below. That said, the tables below cover specific synergies that players should give special consideration for when crafting On-Field DPS Ningguang teams. Customizing Ningguang teams to tailor to the enemies faced plays to her strengths best.
Geo
| Geo Units | Tier | Notes |
Zhongli | S | Zhongli is often considered the premier pick for the Geo option alongside Ningguang, and for good reason. His strong shield is immensely comfortable and guarantees uptime on Geo Resonance, provides a highly coveted 20% Resistance Shred for all elements, and has decent Energy generation when equipped with Favonius Lance. As such, when available, he is always a worthy pick – however, it should be noted his pillar can interfere with Ningguang’s projectiles, and placing it away from enemies hampers the team’s Energy. |
Albedo | S | While Albedo lacks Zhongli’s role compression or comfort of use as a teammate, he makes up for this with lower field time, more consistent Particle generation and significant personal damage. If healing or shielding is covered by a different unit in the team, Albedo is an excellent option. Using Albedo’s Burst in Ningguang teams is generally not recommended, however it is an option in AoE scenarios with proper investment. |
Gorou | A (At C6) C (Before C6) | Before C6, Gorou provides too little of value to Ningguang besides some batterying and a meager 15% Geo Damage Bonus to justify his team slot and the teambuilding constraints it forces. At C6, however, he becomes an excellent buffer and is especially potent when paired with Albedo who can make use of the defense boost. |
Yun Jin | B | Yun Jin’s value to Ningguang is constrained by the fact that Ningguang does not use many Normal Attacks in her rotations, thus reducing Yun Jin’s value. However, she is still a solid pick – and in combat situations where Ningguang fires more Normal Attacks than usual, Yun Jin’s power can skyrocket. Note that using Yun Jin does not make Normal Attack spam worthwhile on its own, and general rotations should not be changed specifically for this. |
Geo Traveler  | C | If it were not for how their constructs impact Ningguang’s projectiles and screen placement, Geo MC would be a fantastic pick. However, their constructs often cause Ningguang’s DPS to be unreliable in many situations due to their anti-synergy – while they are a functional option for those who can play around this, it is nonetheless highly not recommended. |
Pyro
| Pyro Units | Tier | Notes |
Bennett | S | Bennett fixes one of Ningguang’s most glaring issues by offering a huge Flat Attack buff with his field, and his ability to condense healing alongside this is monumental for many Ningguang teams. It should be noted that, as the only Pyro unit in short rotations, Bennett’s ER requirements necessitate him needing field time to use his Tapped Skill to generate sufficient Particles, a trait that hurts his value. However, this also means that with more ER stacked on him (>230%) he is even more potent due to allowing Ningguang to make use of his buff for longer. |
Xiangling | B | Xiangling’s highly significant AoE Pyro damage helps alleviate another of Ningguang’s issues – her extremely lackluster AoE presence. However, Xiangling is phenomenally Energy hungry and requires Bennett to even function, thus heavily constraining her team compositions. Further, while Ningguang’s flexibility with field time and ability to hold 4AP at little personal loss make her a good teammate, Xiangling’s inability to react in such compositions can noticeably lower her personal damage potential. |
Electro
| Electro Units | Tier | Notes |
Fischl | A | Fischl’s low field time, good Particle generation and strong off-field single-target damage are all qualities that Ningguang greatly appreciates. Further, as Geo will always count as the trigger for Crystallize reactions, Ningguang is very adept at triggering Fischl’s A4 for extra damage and Ningguang’s flexible field time allows Fischl to maintain high uptime on Oz. |
Yae Miko | B | Yae’s required field time and Energy needs often limit the number of compositions she can fit comfortably on. Ningguang’s pre-existing synergy with Fischl and ability to freely switch help remedy this, and allow Yae to fully flex her high turret damage and powerful Burst. Ningguang’s ability to hold 4AP is merely icing on the cake. That said, their team compositions are highly limited – and the usage of Fischl and Yae locks such teams significantly to a single target. |
Kujou Sara | B | Often looked down upon outside of Raiden compositions, Sara holds a unique niche in Ningguang teams as she provides a similar, albeit shorter-lived Attack Buff to Bennett on a much shorter cooldown. This is particularly significant in 12 second Ningguang compositions, where Bennett’s 15 second cooldown would unnecessarily extend rotations. |
Anemo
| Anemo Units | Tier | Notes |
Venti | B | Venti is only mentioned due to one specific reason—his grouping is so powerful when it works that it can allow Ningguang to unreliably hit multiple targets with her projectiles, due to them having a tiny, if usually insignificant hitbox. While this patches up one of Ningguang’s weaker matchups, she is still not an excellent pick, and Venti’s ability to usually singlehandedly trivialize such stages means he is often better used in other teams. Outside of mobbing situations, they lack any synergy and should not be used together. |
Rotation Guidelines and Sample Compositions
For all listed teams, note that while Ningguang uses her N1C combos in the videos, these are generally interchangeable with properly executed N2Cs, or simple Charged Attack spam.
12s Rotations
Ning/Zhongli/Geo/Flex

Geo Flex—Albedo, C6 Gorou
Flex Options—Albedo, C6 Gorou, Fischl, Sara
12 second rotations with Ningguang are one of her most unique teams, taking advantage of her flexibility and high Burst damage to output competitive damage by minimizing the time between her Bursts. Despite their power, these teams rely the most on Ningguang’s constellations to achieve their full potential. Further, their unit choices are relatively rigid – requiring both Favonius Lance Zhongli alongside another Geo unit to sufficiently fund the Energy needed for Ningguang’s Burst, as well as having limited options for other units who can rotate in tandem without extending rotations. Despite these caveats, their fast pace allows quick recovery from mistakes, and their damage potential is strong. Zhongli’s Burst will tend to be a DPS loss in single-target, however this can vary – with sufficient buffs, investment, or AoE, extending rotations for the sake of his Burst can be potentially worthwhile. For Albedo, it is worthwhile to note that due to his Skill’s 30s duration and the team’s short rotation, he can skip switching on field every other rotation.
Sample Teams:
Ning/Zhongli/Albedo/Fischl

Sample Rotation :
| Zhongli Hold Skill -> N2 -> Albedo Skill -> Fischl Skill or Burst -> Ningguang Skill -> Burst -> Skill -> Charged Attack -> 2x N2C -> Repeat Fischl will alternate Skill and Burst uses. Albedo can skip his Skill use every other rotation. |
Ning/Zhongli/Albedo/Sara

Sample Rotation :
| Without Burst Zhongli: Zhongli Hold Skill -> Albedo Skill -> Sara Skill -> Charged Shot -> Ningguang N2C -> Skill -> Burst -> Skill -> Charged Attack -> N2C -> Repeat With Burst Zhongli (Needs Sara C2): Albedo Skill -> Sara Skill -> Zhongli Hold Skill -> Burst -> Sara Charged Shot -> Ningguang N2C -> Skill -> Burst -> Skill -> Charged Attack -> Repeat Albedo can skip his Skill use every other rotation. |
15-18s Rotations
Ning/Geo/Bennett/Flex

Geo Flex: Albedo > Zhongli > Others
Flex Suggestions: C6 Gorou, Fischl, Sara. Other units are also viable.
These types of teams tend to be among Ningguang’s most common, accessible and versatile compositions. While Bennett is theoretically not necessary, he provides so much value to these types of rotations that unless he is absolutely necessarily needed elsewhere, it is highly recommended to run him in these types of teams. When making rotations for these teams, it is important to take ER values of party members and the number of Skill uses needed into account – the Energy Recharge Calculator is a valuable tool for this. In 18s rotations, Ningguang can opt to split her Skill uses wherever possible in order to generate additional Energy. Moreover, it is important to make sure units make use of buffs appropriately. For example, Albedo cannot use Bennett’s Attack buff when not using his Burst due to his Skill scaling off of Defense, so he should use his Skill before Bennett’s Burst to leave more time for Ningguang. On the flipside, Fischl tends to benefit greatly from snapshotting Bennett’s buff onto her Skill. Provided below are some sample rotations one can refer and modify as necessary when crafting their own.
Sample Teams:
Ning/Albedo/Bennett/Fischl

Sample Rotation :
| Albedo Skill -> Bennett Skill -> Burst -> Fischl Skill or Burst -> Ningguang Skill -> Burst -> Skill -> Charged Attack -> Bennett Skill -> Ningguang N2C -> Bennett Skill -> Repeat Fischl will alternate Skill and Burst uses. Albedo can skip his Skill use every other rotation. |
The rotation provided uses 3 Bennett Skills for the sake of his Energy, using his A4 Passive to reduce his Skill cooldown and thus rotation time. With more ER, this can be avoided and more field time can be spent on Ningguang. Further, Bennett may have to wait in his Burst field for a moment to properly trigger his A4 Passive.
Ning/Albedo/Bennett/C6 Gorou

Sample Rotation :
| Gorou Burst -> Skill -> Ningguang N2C -> Albedo Skill -> Bennett Skill -> Burst -> Ningguang Skill -> Burst -> Skill -> Charged Attack -> Bennett Skill -> Ningguang 2x N1C -> Bennett Skill -> Repeat |
This team has a similar situation with regards to Bennett as the previous one. Further, Gorou’s funnel to Ningguang can also be removed in higher Energy builds or in content with lots of HP Particles (Energy dropped by mobs at certain HP thresholds) to further shorten the rotation. Ningguang will not have enough time to use 2x N2C in the provided rotation, however, 1 N2C can be used without much of a loss to DPS
> 20s Rotations
Ning/Geo/Flex/Flex

Geo Flex Options: Zhongli, Albedo > Others
Flex Suggestions: Fischl + Yae, Benny + Xiangling. Other units are also viable.
Ningguang generally does not prefer lengthy rotations due to them either constraining her Energy requirements to Burst cooldown, or greatly extending the time between her Bursts. That said, many powerful units have lengthy cooldowns, and Ningguang’s flexibility means she can work well in tandem with them. Since her teammates tend to provide significant team damage in these rotations, 4AP Ningguang particularly shines in these teams. Do note it is highly recommended to not Burst off cooldown in these teams, and instead run lower ER builds and Burst every 20s – however, exceptions exist and some examples will be covered below.
Ning/Albedo/Benny/Xiangling

Sample Rotation :
| 20s Rotation (Recommended): Albedo Skill -> Bennett Burst -> Skill -> Xiangling Burst -> Skill -> Ningguang Skill -> Burst -> Charged Attack -> N2C -> Bennett Skill -> Xiangling Funnel -> Ningguang Skill -> N2C -> Repeat 45s Rotation: This is a combination of two “parts”, as follows–Albedo Skill -> Bennett Skill -> Burst -> Ningguang Skill -> Burst -> Charged Attack -> Bennett Skill -> Xiangling Burst -> Skill -> Ningguang Skill -> N2C -> Burst -> Skill -> Charged Attack -> Bennett Skill -> Xiangling SkillCombined with,Albedo Skill -> Benny Burst -> Skill -> Xiangling Burst -> Ningguang Skill -> Burst -> Charged Attack -> Benny Skill -> Xiangling Skill -> Ningguang Skill -> Bennett Skill -> Xiangling Funnel -> Bennett Skill -> Xiangling Funnel -> Ning N1C |
Two rotations are provided above – one option has Ningguang Bursting in tandem with Xiangling every 20s, the other has Ningguang Bursting more often in a more complicated rotation. Both provide similar damage and thus the first rotation is highly recommended, however, it requires higher ER requirements on Xiangling (~220%), thus constraining her to EoSF + ER weapon builds. On the flipside, the 45s rotation has higher requirements for Ningguang (~130-140% as opposed to 100%) but needs significantly less ER for Xiangling (~170%). Given the availability of The Catch and the resin efficiency of EoSF, it should be stressed the 20s rotation should be given much more consideration.
Ning/Zhong/Yae/Fischl

Sample Rotation :
| Yae Skill x3 -> Zhongli Hold Skill -> Ning Skill -> Burst -> CA -> Fischl E -> Yae Burst -> Skill x3 -> Ning Skill -> N2C -> Burst -> Skill -> CA -> Fischl Burst -> Ning N2C -> Repeat (25s) |
Due to the lack of any significant short-term buffs in this composition, it is fine to deviate from this rotation as long as high turret uptime is properly maintained – due to its reliance on turrets and Ningguang’s flexibility, the composition maintains high single-target damage, which is its main benefit. If Ningguang lacks the Energy to Burst, it is fine to skip one of her Burst uses. Due to her ER needs on this team (130-150%) and the strength of Yae and Fischl, Hakushin Ring is surprisingly competitive with other weapons.
Other Playstyles
Due to her decent Energy generation, A4 Passive, decent Burst damage even when not focused on, and ability to use 4NO, 4AP, Prototype Amber and/or TTDS, Ningguang can function as an adequate option as a flex support. However, it should be noted, with a few exceptions, Ningguang is rarely optimal for this role. She has to pick and choose between team support and her own damage, and in teams that are not focused around her generally the former tends to provide more value. In a supportive or off-field role, she is almost always outclassed by her fellow Geo units whose kits are more tailored to the role – all of Albedo, Yun Jin, Zhongli, Gorou and Geo Traveler are all often better than her in this aspect depending on the scenario.
That said, she can still perform adequately in the role, and there exist use cases for her in such a capacity. One advantage she possesses is the extremely low investment floor she needs—as both TTDS and Prototype Amber stifle her personal damage regardless, simply equipping them alongside a supportive artifact set is often sufficient to get her online compared to more investment hungry competition. Moreover, with Prototype Amber, she is the only reliable Geo healer in the game – which can prove to be a situationally useful trait, such as on budget Itto teams. Her Geo application rate is also unrivaled, and thus very helpful for bosses such as the Golden Wolflord which involve Geo elemental checks. Lastly, as mentioned, she can simply function as a budget option for those who lack the resources to invest into her competitors or for those who simply do not have them.
On a final note, her sheer elegance is worth considering as a reason to flex her onto a team – moral support is always crucial. Unfortunately for her, Geo as a whole is an element stacked to the brim with good-looking characters. 😀
Afterword
Credit to @mistedsky on Twitter!
Thank you for reading this far! It was an absolute pleasure both procrastinating and working on this guide for one of my favorite units. Playing Ningguang is an immensely satisfying and unique experience, and to be able to spread her agenda is an honor. I express my gratitude to all the contributors, and to both KQM and Ningguang Mains as a whole – this guide would not have been remotely possible without all their help and support. If you have any questions about the guide, feel free to ping or DM me at Cuzimori#1535. Once again, you have my appreciation for taking the time to read this collaborative work.
✦ Cuzi!
Contributors
For his assistance in setting up various sims to gauge Ningguang teams at my annoying behest, a special thanks to:
✦ Kurt#5846
For their contribution of various calcs I have no clue how to do, thank you to:
✦ yolitme0#0579
✦ borderline#3100
For representing Ningguang Mains and providing information from the community as well as their own support, thank you to:
✦ Lady Peridot#1737
For their work on formatting the guide to actually make it readable, a thanks to:
✦ Latiwings#3308
For helping verify and approve the guides, as well as transcription, a thank you to:
✦ Raf#7220
✦ Prévisible#7440
Finally, for their general support or help with editing, proofreading, or art permissions, my thanks to:
✦ Xreejan#1180
✦ Markoda#5294
✦ Leah
✦ Rathalos#2875
✦ Puffin#9920
✦ mina#4448
And everyone else ❤


