We’re currently working on an update to Eula’s Extended Guide! Join our Discord to take part in the theorycrafting process!
by Sitri#9504
Maintained and updated by TWICE#9958
(updated for v2.7)

You want to learn some Favonius Bladework? Heh, alright then, I’ll teach you…. Oh yes, I’ll teach you, alright, mark my words…
Eula
Table of Contents
Preface
Welcome to the comprehensive and long overdue Eula guide! This guide took four months, a lot of work from a lot of people, as well as more procrastination than I should have ever done, but it is finally here.
Eula is one of the most interesting and complicated characters in the game, in all senses of both words. She is unique in both skill sets and gameplay style, with many layers and incredible depth that one continues to learn and discover, even after months of playing her. I hope after finishing this guide, you will have a better understanding of not only the basics of Eula, but also her more in-depth knowledge and mechanics, and have an even better experience playing her. For those who do not own Eula, I hope this guide sparks enough curiosity and interest in her for you to consider rolling Eula and have a fun time, as much as I have had the pleasure of both playing and theorycrafting her.
Before we dive in, I want to give special thanks to Artesians#0002 and Zanto#4984, whom I have worked closely with during her release, and who are continuing to help me with expanding my knowledge on all things Eula. A lot of the showcase videos that you will find here are done by them. This guide would not have been possible without them, especially Zanto’s guides, which this guide is heavily inspired by. Check out his works on Raiden and Beidou, it’s great.
There are many more who I am to thank for making this guide as comprehensive as it is currently, but I have no space nor time to name everyone. It is not a one-person job. So again, thank you. You guys know who you are.
Time is short and precious, and we should get to the interesting parts instead of listening to my ranting.
Why should you play Eula? – An analysis
Eula was quite a contentious and debate-sparking character during the time of her release, and although a long time has passed since then, she is still quite an obscure and niche character that not many fully grasp.
What is Eula’s role in a team?
In short, Eula is a Physical hypercarry unit in terms of damage, field requirement, and investment levels, with nuking capability via her Elemental Burst. She is capable of dealing high bursts of damage while taking her and her allies’ resources and time to set up those incredibly high damage instances.
Eula is a hypercarry, and you need to play around her. Most of her rotations and team comps should be built around setting her up to deal the most damage she possibly can. She also benefits from hyper investment, such as leveling her to 90, Talent lv 9 or 10, and highly-invested artifacts.
While she has a Cryo vision, Eula should only be played as a Physical damage unit. Her damage composition is skewed into Physical, and with long cooldowns and no separate ICD on her attacks, she should not be run as a Cryo character.
Misconceptions:
❧ Bosskilling:
There is a misconception that Eula is a very strong boss killer. This is partially correct, but not entirely. It is true her nuking potential means she is capable of accelerating a lot of bosses’ vulnerable phases, thus ending the fight sooner. However, several boss fights’ scripted natures means some bosses such as the Pyro Hypostasis and Maguu Kenki 2nd phase can counter Eula with vulnerable phases shorter than the time it takes for her to unleash her combo. Knowing when to pop her Burst early will prove to be a very valuable skill to learn.
❧ Bad AoE:
There is also the misconception that Eula has bad AoE but completely excels in 2-4 enemy count content. Again, this is only partially true. If you play Eula statically, without adapting your combo to floors, Eula has a very bad time against AoE content.
However, as a Claymore character, she is capable of hitting multiple enemies with one attack, her Burst has a decently large AoE that with good positioning and conscious gameplay, you can destroy mob floors with proper AI manipulation. Also, mob content tends to feature humanoid enemies (hilichurls, treasure hoarders, Fatuis), which inherently have low Physical damage resistance, which makes Eula’s AoE issues quite exaggerated.
Unless you compare her to Venti, and no one wins against him.
❧ Strong Single Target:
The last misconception about Eula is she absolutely destroys single target floors or floors with a very low enemy count.
This is again, partially correct. Eula has a much easier time in single target floors as she can focus her attention and damage on each target, which is considerably easier to do. But single-target enemies, or floors with 2-4 enemies, can feature a lot of mobility, which is Eula’s hardest counter. Enemies that can suddenly dash or teleport away from her Elemental Burst, her largest and most costly damage source, destroy Eula’s DPS. So again, pick your timing carefully with Eula.
❧ Conclusion:
Eula has little content where she is optimal in, but she is quite competent in more content than people either positively or negatively rate her as. While she can’t reach the ceiling of Amplifying Reaction or Freeze teams, with proper Resin and time investment she can perform more than well enough to clear any content.
Pros and Cons
Down here I will list her pros and cons so you can make your own conscious decision. Please remember that only you can decide if a character is worth spending your time, money, and resources on. All I can do is give the most honest information possible to help with your decision. Spend responsibly.
Pros
- Capable of dealing out very strong, consistent above-average Physical damage, with a very high damage burst in every rotation.
- At high investment, she is capable of clearing floors in one or two rotations with ease.
- Built-in Physical and Cryo Resistance Shred, self-sufficient in her damage dealing without relying heavily on buffs, but also scale well with them.
- Teams are cheap to build. Units required to perform are generally not highly contested. Do not need Xingqiu or Bennett in most of her comps.
- Respectable AoE with her Elemental Burst. Capable of low-time Abyss clears.
- Constellations are player-friendly. Immensely strong C6, but also dolphin/lucky F2P friendly with C1 and C3 giving very respectable damage increases.
- Very fun to play. Combo flows well and is very rewarding when pulled off successfully.
Cons
- Needs quite high Resin investment (hyper investing) to get a competitive state.
- Backloaded skill set means damage dealt can be inconsistent and fluctuates a lot depending on player skill, luck, enemy types, and content.
- Some of her best teammates have a weaker support role compared to in other teams (e.g. Raiden hyper, Shenhe in Freeze).
- Decently mechanically intensive and requires good game sense to perform at a top-level outside of investing.
- Some enemies, such as Ruins, result in much lower damage than using non-Physical teams
Article I: Character Overview
[…] those who wish to master my signature “Favonius Bladework” technique have to pass my dance class first.
Eula
Eula’s entire kit, with its many interactive components, serves one ultimate goal: make her Elemental Burst as strong as possible. From her faster-than-Claymore-standard Normal Attacks and her personal Physical and Cryo resistance shred in her Elemental Skill to her passives, her kit all serves to get the most consistency and highest damage out of your Elemental Burst. Learning how to play around with her kit to achieve this goal, is the first step to your success with Eula.
I will go over each component of her kit, as well as tips and tricks on how to use them effectively.
Note: If you are not familiar with notation like “N1C” and “N2D”, review Attack String Notation in the Theorycrafting Library before continuing.
Talents
 Normal Attack | Favonius Bladework – Edel
Talent Description
Normal Attack
Perform up to 5 consecutive strikes.
Charged Attack
Drains Stamina over time to perform continuous slashes. At the end of the sequence, perform a more powerful slash.
Plunging Attack
Plunges from mid-air to strike the ground, damaging opponents along the path and dealing AoE DMG upon impact.
Eula’s Normal Attack is quite straightforward in what it can do. It is a maximum 5-input chain auto-attack sequence, with shorter than average execution frames compared to other Claymores, when they do not have an ATK SPD buff. Eula has high multipliers on each input, even among her weapon type, which is compensated in raw power for their slow attacks. These two factors allow Eula to dish out very consistent, above-average physical damage just from auto-attacking
However, everything is not as simple as it is on paper. Although overall she does attack faster than an average Claymore, her 5th input in the Normal Attack sequence (which we will call N5), takes a devastatingly long time to execute, which makes it unappealing to finish her entire attack chain. Because of this, we will tend to interrupt Eula’s attack sequence with dashes, jumps, or ability casts to get maximum value out of our Normal Attacks.
Down here is more technical information regarding Eula Normal Attacks, her different combos, and their differences in damage.
Eula’s Normal Attack frame data
Recorded in 60 FPS
| Attack Type | Number of hits/input | Execution Frame |
| N1 | 1 | 29 |
| N2 | 1 | 58 |
| N3 | 2 | 125 |
| N4 | 1 | 161 |
| N5 | 2 | 249 |
Eula’s Normal Attack combos, and effective damage differences
Motion value/s = (Sum of multipliers)/(Sum of Frames*60)
Normal Attack multipliers are set at Talent lv 9.
N# = Attack where input is interrupted and reset at.
D = Dash input cancel. J = Jump input cancel.
| Combo Type | Number of hits/sequence | Frames | Time (s) | Motion value/s | Differences |
| N1D | 1 | 53 | 0.88 | 186.63% | 76% |
| N1J | 1 | 64 | 1.07 | 154.56% | 63% |
| N2D | 2 | 82 | 1.37 | 217.25% | 101% |
| N2J | 2 | 93 | 1.55 | 217.25% | 89% |
| N3D | 4 | 149 | 2.48 | 219.64% | 90% |
| N3J | 4 | 160 | 2.67 | 204.54% | 84% |
| N4D | 5 | 185 | 3.08 | 244.02% | 100% |
| N4J | 5 | 196 | 3.27 | 230.32% | 94% |
| N5D | 7 | 273 | 4.55 | 223.37% | 92% |
| N5J | 7 | 284 | 4.73 | 214.72% | 88% |
There are only two cancels you need to do and should master, on Eula: N4 and N2. These two combos far out-damage any other Normal Attack chain. While N2D gives a marginal damage increase, it is far more stamina-consuming, harder to execute, and more punishing. Because of this, N4D should always be the combo you default to. However, this does not mean N2D is useless. There are cases where its very short time requirement comes into use. One such case we will dive into later.
Tips and tricks: Attack sequences can be interrupted and reset through abilities, not just through movement inputs. It is recommended to use Skills and Bursts in place of dashes and jumps when you have the chance, to maximize DPS.
Video demonstration of animation cancels
N4D
N2D
N4 Tap E instead of N4D
Eula’s Charged and Plunge Attacks
Q: Why don’t you talk about Eula’s Charged Attacks and Plunge Attacks? I know Claymore characters can do Dragonstrike, with some seeing damage increase, what about Eula?
A: We are going a bit ahead of ourselves with the way the guide is planned out, but in short, Eula’s Elemental Burst gains more damage based on the number of times Normal Attacks, Elemental Skills and Bursts deal damage in a duration. Because of this, we should only do Normal Attacks to maximize their damage. Dragonstrikes are not worth the large potential DPS loss, and do not add much even when performed optimally.
 Elemental Skill | Icetide Vortex
Talent Description
Press
Slashes swiftly, dealing Cryo DMG. When it hits an opponent, Eula gains a stack of Grimheart that stacks up to 2 times. These stacks can only be gained once every 0.3 seconds.
Grimheart
Increases Eula’s resistance to interruption and DEF.
Hold
Wielding her sword, Eula consumes all the stacks of Grimheart and lashes forward, dealing AoE Cryo DMG to opponents in front of her. If Grimheart stacks are consumed, surrounding opponents will have their Physical RES and Cryo RES decreased. Each consumed stack of Grimheart will be converted into an Icewhirl Brand that deals Cryo DMG to nearby opponents.
Eula’s Elemental Skill is a simple slash that deals Cryo damage. Your Tap E gives you Grimheart stacks that you can expend on your Hold E to gain more damage. At 2 Grimheart stacks, your Hold E grants Physical and Cryo resistance reduction on enemies, which helps you deal more damage.
Eula’s Elemental Skill is the basis of why she is such a top-tier Physical damage carry and competitive hypercarry in general. One of the weaknesses of a Physical carry is they inherently lack modified or extra damage through Reactions, and they have to compensate with higher base values on attacks. However, certain enemies counter these very one-dimensional high values with high Physical resistances (Whooperflowers, shielded Fatui Harbingers, the Ruin-class). Having a built-in Physical and Cryo Resistance Shred means Eula has a high damage baseline, even in situations where she cannot gain access to Superconduct. That said, your teams should still be designed to grant additional shred, such as Superconduct, Rosaria’s C6, etc.
Here is an illustrative calculation of the damage gain by having a Eula-level shred when dealing Physical damage:
Damage gained after Superconduct and Icetide Vortex
| Base | Resistance+ | Superconduct | Icetide Vortex Lv 9 | SC + Icetide Vortex | |
| Ruin Guard | 100.00% | 30.00% | 70.00% | 54.00% | 94.00% |
| Whopperflower | 100.00% | 65.00% | 102.50% | 89.00% | 114.50% |
| Humanoid enemies | 100.00% | 90.00% | 115.00% | 107.00% | 127.00% |
| Shielded Fatui Harbinger | 100.00% | 24.00% | 60.00% | 44.00% | 84.00% |
You can find a compiled list of Eula’s Elemental Skill’s technical information here.
When should I use Tap E? When should I use Hold E?
Eula’s maximum Particle generation with only Tap E is quite standard for a non-battery carry character. On a 40/60 cost Elemental Burst unit, this would be quite sufficient, but with an 80 cost Elemental Burst, Eula is hard-pressed into using another Cryo unit to supply her with enough energy to cast Burst off cooldown without stacking absurdly high ER.
For general use case, you only want to use Hold E when you have 2 Grimheart stacks to maximize damage, and usually use it as an opener to your burst window, where you plan to stay on Eula to deal as much damage as possible on resistance-reduced enemies. Use Tap E when you have the chance, stack up on Grimheart stacks, and as an auto-attack cancel tool, as discussed before.
About Grimheart
Grimheart is fairly straightforward. It gives you DEF%/stack and Interruption Resistances, no matter the stack. It is a strategic decision on whether to keep the stacks for extra defense or expend it with Hold E for more offense.
 Elemental Burst | Glacial Illumination
Talent Description
Brandishes her greatsword, dealing Cryo DMG to nearby opponents and creating a Lightfall Sword that follows her around for a duration of up to 7s.
While present, the Lightfall Sword increases Eula’s resistance to interruption.
When Eula’s own Normal Attack, Elemental Skill, and Elemental Burst deal DMG to opponents, they will charge the Lightfall Sword, which can gain an energy stack once every 0.1s.
Once its duration ends, the Lightfall Sword will descend and explode violently, dealing Physical DMG to nearby opponents.
This DMG scales on the number of energy stacks the Lightfall Sword has accumulated. If Eula leaves the field, the Lightfall Sword will explode immediately.
Eula’s most important ability, and one you must understand the mechanics of thoroughly to play her efficiently.
In simple terms, Glacial Illumination is a charged-up time bomb. After you cast it, you have seven seconds to gather Lightfall Sword stacks through using your Normal Attacks, Elemental Skill, and Elemental Burst. After the 7s duration is over, the Burst will explode, dealing AoE Physical damage based on how many stacks you have gained.
In a standard rotation from Eula, half of your total damage composition should, and would if played correctly, come from her Lightfall Sword. Its massive multipliers and damage number once you learned how to get the maximum stacks every Burst cast is one of the most addictive factors in playing Eula.
Glacial Illumination’s cooldown resets roughly 98 frames into the animation, so while its cooldown is stated to be 20s, in practice it is more around 22s. Team rotations will thus be minimum around 22s, outside of some niche variations.
How to get maximum stacks
In her Elemental Burst’s description, Eula is said to be able to gain stacks through three sources: her Normal Attacks, Elemental Skill, and Elemental Burst. However, this is an inaccurate and quite ambiguous description of what is undoubtedly Eula’s most vital ability. Let’s rectify that.
The first thing one needs to know is that Eula gains stacks on damage, not inputs. This means that if a Normal Attack deals 2 instances of damage per input (e.g. N3), she gains 2 stacks on that input, even though it may be considered one attack.
Second, although her skill description said she can gain stacks from her Elemental Burst, the initial and explosion damage of Glacial Illumination does not grant a stack. However, her Ascension 1 passive, which creates a Shattered Lightfall Sword that deals damage based on the Elemental Burst Talent level, does grant a stack.
Third, you have to deal damage with the aforementioned abilities to gain stacks. Hitting elemental shields, Hlichurl stone or wood shields, hitting enemies in invulnerable frames, even if they register as hits, will not grant you stacks. Note that this is also ping-dependent.
Here is a table of stacks gained by each part of Eula’s kit for easier visualization:
Lightfall Sword stacks gained per input
N# stacks gained are counted in the attack sequence
(Ex: N5 already include stacks gained by N1->4)
| Type | Stacks | Type | Stacks |
| N1 | 1 | Tap E | 1 |
| N2 | 2 | Hold E 0 stack | 1 |
| N3 | 4 | Hold E 1 stack | 2 |
| N4 | 5 | Hold E 2 stacks | 4 |
| N5 | 7 | Q | 0 |
On the issue of shield breaking
Glacial Illumination has an Elemental Gauge value on its initial cast of 2B GU Cryo. Its explosion deals Physical damage, therefore it has no Elemental Gauge. Although the damage from explosion is usually large enough to break down a large portion of smaller shields on Abyss Mages, it is not a recommended method of shield breaking, as it is way far less efficient than using an actual Element that is appropriate for the job.
On the issue of energy
With an 80 energy cost Elemental Burst, and no outstanding self-generation, Eula needs one, or even two batteries to consistently Burst off-cooldown. Not only that, learning how to funnel energy into Eula by casting the battery unit’s Elemental Skill and then swap into Eula so she can catch the particles on field for maximum energy efficiency is important in casting Burst every rotation without relying on high Energy Recharge stats.
Here is an example of energy funneling:
Don’t hesitate to swap after your Burst explodes to battery instead of attacking. Getting your energy back to cast Burst next rotation is more important than a bit more damage with your Normal Attacks.
On characters with very high Burst cost (such as Eula), one of the ways one can efficiently battery them is by casting an Elemental Skill into Elemental Burst in quick succession, and while Elemental Burst animation plays out, the character would catch the traveling particle while in animation lock, thus saving time.
However, Eula is a special case. Her Energy drains after her Burst animation finishes, around 1.5s, which is longer than any particle travel time, thus you cannot pre-funnel Energy into her with this tech. Be mindful of this when you are doing rotations on Eula, to not waste your Particles into the void.
For better visualization, check out this clip by Artesians on the matter: Eula energy why
Recommended ER thresholds
Recommended ER for popular battery choices in Eula compositions
Calculated using the ERC with default – no enemy Particles, safe Particle RNG, R3 weapons
For Rosaria calcs, assumes 2 Skill uses and Fav triggers per rotation
The requirements for specific comps are available here
| Battery unit(s) | ER threshold |
| Favonius Rosaria + Sacrificial Diona | 120-130% |
| Favonius Rosaria + Favonius Diona | 130-140% |
| Favonius Rosaria | 145-155% |
| Sacrificial Diona | 150-160% |
| Raiden + Rosaria + Sacrificial Diona | 100% |
| Raiden + Favonius Rosaria | 110-120% |
| Raiden + Sacrificial Diona | 130-140% |
| Raiden + Favonius Diona | 150-160% |
| Raiden + Favonius Rosaria + Sacrificial Diona | 100% |
| Raiden + Favonius Rosaria + Favonius Diona | 110%-120% |
On the issue of snapshotting
Glacial Illumination does not snapshot. This means her explosion damage will be calculated in real time, using stats at the time it explodes. This means Eula has very low synergy with units that have buff times below 10s, such as Sara, as her highest damage source cannot be buffed by their kit. Longer buffs such as Bennett’s Burst and Xinyan C4 are workable with Eula, but the timing may be quite tight depending on your rotations. Note that while the timing might seem right, Rosaria’s A4 Crit Rate buff is inconsistent with Eula’s Burst and should not be assumed when building Eula’s artifacts.
On the issue of missing Bursts
Eula’s biggest strength is also her biggest weakness. She puts most of her eggs into the Burst basket, and if she misses, it devastates her damage, not the enemy health bar.
Because of this, be mindful of when and where you are casting your Burst. Make sure you have adequate time to ramp up your stacks and make sure that once you do, you hit something with the explosion. It is not a bad idea to delay your combos or cut it short to reposition yourself, or to delay casting it in the first place, to guarantee you get the maximum value of using the 80 Energy. Learn enemies’ movesets! Game knowledge is your best friend here.
 Ascension 1 Passive | Roiling Rime
Talent Description
If 2 stacks of Grimheart are consumed upon unleashing the Holding Mode of Icetide Vortex, a Shattered Lightfall Sword will be created that will explode immediately, dealing 50% of the basic Physical DMG dealt by a Lightfall Sword created by Glacial Illumination.
This Ascension Passive heavily incentivizes you to only use Hold E only when you have 2 Grimheart stacks. The damage loss of omitting this passive is quite considerable, so always be aware of your Grimheart stacks before casting Hold E.
 Ascension 4 Passive | Wellspring of War-Lust
Talent Description
When Glacial Illumination is cast, the CD of Icetide Vortex is reset and Eula gains 1 stack of Grimheart.
A very useful and simple passive that just works. This Ascension Passive allows you to perform the fast combo of E Q Hold E, or E Q Hold E Nx, and still get maximum damage out of your Hold E, even when you start at 0 Grimheart stacks.
Talent Level Priority
Q >= NA >> E
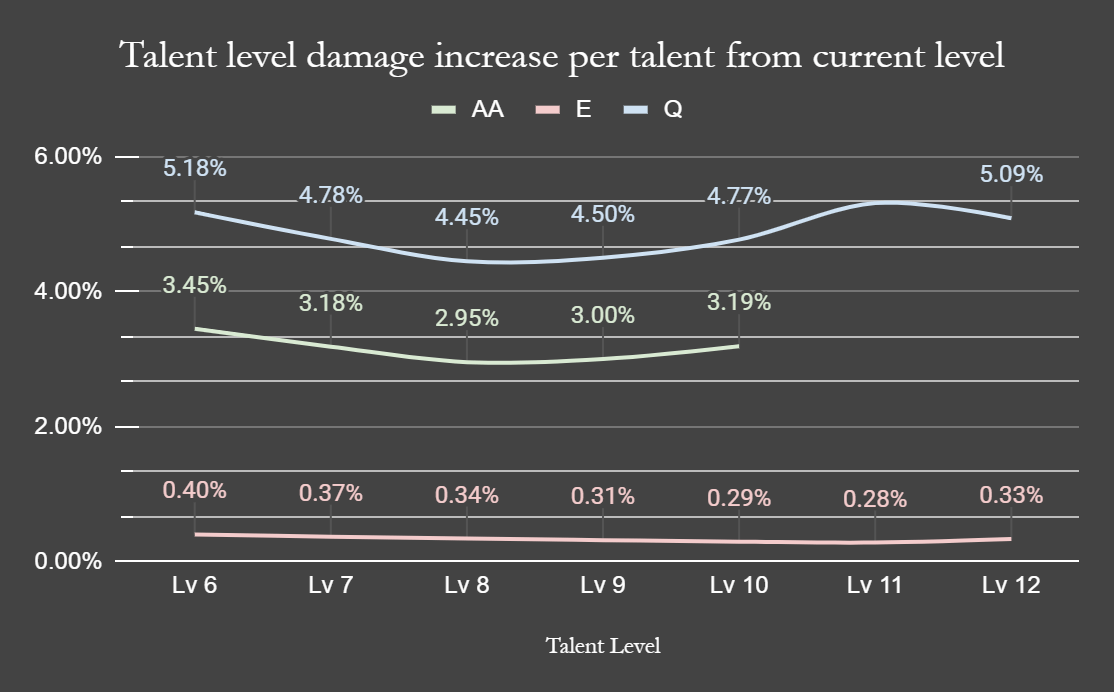
Eula’s Burst is the strongest ability in her kit, and it should be prioritized, followed by her Normal Attacks. Although in a perfect scenario, levelling your Elemental Burst should give you the most damage all the time, Normal Attacks provide consistent damage in the case you miss that explosion or fail to crit (we have all been, and will continue to be there).
Prioritize Burst, the Normal Attacks. Get both of them to Talent level 9, but Crown Elemental Burst first.
Eula’s Elemental Skill is a mediocre ability in damage. It has great utility, but its power per talent level gain is very mediocre, especially if Superconduct already brings enemies down to subzero Physical resistance, at which point all Resistance Shred value is halved. Level this last, you can even keep it at Talent Lv 6 if you want to be extra frugal.
Constellations
*Author’s notes: Rolling for a 5* unit is already a hard and expensive task, not to mention weeks-on-end of saving. Rolling for constellations is that, times how many copies you need. I try to do my due diligence in giving you the most unbiased information possible, but at the end of the day, these numbers do not mean much outside of the context of your own enjoyment. Make your own decision according to your own financial situation. Spend responsibly.
 Constellation 1 | Tidal Illusion
Every time Icetide Vortex’s Grimheart stacks are consumed, Eula’s Physical DMG is increased by 30% for 6s.
Each stack consumed will increase the duration of this effect by 6s up to a maximum of 18s.
Average damage gain over C0: 10.5%
A very straightforward Constellation that gives you very good damage gain as you flow naturally through your rotation. You do not have to change anything with your playstyle with this Constellation, just consider it free damage. It even gains more value outside of your Burst rotation, as it can extend up to 18s, carrying well over into your Burst downtime.
Just remember, having this Constellation means you are now triply incentivized to hit that 2 stack Grimheart Hold E for the most consistent and highest damage gain possible. Don’t forget the stacks!
 Constellation 2 | Lady of Seafoam
Decreases the CD of Icetide Vortex’s Holding Mode, rendering it identical to Press CD.
Average damage gain over previous Constellation: <1%
Average damage gain over C0: 10.5%
A quite niche, situationally good Constellation. During your Burst rotation, C2 does not change any combos. Casting E is too much of a time investment compared to just Normal Attacking, and you might lose stacks instead of gaining any.
This Constellation will see the most power when you are in Burst downtime, and stay on Eula. You net a maximum of 27 Particles/min just using Hold E off cooldown, 21% more Energy than the spamming Tap Es. However, in synergy with C1, you should still do Tap E – Tap E – Hold E for maximum damage, which nets you 24 Particles/min, 9% higher than spamming Tap Es.
Although on paper this Constellation extends more than just higher Particle generation, it is not a damage increase as your downtime is never going to be long enough to see a damage gain, assuming proper play. Think of it as a utility buff.
Note: I’d like to emphasize that C2 is not needed for 4 pc Pale Flame to be best-in-slot.
 Constellation 3 | Lawrence Pedigree
Increases the Level of Glacial Illumination by 3.
Maximum upgrade level is 15.
Average damage gain over previous Constellation: 17.8%
Average damage gain over C0: 30.2%
When half your damage comes from your Burst, a 3 level upgrade to the talent is completely cracked. Not much to say here, it is a straight damage increase, no questions asked. You will see bigger numbers.
 Constellation 4 | The Obstinacy of One’s Inferiors
Lightfall Swords deal 25% increased DMG against opponents with less than 50% HP.
Average damage gain over previous Constellation: 6%
Average damage gain over C0: 38%
This Constellation is not great, as the DMG% is additive with other bonuses such as Physical DMG% from your artifact/weapon. This lowers its overall damage gain.
When you cast your Burst on Eula, unless the enemies are very tanky and need multiple Bursts to kill, Lightfall Sword does not often explode when they are sub-50% HP, thus lowering its practicality. Mediocre Constellation.
 Constellation 5 | Chivalric Quality
Increases the Level of Icetide Vortex by 3. Maximum upgrade level is 15.
Average damage gain over previous Constellation: 1.8%
Average damage gain over C0: 38%
Your Skill makes up an incredibly marginal damage gain, while your Physical/Cryo Resistance Shred caps out at Talent lv 10. Ascension 1 procs on Hold E cast, but the damage scales with your Burst’s Talent level, not Skill’s. Just a step to C6.
 Constellation 6 | Noble Obligation
Lightfall Swords created by Glacial Illumination start with 5 stacks of energy. Normal Attacks, Elemental Skills, and Elemental Bursts have a 50% chance to grant the Lightfall Sword an additional stack of energy.
Average damage gain over previous Constellation: 40.6%
Average damage gain over C0: 97.7%
If you get here, you are an absolute whale, and you are rewarded appropriately. Undeniably Eula’s strongest Constellation, it is understandable why it is a C6. Eula’s Elemental Burst caps out its damage at 30 stacks, but C6 is the only way you can hit that threshold, for the highest single-instanced, achievable damage in the game. Expect going from 13 stacks to 24-26 stacks per Burst on average.
Not only does this Constellation open up your damage ceiling, it also means you can play Eula at a much more lenient level to hit the baseline damage. You can swap earlier for the same or higher amount of stacks than at sub-C6, or play for the highest oneshot possible. This Constellation is absolutely insane.
Optimal Combos
Now that we have finished with our crash course over Eula’s kit, let’s put that knowledge to use and optimize your Eula gameplay. Her combos are quite complicated, and hard to perform consistently when you are being hammered down by enemies in Abyss, so it might take some time before you become really comfortable with it. As always, practice is key!
Standard rotation (Balanced)
Difficulty level: B
Max possible stacks gain: 14
E > Q > N4 > Hold E > N4 > Explosion
Eula’s most generic, versatile, and consistent combo. This is a hassle-free, beginner-friendly, easy to pick up combo that every Eula player should know, and master. If there is only one combo here you need to learn, it is this one.
This combo should consistently give you the highest damage on Eula of all combos while holding on to Grimheart stacks through half of the rotation means you gain adequate defense to play out the fight without needing to worry too much about being one shot. One of Eula’s largest issues is she severely lacks defensive options after she casts Glacial Illumination, as she should be focusing on gaining as many stacks as possible, this combo helps alleviate a lot of that. Input Hold E as soon as possible after the first N4 for maximum DPS.
Tips and tricks: Eula’s Burst’s stack accumulation has an ICD of 0.1s. As a Claymore wielder, usually this does not impede her stack gains. However, after you cast hold E, Ascension 1 (Roiling Rime) procs after a delay, around when you are performing N1. It is advised to delay your combo after casting Hold E by a tiny bit (~0.1 seconds) instead of inputting Normal Attacks right away to maximize your Burst’s damage. Inputting and waiting for a walk animation is a close approximation.
Showcase video: Click me
Regeneration-focused rotation (Defensive & Utility)
Difficulty level: A
Max possible stacks gain: 13
E > Q > Tap E > N4D > N2 > Hold E > N1 > Explosion
A niche combo that should only be used situationally. This combo nets you one more Tap E for extra Energy. Also, this rotation will make your Eula the tankiest compared to other rotations, as you hold Grimheart stacks until the very end of your Burst duration.
As a carry, although defenses are appreciated, doing a combo that sacrifices a lot of damage for some defense is not something one should do. The situations where this combo springs up are rare, but it is useful to know regardless.
Showcase video: Click me
Beidou Driver rotation (Specialized)
Difficulty level: A
Max possible stacks gain: 14
E > Support > N1 > Q > N3 (wait) N4 > Hold E > N3 (wait) N4 > Explosion (New)
E > N1 > Q > N1 E > N4D > N2 > Hold E > Explosion (Deprecated)
A modified standard rotation, which has been shown to be better than the original Beidou driver rotation (left here for historical purposes). This new rotation gets the same amount of Stormbreaker discharges (7) while significantly improving Eula’s personal damage. Use your skill earlier in the rotation to prestack Grimheart, and weave in normal attacks on your supports after Eula’s rotation to continue triggering Stormbreaker. Note: you must wait after each N3 before inputting N4 to account for Stormbreaker’s ~1s ICD, hence the increased difficulty.
Demonstration (new rotation): Click me (don’t do the full N5)
Showcase video (deprecated rotation): Click me
R3+ Pines rotation (Whale)
Difficulty level: A
Wallet damage: S+
Max possible stacks gained: 15 stacks
N2D > N1 (3 Sigils Pines) > E > Q > N3 > Hold E > N5 > Explosion
A combo reserved for those who are lucky enough, or spend enough to get at least a R3 Song of Broken Pines. At this point, you gain enough of an ATK SPD buff that this combo becomes possible, and you get the highest maximum stacks without utilizing C6. Do note you have to stack 3 Sigils of Whispers before doing this combo, so set it up with N2D – N1. This combo is also doable with R1 Pines and C2 Jean or C6 Yunjin. This setup is a DPS loss, so use this rotation only when going for a screenshot or if you need one rotation to clear and the standard rotation is just barely not enough.
On the issue of attack speed
With how strict Eula’s Burst duration is to gain stacks, one may be tempted to use weapons/buffs that give you ATK SPD buffs to gain more stacks, or just to make combos easier to execute. Except for the Whale DPS rotation listed above, there are no currently known other methods to bypass the maximum stacks listed above.
On a positive note, if you are just looking for a way to combo easier with much more leeway, ATK SPD will still help you, and you will have more margin of error.
Showcase video by MichaelB: Click me
Article II: Gearing

Artifacts
For those who do not want to read through this section, here is a TL;DR table. A few % difference is basically negligible—one substat upgrade makes up roughly 3%. Note that the following discussion is generalized—to find your personal best artifacts, check out Genshin Optimizer.
Eula’s Artifact Rankings
Simulated with Lv 90 C0 Eula, level 9 Talents, R1 Serpent Spine
Minimum 130% ER, remaining substats optimized following KQM TC Standards
Lv 100 enemy with base 10% universal Resistances, affected by Superconduct, 4 NO buff
Rotation: E Q N4 Hold E N4 (explosion) – 13 Lightfall stacks
No other external buffs, no auras/Resonance, dynamic weapon passives
Full sheet available here

4pc Pale Flame

Eula’s undisputed BiS (“best in slot”) artifact set. This set is made for her, and ever since her release it has kept its standing as the best set for Eula. 25 Physical DMG% at base, with 25% more and 18% ATK on a condition that Eula can trigger consistently in her Burst rotation with E Q – Hold E is huge. The passive also lasts way past the explosion, if you want to stay on Eula for more after that. Always prioritize farming and using this set, unless your substats on it are very bad compared to other options. Again, C2 is not needed for this to be Eula’s BiS set.
2pc Pale Flame + 2pc Bloodstained Chivalry

Your second best option if you do not have a good 4pc Pale Flame set, or are in the process of farming it. It is basically full set Pale Flame without the 18% ATK buff, which is not too significant of a loss once factoring in external ATK% buffs such as Noblesse, Tenacity, etc. Do not hesitate to use this set if your substats on it are a clear winner over the full Pale Flame set. This combination is notably more attainable now with the Artifact Strongbox.
2pc Pale Flame/Bloodstained + 2pc Gladiator/Shimenawa/Emblem of Severed Fate


Here we get into the mix-and-match territory. These options do not have high synergy with Eula, but they are very competitive stat sticks and can be compensated with good substats. The formula is: Physical DMG% + whatever set bonuses you need, which with Eula is ATK% or ER%.
If you need more ER% to hit the threshold of ulting off cooldown, go with Emblem of Severed Fate. If you already have enough ER%, go with Gladiator for a more offensive option.
4pc Emblem of Severed Fate
A surprisingly decent set for Eula, as it mostly addresses Eula’s ER% needs and provides a decent boost in DMG%. Eula’s Burst (initial slash, A1, and Lightfall) make up 60-70% of her personal damage, so the 4pc effect still decently buffs Eula’s kit. The main appeals of this set are resin efficiency and reallocating ER% subs to crit subs, which is what makes it competitive with other sets. Given that Bloodstained Chivalry is available in the Strongbox, going for 2 Bloodstained 2 ESF will generally be an easier set to assemble. As with basically every other set, go with whatever has the best substats.
Mainstats and Substats
Sands: ATK% > ER%
Eula is a Physical carry, so her stat requirements are quite simple. ATK% should always be your go to. Eula usually needs around 140-150% ER on the high end and 110-120% ER on the lower end (team-dependent) to Burst off cooldown. ER% sands gives you 52% ER at lv 20, and if you get lucky (or unlucky in this case) with some substats you can easily reach upwards of 170 ER%.
With proper team building and substat farming, you should never need that much ER% to meet your Energy requirements, and it dumpsters her personal DMG as you lose so much ATK%. Only run ER% if you have no other options to Burst off cooldown. An ER% sands can also be useful at C6, where Eula can function as a quick-swap Burst support (i.e. on Raiden teams).
Circlet: CRIT Rate%/ CRIT DMG%
As always, CRIT is king for non-reaction carries. Choose whatever CRIT main stat that helps you balance a 1:2 ratio, and take substats into consideration as well. Ideally, aim for a minimum of 70% CRIT Rate before any buffs. Do not assume Rosaria’s A4 passive or Cryo Resonance will save you here.
Goblet: Physical DMG%
She deals Physical DMG, so get the mainstat that benefits her. You should have enough ATK% buffs that an ATK% Goblet should never be a consideration.
Substats:
Substats priority is as follow:
- ER% (until you can comfortably Burst off cooldown)
- CRIT DMG%/CRIT Rate%
- ATK%
Soft goals (without any buffs) should look roughly like the following:
- 70% CRIT Rate, 150% CRIT Damage (200% with a CRIT weapon)
- Approximately 130-140% ER (team dependent) for consistent Burst uptime
- Higher bonus ATK (green) than base on the stats screen
On the issue of “crit fishing”
Eula’s unique kit also opens up a unique playstyle: skewing your CRIT ratio heavily into CRIT Damage instead of keeping a 1:2 CR:CD ratio and reset until you get a massive damage Critical hit with your Burst to oneshot floors. While this can certainly be a viable tactic, it only works in floors with a single wave and low enemy count. It is not recommended to be used as a general playstyle, and for general use and just for sustainability through multiple content, stick with a 1:2 CRIT ratio.
Weapons
For those who do not want to read through this section, here is a TL;DR table.
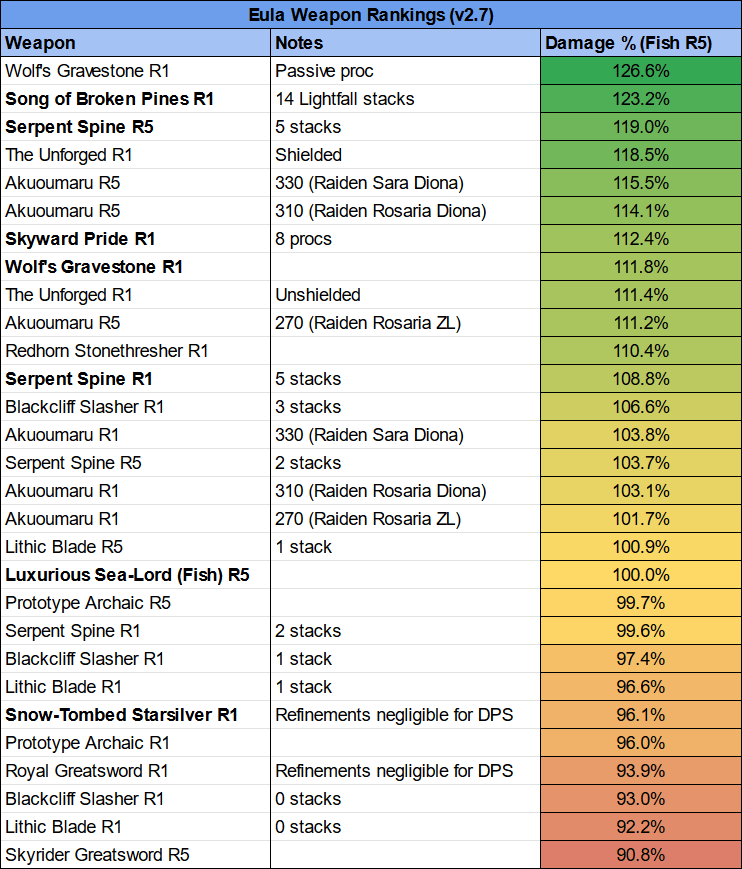
Eula’s weapon rankings
Simulated with Lv 90 C0 Eula, level 9 Talents, 4 Pale Flame
Minimum 130% ER, remaining substats optimized following KQM TC Standards
Lv 100 enemy with base 10% universal resistances, affected by Superconduct
Rotation: E Q N4 Hold E N4 (explosion) – 13 Lightfall stacks
No external buffs, no auras/Resonance, dynamic weapon passives
In-depth weapon analysis
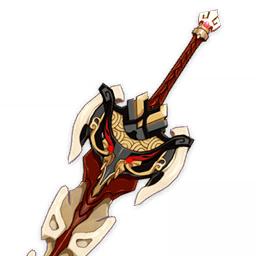
Song of Broken Pines

It is no surprise that Eula’s signature weapon would be BiS for her. Highest base ATK and Physical DMG% substat with more ATK% steroids in its passive all benefit Eula greatly. Not to mention, the ATK SPD buff means your combos are a lot easier to perform. 10/10 weapon for Eula. Only weakness is that outside of Eula, Razor, and Xinyan, no other Claymore wielders really want it. Look at your overall roster before deciding to pull for this.
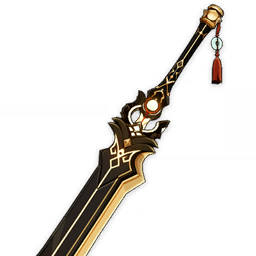
Wolf’s Gravestone
The best generalist Claymore in the game. It has the largest ATK% buff in the game on a single weapon, and it is teamwide. With this weapon, most outside ATK% buff is unneeded or has their opportunity cost reduced greatly. If its passive procs, it can easily out damage Song of Broken Pines. However, the 30% HP threshold condition is quite hard to proc before Eula’s Burst explodes, so although it is still incredibly strong, it sits at 2nd place.
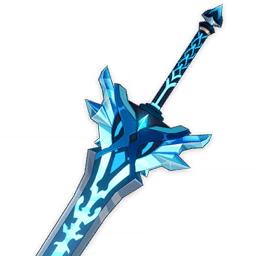
The Unforged

Wolf’s Gravestone v2, albeit weaker. This weapon also gives massive ATK buffs, and although it is a lot more consistent than Wolf’s Gravestone, you are forced to use a shield with Eula to get maximum power out of this Claymore. If you do not have a Zhongli or Diona, this weapon is not as impressive as it seems. Even without shields it is still a 5* weapon with very good ATK% buffs, so it is still up there on the list.
Skyward Pride

Skyward Pride’s power and rankings are hard to pin down, as its power is heavily dependent on how much ER% you need. Eula actually makes very good use of its passive, as Skyward Pride’s airblades deal Physical Damage, and Eula’s kit can maximize its potential. If you need the ER%, it is at least a top 3 weapon. However, if you don’t need this weapon to hit the ER% threshold, or if it brings you too far over that ER% requirement, it can even be beaten by the best 4* options for Eula.
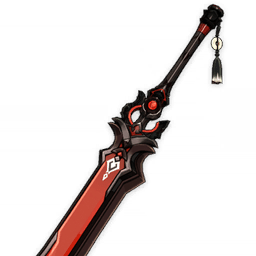
Redhorn Stonethresher

An incredibly strong stat-stick, boasting an 88.2% CRIT DMG% substat at max level. Despite this, Redhorn suffers from having poor base ATK and passive (even with Grimheart stacks). It is not worth it to change your rotation to get a slight boost to Eula’s Normal Attacks. This weapon also suffers from CRIT imbalance, as it will be difficult to achieve a 1:2 CRIT ratio with this weapon. One of the most powerful weapons for Eula when used with Bennett, as he helps solve the issue of low Base ATK.
Serpent’s Spine
An absolute monster of a weapon, it is a surprise how it is even a 4*. With high CRIT Rate substats, a universal DMG% buff, this weapon makes investing in Eula easier than even some 5* options above. Its only weakness is that it is also heavily contested among other Claymores, so unless you have multiple copies, you have to make a decision of who get to use it. Best 4* option for Eula, uncontested.
Luxurious Sea-Lord

For how silly this thing looks, it is the current best F2P option for Eula. It is an event weapon, so you can R5 it with little cost, and at R5 it gives a 24% DMG buff for your Burst, while also having a very good ATK% substat. The on-hit damage you can proc once every rotation consistently is extra icing on the top. Heavily recommended for all F2Ps, if you can get over your Eula whacking people with a giant sardine.
Akuoumaru

Akuoumaru is an unstable weapon that has the potential to be the 2nd best 4* weapon for Eula after Serpent Spine, but also can be worse than Sea-Lord, depending on how much Energy cost you are running in your team. It is recommended to use Akuoumaru only if you are running Eula with Raiden to make the most use of its passive and if you have high refinements on it, or if you do not have a Sea-Lord or Serpent Spine to spare for Eula. Still a very good weapon, do not hesitate to use if the conditions aforementioned apply to you. You can check the comprehensive weapon sheet at the top for specific thresholds and refinements where it matches up with her better options.
Lithic Blade

Another weapon that has a conditional ranking. Two of Eula’s best batteries are Rosaria and Diona, and they are from Mondstadt, while if you do not have a Raiden Fischl is your best off field Electro applicator for Superconduct. This means this weapon is usually stuck at 1-2 stacks, or in some cases even 0, pushing it behind Snow-tomned and Archaic. However, in a Eula Raiden Beidou composition where you can reach 2 stacks, this weapon beats all of the options under it. Quite situational, use with care.
Snow-Tombed Starsilver
Used to be Eula’s best F2P option until Sea-Lord arrived. It has fallen out of favor, but it is still a very competitive weapon on Eula, not to mention there are few who would contest this weapon from her. It’s passive can be dodged and missed, which is its one point of inconsistency, other than that, it is a useful and nice statstick that just works.
Prototype Archaic
Very similar to Snow-Tombed in power, but it trades Snow-Tombed higher damage ceiling for higher consistency. Use it if you don’t have anything better, you don’t need to feel bad about using it.
Blackcliff Slasher
This weapon shares many parallels with the Lithic Blade. Incredibly powerful when everything lines up in its favor, but a fairly underwhelming floor. At 3 stacks it’s comparable to Serpent Spine in damage, but the situations where you reach that power are very rare and niche. At 0-1 stacks, it is still a good weapon, but not worth enough to trade 25 Starglitters for.
Skyrider Greatsword R5
A surprise among the roster, but definitely a welcome one. At R5, it is at the same power of an R1 Snow-Tombed, which for a 3* weapon is incredibly impressive. If you are at this point where you have no other options, beggars can’t be choosers, and this is absolutely not a bad reason to beg for.
Royal Greatsword

The Royal weapon line up has always been a strange one, and not in a good way. While they have very high base ATK for a 4* weapon, along with ATK% substat, its passive is one of contradiction. The passive gets stronger the lower CRIT Rate you have, but never becomes strong enough to the point where it can fully replace actually investing into CRIT. Because of this, its passive becomes worse and worse the more investment you have on Eula, making it unappealing. Still, it works as a useful stat stick, despite its passive.
*Note: The options listed below are never worth running as several of the above options can be easily obtained for even free-to-play players (i.e. Snow-Tombed Starsilver, Skyrider Greatsword). These include the following:
- Whiteblind
- Katsuragikiri Nagamasa
- Rainslasher
- The Bell
- Sacrificial Greatsword
- Favonius Greatsword
Article III: Team Composition and Synergy

As with many other hypercarries, Eula compositions are not very flexible, and usually follow a strict “formula” of units that are core to her performance, with 1-2 other units that are replaceable depending on content and your own preferences and playstyles, as well as availability.
As stated before, although Eula is a Cryo character, you should only play her as a Physical unit unless you are willing to accept that you are not going to perform to even half of Eula’s potential. All of her standard, and best comps, maximize her ability to do as much consistent and sustainable Physical damage as possible.
All of Eula team comps generally fulfill these 3 conditions, and the rest is up to you:
- An off-field Electro applier that can keep consistent Superconduct uptime for Eula throughout her rotation.
- 1-2 units that can battery Eula so she can Burst comfortably off cooldown without relying too heavily on her own ER%.
- Offensive and defensive buffs that can keep uptime throughout Eula’s Burst until her explosion.
From these conditions, we sort Eula’s compositions into different categories, based on her core unit: a Superconduct source (Electro applier).
Superconduct Sources
Fischl

The original base Eula team comp. Most Eula teams that are easy and consistent to perform and play with decent quality-of-life rotations will follow this template. Fischl applies a consistent, long-existing Superconduct with minimal field time, and the other units keep Eula’s damage high and consistent, or provide her with defense. Except for Eula, all other units are usually 4*, making it very F2P friendly. 4 Tenacity of the Millelith is one of Fischl’s better artifact sets in Eula teams, which is easily farmable with Pale Flame.
Here are some popular variations of this template and how to play them. Do note these are just suggestions – you can build different comps with this template once you understand more about how each unit performs in a Eula team setting.
Triple Cryo

A popular variation that allows consistent Energy regeneration for Eula. The damage ceiling of this team is not the highest, but it is consistent, and the barrier of entry is quite low. Recommended if you just started playing Eula.
Rotation: Fischl E > Rosaria E > Diona Hold E (x2) > Eula E > Rosaria Q >
Eula Burst rotation > Rosaria E > Eula normals (repeat at 22 seconds with Fischl Q)
Beidou

One of the most mechanically-intensive variations. Here you trade a bit of Eula’s damage to enable Beidou’s massive off-field damage. A very Energy-hungry team, Eula will need up to 170 ER% to Burst efficiently, or both Sac Diona and Fav Fischl. It is recommended to end fights in around 1-2 Burst rotations, otherwise you might run into Energy issues. This comp scales very well with your Beidou’s investment.
Rotation: Fischl N1 E > Diona Hold E (x2) > Eula E > Diona Q > Beidou E Q > Eula Beidou Driver rotation > Fischl N1 Q > Beidou Hold E N1 > Diona N1 E N1 > Eula normals (repeat at 25 seconds)
Raiden Shogun

A more expensive version of Fischl variations, Raiden’s Elemental Skill is basically a better Fischl. It applies consistent Electro for Superconduct and trades personal off-field damage for more damage on Bursts and Raiden’s on-field damage, which out-damages Fischl. Raiden significantly reduces the whole team’s energy requirements with her top-tier team-wide energy regeneration, making team building and investing a lot easier and more flexible (note: Eula will still need a Cryo battery, even with Raiden). These benefits come at the cost of a higher skill floor, as both Eula and Raiden need strict combos to play optimally.
Eula Raiden compositions generally have rotation times over 22 seconds, and many can have extended rotations of over 25 seconds. Even though the damage per rotation is much higher than Eula Fischl’s, the DPS, although still higher, is not exceedingly high enough that it invalidates any non-Raiden Eula user. Coupled on that all Eula Raiden variations have more complex and active rotations, a lot of the damage gain actually comes from decreasing ER requirements and using those spare substats in more offensive stats. Raiden will also almost always be nerfed as a Eula support rather than as her own carry.
Even with all of these caveats, Raiden excels in the dual carry role and should overall be considered Eula’s best support for her damage, buffs, and energy generation, especially with Constellations 2 and higher.
*Author’s notes: Eula and Raiden are both fragile units, even with their interruption resistances. With both requiring a lot of uninterrupted field time, they are exposed to a lot of potential dangers. It is highly recommended that your flex or Cryo slot is a shielder, such as Zhongli or Diona, or a strong healer like Jean.
Triple Cryo

Any triple Cryo/double battery Eula comp is easy to play and build around, and that applies here as well. This is the only Eula variation where you can run 0% ER on Eula and still be able to Burst off cooldown, provided that you have a Sacrificial Bow on Diona. Rotations in this comp are smooth, with a lot of leeway for error without extending time too much. Heavily recommended for more casual players who want to play Eula Raiden together, but find the rotations to be technically difficult.
Because Raiden’s role is diminished, with plentiful energy and few buffs for her, a good 4pc Tenacity of the Millelith set can be as good as, if not better than ESF here.
Rotation: Raiden E > Diona Hold E (x2) > Eula E > Rosaria E Q > Eula Burst rotation > Rosaria E > Diona Q > Raiden Q 3N3C
Zhongli

A standard team with generalist units that can support both Eula and Raiden in dealing DPS. The rotation of this comp is quite snappy, fast, and easy to get used to. You can replace Rosaria for Diona if you are uncomfortable playing without a healer. Don’t use Zhongli Q outside of emergencies, it is generally a DPS loss.
Rotation: Raiden E > Zhongli Hold E > Rosaria E > Eula E > Rosaria Q > Eula Burst rotation > Rosaria E > Eula N2 > Raiden Q 3N3C
Beidou

Same as Eula Fischl, this comp trades Eula’s personal damage to enable Beidou, and with Raiden’s Elemental Burst buffs, Beidou can dish out some serious damage. This comp is now even harder to pilot well, although if you can play it perfectly, it is one of the highest damage teams in 2-3 enemy scenarios. As always, practice is key!
Rotation: Raiden E > Diona Hold E (x2) > Eula E > Diona Q > Beidou E Q >
Eula Beidou Driver rotation > Raiden Q 3N3C
Showcase by Sitri (older rotation): Beiden dream lives on
Lisa TTDS

Sitri’s personal favorite in terms of snappiness in gameplay. Lisa can be a deceptively very good support in Eula Raiden comps, as her largest issue of a powerful but unsustainable Elemental Burst is solved by Raiden’s unmatched battery ability. Throw Thrilling Tales and Noblesse Oblige on, as much ER as you can (aim for 200+), and you’ll get a massive ATK% steroid and DEF shred unit. For those seeking a low investment team, this one is great because Lisa only needs levels, ER%, and TTDS, which are all f2p-friendly.
Rotation: Raiden E > Diona Hold E (x2) > Eula E > Lisa Q > Eula Burst rotation > Diona Q > Raiden Q 3N3C
Showcase by Sitri: Eula Raiden Lisa TTDS
Yelan

Yelan’s A4 buff is commonly overrated as both Eula and Raiden already have many DMG% buffs, and the team needs ATK% to the point where 4pc ToM Raiden can be optimal. However, damage is still damage, and Yelan’s buff works well with Eula’s back-loaded Burst and Raiden’s Burst following it. This team also is one of the best at breaking Elemental shields due to Yelan’s consistent Hydro application, which Eula teams can otherwise struggle against. Yelan’s rotations require Normal Attack weaving to maximize her Burst procs, and tight execution to maximize the damage.
Rotation: Raiden E > Diona Hold E (x2) > Eula E > Yelan E Q N1 > Diona Q N1 > Eula Burst rotation (wait for Lightfall) > Yelan E N1 > Raiden Q 3N3C
Notes: If you find yourself with plenty of time after performing the DPS rotation and Lightfall hasn’t lit up yet, it could improve DPS to swap immediately.
Showcase by TWICE: Eula Yelan Demo
Kuki Shinobu

Shinobu is an Electro healer that can be mostly considered as a sidegrade to Fischl. Her Elemental Skill follows the active character and deals periodic damage, making Shinobu both a great Electro applier and 4pc Tenacity of the Millelith holder. Because she is a healer, she allows for more offensive Cryo batteries and flex units, such as Rosaria and Shenhe. Favonius Sword is also one of her best weapons, and her fast multi-hit Elemental Burst means you can reliably proc its passive without needing to invest too much into CRIT Rate. Her most relevant Constellation is her C2, which extends the duration of her Elemental Skill. At C0 she still performs fine with a few rotation changes, making her very affordable.
Despite these benefits, Shinobu has mediocre personal damage in Eula teams, and her healing can feel subpar against enemies that do a lot of damage really quickly. When adding another healer or shielder to the team, Shinobu’s merits quickly drop off compared to adding Fischl or Raiden. With these factors all considered, it’s best to build Shinobu as a full healer with Crit Rate to proc the Favonius passive.
The following teams will list rotations assuming C2 for futureproofing. For C0 rotations, move Shinobu to after the funneling, just before characters start using their Bursts.
Triple Cryo

A variation of the typical triple Cryo team that uses the two best offensive Cryo batteries. The team has a ridiculous amount of Physical resistance shred, and high uptime of Cryo resonance. Besides Eula, all characters’ best weapons here are Favonius, so energy is plentiful for Eula and Shenhe’s expensive Elemental Bursts.
Rotation:
Shinobu Q E > Rosaria E > Eula E > Shenhe Q E > Rosaria Q > Eula Burst rotation > Shenhe E N1 > Eula N2 > Rosaria E > Eula N4
Showcase by TWICE: Eula Kuki Shinobu Triple Cryo Rotation
Beidou

Potentially Eula Beidou’s best team. Rosaria and Shinobu both require low field time, and lower Eula and Beidou’s Energy needs with Favonius. Beidou can snapshot both 4 Noblesse and 4 Tenacity, dealing huge damage. Once again, practice the Eula Beidou Driver rotation.
Rotation: Shinobu E N1 > Rosaria E > Eula E > Rosaria Q > Beidou E Q > Eula Beidou Driver rotation > Rosaria E > Eula N2 > Beidou hE N1 > Eula N2
Yelan

With plenty of buffs and three Favonius users, this team is one of Eula’s standout new teams. Because you want to consistently proc Favonius and use Skills off cooldown, this team requires a lot of switching, making the overall rotation fairly involved. Otherwise, this team should excel at whatever content the game has to throw at it.
Rotation: Shinobu E N1 > Rosaria E > Eula E > Yelan Q N1 E > Rosaria Q N1 > Eula Burst rotation (wait for Lightfall) > Yelan E N1 > Eula N2 > Rosaria E > Eula N4
Cryo Battery candidates
Diona

Diona consolidates much of Eula’s needs in one neat, cheap, 4* package. High bursts of Energy generation in a short time with Hold E, proactive defense with shields, and reactive defense with her Elemental Burst healing. Diona with a R3+ Sacrificial Bow and a double Hold E is one of the best Energy generation methods for Eula. While she is best with a R3+ Sacrificial Bow, a Favonius Warbow can be okay. While Diona does open the flex position quite a bit, she will always be weaker in damage compared to more offensive Cryo batteries.
Shenhe

Shenhe is the more expensive version of Rosaria: she shreds Physical Resistance when enemies are in her Burst, provides the same amount of Energy with her press E, applies Cryo about as frequently, and buffs the whole team’s damage via her Ascension 4 passive. At C1 she’s a comparable battery to Sacrificial Diona, and at C2 she’s Eula’s best offensive Cryo support. She slots into existing teams nicely as a Rosaria replacement if you have her, but don’t feel forced to pull if you already have a high Constellation Rosaria.
Rosaria
Rosaria is the more offensive option to Diona’s defensive, and in that regard, she is a very strong offensive battery for Eula, especially at C2. With consistent high Energy regeneration, CRIT Rate buffs, very noticeable damage with her own Elemental Burst, do not hesitate to use Rosaria if you need to use Diona elsewhere. She will serve you well in most situations. While both Rosaria and Shenhe can reasonably maintain Cryo Resonance past the Lightfall explosion, Rosaria’s A4 CRIT share is inconsistent and should not be relied on without swapping early or using Song of Broken Pines.
Kaeya
Kaeya is a very slightly inferior option to Rosaria in a Eula comp, especially if Rosaria is at C2. While he can generate Energy over a long duration of time better than Rosaria, the higher Particle generated per cast by Rosaria makes her more appealing to Eula, who wants to get online as soon as possible. Still, a very good option, and he is free.
Flex candidates
Bennett
One of the strengths of Eula is that she does not need Bennett. Her strict rotation times and combo patterns means she is quite restrictive with when and where she can use Bennett. In the worst cases, she can even make Bennett look mediocre. However, Bennett is still Bennett, and he is still broken. If you don’t need Bennett on your other team you can use him here, and he will reward you with the best DPS of any Eula team.
Xinyan
Xinyan often gets flagged as the worst unit in the game, but she has some value in a Eula team, especially at C4. She gives a lot of useful buffs, such as Physical DMG% buffs, a decently large shield for a 4* unit, and with C4 a good amount of Physical shred. One of Eula’s best teammates for a nuke comp with C4 and WGS, but there are better alternatives otherwise.
Zhongli
There is hardly anyone more universal than the Geo Archon. It doesn’t matter who you are, he will fit just fine in any comp. His Elemental Skill’s 20% universal shred helps every character, his shields provide unmatched comfort, and a 4pc Tenacity of the Millelith set is easily farmable with Pale Flame. Never a bad choice to use him if you have a spare slot.
Albedo
Like Zhongli, Albedo is an inert, unintrusive unit that just works, no matter where you throw him in. He does not provide much for Eula outside of extra damage, but if you have no better option, he is always a choice to consider, or just to put your mind at rest.
Lisa
Outside of the Raiden Lisa variation, where Lisa’s strength as a Thrilling Tales of Dragon Slayer and DEF shred carrier shines the most, she is a limited support. I recommend running her only if you satisfy one of these two conditions: you are looking for a cheap speedrun/one-shot composition, or you plan to run Lisa with Raiden in a Eula comp. Outside of these, Lisa is not that great. If you can fulfill her Energy requirements in those two conditions above however, she is frighteningly useful.
Kujou Sara

Sara, in a lot of ways, is another Bennett. But since no one can be as broken as Bennett, she has a lot more caveats to be used than him. Sara’s buff duration is only 6s, so you cannot get your explosion to be buffed. However, 500-600 bonus ATK even just on half your rotation is still certainly not ignorable. I would only recommend running Sara if you have her at least C2, as it reduces your necessary aiming field time by a lot, and I recommend running her with Raiden, especially if your Sara is C6, for maximum synergy.
Yelan

Yelan is one of the most hyped recent characters. Her HP scaling means Favonius Warbow is one of her best weapons, her Elemental Burst annihilates enemy shields, and her A4 gives a huge DMG% buff that synergizes with Eula’s backloaded damage. While she provides neither the strongest nuke setup nor the best DPS team, Yelan is an extremely comfortable support if you don’t need her for a Reaction-based team.
Exceptional team variations
Geobros

This composition forsakes Superconduct for the bruteforce combo of Zhongli-Albedo, aka GeoBros. With Zhongli’s 20% universal resistance shred and Geo Resonance 15% DMG buff, along with more than enough shields, this composition trades a high damage ceiling for a much more comfortable experience.
Rotation: Zhongli Hold E > Albedo E Q > Cryo E > Eula E > Cryo Q > Eula Burst rotation > Cryo E > Eula Normals (repeat at 22 seconds)
F2P oneshot

Quite a meme comp, but it has been shown to work, so I will include it anyways. Do you ever want to feel like a whale, one-shotting a whole floor in one rotation? This is your chance. Stack all sorts of unsustainable buffs and debuffs, and deal as much damage in one go as possible. You can replace Xinyan C4 with Zhongli. I take no responsibility for the sanity lost in resetting floors to get a good run. This team should only be run for screenshots, not sustained Abyss clears.
Rotation:
Eula E > Lisa Q > Bennett Q > Eula Burst Rotation (swap immediately) > Xinyan E
*There is a delay before Eula’s burst goes off. If you have good enough ping, you can swap into Xinyan, cast her E, and get the resistance shred off before Lightfall Sword explodes.
Zhongli variation: Eula E > Zhongli Hold E > Lisa Q > Bennett Q > Eula Burst rotation
Showcase by Artesians: https://youtu.be/z4avNUneqU0
Mono Cryo

A unique composition that trades away a Superconduct source for the Physical resistance shred provided by Shenhe’s Burst and Rosaria’s C6. This team can potentially get 100% uptime on Cryo Resonance, helping alleviate Eula’s issues with crit, take incredible advantage of Shenhe’s Icy Quills, and free up powerful characters like Raiden for your second team. This comp generally wants multiple Favonius users to fuel Eula’s and Shenhe’s expensive bursts, but can get away with only one with higher overall team ER%.
Rotation (Zhongli variation): Zhongli Hold E > Rosaria E > Eula E > Shenhe Q E > Rosaria Q > Eula Burst Rotation > Shenhe E N1 > Eula N2 > Rosaria E > Eula N4
Showcase by TWICE: Eula Mono Cryo Demo
Eula Resources
Eula Mastersheet by ZΛNTO#4984, Sitri#9504, Artesians#0002, Agent_Eon#8245
Eula Database by KeqingMains
Eula Team DPS Comparisons by TWICE#9958
Change Log
6/28/22: Updated for 2.7 with Shinobu and Yelan.
6/15/22: General cleanup.
3/20/22: Updated team rotations, Beidou driver rotation. Updated ER recommendations. Added artifact comparisons, updated description for 4 ESF.
3/5/22: Updated Lisa TTDS to use NO instead of ESF, removed “maximum DPS” rotation.
1/29/22: Guide is now maintained and updated by TWICE#9958. Updated weapon listings with KQMS and Redhorn Stonethresher, new Shenhe writeup, general formatting and wording cleanup.
11/15/2021: Updated weapon listings with Akuoumaru, team comps with Eula Raiden Triple Cryo, new Lisa writeup, general cleanup.
9/12/2021: Eula guide first edition publicly published.
Closing Thoughts
This project was probably the largest undertaking I have taken solo. While I have written guides with many others before, either in sections, or just consultation, it has not come close to an experience writing this guide was. It was long overdue, and again, my sincerest apology for the delay and my own procrastination.
Eula has been out for a long time now, and although a lot of people have, and still are playing her, and probably know a lot about Eula, I hope anyone who read this guide would learn something new, and find some use from it. I also hope that if she gets a rerun, this would spark interest in more people to try her out and give her a chance. Eula is not a unit that is easy to like, and for good reason. She is not Ganyu, Xiao, Hu Tao, Bennett, Xiangling, who just works, she demands a lot of time and effort, but she is fun, and I hope people would have fun with her as well.
Again, many thanks to those who had helped me in theorycrafting Eula, and have entertained many useful discussions that allow me to have enough ability to write this guide. It would not have been possible without them.
That’s it from me for now. Peace.
-Sitri
