Updated for Version 3.1
This guide is not updated for new content, but the information is still accurate. See the Quick Guide for information on new characters and teams.
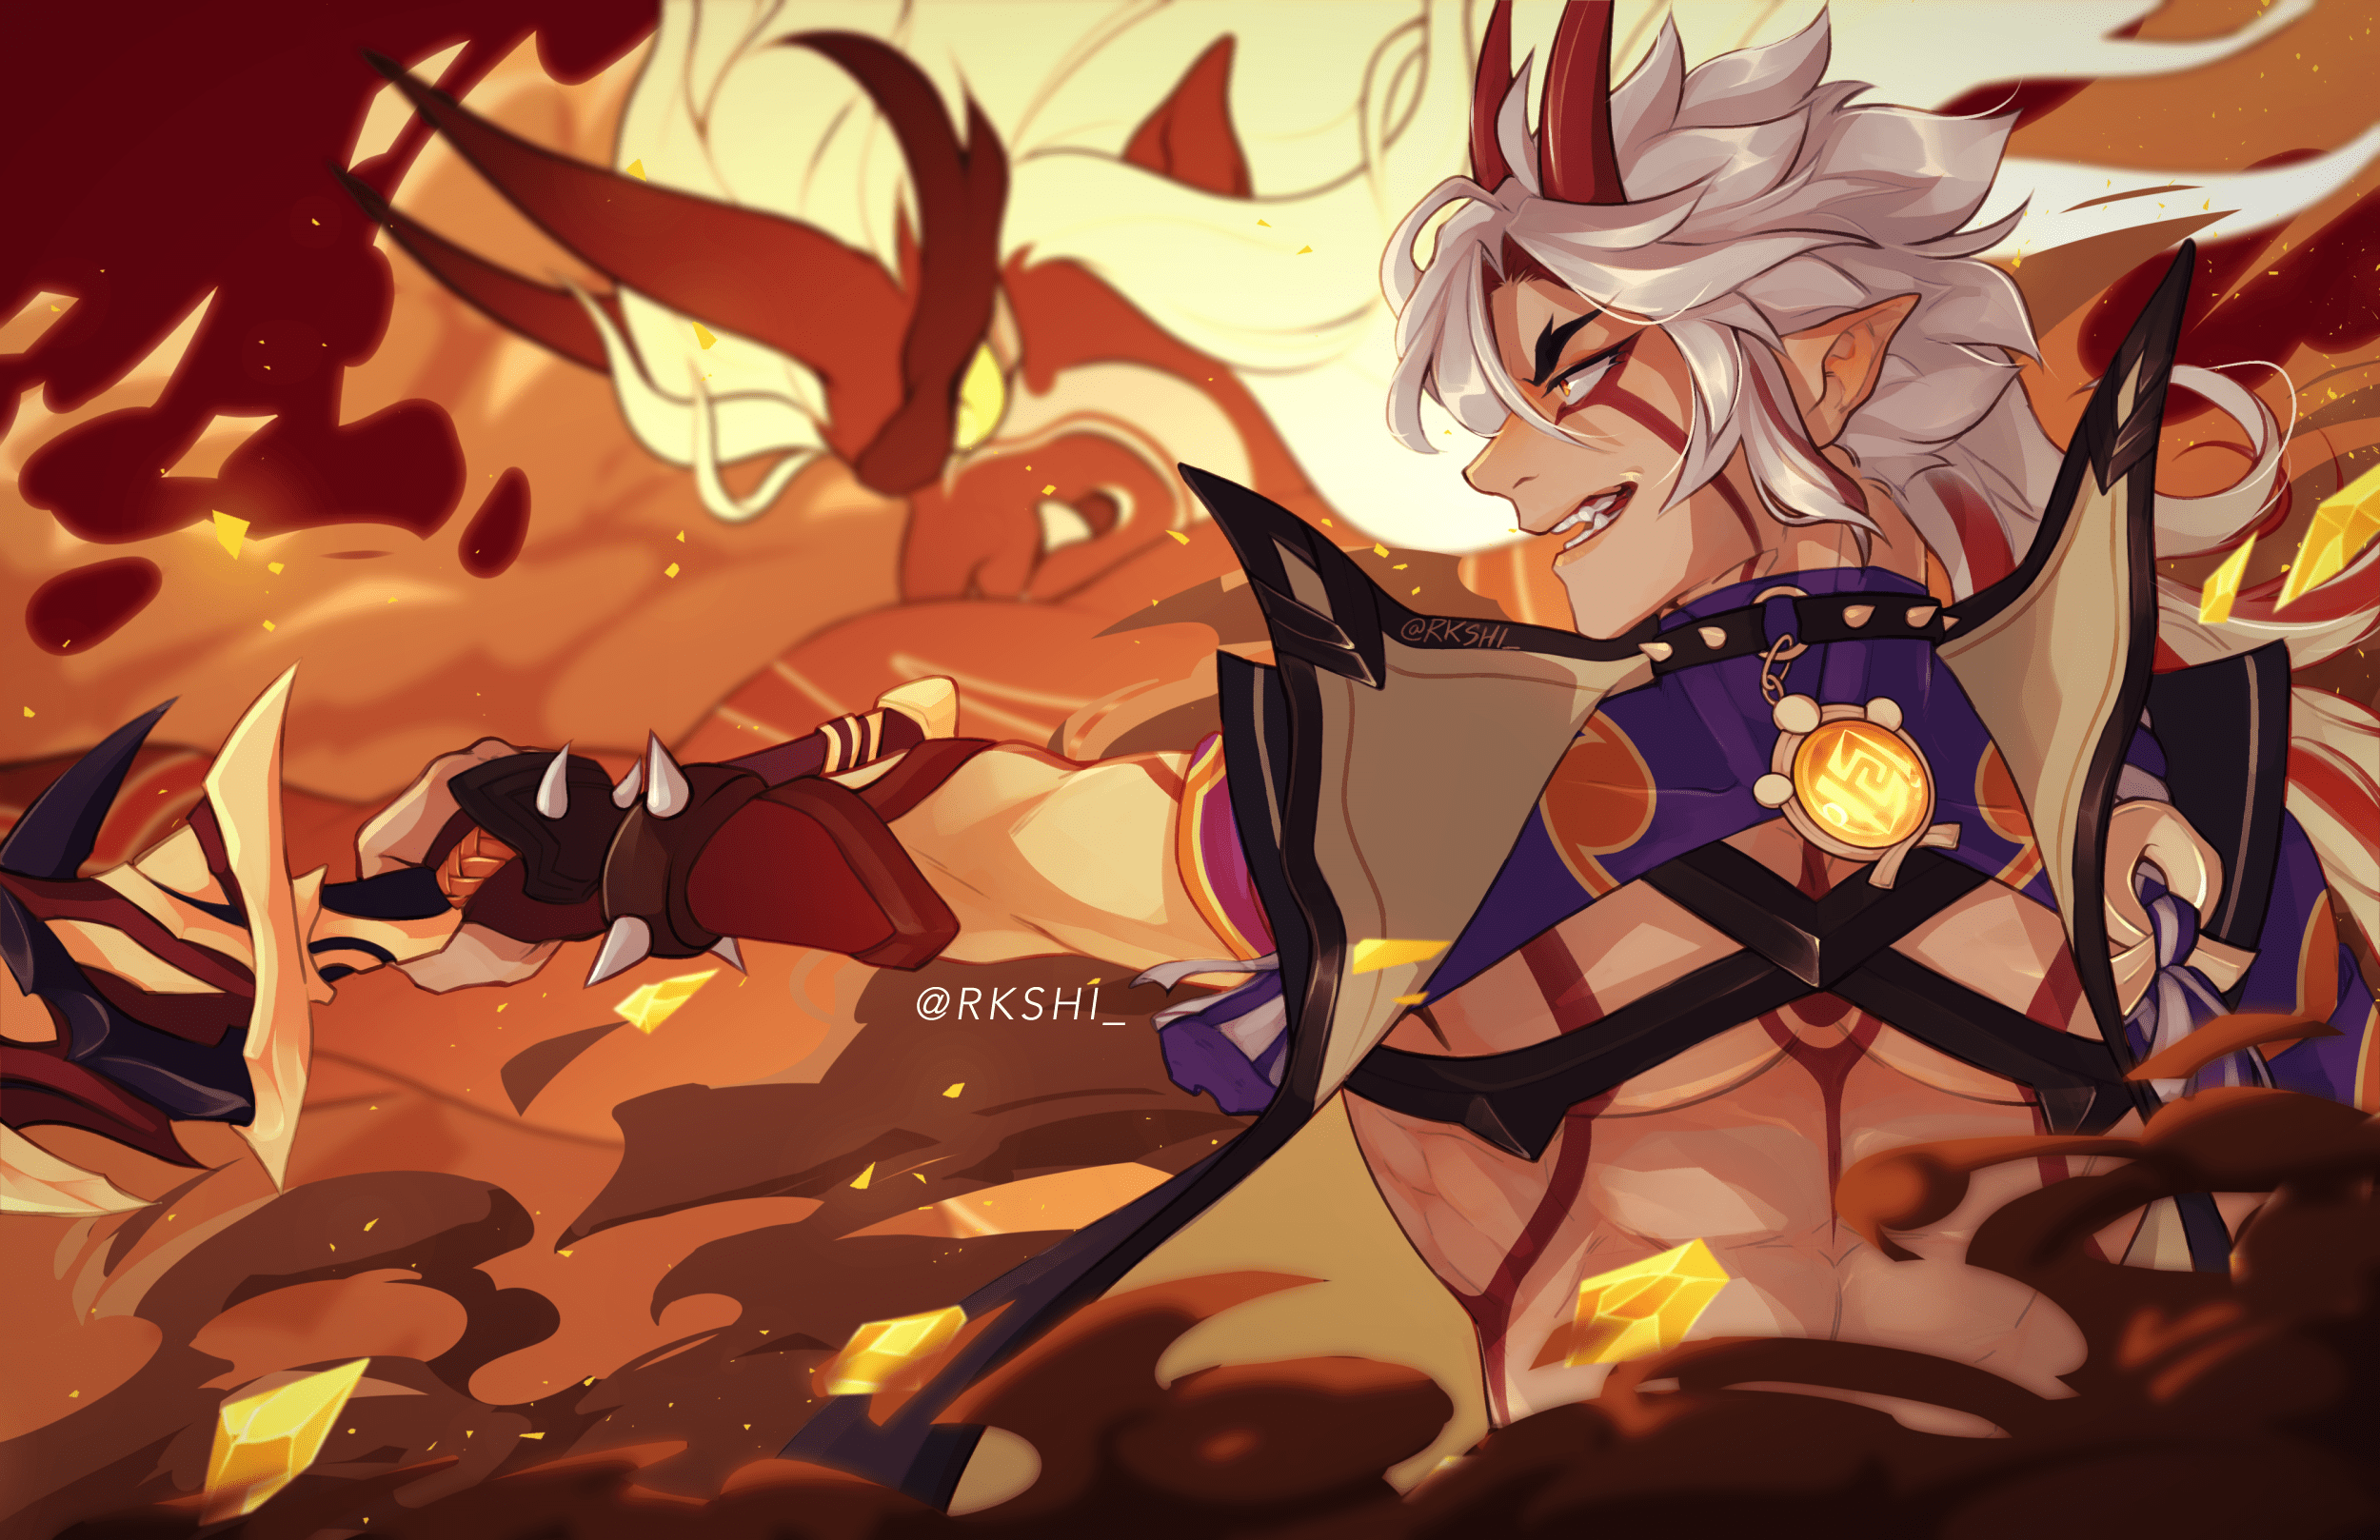
Art by @RKSHI_
Table of Contents
Preface
Welcome to KeqingMains’ guide on Arataki Itto, The First and Greatest Head of the Arataki Gang. Itto is the first 5-star Geo Main DPS of Genshin Impact, with a fast-paced and satisfying playstyle, making him quite unique from the rest of the cast. His kit is straightforward, while still having room for more advanced optimizations, making him a good pick for players who are looking for a balance of fun and challenge. In this guide, we will go over how to gear and play The One and Oni, Arataki Itto.
The following is a condensed infographic for basic information on Itto. For details about gearing, combos and team comp options, please proceed further into the guide.
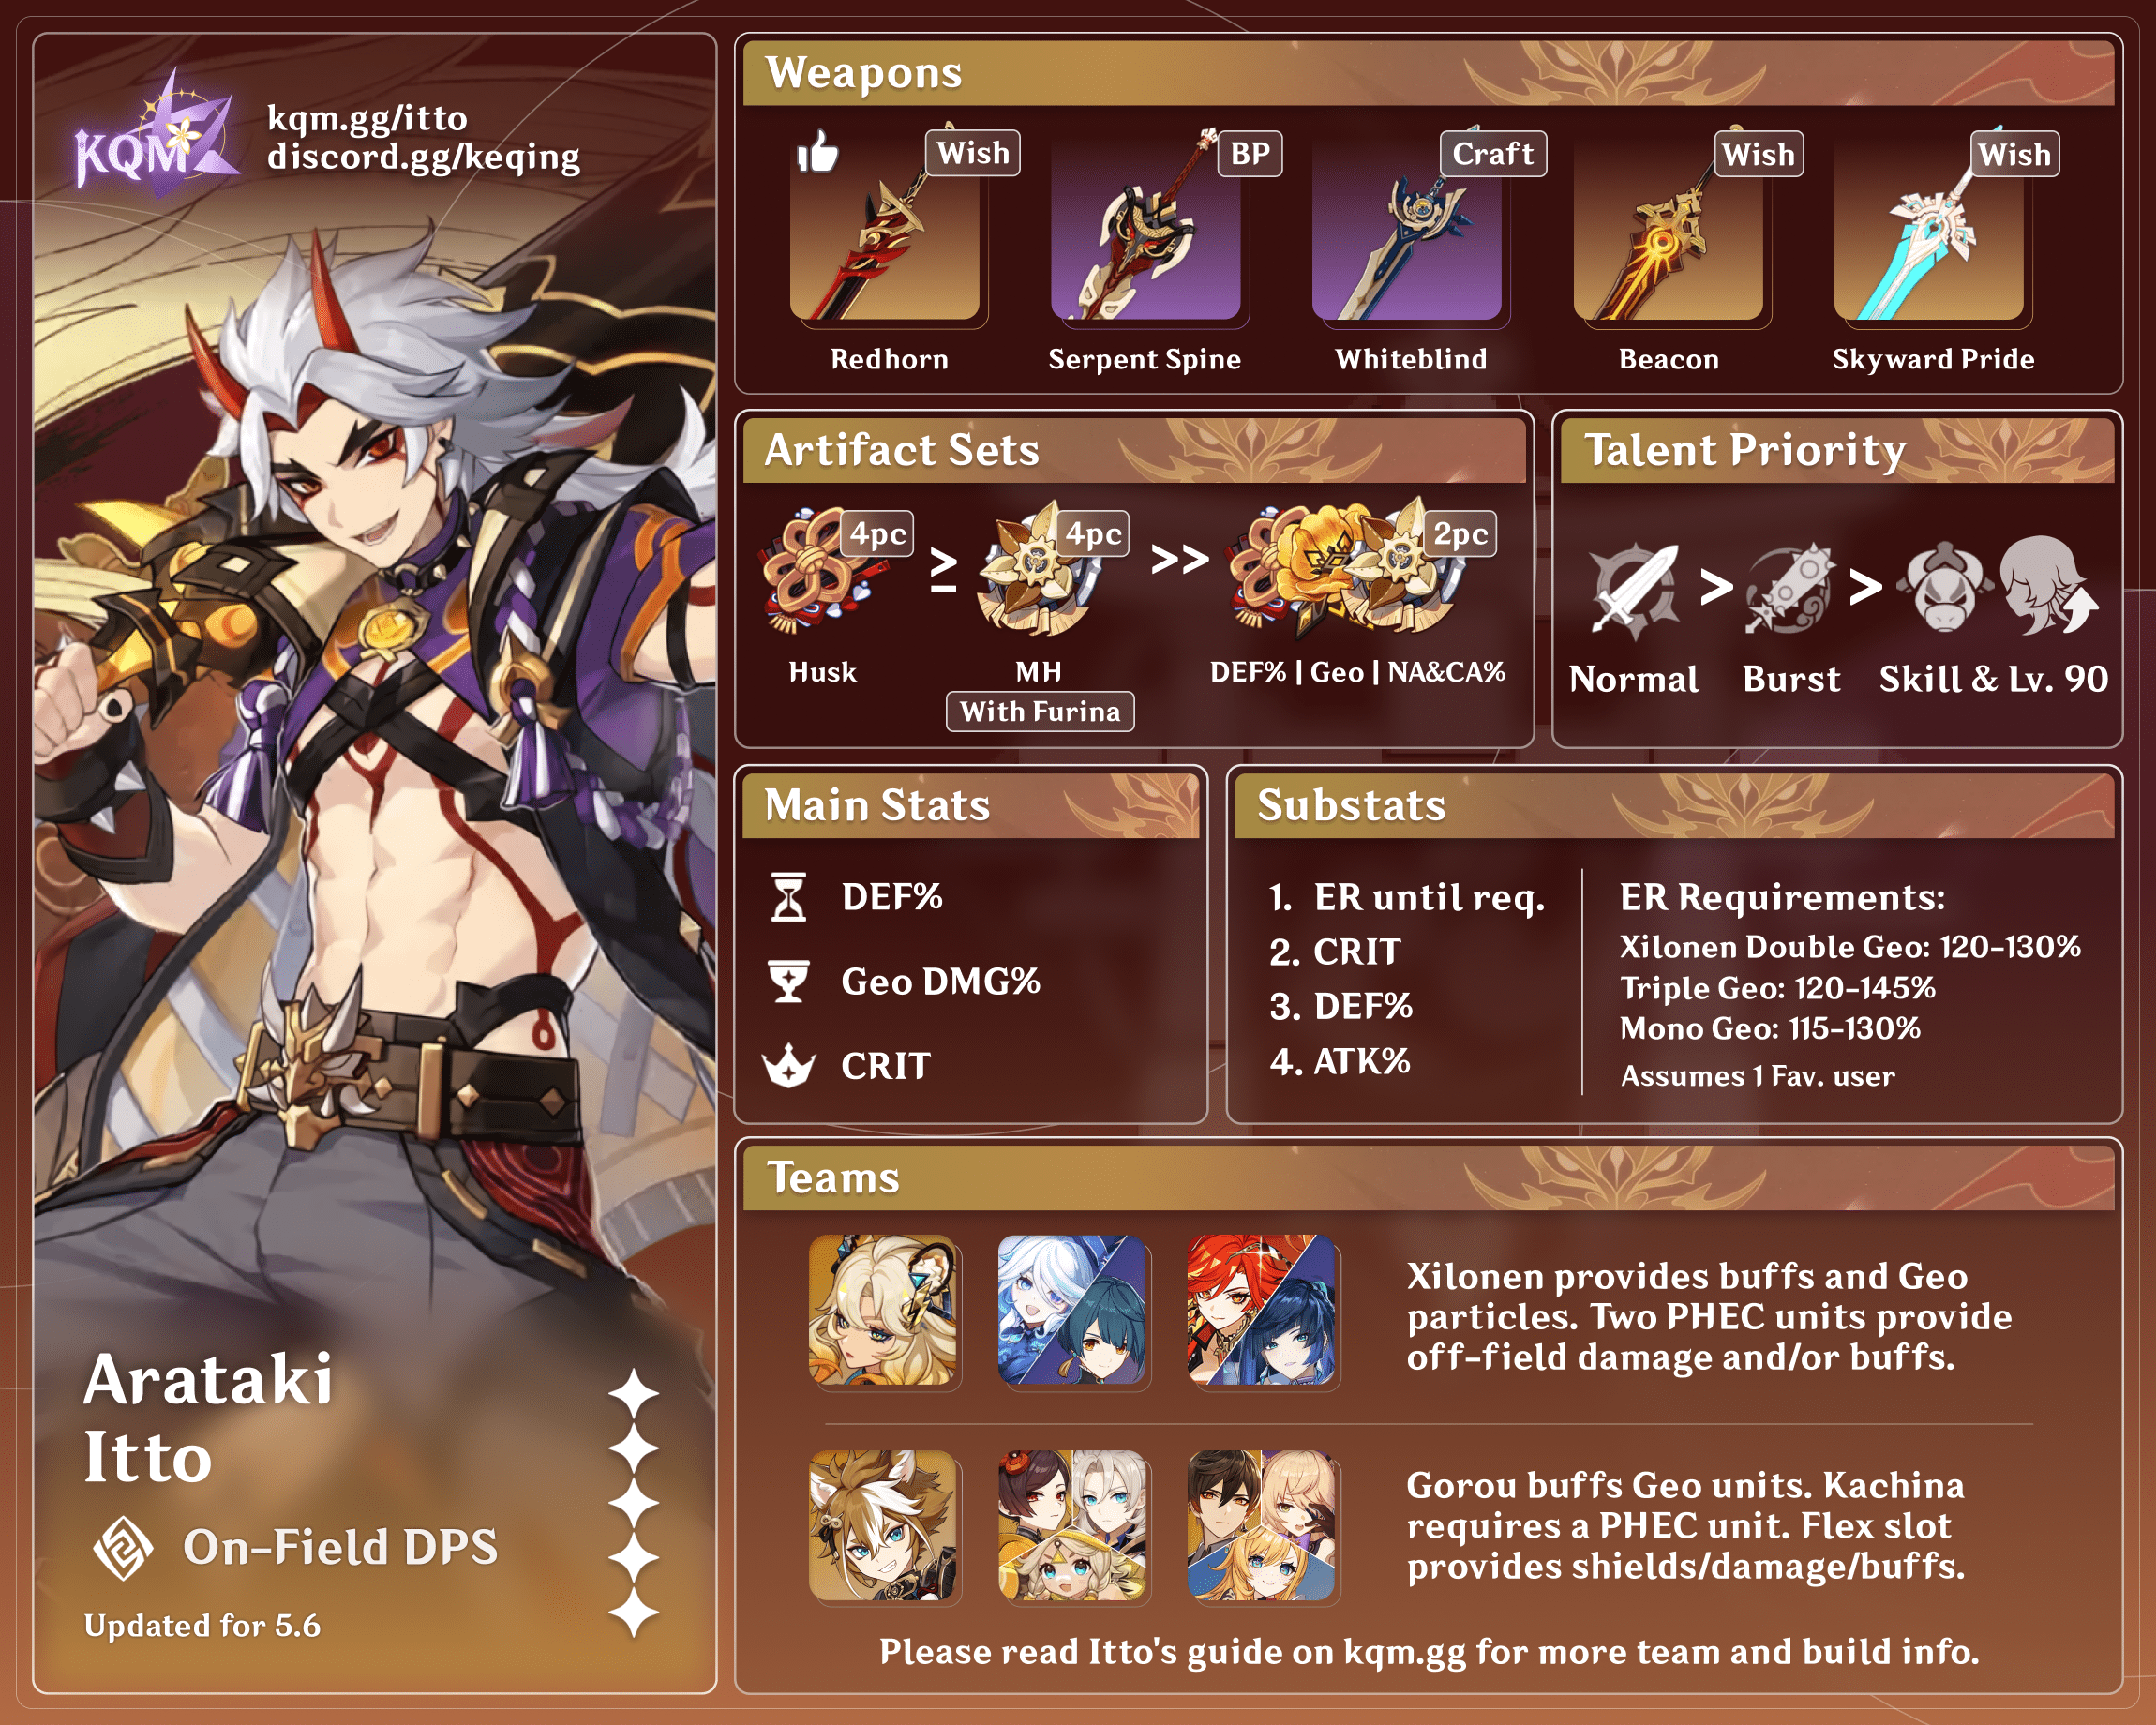
Credits to: kolvii, cegewinne, irokei, mr.pillow, iridescnce
Glossary
| Normal Attack (N/NA) | Normal Attack string. Due to the unique nature of Itto’s attack string, the notations used in this guide will be: • N# (N1, N2. etc.) refer to the full combo from the first Normal Attack to whichever number is next to the N. For example: N2 means doing 2 normal attacks, including the first one in the string. • NA# (NA1, NA2, etc.) refer to a specific Normal Attack in the string. For example: NA2 means doing a singular normal attack that is the second one in the full string without having to start the first one. This is possible due to the fact that Itto’s string does not reset after dashing or using his Skill. For example, this combo notation: Q NA1 E NA2 NA3 SCA3+F N4 SCA4+F E SCAF. Here, Itto is able to use his second and third Normal Attack (NA2, NA3) after using his Skill without having to restart from the first attack. After going through a combo slash, Itto uses a full Normal Attack string from start to finish (N4). |
| Stacks | Talent, artifact or weapon effects that build up over time or under certain conditions. Can refer to Superlative Superstrength stacks, Husk of Opulent Dreams stacks, and Serpent Spine stacks |
| Charged Attack (CA) | Arataki Kesagiri slashes that consume Superlative Superstrength stacks and no stamina – one of the main sources of Itto’s DMG. Not to be confused with Saichimonji Slash |
| Charged Attack Final (CF) | Arataki Kesagiri Final Slash – the final slam that consumes the last Superlative Superstrength stack, dealing more AoE DMG |
| S.S. | Superlative Superstrength |
| PS | Prestack (stacks gained before using Itto’s Q) |
| ER | Energy Recharge |
| Buff | Provides noticeable (DMG) boosts to a character |
| TTDS | Thrilling Tales of Dragon Slayer, a 3-star catalyst obtainable through wishing |
| AoE | Area of Effect |
| ICD | Internal Cooldown, see more explanations here |
| Snapshot and Dynamic | Properties that are assigned to skills and bursts that last over time. See more here |
| Hitlag | Occurs whenever a character hits a target, frames get frozen to give the player a sense of “weight” behind each attack. The amount of hitlag depends on the target hit. Ranged characters and skills aren’t affected by hitlag. See more here |
| BiS | Best in Slot |
| E | Elemental Skill |
| Q | Elemental Burst |
Character Breakdown

Art by @panosarts_
Pros
- Relatively easy to use compared to other more “difficult” characters (e.g. Hu Tao/Ayaka), while still possessing intricacies that make piloting him enjoyable.
- Uses supports that others usually don’t use (Gorou, Albedo) and does not rely on contested supports like Bennett, Xingqiu, Kazuha, etc.
- Fills the hypercarry role, and thus does not need very invested supports (with the exception of Albedo and Fischl)
- Accessible weapon choices, such as Battle Pass or craftables.
- Respectable damage compared to other C0 5* units in both single target and multi-target scenarios.
- Good AoE potential: his Charged Attacks hit a relatively large area around him and can chase enemies, without knocking them back.
- Little to no stamina issues due to his special Charged Attacks.
- Greater mobility and survivability during combat thanks to Normal Attack combo not being reset after dashing or using Elemental Skill.
- Has a lot of interruption resistance during his Charged Attack chains.
- Beatboxes (or sings opera) for you on your birthday.
Cons
- High initial investment floor (Level 90/90 and investment into talents are almost required).
- Team building is often locked to 3 Geo characters to get the most out of Gorou.
- Gorou, while not necessary, is a significant boost to DMG, along with Albedo, a 5* unit.
- Needs a considerable amount of ER (130%-140%) or other Geo characters batterying him for maximum Burst uptime.
- BiS set (4-pc Husk of Opulent Dreams) is in a domain alongside Ocean-Hued Clam, being potentially resin-inefficient to farm.
- Team damage cannot benefit from 4-pc VV as well as amplifying reactions, thus having a lower potential ceiling compared to other teams.
- Needs to be on-field for almost 16 seconds, and cannot swap-off during that time without losing DPS.
- Many top supports are 5* units (Zhongli, Albedo).
Talents
Art by @v1rg03
 Normal Attack | Fight Club Legend
Talent Description
Perform up to 4 consecutive strikes. When the 2nd and 4th strikes hit opponents, Itto will gain 1 and 2 stacks of Superlative Superstrength (S.S.), respectively for a max of 5 stacks. Triggering this effect will refresh the current duration of any existing stacks. Additionally, Itto’s NA combo doesn’t immediately reset after sprinting or using his Elemental Skill.
Charged Attack: When holding to perform a CA, Itto unleashes a series of Arataki Kesagiri slashes without consuming Stamina. Instead, each Arataki Kerasigi slash consumes 1 stack of S.S. When the final stack is consumed, Itto delivers a powerful final slash.
If no stacks of S.S are available, Itto will perform a single Saichimonji Slash.
Plunging Attack: Similarly to every other claymore user, perform a mid-air strike to the ground.
Itto’s Arataki Kesagiri slashes are the highlight of his kit, and will be explained further in a later section of the guide. Always aim to use the stacked up Arataki Kesagiri slashes (CA), rather than the slow and weak Saichimonji Slash. Superlative Superstrength stacks are indicated by the Oni mask floating on Itto’s back, which glows when the maximum number of stack is reached.
 Elemental Skill | Masatsu Zetsugi: Akaushi Burst!
Talent Description
Hurls Ushi and deals Geo DMG to opponents on hit. When Ushi hits opponents, Itto gains 1 stack of Superlative Superstrength.
Ushi, considered a Geo Construct, will remain on the field and:
• Taunts the surrounding opponents and draws their fire.
• Inherits HP based on a percentage of Itto’s max HP.
• When Ushi takes DMG, Itto gains 1 stack of Superlative Superstrength, at a maximum of 1 every 2s.
• Ushi will flee when its HP reaches 0 or its duration ends. Grants Itto 1 stack when it leaves.
This Skill is a burst of high damage, and is a noticeable portion of Itto’s damage. It’ll be covered during the Combos section, as well.
 Elemental Burst | Royal Descent: Behold, Itto the Evil!
Talent Description
For a time, Itto lets out his inner Raging Oni King, wielding his Oni King Kanabou in battle. This state, which disappears when he leaves the field, has the following properties:
• Converts Itto’s Normal, Charged and Plunging Attakcs to Geo DMG. This cannot be overridden.
• Increases Itto’s Normal Attack SPD. Also increases his ATK based on his DEF.
• On hit, the 1st and 3rd strikes of his attack combo will each grant Arataki Itto 1 stack of Superlative Superstrength.
• Decreases Itto’s Elemental and Physical RES by 20%.
This is the crux of Itto’s kit, as he relies on DEF to give him ATK through this Burst, as well as a Geo conversion on all his attacks. The RES decrease on Itto himself is mostly irrelevant, as he has high base DEF and will be tankier than most characters.
A few things to note with Itto’s burst:
• It only snapshots the DEF to ATK conversion, while the rest is dynamic. This means that any buffs aside from DEF buffs that expire or happen during Itto’s burst will affect his DMG.
• Itto’s burst cannot be alt-swapped in without losing the buffs from Gorou, unless in special cases (see more here). It’s recommended to manually switch to Itto first, then activate his Burst once the buff indicator appears.
 Ascension 1 Passive | Arataki Ichiban
Talent Description
When Itto uses consecutive Arataki Kesagiri, he obtains the following effects, which will be cleared once he stops performing CAs:
• Each slash increases the ATK SPD of the next slash by 10%. Max ATK SPD increase is 30%.
• Increases his resistance to interruption.
Encourages you to get max Superlative Superstrength stacks before using them all at once in order to maximize the ATK SPD gain. Also a good QoL passive, as it allows Itto to unleash his CAs faster without being interrupted, which can lead to DPS loss.
 Ascension 4 Passive | Bloodline of the Crimson Oni
Talent Description
Arataki Kesagiri DMG is increased by 35% of Itto’s DEF.
Simply more damage to his Charged Attacks. Encourages building DEF% on him even more.
 Utility Passive | Woodchuck Chucked
Talent Description
When a party member uses Attacks to obtain wood from a tree, they have a 25% chance to obtain an additional log of wood.
Itto is great for wood gathering, in addition to his fast NA string. Great unit for teapot fans. Any extra wood gained from this passive does not count towards the 2000 per day limit.
Talent Priority
> >
Itto’s Normal Attack is the most important to level, followed by his Elemental Burst. His Elemental Skill is good to level, as it is decent damage, but not as important as the other two.
See Zakharov#5645 calcs for a level-by-level breakdown of talent upgrade order.
Constellations
![]() Constellation 1 | Stay a While and Listen Up
Constellation 1 | Stay a While and Listen Up
After using Royal Descent: Behold, Itto the Evil!, Arataki Itto gains 2 stacks of Superlative Superstrength. After 1s, Itto will gain 1 stack of Superlative Superstrength every 0.5s for 1.5s.
Average damage gain over C0: 6.02%
This constellation is particularly interesting. Its average damage gain over C0 is not very high, because it only adds a few slashes to Itto’s combo while taking out some Normal Attacks. However, due to buff uptimes, this constellation can end up being better than expected because more of the slashes happen earlier in his combo. This constellation will be discussed more in the Combo section of the guide.
![]() Constellation 2 | Gather ‘Round, It’s a Brawl!
Constellation 2 | Gather ‘Round, It’s a Brawl!
After using Royal Descent: Behold, Itto the Evil!, each party member whose Element is Geo will decrease that skill’s CD by 1.5s and restore 6 Energy to Arataki Itto.
CD can be decreased by up to 4.5s in this manner. Max 18 Energy can be restored in this manner.
Average damage gain over previous constellation: 2.50%
Average damage gain over C0: 8.66%
This constellation is purely QoL, with any damage increase coming from reduced ER requirements (if you can rearrange artifacts). Itto’s rotations already run over his Burst cooldown, so reducing it does not affect rotations at all. The Energy refund lowers ER requirements and allows for more offensive substats in artifacts, which is an increase in damage overall.
![]() Constellation 3 | Horns Lowered, Coming Through
Constellation 3 | Horns Lowered, Coming Through
Increases the Level of Masatsu Zetsugi: Akaushi Burst! by 3. Maximum upgrade level is 15.
Average damage gain over previous constellation: 3.76%
Average damage gain over C0: 12.75%
This constellation slightly increases the damage dealt by Ushi, which is not insignificant but it is also not very large. Not a particularly impactful constellation one way or the other.
![]() Constellation 4 | Jailhouse Bread and Butter
Constellation 4 | Jailhouse Bread and Butter
When the Raging Oni King state caused by Royal Descent: Behold, Itto the Evil! ends, all nearby party members gain 20% DEF and 20% ATK for 10s.
Average damage gain over previous constellation: 6.72%*
Average damage gain over C0: 20.33%
This constellation is important to note because it only increases Itto’s damage from the second rotation onwards. The first time Itto uses his Burst in a particular Spiral Abyss floor, he will not gain any damage from this constellation, but any time after that he will gain the stated increase (as long as you use his Burst within 10 seconds, which you should be doing). This also buffs allies, so it is essentially a 4NO buff with an additional 20% DEF. A good constellation, if you aren’t already killing everything in the first rotation.
![]() Constellation 5 | 10 Years of Hanamizaka Fame
Constellation 5 | 10 Years of Hanamizaka Fame
Increases the Level of Royal Descent: Behold, Itto the Evil! by 3. Maximum upgrade level is 15.
Average damage gain over previous constellation: 11.42%
Average damage gain over C0: 34.07% (without C4 active: 25.78%)
This constellation increases Itto’s Burst talent level, which increases the DEF to ATK conversion ratio. A rather large increase to Itto’s damage, but nothing particularly special about it, as it is a straightforward constellation.
![]() Constellation 6 | Arataki Itto, Present!
Constellation 6 | Arataki Itto, Present!
Arataki Itto’s Charged Attacks deal +70% Crit DMG. Additionally, when he uses Arataki Kesagiri, he has a 50% chance to not consume stacks of Superlative Superstrength.
Average damage gain over previous constellation: 40.42%
Average damage gain over C0: 88.25% (without C4 active: 76.64%)
Itto’s C6 is quite difficult to quantify. The CRIT DMG is very, very strong, especially when in combination with the second part of the effect to get many more Charged Attacks per Burst. However, the second part of the effect is completely RNG. Furthermore, sometimes, you might get no improvement from it as you will fail every single chance to save a stack. Sometimes, you might save a stack every single time. Because the number of stacks saved also means that it takes longer to get all of them out, it can also vastly change the combo and what you can fit in. Of course, Itto’s power at this level generally means most enemies will have died regardless. Overall, this constellation is quite strong, but it also makes Itto a lot less strategic and makes you rely quite significantly on RNG.
(% damage increase from each constellation was calculated by Merp#6832)
Artifacts
| Set | Notes |
|---|---|
 Husk of Opulent Dreams | The premier artifact set for DEF-scaling, DMG-dealing Geo characters, Husk of Opulent Dreams gives Itto everything he wants: DEF and Geo DMG buffs that build up as he spends more time dealing DMG on-field. This set is his Best-in-Slot, and is what you should farm to maximize Itto’s DMG, even if it means bearing the pain of getting Ocean-Hued Clam pieces. Note for Serpent Spine: When starting an Abyss chamber, prioritize gaining Serpent Spine stacks over Husk stacks by putting Itto in the first team slot. Itto will gain Husk stacks off-field while you rotate through supports and Sub-DPS prior to his Burst, and continue to build them up when in his Burst. |
 Retracing Bolide | 4pc Retracing Bolide is usable on Itto, performing on par with 2pc Husk + 2pc Archaic Petra. It is not worth farming for Itto since 4pc Husk is significantly better. The 40% Normal and Charged Attack DMG bonus to a unit that relies heavily on Charged Attacks like Itto is quite substantial. On teams where Itto runs with a shielder, he can make use of this set well. On teams without a shielder, Crystallized shields help to proc the effect of this set, though it is not recommended to rely on them alone. |
 Archaic Petra/Husk of Opulent Dreams | This set is somewhat less conditional than 4-piece Husk, but it is significantly less DMG. 4-piece Husk provides 54% DEF and 24% Geo DMG bonus at its best, while this set only gives 30% DEF and 15% Geo DMG at its best. |
 Heart of Depths | Usable for Itto due to the DMG% Bonus to Normal and Charged Attacks, although significantly worse than 4 Husk. Relatively Resin-efficient due to sharing the same domain as Blizzard Strayer and being obtainable from Artifact Strongbox, but still not advisable to farm for. |
 Gladiator’s Finale/Husk of Opulent Dreams | This set is very much worse than any of the others. ATK% bonus is not very useful on Itto, but it is the next best option since many players already have a lot of Gladiator’s Finale pieces. It’s almost certainly better to run rainbow pieces with good CRIT substats. |
 Shimenawa’s Reminiscence | Only usable for C2+ Itto, as the energy drain from the set is compensated by the C2 refund effect. Because the drain and refund essentially cancel each other out, Itto would still need ER substats if players decide to choose this build. Not worth farming overall. |
Artifact set calculation was done with R1 Whiteblind. 4Husk is prestacked if not using Serpent Spine. If using Serpent Spine, 4Bolide can be worse than 2Husk 2Petra, but 4Husk is still BiS with any weapon. [120% ER] [140% ER]
Some 2-pc sets provide notable bonuses for Itto, and using a combination of them can offer damage comparable to that of 4 Husk. Below are the sets ranked in effectiveness:
- Husk of Opulent Dreams – [referred to as] 2Husk
- Archaic Petra – 2Petra
- Emblem of Severed Fate – 2ESF
- Any of the ATK% sets (GF, SR, EO, VH) – 2GF
2Petra can be better than 2Husk in some situations—particularly when the other set or Itto’s weapon provides additional ATK or DEF—as seen in the table below.
EoSF is situationally good on Itto, if his ER requirements go higher than 120% and substats can be reallocated to CRIT Rate/DMG. In this case, the set can perform better than 2 Petra. See these calcs for more.
Quick charts on how some 2-pc combinations compare to 4-pc combinations when ER substat is adjusted to account for 2 EoSF:
Artifact Ranking (120% ER)
| Set | % of 4-Piece Husk of Opulent Dreams |
|---|---|
| 4Husk | 100.00% |
| 4Bolide | 90.99% |
| 2Husk 2Petra | 90.54% |
| 4HoD | 87.66% |
| 2Petra 2Glad | 87.14% |
| 2Petra 2ESF | 87.01% |
| 2Husk 2Glad | 85.57% |
| 2Husk 2ESF | 85.45% |
| 2ESF 2Glad | 82.33% |
Artifact Ranking (140% ER)
| Set | % of 4-Piece Husk of Opulent Dreams |
|---|---|
| 4Husk | 100.00% |
| 4Bolide | 90.99% |
| 2Husk 2Petra | 90.54% |
| 2Husk 2ESF | 89.12% |
| 4HoD | 87.66% |
| 2Petra 2Glad | 87.14% |
| 2ESF 2Glad | 85.87% |
| 2Husk 2Glad | 85.57% |
For Mainstat, use DEF% sands / Geo DMG Bonus goblet / CRIT Rate/DMG circlet
For Substats, prioritize ER% (if ER requirement is not met) > CRIT DMG/Rate > DEF%
For ER% requirements, aim for 130-140%. It is recommended to not use an ER% sands due to significant DMG loss, and instead aim to get enough from substats. Use the Energy Recharge Calculator to determine the exact requirements for your team.
Weapons
See Merp#6832’s calcs for details and assumptions: [120% ER] [140% ER]
| Weapon (% of R1 Whiteblind at 120% ER | 140% ER) | Notes |
|---|---|
 Redhorn Stonethresher (5*) (R1: 136.50% | 136.35%) (R5: 159.30% | 159.13%) | Itto’s signature weapon, undoubtedly uncontested as his BiS. Offers an amazing passive along with strongly appreciated second stat, which makes balancing stats in artifacts much easier thanks to his CRIT Rate ascension. This weapon also does not have any conditions on it, and offers pure damage without any hoops to jump through. |
 Serpent Spine (4*) (R1: 114.31% | 113.22%) (R5: 129.66% | 128.43%) | Serpent Spine continues to be an amazing weapon choice for low spenders (while also looking quite good on Itto aesthetics-wise). The CRIT Rate substat and strong passive make it his second BiS. While slightly anti-synergistic with 4-pc Husk of Opulent Dreams, players can gain max stacks on both Serpent Spine and the artifact set from the second rotation onwards, provided they prioritize Serpent Spine stacks over Husk stacks when starting an Abyss chamber. If players choose to ignore Serpent Spine’s passive entirely (i.e. prestacking Husk instead and get hit enough to never have any SS stacks), then the weapon will still be usable due to its CRIT Rate secondary stat. Strongly recommended to have a shielder on the team when using this weapon. |
 Skyward Pride (5*) (R1: 102.30% | 111.08%) | The 36% ER substats can help cover Itto’s energy needs, allowing players to focus on building purely offensive stats in artifacts. A solid option overall. |
 Blackcliff Slasher (4*) (R1: 104.67% | 103.72%) (R5: 105.79% | 104.84%) | While spending Starglitter on Blackcliff weapons is not recommended, Blackcliff Slasher appears to be a somewhat suitable option, having worse refinements scaling than Whiteblind, while still being better at R5. |
 Whiteblind (4*) (R1: 100.00%) (R5: 104.91%) | Recommended F2P option due to its free refines, while still being a very viable option. This is the default for Itto. Refines do increase damage, but not by a very significant amount due to Itto’s Burst snapshotting DEF. Gets better from the second rotation onwards, with the increased number of stacks. |
 Wolf’s Gravestone (5*) (R1 no passive: 98.45%) (R1 with passive: 105.35%) | Usable option; however, Itto does not benefit greatly from the passive. Recommended to use any other free option, and put this on another claymore user instead. |
 The Unforged (5*) (R1 unshielded: 98.45%) (R1 shielded: 101.90%) | Usable option, but generally poor compared to other free options due to having a substat and passive not being that helpful on Itto, as well as constantly having a shield to maximize its uptime, which can be difficult. |
 Sacrificial Greatsword (4*) (97.37% | 105.74%) Assumes the reset procs on the first Skill in Itto’s Burst | Sacrificial Greatsword is a strange option for Itto, but it is usable. It allows him to use a new combo (with 3 Skill uses in one Burst) that will increase his damage, as well as essentially negating Itto’s need for ER. These two things almost balance out the lack of ATK, DEF, and CRIT stat provided by the weapon. The combo is: Q N1 NA2~E NA3 E C4F N4 C4F E F |
Combos
Itto’s combos are affected by several factors (such as hitlag, his own Passive Talents, and framerate), which can make managing them difficult in gameplay. However, there are general tips players can follow for consistent performance:
- Use E twice during one burst duration; one at the start and one at the end.
- Itto typically has time to finish 2 CA chains during burst; aim to do so rather than trying to fit a third chain in.
- React to the number of stacks appropriately; avoid overcapping on stacks.
Most of Itto’s combos are relatively close to each other in terms of DMG output, with varying levels of difficulty. Players can choose to follow whichever combo they are most comfortable with, or improvise as they see fit. Again, these combos are not required for Itto to perform well; feel free to skip this section entirely.The following section covers different combos that have been discovered and tested.
A TL;DR of Combos
| Difficulty level | First rotation combo | Second rotation combo and onwards | Notes |
|---|---|---|---|
| Recommended | 0PS Ceiling: N1 E NA2 NA3 C3F N4 C4F E F | 1PS Ceiling: N1 E NA2 NA3 C4F N4 C4F E F | Performing the 1PS Ceiling combo can be difficult; use 1PS N1 Finisher if it’s easier to consistently pull off. |
| Harder | 1PS Ceiling: N1 E NA2 NA3 C4F N4 C4F E F | 1PS Ceiling: N1 E NA2 NA3 C4F N4 C4F E F | N1Q on first rotation, and do not get the extra prestack on subsequent rotations. This is the same combo across all rotations, and is very high damage; thus, it is good to practice this. |
| Hardest | 1PS Ceiling: N1 E NA2 NA3 C4F N4 C4F E F | 2PS Ceiling: N1 E C3F N3 C3F N3 E C3F | 2PS Ceiling is an incredibly hard combo, but this will be the highest DPS that Itto can muster. Requires N1Q on every rotation. |
| Easier | 0PS N1 Finisher: N1 E NA2 NA3 C3F N3 C3F N1 E C1F | 1PS N1 Finisher: N1 E NA2 NA3 C4F N3 C3F N1 E C1F | N1 Finisher combos are much easier, and leave room for Ushi stacks. |
Using easier combos also leaves more room for Ushi to get hit, making them more consistent due to not having the strict requirements of stacks in higher-damage ones.
Combo Tech
Dash Canceled CF: By dashing right after the CF lands, it is possible to save a few frames by canceling the long endlag of Itto’s CF. While dash canceling is not necessary to perform most combos (and can be a frame loss if executed poorly), players can utilize this tech if they are able to, as it can make certain combos easier to pull off. Note that dash cancels cannot be buffered, but the timing to perform them is forgiving enough due to significant hitlag.
Buffering: The majority of Itto’s combos can be buffered by starting the input for the next attack during the animation of the current attack. This tech can help ease the execution of harder combos. It also seems as though starting a buffer for Itto’s CA earlier in his NA animations can somehow help it come out faster, but this has not been fully tested.
N1Q: This tech is not required, but it is generally useful. It involves using an N1 before using Itto’s Q, and using his Q right as the N1 connects. This causes Itto to gain a stack as if he had used the N1 during his burst duration, while not wasting his Burst’s uptime. All rotations assume that Itto uses this technique, as it ensures that Itto can properly snapshot Gorou’s buff for his Q. This tech also allows Itto to use a 1PS combo on the first rotation, or 2PS combo on subsequent rotations, while wasting as little time as possible.
See more details here.
Dasshu: Itto’s NA string is not interrupted by a dash or use of his Elemental Skill, allowing for fluid cancels. The Dasshu is specifically canceling an NA with E or Dash to begin the next attack while skipping most of the NA animation. This is most useful with NA2, since it is a relatively weak NA compared to the rest of Itto’s string. Although this cancel cannot be buffered, it is relatively simple to pull off. This tech is mostly unused in Itto’s most optimal combos, but is worth noting.
Normal Combos
For readability’s sake, here are a few rules for how these combos will be formatted, and things that are not stated.
- Combos will be notated using “NA#” and “N#”. The differences between these can be found in the glossary.
- A “C#(F)” means start a charged attack, and keep doing Arataki Kesagiri slashes until you run out of stacks. The # is the number of combo slashes, and the F means the finisher. Just an F means you only have one stack, and thus do no combo slashes.
0 Prestack Combos
The combos listed below (save for “C0 0PS Dasshu”) are consistent only in the first rotation, due to the random nature of stacks gained from Itto’s E.
“C0 0PS Ceiling” (RECOMMENDED) – 100%:
N1 E NA2 NA3 C3F N4 C4F E F
A standard combo, which provides respectable damage while being relatively easy to perform (since the inputs here can be buffered, and cancels are not required). . It also offers flexibility in Ushi getting hit: there is room for another CA at some point during the combo, while not sacrificing damage.
“C0 0PS N1 Finisher” – 98.97%:
N1 E NA2 NA3 C3F N3 C3F N1 E C1F
Offers worse damage than the above combo, but is easier to perform. The combo allows for more extra CAs due to stacks gained from Ushi getting hit. This is usually the basis for improvisation.
“C0 0PS Dasshu” – 97.63%:
N1 NA2~E NA3 C3F N4 C4F E F
This combo utilizes the Dasshu to cancel the NA2 in the beginning of the combo. Easier to execute, at the cost of lower damage.. This is the only 0PS combo that is not affected by additional prestacks.
1 Prestack Combos
1PS combos are possible on the first rotation with N1Q, or on subsequent rotations by not using the N1Q cancel and just doing an N1 before Q to allow Gorou’s buff to apply and potentially stack Whiteblind.
“C0 1PS Ceiling” (RECOMMENDED, HARD) – 104.35%:
N1 E NA2 NA3 C4F N4 C4F E F
Similar combo to the “C0 0PS Ceiling,” but with an additional CA from a stack gained before using Q. While it is harder to pull off this combo, it is possible to perform it consistently. It is currently the highest damage combo for Itto at C0.
“C0 1PS N1 Finisher” – 102.91%:
N1 E NA2 NA3 C4F N3 C3F N1 E C1F
Similar to the “C0 0PS N1 Finisher” combo, but with an additional CA from a prestack. Easier to perform compared to the 1PS ceiling combo, at lower damage.
2 Prestack Combos
“C0 2PS Ceiling” (KNOWN CEILING) – 106.76%:
N1 E C3F N3 C3F N3 E C3F
This combo differs significantly from previous ones. It can also only be performed from the second rotation onwards without sacrificing much time (using the stacks from Ushi disappearing and from an N1Q). While difficult to pull off, it offers a noticeable 6-9% increase from 0PS combos. Requires dash cancels, and is only possible on enemies with a lot of hitlag (Ruin Guards, for example).
“C0 2PS N1FEF” – 102.94%:
N1 E NA2 C4F N3 C3F N1 F E F
Similar to 1PS N1 Finisher in terms of damage, with a slightly more complex execution. Difficulty may vary depending on player experience. Not recommended, but worth noting for its uniqueness.
“Special” Combos
Sac GS Combos
Sacrificial Greatsword allows Itto to use 3 Es in one rotation, which can change his combos somewhat significantly. It does however, require the weapon passive to proc, which is not guaranteed unless at R5. The %s for these combos will be relative to the 0PS Sac GS Dasshu, because it doesn’t make sense to compare them to the normal combos.
“C0 0PS Sac GS Dasshu” – 100%:
N1 NA2~E NA3 E C4F N4 C4F E F
A relatively easy combo, though it is unexplored and might not be the ceiling for using Sacrificial Greatsword.
“C0 0PS Sac GS” – 97.92%:
N1 E NA2 E C4F N3 C3F N1 E C1F
This combo is a bit worse than the Dasshu version, but may be easier for those unused to the tech required of the above option.
“C0 1PS Sac GS” – 102.02%:
E E C3F N3 C3F N3 E C3F
One prestack. Can be difficult to pull off.
Constellation Combos
These combos are only possible with the constellation specified. The %s are still relative to C0 0PS Ceiling.
“C1 0PS” – 106.16%:
N1 E C6F N4 C4F E F
If C5F – 101.81%
This combo is fairly tight in the beginning to get all of the CAs out, as C1 gives stacks quickly, making it easy to overcap on them. Skipping the N1 at the beginning eases the execution required of this combo, at the cost of a bit lower damage than the C0 0PS version.
C1 combos are relatively untested. If you have Itto’s C1 and want to find better combos (such as with prestacks), please message Merp#6832 on Discord. However, it is fairly locked and might be very difficult to actually find better combos.
C6 Combo:
There is no way to do one combo for C6 due to the RNG involved. Generally players should start with an E, go into CAs; after that chain ends, do an N2 or N3 and do another chain; then, finish with an E and CF. This may not end up working because of the RNG, and you’ll probably kill everything regardless, so really just do whatever you want with a C6 Itto.
In Case of Flying Cow
If Ushi gets hit, you gain a stack. This can complicate combo strings, and may depend on when Ushi is hit during the combo, so here is a list of possible alterations to the above combos. These alterations have not been fully tested, as it is very difficult to consistently make Ushi get hit to try combos; however, they should be mostly applicable or give you an idea of what to do.
| Combo | Alterations |
|---|---|
| C0 0PS Ceiling | If Ushi is hit before the first CA finisher: Transforms the combo into 1PS Ceiling. Can drop N4 or transition to 1PS N1 Finisher. If Ushi is hit in the N4 string: Already overcapped on stacks, so can continue unchanged. |
| C0 0PS N1 Finisher | If Ushi is hit any time: Similar to 0PS ceiling, but transforms into 1PS N1 Finisher instead of 1PS Ceiling. |
| C0 0PS Dasshu | If Ushi is hit in the N4 string: Doesn’t change anything, as you already cap on stacks. If Ushi is hit in the N3 string: Can still fit if fast enough, or can drop an NA. |
| C0 1PS combos | All of these 1PS combos start with max stacks in their first NA string, so that will not be changed. The second part of the strings are very similar to their 0PS counterparts, but because the timing is much tighter you will not be able to just fit it in; instead, you have to drop an NA to fit the finisher at the end. |
| C0 2PS Ceiling | This combo will not be possible anymore if Ushi is hit at any point. Try to transition to 2PS N1FEF, or drop any NA later in the string. |
| C0 2PS N1FEF | If Ushi is hit in the first NA string: Will not be affected. If Ushi is hit in any other NA or CA string: Instead of N1 F E F, try doing N1 E C1F, which will save some time as a CA is faster than a CAF. You can also drop an NA at some point during this combo. |
| C1 Combo | If Ushi is hit before the first CA finisher: Combo can proceed as normal as long as Ushi only gets hit once and the first CA string does not exceed C7F. |
Combo Improvisation
We’ve attempted to give you some combos that are proven to work and do well, but sometimes, Ushi gets hit twice, or you do a prestack combo but Ushi gets hit anyway. Or maybe, you have C6 Itto. Sometimes, combos won’t go your way. Never fear, though, because it’s very possible to change your combo midway through, if you have quick-thinking skills.
Let’s start with an example. If you are doing a prestacked NA1 E NA2, but Ushi gets hit during the first half of the combo, then you will not have room to fit the SCAF in at the end, resulting in a significant loss of damage. What can we do to rectify this? Well, you can drop the last hit of the N4 string (NA4) in the second half, which makes you lose 2 stacks (one of them is gained back by Ushi disappearing, which usually goes over the cap in this combo). This would lead to the overall combo being Q NA1 E NA2 NA3 SCA5+F (Ushi gets hit during that SCA chain) N3 SCA3+F, and then finish it off with E SCAF. This means that you’ve dropped an NA4 for the finisher, overall, which is significantly better than just going ahead and ignoring Ushi getting hit and not hitting the finisher. In fact, that allows the Ushi proc to be beneficial rather than a detriment to that combo.
This general process can be applied to any combo you might do, and generally requires some forethought since there are so many factors that go into Itto’s combos. However, if you can master this, then you have indeed mastered the One and Oni.
Some general rules to maximize your damage:
- You should always use 2 E’s per Burst. The burst cooldown timer will be around 2-3 seconds left when the burst actually ends if you’ve been attacking enough, so make sure to use the second Skill no matter what.
- You should always try to hit the SCAF right after the final E, because it uses the stack up. There’s no real way to time this with improvisation, so you just have to get a feel for it.
- Itto will have time for approximately two SCA chains in his burst, and then the final SCAF. The length of these can vary, but trying to fit a third in will likely not let you use the E SCAF at the end.
- Try not to overcap stacks: using a full N4 will give you 5 stacks, which is the maximum, so try not to use an E during that or continue doing normal attacks. Once you have 5 stacks, start an SCA chain.
- Cutting off an NA4 in a combo will usually be the solution to allow the SCAF to fit, because NA4 takes 78 frames on its own. If Ushi gets hit, as well, then NA4 is mostly irrelevant, as you will only gain 1 stack. Additionally, Ushi disappearing and giving a stack is usually ignored by these combos; if you drop the NA4 because Ushi got hit, in one of these cases you’ll be at the same number of stacks with 78 frames saved.
- All of this is mostly irrelevant at C6. It’s all RNG up there, so you can try to make sure you get something but honestly you’re going to be killing everything anyways. So.
Teams and Synergies
Images generated using Genshin Team Portrait Generator
Triple Geo

This team composition is the recommended go-to for Itto due to all the synergy it has. Itto appreciates the extra energy generated by having teammates of the same element, and Gorou’s buffs cap out at having 3 Geo members on the team. Albedo is highly recommended in the 3rd slot due to his consistent off-field damage alongside energy particles generation. The fourth slot is usually flexible, and does not require any particular unit, as Itto does not have anti-synergy with a majority of the cast due to the innate, non-reactive nature of the Geo element.
Though strong, Triple Geo with Itto, like any other team, has its own drawbacks. The most obvious problem is the team’s difficulty with breaking elemental shields: Geo does not react with other elements like Pyro, Hydro or Cryo do. This, coupled with the fact that Itto’s NAs and CAs during his burst all apply 1U Geo, means that he by himself can struggle with taking down Abyss Lector’s or Herald’s shield. Fortunately, the flex fourth slot of the team can be a dedicated shield-breaker, making the team far from useless when dealing with shielded enemies.
Note: If players have not obtained Gorou or cannot use him, the characters from the 3rd slot, notably Ningguang, can also fit well for the 2nd slot for this team.
2nd Slot
| Character | Equipment | Explanation |
Gorou Role: Support, Battery Ranking: S | Weapons: Favonius Warbow, Elegy for the End, Sacrificial Bow Artifacts: 4-pc The Exile, 4-pc Noblesse Oblige. 2-pc Emblem of Severed Fate/2-pc The Exile, 2-pc Emblem of Severed Fate/2-pc Husk of Opulent Dreams | Gorou is an invaluable teammate for Itto, providing Geo particles and buffs. Prioritize having enough ER on him to use Burst every rotation. Constellations on Gorou are appreciated, but not necessary. If Gorou is at C6, players can choose to use his Burst right before Itto’s for more uptime on the CRIT DMG buffs. |
3rd Slot
| Character | Equipment | Explanation |
Albedo Role: Off-field DPS Ranking: S | Weapons: Cinnabar Spindle (BiS), Harbinger of Dawn, Favonius Sword Artifacts: 4-pc Husk of Opulent Dreams | Albedo is the best teammate in this slot, due to his strong synergy with Itto and Gorou. Offers consistent off-field DMG and Geo particles, and benefits from Gorou buffs and infinite uptime on Husk. Unfortunately, his BiS weapon, Cinnabar Spindle, is an event-exclusive sword, making his damage contribution lower without it. It is recommended to not use Albedo’s Burst in this team. |
Geo MC Role: Support, Battery Ranking: B | Weapons: Favonius Sword, Festering Desire, Amenoma Kageuchi Artifacts: 4-pc Emblem of Severed Fate, 4-pc Nobless Oblige, 2-pc Archaic Petra/2-pc Noblesse Oblige | Geo MC serves as an adequate replacement for players without Albedo. The Geo particles and CRIT buff provided by their kit are valuable. Nevertheless, using their Elemental Skill optimally may be difficult, and their full damage potential is not realized in an Itto team, making them an often suboptimal choice for this slot. |
Zhongli Role: Shielder, Support Ranking: S | Weapons: Favonius Lance, Black Tassel Artifacts: 4-pc Tenacity of the Millelith In teams where Zhongli deals damage with Stone Steele resonance, he prefers more damage-oriented weapon and artifact options. | The best option for a shielder in this team. Zhongli provides a strong shield with consistent uptime and RES shred, all of which are appreciated for Itto. The shield provides extra value for players using Serpent Spine or The Unforged on Itto. It is not recommended to build him for DMG on this team. |
Ningguang Role: Support, Battery Ranking: C | Weapons: TTDS, Prototype Amber Artifacts: 4-pc Noblesse Oblige | Ningguang is another viable option for batterying Itto and providing buffs. However, she herself does not contribute much in terms of DMG when built for utility in this team, and while she is capable of high Burst DPS, building her for it in this team is not recommended. |
 Noelle Role: Shielder (not recommended) Ranking: F | Bad shield uptime and zero particle generation. There’s no synergy between Noelle and Itto – they’re better off in different teams. | |
 Yun Jin Role: Support (not recommended) Ranking: F | Weapons: Favonius Lance, Prototype Starglitter, The Catch Artifacts: 4-pc Noblesse Oblige, 4-pc Husk of Opulent Dreams | Yun Jin synergizes well with characters that utilize a lot of Normal Attacks in their kit (Yoimiya being a prime example). Itto does not do enough Normal Attacks in his combos for Yun Jin to be a good pick in his team. Not recommended to pair them together. |
4th Slot
| Character | Equipment | Explanation |
Bennett Role: Support Ranking: B | Weapons: Any high base ATK sword, Favonius Sword, Festering Desire Artifacts: 4-pc Noblesse Oblige | Although Itto has more than enough ATK in his Burst, Bennett’s buffs can still be valuable for the sheer amount of flat ATK he can add, alongside healing. Also good at taking down shields with his tap E. However, the benefit of playing Itto is that he is not dependent on Bennett like a lot of other units are, and Bennett is likely of better value on your other Abyss team. Note that Bennett’s ER requirements will be much higher than usual in this team. |
Fischl Role: Off-field DPS, Support Ranking: B | Weapons: Any damage-oriented bow, Elegy for the End Artifacts: 2-pc Thundering Fury/2-pc Gladiator’s Finale/2-pc Shimenawa’s Reminiscence | Fischl offers consistent Electro application from off-field, providing damage and Crystallized shields, in addition to Energy regeneration. Can also hold Elegy for the End for team-wide buffs. Despite her strengths, Fischl has bad turret uptime with Itto as she can only summon Oz once per rotation (due to Itto’s high field time). |
 Kuki Shinobu Role: Support Ranking: B | Weapons: Favonius Sword, any HP or EM weapon Artifacts: 4-pc Tenacity of the Millelith, 4-pc Ocean-Hued Clam | Shinobu’s Elemental Skill provides healing and consistent Crystallize shields, making her a viable option for this slot. She can use the 4-pc Tenacity of the Millelith set to provide further buffs, and can act as a battery when using Favonius Sword. |
 Diona Role: Shielder, Support Ranking: B | Weapons: Favonius Warbow, Elegy for the End Artifacts: 4-pc Noblesse Oblige, 2-pc Tenacity of the Millelith/Maiden Beloved/Ocean-Hued Clam | Diona condenses buff, shield and healing all in one, making her a viable option for this slot. Can act as a battery with Favonius Warbow, or provide further buffs with Elegy of the End, though she does not stack the passive quickly. |
Mona Role: Support Ranking: C | Weapons: Favonius Codex, TTDS, Prototype Amber Artifacts: 4-pc Noblesse Oblige, 4-pc Emblem of Severed Fate | Mona is able to hold TTDS and provide DMG buff with her Burst, or use Prototype Amber for some healing. However, her Omen buff does not last long enough for Itto’s Burst duration, and her Energy needs are high when in the team. Not recommended for general gameplay outside of damage showcase. |
 Thoma Role: Shielder, Support Ranking: C | Weapons: Favonius Lance, Black Tassel Artifacts: 4-pc Noblesse Oblige, 2-pc Emblem of Severed Fate/Tenacity of the Millelith | Thoma provides a decent shield when stacked up, and further buffs with his C6. However, he has high Energy needs in this team, and should only be used at C4+. |
Electro MC Role: Battery Ranking: C | Weapons: Favonius Sword, Sacrificial Sword Artifacts: 4-pc The Exile, 4-pc Noblesse Oblige, 2-pc The Exile/Emblem of Severed Fate | Electro MC provides Energy for Itto, completely removing ER requirements for him. They are set back by their own high Energy needs, and lack of any other utility in the team. Using Geo MC is a better choice overall. |
Overall, any unit with decent particle generation as well as Support and DMG Boosting abilities will be appreciated in this 4th slot. (For instance, characters like Dori, C2 Xinyan, and Yelan.) Examples of team compositions can be found below.
Itto Gorou Albedo Zhongli

Triple Geo plus Zhongli, or Mono Geo, trades in healing and shield-breaking for comfort thanks to the high uptime on a strong shield, in addition to extra Geo RES shred. A rather straightforward team, with Itto and Albedo being the primary DMG dealers, and Gorou and Zhongli adding valuable buffs and protection. Also eases up ER requirements for Itto and Gorou.
Rotation: Zhongli hold E → Gorou EQ → Albedo E → Itto Q combos
Itto Gorou Albedo Diona

This triple Geo variation provides DMG while also offering utility and healing. Albedo is the perfect partner for the Itto-Gorou duo for all the reasons listed above – being able to double-dip in infinite uptime on 4-pc Husk and Gorou buffs, while contributing respectable off-field DMG. Diona provides shield, healing and energy, alongside some potential shield-breaking.
Rotation: Diona EQ → Gorou EQ → Albedo E → Itto Q combos
OR
Rotation: Gorou EQ → Albedo E → Diona EQ → Itto Q combos
You can choose which one to do by which one you prefer: a shield throughout more of your Itto combos, or Gorou buff (15% Geo DMG) throughout more of your Itto combos.
“Microwave”: Itto Geo MC Zhongli Gorou

Only recommended for players with C1 Zhongli, although the team is functional without this Constellation. This team revolves around maximizing resonance damage between the Geo constructs of Zhongli and Geo MC, with Gorou providing buffs. As the resonance between Zhongli’s Stone Steele and Geo MC’s constructs contributes significantly to overall damage, players without C1 Zhongli need to use a different rotation to make sure the pillar is always active. Zhongli prefers a damage-oriented build here (HP sands is recommended).
C1 Zhongli Rotation: Gorou E > Geo MC EQ > Zhongli hold E > Gorou Q > Itto Q combos
C0 Zhongli Rotation (second rotation onwards): Zhongli tap E > Gorou E > Geo MC EQ > Zhongli hold E > Gorou Q > Itto Q combos
Other Teams
Itto unfortunately does not have a lot of team options outside of Triple Geo, given that he will perform best with teammates of the same Element due to the reasons already discussed. However, this does not mean that players are discouraged to explore unconventional options. Players can opt for teams with Itto and another Geo unit, and two flex units that work off-field and can provide good utility or DMG, or mix and match for more fun teams. See some examples below:
2.3 Spiral Abyss, Itto – Beidou from Aftermath#7658: https://youtu.be/R3pHhNWbE0k
2.3 Spiral Abyss, Itto – Beidou from Akarin#8270: https://youtu.be/uPnDR94Ti4k
Afterword
Art by @yeurei
This marks the end of the Arataki Itto guide done by the KQM community. We hope that after reading the guide, you are able to gain more interest in trying out the joy that is Itto. We would like to give special thanks to the KQM Theorycrafting community, as well as everyone that provided their support and contribution to the guide during the writing process. Feel free to contact any of the authors for further questions regarding the guide, and check out the KQM Discord.
This guide was written by :
Merp#6832
Prévisible#7440 (Taked)
nxriaki#6316
Calculations were provided by:
Zakharov#5645
Merp#6832: All of these calculations have variable weapons. If you would like to see accurate artifact/constellation/combo comparisons with a weapon of your choice, create a copy of this sheet and select it from the dropdown. Contributions to these calcs were also made by Aftermath#7658.
Special thanks:
Akarin#8270
Aftermath#7658
Neo Frost#2327
Meatball#0438
Cuzimori#1535
Emiliabyss#1641
Reens#9389