By Zakharov#5645, KeqingMains
Version 2.3.0, last updated 2023-02-23
Table of Contents
Introduction
This guide will walk you through how to build a good team. It’s focused mainly on building teams for Spiral Abyss, though the same principles apply outside of the Abyss.
The summary gives a quick overview of the most important principles in team-building. The body of the guide goes over these principles in detail. Appendix A describes how each character fits into the framework established by the guide. Appendix B analyzes several different teams using the principles established in the guide. A glossary at the end defines abbreviations and key terms.
Summary
Rotations
- Give every character the time they need to do their job
- Don’t have multiple characters that need a lot of time on field to get value. For example, if you have both Raiden and Yoimiya on your team, you can have only one of them attacking at time. If you were to replace Raiden with Xingqiu, you could have both Yoimiya and Xingqiu getting value at the same time.
- Make sure you get the right buffs on the right characters
- Don’t underestimate how long characters take to use their abilities. For example, Xiao doesn’t only use his 15 seconds of Yaksha Mask time, he needs another 2.2 seconds to use his Elemental Skills and Burst.
A rotation is the order in which you use the abilities of all your characters. There are two styles of team, Fixed Rotation and Flexible Rotation.
Fixed Rotation Team
- Plan out what every character will do over the course of the rotation, e.g. 20 seconds, and repeat the cycle until you win
- You want important cooldowns to line up. For example, Xingqiu and Xiangling line up well with their 20 second cooldowns. Xiangling and Rosaria don’t, so Rosaria’s Burst will spend 5 seconds off cooldown unused in a 20s rotation team.
- If you’ve got a character that can’t switch off during their Burst, such as Xiao, you usually run a fixed-rotation team
Flexible Rotation Team
- Swap between characters freely, using Skills and Bursts off cooldown whenever possible
- Great if you want to switch in characters based on enemy actions, such as Beidou’s parry
- Great with characters that have awkward cooldowns, such as Fischl’s 25s E cooldown or any 12s cooldown burst
Energy
- Use the Energy Recharge Calculator to determine your team’s Energy needs.
- Characters who deal a lot of damage don’t usually want to build ER, so they often need other characters of the same element on the team
Reactions
- All reactions have an aura element applied first, and a trigger element applied second. The trigger character is the important one for reactions.
- Make sure that the character you want to be triggering reactions is consistently the one triggering reactions
- 1.5x reactions (Vape with Pyro trigger, Melt with Cryo trigger) are much easier to consistently trigger than 2x reactions
- Be very careful with characters who continually apply Elements that will react with the aura Element, but aren’t your main elemental trigger. For example, if you want Hu Tao to trigger Vaporize, adding Xiangling to the team will eat up all the Hydro and ruin the team.
Survival
- You usually want some characters who can keep your team alive
- Healing, shields, and damage reduction all help
- Multiple small sources of survivability, such as Xingqiu + Beidou, can be as good as a dedicated healer
Character Roles and Needs
A character will often contribute to multiple roles. For example, Bennett is a healer, a buffer and a source of Pyro Energy. Characters can also have needs that the rest of the team must fulfill. For example, Eula needs a Cryo character for Energy, an Electro character for Superconduct, and plenty of field time to use her Elemental Burst.
Many people use terms like “main DPS”, “sub DPS”, “carry”, and “support”. I won’t be doing so, but they usually translate as:
- Main DPS / Carry is a character who deals a lot of damage and (typically) needs field time
- Sub DPS is a character who deals significant damage but doesn’t need field time
- Support is any character whose primary purpose isn’t damage, especially if they provide buffs
Damage Roles
Some teams focus entirely on one character who does nearly all the team’s damage, while others have multiple characters all contributing damage. The first approach works particularly well at low AR, where you only have enough resources to fully build one character. Either approach works late-game.
It’s generally more important to meet your damage characters’ needs than other characters’ needs.
Damage characters don’t usually want to build a lot of Energy Recharge, as that diverts resources from their damage. This means they may need another character of the same element on the team to provide them with energy.
Energy Role (Battery)
A character has the Energy role if they generate particles of a type needed by another character on the team. Characters don’t need to dedicate themselves to the Energy role, they can provide Energy incidentally. For example, even though Klee picks up all her own particles, she still helps Bennett with Energy.
Elemental Application Role (Aura)
This role is for a character who applies an Element to the enemy so that a teammate can react with it. For example, Xingqiu applies Hydro so that Hu Tao can trigger Vaporize. Most good aura characters can apply Elements quickly and for a long time. Some characters, like Tartaglia, can have both the damage and aura roles.
Survivability Role (Healer/Shielder)
Some characters can single-handedly keep your team alive with powerful heals or shields. Others provide only a small amount of healing, shielding or damage reduction, but it might be enough in combination with other sources.
Buff Role
Characters with the buff role make other characters do more damage, either by buffing the target’s stats or by reducing the enemy’s stats. For example, Bennett’s Burst, anyone holding Thrilling Tales of Dragon Slayers, any Anemo character with 4pc Viridescent Venerer. You need to ensure that your buff characters can reliably get their buffs onto the characters who need it at the right time.
Many Talents snapshot, meaning that they lock in whatever buffs were applied to the character at the time the talent was used, and keep them active even if the buffs expire. For example, if you use Xiangling’s Pyronado while in Bennett’s Burst, the extra attack will continue to boost Pyronado’s damage even if Xiangling switches out, moves out of the Burst field, or Bennett’s Burst expires.
You want to focus the most or all of your buffs onto your highest damage dealer.
Field Time Need
Every character needs a certain amount of field time to do what they need to do. For example, Yoimiya wants to spend 10 seconds in her Elemental Skill stance, plus another 2.5 seconds casting her Skill and Burst. Zhongli needs to spend 1.6 seconds using his Elemental Skill, plus another 2.3 seconds if he wants use his Burst. Make sure there’s enough time in your rotation for everyone to meet their field time needs. It’s rarely a good idea to have more than one character with 9 seconds or more of field time needed in your team.
Elemental Application (Aura) Need
Some characters need an Element to react with. For Vaporize, Melt and Overloaded reactions, you need some other character to apply the aura before the damage-dealing character triggers it. This means you need the aura source to apply their Element faster than the aura trigger consumes it. For other reactions, the Elements can be applied in any order.
Energy Need
Characters need Energy from teammates if they need to use their Burst frequently, don’t generate enough Energy themselves, and can’t afford to build ER.
Other Needs
Some characters need various other things from their teammates. For example, Melt Ganyu wants a shield so her Charged Shots don’t get interrupted, while Xingqiu needs someone to use Normal Attacks to trigger his Rain Swords.
Rotations
Rotation Styles
There are two basic styles of team: Fixed Rotation and Flexible Rotation.
Fixed Rotation teams have a “rotation” of a particular length, such as 20 seconds. During this time, they use all their abilities in a set order. For example, “Gorou E – Albedo E – Bennett EQ – Gorou Q – Itto Q – Itto attack combo – Repeat”. Flexible rotation teams might have an order for what to do at the start of the battle, but generally switch between characters and use talents when convenient.
Reasons to use a fixed-rotation team
- You want to make sure all the right buffs are applied to your main damage dealer
- One character needs to stay on-field for an extended period of time, so you can easily plan out your rotation around that period
- You want to reliably use your most important talents off cooldown
- You want to plan out your Energy generation and consumption to minimize Energy Recharge needs
- You have a hard time keeping track of your Elemental Skill cooldowns
Reasons to use a flexible-rotation team
- Your important cooldowns don’t line up, so using a fixed rotation would mean wasting uptime
- None of your characters need to stay on-field for any period of time, so you can swap freely
- The enemies disrupt your fixed rotations
- You want to swap Beidou in and parry when the opportunity arises
- You have a hard time remembering how to execute a full rotation and would rather just mash buttons randomly
Planning rotations on a fixed-rotation team
Rotation Length
The first thing you need to do is work out how long it will take to execute your rotation. The easiest way to do this is to try it a few times in-game and measure the results. If you want to calculate it precisely:
- Add up the cast times of all the talents you use, plus the time you spend on each character attacking. Cast times can be found in the KeqingMains Theorycrafting Library.
- Remember that a character must spend at least 1 second on field before switching out, regardless of how long it takes them to use their abilities.
- If a character needs to catch particles, include the time spent waiting for particles to arrive
- Add in a second or two for switch delay and imperfect execution
For example, Gorou E [1.0s] – Albedo E [1.0s] – Gorou Q [1.0s] – Bennett EQ [1.8s] – Itto Q [1.5s] – Itto attack combo [12.6s] (longer than 11s thanks to hitlag extension). This totals 18.9 seconds, or a 20 second rotation if you add in some slack. This lines up with the longest cooldown, Gorou’s 20s Burst. Adding in Albedo’s Burst would add 1.2s to the rotation, which would result in a lower overall damage per second than skipping it, unless you can perfectly execute the rotation. Also note that this doesn’t include any time for Gorou to catch his particles, which means he’ll require a very large amount of ER to keep up.
Buffs and Auras
You want your team’s damage dealers to get as many buffs as possible for as long as possible. In the Itto team described above, Albedo snapshots Gorou’s Defense buff when he uses his Skill, so he benefits from it for the full duration of his skill. Itto snapshots Gorou’s defense buff (100% of his Burst time), gets Gorou’s Geo Damage buff for 28-53% of his Burst time, and gets Bennett’s Burst and Noblesse buffs for 83% of his Burst time.
Elemental auras work very similarly to buffs. You want to make sure the characters who need an aura have one available for the entire time they need it.
Viridescent Venerer’s Resistance reduction is a particularly important buff to consider, because you need to have the right aura applied before Swirling, and the reduction in enemy Resistance can’t be snapshotted.
Energy
A character can “feed” Energy to a teammate by using an Elemental Skill, switching to the teammate, and catching the particles with that teammate. Plan your rotations so that the low-damage characters who can afford to build lots of ER feed their particles to teammates who really need the Energy.
Planning flexible-rotation teams
Field Time
Calculating field time requirements is trickier for a flexible-rotation team. You need to do it one character at a time. For example, to calculate Rosaria’s field time requirements:
- Her Elemental Skill takes 1.1s, and she wants to use it every 6s, so 18% of your field time is spent on it
- Her Burst takes 1.2s, and she wants to use it every 15s, so 8% of your field time is spent on it
- Adding some slack for switching delay and imperfect execution, Rosaria takes up about 29% of your field time
- Add a bit more slack if you need to wait for particles to arrive
Buffs
A flexible-rotation team is more likely to miss out on buffs than a fixed-rotation team, because they might not be available at the right time. You should still try to get buffs applied at the most important times, especially when snapshotting them.
Energy
Feeding Energy to allies is particularly useful on flexible-rotation teams, because you’re swapping a lot.
Energy
Whenever a character collects an Energy particle, they get Energy: 3 Energy for a particle that matches the character’s Element, 2 for a clear particle, and 1 for a particle of the wrong Element. Every other character also gets Energy: 1.8 for a matching particle, 1.2 for a clear particle, and 0.6 for a non-matching particle. The Energy gained by each character from particles, both on and off field, is multiplied by that character’s Energy Recharge stat.
Getting enough Energy to use your important Bursts off cooldown (or at the correct point in the rotation) is incredibly important. The best approach is to have a team that can generate enough Energy, the next best is to build enough ER to make up the difference, and by far the worst is screwing up your rotation.
Energy Recharge Calculator
Use the Energy Recharge Calculator to determine how much Energy Recharge you need to build on each character. If you need to trade a lot of damage stats (Attack, CRIT, etc) for Energy Recharge on your main damage dealers, you might want to change your team or rotation to give more Energy to those characters.
Energy Batteries
One character can “feed” another character by using an Elemental Skill, switching to another character, and collecting the particles with that character. Feeding Energy makes the Energy generation 67% more effective than passively benefiting from off-field Energy.
You rarely want to run a character whose only role is to provide Energy. They should be dealing damage, healing, or buffing at the same time. A battery who generates Energy slowly but also has a lot of value elsewhere, like Bennett, is more useful than someone who generates Energy quickly but doesn’t provide much other value, like Xinyan.
The table below lists some characters who can battery well:
| Element | Characters |
 Anemo Anemo | Jean, Sucrose |
 Cryo Cryo | Diona, Kaeya, Rosaria |
 Dendro Dendro | Nahida |
 Electro Electro | Fischl, Raiden |
 Geo Geo | Albedo, Geo Traveler, Ningguang |
 Hydro Hydro | Kokomi |
 Pyro Pyro | Bennett |
| All Elements | Electro Traveler, Raiden, Venti (for Cryo, Electro, Hydro and Pyro) |
Reactions
Explaining exactly how reactions work is too complicated to fit in this guide. The most important things to know are Elemental Gauge Theory and Internal Cooldowns. It can be difficult to determine how exactly a team’s Elements will react with one another, so the best approach is to record a video of yourself playing the team, then analyze the video to see what Elemental Reactions occur.
Hydro-Vaporize and Pyro-Melt (2x amplifying reactions)
Triggering Vaporize with Hydro, or Melt with Pyro, are the strongest reactions in the game, but also the most difficult to do consistently. They are most useful for single large damage instances, such as Tartaglia’s Elemental Burst.
If you get a Hydro aura on the enemy, you need to apply twice as much Pyro to remove it. Similarly, if you get a Pyro aura on the enemy, you need to apply twice as much Cryo to remove it. For this reason, any character that applies a lot of Pyro (e.g. Diluc) won’t be able to reliably Melt, and any character who applies a lot of Hydro (e.g. Xingqiu) won’t be able to reliably Vaporize.
This problem can be solved by using both Hydro and Cryo on a Pyro-Melt team. For example, if you use Hu Tao, Xingqiu and Kaeya, whenever Hu Tao applies too much Pyro, Xingqiu will Vaporize it away. You’ll get a combination of Freeze, Pyro-Melt and Pyro-Vaporize. This doesn’t work with blunt attackers (Klee, Diluc, Yanfei) who will Shatter Frozen enemies, preventing both Melt and Vaporize.
Pyro-Vaporize and Cryo-Melt (1.5x amplifying reactions)
Triggering Vaporize with Pyro, or Melt with Cryo, is less damage than the reverse but much more consistent. A single application of Hydro can generally enable two Pyro-Vaporizes, and a single application of Pyro can generally enable two Cryo-Melts. Many teams are built around enabling a damage dealer to consistently do these 1.5x reactions.
If you apply too much of the trigger Element, that can ruin your team. For example, a team of Hu Tao, Xiangling and Xingqiu will apply so much Pyro that it overwhelms Xingqiu’s ability to support it with Hydro. The enemy will end up with a Pyro aura most of the time, and neither Hu Tao nor Xiangling will Vaporize their damage.
Internal cooldowns (ICDs) are an important factor in who can profitably trigger amplifying reactions. Ayaka’s ICDs mean she only applies Cryo on ⅓ of her hits, meaning she can only Melt ⅓ of her damage, and is therefore a poor Melt user. In contrast, Hu Tao applies Pyro on every one of her Charged Attacks, so she can Vaporize all of them and is a great Vaporize user.
You can have an off-field character applying an aura and an on-field character triggering the reaction (e.g Xingqiu + Hu Tao), or an on-field character applying an aura and an off-field character triggering the reaction (e.g. Tartaglia + Xiangling), or off-field characters doing both (e.g. Xingqiu + Xiangling). The first is most common, because on-field characters tend to have higher damage output.
Quicken, Aggravate and Spread
When you combine Dendro and Electro, you trigger Quicken. This is an aura which causes subsequent Dendro applications to trigger Spread, and Electro applications to trigger Aggravate. Spread and Aggravate don’t consume Quicken aura, so you don’t need to worry about how much of each you apply. Quicken lasts at least 6 seconds, so you don’t need to apply Dendro or Electro that quickly.
Aggravate and Spread deal damage based on the EM, level, damage bonus, and CRIT stats of the triggering character. Attack and Talent scaling don’t matter. Aggravate and Spread work best with Talents that apply a lot of Electro or Dendro quickly, regardless of how much damage those talents do. Good examples are Alhaitham’s Chisel-Light Mirrors or Fischl’s A4 and C6 passives. On a Quicken team, all Electro and Dendro characters trigger Aggravate or Spread, though if they have high talent scaling relative to their elemental application rate, they might not want to build EM.
You can add a small amount of Hydro (e.g. Kokomi) to a Quicken team while still maintaining Quicken aura. If you add a large amount of Hydro (e.g. Xingqiu), you’ll lose most of your Quicken uptime. Similarly, Quicken can survive a small amount of Pyro application, especially if you have a lot of Electro to overload it away. Cryo, Anemo and Geo do not interact with Quicken.
If you want to Swirl Electro in a Quicken team, you need to have Electro + Quicken, which means you need more Electro application than you have Dendro application. This can be difficult if you’re using Nahida.
Bloom, Hyperbloom and Burgeon
A single application of Dendro can enable 2 applications of Hydro to trigger Bloom (3 for Nahida’s Tri-Karma Purification). A single application of Hydro can enable only one application of Dendro to trigger Bloom. To get the most out of these reactions, you want fast Dendro (Nahida, Alhaitham, or double Dendro) and Hydro that is fast but not too fast. Because of the interaction of Dendro and Electro-Charged, fast Electro can prevent overapplication of hydro from causing problems.
Pure Bloom teams without Electro or Pyro are generally weak unless they have Nilou to enhance their Bloom damage. It’s often difficult to determine which characters will trigger Bloom in a pure Bloom team. You can either record your team and measure who’s triggering bloom, or build EM on everyone who can afford to build EM.
You want area-of-effect Electro application, such as from Kuki or Raiden’s Elemental Skill, to trigger Hyperbloom. An enemy can take damage from only two Hyperblooms at any one time, so you don’t want to let a lot of Dendro cores build up before triggering them. Only the Hyperbloom trigger wants EM, and they want a lot of it. Electro Swirls or Electro absorption from Anemo characters are effective ways to trigger Hyperbloom. Fischl and Beidou don’t generally trigger Hyperbloom.
Burgeon teams are similar to Hyperbloom teams, but they’re more concerned about having fast Hydro application because they need it to get rid of Burning. While Hyperbloom teams want to apply a lot of Electro to the enemy, Burgeon teams want to avoid applying Pyro to the enemy but still need to apply it to Dendro cores. Thoma is an ideal Burgeon trigger. Adding Electro to a Burgeon team will generally make the team Burgeon more reliably.
Burning
Burning uses the EM of whichever character most recently applied Dendro or Pyro, so you need EM on all of your Dendro, Pyro and Anemo characters to use it effectively. Burning requires fast Dendro application to remain active, but does not need fast Pyro. Burning can enable Cryo Melts, but this is generally less practical than just using pyro alone.
Burning has a small area of effect, so if you group a lot of enemies really tightly (e.g. with Venti’s Burst), you can do a lot of damage quickly. Burning also does a lot of damage to you, so if you stand next to this group of enemies you will die very quickly.
Overload
Overload is the same reaction whether it’s triggered by Electro or Pyro. It uses the Elemental Mastery (EM) stat of whoever triggers the reaction. Overload only cares about the level and EM of the trigger, so to maximize its value you want a trigger that’s level 90 with all their stats put into EM. The most practical way to use Overload is to have Fischl provide an Electro aura and a Pyro character (or Kazuha) provide the trigger. You can also have a team that uses Overload for a bit of extra damage without focusing on it.
Overload deals damage in an area around the enemy. Each enemy can only take Overload damage from a given character once every 0.5s, so you can’t get a ton of damage by triggering many Overloads simultaneously on multiple enemies.
If you apply Pyro to a character affected by Electro-Charged (both Electro and Hydro), you will trigger both Overload and Vaporize. Adding Hydro to an Overload team will also Vaporize away any Pyro auras you accidentally apply so your Pyro character can consistently trigger Overload.
Electro-Charged
Electro-charged uses the EM stat of whoever last applied Electro or Hydro to the target. This is impractical to control, so you don’t generally build EM to boost Electro-Charged damage. Electro-Charged damage is a nice bonus, but not something you usually build a team around. Electro-Charged also staggers enemies, which can delay their attacks.
Freeze and Shatter
It doesn’t matter who triggers Freeze, and EM doesn’t affect Freeze. The main benefit of Freeze is the massive amount of CRIT from the 4pc Blizzard Strayer artifact set. It’s also helpful to keep enemies in place and not attacking you. You need off-field Hydro application (e.g. Xingqiu, Mona, Kokomi) on Freeze teams.
Freeze doesn’t work against bosses, in both overworld and the Abyss. Adding Pyro, Electro, Geo, or blunt attacks (e.g. Claymore swings) to a Freeze team will remove the Freeze, which you generally don’t want. Shatter is too weak and difficult to use to build a team around.
Superconduct
Superconduct’s Physical Resistance reduction is its only relevant aspect, the damage is too small to matter. Superconduct lasts 12s, so you don’t necessarily need an off-field source of either Element to use it. Every team built around a Physical damage dealer wants Superconduct, and no other team cares about it.
Swirl
Because enemies can’t have an Anemo aura, Anemo characters will always be the trigger of Swirl reactions. Although the damage multiplier for Swirl isn’t very high, Sucrose, Kazuha, and Venti can trigger so many Swirls that it adds up to a lot of damage. Swirl removes auras at half the rate of most other reactions, so that won’t interfere too much with your other reactions. However, Elements Swirled from one enemy to another apply at twice the rate of most other reactions, so they will have a large effect on your team’s reactions.
The main purpose of Swirl on a team is to trigger the 4pc Viridescent Venerer bonus to reduce enemy resistance to the Swirled Element. Make sure to adjust your rotation so that the enemy is affected by the Element you want to Swirl before you trigger Swirl.
Like Overload, Swirl deals damage in an area around the enemy. Each enemy can take Swirl damage from a given character twice every 0.5s per Element, so triggering Swirl on multiple enemies in an area of effect can cause each enemy to take twice the damage.
Crystallize
Crystallize is the weakest reaction in the game. The shields generated by Crystallize aren’t enough to reliably keep you alive, though they can help when combined with other sources of damage reduction or healing.
Crystallize removes auras at half the rate of most other reactions, so it won’t interfere too much with other reactions. Despite this, you might want to avoid triggering Crystallize on some teams that can’t afford to lose any aura, such as Hu Tao teams.
Survival: Healing and Shielding
Typically, you’ll want one of the following:
- A powerful healer: Barbara, Bennett, Diona, Dori, Jean, Kokomi, Kuki, Noelle, Sayu, Qiqi, or Yaoyao
- A powerful shielder: Zhongli or to a lesser extent Thoma or Layla
- Multiple sources of minor healing or mitigation
Heals, shields, both, or neither?
The most reliable way to stay alive is to run a dedicated healing character on your team. Having one of these lets you easily recover from any mistakes that don’t kill you. Apart from Qiqi, all of them also provide a secondary benefit you might want on your team. This secondary benefit is the main criteria in determining which healer to choose, it’s more important than how much healing the healer can do.
Shields keep you alive and also prevent enemies from interrupting your attacks. Without a healer, if your shield breaks and you take damage, you could find your health gradually chipped away over the course of an Abyss floor. Zhongli’s shield is strong enough to reliably not break. Diona and Noelle can both heal and shield, though you should only use Noelle on a team where she can take the majority of your field time.
Having both a healer and a shielder is great for comfort. On the other hand, there’s the opportunity cost of running fewer damage dealers on your team.
Going without heals or shields, or with only minimal healing/shielding, is difficult. You need to make sure you don’t get hit much at all. You can get away with it if you’re killing the enemies so fast they don’t have time to hit you. You can also try it if you can’t afford to sacrifice any damage for survivability and are able to play well enough to survive.
Damage Reduction and Mitigation
Having a way to reduce incoming damage or heal a small amount reduces your need for heals and shields. This could be:
- Small shields like Crystallize, Thoma, Xinyan or Yanfei C4
- Small heals like Xingqiu, Gorou C4, Hu Tao Burst, Prototype Amber, The Black Sword
- Freezing the enemies so they can’t attack you, or trapping them with Venti Burst
- Staggering enemies with Electro-Charged so they attack you less
- Damage reduction from Beidou or Xingqiu Burst
- Taunts like Ganyu’s flower or Amber’s Baron Bunny
High Defense is also a source of mitigation, though it doesn’t reduce your need for healing. The only high-DEF characters who want to stay on field are Noelle, who heals, and Itto, who takes a lot of hits while using his Charged Attacks.
Elemental Burst invulnerability (iframes)
Characters cannot take damage while casting their Elemental Burst. If you use a Burst just before an enemy unleashes a strong attack, this will negate the damage from that attack. Flexible-rotation teams tend to be better at exploiting this, because they can more easily time their Burst usage instead of needing to use it on schedule.
Interruption Resistance
Interruption Resistance prevents the enemy from knocking you back when they hit you. The most reliable source of Interruption Resistance is a shield, which will prevent all knockback. Freezing the enemy is another great source. Some characters, like Raiden and Itto, get a large amount of Interruption Resistance during their Burst.
Interruption Resistance is most valuable on characters who want to do Bow Aimed Shots, like Ganyu. It’s also quite useful on Catalyst Charged Attackers like Klee or Ningguang, and on characters who want to do uninterrupted Normal Attack strings like Yoimiya.
Smaller sources of Interruption Resistance, like Xingqiu’s Burst, are useful to keep you in place even when hit, but won’t prevent Charged Attacks from being interrupted. They’re great for melee Normal Attackers like Diluc.
Adapting your team to the enemies
When building a team, you need to consider the context in which you’ll be using that team. Most often, this means a specific Abyss floor or chamber. You don’t need to use the same team through all three chambers of an Abyss floor. You can 3-star the first chamber, abandon the run, then build a new team for the second chamber. You’ll still need to get that team through the first chamber, but you have plenty of time to do so because your 3 stars are locked in.
Elemental Resistance
Many enemies resist, or are weak to, certain Elements. See this table for a list. You can get away with running a Physical-damage team against 30% Physical resist enemies, but you’ll struggle against 70% Physical Resistance. Resistance reduction (e.g. Superconduct, Viridescent Venerer) helps a lot against enemies with high resistance.
Light (small) enemies
Grouping abilities – Venti, Kazuha, and to a lesser extent Sucrose – are extremely strong against light enemies. They let you bring the enemies to one place and hit all of them with your area of effect abilities.
Overload and other knockback effects can be weak against light enemies, because you need to chase after them. You can mitigate this with a ranged Overloader (Yanfei, Yoimiya) or by knocking enemies into a wall. Sometimes knockback can be helpful in disrupting enemy attacks. Freezing the enemy prevents them from being knocked back.
Evasive enemies
If enemies like Cicin Mages are running away from you, Freezing them is the best way to keep them in place. Suction abilities like Venti and Kazuha also help.
Dispersed enemies
The best way to deal with enemies that stay in place and remain separated is to group them up, especially with Venti. If they can’t be pulled, you can either use abilities with a large area of effect (e.g. Ganyu’s Burst) or defeat them one at a time with single-target damage. Ranged damage dealers like Yoimiya reduce the amount of time you spend running between enemies.
Abilities that require enemies to stay in a particular area, such as Rosaria’s Burst, tend to be weak against dispersed enemies.
Heavy (large) enemies
Venti loses a lot of value against heavy enemies, who can’t be pulled into his Burst and might walk out of the area of effect. Kazuha is still good despite being unable to pull them.
Combos that deal a lot of damage over time to an enemy that stays in one place, such as Xiangling + Rosaria, often work well against large enemies.
Large enemies usually can’t be knocked back, so you can use Overload and knockback abilities without needing to chase after enemies.
Bosses
Bosses can’t be Frozen, so don’t run Freeze or Freeze-Melt teams against them. Most boss fights are against only one enemy, so you want to focus on single-target damage.
Aggressive enemies
Some floors, such as triple Kenki or Hydro mimic swarms, can very quickly kill your characters. You can solve this with additional healing or shielding. You can also run a flexible-rotation team that uses a lot of Elemental Bursts, and time those Bursts so that the Burst invulnerability periods negate powerful enemy attacks.
Elemental shields
Elemental shields don’t care about the damage of abilities used against them, only the Elemental Gauge strength. In other words, to break a Cryo shield, frequent Pyro attacks are better than powerful Pyro attacks.
You more or less need to have a character capable of breaking any Elemental shield you’re fighting against, unless you’re overwhelmingly stronger than the enemy. You can avoid Fatui shields by killing or Freezing them before they have a chance to shield up.
Anemo and Geo can break any Elemental shield, but only very slowly. Swirled Elements are very fast at breaking shields, though this can be difficult to pull off.
| Element | Counter Element | Counter Characters |
 Cryo | Pyro (good), Electro (OK) | Bennett, Xiangling, Amber, any on-field Pyro character |
 Dendro | Pyro (good), Electro (OK), Hydro (bad) | Bennett, Xiangling, Yae, any on-field Pyro or Electro character |
 Electro | Pyro (OK), Cryo (OK), Dendro (OK) | Bennett (especially with 4pc Thundering Fury), Chongyun, any on-field Pyro or Cryo character |
 Geo | Blunt damage | Zhongli, Overload, any on-field Claymore character |
 Hydro | Dendro (Good), Cryo (OK), Electro (bad), Pyro (bad) | Nahida, Alhaitham, Chongyun, Ganyu, Ayaka |
 Pyro | Hydro (good), Electro (OK), Cryo (bad) | Xingqiu, Tartaglia, Yelan, Kokomi, Barbara, Mona |
Worked Example: Building a Rosaria Melt team
The first thing to decide on is an objective for your team. Let’s say that your goal is to do a lot of damage by triggering Melt with Rosaria’s Elemental Burst.
Reactions
If you want to Melt Rosaria’s Burst, you’ll need a source of Pyro aura.
On-field Pyro aura
Diluc, Hu Tao, Klee, Yanfei, and Yoimiya can all apply Pyro quickly and consistently while they’re on field. Of those, all but Diluc want a long, uninterrupted block of field time. This prevents Rosaria from using her Elemental Skill, which means Rosaria will do less damage and have more Energy problems.
Off-field Pyro aura
Xiangling can apply a consistent Pyro aura while off field. Thoma, Xinyan, and Kazuha + Bennett can all apply some Pyro. However, the Cryo application from Rosaria’s E will likely interfere with the reaction and break the team.
Best Choices
The contenders for Pyro aura source are Diluc, Klee and Xiangling.
Diluc
- Wants substantial field time
- 12s Burst cooldown doesn’t line up with Rosaria’s 15s
- Works well on a flexible-rotation team where his teammates have low field time requirements
Klee
- Wants substantial uninterrupted field time
- Applies a lot of Pyro, able to support more than one Cryo
- 15s Burst cooldown lines up with Rosaria’s
- Prevents Rosaria from using E off cooldown
- Works well on a fixed-rotation team that can funnel a lot of Energy to Rosaria, and with teammates that have low field time requirements
Xiangling
- Doesn’t need field time
- Applies a lot of Pyro, able to support more than one Cryo
- 20s Burst cooldown doesn’t line up with Rosaria’s
- Allows Rosaria to use E freely
- Needs a lot of Pyro Energy
- Works well on a flexible-rotation team that can provide Pyro energy
Energy
Rosaria has three ways of meeting her ER needs:
- Use E off cooldown, and build a fair bit of ER
- Use E off cooldown, and have another Cryo on the team
- Use E once per rotation, build a fair bit of ER, and have a dedicated battery
If option 2 is chosen, the Cryo options are:
- Chongyun, who also allows Rosaria to Melt her Charged Attacks if she remains on field
- Diona, who also provides heals and shields
- Ganyu, who can do a lot of damage but might interfere with Rosaria’s Melts
- Kaeya, who like Rosaria wants to E every 6s and Q every 15s. Might interfere with Rosaria’s Melts.
- Shenhe, who doesn’t provide that much Energy, but who works particularly well if there’s a third Cryo on the team
Buffs
We’d like to buff Rosaria’s Burst so it does even more damage. The best options are:
- Bennett: Very good buff, provides Pyro Energy for the pyro source, heals
- Jean: Can use Viridescent Venerer to reduce Cryo Resistance and heal
- Kazuha/Sucrose/Venti: Can use Viridescent Venerer to reduce Cryo Resistance and provide other buffs
- Shenhe: Can buff Cryo damage and provide Cryo Energy
Survivability
We need a way to stay alive. The best options are:
- Bennett: Also provides Pyro Energy for the Pyro source and heals
- Diona: Also provides Cryo Energy for Rosaria
- Jean: Can also hold VV
- Zhongli: Provides Interruption Resistance and resistance reduction
Team Options
Diluc – Rosaria – ??? – ???

Start by putting Bennett on the team, because Diluc wants Bennett’s Energy and buffs. Diluc’s combo of Q-N1-E-N1-E-N1-E takes 6.6s, and he wants to use it every 12s, so that’s 55% of your field time. Bennett wants at least 2 Es and a Q every 15s, that’s 2.6s or 17% of your field time. Rosaria wants 2 Es and a Q every 15s, that’s 3.4s or 23% of your field time. That’s 95% already, even before accounting for slack. Not enough time to fit a 4th member in. Maybe we can do a 15s fixed rotation, and lose some value from Diluc. Now we’ve got up to 2.4s in our rotation, or maybe 1 second after slack. We might have to extend our rotation out to 16 or 17 seconds and lose even more value.
Putting Kaeya or Ganyu in the team will steal Melts from Rosaria, given that Diluc has a short Pyro application window and you’re relying on Bennett Es outside of that. Diona’s healing is redundant with Bennett’s. Shenhe can fit a 15s rotation window if she uses her Hold E and Bursts every second rotation. She also gives Rosaria some Cryo Energy. She’s not getting a lot of value from her Skill, though. We might just need to build ER on Rosaria so she can meet her own Energy needs.
We can use an Anemo character to Swirl both Pyro and Cryo, and shred it with VV. We don’t need the healing from Jean. Kazuha takes too much field time. Venti lifts enemies out of Diluc’s reach. Let’s go with Sucrose, she doesn’t need much field time.
Our best contender for a Diluc team is Diluc – Rosaria – Bennett – Sucrose.
Klee – Rosaria – ??? – ???

Because Klee only gives Rosaria time for one E, Rosaria’s only reasonable option for Energy is Sacrificial Bow Diona. Diona’s shield also prevents Klee from getting knocked out of her Charged Attacks.
Klee’s taking 11.7s of field time during her Burst, Rosaria’s taking 2.3s for EQ, and Diona’s taking 0.8-1.6s depending on whether she Bursts. That’s a total of 14.8-15.6s without slack, so this team also can’t fit into a 15s rotation. We could either extend the rotation or cut off the end of Klee’s Burst.
Klee’s going to have Energy problems as the only Pyro in the team. Bennett’s the only reasonable source of Pyro particles, but we’ve already got a healer in Diona. We could just use Klee’s Burst every second rotation; this also eases the pressure on field time.
Klee probably puts out enough Pyro to support Kaeya or Ganyu as well as Rosaria. Both of these have ICD meaning they’ll only Melt ⅓ of their damage, but they also contribute Cryo Energy. Neither of them will be able to use their E off cooldown, though.
We could run an Anemo for VV Shred, as Diona’s double Hold E can reliably give us a Cryo aura. Venti works exceptionally well at grouping enemies up for Klee and Rosaria to hit them in AoE. Rosaria and Klee can both hit in Venti’s burst, so that’s not a problem. Venti can also help with Klee’s Energy problems. If we’re fighting heavy enemies, we can replace Venti with Sucrose.
Shenhe can fit a 15s rotation window if she uses her Hold E and Bursts every second rotation. She also gives Rosaria some Cryo energy. With two Cryo teammates, Shenhe can get decent value out of her Skill.
Our best contenders for a Klee team are Klee – Rosaria – Diona – Venti against light enemies, and Klee – Rosaria – Diona – Shenhe against heavy enemies.
Xiangling – Rosaria – ??? – ???

Xiangling needs a lot of Pyro Energy. Bennett’s the obvious choice to fix this problem, especially in a flexible-rotation team that can spend time batterying Xiangling with Bennett. If Bennett’s not available, maybe you could use Thoma instead, but that would be substantially weaker.
Xiangling wants to use E every 12s and Q every 20s, for a total of 17% of your field time. Rosaria wants to use E every 6s and Q every 15s, for a total of 26% of your field time. Bennett wants to use E every 5s and Q every 15s, for a total of 23% of your field time. To have Xiangling catch the particles, add another 10% or so. This leaves 24% remaining, minus slack time. Not enough for an on-field attacker, but enough for an off-field that wants to switch in a lot.
Rosaria would like to have another Cryo on the team so she doesn’t need to build ER. Every Cryo option has ICD preventing them from getting full Melt value, but that ICD also stops them from applying too much Cryo and breaking the team. Ayaka’s Burst works best against Frozen enemies, so she won’t be great here. Ganyu or Kaeya are both reasonable choices. Ganyu might sometimes steal Melts from Rosaria, but if Xiangling Melts, that’s good too. With Bennett to provide Energy and buff, Xiangling’s personal damage output will be significant. Kaeya’s capable of providing a lot of Energy for Rosaria, but deals less damage than Ganyu. Ganyu’s probably stronger overall, but Kaeya’s perfectly good if Ganyu is unavailable.
Shenhe’s not getting much value from her Skill with only one Cryo teammate, so I wouldn’t recommend her.
This team will have some difficulty getting a Cryo aura for an Anemo character to Swirl, because there’s a lot of Pyro application and the flexible rotation means you have a hard time controlling auras.
Any Electro or Hydro character would interfere with your reactions. You could run Albedo, Yun Jin, or Zhongli, but they wouldn’t add much value.
Our best contender for a Xiangling team is Xiangling – Rosaria – Bennett – Kaeya/Ganyu
Conclusion

Overall, the Xiangling – Rosaria – Bennett – Kaeya team fits together really well without awkward compromises. It’s the team I’d recommend in general.
However, this team does have a significant weakness. It wants enemies to be grouped together in Rosaria’s Burst, but doesn’t have any way to keep them there. Against some enemies (e.g. Ruin Guards) this won’t be an issue, against other enemies it will. You could put Kazuha in the team to solve the problem (Venti would lift enemies out of Xiangling’s Burst), but you’re not getting full value from Kazuha because you can’t reliably swirl Cryo.
Against light, dispersed enemies I’d recommend the Klee – Rosaria – Diona – Venti team. Venti is absurdly strong in this scenario, so you want him in your team.
Against heavy, dispersed enemies there’s no way to make Rosaria work well, so you’ll have to either build a different team or accept some loss of value.
Of course, what teams you can build depend on what characters you have, and what characters are needed for your other team. You might have to make compromises because of that. Weapons also influence your choice – if your only good Polearm is The Catch, you’re more willing to build teams with Rosaria as the only Cryo.
Appendix A: Characters
Albedo

Provides: Damage, moderate Geo Energy
Damage: Fairly good damage for an off-field character, should be built to maximize damage
Team Style: Fits well into either fixed or flexible rotations
Field Time: Very low if only using E, low if using Burst
Energy: Generates quite a bit of Geo Energy. Doesn’t need his Burst for damage, so doesn’t need any Energy.
Reactions: Doesn’t trigger useful reactions. Will sometimes steal auras if your team consumes a lot of them.
Alhaitham
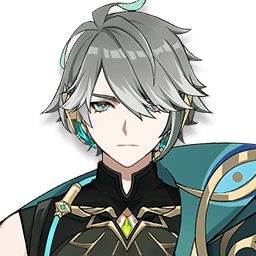
Provides: Damage, fast Dendro application, moderate Dendro Energy
Damage: High when used with Quicken, medium otherwise
Team Style: Prefers fixed rotations, but can do flexible rotations
Field Time: High
Energy: Needs a Dendro teammate to Burst off cooldown, though can function Bursting every second rotation
Reactions: Wants Quicken. Can do Quicken + Hyperbloom if the team doesn’t apply too much hydro. Can enable a Hyperbloom team along with fast Hydro, but loses a lot of damage to do so.
Aloy

Provides: Damage, moderate Cryo Energy
Damage: Should be built for damage, though she doesn’t do much of it
Team Style: Prefers flexible rotations due to 12s cooldown on Burst
Field Time: Low-Medium due to long cast time and short cooldown on Burst
Energy: Generally poor Energy generation due to high-cooldown E, though Sacrificial Bow can mitigate that. Low requirements due to cheap Burst.
Reactions: Wants Pyro aura so she can Melt her Burst
Amber (Melt Damage Build)

Provides: Damage, low Pyro Energy
Damage: Will be the majority of the team’s damage
Team Style: Fixed rotation to provide reliable aura, though she can swap freely
Field Time: High
Energy: Doesn’t need to Burst, so doesn’t need Energy
Reactions: Needs consistent Cryo aura, typically from multiple Cryo teammates, to Melt her Charged Shots
Survivability: Wants a shield so she doesn’t get interrupted while charging shots
Amber (Utility Support Build)

Provides: Limited Pyro application, buffing if you have Elegy of the End, low Pyro Energy
Damage: None
Team Style: Niche pick for very specific teams
Field Time: Low
Energy: Poor particle generation, no requirements because she can afford to run lots of ER
Reactions: Provides lots of Pyro in a very quick Burst, which is good for clearing Elemental shields or apply Pyro aura for Swirl
Specialty: Breaking Cryo Elemental shields
Arataki Itto

Provides: Damage, moderate Geo Energy
Damage: Will be the majority of your team’s damage
Team Style: Fixed rotation
Field Time: Very high, uninterrupted
Energy: Requires another Geo on the team for Energy, ideally two. Doesn’t want to build ER, but usually needs to build some.
Reactions: Itto teams don’t care about reactions
Survivability: Itto’s Charged Attacks during Burst have a lot of Interruption Resistance, and you don’t want to interrupt your combo to dodge. This results in getting hit a lot, but his very high Defense can make up for that. You still want good healing or shielding.
Barbara

Provides: Healing, very slow Hydro application, buff
Damage: None
Team Style: Any
Field Time: Low
Energy: Doesn’t generate any Energy herself. Not strong enough to justify bringing a battery for Barbara, you just need to be patient with your Burst.
Reactions: Generates a small amount of Hydro with significant downtime. Can support Freeze, but not very well. Can be used on-field in Bloom or Hyperbloom if you’re desperate.
Buffs: Can hold Thrilling Tales of Dragon Slayers to buff a teammate
Survivability: Fills all healing needs
Beidou
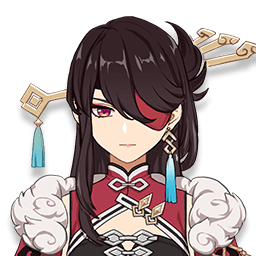
Provides: Damage, some survivability, moderate Electro application, moderate Electro Energy
Damage: Will be a large portion of your team’s damage
Team Style: Prefers flexible rotation, so she can switch in and parry
Field Time: Low to medium, depending on how often you switch in and how good you are at getting perfect parries. Wants to catch her own particles, which extends her field time a bit.
Energy: Needs another Electro on the team for Energy. Fischl works very well.
Reactions: Can help provide Electro aura on an Overload team, but can’t provide enough Electro alone. Can provide Electro for an Electro-Charged team. Quicken helps her damage, but doesn’t make a massive difference. Doesn’t trigger Hyperbloom.
Survivability: Provides damage reduction, which is enough to stay alive when combined with Xingqiu’s damage reduction and healing
Specialty: Excellent against exactly two enemies. Terrible in single-target environments, OK against three or more targets.
Other: Wants a teammate who will Normal/Charged Attack frequently to trigger her Elemental Burst.
Bennett (Healer / Buffer Build)
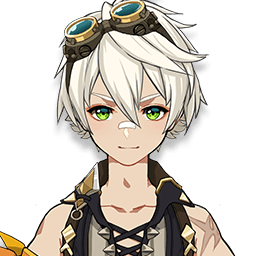
Provides: Healing, buffing, high Pyro Energy
Damage: Not much, but typically worth building for damage over healing
Team Style: Flexible rotation teams let him use his short-cooldown Elemental Skill more often. Fixed rotation teams are usually better at getting value from his buff.
Field Time: Low to medium, depending on how often you want to use your skill
Energy: Can provide a lot of Pyro Energy if he gets the field time to swap in and E a lot. Can afford to run lots of ER to minimize his own needs.
Reactions: Good at providing the aura for a single reaction like a Swirl to shred pyro with VV, or a big Hydro Vape. Can help provide Pyro aura for Cryo-Melt, but can’t do it alone.
Buffs: One of the strongest buffs in the game, especially strong when it is snapshot by multiple characters
Survivability: Fills all healing needs, even if built for damage over healing
Specialty: Breaking Cryo Elemental shields, or with 4pc Thundering Fury, Electro shields. His Skill and Burst both apply 2GU pyro, so they break shields twice as fast as most other Pyro abilities.
Bennett (On-Field Damage Build)

Provides: Damage, healing, buffing, very high Pyro Energy
Damage: Will be a large portion of your team’s damage
Team Style: Flexible rotation
Field Time: High
Energy: Generates so many Pyro particles that it helps even non-Pyro teammates a bit. Doesn’t need any Energy from teammates.
Reactions (Melt build): Needs either Hydro + Cryo, or two sources of Cryo to reliably Melt his Elemental Skill off cooldown
Reactions (Overload/Overload+Vape build): Wants both Fischl and Beidou in order to give a reliable Electro aura
Buffs: One of the strongest buffs in the game, you want to snapshot it with off-field damage dealers
Survivability: Fills all healing needs
Specialty: Breaking Cryo Elemental shields, or with 4pc Thundering Fury, Electro shields. His Skill and Burst both apply 2GU pyro, so they break shields twice as fast as most other Pyro abilities.
Candace

Provides: Moderate Hydro application, buffing, low Hydro Energy
Damage: Low
Team Style: Prefers flexible rotation due to low-cooldown skill, but can do either
Field Time: Low
Energy: Low generation, but can afford to build lots of ER
Reactions: Can’t reliably support Pyro-Vaporize. Can support Bloom, Hyperbloom or Burgeon, but not especially well.
Buffs: Provides some buffs to teammates who use Normal Attacks
Other: A lot of her Hydro application relies on having a melee on-field character who isn’t infused with a different element.
Chongyun

Provides: Slow Cryo application, moderate Cryo Energy
Damage: Can do decent damage if buffed by Shenhe, especially if he Melts. Otherwise, does some damage, not always enough to justify his Burst’s cast time.
Team Style: Any
Field Time: Low
Energy: Mediocre battery, doesn’t need much Energy due to cheap Burst
Reactions: Provides Cryo aura reasonably well. Can Melt his Burst if you get a 2GU pyro aura, typically from Bennett.
Buffs: Provides cooldown reduction at C2, which is mostly useful in flexible-rotation teams
Specialty: Breaking Hydro Elemental shields. Cryo application from infused attacks has ICD, so combine with a fast, multi-hit attacker or switch rapidly between characters and attack once with each.
Collei

Provides: Slow Dendro application, moderate Dendro Energy
Damage: Low to medium
Team Style: Any
Field Time: Low
Energy: Mediocre battery, can generally support herself
Reactions: Good at enabling Quicken. Can enable Bloom, Hyperbloom or Burgeon when combined with another Dendro.
Cyno
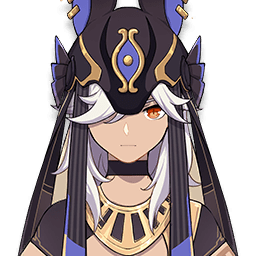
Provides: Damage, fast Electro application, high Electro Energy
Damage: High
Team Style: Fixed rotation
Field Time: Extremely high
Energy: Generates quite a bit of Electro Energy, but still likes having an Electro teammate
Reactions: Strongly wants Quicken to do more damage. Can be used as a Hyperbloom trigger.
Diluc
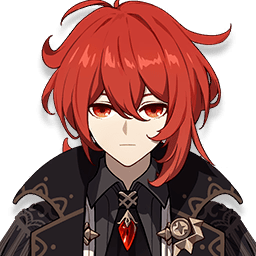
Provides: Damage, moderate Pyro Energy
Damage: Will deal the majority of your team’s damage
Team Style: Preferably fixed rotation to get buffs on Diluc reliably, but can be flexible
Field Time: High
Energy: Likes to have another Pyro for Energy, though his Burst is cheap
Reactions: Needs Xingqiu or Yelan to provide Hydro aura so Diluc can Vaporize
Diona

Provides: Healing, shielding, buffing, high Cryo Energy
Damage: Doesn’t usually do any damage. Can do some if buffed by Shenhe.
Team Style: Any
Field Time: Low
Energy: Very good at providing Energy, as she can use a Favonius or Sacrificial Bow well. Can afford to run a fair bit of ER herself, and doesn’t need to Burst off cooldown.
Reactions: Can support Superconduct. Her Burst might sometimes interfere with a Cryo-Melt team.
Buffs: 200 EM share at C6 is potentially very strong, but it’s difficult to find a team that can use the EM and also wants Diona.
Survivability: Shield is a bit fragile, so its Interruption Resistance isn’t that reliable. Healing is weak, but good enough when combined with her shield.
Dori

Provides: Healing, moderate Electro application, low Electro Energy
Damage: Low
Team Style: Any
Field Time: Low
Energy: Bad at making particles. Can afford to build lots of ER to support herself.
Reactions: Can enable Quicken. Can trigger Hyperbloom, but not well.
Survivability: Can heal enough to keep your team alive.
Eula

Provides: Damage, moderate Cryo Energy
Damage: Will be the majority of your team’s damage
Team Style: Fixed rotation
Field Time: High, uninterrupted
Energy: Needs another Cryo for Energy, and likes having two (or one Cryo and Raiden)
Reactions: Needs an Electro, typically Fischl or Raiden, for Superconduct
Buffs: Eula deals much of her damage when her Burst explodes, which is about 10.5 seconds after she switches in. Any buffs need to last long enough to still be active at this time.
Faruzan

Provides: Buffing Anemo characters, low-high Anemo Energy
Damage: Low pre-C6, medium at C6
Team Style: Any
Field Time: Low-medium pre-C6, low at C6
Energy: Terrible pre-C6, needing to focus entirely on ER. Good at C6.
Reactions: Can trigger VV
Buffs: Kit is focused entirely on buffing your teammates’ Anemo damage.
Fischl
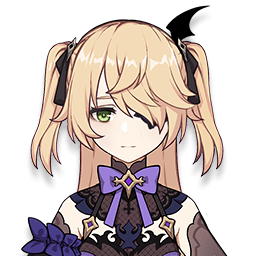
Provides: Damage, moderate to extremely fast Electro application, very high Electro Energy
Damage: Will do fairly good damage for an off-field character, especially in Aggravate teams
Team Style: Prefers flexible rotation so she can swap in every 12-13s to replace Oz. Can work on fixed rotation teams, especially if they run a 25s rotation which lets Fischl maximize Oz uptime
Field Time: Very low
Energy: Provides extremely good Electro particle generation. Helps a little bit at batterying even non-Electro characters. Doesn’t need much Energy herself because she doesn’t need to use her Burst off cooldown.
Reactions: Her A4 passive can apply Electro every 0.5s, making her amazing in Aggravate teams with an on-field Electro such as Keqing. Can’t reliably trigger Hyperbloom. Good at supporting Overload or Electro-Charged teams.
Ganyu (Freeze Build)

Provides: Damage, fast Cryo application, high Cryo Energy
Damage: Will do the majority of your team’s damage
Team Style: Typically fixed rotation, though can be flexible. Strongly prefers to have a 15 second rotation.
Field Time: Medium-high
Energy: Wants another Cryo on the team for Energy
Reactions: Needs Mona or Kokomi for Hydro aura. Can use Barbara if you’re desperate.
Specialty: Combined with Venti or Kazuha, her Burst kills groups of light enemies extremely quickly
Ganyu (Melt Build)

Provides: Damage
Damage: Will do almost all of your team’s damage
Team Style: Typically fixed rotation, though can be flexible.
Field Time: High. Can fill any amount of time with powerful Charged Attacks, so you want to minimize the time spent on the rest of the team.
Energy: Doesn’t usually Burst, so doesn’t need Energy
Reactions: Needs a consistent Pyro aura. Doesn’t apply Cryo too fast, so Kazuha + Bennett works, or Xiangling.
Survivability: Needs a shield to stop her being interrupted while charging her shots. Zhongli is ideal, Diona is substantially weaker but can be used if needed.
Gorou

Provides: Buffing, moderate Geo Energy, some heals at C4
Damage: Does effectively no damage. Can do a small amount in a 4-Geo team where he doesn’t need to build as much ER.
Team Style: Any
Field Time: Low
Energy: Poor Energy generation, though Favonius Bow can make up for it. Can afford to run enough ER to meet his own Energy needs even if he feeds all his particles to others.
Reactions: Doesn’t apply much Geo. Even with C2, doesn’t care about Crystallize shields.
Buffs: The Defense buff is only relevant to Itto, Noelle and Albedo
Survivability: At C4, provides a very small amount of healing. Difficult to rely on it alone, but it helps top you up if your Zhongli shield breaks.
Hu Tao
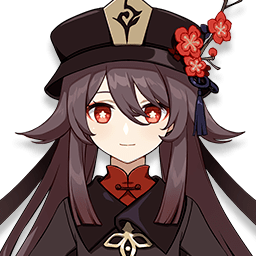
Provides: Damage, low Pyro energy
Damage: Will do a large majority of the team’s damage
Team Style: Fixed rotation
Field Time: High, uninterrupted
Energy: Burst isn’t that important to her damage, you’d rather Burst less often than try to get enough Energy to Burst every rotation.
Reactions: Needs Xingqiu. Can run pure Vape, Vape-Melt with a Cryo (e.g. Kaeya) on the team, or Vape-Overload with Fischl. If run with Zhongli, try to avoid hitting enemies with Zhongli pillar so Crystallize doesn’t eat too much Hydro aura. Can’t produce a reliable Pyro aura to Swirl, so if you want to use 4VV, you’ll need another Pyro (Amber, Xinyan, Thoma or Yanfei).
Specialty: Fighting a single enemy
Jean

Provides: Healing, buffing with 4VV, some damage, moderate to high Anemo Energy
Damage: Does a bit of damage, enough to justify building Anemo Damage/CRIT
Team Style: Ideally flexible rotation due to 6s cooldown on her Elemental Skill, but can be run in fixed rotation
Field Time: Low
Energy: Provides a good amount of Anemo Energy, especially if she can use her Skill off cooldown. Can afford to run enough ER that she doesn’t need Energy from others.
Reactions: Can trigger Viridescent Venerer well. Can’t do a significant amount of Swirl damage unless combined with Bennett for Sunfire. Has the unique ability to apply Anemo to your own character, which will trigger Swirl on any Elements applied to you.
Survivability: Fills all healing needs
Specialties: Removing negative Leyline effects such as Smoldering Flames.
Kaedehara Kazuha

Provides: Buffing, damage, grouping, moderate to high Anemo Energy
Damage: Does good damage for an off-field character
Team Style: Ideally flexible due to 6s cooldown on his Elemental Skill, but also very good in fixed rotation
Field Time: Low-medium. Tap E takes 1.5 seconds, which can add up if you use it a lot.
Energy: Can’t feed Energy to allies because he takes his own particles while plunging. No Energy problems if he can use his Skill off cooldown or has another Anemo, but has to sacrifice some EM for ER otherwise.
Reactions: Does a substantial amount of Swirl damage due to large Anemo output. Can trigger Viridescent Venerer well. When used with Bennett, will consistently absorb Pyro with his E and Q. This can trigger Overload for a lot of damage, or provide an aura for Cryo melt. May need to skip his Burst in some Pyro-Vape or Cryo-Melt teams because if it absorbs the the wrong Element, it can ruin your reactions.
Buffs: Very strong buffs from his A4 and Viridescent Venerer. Need to plan out your rotations well if you want these buffs to apply to multiple Elements.
Other: Kazuha is good at grouping light enemies, which can make your team’s area-of-effect abilities more effective.
Specialties: Grouping small enemies. Being a strong Anemo who, unlike Venti, works well against large enemies.
Kaeya

Provides: Damage, Cryo application, high Cryo Energy
Damage: Does some damage, but you can sacrifice it for Energy Recharge if you need to
Team Style: Ideally flexible due to 6s cooldown on his Elemental Skill and 15s on his Burst, but also works in fixed rotation
Field Time: Low-Medium, depending on how often he uses his Skill
Energy: Great Cryo particle production if you can use his Skill off cooldown or Freeze enemies with it. Freeze bonus particles are sometimes generated if you use Skill on already-Frozen enemies. When built for damage, likes having another Cryo on the team for Energy.
Reactions: Can enable Freeze or Superconduct well. Not very good at Melting because only ⅓ of his Burst hits apply Cryo and can Melt. Decent at providing a Cryo aura for Pyro Melt.
Survivability: The healing from his A1 and the shield from his C4 are basically irrelevant.
Kamisato Ayaka

Provides: Damage, moderate Cryo application (high during Burst), moderate Cryo Energy
Damage: Can be used as your team’s main damage dealer. Will deal good damage even with low field time.
Team Style: Likes fixed rotation to reliably get buffs on her Burst, but can be flexible
Field Time: Usually high, but can be low if you focus only on her Skill and Burst
Energy: Wants another Cryo on the team for Energy, prefers to have that Cryo feed particles to Ayaka
Reactions: Needs Hydro to Freeze the enemy so her Burst can get full value. Doesn’t Melt well because only ⅓ of her Burst hits apply Cryo and can Melt.
Kamisato Ayato (on-field)

Provides: Damage, high single-target Hydro application, moderate Hydro Energy
Damage: Can function as your team’s main damage dealer, but usually prefers to have strong off-field damage dealers present.
Team Style: Fixed rotation, but has fairly short continuous field time requirements so teammates can swap in frequently.
Field Time: Moderate-high
Energy: Isn’t Burst reliant, so doesn’t need additional Hydro particles, but appreciates them.
Reactions: Adequate but not great at enabling Vaporize, due to mostly single-target Hydro application. Good at triggering Bloom.
Kamisato Ayato (off-field)

Provides: Moderate AoE Hydro application.
Damage: Negligible.
Team Style: Any.
Field Time: Low-moderate.
Energy: Can afford to build lots of ER to support himself.
Reactions: Good at enabling Freeze. Mediocre at triggering Bloom. Inadequate for Vaporize.
Notes: Off-field Ayato’s only real purpose is as an area-of-effect Hydro applier to support Freeze teams if you don’t have Mona or Kokomi, who do that job better.
Keqing
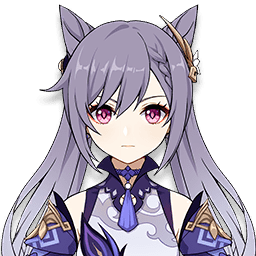
Provides: Damage, fast Electro application, moderate Electro Energy (high with 4TF)
Damage: Will be a significant portion of your team’s damage if she has time to attack.
Team Style: Typically flexible, but can use a fixed rotation
Field Time: Medium-High, depending on how much time you want to spend attacking
Energy: Would like to have another Electro on the team, but doesn’t need a dedicated battery
Reactions: Gets a lot of value out of Quicken, especially when combined with Fischl.
Klee

Provides: Damage, fast Pyro application, low Pyro Energy
Damage: Will be your team’s main damage dealer.
Team Style: Typically fixed because she loses her Burst if she switches off. Can play flexible if necessary, though.
Field Time: High, preferably uninterrupted
Energy: Wants another Pyro for Energy. Her A4 helps battery the team a little bit, but doesn’t make a huge difference.
Reactions: Can only practically trigger Vaporize if you’ve got C6 Xingqiu, and even then it’s questionable. Works best on a team with only Pyro and Anemo. Can provide a lot of Pyro aura for Cryo melt, but her high field time and reluctance to switch off makes such a team awkward.
Kujou Sara
Provides: Buff, low to moderate Electro Energy
Damage: Does a small amount of damage.
Team Style: Any
Field Time: Low
Energy: Needs to use a Charged Attack to generate Energy even at C2, which is annoying. Can afford to meet her own Energy needs by building ER.
Reactions: Doesn’t do much in terms of reactions
Buffs: Her buff has a short 6s duration, so it works best with talents that snapshot or with characters who do their damage quickly (e.g. Raiden). Her C6 buff can’t be snapshotted.
Kuki Shinobu
Provides: Healing, Hyperbloom trigger, moderate Electro Energy, low Electro application
Damage: Excellent when triggering Hyperbloom, low when triggering Aggravate, negligible otherwise.
Team Style: Prefers flexible or 15 second fixed rotations to maximize Skill uptime, but can work in any rotation
Field Time: Low
Energy: Doesn’t need to Burst. Generates a moderate amount of Electro particles.
Reactions: Excellent at triggering Hyperbloom. Can enable Quicken.
Survivability: Can keep your team alive. Tends to reduce her own HP to the point where she gets 1-shotted by enemies if you’re not careful.
Layla

Provides: Shielding, moderate Cryo application, moderate Cryo Energy
Damage: Low
Team Style: Prefers flexible rotation to maintain shield uptime, but can work with any
Field Time: Low, though not that low if she uses her Skill to generate Energy
Energy: Poor particle generation, but not reliant on her Burst
Reactions: Can enable Superconduct or Freeze
Buffs: Shield is quite strong, but has only 12s uptime. Has no way of healing characters who take damage while the shield is inactive. Works best with characters who do a small amount of healing, like Xingqiu or a Prototype Amber user.
Lisa

Provides: Buffs, sometimes damage, fast Electro application
Damage: When built only for buffs, will do no damage. Can do some damage if built for it, especially at C4.
Team Style: Any
Field Time: Low, though not that low if she uses her Skill to generate Energy
Energy: No generation if she doesn’t use her Skill, poor if she does. Can afford to build a ton of ER to make up for it if she’s only for buffs. Needs a lot of Electro battery, preferably Raiden, if she wants to build damage.
Reactions: Likes having Quicken. Can trigger Hyperbloom, especially at C4, but her high ER needs make her not that good at it.
Buffs: DEF Shred from her A4 is nice, and she can hold Thrilling Tales of Dragon Slayers. A mediocre buffer who is cheap to build.
Mona

Provides: Buff, limited Hydro application, low Hydro Energy, sometimes damage
Damage: When built for buffs, will do no damage. Can do some damage if you Vaporize her Burst, but that’s rarely worth the effort.
Team Style: Typically fixed to get her buffs on the right abilities, but can be flexible
Field Time: Low
Energy: Poor generation. Needs to build a ton of ER to meet her own needs.
Reactions: Decent Hydro aura for Freeze teams, though the uptime on her E is a bit lacking. Can Vaporize her burst for good damage, but it’s difficult to set up. Not enough Hydro for Bloom, Hyperbloom or Burgeon.
Buffs: Very strong buffing from Omen and Thrilling Tales of Dragon Slayers.
Survivability: With Prototype Amber R5, may be enough healing on a Freeze team.
Nahida

Provides: Fast Dendro application, high Dendro energy, damage
Damage: Medium
Team Style: Any
Field Time: Low if off-field, can on-field for any amount of time
Energy: Generates a lot of Dendro particles. Doesn’t need to Burst off cooldown, but likes to if the team makes enough Dendro Energy.
Reactions: Great at supporting all Dendro reactions, especially when used on-field. Likes having Quicken to increase her damage, but doesn’t need it.
Buffs: Provides a substantial EM buff to on-field teammates.
Specialty: Breaks Hydro elemental shields very quickly.
Nilou

Provides: Enables Bloom teams, moderate Hydro Energy, moderate Hydro application
Damage: Low
Team Style: Any
Field Time: Low-medium if off-field, can on-field if desired
Energy: Medium particle generation, doesn’t need to Burst every rotation
Reactions: Used exclusively in Bloom teams with only Dendro and Hydro characters. May or may not trigger Bloom reactions, depending on the team.
Buffs: Makes blooms far more effective; this is her role on the team.
Survivability: Blooms do substantial self-damage, so your team needs strong survivability from her teammates.
Ningguang
Provides: Damage, some buffs, high Geo Energy
Damage: Will be your team’s main damage dealer if played on-field. Off-field, she does decent damage, but has relatively low damage for the field time she needs.
Team Style: Typically flexible rotation, though can play fixed rotation if she’s the main on-field character.
Field Time: Typically high, though can be played for Skill/Burst damage with a low-medium field time
Energy: Generates a good amount of Energy C0. Very good Energy generation at C2 if you wait 6 seconds between skill uses. Good at batterying Noelle or meeting her own Energy needs.
Reactions: Doesn’t react much
Buffs: 15% Geo Damage from her Skill, but it’s a bit fiddly. Can hold Thrilling Tales of Dragon Slayers, but a buff-only Ningguang is not great at buffing.
Noelle

Provides: Damage, healing
Damage: Will be your team’s main damage dealer, but her healing comes at the cost of her doing less damage than most, especially pre-C6.
Team Style: Typically flexible, as Noelle can swap out during her Burst, and doesn’t snapshot much.
Field Time: High
Energy: Needs a lot of Elemental Energy from teammates. Typically wants two other Geo characters on the team, one of which can feed her Energy (Gorou, Geo Traveler or Ningguang).
Reactions: Doesn’t react much.
Survivability: Fills all healing needs. Doesn’t work very well as a shielder because she demands too much field time, and has low shield uptime.
Qiqi

Provides: Healing
Damage: Can do some damage with 4pc Ocean-Hued Clam, none otherwise.
Team Style: Any
Field Time: Low
Energy: Generates no Energy. Likes to have other Cryos on the team so she can Burst occasionally, but doesn’t need to Burst off cooldown. Can afford to build a lot of ER.
Reactions: Provides enough Cryo for Superconduct, but not much else.
Survivability: Provides an enormous amount of healing. Great if you’re facing extremely high-damage enemies.
Raiden Shogun (on-field)

Provides: Damage, universal Energy, fast Electro application
Damage: Will either be your team’s main or secondary damage dealer, depending on the team
Team Style: Fixed rotation, because she can’t switch off during her Burst, and because she wants to have all buffs applied to her before Burst.
Field Time: High, uninterrupted
Energy: Generates a lot of Electro particles and provides a lot of Flat Energy to the entire team. Can meet her own needs because she wants to build ER anyway.
Reactions: Good at enabling Superconduct and Electro-Charged. Can enable Overload when on field, especially when combined with Hydro. Can’t reliably trigger reactions.
Buffs: Good at making off-field damage dealers stronger, but her high field time requirements mean she works poorly with on-field damage dealers, except for Eula.
Raiden Shogun (off-field)

Provides: Damage, buffing, moderate Electro application, moderate Electro Energy
Damage: Does a lot of damage with Hyperblooms
Team Style: Works well with fixed rotations due to her long skill duration, also works on flexible rotations.
Field Time: Very low
Energy: Generates a lot of Electro particles. Doesn’t Burst, so doesn’t need any ER.
Reactions: Very reliable at triggering Hyperbloom.
Buffs: Provides a useful Burst damage buff to teammates.
Razor (Physical damage)

Provides: Damage, fast Electro application, low Electro Energy
Damage: Will do a large majority of the team’s damage
Team Style: Fixed rotation, because he needs to stay on-field for a long time during his Burst
Field Time: Very high, which interferes with his teammates’ ability to generate Energy and do damage. Doesn’t want to switch off during Burst.
Energy: Wants another Electro character for Energy. Poor Energy generation, but has a lot of in-built ER to make up for it.
Reactions: Wants a Cryo for Superconduct.
Razor (full EM)

Provides: Damage, fast Electro application, low Electro Energy
Damage: High
Team Style: Fixed rotation, because he needs to stay on-field for a long time during his Burst
Field Time: Very high, which interferes with his teammates’ ability to generate Energy and do damage. Doesn’t want to switch off during Burst.
Energy: Wants another Electro character for Energy. Poor Energy generation, but has a lot of in-built ER to make up for it.
Reactions: Good at triggering Hyperbloom while on-field. If used with C6 Bennett, can also trigger Burgeon. Needs fast Hydro (e.g. Xingqiu) to enable this.
Rosaria
Provides: Damage, buff, fast Cryo application, high Cryo Energy
Damage: Does a lot of damage if she Melts her Burst, a reasonable amount otherwise. Can give up damage for ER if needed.
Team Style: Ideally flexible rotation due to 6s cooldown on her Elemental Skill and 15s on her Burst, but also works in fixed rotation
Field Time: Low-medium
Energy: Great Cryo particle production if she can use her E every 6 seconds. Wants another Cryo on the team if she’s building for damage, otherwise can build ER to meet her own needs.
Reactions: Great at triggering Melt reactions, because every hit of her burst applies Cryo. Good at enabling Superconduct or Freeze, especially at C2. Can contribute to Pyro-Melt alongside other Cryo or Hydro characters.
Buffs: CRIT Rate sharing is useful. At C6, gives a nice boost to Physical teams.
Sangonomiya Kokomi (On-Field)
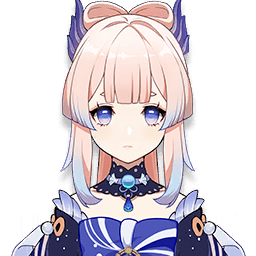
Provides: Healing, fast Hydro application, damage, buffs, high Hydro Energy
Damage: Does some damage, but you’ll want at least one strong off-field damage dealer as a teammate
Team Style: Ideally fixed rotation because she doesn’t want to switch out of her Burst, but can play flexible because losing her Burst buff isn’t too big of a deal.
Field Time: Medium-High
Energy: Can build enough ER to meet her own Energy needs. Would be great to have another Hydro on the team to help with her Energy.
Reactions: Good at enabling Bloom, Hyperbloom or Burgeon. Good at enabling Electro-Charged, though it’s not that valuable a reaction. Can enable Pyro Vaporize when on field, especially when combined with Fischl’s Electro.
Buffs: Can hold Thrilling Tales of Dragon Slayers or Hakushin Ring to buff teammates.
Survivability: Provides an enormous amount of healing. Great if you’re facing extremely high-damage enemies.
Sangonomiya Kokomi (Off-Field)

Provides: Healing, moderate Hydro application, buffs, moderate to high Hydro Energy
Damage: None
Team Style: Any
Field Time: Low
Energy: Can build enough ER to meet her own energy needs. Generates a lot of Hydro particles if you refresh the jellyfish, or a moderate amount if you don’t
Reactions: Great at enabling Freeze due to high uptime. Doesn’t apply enough Hydro to enable Pyro Vaporize. Generates some Dendro cores for Hyperbloom while leaving enough aura to preserve Quicken.
Buffs: Can hold Thrilling Tales of Dragon Slayers and 4pc Tenacity of the Millelith to buff teammates
Survivability: Provides enough healing to keep the team alive, and can stay on-field to heal the entire team in a pinch.
Sayu

Provides: Healing, buffs, moderate Anemo Energy
Damage: Some if you have high levels and lots of EM
Team Style: Any
Field Time: Low
Energy: Low particle generation. Can build enough ER to meet her own needs.
Reactions: Can trigger Viridescent Venerer reasonably well. Can do some damage with Swirls, but not a lot. Note that VV can’t trigger unless Sayu is on-field.
Survivability: Provides enough healing to keep the team alive
Shenhe

Provides: Cross between buffs and damage
Damage: Fairly low personal damage, but contributes a lot through her buffs.
Team Style: Any
Field Time: Low
Energy: Low particle generation. Energy generally isn’t a big problem for her because she wants to be run on teams with other cryos. Most of her power is in her Skill, so she doesn’t absolutely need to Burst off cooldown.
Reactions: Can contribute Cryo to a Pyro-Melt team (e.g. Bennett Melt), but doesn’t do much in the way of reactions.
Buffs: The more teammates who can do Cryo damage, the better Shenhe is. Anemo characters can deal Cryo damage by absorbing Cryo, and other non-cryos can deal Cryo damage with Chongyun’s infusion. However, these characters won’t have a Cryo Damage Bonus goblet. Shenhe is unusual in that she wants to buff multiple characters, even characters who do little damage, not a single powerful character.
Specialty: Single-target
Shikanoin Heizou
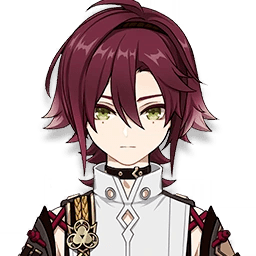
Provides: Damage or buffing, low Anemo Energy
Damage: Medium
Team Style: Prefers flexible or short fixed rotations
Field Time: Flexible, usually plays on-field
Energy: Poor particle generation, but his Burst is cheap and you can afford to Burst infrequently.
Reactions: Doesn’t Swirl enough to prefer an EM build over an ATK build.
Buffs: Can hold VV and TTDS, but is worse than Sucrose in this role.
Sucrose (Off-Field)

Provides: Buffs, moderate to high Anemo Energy
Damage: Very little
Team Style: Any
Field Time: Low
Energy: Great at providing Anemo particles for Xiao. Otherwise, unlikely to be run with any other Anemo. Can meet her own Energy needs well. On some teams, she doesn’t want to use her Burst.
Reactions: Excellent Viridescent Venerer trigger. When off-field, can’t generally Swirl enough to do meaningful damage. Note that her first Normal Attack is bugged and might not hit, and doesn’t trigger Swirl when it misses.
Buffs: VV, EM sharing, and can hold Thrilling Tales of Dragon Slayers
Sucrose (On-Field)

Provides: Damage, buffs, high Anemo Energy
Damage: Reasonable damage, on some teams can be the main damage dealer
Team Style: Typically flexible rotation, but can play fixed rotation
Field Time: Medium-high
Energy: Can meet her own ER needs, especially with Sacrificial Fragments.
Reactions: Can do a lot of Swirl damage. If used with Hydro and Electro, can sometimes trigger Electro-Charged for extra damage. Note that running both Beidou and Fischl as teammates impedes Sucrose’s ability to trigger Electro-Charged, though Beidou’s damage output might make up for that. Swirling auras around can make a Pyro-Vaporize team stronger.
Buffs: VV, EM sharing
Tartaglia (Childe)

Provides: Damage, very fast Hydro application, moderate Hydro Energy
Damage: Good damage, generally about as much as Xiangling if she’s on the team.
Team Style: Fixed rotation. Usually runs a 24-25s rotation with 9 seconds in melee stance.
Field Time: Medium-High, uninterrupted
Energy: Reasonably good at meeting his own ER needs because of the 20 cost discount on Ranged Burst. Doesn’t work well with any other Hydro so having a battery isn’t really an option.
Reactions: Wants to have Pyro aura up when he switches in so he can trigger Vaporize with his Ranged Burst; Bennett can enable this well. Provides a huge amount of Hydro aura in an area of effect while on field, which is good at enabling Pyro Vaporize (from Xiangling). Can also enable Electro-Charged. Could Freeze, but little point because he doesn’t want to use Blizzard Strayer.
Specialty: Area of effect damage against many grouped-up enemies
Tighnari
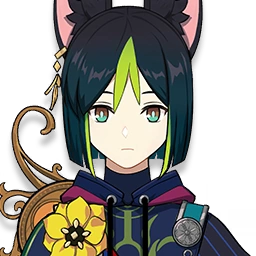
Provides: Damage, fast but inconsistent Dendro application, moderate Dendro Energy
Damage: Medium
Team Style: Prefers flexible rotations or fixed rotations that let him use his skill every 12s.
Field Time: Medium. More than most off-fielders, but not as much as a dedicated on-fielder.
Energy: Decent particle generation. Prefers having another Dendro to Burst off cooldown, but doesn’t need to do so.
Reactions: Wants Quicken to enhance his damage. Not very good at enabling Bloom or Hyperbloom, but can do some.
Thoma
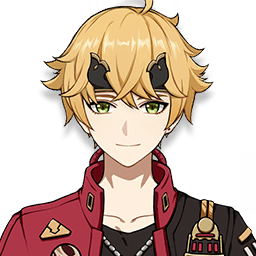
Provides: Burgeon trigger, shielding, slow Pyro application, low Pyro Energy
Damage: Good if triggering Burgeon, none otherwise
Team Style: Any
Field Time: Low
Energy: Poor Energy generation. Doesn’t want to sacrifice HP/EM for ER, but might need to. Likes having one or two Pyro teammates for Energy.
Reactions: Excellent at triggering Burgeon. Can enable Pyro VV on a Hu Tao team, but will occasionally steal her Vaporize triggers. Can contribute Pyro to a Cryo-Melt team, but can’t provide enough Pyro alone.
Survivability: Can provide a strong enough shield to keep the team alive if you can provide Thoma with enough Pyro Energy and trigger his Burst reliably. Otherwise, contributes to survival but isn’t enough alone. Shield is quite weak if he’s building full EM in a Burgeon team.
Specialty: Shielding against Pyro damage.
Other: Wants a teammate who will Normal Attack to trigger his Burst.
Traveler (Anemo)

Provides: Buffing, low Anemo Energy
Damage: Low
Team Style: Ideally flexible rotation due to 5-8s cooldown on their Elemental Skill
Field Time: Low-Medium, using Hold Skill off cooldown can take a while
Energy: Can support their own Energy needs.
Reactions: Can trigger Viridescent Venerer. Burst can do decent Swirl damage if you can keep it on an enemy, which is difficult.
Buffs: Burst provides an extra 20% RES Shred
Specialty: Manipulating enemy AI to stop them hitting a monolith
Traveler (Dendro)

Provides: Moderate Dendro application, low to moderate Dendro Energy
Damage: Some if built for damage, none if built for ER
Team Style: Prefers flexible teams to take advantage of short Skill cooldown, but can play fixed rotation if you build a lot of ER
Field Time: Low-medium
Energy: Needs a huge amount of ER if only using one Skill per rotation. Self-sufficient if using 2 Skills per rotation with Amenoma Kageuchi. Not a very good battery for teammates.
Reactions: Can support Quicken. Can support Bloom, Hyperbloom or Burgeon when combined with another Dendro.
Traveler (Electro)
Provides: Universal Energy source, slow Electro application
Damage: None
Team Style: Ideally flexible due to 6s cooldown on their Elemental Skill
Field Time: Low
Energy: Quite good at providing Energy to anyone, but that’s really all they do. Needs to build a ton of ER to meet their own Energy needs.
Reactions: Can enable Superconduct. Burst only applies Electro on every 3rd hit, so it isn’t very good for Electro-Charged or Overload.
Buffs: 15% Electro shred from C2 is sometimes nice to have
Traveler (Geo)
Provides: High Geo Energy, damage, buffs
Damage: Some, though they won’t be the main damage dealer
Team Style: Ideally flexible due to 6s cooldown on their Elemental Skill and 15s cooldown on their Burst
Field Time: Low-Medium
Energy: Excellent source of Geo particles. Can meet their own Energy needs fairly well, particularly since you always play Geo Traveler with another Geo.
Reactions: Irrelevant
Buffs: Burst gives 10% CRIT Rate to the team, which is nice.
Other: Be careful about playing Geo Traveler with Ningguang, as Geo Traveler’s boulders can block Ningguang’s Burst.
Venti

Provides: Grouping, damage, buffs, low to moderate Anemo Energy, universal Energy
Damage: Quite good damage for an off-field character
Team Style: Ideally flexible due to 6s cooldown on his Elemental Skill and 15s cooldown on his Burst
Field Time: Low-Medium. Using his Skill off cooldown takes a fair bit of field time
Energy: Can meet his own Energy needs, but is happy to have another Anemo on the team (e.g. Jean) to help. Not good at batterying Xiao. Gives 15 Energy to anyone whose Element he absorbs. It can be tricky to reliably absorb the right Element.
Reactions: Can trigger a lot of Swirls for high damage. Can reliably trigger Viridescent Venerer.
Specialty: Incredibly good at grouping light enemies and keeping them tightly packed. This works very well with Ganyu, whose Burst deals a ton of damage to tightly packed enemies. Some characters can’t hit enemies who have been lifted with Venti. Against heavy enemies, you need to position carefully to hit them with Venti’s Burst, and they might walk out of it.
Wanderer

Provides: Damage, moderate Anemo Energy
Damage: Will be a large majority of your team’s damage
Team Style: Fixed rotation
Field Time: High
Energy: Poor particle generation. Wants another Anemo in order to burst off cooldown, but isn’t Burst-reliant.
Reactions: Doesn’t really care about reactions.
Specialty: Doesn’t like to dodge while using his Skill, so would like a teammate to provide a shield.
Xiangling (Vaporize Trigger)

Provides: Damage, low Pyro Energy
Damage: Will usually be your team’s main damage dealer
Team Style: Ideally fixed-rotation to stack all buffs on Xiangling’s Burst, but can be flexible
Field Time: Low
Energy: Very bad at generating Energy for herself, wants Bennett to feed her Pyro particles. If you can do a 24s+ rotation where you use Guoba twice, you can run R5 Kitain Cross Spear and not need a battery.
Reactions: Needs Xingqiu or Tartaglia to provide a reliable Hydro aura. Can use Fischl + Kokomi to provide a combination of Overload and Vaporize, with Fischl’s fast Electro application preventing Xiangling from overtaking Hydro with Pyro. Can use Hydro + Cryo to get some Melts, but this is rarely worthwhile.
Xiangling (Pyro Aura)

Provides: Very fast Pyro application, low Pyro Energy
Damage: Some, but generally has to sacrifice a lot for ER
Team Style: Any, though being flexible enough to use Guoba every 12s helps.
Field Time: Low
Energy: Very bad at generating Energy for herself, needs a huge amount of ER. Would like to have Bennett on the team to help.
Reactions: Can provide a reliable and long-lasting Pyro aura for Reverse Melt, particularly at C4.
Xiao
Provides: Damage, low Anemo Energy
Damage: Will be a large majority of your team’s damage
Team Style: Fixed rotation, as Xiao doesn’t want to switch out during his Burst.
Field Time: Very high, meaning you need to build the entire team around Xiao’s long, uninterrupted field time
Energy: Xiao needs a dedicated Anemo battery, typically Sucrose, to provide him with Energy. If you can clear in 2 rotations, you can get away with a lot less Energy because you can support your second Burst with Energy from 4 of Xiao’s Elemental Skills.
Reactions: Xiao doesn’t do a meaningful amount of Swirl damage. Xiao’s field time requirements effectively prevent you from triggering useful reactions with the rest of the team.
Survivability: Really likes having a strong shield (Zhongli) to provide Interruption Resistance.
Xingqiu

Provides: Very fast Hydro application, damage, moderate to high Hydro Energy, some survivability, some interrupt resistance
Damage: Quite good, especially if you can get away with low ER
Team Style: Any, though he works quite well in fixed-rotation teams due to his long cooldowns
Field Time: Low
Energy: Needs to run a lot of ER to meet his own Energy needs. Can reduce that considerably with R3+ Sacrificial Sword. Doesn’t generally have Hydro teammates.
Reactions: Extremely good Hydro application, especially at C6. Excellent at providing an aura for Pyro Vaporize. Very good at enabling Freeze or Electro-Charged. Very good at enabling Bloom/Hyperbloom/Burgeon. Can enable Freeze, but only for a single enemy.
Survivability: Doesn’t heal enough to reliably keep the team alive on his own, though it’s maybe workable in a Freeze team. The combination of healing and damage reduction is enough when combined with a teammates’ survivability abilities.
Buffs: Xingqiu can’t snapshot buffs, so there’s little need to time your buffs around Xingqiu’s Burst
Specialties: Breaking Pyro Elemental shields. Fighting a single enemy.
Other: Needs a teammate who will Normal Attack frequently to trigger his Elemental Burst. If you’re not running a dedicated attacker, you can have all characters in the team use Normal Attacks between their Skill and Burst uses to trigger Xingqiu’s Burst.
Xinyan (Shield)
Provides: Shielding, buffs, moderate Pyro Energy
Damage: None
Team Style: Any
Field Time: Low
Energy: Very poor particle generation and a high-cost Burst means she won’t generally be Bursting off cooldown.
Reactions: Pyro aura isn’t frequent enough to be useful. If you’re running a Pyro Vaporize team, Xinyan might steal Vapes from the intended trigger. You can avoid getting a level 3 shield to disable the Pyro application, but this weakens your shield.
Survivability: Shield isn’t strong enough to reliably keep your team alive, and it’s got poor uptime unless you can use your Burst frequently. Can be useful when combined with other survivability abilities such as Xingqiu or Hu Tao.
Buffs: Her A4 and C4 buff Physical damage characters, but this isn’t enough to justify Xinyan outside of niche damage-per-screenshot Eula teams.
Specialties: Shielding against Pyro damage
Xinyan (Off-Field Damage)

Provides: Damage, moderate Pyro Energy
Damage: Not enough to be worth the effort you’re putting into making Xinyan work
Team Style: Any
Field Time: Low
Energy: She has very poor particle generation and a high-cost Burst which is her main damage source. She needs a team with very strong Pyro Energy generation.
Reactions: Wants Cryo and Electro for Superconduct.
Survivability: When built for damage instead of DEF, Xinyan’s shield is essentially worthless.
Buffs: Her A4 and C4 buff Physical damage characters, but any team which can provide Xinyan with enough Energy isn’t going to also have another Physical damage dealer.
Yae Miko

Provides: Damage, fast Electro application, moderate Electro Energy
Damage: Good
Team Style: Any team that can switch Yae in at least once every 14 seconds
Field Time: Medium – not a main on-field character, but needs a fair bit of field time for an off-fielder.
Energy: She needs a strong source of Electro Energy – Raiden or Fischl – if she wants to Burst off cooldown. Can still work using her Burst less often.
Reactions: Likes to Aggravate but doesn’t need to. Can trigger Hyperbloom, but isn’t great at doing so.
Yanfei (Vaporize Trigger)

Provides: Damage, low Pyro Energy
Damage: Will be the majority of your team’s damage
Team Style: Typically fixed rotation, though can be flexible
Field Time: High
Energy: Wants a lot of Pyro Energy from teammates to Burst, but can’t afford to sacrifice field time batterying Yanfei. Generally has to settle for Bursting every second rotation.
Reactions: Has to do N3C or E-N3C combos so she doesn’t apply too much Pyro, instead of the N2C or EC combos she’d normally prefer. Still, if you do so, she can reliably Vape her Charged Attacks.
Survivability: Her C4 shield is nice to have, but if you Burst every second rotation the uptime is poor.
Yanfei (Overload Trigger)

Provides: Damage, low Pyro Energy
Damage: Will do significant damage, but probably not the main damage dealer
Team Style: Flexible rotation. Needs to use Fischl E/Q every 12-13s and Beidou Q every 20 seconds, so a fixed rotation doesn’t line up. Doesn’t need to stay in her Burst because she doesn’t care about the Charged Attack bonus.
Field Time: Medium-High
Energy: Doesn’t need to use her Burst, so no Energy problems
Reactions: Uses Fischl and Beidou as Electro auras so Yanfei can reliably trigger Overload. With a full-EM build, these Overloads do fairly good damage.
Survivability: Her C4 shield is nice to have, but she Bursts infrequently so the uptime is poor.
Yanfei (Shield)

Provides: Shield, either buff or heal, low Pyro Energy
Damage: None
Team Style: Any
Field Time: Low
Energy: Wants to have at least one Pyro teammate for Energy. Needs to Burst off cooldown, and needs a huge amount of ER to do so. Doesn’t provide much Energy for teammates. Things get a bit easier if your rotation lets you use her Skill every 10 seconds instead of every 20.
Reactions: Can use EQ to provide a Pyro aura to Swirl with VV
Survivability: Has a decent shield, but a maximum of 75% uptime. With Prototype Amber, also provides a bit of healing. Generally won’t be enough to keep your team alive on her own.
Buffs: Can hold Thrilling Tales of Dragon Slayers, but only if you don’t need Prototype Amber for Energy.
Specialty: Shielding against Pyro damage
Yaoyao
Provides: Healing, slow Dendro application, moderate Dendro Energy
Damage: Negligible
Team Style: Any
Field Time: Low if not Bursting, high for an off-fielder if Bursting.
Energy: Helps Dendro teammates a bit with Energy, especially if they’re on field. Doesn’t usually need to Burst all that often.
Reactions: Good at enabling Quicken. Can support Bloom, Hyperbloom or Burgeon alongside another Dendro.
Survivability: Her Skill’s healing is a bit on the low side for a healer, but it can be enough most of the time. Her Burst does a huge amount of healing, but requires her to stay on field for it to work.
Yelan

Provides: Fast Hydro application, damage, moderate to high Hydro Energy
Damage: High for an off-fielder
Team Style: Prefers flexible or fixed rotations which allow her to use her skill every 10s, but can work even without that
Field Time: Low
Energy: High particle generation if she can use her Skill off cooldown, decent otherwise. HP scaling makes her very good at holding Favonius Bow.
Reactions: Extremely good Hydro application, though not quite as good as C6 Xingqiu. Good at providing an aura for Pyro Vaporize. Good at enabling Bloom, Hyperbloom or Burgeon. Can enable Freeze, but only for a single enemy.
Buffs: Provides a useful damage buff to the on-field character.
Other: Needs a teammate who will Normal Attack frequently to trigger her Elemental Burst. If you’re not running a dedicated attacker, you can have all characters in the team use Normal Attacks between their Skill and Burst uses to trigger Yelan’s Burst.
Yoimiya
Provides: Damage, low Pyro Energy
Damage: Will be the majority of your team’s damage
Team Style: Fixed rotation
Field Time: High, uninterrupted
Energy: Typically wants another Pyro on the team for Energy, but doesn’t need to be fed Energy. Doesn’t need to use her Burst every rotation if doing so would be difficult.
Reactions: With Xingqiu, she can Vaporize most of her damage. Adding Fischl and/or Beidou lets her Overload, with or without Xingqiu. Overload isn’t that big of a deal, though, because you don’t want to build full EM.
Survivability: Yoimiya likes to have a shield so she can perform a 5-Normal-Attack string without being interrupted by enemies, but it’s not absolutely necessary.
Buffs: Yoimiya can buff her allies by up to 20% Attack, which is nice to have.
Specialty: Single-target damage
Yun Jin

Provides: Cross between buff and damage, low Geo Energy
Damage: Little personal damage, but contributes a fair bit through her buffs.
Team Style: Prefers flexible teams so that she can swap in and parry, but can work with fixed rotation teams. Yun Jin cares less about parrying than Beidou does.
Field Time: Low
Energy: Poor particle generation. Wants to have a Geo teammate, will need to build quite a bit of ER in any case
Reactions: Irrelevant
Buffs: Provides a substantial buff to Normal Attacks. Yun Jin wants to be run with a teammate that will be triggering a large number of Normal Attack hits, and has a significant Damage and CRIT bonus to those attacks. Yun Jin doesn’t care if the character she’s buffing has good Normal Attacks, she’s more like Xingqiu in that regard. Gorou’s DEF buff doesn’t affect Yun Jin’s Burst.
Zhongli (Shield)
Provides: Shield, buff, low Geo Energy
Damage: None
Team Style: Any. Works well on fixed-rotation teams because his shield lasts 20 seconds.
Field Time: Low
Energy: Provides a reasonable amount of Geo Energy if his pillar remains intact and in range of enemies, which can be tricky. Doesn’t need any Energy himself because he doesn’t Burst.
Reactions: Will Crystallize occasionally if his pillar is in range of an enemy. This is at best irrelevant and at worst interferes negatively with your team’s other reactions. You can place the pillar away from enemies to avoid this, but if you do, Zhongli won’t generate any Energy.
Survivability: Zhongli’s shield is strong enough to reliably not break, so it can single-handedly keep your team alive
Buffs: Zhongli’s universal 20% RES shred is very nice to have, especially for Dendro damage which can’t use Viridescent Venerer.
Specialty: Removing Geo shields
Zhongli (Damage)

Provides: Damage, shield, buff, low Geo Energy
Damage: A decent amount. Looks more impressive than it is because of the single big number.
Team Style: Works best in a flexible rotation team so he can Burst more frequently, but can be run in a fixed rotation team
Field Time: Medium, as his Burst and shield both have long cast times.
Energy: Provides a reasonable amount of Geo energy if his pillar remains intact and in range of enemies, which can be tricky. Wants Geo teammates for Energy, but doesn’t need a dedicated battery. Would prefer not to build ER.
Reactions: Generally not relevant.
Survivability: Zhongli built for damage has a substantially weaker shield than one built for shielding. You can make up for that if your team allows you to use your Skill every 12s, or if you have C2. You might need to run a source of healing, either a true healer like Bennett or a small healer like Xingqiu or Gorou C4.
Buffs: Zhongli’s universal 20% resistance shred is very nice to have, but with a weaker shield you might have some downtime on it
Specialty: Removing Geo shields
Appendix B: Teams
This section will describe how various teams work. This section contains more abbreviations than usual, check the glossary for definitions.
Bennett – Sucrose – Xiangling – Xingqiu

Objective
Maximize the damage dealt by Xiangling’s Pyronado by giving her buffs, Energy and Hydro aura
Roles and Needs
- Bennett: Buffer, Pyro Energy source
- Sucrose: Buffer, damage, field time user
- Xiangling: Damage, Hydro aura need, Pyro Energy need
- Xingqiu: Hydro aura source, damage
Rotation
Fixed rotation (23-24s) with some flexibility. Tends to go a bit over the ideal 21-22s rotation because of the time needed to feed Bennett’s particles to Xiangling
Bennett EQ [1.7s] – Xingqiu EQN1 or EQEN1 [2.1-3.4s] – Xiangling EN1 [1.0s] – Sucrose EN1 [1.0s] – Xiangling Q [1.7s] – Sucrose attacks and Es until Guoba expires [8s] – Bennett E – Xiangling [1.6s] – Sucrose attacks [2.4s] – Bennett E – Xiangling [1.6s]. Total of 21.1-22.2s, or 23-24s with slack. Bennett E will be on cooldown at the start of the second rotation, so Bennett will start with a plain Q.
Buff Xiangling with Bennett Burst, Bennett 4NO, Sucrose VV Shred, Sucrose TTDS then snapshot all of that with Pyronado. Xingqiu’s Rain Swords enable it to trigger Vaporize. Sucrose can attack during this time, with her Swirls doing decent damage and sometimes Swirling Hydro to other enemies so they can be Vaporized. Wait until Guoba expires before you start using Bennett Es so you don’t overapply Pyro and break your Vaporizes. If Xingqiu isn’t C6, you might need to wait until Pyronado expires before using Bennett Es.
Energy
- Bennett doesn’t care much about damage, so he can afford to feed his particles to Xiangling
- Sucrose doesn’t Burst
- Xiangling gets particles from Bennett. She wants to minimize the amount of ER she needs, but usually has to build ER anyway.
- Xingqiu needs to support himself with Energy. He can do that with Sacrificial Sword or a lot of ER.
Reactions
Xingqiu can easily provide enough Hydro on a single target for Xiangling to trigger Vaporize. The team can’t reliably get Hydro aura on multiple targets, though.
Sucrose can VV Shred Pyro by using her E when Guoba is breathing fire, and Swirling that. Sucrose can VV Shred Hydro by Normal Attacking while Xingqiu’s Burst is active.
Sucrose doesn’t use her Burst because if it absorbs or Swirls Pyro, it can apply too much Pyro for Xingqiu to keep up.
Survivability
Bennett provides a lot of healing. Xingqiu adds in damage reduction and a bit more healing. The team is free to dodge whenever it wants without losing out on damage. All of this makes the team very good at staying alive.
Ideal environment
Because the team can’t reliably Vape against multiple targets, it works best in single-target fights. The team can easily deal with Cryo, Electro or Pyro Elemental shields.
Diona – Ganyu – Mona – Venti

Objective
Group enemies up with Venti, Freeze them, and deal a ton of damage with Ganyu’s Elemental Burst and Charged Shots. Ganyu’s Burst works particularly well against grouped enemies – if there are 4 enemies next to each other, each will receive an icicle, and each icicle will hit all 4 enemies, for a total of 16 damage instances.
Roles and Needs
- Diona: Shielder, healer, Cryo Energy source
- Ganyu: Damage, grouping need, Cryo Energy need, Hydro aura need, field time need
- Mona: Hydro aura source, buffer
- Venti: Grouper, buffer, Cryo Energy source (from his A4)
Rotation
Fixed rotation (15s) with some flexibility. 15 seconds matches the cooldown on Ganyu, Mona and Venti Burst.
Ganyu EQ [2.3s] – Venti EQ [1.9s] – Mona QE [2.8s] – Diona hE or QhE [1.0-1.2s] – Ganyu 3x aimed shot [5.4s]. Total of 13.8-14.0s, add in some slack for 15 seconds. Can use a second venti E between Ganyu’s Charged Shots, which will extend the rotation slightly unless you have very good execution. If using TTDS on Mona, move one of Ganyu’s Charged Shots before Diona.
Starting with Ganyu – Venti – Mona ensures that Venti will absorb Cryo so he gives Energy to Ganyu and Diona, and maximizes the duration of Mona’s Freeze and Omen extension. The downside is that if Mona runs Thrilling Tales of Dragon Slayers, it can’t buff Ganyu’s Burst.
Following that with Diona – Ganyu lets Ganyu take Diona’s particles, and ensures Diona’s shield will be active to protect Ganyu while she uses her Charged Shots.
Ganyu doesn’t attack very much on this team, because that would extend the rotation past 15 seconds and result in fewer Ganyu/Venti/Mona Bursts.
Energy
- Diona feeds Energy to Ganyu. She can afford to run ER, and doesn’t need to Burst off cooldown.
- Ganyu receives Energy from Diona and from Venti’s A4, so she doesn’t need to run ER herself.
- Mona gets very little Hydro Energy from herself or the team, so needs to run a ton of ER to make up for it
- Venti can support his own Energy needs easily using two Elemental Skills, or use only one Skill and build ER
Reactions
The team doesn’t have perfect Freeze uptime, but it’s good enough. Venti can consistently VV Cryo, and there’s plenty of Elements for him to Swirl for damage.
Survivability
Freezing the enemy and having Diona makes the team very resilient.
Ideal environment
This team is incredible against a large number of small, light enemies who can be sucked into Venti’s Burst and destroyed by Ganyu. It struggles against heavy enemies, and is very bad against bosses. It’s great at breaking Hydro Elemental shields.
Beidou – Bennett – Fischl – Kazuha

Objective
Get good value from Beidou’s Burst. Trigger Overload with full-EM Bennet and Kazuha for a lot of damage.
Roles and Needs
- Beidou: Damage, Electro aura source, Electro Energy need
- Bennett: Buffer, damage, Pyro self-application source, Electro aura need
- Fischl: Electro aura source, Electro Energy source, damage
- Kazuha: Damage, buffer, Electro aura need, Pyro self-application need
Rotation
Flexible rotation, as most of the cooldowns don’t line up. Everyone uses one normal attack when they swap in to trigger Beidou’s burst.
- Beidou swaps in whenever she gets the opportunity to parry an attack, and wants to Burst off cooldown, ideally in Bennett’s Burst. Takes about 20% of the field time.
- Bennett swaps in to use E whenever nobody else needs to do anything, and wants to Burst off cooldown. Takes about 30% of the field time.
- Fischl swaps in to replace Oz ever time it expires (12-13s). Takes about 10% of the field time.
- Kazuha swaps in to use his E every 6 seconds, and his Burst off cooldown. Kazuha wants to burst in Bennett’s Burst, which is easy to achieve since their cooldowns line up. Takes about 40% of the field time.
Energy
- Beidou generates a reasonable number of particles for herself because the team lets her swap in and counter at any time. Fischl generates a lot of Electro particles.
- Bennett can use his Skill quite frequently, because with his Burst and 4pc Thundering Fury its got a 1 second cooldown.
- Fischl can sustain herself while helping Beidou, because she only needs to use a 60-Cost Burst every 25 seconds and the team makes a lot of Electro particles
- Kazuha can use 2 or 3 Elemental Skills per Burst, which lets him sustain himself quite well. Although nobody else makes any Anemo particles, the large number of Pyro and Electro particles help Kazuha a bit.
Reactions
Bennett triggers Overload with his E. Bennett’s burst applies Pyro to the active character, meaning that Kazuha’s E and Q will absorb Pyro and trigger Overload. Kazuha will also Swirl a lot. With both Bennett and Kazuha building full EM, this is a lot of damage. Kazuha can trigger Electro VV reliably, and Pyro VV sometimes if an enemy happens to get a Pyro aura.
Fischl can provide a very reliable Electro aura thanks to her A4. Beidou also applies quite a lot of Electro.
Survivability
Between Beidou’s damage reduction and Bennett’s healing, the team has no trouble staying alive.
Ideal environment
The team really wants to stay in Bennett’s circle at all times, so you don’t want to move around a lot. Against light enemies, Kazuha’s suction can keep them in place.
Beidou works best against exactly two enemies. The team fares very poorly in single-target scenarios.
Fischl – Kokomi – Sucrose – Xiangling

Objective
Trigger both Vaporize and Overload with Xiangling against multiple enemies, without needing to use Bennett or Xingqiu. See this video for an overview by the team’s creator.
Roles and Needs
- Fischl: Electro aura source, damage
- Kokomi: Hydro aura source, healing, buff, field time need
- Sucrose: Buff, damage, field time need
- Xiangling: Damage, Hydro aura need, Electro aura need
Rotation
Fixed rotation (25s) to allow for 2 Oz summons and 2 Guoba summons.
Fischl E [1.0s] – Kokomi E [1.1s] – Xiangling E [1.0s] – Sucrose N1-E-N2-E-N1 [1.6s] – Xiangling Q [1.7s] – Kokomi Q-N2C-N2D-N2C [5.4s] – Fischl Q [1.0s] – Xiangling E [1.0s] – Sucrose N1-E-N1-Q-5xN3D [9.4s]. Total of 23.2s, or 25s with slack. See here for a full detailed breakdown. Sucrose C4 allows an extra Sucrose E towards the end of the rotation.
Xiangling benefits from Kokomi’s Thrilling Tales of Dragon Slayers and Tenacity of the Millelith buffs, and from Sucrose’s EM sharing, all of which gets snapshot. Fischl benefits from TotM except for the first Oz.
Energy
- Fischl can meet her own needs, because she makes a lot of particles and has a relatively cheap Burst
- Kokomi needs to build a lot of ER, but she can afford to sacrifice damage for ER
- Sucrose can meet her own needs thanks to frequent Skill usage
- Xiangling generates 8 Pyro particles with two Guoba uses, though she’s unlikely to pick up any of those herself. Combined with the Energy from an R5 Kitain Cross Spear, she can meet her own Energy needs.
Reactions
Fischl and Kokomi both have good uptime on their summons, giving reliable Electro-Charged. Sucrose supplements this by Swirling auras from one enemy to another. All of these auras allow Xiangling to reliably Vaporize and Overload her Pyronado. Sucrose’s Swirls also do good damage, and she can trigger Electro-Charged for extra damage a lot of the time. This team does a whole huge mess of reactions which somehow come together perfectly.
Survivability
Kokomi’s jellyfish is a good source of healing, and when she gets on-field time she’ll heal the whole team up to full health.
Ideal environment
This team works best against multiple heavy enemies. You want enemies to be close to your jellyfish, because you need it for Hydro application and you can only reposition it once every 25 seconds. Overload will knock light enemies away. Fighting multiple enemies increases your Swirl damage, and lets you take advantage of being able to Vaporize Pyronado against multiple enemies.
Bennett – Kazuha – Mona – Raiden

Objective
To maximize the damage dealt by Raiden during her Burst
Roles and Needs
- Bennett: Buff, healing
- Kazuha: Buff, grouping
- Mona: Buff
- Raiden: Damage, universal Energy source
Rotation
Fixed rotation (21s). Need to build around Raiden’s field time, and need to maximize buffs on Raiden. Can go down to 19s with perfect execution.
Raiden E [1.0s] – Bennett Q [1.0s] – Kazuha Q [1.6s] – Mona Q [2.1s] – Raiden Q [1.9s] – Raiden attacks [8s] – Bennett E [1.0s] – Mona E [1.0s] – Kazuha hE [2.2s]. Total of 19.8s, or 21s accounting for slack. Hitlag extension means Raiden’s Burst lasts 8 seconds, not the 7 seconds in the description.
All the Bursts are used at the start of the rotation, and Skills at the end, to maximize buff uptime on Raiden. You end up with Bennett’s Burst and 4NO, Kazuha’s VV Shred and damage bonus, Mona’s Omen, and Mona’s TTDS all on Raiden during her Burst, for a huge damage bonus.
Energy
- Bennett, Kazuha and Mona can afford to build ER, and Raiden helps with Energy.
- Raiden wants to build some ER anyway, and between her Skill and Flat Energy can fund herself without problems.
Reactions
At the start of the rotation, Raiden will apply Electro, Bennett will Overload with his Q, Raiden will apply Electro with her Eye of Stormy Judgment, then Kazuha will Swirl Electro for VV Shred. Kazuha will deal a reasonable amount of Swirl damage, and might get some Electro-Charged or Overload triggers as well. Nobody else on the team will deal meaningful reaction damage.
Survivability
Bennett’s good at keeping the team alive
Ideal environment
This team performs well in any environment, though it works particularly well when Raiden can hit all the enemies at the same time with her attacks.
Glossary
- A4 – the talent unlocked at your 4th ascension (level 60/70)
- ATK – Attack
- Aura – an Element which is on an enemy. An enemy gets an aura when you apply an Element to an enemy without an aura. Distinct from a trigger, which is an Element applied to an enemy who already has an aura; the trigger reacts with the aura.
- Burst – Elemental Burst
- C6 – sixth Constellation
- CD – cooldown
- CRIT – Critical Rate and Critical Damage
- DEF – Defense
- E – Elemental Skill
- EC – Electro-Charged
- EM – Elemental Mastery
- ER – Energy Recharge
- GU – Gauge Units
- hE – Held Elemental Skill
- ICD – internal cooldown
- N1C – 1 Normal Attack, followed by a Charged Attack
- N2E – 2 Normal Attacks, followed by an Elemental Skill
- NO – Noblesse Oblige artifact set
- Off-field – Not the active character
- OL – Overload
- On-field – The active character
- Shred – resistance reduction
- Skill – Elemental Skill
- TF – Thundering Fury artifact set
- TotM – Tenacity of the Millelith artifact set
- Trigger – an Element applied to an enemy that has an aura, which reacts with that aura
- TTDS – Thrilling Tales of Dragon Slayers (3-star Catalyst)
- Uptime – The amount of time a talent is active
- Q – Elemental Burst
- Vape – Vaporize reaction
- VV – 4pc Viridescent Venerer artifact set bonus (-40% Elemental Resistance to Swirled Element)

