Please refer to the Mona Quick Guide for updated build advice!
The current Extended Guide is out of date. Join our Discord if you’re interested in helping update this guide!
Updated for v2.4
Table of Contents
General Terminology
Note the following terminologies used in this guide:
| A1, A2, A3, etc. | Character Ascension Level 1, Level 2, Level 3, etc. |
| C1, C2, C3, etc. | Constellation 1, 2, 3, etc. |
| R1, R2, R3, etc. | Weapon Refinement Level 1, 2, 3, etc. |
| AoE | Area of Effect – common game terminology referring to abilities which occurs in an area around a targeted location (in contrast with single target damage) |
| CC | Crowd Control – common game terminology referring to when abilities disable enemies preventing them from engaging in certain actions |
| DoT | Damage over Time – common game terminology referring to abilities which apply damage in ‘ticks’ or, as the name suggests, over a period of time (instead of instantly) |
| ICD | Internal Cooldowns |
| Quickswap | Refers to team comps where multiple characters with powerful Elemental Bursts and Elemental Skills constantly switch to maximize damage output |
| Sustained Damage | Damage that can be dealt consistently, often without much variation |
Preface
Credits to all Helpers, Mods and Theorycrafter Astrologists. List here
Stay up to date with Mona Mains Discord and Reddit
Discord: https://discord.gg/mona
Reddit: https://www.reddit.com/r/MonaMains/
You can donate to support the continued endeavors of updating this guide at Ko-Fi Mona Mains
Should you use Mona?
“Always” – Albert Einstein
Pros
- One of the most flexible supports in the game
- Used in popular Freeze teams with Ganyu or Ayaka
- Provides huge damage increase to your team, can hold TTDS
- Doesn’t take much field time, enabling Quickswap playstyles and compositions
- Support Mona is cheap to build. Does not require 5★ catalysts to perform at maximum potential
- She is great for DMG per screenshot
- She also has a lot of fanart
Cons
- Requires some practice to get used to the Alternative Sprint mechanic
- DPS Mona for either Vaporize or Electro-Charged teams is semi-expensive to build
- Can be technically challenging
- Constellations are not great after C4
- Might have caused you to lose a 50/50
- A very complicated Elemental Burst, which will be explained in this guide
Talents
 Normal/Charged Attack | Ripple of Fate
This is Mona’s Normal, Charged and Plunge Attack talent. The Normal Attack string consists of 4 different attacks dealing varying amounts of damage.
- All of Mona’s Normal Attacks are small AoEs that can deal damage to multiple enemies if they are grouped – this synergizes well with CC.
- The 3rd attack teleports Mona either slightly forward or backward, depending on her distance from the enemy before inputting the attack – this creates a slight delay between the 2nd and 3rd attacks in the attack string.
- The 4th attack acts like a pseudo Charged Attack that is slightly larger in AoE than the other normal attacks, and does more damage.
- As it is the last attack in the attack string, there is a delay after the 4th attack that prevents the start of the next set of attacks.
- Charged Attack – holding the attack key consumes stamina and triggers a slightly delayed Charged Attack which does increased damage in a larger AoE.
- Plunge Attack – Mona plunges towards the ground dealing Hydro DMG on impact.
Mona’s Optimal Attack String (Normal Attack Canceling)
Mona’s Normal Attack, Ripple of Fate, consists of a string of 4 attacks, each dealing an increasing amount of damage, and a Charged Attack which does massive AOE damage around the targeted enemy. In order to maximize Mona’s damage output, the best DPS attack string is to do 2 Normal Attacks then cancel the attack string with a Charged Attack (2NA + CA).
- To further increase her damage, you can animation-cancel the Charged Attack by using Mona’s jump partway through the animation of the Charged Attack (Jump Canceling or JC). (2NA + Charged JC)
- Note that Jump Canceling a Charged Attack requires some practice. If you jump too early, despite part of the animation for a Charged Attack playing out, no damage will occur. See the clips below for further details.
The clip above is an example of good Jump Canceling.
The clip above is an example of poor Jump Canceling.
 Elemental Skill | Mirror Reflection of Doom
There are two ways to use Mona’s Elemental skill.
Tap: Her Elemental Skill produces a Phantom which taunts all enemies. The Phantom deals 4 ticks of damage (DoT) over 4 seconds, followed by a final instance of Explosion DMG.
Hold: Her Elemental Skill causes Mona to teleport backwards and the AOE taunt replaces her at her previous location. E hold has i-frames, which can be used for dodging enemies.
Particle Generation: At the end of the Explosion DMG, Mona’s Elemental Skill generates 3 to 4 Hydro Elemental Energy Particles (although 3 Particles is more likely). You get 3.33 Hydro Particles on average. Note that the Elemental Skill must hit an enemy on the fourth tick in order for Hydro Particles to be generated during the final explosion. This interaction can make it difficult for Mona to reliably generate Energy.
There is a known bug with Mona’s Elemental skill which is mentioned in the KQM Theorycrafting Library. There is a small chance that when you use Mona’s Press E, the explosion damage and Particle generation also happens during cast. It can happen against any enemy, and it seems to be a random occurrence.
 Elemental Burst | Stellaris Phantasm
One of the most technical Elemental Bursts in Genshin Impact. Applies the Omen DMG% Buff on cast, and Illusory Bubble, which deals damage when popped. The Omen DMG% Buff timer only begins when the Illusory Bubble is popped.
As of patch 2.4, there are many ways to utilize Mona’s burst; see our in-depth explanation of Mona’s Elemental Burst, Stellaris Phantasm.
It is strongly recommended to prioritize leveling up Mona’s Elemental burst to level 7 in order to maximize your Omen DMG% Buff duration.
 Alternative Sprint | Illusory Torrent
Mona will submerge into a water flow animation on the ground, consuming stamina. When ‘re-surfacing,’ she will apply Hydro to nearby opponents. Mona is not immune to damage while submerged.
Illusory Torrent may be initially tough to get used to, but it is slightly faster than normal sprint animations, and adds up over a long period of time. It will take some practice to get used to the timing of Mona’s sprint animation. A solid understanding of Mona’s positioning tools (Alternative Sprint, Hold E, teleport between 2nd and 3rd Normal Attacks) along with taking advantage of the fact that Mona is a ranged unit will greatly improve your combat experience.
Note: with 1.3, small QoL fixes were made which allow for better dodging in short bursts. Since the Alternative Sprints do not have the standard sprint cooldown following two sprints, this can be useful for continually dodging multiple sources of damage. Mona’s Alternative Sprint has been further improved in patch 2.0 to be more like Ayaka’s. It is noticeably smoother, and allows you to change directions much more quickly.
 1st Ascension Passive | Come ‘n’ Get Me, Hag!
After using Illusory Torrent for 2s, Mona will automatically create an AOE Taunt similar to her Elemental Skill when an enemy is nearby. This deals 50% of the Explosion DMG of Mirror Reflection of Doom, and counts as Elemental Skill damage.
 4th Ascension Passive | Waterborne Destiny
Increases Mona’s Hydro DMG% by 20% of Mona’s total Energy Recharge. A nice bonus that stacks with the base 100% and 32% from her Ascensions. Do not get baited into stacking ER% to utilize this Passive Talent, as the conversion is only 20% – it is usually better to just run offensive stats – ATK%, Crit Rate and Damage. The exception is in Freeze Comps (and to a lesser degree EC Comps), where there is a greater focus on maintaining Mona’s Omen DMG% Buff uptime rather than directly maximizing her damage.
 Utility Passive | Principium of Astrology
Cash money – 25% chance to refund Weapon Ascension Materials used to craft a higher tier one. Depending on the tier of material being crafted, Mona’s talent gives a 9.1% bonus, which is slightly worse than Albedo and Ayaka’s Talents, which give a 10% bonus. See here for math: Reddit post
Constellations
 C1 – Prophecy of Submersion
Hydro-related Elemental Reactions are enhanced for 8s against enemies inflicted with Omen DMG% Buff.
- Electro-Charged DMG is increased by 15%.
- Vaporize DMG is increased by 15%. This increase does NOT apply to Mona’s Elemental Burst damage itself for single target scenarios. It does work in multi-target scenarios. After the first bubble is popped, subsequent bubble pops will receive the Reaction bonus. See the Mona Mains Theorycrafting Library.
- Hydro Swirl DMG is increased by 15%.
- The duration for which enemies are Frozen is increased by 15%. As of patch 2.3, this part of the constellation might be bugged since it does not seem to actually increase Freeze duration even after the bubble is popped and the enemy is frozen.
 C2 – Lunar Chain
When a Normal Attack hits, there is a 20% chance that it will be automatically followed by a Charged Attack.
- The automatic Charged Attack does NOT consume any stamina.
- The automatic Charged Attack cannot be used to double vaporize a Pyro inflicted enemy.
 C3 – Restless Revolution
Increases the Level of Stellaris Phantasm by 3. Maximum upgrade level is 15. Boosts Mona’s Elemental Burst Damage.
 C4 – Prophecy of Oblivion
Characters that attack enemies afflicted by Omen DMG% Buff gain 15% Crit Rate. Really nice extra bonus in a Freeze comp to help round up Crit Rate closer to 100%, and allows your Cryo characters to stat even more aggressively into Crit Damage. With Omen DMG% Buff extensions in a Freeze team you can effectively maintain 73.3 – 86.6% uptime on both the Omen DMG% and Crit Rate Buff.
Mona can also benefit from the 15% Crit Rate. Video Evidence
 C5 – Mockery of Fortuna
Increase the Level of Mirror Reflection of Doom by 3. Maximum upgrade level is 15.
 C6 – Rhetorics of Calamitas
Mona gains a 60% increase to the DMG of her next Charged Attack for every second she is in Illusory Torrent. DMG Bonus is capped at 180% – i.e. only stacks up to 3s.
Note that the seconds stack only on whole numbers – i.e. you do not start with 1 stack as soon as you enter Illusory Torrent, you must wait 1s after you first enter Illusory Torrent. The effect lasts for no more than 8s.
C6 is too gimmicky given that you must wait out 1s first for 1 stack, and it does not really boost Mona’s damage potential much. At this point in time, there is not much use for this Constellation.
Mona Playstyle

Mona can be run as a Damage Dealer (DPS) or as a Support who provides utility through Hydro application, grouping, and a DMG% buff on Omen-afflicted enemies.
DPS
Mona as a main on-field DPS can be used in both Vaporize and Electro-Charged comps.
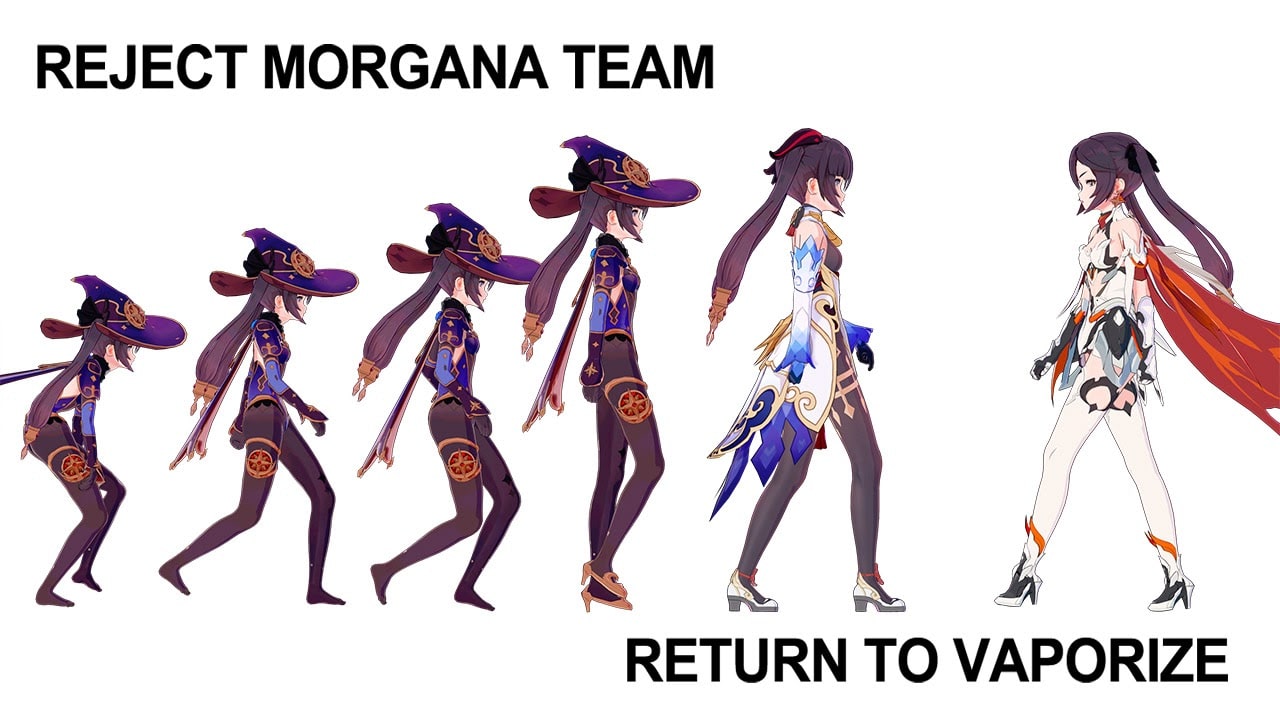
Vaporize Comp
The Vaporize comp has two distinct playstyles: a sustained damage playstyle and a burst damage, or nuke, playstyle.
Sustained damage Vaporize
The sustained damage Vaporize team usually consists of Mona, Bennett, Xiangling, and an Anemo character of your choice. This team bears some similarity to the burst damage/nuke playstyle since it often incorporates the ‘Perfect Combo,’ especially in its first rotation. However, the Burst/Nuke team puts more emphasis on Vaporizing Mona’s Burst. While her Burst may still be Vaporized in the sustained damage Vaporize team, it primarily focuses on her Hydro application, and she may also occasionally trigger Reactions with her Elemental Skill, Normal Attacks, and Charged Attacks.
This team is essentially the ‘Childe Vaporize’ team but with Childe replaced by Mona. Both teams have a high skill ceiling as strong knowledge of Elemental auras, Internal Cooldowns, and Omen Extension mechanic will allow the team to reach its highest potential. Mona does have the benefit of being a ranged Catalyst user, and if you are uncomfortable with Childe’s Stance change mechanic, this iteration of a Vaporize team can be easier to play.
Mona can either act as a Hydro enabler by applying enough Hydro aura to enemies to allow Xiangling to Vaporize her Pyronado hits, or alternatively Mona can also utilize the various sources of Pyro application to focus on Vaporizing her Charged Attacks. Many players also opt for a more ‘unga bunga’ casual approach that enables Mona to be the trigger for Vaporize Reactions, though the damage output is reduced a bit because not every hit will always be Vaporized, but it can still perform quite well. Regardless of how you choose to play, with enough investment into the team members, you will be able to clear the most difficult content that Genshin Impact has to offer.
See LACola’s video to see a detailed breakdown of the sustained damage Vaporize team.
Burst damage/Nuke
This team focuses on maximizing Mona’s damage capabilities from the ‘Perfect Combo‘. This team usually consists of Mona, Bennett, Sucrose and a flex option which depends on the particular combo you are choosing to execute. This team can be somewhat impractical in certain types of content, and has fallen out of favor in Spiral Abyss because characters with powerful Elemental Bursts such as Hu Tao and Eula have been released. However, it can be useful for farming overworld bosses, as it allows you to deal enough damage at once to avoid annoying boss mechanics. It is somewhat of a rite of passage for Mona mains to use some version of this team to ‘one shot’ the Pyro Regisvine.
As of Patch 2.3, the Mona world record nuke damage is 3.02 million, which was achieved in co-op in the Patch 2.3 Energy Amplifier event domain.
Electro-Charged (EC) Comp
The EC comp works by having an Electro support consistently apply Electro while off field. In this team, Mona acts as an enabler through her Hydro application, which allows for high-uptime on Electro-Charged Reactions. The core of this team usually consists of Mona plus the Fischl and Beidou Electro duo. They synergize well because Fischl provides single-target damage and helps to battery Beidou, who in turn excels in multi-target scenarios. If running this team, it is advised to invest in the Electro units first because they will be dealing a majority of the damage. If you are comfortable dodging with Mona, you can forgo a healer since Electro-Charged stun-locks enemies, and since Mona is a ranged unit she can often avoid taking damage.
Check out Curiously#2324’s video to see how DPS Mona in an EC comp would work.
Support
Mona’s strong support abilities have allowed her to age gracefully compared to the other standard 5★ characters, who have mostly fallen out of favor as new characters, weapons, artifact sets and content have been released. Support Mona works by boosting your main DPS’s damage with her Omen DMG% buff on Omen-afflicted enemies. In this role, Mona’s ER requirements can be quite high because she will primarily be off-field, and Xingqiu, the only Hydro character who can generate a large amount of Hydro Particles, is better utilized on a separate team. . Support Mona is a strong teammate in Freeze comps because they can extend the duration of Omen using Freeze, thereby fully utilizing her Omen DMG% buff.
Although Mona excels in teams with amplifying Reactions, she also works well even in teams that do not have access to them, especially if they can deal a large portion of their damage in a short period of time. Some of these examples are Freeze teams and Raiden hypercarry teams.
In Quickswap teams, you can use Mona’s Elemental Skill before her Elemental Burst since it allows you to animation-cancel part of her Elemental Skill. Alternatively, you can use her Elemental Burst before Elemental Skill in order to maximize the buff’s duration for your team. However, in Freeze teams, it is recommended to cast Mona’s Elemental Burst first and then her Elemental Skill, as this will lead to more Hydro application while the rest of the team is on-field, since Mona’s long Burst animation would otherwise take up time when Hydro is being applied.
As of patch 2.4, Freeze comps are the most popular Mona teams, so extra focus is given to describing Mona’s role in Freeze comps. See variations of Mona in Freeze comps.
Freeze Comp
This team primarily focuses on freezing enemies with Mona’s Hydro and a Cryo DPS (usually Ganyu or Ayaka) to render enemies immobile and permanently frozen. This playstyle focuses on extending the duration of Mona’s Omen DMG% buff by keeping enemies frozen in the bubbled state. This prevents Mona’s Illusory Bubble from bursting, allowing damage during this period to gain the benefit of Mona’s Omen DMG% buff without starting the Omen DMG% buff timer.
NOTE: You MUST apply Cryo prior to casting Mona’s Elemental Burst to freeze them in a bubble. You cannot apply Mona’s Elemental Burst first and then apply Cryo as it will pop the bubble.
We are taking advantage of the fact that you can artificially prolong the duration of Mona’s Omen DMG% Buff by preventing the bubble from being bursted by damage. When frozen, the Illusory Bubble lasts ~6s before the frozen status wears off and pops the bubble. However, with good Element management (by reapplying Cryo and Hydro consistently), one can extend the Omen DMG% Buff can be extended for the whole duration of the bubble (8s). This means that Mona can apply the Omen DMG% Buff for a total of ~11 to 13s out of 15s (CD of her Elemental Burst). In other words, with good ER% and Energy Particle production, Mona can provide up to 60% DMG at a ~73.3 to 86.6% uptime.
The priority for Mona’s build in Freeze comps is to have enough ER% to reliably use her Elemental Burst off-cooldown. For example, in the Ganyu Freeze team (typically Ganyu, Mona, Venti, and Diona), the ER% requirements for Mona can be very high since Mona primarily collects Energy Particles while off-field. With 1 use of Elemental Skill by each team member every rotation and 3 clear Particles from enemies, Mona still requires 303 ER% with 1 additional Favonius weapon trigger, (256 ER% with 2 Favonius triggers, 222 ER% with 3 Favonius triggers). You can also calculate how much ER% your team requires through the KQM Energy recharge Calculator.
Freeze comps tend to excel in mob scenarios where there are a lot more Particles from enemies, which will lower ER% requirements. It is best to test your rotations in either domains or the Spiral Abyss to see what level of ER% works best for your particular playstyle. Depending on your team composition, rotation, investment level, Energy generation and the particular content you are facing, Mona’s ER% can vary quite drastically (between 200-300 ER%).
If Mona is able to meet the Energy requirements in your rotation, you can use TTDS instead of Favonius Codex.
See also LACola’s video explaining this concept and evidence for Extending Omen DMG% Buff duration.
Depending on which playstyle you are running, this can change what team comp, artifacts or weapons you ideally want. Below are sections about each of those in order to help you figure out what you may need.
Team Composition (Mona and Friends)
Now that you have determined what kind of playstyle you want to run on Mona, it’s time to consider what friends you want to bring along to Mona’s adventure.

Vaporize (Sustained Damage)
- Bennett and Xiangling are must-haves for the team to have enough Pyro application. Bennett is also an ATK buffer which helps for executing the ‘Perfect Combo,’ as well as serving to battery Xiangling.
- An Anemo support usually occupies the final team slot. Kazuha and Sucrose are the most popular options for their buffing and crowd-control abilities. Kazuha in particular has the easiest time getting Pyro absorption on his Elemental Burst, due to how his Elemental priority works. Venti is another strong option because of his grouping and Energy-refund abilities.
- A shield unit such as Zhongli can also work in the last slot.
Recommended Comp example:

Gameplay examples:
1. Mona DPS Xiangling vaporize in Floor 12
2. Mona Xiangling Single target scenario
3. Mona Xiangling Sucrose Bennett
Vaporize (Burst/Nuke)
- Bennett and Sucrose/Kazuha are must-haves for their buffing abilities. Sucrose will usually give higher damage compared to pre-C2 Kazuha. Anemo users must have the Viridescent Venerer set or at the very least Instructor set. For Sucrose, you can use Thrilling Tales of Dragon Slayers, or either Sacrificial Fragments or The Widsith if you have another TTDS holder in your team.
- The last slot is fairly flexible. Some common options are Klee and Yanfei for Pyro Resonance, and either may also hold TTDS. Zhongli also works for extra Resistance shred from his Elemental Skill. For other options, check out the #mona-combos channel in the Mona Mains discord, which contains an extensive library of user-submitted Mona combos along with detailed descriptions and videos.
Recommended Comp example:

Electro-Charged Comp
This team usually revolves around an Electro core of Fischl and Beidou. However, you can substitute either Raiden Shogun or Kujou Sara for Fischl or Beidou. Raiden Shogun, in most cases, will extend the duration of your rotation. The last slot is a flex slot and can be filled by a healer, shielder, Anemo character, or another Element needed for shield-breaking purposes. Note that an Anemo character is particularly effective in EC teams, since you can easily swirl both Hydro and Electro to trigger the 4pc Viridescent Venerer effect on both Elements.
Recommended Comp examples:


Gameplay examples:
1. Mona Electrocharged team
2. Mona Venti Fischl Beidou
3. Mona Beidou Fischl
4. Mona Raiden Eternal Burst team
Freeze Comp
This team usually consists of two Cryo units and an Anemo support unit. The most popular Cryo damage dealers are Ganyu and Ayaka. It is preferred to have an Anemo unit with crowd control abilities to take advantage of Mona’s AoE Hydro application from her Elemental Burst. The second Cryo unit is usually Diona for her shielding, healing, and Energy-battery capabilities. If you are comfortable with not running a defensive unit, you can use a sub-dps unit such as Shenhe, Kaeya or Rosaria. You can opt to run Prototype Amber on Mona for some marginal healing and extra Energy if you choose to go this route.
Recommended Comp examples:


Gameplay examples:
1. Ganyu Rosaria Mona Venti
2. Ganyu/Ayaka Shenhe Mona and Kazuha
3. Ayaka Rosaria Mona Venti
4. Ayaka Mona Diona
Artifacts
DPS
Mona will usually run ATK% Sands/Hydro DMG Goblet/Crit Rate or Crit DMG Circlet when used as a DPS. An EM Sands can be considered if Mona is able to reliably and consistently trigger Vaporize Reactions. In particular, an EM Sands can lead to higher damage when Mona is used for her burst damage/nuke abilities. There is no general rule on whether ATK% Sands or EM Sands is better for nuking. The optimal choice will depend on the quality of your substats, as well as how well-geared your other buffers (Bennett/Sucrose or Kazuha) are. It is best to consult a damage calculator when deciding which piece to use.
2pc of HoD/Gladiator’s Finale/Shimenawa’s Reminiscence/WT/NO
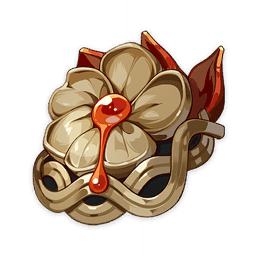
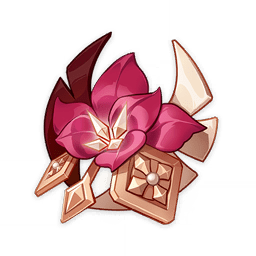


You can opt to run two different 2-piece bonuses of any of the following combinations of artifact sets listed above. Each combination might have a slightly different emphasis in terms of playstyle, but they are all roughly comparable in terms of damage. The priority should be on choosing artifact pieces with the highest quality substats. This is the most flexible option and can even overtake the various 4 piece options listed below. The following handy tool can help you choose the best pieces to equip given your artifact inventory. Unless you already have existing pieces, the most resin efficient option is to farm for 2 Depth/2 Shim since the alternative domain sets, Blizzard Strayer and ESF, can be used on other characters.
4 Heart of Depth (HoD)

Mona’s Elemental Skill has a 12 second Cooldown, and the duration of the 4 set effect is 15 seconds, so 100% uptime is easily achievable. The only negative of the 4 Depth set is that Mona’s Elemental Skill can steal Vaporize Reactions from either Mona’s Charged Attacks or Xiangling’s Pyronado, which can be a DPS loss. As such, this artifact choice usually works best in Electro-Charged teams.
4 Emblem of Severed Fate (ESF)

On paper, this artifact set is the strongest option for burst damage/nuke Mona. A Lvl 90 Mona has 132% base ER (152% ER when factoring in the 2 piece bonus), meaning the 4 piece bonus will provide to Mona 38% DMG Bonus to her Elemental Burst compared to the 35% DMG Bonus provided by the 2 Depth/ 2 NO option. However, this difference of 3% is not substantial and you should still focus on using artifact pieces with the highest quality substats. This web tool will help you to choose the correct artifact pieces to maximize your nuke damage.
Note that even when running this set, the amount of damage Mona receives from the 4 piece effect and her own A4 passive by rolling into ER% is still less than what she receives from offensive substat rolls, e.g. ATK%, EM and CRIT. It is therefore not recommended to overinvest into ER% beyond what is needed to use Burst off-cooldown when using 4ESF for DPS Mona.
4 Wanderer’s Troupe (WT)

This option is especially strong in scenarios where you can reliably Vaporize Mona’s Charged Attacks. If you can accomplish the above, then this set is worthwhile since a majority of Mona’s damage will come from Charged Attacks and will make up for the lack of bonuses for Mona’s Normal Attacks, Elemental Skill, and Elemental Burst. However, Mona does not have any stamina reduction mechanics built into her kit, so it can be difficult to spam Charged Attacks over long periods of time. Only a viable option in Mona sustained damage Vaporize teams since EM does not benefit Electro-Charged teams much.
Support
Mona will want to run an ER% Sands/Hydro DMG Goblet/Crit Rate Circlet in this role. It is best to prioritize ER% for the substats, until you have enough ER% to use Burst off-cooldown which is roughly around the 200-300% range. Note that if you are running 4ESF (Emblem of Severed Fate) on Mona in a Freeze comp (or team without any ATK buffers), an ATK% goblet can be a competitive option. This is because Mona already possesses a lot of DMG Bonus for her Elemental Burst due to her passive talent, the 4ESF effect, and the Omen DMG% Buff.
4 Noblesse Oblige (NO)

Gives a strong team buff and Mona’s 60-cost Energy Burst makes it easy for her to activate the Noblesse buff every rotation. This is the most versatile set for the support role.
4 Tenacity of the Millelith (TotM)

Gives a strong team buff, but Mona is not able to maintain uptime of the TotM buff for the full duration of a team rotation, since Mona’s Elemental Skill only lasts for 5 seconds. Be aware that Mona’s Elemental Skill will not trigger the 4-piece set bonus on cast: only the ticking damage from when her Elemental Skill hits an enemy will trigger or sustain the set bonus effect. Should only be considered if a separate teammate is already using 4NO and additional team buffs are required. Mona can trigger the TotM buff using her Ascension 1 talent, but this is a niche interaction that is usually never relevant in actual combat. Also note that the TotM buff can be snapshotted by some characters.
4 Emblem of Severed Fate (ESF)

This artifact set is a comfort pick for Support Mona since the 2 piece bonus makes it easier to reach desired ER% thresholds. In teams such as Freeze comps where Mona requires high amounts of ER% (200+) and Mona’s damage contribution consists of one E and one Q usage every rotation, this set option will maximize her personal damage.
4 Instructor

This is a niche set that can allow other Reaction-based characters to achieve their highest damage potential in nuke setups. For instance, Hu Tao nuke combos in Spiral Abyss Floor 7 or the Peak of Vindagnyr rely on this setup.
Weapons

What weapon should I use on Mona?
This will vary on whether you’re using Support or DPS Mona.
Discussion of 5★ Weapons
Lost Prayer to the Sacred Winds
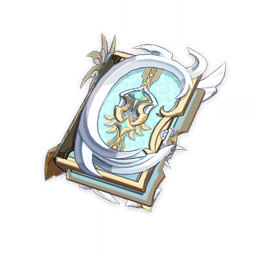
Lost Prayer becomes the strongest 5★ in average damage IF you are able to maintain at least 1 stack (requires staying on-field for 4 seconds). Additionally, Movement Speed is helpful for dodging enemy attacks and synergizes with her Alternative Sprint. The Crit Rate secondary stat also makes it easier to build Mona because of reduced reliance on artifacts having good substat distribution.. Unfortunately, due to the difficulty of gaining and maintaining stacks, Mona will most likely not benefit from the weapon’s passive effect when performing the ‘Perfect Combo’. However, using this weapon will increase the likelihood of seeing big crit numbers on screen.
Skyward Atlas
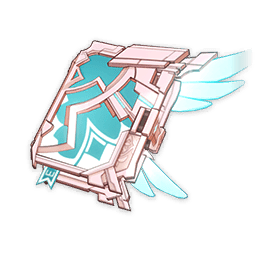
Skyward Atlas has the highest damage potential compared to other 5★ options, but requires that you build enough Crit stats, which can be difficult. Skyward Atlas also has some inconsistencies when it comes to making use of the ‘Perfect Combo‘. If you summon an Orb, the Orb can burst Mona’s Illusory Bubble prematurely and disrupt the combo, reducing the Elemental Burst damage significantly. You can work around this by utilizing the 15 second downtime during which the weapon passive effect is not active or applying Hydro with Mona’s Charged Attack, Elemental Skill, or Alternative Sprint, since these
will not trigger the weapon’s passive.
Memory of Dust

This weapon is still strong without the shield bonus, since you still receive a bonus 20% ATK at 5 stacks, but it really shines in teams with a strong shielder such as Zhongli. The shield requirement can be rather restrictive on teambuilding. Furthermore, if running this weapon in a team with other ATK buffers such as Bennett or Sara, the passive effect can be less impactful.
Discussion of 4★ Weapons
The Widsith
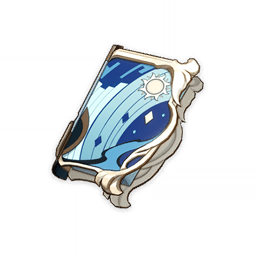
This weapon is the best option for both the sustained Vaporize DPS and nuke Mona builds. When its passive is active, The Widsith outperforms all 5★ weapons; however, there are some flaws. The Widsith is not ideal for Electro-Charged comps, because its third buff boosts EM, which doesn’t affect damage much in this type of team. The weapon’s passive also becomes useless in co-op situations where you can only use one character, which means you cannot swap characters to trigger the weapon’s passive. It also has 20 seconds of downtime, which can make it unreliable for general use.
Mappa Mare
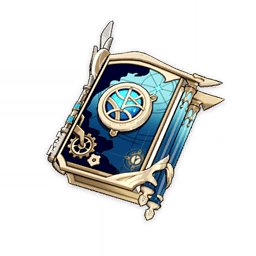
A solid weapon for Vaporize teams. The weapon passive can be stacked twice very easily. For instance, if you cause a Vaporize Reaction on two different enemies with a single Charged Attack, you will obtain two stacks. It is usually the best weapon for F2P/low spenders/unlucky players who do not own The Widsith or any 5★ catalysts, but are still interested in the Mona nuke playstyle.
Favonius Codex
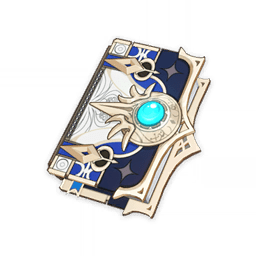
Very strong weapon that allows Mona to meet the high ER% thresholds required in teams where she is used as a support. With enough Crit Rate and a high refinement level, Mona can reliably trigger the passive effect and feed extra Energy to the team. It provides a consistent Burst uptime for Mona and her party members, which is important in both Freeze and Sustained damage Vaporize comps. Combining this weapon with the 4ESF set enables Mona to be a hybrid between support and Burst support. In Quickswap teams, it may benefit you to use your Elemental Skill before your Elemental Burst in your rotations so that more Elemental Skill ticks occur while Mona is on-field, that way it is more likely for the Favonius passive to trigger, which therefore lessens the strain on building Crit Rate.
Solar Pearl
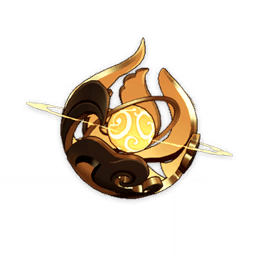
This weapon is a great “stat stick” for DPS Mona. Its secondary Crit Rate secondary stat makes it easier to approach a 1:2 crit ratio, and the passive provides 20% increased DMG (up to 40% at R5) on Normal Attacks, Elemental Skill and Burst. 6 seconds is often too short to perform the ‘Perfect Combo‘ in time to benefit from the DMG increase from the passive, but that’s not an issue for Electro-Charged and Freeze comps where you are not vaporizing Mona’s Burst, rather are more focused on the Omen DMG% buff and her Hydro damage output.
Prototype Amber

Allows Mona to act both as a damage increasing support and a pseudo-healer with the passive effect. This type of role compression can be beneficial in Freeze teams by allowing you to replace Diona with a more damage-oriented Cryo unit (Ganyu, Ayaka, Rosaria, Kaeya, Shenhe). The Energy regeneration through its passive is comparable to the Favonius Codex at higher refinements. However, using this weapon will make your Mona’s damage almost non-existent. If you’re a Mona enthusiast, this is a crime against humanity.
Thrilling Tales of Dragon Slayers (3★ Weapon)
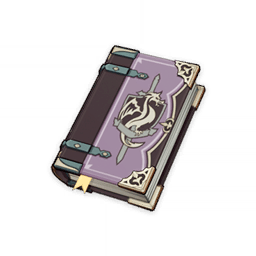
An extremely strong support weapon that provides a 48% ATK buff at Refinement level 5 for your main DPS, on top of the DMG% buff from Omen, to further enhance Mona’s buffing abilities. A good example is a Freeze Comp with Ganyu/Ayaka who will be doing the majority of the team’s damage. It is a very low investment for high return since it only requires refinements to shine, but can make building ER% on Mona difficult due to its useless secondary stat. Similar to Prototype Amber, using this weapon makes Mona’s damage almost non-existent.
Alternative 4★ Weapons
Blackcliff Agate
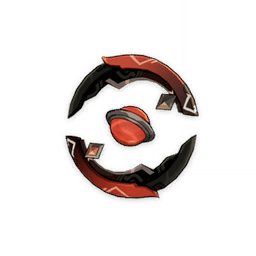
This catalyst has the potential to be very strong, because it gives up to 3 stacks of 12% ATK (up to 24% at R5) for 30 seconds after killing an enemy. The strength of the passive depends on the situation at hand. It can be easy to stack and maintain stacks against a set of mobs. On the other hand, the passive is rendered useless against most boss enemies. Note that each stack is independent of the others, and stacks are only obtained if it is the catalyst wielder who deals the killing blow. Additionally, you cannot gain stacks off-field, meaning it does not work with the ‘Perfect Combo’. Depending on your preferences, you may want to spend starglitter on fates and/or obtaining characters instead.
Wine and Song
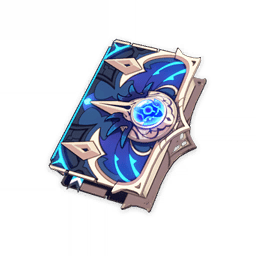
This weapon has a great aesthetic, and at first glance appears to be made for Mona. Unfortunately, the catalyst tries to do too much at once with an offense-focused passive effect and high Base ATK, but a support-oriented secondary stat. Dashing to make use of the passive effect has anti-synergy with Mona’s strongest attack string combo of 2NA + CJ. Some people find Mona’s Alternative Sprint to be clunky which makes it difficult to take advantage of the effect. Refinements are also difficult to obtain since it is a limited 4★ weapon.
Dodoco Tales
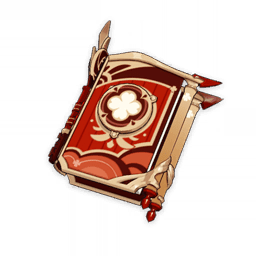
Strong F2P-accessible weapon for DPS Mona if you played the event in version 1.6. Additionally, the weapon passive effect works with Mona’s constellation 2. An R5 Dodoco Tales is equivalent to R1 Widsith for sustained Vaporize DPS Mona.
Hakushin Ring

Solid weapon for Electro-Charged teams, and more accessible than other options. This weapon can be a viable option since Electro units such as Fischl and Beidou will usually be dealing the majority of the damage in those teams, and this catalyst can buff them both.
Detailed Explanation of Mona’s Elemental Burst, Stellaris Phantasm

The best way to understand Mona’s Elemental Burst is to view it in THREE separate parts.
- Hydro application
- Illusory Bubble application
- Omen application (breaking the bubble, triggering the timer, and applying Omen)
When Mona casts her Elemental Burst, it applies Hydro to all enemies, but without dealing damage (1). Simultaneously with that, both the Illusory Bubble status (2) and Omen status (3).
- All Elemental Reactions that work with Hydro will trigger as normal.
The significance of this is that, because Mona’s Burst applies Hydro without dealing damage, it can trigger Reactions (such as Vaporize, Pyro + Hydro) without any damage actually occurring. This is important for ‘Perfect’ Mona combos and will be explained in more detail later, but for now, just know that this means that applying Hydro via Mona’s Burst functions as a damageless Reaction, which is to say, it is a damage multiplier that does not inherently deal damage.
- However, in the case of Electro-Charged, despite the Illusory Bubble application not doing any damage, Mona’s initial Bubble’s Hydro application onto an existing Electro aura will cause Electro-Charged damage to occur, which ticks twice. This is bad because the second tick will prematurely break the bubble.
Once the Illusory Bubble is applied, smaller mob enemies will be trapped in the bubble and be disabled for several seconds, while large mob enemies will only have the Bubble effect applied (as indicated by the constellation ‘weird patterns’ on their bodies).
Any subsequent damage will burst the bubble. That source of damage will gain a DMG% bonus (based on Mona’s Burst talent level).
- To put it simply, this means that whatever you use to burst Mona’s Illusory Bubble will also gain the Omen DMG% buff.
- Ideally, Pyro damage is used to burst the bubble to benefit from the effects of Vaporize, because it has a high damage multiplier.
- This is why we say that the Omen status is applied upon casting Mona’s Elemental Burst, instead of saying that Mona’s Omen status is applied when or after the bubble is broken (more on this later), because it also boosts damage that occurs prior to the bubble bursting.
What happens is that the damage which was used to burst the bubble will be inflicted on the enemy while the bubble is still active, and then subsequently CAUSES the bubble to burst after the damage was already applied.
- This order of damage is important to understand in order to ensure that Mona’s Elemental Burst is able to Vaporize Pyro and the ‘Perfect Combo’ is able to work.
When the bubble bursts, it will deal massive Hydro damage and the TIMER of the Omen status will begin (up to 5s). That is to say, the Omen status DMG% buff had already been applied since the time Mona’s Burst was cast, but now a timer countdown is added for when it will expire. In other words, the Omen status itself is unchanged before and after the bubble bursting, other than that it gains a timer.
- This is why despite the timer for the Omen status beginning after the bubble bursts, Mona’s Elemental Burst damage also gains the benefit of the Omen DMG% buff.
- Again, this is because, as noted earlier, the Omen status is applied at the time of cast, rather than at the time the bubble bursts.
- Note that it is the BUBBLE (HYDRO) that is doing the huge damage, NOT YOUR PYRO CHARACTER.
How does the Omen DMG% buff work?

The Omen DMG% buff has TWO mechanisms to it:
- It buffs attacks made prior to the bubble bursting, most notably the one that triggers the bubble to burst.
- It continues to buff attacks after the bubble bursts for the duration stated in the talent description.
This line of thinking may help understand how the Omen DMG% buff works, from a technical perspective:
If Omen were to start only when the bubble bursts, you’d need retrospective coding that applies Omen only to that specific damage instance which broke the bubble.
That’s very difficult to do from a coding perspective, and we know that damage that does not burst the bubble still gains the benefit of Mona’s Omen DMG% buff, prior to the bubble even bursting. So in other words, with regard to the above, any damage that triggers the bubble burst will also receive the Omen DMG% buff, just by virtue of the buff having been active since Mona cast her Burst in the first place.
Stated simply, this means that miHoYo has coded the Omen DMG% buff to apply the Omen status as soon as you cast Mona’s Elemental Burst, and if damage pops the bubble, then the second mechanism, the Omen DMG% buff timer, begins.
Clip from LACola video between 2:55 – 3:20.
How to maximize Mona’s Burst. The “Perfect Combo” 
With the previous explanation in mind, we can now look at the mechanics of the ‘Perfect Vaporize Combo’ and how it maximizes Mona’s Elemental Burst damage.
This method utilises the fact that we can preemptively apply Pyro so that when the Hydro from the initial Illusory Bubble status is applied, it is immediately Vaporized, clearing all Elements from the affected enemies.
This allows us to apply Pyro FIRST, before the second instance of Hydro is applied (by the bubble bursting), to abuse the high Elemental Reaction damage multiplier of Vaporize (2x).
STEP 0: Swirl Hydro Element using an Anemo support with 4-set Viridescent Venerer
This shreds Hydro Elemental Resistance + applies any other boosts (Sucrose/Kazuha). This step is not mandatory but does boost potential max damage and should be done when possible.
STEP 1: Apply Pyro to the enemy
Make sure that before you cast Mona’s Elemental Burst, there aren’t any Elements other than Pyro on the enemy.
You don’t want to trigger Electro-Charged (Electro then Hydro) or Frozen (Cryo then Hydro), becauses Hydro will not clear either of these Elements, which means they persist even after Hydro application.
Tip: If you want to maximize your damage, consider using Bennett’s Elemental Burst for this initial Pyro application (as it will boost your Mona’s ATK by a % of Bennett’s base ATK).
Note: If using Klee, this first step of applying Pyro to the enemy can be skipped: casting Klee’s Elemental Burst AFTER Mona’s which will clear the Hydro Element and reapply Pyro before the bubble bursts.
A similar interaction, known as the ‘Stagger Resistant Vaporize Combo,’ occurs with Zhongli’s pillar resonance, which will clear out the Hydro aura but will not pop the bubble. Although similar mechanically to how Klee can remove Hydro, the ‘Stagger Resistant Vaporize Combo’ is a separate concept.
STEP 2: Cast Mona’s Elemental Burst
This will cause a zero-damage Vaporize Reaction that will clear the Pyro Element from the enemy.
STEP 3: Wait 2 seconds for the internal cooldown (ICD) of Mona’s Burst to expire
To sum up briefly what an ICD is, it is the concept that a given skill cannot apply multiple instances of Elemental application to the same enemy within a 2.5s period. For Mona, what this means is that because Mona applied Hydro through the initial bubble from her Burst cast, triggering a Vaporize Reaction in the process, she must wait out the ICD of her own initial Elemental Burst before the 2nd part of the Burst can apply Hydro again and trigger another Vaporize.
Clip displayed above of Mona waiting 2 seconds for the internal cooldown.
Important Tip: When using Bennett’s Elemental Burst, you want to STAY on Mona until the last second before carrying out Step 4.
- This is because Mona’s Elemental Burst damage does not snapshot Mona’s stats at the time of applying the Illusory Bubble, but instead uses her stats at the time of the bubble bursting to determine its damage.
- Therefore, if you switch out too early to wait out the ICD, Mona loses the Bennett Elemental Burst ATK buff, and your damage will be considerably lower.
Video explanation from LACola of whether Mona can benefit from Bennett’s buff.
STEP 4: Apply Pyro damage to the enemy, causing the Illusory Bubble to burst, dealing huge Vaporize damage.
As you know by now, although it seems like the bubble is bursting first, it is not. What is happening is that the Pyro damage is inflicted on the enemy which then CAUSES the bubble to burst. The damage is registered sequentially as Pyro then Hydro, rather than simultaneously (it does look like both happen at the same time, but that is merely visual).
For a more in-depth explanation that involves the concept of ICDs and Elemental gauge theory, we recommend checking out this video from LACola.
There are 2 ways the ‘Perfect Combo’ can go wrong
Scenario 1 | You don’t apply Pyro before casting Mona’s Elemental Burst
Failure to apply Pyro means that the initial bubble application applies Hydro to the enemy. Then, when you break the bubble after a short wait, the Pyro damage used to break the bubble will react with the Hydro status to Vaporize, which means the Pyro damage gains the benefit of Vaporize, rather than Mona’s bubble burst Hydro damage.
Scenario 2 | You didn’t do ‘Step 3’ properly and didn’t wait out the ICD
As stated earlier, Mona’s Elemental Burst has an ICD for its Hydro application.
If you try to burst the bubble too soon after Steps 1 & 2, you will find that the Pyro damage causes the bubble to burst, but no Hydro Element will be applied, so no Vaporize Reaction occurs. This means Mona will deal her unmultiplied base Elemental Burst damage instead of a much larger amount, and Pyro will remain on the enemy after the bubble bursts.
Note: The ‘Stagger Resistant Vaporize Combo’ somewhat ignores these two scenarios. However, it requires an advanced understanding of Mona’s Elemental Burst because it combines multiple ICD mechanics, Elemental gauges and certain enemy states into one combo. The following Omen extension section below covers this combo.
Omen Extension
There is an Omen Extension mechanic that allows Mona’s Omen DMG% bonus to last for longer than its usual duration when encountering certain enemy states. These can be broken into 3 categories: Stagger/poise resistance, Elemental shields, and Elemental armor. The first category is what causes Omen Extension in Freeze comps, but a solid understanding of these above scenarios will allow you to apply the Omen Extension mechanic more generally even when not using Cryo.
Stagger/poise resistance
During certain animations, an enemy can enter a state where they are completely immune to stagger/poise damage. This means that, while in that stagger-resistant state, attacks to this enemy cannot pop Mona’s Illusory Bubble.
For example, a Geovishap becomes stagger/poise resistant during its jumping animation.
Frozen enemies also become stagger/poise resistant. It is precisely this interaction which makes Mona so potent in Freeze teams. A full list of such enemy states can be found in a spreadsheet maintained by Myuwi#0001 from Mona mains.
The clip above is an example of the two Geovishaps performing their stagger/poise resistant jump attack animation.
Note: Petrify cannot extend the duration of Omen; however, it can extend the enemy’s state. See KQM Theorycrafting Library for more details.
Mona can take advantage of these states by simplifying her nuke combo into one known as the ‘Stagger Resistant Vaporize Combo’:
- Once an enemy has entered such a state, apply Hydro to the enemy with Mona’s Elemental Burst.
- Then, swirl off the Hydro aura with an Anemo character to apply the 4pc Viridescent Venerer effect.
- Finally, apply Pyro to the enemy and either wait for the enemy to exit its stagger/poise resistant state, or for the Omen bubble to time out. At that point, the bubble will burst and the affected enemies will take Hydro damage as in the normal Vaporize combo.
For more details, check out some videos from LACola:
1 Mona’s In-depth Vaporize Guide
2 Understanding Omen Extension
Note: For Mona Vaporize DPS users, performing the ‘Stagger Resistant Vaporize Combo’ can become overwhelmingly complex in multi-target scenarios. This is due to the Hydro Swirl mechanic, where Hydro can be indefinitely swirled onto multiple targets, making it difficult to remove without enough Pyro application. This can mess up the ‘Stagger Resistant Vaporize Combo.’
Elemental shields
Mona’s Illusory Bubble will not pop against enemies that have an Elemental shield, such as Abyss mages. However, Mona’s Omen DMG% bonus still applies, which makes the shield easier to break.
Elemental armor
Some enemies, such as Lawachurls and Abyss Heralds/Lectors, are capable of infusing themselves with Elemental armor. This will prevent Mona’s Illusory Bubble from popping from a subsequent attack. The Bubble will eventually pop on its own after timing out, however, so they will still take damage.
Mastery of the Omen Extension mechanic is a great way to level up your Mona gameplay. Around 30% of enemies as of patch 2.4 are susceptible to this technique. Furthermore, this technique can make it easier to pull off the Mona nuke combo in Spiral Abyss and against more difficult enemies.
Hitlag
Mona’s Elemental Burst is affected by hitlag in the same way Elemental auras and enemy debuffs are: the higher the hitlag amount, the longer the duration. Hitlag affects precise frame counts, and should be accounted for. It is possible to abuse hitlag in co-op to prolong Mona’s Omen without any setup. This may be useful against future co-op content. See more details in the KQM Theorycrafting library.
Credits

Atr
Baezal
Boesik
Cerberus
Chidoge
Chibi
Curiously
Dreeman
Genesis
HiImHello
Hydrosam
KG44
LACola
LastFireFox
Mcpie
Myuwi
And to all our Helpers, Mods, Theorycrafter Astrologists and KQM
Join us at Mona Mains
We are always looking for more theorycrafters to test theories, do maths and figure out bugs and Elemental Reactions. Testers for different weapons and Constellations are always important, so don’t be afraid by thinking we’re doing just maths! A lot of it is hypothesizing and testing in-game.
Check out the Mona Mains Theorycrafting Library and come visit your fellow astrologers at the Mona Mains Discord.


