Updated for Version 4.7

Alhaitham is a 5-star Dendro Sword character in Genshin Impact who deals strong Dendro damage with flexible field time. Learn about Alhaitham’s best builds, best weapons, best artifacts, and best teams in this quick guide.
Note that the information given may change if new discoveries are made. More extensive testing is in progress.
The full-length guide is currently being written. Join our Discord to participate in the theorycrafting process.
Table of Contents
New Content
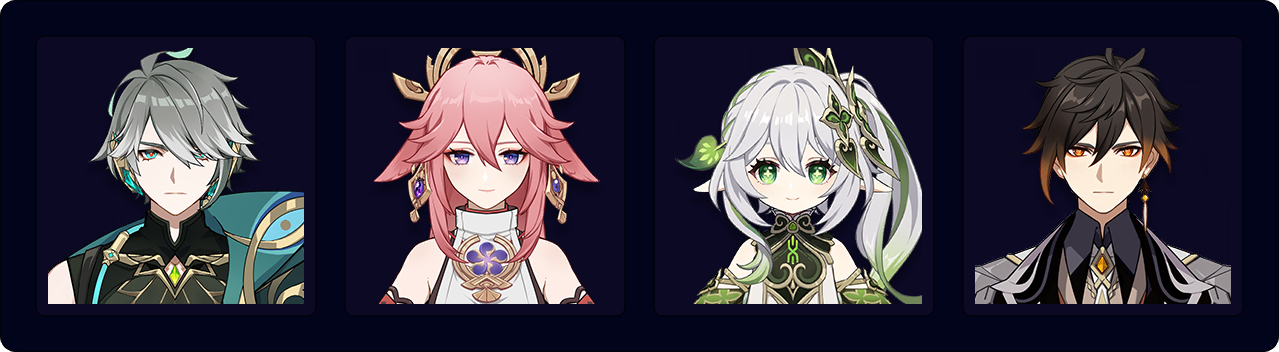
 Furina | Furina is an excellent teammate in Alhaitham’s Quickbloom and Nilou Bloom teams. Her low rate of sporadic Hydro application helps maintain Quicken uptime while the DMG% buff from her Burst increases Alhaitham’s damage output. The recommended healer for an Alhaitham-Furina team is Kuki Shinobu or Baizhu. |
 Golden Troupe | Both Golden Troupe’s 2pc and 4pc set bonuses are decent options since most of Alhaitham’s damage comes from his Elemental Skill. 4pc Golden Troupe performs on par with 2pc + 2pc set combinations. The 4-piece set bonus can have better uptime if you play Alhaitham in a split rotation or swap off during his Burst animation. |
 Marechaussee Hunter | 4pc Marechaussee Hunter is practically his Best-in-Slot option (for personal damage) in Furina teams or Nilou Bloom teams without Kirara. Be careful not to overcap on CRIT Rate! |
 Unfinished Reverie | 4pc Unfinished Reverie may be an option in Burgeon teams with only one Hydro character, but you should not farm for it since it is such a niche set and his other sets are viable and more versatile. |
 Wolf-Fang | Wolf-Fang is Alhaitham’s best 4-star option, performing similarly to Mistsplitter Reforged and Haran Geppaku Futsu at R5. Alhaitham’s Projection Attacks (coordinated Dendro attacks) scale with Elemental Skill DMG, so Wolf-Fang’s passive is perfect for him. |
 Finale of the Deep | Finale of the Deep is a poor choice for Alhaitham since Iron Sting outperforms it in any situation. |
 Fleuve Cendre Ferryman | Fleuve Cendre Ferryman helps meet Alhaitham’s ER requirements and buffs his Skill damage. It’s a solid free-to-play option in Solo Dendro teams in an enabler playstyle, or generally if Alhaitham has high ER requirements (>145%). |
 Splendor of Tranquil Waters | Splendor of Tranquil Waters is a great option for Alhaitham in teams with guaranteed HP fluctuations, which includes Nilou Bloom, Furina Quickbloom, and Burgeon. Without HP fluctuations, it still performs better than free options. You should not intentionally take enemy damage to trigger the passive since this can interrupt Alhaitham. |
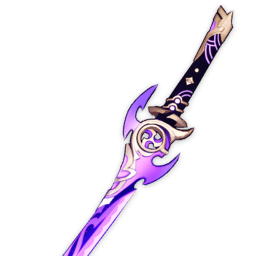
 Uraku Misugiri | In teams without a Geo teammate, Uraku Misugiri is a good 5-star option thanks to its stats and passive. In teams with a Geo teammate, Uraku performs slightly better than Light of Foliar Incision and Primordial Jade Cutter, making it his Best-in-Slot Sword in such scenarios. |
 Absolution | Absolution has the same base stats as Mistsplitter Reforged, but its passive increases CRIT DMG instead of Elemental DMG. As such, it is just a CRIT DMG stat stick that performs better than free-to-play options. The Bond of Life passive can only trigger if Alhaitham faces an enemy that applies a Bond of Life to the active character, so Alhaitham almost never activates it. |
Infographic
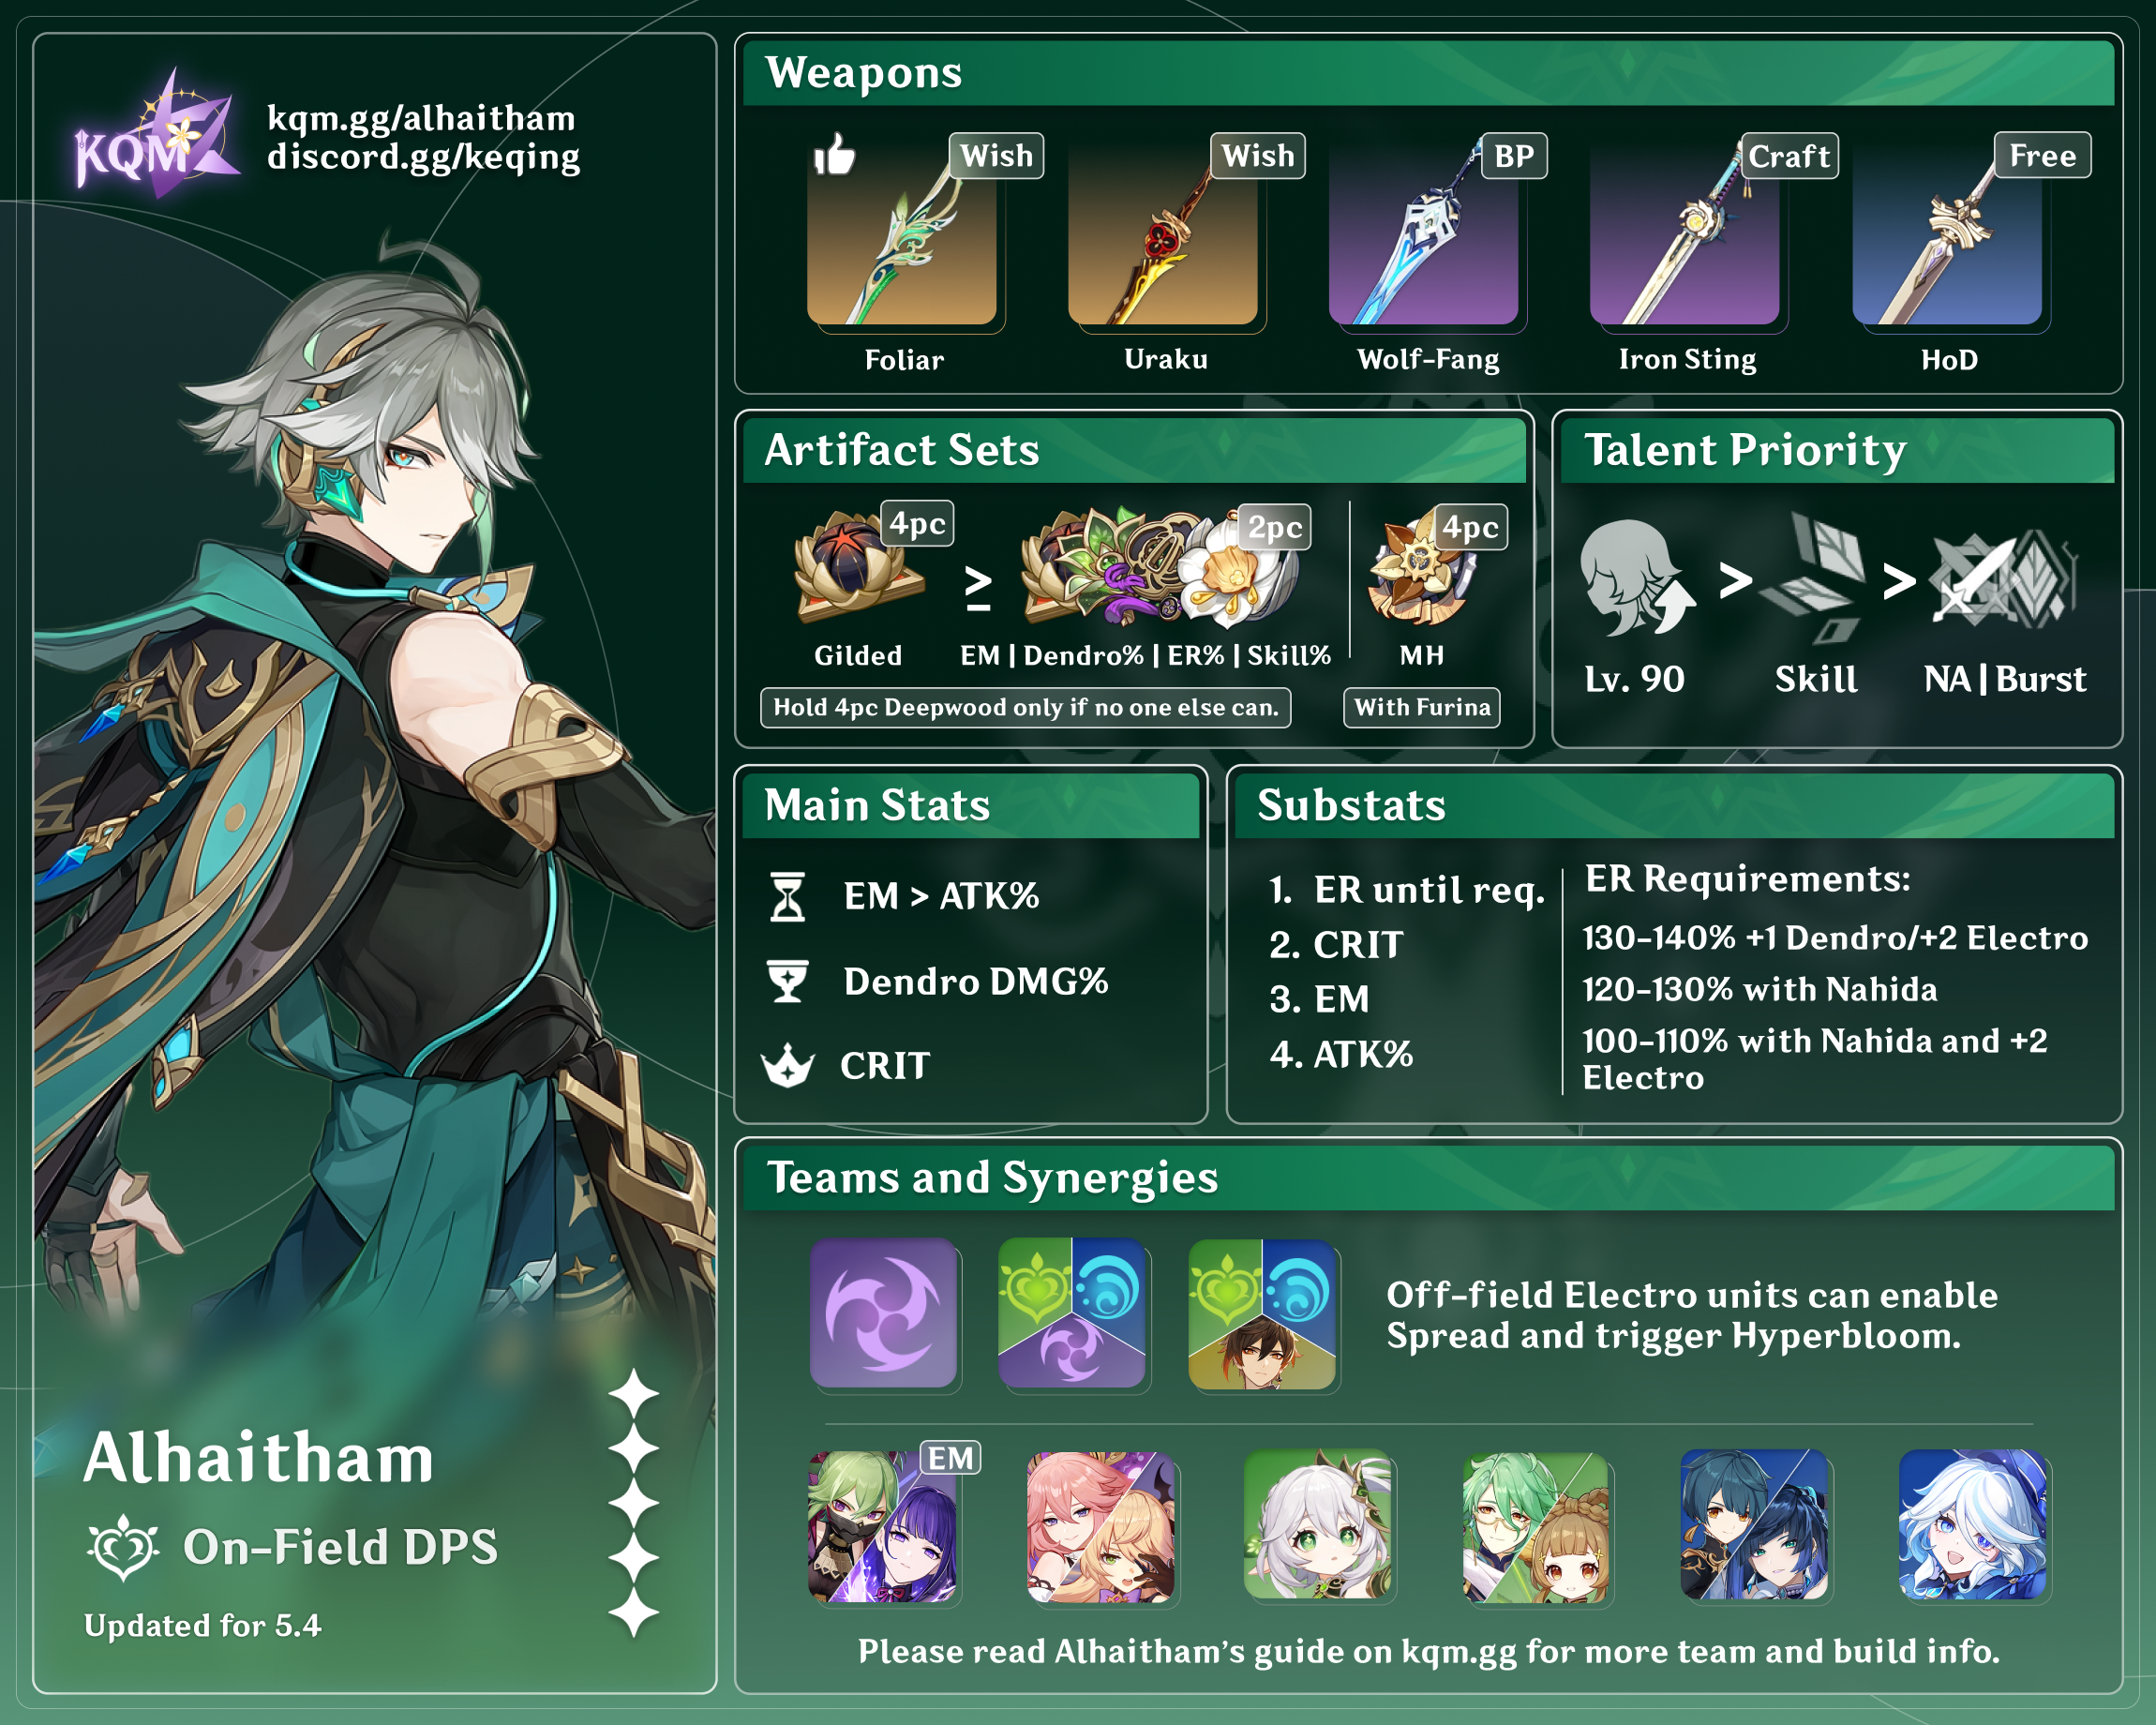
Credits to: euphorysm, mocha_biscuit
Character Overview
Playstyles
Alhaitham is an on-field Dendro unit in all of his recommended teams. Alhaitham’s kit revolves around his Chisel-Light Mirrors, which convert his Normal, Charged, and Plunging Attacks to Dendro and provide additional Dendro damage via coordinated Projection Attacks.
On-Field DPS and Enabler
Alhaitham is a powerful on-field Spread DPS unit thanks to his high personal damage, strong Dendro application, and EM scaling. He is also a strong on-field Dendro enabler in Bloom, Burgeon, and Hyperbloom teams.
Alhaitham’s teammates should generally set up their abilities before Alhaitham takes the field. He can enable split field-time to allow teammates to refresh their abilities or use an additional charge midway through the rotation. Upon taking the field, Alhaitham sets up his Chisel-Light Mirrors and performs one of his optimal combos.
See the Combos section for more information on Alhaitham’s optimal attack strings and rotations.
Talents
Level and Talent Priority
Level 90 > Skill > Normal Attack ≥ Burst
You should raise Alhaitham to level 90 since it greatly increases his reaction damage. In a Quicken team, going from 80/90 to 90/90 provides a 20% DPS increase whereas 6/6/6 to 9/9/9 provides only 12% DPS increase and requires more than double the Resin. In Nilou Bloom teams, level 90 is also important since it increases Alhaitham’s Bloom damage significantly.
You should prioritize Alhaitham’s Skill as it represents the largest portion of his non-Spread damage. If you use his Burst every rotation, then his Normal Attack and Burst Talents share equal priority. If you use his Burst every other rotation, then prioritize his Normal Attack Talent.
Talent Overview
 Normal Attack | Abductive Reasoning
Talent Description
Normal Attack
Performs up to 5 rapid strikes.
Charged Attack
Consumes a certain amount of Stamina to unleash 2 rapid sword strikes.
Plunging Attack
Plunges from mid-air to strike the ground below, damaging opponents along the path and dealing AoE DMG upon impact.
Alhaitham’s Normal, Charged, and Plunging Attacks are converted to Dendro when he has at least 1 Chisel-Light Mirror active. His Physical attacks are practically never used.
His Dendro-converted attacks scale with his Normal Attack Talent, so you can level this Talent to slightly increase his damage. However, his Dendro-converted Normal Attacks are primarily used to apply Dendro and trigger Projection Attacks, so their personal damage is less important.
 Elemental Skill | Universality: An Elaboration on Form
Talent Description
Rushes forward, dealing Dendro DMG to nearby opponents when the rush ends, causing a Chisel-Light Mirror to form.
Holding this skill will cause it to behave differently.
Hold
Enters Aiming Mode to adjust the direction of Alhaitham’s rush attack.
Chisel-Light Mirror
When this skill is unleashed, Alhaitham will generate 1 Chisel-Light Mirror. If there are no Mirrors at this time, he will generate 1 additional Mirror. Chisel-Light Mirrors will have the following properties:
- When he possesses Chisel-Light Mirrors, Alhaitham’s Normal, Charged, and Plunging Attacks will be converted to Dendro DMG. This cannot be overridden.
- When attacks of the aforementioned kinds hit opponents, the Chisel-Light Mirrors will unleash a Projection Attack that deals AoE Dendro DMG based on the number of Mirrors on the field.
- A total of 3 Chisel-Light Mirrors can exist at once.
- The Chisel-Light Mirrors will disappear one after the other over time, and will all disappear when Alhaitham leaves the field.
Alhaitham’s Skill can be tapped or held. In either case, he quickly closes the gap between him and his target and generates Mirrors. When used, it generates 2 Mirrors if he has none, and 1 Mirror otherwise.
See Mirror Mechanics for more information.
 Elemental Burst | Particular Field: Fetters of Phenomena
Talent Description
Creates a Particular Binding Field and deals multiple instances of AoE Dendro DMG.
If Chisel-Light Mirrors exist when this ability is unleashed, all such Mirrors will be consumed and increase the number of DMG instances dealt.
2s after this ability is unleashed, if 0/1/2/3 Mirrors were consumed, Alhaitham will generate 3/2/1/0 new Mirrors in turn.
Alhaitham’s Burst deals damage and generates Mirrors based on how many Mirror stacks he has on cast. His Burst deals additional hits of Dendro damage based on how many Mirrors it consumes, and it refunds Mirrors equal to 3 minus the number of Mirrors consumed (e.g. consuming 1 Mirror generates 2 Mirrors).
It is generally better to use Alhaitham’s Burst with 0 Mirrors active to generate 3 Mirrors before his extended field time. Using his Burst with 2–3 Mirrors active is generally suboptimal since it limits his Mirror uptime, but it can be useful for frontloading damage or quickly clearing a wave of mobs.
Note that the Mirrors generated from Alhaitham’s Burst are only granted 2s after his Burst animation finishes. As a result, if you have low enough ping and can avoid being staggered, you can swap to another character and use an ability while his Burst animation is happening.
 Ascension 1 Passive | Four-Causal Correction
Talent Description
When Alhaitham’s Charged or Plunging Attacks hit opponents, they will generate 1 Chisel-Light Mirror. This effect can be triggered once every 12s.
Alhaitham’s A1 Passive lets him produce 1 Chisel-Light Mirror with a Charged or Plunging Attack. This lets you start his field-time with a Hold Skill into a Plunging Attack to quickly gain 3 Mirror stacks if his Burst isn’t ready.
After using Alhaitham’s Burst, you should be mindful of using Charged Attacks during his on-field combo, since triggering his A1 Passive prematurely reduces 3-Mirror uptime.
 Ascension 4 Passive | Mysteries Laid Bare
Talent Description
Each point of Alhaitham’s Elemental Mastery will increase the DMG dealt by Projection Attacks and Particular Field: Fetters of Phenomena by 0.1%.
The maximum DMG increase this way for both these abilities is 100%.
Alhaitham’s A4 Passive provides additional EM scaling to his Projection Attacks and Burst. You should build 200–300 EM before prioritizing CRIT stats to make the most of this passive. You should not build 1000 EM just to maximize this passive.
Constellations
Alhaitham is a completely viable unit at C0. His Constellations are relatively underwhelming for a 5-star character; there is little reason to pull any Constellations except his C6 if you want to whale.
A 5-star weapon or R5 Wolf-Fang are better investments for Alhaitham. If you want to vertically invest into Alhaitham via Constellations, you’d be better off pulling Nahida’s C2.
 Constellation 1 | Intuition
When a Projection Attack hits an opponent, Universality: An Elaboration on Form’s CD is decreased by 1.2s. This effect can be triggered once every 1s.
Alhaitham’s C1 is only useful in overworld and co-op gameplay. It is otherwise merely a stepping stone to other Constellations.
In combat, Alhaitham’s long Skill cooldown does not allow you to use his Skill twice even with his C1 active. Using his Skill a second time would prevent him from using it in time for the subsequent rotation.
This Constellation may allow shorter rotations than usual, but there are only a handful of teams with Alhaitham that could even accommodate this.
 Constellation 2 | Debate
When Alhaitham generates a Chisel-Light Mirror, his Elemental Mastery will be increased by 50 for 8 seconds, max 4 stacks. Each stack’s duration is counted independently. This effect can be triggered even when the maximum number of Chisel-Light Mirrors has been reached.
Alhaitham’s C2 is his second-best Constellation (after his C6). It provides a 200 EM buff at maximum stacks. Despite this, if you run Alhaitham with Nahida, you should get her C2 first instead since it provides a greater DPS increase.
 Constellation 3 | Negation
Increases the Level of Universality: An Elaboration on Form by 3.
Maximum upgrade level is 15.
This Constellation provides only a modest boost to Alhaitham since most of his damage comes from Spread reactions, not his personal Skill damage.
 Constellation 4 | Elucidation
When Particular Field: Fetters of Phenomena is unleashed, the following effects will become active based on the number of Chisel-Light Mirrors consumed and created this time around:
- Each Mirror consumed will increase the Elemental Mastery of all other nearby party members by 30 for 15s.
- Each Mirror generated will grant Alhaitham a 10% Dendro DMG Bonus for 15s.
The pre-existing duration of the aforementioned effects will be cleared if you use Particular Field: Fetters of Phenomena again while they are in effect.
Alhaitham’s C4 provides an EM buff to his teammates when his Burst consumes Mirrors and provides himself with a Dendro DMG% buff when his Burst generates Mirrors. Since Alhaitham generally prefers casting his Burst with 0 Mirror stacks, he usually only triggers the personal Dendro DMG% buff.
This Constellation may become more valuable in certain scenarios with Alhaitham’s C6 since you can both consume Mirrors while always receiving the maximum possible Dendro DMG% buff. However, this is still rarely optimal.
 Constellation 5 | Sagacity
Increases the Level of Particular Field: Fetters of Phenomena by 3.
Maximum upgrade level is 15.
This Constellation provides a miniscule damage increase. The personal damage from Alhaitham’s Burst accounts for a very small proportion of his overall damage.
 Constellation 6 | Structuration
Alhaitham gains the following effects:
- 2 seconds after Particular Field: Fetters of Phenomena is unleashed, he will generate 3 Chisel-Light Mirrors regardless of the number of mirrors consumed.
- If Alhaitham generates Chisel-Light Mirrors when their numbers have already maxed out, his CRIT Rate and CRIT DMG will increase by 10% and 70% respectively for 6s. If this effect is triggered again during its initial duration, the duration remaining will be increased by 6s.
Alhaitham’s C6 is his best Constellation. It ensures that his Burst always generates 3 Mirrors and can provide him with a CRIT Rate and CRIT DMG buff.
To effectively use this Constellation, you should start Alhaitham’s field time with his Burst and follow up with his Skill. Then within 4s, use a Charged Attack to extend the duration of the CRIT buffs.
If you try to use Alhaitham’s Burst with Mirror stacks that are already active, you still need to save either his Skill or A1 Passive to activate the C6 CRIT buff. This not only limits the damage potential of his pre-Burst field time but also shortens the maximum 3-Mirror uptime he can get after his Burst. As such, you should basically play C6 Alhaitham like you would C0 Alhaitham.
Mirror Mechanics
Mirror Generation and Expiration
Alhaitham can generate Mirrors in three different ways:
- Using his Burst — If 0 Mirrors are active, he gains 3 Mirrors after 2s.
- Using his Skill — If 0 Mirrors are active, he gains 2 Mirrors. If at least 1 Mirror is active, he gains 1 Mirror.
- Hitting an enemy with a Charged or Plunging Attack (A1 Passive) — He gains 1 Mirror. His A1 Passive has a 12s cooldown.
These methods are independent, so you can generate Mirrors without even using Alhaitham’s Skill.
Each Mirror has an independent timer of 4s, but only the timer with the shortest duration is currently active. Alhaitham can only have at most 3 Mirrors at any given time. If 3 Mirrors are active and another Mirror is gained, the timer with the shortest duration is refreshed. This refresh does not happen for 1 or 2 Mirrors.
All active Mirrors disappear when Alhaitham leaves the field.
Projection Attacks
With at least 1 Mirror active, Alhaitham’s Normal, Charged, and Plunging Attacks are converted to Dendro. Hitting an enemy with a Dendro-converted attack or his Skill triggers a Projection Attack. A Projection Attack occurs at most every 1.6s, but the practical interval may be longer due to animation timings.
Each Projection Attack deals a separate hit of AoE Dendro damage for each active Mirror. For example, if Alhaitham has 3 Mirrors, there are 3 instances of Dendro damage and application. Projection Attacks have a 2-hit ICD, so every other wave of 3-Mirror Projection Attacks apply Dendro twice.
The table below contains videos demonstrating each Projection Attack at different Mirror stacks.
Projection Attacks aim in the direction Alhaitham is facing when they are triggered. As such, you should dodge towards enemies rather than away from them to avoid missing Projection Attacks.
Combos
Combo Notation
- N = Normal Attack
- C = Charged Attack
- A = Aimed Shot
- P = Plunging Attack
- E = Elemental Skill
- tE = Tap Skill
- hE = Hold Skill
- Q = Elemental Burst
- D = dash (cancel)
- J = jump (cancel)
- W = walk (cancel)
- > = switch character
- ( ) = these actions are optional; please refer to the notes below
- [ ] = repeat these actions the specified number of times
Combo Overview
Alhaitham generally wants to start his combo with 3 Mirrors. Combos prioritize the following:
- Maintain 3-Mirror uptime.
- Maximize Projection Attack proc rate.
- Maximize Dendro application.
There are several combos to consider. Each combo is optimal for different rotation durations and Burst frequencies.
Tip: Mirror refreshes ideally happen every ~4s. You can estimate that ~4s have passed after 2 Projection Attacks have occurred, or look at your Skill/Burst cooldown or Abyss timer.
Longer Continuous (With Burst)
| Purpose | Maximizes 3-Mirror uptime (pre-C6) in uninterrupted extended field time |
| Combo Duration | 15.5–16s |
| Rotation Duration | 21–22s |
| Quickhand Notation | Q + (2s) + N3D N3D N1E + N3D N3CD + N3D N3CD … |
| Expanded Notation | 1. Burst 2. Attack, dodge, or swap for 2s 3. Attack for ~4s 4. Skill or Charged Attack 5. Attack for ~4s 6. Charged Attack or Skill 7. Attack for ~4s 8. (Continue attacking if necessary) |
| Notes | Avoid using a Charged Attack within a 4s duration if you haven’t already activated his A1 Passive. If you use a Charged Attack too soon, then you will prematurely refresh a Mirror and stifle his 3-Mirror uptime. |
Shorter Continuous (With Burst)
| Purpose | Maximizes 3-Mirror uptime to fit a shorter rotation; obtain 3 Mirrors sooner; C6 combo |
| Combo Duration | 11.5–12s |
| Rotation Duration | 18–20s |
| Quickhand Notation | Q + E + N3D N3D N3CD + N3CD N3CD |
| Expanded Notation | 1. Burst 2. Skill 3. Attack for ~5s 4. Charged Attack 5. Attack for ~4s |
| Notes | This combo fits into the shortest possible rotations where Alhaitham uses his Burst every rotation. |
Continuous (No Burst)
| Purpose | Maximizes 3-Mirror uptime without Burst available. |
| Combo Duration | 2–12s |
| Rotation Duration | ≥18s |
| Quickhand Notation | hEP + NA/CA |
| Expanded Notation | 1. Hold Skill 2. Plunge 3. Attack for 1–11s |
| Notes | This combo is useful when your Burst isn’t available or you want to save your Burst for the next chamber of Spiral Abyss. You aim the hold skill slightly above the ground towards an enemy and then plunge. |
Split Field Time
| Purpose | Enables split field time rotations with maximum Mirror uptime. |
| Combo Duration | – |
| Rotation Duration | ≥21s |
| Quickhand Notation | hEP + NA/CA + Swap + Q + (2s) + NA/CA |
| Expanded Notation | 1. Hold Skill 2. Plunge 3. Attack for 4–11s 4. Swap to other teammates 5. Burst 6. Attack, wait, or swap for 2s 7. Attack for 4–12s |
| Notes | This rotation lowers Alhaitham’s ER requirements and also allows teammates to refresh abilities and buffs. |
Quickswap 3-Mirror Burst
This combo is only used in a quickswap Burst DPS playstyle. We do not recommend gaining Mirrors before using his Burst in his typical playstyle.
| Purpose | Maximizes Burst damage with 3 Mirrors in a quickswap Burst DPS playstyle (not recommended). |
| Combo Duration | 3.5–6s |
| Rotation Duration | ≥18s |
| Quickhand Notation | hEP + NA/CA + Q |
| Expanded Notation | 1. Hold Skill 2. Plunge 3. Attack for 1–3s 4. Burst |
| Notes | You can use Normal and Charged Attacks for 1–3s before casting his Burst since the 3-Mirror stack lasts a few seconds. |
Combo Tips
Generating 3 Mirrors Efficiently
The two most efficient ways to gain 3 Mirrors starting from zero are:
- Use Burst (Q).
- Use Hold Skill into a Plunging Attack (hEP).
While Tap Skill into N1C (tE N1C) also generates 3 Mirrors, it takes slightly longer and only allows one 3-Mirror Projection Attack to occur initially (as opposed to two via the more efficient methods).
What to Do During Alhaitham’s Burst Animation
Alhaitham’s Burst takes approximately 2s to generate Mirrors. There are 3 things you can do during these 2s:
- Attack and dodge: Attacking and dodging is a safe option that maximizes 3-Mirror uptime.
- Use his Skill: Using Alhaitham’s Skill is another safe option to gain Mirrors sooner, but it shortens his available field time.
- Swap to a teammate: Swapping to a teammate allows them to refresh or use an ability, but this can be risky! While this can “min-max” your team DPS in some scenarios, many things can go wrong like being staggered or taking too long. If you have high ping, you should not consider this option. If you take too long, you will swap back to Alhaitham and he will have 0 Mirrors!
Attack Strings
- N3D, N3CD, N4D, and N4CD are the generally best attack strings during Alhaitham’s field time. You should use Normal Attack–only strings when paired with Xingqiu, Yelan, or C6 Fischl.
- hEP is the fastest way to trigger Alhaitham’s A1 Passive with his Skill.
- N1C is the fastest way to trigger Alhaitham’s A1 Passive without using his Skill. If you have no Mirrors prior, the Charged Attack triggers both his A1 Passive and the first Projection Attack.
Artifacts
ER Requirements
Alhaitham’s ER requirements depend on his team, enemy scenario, field time, and how regularly he uses his Burst. He generates 1 Dendro Particle per Projection Attack.
As an on-field Spread DPS unit, Alhaitham does not need to use his Burst every rotation. In some teams with 18–20s rotations, it can be better to use his Burst every other rotation. In rotations with split field time, you use his Burst every other time Alhaitham takes the field.
As an on-field Dendro enabler, you should try to Burst every rotation to maximize Dendro application with 3-Mirror uptime. At high ER requirements, you should use an ER% Sands or a weapon like Favonius Sword to ensure you can use his Burst every rotation. This is especially the case in Nilou Bloom teams.
Use the Energy Recharge Calculator to determine exact requirements for your team and rotation.
Calcs for ER requirements can be found here (last updated for 4.7). Every team in the quick guide is represented.
| Nahida + Fischl + Electro/Dendro | 105–115% |
| Nahida | 120–130% |
| Fischl + Electro and/or Dendro | 130–140% |
| Yaoyao, Kirara, or Baizhu | 130–140% |
| Solo Dendro | 175–220% |
- Assumes Favonius on teammates when logical
- Additional Favonius procs reduce ER requirements by roughly 10%
- “Default” enemy particles
- “Safe” particle RNG
- Rotations vary from 21–26s
- Alhaitham triggers 6–7 Projection Attacks per rotation
- Kirara and Baizhu use their Skill twice per rotation
- Zhongli pillar hits 50% of the time
- All 4-star teammates are C6
Artifact Stats
 Sands |  Goblet |  Circlet |
| EM > ATK% | Dendro DMG% | CRIT Rate or CRIT DMG |
Stat Priority: ER (until requirement) > 200–300 EM > CRIT > EM > ATK%
In Quicken teams, Alhaitham should reach 200–300 EM (including buffs) before prioritizing CRIT stats, but this threshold is easy to reach. However, Light of Foliar Incision heavily favors EM compared to other weapons.
In teams without consistent Quicken uptime, an ATK% Sands is slightly better than an EM Sands with weapons other than Light of Foliar Incision (with which it performs similarly).
We recommend using Genshin Optimizer to compare your actual artifacts.
Artifact Sets
 4pc Gilded Dreams (GD) | 4pc Gilded Dreams is Alhaitham’s general Best-in-Slot artifact set, provided a teammate can hold 4pc Deepwood Memories. Despite this, 2pc set combinations with a 2pc EM set can outperform with better substats. Although 4pc GD has a bit of downtime on its passive (slightly worse at higher ping), the set’s 4pc effect is relatively easy to maintain since Alhaitham triggers reactions rapidly in his typical Quicken and Quickbloom teams. |
 2pc Mixed Sets | 2pc EM + 2pc EM 2pc EM + 2pc Deepwood Memories 2pc EM + 2pc Golden Troupe 2pc EM + 2pc ATK 2pc Deepwood Memories + 2pc Golden Troupe These 2pc mixed sets are only slightly weaker than 4pc GD. They can outperform 4pc GD if they have better substats, you have high ping, or in teams where Alhaitham triggers fewer reactions. |
 2pc Mixed Sets (ESF) | 2pc ESF + 2pc EM 2pc ESF + 2pc Deepwood Memories 2pc ESF + 2pc Golden Troupe If Alhaitham’s ER requirement is at least 120%, then 2pc ESF sets are a competitive option (depending on substats). 4pc ESF is not recommended. |
4pc Golden Troupe | 4pc Golden Troupe is another competitive option that performs on par with 2pc + 2pc set combinations. A majority of Alhaitham’s personal damage scales with Elemental Skill DMG, which makes 2pc and 4pc Golden Troupe viable options depending on substats. The 4-piece set bonus can have better uptime if you play Alhaitham in a split rotation or swap off during his Burst animation. |
4pc Marechaussee Hunter | 4pc Marechaussee Hunter is practically his Best-in-Slot option (for personal damage) in Furina teams or Nilou Bloom teams without Kirara. Be careful not to overcap on CRIT Rate! |
 4pc Deepwood Memories (DM) | 4pc Deepwood Memories is Alhaitham’s Best-in-Slot artifact set in teams without another viable holder. This is generally the case for Alhaitham as a solo Dendro enabler, but you should try to find a suitable 4pc DM support for Spread DPS Alhaitham. |
We recommend using Genshin Optimizer to compare your actual artifacts.
Weapons
Generally Recommended Swords
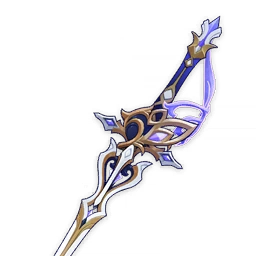
 Light of Foliar Incision | Light of Foliar Incision (LoFI) is Alhaitham’s Best-in-Slot weapon in single-target scenarios. It provides hefty CRIT stats and an EM-scaling Additive Base DMG Bonus to 28 instances of damage from his Normal Attacks and Projection Attacks. LoFI performs worse in multi-target scenarios. The passive’s 28 procs are consumed much more quickly against multiple enemies. As a result, Primordial Jade Cutter and R5 Wolf-Fang can become better options in multi-target scenarios (calcs here). |
 Primordial Jade Cutter | Primordial Jade Cutter (PJC) is Alhaitham’s second-best option in single-target and his best option in multi-target. It provides excellent CRIT Rate and an unconditional ATK bonus. You should not prioritize HP stats since EM, CRIT, and ATK% provide larger gains. |
 Mistsplitter Reforged | Mistsplitter Reforged is another top pick for Alhaitham since he can reliably maintain 3 stacks if you use his Burst every rotation. |
 Haran Geppaku Futsu | Haran Geppaku Futsu performs on par with Mistsplitter. Alhaitham prefers combos with more Normal Attacks with this weapon equipped. |
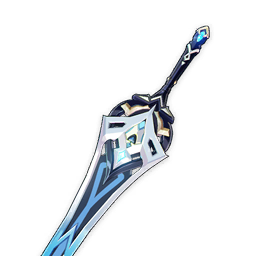
Uraku Misugiri | In teams without a Geo teammate, Uraku Misugiri is a good 5-star option thanks to its stats and passive. In teams with a Geo teammate, Uraku performs slightly better than Light of Foliar Incision and Primordial Jade Cutter, making it his Best-in-Slot Sword in such scenarios. |
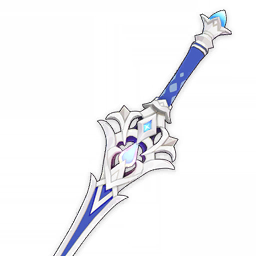
Wolf-Fang | Wolf-Fang is Alhaitham’s best 4-star option, performing similarly to Mistsplitter Reforged and Haran Geppaku Futsu at R5. Alhaitham’s Projection Attacks (coordinated Dendro attacks) scale with Elemental Skill DMG, so Wolf-Fang’s passive is perfect for him. |
 Iron Sting, Toukabou Shigure | Iron Sting and Toukabou Shigure are usually Alhaitham’s best free-to-play options, thanks to their EM secondary stats and passives. Iron Sting performs well in any scenario, while Toukabou Shigure prefers single-target scenarios. |
Other Possible Swords
 Harbinger of Dawn | Harbinger of Dawn can compete with Mistsplitter and Haran if you can keep Alhaitham’s HP above 90%. A strong shielder is mandatory to realistically maintain this. |
Splendor of Tranquil Waters | Splendor of Tranquil Waters performs on par with Mistsplitter in teams with guaranteed HP fluctuations, which includes Nilou Bloom, Furina Quickbloom, and Burgeon teams without a shielder. Without HP fluctuations, it still performs better than free options. You should not intentionally take enemy damage to trigger the passive since this can interrupt Alhaitham. |
 Freedom-Sworn | Freedom-Sworn performs slightly better than Alhaitham’s 4-star options. Its teamwide ATK% buff can be useful for non-snapshotting ATK-scaling teammates like Yae Miko and Xingqiu. |
 The Black Sword | The Black Sword is a fine 4-star option if you already have it, but Wolf-Fang is a much stronger option that more Sword characters also prefer. If you want a Battle Pass Sword, go with Wolf-Fang. |
 Xiphos’ Moonlight | Xiphos’ Moonlight provides an EM secondary stat and helps fulfill Alhaitham’s ER requirements. It also helps lower his teammates’ ER requirements. Xiphos’ Moonlight is a particularly strong option in Nilou Bloom teams. |
 Festering Desire, Fleuve Cendre Ferryman | Festering Desire and Fleuve Cendre Ferryman help meet Alhaitham’s ER requirements and buff his Skill damage. These are solid free-to-play options in Solo Dendro teams in an enabler playstyle, or generally if Alhaitham has high ER requirements (>145%). |
 Favonius Sword | Favonius Sword is a strong option for a Solo Dendro enabler playstyle where he uses his Burst every rotation. Alhaitham’s extended field time can guarantee 2 procs per rotation and help lower the team’s ER requirements. |
 Sacrificial Sword | Sacrificial Sword (R4+) is a decent quality-of-life Sword in overworld and co-op gameplay. It can help make rotations smoother if you defeat overworld mobs early. It is a significant DPS loss in Spiral Abyss content. |
Teams
Rotation Notation
- N = Normal Attack
- C = Charged Attack
- A = Aimed Shot
- P = Plunging Attack
- E = Elemental Skill
- tE = Tap Skill
- hE = Hold Skill
- Q = Elemental Burst
- D = dash (cancel)
- J = jump (cancel)
- W = walk (cancel)
- > = switch character
- ( ) = these actions are optional; please refer to the notes below
- [ ] = repeat these actions the specified number of times
Notable Teammates
As an on-field DPS unit or enabler, Alhaitham appreciates off-field teammates who deal damage, provide defensive utility, or grant buffs. He cannot work well with other units who also take extended field time.


Electro
Electro units enable Quicken, which allows Alhaitham to trigger Spread. You should play Alhaitham with an off-field Electro unit in all of his teams except Nilou Bloom. They can even work in Burgeon teams.
 Fischl | Fischl applies Electro, generates particles, and deals good personal damage. Her A4 Passive triggers less frequently with Alhaitham compared to an Electro on-fielder since Spread reactions do not count as Electro-related reactions. However, Alhaitham still triggers Quicken often, which does trigger Fischl’s A4 Passive. Fischl alternates using her Skill and Burst and can refresh Oz midway through rotations of at least 25s. |
 Yae Miko | Yae Miko’s Skill provides consistent off-field Electro damage and her Burst deals a powerful AoE nuke. Yae and Alhaitham can alternate using their Bursts every other rotation, equalizing rotation times while lowering both of their ER requirements. |
 Kuki Shinobu | Kuki Shinobu is an excellent off-field Hyperbloom trigger, and she can also be played as a more defensive unit in Quicken teams. Her healing helps with survivability and can be sufficient in teams with Furina. Shinobu also does not need to worry about ER% since she relies almost exclusively on her Skill. |
 Beidou | Beidou is a great off-field Electro DPS unit against 2–3 enemies. She provides Alhaitham with some interruption resistance and damage reduction. Beidou strongly prefers Double Electro teams to lower her ER requirements, most notably with Fischl. |
 Lisa | Lisa is primarily played as a Burst support, holding R5 Hakushin Ring and 4pc Instructor. Lisa prefers Double Electro teams to lower her ER requirements, most notably with Fischl. |
 Raiden | Raiden is a great off-field Hyperbloom trigger due to her long Skill duration and frequent AoE Electro application, but she lacks defensive utility. As such, a defensive Hydro or Dendro character is recommended for team survivability. |
 Dori | Dori is similar to Kuki Shinobu in that she provides healing, triggers Hyperbloom, and enables Quicken. She also helps lower Alhaitham’s ER requirements. However, she is more cumbersome to play and relies on her Burst. |
Dendro
Dendro teammates enable Dendro Resonance and lower Alhaitham’s ER requirements. They most often hold 4pc Deepwood Memories. Alhaitham appreciates a Dendro teammate, but they are not required.
 Nahida | Nahida is one of Alhaitham’s best teammates. She is the best Dendro battery, deals solid off-field damage, provides a strong EM buff via her A1 Passive, and allows almost 100% uptime on 4pc Deepwood Memories. In multi-wave content, Nahida needs to return on-field to reapply her Skill for each new wave. As a result, you may have to forcibly cut into field time to maintain her aforementioned benefits. Against more powerful enemies or single-wave content, this is less of an issue. |
 Yaoyao | Yaoyao condenses healing and particle generation for Alhaitham. However, her low, semi-random AoE damage can result in spotty 4pc Deepwood Memories Dendro RES Shred in multi-target scenarios. |
 Baizhu | Baizhu provides teamwide healing, Dendro-related reaction buffs, and interruption resistance. He is one of the preferred healers in teams with Furina. Baizhu can typically use 2 Skills per rotation in teams with Alhaitham. |
 Kirara | Kirara provides a sturdy shield and can provide further buffs to Alhaitham via 4pc artifact sets and her C6. She can maintain full shield uptime and stack shields if Alhaitham uses a split field time rotation. |
 Dendro Traveler | Dendro Traveler provides an EM and Dendro DMG% buff at C6. However, they are poorer batteries than Nahida and Yaoyao. They can fit 2 Skills easily in split rotations, but rotations with extended field time for Alhaitham usually do not allow this. |
 Collei | Collei is another free-to-play Dendro teammate, but she lacks any innate buffing utility. Additionally, she has relatively long animations that can make her prone to damage and interruption without a shield. |
 Kaveh | While Kaveh and Alhaitham may be “roommates”, they basically have zero chemistry in combat and should not be played together. |
Hydro
Off-field Hydro teammates enable Dendro Core production and Bloom-related reactions. In Hyperbloom teams, lower rates of Hydro application can enable higher Quicken uptime (a.k.a. Quickbloom).
 Furina | Furina is an excellent teammate in Alhaitham’s Quickbloom and Nilou Bloom teams. Her low rate of sporadic Hydro application helps maintain Quicken uptime while the DMG% buff from her Burst increases Alhaitham’s damage output. The recommended healer for an Alhaitham-Furina team is Kuki Shinobu or Baizhu. |
 Yelan | Yelan provides strong single-target damage and a ramping DMG% buff that Alhaitham can take advantage of. |
 Xingqiu | Xingqiu deals high single-target damage, consistently applies Hydro, and grants defensive utility via his damage reduction and interruption resistance. |
 Nilou | Alhaitham can act as an on-field Dendro enabler in Nilou Bloom teams. See the Nilou Bloom team section for more information. |
 Kokomi | Kokomi provides off-field Hydro application and healing. In Nilou Bloom teams, she needs to use her Burst every rotation to keep the team healthy which extends the rotation. |
Pyro
A Pyro teammate’s Pyro application can trigger Burning. Burning can deplete a Quicken aura, so Alhaitham’s other teammates need to be able to clear Burning or Pyro auras quickly.
 Thoma | Thoma is an effective Burgeon trigger who also provides some defensive utility. If he is paired with another defensive unit, then he can invest more into EM instead of HP%. |
 Dehya | Dehya is another possible Burgeon trigger that provides defensive utility in the form of interruption resistance and damage mitigation. |
 Bennett | Bennett can be a buffing support and healer for Alhaitham in Quicken teams. While his Skill and Burst have strong Pyro application, the team’s Electro and Dendro application can easily clear a Burning aura since Bennett only applies Pyro once or twice per rotation. |
Geo
Geo teammates are sometimes seen in Quicken, Hyperbloom, and Burgeon teams. Uraku Misugiri is Alhaitham’s Best-in-Slot weapon in teams with a Geo unit.
 Zhongli | Zhongli provides an incredibly strong shield, shreds Universal RES, and can provide further buffs in the form of 4pc Instructor, Deepwood Memories, or Tenacity of the Millelith. However, the 4-piece set bonuses may be difficult to maintain. He is particularly strong in Quicken teams. |
 Albedo | Albedo deals off-field Geo damage in a variety of teams. His Burst provides a 125 EM buff that can be useful, but you don’t need to build ER% to use it every rotation. His Geo application can help mitigate Burning in Burgeon teams. He isn’t strongly recommended over other possible units, however. |
 Chiori | Chiori provides good off-field Geo damage in a variety of teams and can help mitigate Burning in Burgeon teams. She is a competitive alternative to many units in Quicken teams with Zhongli. |
Anemo
Anemo teammates could be used in Quicken-related teams to help buff Electro teammates via 4pc Viridescent Venerer’s Electro RES Shred.
 Sucrose | Sucrose provides teamwide EM buffs and can hold R5 Hakushin Ring to buff Alhaitham and his teammates. Note that Hakushin Ring does not buff Alhaitham in single-target scenarios since Electro Swirls do not reapply Electro to the same enemy, but it can still buff his Electro teammates from the Electro Swirl. |
 Kazuha | Kazuha can provide an Elemental DMG% buff to Alhaitham’s Electro and Hydro teammates. At C2, he provides a 200 EM buff to the on-field character, which Alhaitham enjoys. His grouping can help Alhaitham’s coordinated attacks hit more enemies. |
 Xianyun | Xianyun enables a Plunging Attack DPS playstyle for Alhaitham. While this playstyle isn’t recommended over his typical playstyle since it results in fewer Spread reactions, it is still fun and viable with the right teammates. |
 Jean | Jean provides teamwide healing that can counteract Furina’s HP drain if you lack other options. |
Cryo
Cryo has no innate synergy with Dendro, so these units are used for their general support capabilities.


Quicken

Alhaitham excels in Quicken teams since his high rate of Dendro application results in many Spread reactions. He can run with multiple Electro units who contribute substantial off-field damage via Aggravate. A secondary Dendro unit can also be slotted in for their own Spread damage, Dendro particles, and Dendro Resonance.
Information on Quickbloom teams is in the Hyperbloom section.
Example Teams
This is not a comprehensive list of teams. The inclusion or exclusion of any given team does not necessarily reflect its power level.
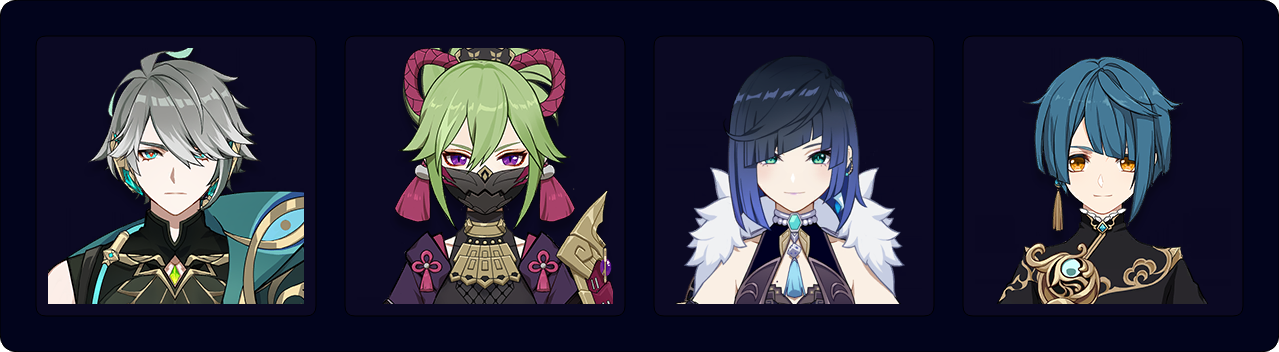
This team uses a split rotation to allow near full uptime on Yae Miko’s turrets. Zhongli and Nahida refresh their abilities halfway through the rotation. Yae should only use her Burst in AoE or to finish off enemies, since otherwise it simply extends the rotation and can incur a DPS loss.
Sample Rotation
Yae 3[E] > Zhongli hED > Nahida E Q > Alhaitham hEP N2CD N3C > Yae (Q) 3[E] > Zhongli hED > Alhaitham Q > Nahida E* > Alhaitham N3D N3CD N3D N3D N3
*If you can’t swap to Nahida safely or due to ping, you can instead use her Skill before Alhaitham’s Burst.
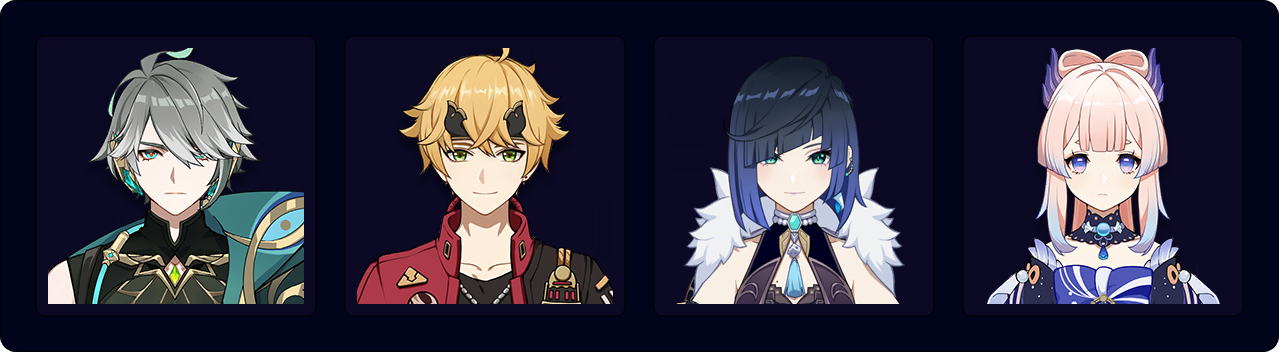
This is a solid team with 4-star teammates. Sara can buff both Alhaitham and Fischl, providing a significantly stronger buff to Fischl at C6. Kirara can refresh her shield halfway through the rotation.
Sample Rotation
Kirara shE > Sara E (C) > Fischl E > Sara Q > Alhaitham hEP N2CD N3C > Kirara shE* (Q) > Sara E (C) > Fischl Q > Alhaitham Q N3D N4CD N4CD N3
*Kirara can recast her shield before Fischl’s Burst, but this means Alhaitham doesn’t have a shield for the last ~2s of his second combo. You can use it immediately before Alhaitham’s Burst so he is fully shielded at the expense of Fischl.

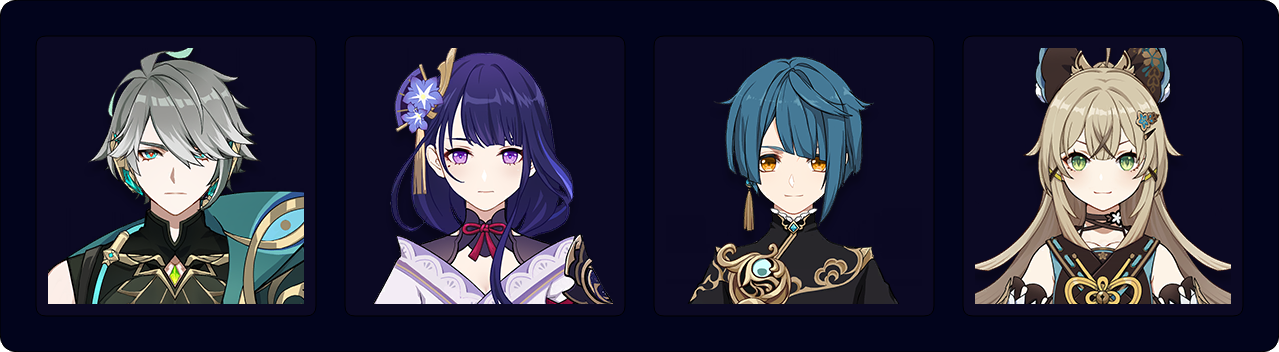
This is a strong team against 2–3 enemies with Alhaitham driving Beidou’s Burst. It uses a split rotation, so Alhaitham only drives Beidou for his first period of field time.
Sample Rotation
Fischl E > Baizhu EQ > Beidou EQ > Alhaitham hEP N2CD N3C N3 > Fischl Q > Beidou E > Alhaitham Q > Baizhu E* > Alhaitham N3D N4CD N4CD N3
*If you can’t swap to Baizhu safely or due to ping, you can instead use his Skill before Alhaitham’s Burst.
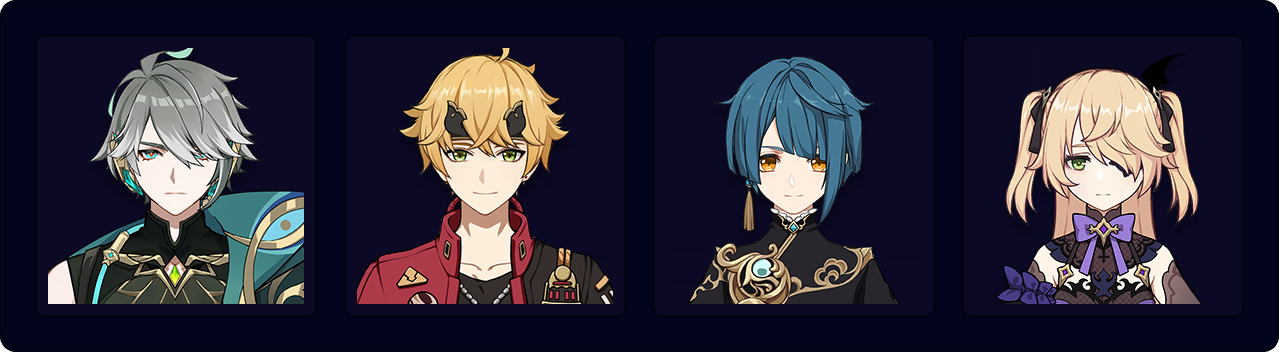
This is a more hypercarry Spread team. Alhaitham’s first attack sequence is buffed by both Bennett and Nahida, but his second sequence only receives buffs from Nahida and doesn’t have active healing. The split field time allows for maximum Oz uptime.
Sample Rotation
Nahida E Q > Bennett EQ > Fischl E > Alhaitham hEP N2CD N3D N3CD > Bennett E N2 > Nahida E* > Fischl Q > Alhaitham Q N3D N4CD N4CD N3
*You can also refresh Nahida’s Skill during Alhaitham’s Burst if you have low enough ping.
Hyperbloom

Alhaitham is an effective on-field unit for Hyperbloom due to his strong personal damage and Dendro application. In teams with more abundant Hydro application, Alhaitham acts more as a Dendro enabler for a Hyperbloom trigger. In teams with lower Hydro application (Quickbloom), Alhaitham serves more as a Spread DPS unit since there is typically higher Quicken uptime in exchange for lower Dendro Core production.
Example Teams
This is not a comprehensive list of teams. The inclusion or exclusion of any given team does not necessarily reflect its power level.
This is a great Quickbloom team. Even on a full EM build, Shinobu can sustain the team and even overheal Alhaitham to trigger Furina’s A1 Passive. Nahida can also hold Prototype Amber for additional healing. This team runs a 30s split field time rotation to allow maximum Shinobu Skill uptime and distribute healing to all party members.
Sample Rotation
Shinobu E > Nahida E Q > Furina ED Q > Alhaitham hEP N2CD N3C > Shinobu Q > Alhaitham Q > Shinobu E* > Alhaitham 3[N3D N3CD] N3
*If you can’t swap to Shinobu safely or due to ping, you can instead use her Skill before Alhaitham’s Burst.
This is a satisfying Hyperbloom team. Alhaitham has fewer Spread reactions in exchange for more Hyperblooms from Shinobu. Yelan and Xingqiu provide very strong single-target Hydro damage and application. Due to Yelan and Xingqiu’s cooldowns, a split rotation isn’t viable.
Sample Rotation
Xingqiu ED Q N1 > Yelan E N1 Q N1 > Alhaitham Q > Shinobu E* > Alhaitham N3D N3D N1E N3D N3CD N3D N3D N3D N2
*If you can’t swap to Shinobu safely or due to ping, you can instead use her Skill before Alhaitham’s Burst.
This is a solid Raiden Hyperbloom team. Kirara’s shield with Xingqiu’s additional defensive utility provides enough survivability in most content. The Shinobu version of this team is still competitive and more F2P-friendly.
Sample Rotation
Raiden E > Kirara shE Q > Xingqiu ED Q N1 > Alhaitham hEP N2CD N3C > Kirara shE > Alhaitham Q 4[N3D] N2

This is a possible Furina Quickbloom team without Shinobu or Raiden. It focuses more on Alhaitham’s personal damage than Hyperbloom damage. Fischl has inconsistent Hyperbloom procs, but she still deals high personal damage and enables a Quicken aura. Baizhu provides teamwide healing that counteracts Furina’s teamwide HP drain.
Sample Rotation
Fischl E > Furina ED Q > Baizhu EQ > Alhaitham hEP N2CD N3CD N3 > Fischl Q > Alhaitham Q > Baizhu E* > Alhaitham 4[N3D] N2
*If you can’t swap to Baizhu safely or due to ping, you can instead use his Skill before Alhaitham’s Burst.
Burgeon

Alhaitham is a viable on-field Dendro enabler in Burgeon teams. However, such teams cannot enable stable Quicken auras even with Fischl, so Alhaitham’s personal damage usually takes a hit. Alhaitham requires a healer or shielder to survive Burgeon’s self-damage. Strong Hydro application or a combination of Hydro and Electro application is required to mitigate Burning, which limits Dendro Core generation.
Example Teams
This is not a comprehensive list of teams. The inclusion or exclusion of any given team does not necessarily reflect its power level.

This is another possible Burgeon team. Baizhu provides enough defensive utility by himself that Thoma can completely invest into EM safely.
Sample Rotation
Baizhu EQ > Xingqiu ED Q N1 > Thoma E N1 Q N1 > Alhaitham Q > Baizhu E > Alhaitham N3D N3D N1E N3D N3CD N3D N3D N2
Another Burgeon team with Hydro Resonance. Kokomi can hold 4pc Deepwood Memories to buff Thoma and Alhaitham and TTDS to buff Alhaitham further. Yelan can also hold Favonius Warbow to lower Alhaitham and Thoma’s ER requirements.
Sample Rotation
Yelan Q N1 E N1 > Thoma E N1 Q N1 > Alhaitham Q > Kokomi E* > Alhaitham N2D N3D N3D N1E N3D N3CD N3D N3D N2
*If you can’t swap to Kokomi safely or due to ping, you can instead use her Skill before Alhaitham’s Burst.
Fischl and Xingqiu’s combined Elemental application mitigates Burning, which helps with Dendro Core production. Xingqiu’s additional defensive utility can help somewhat with enemy damage, but it does not mitigate Burgeon self-damage.
Sample Rotation
Xingqiu ED Q N1 > Thoma E N1 Q N1 > Fischl E/Q > Alhaitham Q N3D N3D N1E N3D N3CD N3D N3D N3D N2
Nilou Bloom
Alhaitham is a viable on-field Dendro enabler in Nilou Bloom teams. For sustain, Baizhu and Kirara are the most reliable options and enable shorter rotations. Yaoyao and Kokomi are also potential healers if you use their Burst every rotation.
While a full EM build is possible, Alhaitham’s standard build generally performs on par. Xiphos’ Moonlight is a fantastic Sword to use if you have it.
Example Teams
This is not a comprehensive list of teams. The inclusion or exclusion of any given team does not necessarily reflect its power level.
All these teams use Xingqiu as the second Hydro unit, but Yelan could also work (especially if she is C2).

This is a very solid Alhaitham-Nilou team with Baizhu providing enough sustain for the team. Alhaitham’s split field time allows Baizhu to use 2 Skills per rotation.
Sample Rotation
Nilou E N2 E > Baizhu EQ > Xingqiu ED Q N1 > Alhaitham hEP N2C N3C > Baizhu E > Alhaitham Q 4[N3D] N3
This is another great Alhaitham-Nilou team. Kirara can provide full shield uptime thanks to Alhaitham’s split field time.
Sample Rotation
Nilou E N2 E > Kirara shE Q > Xingqiu ED Q N1 > Alhaitham hEP N2C N3C > Kirara shE > Alhaitham Q 4[N3D] N3
This is a riskier team to run since Yaoyao’s Skill healing may be insufficient for Alhaitham’s entire attack string. As such, she should use her Burst at the end of the rotation to heal the team back to full HP; however, this can increase the rotation length to 26–28s. A similar issue also occurs if you replace Yaoyao with Kokomi.
Sample Rotation
Nilou E N2 E > Xingqiu ED Q N1 > Yaoyao E > Alhaitham Q N2D N3D N3D N1E N3D N3CD N3D N2 > Yaoyao Q
Credits
Contact: irokei
Contributors: miannes, irokei, cuppacote, haafr, talpha, baloopy, xochiyoh, acerbus114, rioau, jamberry, pjeljr
Quick Guide Release (3.4): miannes, loftyginger, latiwings, juko, snowy, fourmana, cuzimori, idkanonymized
Team images made with the KQM portrait generator.