Updated for Version 5.6
Chevreuse is a 4★ Pyro Polearm character in Genshin Impact who is best played as a support in Overloaded teams to provide buffs such as ATK% and Pyro and Electro RES Shred. Learn about Chevreuse’s best builds, best weapons, best artifacts, and best teams in this quick guide.
Note that the information given may change if new discoveries are made. More extensive testing is in progress.
Join our Discord to check on and participate in the theorycrafting process.
Table of Contents
New Content
 Symphonist of Scents | A very strong weapon competing with Favonius Lance’s utility while offering offensive stats to Chevreuse. |
 Varesa | Varesa deals damage through her Plunging Attacks and Burst. Mavuika is a standout off-fielder for her since Varesa’s Nightsoul point consumption helps battery Mavuika’s Burst. |
 Iansan | Iansan’s Burst requires on-fielders to either be from Natlan or move often to maintain its buff, limiting her teams with Chevreuse to mainly Varesa, Mavuika, or Clorinde teams. For teams that fulfill this passive she brings a powerful flat ATK buff. However, even without maintaining this buff completely, Iansan is still a competitive option due to her ability to provide the full 4pc Scroll buff. |
 Mavuika | Mavuika is a strong on-fielder who deals damage with her Burst and Charged Attacks. As an on-fielder, she typically requires Iansan or Ororon to stack Fighting Spirit for her Burst. However, running with Chevreuse means Mavuika cannot use Melt or Vape to amplify her powerful initial Burst hit. She is also a great off-fielder, bringing consistent Pyro application, personal damage, and buffing through her A4 Passive and 4pc Scroll. |
 Pyro Traveler | Pyro Traveler brings off-field Pyro application and buffing through 4pc Scroll and their C1 buff. |
 Ororon | Due to Ororon’s A4 Passive, in Pure Overloaded teams, he can only run with other Natlan units. In those cases, Ororon brings the full buff from 4pc Scroll, an ATK% buff from his C6, and personal damage. |
 Scroll of the Hero of Cinder City | Chevreuse is able to provide a 12% DMG Bonus buff with 4pc Scroll. However, this set is usually better used on another character as Chevreuse can hold 4pc Song, 4pc Noblesse, or a damage set instead. |
 Mountain Bracing Bolt, Tamayuratei no Ohanashi | These two new ER Polearms are viable options if Favonius Lance is unavailable. Mountain Bracing Bolt’s Skill buff is stronger for C4+ Chevreuse. |
 Crimson Moon’s Semblance, Lumidouce Elegy | Two new CRIT stat sticks that improve Chevreuse’s personal damage. |
 New “General Pyro and Electro Support (C6)” team section has been added! (including Chasca, Overvape teams and more) |
Infographic
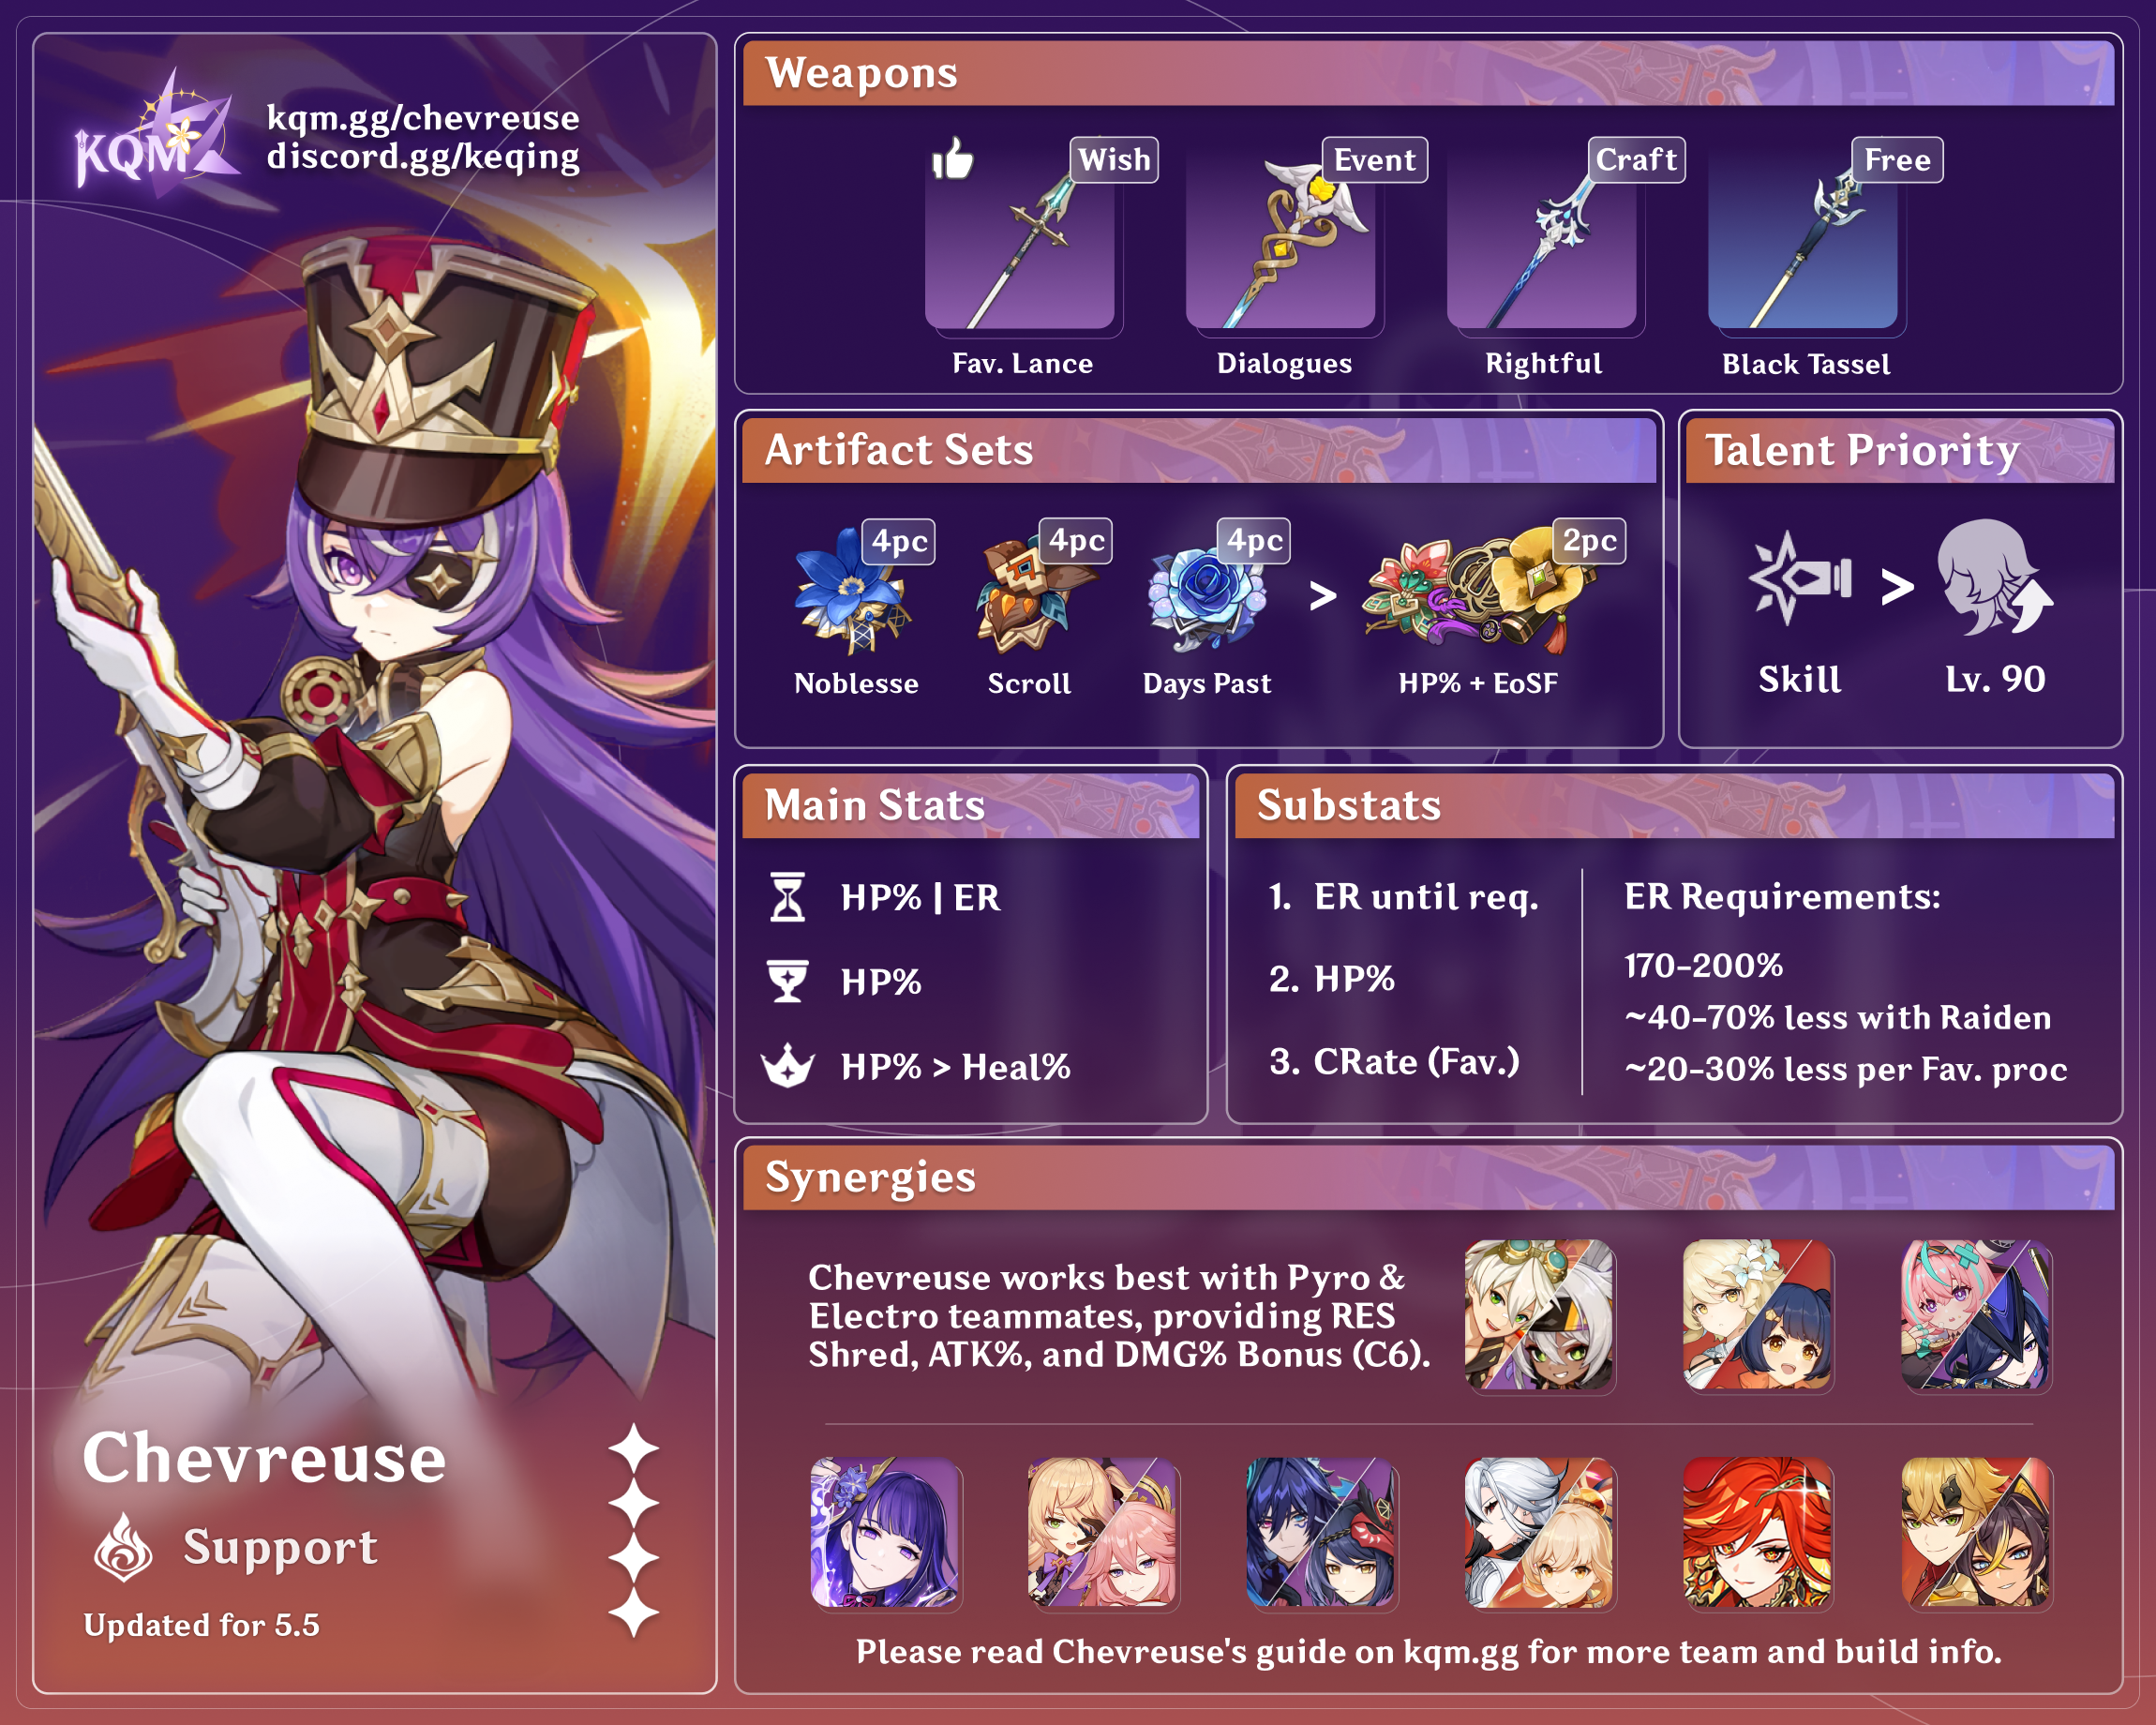
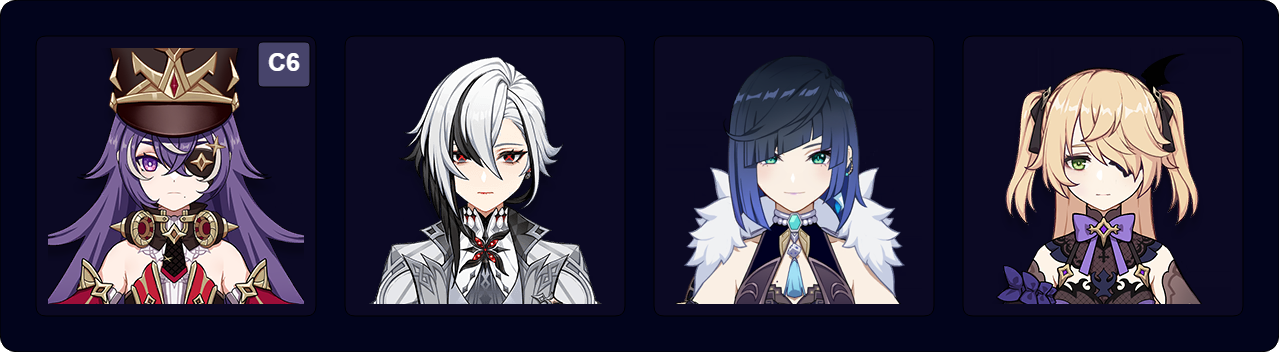
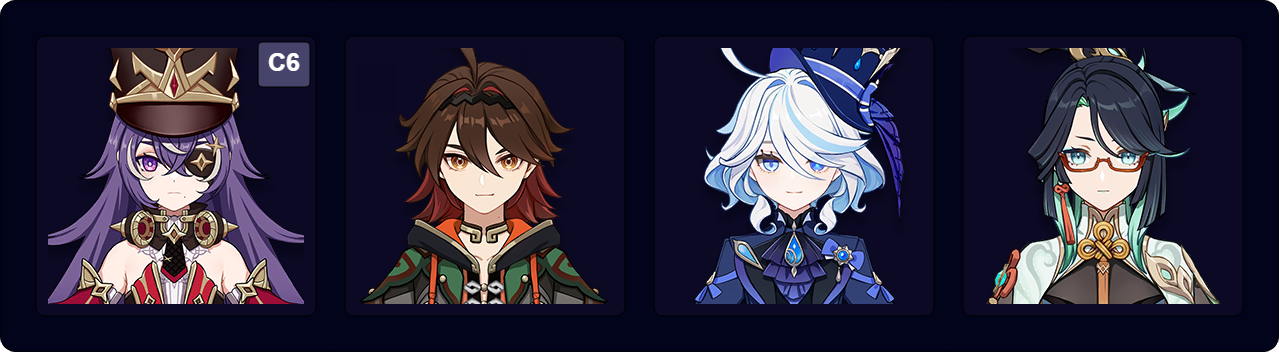
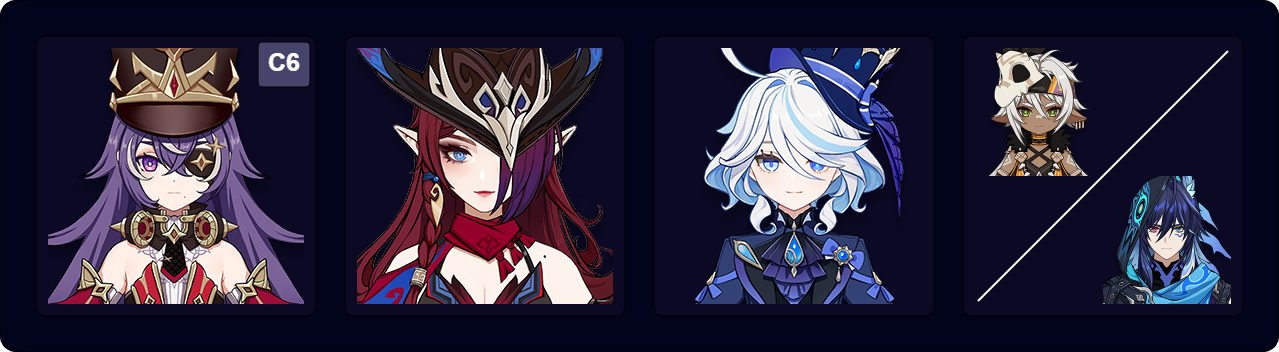
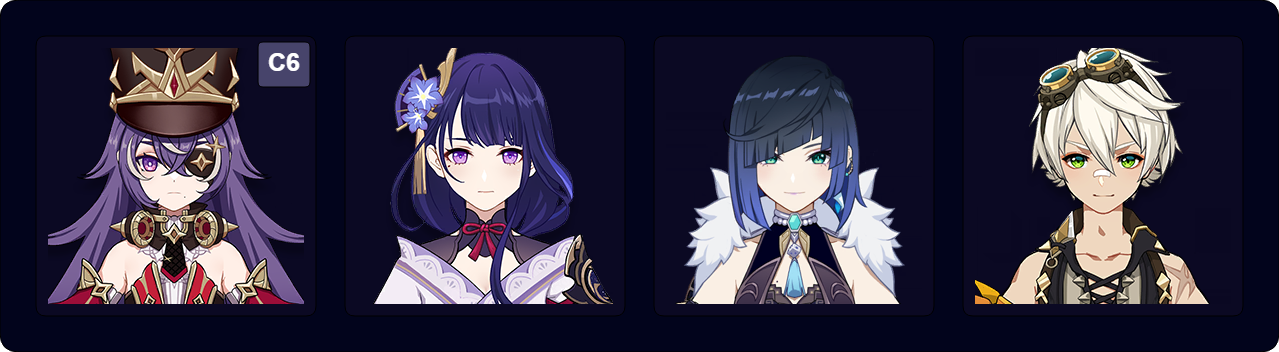
Support
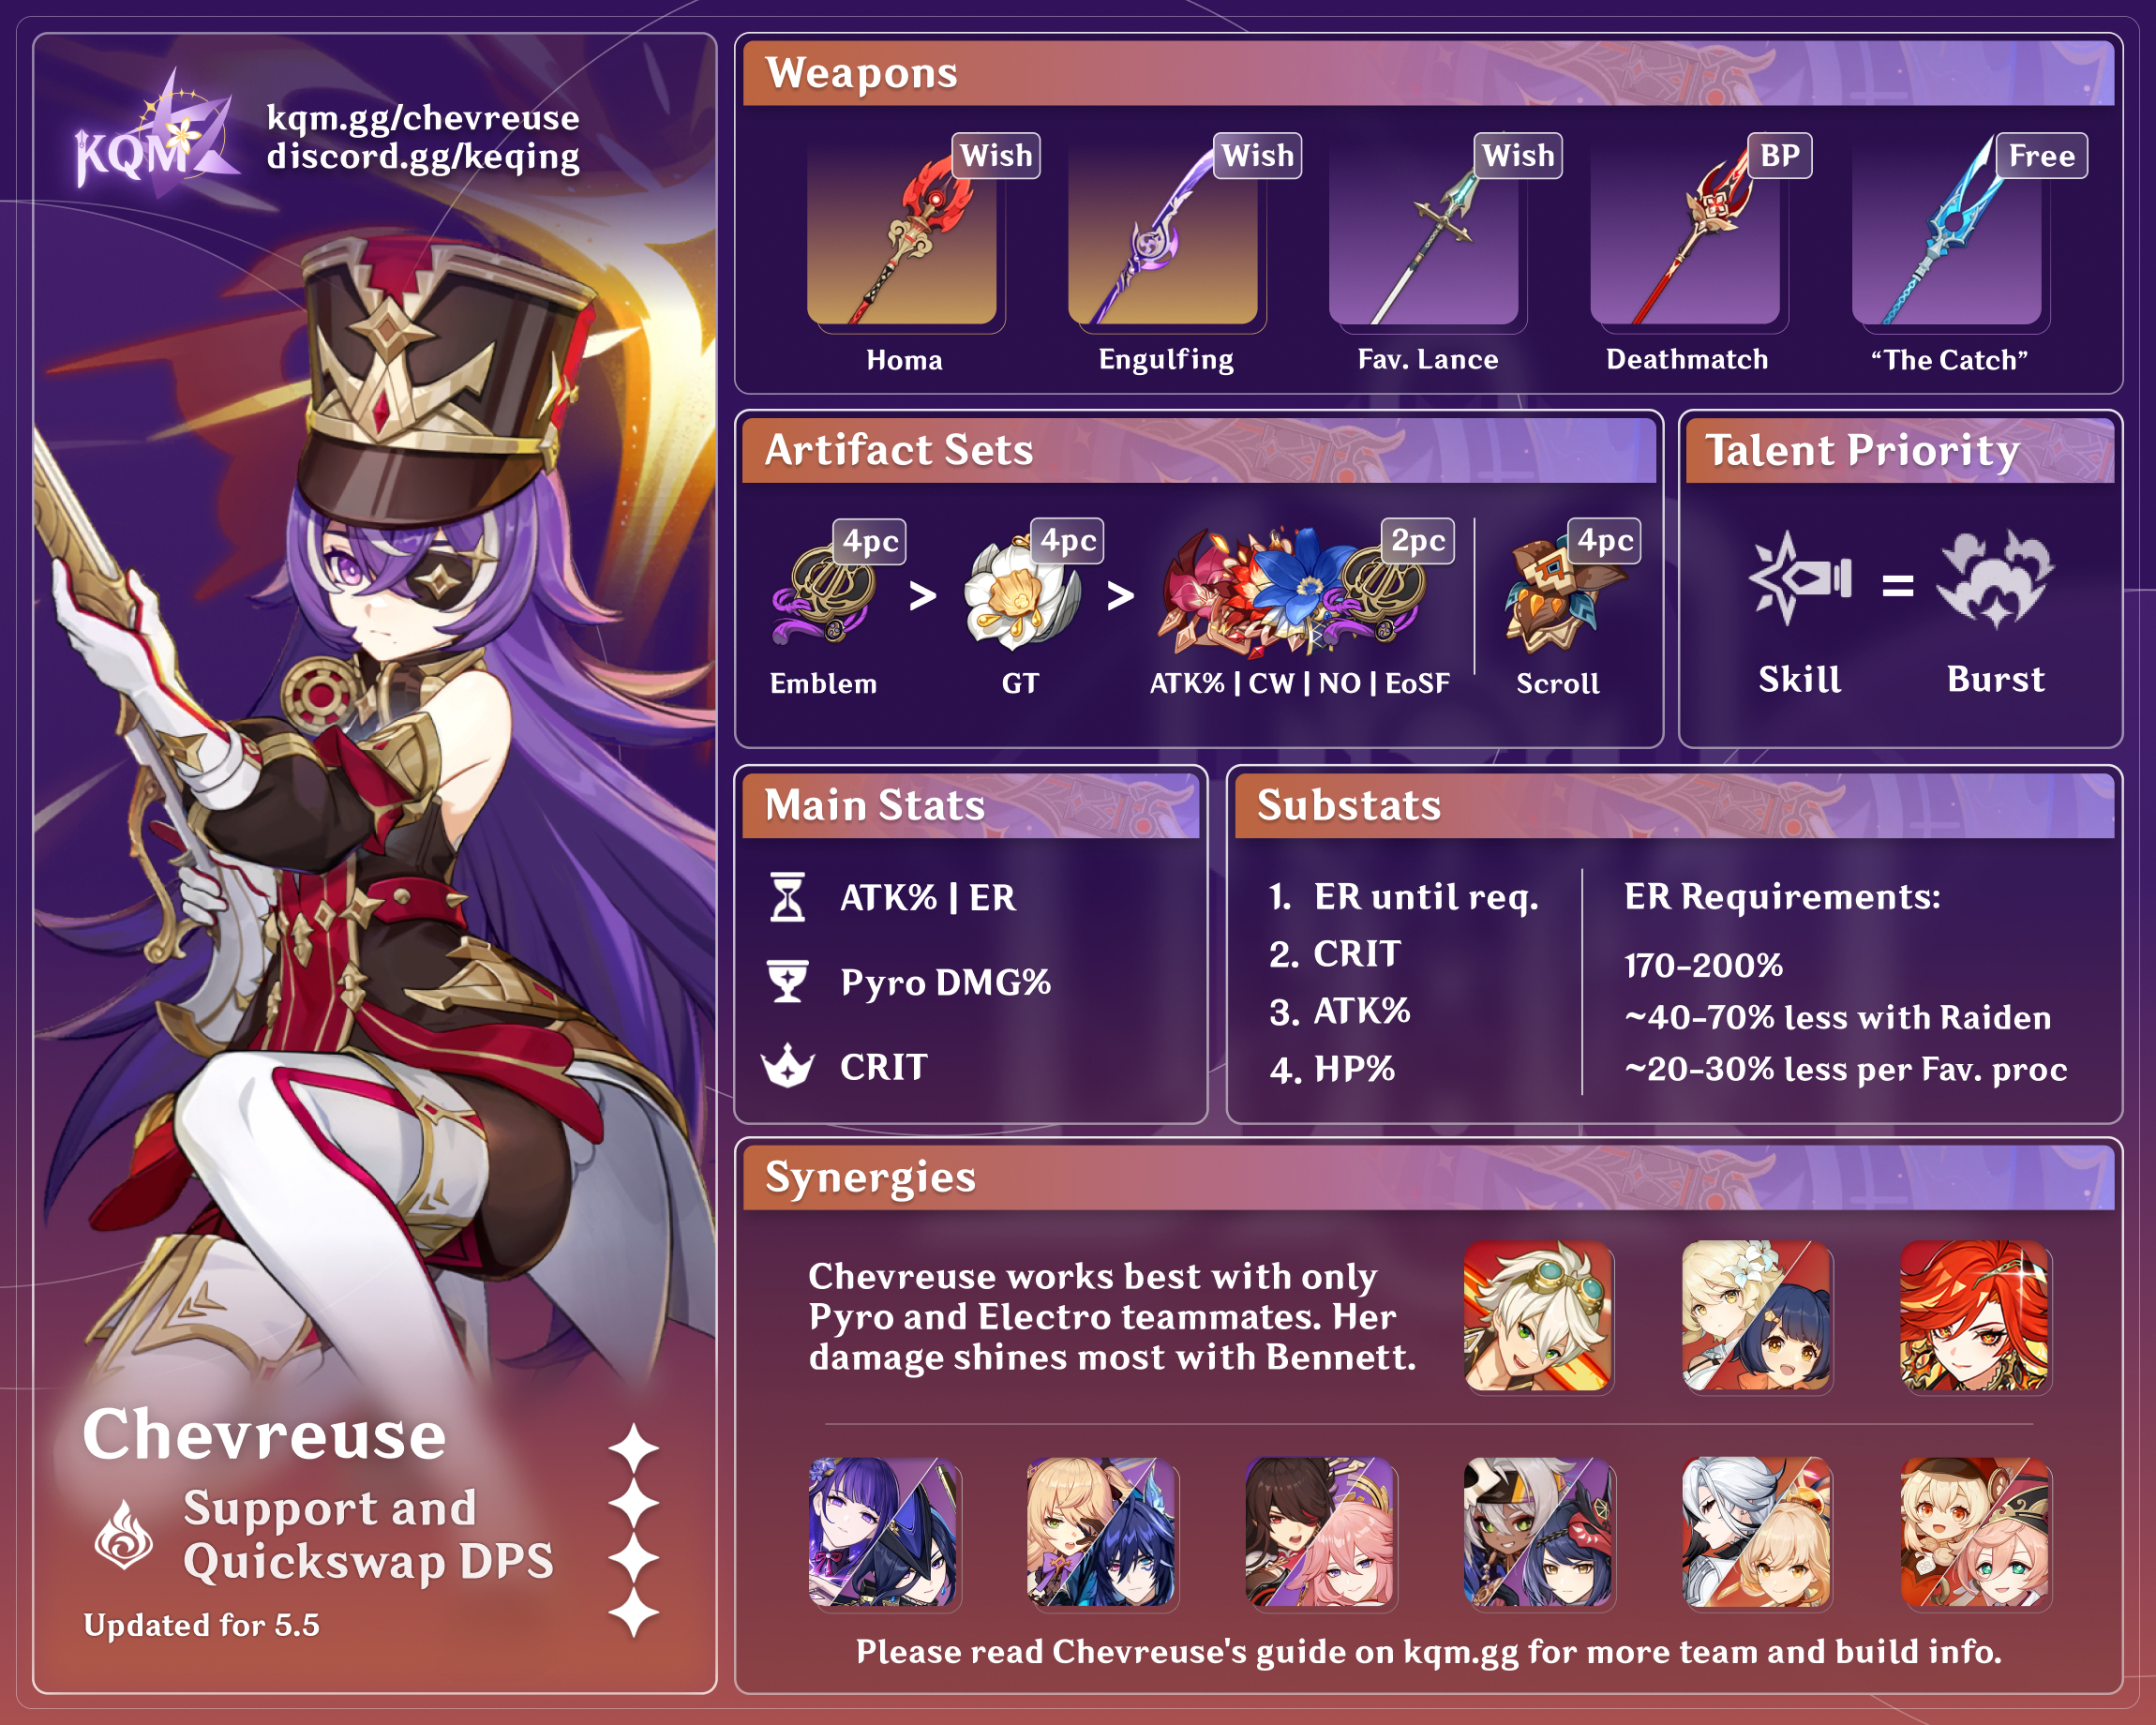
Support and Quickswap DPS
Credits to: cuppacote, auraolis, and KQM Staff
Character Overview
Playstyles
Pure Overloaded Teams Support
Chevreuse buffs teams with only Pyro and Electro characters. She provides ATK% through her 4th Ascension Passive and Pyro and Electro RES Shred in teams consisting of only Pyro and Electro units. Triggering Overloaded is the only requirement to apply these buffs. Her Skill heals the active character and, at C6, provides teamwide healing and DMG Bonus to further buff her team.
Note that Chevreuse uses Overloaded to increase her Pyro and Electro teammates’ damage. Her Pyro RES Shred only coincidentally increases the damage from Overloaded.
Pros
- Easy to build — her buffs do not require Talent levels, and she can ignore her Burst and not build ER.
- Applies RES Shred that persists through different enemy waves and works against enemies with most innate auras (except for Cryo and Anemo auras).
- Already a complete character at C0; her Constellations only improve her capabilities further.
- Her teamwide ATK%, RES Shred, and DMG Bonus (at C6) buffs also apply to her, allowing her to deal significant personal damage when built as quickswap DPS.
Cons
- Restricts teambuilding to only Pyro and Electro characters.
- Might be insufficient healing to be the only defensive unit for some players.
- Can struggle in multi-target scenarios since Overloaded reactions knock back smaller mobs.
General Pyro and Electro Support (C6)
At C6, Chevreuse is a potent enough buffer for Pyro and Electro units, that she becomes a solid pick even outside of Pure Overloaded teams. For example, she can slot into Vaporize teams to offer a DMG Bonus, Elemental Particles, sustain, reliable Pyro reaction setups (such as VV and Scroll), and, in Overvape teams, an ATK% buff.
Talents
Level and Talent Priority
Though not required, players can raise Chevreuse to Level 90 to increase her healing and help reach the 40,000 HP cap on her A4 buff.
Skill > Burst
Chevreuse’s buffs do not scale with her Talents, so levels are not required. However, Skill levels increase healing, while Burst and Skill levels increase her damage output if she is built for damage. It is not necessary to level Chevreuse’s Normal Attacks.
Talent Overview
 Normal Attack | Line Bayonet Thrust EX
Talent Description
Normal Attack
Performs up to 4 consecutive spear strikes.
Charged Attack
Consumes a certain amount of Stamina to lunge forward, dealing damage to opponents along the way.
Plunging Attack
Plunges from mid-air to strike the ground below, damaging opponents along the path and dealing AoE DMG upon impact.
A 4-hit attack string that can be ignored, as Chevreuse rarely uses her Normal Attacks.
 Elemental Skill | Short-Range Rapid Interdiction Fire
Talent Description
Chevreuse quickly shoulders her musket and fires at her opponent(s), dealing AoE Pyro DMG.
For a short duration after Chevreuse fires a shot, she will continuously restore HP to the active character on the field. The amount healed is based on her Max HP.
Hold to fire in a different fashion.
Hold
Enter Aiming Mode, locking a target in her sights to fire a precise interdiction shot. If Chevreuse has an Overcharged Ball, then she will fire the Overcharged Ball instead, dealing greater Pyro DMG in a larger area.
Chevreuse gains 1 Overcharged Ball every time a nearby character in the party triggers an Overloaded reaction, and can have up to 1 Overcharged Ball at a time.
Arkhe: Ousia
Periodically, after Chevreuse’s Short-Range Rapid Interdiction Fire hits, a Surging Blade will be called forth that deals Ousia-aligned Pyro DMG.
Tapping Chevreuse’s Skill fires a shot that deals AoE Pyro damage. On the other hand, holding Chevreuse’s Skill lets her enter Aiming Mode, where she can lock onto a target in her crosshair to fire a precise shot, dealing greater damage. While holding her Skill, Chevreuse’s interruption resistance is slightly increased.
After the team triggers Overloaded, Chevreuse’s next Hold Skill is enhanced. It deals additional damage, knocks back enemies and provides an ATK% buff via her A4 Passive.
Both Chevreuse’s Tap and Hold Skill variants generate 4 particles with a 15s cooldown. After casting her Skill, the active character will receive healing over time that scales with Chevreuse’s Max HP, triggering every 2s with a 12s duration.
 Elemental Burst | Ring of Bursting Grenades
Talent Description
Chevreuse fires an explosive grenade at opponents with her musket, dealing AoE Pyro DMG. After the projectile hits, it will split into many secondary explosive shells.
The secondary explosive shells will burst after a short interval, dealing Pyro DMG to nearby opponents.
Chevreuse’s Burst shoots a bomb that deals a large instance of AoE Pyro damage, followed by a cluster of 8 smaller bombs. These smaller ones explode immediately, deal further damage, and apply Pyro on the first and fourth hit. However, their instant detonation does not allow for long and consistent off-field Pyro application.
Upon exploding, the smaller bombs group enemies towards the center of her Burst AoE.
 Ascension 1 Passive | Vanguard’s Coordinated Tactics
Talent Description
When all party members are Pyro and Electro characters and there is at least one Pyro and one Electro character each in the party:
Chevreuse grants “Coordinated Tactics” to nearby party members: After a character triggers the Overloaded reaction, the Pyro and Electro RES of the opponent(s) affected by this Overloaded reaction will be decreased by 40% for 6s.
The “Coordinated Tactics” effect will be removed when the Elemental Types of the characters in the party do not meet the basic requirements for the Passive Talent.
As long as Chevreuse’s team only consists of Pyro and Electro characters, hitting an opponent with Overloaded will reduce their Pyro and Electro RES by 40% for 6s.
Chevreuse eliminates the need for delicate Double Swirl setups, requiring only regular Overloaded to shred both Elements, and does not require her to be on-field, unlike Anemo units with 4pc VV.
 Ascension 4 Passive | Vertical Force Coordination
Talent Description
After Chevreuse fires an Overcharged Ball using Short-Range Rapid Interdiction Fire, nearby Pyro and Electro characters in the party gain 1% increased ATK for every 1,000 Max HP Chevreuse has for 30s. ATK can be increased by up to 40% in this way.
Chevreuse’s enhanced Hold Skill gives her Pyro and Electro teammates an ATK% buff — 1% for every 1,000 points of her Max HP for up to 40% ATK. This buff caps out at 40,000 HP. However, sometimes building for personal damage may be preferable over maximizing this passive. Note that the condition to activate this passive is triggering an Overloaded reaction, which can be fulfilled without a full team of Pyro and Electro characters.
Constellations
Calcs for Constellation comparisons can be found here (last updated for Version 4.3).
 Constellation 1 | Stable Front Line’s Resolve
Constellation Description
When the active character with the “Coordinated Tactics” status (not including Chevreuse herself) triggers the Overloaded reaction, they will recover 6 Energy. This effect can be triggered once every 10s.
You must first unlock the Passive Talent “Vanguard’s Coordinated Tactics.”
This Constellation grants 6 Energy to the on-field character upon triggering Overloaded, with a 10s cooldown. While Chevreuse’s C1 looks good on paper since she usually runs alongside Energy-hungry teammates, in practice it is too difficult to control who triggers Overloaded. As such, any additional Energy should be treated as a bonus and not to be relied upon.
 Constellation 2 | Sniper Induced Explosion
Constellation Description
After Holding Short-Range Rapid Interdiction Fire and hitting a target, 2 chain explosions will be triggered near the location where said target is hit. Each explosion deals Pyro DMG equal to 120% of Chevreuse’s ATK. This effect can be triggered up to once every 10s, and DMG dealt this way is considered Elemental Skill DMG.
Chevreuse’s Hold Skill now triggers two more explosions after hitting a target, dealing damage and applying another instance of Pyro. The additional damage and Pyro application make Favonius Procs and Pyro reaction setups more reliable. The additional explosions also knock back enemies like her enhanced Hold Skill.
This Constellation is a decent increase for Chevreuse’s personal damage.
 Constellation 3 | Practiced Field Stripping Technique
Constellation Description
Increases the Level of Short-Range Rapid Interdiction Fire by 3.
Maximum upgrade level is 15.
Talent levels for Chevreuse’s Skill. An appreciated increase in healing and a minor buff to her damage.
 Constellation 4 | The Secret to Rapid-Fire Multishots
Constellation Description
After using Ring of Bursting Grenades, the Hold mode of Short-Range Rapid Interdiction Fire will not go on cooldown when Chevreuse uses it. This effect is removed after Short-Range Rapid Interdiction Fire has been fired twice using Hold or after 6s.
Chevreuse’s Hold Skill has no cooldown after using her Burst, lasting two Skill uses or a 6s period. This lets her use her Hold Skill three times in quick succession as long as her Skill is ready before activating the effect. Do note that this does not double or triple her particle generation due to its 10s cooldown.
While this Constellation is a sizable increase to Chevreuse’s personal damage, it requires a bit more field time on Chevreuse. As such, in some teams it can be better to instead spend the time refreshing teammate buffs and abilities, or attacking with an on-field damage dealer.
 Constellation 5 | Enhanced Incendiary Firepower
Constellation Description
Increases the Level of Ring of Bursting Grenades by 3.
Maximum upgrade level is 15.
Talent levels for Chevreuse’s Burst. A decent increase to her personal damage.
 Constellation 6 | In Pursuit of Ending Evil
Constellation Description
After 12s of the healing effect from Short-Range Rapid Interdiction Fire, all nearby party members recover HP equivalent to 10% of Chevreuse’s Max HP once.
After a party member is healed by Short-Range Rapid Interdiction Fire, they gain a 20% Pyro DMG Bonus and Electro DMG Bonus for 8s. Max 3 stacks. Each stack’s duration is counted independently.
At C6, each instance of healing a teammate receives from Chevreuse grants that teammate a 20% Pyro and Electro DMG Bonus for 8s, stacking up to 3 times. Each stack is counted separately, so Chevreuse effectively offers a 60% Pyro and Electro DMG Bonus after 3 instances of healing to the on-field character.
Despite Chevreuse’s slow healing rate, this Constellation is still a potent buff that’s worth considering for certain Pyro and Electro damage dealers, even outside Overloaded teams.
Chevreuse’s C6 further provides an instance of teamwide healing 12s after using her Skill, which grants the entire team 20% Pyro and Electro DMG Bonus for 8s. It is also an appreciated improvement for survivability.
Combos
Combo Notation
- N = Normal Attack
- hE = Hold Skill
- Q = Elemental Burst
It is important to trigger Overloaded before casting Chevreuse’s Hold Skill to trigger her A4 Passive.
| Q hE | Default combo This is the preferred combo for most Chevreuse rotations. Her Elemental Burst provides Pyro application to help trigger Overloaded for her A4 Passive. Her Elemental Skill helps battery other Pyro characters. |
| Q 3[hE] | This combo can only be used when Chevreuse has unlocked her C4. It is her strongest combo for personal damage. |
| hEQ | Chevreuse can use this combo if Overloaded is reliably triggered without the need of her Elemental Burst and she needs the Energy herself to use her Burst every rotation. |
Managing Chevreuse’s Buffs
Chevreuse has different conditions to activate her A1, A4 and C6 buffs and each one can be used in different scenarios.
In a Pure Overloaded team, getting all her buffs is simple:
- Trigger Overloaded before casting her Hold Skill
- Consistently apply Pyro and Electro every 6 seconds
| Buff / Debuff | Who does it buff? | Team Restriction | Condition to Trigger | Duration |
| RES Shred (A1 Passive) | Any instance of Pyro or Electro damage (including Overloaded damage*) | Only Pyro and Electro characters | Trigger Overloaded | 6 seconds |
| ATK% buff (A4 Passive) | Pyro and Electro characters | At least 1 Electro to trigger Overloaded | Trigger Overloaded before using Chevreuse’s enhanced Hold Skill | 30 seconds |
| DMG% buff (C6) | Any character that deals Pyro or Electro damage and receives healing from Chevreuse | None | Use any version of Chevreuse’s Skill to trigger her on-field healing (after 12s, the whole team is healed) | 8 seconds (per stack) |
*Note that Overloaded damage benefits from the RES Shred since it is considered Pyro damage.
Artifacts
ER Requirements
Chevreuse often does not need to use her Burst every rotation to maintain her buffs. If built as a quickswap DPS, she wants to use her Burst every rotation to maximize her personal damage, provided her ER requirements are reachable.
Chevreuse’s ER requirements are quite high if she uses her Burst every rotation outside of Raiden teams. You can opt to ignore ER requirements entirely and use Chevreuse’s Burst when available for additional crowd control or to trigger Overloaded for her A4 Passive buff. This lets you more easily hit her 40,000 Max HP threshold by investing artifact stats into her HP.
| Burst When Available | 100% |
| Burst Every Rotation | 175–205% |
| Burst Every Rotation With On-Field Raiden | 105–135% |
Team Favonius procs reduce ER requirements by 10–20% each.
Use the Energy Recharge Calculator to determine exact requirements for your team and rotation.
Artifact Stats
Support
 Sands |  Goblet |  Circlet |
| HP% / Energy Recharge | HP% | HP% / Healing Bonus |
Stat Priority: ER (until requirement) > HP% (until 40,000) > Flat HP (until 40,000) > CRIT
Quickswap DPS
Sands | Goblet | Circlet |
| ATK% / Energy Recharge | Pyro DMG Bonus | CRIT Rate / CRIT DMG |
Stat Priority: ER (until requirement) > CRIT > ATK% > HP%
Chevreuse’s build can either focus on supporting her teammates or on dealing personal damage. Builds focused on personal damage are better in teams where she benefits from buffs like Bennett’s Flat ATK buff. However, note that investing in a DPS Chevreuse build is often a less efficient use of Resin compared to investing in the team’s damage dealer(s).
On a support build, Chevreuse utilizes HP% main stats to maximize her A4’s ATK% buff (at 40,000 HP) and increase her healing. As previously noted, Chevreuse does not need to use her Burst every rotation, so ER stats are optional. When building for damage, she instead prioritizes CRIT, DMG% and ATK%.
If Chevreuse can reach 40,000 HP without an HP% Circlet, she can opt to use a Healing Bonus Circlet for added survivability. If she holds Favonius Lance, she can run a CRIT Rate Circlet to consistently trigger the weapon passive but she can still use a different main stat if she has enough CRIT Rate substats thanks to the multiple hits from her Burst and her C2. If you want to use Chevreuse’s Burst every rotation and are having trouble meeting her ER requirement, you can opt to run an ER Sands.
Artifact Sets
Calcs for artifact set comparisons can be found here (last updated for Version 4.3).
 4pc Noblesse Oblige | 4pc Noblesse Oblige lets Chevreuse further increase her teammates’ damage with a partywide 20% ATK buff after using her Burst. She should equip this set if no one else is holding it. Chevreuse must build enough ER to Burst every rotation when using this set. |
 4pc Song of Days Past | 4pc Song of Days Past records the total healing granted over 6s. Then, it provides 5 instances of Additive DMG Bonus for the on-field character based on the recorded healing. The damage applies similarly to Shenhe’s Icy Quill effect. The limited instances of damage are quickly used up in AoE combat and are prone to being used by the wrong teammate. Still, it can be a viable set for C6 Chevreuse in teams that already run other supportive sets since she can maximize its effect at C6. |
4pc Scroll of the Hero of Cinder City | Chevreuse is able to provide a 12% DMG Bonus with 4pc Scroll. However, it requires her to trigger a reaction, which may not be possible in some teams or rotations. If there is a Natlan teammate who can activate the full 4pc effect, prioritize giving this set to them. |
 4pc Emblem of Severed Fate | The best option for Chevreuse’s personal damage, especially in teams with high ER requirements. The 2pc set bonus helps her reach her ER requirements and the 4pc bonus buffs her Burst damage. |
 4pc Tenacity of the Millelith | Tenacity of the Millelith’s 2pc effect increases Chevreuse’s healing and helps her reach 40,000 Max HP. The 4pc effect provides an ATK% buff for 3s after Chevreuse hits an enemy with a Skill. This is a decent option if her teammates can snapshot the ATK% buff. |
 4pc Golden Troupe (C4+) | An option for C4+ Chevreuse in teams where she uses all 3 Skill charges. The set provides plenty of DMG Bonus for her Skill, which makes up a significant portion of her personal damage in these teams. Note that it still falls behind 4pc Emblem at higher ER requirements. |
 4pc Crimson Witch of Flames (C4+) | Another alternative for C4+ Chevreuse, offering unconditional Pyro DMG Bonus after using her Skill. However, it still performs worse than 4pc Golden Troupe and 4pc Emblem. |
 4pc Ocean-Hued Clam | 4pc Ocean-Hued Clam lets Chevreuse dish out some extra damage while prioritizing her healing. Note that Chevreuse does not heal enough to max out Sea-Dyed Foam damage, making it less recommended. |
 2pc Mixed Sets (Support) | 2pc Bonuses: HP%, Healing Bonus, Energy Recharge, Scroll of the Hero of Cinder City* 2pc mixed sets lack team utility but are cheaper to build. They can help Chevreuse reach her 40,000 Max HP, increase her healing, and meet her ER requirements. *Note that to activate the 2pc effect of Scroll of the Hero of Cinder City, a Natlan character needs to be in the party. |
2pc Mixed Sets (Personal DPS) | 2pc Bonuses: ATK%, Pyro DMG Bonus, Elemental Burst DMG Bonus, Elemental Skill DMG Bonus, Energy Recharge, Scroll of the Hero of Cinder City* 2pc mixed sets are competitive for a personal damage build at low ER requirements. *Note that to activate the 2pc effect of Scroll of the Hero of Cinder City, a Natlan character needs to be in the party. |
Weapons
Calcs for weapon comparisons can be found here (last updated for Version 4.3).
5★ Symphonist of Scents | Symphonist of Scents provides CRIT DMG and ATK% to Chevreuse while also offering an ATK% buff to teammates healed by her. Chevreuse’s healing is single-target so only the active character will benefit from this buff unless snapshotted. At C6, Chevreuse also gets one instance of teamwide healing which can momentarily buff other non-snapshotting teammates’ ATK. |
 4★ Favonius Lance | Favonius Lance lowers the team’s ER requirements and helps Chevreuse meet her own. The go-to choice in teams with Energy-hungry teammates. Due to its utility, this weapon can be still better for the team than maximizing her HP or personal damage with other weapons. |
 3★ Black Tassel | Black Tassel provides plenty of HP% to increase Chevreuse’s healing and help reach 40,000 Max HP. As a 3-star Polearm, it is relatively accessible and cheap to level. |
 4★ Dialogues of the Desert Sages | An Event-exclusive weapon that provides both Energy and more HP% than Rightful Reward. Note that (at low ping) Chevreuse can only trigger the passive once, but even one proc lowers her ER requirements greatly. However, Favonius Lance can still be preferred to battery teammates. |
 4★ Rightful Reward | Rightful Reward is a craftable Polearm from Fontaine with an HP% secondary stat, which helps Chevreuse reach 40,000 Max HP and increases her healing. Its passive regenerates Energy for the holder if they are healed. Chevreuse struggles to activate this effect by herself before C6 since her healing is slow and purely to on-field characters. Her C6 grants teamwide healing, so she can more easily trigger the passive effect then. |
 Other ER Polearms | 5★ Engulfing Lightning, Skyward Spine; 4★ The Catch, Prototype Starglitter, Mountain Bracing Bolt, Tamayuratei no Ohanashi Other Polearms with ER secondary stats can help Chevreuse reach her ER requirements if Favonius Lance is unavailable. The Catch, Tamayuratei no Ohanashi, and Mountain Bracing Bolt all increase Chevreuse’s personal damage. Engulfing Lightning is also a good option for her personal damage build at high ER requirements, but it is often better used for other DPS units like Raiden or Xiangling. |
 CRIT Polearms | 5★ Staff of Homa, Staff of the Scarlet Sands, Crimson Moon’s Semblance, Lumidouce Elegy; 4★ Deathmatch Strong CRIT stat sticks that increase Chevreuse’s personal damage. Staff of Homa also provides a small HP% buff that increases her healing and her A4 Passive’s ATK% buff. |
Teams
Rotation Notation
- N = Normal Attack
- C = Charged Attack
- P = Plunging Attack
- E = Elemental Skill
- tE = Tap Skill
- hE = Hold Skill
- Q = Elemental Burst
- D = dash cancel
- J = jump cancel
- W = walk cancel
- > = switch character
- ( ) = these actions are optional; please refer to the notes below
- [ ] = repeat these actions the specified number of times
Teambuilding
- Chevreuse’s teams are limited to only Pyro and Electro characters if they want to benefit from her RES Shred.
- Her ATK% buff benefits all ATK-scaling Pyro and Electro characters.
- Her Skill offers defensive utility through its healing, but may not be enough to solo sustain in all scenarios.
- To have good uptime on her RES Shred, sustained off-field Elemental application is required to trigger Overloaded. This usually means bringing another Pyro character as Chevreuse only applies Pyro within a few seconds of her field time.
Pure Overloaded
Overloaded teams are Chevreuse’s bread🍞 and butter🧈, taking advantage of both Overloaded and existing character synergies to deal high damage. In exchange for limiting her team composition to only Pyro and Electro, Chevreuse provides plenty of buffs to said units, as long as they trigger Overloaded regularly. Chevreuse’s own Pyro application is limited, so she incentivises teammates with consistent Pyro application.
Note that the knockback from Overloaded can cause issues in multi-target scenarios by scattering smaller enemies.
Notable Teammates
Pyro On-Fielders
Mavuika | Mavuika is a strong on-fielder who deals damage with her Burst and Charged Attacks. She needs to run with Iansan or Ororon to stack Fighting Spirit for her Burst. However, running with Chevreuse means Mavuika can not use Melt or Vape to amplify her powerful initial Burst hit. |
 Arlecchino | Arlecchino is a powerful on-field carry who utilizes Pyro-infused Normal Attacks. Her teams with Chevreuse offer decent damage without needing to worry about Elemental Auras and reactions. Despite Arlecchino’s inability to be healed by teammates, Chevreuse’s C6 still provides a DMG Bonus. |
 Lyney | Lyney deals significant damage with his Charged Shots, Elemental Skill and Elemental Burst. His A4 Passive incentivizes Pyro teammates, but he can still slot in an Electro unit for Overloaded. |
 Yoimiya | Yoimiya’s Pyro-infused Normal Attacks are her main source of damage and their range alleviates issues with Overloaded’s knockback. Her Pyro application is not crucial in Overloaded teams unlike in Vaporize teams, so she can be played without shields and can freely dodge when needed. |
  Klee, Yanfei | Both Klee and Yanfei can slot in as on-field damage dealers building for personal damage. In some Double Electro teams, Yanfei can build for Overloaded damage instead. Yanfei’s range helps mitigate the knockback from Overloaded. |
 Hu Tao | Hu Tao’s teams with Chevreuse are suboptimal compared to her Vaporize teams; however, Hu Tao can still take advantage of Chevreuse’s buffs to deal solid damage with her Charged Attacks. |
Pyro Off-Fielders
 Bennett | Bennett’s hefty Flat ATK buff makes him a go-to pick for most teams with ATK-scaling units; Chevreuse herself can benefit from his buff to deal increased personal damage. His Burst’s healing supplements Chevreuse’s healing. He can also funnel Pyro Particles to battery his teammates. He can also be played as an on-field DPS utilizing Chevreuse’s buffs and 4pc Thundering Fury with the help of Electro teammates. |
Mavuika | When played as an off-fielder, Mavuika brings consistent off-field Pyro application, personal damage, and buffing through her A4 Passive and 4pc Scroll. |
 Xiangling | Xiangling deals impressive off-field damage, with long-lasting Pyro application that ensures high Overloaded uptime. She will generally want someone to battery her high-cost Burst, typically Bennett. Chevreuse provides decent batterying capabilities, allowing Xiangling to run without Bennett. |
Pyro Traveler | Pyro Traveler brings off-field Pyro application and buffing through 4pc Scroll and their A1 Passive. |
 Dehya | Dehya offers damage mitigation, interruption resistance, and some off-field Pyro application with her Skill. She is one of the few Pyro units who provide resistance to interruption. For those who want to play Dehya as an on-field damage dealer, Chevreuse teams are among her better options. |
 Thoma | Thoma brings slow off-field Pyro application and his shield makes him one of the few options to provide interruption resistance for Chevreuse’s teams. At C6, he also provides 15% DMG Bonus to the on-field character’s Normal, Charged, and Plunging Attack damage. |
Electro On-fielders
Varesa | Varesa deals damage through her Plunging Attacks and Burst. Mavuika is a standout off-fielder for Varesa since Varesa’s Nightsoul point consumption helps battery Mavuika’s Burst. |
 Raiden Shogun | A powerful on-field damage dealer, Raiden takes excellent advantage of Chevreuse’s buffs while maintaining Overloaded uptime. She provides teamwide Burst DMG Bonus and significantly reduces her teammates’ ER requirements. Combined with Bennett’s buff, Chevreuse can maximize her personal damage in Raiden teams. |
 Clorinde | Clorinde’s Overloaded teams offer solid damage and perform especially well in multi-wave content thanks to the RES Shred from Chevreuse’s A1 Passive. |
 Yae Miko | Yae Miko deals high damage from off-field, but she can also be used on-field. A second Electro character is recommended to alleviate her ER requirements. When played as solo Electro, she can opt to Burst every other rotation or not at all if her ER requirements are high. |
 Razor | When paired with C6 Bennett, Razor can deal both Pyro and Electro damage for a less optimal but still fun playstyle. |
   Cyno, Keqing, Lisa | Cyno, Keqing, and Lisa can pair with off-field Pyro units to trigger Overloaded while dealing consistent on-field Electro damage. However, their Dendro teams tend to perform better. Being melee DPS units, Cyno and Keqing often chase enemies knocked back by Overloaded. As such, they are only recommended against bosses or heavier enemies. |
Electro Off-Fielders
 Fischl | Fischl deals significant off-field damage, provides unmatched Electro application, and consistently ensures Overloaded uptime for Chevreuse’s buffs. Her Electro Particle generation lets her battery her teammates. |
Raiden Shogun | Raiden can be played off-field for her long-lasting Electro application. She should use a full EM build for Overloaded damage. |
 Beidou | Beidou’s Burst lets her deal solid off-field damage in multi-target scenarios, especially against 2–3 enemies, and it is one of the few available sources of interruption resistance. Her high ER requirements make a second Electro unit near mandatory. |
Yae Miko | Yae Miko deals high damage from off-field, but she can also be used on-field. A second Electro character is recommended to alleviate her ER requirements. When played as solo Electro, she can opt to Burst every other rotation or not at all if her ER requirements are high. |
 Kujou Sara | Sara can pair with Chevreuse to buff their team’s damage dealer(s). At C6 she becomes an unmatched buffer for Electro units. |
Ororon | Due to Ororon’s A4 Passive, he can only run in teams with other Natlan units.In those cases, Ororon brings the full buff from 4pc Scroll, an ATK% buff from his C6, and personal damage. |
Iansan | Iansan’s Burst requires on-fielders to either be from Natlan or move often to maintain its buff, limiting her teams with Chevreuse to mainly Varesa, Mavuika, or Clorinde teams. For teams that fulfill this requirement she brings a powerful Flat ATK buff. However, even without maintaining this buff completely, Iansan is still a competitive option due to her ability to provide the full 4pc Scroll buff. |
Lisa | Lisa can slot in as an off-field support thanks to her DEF Shred and ability to hold Thrilling Tales of Dragon Slayers or Hakushin Ring. A second Electro character is strongly recommended to lower her ER requirements. |
Example Teams
This is not a comprehensive list of teams. The inclusion or exclusion of any given team does not necessarily reflect its power level.

Sample Rotation
(Varesa N1)1 > Chevreuse Q hE > Iansan E N1 Q > Mavuika tE Q > Varesa ECP ECP sQ ECP ECP sQ CP CP ECP
1First rotation only.

Mavuika can extend her field time by using unenhanced Charged Attacks instead of using Bennett’s Elemental Skill at the end of the rotation. Due to high Overloaded ownership, Ororon can build full EM.
Sample Rotation (Support Build)
(Mavuika tE)1 > Ororon EQ > Chevreuse (Q) hE > Bennett EQ > Mavuika Q combo tE > Bennett E
1First rotation only.
Sample Rotation (Quickswap DPS Build)
(Mavuika tE)1 > Ororon EQ > Bennett EQ > Chevreuse Q 3[hE]2 > Mavuika Q combo tE > Bennett E
1First rotation only.
2Use one Chevreuse Hold Skill Pre-C4.

Sample Rotation
(Raiden E)1 > Chevreuse Q hE > Xiangling N2 > Bennett Q E > Xiangling Q E > Raiden Q N4 E N4D N4D N4 > Bennett E > Xiangling N2
1First rotation only.

Sample Rotation
(Fischl C)¹ > Chevreuse Q hE > Bennett Q E > Fischl N2 E/Q² > Yoimiya E 3[N5D] N1 > Bennett E
¹First rotation only. Can be skipped without losing much damage.
²Fischl alternates Burst and Skill.
Sample Rotation
Opener: Sara E > Chevreuse Q hE > Pyro Traveler E Q > Sara Q > Clorinde E combo
Ongoing Rotation: Sara C > Clorinde Q > Chevreuse Q 3[hE] > Pyro Traveler E Q > Sara E (Q) > Clorinde E combo
This team makes excellent use of Chevreuse’s Constellation 4 and Constellation 6, enabling constant healing ticks and C6 stacks.
Sample Rotation
Yae 3[E] > Chevreuse Q hE > Bennett EQ > Fischl E > Bennett N2 E > Yae Q 3[E] > (Chevreuse hE)1 > Bennett N2 E > Fischl Q > Yae N2CJ > Bennett E > Yae N2CJ N2
1Skip if Chevreuse is not C4+.
General Pyro and Electro Support (C6)

Chevreuse’s ATK% and DMG% buffs are not restricted to a full team of Pyro and Electro units. Therefore at C6, she can be a potent buffer for Pyro and Electro damage dealers. Note that the ATK% buff requires an Overloaded reaction, so Pyro units will struggle to get it outside of archetypes like Overvape. More information on her buff requirements and applications can be found here.
Her C2 adds an extra Pyro application to her Skill and her Burst applies Pyro up to 3 times in short succession. This high amount of Pyro application during a short period of time can help improve 4pc VV and 4pc Scroll setups, especially in Furina teams.
Notable Teammates
 Pyro and Electro DPS | Almost any Pyro or Electro DPS can use C6 Chevreuse for her DMG% buffs. To benefit from Chevreuse’s ATK% buff, Pyro DPS units need to run an Electro on their team while Electro DPS units need not do the same if they can apply Electro easily at the start of the rotation. |
Chasca | Chasca is a multi-element damage dealer. With Chevreuse and an Electro on the team, she can benefit from Chevreuse’s DMG% buff on her Pyro and Electro shells. Note that since Chasca is neither a Pyro nor an Electro unit, she cannot benefit from Chevreuse’s ATK% buff. This means slotting in an Electro unit over a non-Electro unit does not necessarily mean the team becomes stronger. |
 VV and Scroll Holders | Chevreuse’s high consecutive Pyro application allows for easier and more reliable 4pc VV and 4pc Scroll setups, especially in Furina teams. |
Example Teams
This is not a comprehensive list of teams. The inclusion or exclusion of any given team does not necessarily reflect its power level.
A simple Overvape team where Chevreuse provides an ATK% and DMG% buff to both Arlecchino and Fischl (Fischl receives the ATK% buff from the second rotation onwards).
Sample Rotation
Arlecchino E > Yelan EQ N1 > Fischl N1 E/Q > Chevreuse Q N1 hE > Arlecchino N3C 6[N3D]
Chevreuse’s Skill (at C2) and Burst provide a high amount of Pyro application, establishing a Pyro aura for Xianyun to Swirl. Unlike Bennett, Chevreuse does not restrict Gaming to a stationary circle.
Sample Rotation
Furina ED Q > Chevreuse Q hE > Xianyun N11 EPQ > Gaming combo
1Quickly execute one Normal Attack to Swirl Pyro.
Since Chasca is neither a Pyro nor an Electro character, she cannot benefit from Chevreuse’s ATK% buff. Chevreuse is still a decent option in this team, providing a DMG% buff for Pyro and Electro damage, a Pyro shell for Chasca, and some healing to counter Furina’s drain. Additionally, her high Pyro application allows for easier 4pc Scroll setups with Iansan and Ororon.
Sample Rotation (Iansan)
Furina ED Q > Chevreuse Q 1-3[hE]1 > Iansan E C Q > Chasca E 4[C] (Q/C)2
1Use 1 to 3 Chevreuse Hold Skills depending on which provide a more reliable 4pc Scroll setup.
2Burst when available. Otherwise, hold Chasca’s Charged Attack until she falls to the ground.
Sample Rotation (Ororon)
Furina ED Q > Ororon EQ > Chevreuse Q hE > Chasca E 4[C] Q > Ororon EQ > Chevreuse Q hE > Chasca E 5[C]1
1Hold Chasca’s 5th Charged Attack until she falls to the ground.
Both Chevreuse and Raiden benefit from Chevreuse’s ATK% and DMG% buffs, Raiden’s Burst DMG% buff, Pyro Resonance, Yelan’s ramping DMG% buff, and Bennett’s Flat ATK Bonus. Chevreuse should be built as a quickswap DPS to fill the downtime in the rotation. She triggers Vaporize and Overloaded reactions, leading to a high team damage share.
Sample Rotation (Quickswap DPS Build)
(Raiden E)1 > Yelan EQ N1 > Bennett Q E > Chevreuse N1 Q 3[N1 hE] > Raiden Q N4 E N4D N4D N4
1First rotation only.
Credits
caramielle., leifa, alix.sh, caxia5, whalien., sew, lizz71, sirvaughan, irokei, polomo, chasing_haze, cuppacote, haafr, clevernt, baloopy, madeofseaglass, acerbus114, lesterberne, radicnnos4388, plumetra, nyte
Team images made with the KQM portrait generator.