Updated for Version 3.3
Hu Tao is a 5-star Pyro Polearm on-field DPS character who can deal tremendous single-target oriented damage. Mastering her animation cancels rewards players with remarkable increases in Hu Tao’s performance, making her a popular unit among the playerbase.
The updated full-length guide is currently in the process of being written. Join our Discord to check on and participate in the theorycrafting process.
Table of Contents
Infographic

Credits to: icedsquid, snowwwwww.
New Content
 Nahida | While Nahida can fit in Hu Tao teams with Xingqiu and Yelan to enable Burgeons and provide a huge EM buff, the Burgeon self-damage cannot be easily mitigated and can prove fatal. |
 Staff of the Scarlet Sands | Staff of the Scarlet Sands contends as a strong weapon option on Hu Tao, only hindered by her inability to fully stack its passive. |
 Gilded Dreams | Gilded Dreams trails only slightly behind Hu Tao’s best artifact sets, albeit scaling worse with EM buffs. |
Playstyles
On-Field Pyro DPS
Hu Tao should only be played as an on-field Pyro DPS. She can deal marginal amounts of off-field damage with her Blood Blossoms, but playing her as an off-field DPS is not recommended.
Character Overview
Talent Priority
Normal Attack ≥ Skill > Burst
Hu Tao benefits from character levels more than a typical ATK- scaling DPS unit like Diluc because levels give her both ATK and HP, both of which she benefits from. While players should strive to get her to level 90, she is not quite as dependent on levels for her damage compared to more Transformative/Additive Reaction-based units such as Kazuha.
Talents
 Normal Attack | Secret Spear of Wangsheng
Talent Description
Normal Attack
Performs up to six consecutive spear strikes.
Charged Attack
Consumes a certain amount of Stamina to lunge forward, dealing damage to opponents along the way.
Plunging Attack
Plunges from mid-air to strike the ground below, damaging opponents along the path and dealing AoE DMG upon impact.
Hu Tao’s Normal Attack Talent scaling affects her Charged Attacks, which are the main source of her damage. Mastering her Charged Attack combos is key to increasing her DPS, although she can still deal respectable damage even without animation cancels.
 Elemental Skill | Guide to Afterlife
Talent Description
Hu Tao consumes a set portion of her HP to knock the surrounding enemies back and enter the Paramita Papilio state.
Paramita Papilio
Increases Hu Tao’s ATK based on her Max HP at the time of entering this state. ATK Bonus gained this way cannot exceed 400% of Hu Tao’s Base ATK.
Converts attack DMG to Pyro DMG, which cannot be overridden by any other elemental infusion.
Charged Attacks apply the Blood Blossom effect to the enemies hit.
Increases Hu Tao’s resistance to interruption.
Blood Blossom
Enemies affected by Blood Blossom will take Pyro DMG every 4s. This DMG is considered Elemental Skill DMG.
Each enemy can be affected by only one Blood Blossom effect at a time, and its duration may only be refreshed by Hu Tao herself.
Paramita Papilio ends when its duration is over, or Hu Tao has left the battlefield or fallen.
Hu Tao’s Elemental Skill drains her HP and converts a portion of it to Flat ATK, which makes using an HP Sands on Hu Tao a good option. Her Elemental Skill duration is slightly lengthened by hitlag extension, which makes it last longer than 9 seconds in practice.
Hu Tao’s Elemental Skill also allows her to apply the Blood Blossom effect to enemies hit by her Charged Attacks. Blood Blossoms periodically tick to deal Pyro DMG.
 Elemental Burst | Spirit Soother
Talent Description
Commands a blazing spirit to attack, dealing Pyro DMG in a large AoE.
Upon striking the enemy, regenerates a percentage of Hu Tao’s Max HP. This effect can be triggered up to 5 times, based on the number of enemies hit.
If Hu Tao’s HP is below or equal to 50% when the enemy is hit, both the DMG and HP Regeneration are increased.
Hu Tao’s Elemental Burst deals Pyro DMG in a large AoE and also causes Hu Tao to regenerate a small amount of HP per enemy hit; both effects are increased when Hu Tao is under 50% HP. This can be used as a survivability tool, not only for its healing effect but also for its invincibility frames. It also deals a decent chunk of damage, making it a good option for nuking down enemies quickly.
Hu Tao’s Elemental Burst also “extends” her Skill duration. If the Elemental Burst is cast before her Elemental Skill ends, then the Elemental Skill effect will still apply to her Burst hit.
 Ascension 1 Passive | Flutter By
Talent Description
When a Paramita Papilio state activated by Guide to Afterlife ends, all allies in the party (excluding Hu Tao herself) will have their CRIT Rate increased by 12% for 8s.
This Passive buffs Hu Tao’s teammates, but only after her Elemental Skill duration ends—this means that its buffs only apply on the second rotation onwards. It is generally only a minor boost to team damage and does not alter her teammates’ builds in any significant way; that said, it does help with consistency in triggering Favonius weapons’ passives.
 Ascension 4 Passive | Sanguine Rouge
Talent Description
When Hu Tao’s HP is equal to or less than 50%, her Pyro DMG Bonus is increased by 33%.
This Passive increases Hu Tao’s damage when she’s below 50% HP, and significantly affects her teams and playstyle. Hu Tao should be kept at below 50% HP to maximize her damage, making it tricky to use healers with her. The Passive also means that Hu Tao has a little bit of “ramp up” time, as she needs to either get hit by enemies or use her Skill at least twice to achieve maximum DPS. However, she can still deal a large amount of damage without this Passive active. In addition, please be considerate of your teammates’ healing needs if playing Hu Tao in co-op. Hu Tao can still do damage at full health, but your teammates do none if they are dead.
Constellations
 Constellation 1 | Crimson Bouquet
Constellation Description
While in a Paramita Papilio state activated by Guide to Afterlife, Hu Tao’s Charge Attacks do not consume Stamina.
Hu Tao’s first Constellation does a lot of things: it increases her ease of use, survivability, and damage potential. Her C1 allows her to cancel her Charged Attack end animations with dashes without the added stamina cost of CAs, which lets her perform such cancels more often before running out of Stamina. Dashing also grants invincibility frames while jumping does not, making it harder for Hu Tao to take damage.
Dash cancels are also faster than jump cancels, which means that she can perform more Charged Attacks in a single Skill window when using dash cancels, potentially increasing her damage by over 20%.
Overall, Hu Tao’s C1 is very valuable.
 Constellation 2 | Ominous Rainfall
Constellation Description
Increases the Blood Blossom DMG by an amount equal to 10% of Hu Tao’s Max HP at the time the effect is applied.
Additionally, Spirit Soother will also apply the Blood Blossom effect.
Hu Tao’s C2 does increase her Blood Blossom damage quite significantly, but it doesn’t change her rotations or build. She still wants to cast her Elemental Burst at the end of her rotation, since the Burst extends her Skill duration — doing this allows her to cast her Burst without significantly eating into her Skill span.
 Constellation 3 | Lingering Carmine
Constellation Description
Increases the Level of Guide to Afterlife by 3.
Maximum upgrade level is 15.
A small damage increase. Hu Tao’s damage is spread across her Talents, making any individual Talent-boosting Constellation have some (but not much) impact.
 Constellation 4 | Garden of Eternal Rest
Constellation Description
Upon defeating an enemy affected by a Blood Blossom that Hu Tao applied herself, all nearby allies in the party (excluding Hu Tao herself) will have their CRIT Rate increased by 12% for 15s.
Hu Tao’s fourth Constellation acts similarly to her first Ascension Passive — the buff only really applies after some time has passed, as an enemy needs to be defeated for it to activate. Given that Hu Tao generally performs best against single targets, players may sometimes not even get the chance to activate this Constellation.
 Constellation 5 | Floral Incense
Constellation Description
Increases the Level of Spirit Soother by 3.
Maximum upgrade level is 15.
Similar to C3 in effect, although its overall damage increase for Hu Tao is smaller than her third Constellation. However, since the boost is entirely for her Elemental Burst, it does improve Burst-focused/nuke Tao setups. These playstyles may be more feasible and attractive for players willing to invest heavily in Hu Tao.
 Constellation 6 | Butterfly’s Embrace
Constellation Description
Triggers when Hu Tao’s HP drops below 25%, or when she suffers a lethal strike:
Hu Tao will not fall as a result of the DMG sustained. Additionally, for the next 10s, all of her Elemental and Physical RES is increased by 200%, her CRIT Rate is increased by 100%, and her resistance to interruption is greatly increased.
This effect triggers automatically when Hu Tao has 1 HP left.
Can only occur once every 60s.
Hu Tao’s sixth Constellation acts as both a survivability effect and a damage boost. While the Constellation is most popular in speedruns (as it eliminates the need for “crit fishing”), it also can be used in general play, as the free 100% CRIT Rate it grants massively increases Hu Tao’s damage.
Using Hu Tao with her C6 does change her build, as building high CRIT Rate (>60%) becomes much less advisable and her stat priorities change accordingly.
Combos
Hu Tao’s Charged Attacks have high motion values and lack an ICD, allowing them to be consistently Vaporized. Using them is very important for Hu Tao’s damage, with the various recommended combos to do so being detailed below.
N# = Corresponding number of consecutive Normal Attacks
C = Charged Attack
E = Elemental Skill
Q = Elemental Burst
J = Jump
D = Dash
Videos courtesy of ItzSomebody#0029.
N1C
N1C refers to Hu Tao doing one Normal Attack, then one Charged Attack. There are two ways to cancel her Charged Attack: a jump, which creates the N1CJ combo, and a dash, which creates the N1CD combo.
Note that players don’t actually strictly need to cancel her Charged Attacks, and without cancels Hu Tao can still reach 9 N1C combos as shown here, although players should aim for 7 or 8. This is mostly similar to using jump cancels but is significantly less mechanically intensive. That said, canceling her Charged Attacks still helps to improve Hu Tao’s positioning, as uncancelled Charged Attacks can excessively distance her from targets that she can phase through when performing Charged Attacks.
N1CJ
At Constellation 0, N1CJ is Hu Tao’s best combo to use in Freeze/Melt teams and VV Vape teams with Thoma and without C6 Xingqiu.
The max number of CAs at C0 that can be performed with N1CJ is 9 without any sources of Stamina cost reduction (she will run out of Stamina after 9 CAs). 10N1CJ at C0 is theoretically reachable with Stamina cost reduction (like from Diona) but is not recommended for players to aim for because of the technical difficulty and the teammate requirements.
N1CD
N1CD is Hu Tao’s best combo for Freeze/Melt teams and VV Vape teams with Thoma at C1. Note that this combo will usually need to be interspersed with the N1CJ combo because of dash cooldown. Note that players will hit the dash limit at C1 when dash canceling with N1C (the game only allows the player to perform two dashes within a certain time period), meaning that players will need to alternate between N1CDs and N1CJs even at C1 if they’re performing the N1C combo.
The way that players should alternate is as such: N1CD > N1CD > N1CJ > Repeat as shown below.
The maximum number of N1CDs that are performable at C1 is 12; however, players should just aim for around 9 to 10 for “good” play.
Video: N1CD > N1CD > N1CJ
N2C
N2C refers to Hu Tao doing two Normal Attacks, then one Charged Attack. This combo is optimal for most Hu Tao teams, and like N1C can be canceled with either a dash or jump. However, this is not necessary — players can still achieve a very respectable 8N2C with no cancels (video example here), albeit at some cost to her positioning against non-heavy enemies.
N2CJ
N2CJ is Hu Tao’s C0 combo for teams where she wants to perform N2C. She can consistently perform 9N2CJ at perfect execution (with 10N2CJ being inconsistently possible at 30fps), but it’s only recommended to aim for around 7N2CJ for “good” performance. Video of N2CJ combos can be found below.
Video: N2CJ combo
N2CD
N2CD is Hu Tao’s C1 combo for teams where she wants to perform N2C. She can consistently perform 11N2CD at perfect execution (with 12N2CD being inconsistently possible at 30fps), but most players should aim for around 8 or 9 N2CD for “good” performance. Video of N2CD combos can be found below.
Video: N2CD combo
Artifacts
ER Requirements
While Hu Tao’s Burst provides Quality of Life benefits (healing and i-frames) as well as AoE damage, she does not want to actively seek ER in substats, as building the ER to Burst every rotation is an overall damage loss. Instead, Bursting every other rotation (or every 3-4 rotations with Shimenawa’s Reminiscence) is most recommended, though it is worth noting that around 110% ER can be helpful for her to consistently achieve this in low-Energy situations.
Artifact Stats
 Sands |  Goblet |  Circlet |
| Elemental Mastery or HP% | Pyro DMG Bonus | CRIT Rate or CRIT DMG |
Substat priorities:
1. EM to ~100
2. CRIT
3. EM to 200-300
4. HP%
5. ATK%
6. Flat HP = Flat ATK
7. ER
As Hu Tao is able to Vaporize an outstanding amount of her damage, EM substats have the potential to be worth more than CRIT and HP substats until the listed breakpoints, which factor in EM buffs. However, weapons such as Staff of the Scarlet Sands can affect stat priorities, and it is thus recommended to seek a more definitive answer through Genshin Optimizer.
Artifact Sets
| Artifact Set | Notes |
 4pc Crimson Witch of Flames (4CW) | Very strong on Hu Tao as she is able to benefit from everything it provides and it scales well with buffs, despite Hu Tao only being able to maintain one stack on its 4pc effect. |
4pc Shimenawa’s Reminiscence (4SR) | Shimenawa’s Reminiscence is very strong on Hu Tao while also being extremely Resin-efficient. That said, it does make some notable sacrifices in playability, as the Energy drain prevents Hu Tao from easily frontloading her damage and restricts its use as a panic button; the latter is mostly mitigated if running her with a shielder. |
4pc Gilded Dreams (4GD) | Generally, Gilded Dreams performs slightly worse than 4CW. However, it is close enough that substats will usually be the deciding factor — especially if Hu Tao receives the full 150 EM granted by the 4pc effect when she is the only Pyro unit on the team. That said, it does scale worse with EM buffs than the above options. |
 2pc combinations of Crimson Witch / EM / HP% | 2pc combinations can outperform the sets listed above if they have significantly better substats. |
Weapons
| Weapon | Notes |
 Staff of Homa | Hu Tao’s uncontested BiS. Hu Tao maximizes the value it provides, making it incredibly strong. |
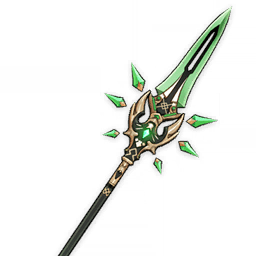
Staff of the Scarlet Sands | While Hu Tao cannot fully stack Staff of the Scarlet Sands, the EM to ATK conversion and high CRIT Rate it provides make it potent particularly on high EM builds. |
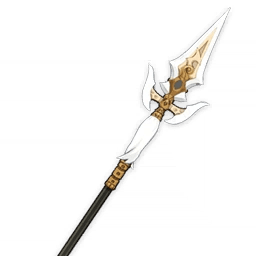
 Primordial Jade Winged-Spear | Though the ATK% from PJWS has a rather diminished value on Hu Tao and she stacks the passive relatively slowly, the weapon’s overall stats still make it a decent choice. |
 Deathmatch | Deathmatch is a strong and reliable option due to the healthy amount of CRIT Rate it provides, even though the passive’s effect is diminished on her. |
 Dragon’s Bane | Dragon’s Bane has a strong passive and provides a substantial amount of EM, giving it significant value. Scales well with refines but its value does diminish with further EM and DMG Bonus buffs. |
 White Tassel | White Tassel is Hu Tao’s de facto F2P weapon; it serves its purpose and is relatively uncomplicated outside of making Hu Tao prefer N2C combos. |
Teams
Teambuilding
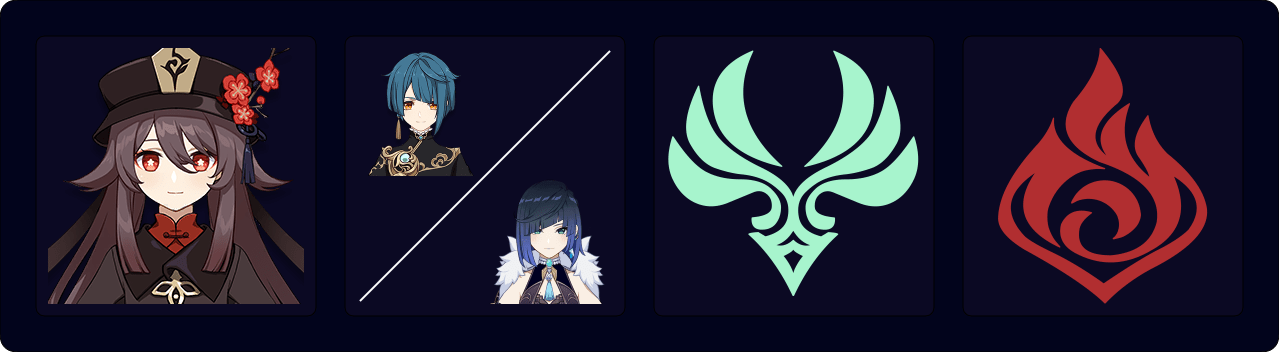
- Hu Tao’s teams revolve around her, a Hydro enabler (either Xingqiu or Yelan), and two flexible positions to include buffers, off-field DPS, or survivability options.
- The team archetypes given below are not an exhaustive list of combinations of teams Hu Tao can use, as she only truly needs the aforementioned Hydro enabler.
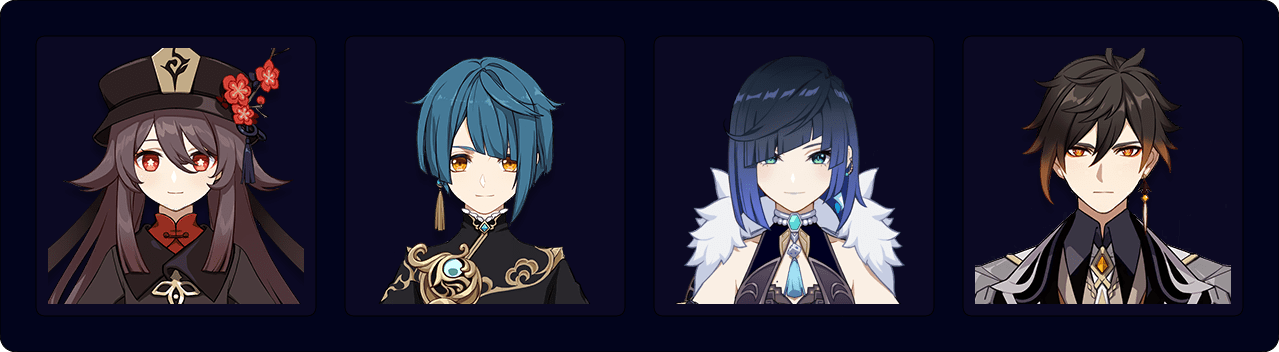
Double Hydro

Hu Tao’s Double Hydro team composition is extremely strong, as it has some of the highest DPS out of any of Hu Tao’s teams. The HP% provided by Hydro Resonance further boosts both the team’s damage and survivability. Players have a wide variety of choices for flex units, including Zhongli, Kazuha, Sucrose, Fischl, Albedo, Xiangling, and more. Zhongli in the fourth slot is a highly comfortable option who offers team damage that is on-par to the Kazuha variant due to Zhongli being able to RES Shred both Pyro and Hydro. In contrast, Anemo units cannot reliably VV Pyro in Double Hydro teams, though the buffs they provide to Xingqiu and Yelan are still strong.
The drawback of the Double Hydro team archetype is that using both Xingqiu and Yelan on a single team does prevent using one of them in the other Abyss team. Mona is an option, but her off-field DPS is significantly lower than Yelan’s or Xingqiu’s and her buff’s duration is rather fleeting.
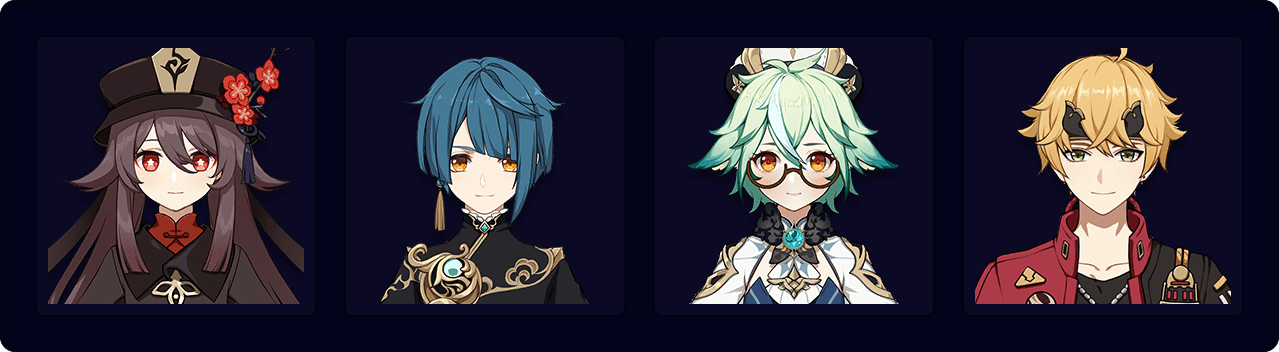
VV Vape
VV Vape teams used to be Hu Tao’s highest DPS teams, but with the release of Yelan, Double Hydro has become competitive in terms of DPS while also being significantly easier to use compared to the setups VV Vape requires. VV Vape teams function by having an Anemo unit to Swirl Pyro and Hydro to boost Hu Tao/Xingqiu or Yelan’s damage, and an additional Pyro unit to apply Pyro for the Anemo unit to Swirl. Pyro characters that are suitable for this role are Amber, Thoma, Xinyan, and Bennett; while other options such as Yanfei are usable they tend to come with significant caveats.
Double Geo
The “Geo Bros” team composition is one of Hu Tao’s most comfortable team compositions; Zhongli’s shield provides a massive increase in survivability and Interruption Resistance that allows Hu Tao to more easily perform combos. Albedo also provides off-field damage and a 125 EM buff that increases Hu Tao’s personal damage with his Burst. Yun Jin can also be used in place of Albedo if players are able to perform N2C combos, and in some cases can even be better due to not having off-field Geo application to react away the Hydro aura on enemies.
While the team is strong and comfortable to play, it does have a few drawbacks:
- The DPS ceiling of the team is lower than the DPS ceiling of other Hu Tao teams.
- Albedo’s flower can be destroyed by large enemies, which makes his off-field damage unreliable in some situations.
- It can demand three or four five-star units, making some variations very expensive.
Vapemelt
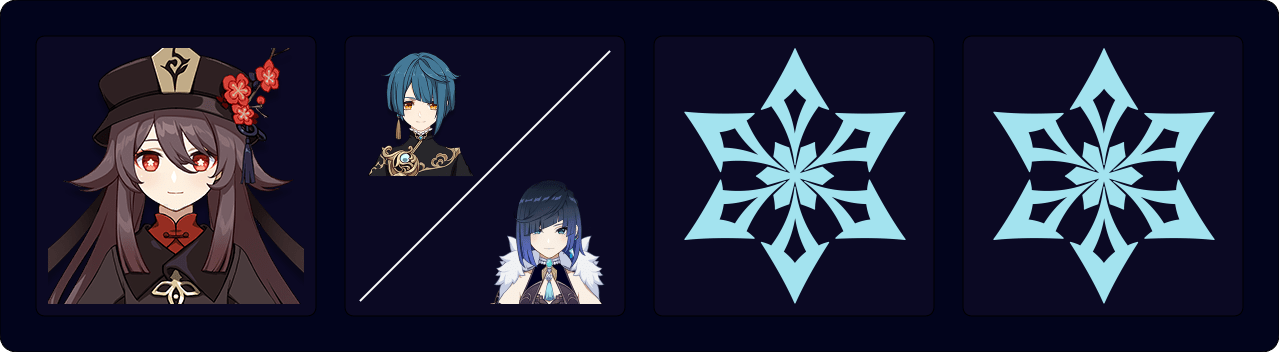
Vapemelt teams consist of Hu Tao, a Hydro unit, and two Cryo units. While they do not have as much DPS as Hu Tao’s “ceiling” teams, they are much more accessible as they only require one 5-star unit (Hu Tao herself) and the team archetype provides significant utility and comfort through periodically Freezing enemies.
Players can choose from a variety of Cryo units, including Kaeya, Rosaria, Ganyu, Shenhe, Diona, Layla, and experienced players can even use Ayaka.
Notable Teammates
| Character | Notes |
 Xingqiu | Xingqiu is Hu Tao’s premier Hydro enabler. His rate of off-field Hydro application is unsurpassed (especially at C6), and he also contributes a large amount of damage in Hu Tao’s teams. Xingqiu can choose to run a Favonius Sword instead of a Sacrificial Sword for shorter rotations. He can also use 5-star swords like Mistsplitter Reforged or Primordial Jade Cutter, but these require more Energy Recharge because of the lack of any Energy-generating passive. |
 Yelan | Yelan is another premier Hydro enabler, although she doesn’t apply as much Hydro as a C6 Xingqiu at C0. Given her lower rate of Hydro application, she can have issues keeping up with Hu Tao’s Pyro application when other teammates like Zhongli are also “eating away” at the Hydro aura applied to an enemy through their off-field Elemental application. This can result in lost Reverse Vapes, decreasing Hu Tao’s damage. However, this issue can be alleviated in a couple ways, and is avoided with her C2. First, players can use another unit like Xingqiu, Kazuha, or Fischl. Using Xingqiu adds more Hydro, while using Fischl applies Electro-Charged to enemies. When enemies are Electro-Charged, any additional Elemental application will affect the Electro before affecting the Hydro, essentially allowing the Electro aura to “protect” the Hydro aura. Players can also use Kazuha to apply more Hydro aura, although they need to make sure that Kazuha’s Burst absorbs Hydro, not Pyro. Second, players can use different combos. N2C applies more Pyro than N1C, because the additional Normal Attacks apply more Pyro to the enemy. Using N1C instead of N2C can be a viable way to preserve Hydro aura. |
 Zhongli | Zhongli provides a large amount of survivability for Hu Tao, and his Interruption Resistance can make it easier to perform combos. While Hu Tao + Xingqiu already provides a large amount of Interruption Resistance, there are still enemies who can disrupt Hu Tao; Zhongli’s shield makes it nigh-impossible for Hu Tao to be interrupted. Zhongli also buffs his team’s damage with his AoE Resistance Shred. The only drawback that Zhongli has is that the Geo application from his pillar can sometimes interfere with Reverse Vaporize reactions if the Hydro aura applied to enemies is inconsistent. Strategies similar to those used for Yelan as detailed above are applicable here, and players can opt to place Zhongli’s pillar away from enemies to avoid hitting them at all. |
 Kazuha | Kazuha works extremely well as both a grouper and a buffer for Hu Tao and/or her teammates. He can use Swirls to buff the Hydro DMG of Xingqiu and/or Yelan through VV and his A4 Passive; in VV Vape teams he can also provide similar buffs for Hu Tao’s Pyro DMG. Kazuha can also buff Hu Tao even without Shredding Pyro Resistance with his C2 or Freedom-Sworn, making him an even better support option at whale-level investments. |
 Sucrose | While she is not as versatile as Kazuha due to her buffing primarily only benefitting Hu Tao and having significantly less off-field damage, Sucrose is a strong support option for Hu Tao. Her Elemental Mastery buff and ability to hold TTDS already serve as a significant boost to Hu Tao’s damage; further, she can offer additional buffs to the team using her artifact set. 4pc Viridescent Venerer is the best option when Sucrose can Swirl Pyro and/or in Double Hydro teams; however, 4pc Instructor can also be competitive when this is not the case. |
 Fischl | Fischl can do three important things for Hu Tao teams: • She can “protect” Hydro aura to make Reverse Vaporizes more consistent in teams with lower Hydro application. • She can deal significant amounts of damage as an off-field DPS. • She can apply Electro to enable Overloads from Hu Tao for even more damage. That said, it should be kept in mind Fischl and other Electro characters should not be used in conjunction with Cryo characters. |
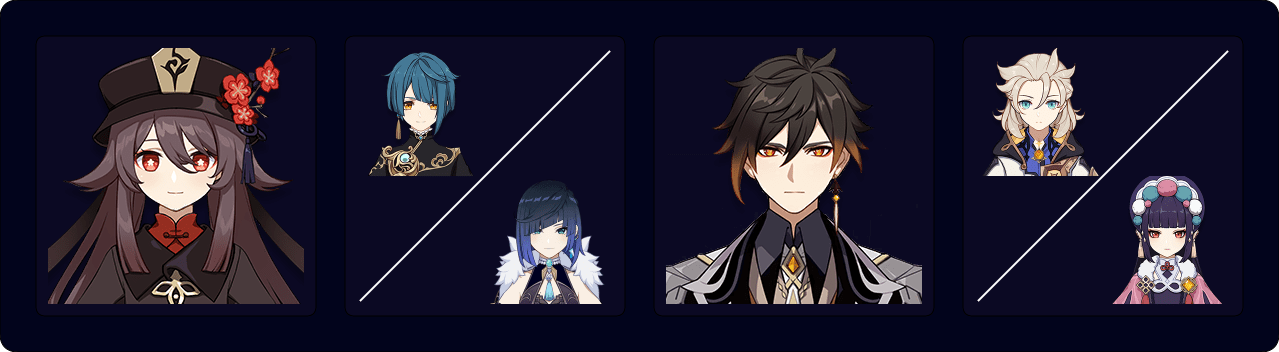
Example Teams
This is not a comprehensive list of teams, and the inclusion of a certain team or lack thereof does not necessarily indicate the power level of the team in question. This list is not ranked.


Credits
Ayzel#7399, Cuzimori#1535, Leah, ItzSomebody#0029, Nikatosaurus#5639, idkanonymized#4166, xf3#3123