Updated for Version 4.6

Wanderer is a 5-star Anemo Catalyst character in Genshin Impact who deals solid on-field damage with special Normal and Charged Attacks. Learn about Wanderer’s best builds, best weapons, best artifacts, and best teams in this quick guide.
Note that the information given may change if new discoveries are made. More extensive testing is in progress.
Join our Discord to check on and participate in the theorycrafting process.
Table of Contents
New Content
 Furina | Furina is a fantastic support and off-field damage dealer for Wanderer; however, she requires a strong healer on the team. She is most often paired with Bennett or Mika, but other teamwide healers like Jean, Baizhu, or Kokomi could work. Note that pairing Furina with Wanderer often means running no shielder on the team, requiring you to be more mindful about dodging enemy attacks to not get interrupted. |
 Chiori | Chiori is a strong off-field Geo DPS unit with short field time. She synergizes well in Wanderer’s teams with Zhongli, but not to the extent of replacing Bennett or Faruzan. |
 Mika | Mika provides Wanderer with an Attack SPD buff, allowing Wanderer to perform an additional N3 combo. It can be difficult to gain Wanderer’s A1 Cryo buff since Mika applies very little Cryo. |
 4pc Marechaussee Hunter | 4pc Marechaussee Hunter is the recommended set to farm for Wanderer in teams with Furina. Its 2pc effect provides a nice Normal and Charged Attack DMG Bonus, which is also great for transitional 2pc + 2pc set combinations. Marechausse’s 4pc effect is where it shines, providing a great CRIT Rate boost. However, Wanderer’s CRIT Rate Ascension paired with a CRIT Rate Catalyst may cause him to overcap CRIT Rate. |
 Flowing Purity | Flowing Purity is Wanderer’s best free option. It provides a great Elemental DMG% buff after using his Skill, so do not use Wanderer’s Burst before Skill. Most Wanderer teams run Bennett as their only healer, and Bennett can’t clear the Bond of Life when above 70% HP. Nevertheless, the weapon still provides Elemental DMG%, and maximizing the passive is not worth dropping Bennett. |
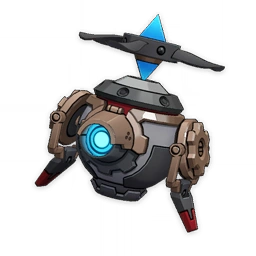 Cashflow Supervision | Cashflow Supervision provides the same Base ATK and CRIT value as Tulaytullah’s Remembrance, but its passive’s Normal and Charged Attack DMG% buff requires Wanderer’s HP to increase or decrease. As such, it is best used in teams with Furina and is otherwise a solid stat stick. Note that Wanderer’s CRIT Rate Ascension paired with Cashflow Supervision may cause him to overcap CRIT Rate on 4pc Marechaussee Hunter. |
 Tome of the Eternal Flow | Tome of the Eternal Flow is a good stat stick. When Wanderer can activate its passive (in Furina teams), he should spam Charged Attacks to make the most of the passive’s buff. |
 Ballad of the Boundless Blue | Ballad of the Boundless Blue is an event-exclusive weapon obtained from Version 4.1. Ballad’s passive increases Wanderer’s Normal and Charged Attack damage, and its ER% secondary stat lets him Burst every rotation in teams with C6 Faruzan. |
Infographic
Credits to: euphorysm, cuppacote, xsylent, and KQM Staff
Character Overview
Playstyles
Wanderer is an on-field character in all of his teams. He can be either played as the primary DPS unit or as a driver for off-field damage dealers. He has extended field time that cannot be interrupted by swapping, so his teammates should set up their abilities before he takes the field.
On-Field DPS
As an on-field Anemo DPS, Wanderer deals damage with Normal and Charged Attacks while in the Windfavored state triggered via his Skill. Wanderer’s teammates in this playstyle mostly focus on buffing his personal damage.
EM Driver
As an EM driver, Wanderer’s attacks proc his teammates’ off-field abilities to trigger Elemental Reactions like Electro-Charged, Aggravate, Hyperbloom, or Burgeon. He typically builds 4pc Viridescent Venerer with a focus on EM since his damage comes mostly from Swirl and other Transformative Reactions. While this playstyle can be viable, in most cases Sucrose is a better driver. Note that you should avoid this playstyle in single-target combat, since Wanderer triggers far fewer reactions compared to multi-target scenarios.
Wanderer’s EM driver build is examined briefly after his DPS content.
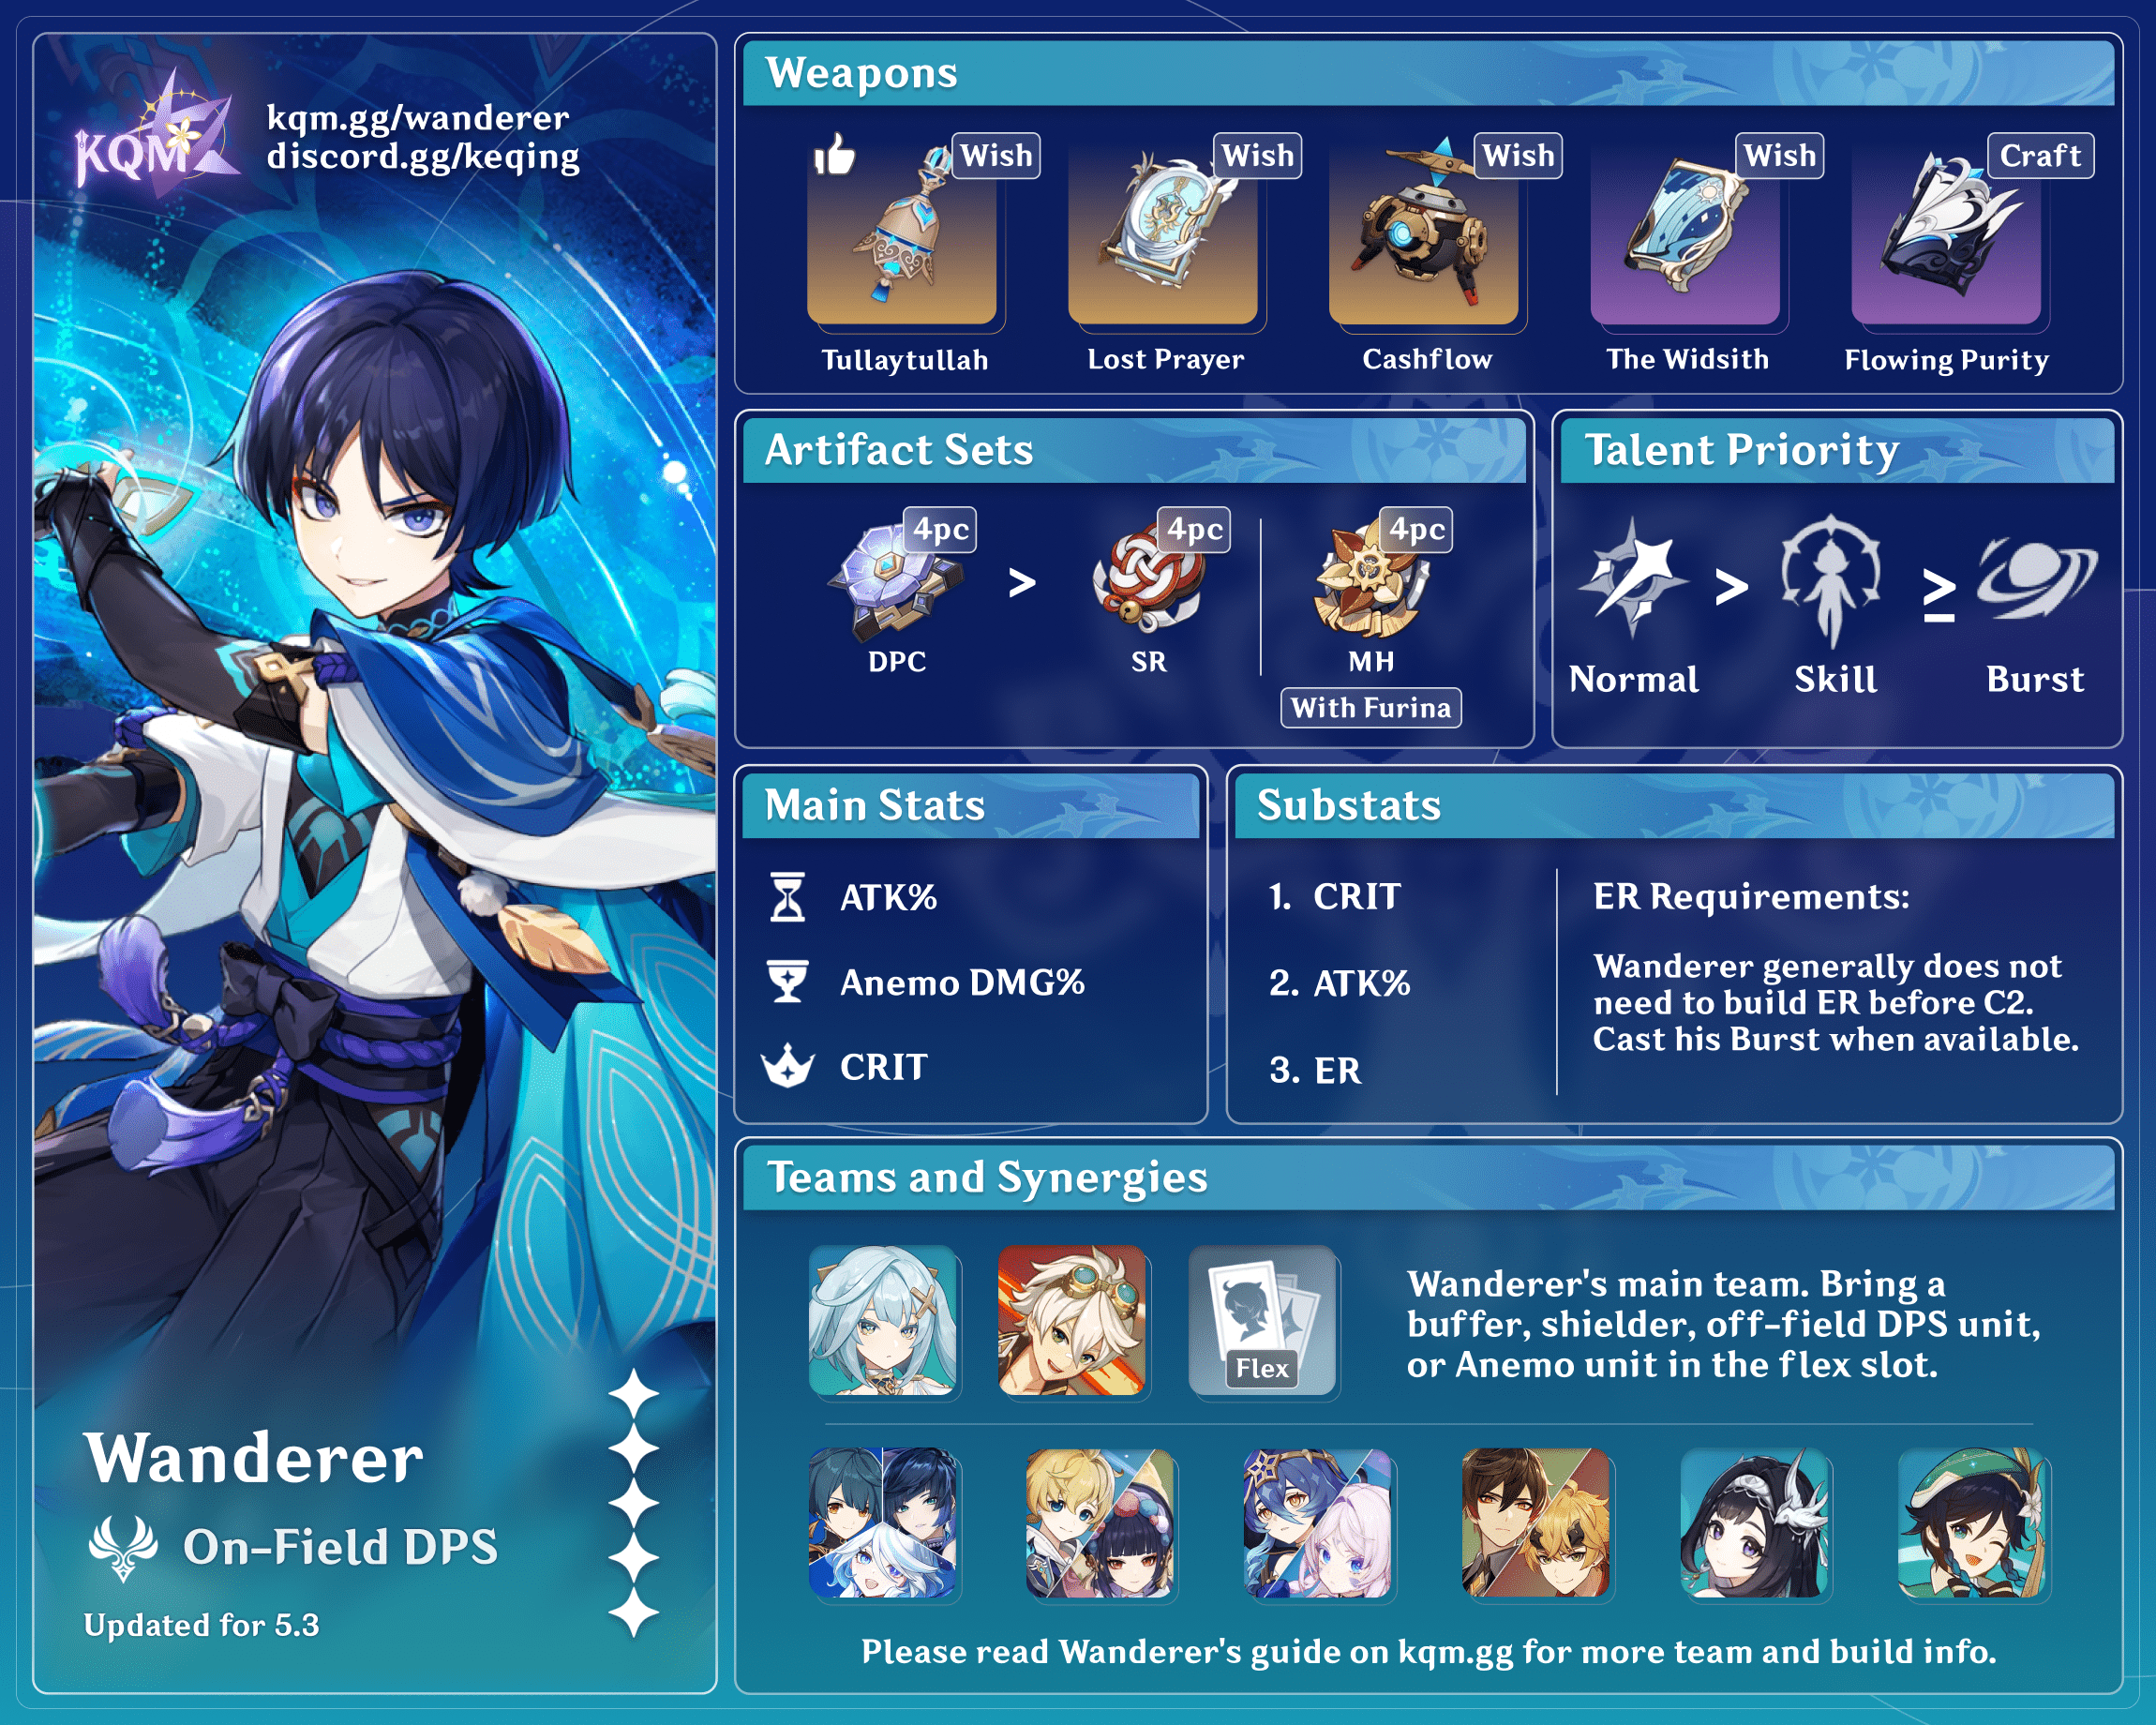
Talents
Level and Talent Priority
C0–C1: Normal Attack ≥ Skill > Burst
C2–C6: Normal Attack ≥ Burst > Skill
Wanderer’s Normal Attacks account for the majority of his damage, so they should be his priority. The Talent level scaling on Wanderer’s Skill is poor but still valuable. At C2, Wanderer should cast his Burst every rotation, so it takes higher priority than his Skill with higher Constellations.
Talent Overview
 Normal Attack | Yuuban Meigan
Description
Normal Attack
Performs up to 3 attacks using wind blades, dealing Anemo DMG.
Charged Attack
Consumes a certain amount of Stamina, gathers a build up of high wind pressure, and deals AoE Anemo DMG after a short casting time.
Plunging Attack
Calling upon the power of Anemo, the Wanderer plunges towards the ground from mid-air, damaging all opponents in his path. Deals AoE Anemo DMG upon impact with the ground.
The vast majority of Wanderer’s damage comes from his Normal Attacks, which shoot blade-like Anemo projectiles at enemies from a long range. The attacks have fairly strong tracking, which helps against agile flying enemies like the Golden Wolflord.
 Elemental Skill | Hanega: Song of the Wind
Description
Concentrates the power of the winds to break free from the shackles of the earth, dealing AoE Anemo DMG before leaping into the air and entering the Windfavored state.
Windfavored
The Wanderer cannot perform Plunging Attacks in this state. When he uses Normal and Charged Attacks, they will be converted into Kuugo: Fushoudan and Kuugo: Toufukai respectively; the DMG they deal and their AoE will be increased, and their DMG will be considered Normal and Charged Attack DMG respectively. Kuugo: Toufukai will not consume Stamina.
The Wanderer will hover persistently during this time. While this state is active, the Wanderer’s movements gain the following properties:
- Persistently consumes Kuugoryoku Points to maintain this hovering state.
- When sprinting, additional Kuugoryoku Points will be consumed for the Wanderer to accelerate mid-air. Holding sprint will cause persistent Kuugoryoku Point consumption to maintain speed. This effect will replace his default sprint.
- Jumping expends extra Kuugoryoku Points to increase hovering height. Holding jump will cause persistent Kuugoryoku Point consumption to keep increasing hovering height.
Running out of Kuugoryoku Points will end the Windfavored state.
A second cast during the duration of Windfavored will also end it.
Wanderer’s Skill allows him to fly and hover in midair after casting, and grants him the Windfavored state that buffs his Normal and Charged Attacks. The buff ends when he leaves the Windfavored state. In the Windfavored state, Wanderer gains “Kuugoryoku Points,” which show how long Wanderer can maintain this state.
Wanderer’s Kuugoryoku Points are shown as a unique Stamina bar that depletes over time. He consumes additional points when dashing, increasing flight speed, or raising altitude.
 Elemental Burst | Kyogen: Five Ceremonial Plays
Description
Compresses the atmosphere into a singular vacuum that grinds all troubles away, dealing multiple instances of AoE Anemo DMG.
If the character is in the Windfavored state due to the skill “Hanega: Song of the Wind,” Windfavored state will end after casting.
Wanderer’s Burst deals 5 rapid hits of respectable Anemo damage. Wanderer should cast his Burst every other rotation before C2 due to his high ER requirements.
Depending on Wanderer’s gear and Constellations, you can use his Burst before his Skill, at the very end of his Skill duration, or sometimes even in the middle of a rotation to clear a wave of enemies. Timing is more relevant at C2: Bursting at the end of his Skill duration becomes much more valuable.
 Ascension 1 Passive | Jade-Claimed Flower
Description
If Hanega: Song of the Wind comes into contact with Hydro/Pyro/Cryo/Electro when it is unleashed, this instance of the Windfavored state will obtain buffs according to the contacted element(s):
- Hydro: Kuugoryoku Point cap increases by 20.
- Pyro: ATK increases by 30%.
- Cryo: CRIT Rate increases by 20%.
- Electro: When Normal and Charged Attacks hit an opponent, 0.8 Energy will be restored. Energy can be restored this way once every 0.2s.
You can have up to 2 different kinds of these buffs simultaneously.
Wanderer’s A1 Passive offers up to two buffs if his Skill’s initial Anemo AoE makes contact with a Swirlable Element, including Wanderer’s self-aura. If more than two auras are present, the buff absorption priority is as follows (in order from first to last; not sorted by usefulness):
- Pyro = 30% ATK
- Hydro = 20 additional Kuugoryoku Points
- Electro = 0.8 Energy generated on attack inputs
- Cryo = 20% CRIT Rate
Controlling the buffs that Wanderer receives is difficult. You should avoid building teams around the buffs, since enemies and the environment can easily interfere with lower-priority Elements. However, there are a few easy ways to guarantee a specific buff, such as Bennett’s Burst and Diona’s Cryo shield (with adept timing).
With that said, the buffs all perform within about 5–10% of each other; each buff represents roughly 15% bonus damage. The Pyro and Cryo buffs are the best, though a consistent Electro buff can alleviate Wanderer’s Energy issues. The Hydro buff offers some extra comfort for dodging in midair, at the cost of potentially extending rotations.
Be especially careful with the Electro and Cryo buffs, as Wanderer often needs to be built around them to maximize their value, and missing the buffs is especially punishing for your rotation. In practice, these buffs are hard to take advantage of.
 Ascension 4 Passive | Gales of Reverie
Description
When the Wanderer hits opponents with Kuugo: Fushoudan or Kuugo: Toufukai in his Windfavored state, he has a 16% chance to obtain the Descent effect: The next time the Wanderer accelerates in mid-air while in this instance of the Windfavored state, this effect will be removed, this acceleration instance will not consume any Kuugoryoku Points, and he will fire off 4 wind arrows that deal 35% of his ATK as Anemo DMG each.
For each Kuugo: Fushoudan and Kuugo: Toufukai that does not produce this effect, the next attack of those types will have a 12% increased chance of producing it. The calculation of the effect production is done once every 0.1s.
During Wanderer’s Windfavored state, Normal and Charged Attacks have a small but increasing chance to trigger his A4 Passive. While active, Wanderer’s next midair dodge will not consume Kuugoryoku Points and will unleash a flurry of homing Anemo attacks at nearby opponents.
Dashing before you have triggered Wanderer’s A4 Passive severely hurts his DPS since he unnecessarily loses Kuugoryoku Points. A premature dodge loses a full N3 combo. To avoid this, pay attention to the audiovisual cues that occur when you trigger the passive. Wanderer will visibly light up and a “ping” sound will play, prompting you to dash to deal some extra damage. Rings will also appear around Wanderer’s wrists if the Passive is ready to be used.
Constellations
Calcs for Constellation DPS increases can be found here (last updated for Version 3.6).
 Constellation 1 | Shoban: Ostentatious Plumage
When in the Windfavored state, the Attack SPD of the Wanderer’s Kuugo: Fushoudan and Kuugo: Toufukai is increased by 10%.
Additionally, the wind arrows fired by the Passive Talent “Gales of Reverie” will deal an additional 25% of his ATK as DMG. You must unlock the Passive Talent “Gales of Reverie” first.
Wanderer’s C1 grants an additional 10% Normal and Charged Attack SPD and also increases the A4 multiplier from 140% to 240%. This allows you to squeeze in up to two more Normal Attacks per rotation. This is also one of the few sources of Attack SPD for Charged Attacks.
 Constellation 2 | Niban: Moonlit Isle Amidst White Waves
When in the Windfavored state, Kyougen: Five Ceremonial Plays will see its DMG increased by 4% per point of difference between the max amount of Kuugoryoku Points contrasted with Kuugoryoku’s present capacity when using this skill.
Through this method, you can increase Kyougen: Five Ceremonial Plays’s DMG by a maximum of 200%.
Wanderer’s C2 provides a 200% Burst DMG Bonus as long as you use Wanderer’s Burst after 50 Kuugoryoku Points are consumed, so you should use Wanderer’s Burst at the end of his Skill duration. This makes Bursting every rotation recommended.
 Constellation 3 | Sanban: Moonflower Kusemai
Increases the Level of Kyougen: Five Ceremonial Plays by 3.
Maximum upgrade level is 15.
Adds 3 Talent levels to Wanderer’s Burst. This further improves the DMG Bonus from C2 but is otherwise uninteresting.
 Constellation 4 | Yonban: Set Adrift into Spring
When casting Hanega: Song of the Wind, should the Passive Talent “Jade-Claimed Flower” be triggered, the character will gain buffs in correspondence to the contacted Elemental Type(s), and also obtain a random untriggered buff. A maximum of 3 such corresponding elemental buffs can exist simultaneously.
You must unlock the Passive Talent “Jade-Claimed Flower” first.
Wanderer’s C4 gives a random buff from A1 in addition to the two that Wanderer can normally acquire. The Hydro buff may not add any benefit depending on the rotation, but the others can increase damage by up to 15%. As mentioned earlier, the Cryo and Electro buffs are still restrictive — you usually need to build around them, and you might not be able to utilize their full potential. If these Elements are already accessible via the party, the third Elemental buff is unlikely to increase damage further.
 Constellation 5 | Matsuban: Ancient Illuminator From Abroad
Increases the Level of Hanega: Song of the Wind by 3.
Maximum upgrade level is 15.
Adds 3 Talent levels to Wanderer’s Skill. This Constellation is pretty underwhelming since his Skill, while important, does not have particularly high scaling.
 Constellation 6 | Shugen: The Curtains’ Melancholic Sway
When the Wanderer actively hits an opponent with Kuugo: Fushoudan while in the Windfavored state, the following effects will occur:
· Deals an additional instance of Kuugo: Fushoudan at the position hit, dealing 40% of the attack’s original DMG. This DMG will be considered Normal Attack DMG.
· When the Wanderer falls below 40 Kuugoryoku Points, restores 4 Points to him. Kuugoryoku Points can be restored in this manner once every 0.2s. This restoration can occur up to 5 times within one Windfavored duration.
With Wanderer’s C6, his Normal Attacks now fire additional arcs of Anemo damage that deal 40% of Wanderer’s regular Normal Attack damage. This also extends the Windfavored state, which can increase DPS uptime at the cost of prolonging the rotation.
Combos
N = Normal Attack
C = Charged Attack
A = Aimed Shot
P = Plunging Attack
E = Elemental Skill
tE = Tap Skill
hE = Hold Skill
Q = Elemental Burst
D = dash (cancel)
J = jump (cancel)
W = walk (cancel)
> = switch character
( ) = these actions are optional; please refer to the notes below
[ ] = repeat these actions the specified number of times
Wanderer has three different attack combos. While each one is optimal in different scenarios, there isn’t too much of a DPS difference between them. However, some strings are better at triggering teammate abilities.
| N2C spam | Use Cases: · Double Swirls in driver teams · Triggering teammate abilities Wanderer’s N2C combo is typically his best option except in the cases mentioned below. |
| N3 spam | Specific Use Cases: · With Tulaytullah’s Remembrance · With Solar Pearl · With Normal Attack DMG Bonuses like Yun Jin’s Burst · With significant Attack SPD buffs like Mika’s Skill · Triggering teammate abilities Wanderer’s N3 combo is his best when Normal Attack DMG Bonuses (and not Charged Attack DMG buffs) are active from weapon passives or teammate abilities. |
| C spam | Specific Use Cases: · With Dodoco Tales · Multi-target scenarios with strong grouping Wanderer’s Charged Attack combo is competitive if you can consistently cancel the animation with another Charged Attack. Canceling the animations lets you spam up to 14 at C0 (15 at C1). In practice, most players can expect to perform 12–13 at C0. |
Rotations
Wanderer’s rotations are fairly straightforward, but there are some things to note.
- Burst: Wanderer can cast his Burst either before his Skill or after his full attack combo, at the very end of his Windfavored state. At C2 or with 4pc Shimenawa’s Reminiscence, Wanderer should use his Burst at the end of his combo if available.
- 4pc DPC: With 4pc Desert Pavilion Chronicle, Wanderer can use a Charged Attack (C) immediately before or after entering the Windfavored State with his Skill; either way works since his field time is about the same.
General Rotation
Teammate abilities > Wanderer (Q) (C) E combo
Mechanics
For more information regarding Wanderer’s flight mechanics, especially in the overworld, please check out the Extended Guide!
Artifacts
ER Requirements
You do not need to build ER% on Wanderer at C0–C1, since he does not need to Burst every rotation. At C2, you should build enough ER% to Burst every rotation.
Calcs for ER requirements can be found here (last updated for Version 4.6).
| Burst Every Rotation | Burst Every Other Rotation | |
| Solo Anemo | 210–230% | 105–115% |
| Double Electro (Fischl) | 170–190% | 100–110% |
| Pre-C6 Faruzan | 180–220% | 100–110% |
| C6 Faruzan | 115–135% | 100% |
| Triple Anemo (C6 Faruzan) | 105–125% | 100% |
- “Safe” enemy particles.
- Average particle RNG.
- Wanderer catches 3 out of 4 Faruzan C6 procs.
- Faruzan always holds Favonius Warbow.
- Additional teammate Favonius procs reduce ER requirements by roughly 10%.
- If Wanderer activates his A1 Passive’s Electro buff, he gains approximately 13 Energy and his ER requirements decrease by roughly 30–40%.
- If Wanderer holds 4pc Shimenawa’s Reminiscence, his ER requirements increase by roughly 20–30%. As such, he can use his Burst every third rotation.
Use the Energy Recharge Calculator to determine exact requirements for your team and rotation.
Artifact Stats
 Sands |  Goblet |  Circlet |
| ATK% | Anemo DMG Bonus | CRIT Rate or CRIT DMG |
Stat Priority: (ER% until requirement) > CRIT > ATK%
Wanderer uses a standard DPS build. Try to get a 1:2 CRIT ratio if possible. He does not need to invest into ER% unless he is at least C2.
In teams without Bennett nor abundant ATK% buffs, you can opt for an ATK% Goblet instead of an Anemo DMG% Goblet, depending on substats. The more ATK% buffs, however, the greater the power difference in favor of Anemo DMG%.
Artifact Sets
Calcs for artifact set comparisons can be found here (last updated for Version 3.6).
 4pc Desert Pavilion Chronicle | 4pc Desert Pavilion Chronicle (DPC) is Wanderer’s general Best-in-Slot artifact. It gives Normal Attack SPD and a 40% DMG Bonus to all of his Normal and Charged Attacks, which make up the majority of his damage. |
4pc Shimenawa’s Reminiscence | 4pc Shimenawa’s Reminiscence (SR) is Wanderer’s most Resin-efficient option if you’re willing to play around its Energy consumption effect. It is only a minor DPS loss compared to 4pc DPC. When using this set, use Wanderer’s Burst every three rotations. Do not use 4pc SR if C2–C6. You should Burst at the end of Wanderer’s airtime to ensure he has Energy for the 4pc buff. |
4pc Marechaussee Hunter | 4pc Marechaussee Hunter is the recommended set to farm for Wanderer in teams with Furina. It provides a nice Normal and Charged Attack DMG Bonus with its 2pc effect and a great CRIT Rate boost with its 4pc effect. However, Wanderer’s CRIT Rate Ascension paired with a CRIT Rate Catalyst may cause him to overcap CRIT Rate. |
 4pc Echoes of an Offering | 4pc Echoes of an Offering is not recommended at high ping (>100ms). It performs worse than 4pc DPC and 4pc SR even at low ping, so you should avoid using it. However, this set becomes one of Wanderer’s best options at C6 due to his added Normal Attack instances on each input. |
2pc Mixed Sets | 2pc Bonuses: ATK%, Anemo DMG%, Marechaussee Hunter 2pc Anemo DMG% + 2pc Anemo DMG% is a safe transitional set as you farm for 4pc DPC or 4pc SR. You should avoid 2pc ATK% + 2pc ATK% sets on Wanderer due to the significant ATK buffs he typically receives from his teammates. |
Weapons
Calcs for weapon comparisons can be found here (last updated for Version 3.6).
Highly Recommended Weapons
 Tulaytullah’s Remembrance | Tulaytullah’s Remembrance is Wanderer’s Best-in-Slot weapon. You should use N3 combos with this weapon; it performs worse for combos with more Charged Attacks. |
Cashflow Supervision | Cashflow Supervision provides the same Base ATK and CRIT value as Tulaytullah’s, but its passive’s Normal and Charged Attack DMG% buff requires Wanderer’s HP to increase or decrease. As such, it is best used in teams with Furina and is otherwise a solid stat stick. Note that Wanderer’s CRIT Rate Ascension paired with Cashflow Supervision may cause him to overcap CRIT Rate on 4pc Marechaussee Hunter. |
 Lost Prayers to the Sacred Winds | Lost Prayers to the Sacred Winds is a top pick for Wanderer. Its passive grants a DMG Bonus that increases as the holder stays on-field; Wanderer can consistently maintain 2 stacks of the effect. |
 The Widsith | The Widsith is a solid option for Wanderer; however, he sadly doesn’t benefit from the EM buff as much as other Catalyst users do. If you love resetting Abyss, you can shoot for the other two buffs for higher performance. |
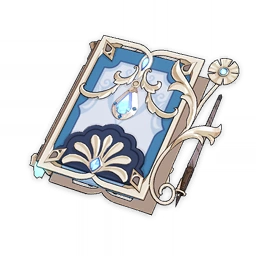
Flowing Purity | Flowing Purity is Wanderer’s best free option. It provides a great Elemental DMG% buff after using his Skill, so do not use Wanderer’s Burst before Skill. Most Wanderer teams run Bennett as their only healer, and Bennett can’t clear the Bond of Life when above 70% HP. Nevertheless, the weapon still provides Elemental DMG%, and maximizing the passive is not worth dropping Bennett. |
Other Recommended Weapons
Tome of the Eternal Flow | Tome of the Eternal Flow is a good stat stick. When Wanderer can activate its passive (in Furina teams), he should spam Charged Attacks to make the most of the passive’s buff. |
 Kagura’s Verity | Kagura’s Verity is a solid stat stick. However, Wanderer does not make good use of its passive’s Skill DMG Bonus. |
 Skyward Atlas | Skyward Atlas is a solid 5-star weapon available on the Standard Banner. It provides a lot of ATK% stats, which benefit Wanderer even in teams with Bennett. |
 Solar Pearl | Obtainable through the Battle Pass. Solar Pearl is often compared to Widsith in terms of damage, as they perform similarly on most characters. However, in Wanderer’s case, Widsith performs better at every refinement. |
 Memory of Dust | Memory of Dust provides a huge amount of ATK%, which makes it great in teams without many ATK buffs. In teams with external ATK buffs (notably, Bennett), this weapon ranks significantly lower. Use Wanderer’s Burst at the end of his Skill for best results. |
 Dodoco Tales | The event-exclusive Dodoco Tales is surprisingly strong on Wanderer. Use 2 Normal Attacks evenly distributed throughout Wanderer’s airtime to retain the buff from the passive. Special Combo: Wanderer (Q) E N1 5–6[C] N1 5–6[C] |
 Blackcliff Agate | Obtainable in Paimon’s Bargains. Blackcliff Agate is a good weapon for Wanderer that performs best in multi-target scenarios. However, it is generally not recommended to spend Starglitter on it over 4-star character Constellations. |
Ballad of the Boundless Blue | Ballad of the Boundless Blue is an event-exclusive weapon obtained from Version 4.1. Ballad’s passive increases Wanderer’s Normal and Charged Attack damage, and its ER% secondary stat lets him Burst every rotation in teams with C6 Faruzan. |
Teams
This is not a comprehensive list of teams. The inclusion or exclusion of any given team does not necessarily reflect its power level.
Rotation Notation
- N = Normal Attack
- C = Charged Attack
- A = Aimed Shot
- P = Plunging Attack
- E = Elemental Skill
- tE = Tap Skill
- hE = Hold Skill
- Q = Elemental Burst
- D = dash (cancel)
- J = jump (cancel)
- W = walk (cancel)
- > = switch character
- ( ) = these actions are optional; please refer to the notes below
- [ ] = repeat these actions the specified number of times
Teambuilding
Wanderer has extremely flexible teams with a variety of characters. The only characters he doesn’t work with are other dedicated on-field units. Particularly notable synergies are listed below with some additional considerations for teambuilding.
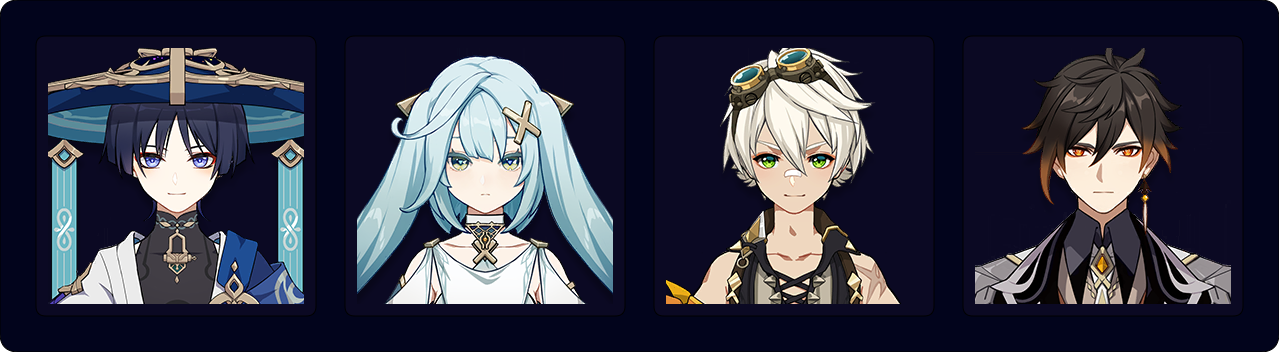
 Faruzan (C6 Recommended) | Faruzan is the quintessential unit to Wanderer’s best teams. She gives an Anemo DMG Bonus and shreds enemy Anemo RES. She can also carry 4pc Noblesse Oblige or (if C6) 4pc Tenacity of the Millelith to further buff Wanderer. Favonius Warbow is practically mandatory to manage Faruzan’s ER requirements. |
 Bennett | Bennett gives a considerable Flat ATK boost, heals, applies Pyro for Wanderer’s A1 Pyro buff, and can hold 4pc Noblesse Oblige. Bennett’s only drawbacks are his “Circle Impact” gameplay and his high demand in many other teams. |
Furina | Furina is a fantastic support and off-field damage dealer for Wanderer; however, she requires a strong healer on the team. She is most often paired with Bennett or Mika, but other teamwide healers like Jean, Baizhu, or Kokomi could work. Note that pairing Furina with Wanderer often means running no shielder on the team, requiring you to be more mindful about dodging enemy attacks to not get interrupted. |
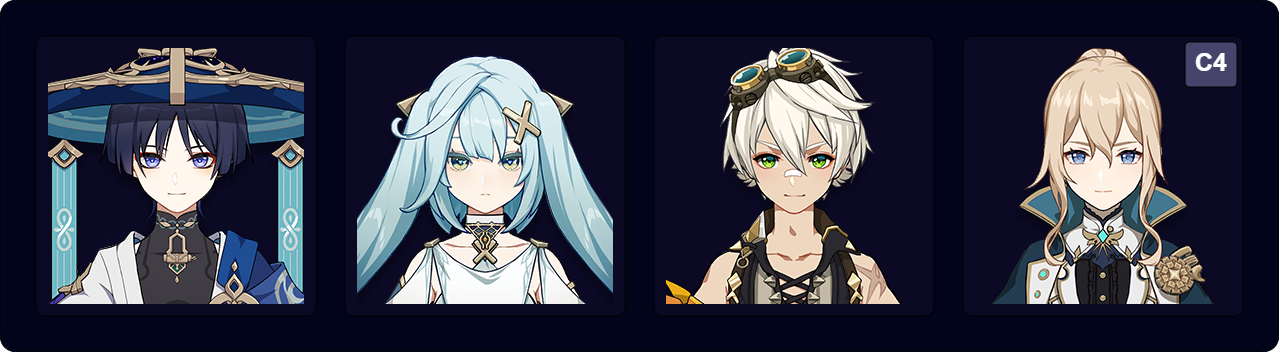
 Mika, Yun Jin | Mika provides Wanderer with an Attack SPD buff, allowing Wanderer to perform an additional N3 combo. It can be difficult to gain Wanderer’s A1 Cryo buff since Mika applies very little Cryo. Yun Jin is a strong support for hypercarry Wanderer teams, especially at C6. To maximize her potential, Wanderer should focus on N3 combos. She has extremely high ER requirements outside of Double Geo teams. |
 Shields and Dodging | Wanderer has no native interruption resistance while in the Windfavored state, so he is extremely prone to being staggered. To avoid being interrupted during his combo, you need to either dodge or use a shield. Shielders bring comfort to overall gameplay, especially if you play on mobile or have high ping. Zhongli, Layla, Diona, Dehya, and Thoma are among Wanderer’s best shielder options. |
 Grouping | Units who provide grouping are highly valuable to Wanderer in high–multi-target combat. Most notably, Venti and Kazuha can group enemies close enough that Wanderer’s Charged Attacks consistently hit multiple enemies simultaneously. |
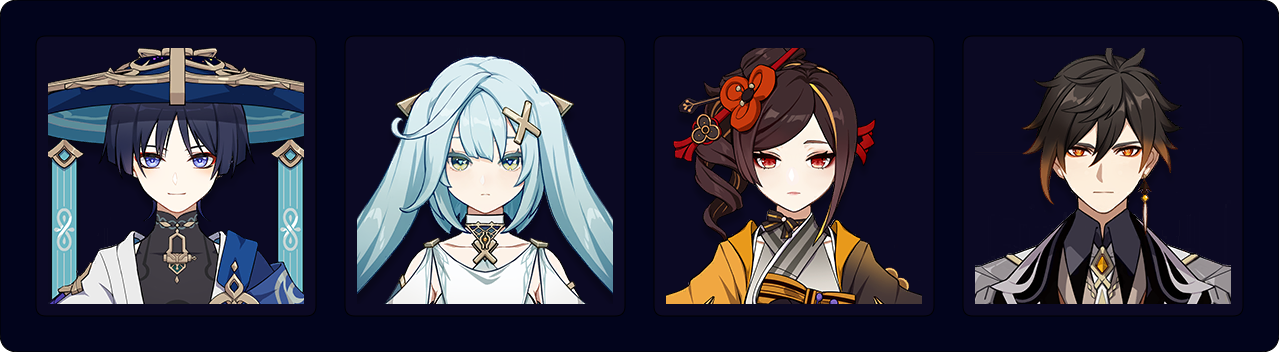
 Off-Field DPS Units | In addition to the aforementioned supports, Wanderer pairs nicely with off-field DPS units. Characters like Yelan, Xingqiu, Fischl, Beidou, Xiangling, Rosaria, Albedo, and Chiori can all be strong options. |
Hypercarry

Wanderer’s hypercarry teams maximize his personal damage by dedicating every other teammate to support him. Faruzan provides an Anemo DMG Bonus and Anemo RES Shred, while Bennett provides a large Flat ATK boost, healing, and Pyro self-aura to easily trigger Wanderer’s A1 Pyro buff.
Faruzan’s C6 is highly valuable in this archetype, since it not only significantly improves particle generation but also buffs Wanderer’s damage and provides mild grouping.
Example Teams
Note: All rotations assume C2+ Faruzan. If you have C0–C1 Faruzan, you can use her immediately before Wanderer instead.

This is one of Wanderer’s top-performing teams. Faruzan, Bennett, and Furina’s combined buffs help Wanderer reach his personal damage ceiling. Wanderer should hold 4pc Marechaussee Hunter if possible. Note that this team lacks a shielder, so careful dodging and positioning is required for optimal gameplay.
Sample Rotation
Furina ED Q > Faruzan (E C)Q > Bennett EQ > Wanderer combo
This is a very solid team. Zhongli provides additional Anemo RES Shred and the strongest shield in the game.
Sample Rotation
Zhongli hED > Faruzan (E C)Q > Bennett EQ > Wanderer combo > Bennett E

A more accessible hypercarry team. Layla’s Cryo application is inconsistent, so Wanderer may not get his A1 Passive’s Cryo-related buff.
Sample Rotation
Faruzan (E C)Q > Layla Q E > Bennett EQ > Wanderer combo > Bennett E

This is a good hypercarry team with Mika providing an Attack SPD buff; however, it lacks a shielder, which can make gameplay difficult in some scenarios.
Sample Rotation
Faruzan (E C)Q > Mika tE(Q)¹ > Bennett E Q > Wanderer combo > Bennett E
¹Mika’s Burst is optional since Bennett already heals and often holds 4pc Noblesse Oblige.

A great hypercarry team. Thoma provides a shield, enables Pyro Resonance, and (at C6) gives an additional Normal and Charged Attack DMG Bonus for Wanderer.
Sample Rotation
Faruzan (E C)Q > Thoma EQ > Bennett EQ > Wanderer combo > Bennett E
Triple Anemo
Faruzan is the glue that holds together Triple Anemo (sometimes referred to as An3mo). She provides valuable buffs to two other teammates and can Burst every rotation even without funneling particles. Venti, Kazuha, Sucrose, and Jean all work as damage dealers and groupers in the Anemo flex slot.
Bennett provides good buffing, healing, and Pyro application, but he can be switched for other units if an enemy has a Pyro shield. In overworld content, this archetype can forgo Bennett for a more comfortable defensive option like Layla.
Example Teams
Note: All rotations assume C2+ Faruzan. If you have C0–C1 Faruzan, you can use her immediately before Wanderer instead.

A fantastic Wanderer team in multi-target combat against many enemies who can be lifted or grouped by Venti’s Burst.
Sample Rotation
Faruzan (E C)Q > Venti EQ > Bennett EQ > Wanderer combo > Bennett E

This is a solid Triple Anemo composition for AoE content; however, Kazuha is usually in high demand for another Spiral Abyss team. CRIT Kazuha is optimal for this specific team so that he can take better advantage of Faruzan’s buffs. However, an EM build is viable and more versatile in other Kazuha teams.
Sample Rotation
Faruzan (E C)Q > Kazuha hEP > Bennett EQ > Kazuha Q > Wanderer combo > Kazuha tEP > Bennett E
This team performs best with Jean’s Constellations: her C4 shreds Anemo RES and her C2 buffs Wanderer’s Attack SPD. Bennett and Jean’s “Sunfire” effect and powerful combination of buffs make this a highly powerful team, especially in single-target scenarios.
Sample Rotation
Faruzan (E C)Q > Bennett EQ > Jean EQ > Wanderer combo > (Bennett E) > (Jean E)
Double Anemo Flex

These teams focus slightly less on Wanderer’s personal damage in exchange for stronger off-field damage from his teammates. Although these teams typically deal less damage than the teams listed above, they are still more than capable of handling most content.
Example Teams
Note: All rotations assume C2+ Faruzan. If you have C0–C1 Faruzan, you can use her immediately before Wanderer instead.

A single-target team of four people who go to the same hairdresser. Xingqiu and Yelan decrease each others’ Energy Recharge requirements while providing large amounts of off-field damage. Together with nearly any Anemo character holding 4pc Viridescent Venerer, they can take down much of the Abyss with nearly any character added to the fourth slot. Wanderer teams are no exception.
Zhongli can replace Faruzan, and Wanderer can instead run 4pc Viridescent Venerer to further reduce enemy Hydro RES, allowing Yelan and Xingqiu to more effectively carry.
Sample Rotation
Faruzan (E C)Q > Xingqiu EDQ N1 > Yelan E N1 Q N1 > Wanderer combo
This team deals good damage in both single-target and multi-target scenarios. Its greatest strength is that it doesn’t rely on any Burst besides Faruzan’s. Faruzan can also be replaced with Bennett or even Fischl. In Fischl’s case, the entire team does not need to Burst every rotation or at all.
Sample Rotation
Zhongli hED > Faruzan (E C)Q > Chiori (Q) 2[E] > Wanderer combo

Faruzan provides her usual buffs and carries 4pc Viridescent Venerer; Bennett adds Flat ATK to the party and heals; Xiangling helps carry the team with raw Burst damage. This team’s drawback is the fact that the Xiangling-Bennett duo performs best in other compositions. Furthermore, the characters in this team have extremely high ER requirements.
Sample Rotation
Faruzan (E C)Q > Bennett Q E > Xiangling Q E > Wanderer combo > Bennett E > Xiangling N2

While this is technically a Freeze team, it focuses more on single-target damage. Layla and Xingqiu provide interruption resistance, but the team lacks additional buffs aside from 4pc Noblesse Oblige and 4pc Tenacity of the Millelith. Nevertheless, the composition remains a solid free-to-play option without Bennett.
Sample Rotation
Xingqiu EDQ N1 > Faruzan (E C)Q N1 > Layla Q E N1 > Wanderer combo
Driver
As stated previously, Wanderer’s EM driver playstyle is lackluster in comparison to Sucrose or his DPS playstyle. However, you can still play it if you like.
Driver Build
Artifact Stats
Sands | Goblet | Circlet |
| EM | EM | EM |
Stat Priority: ER% (until requirement) > EM
As a pure driver, Wanderer wants to build EM to maximize his Transformative Reaction damage.
Artifact Sets
 4pc Viridescent Venerer | 4pc Viridescent Venerer (VV) is the go-to set for Wanderer in his driver playstyle since it maximizes his Swirl damage and buffs his off-field teammates’ damage. |
Weapons
 Wandering Evenstar | Wandering Evenstar is only available from certain weapon banners; it gives a teamwide ATK buff based on the wielder’s EM stat. Wanderer needs Wandering Evenstar to perform decently as a driver. |
 R5 Hakushin Ring | R5 Hakushin Ring is a viable, craftable option for driver Wanderer in Electro-Charged, Aggravate, and Hyperbloom teams. It gives a teamwide Elemental DMG Bonus as he triggers the aforementioned Electro-related reactions. Note that Wanderer can only trigger Hakushin’s passive in multi-target scenarios, since Swirls do not reapply an Element to the target on which Swirl was triggered. |
Driver Example Teams
This is not a comprehensive list of teams. The inclusion or exclusion of any given team does not necessarily reflect its power level.

In this team, Wanderer triggers Electro-Charged chain reactions in multi-target scenarios. The combination of Xingqiu and Beidou provides great survivability, which lets you forgo a proper healer in favor of more damage. He uses N3C combos to maximize Swirl and Electro-Charged reactions. Wanderer also has split uptime in this rotation, so he ends his Skill state prematurely after his short combo and performs a Plunging Attack to return to the ground.
Sample Rotation
Xingqiu EDQ N1 > Beidou EQ > Fischl E > Wanderer E 4[N3C] EP > Fischl Q > Beidou E > Wanderer (Q) E 5[N3C] EP

Wanderer can drive Aggravate teams with his Charged Attacks, which stagger enemies more easily and trigger more Swirls per rotation than other drivers’ attacks. Wanderer has split uptime in this rotation, so he ends his Skill state prematurely after his short combo and performs a Plunging Attack to return to the ground. Note that this team does not work in single-target scenarios, since Wanderer will not trigger Aggravated Swirls.
Sample Rotation
Yae 3[E] > Baizhu EQ > Fischl E > Wanderer E 7[C] EP > Yae (Q) 3[E] > Baizhu E > Fischl Q > Wanderer (Q) E 7[C] EP

Hyperbloom Wanderer teams rely on continuous reaction damage triggered by his Swirls. His best teammates for Hyperbloom are Nahida or Dendro Traveler, Fischl, and Xingqiu. Fischl is preferable to Kuki Shinobu and Raiden Shogun because she does not steal Wanderer’s Hyperblooms as much. Nonetheless, Sucrose is still a superior option to Wanderer in this team. Traveler should dash towards their Burst to activate its Hydro transfiguration with Xingqiu’s orbitals.
Sample Rotation
Xingqiu EDQ N1 > Traveler EQ D N1 > Fischl E > Wanderer E 4[N3C] EP > Fischl Q > Traveler E > Wanderer (Q) E 5[N3C] EP

Unlike in other driver teams, Wanderer prefers his conventional hypercarry build in this team because Thoma is the primary Burgeon trigger. Thoma offers a shield to protect Wanderer from interruption and provides Pyro to trigger Wanderer’s A1 Pyro buff. Xingqiu provides high off-field Hydro application and extra utility. Yelan can also be used for her ramping DMG% buff, but she has lower Hydro application than C6 Xingqiu.
Note that this team is extremely Energy-hungry, especially if using Dendro Traveler instead of Nahida. You should use multiple Favonius weapons to ensure Burst uptime across rotations.
Sample Rotation
Nahida E (Q) > Xingqiu EDQ N1 > Thoma EQ > Wanderer combo
Nahida and Wanderer can use their Burst every other rotation.
Credits
Contact: irokei
Contributors: emiliabyss; irokei, chasing_haze, nikatosaurus, haafr, baloopy
Extended Guide Info: emiliabyss, lacudai, anmaru, ash, edulis, luna, kisa, raikh, tatsu, casdela, cuppacote, cynematic, fourmana, irokei, idkanonymized, nikatosaurus
Team images made with the KQM portrait generator.