Updated for Version 3.6

A Wanderer Guide
Written by Emiliabyss#1641
⎈ ⎈ ⎈
I’d like to reclaim the sins that are mine to bear. So I beg you… Grant me this opportunity to gain a purpose; to change my destiny and end my wandering.
Table of Contents
Introduction
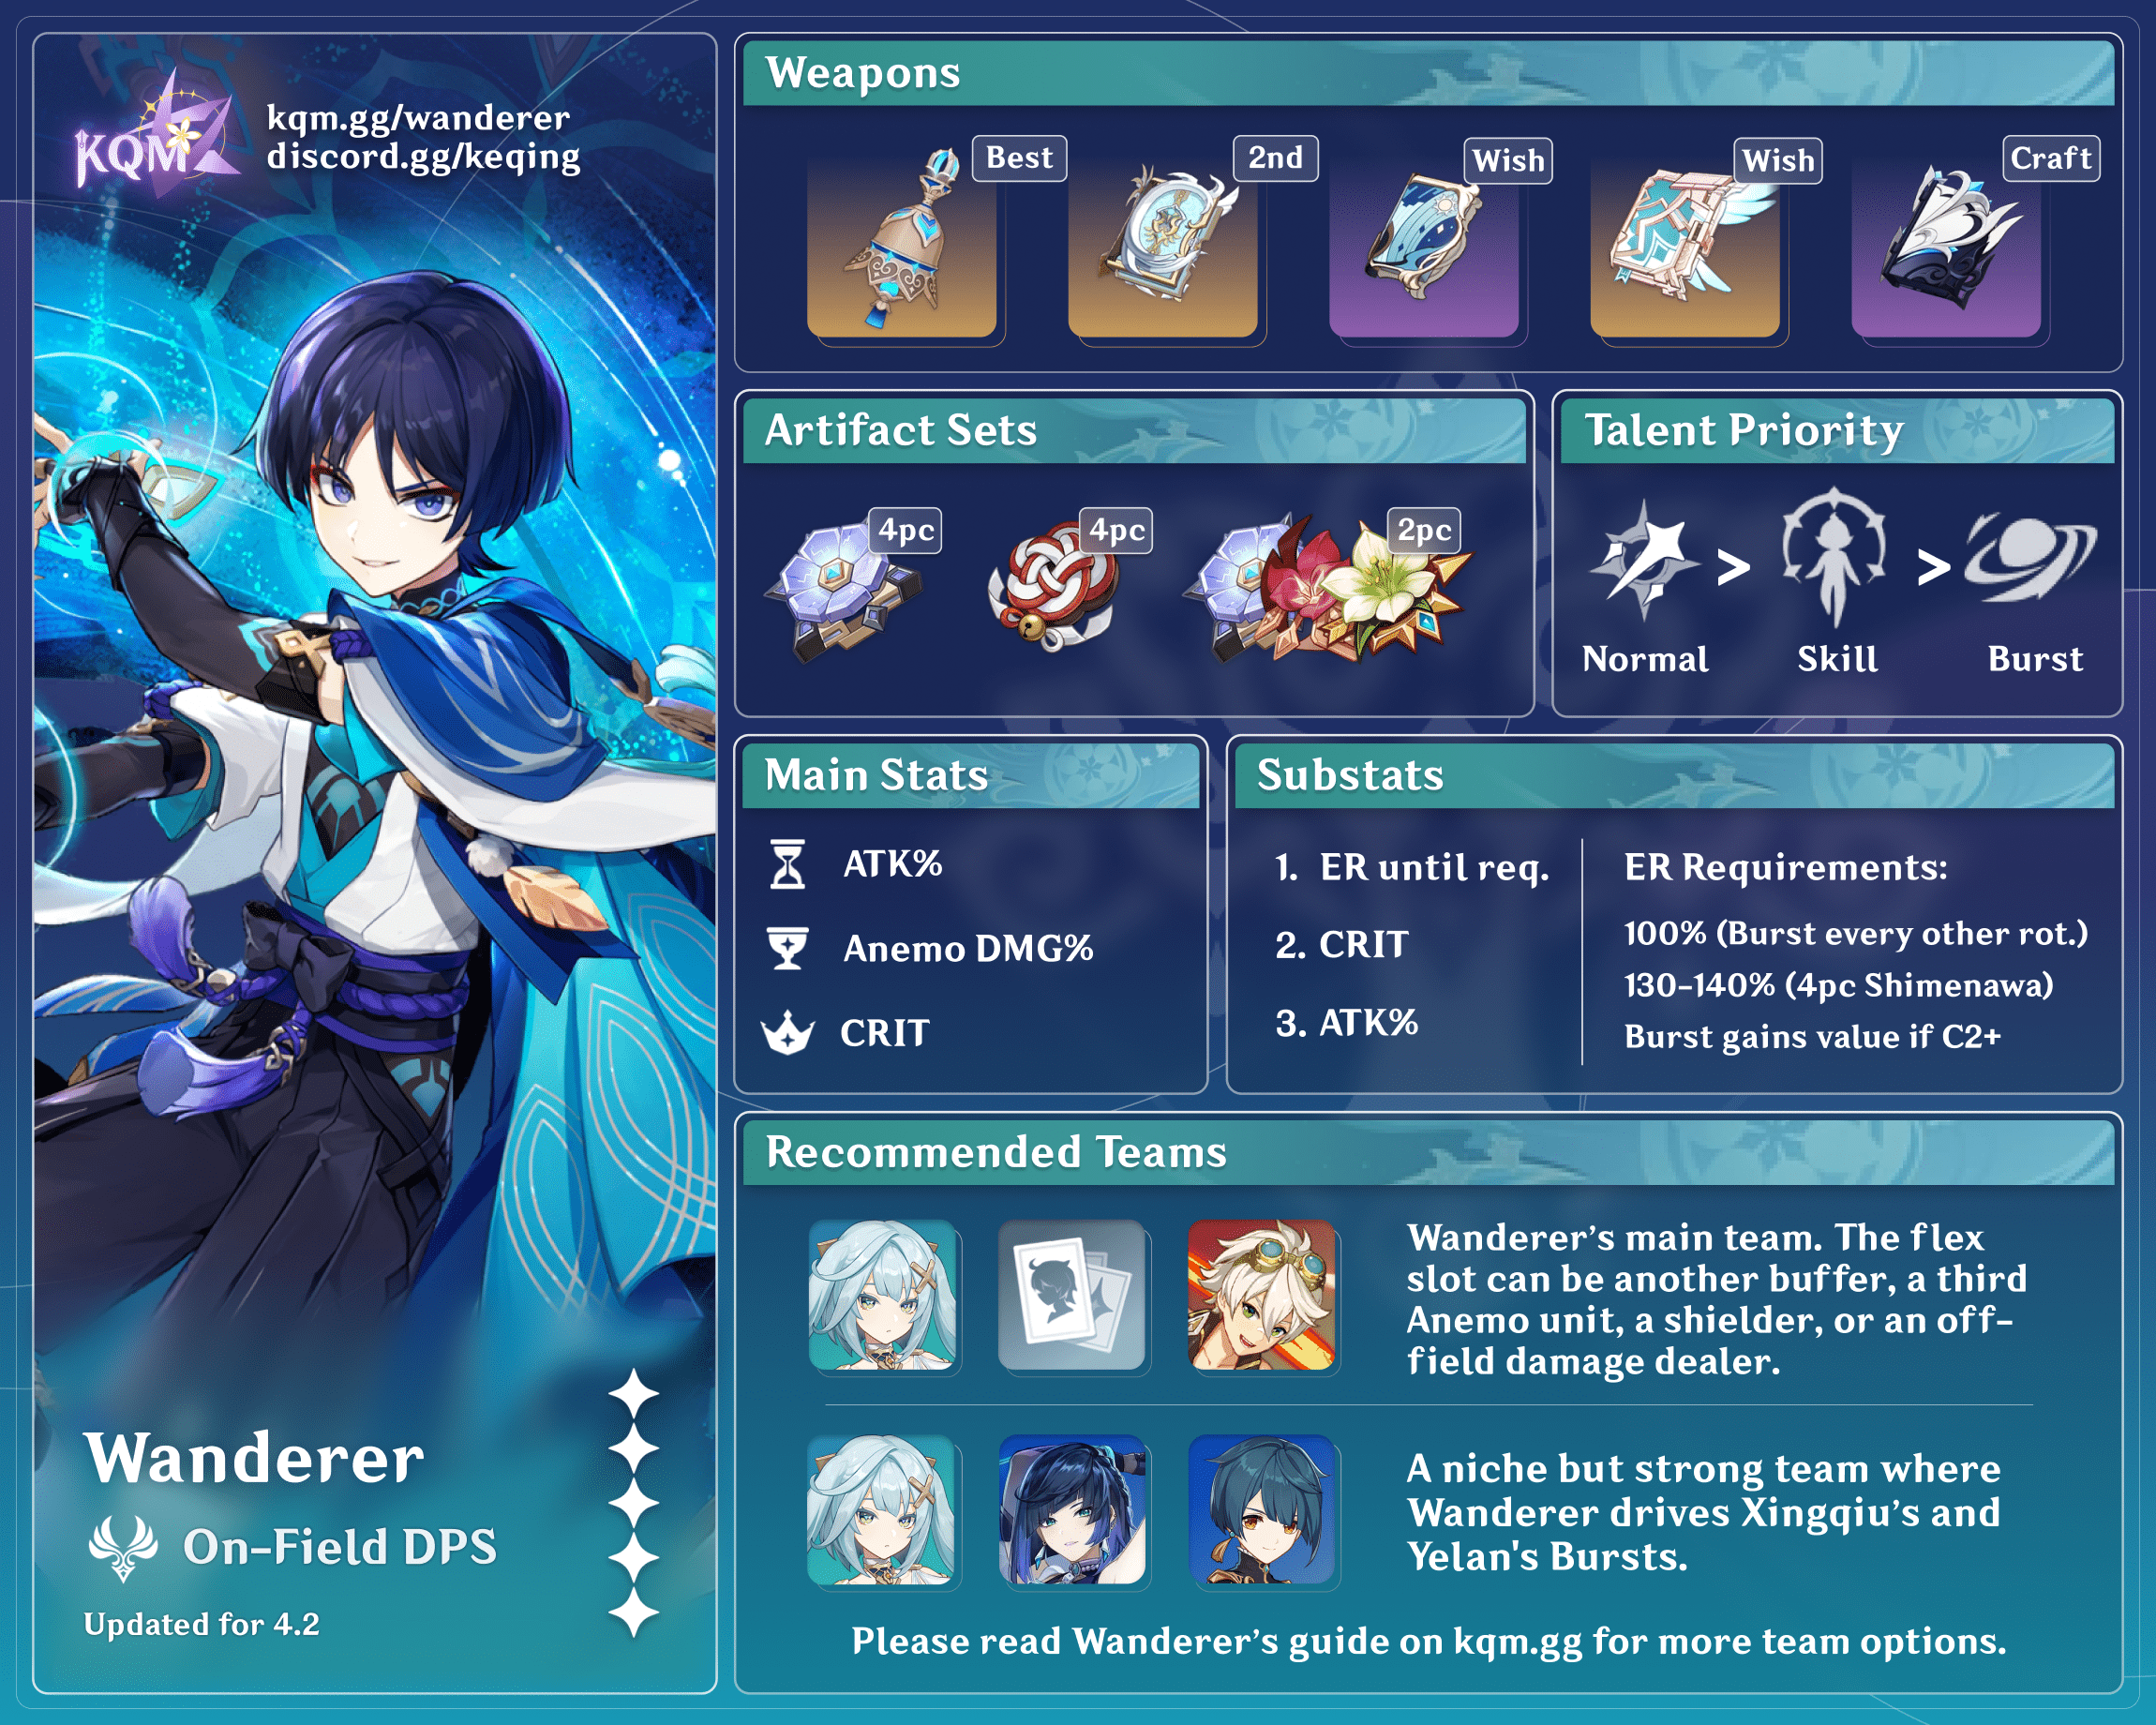
Wanderer is a 5-star Anemo Catalyst user in Genshin Impact who distinguishes himself as a mobile hypercarry capable of flight. As an Anemo Catalyst user, Wanderer can also act as an on-field DPS that drives off-field abilities from other units. This guide reviews Wanderer’s best weapons, best artifacts, best teams, Talent priority, optimal combos, and more.
Pros
- Excellent single-target performance.
- Solid multi-target performance when paired with groupers like Venti or Kazuha.
- More flexible teambuilding than other hypercarries, who are often limited to only 1–2 teams.
- High multipliers, which make his damage skyrocket with proper support and investment.
- Excellent for overworld exploration.
- Normal Attacks have long range and decent enemy tracking.
- No Stamina consumption on Charged Attacks in midair; can trigger over a dozen Swirls in a rotation.
Cons
- Reliant on C6 Faruzan for peak performance.
- Extremely vulnerable to knockback and interruption; reliant on shielding or proper play.
- Energy issues and low base Burst damage make Bursting every rotation impractical without C2 or multiple Anemo supports.
- Poor crowd control despite being an Anemo character; can struggle against groups of mobs. Most Anemo characters are much better than Wanderer at grouping.
- Can’t take full advantage of his Swirling capabilities due the lack of EM scaling.
- May need to adjust altitude at the cost of Kuugoryoku Points in rare situations.
Glossary
| A# | Ascension # Passive |
| C# | Constellation Level # |
| R# | Weapon Refinement Level # |
| On-field | Active character |
| Off-field | Non-active character |
| DPS | “Damage per second” — character whose primary function is to deal damage |
| Hypercarry | An on-field DPS who deals the majority of the team’s damage |
| Sunfire | A unique interaction between the Elemental Bursts of Bennett and Jean that causes frequent Pyro Swirls |
| EM | Elemental Mastery |
| ER | Energy Recharge |
| SR | Shimenawa's Reminiscence |
| VV | Viridescent Venerer |
| AoE | Area of Effect; refers to abilities that can affect multiple targets at once |
| BiS | “Best-in-Slot” — the best available equipment for a character |
| Aura | When an enemy is not affected by any Element, the next Elemental application to hit them will apply an aura of that Element. More information here. |
| ICD | Internal Cooldown, generally referring to the timer that limits Elemental application — a Skill with no ICD can apply the Element every usage, while one with a 2.5s ICD can only apply the Element once every 2.5 seconds. You can read more about ICD here. |
| #U | # of Elemental Gauge Units (in Elemental Gauge Theory) |
Combo Notation
| N# | N – Normal Attack, # – Number of attacks performed |
| C | Charged Attack |
| E | Elemental Skill |
| Q | Elemental Burst |
| D | Dash Cancel |
| #[Combo] | Number of times to perform that combo |
| tE | Tap Skill – Tap the Elemental Skill |
| hE | Hold Skill – Hold the Elemental Skill |
| P | Plunging Attack |
| J | Jump |
FAQs
If I have the Primogems, should I grab Wanderer’s signature weapon or Constellations first?
This is a bit of a trick question, as Wanderer’s biggest upgrade is actually tied to getting C6 Faruzan, a 4-star Anemo support. While Wanderer’s signature weapon offers more damage than his Constellations, going after the latter increases the odds that you get C6 Faruzan.
Additionally, Wanderer’s signature weapon does not provide as large of a DPS boost compared to other signature weapons, while also not being exceptionally useful on other Catalyst-wielding characters. Finally, Wanderer's Constellations are good, but fairly unnecessary.
The following is the recommended priority:
- C6 Faruzan, if you can afford it. You will also likely have C2 Wanderer at this point.
- R1 Tulaytullah’s Remembrance
- Wanderer Constellations
- R5 Tulaytullah’s Remembrance
Is Wanderer reliant on C6 Faruzan?
Wanderer relies on Faruzan to reach his peak potential as a hypercarry. Faruzan offers Anemo RES Shred and a variety of other unique effects that support Anemo DPS characters. However, she is particularly reliant on her own C6, which not only offers a 40% CRIT DMG buff for Anemo teammates, but also mild grouping and significantly improved Energy generation.
Pre-C6 Faruzan builds have astronomical ER requirements and awkward on-field rotations that are frustrating to play around. C2 alleviates some of her rotation problems, and C4 lowers her ER requirements a little, but Faruzan’s C6 is one of the most impactful Constellations in Genshin Impact.
All of this is to say that C6 Faruzan makes a massive difference to Wanderer’s damage, and that Wanderer loses a lot of his value in Abyss without her. With that said, he’s still more than capable of clearing many Abyss stages with C0 Faruzan, and there are definitely ways to make her work; the Faruzan Quick Guide covers several F2P-friendly builds.
Also, keep in mind that Wanderer’s value as an overworld unit is fairly independent from Faruzan; if you are building him as a way to quickly travel around and clear weak enemies, a C0 Wanderer with some healing support will suffice.
Can I use Wanderer as a driver?
Because Wanderer is an Anemo unit, you can use him as a 4pc Viridescent Venerer driver for characters like Fischl, Beidou, and Xingqiu. However, Wanderer provides less team utility than Sucrose, who offers EM-sharing and crowd control. Sucrose is a better driver in most cases, so you’ll usually only use this build while transitioning towards a typical carry build. You can review the Scara vs. Sucrose (EM VV) sheet by Luna#0188 for an in-depth comparison between the two.
TL;DR
Wanderer Talents

 Normal Attack | Yuuban Meigen
Talent Description
Normal Attack
Performs up to 3 attacks using wind blades, dealing Anemo DMG.
Charged Attack
Consumes a certain amount of Stamina, gathers a build up of high wind pressure, and deals AoE Anemo DMG after a short casting time.
Plunging Attack
Calling upon the power of Anemo, the Wanderer plunges towards the ground from mid-air, damaging all opponents in his path. Deals AoE Anemo DMG upon impact with the ground.
The vast majority of Wanderer's damage comes from his Normal Attacks, which shoot blade-like Anemo projectiles at enemies from a long range. The attacks have fairly strong tracking, which helps against agile flying enemies like the Golden Wolflord.
Normal Attack ICD: Standard ICD (3 hits or every 2.5s)
Charged Attack ICD: No ICD, 1U
 Elemental Skill | Hanega: Song of the Wind
Talent Description
Concentrates the power of the winds to break free from the shackles of the earth, dealing AoE Anemo DMG before leaping into the air and entering the Windfavored state.
Windfavored
The Wanderer cannot perform Plunging Attacks in this state. When he uses Normal and Charged Attacks, they will be converted into Kuugo: Fushoudan and Kuugo: Toufukai respectively; the DMG they deal and their AoE will be increased, and their DMG will be considered Normal and Charged Attack DMG respectively. Kuugo: Toufukai will not consume Stamina.
The Wanderer will hover persistently during this time. While this state is active, the Wanderer's movements gain the following properties:
- Persistently consumes Kuugoryoku Points to maintain this hovering state.
- When sprinting, additional Kuugoryoku Points will be consumed for the Wanderer to accelerate mid-air. Holding sprint will cause persistent Kuugoryoku Point consumption to maintain speed. This effect will replace his default sprint.
- Jumping expends extra Kuugoryoku Points to increase hovering height. Holding jump will cause persistent Kuugoryoku Point consumption to keep increasing hovering height.
Running out of Kuugoryoku Points will end the Windfavored state.
A second cast during the duration of Windfavored will also end it.
Allows Wanderer to fly and hover in midair after casting, and grants him the Windfavored state that buffs his Normal and Charged Attacks. The buff ends when he leaves the Windfavored state. In the Windfavored state, Wanderer gains “Kuugoryoku Points,” which show how long Wanderer can maintain this state.
Wanderer’s Kuugoryoku Points are shown as a unique Stamina bar that depletes over time. He consumes additional points when dashing, increasing flight speed, or raising altitude.
The Talent level scaling on Wanderer’s Skill is poor but still valuable. At C2, leveling his Burst becomes more important.
 Elemental Burst | Kyougen: Five Ceremonial Plays
Talent Description
Compresses the atmosphere into a singular vacuum that grinds all troubles away, dealing multiple instances of AoE Anemo DMG. If the character is in the Windfavored state due to the skill "Hanega: Song of the Wind," Windfavored state will end after casting.
Five rapid hits of respectable Anemo DMG. Due to Wanderer’s high ER requirements, it is better to Burst every other rotation before C2.
Depending on Wanderer’s gear and Constellations, you can use his Burst before his Skill, at the very end of his Skill duration, or sometimes even in the middle of a rotation to clear a wave of enemies. Timing is more relevant at C2, which makes Bursting at the end of his Skill duration much more valuable.
ICD: Standard, 1U, (two Swirls per Burst)
 Ascension 1 Passive | Jade-Claimed Flower
Talent Description
If Hanega: Song of the Wind comes into contact with Hydro/Pyro/Cryo/Electro when it is unleashed, this instance of the Windfavored state will obtain buffs according to the contacted element(s):
- Hydro: Kuugoryoku Point cap increases by 20.
- Pyro: ATK increases by 30%.
- Cryo: CRIT Rate increases by 20%.
- Electro: When Normal and Charged Attacks hit an opponent, 0.8 Energy will be restored. Energy can be restored this way every 0.2s.
You can have up to 2 different kinds of these buffs simultaneous
Offers Wanderer up to two buffs based on the Elemental auras present within his Skill’s AoE during the initial cast, including Wanderer’s self-aura. If more than two auras are present, the buff absorption priority is as follows (in order from first to last; not sorted by usefulness:
- Pyro (30% ATK)
- Hydro (20 additional Kuugoryoku Points)
- Electro (0.8 Energy generated on attack inputs)
- Cryo (20% CRIT Rate)
Controlling the buffs that Wanderer receives is difficult. It’s best to avoid building teams around the buffs, since enemies and the environment can easily interfere with lower-priority Elements. However, there are a few easy ways to guarantee a specific buff, such as Bennett’s Burst and Diona’s Cryo shield (with adept timing).
With that said, the buffs all perform within about 5–10% of each other; each buff represents roughly 15% bonus damage. The Pyro and Cryo buffs are the best, though a consistent Electro buff can alleviate Wanderer’s Energy issues. The Hydro buff offers some extra comfort for dodging in midair, at the cost of potentially extending rotations.
Be especially careful with the Electro and Cryo buffs, as Wanderer often needs to be built around them to maximize their value, and missing these buffs become especially punishing for your rotation. In practice, these buffs are hard to take advantage of.
When not building around the Electro buff, the occasional Electro buff will shift Wanderer’s Burst (usually) from every other rotation to twice per three rotations. When Wanderer can reliably gain the Electro buff in Double or Triple Anemo teams, it is much easier to Burst every rotation with low Energy Recharge investment.
 Ascension 4 Passive | Gales of Reverie
Talent Description
When the Wanderer hits opponents with Kuugo: Fushoudan or Kuugo: Toufukai in his Windfavored state, he has a 16% chance to obtain the Descent effect: The next time the Wanderer accelerates in mid-air while in this instance of the Windfavored state, this effect will be removed, this acceleration instance will not consume any Kuugoryoku Points, and he will fire off 4 wind arrows that deal 35% of his ATK as Anemo DMG each.
For each Kuugo: Fushoudan and Kuugo: Toufukai that does not produce this effect, the next attack of those types will have a 12% increased chance of producing it. The calculation of the effect production is done once every 0.1s.
During Wanderer's Windfavored state, Normal and Charged Attacks have a small but increasing chance to trigger this Passive. While active, Wanderer’s next midair dodge will not consume Kuugoryoku Points and will unleash a flurry of homing Anemo attacks at nearby opponents.
CAUTION: dashing before you have triggered this buff severely hurts Wanderer’s DPS because of the Kuugoryoku Points lost by normal dodges. A premature dodge loses a full N3 combo. To avoid this, pay attention to the audiovisual cues that occur when you trigger the Passive. Wanderer will visibly light up and a “ping” sound will play, prompting you to dash to deal some extra damage. Rings will also appear around Wanderer’s wrists if the Passive is ready to be used.
This is Wanderer’s main tool for repositioning. Consider the bonus damage as compensation for having to interrupt your Normal Attack strings to dodge. Keep in mind that these triggers can be negatively affected by ping issues.
ICD: 1s, 1U
 Utility Passive | Strum the Swirling Winds
Talent Description
Mora expended when ascending Bows and Catalysts is decreased by 50%.
Wanderer reduces the cost of ascending Catalyst and Bow weapons.
This Passive is fairly unimpressive because it does not include leveling the weapon.
Talent Priority
C0-C1
 ≥
≥  >
> 
Normal Attack (NA) ≥ Skill (E) > Burst (Q)
C2-C6
 ≥
≥  >
> 
Normal Attack (NA) ≥ Burst (Q) > Skill (E)
Wanderer Constellations

 Constellation 1 | Shoban: Ostentatious Plumage
When in the Windfavored state, the Attack SPD of the Wanderer's Kuugo: Fushoudan and Kuugo: Toufukai is increased by 10%.
Additionally, the wind arrows fired by the Passive Talent "Gales of Reverie" will deal an additional 25% of his ATK as DMG. You must unlock the Passive Talent "Gales of Reverie" first.
Grants an additional 10% Normal Attack and Charged Attack SPD and also increases the A4 multiplier from 140% to 240%. Allows you to squeeze in up to two more Normal Attacks per rotation. This is also one of the few sources of ATK SPD for Charged Attacks.
Increase from C0: ~6–11%
 Constellation 2 | Niban: Moonlit Isle Amidst White Waves
When in the Windfavored state, Kyougen: Five Ceremonial Plays will see its DMG increased by 4% per point of difference between the max amount of Kuugoryoku Points contrasted with Kuugoryoku's present capacity when using this skill.
Through this method, you can increase Kyougen: Five Ceremonial Plays's DMG by a maximum of 200%.
Provides a 200% Burst DMG Bonus as long as you use Wanderer’s Burst after 50 Kuugoryoku Points are consumed. This makes Bursting every rotation viable. With this, it is best to use Wanderer’s Burst at the end of his Skill duration.
Increase from C1: ~14-17%
Total Increase from C0: ~25-27%
 Constellation 3 | Sanban: Moonflower Kusemai
Increases the Level of Kyougen: Five Ceremonial Plays by 3.
Maximum upgrade level is 15.
Adds three Talent levels to his Burst. This further improves the DMG Bonus from C2 but is otherwise uninteresting.
Increase from C2: ~4-5%
Total Increase from C0: ~32-34%
 Constellation 4 | Yonban: Set Adrift into Spring
When casting Hanega: Song of the Wind, should the Passive Talent "Jade-Claimed Flower" be triggered, the character will gain buffs in correspondence to the contacted Elemental Type(s), and also obtain a random untriggered buff. A maximum of 3 such corresponding elemental buffs can exist simultaneously.
You must unlock the Passive Talent "Jade-Claimed Flower" first.
Gives a random buff from A1 in addition to the two that Wanderer can normally acquire. The Hydro buff may not add any bonus depending on rotation, but the others can add up to 15% damage. The aforementioned restriction to Cryo and Electro applies — they usually need to be built around and won’t always reach their full potential. This means the only buffs that guarantee a benefit are Cryo and Pyro. If these Elements are already accessible via the party, the third Elemental buff is unlikely to increase damage further.
Disclaimer: this Constellation is too inconsistent to represent a guaranteed DPS gain.
 Constellation 5 | Matsuban: Ancient Illuminator From Abroad
Increases the Level of Hanega: Song of the Wind by 3.
Maximum upgrade level is 15.
Adds three Talent levels to his Skill. This Constellation is pretty underwhelming since his Skill, while important, does not have particularly high scalings.
Increase from C3/C4: ~3-4%
Total Increase from C0: ~37-39%
 Constellation 6 | Shugen: The Curtains' Melancholic Sway
When the Wanderer actively hits an opponent with Kuugo: Fushoudan while in the Windfavored state, the following effects will occur:
• Deals an additional instance of Kuugo: Fushoudan at the position hit, dealing 40% of the attack's original DMG. This DMG will be considered Normal Attack DMG.
• When the Wanderer falls below 40 Kuugoryoku Points, restores 4 Points to him. Kuugoryoku Points can be restored in this manner once every 0.2s. This restoration can occur up to 5 times within one Windfavored duration.
Normal Attacks now fire additional arcs of Anemo energy that deal 40% of Wanderer’s regular Normal Attack DMG. This also extends the Windfavored state, which can increase DPS uptime at the cost of prolonging the rotation.
Increase from C5: ~24-27%
Total Increase from C0: ~69-75%
Wanderer Combos

Basic Gameplay
Wanderer’s gameplay can be summarized in a few easy steps.
- Establish buffs from supports (Faruzan, Bennett, shields, etc.)
- Use Wanderer’s Burst.
- Use Wanderer’s Skill to enter the Windfavored state.
- Use Wanderer’s Charged Attack if using his Best-in-Slot artifact set, 4pc Desert Pavilion Chronicle.*
- Start attacking with Normal and Charged Attacks, depending on gear and teams.
- (Advanced) Dash in accordance with A4 procs between attacks to dodge or improve positioning.
*With 4pc DPC, Wanderer can use a Charged Attack immediately before or after entering the Windfavored State; either way works since his field time is about the same.
- Establish buffs from supports (Faruzan, Bennett, shields, etc.)
- Use Wanderer’s Skill to enter the Windfavored state.
- Use Wanderer’s Charged Attack if using his Best-in-Slot artifact set, 4pc Desert Pavilion Chronicle.*
- Start attacking with Normal and Charged Attacks, depending on gear and teams.
- Use Wanderer’s Burst.
- (Advanced) Dash in accordance with A4 procs between attacks to dodge or improve positioning.
*With 4pc DPC, Wanderer can use a Charged Attack immediately before or after entering the Windfavored State; either way works since his field time is about the same.
- Establish buffs from supports (Faruzan, Bennett, shields, etc.)
- Use Wanderer’s Skill to enter the Windfavored state.
- Start attacking with Normal and Charged Attacks, depending on gear and teams.
- Use Wanderer’s Burst.
- (Advanced) Dash in accordance with A4 procs between attacks to dodge or improve positioning.
- Establish buffs from supports (Faruzan, Bennett, shields, etc.)
- Use Wanderer’s Burst.
- Use Wanderer’s Skill to enter the Windfavored state.
- Use Wanderer’s Charged Attack if using his Best-in-Slot artifact set, 4pc Desert Pavilion Chronicle.*
- Start attacking with Normal and Charged Attacks, depending on gear and teams.
- (Advanced) Dash in accordance with A4 procs between attacks to dodge or improve positioning.
*With 4pc DPC, Wanderer can use a Charged Attack immediately before or after entering the Windfavored State; either way works since his field time is about the same.
Attack Chains
Wanderer has three main attack chains.
N3 Spam
Use his full Normal Attack chain continuously until the end of the Windfavored state.
Best when using Tulaytullah’s Remembrance or Solar Pearl, along with any other buffs that only apply to Normal Attacks, such as Yun Jin’s Burst.
If you’re looking to trigger additional Swirls, you can always do a Charged Attack at the end of an N3 chain. However, you should only do so with an explicit purpose.
N2C Spam
Use two Normal Attacks immediately followed by a Charged Attack. Repeat until the end of Wanderer’s airtime.
Best when using weapons that buff both Normal and Charged Attacks or neither. Also good for Double Swirling consistently as a driver.
CA Spam
Spam Wanderer’s Charged Attack in midair, as it consumes no Stamina during the Windfavored state.
The best combo for the event weapon Dodoco Tales. Note that you should use a Normal Attack every 5–6s to keep the weapon’s buff persistent.
Wanderer’s Charged Attack can be canceled into another Charged Attack! The extra few Charged Attacks can make this competitive with other attack methods, but the cancels require adept timing and no interruption.
Wanderer Builds

Artifact Stats
 Sands |  Goblet |  Circlet |
| ATK% | Anemo DMG% | CRIT |
Building Wanderer is straightforward: focus on ATK%, Anemo DMG%, and CRIT stats, while aiming for a 1:2 ratio of CRIT Rate to CRIT DMG. The best artifacts and weapons for him will reflect this. However, the best choices will also depend on Wanderer’s teammates, since characters like Bennett can disproportionately devalue ATK% weapons like Memory of Dust and Skyward Atlas.
If you are not using Bennett or abundant ATK% buffs, you can opt for an ATK% Goblet instead of an Anemo DMG% Goblet, depending on substats. The more ATK% buffs, however, the greater the power difference in favor of Anemo DMG%.
ER Requirements
As previously stated, there is no reason to build Energy Recharge on Wanderer at C0. If optimizing, Bursting every other rotation is preferable to the DPS loss from investing in ER. For most players, 100% Energy Recharge is fine.
If Wanderer is C0 and he uses the 4pc Shimenawa’s Reminiscence artifact set, you’ll need around 130–140% Energy Recharge, even with C6 Faruzan. Otherwise, you’ll Burst every third rotation.
At C2, building for Energy Recharge becomes more valuable. If you’d like to build Energy Recharge to Burst regularly, you should expect to build 160–170% ER. C6 Faruzan lowers this by 20–30%, but 4pc Shimenawa’s Reminiscence raises this by 20–30%. Finally, note that Triple Anemo teams can substantially lower Wanderer’s and Faruzan’s ER requirements.
The Energy Recharge Calculator by Zakharov is available to calculate specific Energy requirements for your given team and rotation.
Artifact Sets
Assumptions: KQM Standards | Level 90 | Talents 9/9/9 | C0 | 100% ER | Blackcliff Agate, no stacks | Rotation: Q (every other rot) > E > CA (if DPC) > N3 spam | Pyro buff (30% ATK) | Calcs Here
4pc Desert Pavilion Chronicle 100% | A set tailor-made for Wanderer, and his obvious Best-in-Slot. 4pc Desert Pavilion Chronicle gives Wanderer Normal Attack SPD and a 40% DMG Bonus on all of his Normal and Charged Attacks, which make up the majority of his damage. However, the damage difference between this set and his second-best option (4pc Shimenawa’s Reminiscence) is small. |
4pc Shimenawa’s Reminiscence 94% | Bursts every three rotations. Do not use if C2+; Bursting becomes important. 4pc Shimenawa’s Reminiscence is Wanderer’s most Resin-efficient option if you’re willing to play around its Energy consumption effect. When using this set, you should Burst at the end of Wanderer’s airtime to ensure he has Energy for the 4pc buff. As many characters use the 4pc Emblem of Severed Fate set, farming for them allows you to also farm 4pc Shimenawa’s Reminiscence in the process. |
4pc Echoes of an Offering 87% | At the time of writing, there are too many issues with 4pc Echoes of an Offering for it to be valuable on most units. Ping is also a major, uncontrollable factor in determining the value of this set, and with Wanderer, distance between himself and enemies is a further factor. However, this set significantly improves at C6 due to the added Normal Attack instances on each input. |
2pc Anemo + 2pc ATK% / 2pc Anemo    84% | A safe choice for F2P players who can’t afford to spend Resin for 4pc Desert Pavilion Chronicle and don’t have a good 4pc Shimenawa’s Reminiscence set. |
2pc ATK% + 2pc ATK%    81% | It’s especially bad to put double 2pc ATK% sets on Wanderer due to the high amount of ATK he will likely be receiving from external buffs, such as Bennett’s Burst or the Pyro buff on Wanderer’s A1. Even outside of these circumstances, double ATK% artifacts do not provide enough of an increase over other options to be a valuable choice. |
4pc Viridescent Venerer 78% | 4pc Viridescent Venerer is typically the default option for Anemo characters, though most of them are supports rather than the main damage dealers of the team. When it comes to raw Anemo DMG, this set doesn’t cut it. An argument can be made that 4pc VV would help Wanderer function better as an on-field driver, but again, he lacks most of the utility that makes other, lower-rarity Anemo units more suited to the role. |
Wanderer Weapons
Weapon rankings change depending on whether Bennett is in your team, because his massive Flat ATK buff devalues ATK% weapons. As such, there will be two sets of rankings.
- Vanilla — no external buffs
- Hypercarry — with Faruzan (C0), Bennett (C1+), 4pc Noblesse Oblige, Pyro buff on Skill
Vanilla — No External Buffs
Assumptions: KQM Standards | Level 90 | Talents 9/9/9 | C0 | 100% ER | 4pc Desert Pavilion Chronicle | Rotation: Q (every other rot) > E > CA (if DPC) > N2C spam (unless otherwise specified) | No outside buffs | Calcs Here
Tulaytullah’s Remembrance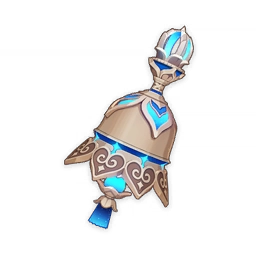 130% | Best to N3 spam with this weapon. This weapon’s ramping buff quickly reaches its maximum amount of 48% Normal Attack DMG. This, stacked on top of a whopping 674 Base ATK and 44% CRIT DMG, makes Tulaytullah’s Remembrance Wanderer’s obvious Best-in-Slot. However, it does not outclass the second-best options as much as other signature weapons (5-10%, compared to most signatures’ 15-20%). It is also important to note that the more Charged Attacks you perform, the weaker this weapon gets. |
Memory of Dust (Shielded + Unshielded) 119-126% | Burst at the end of Wanderer’s Skill airtime for best results. Memory of Dust is the next best choice in teams without Bennett due to its quickly ramping ATK% buff. Wanderer often wants a defensive option in the form of a shield, but people may feel confined to shielding playstyles in order to maximize this weapon’s damage. At worst, it is as strong as Skyward Atlas, the next best choice. At best, it approaches Tulaytullah’s Remembrance. |
Skyward Atlas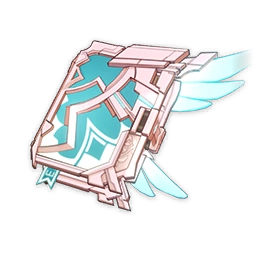 119% | Skyward Atlas is the best 5-star weapon on the Standard Banner for Wanderer teams without Bennett — a title that goes to Lost Prayer to the Sacred Winds when Bennett is in the team. Not much to say besides the fact that this weapon provides a ton of ATK%, which Wanderer likes. |
Lost Prayer to the Sacred Winds 118% | Burst at the end of Wanderer’s Skill airtime for best results. Since Genshin Impact’s release, Lost Prayer to the Sacred Winds has been looking for a good home, as few Catalyst users can fully benefit from the slow-ramping DMG% buff. When played as a hypercarry, Wanderer hogs field time and can easily and consistently get two stacks. The CRIT Rate is also appreciated. |
The Widsith (R5)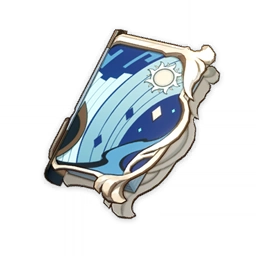 117% | Average buff, averaged across two rotations. Wanderer sadly doesn’t benefit from the EM buff as much as other Catalyst users, which pulls The Widsith back in rankings. If you love resetting Abyss, you can shoot for the other two buffs for higher performance. |
Dodoco Tales (R5) 116% | Special Rotation: (Q) > E > NA > CAx(5 or 6) > NA > CAx(5 or 6) Dodoco Tales is surprisingly strong on Wanderer. Depending on your gear and ATK SPD, you may need to change how many Charged Attacks you do between Normal Attacks, but the idea is to use two Normal Attacks evenly distributed throughout Wanderer’s airtime to give your Charged Attacks the buff from the passive. |
Kagura's Verity 114% | Calculated without passive. The fact that Kagura’s Verity ranks so high based on only its Base ATK and CRIT DMG stat shows just how valuable CRIT weapons are. |
Solar Pearl (R5) 108% | Obtained from the Battle Pass. Solar Pearl is often compared to Widsith in terms of damage. For most characters, these weapons are equal by refinement. However, in Wanderer’s case, Widsith ends up winning at each refinement rank. What Solar Pearl lacks in explosiveness, it makes up for with consistency. The weapon’s CRIT Rate substat also makes Wanderer easier to build compared to ATK% weapons. |
Blackcliff Agate 100% | Obtainable in Paimon’s Bargains for free if you have Stardust. Calculated as a pure CRIT DMG% stat stick. Blackcliff Agate is the strongest freely-obtainable weapon for Wanderer, and can potentially rank higher than pictured here, thanks to its ability to scale with kills. However, Wanderer's other F2P options may be better because the passive doesn't work in the single-target scenarios, where he shines. |
Frostbearer (R5) or Mappa Mare (R5)  98% | Craftable Options Consider these the bare minimum. Frostbearer is slightly better without Bennett in the team and when you can consistently have Cryo applied to enemies for the enhanced damage instance. |
Hypercarry — With External Buffs
Assumptions: KQM Standards | Level 90 | Talents 9/9/9 | C0 | 100% ER | 4pc Desert Pavilion Chronicle | Rotation: Q (every other rot) > E > CA (if DPC) > N2C spam (unless otherwise specified) | Faruzan’s Burst (lvl 9), Bennett 871 ATK, Pyro buff (30% ATK), 4pc Noblesse Oblige | Calcs Here
Tulaytullah’s Remembrance C0 Faruzan: 132% C6 Faruzan: 129% | Signature Weapon, Best-in-Slot; N3 Spam. This weapon’s ramping buff quickly reaches its maximum amount of 48% Normal Attack DMG. This, stacked on top of a whopping 674 Base ATK and 44% CRIT DMG makes Tulaytullah’s Remembrance Wanderer’s obvious Best-in-Slot. However, it does not outclass the second-best option as much as other signature weapons. (5–10%, compared to most signatures’ 15–20%.) It is also important to note that the more Charged Attacks you perform, the weaker this weapon gets. |
Lost Prayer to the Sacred Winds C0 Faruzan: 123% C6 Faruzan: 121% | Burst at the end of Wanderer’s Skill airtime for best results. Since Genshin Impact’s release, Lost Prayer to the Sacred Winds has been looking for a good home, as few Catalyst users can fully benefit from the slow-ramping DMG% buff. When played as a hypercarry, Wanderer hogs field time and can easily and consistently get two stacks. The CRIT Rate is also appreciated. |
The Widsith (R5) C0 Faruzan: 121% C6 Faruzan: 118% | Average buff, averaged across two rotations. Wanderer sadly doesn’t benefit from the EM buff as much as other Catalyst users, which pulls The Widsith back in rankings. If you love resetting Abyss, you can shoot for the other two buffs for higher performance. |
Kagura's Verity C0 Faruzan: 119% C6 Faruzan: 115% | Calculated without passive. The fact that Kagura’s Verity ranks so high based on only its Base ATK and CRIT DMG stat shows just how valuable CRIT weapons are. |
Skyward Atlas C0 Faruzan: 118% C6 Faruzan: 118% | Skyward Atlas is still among the best 5-star weapons on the Standard Banner for Wanderer teams even when Bennett is in the team. Not much to say besides the fact that this weapon provides a ton of ATK%, which Wanderer likes. |
Solar Pearl (R5) C0 Faruzan: 113% C6 Faruzan: 110% | Obtainable through the Battle Pass. Solar Pearl is often compared to Widsith in terms of damage, as they perform similarly on most characters. However, in Wanderer’s case, Widsith ends up winning at each Refinement Rank. What Solar Pearl lacks in explosiveness, it makes up for with consistency. The weapon’s CRIT Rate substat also makes Wanderer easier to build compared to using ATK% weapons. |
Memory of Dust (Shielded + Unshielded) C0 Faruzan: 112–116% C6 Faruzan: 112–116% | Burst at the end of Wanderer’s Skill airtime for best results Bennett heavily devalues Memory of Dust’s massive ATK% buff, which makes it plummet in rankings after buffs are stacked. There’s nothing particularly exciting about this weapon in these scenarios. |
Dodoco Tales (R5) C0 Faruzan: 112% C6 Faruzan: 111% | Special Rotation: (Q) > E > NA > CAx(5 or 6) > NA > CAx(5 or 6) Dodoco Tales is surprisingly strong on Wanderer. Depending on your gear and ATK SPD, you may need to change how many Charged Attacks you do between Normal Attacks, but the idea is just to use two Normal Attacks evenly distributed throughout Wanderer’s airtime to retain the buff from the passive. |
Blackcliff Agate C0 Faruzan: 107% C6 Faruzan: 105% | Obtainable in Paimon’s Bargains for free if you have Stardust. Calculated as a pure CRIT DMG% stat stick. Blackcliff Agate is the strongest freely obtainable weapon for Wanderer, and it can potentially rank higher than pictured here, thanks to its ability to scale with opponents defeated. However, Wanderer's other F2P options may be better because the passive doesn't work in the single-target scenarios, where he shines. |
Frostbearer (R5) or Mappa Mare (R5)  C0 Faruzan: 100–102% C6 Faruzan: 100–102% | Craftable Options The best craftable option if the passive can be reliably triggered. However, it is probably more resource-efficient to get an R1 Blackcliff Agate than five prototype billets. Frostbearer assumes you can consistently have Cryo applied to enemies for the enhanced damage instance. |
Wanderer Team Compositions

Teambuilding
Unlike many other hypercarries, Wanderer is not confined to a single team. However, his lack of well-defined teammates is a double-edged sword. While Wanderer teams can adapt to all sorts of situations by swapping out flex picks, the best choice isn’t always intuitive.
Wanderer teams should be built around the content faced rather than the damage they deal. Different enemies have different Resistances and they sometimes have mechanics that invalidate your game plan, depending on your team. This section will guide players through the teambuilding process.
In order to build a successful team, ask yourself the following four questions:
1. How Many Buffs Does My Wanderer Want?
As a hypercarry, Wanderer greatly appreciates buffs from his teammates. Amplifying Wanderer’s damage is not the only way to assemble a strong team, but it certainly plays to his strengths.
Here are Wanderer’s two best supports:
 Faruzan (C6 Recommended) | While Faruzan buffs Anemo DMG, her real value is in her Burst’s (30%) Anemo RES Shred. This is a rare debuff only shared by C4 Jean, C2–6 Venti, C6 Anemo Traveler, and Zhongli. She can also carry 4pc Noblesse Oblige or (if C6) 4pc Tenacity of the Millelith to further buff Wanderer. This makes Faruzan one of the best supports for Wanderer, especially at C6. However, it is difficult to maintain her Burst without at least C4 or extremely high Energy Recharge. Favonius weapons are practically mandatory to manage her Energy requirements. |
 Bennett | Bennett takes up little field time, gives a considerable Flat ATK boost, heals, applies Pyro for Wanderer’s A1 Pyro buff, and can hold 4pc Noblesse Oblige. Bennett’s main drawback is his high demand in many other non-Dendro teams. |
2. How Many Enemies Am I Facing?
Single-Target — Is Slow Particle Generation a Problem?
Unless you run a Triple Anemo team, Wanderer needs consistent and frequent Energy funneling from Faruzan and other teammates to Burst every rotation. At C0, the ER investment required significantly lowers his damage. Keep in mind that Bursting every other rotation eases overall requirements and deals more damage in fights that last longer than a single rotation.
Multi-Target — Is Wanderer’s Mild CC Enough for Mobs?
It is difficult to track the behavior of individual enemies in multi-target scenarios. Crowd control characters can minimize these issues, maximize the DPS from Wanderer’s mild AoE, and provide good personal damage.
Here are some Anemo teammate options:
 Venti | Venti is a great crowd controller because of his Burst, which arguably has the best enemy grouping in the game. Wanderer’s elevation during the Windfavored state makes it easy to attack enemies sucked into Venti’s Burst. Be careful with your positioning, since Venti’s Burst automatically targets the closest enemy. |
 Kazuha | Although Kazuha’s crowd control is sometimes less effective than Venti's, his Skill can help Wanderer hit all enemies at once if they were initially scattered around the room. However, Kazuha is a premier unit and often used by many other teams that need him or can make better use of him. His availability will likely depend on what your other Abyss team needs. |
 Sucrose | Sucrose is the most accessible Anemo character in the game after Anemo Traveler, has good crowd control, and is a decent battery for other Anemo characters. This is especially true at C1. As a Catalyst wielder, Sucrose can also carry valuable support weapons like Thrilling Tales of Dragon Slayers to further buff Wanderer. |
3. Does Wanderer Need a Shielder?
Because Wanderer has no native Interruption Resistance while in the Windfavored state, he is extremely prone to knockback. Shielders aren’t exactly necessary, but you may find that you prefer using them depending on your dodging skills and the enemies you are facing. Shielders bring comfort to overall gameplay, especially since DPS plummets when using Kuugoryoku Points to dodge enemy attacks. Characters who can simultaneously shield and provide buffs, debuffs, or damage are preferred.
Here are some notable shielders:
 Zhongli | Zhongli is the strongest shielder in the game. He also provides Universal RES Shred and can hold 4pc Tenacity of the Millelith. Note that his pillar can occasionally be destroyed by enemy attacks. |
 Layla | Layla has a strong shield and can hold 4pc Tenacity of the Millelith. At C4, she also grants increased Normal and Charged Attack DMG — Wanderer’s greatest source of DPS — based on her HP. While her shield does not self-inflict Cryo, her Skill and Burst still allow Wanderer to gain his A1 Cryo buff, but the timing required is strict and sometimes impractical. Her shield also only lasts 12s, which can feel insufficient at times. |
 Diona | Diona offers a weaker shield than Layla and Zhongli in exchange for healing and a 10% Movement Speed buff that is especially nice for Wanderer. It is worth mentioning that the Movement Speed bonus also speeds up his dash animations, which lets you fire wind arrows with N3D faster and Swirl more frequently. Diona can also provide a Cryo aura on the active character with her shield to aid Wanderer’s A1, but the timing required is strict and sometimes impractical. |
 Thoma | Thoma is a viable option — especially at C6, which essentially grants Wanderer a 15% Normal and Charged Attack DMG Bonus. Unlike the other shielders, Thoma’s strength lies in his ability to keep Wanderer uninterrupted even if his shield breaks, as long as he keeps using Normal Attacks to generate new ones. His high ER requirements can be managed by equipping 2pc Emblem of Severed Fate, Kitain Cross Spear, or Favonius Lance; obtaining his C4; or adding another Pyro unit to the team. |
 Xingqiu | Xingqiu is not a shielder but operates as a fine defensive option if you only need some Interruption Resistance. He not only reduces damage, prevents interruption, and offers minor healing with his Rain Swords, but also deals respectable off-field damage thanks to his Burst. If you appreciate Xingqiu’s damage output but still need more defensive options, you can use Xingqiu alongside a shielder or healer. |
4. Do Enemies Have Elemental Shields or Particular Weaknesses?
Elemental shields can sometimes be a problem that slows the whole team down. Choosing teammates that can quickly break relevant shields is important for clearing floors on time. The same can be said for particular weaknesses: if an enemy is weak to a particular Element, choosing teammates of the matching Element can be better than otherwise optimal picks from the charts above.
The section below covers good shield-breaking units and a few other miscellaneous options that can be useful in the right situation.
Other Synergies
Apart from those already discussed above, there are other remarkable units to be included. Please note that Dendro-based Wanderer teams are weaker than other options for synergies.
 Jean (C2+) | Jean is an unimpressive support for Wanderer at C0. However, her C2 grants a 15% increase to all party members' Movement Speed and Normal Attack SPD, and her C4 offers a 40% Anemo RES Shred for enemies within her Burst’s field. Being able to heal with her Burst increases her value. Note that she is mostly limited to single-target scenarios due to the knockback from her Burst and Skill. |
 Yelan | Yelan provides a DMG Bonus buff to Wanderer with her A4 Passive in addition to dealing plenty of off-field damage. Pairing her with Xingqiu can greatly increase single-target damage while decreasing each other’s ER requirements. She is also notably easy to build and works with minimal investment. |
 Yun Jin | Yun Jin is a strong support for hypercarry Wanderer teams, especially at high Yun Jin Constellations. To maximize her potential, Wanderer should focus on Normal Attack spam. |
 Albedo | Albedo is not particularly strong with Wanderer, but he is an option for off-field damage who also contributes to Geo Resonance. Albedo is not recommended if you are not running him alongside a second Geo unit and a shielder, as his viability is heavily tied to Geo Resonance. |
 Fischl | Oz and Fischl deal respectable, self-sufficient damage. However, Wanderer’s A1 Electro buff is weaker than its Pyro and Cryo counterparts. Fischl is best used as an off-field source of Electro DMG. |
 Beidou | Beidou is a powerful Electro off-field damage dealer who excels in AoE content. Her Burst, which procs off of both Normal and Charged Attacks, synergizes with all of Wanderer's best attack combos. She is best paired with Fischl because of her high ER requirements. |
 Rosaria | Rosaria is an excellent Cryo applier with a valuable CRIT Rate buff. She is also an effective battery when given a Favonius Lance and offers great mobility and personal damage. The go-to choice if a Cryo character without a shield is necessary. |
 Xiangling | Whenever Bennett is on a team, Xiangling is a viable option if only for her raw Burst DMG. Xiangling also helps with shield breaking, and her massive Energy needs are mostly managed by Bennett’s particle generation from his Skill. |
 Nahida | In the rare cases where Wanderer needs a Dendro teammate, Nahida is his ideal partner. She doesn’t need to be on-field to constantly apply Dendro and can buff the active character by sharing a good amount of Elemental Mastery through her A1 Passive. The EM-sharing does not particularly benefit Wanderer, but can assist other teammates when they are on-field. |
 Traveler (Dendro) | Like Nahida, Dendro Traveler provides EM-sharing for the active character and consistent Dendro application through their Burst. |
Best Wanderer Teams

The following section reviews some of Wanderer’s best teams and their rotations, based on the synergies and units above.
There are a couple of things to keep in mind. First, these examples assume that Faruzan is not C6. In teams with C6 Faruzan, you can speed up the rotation by forgoing Faruzan’s E CA. Second, these teams are fairly flexible. You can easily substitute certain units for others depending on the situation and what you have. Finally, remember that these are simply tips for bringing out Wanderer's maximum potential. Feel free to experiment yourself!
Hypercarry

This team maximizes Wanderer’s personal damage by dedicating every other teammate to supporting him. Faruzan provides an Anemo DMG% Bonus and Anemo RES Shred, while Bennett provides a large Flat ATK boost, healing, and Pyro self-aura to easily trigger Wanderer’s A1 Pyro buff.
Faruzan’s C6 is highly valuable in this comp, since it not only significantly improves particle generation but also buffs Wanderer’s damage and provides mild grouping.
The flex slot is best filled by Zhongli, Yun Jin, Xingqiu, or Yelan. Zhongli can be replaced by other shielders if you do not have him.
Hypercarry Rotation
Faruzan E CA Q > Yelan EQ > Bennett EQ > Wanderer CA E [preferred NA/CA combo] Q > Bennett E
Rotation Video
Faruzan E CA Q > Xingqiu EQ > Bennett EQ > Wanderer CA E [preferred NA/CA combo] Q > Bennett E
Rotation Video (NA Spam)
Rotation Video (N2C Spam)
Faruzan E CA Q > Bennett EQ > Yun Jin EQ > Wanderer CA E [preferred NA/CA combo] Q > Bennett E
Rotation Video
Zhongli hE > Faruzan E CA Q > Bennett EQ > Wanderer CA E [preferred NA/CA combo] Q > Bennett E
Rotation Video
Sunfire

For this team to perform at its best, Jean requires her C4. It is undeniable that this comp is expensive and that other, more manageable options exist and perform well without the requirement of Constellations for a 5-star standard character.
With that said, C4 Jean, Bennett, and Faruzan do a ton of off-field damage that cannot be ignored. The consistent Pyro Swirls between Jean and Bennett’s overlapping Burst fields along with their buffs to Wanderer are a powerful combination.
Bear in mind that this team performs best in single-target because you have to keep your active character and enemies within a constrained area, and Jean’s Burst tends to ungroup enemies.
Sunfire Rotation
Faruzan EQ > Bennett EQ > Jean EQ > Wanderer CA E [preferred NA/CA combo] Q
Rotation Video
Triple Anemo

Faruzan is the glue that holds together Triple Anemo (sometimes referred to as An3mo). She provides valuable buffs to two other teammates and can Burst every rotation even without funneling particles.
Venti, Kazuha, and Sucrose all work as damage dealers and groupers in the Anemo flex slot. The choice between them depends on whether or not you can group the enemies you face, and if any of them are in demand for the other team in Abyss.
Bennett provides good buffing, healing, and Pyro application, but he can be switched for other units if an enemy has a Pyro shield. In overworld content, this team can forgo Bennett for a more comfortable defensive option.
Triple Anemo Rotation
With Venti
Faruzan Q > Venti EQ > Bennett EQ > Wanderer CA E [preferred NA/CA combo] Q
Rotation Video (with Venti)
With Kazuha
Faruzan E CA Q > Kazuha hEP > Bennett EQ > Kazuha Q > Wanderer CA E [preferred NA/CA combo] Q > Kazuha tEP > Bennett E
Rotation Video (with Kazuha)
Honorable Mentions
Although these teams deal less damage than the teams listed above, they are still more than capable of handling most content.
Double Hydro

A single-target team of four people who go to the same hairdresser. Yelan and Xingqiu, together with nearly any Anemo character holding 4pc Viridescent Venerer, can take down much of the Abyss with nearly any character added to the fourth slot. Wanderer is no exception. Xingqiu and Yelan decrease each others’ Energy Recharge requirements while providing large amounts of off-field damage.
Zhongli can replace Faruzan, and Wanderer can instead run 4pc Viridescent Venerer to reduce Hydro RES on enemies further, allowing Yelan and Xingqiu to more effectively carry.
Double Hydro Rotation
Faruzan E CA Q > Xingqiu EQ > Yelan EQ > Wanderer CA E [preferred NA/CA combo] (Q)
Rotation Video
Double Geo

This team deals good damage in both single-target and multi-target scenarios, although it should be noted that some Bosses can wipe out Geo Constructs through their attacks. Wanderer can take up most of the field time because Fischl, Albedo, and Zhongli all have low field-time requirements. Geo Constructs continue to resonate and generate particles, even when Wanderer gets hit. Oz provides good off-field damage.
This team’s greatest strength is that it doesn’t rely on any Burst besides Fischl’s. The team’s ER requirements are low even in single-target scenarios, which allows you to concentrate on offensive stats. Fischl can also be substituted with Bennett.
It is recommended to align Albedo’s Skill with Zhongli’s pillar rather than vice versa because Zhongli’s Hold Skill CD is longer than Albedo’s and his pillar is harder to properly place.
Double Geo Rotation
With Fischl
Zhongli hE > Albedo E > Fischl E > Wanderer CA E [preferred NA/CA combo] > Zhongli hE > Albedo E > Fischl Q > Wanderer CA E [preferred NA/CA combo] Q
Rotation Video (with Fischl)
Double Pyro

As with Yelan and Xingqiu, Bennett, Xiangling, and a 4pc Viridescent Venerer–holder can carry nearly any fourth member, and Wanderer is no exception.
Faruzan provides her usual buffs and carries 4pc Viridescent Venerer; Bennett adds Flat ATK to the party and heals; and Xiangling helps carry the team with raw Burst DMG.
The biggest drawback is that many other Bennett and Xiangling teams are just better than those with Wanderer. The team also has extremely high ER requirements.
Double Pyro Rotation
Faruzan EQ > Bennett QE > Xiangling QE > Wanderer CA E [preferred NA/CA combo] Q > Bennett E > Xiangling N2 (for funneling)
Rotation Video
Freeze

Freeze teams are difficult to assemble with Wanderer because Kokomi does not have long-range Hydro application, and Mona has limited application in general. They are also ineffective against Boss enemies. However, Layla and Xingqiu can help with these range issues at the cost of buffs and/or healing proficiency.
While Layla offers a shield, it may not be strong enough to be worth playing without a healer and oftentimes requires Kokomi’s help. Xingqiu can also work as a defensive option if you find Kokomi’s healing unnecessary, but he is fairly limited to single-target content. Alternatively, an Anemo healer like Jean or Sayu can be used in place of Faruzan at a massive cost to DPS.
Driver Teams
Before discussing this section in more detail, it is important to remember that Sucrose is a superior unit in Driver Teams. Playing Wanderer in her place does not provide an effective replacement, but rather a 'worse' alternative.
Wanderer does not excel compared to his competitors; he needs Wandering Evenstar — a limited gacha weapon — to perform decently, and his team requires more ER than with Sucrose because Sacrificial Fragments is a worse option for him. Sucrose’s grouping is useful for maximizing AoE damage. Wanderer does not have grouping, which makes him more difficult to use in the same scenarios.
If spamming Charged Attacks, Wanderer is capable of Swirling more frequently than Sucrose. However, this is typically impractical because he has to perform Normal Attacks in order to trigger coordinated attacks from units like Xingqiu and Yelan.
Finally, Sucrose can support her teammates via her EM buff — unlike Wanderer, who is designed as a purely offensive character.
With all that said, Wanderer can be used if other options are unavailable.
Taser

In this team, Wanderer is used to trigger Electro-Charged reactions via Swirls while holding 4pc Viridescent Venerer with EM/EM/EM main stats. His recommended teammates are Xingqiu, Fischl, and Beidou due to their strong off-field Hydro and Electro application. The combination of Xingqiu and Beidou provides great survivability, which lets you forgo a proper healer in favor of more damage.
Taser Rotation
With Beidou
Xingqiu EQ(E) > Beidou EQ > Fischl E > Wanderer E 4N3C > Fischl Q > Beidou E > Wanderer QE N3C
Rotation Video (with Beidou)
Hyperbloom

Hyperbloom Wanderer teams rely on continuous reaction damage triggered by his Swirls. His best teammates for this archetype are Nahida or Dendro Traveler, Fischl, and Xingqiu. Fischl is preferable to Kuki Shinobu and Raiden Shogun if building Wanderer as a full EM driver because she does not steal Wanderer’s Hyperblooms as much.
In this team, Wanderer is not a terrible replacement for Sucrose, but he is noticeably worse in AoE scenarios. In addition to having better crowd control, Sucrose has much more flexible rotations. Wanderer forces the rotation to revolve around his on-field time, whereas Sucrose can be swapped off immediately after her Skill or Burst is used.
Hyperbloom Rotation
With Nahida
Nahida EQ > Xingqiu EQ > Fischl E > Wanderer CA E [preferred NA/CA combo] Q
Nahida and Wanderer Burst every other rotation.
Rotation Video (with Nahida)
With DMC
Xingqiu EQ(E) > DMC EQ > Fischl E > Wanderer E 4N3C > Fischl Q > DMC E > Wanderer QE N3C
Rotation Video (with DMC)
Aggravate

Wanderer can drive Aggravate teams with his Charged Attacks, which stagger enemies more easily and trigger more Swirls per rotation than other Drivers’ attacks. The team takes full advantage of his Charged Attacks given that there are no teammates which require Normal Attacks like Xingqiu, Yelan, or Thoma.
In this team, Wanderer’s recommended build is 4pc Viridescent Venerer (VV) with EM/EM/EM main stats. The team’s strength is in multi-target scenarios and relies on Wanderer’s Charged Attacks for enemy staggering and grouping. Note that this team does not work in single-target scenarios, as Wanderer will not trigger Swirled Aggravates.
His best teammates for the flex slots are Beidou or Kuki for Electro, and Nahida, DMC or Yaoyao for Dendro. Beidou is the preferred Electro flex unit because of her damage reduction, interruption resistance, Charge Attack based off-field DPS, and small shield (at C1). Yaoyao is usually the safest Dendro option if you do not use Kuki due to her healing.
Rotation
With Yaoyao and Beidou
Beidou EQ > Yaoyao E > Fischl E > Wanderer N1 E CA-spam > Fischl Q > Beidou E > Yaoyao Q 2N2D > Wanderer N1 E 2C Q
Rotation Video
There is an accidental swap to Fischl before Yaoyao but the rotation is still solid.
Burgeon

Burgeon is the AoE equivalent of Hyperbloom; it replaces the Electro character with Thoma, who is most effective for Burgeon after Constellations are acquired.
In this team, unlike the other Driver teams, Wanderer prefers his conventional hypercarry build, because Burgeon is mostly triggered by Thoma.
Thoma offers a shield to protect Wanderer from interruption and provides Pyro to trigger Wanderer’s A1 Pyro buff. Yelan provides a ramping DMG% Bonus buff to Wanderer while dishing out high off-field damage. Xingqiu provides high off-field Hydro application and extra utility. Nahida or Dendro Traveler (DMC) share Elemental Mastery with the active character.
Note that this team is extremely Energy-hungry, especially if using Dendro Traveler. Using several Favonius weapons is strongly recommended to ensure Burst uptime to maintain consistency in rotations.
Burgeon Rotation
With Nahida
Nahida EQ > Xingqiu EQ > Thoma EQ > Wanderer E NA-spam Q
Nahida and Wanderer can Burst every other rotation.
Rotation Video (with Nahida)
With DMC
Xingqiu EQ(E) > DMC EQ > Thoma EQ > Wanderer E 4N3C Q > DMC (E)N2 > Wanderer N2
Xingqiu and DMC use E twice if Xingqiu holds Sacrificial Sword.
25s Triple Favonius Rotation Video
This rotation requires every teammate except Wanderer to hold a Favonius weapon. It also requires R5 Favonius Sword on DMC. Alternatively, after Wanderer's Normal Attack combo (and Burst), you can swap to Thoma and perform a couple Normal Attacks to funnel the Favonius particles to DMC.
27s Sacrificial Sword Rotation Video
Using Sacrificial Sword on Xingqiu extends the rotation but significantly reduces the ER requirements of both Xingqiu and DMC.
Note that in the video Xingqiu performs EEQ instead of EQE.
Wanderer Flight Mechanics

Extending the Windfavored State
Wanderer can extend the duration of his Windfavored state by performing a Charged Attack just before his special Kuugoryoku Points runs out. This allows you to fit in a final Charged Attack which benefits from the increased damage in this state.
His Windfavored state can also be extended by dashing and jumping (to increase hovering height). This can be used in exploration and is discussed further in the following sections.
Horizontal Flight
Wanderer can travel horizontally in many different ways. However, some methods travel further, consume fewer points, or travel faster than others.
Holding Dash (Recommended for Speed)
Press and hold dash once Wanderer begins hovering in his Windfavored state. This method is simple to perform and allows you to travel a reasonable distance in a short amount of time.
Spamming Dash (Not Recommended)
This method is not recommended because each dash does not propel Wanderer very far. It is also the least efficient.
Holding Dash (with Windfavored Extension)
Similar to the previous method, but with the only difference of releasing dash while you still have a few points left. These points are then used to perform a final dash to gain even more distance.
This method is slightly more difficult as you need to time the release to give yourself enough points for the last dash. It is only recommended if you are comfortable with this timing.
No Dashing (with Windfavored Extension)
This method allows you to travel the greatest horizontal distance by a large margin. However, it is also the slowest method of travel.
You can perform this by simply moving in a direction and dashing just before Wanderer’s points run out to inch out a little more distance.
Vertical Flight
Similar to horizontal flight, you can also jump to extend Wanderer’s Windfavored state while flying. There is a large difference in the height gained depending on when and how you jump.
Spamming Jump (Recommended)
Start spamming jump once Wanderer enters his Windfavored state. This will cause him to ascend at regular intervals and will elevate him to a reasonable height. No timing is required, making it the easiest combo to perform.
You can also perform a Windfavored extension by delaying your last jump just before you run out of points. This uses the remaining momentum to gain more height.
Holding Jump (Not Recommended)
Start holding jump once Wanderer enters his Windfavored state. This method provides the least height and should be avoided if you want to maximize the height gained.
Advanced Vertical Flight Techniques
These combos are for those who wish to squeeze out every last inch of height Wanderer asserts over the rest of his Anemo family. When done correctly, he can rise to more than twice the height of Kazuha and Venti’s Hold Elemental Skills.
Hold Jump Cancels
Wanderer begins consuming points to ascend at regular (“ticking”) intervals only after holding jump for a certain duration. You can release jump early to minimize the points consumed, while still gaining more height than just tapping jump.
Ascending Immediately
After activating Wanderer’s Elemental Skill, you can make him ascend immediately once its animation has finished by spamming jump. Remember to stop spamming once he begins his ascending animation so that you do not trigger the next jump too early.
This removes the need to wait and perfectly time your first jump because there is a cooldown between each ascension.
Flight Combos
Hold Cancel into Hold Jump (with Windfavored Extension)
This method allows Wanderer to ascend to the greatest height possible without his A1 Hydro buff, and it gives you more control throughout his ascent. However, it requires you to pay attention to your points while holding jump.
- Hold jump until points start being consumed.
- Hold jump again until only a few points remain.
- Tap jump once to extend the Windfavored state and gain more height.
3 Hold Cancels (with Windfavored Extension)
This method allows Wanderer to ascend to the greatest height currently possible.
Similar to the previous Hold cancel method, but with less Point leeway. It is more difficult to perform because you need to release jump just before points begin getting consumed. You should familiarize yourself with this timing first.
- Hold jump and release just before points are consumed (one or two ticks is fine).
- Repeat two more times until you only have a few points remaining.
- Tap jump once to extend the Windfavored state and gain more height.
References
- Wanderer Mastersheet by Emiliabyss, et al.
- Ash Wanderer Mastersheet by Ash.
- List of Resources thanks to Wanderer Mains.
- Wanderer Quick Guide
Credits

Emiliabyss#1641 — Author, calcs || Named Wanderer “Zampano”
Lacudai#2755 — Co-Author, Teambuilding
Anmaru#6288 — Co-Author, Overworld Flight Techniques
Ash — QA, Calcs
Edulis — Calcs
Luna — QA, Calcs, Team Rotation Videos
Kisa — QA, Calcs
Raikh — Early-TC Consultation, Calcs
Tatsu — QA
Anmaru#6288 — Overworld Information, Flight Videos
Casdela#5121 — TC Content Editing, Team Rotation Videos
cote#4733 — Team Rotation Videos
Cyn#0962 — QA, CA Cancel Video, Team Rotation Videos
fourmana#0477 — Line Editing
irokei#6189 — Transcription, Team Rotation Videos
idkanonymized#4166 — Copy Editing
Nikatosaurus#5639 — Copy Editing
