Updated for Version 4.5

Yanfei is a 4-star Pyro Catalyst character who primarily acts as an on-field damage dealer centered around her ranged Pyro application and enhanced Charged Attacks. Learn about Yanfei’s best builds, Talent priority, best weapons, best artifacts, and best teams in this quick guide.
Note that the information given may change if new discoveries are made. More extensive testing is in progress.
The full-length guide is available here. It is heavily outdated and currently being updated, please visit our Discord to learn more about Yanfei.
Table of Contents
New Content
 Furina | Furina brings long-lasting off-field Hydro application and damage, along with a powerful teamwide buff, but she requires a healer to bring out her potential. Her teamwide HP drain allows Yanfei to effectively use the 4pc Marechaussee Hunter set. |
 Xianyun | Xianyun consolidates teamwide healing and 4pc Viridescent Venerer RES Shred. She enables a unique Plunging Attack–oriented playstyle for Yanfei. |
 Chevreuse | Chevreuse brings plentiful buffs to teams composed of only Pyro and Electro units. While they normally have no access to Vaporize, they are nonetheless viable teams for Yanfei. Chevreuse also provides some modest healing. |
  Cashflow Supervision, Tome of the Eternal Flow | These 5-star Catalysts are CRIT stat sticks in most teams, but they become Yanfei’s best options by a large margin when used with Furina. |
 Chiori | Chiori is a 5-star off-field Geo damage dealer. She does not have much strong synergy with Yanfei and is a suboptimal option in her teams. |
Infographic

Credits to: cuppacote, nikatosaurus & haafr
Character Overview
Playstyles
On-Field Pyro DPS
Yanfei’s Pyro Normal and Charged Attacks allow her to trigger numerous Pyro reactions such as Vaporize and Overloaded from a distance. In particular, the lack of ICD on her Charged Attacks allows her to consistently trigger Vaporize for substantial damage. Her frequent use of fast Normal Attacks also make her a good driver for off-field damage dealers such as Beidou, Xingqiu, and Yelan.
Xianyun enables Yanfei to perform Plunging Attacks, which replace her Charged Attacks but are still capable of consistently triggering Vaporizes.
On-Field Transformative Reaction DPS
An off-shoot to her typical Pyro DPS playstyle that focuses on dealing Transformative Reaction damage (i.e., by triggering Overloaded and/or Burgeon). In this playstyle, Yanfei only needs levels and EM and is not reliant on performing Stamina-consuming and interruptible Charged Attacks.
Shield Support (C4+)
With her Constellation 4, Yanfei can create a Pyro shield that provides some survivability without Talent investment, while also contributing towards Pyro Resonance. She can also apply Pyro aura for Double VV Vape setups. However, this playstyle requires a high investment into Energy Recharge since her shield can only be deployed using her Burst. A niche playstyle, as other shielder options will outshine Yanfei outside of a few specific teams that require her Pyro Element.
Talents
Level and Talent Priority
If Yanfei is triggering numerous Transformative Reactions such as Overloaded and Burgeon, raising her to Level 90 is highly recommended to maximize her reaction damage.
Normal Attack > Elemental Burst > Elemental Skill
For builds that focus on Transformative Reactions or her C4 shield, Talent levels are not required due to her negligible personal damage in such cases.
Talent Overview
 Normal Attack | Seal of Approval
Talent Description
Normal Attack
Shoots fireballs that deal up to three counts of Pyro DMG.
When Yanfei’s Normal Attacks hit enemies, they will grant her a single Scarlet Seal. Yanfei may possess a maximum of 3 Scarlet Seals, and each time this effect is triggered, the duration of currently possessed Scarlet Seals will refresh.
Each Scarlet Seal will decrease Yanfei’s Stamina consumption and will disappear when she leaves the field.
Charged Attack
Consumes Stamina and all Scarlet Seals before dealing AoE Pyro DMG to the opponents after a short casting time.
This Charged Attack’s AoE and DMG will increase according to the amount of Scarlet Seals consumed.
Plunging Attack
Gathering the power of Pyro, Yanfei plunges towards the ground from mid-air, damaging all opponents in her path. Deals AoE Pyro DMG upon impact with the ground.
Yanfei’s Normal Attack sequence launches projectiles that home in and can hit enemies at a decent range. Each Normal Attack hit grants Yanfei a Scarlet Seal for 10s, stacking up to 3 Seals (or 4 at C6). The duration for all Seals is refreshed for each new Seal gained.
When Yanfei uses a Charged Attack, she consumes her currently held Scarlet Seals to increase her Charged Attack’s damage and AoE, as well as reduce its Stamina consumption. Her Charged Attacks have no ICD, which allows each one to trigger a reaction. Her Charged Attacks are also considered Blunt damage, which allows them to trigger Shatter and effectively damage Geo shields.
As a Catalyst user, Yanfei’s Plunging Attacks always deal Pyro damage. This gives her some added teambuilding flexibility with Xianyun, as she is not reliant on C6 Bennett’s Pyro Infusion.
 Elemental Skill | Signed Edict
Talent Description
Summons blistering flames that deal AoE Pyro DMG.
Opponents hit by the flames will grant Yanfei the maximum number of Scarlet Seals.
A single instance of Blunt Pyro damage. Its primary use is to instantly provide Yanfei with the maximum amount of Scarlet Seals along with particle generation.
 Elemental Burst | Done Deal
Talent Description
Triggers a spray of intense flames that rush at nearby opponents, dealing AoE Pyro DMG, granting Yanfei the maximum number of Scarlet Seals, and applying Brilliance to her.
Brilliance
Has the following effects:
· Grants Yanfei a Scarlet Seal at fixed intervals.
· Increases the DMG dealt by her Charged Attacks.
The effects of Brilliance will end if Yanfei leaves the field or falls in battle.
Deals a single instance of Pyro damage, and instantly grants Yanfei the maximum amount of Scarlet Seals. It also imbues the Brilliance state while she remains on-field, which increases Yanfei’s Charged Attack damage and passively grants her Scarlet Seals during its duration. While it provides many benefits, it is typically only used every other rotation due to its high Energy Cost.
In Xianyun teams, it is recommended to neglect using Yanfei’s Burst entirely, as it has no benefit to her Plunging Attacks (aside from interruption resistance via her C4).
 Ascension 1 Passive | Proviso
Talent Description
When Yanfei consumes Scarlet Seals by using a Charged Attack, each Scarlet Seal will increase Yanfei’s Pyro DMG Bonus by 5%. This effect lasts for 6s. When a Charged Attack is used again during the effect’s duration, it will dispel the previous effect.
A simple Talent that increases Yanfei’s Pyro DMG% after her Charged Attacks consume Scarlet Seals.
 Ascension 4 Passive | Blazing Eye
Talent Description
When Yanfei’s Charged Attack deals a CRIT Hit to opponents, she will deal an additional instance of AoE Pyro DMG equal to 80% of her ATK. This DMG counts as Charged Attack DMG.
Allows Charged Attacks that crit to deal a second hit that can also apply Pyro. This Talent can be detrimental since excess Pyro application can overtake useful Elemental auras.
Constellations
 Constellation 1 | The Law Knows No Kindness
When Yanfei uses her Charged Attack, each existing Scarlet Seal additionally reduces the stamina cost of this Charged Attack by 10% and increases resistance against interruption during its release.
A simple Constellation that can alleviate the Stamina issues from Yanfei’s Charged Attack-centric playstyle.
 Constellation 2 | Right of Final Interpretation
Increases Yanfei’s Charged Attack CRIT Rate by 20% against enemies below 50% HP.
A straightforward CRIT Rate buff that is excellent for Yanfei’s personal damage, but may cause more unwanted A4 procs.
 Constellation 3 | Samadhi Fire-Forged
Increases the Level of Signed Edict by 3.
Maximum upgrade level is 15.
A simple but negligible Skill damage increase.
 Constellation 4 | Supreme Amnesty
When Done Deal is used:
Creates a shield that absorbs up to 45% of Yanfei’s Max HP for 15s.
This shield absorbs Pyro DMG 250% more effectively.
Enables Yanfei’s shielder playstyle, boosts her survivability, and provides interruption resistance in her DPS playstyles. The added survivability is also greatly appreciated in Burgeon teams.
 Constellation 5 | Abiding Affidavit
Increases the Level of Done Deal by 3.
Maximum upgrade level is 15.
Increases the Charged Attack DMG Bonus granted by Yanfei’s Burst. A very minor damage improvement.
 Constellation 6 | Extra Clause
Increases the maximum number of Scarlet Seals by 1.
Increases the maximum number of held Scarlet Seals to 4. At 4 Seals, Charged Attacks consume no Stamina and deal maximum damage. This eliminates Yanfei’s Stamina issues and slightly increases the value of her Burst and A1 Passive. This Constellation does not change Yanfei’s preferred attack combos, since N2Cs still gain maximum Seals while her Burst is active.
Combos
N = Normal Attack
C = Charged Attack
P = Plunging Attack
hP = High plunge
lP = Low Plunge
E = Elemental Skill
Q = Elemental Burst
J = jump (cancel)
[ ] = repeat these actions the specified number of times
Yanfei’s general attack combo will consist of an opening combo with her Skill and Burst (when available), a series of Normal Attack combos, and finally an ending combo when her Skill is off cooldown. An example of a full combo is N1 EQ 3[N3C] N1 E C, where N1 EQ is the opening combo and 3[N3C] N1 E C is the Normal Attack combo.
Opening Combos
With Burst
| N1 EQ | Easy-to-execute opening combo. |
| N1 Q N1C N1 E C | Another opening combo that better utilizes the Seals generated by Yanfei’s Skill and Burst while also maximizing Vaporizes. |
Without Burst
| N1 E C | Opening combo for when Yanfei’s Burst is not available. |
Normal Attack Combos
Pyro DPS
| 3[N3C] | Standard combo that ensures a Hydro aura before Yanfei uses Charged Attacks when using either non-C6 Xingqiu or non-C2 Yelan. It also uses the least amount of Stamina among her normal combos. |
| 4[N2C] | Highest-damage normal combo due to a balance of Scarlet Seal generation and Charged Attack frequency. Generally requires a high amount of off-field Hydro to consistently Vaporize Yanfei’s Charged Attacks. |
| N3C + N2C Hybrid | Alternating between the above combos can act as a middle ground between the two, especially if frequent dodging is required. |
| N1 E C | Used at the end of the rotation when Yanfei’s Skill is off cooldown. |
Reaction DPS
| 4[N3C] | This combo is a reasonable option in Overload teams. It has a decent trigger frequency with low Stamina consumption. |
| 5[N2C] | This combo allows for the most possible Overloaded procs. |
| Normal Attack Spam | Yanfei’s Normal Attacks are preferred in Burgeon as they detonate Dendro Cores while applying less Pyro than her Charged Attacks. They also have faster animations and do not require Stamina to be used. |
Plunge Combos (Xianyun)
| E 8[JhPD] | The preferred combo if Furina is the sole Hydro unit. It is best to wait slightly for a Hydro aura to be applied on the enemy before performing each Plunging Attack to ensure Vaporizes. |
| E 8[N1JP] | This combo is used if either Xingqiu or Yelan are on the team, maximizing off-field attacks and applying Hydro aura for each Plunging Attack. |
Pyro DPS
Pyro DPS ER Requirements
| Solo Pyro | With Bennett | |
| Burst Every 2 Rotations | 120–130% | 100–120% |
- Assumes that Yanfei uses 2 Skills per rotation, or 4 Skills per Burst. In teams with Bennett, he uses 2 Tap Skills per rotation.
- Yanfei’s exact ER requirements will depend greatly on her team’s composition and gear. Each Favonius proc reduces ER requirements by around 10–20%.
For an on-field DPS playstyle, it is recommended to use Yanfei’s Burst every other rotation instead of sacrificing substats for enough ER% to use her Burst every rotation. Yanfei may opt to never cast her Burst when using 4-piece Shimenawa’s Reminiscence or in a Plunge playstyle; in such cases avoid building any ER%.
Use the Energy Recharge Calculator to determine exact requirements for your team and rotation.
Pyro DPS Artifact Stats
 Sands |  Goblet |  Circlet |
| EM or ATK% | Pyro DMG Bonus | CRIT Rate or CRIT DMG |
Stat Priority: CRIT > EM ≥ ATK% > ER%
ATK% and EM Sands perform similarly for a Vaporize DPS playstyle; the better of the two will depend on external buffs. EM Sands is often slightly better, particularly with Bennett. However, EM is completely useless if Yanfei does not trigger reactions at all, such as in Mono Pyro teams. Some ER% substats may be helpful to guarantee her Burst every 2 rotations, especially in teams without Favonius weapons.
Because of Yanfei’s A4 Passive, there is a slight advantage to CRIT Rate over CRIT DMG such that a 3:5 ratio may be preferred as opposed to the usual 1:2 ratio. However, players should not go out of their way to only stack CRIT Rate.
Pyro DPS Artifact Sets
 4pc Crimson Witch of Flames | Overall Best-in-Slot in Vaporize teams by a slight margin. Its Pyro DMG Bonuses boost all of Yanfei’s damage sources, and it also increases the damage of all Pyro-related reactions. |
 4pc Marechaussee Hunter | Definitive Best-in-Slot set when used in teams with Furina, but it should not be used outside of those teams. |
 4pc Wanderer’s Troupe | Grants an unconditional boost to Charged Attacks, which make up the majority of Yanfei’s DPS. Its 2pc effect also grants an EM bonus which enhances reaction damage. |
 4pc Gilded Dreams | Provides 180 EM and 14% ATK in teams with a second Pyro unit, or 230 EM when Yanfei is Solo Pyro. She can easily maintain the set bonus with her various Pyro attacks, though the effect can deactivate right before a Charged Attack hits. Gilded Dreams gains additional value in Overvape teams since it buffs Overloaded as well. |
 2pc Mixed Sets | 2pc Bonuses: Pyro DMG%, EM, ATK%, Normal and Charged Attack DMG% A mix of 2-piece sets can be useful when building towards a full 4-piece set, or if substats are exceptional. |
4pc Shimenawa’s Reminiscence | Trades Yanfei’s passive Seal generation (and her C4 shield) for a more consistent but slightly weaker Charged Attack DMG Bonus that can be used every rotation. Shimenawa’s performance drops significantly when using N2C combos, particularly at C6. |
 4pc Lavawalker | Viable option only in teams that can maintain a Pyro aura. Not recommended to farm. |
Pyro DPS Weapons
 Lost Prayer to the Sacred Winds | One of Yanfei’s Best-in-Slot weapons for general use. Provides a substantial amount of highly valued CRIT Rate, and Yanfei’s long field time requirement synergizes well with the weapon passive. |
 Kagura’s Verity | A strong alternative to Lost Prayer due to its useful stats. It is possible to maintain all stacks after the second rotation, further increasing its damage potential in extended fights. |
Cashflow Supervision | Yanfei’s Best-in-Slot weapon in teams with Furina by a noticeable lead compared to most weapons. In teams without Furina, it is still a potent stat stick even without its passives in effect. Cashflow’s Attack SPD buff is largely insignificant for Yanfei. |
Tome of the Eternal Flow | A close second-best option in Furina teams after Cashflow, and a decent CRIT DMG stat stick in other teams. Its HP stat slightly boosts Yanfei’s C4 shield. |
 A Thousand Floating Dreams | Gives Yanfei an unmatched amount of EM as well as some Elemental DMG% buffs. Also provides some EM to the rest of the team. Significantly stronger in Overvape teams due to its high EM benefitting Overloaded. |
 The Widsith | Yanfei’s strongest 4-star option, and often surpassing many of her 5-star options at high refinements. While its buffs are active, it has near unparalleled output. However, the long cooldown on its passive reduces its performance in longer fights. Note that the EM buff is useless in non-Vaporize teams, which can make its randomized buffs frustrating in said teams. |
 Sacrificial Jade | Provides a hefty amount of CRIT Rate and a modest amount of EM, both of which are well appreciated in Yanfei’s Vaporize playstyles. Refinements on this weapon are a marginal damage increase. Its HP buff has some usefulness in increasing Yanfei’s C4 shield durability. |
 Tulaytullah’s Remembrance | Boasts a modest amount of CRIT DMG and high Base ATK, but its Normal Attack DMG% and Attack SPD buffs are largely insignificant for Yanfei. |
 Skyward Atlas | This weapon gives a large amount of ATK% and an unconditional Elemental DMG Bonus. However, its value diminishes slightly with external ATK buffers. |
 Memory of Dust | Similar performance to Skyward Atlas especially with consistent shielding. While Yanfei’s C4 shield can fulfill this requirement, it is still comparatively fragile compared to those of dedicated shielders. Greatly diminishes in value when used with external ATK buffers. |
 Mappa Mare | Decent free-to-play weapon option that performs well in Vaporize teams, especially with high refinements. |
 Dodoco Tales | Good free-to-play weapon for those who have it, with a consistent buff to Yanfei’s Charged Attacks. |
 Flowing Purity | This craftable option works well in Vaporize playstyles and is her best free-to-play weapon in non-Vaporize teams. This weapon’s performance improves in teams with strong healers. |
Pyro DPS Teambuilding
Rotation Notation
- N = Normal Attack
- C = Charged Attack
- A = Aimed Shot
- P = Plunging Attack
- E = Elemental Skill
- tE = Tap Skill
- hE = Hold Skill
- Q = Elemental Burst
- D = dash (cancel)
- J = jump (cancel)
- W = walk (cancel)
- > = switch character
- ( ) = these actions are optional; please refer to the notes below
- [ ] = repeat these actions the specified number of times

- Yanfei as an on-field DPS works best in teams with a mix of buffers and off-field damage dealers. She works particularly well with teammates that consistently apply Elemental auras for Yanfei to trigger reactions such as Vaporize or Overloaded.
- Shielders (or her C4) can be helpful in allowing Yanfei to perform her attack strings at closer range without interruption. However, this generally leads to lower damage potential.
- Yanfei’s Charged Attacks and Skill trigger Shatter when used on Frozen enemies, dealing paltry damage and preventing either Melt or Vaporize. As such, avoid using off-field Cryo appliers in Yanfei’s Vaporize teams.
Yanfei’s personal damage is best improved with fast off-field Hydro application from one or two Hydro appliers to help her consistently Vaporize her Charged Attacks. Xianyun teams work on a similar principle, though they focus on Vaporizing her Plunging Attacks instead.
Yanfei teams can also ignore reactions to instead focus on stacking buffs or dealing off-field damage. These teams have simpler gameplay as there is no need to maintain Hydro aura.
Notable Teammates
Vaporize and All Archetypes
  Xingqiu, Yelan | These two units both offer fast off-field Hydro application, primarily single-target. Xingqiu’s Rain Sword orbitals offer added Hydro application, interruption resistance, damage reduction, and minor healing. His damage reduction improves shields created by Yanfei or her teammates. Yelan offers a ramping DMG% buff which synergizes well with Yanfei’s extended field time. Her lack of on-contact Hydro application can make Double Swirl setups more consistent, but her slower Hydro application pre-C2 can struggle to maintain Pyro aura unassisted. Xingqiu and Yelan can be paired together to reduce each other’s ER requirements and deal potent single-target damage. |
Furina | Furina provides persistent off-field damage and Hydro application, as well as a significant teamwide DMG% buff that requires a dedicated healer to use effectively. In Vaporize teams she works best with either Xingqiu or Yelan to reduce her ER requirements, improve Hydro application, and benefit from Hydro Resonance. Yanfei may also enable Furina to trigger Vaporize, particularly with the help of another off-field Pyro applier. Furina’s personal damage and team buff can compensate for not Vaporizing Yanfei’s Charged Attacks. |
 Bennett | Bennett is highly recommended, as he provides healing, Pyro Particles, Pyro Resonance, and a substantial Flat ATK buff on his Burst. His buff gains further value with teammates who can snapshot it such as Fischl. |
 Kazuha, Sucrose, Heizou | Anemo units provide grouping and RES Shred through 4-piece Viridescent Venerer (4pc VV), along with buffs such as TTDS or Kazuha’s A4 Passive. Be careful to not absorb Pyro on Kazuha’s or Sucrose’s Bursts in Reverse Vaporize teams to avoid stealing reactions from Yanfei. |
 Xianyun | Xianyun offers teamwide healing, 4pc VV RES Shred, and enables any character to perform buffed Plunging Attacks. She is the basis of Yanfei’s Plunge-oriented playstyles. |
 Jean | Jean is best used in teams with Furina to provide team healing and shred enemy Hydro RES. She can also apply Pyro off-field when used in conjunction with Bennett. |
  Fischl, Yae Miko | Fischl and Yae Miko offer good off-field Electro damage. Electro application allows Yanfei to trigger both Overloaded and Vaporize simultaneously and also helps slower Hydro appliers in maintaining Hydro aura. |
 Kokomi | Kokomi cannot sustain a Hydro aura by herself, but she can supplement it with a second Hydro, especially in AoE. She also brings healing and buffs via TTDS and Tenacity of the Millelith (ToTM). |
 Beidou | Beidou provides off-field AoE damage that scales well in multi-target, defensive utility through her Burst’s damage reduction, and interruption resistance. However, her ER requirements skyrocket without Fischl. |
 Zhongli | Zhongli provides immense survivability and Interruption Resistance, allowing Yanfei to execute her combos at close range easily. He also provides convenient Universal RES Shred and can give buffs through 4pc ToTM, 4pc Archaic Petra, or 4pc Instructor. |
Non-Vaporize–Only
Chevreuse | Chevreuse requires strict team compositions to activate her passives, but she compensates with strong teamwide buffs that require little setup. |
 Xiangling | Xiangling deals substantial off-field damage and benefits from having Pyro teammates to reduce her ER requirements. |
 Chiori, Albedo | Chiori and Albedo act as off-field Geo damage dealers. They are most effective in Double Geo teams to enable Geo Resonance. |
Example Teams
This is not a comprehensive list of teams. The inclusion or exclusion of any given team does not necessarily reflect its power level.

Bennett buffs both Yanfei and Fischl, as the latter’s Skill can snapshot. Fischl provides off-field damage and Electro application that allows Yanfei to trigger Overvape.
Sample Rotation
Xingqiu EDQ N1 > Bennett N1 EQ > Fischl N1 E/Q > Yanfei combo

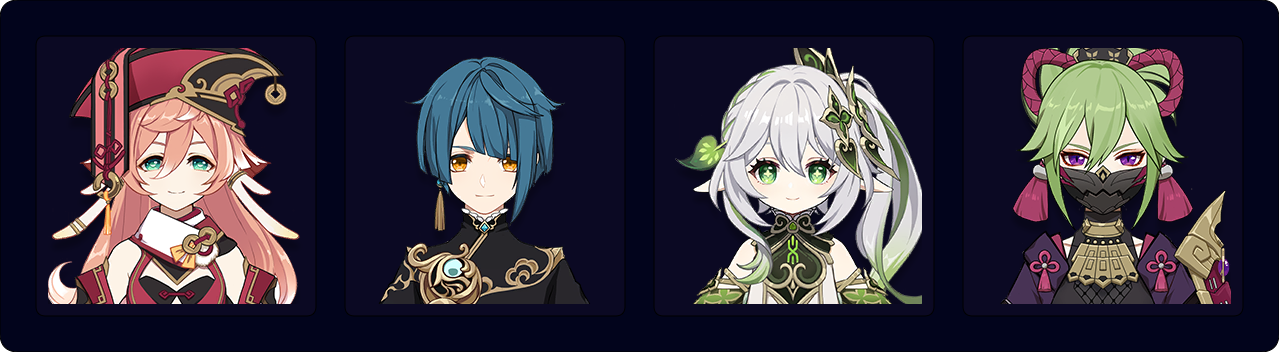
Xianyun generates plenty of Fanfare stacks while allowing Yanfei to deal significant damage via Vaporized Plunges. This team is quite comfortable due to its teamwide healing, lack of restrictive teammate AoEs, and simple Plunge Combos that can also be used to dodge attacks.
Sample Rotation
Furina ED Q > Xianyun EPQ > Yelan EQ N1 > Yanfei E 8[N1JP]

Zhongli should hold either 4pc Archaic Petra to buff Xingqiu and Yelan (assuming he can pick up the Hydro Crystallize shard) or 4pc Instructor to buff Yanfei; if not equipping either set, use Zhongli’s Hold Skill at the start of the rotation.
Sample Rotation
Xingqiu EQ N1 > Yelan EQ N1 > Zhongli N1 hED > Yanfei combo

In this VV Vape team, Kazuha Swirls both Pyro and Hydro to apply RES Shred and activate his A4 buff for both Elements. Avoid contacting enemies during setup, as Xingqiu’s Rain Sword orbitals may remove Pyro aura before it can be Swirled.
Sample Rotation
Xingqiu EQ N1 > Bennett E N1 Q N1 > Kazuha hEP N1 > Yanfei combo

Make sure to cast Xiangling’s Pyronado while Bennett’s ATK buff and Kazuha’s A4 Passive are active to snapshot those buffs. Kazuha ideally Swirls Pyro again before Yanfei’s field time to extend the duration of VV RES Shred.
Sample Rotation
(Yanfei N1)¹ > Kazuha N1 tEPQ > Bennett Q E > Xiangling Q E > Kazuha tEP > Yanfei combo
¹First rotation only.

Sample Rotation
(Fischl C)¹ > Bennett EQ > Fischl N1 E/Q > Chevreuse hE N1 Q >Yanfei E C N2C Q/C 4[N2C]
¹First rotation only.
Transformative Reaction DPS
Reaction DPS ER Requirements
Yanfei may opt to never cast her Burst when acting as a Transformative Reaction DPS; avoid building any ER%.
Reaction DPS Artifact Stats
Sands | Goblet | Circlet |
| EM | EM | EM |
Stat Priority: EM ≫ ER%
For an on-field Transformative Reaction DPS, Elemental Mastery should be prioritized as it is the only stat that contributes to Overloaded and Burgeon damage. Energy Recharge substats can still have value since Yanfei’s Burst provides reduced Charged Attack Stamina consumption and a shield at C4+. CRIT Rate is detrimental since A4 procs can cause Pyro to overtake other auras, reducing the frequency of Yanfei’s reactions.
It is also possible to use a hybrid build similar to that of Pyro DPS Yanfei but with more emphasis on EM. This can be more convenient than farming another set, but it will typically result in lower damage output, particularly in AoE.
Reaction DPS Artifact Sets
4pc Gilded Dreams | Yanfei’s general Best-in-Slot for this playstyle. It provides a large amount of EM, as Yanfei is often the sole Pyro character in her Transformative Reaction teams. |
 4pc Flower of Paradise Lost | A marginal improvement over Gilded Dreams for Burgeon teams, but this set is worse outside of them. Not recommended to farm specifically for Yanfei. |
 2pc EM + 2pc EM | 2-piece combinations may be easier to obtain, as EM main stat artifacts can be rare. Avoid using Instructor pieces due to the lower stats. |
4pc Crimson Witch of Flames | Gives a decent boost to Overloaded and Burgeon damage, but it is still a worse set than Gilded Dreams. Not recommended to farm. |
Reaction DPS Weapons
A Thousand Floating Dreams | Best-in-Slot for Yanfei’s Transformative Reaction builds. Provides an unmatched amount of EM. Also provides some EM to her team. |
 Sacrificial Fragments | Has the second-highest EM stat of all Catalysts. Additional Skill uses can be helpful for reducing her Stamina consumption, but they otherwise do not greatly affect this playstyle. |
 Wandering Evenstar | This weapon provides less EM than Magic Guide, but it can give a substantial permanent ATK buff to teammates like Fischl or Yae Miko. |
 Magic Guide | Has the third-highest EM stat while being very cheap to level. |
 Hakushin Ring | Provides an Elemental DMG% buff for Electro teammates and enables more frequent Bursts at the cost of reaction damage. |
Burgeon and Overloaded Teambuilding
Rotation Notation
- N = Normal Attack
- C = Charged Attack
- A = Aimed Shot
- P = Plunging Attack
- E = Elemental Skill
- tE = Tap Skill
- hE = Hold Skill
- Q = Elemental Burst
- D = dash (cancel)
- J = jump (cancel)
- W = walk (cancel)
- > = switch character
- ( ) = these actions are optional; please refer to the notes below
- [ ] = repeat these actions the specified number of times

- Yanfei’s Transformative Reaction playstyle is either Burgeon- or Overloaded-focused.
- Yanfei can afford to swap off more often to cast teammates’ Skills, as she is not reliant on her Burst or other buffs for her damage.
Yanfei can trigger numerous Transformative Reactions with sufficient off-field Hydro, Dendro, and/or Electro application. Care must be taken so that Pyro or Burning does not overtake as an aura. These teams are best used in multi-target content for several reasons:
- Burgeon and Overloaded have a sizable AoEs, allowing damage to scale with more targets.
- Reaction ICD is specific to each enemy — alternating which enemies are attacked thus triggers more reactions.
- Switching targets can prevent Yanfei from applying too much Pyro onto any enemy. AoE Hydro appliers become more valuable in this regard.
In Burgeon teams, at least one party member should hold the 4pc Deepwood Memories set to shred enemy Dendro RES. A strong healer or shielder is also recommended to counteract Burgeon’s self-damage.
Notable Teammates
Burgeon and Overloaded
  Xingqiu, Yelan | Xingqiu offers additional Hydro application on contact, interruption resistance, damage reduction, and minor healing. Yelan’s ramping DMG% buff is unable to buff Yanfei’s Transformative Reactions, but she can easily use her Skill off cooldown in these teams. |
 Kokomi | Kokomi consolidates AoE Hydro application (though it is too slow to generate many cores by herself) with strong healing that counteracts Burgeon self-damage. |
 Zhongli | Zhongli provides survivability, Universal RES Shred (which boosts Overloaded and Burgeon damage), interruption resistance, and potentially team buffs via artifact sets. |
Fischl | Fischl provides strong single-target damage, and her fast Electro application is mandatory in Overloaded teams. She also enables Quicken in Burgeon teams, which helps create more Dendro Cores. To top it off, she greatly reduces the ER requirements of other Electro teammates. |
Burgeon-Only
 Nahida | Nahida is the best Dendro applier due to her peerlessly consistent AoE application. She can freely swap in to mark enemies with her Skill as needed, and her EM buff boosts Yanfei’s reaction damage. |
  Dendro Traveler, Collei | Accessible alternatives to Nahida. Hydro should be applied onto Dendro Traveler’s Burst to prevent it from being destroyed by Pyro. |
 Yaoyao, Baizhu, Kirara | Off-field Dendro appliers that also provide defensive utility. They apply Dendro slowly, so they should be paired with other Dendro units to compensate. |
 Kuki Shinobu | Kuki provides healing and off-field Electro application to act as an excellent Hyperbloom trigger. |
Overloaded-Only
 Beidou, Yae Miko | Beidou excels in multi-target and can use her Skill frequently to counter damage and generate particles, whereas Yae functions better in single-target and deals front-loaded damage with her Burst. |
 Chevreuse | Chevreuse provides a teamwide ATK% buff and easy Pyro and Electro RES Shred, the former of which also increases Overloaded damage. She also consolidates some healing. |
Bennett | Bennett gives potent ATK buffs and healing with his Burst, as well as Pyro Resonance. His Burst’s Flat ATK buff is valued by off-field teammates who can snapshot. |
Anemo Units | Anemo units offer VV Shred and other utilities such as grouping, healing, or additional team buffs. |
Example Teams
This is not a comprehensive list of teams. The inclusion or exclusion of any given team does not necessarily reflect its power level.

Kokomi’s AoE Hydro application and healing make this team quite comfortable to play; her Skill duration can be refreshed with either her Burst or Sacrificial Fragments, the latter of which also allows her to reposition it.
Shinobu’s Skill has a 1.5s delay between procs, which normally causes excess Dendro Cores to accumulate. This could lead to “wasted” damage — while Kuki can trigger numerous Hyperblooms simultaneously, targets only take damage from Bloom reactions up to two times every 0.5s. Yanfei can detonate Dendro Cores that would otherwise be wasted for additional AoE damage.
Shinobu’s Electro application also causes Quicken and Electro-Charged auras, allowing more Blooms to be created. It can also minimize Burning and remove Pyro auras by triggering Overloaded.

If using Archaic Petra on Zhongli, pick up Electro shards with Zhongli before deploying Oz and Beidou’s Burst so they snapshot the Electro DMG% buff.

This team is very flexible due to the long durations of Fischl and Yae’s turrets and Chevreuse’s buffs.
Shield Support
Shield Support ER Requirements
| Double Pyro | Triple Pyro | |
| Burst Every Rotation | >250% | >250% |
| Burst Every Rotation, R5 Prototype Amber | ~250% | ~200% |
- Assumes 1 Skill per Burst.
- Yanfei’s exact ER requirements will depend greatly on her team’s composition and gear. Each Favonius proc reduces ER requirements by around 10–20%.
Shield Support Artifact Stats
Sands | Goblet | Circlet |
| Energy Recharge or HP% | HP% | HP% or CRIT Rate (if Favonius) |
Stat Priority: ER% (until requirement) > HP% > Flat HP > CRIT Rate (if Favonius)
Energy Recharge is vital to ensure access to Yanfei’s Burst. Afterwards, HP stats should be prioritized to increase her shield’s durability. CRIT Rate is only relevant if using Favonius Codex.
Shield Support Artifact Sets
 2pc Mixed Sets | 2pc Bonuses: HP%, Energy Recharge Combinations of 2pc sets are effective options for meeting Yanfei’s high ER requirements and/or increasing her shield’s toughness, but they provide no team buffs. |
 4pc Noblesse Oblige | Noblesse has reduced shield durability compared to HP% sets, but it provides a handy ATK% buff to the team. |
Shield Support Weapons
 Prototype Amber | The preferred weapon for shielder builds, alleviating much of Yanfei’s ER requirements while also bolstering her shield. It also provides minor teamwide healing. |
 Favonius Codex | Favonius decreases the entire team’s ER requirements, but it regenerates less Energy for Yanfei and provides a weaker shield. It can be difficult to trigger its passive without substantial amounts of CRIT Rate. |
 Thrilling Tales of Dragon Slayers | An incredibly niche option. While its ATK buff can be impactful and its HP stat is appreciated, it doesn’t help Yanfei recharge her Burst at all and heavily restricts rotations. This weapon is only realistically used in Lyney teams. |
Shield Support Teambuilding
Rotation Notation
- N = Normal Attack
- C = Charged Attack
- A = Aimed Shot
- P = Plunging Attack
- E = Elemental Skill
- tE = Tap Skill
- hE = Hold Skill
- Q = Elemental Burst
- D = dash (cancel)
- J = jump (cancel)
- W = walk (cancel)
- > = switch character
- ( ) = these actions are optional; please refer to the notes below
- [ ] = repeat these actions the specified number of times

“Shieldfei” is best used with Pyro damage dealers for enabling Pyro Resonance and/or VV Vape setups. Her lack of off-field Pyro application prevents her from stealing reactions such as Vaporize.
For VV Vape setups, Yanfei can use any combination of Charged Attack, Skill, or Burst so long as it removes Hydro aura and applies a Pyro aura before she swaps out.
It is not recommended to use a shielder Yanfei outside of these teams, since her extremely high ER requirements and lack of utility make her subpar compared to other shielders.
Notable Teammates
 Lyney | Lyney appreciates a shield to avoid getting interrupted while using his Charged Attacks. As a Pyro unit, Yanfei contributes towards his A4 Passive. It is even possible to run TTDS to further buff Lyney. However, her Burst cooldown forces the team to run a 20s rotation. |
 Hu Tao | Hu Tao is relatively vulnerable due to her HP drain and high Stamina consumption at C0. Yanfei can shield in VV Vape teams while also not stealing any Vaporizes from Hu Tao; this allows a pre-C2 Yelan to maintain Hydro aura more consistently. However, there is some anti-synergy if using Prototype Amber, as its healing can delay the activation of Hu Tao’s A4 Passive. |
 Ganyu | Ganyu is reliant on her Charged Attacks in Melt playstyles. Yanfei acts as a serviceable shielder, with her high ER requirements somewhat mitigated by Pyro Particles generated by Bennett and Xiangling. |
 Yoimiya | Yoimiya wants to perform her Normal Attack string without interruption from neither enemy hits nor dodging, and she also benefits from Pyro Resonance. |
Example Teams
This is not a comprehensive list of teams. The inclusion or exclusion of any given team does not necessarily reflect its power level.

Sample Rotation (TTDS Variation)
Bennett EQ > Kazuha tEP > Yanfei EQ > Lyney 3[C] Q E > Bennett E > Lyney C
Sample Rotation (Prototype Amber Variation)
Lyney E* > Kazuha tEPQ > Yanfei EQ > Bennett EQ > Kazuha tEP > Lyney 4[C] Q/C E
*Only in the first rotation

Sample Rotation
Yelan EQ N1 > Yanfei N1 Q E > Sucrose N2 E > Hu Tao combo
Credits
nikatosaurus, kolvii, idkanonymized, sew, .pweep, luno_, leah, irokei, seima, nocii, polomo, dejaroo, uhinf1999, chasing_haze, raven.9205, haafr
Team images made with the KQM Portrait Generator.