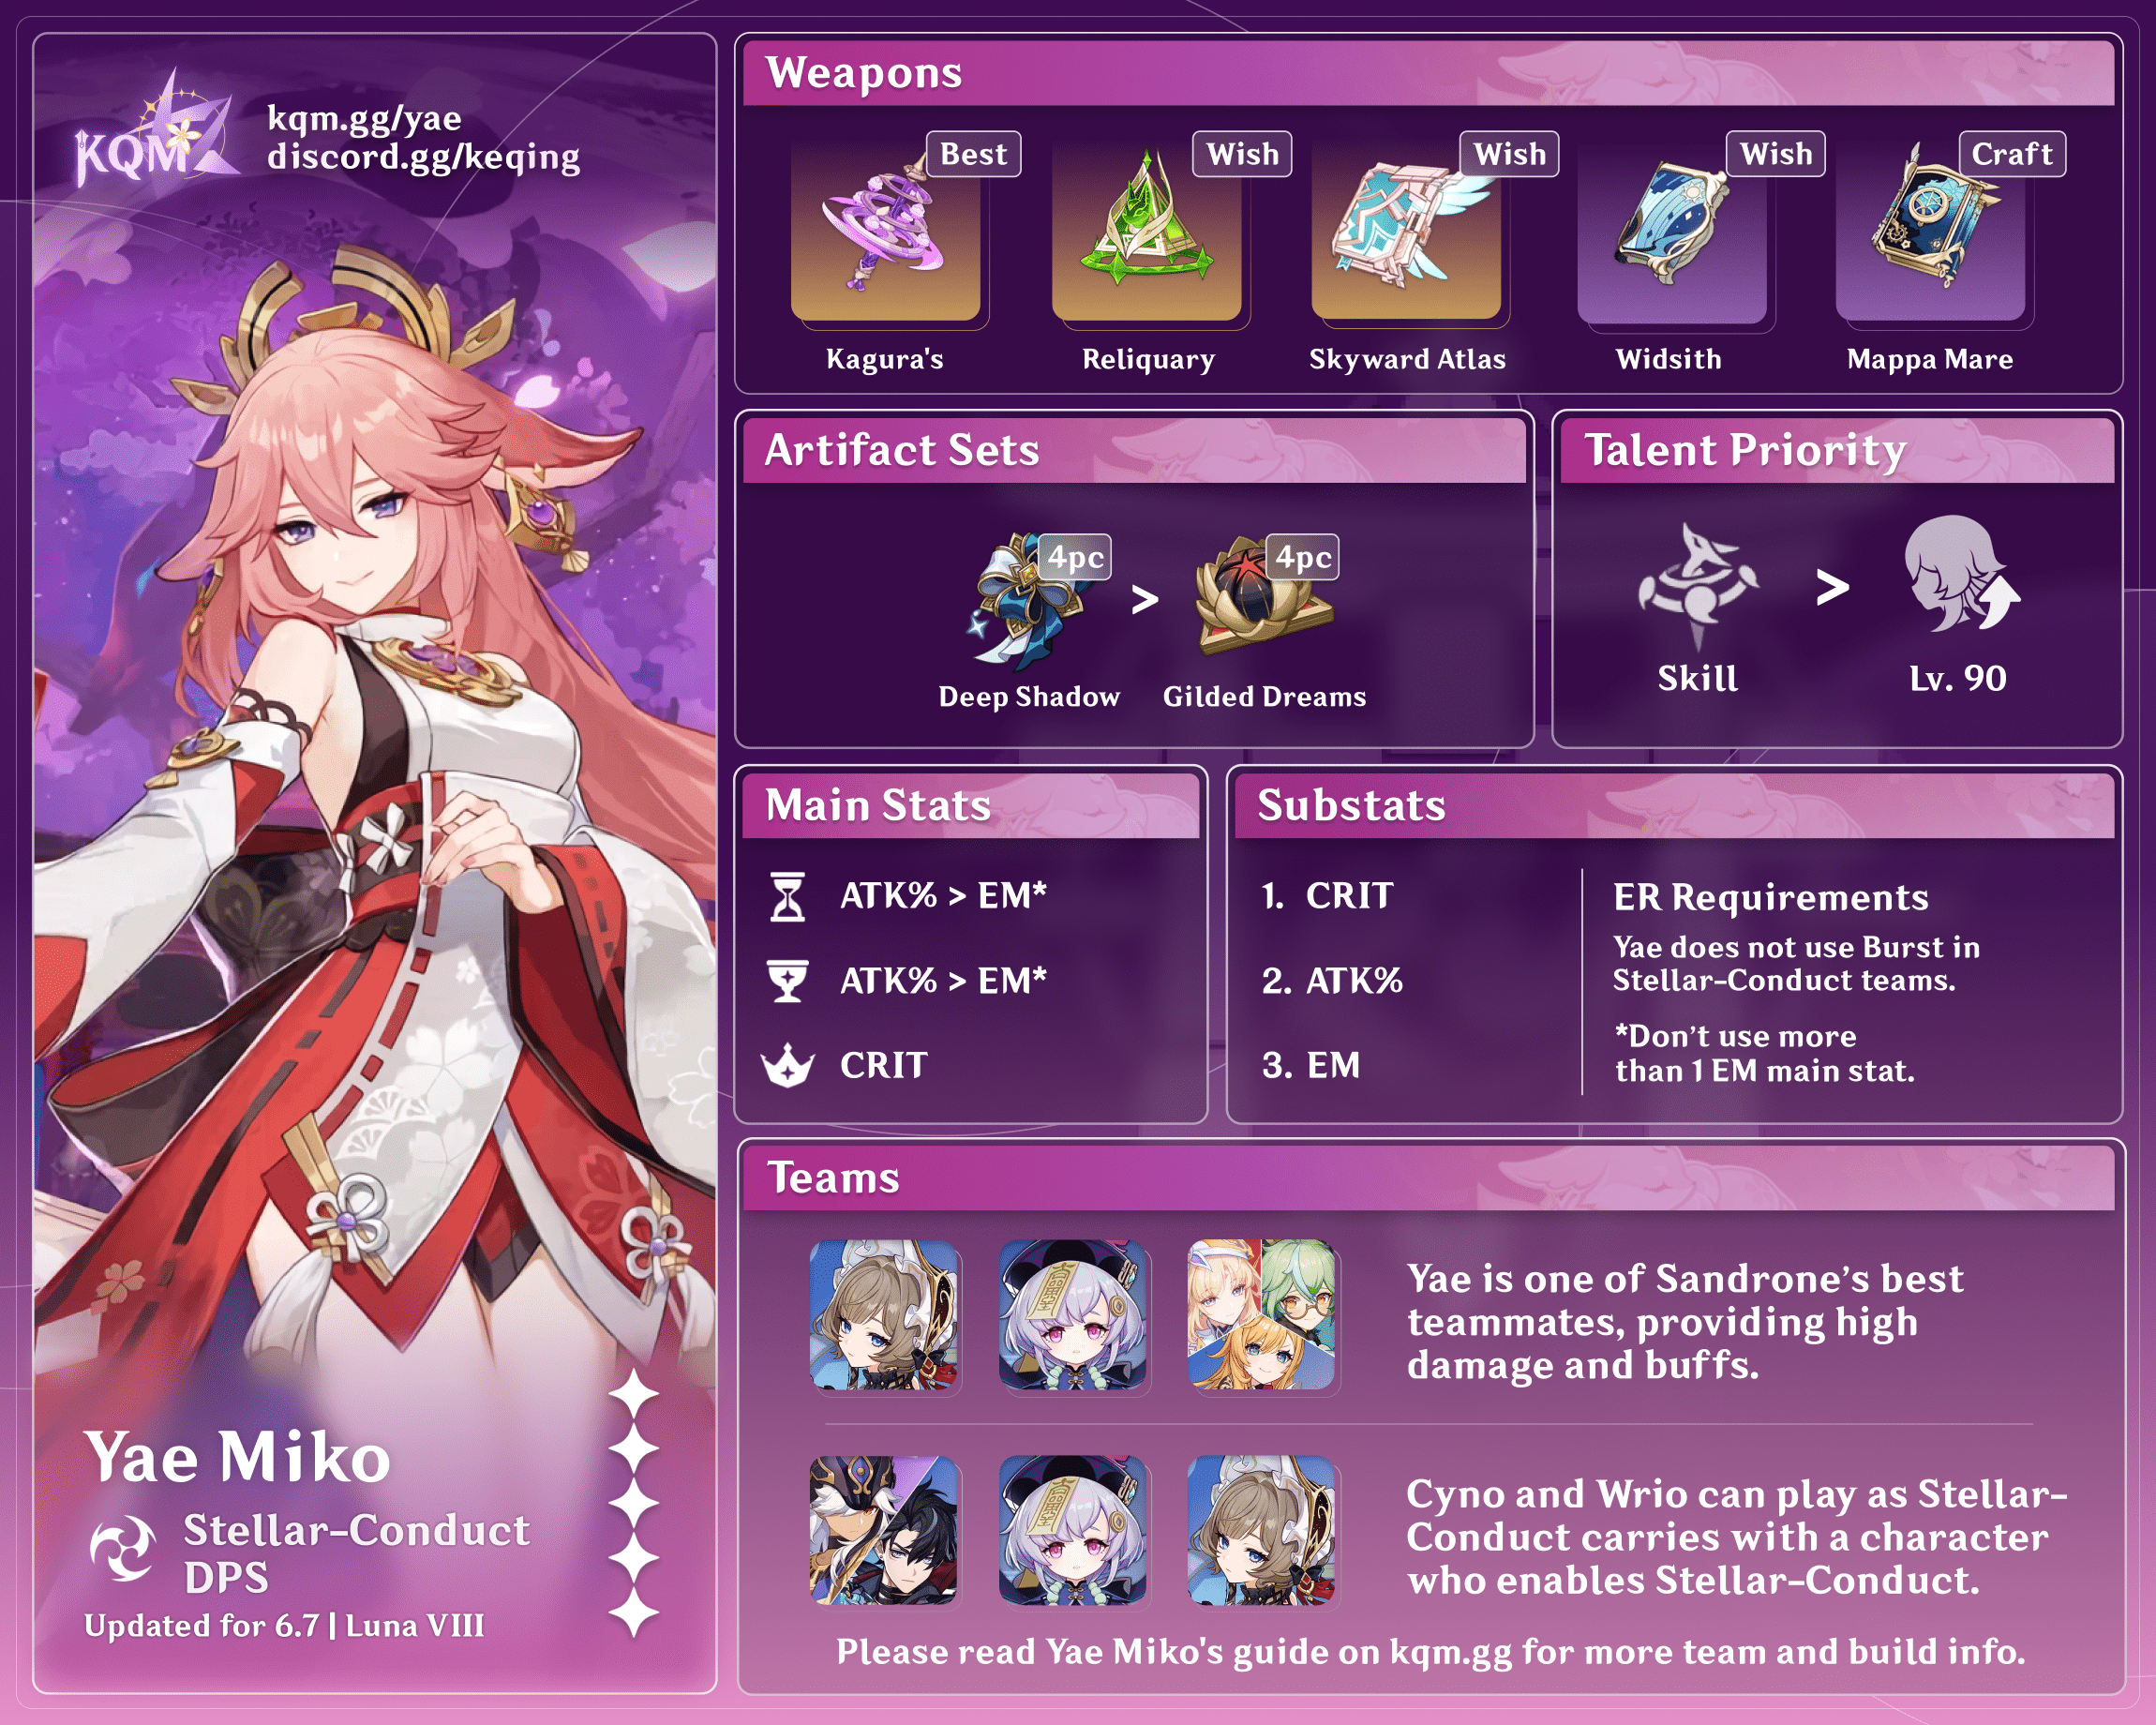
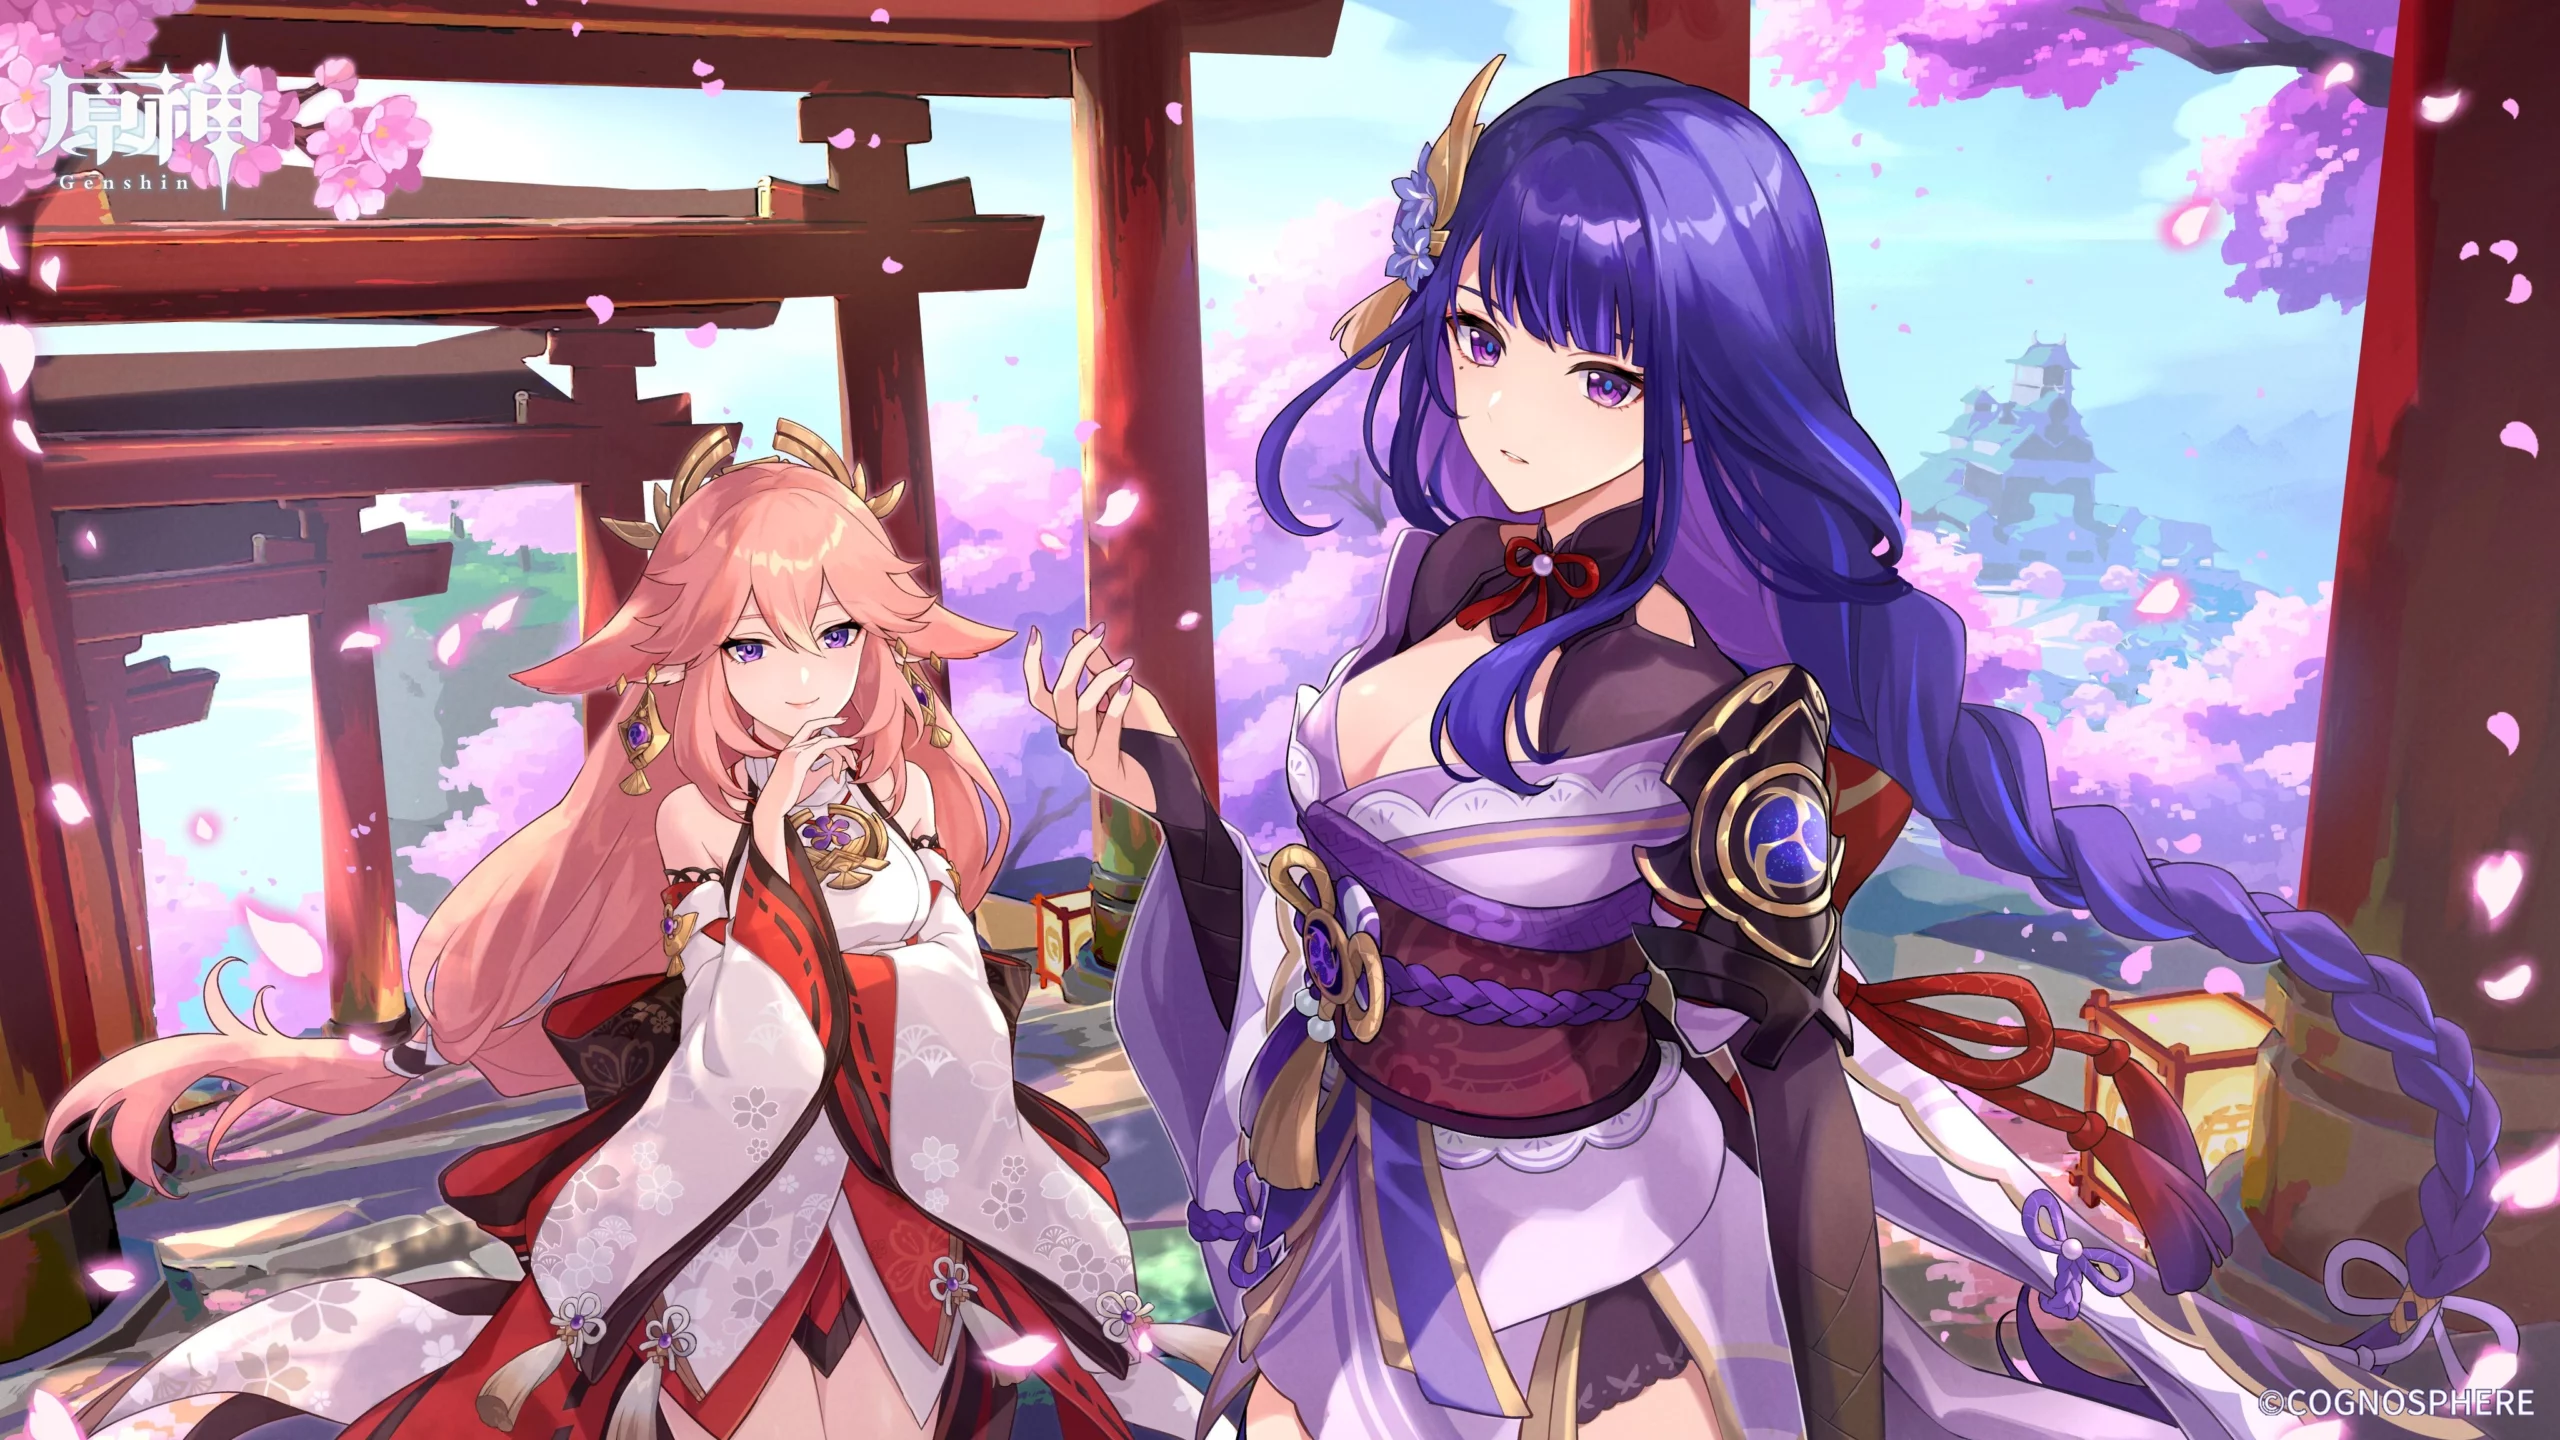
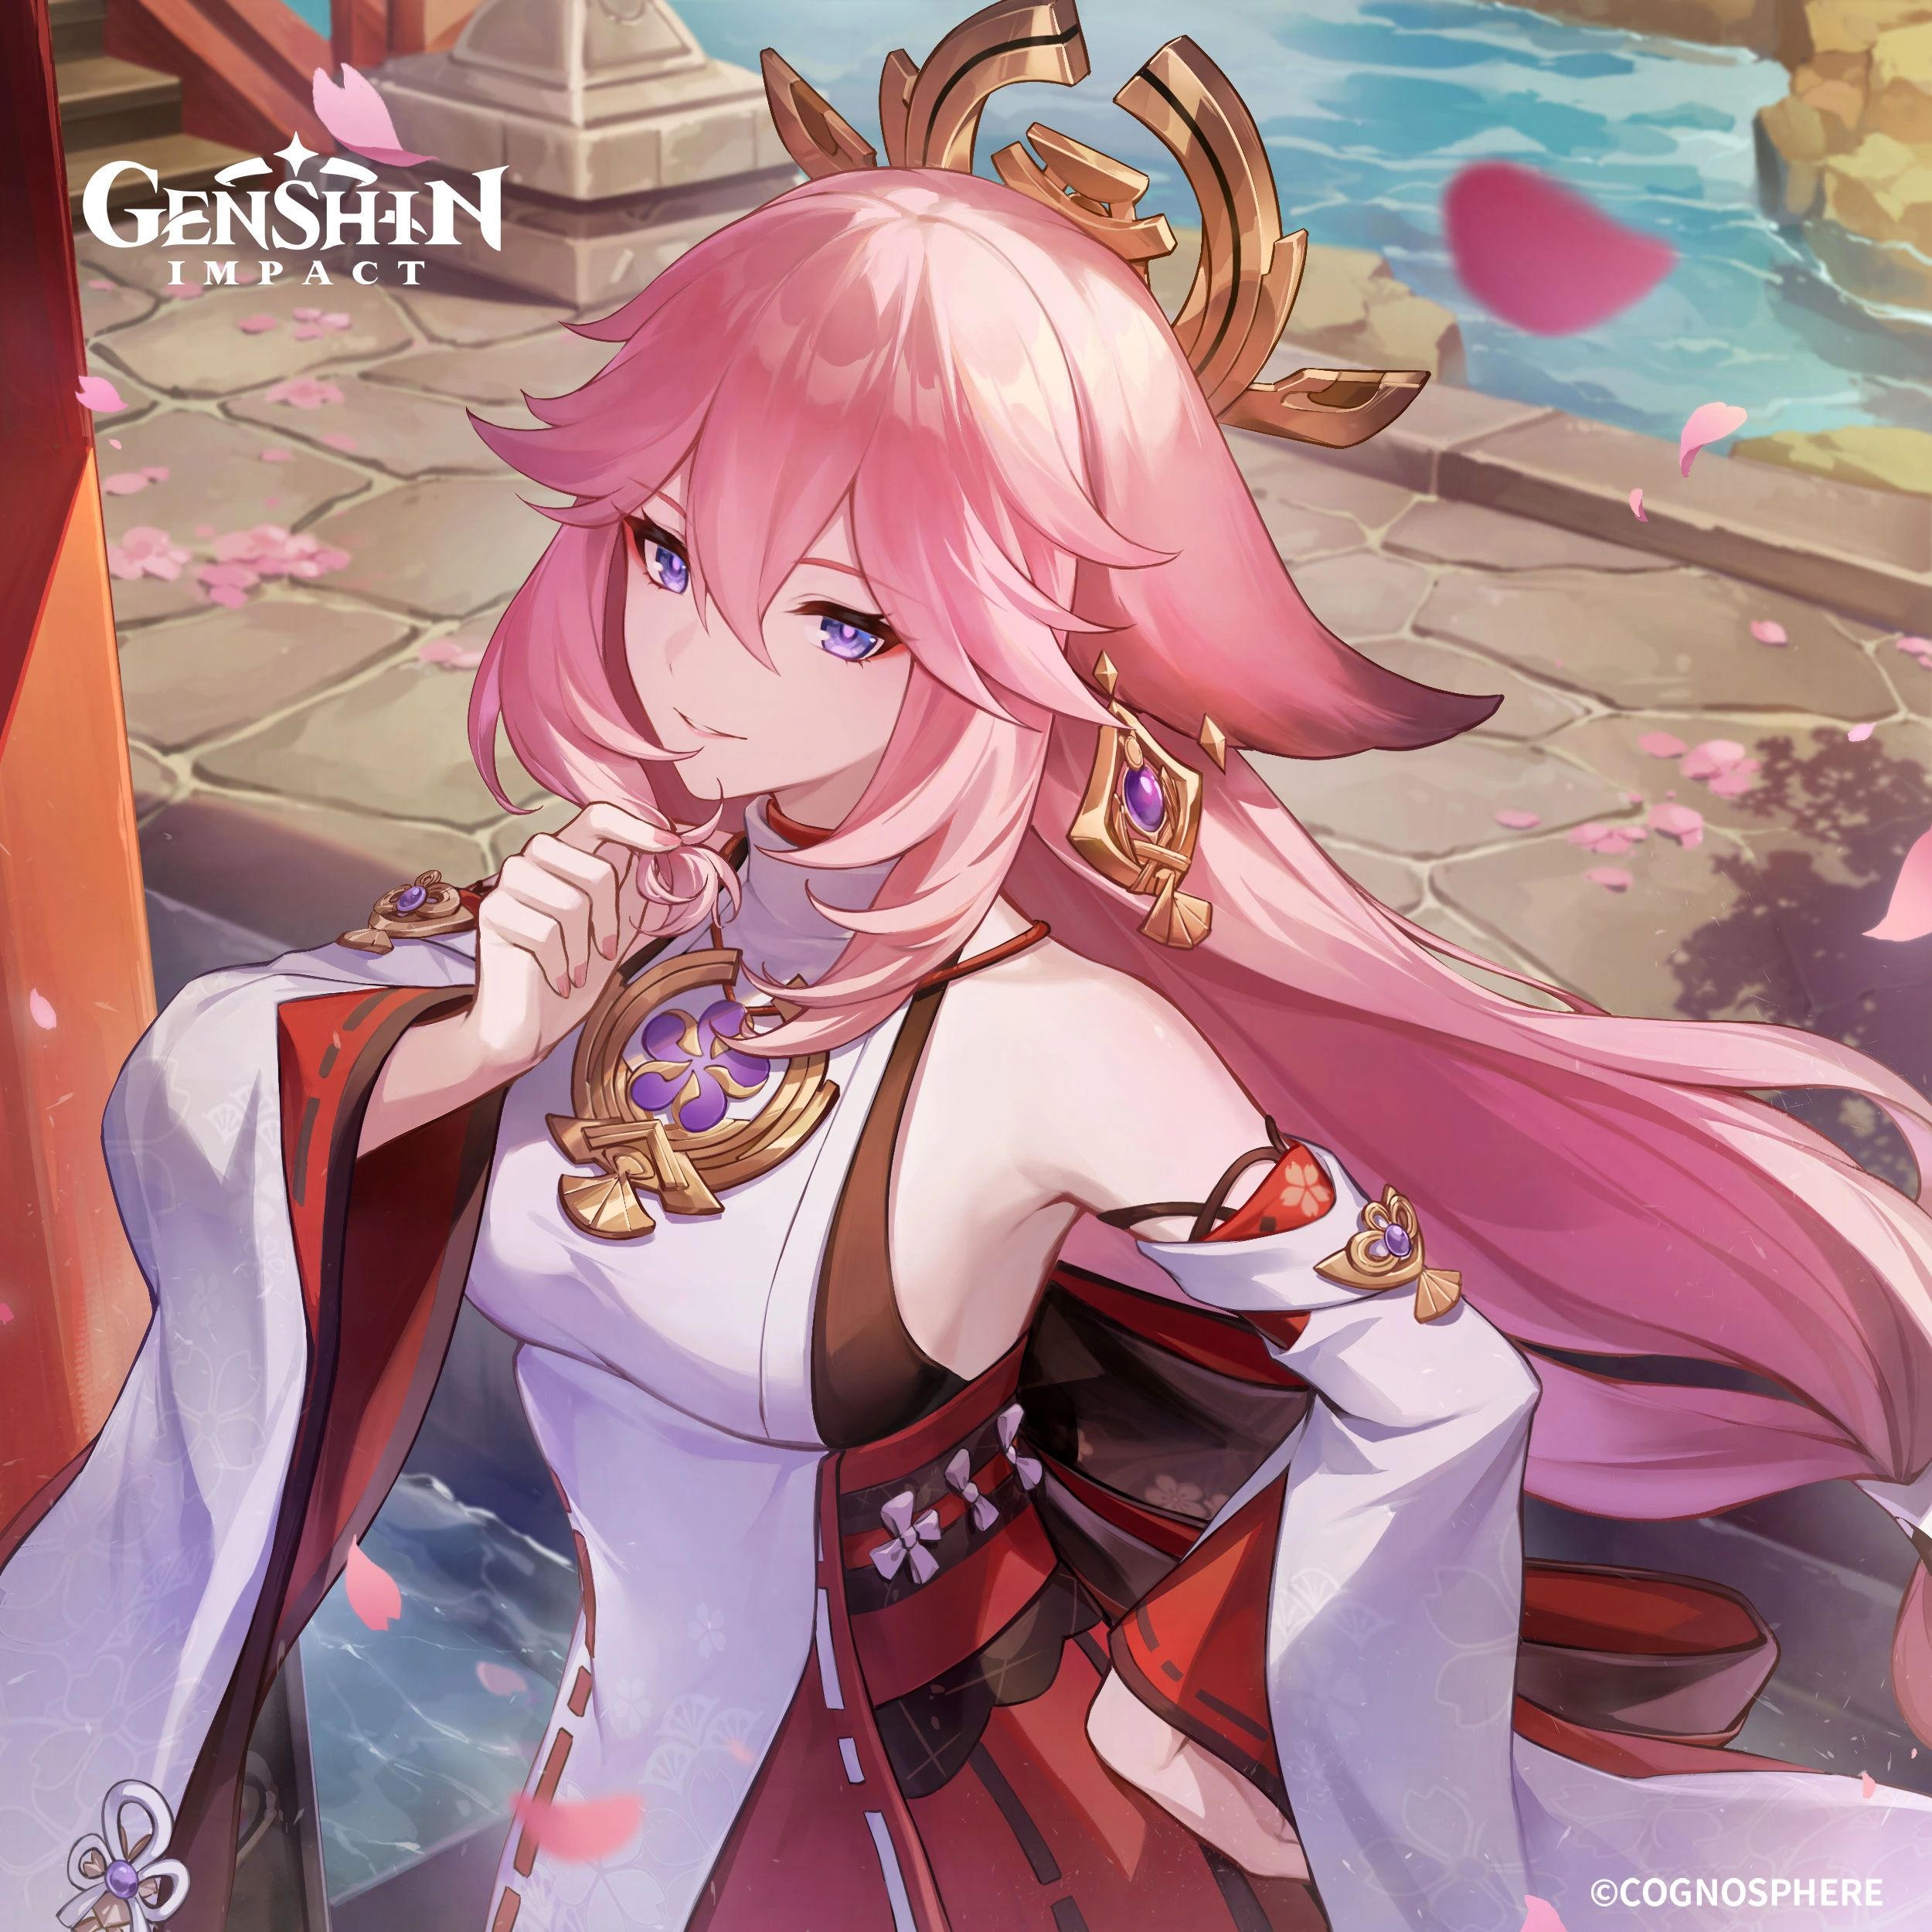
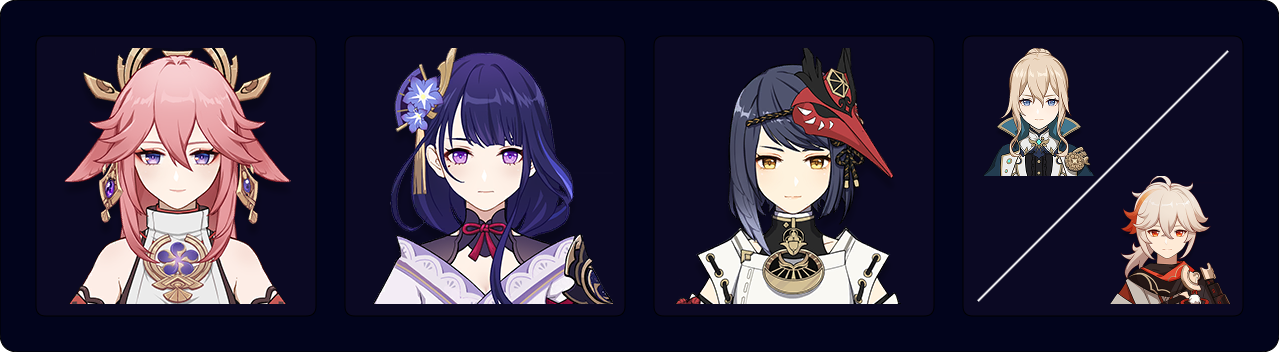
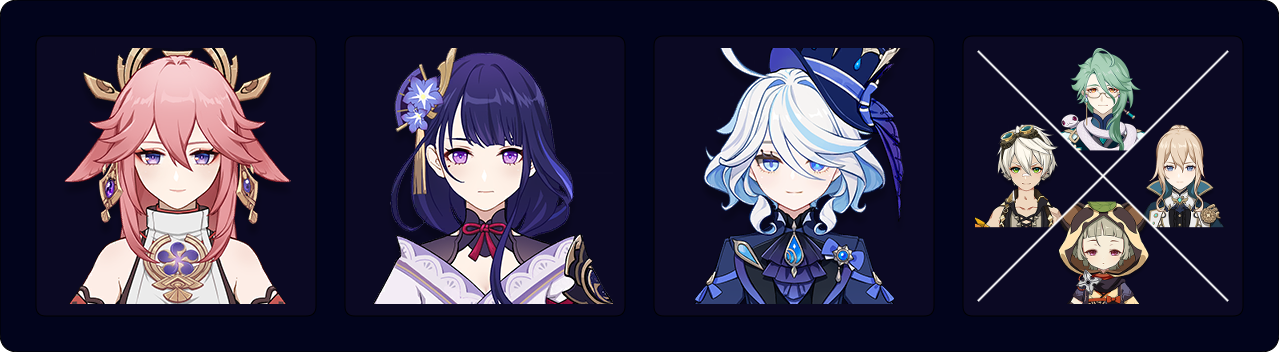
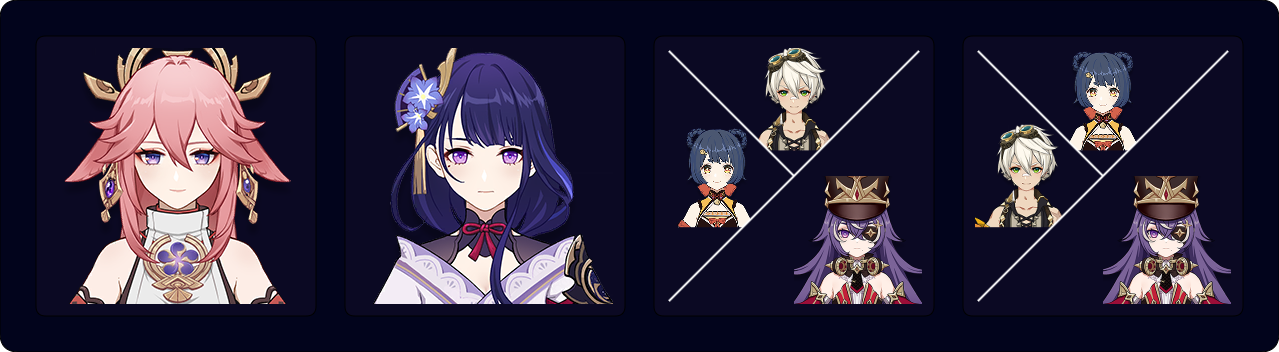
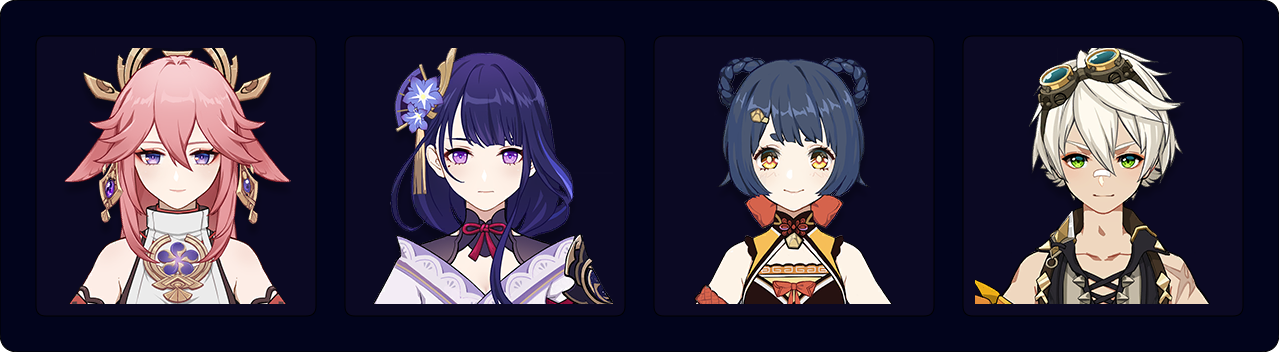
A Yae Miko Guide
Written by rarepossum
Updated for Version 4.5
The moon is simply magnificent tonight. We mustn’t squander it. Come, join me for a moonlight stroll — I won’t take no for an answer.
Table of Contents
Introduction
Yae Miko is a versatile off-field Electro DPS unit who deals great personal damage, provides consistent Electro application, and specializes in having cute ears and fluffy pink tails. This guide examines Yae Miko's kit in-depth to help you better understand her best builds, best teams, best weapons, best artifacts, synergies, Talents, Constellations, and more!
TL;DR
Credits to: laynnea, haafr, and KQM Staff
Why Play Yae Miko?
Tails.
Pros
- Fluffy pink tails
- High single-target damage
- Solid performance in multi-target scenarios, especially with Aggravate
- Extremely flexible rotations
- Powerful nuke with her Burst
- Strong sustained damage with her Skill
- Very pretty animations
- Easy gameplay
- Diverse playstyles
- Fluffy pink tails
Cons
- High ER requirements, making her reliant on units like Raiden or Fischl to use her Burst
- Somewhat clunky Skill that takes up significant field time
- Low HP and DEF base stats, making her one of the squishiest characters in the game
- Highest–Energy Cost Burst in the game (90 Energy)
- Awkward 22s Burst cooldown
- Fluffy pink tails are not permanent
Glossary
FAQ
Should I pull C1 or R1?
This is down to a matter of preference. Which do you value more: damage or comfort?
R1 Kagura’s Verity provides a massive boost in damage compared to every other weapon and is more consistent than options like Widsith. It is also a noticeably bigger DPS gain than C1. However, this increase is mostly tied to Yae’s Skill damage. As a result, R1 may be less useful for speedruns, especially if you are willing to reset for the right Widsith buff.
C1, on the other hand, provides a massive decrease to Yae’s ER requirements, making her significantly easier to build and more flexible in gameplay. However, her C1 does not always lower her ER needs dramatically. This is especially the case when Yae is played on-field, where she does not need to build any ER%.
Is Yae’s Burst important?
Yes and no.
Yae’s Burst is an incredibly powerful nuke, especially when buffed by characters like Kazuha, Bennett, and Raiden. In teams with high amounts of ATK buffs, her Burst is not strictly necessary, so you should use it when possible; its extremely high damage and large AoE make it very powerful.
However, in other teams, especially Aggravate teams, Yae’s Burst contributes significantly less damage compared to her Skill, except in AoE scenarios. It is still worth using her Burst if it is available, but it’s not so important that you should go out of your way to use it. Often, it is better to reserve Yae’s Burst until there is an opportune moment when the enemy is more vulnerable.
How good are her tails?
Very.
Character Overview
Right here! Right now! Emerge!
Playstyle Overview
Yae Miko has three primary playstyles depending on her field time and which abilities she uses. In all of her playstyles, Yae is a DPS unit; she is rarely played purely as a support.
Skill + Burst
This playstyle uses Yae’s Skill and Burst in an off-field role. In some teams, their damage is roughly equal, with Yae’s Burst providing a significant front-loaded nuke. This is good for quickly reaching enemy HP thresholds or killing waves of weaker enemies.
In other teams, such as Aggravate, her Skill deals the vast majority of her damage. Nevertheless, her Burst still contributes significant damage, may be saved for more time-sensitive scenarios, and has higher value in multi-target content compared to her Skill’s single-target damage.
Driver
In some teams, particularly quickswap and Aggravate teams, there is no clear choice for an on-field unit. Since Yae is an Electro Catalyst, she has relatively fast Normal and Charged Attack animations. As a result, she is an effective driver for units like Fischl, Xingqiu, and Yelan, or she can be a viable Hyperbloom trigger who directly hits Dendro Cores.
Additionally, none of Yae’s Talents can snapshot, so being on-field allows her to benefit from buffs like Bennett’s Flat ATK buff or Nahida’s EM buff. While Yae uses her Normal Attack Talent in this playstyle, her Skill and Burst still constitute most of her damage.
Skill-Only
Yae can also be used solely for her Elemental Skill, where she contributes raw Skill damage, Electro application, and potentially some buffs. Skill-only Yae is common with on-field DPS units, such as Alhaitham, Eula, Navia, or Hu Tao. In such teams, Yae is not a major damage dealer, and there is insufficient time or Energy generation to Burst.
Talents
Level and Talent Priority
 ≥
≥  >
> 
Skill ≥ Burst > Normal Attack
Yae’s Skill accounts for most of her damage, so it should always be your priority to level. However, in some teams like Raiden — Bennett — Kazuha, Yae’s Burst deals roughly the same amount of damage as her Skill.
Yae’s Normal Attacks, even when she is driving, typically do not deal massive amounts of damage. As such, leveling her Normal Attack Talent level isn’t that important.
In Aggravate teams, you should raise Yae to Level 90, since this massively increases her Aggravate damage. Outside of Aggravate teams, leveling Yae to 90 is not particularly important, though ascending her to 80/90 is recommended.
In a Skill-only Yae playstyle, her Burst and Normal Attack are not used, so don’t level them.
Talent Overview
Normal Attack | Spiritfox Sin-Eater
Talent Description
Normal Attack
Summons forth kitsune spirits, initiating a maximum of 3 attacks that deal Electro DMG.
Charged Attack
Consumes a certain amount of Stamina to deal Electro DMG after a short casting time.
Plunging Attack
Gathering the might of Electro, Yae Miko plunges towards the ground from mid-air, damaging all opponents in her path. Deals AoE Electro DMG upon impact with the ground.
Yae has beautiful Normal and Charged Attack animations, but they aren’t relevant most of the time. The vast majority of Yae’s damage comes from her Elemental Skill and Burst, which leaves her NAs as a means to drive teammate abilities.
Driver Potential
Yae’s Normal and Charged Attacks are ranged and deal Electro damage. She is an excellent driver for Fischl, especially in Aggravate teams. The NAs and CAs can trigger Aggravate, which allows Fischl to proc her A4 Passive and greatly increases team damage. Additionally, the lack of Internal Cooldown (ICD) on her CAs lets each one trigger Aggravate.
On-Field Combo
The best combo to weave in CAs is N2C, since it balances Stamina usage with high damage and Electro application. N1C is also an option if you’re crunched for time and need to defeat an enemy quicker at the end of a chamber.
Charged Attack Cancels
Regardless of the combo, Yae’s CA has a long delay before she can use another attack. This delay can be canceled by dashing or jumping immediately after performing a CA. Be careful not to dash or jump cancel too early, since this can cancel the Charged Attack and consume Stamina without even dealing damage. Ultimately, however, if you decide to cancel her CA endlag, you will be unable to see Yae flick her ears, which is a very, super duper, huge, extremely, times infinity, big loss.
Yae’s Charged Attack has a unique mechanic where it can hit large enemies multiple times. The 5 bolts it calls down are all separate hits but have shared damage ICD, which normally prevents enemies from taking damage more than once. However, the time between the first and fifth bolt is greater than the ICD’s duration, allowing both hits to deal damage. Yae has no ICD on her CA’s Elemental application, so the first and fifth hits can trigger a reaction like Aggravate.
This does require the enemy to be very large, such as Ruin Graders or the Aeonblight Drake, but Yae’s CAs deal massive damage in these situations, especially in Aggravate.
Plunging Attacks
Yae’s Plunging Attack reveals one of her tails, so you should always plunge when the opportunity occurs, which is rare.
In all seriousness, Yae only uses her Plunging Attacks when she is the on-field DPS in a team with Xianyun.
Elemental Skill | Yakan Evocation: Sesshou Sakura
Talent Description
To Yae, such dull tasks as can be accomplished by driving spirits out need not be done personally.
Moves swiftly, leaving a Sesshou Sakura behind.
Sesshou Sakura
Has the following properties:
- Periodically strikes one nearby opponent with lightning, dealing Electro DMG.
- When there are other Sesshou Sakura nearby, their level will increase, boosting the DMG dealt by these lightning strikes.
This skill has three charges.
A maximum of 3 Sesshou Sakura can exist simultaneously. The initial level of each Sesshou Sakura is 1, and the initial highest level each sakura can reach is 3. If a new Sesshou Sakura is created too close to an existing one, the existing one will be destroyed.
Yae’s Elemental Skill is her primary source of damage. It summons turrets called Sesshou Sakura, commonly called totems. They periodically strike enemies with bolts from the sky to deal damage. These bolts deal damage in an extremely small AoE, so they can effectively be treated as single-target damage.
Sesshou Sakura Levels
A single Sesshou Sakura by itself is not particularly strong, but placing Sesshou Sakura close together upgrades them, which increases their damage. As long as the Sesshou Sakura are not in a straight line, they will reach level 3 (level 4 at C2).
| Level 1 | Level 2 | Level 3 | Level 4 |
 |  |  |  |
Snapshotting
Sesshou Sakura do not snapshot, which is disadvantageous for buffs that only apply to the on-field character, such as Bennett's Burst. However, it makes rotations with conditional team buffs much easier to apply, such as Kazuha's DMG% buff. Yae can use her Skill before Kazuha to provide a source of Electro for him to Swirl without having to recast her Skill for the buff to apply. For this reason, Yae’s Skill should be one of the first abilities cast in a fight.
Skill ICD
Sesshou Sakura have standard ICD and share ICD, so only the first hit of each round of 3 hits can trigger a reaction. However, as her Sesshou Sakura target enemies semi-randomly in multi-target situations and enemies do not share ICD, she can trigger multiple reactions per 3-strike sequence on different targets.
Skill Timing Trick
When Yae casts her Elemental Skill, the delay until the next hit is shorter than all subsequent hits. This means there is a small trick you can perform by recasting her Elemental Skill right as a shot fires, “replacing” that Sakura. This will cause the Sakura to be “new,” meaning they will shoot their first round shots, coming up faster than if just simply left alone.
Simply put, the first Sesshou Sakura hit occurs about 2s after you cast the Skill. Every following hit takes 3s. If you cast Yae’s Skill just as an old Sesshou Sakura fires, you can shave off 1s between firing.
This is not a significant change in overall DPS, but you can queue up damage “faster.”
Elemental Burst | Great Secret Art: Tenko Kenshin
Talent Description
Legends of "kitsunetsuki," or the manifestations of a kitsune's might, are common in Inazuma's folktales. One that particularly captures the imagination is that of the Sky Kitsune, said to cause lightning to fall down upon the foes of the Grand Narukami Shrine. Summons a lightning strike, dealing AoE Electro DMG.
When she uses this skill, Yae Miko will unseal nearby Sesshou Sakura, destroying their outer forms and transforming them into Tenko Thunderbolts that descend from the skies, dealing AoE Electro DMG.
Each Sesshou Sakura destroyed in this way will create one Tenko Thunderbolt.
Yae’s Burst is her secondary source of damage, but it is very expensive with its 90 Energy Cost. To reasonably use it every rotation, Yae must be paired with Raiden, Fischl, another Electro character on Favonius, or have her C1.
Burst Strengths
When Yae can fulfill her ER requirements, her Burst is incredibly powerful. It is a potent nuke, capable of one-shotting waves or reaching enemy HP thresholds (like Maguu Kenki). It is especially strong in teams with strong ATK buffs, like from Bennett or Sara. Her Burst also has no ICD, so it can trigger Aggravate on all 4 hits. Furthermore, Yae’s Burst has a massive hitbox, making it extremely good in multi-target scenarios.
The Most Important Reason to Use Yae’s Burst
You get to see all five of her tails.
 Ascension 1 Passive | The Shrine’s Sacred Shade
Talent Description
When casting Great Secret Art: Tenko Kenshin, each Sesshou Sakura destroyed resets the cooldown for 1 charge of Yakan Evocation: Sesshou Sakura.
Yae’s A1 Passive basically restores all 3 charges of her Skill upon using her Burst. This is vital for maintaining short rotations while also having high uptime on her Skill, since you can effectively shave several seconds off her Skill cooldown.
 Ascension 4 Passive | Enlightened Blessing
Talent Description
Every point of Elemental Mastery Yae Miko possesses will increase Sesshou Sakura DMG by 0.15%.
Yae’s A4 Passive is good in Aggravate and Spread teams; however, it is not enough to make EM more valuable than ATK%. While EM stats come close to ATK% in Aggravate and Spread, ATK% substats are still generally better, especially since Yae’s Burst does not benefit from this Passive. Furthermore, the gap between ATK% and EM increases if Yae has a higher Base ATK Catalyst equipped.
In non-Aggravate scenarios, this Passive makes EM substats better than useless. Yae’s reaction damage outside of Aggravate is not enough to make building EM worthwhile.
 Utility Passive | Meditations of a Yako
Talent Description
Has a 25% chance to get 1 regional Character Talent Material (base material excluded) when crafting. The rarity is that of the base material.
Yae’s Utility Passive gives her a 25% chance to receive a random Talent book of the same rarity when crafting Talent books. This is generally worse compared to the other Talent Material Utility Passives, but it can be nice when you are building multiple characters with different Talent books.
When to Use Yae’s Burst
Here are three tips for using Yae’s Burst:
- Ensure that her Sesshou Sakura (totems) are on-field so her Burst can trigger Tenko Thunderbolts (additional Electro damage).
- Wait for enemies to be more vulnerable or immobile to maximize damage output.
- Use it when relevant team buffs are active (e.g., Kazuha's Electro DMG% buff or Bennett’s ATK buff).
Timing With Sesshou Sakura
Yae must have all 3 Sesshou Sakura active on-field when she uses her Burst because most of its damage comes from the Tenko Thunderbolts.
You should generally avoid using Yae’s Skill immediately before her Burst due to the long field time to place and replace her totems. In teams with flexible rotations, you can wait for Yae to regain her 3 Skill charges, since this maximizes her Skill hits without her totems disappearing. In teams with fixed rotations, you should use her Burst every other rotation when her totems are active.
TL;DR: Avoid 3[E] Q 3[E] in rotation unless the Sesshou Sakura have disappeared by the time you want to use Yae’s Burst.
Timing With Enemies
The hits from Yae’s Burst (including the Tenko Thunderbolts) track enemies towards the end of her Burst animation. As a result, her Burst can miss enemies if they move away during her animation. Most enemies stay relatively stationary between their abilities, so you can wait to use Yae’s Burst as the enemy completes an attack or action. Timing this is especially helpful to make sure all 3 Tenko Thunderbolts land on highly mobile enemies who would otherwise avoid taking damage.
In teams with more flexible rotations, you can refrain from using Yae’s Burst until the enemy is more vulnerable to damage, e.g., when the Ruin Serpent, A.S.I.M.O.N., or the Solitary Suanni are stunned. Furthermore, Yae’s Burst helps reach enemy HP thresholds more quickly, e.g., when playing against Maguu Kenki or the Perpetual Mechanical Array. However, if they are close to the HP threshold, it may be better to use Yae’s Burst later to maximize its damage potential.
Timing With Buffs
Try to use Yae’s Burst when relevant team buffs are active, most notably Kazuha’s A4 Passive Electro DMG% buff, 4pc Viridescent Venerer’s Electro RES Shred, and any ATK buffs. Additionally, in Aggravate teams, a Quicken aura should be on the enemy, since Yae triggers Aggravate on all 4 hits of her Burst.
While this may not always be possible in some rotations and enemy scenarios, a buffed Burst deals more damage than an unbuffed one!
Constellations
Yae’s Constellations are quite powerful, but almost all focus on her Elemental Skill. They don’t change her gameplay that much. Additionally, their value varies greatly between different teams.
Her typical stopping points are C1, C2, C3, and C6.
 Constellation 1 | Yakan Offering
Each time Great Secret Art: Tenko Kenshin activates a Tenko Thunderbolt, Yae Miko will restore 8 Elemental Energy for herself.
With all 3 Sesshou Sakura, this Constellation restores up to 24 Energy. This is a huge decrease to her ER requirements, reducing by 27% multiplicatively. For example, a 200% ER requirement drops to 146%, 150% drops to 110%, etc. This Constellation also pairs very well with other sources of Flat Energy, such as Raiden, significantly reducing her ER requirements.
This is an especially valuable Constellation for off-field Yae. However, it is less impactful in Yae’s driver teams, especially ones with Fischl, as Yae’s ER requirements are much lower. Furthermore, it is completely useless in Skill-only teams. Nonetheless, it still is a nice, general Quality of Life improvement.
Note that the Tenko Thunderbolts do not have to hit an enemy to restore Energy.
| DPS Increase From C0 | 0–14% |
 Constellation 2 | Fox’s Mooncall
Sesshou Sakura start at Level 2 when created, their max level is increased to 4, and their attack range is increased by 60%.
Yae’s C2 increases both the range and damage of her Elemental Skill.
Range
The increase to her Skill’s range is quite nice. When placed in the center of a Spiral Abyss chamber, Yae’s totems can hit any enemy wherever they are.
Damage
Yae’s C2 increases the damage of her Skill by increasing the level of her Sesshou Sakura. The increased level accomplishes two things:
- The totems become shiny.
- The base multipliers increase by 25%.
The overall damage buff provided by this Constellation is reduced in Aggravate teams, since her Sesshou Sakura’s damage is buffed through other sources.
Overall, this is a powerful Constellation, albeit a bit boring.
| DPS Increase From Previous | 0–16% |
| DPS Increase From C0 | 14–30% |
 Constellation 3 | The Seven Glamours
Increases the Level of Yakan Evocation: Sesshou Sakura by 3.
Maximum upgrade level is 15.
A Talent level increase for Yae's Elemental Skill, her primary form of damage. This is quite valuable, but in Aggravate the value is slightly reduced.
| DPS Increase From Previous | 10–16% |
| DPS Increase From C0 | 23–45% |
 Constellation 4 | Sakura Channeling
When Sesshou Sakura lightning hits opponents, the Electro DMG Bonus of all nearby party members is increased by 20% for 5s.
Yae’s C4 Electro DMG% buff benefits not only her allies, but also herself. She can maintain 100% uptime on this buff, resulting in a constant 20% Electro DMG Bonus for the entire team. As Yae usually pairs with another Electro character, this is very powerful.
| DPS Increase From Previous | 10–18% |
| DPS Increase From C0 | 40–60% |
 Constellation 5 | Mischievous Teasing
Increases the Level of Great Secret Art: Tenko Kenshin by 3.
Maximum upgrade level is 15.
A Talent level increase to her Elemental Burst. This is good for nuking with her Burst, but it is a bit lackluster compared to her Skill-buffing Constellations.
| DPS Increase From Previous | 2–6% |
| DPS Increase From C0 | 45–70% |
 Constellation 6 | Forbidden Art: Daisesshou
The Sesshou Sakura’s attacks will ignore 60% of the opponent’s DEF.
Yae’s final Constellation is a hefty damage increase to her Elemental Skill damage, functioning similarly to Raiden’s C2. Please keep in mind that the DEF Ignore is restricted to only her Skill’s damage.
| DPS Increase From Previous | 22–30% |
| DPS Increase From C0 | 75–110% |
Builds
Personally, I think the idea of things staying the same forever is quite beautiful. But alas, that is simply not the way the world works.
Stat Priority
Yae Miko’s preferred artifact stats are basically the same across her different playstyles. The primary differences are how often she uses her Burst and if she can trigger Aggravate.
Artifact sets and weapons are examined in detail for each playstyle, while ER requirements and artifact stats are considered in general.
ER Requirements
These numbers are approximate. ER requirements will vary depending on team and context. For a more accurate estimate of your ER requirements, use the Energy Recharge Calculator.
| C0 | C1 | |
| Raiden | 140–150% | 100% |
| Off-Field With Fischl | 130% | 100% |
| On-Field With Fischl | 100–110% | 100% |
Favonius weapons reduce Yae’s ER requirements by approximately 10% per proc.
Artifact Stats
 Sands |  Goblet |  Circlet |
| ATK%, EM or ER% | Electro DMG Bonus | CRIT Rate or CRIT DMG |
Substats: ER% (until requirement) > CRIT > ATK% ≥ EM
EM is only desirable in Aggravate teams. Outside of Aggravate, EM is barely more than a dead weight.
In Aggravate, ATK% Sands are usually better than EM Sands, especially with 5-star weapons, but the difference is small. A good EM Sands is often better than a mediocre ATK% Sands.
KQM recommends using Genshin Optimizer to compare your actual artifacts.
Skill + Burst
In her most common playstyle, Yae primarily deals damage via her Skill and Burst. These teams tend to have a fixed rotation. Team examples include Raiden — Kazuha — Bennett, and Tighnari — Fischl — Sucrose.
Pros
- Easy-to-follow rotations
- Strong nukes
- Largely off-field playstyle, keeping Yae safe with a dedicated on-fielder
Cons
- Low rotation flexibility
- Higher ER requirements than her on-field playstyle
Artifacts — Skill + Burst
Non-Aggravate
| Artifact | DPS% | Notes |
 4pc Emblem of Severed Fate | 100% | 4pc Emblem of Severed Fate is the best option for C0 Yae in non-Aggravate teams where she can consistently use her Burst. Its 2pc set bonus and 4pc ER% to Burst DMG% conversion help compensate for Yae’s typically high ER requirements. With Yae’s C1, 4pc Golden Troupe and 2pc mixed sets almost always outperform 4pc EoSF, since she has significantly lower ER requirements. |
 4pc Golden Troupe | 100% | 4pc Golden Troupe is a very powerful set, since it buffs Yae’s Skill damage. However, it does not benefit Yae’s Burst at all. Regardless, it is still one of her strongest options. From C1 onwards, Yae’s ER requirements plummet, causing 4pc Golden Troupe to become Yae’s optimal artifact set. This also applies when using weapons with ER% secondary stats or passives like Oathsworn Eye. |
2pc Mixed Sets | 90-98% | 2-piece sets in order of general value: 1. Thundering Fury 2. ATK% 3. Golden Troupe 4. Noblesse Oblige 5. Emblem of Severed Fate. 2-piece set combinations make it easier to build Yae with comparable performance to her 4-piece sets. Farming 2-piece sets is much easier, so they often end up having better substats than 4-piece sets, which allows them to outperform. |
 4pc Tenacity of the Millelith | ~98% | This set sacrifices Yae’s damage in exchange for team damage. With similar artifacts, the performance isn’t too much worse, but Tenacity is generally less Resin-efficient than other options, even with the Strongbox. 4pc Tenacity of the Millelith’s value increases with strong teammates who can use its buff and decreases with a well-invested Yae. |
- Raiden — Bennett (C6) — Kazuha
- Talents 9 | 9 | 9, KQMS, R3 Widsith
- Dynamic buffs
- Simulated rotation with average 5 frames of delay between actions
- Fixed Rotation: Yae 3[E] > Kazuha tEP > Bennett EQ > Yae Q 3[E] > Kazuha tEPQ > Raiden Q N4 E N4D N4 > Bennett E
- DPS% is Yae’s contribution to the team including damage teammates deal because of Yae's buffs
- Refer to sheet for Yae’s personal damage
- Yae Guide Calcs
Aggravate
| Artifact | DPS% | Notes |
4pc Golden Troupe | 100% | 4pc Golden Troupe provides the highest overall sustained damage, since Yae’s Skill constitutes the largest portion of her damage in Aggravate teams. However, it may be less than ideal if Yae’s Burst is a more important part of her damage, e.g., in speedrunning. |
 4pc Gilded Dreams | 98% | While 4pc Gilded Dreams does not provide the raw buff strength that 4pc Golden Troupe does, it gives Yae a massive amount of EM and ATK%, making it her generally second best set in Aggravate. If Burst damage is highly valued, e.g., when the enemy has an HP threshold, when there are multiple waves, or when speedrunning, it can outperform 4pc Golden Troupe. Despite this, 4pc Gilded Dreams is only a very small improvement over 2-piece combinations. If you don’t intend on obtaining a high quality 4pc Deepwood Memories set, it may not be best to farm for. Note: You can lose uptime on the 4-piece effect at very high ping due to the game’s programming. This doesn’t usually result in a huge loss, but do be wary. |
 2pc Mixed Sets | 93-97% | 2-piece sets in order of general value: 1. Thundering Fury 2. Emblem of Severed Fate (if needed) 3. EM 4. Golden Troupe 5. ATK% (better with high–Base ATK 5-star Catalysts). 2-piece combinations are quite potent in Aggravate teams, only performing marginally worse than 4pc Gilded Dreams. Mixed sets are much easier to farm for, so in reality they often have better substats than 4-piece sets, resulting in better performance. |
4pc Emblem of Severed Fate | 93% | 4pc Emblem of Severed Fate is less impactful in Aggravate teams, since more of Yae’s damage stems from her Elemental Skill. Its 2-piece effect still helps with ER requirements, nonetheless. |
4pc Tenacity of the Millelith | ~96% | This set sacrifices Yae’s damage in exchange for team damage. With similar artifact substats, the performance isn’t too much worse, but Tenacity is generally less Resin-efficient than other options, even with the Artifact Strongbox. 4pc Tenacity of the Millelith’s value increases with strong teammates who can use its buff, and decreases with a well-invested Yae. |
- Tighnari — Fischl (C6) — Sucrose (C6)
- Talents 9 | 9 | 9, KQMS, R3 Widsith
- Dynamic buffs
- Simulated rotation with average 5 frames of delay between actions
- Fixed rotation: Yae 3[E] N2 > Sucrose Q N2 > Fischl N1 Q > Tighnari E 3[C] Q > Yae N1 Q 3[E] N2 > Sucrose N1E D N3C > Fischl N1 E > Tighnari E 3[C] > Sucrose N1 EJ N2C N2
- DPS% is Yae’s contribution to the team including teammate damage due to Yae's buffs
- Refer to sheet for Yae’s personal damage
- Yae Guide Calcs
Weapons — Skill + Burst
Non-Aggravate
| Weapon | DPS% | Notes |
 Kagura’s Verity | 127–143% | Kagura’s Verity is Yae’s best weapon. Though Kagura primarily buffs her Skill, it is far more reliable and consistently powerful than any other option. |
 Solar Pearl | 114–121% | To take full advantage of Solar Pearl, Yae Miko should perform a Normal Attack before using her Burst and after using her Skill. |
 Tome of the Eternal Flow | 118% | Tome of the Eternal Flow’s passive is useless, but it is a powerful stat stick nonetheless. |
 Lost Prayer to the Sacred Winds | 116–117% | While a good stat stick, Lost Prayer’s passive is not too powerful because Yae spends most of her time off-field. Additionally, the Movement SPD buff is unused. |
 Cashflow Supervision | 115–122% | Cashflow Supervision is a good stat stick, but with a poor passive for Yae in a Skill + Burst playstyle. |
 R5 Oathsworn Eye | 110% | Oathsworn Eye’s passive gives a very large amount of ER% while still providing high Base ATK and an ATK% substat. This allows Yae to move off 4pc Emblem of Severed Fate and onto 4pc Golden Troupe. |
 The Widsith | 105–110% | Widsith is a relatively accessible 4-star weapon with good power. The CRIT DMG and Elemental DMG% buffs are quite useful for Yae, while the EM buff is not entirely useless. When speedrunning, Widsith can be better than Kagura’s Verity if you reset for the Elemental DMG% buff. Calcs are an average of all three buffs over ~90s. |
 Skyward Atlas | 109–116% | Skyward Atlas is a stat stick that provides unconditional ATK% and DMG%. |
 R5 Sacrificial Jade | 108% | Sacrificial Jade is a good stat stick, but the passive is not particularly helpful. |
 Memory of Dust | 108–112% | Memory of Dust is another stat stick, but its passive does not stack off-field. Weaving Normal Attacks is important to help stack it. |
 A Thousand Floating Dreams | 104–118% | Without Aggravate, the value of a Thousand Floating Dreams’ EM secondary stat is low for Yae. However, if teammates can trigger a significant number of reactions like Overloaded or Swirl, the teamwide EM passive can be quite useful. |
 R5 Hakushin Ring | 100% | No Passive: 98% While Hakushin Ring is not the best weapon in this team as it is difficult to activate the passive, the ER% secondary stat allows Yae to use 4pc Golden Troupe over 4pc Emblem of Severed Fate. Nevertheless, Hakushin RIng is Yae’s best craftable weapon. |
- DPS% values are a range of R1–R5 (if applicable)
- Raiden — Bennett (C6) — Kazuha
- Talents, 9 | 9 | 9, KQMS
- 4pc EoSF or 4pc Golden Troupe depending on weapon ER%
- Dynamic buffs
- Simulated rotation with average 5 frames of delay between actions.
- Fixed rotation: Yae 3[E] > Kazuha tEP > Bennett EQ > Yae Q 3[E] > Kazuha tEPQ > Raiden Q N4E N4D N4 > Bennett E
- DPS% is Yae’s contribution to the team including teammate damage due to Yae's buffs
- Refer to sheet for Yae’s personal damage
- Yae Guide Calcs
Aggravate
| Weapon | DPS% | Notes |
Kagura’s Verity | 118–137% | Kagura’s Verity is Yae’s best weapon in Quicken teams, since its Elemental Skill DMG% buff is incredibly potent alongside the Aggravate reaction. |
A Thousand Floating Dreams | 111–129% | A Thousand Floating Dreams provides a huge amount of EM to buff Yae’s Aggravate reactions, contributes to her A4 Skill’s DMG% buff, and buffs the entire team, which increases its value tremendously. |
Tome of the Eternal Flow | 103% | Tome of the Eternal Flow has good stats but a useless passive. Not really that much better than Yae’s 4-star options. |
The Widsith | 94–103% | All three of the Widsith’s buffs are highly valuable in Quicken teams, but its poor uptime holds it back compared to stronger weapons. Calcs assume an average of all three buffs over ~90s. |
Solar Pearl | 95–102% | To maximize the value of Solar Pearl, Yae Miko should perform a Normal Attack before using her Burst and after using her Skill. |
Skyward Atlas | 101–111% | Skyward Atlas is a stat stick that provides unconditional ATK% and DMG%. |
R5 Hakushin Ring | 100% | No Passive: 81% Hakushin Ring is Yae Miko’s best free option in Aggravate Skill + Burst teams. Its buff can benefit the entire team. However, if the weapon’s passive cannot be activated (e.g., against an enemy with an incompatible innate Elemental aura), its value decreases significantly. Note that multiple Hakushin Rings do not stack their passive buff, so Sucrose should hold a different Catalyst if this is your best weapon for Yae Miko. |
Cashflow Supervision | 99–107% | The main strength of Cashflow Supervision is its high Base ATK and moderate CRIT Rate secondary stat. |
Lost Prayer to the Sacred Winds | 99–101% | While it has decent stats, Lost Prayer’s Movement SPD is unneeded and the DMG% is quite low. |
Memory of Dust | 97–102% | Memory of Dust does not stack off-field, so it is important for Yae to weave Normal Attacks, allowing her to obtain a few stacks before swapping. |
R5 Sacrificial Jade | 94% | Sacrificial Jade is not recommended. Its passive is useless and it is outperformed by accessible options like Hakushin Ring. |
 Wandering Evenstar | 86–93% | Wandering Evenstar is not recommended. Its team damage buff is too small to compensate for Yae’s personal DPS loss. |
- DPS% values are a range of R1–R5 (if applicable)
- Tighnari — Fischl (C6) — Sucrose (C6)
- Talents 9 | 9 | 9, KQMS, 4pc Golden Troupe
- Dynamic buffs
- Simulated rotation with average 5 frames of delay between actions
- Fixed rotation: Yae 3[E] N2 > Sucrose Q N2 > Fischl N1 Q > Tighnari E 3[C] Q > Yae N1 Q 3[E] N2 > Sucrose N1 ED N3C > Fischl N1 E > Tighnari E 3[C] > Sucrose N1 EJ N2C N2
- DPS% is Yae’s contribution to the team including teammate damage due to Yae's buffs
- Refer to sheet for Yae’s personal damage
- Yae Guide Calcs
Driver
In some teams, especially quickswap teams, Yae can take the position as the driver, weaving her Normal and Charged Attacks to maximize damage. Yae normally takes this role when there is no dedicated on-field unit like Raiden or Alhaitham, often performing better than other potential drivers. Nonetheless, most of the damage in these teams still comes from Yae’s Skill. Her Burst can be reserved until needed, adding a lot of flexibility to the team.
Yae Driver is typically used in Aggravate; however, there are a few non-Aggravate versions like Hyperbloom. With how good Yae’s Normal and Charged Attacks are at driving and triggering reactions, these teams can be quite strong. However, Yae is one of the squishiest characters in the game, making her very likely to die. Healers and shielders are highly recommended in this playstyle. With her increased field time, Yae has significantly reduced ER requirements, typically around 115% and reaching 125% on the high end.
Pros
- On-field playstyle, so you get to see Yae’s Charged Attacks in action
- Very potent damage
- Highly flexible rotations
- Low ER requirements
Cons
- Extreme vulnerability to getting staggered and dying, which necessitates having a shielder on the team
- Difficult Stamina management, since Yae’s CAs have a high Stamina cost
Artifacts — Driver
Non-Aggravate
| Artifact | DPS% | Notes |
4pc Golden Troupe | 100% | 4pc Golden Troupe’s Skill DMG% buff for is still potent in a driver playstyle. However, with Yae being on-field most of the time, she can only obtain a 45% Skill DMG Bonus. Nonetheless, it remains her strongest set without Aggravate. |
2pc Mixed Sets | 97–100% | 2-piece sets in order of general value: 1. Thundering Fury 2. ATK% 3. Golden Troupe. 2-piece combinations are very easy to farm and have good performance. Their ease of farming allows them to have a higher average quality than 4-piece sets, exceeding them in performance. With 5-star weapons, ATK% pieces gain so much value that 2-piece combinations outperform 4pc Golden Troupe and 4pc Thundersoother. |
 4pc Thundersoother | 100% | If an Electro aura can be maintained on the enemy, 4pc Thundersoother is just as potent in non-Aggravate teams. Calcs assume 96% uptime on the passive. |
4pc Tenacity of the Millelith | ~99% | 4pc Tenacity of the Millelith’s value increases with strong teammates who can use its buff, and decreases with a well-invested Yae. This set sacrifices Yae’s damage in exchange for team damage. With similar artifact substats, the performance isn’t too much worse, but Tenacity is generally less Resin-efficient than other options, even with the Artifact Strongbox. |
- Fischl (C6) — Kazuha — Zhongli
- Talents 9 | 9 | 9, KQMS, R3 Widsith
- Dynamic buffs
- Simulated rotation with average 5 frames of delay between actions
- Flexible team rotation
- DPS% is Yae’s contribution to the team including teammate damage due to Yae's buffs
- Refer to sheet for Yae’s personal damage
- Yae Guide Calcs
Aggravate
| Artifact | DPS% | Notes |
4pc Gilded Dreams | 100% | With Yae on-field, 4pc Golden Troupe falls slightly, allowing 4pc Gilded Dreams to overtake in Aggravate teams. This set is especially potent when Yae triggers Hyperblooms. |
4pc Golden Troupe | 98% | 4pc Golden Troupe’s Skill DMG% buff is still potent in a driver playstyle. However, with Yae being on-field most of the time, she can only obtain a 45% Skill DMG Bonus. Nonetheless, it remains a competitive option in Driver Aggravate teams. |
2pc Mixed Sets | 93–98% | 2-piece sets in order of general value: 1. Thundering Fury 2. EM 3. ATK% (better with high–Base ATK 5-star Catalysts) 4. Golden Troupe. 2pc combinations remain highly competitive with 4pc Gilded Dreams and 4pc Golden Troupe while being extremely easy to farm. As a result, they often have better substats and outperform 4pc sets. |
4pc Tenacity of the Millelith | ~92% | 4pc Tenacity of the Millelith’s value increases with strong teammates who can use its buff, and decreases with a well-invested Yae. This set sacrifices Yae’s damage in exchange for team damage. With similar artifact substats, the performance isn’t too much worse, but Tenacity is generally less Resin-efficient than other options, even with the Artifact Strongbox. |
- Fischl (C6) — Kazuha — Kirara (C6)
- Talents 9 | 9 | 9, KQMS, R3 Widsith
- Dynamic buffs
- Simulated rotation with average 5 frames of delay between actions
- Flexible team rotation
- DPS% is Yae’s contribution to the team including teammate damage due to Yae's buffs
- Refer to sheet for Yae’s personal damage
- Yae Guide Calcs
Weapons — Driver
Non-Aggravate
| Weapon | DPS% | Notes |
Kagura’s Verity | 149–168% | Kagura’s Verity is Yae’s best weapon. Though Kagura primarily buffs her Skill, it is far more reliable and consistently powerful than any other option. It also provides a moderate boost to her Burst, NAs, and CAs at 3 stacks. |
Memory of Dust | 139–154% | The low amount of ATK in Driver teams make Memory of Dust extremely valuable. Since Yae spends a significant amount of time on-field, she can more easily gain and maintain stacks. |
Cashflow Supervision | 135–144% | Cashflow Supervision is a great option even without its passive. Yae can only reliably gain stacks on its passive with Furina on the team. |
Skyward Atlas | 134–146% | Skyward Atlas’s ATK% makes it a very useful weapon, similarly to Memory of Dust. |
Lost Prayer to the Sacred Winds | 130–133% | Lost Prayer has good stats, but its passive isn’t the best. |
Tome of the Eternal Flow | 128% | Tome of the Eternal Flow’s CRIT DMG is appreciated, but its low Base ATK holds it back. Furthermore, its passive effect is hard to trigger without Furina on the team. |
The Widsith | 119–127% | Widsith’s EM buff is almost worthless, but its stats are good for a 4-star Catalyst. |
Solar Pearl | 119–127% | Solar Pearl performs nearly identically to Widsith at equal refinements, and it is significantly more consistent. |
R5 Sacrificial Jade | 117% | Sacrificial Jade’s passive isn’t that good, but it isn’t a bad choice if you have it. |
A Thousand Floating Dreams | 115% | A Thousand Floating Dreams’ Base ATK and DMG Bonus allow it to perform okay but worse than recommended 4-star options. |
R5 Oathsworn Eye | 112% | Oathsworn Eye provides decent ATK%, but the ER% isn’t needed here. |
R5 Hakushin Ring | 100% | With Passive: 113% Hakushin Ring’s ER% secondary stat and passive are often useless in these teams, as Yae does not need much ER%, and it is difficult to trigger the passive. |
- DPS% values are a range of R1–R5 (if applicable)
- Kazuha — Fischl (C6) — Zhongli
- Talents 9 | 9 | 9, KQMS, optimal artifact set for each weapon
- Dynamic buffs
- Simulated rotation with average 5 frames of delay between actions
- Flexible team rotation
- DPS% is Yae’s contribution to the team including teammate damage due to Yae's buffs
- Refer to sheet for Yae’s personal damage
- Yae Guide Calcs
Aggravate
| Weapon | DPS% | Notes |
Kagura’s Verity | 122–141% | Kagura’s high Skill DMG% is incredibly potent in Driver Aggravate. Though Kagura primarily buffs Yae’s Skill, it is far more reliable and consistently powerful than any other option. |
Cashflow Supervision | 115–122% | Cashflow Supervision is a great option even without its passive. Yae can only reliably gain stacks on its passive with Furina on the team. |
The Widsith | 108–115% | Widsith is very potent in Driver Aggravate teams, since Yae can take advantage of all of its buffs. |
A Thousand Floating Dreams | 112–128% | A Thousand Floating Dreams’ buff is extremely valuable, providing a good boost for the entire team. However, the lack of CRIT makes it fall behind some of the other options. It refines extremely well. |
Lost Prayer of the Sacred Winds | 111–113% | Lost Prayer’s CRIT is good, but the DMG% isn’t much, preventing it from performing too well. |
Tome of the Eternal Flow | 111% | Tome has good stats but a bad passive. |
Memory of Dust | 109–118% | Yae can easily stack Memory of Dust and maintain stacks as she drives; however, the value of its ATK stats decreases significantly. |
Solar Pearl | 102–108% | Solar Pearl doesn’t perform too well in Driver Aggravate teams, despite it being extremely easy to maintain the passive. |
R5 Sacrificial Jade | 107% | Sacrificial Jade is a decent choice if available. Refinements don’t affect performance that much. |
Skyward Atlas | 105–113% | Skyward Atlas provides a decent amount of DMG%, but its ATK% isn’t too useful with Aggravate present. |
Hakushin Ring R5 | 100% | Hakushin Ring is a surprisingly viable option in Driver Aggravate teams, since Yae can maintain very high uptime on the passive as she drives, buffing the entire team. |
Oathsworn Eye R5 | 91% | Oathsworn Eye performs much weaker in Driver Aggravate teams due to the lack of need for ER% and ATK% stats. |
Wandering Evenstar | 86–90% | Wandering Evenstar’s team buff is too small to compensate for its poor stats, weakening Yae’s personal damage. |
- DPS% values are a range of R1–R5 (if applicable)
- Kazuha — Fischl (C6) — Kirara (C6)
- Talents 9 | 9 | 9, KQMS, optimal artifact set for each weapon
- Dynamic buffs
- Simulated rotation with average 5 frames of delay between actions
- Flexible team rotation
- DPS% is Yae’s contribution to the team including damage teammates deal because of Yae's buffs, refer to sheet for Yae’s personal damage
- Yae Guide Calcs
Skill-Only

Pros
- Easy to build
- Easier to play
Cons
- Very little Yae gameplay
- Low personal Yae damage
- Lack of additional utility compared to Kuki Shinobu (healing) and Fischl (higher Electro application)
- No tails
Artifacts — Skill-Only
4pc Tenacity of the Millelith | By using 4pc Tenacity of the Millelith, Yae sacrifices her own personal damage to buff the rest of the team. Yae has 17s uptime for each set of Skill casts, but she only needs one totem to maintain the buff. This set outperforms 4pc Golden Troupe in teams where Yae is primarily there for her Electro application, for example, with Eula or Alhaitham. |
4pc Golden Troupe | 4pc Golden Troupe maximizes Yae’s only source of damage in this playstyle — her Skill. |
4pc Gilded Dreams | Though less powerful than 4pc Golden Troupe, 4pc Gilded Dreams still provides a very powerful buff in teams where Yae can trigger Aggravate. |
2pc Mixed Sets | 2-piece set options: 1. Thundering Fury 2. ATK% 3. EM 4. Golden Troupe. A combination of 2pc sets is also usable. This is a cheap build that is often comparable to 4pc Gilded Dreams. |
Weapons — Skill-Only
Kagura’s Verity | Kagura’s Verity is the premier choice to maximize Yae’s personal damage. However, pulling this weapon isn't a priority if you're only playing her in this playstyle. |
The Widsith, Solar Pearl | Widsith and Solar Pearl are relatively good for Yae’s personal damage. |
A Thousand Floating Dreams | A Thousand Floating Dreams provides a sizable EM buff to the entire team. This is especially valuable for Spread teams, such as with Alhaitham. Yae also benefits from the high EM for Aggravate and her A4 Passive. The DMG% is appreciated, too. |
Hakushin Ring | If Yae can semi-regularly trigger an Electro reaction, Hakushin Ring is a very powerful option, allowing her to buff the entire party. |
Wandering Evenstar | Wandering Evenstar provides a small Flat ATK buff to the rest of the team; however, to get good value out of it, it requires a lot of EM. This makes it worse than other options. |
 Thrilling Tales of Dragon Slayers | If no other weapon suits your needs, TTDS allows Yae to provide a powerful ATK% buff to one other teammate. |
Synergies
Whenever we are together, it is vital that we always shine a light for each other, okay? It's rather difficult to remain enlightened in the dark.


Electro
Raiden | Raiden is Yae’s Yae is normally used in her Skill + Burst playstyle with Raiden, because Raiden has strict field time requirements. Additionally, Raiden’s Burst DMG% buff increases the damage contribution of Yae’s Burst. Yae’s 22s cooldown on her Burst does make it slightly awkward for Raiden who typically prefers 18s rotations, but the two powerful nukes can quickly clear waves of enemies. Playstyles: Skill + Burst |
 Fischl | Fischl heavily concentrates Yae’s strength in single-target scenarios by adding her own immense single-target damage. On top of that, Fischl’s high particle generation helps lower Yae’s ER requirement. In return, Yae is an excellent driver for Fischl, able to trigger her C6 and A4 frequently, greatly increasing her damage. Yae even works comfortably with Fischl’s preferred 25s rotation. All in all, Yae and Fischl have an incredibly high level of synergy. Playstyles: All |
 Sara | Sara acts as a Sara is extremely potent in teams where Yae’s Burst is used regularly, such as Raiden-Yae teams or Yae Driver teams. In the former, Sara will heavily buff Yae’s Burst for a significant increase in damage. In the latter, Yae will spend a significant amount of time on field using her Normal Attacks to take advantage of Sara’s buffs. Playstyles: Skill + Burst, Yae Driver |
 Kuki Shinobu | Shinobu is not a frequent pairing with Yae, but she is usable. She provides a moderate amount of healing on top of her AoE Electro application. This application makes Shinobu most suited to Aggravate / Quickbloom teams where there are Dendro cores present for her to trigger Hyperbloom. However, Shinobu’s 15s cooldown causes her to be misaligned with Yae, who prefers teams with 12s or 22s rotations. This results in either poor uptime or desynced rotations. This misalignment makes the pairing less ideal, but is not too hard to adapt too. Playstyles: Aggravate Yae Driver |
Dendro
Dendro characters enable the Quicken reaction, a massive increase to Yae’s single-target damage through Aggravate. The vast majority of Yae’s best Dendro teammates are off-field units and provide extremely similar gameplay. Their main distinction is in the utility they provide, either through buffs, or through shielding and healing.
As her two most common options, most of these descriptions will be stated with consideration for Yae-Fischl and Yae-Raiden teams.
 Nahida | Nahida provides consistent off-field Dendro application with her Elemental Skill and a strong EM buff with her Burst. Her Dendro application is among the highest in the game, allowing her to sustain Hyperbloom and Quickbloom teams. Yae and Fischl combined do much more damage than Nahida, especially in single-target scenarios, to the point it may be better to give Nahida a supportive build with equipment such as 4pc Tenacity of the Millelith, Hakushin Ring, or Wandering Evenstar. Nahida is good in both single- and multi-target scenarios, but struggles against waves where she must frequently recast her Skill. This issue is compounded if the team follows fixed rotations or has an on-fielder with strict field time requirements, like Raiden-Yae teams. Additionally, Nahida’s fast and long-lasting Dendro application can make it difficult to swirl Electro at the right time. When an Electro character triggers an Aggravate reaction, Nahida reapplies Dendro, removing the Electro aura before you can Swirl it. You can overcome this by Swirling Electro before casting Nahida’s Skill and by having fast Electro application, such as with Yae’s Normal and Charged Attacks. |
 Baizhu | Baizhu provides valuable role compression. He is a teamwide healer, and provides a moderate buff to Dendro reactions to the on-field character. He also provides shields, but these are extremely easily broken and should not be relied on for interruption resistance. Baizhu’s cooldowns are slightly misaligned when in Yae-Fischl teams. This can be circumvented with the use of a second Dendro character, but this may sacrifice additional buffs or damage. However, the duration of the Dendro application and Quicken Aura results in him slotting into them without too much issue. He fits flawlessly into Yae-Raiden teams. |
 Kirara | Kirara provides an extremely strong shield. This makes her a great support for Yae Driver, protecting her from being interrupted. At higher Constellations she also provides a moderate DMG% buff. Her Skill cooldown is short enough to let her fit nicely within the 12s/25s rotations that Yae-Fischl teams commonly run. Kirara isn’t as well suited for Yae-Raiden teams, as Raiden does not proc her C4 for additional off-field Dendro Application. In single-target scenarios, it is usually better for Kirara to perform a Short Hold Skill for extra shield strength and Dendro application. In multi-target scenarios, Kirara will often need to perform a Long Hold Skill to ensure every enemy has Dendro applied. |
 Collei | Collei is a free option. She provides moderate damage and minor buffs. Her cooldown allows her to fit neatly into Yae-Fischl teams, with only a slightly more difficulty in Yae-Raiden teams. However, her small AoE means that either the team has to get extremely close to the enemy for her A1 to apply Dendro, or her Boomerang may miss the enemy, especially on the return. With such a close proximity to the enemy, it is vital to bring some defensive utility alongside Collei, preferably a shielder to provide some interruption resistance, such as Zhongli or Kirara. Remember that Collei’s boomerang curves from the right side to the left, so by moving rightwards the chance it hits on the return is increased. |
Traveler | Another free option, DMC provides slightly higher buffs than Collei, similar damage, and longer lasting Dendro application. DMC’s cooldowns aren’t as synergistic for Yae-Fischl teams, but they are excellent for Yae-Raiden teams. They are more than sufficient and are a good budget option. |
 Yaoyao | Yaoyao is a healer. However, Yaoyao’s cooldowns don’t align particularly well with Yae and Fischl, with her 15s cooldown on her Skill and demand of field time for her Burst. When used in Yae-Raiden teams, Yaoyao is a suitable healer but will typically have to forgo her Burst entirely unless emergency healing is needed. |
Alhaitham and Tighnari, as dedicated on-field characters with little to no off-field capabilities, result in significantly different gameplay compared to the other Dendro characters. As such they have been separated to further emphasize this distinction.
 Alhaitham | Alhaitham is an on-field Dendro DPS unit, enabling Aggravate and in certain situations, Hyperbloom, for Yae. However, Alhaitham usually has quite high field time. This means that, when paired with Alhaitham, Yae is usually unable to Burst and only uses her Skill. Often, it can be beneficial to build Yae with support gear to buff Alhaitham. Aside from being Dendro, Alhaitham has no particular synergy with Yae, and Yae is merely a source of off-field Electro for him. However, they still work well together. Playstyles: Aggravated Skill-Only |
 Tighnari | Much like Alhaitham, Tighnari is an on-field Dendro DPS, allowing him to enable Aggravate. However, unlike Alhaitham, Tighnari has a much shorter on-field duration, allowing Yae to use her entire kit, and occasionally weave in a few Normal Attacks too. Tighnari also follows a 12s rotation, making him an excellent fit with both Yae and Fischl, creating an extremely potent single-target team with a high amount of front-loaded damage. Playstyles: Skill + Burst with Aggravate |
Anemo
 Kazuha | Kazuha is a potent Anemo buffer. He brings 4pc Viridescent Venerer (VV) and a very high DMG% buff for any element he Swirls. Additionally, he creates a generous number of Swirls and groups enemies tightly, allowing Yae’s Burst to hit more enemies. Additionally, his personal damage is decent, especially with Electro absorption allowing him to both Swirl and Aggravate with his high EM. In many teams, Kazuha is an excellent choice to use to fill an open flex slot. |
 Sucrose | Sucrose is another 4pc VV buffer, and brings along a sizable EM buff which can increase Yae’s Skill damage by a decent amount via Yae’s A4 Passive. While Kazuha often has a stronger direct buff for Yae, Sucrose may provide a greater overall buff to team damage in Dendro teams. She buffs all members of the team, including the Dendro characters, characters who snapshot before she Swirls (as units cannot snapshot EM), and other reactions such as Hyperbloom. Additionally, Sucrose, as an Anemo Catalyst, may fulfill a unique role in Electro-Charged teams. She can use her Normal Attacks to Swirl Hydro and Electro and hold weapons like TTDS and Hakushin Ring to further buff the team. Playstyles: Skill + Burst with Aggravate, Yae Driver |
 Heizou | Heizou fulfills a similar position to Sucrose, acting as an Anemo driver, allowing him to rapidly Swirl. Compared to Sucrose, he has higher personal damage but a significantly smaller EM buff. Heizou is a fine option, but Yae usually deals a much larger portion of the team’s damage and gets more value from Sucrose’s buffs. Playstyles: Skill + Burst with Aggravate, Yae Driver |
Hydro
 Kokomi | Kokomi provides both AoE off-field Hydro application and very good healing. This makes her a versatile character who can fulfill many different roles. She can be played on-field or off-field to provide healing and Hydro application for Electro-Charged and Bloom reactions. Playstyles: Skill + Burst, Yae Driver with Aggravate |
 Furina | Furina brings a powerful buff and very good off-field damage for Yae. However, as Yae often prefers to have a second damage-dealing Electro unit, this leaves healer options to support Furina’s buff quite limited. The four main options are Bennett, Jean, Sayu, and Baizhu. Additionally, Furina’s buff has a duration of 18s, while Yae runs 22s rotations or 25s with Fischl. This encourages running Furina with Raiden to focus more on Yae’s Burst so it can be fully buffed by Furina’s DMG% buff. Playstyles: Skill + Burst |
Pyro
 Bennett | Bennett provides a tremendous Flat ATK buff that can greatly increase Yae’s damage. However, as Yae’s Skill does not snapshot, she is required to stay on field to fully take advantage of his buff. When Yae is not being played on field, prioritize using Bennett to buff her Burst. Playstyles: Non-Aggravate Skill + Burst, Yae Driver |
 Chevreuse | Cheveruse adds a great deal of power to Overloaded teams, providing a good amount of ATK%, Pyro/Electro RES Shred, and a small amount of healing. Because she requires a party composed entirely of Electro and Pyro characters, she will usually demand Bennett or Xiangling as the 4th slot, though characters like Dehya are also options. Playstyles: Non-Aggravate Skill + Burst, Yae Driver |
Geo
 Zhongli | Zhongli is a universally good option in Yae teams. At a baseline, he provides a strong shield and Universal RES Shred, making him a good quality-of -life option with a small damage buff. The shield is especially valuable in Yae Driver teams, where Yae is especially prone to death due to low Stamina from Charged Attacks and her innately low HP and DEF. On top of that, Zhongli also has access to Tenacity of the Millelith, Archaic Petra, and Instructor, to add some additional buffs to the team. With a 12s cooldown on his Skill and a 20s shield duration, Zhongli slots well into almost every possible rotation in Yae teams too. Playstyles: All |
Teams
Yae is rarely played as the only Electro character on the team. Her available playstyle largely depends on the Electro character who she is paired with. As such, the section below is split into teams with Raiden or Fischl. Skill-only teams are briefly examined at the end.
Yae Raiden Teams

Yae and Raiden complement each other well to form a powerful duo. Raiden significantly lowers Yae’s ER requirements and grants a sizable Burst DMG% buff, while Yae provides the most Resolve stacks of any character and deals consistent damage with her Skill.
Furthermore, their Bursts are extremely potent nukes. Yae often uses her Burst before Raiden to defeat a wave of enemies or reach an enemy HP threshold, which lets Raiden finish off the remaining enemies and recharge Yae’s Energy. Staggering their Bursts is especially effective for speedrunning against enemies with phase mechanics that would otherwise force additional downtime due to cooldowns.
The final two members of the team are typically buffers like Bennett, Kazuha, or Sara. Additionally, a Dendro character like Baizhu or Nahida can enable Quicken, which allows Raiden and Yae to trigger Aggravate. Regarding defensive utility, a shielder is not often necessary, since Raiden has infinite interruption resistance during her Burst. However, a healer like Bennett, Jean, Baizhu, or Yaoyao can be valuable, since they let Raiden perform her Burst combo without needing to dodge to avoid dying.
Several team examples are shown below.
Raiden — Kazuha — Bennett
More colloquially known as “Raikou”, this team is one of Yae’s oldest and most reliable. Kazuha and Bennett provide massive buffs to both Yae and Raiden, primarily concentrating on their Bursts. This makes it an extremely potent nuking team with a very simple and easy-to-play rotation.
Rotation
Raiden E > Yae 3[E] > Kazuha tEP > Bennett EQ > Yae Q 3[E] > Kazuha tEP Q > Raiden Q combo > Bennett E
If Yae holds Widsith, special care must be taken to ensure its effect buffs her Burst. Yae needs to start on-field (the first party slot in Abyss) and place her Sesshou Sakura before Raiden uses her first Skill. When you switch back to Yae to cast her Burst, the Widsith's effect will activate and buff it for maximum damage.
Generally, both Yae and Raiden use an ATK% Sands, and Raiden uses an ER% weapon like the Catch. However, different combinations are available depending on their weapon choices. When Raiden has lower ER%, it becomes harder to meet Yae’s ER requirements with an ATK% Sands without sacrificing too many offensive substats. In these cases, ER% Sands are superior. This is difficult to determine, so the general rule is if Raiden is not using an ER% weapon, then Yae should be on ER% Sands.
If Yae is C1, she should always use an ATK% Sands and the advice above should be ignored.
While Kazuha’s Burst ideally absorbs Pyro to trigger Overloaded for increased damage, he can absorb Electro to avoid knocking back lighter enemies, especially in mobbing content with many smaller waves.
For a faster front-load, you can perform an alternate rotation; however, this should be done sparingly as it greatly increases ER requirements. Best for speedrunning a single chamber.
Raiden E > Yae 3[E] > Bennett Q > Kazuha Q > Yae Q 3[E] > Raiden Q combo
Raiden Aggravate

Aggravate teams with Raiden have similar dynamics to Raiden — Bennett — Kazuha, but there is less front-loaded damage. However, Aggravate is much more reliable at triggering a steady supply of Electro Particles from Electro Resonance, lowering the team’s ER requirements slightly. In Aggravate teams, Yae becomes much more Skill-oriented, to the point that 4pc Gilded Dreams and 4pc Golden Troupe outperform 4pc Emblem of Severed Fate despite her ER requirements at C0.
Raiden should increase the number of her Electro hits to maximize Aggravate procs, which compensates for the damage loss on her Burst’s initial hit without Bennett. To maximize the number of Aggravate procs triggered by Raiden, she should use N4D combos.
Dendro Options
Most Dendro characters play similarly. Choosing one is a matter of preference, but they each have their advantages and disadvantages. More in-depth information on every Dendro character is in the Synergies section.
Most of the Dendro characters do not contribute significantly to the team via their personal damage. As such, they should usually be on more supportive sets like 4pc Tenacity of the Millelith and 4pc Noblesse Oblige. This includes Nahida, especially in single-target. Similarly, they should use more supportive weapons like Favonius for the increased particle generation, or other options like Wandering Evenstar, Hakushin Ring, Sapwood Blade, etc.
 Nahida | Nahida provides a sizable EM buff and moderately high damage (which can’t be said for the others). However, she struggles against multi-wave content where she can’t refresh her Dendro application. Furthermore, her high Dendro application can make Electro Swirls inconsistent. As such, it may be preferable to pair her with a non-Anemo character like Kokomi or Zhongli. |
 Baizhu | Baizhu provides significant healing and a moderate Aggravate buff, making him the most “complete” option among Dendro characters. |
 Dendro Traveler | Dendro Traveler provides long, off-field Dendro application and a small buff. They are also free! |
Kirara | Kirara has a shield and a small buff, but her Dendro application is relatively short and her C4 cannot be activated in this team. |
Yaoyao | Yaoyao has decent healing, but her Dendro application doesn’t last as long as Baizhu, Nahida, or Dendro Traveler. She also struggles more in multi-target while also taking more field time. Yaoyao should not use her Burst, since she spends the entire rotation off-field. |
Flex Options
In Aggravate teams without Baizhu, Kirara, or Yaoyao, a healer or shielder is recommended to avoid dying.
Zhongli | Zhongli’s Universal RES Shred is potent and his shield is very comfy. |
  Jean, Sayu | Jean and Sayu can provide 4pc Viridescent Venerer Electro RES Shred as well as teamwide healing. |
  Kazuha, Sucrose | Kazuha and Sucrose have extremely potent buffs for the entire team, being the best Anemo options if you don’t require defensive utility. |
 Lisa, Sara | Lisa provides DEF Shred, while Sara brings powerful ATK and Electro DMG% buffs. |
  Kokomi, Furina | Hydro options like Kokomi and Furina can further increase damage via Hyperbloom at the expense of Quicken uptime. If Raiden has a moderate amount of EM, this can be quite valuable. |
General Rotations
There are many possible Aggravate teams, so here is a generalized rotation:
Raiden E > Yae 3[E] > Anemo E(Q) > Dendro EQ > Yae Q 3[E] > Anemo E(Q) > Raiden Q combo
While different Dendro characters alter the exact dynamics of the team, the above rotation will work for almost all of them without issue. There are some exceptions:
- With Nahida, it is imperative that you make sure there is an Electro aura on the enemy prior to attempting an Electro Swirl. Nahida’s unique Dendro application may prevent an Electro Swirl. If there is no Electro aura present, you have to wait for Yae or Raiden to apply Electro and perform Normal Attacks in the meantime; however, it may be better to swap to Yae and Normal Attack until Electro is present.
- Yaoyao should not use her Burst, since she spends the entire rotation off-field.
- Some Dendro characters may need a second Skill cast for additional particle generation or for the Skill’s utility itself. For example, Kirara can refresh her shield.
Example Teams
Raiden E > Yae 3[E] > Kazuha tEP > Baizhu EQ > Yae Q 3[E] > Kazuha tEPQ > Raiden Q combo
Raiden E > Yae 3[E] > Jean E > Nahida E Q > Yae Q 3[E] > Jean EQ > Raiden Q combo
Raiden E > Yae 3[E] > Sucrose E > Kirara EQ > Yae Q 3[E] > Sucrose EQ > Kirara E > Raiden Q combo
Raiden — Sara Mono Electro
Mono Electro trades out Bennett for Sara’s more dedicated Electro buffing. However, you also lose out on Bennett’s healing. To account for this, either forgo healing in a higher-risk playstyle, or use Jean, which lowers damage in exchange for reduced risk of death.
This team should only be considered once Sara is C2+ to make the rotation feel fluid, and ideally only after she reaches C6. Prior to C6, Sara’s buff is significantly weaker than other options such as Bennett or TTDS Lisa with her DEF Shred. However, if other buffers are not available, it can be an option.
Rotation
With Kazuha
Raiden E > Yae 3[E] > Kazuha tEP > Sara E (C) > Yae Q 3[E] > Sara Q > Kazuha tEPQ > Sara E (C) > Raiden Q combo
With Jean
Raiden E > Yae 3[E] > Jean EQ > Sara E (C) > Yae Q 3[E] > Jean E > Sara Q > Raiden Q combo
If Yae holds Widsith, special care must be taken to ensure its effect buffs her Burst. Yae needs to start on-field (the first party slot in Abyss) and place her Sesshou Sakura before Raiden uses her first Skill. When you switch back to Yae to cast her Burst, the Widsith's effect will activate and buff it for maximum damage.
If Sara uses her Charged Shots, there is a significant increase in Electro Particle generation, allowing both Raiden and Yae to run ATK% Sands with no additional ER% from substats (as long as Raiden uses an ER% weapon like the Catch or Engulfing Lightning). If Raiden is instead running a CRIT weapon such as Deathmatch or Staff of Homa, then Yae may need an additional ~15% ER for consistency.
Raiden — Furina
Furina is a powerful addition to the Yae-Raiden core, providing a powerful DMG% buff. The synergy isn’t perfect, however, because Furina’s buff is back-loaded whereas Yae and Raiden’s damage is more front-loaded. Nonetheless,the team is still very potent.
Healers and Rotations
The team requires a healer to maximize Furina’s buffing potential. There are four main options to consider.
 Baizhu | Baizhu provides the most overall damage because he enables both Hyperbloom and Quicken. However, his rotation is more complex than the others’ due to his longer Skill cooldown. Rotation (Raiden E) > Yae 3[E] > Furina ED Q > Baizhu Q > Yae Q 3[E] > Baizhu E > Raiden Q combo E > Baizhu E |
Bennett | Bennett provides the least healing but compensates with a stronger buff, often resulting in more overall damage and front-loaded damage for Yae and Raiden. Rotation (Raiden E) > Yae 3[E] > Furina ED Q > Bennett EQ > Yae Q 3[E] > Bennett E > Raiden Q combo E > Bennett E |
 Jean, Sayu | Jean and Sayu buff all three of their teammates and provide enough teamwide healing. This can be more comfortable to play, especially because of their upfront healing, and makes them slightly less restrictive compared to Bennett’s small circle. Between Jean and Sayu, Sayu does offer slightly more damage than Jean; however, Sayu requires C1 or ideally C4. Rotation (Raiden E) > Yae 3[E] > Furina ED Q > Jean/Sayu Q E* > Yae Q 3[E] > Raiden Q combo E > Jean/Sayu E* *Sayu should perform a Short Hold Skill as it generates more particles, provides an additional Swirl, and deals more damage without taking up too much time. |
Yaoyao and Kokomi are also options, but they do not provide much for the team.
 Yaoyao | While Yaoyao can trigger Quicken for the team like Baizhu, her greatly reduced Dendro application is much less reliable. |
 Kokomi | Kokomi activates Hydro Resonance for Furina and can hold TTDS, which buffs Yae. But as Electro-Charged ownership is inconsistent, Kokomi cannot use Hakushin Ring to buff Raiden. She does have very good healing and greatly lowers Furina’s ER requirements, nonetheless. |
Raiden Double Pyro
Double Pyro Raiden teams take advantage of Raiden’s Burst DMG% and Overloaded reactions. This archetype is particularly effective against enemies with innate Cryo or Hydro auras (e.g., Hydro Tulpa), where Xiangling’s damage is multiplied thanks to Melt or Vaporize. Chevreuse is highly valued in these teams, since her RES Shred does not require enemies to have an aura unlike Anemo units
There are a very large number of Overloaded reactions created by this team, so they perform best against heavy enemies like Ruin Guards and Bosses who cannot be knocked back, or against enemies with innate Cryo auras, since there are more Melt reactions than Overloaded.
While 4pc Golden Troupe and 4pc Emblem of Severed Fate perform on par for Yae in this team, 4pc Emblem of Severed Fate is recommended as it further emphasizes the Burst-oriented nature of this team. In addition, it simplifies farming significantly, since Raiden and Xiangling also ideally hold 4pc EoSF.
In teams with Chevreuse, Dehya can also be a potential substitute fourth teammate. However, with Raiden’s interruption resistance and Dehya’s low damage, Dehya’s primary value is her damage mitigation, which prevents one-shot deaths. Damage mitigation isn’t always necessary, so Dehya is more of a backup than an ideal teammate.
Rotations
(Raiden E) > Yae 3[E] > Bennett QE > Xiangling QE > Yae Q 3[E] > Raiden Q combo E > Bennett E > Xiangling N3
Raiden E > Yae 3[E] > Chevreuse Q hE > Xiangling QE > Yae Q 3[E] > Raiden Q combo
(Raiden E) > Yae 3[E] > Chevreuse Q hE > Bennett EQ > Yae Q 3[E] > Bennett E > Raiden Q combo E > Bennett E
Yae Fischl Teams

Yae and Fischl are both high damage single-target Electro characters with complimentary kits. Fischl’s incredibly high particle generation allows Yae to greatly reduce her ER requirements, while Yae can be a fantastic driver for Fischl’s A4 Passive. These two also pair extremely well in Aggravate teams, as they can both trigger a large number of Aggravate reactions, and Yae’s Normal Attacks can allow her to drive Fischl’s A4 for even more.
Even when Yae isn’t driving, they still have synergistic cooldowns. Fischl prefers 12s or 25s rotations due to her Skill and Burst cooldowns, which is awkward with most characters who prefer 15s or 20s rotations. However, Yae can accommodate this, since her Skill has a 12s cooldown and her Burst has a 22s cooldown which easily fits in a 25s rotation by extending the time between Skill refreshes.
Yae Fischl teams tend to be very flexible with their rotation, but they are heavily single-target focused. Their multi-target damage is respectable, but it is not their forte.
Fischl Aggravate

Aggravate is the most common way Yae and Fischl are played together, and for good reason. Their extremely high Electro application allows them to trigger a tremendous amount of Aggravate reactions, greatly increasing their damage. Yae is an Electro Catalyst user, so she can frequently trigger Fischl’s A4 Passive which has no ICD.
This team composition is extremely single-target focused; however, it still performs well in multi-target, since ICD isn’t shared between enemies.
Tip! When placing Yae’s Sesshou Sakura, weave in 2 Normal Attacks, either after all 3 Sesshou Sakura are placed or between each cast. This allows Yae’s first Sakura strike to occur while she is on-field, reliably triggering Fischl’s A4 Passive.
Aside from Tighnari and Alhaitham, most of the Aggravate teams are rather similar. A few notable examples are examined below.
Example Fischl Aggravate Teams
This is an extremely potent single-target team. It deals high amounts of front-loaded damage from Tighnari’s Charged Attacks and Yae’s Burst Moreover, it maintains good sustained damage with Yae’s Sesshou Sakura and Fischl’s Oz. Sucrose buffs the entire team via her EM buffs, 4pc VV Electro RES Shred, and potentially her weapon passive (Hakushin Ring or Wandering Evenstar).
Survivability
This team lacks direct defensive utility, but it is feasible to clear content without taking much damage thanks to the team’s high range, frequent Burst use, and decent mobility.If the enemies deal smaller instances of damage and you need healing to survive, Sucrose can hold Prototype Amber.
Alternative to Sucrose
Sucrose can be replaced with units like Zhongli, Yaoyao, Baizhu, or Kirara for their defensive utility. These alternative teams have similar rotations, with the primary difference being Yae driving at the end of the rotation instead of Sucrose.
Other potential Sucrose replacements include Nahida, Kazuha, and Lisa. Nahida provides an EM buff and allows Tighnari to reliably Burst in both halves of the rotation for example, but without 4pc VV Electro RES Shred, the team performs noticeably worse. Kazuha’s Electro DMG% buff is better for Yae and Fischl, but he does nothing for Tighnari; however, C2 Kazuha does grant a 200 EM buff to the on-field character. Lisa shreds enemy DEF with her Burst, but this debuff is not as strong as the aforementioned buffs.
Rotation
Yae 3[E] N2 > Sucrose Q N2 > Fischl Q > Tighnari E 3[C] Q > Yae Q 3[E] N2 > Sucrose N1 ED N3C > Fischl E > Tighnari E 3[C] > Sucrose N1 ED N2C N2
This rotation can be thought of as two variants of the same rotation, joined together by Yae’s Burst. In the first half with a few small differences in each half. In the first half, Sucrose and Tighnari Burst, while in the second half, Sucrose drives instead. Otherwise they form a very similar structure.
This is a very simple team. Arguably, it is one of the easiest teams in the game to play. Yae, Fischl, and Nahida primarily deal turret damage with their Skills, and Zhongli provides safety. As a result, it is possible to even “AFK” during combat after setting up everyone’s abilities.
Nahida
Nahida’s strong Dendro application enables Quicken, and her EM buff strengthens the on-field character. However, her damage is not particularly high in comparison to Yae and Fischl, especially if Zhongli uses 4pc Archaic Petra instead of 4pc Deepwood Memories or 4pc Instructor.
It can often be better to build Nahida more as a support, with 4pc Tenacity of the Millelith and a Catalyst like Hakushin Ring or Wandering Evenstar. While her damage does improve in multi-target, it still trails behind Yae and Fischl.
Zhongli
Zhongli can hold 4pc Archaic Petra, since it is relatively easy for him to pick up Electro Shards given the lax rotation. However, missing shards isn’t a huge deal either, as there is time later on to pick them up.
Alternative Teammates
Most off-field Dendro characters can replace Nahida without too much issue or even change in the rotation. But, none provide the same damage from buffs as Nahida.
Zhongli shielder alternatives are hard to find. The main alternative is Kirara who sometimes outperforms Zhongli, but her lower shield uptime makes her demand more attention, preventing you from making that sandwich. Baizhu is also an option, but his interruption resistance is poor against rapid enemy attacks.
More offensive units like Kazuha or Sucrose can also replace Zhongli. While this greatly increases the team’s damage, it also greatly lowers its survivability. The team retains a lot of range so it is not impossible to play. Alternatively, you can replace Nahida with Kirara.
There are several things to consider when replacing Zhongli with Kazuha or Sucrose:
- For optimal buff uptime, it is best not to pair their Skill and Burst together. Instead, use their Skill or their Burst.
- Additionally, 4pc VV should be refreshed before Yae drives then uses her Burst, at the end of the rotation, and whenever Zhongli would have used his Skill.
- For Sucrose, it is important to weave in Normal Attacks to guarantee an Electro Swirl. For C4+ Sucrose, she should drive at the end of the rotation to lower her Skill cooldown.
- Nahida can make Swirling inconsistent. When Yae or Fischl apply Electro, they will also trigger Aggravate, which may cause Nahida to trigger Tri-Karma Purification (TKP), thereby clearing the Electro and preventing an Electro Swirl. If this happens, you should wait for the next instance of Electro application to occur, hopefully before TKP comes off cooldown. You can speed up this process by Normal Attacking to drive Fischl’s C6 or swapping to Yae to do an N1C, which will always leave an Electro Aura if TKP was triggered recently.
Fixed Rotation
The rotation should follow the structure of the example rotation below.
Yae 3[E] N2 > Zhongli hED > Nahida E Q > Fischl Q > Yae Q 3[E] N2 > Zhongli hED > Nahida E > Fischl E
There is a lot of time to fill in the rotation. You could use this time to make a sandwich or pick up some shards with Zhongli, but ideally you drive with Yae to optimize for damage (and ear flicks).
Yae’s ideal combo is N2C, canceled with a dash or jump. When low on Stamina, jumping is better, but dashing is usually preferred, since it’s faster. N1C is slightly faster, but it results in slightly fewer A4 Passive, C6, and Aggravate procs from Fischl. Another option is to climb Zhongli’s pillar and use a Plunging Attack instead, blessing yourself with the rare sight of Yae’s tail.
With this in mind, a more “filled” rotation looks like this.
Yae 3[E] N2 > Zhongli hED > Nahida EQ > Fischl N1 Q > Yae N2CD N1CD Q N1 3[E] N2 > Zhongli hED > Nahida E N2 > Fischl N2 E > Yae N1CD N2CD N2CJ N2
A few N1Cs are used to align the rotation a bit better.
Flexible Rotation
Alternatively, the rotation can be played more fluidly with these points in mind:
- Maintain Yae’s Sesshou Sakura at all times.
- Use the Electro aura from Yae’s Skill to proc 4pc Archaic Petra with Zhongli’s Skill or Swirl Electro.
- Refresh Zhongli’s shield as needed.
- When Nahida’s Burst is available, swap to her and use both her Skill and Burst. Ignore refreshing her Skill otherwise unless new enemies spawn and must be marked.
- Alternate Fischl’s Skill and Burst to maintain high uptime on Oz.
- Use Yae’s Burst when points 1–5 are all complete and the enemies have enough health remaining to make using her Burst worth it.
- With nothing else left to do, aside from doing a little twerk, you may weave in Normal and Charged Attacks. Yae is the most effective Fischl driver for the team, but Zhongli can trigger slightly more C6 procs with his faster but vastly weaker Normal Attacks. Fischl, Nahida, or Kazuha can also drive if you really want.
- With time permitting, Yae can climb Zhongli’s pillar and jump off to perform a Plunging Attack, providing you with the rare sight of her tail.
This team with Kirara and an Anemo buffer takes a bit more effort to play than the Nahida — Zhongli variant, primarily because Kirara’s shield doesn’t last as long as Zhongli’s and her Dendro application is shorter than Nahida’s. However, Kirara’s C4 provides off-field Dendro application every few seconds when a character deals Normal or Charged Attack damage, which in this team is Yae.
While this team can do incredible amounts of single-target damage, it struggles more in multi-target scenarios as Kirara spends more time in her Hold Skill’s box form to apply Dendro, which reduces Yae’s available driving window, decreases buff uptime, and potentially times out Yae’s Sesshou Sakura. Kazuha’s grouping can help with Kirara’s Dendro application, but it is still somewhat awkward.
Despite the aforementioned drawbacks, this team is incredibly mobile. With Yae’s Skill, Fischl’s Burst, and Kirara’s Hold Skill, it allows rapid repositioning either to dodge telegraphed abilities or to approach the next wave of enemies. Kazuha’s grouping also lets Kirara and Yae’s Bursts be significantly more reliable in multi-target scenarios.
Alternative Teammates
Baizhu can quite easily replace Kirara here, trading her stronger shield for his weaker shield, healing, and A4 buff. However, his shield has lower effective health, so it is more likely to break.
Nahida can replace Kirara in exchange for higher damage and better multi-target performance; however, the team lacks defensive utility, significantly increasing its risk. She can also supplant Sucrose/Kazuha, which lowers the team’s single-target damage but improves its multi-target performance. The Kirara — Nahida variant is also easier to pilot, since Nahida only needs to reapply her Skill (and Burst) when necessary. Nahida’s increased Dendro application reduces Fischl’s A4 procs (since Spread doesn’t trigger the passive), but she does allow Yae to drive longer, which helps compensate for the difference.
Other Dendro characters with off-field application are not particularly notable in Yae-Fischl Aggravate.
Fixed Rotation
This is an example rotation, but there are many ways to vary it to suit your needs.
With Kazuha
Yae 3E N2 > Kazuha Q > Fischl E > Kirara EQ > Kazuha E > Yae Q 3[E] N2 > Kirara E > Fischl Q > Kazuha E > Flexible Time (Yae Driving, Kirara Refresh, Kazuha 4pc VV Refresh)
With Sucrose
Yae 3[E] N2 > Sucrose N1 Q > Fischl E > Kirara EQ > Sucrose E > Yae Q 3[E] N2 > Kirara E > Fischl Q > Sucrose E > Flexible Time (Yae Driving, Kirara Refresh, Sucrose 4pc VV Refresh)
Flexible Rotation
The team can be played more dynamically if sticking to the fixed rotation proves difficult. For example, you can refresh Kirara’s shield more often against high-damage enemies like the Hydro Tulpa or Consecrated Beasts. You can also save Bursts when enemies are low health or until a Boss is in a more vulnerable state. You can also stagger Kirara’s Skill and Burst uses to increase Quicken uptime; this is especially beneficial prior to C4.
Here is a general order of operations for a more flexible rotation:
- Maintain Yae’s Sesshou Sakura and weave in a couple Normal Attacks to trigger Fischl’s A4 Passive and C6.
- Trigger an Electro Swirl; use either a Skill or Burst to reduce field time and increase 4pc VV uptime (by saving the other ability for later).
- Summon Oz (alternate Fischl’s Skill and Burst), allowing Fischl to snapshot Kazuha’s A4 Electro DMG% buff or Sucrose’s EM buffs.
- Use Kirara’s Hold Skill. A “Short Hold” is often sufficient, but you can stay in her Skill longer if there are multiple enemies or a stronger shield is required. Her Burst can also be used here if desired.
- Use Yae’s Burst when points 1–4 are all complete and the enemies have enough health remaining to make using her Burst worth it.
- Between these actions, Yae or Sucrose can drive Fischl, Kazuha/Sucrose can refresh 4pc VV, and Kirara can refresh her shield or reapply Dendro with her Burst.
This is a Quickbloom team with Kokomi offering healing in exchange for reduced buffs (in comparison to Sucrose, Kazuha, Zhongli, and Kirara). Yae should be the on-field driver in this team, since it reduces the number of turret shots that target Dendro Cores instead of enemies. With her Hyperbloom ownership, 4pc Gilded Dreams and EM stats increase in value, to the point that EM is preferred over ATK% in this team.
Rotation
Yae N1 3[E] N2 > Nahida E Q > Kokomi E N1 > Fischl Q > Yae 2[N2C] Q N1 3[E] N2 > Kokomi Q N2 > Nahida E N2 > Fischl E > Yae 2[N2C]
Despite its length, the rotation can be thought of in simpler terms: Yae E > Nahida and Kokomi > Fischl > Yae Drive > Yae Q. Note that Kokomi’s Burst should go before Nahida, which makes it easier to refresh her jellyfish and results in more Dendro Core production and healing
Kokomi’s low Hydro application allows other Dendro characters to replace Nahida, but Nahida is by far the most reliable. Similarly, other Hydro characters can replace Kokomi, but this severely hampers survivability. Additionally, the increased Hydro application may reduce Aggravate uptime, further lowering performance if Hyperbloom cannot be reliably triggered by Yae.
Fischl Mono Electro
This team is extremely easy to play and quite reliable. Its damage is solid, and Kazuha’s grouping makes it decent in multi-target scenarios. On top of that, Fischl and Yae’s raw single-target damage yields solid performance in multi-target, too. Zhongli brings a powerful shield that he can refresh the moment his Skill comes off cooldown.
This is a team where Yae’s lack of snapshot is strictly beneficial, as she can apply Electro with her Sesshou Sakura for Kazuha to Swirl or Zhongli to proc 4pc Archaic Petra which then apply to Yae even if she’s off-field. Fischl can then come in to snapshot the buffs to Oz.
With the vast majority of the team’s damage coming from Yae and Fischl’s turrets, the team has a lot of free time. This can be used to reposition, weave in Yae’s Normal Attacks, or even do a little dance.
For Yae’s build, refer to Yae Driver (Non-Aggravate) Weapons and Artifacts. To summarize, 2pc + 2pc combinations are usually the best option, and non-EM weapons are ideal, especially Kagura’s Verity, Widsith, and Solar Pearl.
Fixed Rotation
This team is incredibly flexible, so a fixed rotation does not need to be strictly followed. It is provided as an example.
Yae 3[E] > Zhongli hED > Kazuha tEPQ > Fischl Q > Yae Q 3[E] > Zhongli hED > Kazuha tEP > Fischl E
Flexible Rotation
A fixed rotation like the one above should not be adhered to strictly because of the team’s flexibility. Instead, play with certain priorities in mind and adapt to the situation.
- Maintain Yae’s Sesshou Sakura at all times.
- Use the Electro aura from Yae’s Skill to proc 4pc Archaic Petra with Zhongli’s Skill and 4pc VV with Kazuha.
- Refresh Zhongli’s shield as needed.
- Alternate Fischl’s Skill and Burst to maintain high uptime on Oz.
- Use Yae’s Burst when points 1–4 are all complete and the enemies have enough health remaining to make using her Burst worth it.
- With nothing else left to do, aside from doing a little twerk, you may weave in Normal and Charged Attacks. Yae is the most effective Fischl driver for the team, but Zhongli can trigger slightly more C6 procs with his faster but weaker Normal Attacks. Fischl or Kazuha can also drive if you really want.
Some further tips are presented below:
- Zhongli can hold 4pc Archaic Petra, since it is relatively easy for him to pick up Electro Shards given the lax rotation.
- Watch Yae’s Skill cooldown to time her Burst. The moment all 3 charges return, use her Burst.
- Watching Yae’s Skill cooldown also helps timing with Fischl because Yae takes 12s to get all her Sesshou Sakura back, which is the same duration as C4+ Oz.
Fischl Electro-Charged
This is an Electro-Charged team that deals high amounts of consistent damage with good survivability. However, compared to Fischl Aggravate teams, it falls behind in damage. Despite this, it is quite potent in multi-target scenarios where Electro-Charged and Swirl reactions deal more damage. If Sucrose is the on-fielder, she can proc her C4 well, which results in more Skill uses and more crowd control than other Yae Sucrose teams.
Both Kokomi and Sucrose can act as the driver, each with their own benefits. Kokomi has higher single-target damage and greatly increased healing, which is especially valuable against high-damage enemies or debuffs like Corrosion. On the other hand, Sucrose performs better in multi-target, since she can trigger a significantly larger number of Swirls, especially Double Swirls when Electro-Charged is present, greatly increasing her damage. In multi-target scenarios, Sucrose is less likely to Swirl Hydro for 4pc VV, but Yae and Fischl deal most of the team’s damage so this isn’t a huge deal.
It is also possible to use Kazuha over Sucrose in this team, with Kokomi as the driver. His DMG% buff increases his teammates’ personal damage but results in lower Electro-Charged damage (compared to Sucrose’s EM buffs). In addition, he is more likely than Sucrose to Swirl Hydro for 4pc VV in multi-target scenarios, but it’s still inconsistent.
Rotation
The rotation for this team is extremely flexible, following a procedure like below:
- Place Yae’s Sesshou Sakura, and refresh them as needed.
- Summon Oz (since there is nothing to snapshot).
- Use Kokomi’s Skill.
- Swirl again.
- If you still have a bit of time, drive with Kokomi or Sucrose while you let Yae’s Sesshou Sakura tick for a bit.
- Yae should then Burst if needed, before refreshing Oz and the jellyfish.
- Kokomi or Sucrose should drive until the turrets begin to time out.
Fischl — Bennett — Chevreuse
This team excels against enemies with innate Hydro or Cryo auras, since Chevreuse always shreds enemy Electro RES. By combining Chevreuse’s buffs with Bennett, Yae and Fischl can deal large amounts of damage. Be wary! This team lacks interruption resistance. Additionally, the self-applied Pyro aura from Bennett’s Burst can increase incoming damage, since enemies can trigger Melt, Vape, or Overloaded, significantly increasing the risk of dying in one shot.
With no off-field Pyro application, it’s important to frequently switch back to Bennett to reapply Pyro. Yae is the ideal driver, since Fischl cannot proc her A4 Passive if there is a constant Pyro aura (from Bennett driving). Despite being on-field, Golden Troupe is still Yae’s optimal set; however, 2pc + 2pc combos can perform on par, since the DPS difference is small.
Rotation
This team works best on a 15s rotation.
Yae 3[E] > Bennett EQ > Chevreuse Q hE > Fischl E/Q > Yae N2C > Bennett E N1 > Yae (Q) / 2[N2C]
Yae uses her Burst as needed and does not need to build any ER%.
Skill-Only Yae Teams

Yae can appear in many different teams, being a Skill-based damage dealer with relatively low field time. Usually, these teams rely solely on her Skill’s Electro application and damage, with limited use of her Burst. Often, she is still paired with Fischl to further maximize the Electro application and single-target damage output, but this is not required.
Skill-only Yae teams do not have very complex interactions, so they are not explored in depth.
Alhaitham Yae Teams

As an on-field Spread DPS unit, Alhaitham requires an off-field Electro applier like Yae to enable Quicken. Yae’s high totem uptime allows her to easily refresh Quicken while also dealing moderate damage.
With Alhaitham’s long field time and tight team rotation, it is quite difficult for Yae to use her full kit. It is more common for her to place her 3 Sesshou Sakura at the beginning, and refresh 1–2 later on if there is time. Rarely do the teams have enough time for Yae to use her Burst.
Because Yae’s damage is so severely reduced in these teams, it is often better to build Yae more supportively, on 4pc Tenacity of the Millelith with a weapon like Hakushin Ring.
While other characters like Lisa, Shinobu, or Fischl may be better suited for this role, Yae is still a good choice.
Navia Yae Teams

Navia requires off-field Elemental appliers to trigger Crystallize for her Skill. Yae’s low field time and relatively high damage makes her a strong option. Especially with Fischl, Yae is quite potent in single-target scenarios where Navia thrives. In addition, Yae and Fischl fit in short rotations, increasing DPS significantly.
However, as with most of these teams, Yae cannot Burst reliably, due to the short and rather tight rotation. Note that Navia has stronger pairings, but Yae is still a good choice because of her easy and reliable gameplay.
Overvape
By applying Electro to a Hydro aura, you can achieve Electro-Charged auras. If Pyro is then applied to the Electro-Charged, it will trigger both Overloaded and Vape (unless the Pyro aura is weaker than the Electro Aura, where it will only Overload).
As an off-field Electro applier, Yae is quite effective at enabling this team archetype. Yae’s slower rate of Electro application can let some slower Hydro appliers like Kokomi enable Vape . Despite this, her Electro application results in fewer successful instances of Overloaded compared to other Electro options. However, if more Electro application is needed, another Electro unit like Fischl and Kuki Shinobu can be used in the last team slot. An example of such a team is Hu Tao — Xingqiu/Yelan — Fischl — Yae.
Cyno or Keqing Aggravate
Yae can complement on-field Aggravate characters such as Keqing and Cyno quite well by adding a significant amount of damage from off-field with minimal effort. Notably, Yae’s Sesshou Sakura have higher uptime than Fischl, which is particularly beneficial for Cyno. However, compared to Fischl or Lisa, Yae takes significantly more field time, especially if she has to Burst.
Superconduct

Superconduct is an important reaction for Physical damage dealers, as it is their primary source of Physical RES Shred. Yae can easily apply Electro to enable Superconduct. This makes her work well with characters like Eula, Freminet, and Physical Zhongli. However, Yae’s damage is not particularly high, since she usually can’t use her Burst or take advantage of team buffs.
Credits
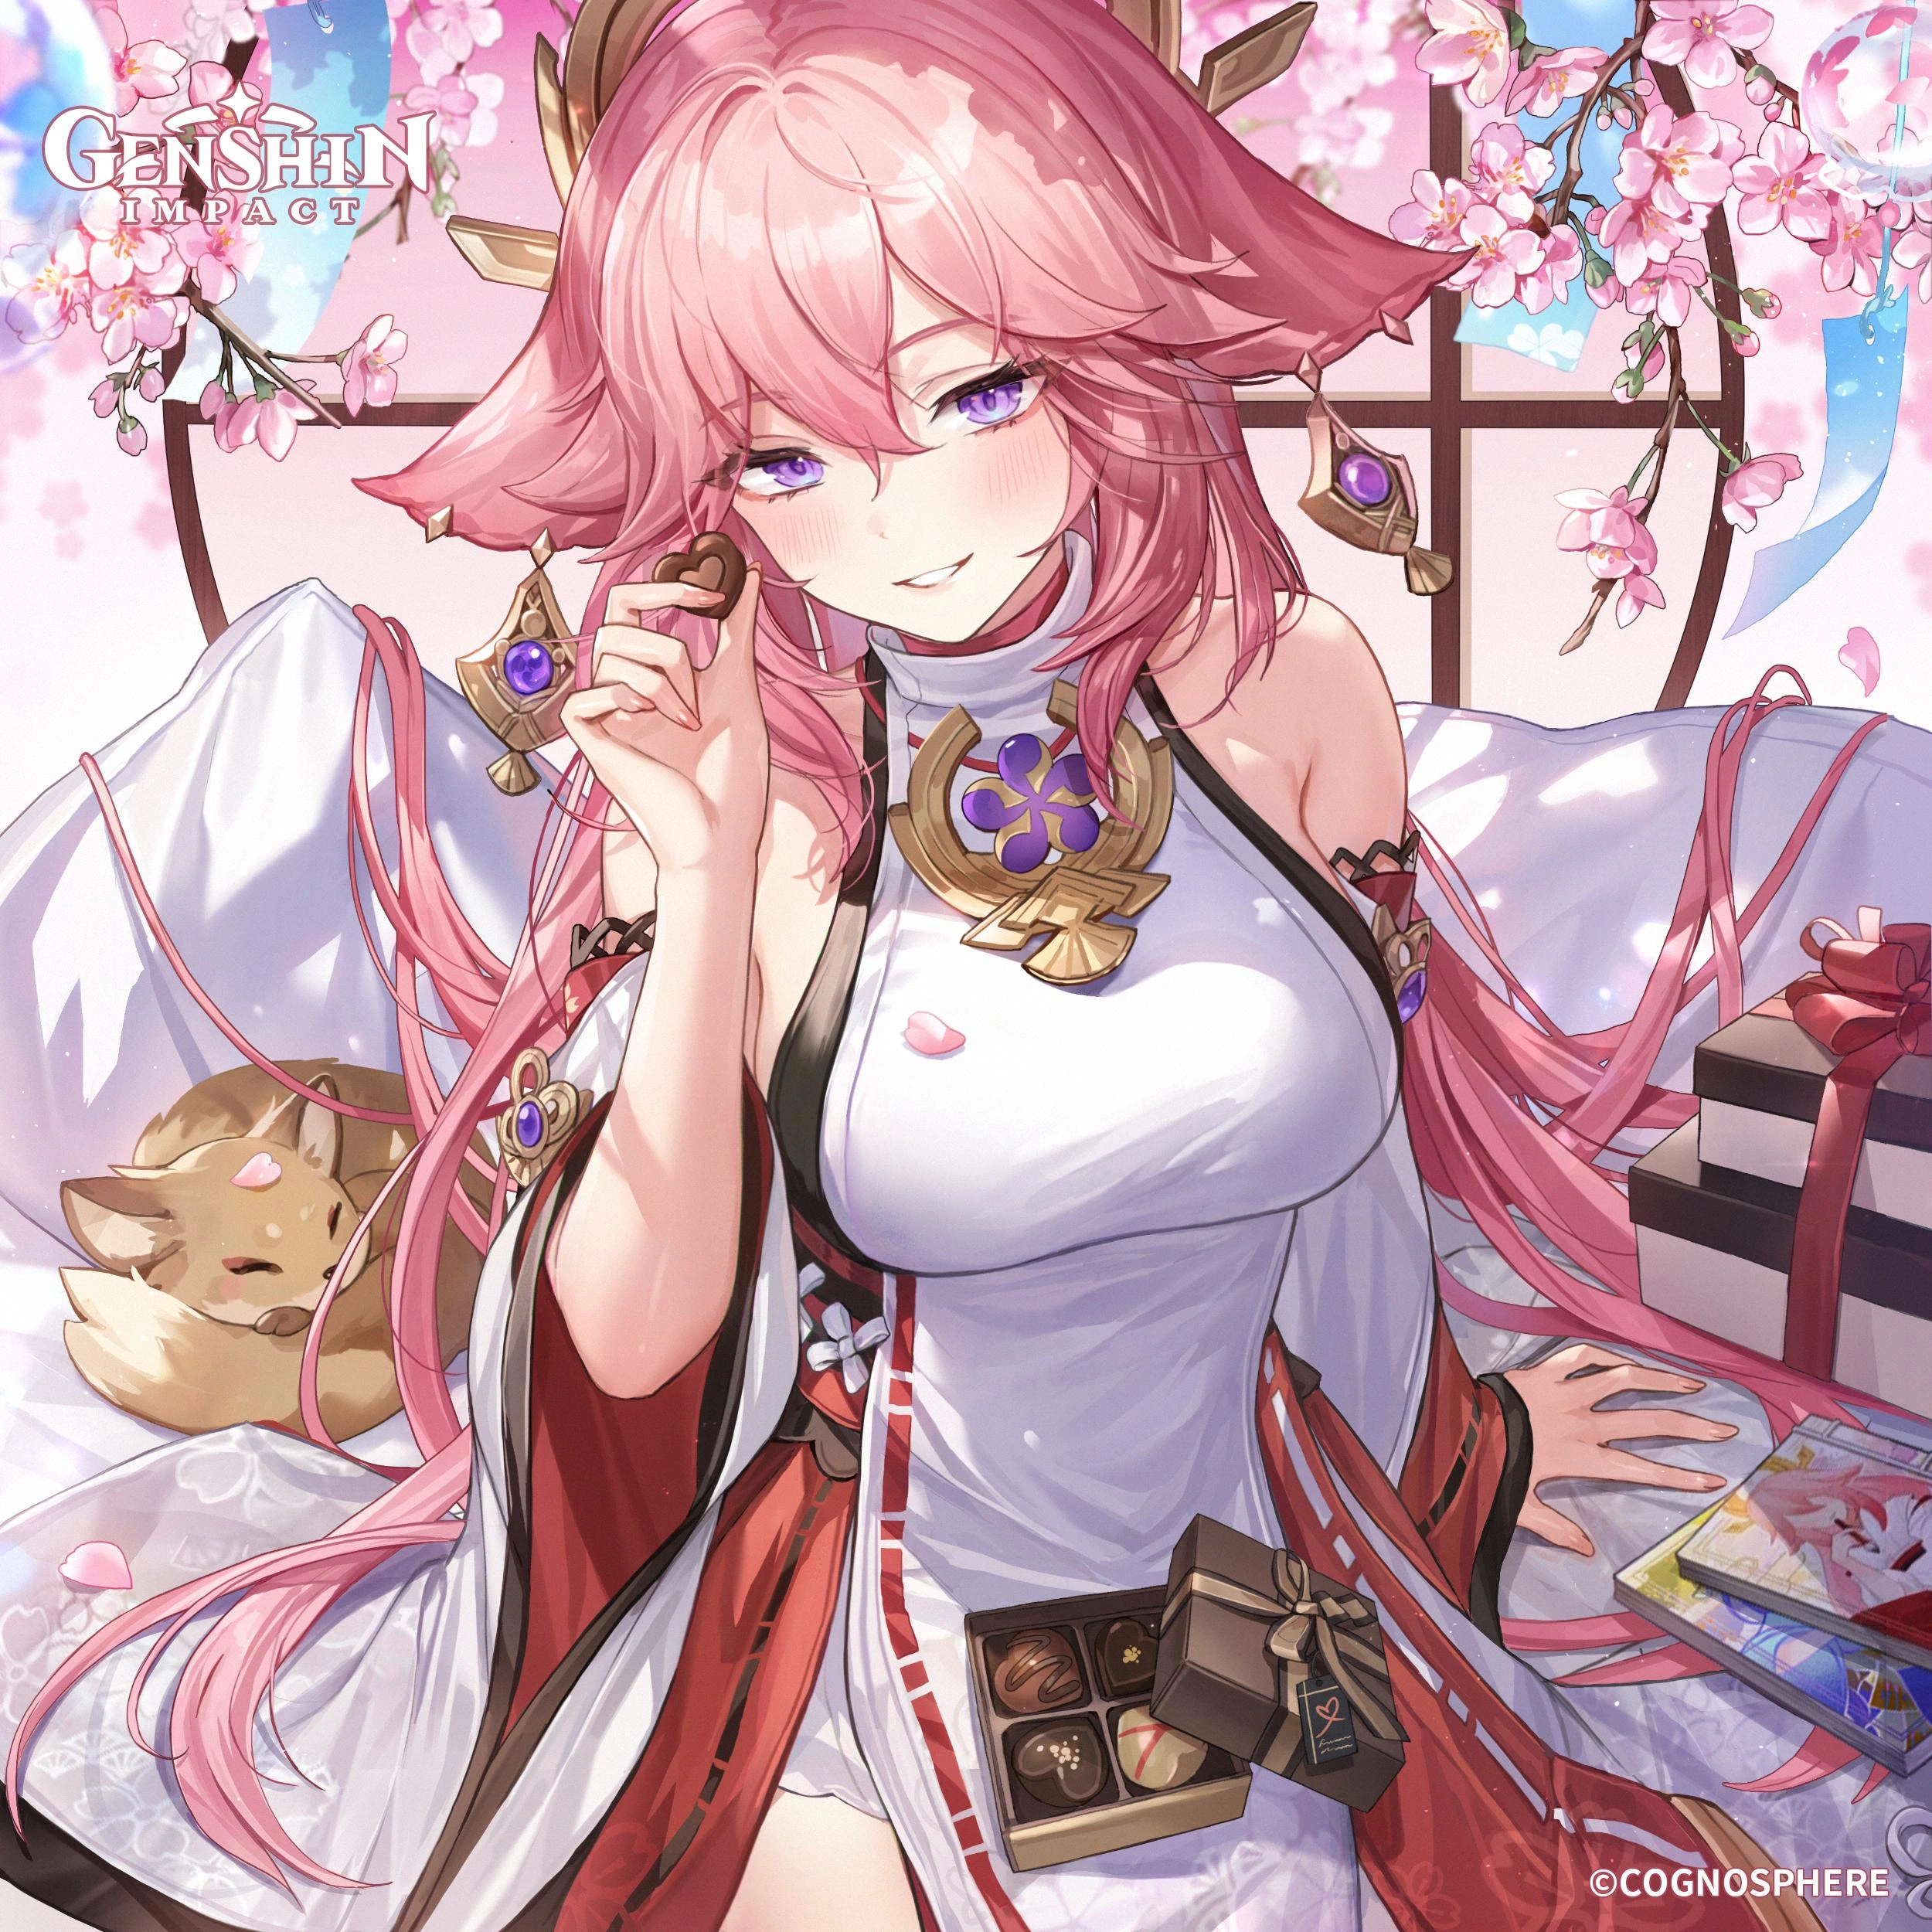
Eternity means never having to let go of what you already have. But on the other hand, it also means giving up on all other possibilities. That's just the way of the world... No one can have everything.
Author: rarepossum
Calculations: rarepossum
Readability Verification: irokei, eastonair, polomo
TC Verification: .tokkitsune, quinslay
Calc Verification: .athene.
Formatting: cuppacote, irokei, alix.sh
Transcription: irokei
Yae Guide Calcs by rarepossum