Please refer to the Yanfei Quick Guide for now!
The current Extended Guide is out of date. Join our Discord if you’re interested in updating this guide!
Written By: kol#1593
Updated for Version 2.7
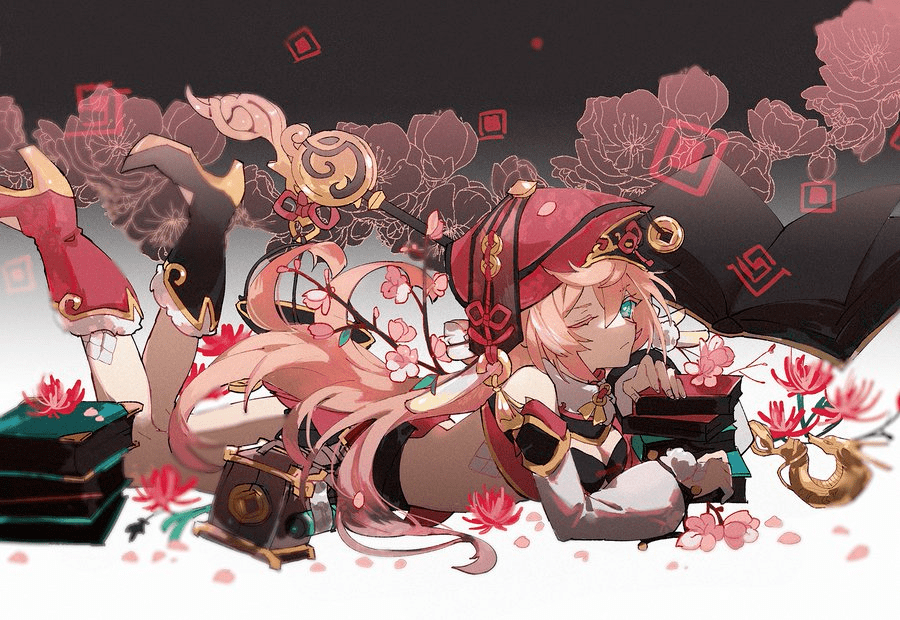
Art by emmikn
Table of Contents
Introduction
Yanfei is a 4-star Pyro catalyst who fits in various teams as an on-field DPS. It can be difficult to stand out among the Pyro DPS units in Genshin, but Yanfei still has her place as a fun and viable option for many accounts: whereas other DPS units may require careful management of Energy or demanding animation cancels, Yanfei, with her large range and smooth animations, is a relatively comfortable choice. Additionally, while Yanfei’s personal output may not be exceptional, she synergizes well with several strong sub-DPS and support units. (Also, she has an amazing hat.)
However, Yanfei is not without her complexities. This guide serves to cover them so that people can play Yanfei at her full potential.
Refer to the Glossary for definitions of terms used in the guide.
TL;DR

Design: cuppacote
Content: nikatosaurus & haafr
Why Play Yanfei?
Pros
- Big funny hat
- Great option for players in early game
- Has ranged Normal Attacks that allow her to hit difficult-to-reach enemies such as Spectres
- Respectable AOE
- Not reliant on animation cancels to perform well
- Not reliant on Constellations to perform well
- Many F2P or 4* weapon options
- Fast Pyro application that other units can use to react off of
- Cost-efficient Beidou driver (Overload playstyle)
Cons
- Will not match up the “premier” damage-dealing units in raw output
- Cannot easily cancel the long animation of her Charged Attack, leaving her susceptible to being interrupted
- Reliant on a stamina-consuming Charged Attack, although mostly alleviated with Constellations (Vaporize playstyle)
- Strong Pyro application that can mess up auras if measures are not taken to prevent it
- Can be reliant on Bennett and Xingqiu, two highly contested units (Vaporize playstyle)
Talents
The Talent priority for Yanfei is always:
 >
> >
>
However, for Overload Yanfei, it is recommended that players do not level her Talents, as they provide minimal damage increases while being expensive to level. It is instead recommended that players max out Yanfei’s level, weapons, and then artifacts, in that order.
Normal Attack | Seal of Approval
Talent Description
Normal Attacks
Shoots fireballs that deal up to three counts of Pyro DMG.
When Yanfei’s Normal Attacks hit enemies, they will grant her a single Scarlet Seal. Yanfei may possess a maximum of 3 Scarlet Seals, and each time this effect is triggered, the duration of currently possessed Scarlet Seals will refresh.
Each Scarlet Seal will decrease Yanfei’s Stamina consumption by 15% and will disappear when she leaves the field.
Charged Attack
Consumes Stamina and all Scarlet Seals before dealing AoE Pyro DMG to the opponents after a short casting time.
This Charged Attack’s AoE and DMG will increase according to the amount of Scarlet Seals consumed.
Plunging Attack
Gathering the power of Pyro, Yanfei plunges towards the ground from mid-air, damaging all opponents in her path. Deals AoE Pyro DMG upon impact with the ground.
Yanfei’s Normal Attacks each grant her 1 Scarlet Seal for 10s, which reduces the stamina consumption of and increases the damage of her Charged Attacks. The duration of all Scarlet Seals she possesses will refresh each time she gains a Seal. Yanfei can possess a maximum of 3 Scarlet Seals at C0, and a maximum of 4 at C6.
Yanfei’s Charged Attacks are blunt attacks, and thus will Shatter Frozen targets. They have no ICD, or internal cooldown, on elemental application, meaning that every Charged Attack will apply Pyro.
Elemental Skill | Signed Edict
Talent Description
Summons blistering flames that deal AoE Pyro DMG.
Opponents hit by the flames will grant Yanfei the maximum number of Scarlet Seals.
Yanfei’s Elemental Skill deals negligible damage, and is thus mostly used for Seals and Energy generation.
Signed Edict generates 3 Pyro particles upon cast, and is considered a blunt attack.
Elemental Burst | Done Deal
Talent Description
Triggers a spray of intense flames that rush at nearby opponents, dealing AoE Pyro DMG, granting Yanfei the maximum number of Scarlet Seals, and applying Brilliance to her.
Brilliance
Has the following effects:
• Grants Yanfei a Scarlet Seal at fixed intervals.
• Increases the DMG dealt by her Charged Attacks.
The effects of Brilliance will end if Yanfei leaves the field or falls in battle.
Similar to her Skill, the damage of Yanfei’s Burst isn’t particularly important, but it provides a significant damage bonus to her Charged Attacks.
It also grants Yanfei a Scarlet Seal every 1 second. However, having her Burst active does not change the combos Yanfei uses. Furthermore, due to its high 80 Energy cost, Yanfei should generally Burst every other rotation rather than build the ER necessary to Burst every rotation. This does not apply in situations with high enemy HP particle density, where she may be able to Burst more often.
However, the passive Scarlet Seal generation can be useful, particularly for C6 Yanfei or with C6 Xingqiu. See the section on Vaporize Yanfei’s combos for more.
 Ascension 1 Passive | Proviso
Talent Description
When Yanfei consumes Scarlet Seals by using a Charged Attack, each Scarlet Seal will increase Yanfei’s Pyro DMG Bonus by 5%. This effects lasts for 6s. When a Charged Attack is used again during the effect’s duration, it will dispel the previous effect.
A simple damage increase that can make the passive Seal generation from Done Deal slightly more valuable in some situations. The Pyro DMG Bonus will apply to the Charged Attack that triggers it.
 Ascension 4 Passive | Blazing Eye
Talent Description
When Yanfei’s Charged Attack deals a CRIT Hit to opponents, she will deal an additional instance of AoE Pyro DMG equal to 80% of her ATK. This DMG counts as Charged Attack DMG.
Although this talent appears to be free damage at first glance, this damage actually comes at a large cost, as the additional instance of Pyro application can overtake elemental auras maintained by supports. As such, it is important for players to follow the combos detailed later in the guide.
In an extreme case of the issue outlined above, Overload Yanfei actively avoids CRIT Rate to prevent this Passive from causing Yanfei to overtake the Electro aura. See the section on Overload Yanfei’s desired artifact stats for more.
 Utility Passive | Encyclopedic Expertise
Talent Description
Displays the location of nearby resources unique to Liyue on the mini-map.
Useful for exploration or farming for character ascension materials in Liyue.
Constellations
 C1: The Law Knows No Kindness
When Yanfei uses her Charged Attack, each existing Scarlet Seal additionally reduces the stamina cost of this Charged Attack by 10% and increases resistance against interruption during its release.
An excellent Constellation that can lessen Yanfei’s stamina problems in all playstyles, allowing her more leeway in her rotations and dodging.
Cumulative DPS Increase: 0.0%
 C2: Right of Final Interpretation
Increases Yanfei’s Charged Attack CRIT Rate by 20% against enemies below 50% HP.
A decent Constellation for Vaporize Yanfei; roughly a 10% CRIT Rate buff.
However, this Constellation can be detrimental to Overload Yanfei; see the artifact section under Overload Yanfei for details.
DPS Increase over C1 (Vaporize Yanfei): 5.3%
Cumulative DPS Increase (Vaporize Yanfei): 5.3%
 C3: Samadhi Fire-Forged
Increases the Level of Signed Edict by 3.
Maximum upgrade level is 15.
The small damage increase to Yanfei’s Skill damage is negligible, as her Skill damage is largely irrelevant.
DPS Increase over C2 (Vaporize Yanfei): 2.6%
Cumulative DPS Increase (Vaporize Yanfei): 8.1%
 C4: Supreme Amnesty
When Done Deal is used:
Creates a shield that absorbs up to 45% of Yanfei’s Max HP for 15s.
This shield absorbs Pyro DMG 250% more effectively.
Another quality-of-life Constellation, this one providing a sizable shield for the same duration as Yanfei’s Burst.
This shield is universal and will remain even after switching characters. Therefore, this Constellation allows Yanfei to become a viable shield support for Hu Tao, providing both a shield and Pyro application for an Anemo to VV. However, due to the high cost of her Burst, Yanfei will have Energy issues, which can be mitigated through Prototype Amber and large amounts of ER.
DPS Increase over C3 (Vaporize Yanfei): 0.0%
Cumulative DPS Increase (Vaporize Yanfei): 8.3%
 C5: Abiding Affidavit
Increases the Level of Done Deal by 3.
Maximum upgrade level is 15.
This Constellation increases the levels on Yanfei’s Elemental Burst, increasing the damage bonus to her Charged Attacks while her Burst is active. This Constellation is not particularly significant to either Vaporize or Overload Yanfei, due to the low frequency of Burst use.
DPS Increase over C4 (Vaporize Yanfei): 1.2%
Cumulative DPS Increase (Vaporize Yanfei): 9.4%
C6: Extra Clause
Increases the maximum number of Scarlet Seals by 1.
This Constellation raises the maximum number of Scarlet Seals Yanfei can possess at a time to 4 from 3. However, the optimal combos for Yanfei do not change after obtaining C6, therefore 4 Scarlet Seals will usually only be obtained when her Burst is active, or after a Skill cast.
Although the bonus damage from the extra Scarlet Seal is only relevant for Vaporize Yanfei, all playstyles benefit from the stamina consumption decrease: using a Charged Attack with 4 Scarlet Seals consumes 0 stamina.
DPS Increase over C5 (Vaporize Yanfei): 3.2%
Cumulative DPS Increase (Vaporize Yanfei): 12.9%
| Vaporize Yanfei | C1 | C2 | C3 | C4 | C5 | C6 |
| DPS Increase over previous Constellations | – | 5.3% | 2.6% | 0.0% | 1.2% | 3.2% |
| Cumulative DPS Increase | 0.0% | 5.3% | 8.1% | 8.3% | 9.4% | 12.9% |
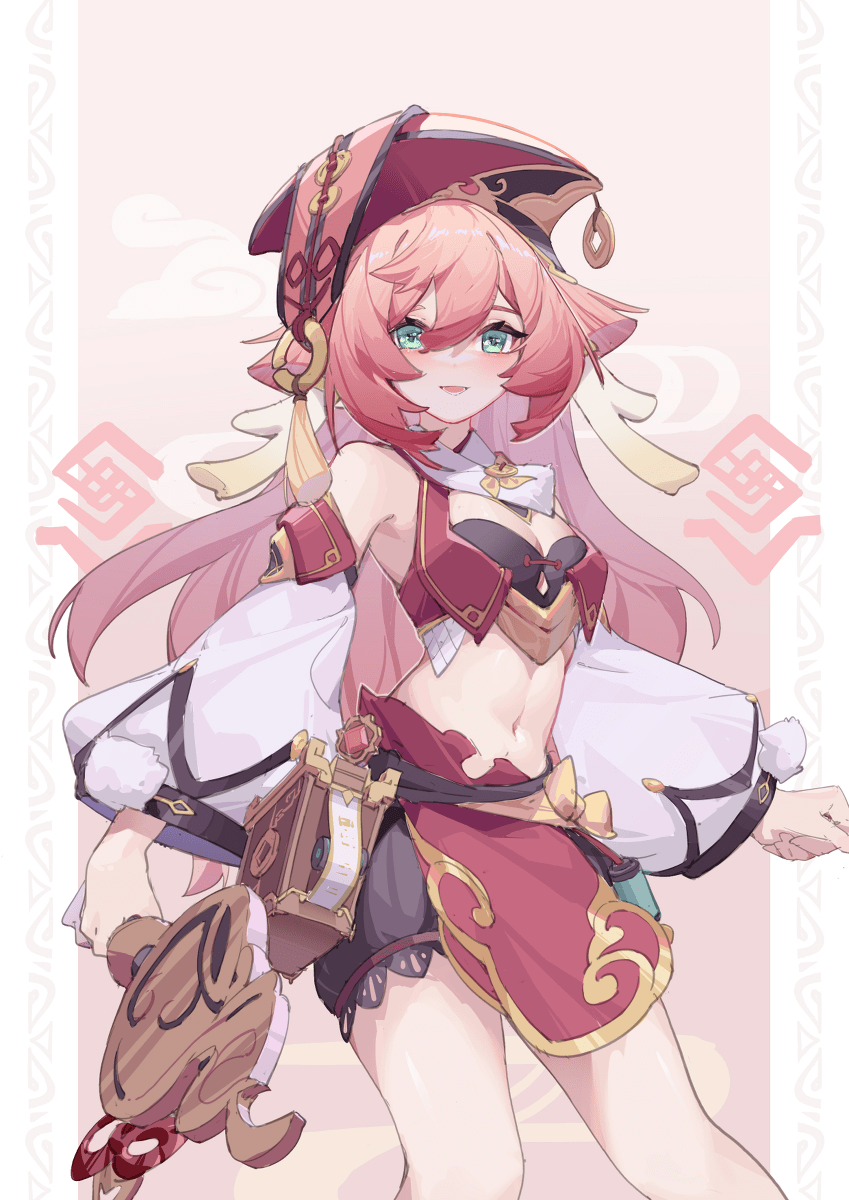
Art by 陆生双足虫
Playstyles
Vaporize Yanfei
Vaporize Yanfei relies on stacking Scarlet Seals and Xingqiu’s off-field Hydro application to dish out powerful Charged Attacks.
Pros
- Vaporize Yanfei’s personal damage scales better at high investment compared to other builds
- Utilizes the entirety of her kit
Cons
- Reliant on Charged Attacks, so proper stamina management is required
- Requires Xingqiu and Bennett, who are just as desired on countless other teams
- Primarily single-target, due to the limitations of Xingqiu’s Hydro application
- Requires Yanfei to remain on-field for the duration of her Burst
Overload Yanfei
Overload Yanfei utilizes Fischl’s A4 Talent to maintain an Electro aura on enemies, allowing Yanfei to constantly trigger Overload. This playstyle allows Yanfei to run as a relatively cheap and comfortable driver of the incredibly strong unit that is Beidou.
Pros
- Generally has a higher team damage ceiling compared to Vaporize
- Provides higher personal damage than other Yanfei builds at lower investments into her
- No Energy management required
- Does not require Yanfei to remain on-field for extended periods of time
- Frees up Xingqiu and Bennett for another team
Cons
- Requires more investment in her teammates
- Team damage suffers in single-target situations, where Beidou is less effective; a strong Fischl can mitigate this issue
- Her Constellations are either mostly useless or actively detrimental
Other
Other variations of Yanfei include Reverse Melt Yanfei, where Yanfei provides Pyro application for Rosaria and Kaeya to Melt their Bursts off of; and Mono-Pyro Yanfei, where Yanfei is on-field while Xiangling and other Pyro, Anemo, and Geo units deal damage off-field; as well as various others.
However, as they are not ideal for her, these variations of Yanfei will not be covered in depth in this guide.
Pros
- Team compositions are more flexible
- The flexibility of the teams gives you tools to deal with more situations
Cons
- Yanfei is generally a worse alternative to other Pyro applicators
- Requires more investment in her teammates
- Kaeya and Xiangling require you to play in close range, negating the benefits of her range
Early Game
Any of the builds discussed above will work well as an early game (pre-AR 45) option for players just getting to know Yanfei and Genshin.
For Overload Yanfei, players should prioritize levelling Yanfei and her weapon over her talents. For Vaporize and other builds, levelling Yanfei’s weapon and talents should be top priority.
Use artifacts obtained naturally—via chests and quests rather than spending resin to farm them—and prioritize main stats over forcing set bonuses.
Invest in off-field DPSes for utility first, then damage; for example, Xingqiu and Beidou will need ER to have access to their Bursts in order to enable Yanfei to trigger Vaporize or Overload, and in order to deal damage themselves. Fischl should be taken to Ascension 4 whenever possible in order to better enable Yanfei to trigger Overload.
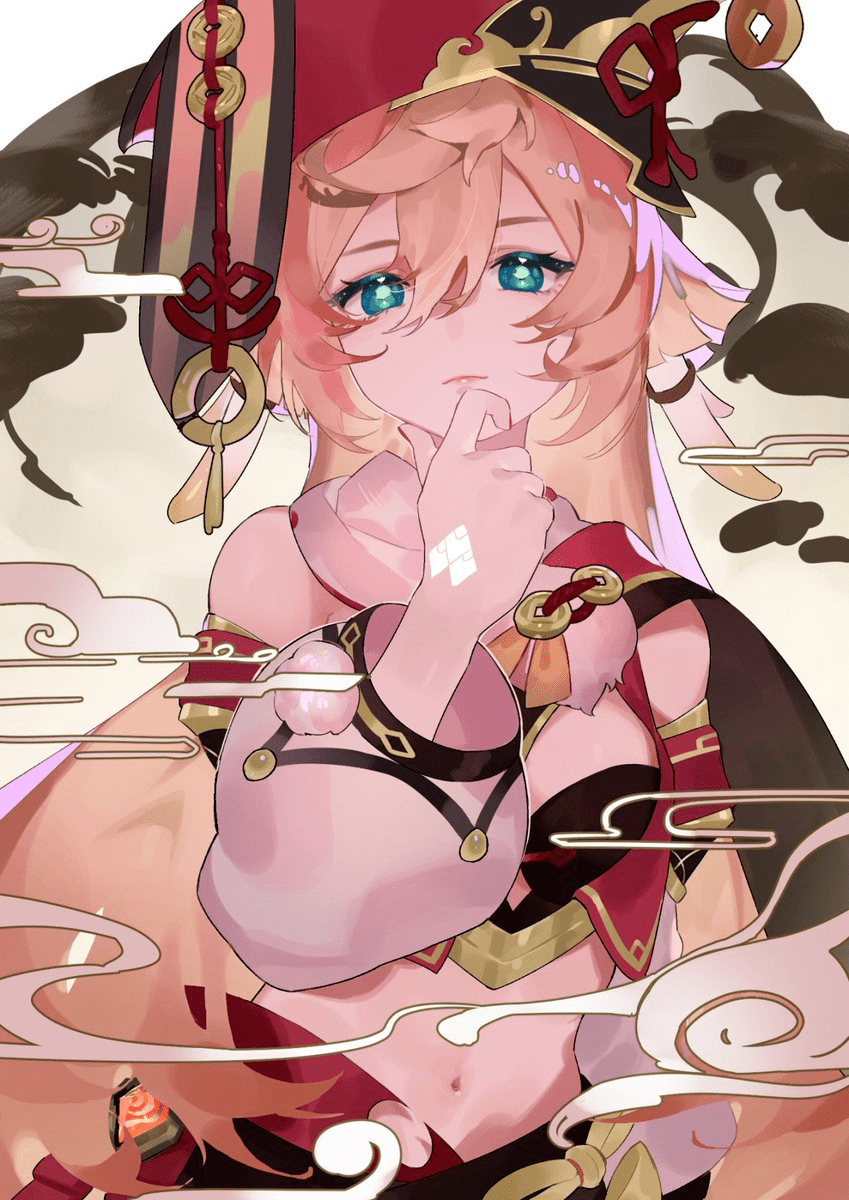
Art by riiein
Builds
Vaporize Yanfei
Weapons
Assumptions: C5 Yanfei Lvl 80/90; T9/12/12; 4CW; EM or ATK/PYRO DMG%/CRIT%; 800 ATK Bennett buff; 4 NO; Pyro resonance; VV shred; 2 preallocated rolls into each substat; 20 liquid substats distributed optimally
Rotation: Xingqiu EQ > Bennett EQ N1 > Yanfei EQ 3xN3C E C > Xingqiu EQ > Bennett EQ N1 > Yanfei E N1C 3xN3C E C
(NOTE: Constellations and Talent levels have negligible impact on relative performance of each weapon.)
| Weapon | Damage % vs. The Widsith R1 | Notes |
 Lost Prayer to the Sacred Winds R1 Lost Prayer to the Sacred Winds R1 | 111.6% | Due to the nature of her Burst and rotations, Yanfei requires extended on-field time, which synergizes well with Lost Prayer’s passive. Its CRIT Rate secondary stat—difficult to obtain elsewhere—solidifies its place as one of Yanfei’s strongest weapons. |
 The Widsith R5 The Widsith R5 | 109.5% | Yanfei, unlike some other catalyst users, can take full advantage of all three of Widsith’s buffs. At high refines, Widsith overtakes even 5-star options. Widsith passive accounted for by calculating average damage of each buff. |
 Kagura’s Verity R1 | 109.5% | By casting 2 Skills per rotation, Yanfei is able to obtain full stacks by the start of the second rotation. Even without obtaining full stacks, however, Kagura’s Verity can be still a valuable CRIT DMG statstick. |
 Skyward Atlas R1 Skyward Atlas R1 | 102.1% | Skyward Atlas tends to fall behind its CRIT-having counterparts, by nature of how much more difficult it is to obtain CRIT over ATK. |
 Memory of Dust R1 (100% Shield Uptime) | 101.8% | A strong option with good shield uptime. However, the weapon gives an excess of ATK, which causes it to fall behind other 5-star options after accounting for external buffs, in an even more extreme case of what afflicts Skyward Atlas. As Yanfei’s Burst and therefore C4 shield uptime will usually not be enough, and Diona’s shield typically does not fare much better, Zhongli will be required to achieve full shield and passive uptime. |
| The Widsith R1 | 100.0% | A strong passive and rare CRIT DMG makes The Widsith a powerhouse even at R1. |
| Memory of Dust R1 (No Shield) | 97.6% | Without a shielder, Memory of Dust falls further behind, but still proves to be a decently strong option. |
 Solar Pearl R5 Solar Pearl R5 | 95.7% | Solar Pearl’s passive does not buff the largest source of Yanfei’s damage, her Charged Attacks. As such, refines do not scale particularly well. However, the CRIT Rate secondary stat can be very valuable, given how few sources there are of it. |
 Dodoco Tales R5 Dodoco Tales R5 | 94.3% | A strong and completely free F2P option, but only if you were present for its event. |
Solar Pearl R1 | 93.9% | |
 Oathsworn Eye R5 | 93.3% | Oathsworn Eye allows you to run no ER, which, while valuable especially for comfort of gameplay and Energy management, does not make up for its otherwise lackluster benefits. |
 Blackcliff Agate R1 (0 Stacks) Blackcliff Agate R1 (0 Stacks) | 91.3% | Blackcliff’s passive is simply too unreliable for it to be worth your Starglitter. |
 Mappa Mare R5 | 90.5% | Yanfei can take full advantage of Mappa Mare’s substat and passive. A fairly strong F2P option provided you can acquire enough catalyst billets. |
Mappa Mare R1 | 87.6% | Better than nothing. |
Artifacts
Stats
Vaporize Yanfei runs an ATK% or EM Timepiece, Pyro DMG% Goblet, and a CRIT Rate or CRIT DMG circlet, whichever balances out her CRIT ratio better. Substat priority consists of the same stats.
Interestingly enough, instead of preferring a 1:2 CRIT ratio like most other CRIT-building characters, Yanfei’s A4 Talent means that her ideal CRIT ratio is closer to 3:5. Players should, however, strive to achieve a strong overall balance of stats rather than focus solely on CRIT ratio.
EM versus ATK Timepiece will be dependent on the substats of each respective piece and external buffs.
With 2 Bennett Skills and 4 Signed Edicts casted per Burst, Yanfei needs around 120-130 ER to Burst every 2 rotations. Forgoing offensive stats for more ER to Burst more often is not recommended.
Sets
Assumptions: C5 Yanfei Lvl 80/90; T9/12/12; Lvl 90 R1 Mappa Mare; EM or ATK/PYRO DMG%/CRIT%; 800 ATK Bennett buff; 4 NO; Pyro resonance; VV shred; 2 preallocated rolls into each substat; 20 liquid substats distributed optimally
Rotation (unless otherwise stated): Xingqiu EQ > Bennett EQ N1 > Yanfei EQ 3xN3C E C > Xingqiu EQ > Bennett EQ N1 > Yanfei E N1C 3xN3C E C
4 Shime Rotation: Xingqiu EQ > Bennett EQ N1 > Yanfei E N1C 3xN3C E C > Xingqiu EQ > Bennett EQ N1 > Yanfei E N1C 3xN3C E C
(NOTE: Constellations and Talent levels have negligible impact on relative performance of each set.)
| Artifact Set(s) | Damage % vs. 4 CW | Notes |
 4 Crimson Witch of Flames | 100.0% | The standard and typically the strongest set for Pyro characters that utilize Vaporize. However, all options listed are close enough that substats and external buffs can cause another set or combination of sets to overtake 4 CW. |
 4 Wanderer’s Troupe | 95.9% | Both the 2-piece and 4-piece effect suit Vaporize Yanfei, as she utilizes the EM and Charged Attack DMG% bonus well. Another relatively resin-efficient option, thanks to the existence of the Mystic Offering strongbox that allows players to trade their 5-star fodder for WT pieces, and how WT will be naturally acquired through fighting bosses. |
 4 Retracing Bolide (100% Shield Uptime) | 95.4% | As with Memory of Dust, Yanfei’s Burst and therefore C4 shield uptime will usually not be enough for full shield uptime, with Diona’s shield not faring much better. It is thus only recommended to run this set with Zhongli. Even with Zhongli, this set and the other set (Archaic Petra) in its domain are both extremely niche, and therefore difficult to recommend to farm. |
 4 Shimenawa’s Reminiscence (No Burst) | 95.2% | Contrary to what one might believe, Yanfei has little issue maintaining uptime on the 4-pc effect. By using this set, she chooses to trade the stronger buff from her Burst over a shorter duration of time, for a weaker but more consistent buff. This, combined with the resin efficiency of farming the set, leaves 4 Shime as a strong contender for one of Vaporize Yanfei’s best artifact sets. However, running 4 Shime means losing benefits from her Burst, including her C4 shield. Furthermore, it is not recommended to run 4 Shime with C6 Xingqiu and/or C6 Yanfei, cases where the passive seal generation from her Burst becomes more valuable. |
 2 Crimson Witch, 2 Wanderer’s Troupe | 94.9% | A decent option for those who do not want to farm a full set. |
 2 Crimson Witch, 2 Shimenawa’s Reminiscence / Gladiator’s Finale | 94.0% | A decent option for those who do not want to farm a full set. |
 2 Wanderer’s Troupe, 2 Shimenawa’s Reminiscence / Gladiator’s Finale | 93.4% | A decent option for those who do not want to farm a full set. |
Team Comps

Vaporize Yanfei relies on a core off-field Hydro applicator—Xingqiu or Yelan—to enable her to Vaporize her Charged Attacks and A4s. At least one core Hydro applicator must be in the team in order for Vaporize Yanfei to work.
The last slot can be the other core off-field Hydro applicator or some other character who provides defensive utility, personal damage, or buffs from off-field.
It should be noted that Yanfei benefits greatly from running a shielder in the team. Her long animation time on her Charged Attack during which she must remain in place means that she is already susceptible to being interrupted. This problem of interruption is exacerbated by the fact that Yanfei must execute the correct combos in order to ensure that the correct attacks Vaporize, and so being interrupted at any time can lead to a significant damage loss.
Editor’s Note: The following rankings are purely in the context of how much they contribute to the above Yanfei team. Do not interpret any part of this as a tier list.
Players must choose one of the following Hydro units or unit combinations listed as “CORE” in order for Vaporize Yanfei to work.
Hydro
| Character | Rating | Notes |
Xingqiu | CORE | Xingqiu is one of only two characters who can enable Yanfei to repeatedly and consistently Vaporize her Charged Attacks and A4s on his own, through his Burst.
Besides Hydro application and personal damage, he also provides slight healing and valuable Interruption Resistance. However, his orbitals (the Hydro swords that float around the active character when his Burst is active) can cause problems when attempting to Swirl both Hydro and Pyro in a rotation, also known as double Swirling. |
 Yelan | CORE | Yelan is the other character who can enable Vaporize Yanfei to consistently Vaporize the correct hits on her own, also through her Burst.
With Xingqiu’s orbitals out of the equation due to Yanfei’s range, Yelan typically has similar Hydro application to Xingqiu. There are cases when she can even enable Yanfei to execute combos that Xingqiu cannot; see the Combos and Rotations section below for details. Furthermore, her lack of orbitals means that double Swirl setups involving Yelan are more consistent than those with Xingqiu. Yelan additionally provides a ramping DMG% buff and similar personal damage to Xingqiu, although she lacks the defensive utility of Xingqiu. |
| Xingqiu + Yelan | CORE | Both Xingqiu and Yelan can struggle with Energy; running the two together can help solve this by having them provide Hydro particles to one another.
Furthermore, the additional Hydro application allows certain combos to be more consistently executed that either of the two on their own cannot enable. |
 Kokomi | B | Due to Yanfei’s A4 talent, Kokomi alone is not capable of maintaining a Hydro aura for Yanfei to Vaporize. However she can provide further healing, the Thrilling Tales of Dragon Slayers buff, hold 4 Tenacity of the Millelith or 4 Instructor, and supplement Xingqiu’s Hydro application. |
 Barbara | B | Another Hydro healer capable of holding and benefitting from Thrilling Tales of Dragon Slayers, much like Kokomi, except with lackluster Hydro application and near nonexistent off-field damage. |
Mona | B | As a buffer, Mona is far from ideal on a Vaporize Yanfei team. Like Sara, she provides only brief buffs via her Burst and Thrilling Tales of Dragon Slayers that Yanfei, as a character that cannot frontload her damage, cannot utilize especially well. Furthermore, the short duration and nature of Mona’s buffs requires that she set up her buffs immediately prior to switching to Yanfei, shortening practical uptime on both Bennett’s buffs and Xingqiu’s Hydro application. |
Pyro
| Character | Rating | Notes |
Bennett | S | Bennett provides Yanfei a significant ATK bonus via his Burst, 4 NO, Pyro Resonance, as well as healing and Pyro particles. |
 Thoma | B | Despite Thoma’s Burst dealing instances of Pyro application, he does not prevent Yanfei from vaporizing both her Charged Attacks and A4 procs, even with only non-C6 Xingqiu supplying Hydro. Therefore, Thoma can provide a decent shield for Yanfei through his shield-stacking mechanic, as well as buffs through artifact sets and weapons. At C6, Thoma can provide Yanfei a 15% DMG buff to her Normal and Charged Attacks. However, other units can provide significantly more personal damage and buffs, making him a subpar choice. |
Anemo
| Character | Rating | Notes |
Kazuha | S | Kazuha can provide grouping, Viridescent Venerer 40% RES shred, and a DMG% buff for both Yanfei and Xingqiu given proper setup. Furthermore, his absorption priority in combination with the self-Pyro application from Bennett’s Burst allows him to easily Swirl Pyro to apply aforementioned buffs. See the Combos and Rotations section below for more. Players should be careful not to infuse his Burst with Pyro, or it will mess up Yanfei’s Vaporizes. See the Rotations section for details. |
Sucrose | S | Sucrose can provide grouping, Viridescent Venerer 40% RES shred, EM share, and a 48% ATK buff from Thrilling Tales of Dragon Slayers. Players should be wary of casting her Burst unless they are knowledgeable with how its absorption works, lest it absorb the wrong element and mess with reactions. |
Jean | A | Jean condenses Viridescent Venerer RES shred, personal damage, and healing into one slot. Players should not cast Jean’s Elemental Burst in range of Bennett’s Burst if using her with Bennett, as it will cause Pyro to constantly be Swirled off of the on-field character onto enemies, and will overtake Xingqiu’s Hydro application. |
Sayu | A | A cheaper and subpar version of Jean. |
 Anemo Traveler | A | Anemo Travleer can provide Viridescent Venerer 40% RES shred. While their Burst can provide an additional 20% RES shred, it must be infused with Pyro to provide this debuff, which will prevent Yanfei from Vaporizing, and thus is not recommended. In general, players should be wary of using Anemo Traveler’s Burst at all, as it can blow smaller enemies out of Yanfei’s range. |
Venti | A | Venti provides the strongest and longest grouping in the game, as well as Viridescent Venerer 40% RES shred. However, Yanfei may struggle to hit enemies lifted by his Burst. Additionally, his A4 talent allows him to refund 15 Energy to Xingqiu. Players should also be careful not to infuse his Burst with Pyro, or it will mess up Yanfei’s Vaporizes. |
Electro
| Character | Rating | Notes |
Fischl | S | Fischl, in combination with Xingqiu, enables Yanfei to trigger both Overload and Vaporize at the same time, while adding personal damage. |
Beidou | B | Without a battery, Beidou’s high ER requirements decrease her damage drastically. This is not to say that Beidou is not an incredibly strong character in proper teams. Therefore, if players are interested in running Beidou with Yanfei, view the section on Overload Yanfei for details. |
Lisa | B | Lisa can provide buffing via TTDS and 4 NO or 4 Instructor, and one of the few DEF% shreds in the game. However, enemies are prone to being knocked out of the range of her Burst and she is generally a subpar choice for the team. |
 Sara | B | Yanfei does not utilize Sara’s brief ATK buff well, as she has no way of frontloading her damage. And while Sara can have high uptime on her buffs given the field time, Yanfei cannot switch out to refresh Sara’s buff without prematurely ending her Burst. Furthermore, because of how Sara’s buff is passed to the intended target, she must set up her buffs directly prior to switching to Yanfei, shortening practical uptime on both Bennett’s buffs and Xingqiu’s Hydro application. |
Raiden Shogun | ??? | It is possible to run a dual carry composition of sorts with an extended rotation, where Yanfei uses one Burst per rotation and Bennett uses his Burst twice per.
While this team can output relatively high DPS by nature of Raiden being in the team, it is worth considering that the team is neither optimal for Yanfei nor Raiden. Yanfei’s damage contribution is lowered significantly by both not running another buffer and by extending rotation time, while Raiden would be better off with another unit over Yanfei who can contribute damage off-field or buff herself. |
Cryo
No existing Cryo characters can allow Yanfei to Forward Melt off Cryo application alone for more than only a brief duration of time. And while some Pyro characters are capable of Melting some attacks with supplementary Hydro application—commonly known as “Vapemelt”—Yanfei’s Charged Attack is a blunt attack, meaning it will Shatter any Frozen enemies and remove any Hydro or Cryo on said enemies, causing the Charged Attack damage to not Vaporize or Melt. As such, Cryo characters such as Rosaria, Kaeya, and Ganyu, who consistently apply Cryo off-field, will cause the team to lose more damage than it gains.
| Character | Rating | Notes |
 Diona | A-B | While Diona does provide a decent shield, she brings far more caveats than benefits to Yanfei’s team. Combined with Xingqiu’s Hydro application, even her lackluster Cryo application can apply Frozen to enemies at inopportune moments, causing Yanfei to lose a Vaporize on her Skill or Charged Attack to a Shatter. And even with her C6 EM share, another buffer will allow Yanfei to do significantly more damage. Nonetheless, if players are truly struggling to manage without a shield, Diona can be considered. |
Geo
| Character | Rating | Notes |
Zhongli | S+ | Zhongli provides a strong shield for increased survivability and interruption resistance—allowing Yanfei to execute the combos she needs more easily—as well as a 20% universal RES shred. However, his pillar should be placed away from enemies to avoid messing up Yanfei’s Vaporizes. |
Albedo | B | Albedo is a relatively cheap character to build whose A4 talent gives him EM share for further utility. However, his damage falls drastically without a second Geo character, which isn’t possible without dropping either of the two core characters, making him an overall subpar choice. |
Combos
E = Elemental Skill
Q = Elemental Burst
N1C = Normal Attack, Charged Attack
N2C = Normal Attack, Normal Attack, Charged Attack
N3C = Normal Attack, Normal Attack, Normal Attack, Charged Attack
C = Charged Attack
Starting Combo
Yanfei casts her Burst when possible early into her duration on field: this can be done in two ways.
First, Yanfei can chain a Skill directly into Burst (EQ). This is the safest combo in regards to maintaining a Hydro aura, and is recommended for when only a single Hydro character is in the team. EQ can be followed by N1C or N3C, depending on the Hydro enablers.
Alternatively, Yanfei can—in the presence of sufficient Hydro application (C6 Xingqiu / Yelan and Xingqiu)—Q N1C N1 E C. This combo takes full advantage of the Seals generated by Yanfei’s Skill and Burst, while also Vaporizing the majority of the attacks.
After opening with her Skill and Burst, Yanfei will want to repeatedly execute N2C and/or N3Cs. The combo with the highest theoretical damage is N2C, trumping both N1C and N3C by being fast while also building stacks. However, Vaporize Yanfei must use specific combos with each Hydro enabler to ensure she Vaporizes the correct attacks.
Normal Combo
Using non-C6 Xingqiu, Yanfei must use N3C to ensure she Vaporizes her Charged Attack, even with her Burst active. This is because N3C allows for two waves of Xingqiu’s Rain Swords to be fired, with one on her N3, ensuring that Hydro is applied directly prior to performing a Charged Attack.
With C6 Xingqiu, at a range, the additional Rain Sword on each third wave of Xingqiu’s Burst allows Yanfei to alternate between N3C and N2C. And with C6 Xingqiu, at a distance close enough that his orbital can aid in applying Hydro, Yanfei can continuously use N2C.
With C0 Yelan, repeatedly using N2C is possible but inconsistent: players must execute N2C at such a speed that two waves of Yelan’s lasers are triggered per N2C. This may require deliberately delaying inputting Yanfei’s Charged Attack.
With both Xingqiu and Yelan, repeated N2Cs is consistently possible and recommended.
Ending Combo
Finally, at the end of her duration on field, Yanfei should cast another Skill for Particles, followed by an N1C to utilize the Seals generated by the Skill cast.
Rotations
When possible, supports should typically cast their relevant Skills and Bursts from first to last, in the following priority: Albedo > Zhongli > Xingqiu > Anemo attacks with infusion > Bennett > Yelan > Anemo attacks without infusion > Fischl > TTDS holders, prior to switching to Yanfei to execute her combos. This ensures maximum buff uptime on Bennett, 4 VV, Hydro application, and so on.
Example Rotation: Yanfei Xingqiu Bennett Sucrose
Rotation:Xingqiu EQ > Bennett E Dash Q > Sucrose N1 E N1 > Yanfei Starting Combo > Yanfei Normal Combo > Yanfei E N1C
In single-target, to ensure that Xingqiu’s orbitals do not interfere with Bennett’s Pyro application, Bennett should dash away from the enemy before casting his Burst.
Sucrose’s first N1 swirls Pyro and triggers a wave of Xingqiu’s Burst to apply Hydro. Her Skill Swirls Hydro and activates her A4, followed by another N1 to trigger another wave of Hydro.
Example Rotation: Yanfei Xingqiu Bennett Kazuha
Rotation:Xingqiu EQ > Bennett E Dash Q > Kazuha tEP > Yanfei Starting Combo > Yanfei Normal Combo > Yanfei E N1C
Like with Sucrose, to ensure that Xingqiu’s orbitals do not interfere with Bennett’s Pyro application in single-target, Bennett should dash away from the enemy before casting his Burst. Note that Kazuha will have difficulty Swirling both Hydro and Pyro within a brief time frame like Sucrose does when in single-target.
Kazuha’s Burst will absorb Pyro if cast on Bennett’s Burst and consequently interfere with Yanfei’s Vaporizes, so he can either Burst immediately after Xingqiu to absorb Hydro or skip Bursting altogether.
Example Rotation: Yanfei Yelan Bennett Zhongli
Rotation:Zhongli hE > Bennett EQ > Yelan EQ > Yanfei Starting Combo > Yanfei Normal Combo > Yanfei E N1C
Example Rotation: Yanfei Xingqiu Yelan Zhongli
Rotation:Zhongli hE > Xingqiu EQ > Yelan EQ > Yanfei Starting Combo > Yanfei Normal Combo > Yanfei E N1C

Overload Yanfei
Weapons
| Weapons | Notes |
 Sacrificial Fragments | Sacrificial Fragments has the highest EM secondary stat of all the catalysts in the game. Refinements do not change much, as the Skill reset of its passive is not especially valuable to Yanfei. |
 Magic Guide | Magic Guide provides the second highest EM secondary stat of available catalysts. As ATK is mostly irrelevant to Overload Yanfei, the lackluster 3-star Base ATK scaling does not affect it much. As such, Magic Guide is not far behind Sacrificial Fragments, but is much cheaper to raise. |
 Thrilling Tales of Dragon Slayers R5 | Another 3-star weapon makes its appearance, this one sacrificing Yanfei’s personal damage to buff a teammate, usually Beidou. TTDS can be a strong option for team damage, depending on how well-invested Beidou is. |
 Hakushin Ring | Similar to TTDS, Hakushin sacrifices Yanfei’s personal damage to buff both Fischl and Beidou. A solid option for teams with a TTDS holder already, or ones with a well-invested Fischl. Its ER substat allows Yanfei to have her Burst up more often for stamina reduction and shielding at C4. |
Artifacts
Stats
Overload Yanfei typically runs an EM Sands, EM Goblet, and EM Circlet. Similarly, the ideal substat on her flower and feather is EM. Most other stats have little positive effect, and thus can be treated as merely small bonuses.
On the other hand, CRIT Rate is actively harmful to Overload Yanfei and should be avoided, as it increases the chances of triggering her A4 talent, which will mess up Electro auras. Fischl’s C6 greatly alleviates this concern.
There is a variation of Overload Yanfei, in which Yanfei runs an ATK% or EM/DMG%/CRIT% build. However, this build tends to perform significantly worse than full EM.
Sets
| Artifact Sets | Notes |
4 Crimson Witch of Flames | 4 CW has the highest damage ceiling of all options, however, it is not recommended to farm 4 CW solely for Overload Yanfei, as the damage difference is negligible even in the best case scenario. This set should only be run if players already own a full set of CW EM artifacts. |
 4 Thundering Fury | Similar to 4 CW, but with the other set bonuses being even more useless. This set should only be run if players already own a full set of TF EM artifacts. |
 2 Wanderer’s Troupe, 3 Miscellaneous 5-star Artifacts | Any 5-star Flowers and Feathers with high EM substat rolls or any other pieces with an EM mainstat will work as one of the miscellaneous 5-star artifacts. Use whichever of this versus 2 Wanderer’s Troupe, 2 Instructor provides the highest amount of EM. |
 2 Wanderer’s Troupe, 2 Instructor | The 2 Instructor pieces should ideally be Yanfei’s flower and feather, to minimize stat loss from 4-star scaling. Use whichever of this versus 2 Wanderer’s Troupe, 3 miscellaneous 5-star artifacts provides the highest amount of EM. |
Team Comps

Fischl is the only Electro unit who can, primarily through her A4 talent, sustain an Electro aura off-field for Yanfei to consistently trigger Overload off of. And while Beidou alone cannot provide a consistent Electro aura for Yanfei to trigger Overload off of, in tandem with Fischl, who additionally acts as her battery, she provides incredibly strong AOE damage, as well as resistance to interruption and damage reduction. Furthermore, she can compensate for if Oz targets a different enemy than Yanfei, applying Electro in a wide AOE to allow Yanfei to start a Fischl A4 chain on any enemy within proximity.
Pyro
| Character | Rating | Notes |
| S | Although full EM Yanfei herself does not utilize his ATK buff well, Bennett provides other team members a substantial ATK bonus that can be snapshotted by both Fischl and Beidou, as well as healing. | |
| Thoma | C | Thoma can provide a decent shield for Yanfei through his shield-stacking mechanic, as well as buffs through artifact sets and weapons. |
Hydro
| Character | Rating | Notes |
| S | Xingqiu, in combination with Fischl, enables Yanfei to trigger both Overload and Vaporize at the same time, while adding significant single-target personal damage. Through his Hydro application, he can reduce the chances of Yanfei messing up the Electro aura.
Additionally, his pseudo-healing and damage reduction, combined with Beidou’s own damage reduction, is usually enough to sustain the team even without a dedicated healer. | |
| Kokomi | S | Although Kokomi will have lower personal damage than Xingqiu, she can similarly provide Hydro from off-field to enable Yanfei to trigger both Overload and Vaporize at the same time, and reduce the chances of Yanfei messing up the Electro aura.
As a catalyst, Kokomi can hold Thrilling Tales of Dragon Slayers to buff a teammate, usually Beidou, and her turret Skill allows her to run 4 Tenacity of the Millelith or 4 Instructor for a team-wide buff. She can also provide Yanfei with much-appreciated, consistent healing in a team with otherwise no reliable healers. However, her jellyfish can not be repositioned often, which can sometimes hamper her ability to apply Hydro. |
| Yelan | A | Yelan works similarly to Xingqiu, providing Hydro and personal damage from off-field, but lacks their defensive utilities.
Her ramping DMG% buff generally makes little difference to full EM Yanfei. |
| Barbara | A | Another Hydro healer capable of holding and benefiting from TTDS as well as holding 4 Instructor, much like Kokomi, except with lackluster Hydro application and near nonexistent off-field damage. |
Anemo
| Characters | Rating | Notes |
| A | Sucrose can provide grouping, Viridescent Venerer for 40% RES shred, EM share, and a 48% ATK buff from TTDS (which should be given to another team member rather than an EM Yanfei). However, running Sucrose means that the team will not have a healer. | |
| A | Kazuha can provide grouping, Viridescent Venerer, personal damage, and a DMG% buff for the rest of the team. However, players should take care not to infuse his Burst with Pyro so as not to mess up Yanfei’s Overloads, and running him means that the team will be left without a healer. | |
| A | Jean condenses Viridescent Venerer and healing into one slot. | |
| B | A cheaper and subpar version of Jean. | |
| A | Venti provides the strongest grouping in the game, which can be incredibly valuable because of Overload’s knockback, as well as Viridescent Venerer and substantial damage. Additionally, his A4 talent allows him to refund 15 Energy to Beidou. However, Yanfei may struggle to hit enemies lifted by his Burst. Furthermore, players should take care not to infuse his Burst with Pyro so as not to mess up Yanfei’s Overloads, and running Venti means that the team will not have a healer. |
Electro
| Characters | Rating | Notes |
| Sara | B | Sara can provide additional Electro particles, as well as an ATK buff that both Fischl and Beidou can snapshot. In the case that players do not own Fischl, her battery capabilities mean that the team can still be run, but with Yanfei built ADC. However, she can complicate rotations, particularly without Constellations, and running Sara means the team will not have a healer. |
 Electro Traveller Electro Traveller | B | Similar to Sara in battery capabilities and clunkiness, but with slightly better Electro application and no ATK buff. Otherwise, everything that applies to Sara applies to Electro Traveler. |
| C | Lisa can provide damage, or buffing via TTDS and 4 NO or 4 Instructor, and one of the few DEF% shreds in the game. However, she is generally a subpar choice for the team, as enemies are prone to being knocked out of her Burst’s range, and leaving the team without a healer. | |
| F | Raiden Shogun can only maintain an Electro aura via her Skill if the enemy starts with an Electro aura; this remains unreliable (even with Beidou) due to her Skill proccing only after dealing damage. Furthermore, the off-field damage from her Skill is incredibly lackluster, and simply does not provide enough to justify running her in the final slot over another character. Although Beidou, unlike the other members of the team, does use the energy from Raiden’s Burst well, which opens up the potential of extending rotations to allow for Raiden to Burst, the fact that Beidou’s Burst cannot proc during Raiden’s complicates rotations to a degree not suited for most players. In comparison, Fischl provides her damage, particle generation and Electro application entirely off-field making Yanfei’s full EM build possible, all without creating overly complex rotations, Raiden is simply not worth a slot on the team. |
Geo
| Characters | Rating | Notes |
| S | Zhongli provides a strong shield for increased survivability and interruption resistance, as well as a 20% universal RES shred. With proper investment, his shield is strong enough , when combined with Beidou’s damage reduction and Yanfei’s range, to allow the team to run comfortably without a healer. He can even sacrifice some of his shield’s health to run 4 Instructor to buff Yanfei. His interruption resistance proves valuable for Overload Yanfei, who may need to pull off tight combos to maximise Overloads triggered through the duration of Fischl’s Skill. | |
| C | Being unable to run with a second Geo character means that Albedo’s damage falls drastically. Thus, although his A4 talent gives him EM share, he serves only as a subpar choice to running other units. |
Combos and Rotation
At lower frequencies, N2C spam over N3C spam does not result in more Overloads or Beidou Burst discharges (E N2C N2C N2C N2C versus E N3C N3C N3C). In these cases, although N3C spam deals slightly less damage, the difference is insignificant enough that players should use N3C to conserve stamina.
However, N2C allows for higher numbers of Overloads if players can pull off more attack strings per rotation. E N2C N2C N2C N2C N2C can trigger up to 11 Overloads over the maximum duration of Fischl’s Skill, whereas E N3C N3C N3C N3C triggers only 9.
Yanfei’s Elemental Skill and Burst can be weaved into any sequence after any combo. It is recommended to always weave in Normal Attacks after a Skill or Burst before performing a Charged Attack to trigger a discharge from Beidou’s Burst and Fischl’s C6 if relevant for damage and more Electro application.
Rotation-wise, players should aim to cast Beidou Burst, apply buffs, and cast other longer-lasting skills, before using Fischl to place down Oz and then switch to Yanfei to perform her combos. As Yanfei is not as reliant on her Burst, she can be switched out at any time to reposition Oz, clear a Pyro aura, or counter with Beidou.

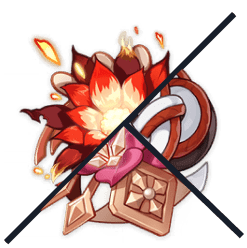
Art by 餡ころ餅
Credits
Writing
kol#1593
Special Thanks To
jamberry#7142
Zakharov#5645
Forge#2341
elnawawi #7114
CQLQRS#7853
Dooners#6709
Sunny | 108 Primo Main#3374
Team Composition Images
muakasan#2792
Glossary
Definitions listed here are only applicable to this guide.
Combat
| Term | Definition |
| DPS | A or one of a team’s damage dealer. |
| Aura | If an enemy is not affected by an element, attacking them with an elemental attack will apply an elemental aura. Applying another element while an enemy is affected by an elemental aura will result in an elemental reaction. |
| Battery | A battery is a character that provides Energy particles, usually of the same element, to another character. |
| Driver | An on-field character who uses Normal and Charged Attacks to proc the Bursts or Passives of characters like Beidou, Fischl, and Xingqiu. Drivers may be used because the off-field character themself gains little from being on-field or has some sort of deficiency in their ability to proc their own skills. |
| Snapshot | If a character snapshots their Skill or Burst, that Skill or Burst retains their stats at cast. Even if the character gains or loses buffs during the duration of the Skill or Burst, the relevant skill will not be affected. |
| Shred | Reduction of enemies’ Resistance stat. For example, a character that provides RES shred would reduce enemies’ resistance to damage. |
| A4 | Refers to the Talent a character unlocks at their 4th Ascension. |
Stats
| Term | Definition |
| ADC | Used to refer to a CRIT build. Technically stands for Attack/Damage/CRIT Rate or CRIT Damage, but variations such as an EM Timepiece instead of ATK still fall under the umbrella of ADC. |
| ATK | Short for Attack%. |
| DEF | Short for Defence%. |
| EM | Short for Elemental Mastery. |
| RES | Short for Resistance%. |
| CRIT% | Refers to both CRIT Rate and/or CRIT Damage. |
| ER | Short for Energy Recharge, this stat increases the amount of Energy received from Energy particles. For more, see this page on Energy. |
Weapons and Artifacts
| Term | Definition |
| TTDS | Thrilling Tales of Dragon Slayers |
| 4CW | 4-piece Crimson Witch of Flames |
| 4NO | 4-piece Noblesse Oblige |
| 4 Shime | 4-piece Shimenawa’s Reminiscence |
| TF | Thundering Fury |
| WT | Wandering Troupe |
Resources and References
 Vaporize Yanfei Weapon Calculations
- Vaporize Yanfei Artifact Calculations
- Vaporize Yanfei Constellation DPS Increase Calculations
- Overload Yanfei Weapon Calculations
- Overload Yanfei Artifact Calculations
- Overload Yanfei Build Comparison Calculations
Changelog
02/18 – Weapon table updated, Minor changes in wording and formatting in various sections
03/19 – Changed art for Overload Yanfei section, Edited Combos and Rotations section under Vaporize Yanfei, Minor changes in wording and formatting in various sections