by Vladone ツ#9281, Emiliabyss#1641, KB#1111
(Updated for Version 3.4)
Table of Contents
Preface
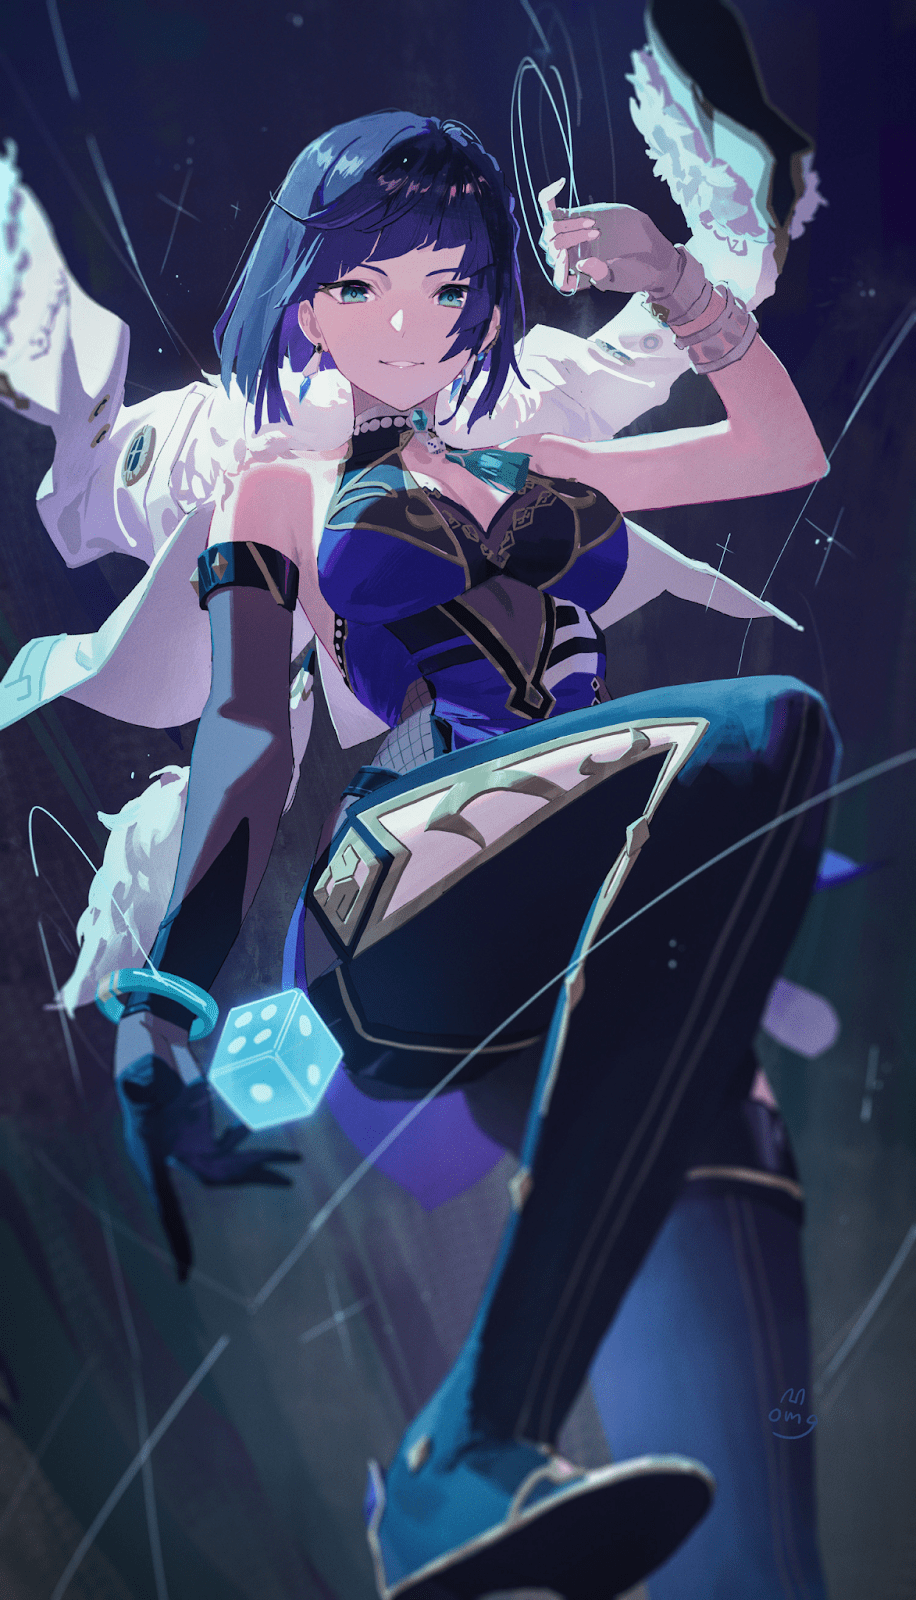
Yelan is a 5-star Hydro Bow character who quickly became popular not only for her looks, but also for her strength and utility on- and off-field. With a playstyle similar – though not identical – to Xingqiu, Yelan finds herself in the flex spot of pretty much any team to bring value through the use of her Elemental Burst.
Why Play Yelan?
Pros
- Similarity to Xingqiu allows for better team choices and flexibility
- Elemental Skill provides modest enemy-grouping
- Pure HP scaling makes even 3-star Bows effective, due to ATK stats being entirely irrelevant for her damage
- Creates one of the most powerful duos in the game with Xingqiu, known as “Double Hydro”
- Skill is great for overworld exploration
- Can buff her team while dishing out damage with the ramping buff on her Elemental Burst and Elegy for the End
- Burst provides significant damage and consistent Hydro application while off-field
- Straightforward build and wide variety of weapon choices
- Extremely free-to-play friendly with weapons. Her best 4-star (Favonius Warbow) is given out for free after completing the Mondstadt Archon Quest
- Exceptional scaling with Constellations; C6 Yelan (+150% damage increase) is popular for speedruns and can easily solo most content in the game without teammates
Cons
- Pure HP scaling limits buffs available to Yelan, mainly Hydro Resonance, DMG% buffs and Resistance Shred
- She is a 5-star character with a mostly similar kit and effectiveness to C6 Xingqiu, making Yelan a luxury pull to some
- She is not a Xingqiu upgrade, but rather a side-grade who aims to provide different utilities compared to Xingqiu
- Lacks any defensive utility, unlike Xingqiu
- Damage is single-target focused
- Extremely high Energy requirements when not paired with additional Hydro units or other batteries; this makes C1, Favonius Warbow, or Sacrificial Bow the go-to options for managing Energy needs
Yelan vs Xingqiu
It is fairly obvious why Yelan is often compared to Xingqiu to the extent of being called a 5-star Xingqiu – they have roughly similar Burst functionality, cooldowns, Energy generation and requirements, and even share the same Element. However, there are a few key differences:
- Xingqiu applies additional Hydro with his Rain Sword orbitals. Without the help of Constellations, Yelan cannot match or surpass Xingqiu’s Elemental application.
- Yelan lacks any defensive abilities. She doesn’t provide any of the micro-healing, DMG Reduction, or Interruption Resistance that Xingqiu does. In exchange, she offers potent offensive buffs to herself and/or her teammates, depending on gear.
- Yelan and Xingqiu’s personal damage are about the same. For example, a Constellation 0 Yelan with Aqua Simulacra deals comparable damage to a Constellation 6 Xingqiu with Primordial Jade Cutter. However, when accounting for Yelan’s 4th Ascension Passive, she contributes more to team damage.
Because of the reasons stated above, it is better to view Yelan as a potential partner for Xingqiu. Pairing them is surprisingly effective because they empower each other and deal more damage, making them one of the strongest and most flexible duos you can play.
For example, Xingqiu often carries Sacrificial Sword or Favonius Sword, which helps battery Yelan. With Constellations, Xingqiu also reduces Hydro Resistance, which buffs Yelan. Xingqiu provides defensive utility to cover for Yelan’s purely offensive playstyle. Both have similar cooldowns for acting in synchronicity. Together, the combined Hydro application is more than enough to ensure your favorite Pyro DPS Vaporizes enemies as frequently as possible, while also benefiting from Yelan’s A4 buff.
Importance of Pure HP Scaling
As already known, Yelan’s relevant Talents scale purely off Max HP, making it more important to raise her to level 90 than it would be for an ATK-scaling character.
This scaling is different from characters like Hu Tao or Itto who convert their HP/DEF into ATK then scale off ATK like usual. Yelan doesn’t convert stats — the ATK-scaling is replaced entirely with HP for her Skill and Burst. This pure HP scaling has both benefits and drawbacks when building Yelan.
Pros
- Since she scales off HP, weapon choice is easier because she doesn’t care about the ATK main stat, making the secondary stat and passive the only relevant parts
- HP% pieces, which have long needed a home while taking up inventory space, become valuable
- Allows greater team flexibility due to not being reliant on characters like Bennett to reach maximum potential
Cons
- Doesn’t benefit from common ATK bonuses like Bennett’s Burst, Thrilling Tales of Dragon Slayers, 4-piece Noblesse Oblige, Pyro Resonance and so on. This forces her to rely on rarer buffs such as DMG Bonuses and Resistance Shreds
Energy Recharge Requirements
Energy Recharge is a crucial part of building Yelan due to her reliance on her Burst for a significant amount of her kit’s damage. It’s important to Burst every rotation comfortably, and her requirements vary greatly – multiple variables factor into determining Energy Recharge requirements. The tables below attempt to cover some important scenarios. For more accurate values, use the Energy Recharge Calculator.
Keep in mind that the higher the Energy Recharge, the lower Yelan’s damage will be. While it will still be considerable, she won’t hit as hard compared to a lower Energy build. The reason behind this is stats balancing. If you need a lot of Energy Recharge, you will look for more ER substats to focus on instead of other offensive stats and vice versa.
The left column represents Yelan’s number of Skill uses in the rotation and the top row represents weapons or teammates that reduce Yelan’s Energy requirements. The following values are from the calculated averages of several team compositions.
No Favonius Teammate
| Other | Fav | Sac | Raiden | 2nd Hydro | 2nd Hydro + Fav | 2nd Hydro + Sac | |
|---|---|---|---|---|---|---|---|
| 1 Skill | 324% | 253% | 208% | 190% | 229% | 191% | 164% |
| 2 Skills | 208% | 176% | 153% | 178% | 173% | 150% | 133% |
1 Favonius Teammate
| Other | Fav | Sac | Raiden | 2nd Hydro | 2nd Hydro + Fav | 2nd Hydro + Sac | |
|---|---|---|---|---|---|---|---|
| 1 Skill | 277% | 224% | 188% | 167% | 205% | 174% | 151% |
| 2 Skills | 188% | 162% | 142% | 157% | 159% | 139% | 124% |
Notes
- Due to the Energy-rich nature of Taser teams, Yelan’s Energy requirements will lower. She can also afford to use only one Skill per Burst, even if she is the sole Hydro unit without Energy-reducing weapons.
- Using a Refinement Rank 3 Favonius Warbow or higher makes it possible to trigger its passive on both Skill uses, further reducing Yelan’s Energy Recharge Requirements.
- Sacrificial Bow (2 Skills) is assumed to be at Refinement Rank 3 or higher, as lower refinements may not allow rotations to line up due to the longer passive cooldown.
Infographic
Section 1: Talents
Let’s go get ourselves some answers.
| Talent Priority – Constellation 0 Burst >> Skill > Normal Attack |
| Talent Priority – Constellation 6 Normal Attack > Burst > Skill |

Normal Attack: Stealthy Bowshot
Description
Normal Attack
Performs up to 4 consecutive shots with a bow.
Charged Attack
Perform a more precise Aimed Shot with increased DMG.
While aiming, flowing water will accumulate on the arrowhead. A fully charged torrential arrow will deal Hydro DMG.
Breakthrough
Yelan will enter a “Breakthrough” state after spending 5s out of combat, which will cause her next Charged Aimed Shot to have 80% decreased charge time, and once charged, she can fire a “Breakthrough Barb” that will deal AoE Hydro DMG based on Yelan’s Max HP.
Plunging Attack
Fires off a shower of arrows in mid-air before falling and striking the ground, dealing AoE DMG upon impact.
Yelan’s Normal Attacks are the only part of her kit which scale off her ATK. Typically they aren’t used to deal damage, but instead to trigger waves of her Burst. Yelan can also shoot her special Charged Attack when an extra instance of Hydro DMG is needed and the rotation allows for it. If Normal Attacks are absolutely needed, the recommended combo is N3D (three Normal Attacks followed by a dash), unless you have C6. If you do have C6 Yelan, you can visit the Combos section for more info.

Elemental Skill: Lingering Lifeline
Description
Fires off a Lifeline that allows her to move rapidly, entangling and marking opponents along its path.
When this rapid movement ends, the Lifeline will explode, dealing Hydro DMG to the marked opponents based on Yelan’s Max HP.
Tap
Moves a certain distance forward swiftly.
Hold
Engages in continuous, swift movement, during which Yelan’s resistance to interruption is increased.
During this time, Yelan can control this rapid movement and end it by using this Skill again.
Additionally, each opponent marked by the Lifeline when it explodes grants Yelan a 34% chance to reset her Breakthrough state.
Yelan’s Elemental Skill starts its 10-second cooldown after dealing damage to the enemy and not at the moment of cast, making rotation structures awkward.
On one hand, this allows her to have a more unique way to generate particles, as she is able to do so twice per rotation. On the other hand, even when timed perfectly, using 2 Skills forces a 22-second rotation. This is not necessarily good, as even if you are a skilled player, the extended rotation results in lower DPS and less Burst uptime.
Despite this, there are a few ways to mitigate this disadvantage of Yelan’s Skill:
- Share your credit card details with HoYoverse and wish for her first Constellation, allowing Yelan to use her Skill twice in a row
- Mimic her Constellation 1 by using an R3-R5 Sacrificial Bow
- Play Yelan alongside characters who prefer long rotations
- Use her in quickswap-style teams which allow her to freely enter the field without affecting the rotation
- Build enough Energy Recharge so she only needs to use one Skill per rotation.

Elemental Burst: Depth-Clarion Dice
Description
Deals AoE Hydro DMG and creates an “Exquisite Throw,” which aids her in battle.
Exquisite Throw
Follows the character around and will initiate a coordinated attack under the following circumstances, dealing Hydro DMG based on Yelan’s Max HP:
• Can occur once every second when your active character uses a Normal Attack.
• Will occur each time Yelan’s Lifeline explodes and hits opponents.
The Elemental Burst is the most important part of her kit and the reason why she is compared to Xingqiu. It is also the primary reason to include Yelan in your teams, regardless of whether Xingqiu is present.
The on-field character can activate waves of her Burst only through Normal Attacks – Charged Attacks do not work. Using Yelan’s Elemental Skill can also trigger Exquisite Throws.

1st Ascension Passive: Turn Control
Description
When the party has 1/2/3/4 Elemental Types, Yelan’s Max HP is increased by 6%/12%/18%/30%.
A solid Passive which increases Yelan’s damage based on the number of different Elements present in your team. Generally you’ll have two or three Elemental Types in a Yelan team, but there are also good teams which take maximum advantage of this. The differences are not huge, and it is not recommended that you build your team around the Passive and force four Elements.

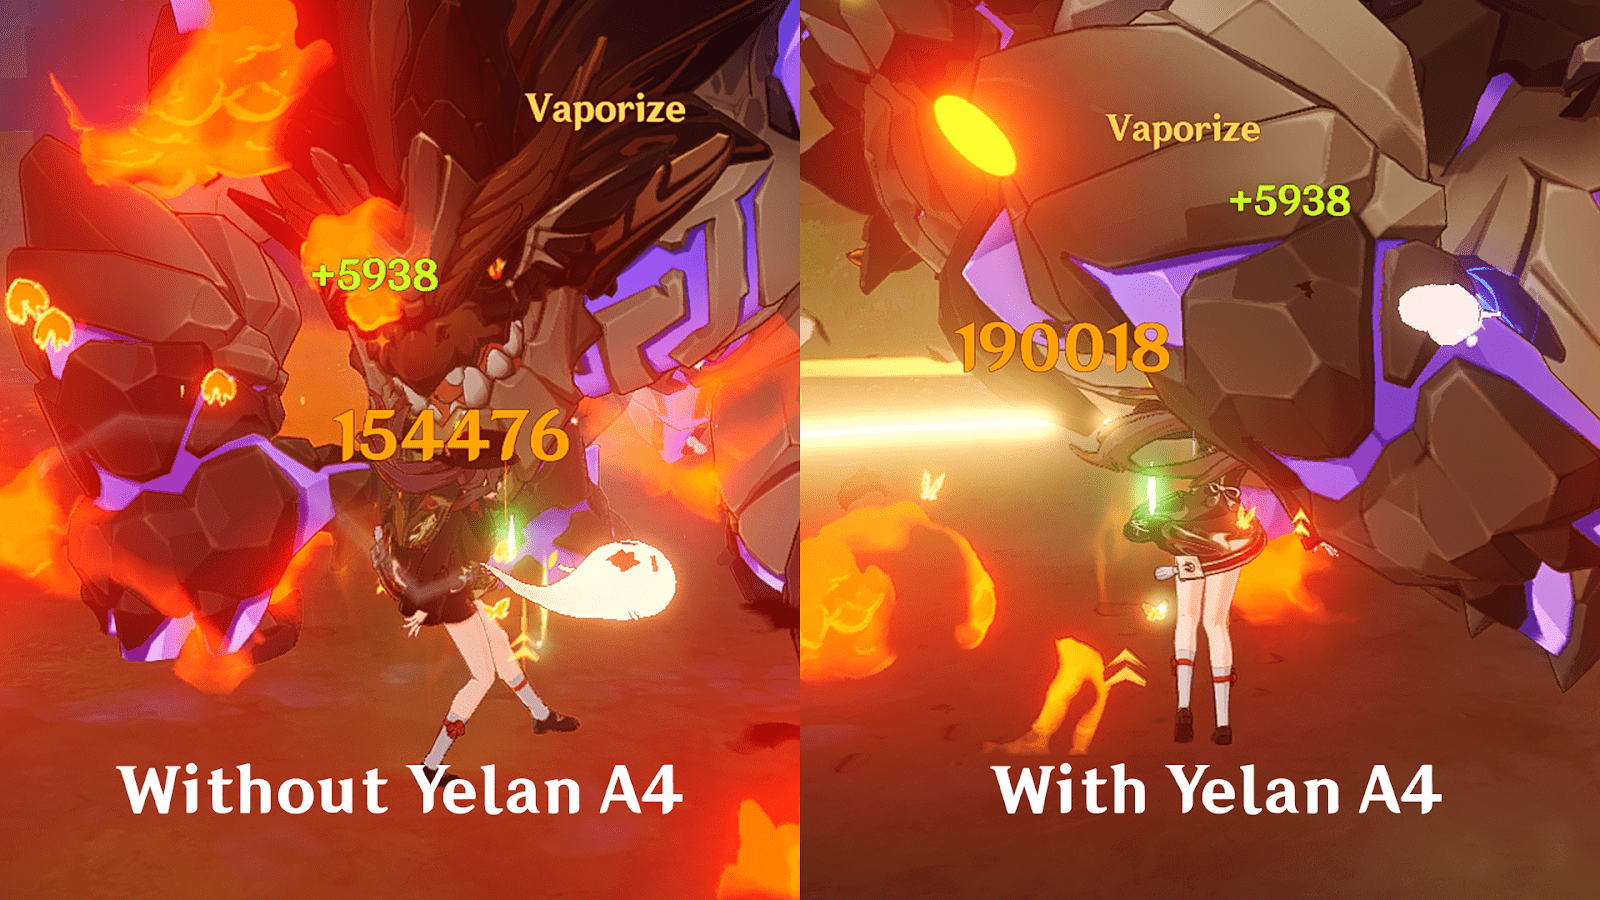
4th Ascension Passive: Adapt With Ease
Description
So long as an Exquisite Throw is in play, your own active character deals 1% more DMG. This increases by a further 3.5% DMG every second. The maximum increase to DMG dealt is 50%.
The pre-existing effect will be dispelled if Depth-Clarion Dice is recast during its duration.
This Passive is a “ramping buff” due to the way it increases its damage buff for the on-field character over time. In order to maximize the effectiveness of this buff, place your greatest damage window towards the end of the buff’s duration. Note that other buffs might expire sooner than Yelan’s Burst, making rotation timing crucial.
Additionally, Yelan can reap the benefits of her own Passive, making her Burst waves deal even more damage. This allows Yelan to be played as an on-field driver for her own Burst in some teams, most notably Electro-Charged variants featuring Electro and Anemo characters.

Utility Passive: Necessary Calculation
Description
Gains 25% more rewards when dispatched on a Liyue Expedition for 20 hours.
Allows Yelan to go on dates with Shenhe, who has the same Passive. When sending either of them on a 20-hour Expedition in Liyue, you’ll get bonus materials. Use this for a few extra Crystal Chunks every day.
Section 2: Constellations
You’re running cold; allow me.
Rolling for a 5-star unit is expensive – even more so when rolling for Constellations – which is why you should only roll for multiple copies of Yelan if you know you can afford it. Yelan works perfectly fine and performs incredibly well at Constellation 0, but of course, some players like to play with more power.
To keep it short, Yelan’s most worthy Constellations are her first and second, with the sixth also having a tremendous increase in damage.

Constellation 1: Enter the Plotters
Lingering Lifeline gains 1 additional charge.
DPS increase from Constellation 0: ~20%
Note that this Constellation is NOT a DPS increase if you are already using two Elemental Skills per rotation and have no need for the additional Skill use.
This Constellation eases her Energy Recharge requirements while also increasing her damage. This allows you to invest in more offensive substats like HP and CRIT. Yelan’s Skill also deals respectable damage, but the Energy generation is the highlight of this Constellation.
While Constellation 1 allows for more on-field activity, mobility and more flexible rotations, it is important to keep in mind that using it will force you to have your rotation at least 21-22 seconds long.
Additionally, this Constellation makes overworld travel much more efficient.

Constellation 2: Taking All Comers
When Exquisite Throw conducts a coordinated attack, it will fire an additional water arrow that will deal 14% of Yelan’s Max HP as Hydro DMG.
This effect can trigger once every 1.8s.
DPS increase from Constellation 1: ~24%
DPS increase from Constellation 0: ~40-50%
Arguably the most valuable Constellation for Yelan, as it provides an additional water arrow every other Burst wave. This extra arrow has a set scaling of 14% of Yelan’s Max HP.
The main benefit is that this instance applies Hydro separately from the Exquisite Throws, which increases Yelan’s Hydro application and fixes issues found at Constellation 0 and 1.
Yelan can then provide enough Hydro application on her own to keep up with Pyro DPS’s who rapidly apply Pyro like Hu Tao and Xiangling.
For detailed information regarding Hydro application, it is recommended to read the ICD Mechanics section.

Constellation 3: Beware the Trickster’s Dice
Increases the Level of Depth-Clarion Dice by 3.
Maximum upgrade level is 15.
DPS increase from Constellation 2: ~13%
DPS increase from Constellation 0: ~60%
If Yelan’s Burst wasn’t already dealing a lot of damage, now it deals even more.
It is worth mentioning that Yelan’s Constellation 2 projectile is not affected by this Constellation.

Constellation 4: Bait-and-Switch
Increases all party members’ Max HP by 10% for 25s for every opponent marked by Lifeline when the Lifeline explodes. A maximum increase of 40% Max HP can be attained in this manner.
DPS increase from Constellation 3: ~4-15%
DPS increase from Constellation 0: ~80-90%
This Constellation is a sizeable buff in teams with characters who scale with Max HP, like Hu Tao, Ayato, and Kokomi. However, there aren’t many HP-scaling units yet, so while the Constellation is potent in these situations, it falls off in efficiency everywhere else.
On the plus side, it is possible to maintain 100% uptime on this buff simply by using Yelan’s Skill off cooldown.

Constellation 5: Dealer’s Sleight
Increases the Level of Lingering Lifeline by 3.
Maximum upgrade level is 15.
DPS increase from Constellation 4: ~2%
DPS increase from Constellation 0: ~92%
Yelan’s Elemental Skill deals more damage, but the increase is not significant. You should Vaporize her Skill to maximize this Constellation’s efficiency.

Constellation 6: Winner Takes All
After using Depth-Clarion Dice, Yelan will enter the Mastermind state.
In this state, all of Yelan’s Normal Attacks will be special Breakthrough Barbs. These Breakthrough Barbs will have similar abilities to normal ones and the DMG dealt will be considered Charged Attack DMG, dealing 156% of a normal Breakthrough Barb’s DMG.
The Mastermind state lasts 20s and will be cleared after Yelan fires 5 arrows.
DPS increase from Constellation 5: ~25%
DPS increase from Constellation 0: ~150%
Constellation 6 is one of Yelan’s strongest. This allows her to spend a few more seconds on-field to deal a truckload of front-loaded damage.
By the time you have this Constellation, you basically beat Genshin Impact. C6 Yelan is extremely popular in speedrunning for a reason.
While C6 can extend a rotation with Yelan’s extra field time, you can probably defeat the enemy in one rotation anyway (with the right team, of course).
Section 3: Artifacts
A chest full of valuables… and a trove of potential clues.

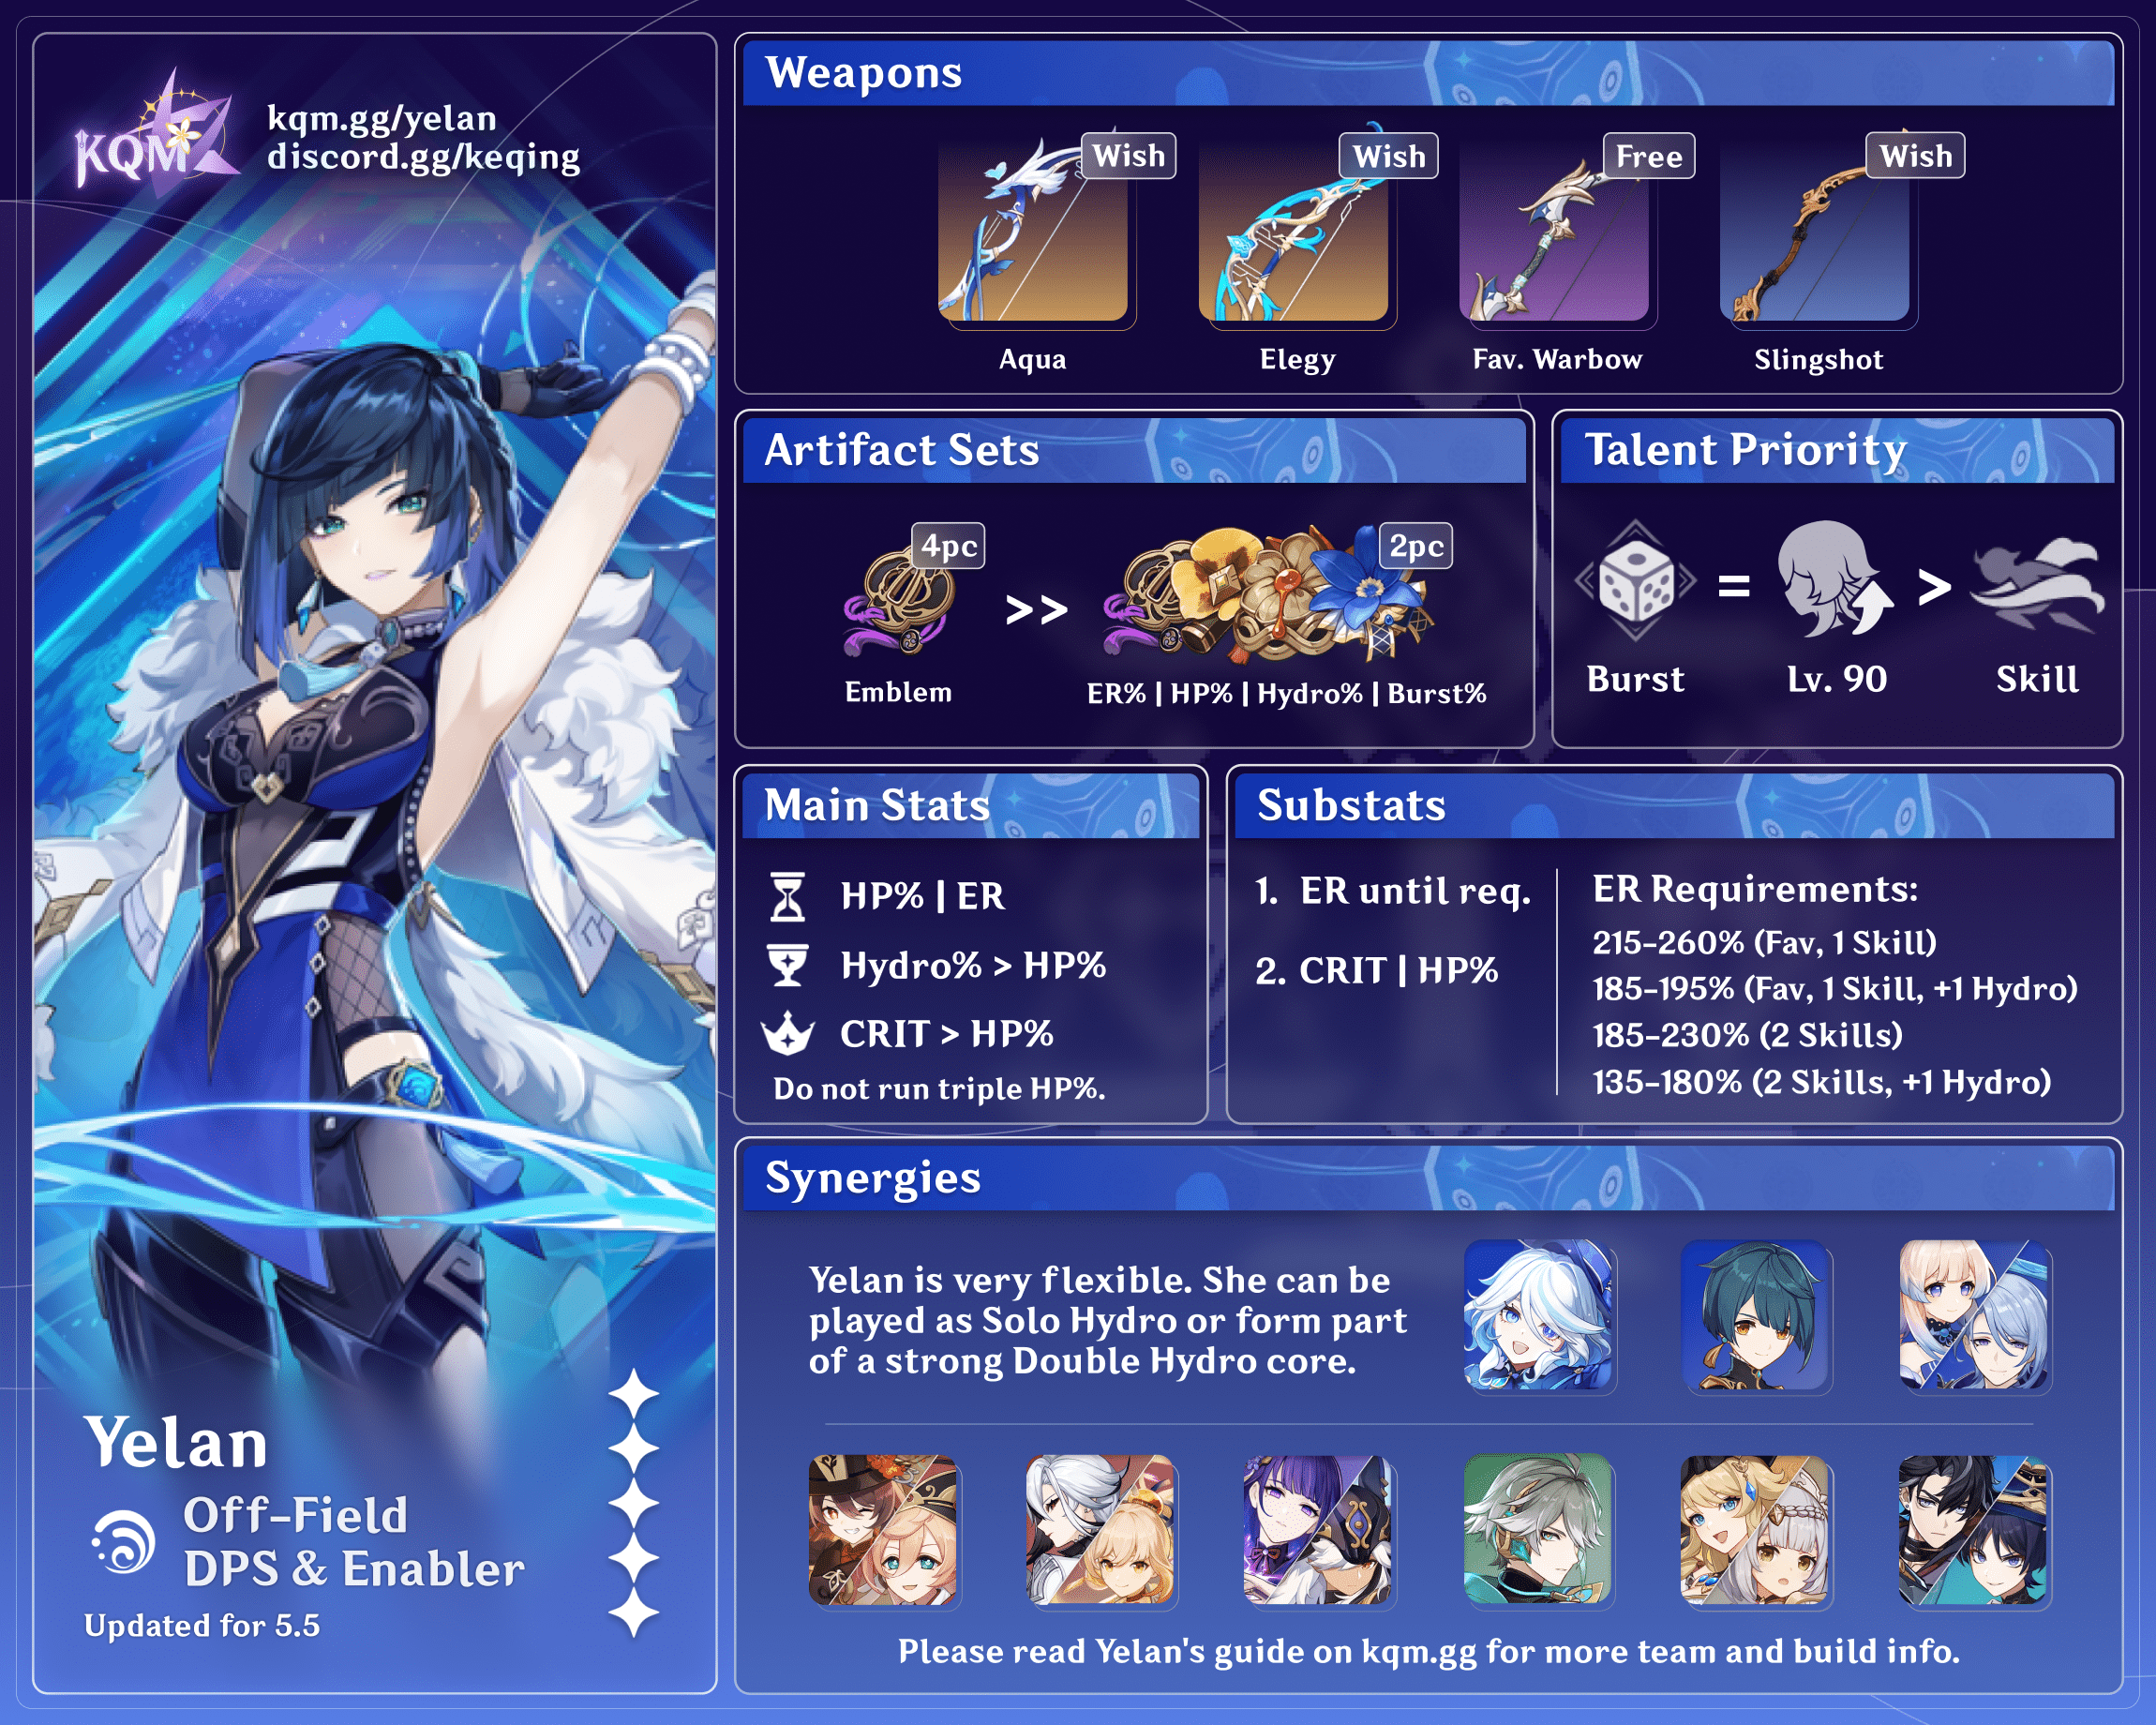
Artifact Sets
In nearly all cases, substats are more important than set bonuses. While the damage difference between the ideal choice and alternatives are much greater in Yelan’s case, you should, as usual, use the Genshin Optimizer tool to figure out what build works best for your account.
 4-piece Emblem of Severed Fate | Many characters fight over Emblem pieces, and Yelan is no exception. All other options are at least 5% worse, making this the uncontested Best-in-Slot for Yelan. Even when your team is built to minimize Yelan’s ER requirements, Emblem still demolishes the competition in terms of damage. Use it. |
 2-piece/2-piece Mix | It is only recommended to use this if you don’t have a good 4-piece Emblem set, but it will get the job done. Just be aware that this is up to a 20% damage loss. The exact combinations between Emblem, Tenacity, Heart of Depth, and Noblesse all perform pretty similarly. Just pick the combination with the best substats. |
Artifact Stats
Main Stats
 Sands |  Goblet |  Circlet |
| HP% / ER% | Hydro DMG% / HP% | CRIT% / HP% |
| This depends on your team composition, weapon choice, and whether you have C1 Yelan. If your weapon does not have an ER% stat and Yelan is C0, consider an ER% Sands. When Energy requirements are low (160% or lower), HP% is a fine choice. | The difference between Hydro DMG% and HP% depends on what kinds of buffs Yelan receives. Normally, pick Hydro DMG% Goblet. If there are lots of DMG% buffs from your team, HP% can come pretty close to DMG% Goblet, and HP% Goblets are usually plentiful. | CRIT% is naturally the default option. In non-Tenacity builds, HP% Circlet doesn’t fall far behind (~5%). As usual, focus on a 1:2 CRIT ratio, starting with 60% CR and 120% CD. |
IMPORTANT:
It is NOT RECOMMEND to use more than two HP% main stat artifacts at once!
Such a setup becomes the weakest combination of stats for Yelan’s damage.
Sub Stats
- ER% (until you meet your threshold for Bursting every rotation)
- Tie between [CRIT stats (until a solid 1:2 ratio)] and [HP%]
- Flat HP
Many players focus on CRIT more than any other stat, often ignoring Energy needs and disregarding external buffs. In the case of HP% pieces, the difference between a CRIT% Circlet and an HP% Circlet with equal substats is only about 5%.
This can be compensated for if the substats on your HP% Circlet are much better than your CRIT% Circlet. Additionally, HP% Circlets have much less competition for characters who can effectively utilize them.
Baseline Stats
Without CRIT Weapon:
- Enough ER% to Burst every rotation
- 30k HP
- 60% CRIT Rate
- 120% CRIT DMG
With CRIT Weapon:
- Enough ER% to Burst every rotation
- 30k HP
- 70-75% CRIT Rate
- 140-150% CRIT DMG
Section 4: Weapons
But the truth… is still unknown…
The most important weapon stats to look for are CRIT, Energy Recharge, and sometimes HP, depending on what’s available. Naturally, Yelan’s signature weapon Aqua Simulacra is her best for personal damage, while Elegy for the End provides the most team benefit. Favonius Warbow, of course, is the ideal free-to-play weapon, generating particles and offering plenty of Energy Recharge to satisfy Yelan’s demanding needs.
The next best alternatives are easily accessible through wishes and chests, namely Slingshot and Recurve Bow.
Remember, again, that Yelan does not benefit at all from the ATK stat on weapons.
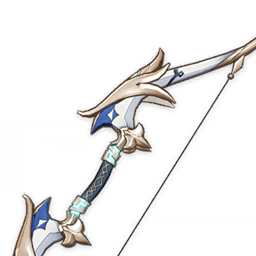
 Aqua Simulacra | Holder’s Max HP +16%. When opponents are nearby, wielder DMG% +20%, even when off-field. [ 88.2% CRIT DMG ] The all-purpose Best-in-Slot for Yelan, Aqua deals 15-30% more damage than competing weapons. The lower Yelan’s Energy requirements are, the stronger this weapon becomes. |
 Elegy for the End | Increases Elemental Mastery by 60. On Skill or Burst hit, gain a stack, even if off-field. 4 stacks grant party 100 EM and 20% ATK for 12s. [ 55.1% Energy Recharge ] Best-in-Slot for reaction-focused teams due to the pure stats this weapon gives to the entire team. Keep in mind that Yelan trades personal damage for overall team performance. |
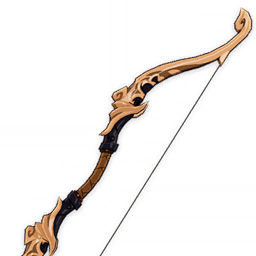
 Favonius Warbow | CRIT Hits have a 60-100% (R1-R5) chance to generate 6 Energy for the character, once every 12-6s (R1-R5). [ 61.3% Energy Recharge ] Best free-to-play option and overall best 4-star at high Energy Recharge requirements. Significantly lowers Energy Recharge requirements and allows higher investment in offensive stats for the team. Higher refinements are recommended for consistency. |
Since Favonius Warbow is so strong on Yelan and is given for free just for completing Mondstadt’s story, all other weapon choices are niche options with caveats.
 Mouun’s Moon R3+ | Elemental Burst DMG of the character equipping this weapon is increased by 0.24% (R5) of the party’s combined energy capacity. Maximum buff at R5: 80% [ 27.6 ATK% ] Best with low Energy requirements. No levels are needed since ATK is irrelevant. Level 1 will do! Keep in mind that refinements are crucial for this weapon to perform well. |
 The Stringless R5 | Increases Elemental Skill DMG by 48%. Increases Elemental Burst DMG by 48%. [ 165 Elemental Mastery ] Similar to Mouun’s Moon, but weaker. Elemental Mastery is not great on her, as she usually facilitates reactions rather than triggers them herself. |
 Slingshot | If a Normal or Charged Attack hits a target within 0.3s of being fired, increases DMG by 60%. Otherwise, decreases DMG by 10%. [ 31.2% CRIT Rate ] Solid F2P stat stick. Recommended at low Energy Recharge requirements and can compete with or beat most 4- and 5-star weapons. |
 Fading Twilight R5 | Has three states which increase DMG dealt by 12%/20%/28% (R5) respectively. When attacks hit opponents, this weapon will switch to the next state once every 7s, even if off-field. [ 30.6% Energy Recharge ] A free weapon from an event. Best when Energy needs are low. Generally comparable with Slingshot. |
 Sacrificial Bow R3+ | On Elemental Skill hit, 60-80% (R3-R5) chance to end its own CD. Can occur once every 22-16s (R3-R5). [ 30.6% Energy Recharge ] Worse than Favonius at consistency and team utility. Decent C1 emulator. Only good when Yelan catches her own particles from both Elemental Skills. It’s worth mentioning that using Sacrificial Bow will lengthen your rotations. |
 Recurve Bow R5 | Defeating an opponent restores 16% HP. [ 46.9 HP% ] Another strong F2P weapon and comparable with Slingshot. Open a few chests in Mondstadt and you’ll have something usable. |
Section 5: Mechanics
Who’s our target this time?
This section delves into the technical aspects of Yelan gameplay, highlighting key mechanics to keep in mind. Some concepts may be complex, but we’ve simplified them as much as possible and provided links to the KQM Theorycrafting Library for further reading. If you have any questions, reach out to Guhua in KQM’s help channels for clarification.
Rotation Crafting
Rotation crafting techniques focus on taking advantage of Yelan’s entire kit to get the most out of her abilities. The following subcategories cover only general ideas, but of course, once you understand the basics, it is possible to make variations and adapt it so it fits your team and playstyle.
Maximizing Burst Waves
Yelan’s Burst is the vast majority of her damage contribution, so learning how to make the best use of this Talent is key to fulfilling her role as an off-field DPS.
Having a separate cooldown means that if Yelan uses a Normal Attack and Skill within 1 second of each other, the 1-second trigger rule will be ignored and two Exquisite Throw waves will be triggered instead of one. If you perform an N1 E N1 combo while the Burst is active, Yelan will trigger three Exquisite Throw instances within 1.5 seconds.
Using two Skills per rotation (every 10s, near the beginning and end of her Burst) can add an additional wave trigger. At C1 or with R3+ Sacrificial Bow, you can trigger another Burst wave in the same rotation.
Balancing the Ramping Buff
Yelan’s Ascension 4 Passive provides an incredibly useful buff while the Elemental Burst is active. The closer you are to the end of the Burst’s duration, the more DMG% your active character gains, up to 50% DMG. For example, during the 15 seconds the buff is active, you will see a higher damage increase 10 seconds in than at 5 seconds.
Use Yelan’s Burst early into the rotation so that by the time your heavy hitter takes the field, they will have a larger DMG% Bonus for their DPS window. However, if you cast the Elemental Burst too early into the rotation, the uptime will not align properly with your on-field unit and the buff will end before you finish your combos.
Using the Burst too late is also not recommended. Casting her Burst too late may lead to the peak of Yelan’s ramping buff falling outside of your on-field DPS’s damage window, resulting in a loss of DPS potential.
In some scenarios you will have to sacrifice a bit of Yelan’s buff uptime, but maintaining Hydro aura on enemies is a crucial factor and its importance shouldn’t be neglected. Yelan is not only about damage, but also about Hydro application.
Burst Synergy with Fourth Ascension Passive
To maximize Burst waves without sacrificing buff uptime, it is recommended to weave Normal Attacks between character swaps, Skill uses, and Burst uses before bringing the main on-field unit to the battlefield.
Weaving is very useful. It takes close to no time to do a quick Normal Attack, and then cancel out of the animation. This technique will trigger additional Exquisite Throws without having to worry about lengthening the rotation or wasting buff uptime.
To better understand the concept of weaving, let’s use the rotation Yelan Q E > Kazuha E Q > Hu Tao 8N2C as an example. By adding a few Normal Attacks between swaps and ability uses, you get Yelan Q N1 E > Kazuha N1 E Q N1 > Hu Tao 8N2C. In this case, three Normal Attacks were added which trigger three more waves compared to the initial rotation.
While weaving is useful, using it too much can cause problems. Remember that Exquisite Throws triggered by Normal Attacks have a 1-second cooldown. Using two Normal Attacks one after another, even with a character switch between them, has a very high possibility to trigger only one wave instead of the expected two.
In this example, the rotation is Yelan E Q N1 > Bennett N1 Q. Here, only a single wave was triggered despite using two Normal Attacks.
Combos
With rotation mechanics cleared, let’s focus on Yelan herself rather than the entire team. Even with Yelan’s very short field time, you can still maximize her damage by performing these recommended combos.
| N# | Number of consecutive Normal Attacks |
| E | Elemental Skill |
| Q | Elemental Burst |
| D | Dash |
C0 Combos
Q N1 E (N1)
This combo is the most damage-efficient, but it makes Yelan’s Energy Recharge requirements stricter. By doing this combo, you will trigger two (or three) Burst waves.
We recommend using this combo only if you can maintain Burst uptime without needing Yelan to catch the particles generated by her Skill. This is because an off-field Yelan will receive only 60% of the Energy compared to if she was on-field.
Q E
Very similar to the combo above, but triggers a single Burst wave. It is slightly faster than a well executed Q N1 E.
E Q
The most obvious combo to use. This combo trades some damage for Energy Recharge, as Yelan is able to catch her own particles during the Burst’s animation without delaying the rotation.
Q N1 E (N1) – swap ~10 seconds – E
Standard way to use her Elemental Skill twice in a rotation. Its viability is slightly restricted, as casting a second Skill often interrupts the main on-field unit. Nonetheless, there are teams where this works perfectly fine and is actually recommended. Use it where it is possible, but don’t force it.
C1 or Sacrificial Bow Combos
Q N1 E N1 E
The upgraded version of the most recommended C0 combo. This one allows Yelan to maximize damage and catch particles at the same time. Highly recommended if you are able to maintain Burst uptime easily.
E Q N1 E
As with the combo above, Yelan is able to catch particles from the first Elemental Skill, which allows for more buff uptime at the cost of a few Exquisite Throws. A balanced combo with good and efficient damage.
E E Q
Standard combo which allows Yelan to catch the particles from both of her Elemental Skills.
C6 Combos
Q N1 E N1 E N3
Very efficient C6 combo which deals a very high amount of damage in a very short period of time. Not only does it allow Yelan to catch all the particles generated by her Elemental Skill, but the damage provided also makes it a solid choice for speedruns.
E E Q N4 or Q E E N4
An obvious combo which deals good damage. It is certainly not better than the one above, but still a solid choice which is also easy to perform.
The combos can also be adapted and have Breakthrough Barbs inserted between hits. Such an adaptation works, but it isn’t highly recommended. If you decide to play on-field Yelan, you should use N3D.
Pre-Funneling
Pre-funneling is one way to manage Yelan’s Energy Recharge requirements, but it requires caution and understanding to perform reliably.
This mechanic exploits having all Elemental Bursts charged at the beginning of an Abyss Floor. A player can Burst immediately after Yelan’s Skill use in order to gather particles during the Burst animation. When using two Skills in a single rotation, this allows for pre-funneling.
This allows for more Energy generation for Yelan in your second rotation at the cost of losing lots of Energy generation in your third rotation. In short, it allows for short-term benefit at the cost of long-term consequences.
Players often underestimate the importance of Energy Recharge and rely too much on pre-funneling to recharge characters’ Bursts. Using this technique irresponsibly will lead to an inefficient build for Yelan. In a longer fight, the side-effects become prevalent when a character does not have their Burst ready when swapped onto the field, leading to a DPS loss.
The ideal use case for pre-funneling is when you know a battle will be over before the drawbacks occur. Keep in mind that Yelan’s Burst is her most important ability and it is crucial to make sure you can use it right when it is needed, without any delays. There are some cases, depending on build and team, that may require a pre-funneled rotation during a battle in order to maintain momentum with team DPS.
ICD Mechanics
The following section covers aspects of Yelan’s kit which are related to Elemental Gauge Theory (EGT) and Internal Cooldown of Elemental Applications (ICD). Before proceeding, read the documentation found in the KQM Theorycrafting Library. It will be necessary in order to properly understand the following information.
The main focus for Yelan’s ICD mechanics is on her Burst waves. They help her maintain the Hydro aura, which is necessary to trigger reactions. However, making sure a Hydro aura stays on the enemy can be challenging.
Yelan’s Exquisite Throws come in waves of three hits of Hydro DMG, and each wave comes once per second. The projectiles in a single wave hit about six frames from each other.
Yelan has a unique ICD of every 3 hits and every 2 seconds, as opposed to every 2.5 seconds. Her Exquisite Throws apply a standard 1 unit (1U) of Hydro to enemies. When followed by Pyro attacks, the 1U of Hydro is enough to enable two Vaporize reactions before it expires. The trickiest part is to reapply and maintain the Hydro aura so you can constantly Vaporize with subsequent Pyro attacks.
One such case is using Yelan as the sole Hydro applicator for Hu Tao; at Constellation 0, Yelan (on her own) can struggle to provide enough Hydro for Hu Tao to consistently Vaporize all of her Charged Attacks.
Yelan’s projectiles, again, come in waves of three and apply 1U of Hydro, triggered once a second. Usually only one of the three projectiles will apply Hydro due to ICD. In short, you apply 1U of Hydro per second if the Burst waves are triggered constantly. Across three Burst waves, then, 1U of Hydro is applied each wave. Call this a “1-1-1 sequence.”
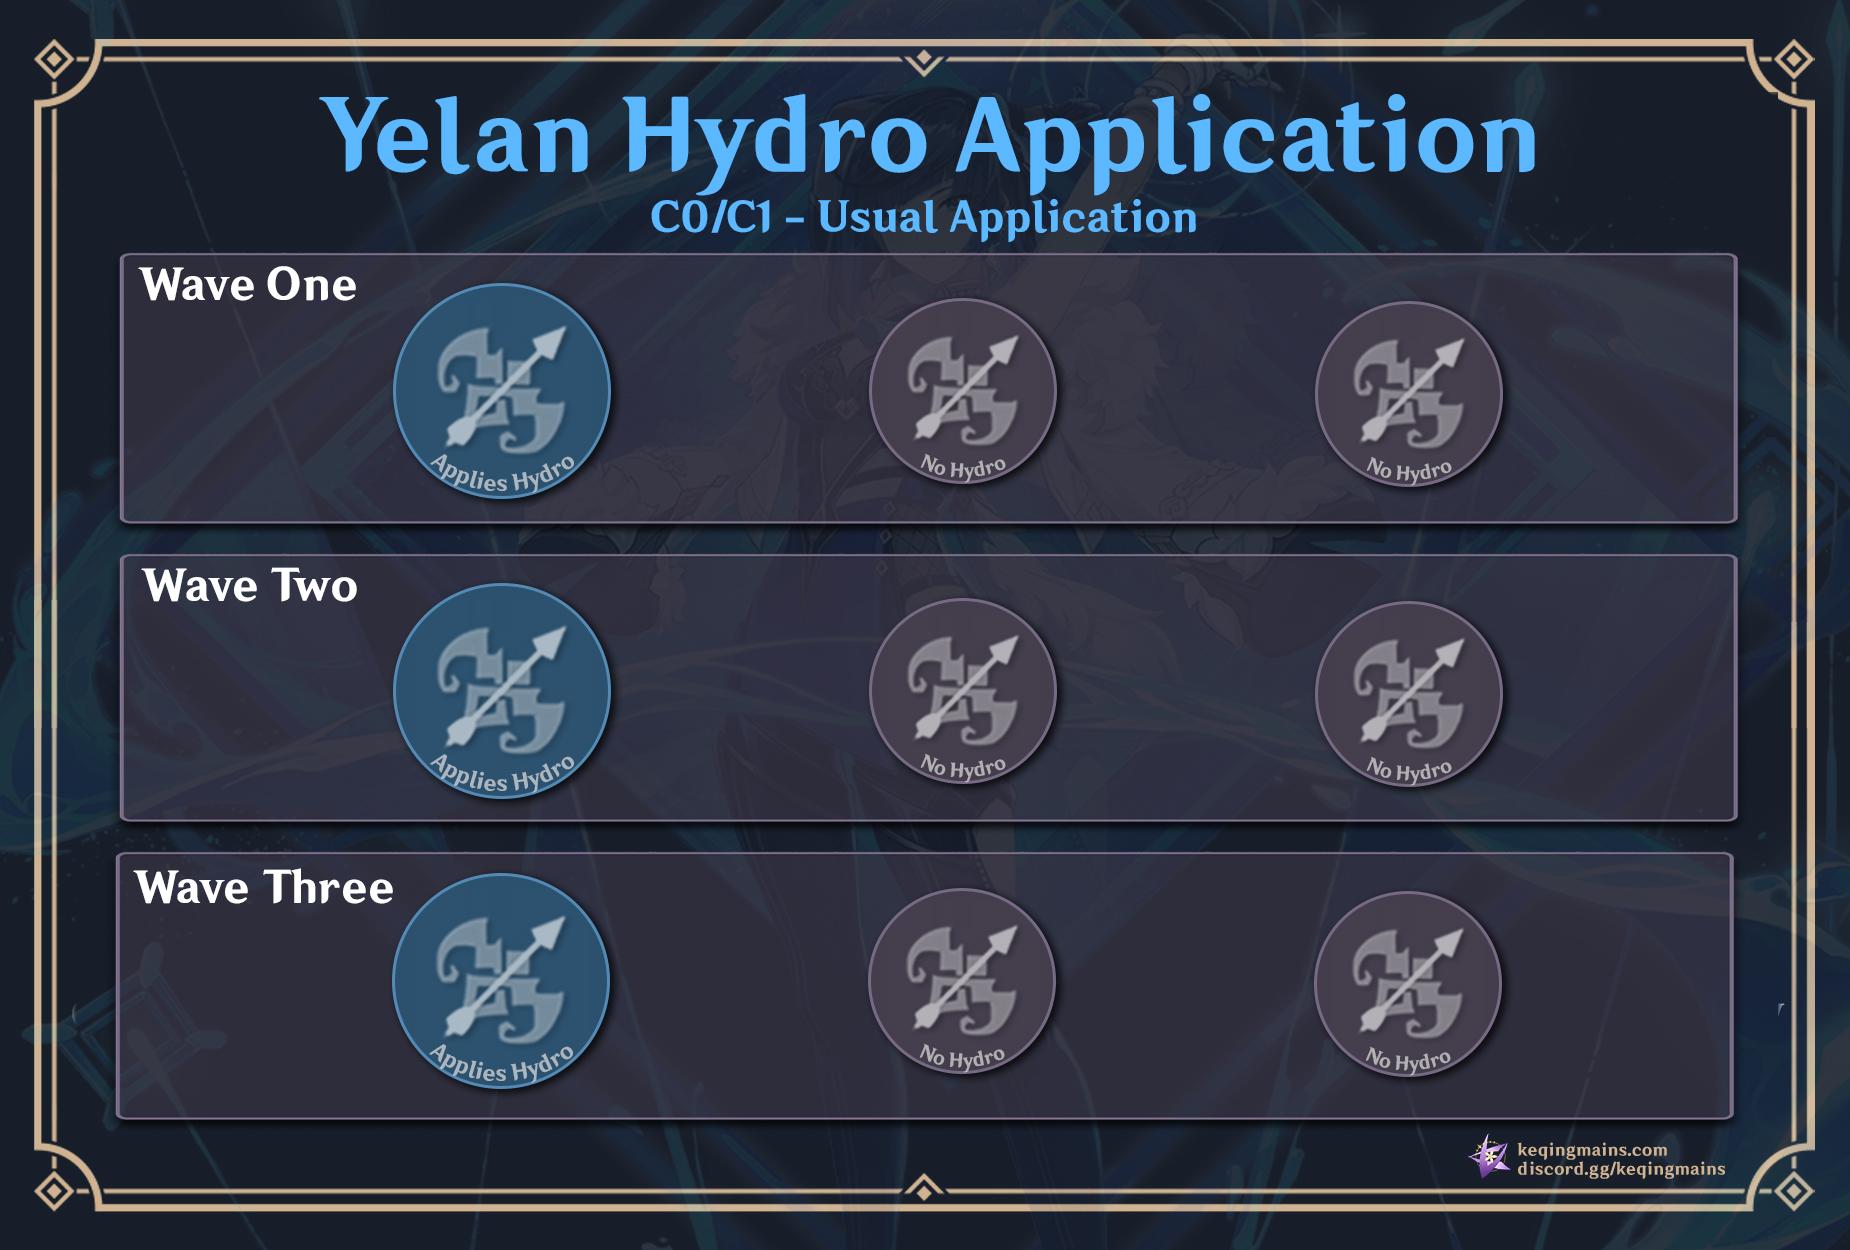
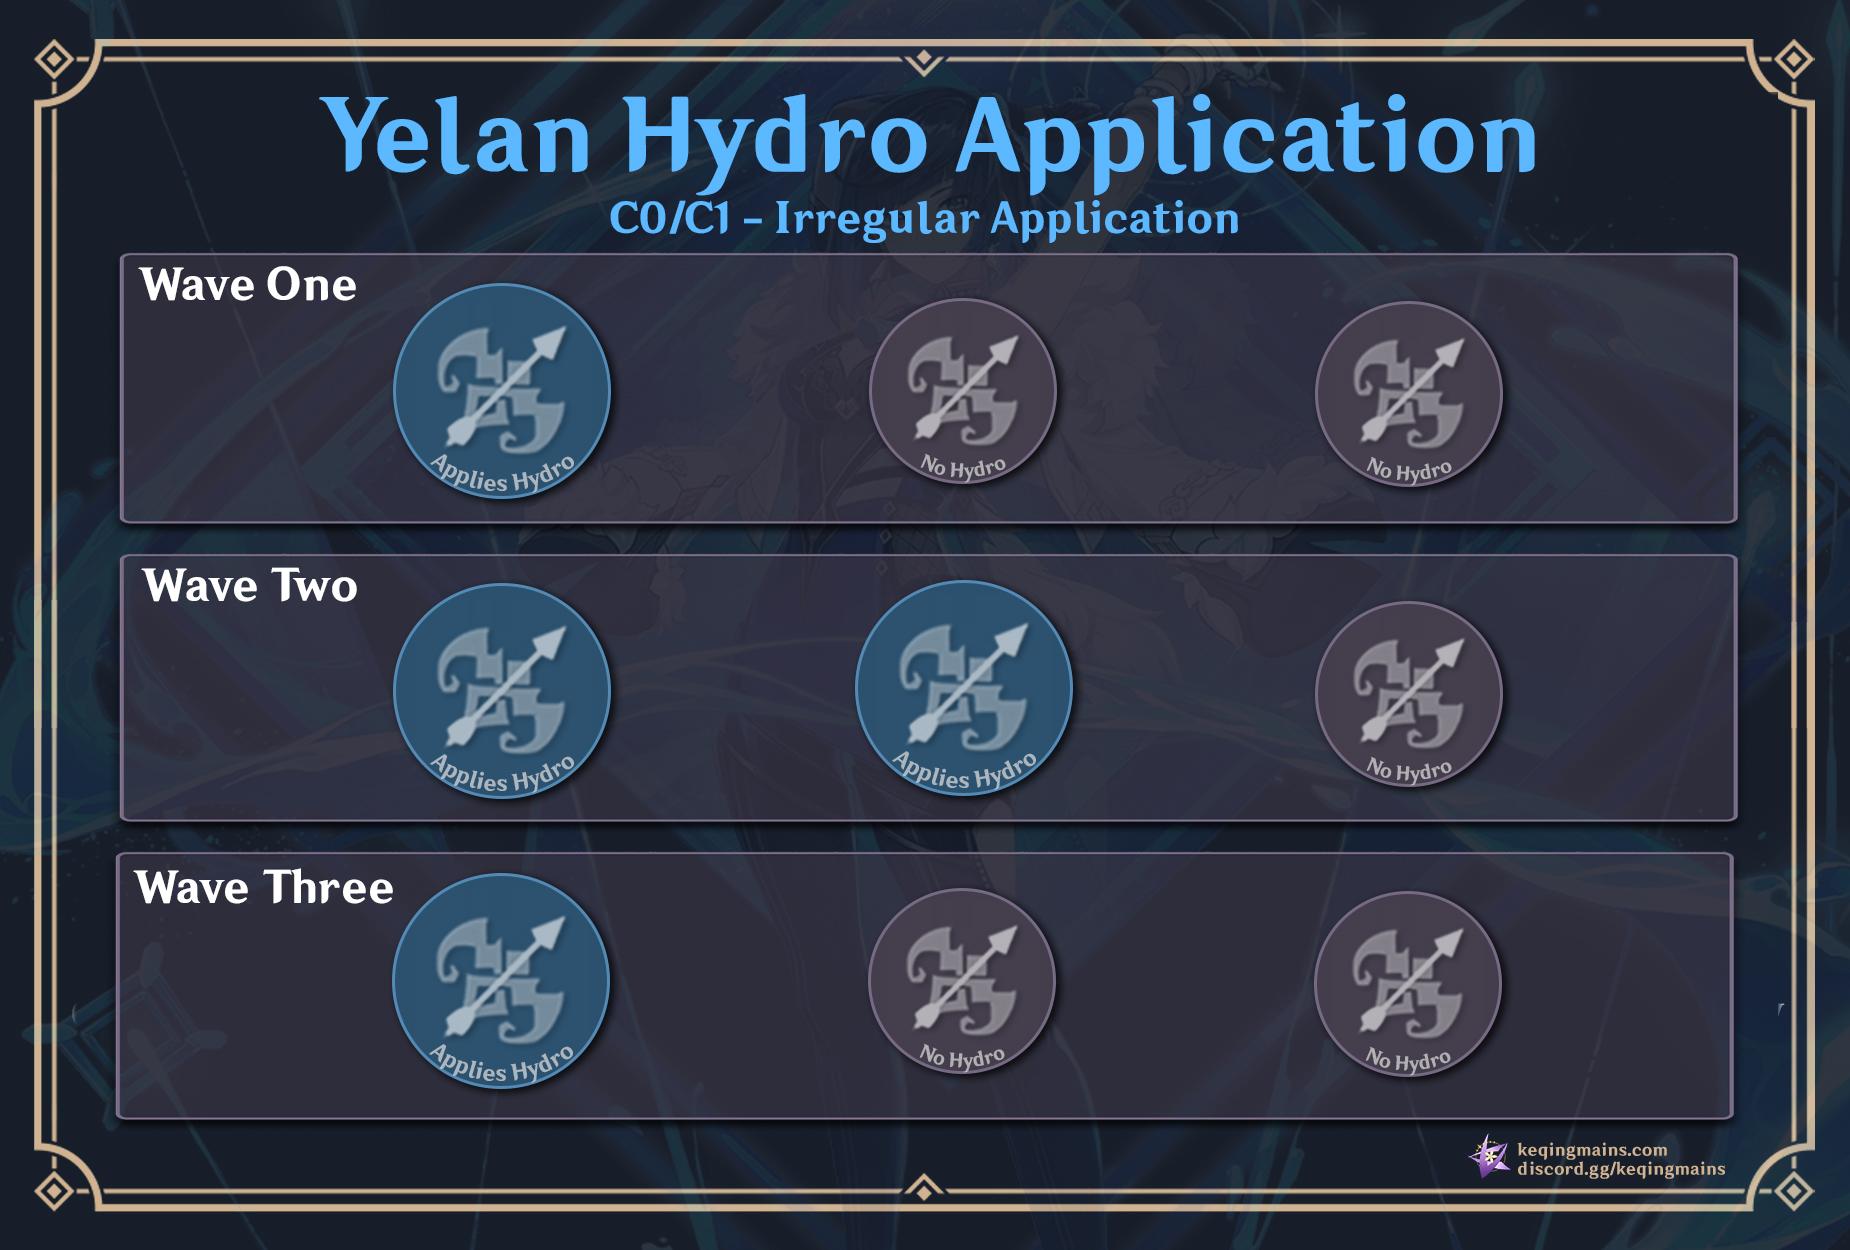
On rare occasions, the wave is triggered imperfectly and one of the Exquisite Throw waves applies Hydro twice within the same three projectiles, forming a 1-2-1 sequence. This may happen occasionally, but you should not rely on it.
In summary, a Constellation 0 Yelan fits into the reaction enabler role and can keep up with most Pyro characters to allow constant Vaporize triggers. However, Vaporize is not the only reaction that benefits from this.
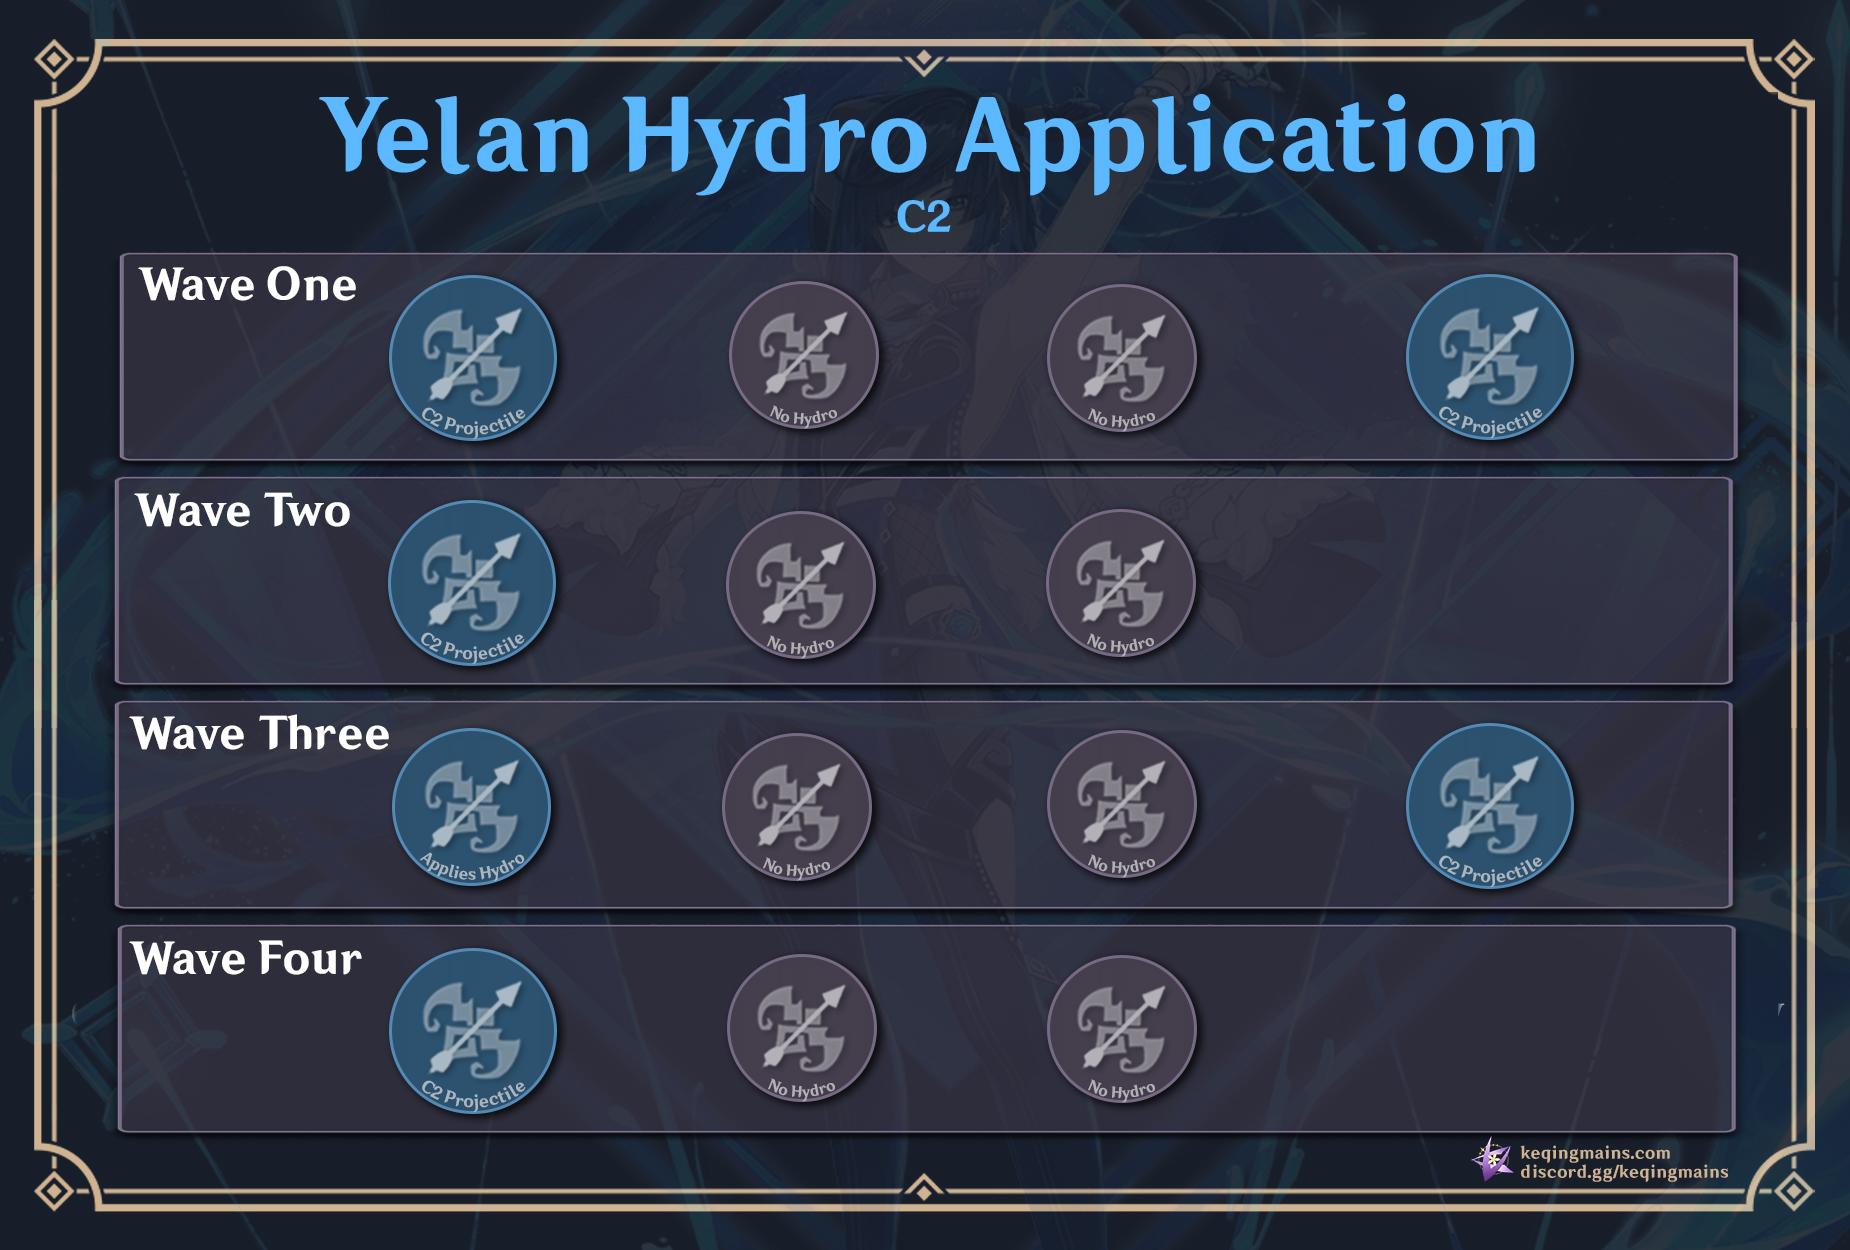
It’s important to note that the additional projectile from Yelan’s second Constellation has no ICD. This means that it will apply 1U of Hydro every time it hits the target. With a 1.8 second cooldown, it can be triggered at least every other wave, resulting in a 2-1-2-1 sequence.
Section 6: Teams and Synergies
It’s time to pull the trigger.

Synergies
Yelan is an extremely flexible unit and manages to perform well in almost any team. Flexible units allow players to easily choose a character for their team whenever there is an open team slot – a flexible unit can do their job in nearly all situations that benefit from them without restrictive caveats.
When building a Yelan team, you should first decide on an on-field DPS who performs Normal Attacks frequently. It is even better if the on-field unit scales well with reactions. Yelan performs especially well in Vaporize and Electro-Charged teams, but she can also be a solid option in teams like Mono-Hydro or Freeze.
As mentioned across the guide, Yelan has a lot of similarities to Xingqiu and team archetypes are no exception. She can blend in pretty much anywhere Xingqiu is an option. Being able to act as a second Xingqiu is incredibly valuable and owning both of them makes team building significantly easier for Spiral Abyss.
Besides the fact that Yelan works well as a Xingqiu replacement as stated before, they can do an unbelievable job together, with Double Hydro being one of the strongest and most flexible teams in the game. They can cover each other’s weaknesses, forming a deadly duo.
Featured Hydro Unit

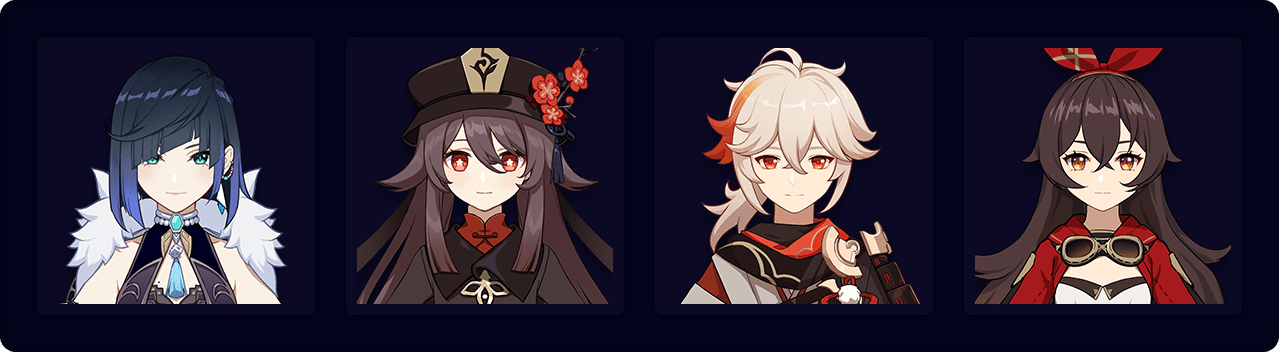
Xingqiu
Xingqiu is very effective when paired with Yelan. He can also act as a battery for her with a high refinement Sacrificial Sword or Favonius Sword equipped.
His second Constellation reduces enemies’ Hydro Resistance, a useful buff for Yelan which increases her damage potential.
A Constellation 6 Xingqiu is ideal for Yelan. With all the beneficial upgrades he gets compared to Constellation 0, he is able to cover Yelan’s lack of defensive abilities while also delivering substantial damage and Hydro application.
Notable Hydro Units

Kokomi
Solid and straightforward choice for Yelan. Kokomi provides useful off-field healing and is a good source of Hydro Energy Particles for Yelan. Additionally, she can also deal damage with her Normal Attacks during her Burst when needed.
It is worth mentioning that Kokomi benefits from Yelan’s fourth Constellation.

Mona
Mona provides DMG% Bonus, one of the few buffs Yelan appreciates, and the buff comes in great quantities too.
A Constellation 1 Mona is an even more worthy flex option in Vaporize teams which favor strong single strikes.
She can also hold Thrilling Tales of Dragon Slayers to buff her teammates, though Yelan will not benefit from it.

Ayato
Ayato is a strong on-field option when paired with Yelan and similar off-field characters.
Ayato reduces her Energy Recharge requirements by virtue of being a Hydro unit, and Yelan will make him stronger with her ramping buff.
He is also one of the few characters who benefit from Yelan’s fourth Constellation.

Nilou
Nilou is a solid choice as an on-field unit for Yelan, mostly in Bloom teams. Sharing the same spot as Xingqiu, Yelan can play the off-field role with lower Energy Recharge requirements thanks to Nilou.
Her playstyle allows Yelan to trigger two Elemental Skills per rotation.
Nilou scales entirely with HP, thus also benefiting from Yelan’s fourth Constellation.
Featured Pyro Unit

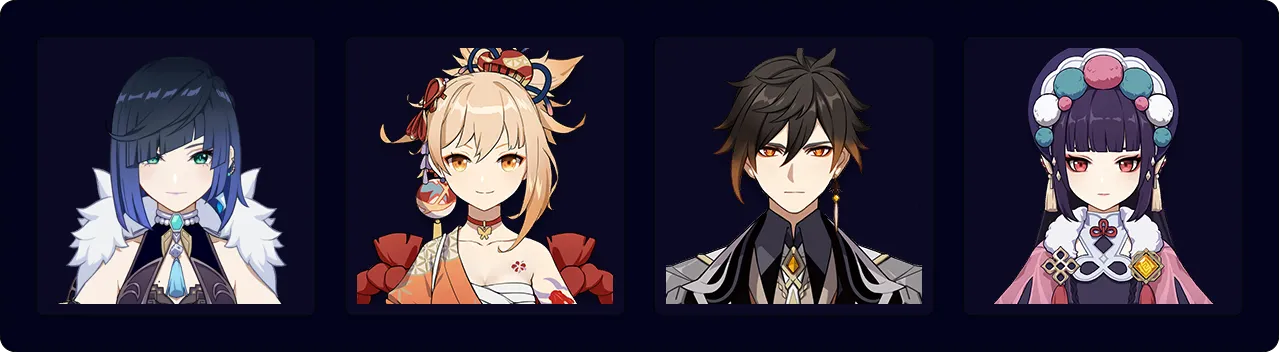
Hu Tao
Not surprising at all, Hu Tao is the Pyro character who works the best alongside Yelan. With Xingqiu already being her most recommended teammate, Yelan performs well by default and is able to increase the team’s damage. If Hu Tao didn’t already have strong teams, she now has the Yelan and Xingqiu duo unlocked with even more team possibilities and satisfying damage numbers.
When using Yelan as the only Hydro unit, you should use the N1C combo for Hu Tao to make sure you can control the Pyro application. It is important to not overwhelm the Hydro aura, as once Pyro takes over as the main Element present on the enemy, it will be impossible to recover Hydro efficiently and you will lose Vaporize uptime.
In other scenarios, you should use the N2C combo.
It is also worth mentioning that when Yelan is the only Hydro character, additional sources of Hydro application from characters like Kazuha or helpers like Fischl are appreciated, but not a necessity. Read the ICD Mechanics section for more details. If your Yelan has Constellation 2 unlocked, you can ignore this.
Lastly, Yelan’s Constellation 4 is also a valuable buff for Hu Tao.
Notable Pyro Units

Xiangling
Despite the duo being strong when paired together, Xiangling encounters difficulties when it comes to Vaporizing her Elemental Burst hits and might miss some of them.
Xiangling’s off-field playstyle also means she will not benefit from Yelan’s fourth Ascension Passive unless you decide to use her on-field.
However, Xiangling and Bennett together are so strong that this might not matter, depending on your team composition.

Yoimiya
Yoimiya is the recommended ranged Pyro on-field unit to pair with Yelan. Yoimiya’s slow Pyro application allows her to Vaporize her hits without issues even when paired with a Constellation 0 Yelan.
Sadly, Yoimiya requires defensive abilities from the off-field units—something Yelan cannot provide. It is recommended that you include a shielder or Xingqiu in your team.
Lastly, Yoimiya prefers ATK buffs, a buff Yelan doesn’t benefit from.

Diluc
Diluc is in a similar situation to Yoimiya, since he benefits from ATK buffs and lacks defensive abilities, which Yelan fails to provide for him. Even with all of this, he is still a fine choice as an on-field unit, though not ideal.

Klee
Once again, a Pyro unit who prefers ATK buffs but still benefits from Double Hydro compositions.
As Klee is a melee-range Catalyst user with low DEF and HP, defensive options are almost mandatory.

Yanfei
Yanfei is another ranged on-field Pyro unit who works with Yelan.
While she has solid offensive power, Yanfei also has defensive and support abilities once her fourth Constellation is unlocked.
It is worth mentioning that she might be unable to Vaporize consistently.
Featured Anemo Units

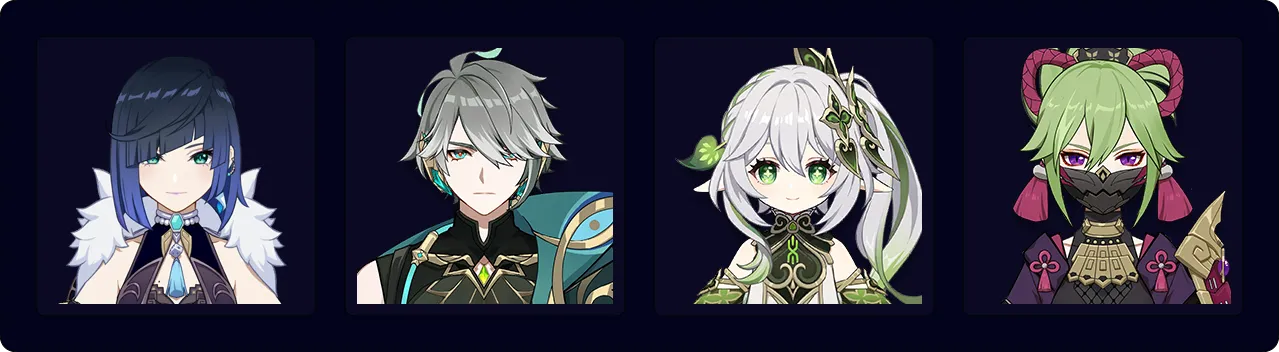
Kazuha
As expected, Kazuha is the Anemo character Yelan benefits the most from. The buffs, debuff and crowd control he provides make him a very strong and highly recommended unit to run alongside her. Not only is he able to supply Yelan with one of the few buffs she benefits from, but he also excels at it, further increasing Yelan’s damage.
Kazuha’s only weakness is that he is wanted by a wide variety of teams, which, depending on your characters, might pose a difficulty for you when choosing teams.

Sucrose
Sucrose is a great alternative to use if Kazuha is not available. She is able to provide useful Hydro Resistance Shred to enemies with the 4-piece Viridescent Venerer set and increase Yelan’s damage.
Sucrose is also able to share a portion of her Elemental Mastery with the team, though this isn’t a stat Yelan generally benefits from, as Yelan does not trigger reactions as much as she enables them. However, this EM buff will still benefit your on-field DPS who reacts with Yelan.
Notable Anemo Units

Jean
Plays well as a support since she can provide Resistance Shred with the 4-piece Viridescent Venerer set, healing and buffs with weapon passives.
Additionally, Jean and Bennett’s Sunfire interaction is strong and works well with Yelan.

Sayu
Very similar to Jean, with the most significant difference being that she doesn’t interact with Bennett as well as Jean.
One thing Sayu can do that Jean cannot is carry Wolf’s Gravestone to buff her team’s ATK, though Yelan would not benefit from this.
Her Swirl counts provided by her Burst can make her a good option for Electro-Charged teams.

Xiao
Xiao is a solid on-field Anemo damage dealer to play with Yelan, but he requires specific combos such as N1CJP if you want the pair to work effectively. The main idea is to use a Normal Attack between Plunges to ensure that Yelan’s Elemental Burst is triggered.
It is worth mentioning that Yelan’s faster trigger point on her Burst allows Xiao to perform his combos quicker than if you were using Xingqiu.
Yelan’s fourth Ascension Passive is also beneficial for his damage.

Venti
Venti does what he usually does – crowd control.
He is also able to provide 15 Energy based on the Element absorbed by his Burst. Additionally, Yelan’s attacks can reach his Burst.

Heizou
Heizou is a decent choice and can be played as both off-field and on-field unit. You can compare him to Sucrose role-wise.

Wanderer
Wanderer is an Anemo DPS who, of course, benefits from the DMG% Bonus Yelan provides, but he does not typically look for Hydro teammates.
The two characters are compatible, depending on how Wanderer is geared, though the synergy is nothing game-breaking.

Faruzan
Another choice if you are searching for a character which provides (limited) crowd control and maintains the 4-piece Viridescent Venerer effect.
Faruzan’s compatibility with Yelan highly depends on the on-field Anemo unit, like Wanderer or Xiao.
Featured Geo Unit

Zhongli
To no one’s surprise, the most favored Geo character is Zhongli. His strong shield with its great uptime and Resistance Shred greatly benefits Yelan.
Despite being a bit difficult to use in an efficient way, 4-piece Archaic Petra is a very strong set to use on Zhongli when paired with Yelan.
Alternatives like 4-piece Tenacity of the Millelith and 4-piece Instructor can also be used. Realistically they won’t benefit Yelan herself, but they might be preferred for other members of the team.
Notable Geo Units

Albedo
Does a good job at maintaining some noticeable off-field damage and provides 125 Elemental Mastery, which can be useful for some party members.
One aspect of Albedo to keep in mind is that his Geo aura can interrupt reactions, so use him carefully.

Yun Jin
Yun Jin doesn’t directly benefit Yelan herself, but with her buff she can allow the main on-field unit to deal higher damage from the Vaporize hits Yelan enables. Good examples are Hu Tao and Yoimiya teams.

Itto
Yelan can replace Zhongli or Albedo in Itto’s Geo teams, which is a surprise.
If you decide to play them together, it is recommended that you use Favonius Warbow on Yelan—she will need a lot of Energy Recharge.
Featured Electro Units

Raiden
Raiden plays exceptionally well as both the main on-field unit and battery for Yelan. Being able to act in multiple roles at the same time is definitely an advantage.

Fischl
Fischl deals noticeable amounts of damage while being off-field, applies Electro consistently and can even reduce the Energy Recharge requirements for the entire team.
She fits well especially in compositions with lots of reactions triggered in quick succession, such as in Electro-Charged teams.
Additionally, she does a great job at supporting Yelan’s Hydro aura when the latter is played as the only Hydro unit with Hu Tao.
Notable Electro Units

Yae Miko
Yae excels at maintaining damage and Electro aura with her turrets. Besides that, she can deal large chunks of damage with her Elemental Burst.

Beidou
Beidou is best used in multi-target scenarios and highly appreciates having another Electro unit alongside her due to her high Energy Recharge requirements.

Keqing
Keqing is a solid on-field unit for Electro-Charged teams. While she is usually paired with Xingqiu in this situation, Yelan can also be a suitable replacement, or even be played alongside him.

Cyno
Cyno can be paired with Yelan in Hyperbloom teams. You should avoid using both Yelan and Xingqiu if you decide to play Hyperbloom, as the rapid Hydro application will lower the damage potential.

Shinobu
Shinobu is a solid option for Electro-Charged teams and is able to provide useful healing.
She is best used for damage in Hyperbloom teams, so pairing Yelan and Shinobu with a Dendro character like Nahida will yield some benefit.
Notable Cryo Units

Ayaka
Ayaka has one of the strongest Elemental Bursts when buffed by Yelan’s fourth Ascension Passive. Ayaka’s Burst on its own is very strong, but it can be even stronger if you play a back-loaded rotation to take advantage of the ramping buff.
She prefers having a Cryo unit playing alongside her.

Eula
Eula benefits a lot from Yelan’s fourth Ascension Passive due to her naturally back-loaded Elemental Burst.
When pairing Yelan with Eula, Favonius Warbow is recommended.

Rosaria / Kaeya
Due to the similarities between Rosaria and Kaeya, they behave pretty much the same with Yelan. They are both solid off-field damage dealers and provide useful Cryo application.

Layla
Layla provides a solid shield and mainly single-target focused Cryo application.
She also works exceptionally well in Hu Tao and Yoimiya Double Hydro teams.
Featured Dendro Unit

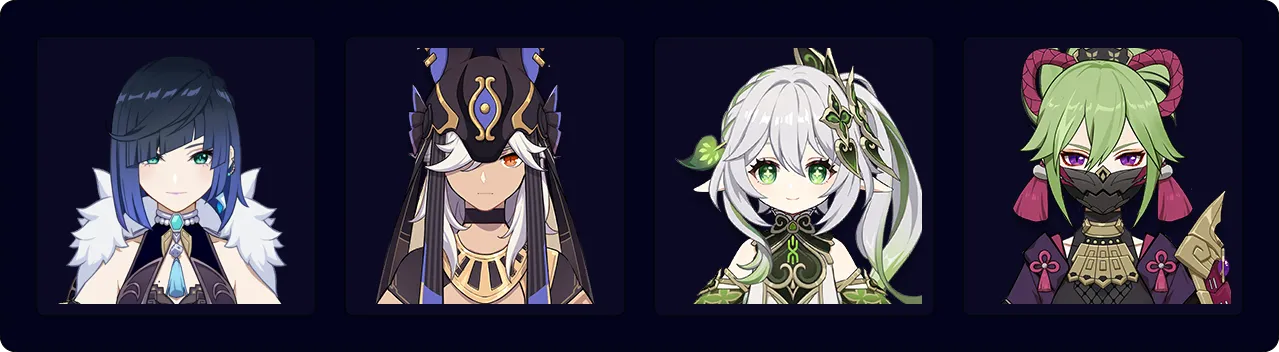
Nahida
Nahida can play as both an on- or off-field Dendro enabler. She synergizes with Yelan in on-field play by providing incredible amounts of Dendro application. This allows for increased Dendro Core generation, whether for Bloom, Burgeon or Hyperbloom teams.
Notable Dendro Units
![]()
Alhaitham
As an on-field Dendro enabler and DPS who relies on his Normal Attacks to trigger Projection Attacks, Alhaitham can easily make use of Yelan’s Exquisite Throws to produce Dendro Cores.
In Hyperbloom teams, his personal damage benefits from Yelan’s A4 Passive, while he can easily apply enough Dendro aura for his own Quicken uptime.
In Triple Hydro Nilou teams with Yelan, Alhaitham can become the sole trigger of Blooms by avoiding max Mirror stacks to intentionally lower his Dendro application, allowing his teammates to focus on non-EM builds.

Collei
Collei can be used to apply Dendro off-field; however, she often needs to be paired with a second Dendro character to match Yelan’s fast Hydro application for maximizing Dendro Core generation.
She can pair well with the other 4-star Dendro options (Yaoyao or Dendro Traveler) to provide enough Dendro application.
![]()
Yaoyao
As the only Dendro healer currently available, Yaoyao offers additional flexibility in Dendro teams, allowing Yelan to be used as the solo Hydro option.
Her Dendro application off-field is similar to Traveler or Collei. When on-field to use her Burst, Yaoyao can also utilize Yelan’s Exquisite Throw by performing N1J (Normal Attack > Jump).

Dendro Traveler
Dendro Traveler provides decent off-field Dendro application for Bloom, Hyperbloom or Burgeon teams utilizing Yelan. Like the other 4-star Dendro characters, Traveler needs to be paired with another Dendro unit for enough application to match Yelan’s rapid Hydro application
While the Dendro Traveler doesn’t have much synergy with Yelan herself, they are a solid F2P option for off-field Dendro application if Nahida is not available.
Team Compositions
Yelan Double Hydro
As mentioned before, Yelan unlocks one of the strongest and most flexible team archetypes currently found in the game – Double Hydro with Xingqiu. The Yelan and Xingqiu pair is an unbelievably strong team which can be paired with pretty much any other character and still deliver due to the high damage they provide together.
Double Hydro + Double Flex
 | |||
| Yelan | Xingqiu | On-field unit | Support / Off-field unit |
The on-field unit can be whoever you prefer as long as they use Normal Attacks to trigger Yelan and Xingqiu’s Elemental Burst waves. The second flex spot can be a buffer of your choice or even another off-field damage dealer if that is what you desire.
This duo is so flexible it doesn’t have a specific requirement for the other two spots. It can literally be anyone, and the team sometimes even lacks a fourth or third party member altogether.
It is worth noting that the second Hydro spot is not limited to Xingqiu, other Hydro units can be used too. Additionally, even the other two flex spots can be occupied by Hydro units and form Mono Hydro teams.
Double Hydro Pyro Flex


Hu Tao is the preferred Pyro unit due to the flexibility she allows in choosing the last slot. Unlike the other options, Hu Tao isn’t that dependent on ATK buffs, which gives her a wider variety of options.
Yoimiya is also an exceptionally strong choice for the on-field Pyro DPS, and can sometimes excel where Hu Tao does not. For example, teleporting, flying, or fast-moving enemies like the Golden Wolflord, Thundering Manifestation, and widely spread-out mobs—especially groups of Specters.
In the case of Double Hydro with Xiangling and Bennett, it is important to know that Bennett’s Skill applies more Pyro and can remove the Hydro aura with a single hit. This can cause the Pyronado to not Vaporize and the reaction chain to break. To avoid this, you should use Bennett’s Skill after the Pyronado hits.
Double Hydro Taser


Electro-Charged teams are strong due to the rapid trigger of reactions produced by quickswap playstyles. In this team, Yelan also has the chance to be played as an on-field unit. It is recommended to do so only if you don’t have another alternative.
Double Hydro Dendro

Yelan and Xingqiu together in Dendro teams allows for a large amount of consistent Hydro application. In Hyperbloom teams, this can be a significant increase in single-target damage, although some Cores can be wasted due to Dendro Core ICD.
In Burgeon teams, Yelan can offer great single-target damage, and the team benefits from the Hydro Resonance provided by Yelan and another Hydro unit. In Bountiful Bloom teams, she can offer great off-field Hydro application along with on-demand AoE Hydro application with her Breakthrough Barb.
Nilou Triple Hydro
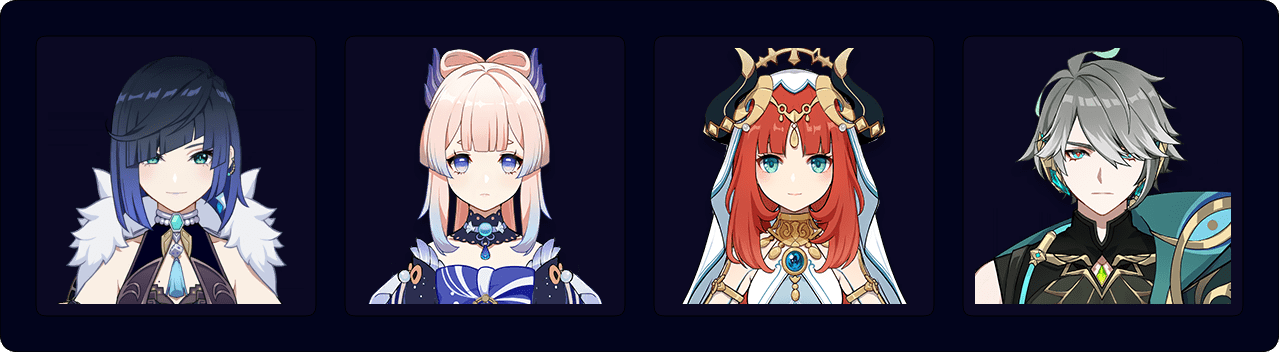
Yelan can synergize with Nilou teams thanks to her significant Hydro application rate, which allows for increased Bountiful Bloom generation. Similarly to Xingqiu, she can maintain Hydro aura for an on-field Dendro character like Alhaitham, which allows virtually all the Bountiful Blooms to be triggered by him.
Maintaining only 1 Mirror stack on Alhaitham offers Nilou teams with him a unique advantage over similar teams using Nahida—which apply too much Dendro, overtaking the Hydro aura. This allows Alhaitham to focus purely on an EM build, while Yelan, Kokomi and Nilou can forgo EM entirely for their preferred stats. Do note that both Nilou’s Water Wheel and Kokomi’s Bake-Kurage must be hitting the enemy as often as possible.
Yelan Solo Hydro
When it comes to Yelan being the only Hydro in the team, some difficulties emerge. Depending on who she is paired with, it can be somewhat of a challenge to play her, often due to her lack of defensive utility. This means that Yelan can fill the same role as Xingqiu, but she might not be as good as him from a comfort point of view.
Keep in mind that when Yelan is the only Hydro unit, her Energy Recharge requirements skyrocket. To counteract this, you can use weapons like Favonius Warbow or pairing Yelan with characters like Raiden. For more details, read the Energy Recharge Requirements and Pre-Funneling sections.
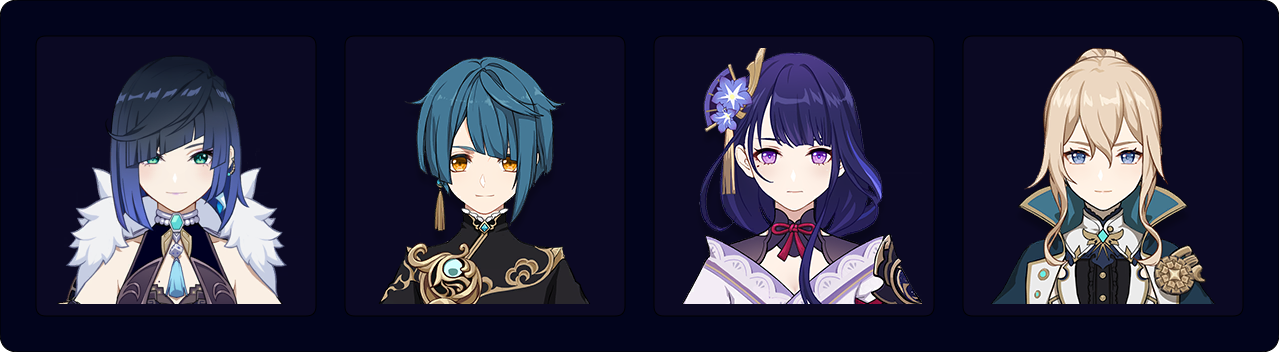
Yelan Raiden Xiangling Bennett

In this team, Yelan’s spot is usually occupied by Xingqiu, but her amazing performance here shows just how flexible she is and how big of an advantage it may be to have both Yelan and Xingqiu on your account. Yelan isn’t necessarily an upgrade to Xingqiu, but rather an alternative.
Yelan Raiden Kazuha Bennett

A team where Kazuha’s Absorption mechanic is taken full advantage of. This “soup” of reactions deals damage by consistently triggering reactions using Hydro, Electro and Pyro.
It is worth mentioning that the Pyro application from Bennett’s Burst might interfere with the Hydro and Electro aura. To avoid this, you can simply weave a Normal Attack into your rotation (though only for pre-C6 Bennett).
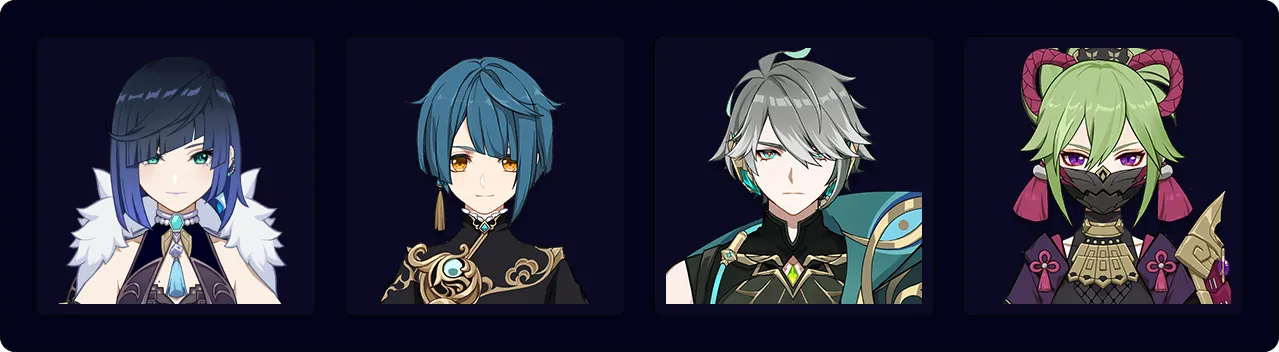
Yelan Pyro Zhongli Flex


Yelan is able to enable all of Hu Tao’s hits to Vaporize even at Constellation 0, but you might encounter some difficulties. To facilitate this, you should start with performing the N1C combo on Hu Tao. Additionally, you can also use another character which helps maintain, or “protect”, the Hydro aura, such as Kazuha with his Hydro-absorbed Burst or Fischl.
Yoimiya in the Double Geo team can have shorter rotations resulting in higher DPS.
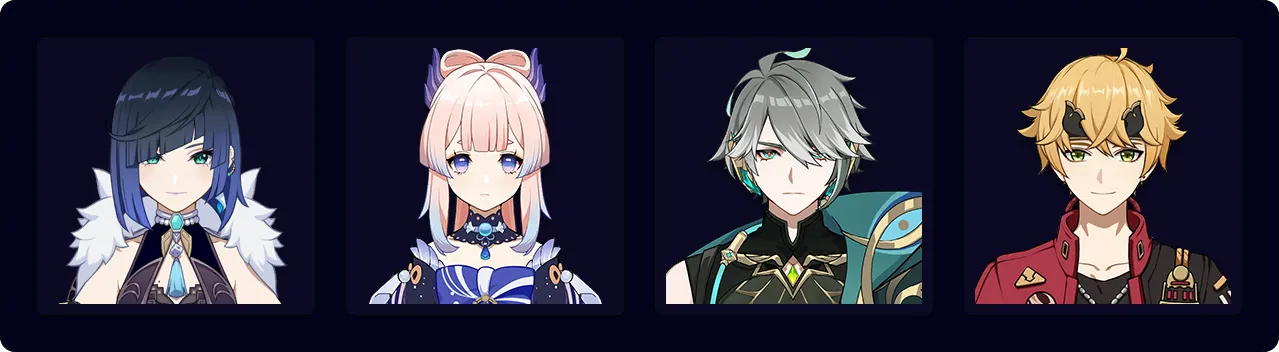
Yelan Hu Tao VV Vape
This is one of the most difficult teams you can play and requires a lot of skill to pull off. Your only defensive options are i-frames and well-executed swaps or combos. In exchange, this team has a short rotation with a high damage ceiling.
Take caution; there is tons of room for error and high-precision gameplay is required.
Hyperbloom

Hyperbloom teams can take full advantage of Yelan. Her Hydro application is appreciable for producing Dendro Cores but not too much as to lose Quicken outright. Her buff synergizes with Aggravate or Spread DMG from the on-field character. Finally, she contributes a healthy amount of her own damage, resulting in extremely powerful single-target teams.
There are a lot of good Yelan teams, and this section barely scratches the surface. If you want more details about possible combinations, we recommend reading a character specific guide for the unit you are interested in pairing Yelan with, or build your own team after reading the KQM Team Building Guide.
Additionally, KQM theorycrafters who participated in #tc-yelan have compiled a Yelan Team Rotations Sheet where you can find many more teams that have been explored.
Section 7: Conclusions
Game’s up, fun’s over!

To sum up, Yelan is a powerful off-field DPS with plenty of flexibility to fit in nearly any team composition. She is also able to form one of the strongest team cores in Genshin Impact – Double Hydro. Her similarity to Xingqiu means that not only can you use this powerful composition, but you can use an off-field Hydro applicator for each Spiral Abyss team. This makes her an incredibly valuable unit to have.
When it comes to Constellations, Yelan benefits from them more than nearly every other unit in the game. They more than double her damage and make her an all-star unit for speedrunning.
In addition, viable weapons are cheap and accessible for competitive results, thanks to her lack of ATK scaling.
Even outside of Spiral Abyss, Yelan is one of the best units for overworld exploration, allowing you to save hours of gameplay with her Skill that allows for swift movement, especially after her first Constellation.
That said, while Yelan is a character who is beneficial for nearly any account, regardless of goals, she is not a must-pull, as Xingqiu is quite similar to her and easier to obtain.
Section 8: The End
Quietly now.

Thank you dearly for reading all the way to the end of this guide. We hope you enjoyed the work that we have invested into this presentation.
- Yelan Mastersheet | Yelan Mains by Vladone ツ#9281
- Yelan Mastersheet by Emiliabyss#1641 and KB#1111
- Yelan ER by Saber#9529
Finally, a huge special thanks to all the people who contributed to the guide and spent this theorycrafting journey with us:
jstern25#1399, Aluminum#5462, Reens#9289, Peekays#2722, CC#5588, Phana#0420, ItzSomebody#0029, Nymous_SDG#2696, Adranelyne#0024, Kaleamaranth#6687, Luanjo#5886, murmandamos#3076, Xreejan#1180, Chymous (차임어스#6748), Sitri#9504, Ayzel#7399, zajef77#2838, Cuzimori#1535, Prévisible#7440, Spbm10#8189, jrm.spirit#2671, Cory#0004, mika#0069, Rinri#2313, alrex#8148, Nayde#0658, Luno#1337, 3b00d_09#2235, idkanonymized#4166, Eris#6748, Leah, acie#1290, Reimu#1626, xf3#3123, fritzzes#2211, fourmana#0477, an odd medium#6288, Saber#9529, LostGuide#4812
- KQM’s #tc-yelan – discord.gg/keqing
- Yelan Mains TC – discord.gg/yelan
- Yae Miko Mains – discord.gg/yaemiko