A Kamisato Ayato Guide
Written by irokei and kolvii
Updated for Version 5.1

You want to know about me? Hmm. Things aren’t always a case of the more you know, the better.
Table of Contents
Introduction
Ayato is a 5-star Hydro Sword character in Genshin Impact who uses his special Hydro Normal Attacks and Burst to deal considerable damage and apply Hydro. He is a versatile Hydro DPS unit in a variety of team compositions due to his unique kit. While our boba king prefers basking in the sun, if you ask nicely, he can put in impressive work with his consistent damage output, fantastic team flexibility, and bombastic side eye.
This guide examines Ayato’s kit in-depth to help you better understand his best builds, best teams, best weapons, best artifacts, synergies, Talents, Constellations, and more!
TL;DR
Credits to: angtahimik, cuppacote, luno_, haafr, caxia5, and KQM Staff
Why Play Ayato?
Ayato is a great pick if you’re looking for a versatile, satisfying, and stylish on-field DPS unit. He deals solid damage while enabling reactions with his off-field and on-field Hydro application. His special Hydro Normal Attacks deal a quick barrage of damage while his Burst contributes AoE Hydro damage and further buffs his Normal Attacks. While Ayato’s click-and-hold attacks are simple to execute, his teams come with considerable nuance in regard to reactions and rotations.
Many have likened Ayato to a jack-of-all-trades, which makes him an excellent option for players who believe that variety is the spice of life. He can enable Elemental Reactions like Vape, Electro-Charged, Bloom, Hyperbloom, and Burgeon. His popular Anemo Overvape teams are sometimes called “Soup”, but make sure Ayato doesn’t get near the hotpot or your stomach will never forgive you!
Pros
- Strong, consistent damage output in both multi-target and single-target scenarios
- Valuable on-field and off-field Hydro application
- Wide variety of team compositions
- Multiple Resin-efficient artifact options
- High viability without Constellations
Cons
- 12s Skill cooldown resulting in 24–25s rotations, which are difficult to sync with most other characters’ cooldowns
- Free-to-play weapon selection that performs significantly worse than paid alternatives
- Lack of front-loaded damage without Constellations
- Competition from other Hydro units
- Team compositions that require highly-contested teammates
FAQ
Do I need to level Ayato’s Normal Attack Talent?
No, you do not need to level Ayato’s Normal Attack Talent. Ayato’s special Hydro Normal Attacks (Shunsuiken) after using his Skill do not scale with his Normal Attack Talent; they scale with his Elemental Skill Talent Level instead. However, the special Hydro Normal Attacks do benefit from Normal Attack DMG buffs.
The only scenario where you would level Ayato’s Normal Attack Talent is if you pair him with Xianyun in a Plunging Attack DPS playstyle. Such teams are viable with Candace’s Hydro Infusion or C6 Bennett’s Pyro Infusion (but not both). Physical DPS playstyles are not recommended for Ayato.
Does Ayato’s Burst matter?
Yes, Ayato’s Burst matters. It is a significant DPS loss to not use his Burst every rotation. It boosts his Normal Attack damage, applies Hydro in a large AoE, deals solid damage, and often enables Swirl setups. As such, you need to meet his ER requirements (see specific ER requirements here).
Should I run 4pc Echoes of an Offering?
You can run 4pc Echoes of an Offering if you want, but it isn’t significantly better than other recommended 4-piece options. Previous statements regarding its unviability at high ping were exaggerated.
4pc Echoes is actually fine if you have high ping. Even if you get only 5 procs per Skill (>400ms), the set still performs on par with 4pc Heart of Depth and 4pc Gladiator’s Finale.
Should I run 4pc Shimenawa’s Reminiscence?
No, you should not run 4pc Shimenawa’s Reminiscence on Ayato. His Burst needs to be used every rotation to maximize his damage, and 4pc SR’s Energy drain significantly increases his ER requirements. This actually results in a DPS loss since you need to invest more into ER% instead of CRIT and ATK% stats.
Additionally, Ayato usually uses his Burst at the start of a rotation. This means you need to make sure Ayato has at least 15 Energy by the time you need to use his Skill and has at least 15 Energy by the time you use his second Skill and still has 80 Energy by the time you need his Burst (which is usually right after his second Skill).
While this sounds plausible, Ayato only regenerates 2 Energy per 1s off-field via his A4 Passive and he can only receive so many particles from his teammates. If he spends 6s off-field, he gains 12 Energy that he loses each time he uses his Skill while on 4pc Shimenawa’s Reminiscence. The “negative” Energy from 4pc SR’s passive significantly increases his ER requirements since it activates twice per rotation, effectively adding 30 Energy to his Burst cost. As a result, Ayato’s ER requirements can reach or exceed 200% in teams where he normally has a 130–140% ER requirement.
Even if you never used his Burst, it would still be a significant DPS loss since Ayato’s Burst contributes more damage than the relative gain using 4pc SR would have over using 4pc Heart of Depth or Gladiator’s Finale. Use literally anything else noted in the artifact set section.
Should I get a 5-star Sword or C1?
You do not need a 5-star Sword nor Constellations for Ayato. The information below is for those who have already decided they want to invest Primogems into him.
Ayato’s best R1 5-star Swords provide a greater DPS increase than his C1 (assuming you start with C0 Ayato and an R1 4-star Sword). Haran Geppaku Futsu is his best weapon, but Primordial Jade Cutter and Mistsplitter Reforged are very close second and third place options. If you want a 5-star Sword for Ayato, you can also use Jade Cutter or Mistsplitter if you already have them or they are currently on-banner and you wouldn’t mind getting the other 5-star on the weapon banner. Haran is only slightly better than them.
Ayato’s C1 provides a meager buff to his damage and its enemy HP condition limits its uptime. Even if you want to go for Ayato’s later (and better) Constellations, you should first ensure you own one of the top three recommended 5-star Swords.
Should I pull Constellations?
No, you never need to pull Constellations for a 5-star character. Ayato performs excellently at C0.
That being said, his C2, C3, C4, and C6 all provide very solid increases to his personal damage. In fact, C6 Ayato has one of the highest relative DPS increases compared to C0 Ayato among limited 5-star characters (almost 100% more personal damage). If you love the boba king and want to main Ayato, his C2, C3, and C6 are all good stopping points. His C1 and C5 are not worth the Primogems on their own.
As stated above, make sure you secure a 5-star Sword like Haran, Jade Cutter, or Mistsplitter before going for Constellations. They provide a greater DPS increase over his 4-star Sword options than his Constellations do over C0.
How do I optimize (min-max) Ayato?
Optimizing Ayato can be difficult. Ayato has many sources of damage: his Burst’s droplets (Bloomwater Blades), his Skill’s Illusion, his special Hydro Normal Attacks, and his Namisen stack damage. Moreover, his recommended 4-piece artifact sets all perform similarly to each other, with 2-piece Hydro DMG% combinations also being competitive depending on substats. Furthermore, Ayato may or may not be the trigger for reactions like Vaporize or Bloom. As such, determining Ayato’s best build for your account and chosen team is not always so clear.
No fear! You can use Genshin Optimizer along with one of the multi-opt configurations we made just for you. Directly copy the configs below by pressing the “Copy Config” button below the text area. Note that the configs assume single-target scenarios.
Note: When optimizing with 4pc Echoes of an Offering as an option, choose a Trigger Mode based on your average ping.
| Average Ping | Approx. Proc Rate | Procs per Skill |
| 0–30ms | 47.5% | ~7 |
| 30–100ms | 45.0% | ~7 |
| 100–500ms | 40.0% | ~6 |
| 500—1000ms | 35.0% | ~5 |
| >1000ms | 30.0% | ~4–5 |
- Solo Ayato
- Default
- Mistsplitter
- Ayato — Bennett — Kazuha — Fischl
- Default
- Mistsplitter
- Ayato — Bennett — Xiangling — Fischl
- Default
- Mistsplitter
- Ayato — Furina — Yelan — Xilonen
- Default
- Mistsplitter
- Ayato — Nahida — Shinobu — Fischl
- Default
- Mistsplitter
- 4pc TF
- 4pc TF + Mistsplitter
- Ayato — Thoma — Nahida — Baizhu
- Default
- Mistsplitter
- Ayato — Nilou — Nahida — Baizhu
- Default
Is Ayato worse than Neuvillette?
To answer this question, first ask yourself: is boba worse than water?
While Ayato and Neuvillette have similarly braindead, on-field Hydro DPS playstyles, they occupy different niches, enjoy different teammates, and slay in different team archetypes. Both of them have split field time and equally easy click-and-hold abilities, but Ayato does not have to worry about managing orbs (Sourcewater Droplets). Moreover, Ayato’s Burst provides sustained Hydro damage and application, whereas Neuvillette’s Burst deals a burst of damage and creates orbs. Ayato also has some off-field viability, but Neuvillette has none.
Their largest difference comes in terms of their personal damage and role in the team. Ayato’s Hydro application results in more Bloom-related reactions in Burgeon, Hyperbloom, and Nilou Bloom. While Neuvillette can certainly work in teams centered on Bloom reactions, the rate of Dendro Core production is often lower, with Neuvillette compensating via his raw damage. In contrast, Neuvillette is better-suited for hypercarry teams. While Ayato hypercarry teams can be viable, they require significantly more investment to deal comparable damage with Neuvillette’s hypercarry teams.
All this to say, Neuvillette is a strong unit, but his presence doesn’t make Ayato any weaker. Ayato never got nerfed and his teams’ damage isn’t going down either. Although Spiral Abyss is slowly becoming more difficult, Ayato can clear any of the game’s most-difficult content. At the end of the day, play who you like and don’t let doomposters get to your head!
Talents
 Normal Attack | Kamisato Art: Marobashi
Talent Description
Normal Attack
Performs up to 5 rapid strikes.
Charged Attack
Consumes a certain amount of Stamina to dash forward and perform an iai.
Plunging Attack
Plunges from mid-air to strike the ground below, damaging opponents along the path and dealing AoE DMG upon impact.
Ayato’s special Hydro-infused Normal Attacks (Shunsuiken) do not scale with his Normal Attack Talent.
When to Use "Normal" Attacks
His Physical Normal Attacks are almost never used in combat. The only instances where they may be used are at the beginning of a rotation to gain a stack of 4pc Nymph’s Dream or to enable Kagotsurube Isshin’s passive. While teams with Candace exist, Ayato still uses his Shunsuiken attacks instead of Hydro-infused “normal” Normal Attacks.
Ayato’s Plunging Attack is used in teams with Xianyun in a Plunging Attack DPS playstyle. A Physical Plunging DPS build is not recommended, but a Hydro or Pyro Plunging DPS is possible with Candace or C6 Bennett, respectively.
Attack Mechanics
With his “normal” Normal Attacks, Ayato performs a stylish sequence of 5 inputs and 6 hits (the 4th Normal Attack is a double-hit). He has a unique Charged Attack animation that lunges him forward. He can lunge through smaller enemies, but he cannot pass through larger enemies or solid objects (like Geo Constructs or trees).
Sheathing Animations
Ayato’s Normal and Charged Attacks have special sheathing animations, a trait shared among Inazuma Sword users with a sword art. Ayato can sheath his Sword after every Normal Attack (except his 4th NA), after his Charged Attack, and after any Shuinsuiken attack. He does not sheath his Sword after a Plunging Attack or after casting his Burst.
The sheathing animation occurs after a short period of time; it does not occur if you cancel it when Ayato walks, dashes, jumps, becomes staggered, or performs another ability.
 Elemental Skill | Kamisato Art: Kyouka
Talent Description
Kamisato Ayato shifts positions and enters the Takimeguri Kanka state.
After this shift, he will leave a watery illusion at his original location. After it is formed, the watery illusion will explode if opponents are nearby or after its duration ends, dealing AoE Hydro DMG.
Takimeguri Kanka
In this state, Kamisato Ayato uses his Shunsuiken to engage in blindingly fast attacks, causing DMG from his Normal Attacks to be converted into AoE Hydro DMG. This cannot be overridden.
It also has the following properties:
- After a Shunsuiken attack hits an opponent, it will grant Ayato the Namisen effect, increasing the DMG dealt by Shunsuiken based on Ayato’s current Max HP. The initial maximum number of Namisen stacks is 4, and 1 stack can be gained through Shunsuiken every 0.1s. This effect will be dispelled when Takimeguri Kanka ends.
- Kamisato Ayato’s resistance to interruption is increased.
- Unable to use Charged or Plunging Attacks.
Takimeguri Kanka will be cleared when Ayato leaves the field. Using Kamisato Art: Kyouka again while in the Takimeguri Kanka state will reset and replace the pre-existing state.
Ayato’s Elemental Skill provides the bulk of his damage. After casting his Skill, Ayato creates a water illusion and can perform consecutive Shunsuiken attacks. The water illusion deals damage if an enemy or certain environmental objects are nearby.
After using his Skill, Ayato cannot use his Charged or Plunging Attacks. If you are playing a Plunging DPS team with Xianyun, you should never use Ayato’s Skill.
Scaling and Snapshotting
Ayato’s Shunsuiken attacks and Namisen stacks are considered Normal Attack DMG. His water illusion is the only ability that scales with Elemental Skill DMG. Ayato’s Shuinsuiken attacks and water illusion scale with ATK. His Namisen stacks scale with HP.
Ayato’s water illusion snapshots on Skill cast, but his Shunsuiken attacks and Namisen stacks scale dynamically.
Shunsuiken Attacks
At C0, he usually performs 15 Shunsuiken attacks (N15). These attacks generate Hydro Particles and apply Hydro. Shunsuiken attacks have a noticeably large AoE, which means that Ayato can still hit enemies who are not tightly grouped.
Note that you can hold down the Normal Attack button to perform Shunsuiken attacks. You do not have to individually perform each Shunsuiken attack.
Particle Generation
When a Shunsuiken attack hits an enemy, it generates between 1–2 Hydro Particles (1.5 on average). This has a 2.5s internal cooldown, so Ayato can generate particles 3 times per Skill use. On average, this is 4.5 Hydro Particles per Skill.
Frame Dependence
The number of Shunsuiken attacks Ayato actually executes depends on your device’s frame rate. In most cases, Ayato performs 15 Shunsuiken attacks, but in certain cases he can perform 14 or 16, even without changes to his Attack SPD. While this isn’t a big deal in practice, it is something to note if you notice you aren’t performing exactly 15 NAs per Skill.
Attack SPD Buffs
Ayato’s Shunsuiken attacks are affected by Attack SPD buffs. Such sources include Ayato’s C4, Yun Jin’s C6, Jean’s C2, Mika’s Skill, Chongyun’s A1 Passive, and Skyward Blade’s passive. With a 15% Attack SPD buff, Ayato typically performs 1–2 additional Normal Attacks per Skill use. However, multiple Attack SPD buffs stack, so Ayato can go ham if you want to max out his Attack SPD. Note that Attack SPD has a cap of 160%, and any additional Attack SPD will have no effect.
Performing Fewer Shunsuiken Attacks
In some teams where Ayato is more Burst-oriented, it may be optimal to cut his Shunsuiken attacks short. For example, if Ayato is in a Ganyu Freeze team, the rotation allows Ayato to perform N10 instead of N15 so that Ganyu can perform 1 more Charged Attack. However, decreasing the number of Shunsuiken attacks also lowers his Hydro Particle generation, which increases his ER requirements.
If certain teams prefer shorter rotations and you can meet Ayato’s ER requirements, then you may consider using an N9–14 combo. Nevertheless, in almost all cases, you should just use N15.
Namisen Stacks
Namisen stacks seem complicated, but they are essentially just a buff to Ayato’s Shunsuiken attacks. They scale with HP (but not so much to warrant prioritizing HP stats), and they only trigger off Shunsuiken attacks.
Ayato gains stacks after using his Skill (A1 Passive), after his water illusion deals damage (A1 Passive), and as he continues to perform Shunsuiken attacks (innate). The max number of stacks at C0 is 4, while the max at C2 is 5. Ayato maxes out his Namisen stacks on his 1st to 3rd Shunsuiken attack, depending on whether his water illusion hits an enemy.
 Elemental Burst | Kamisato Art: Suiyuu
Talent Description
Unveils a garden of purity that silences the cacophony within.
While this space exists, Bloomwater Blades will constantly rain down and attack opponents within its AoE, dealing Hydro DMG and increasing the Normal Attack DMG of characters within.
Ayato’s Elemental Burst deals AoE Hydro damage through Bloomwater Blades, which we refer to as droplets. Characters within the Burst radius gain a Normal Attack DMG Bonus.
His Burst can snapshot, but this doesn’t factor into most rotations.
Droplet Targeting
Enemies within the Burst’s AoE are targeted by droplets for 18s. The droplets are summoned in 9 waves, with a maximum of 4 droplets per wave, and a maximum total of 35-36 droplets altogether (36 is the theoretical maximum if frames align perfectly). Each droplet targets a random opponent within the area if it has not been targeted by the last 3 droplets. If all enemies have been targeted by the last 3 droplets, or if there are no enemies in the area, then the next droplet strikes randomly. Enemies who are hit by a droplet that did not target them are not considered to be targeted. As a result, each enemy within the Burst AoE is guaranteed to be targeted by 9 droplets for its entire duration, with a random amount of additional hits occurring depending on enemy size or movement.
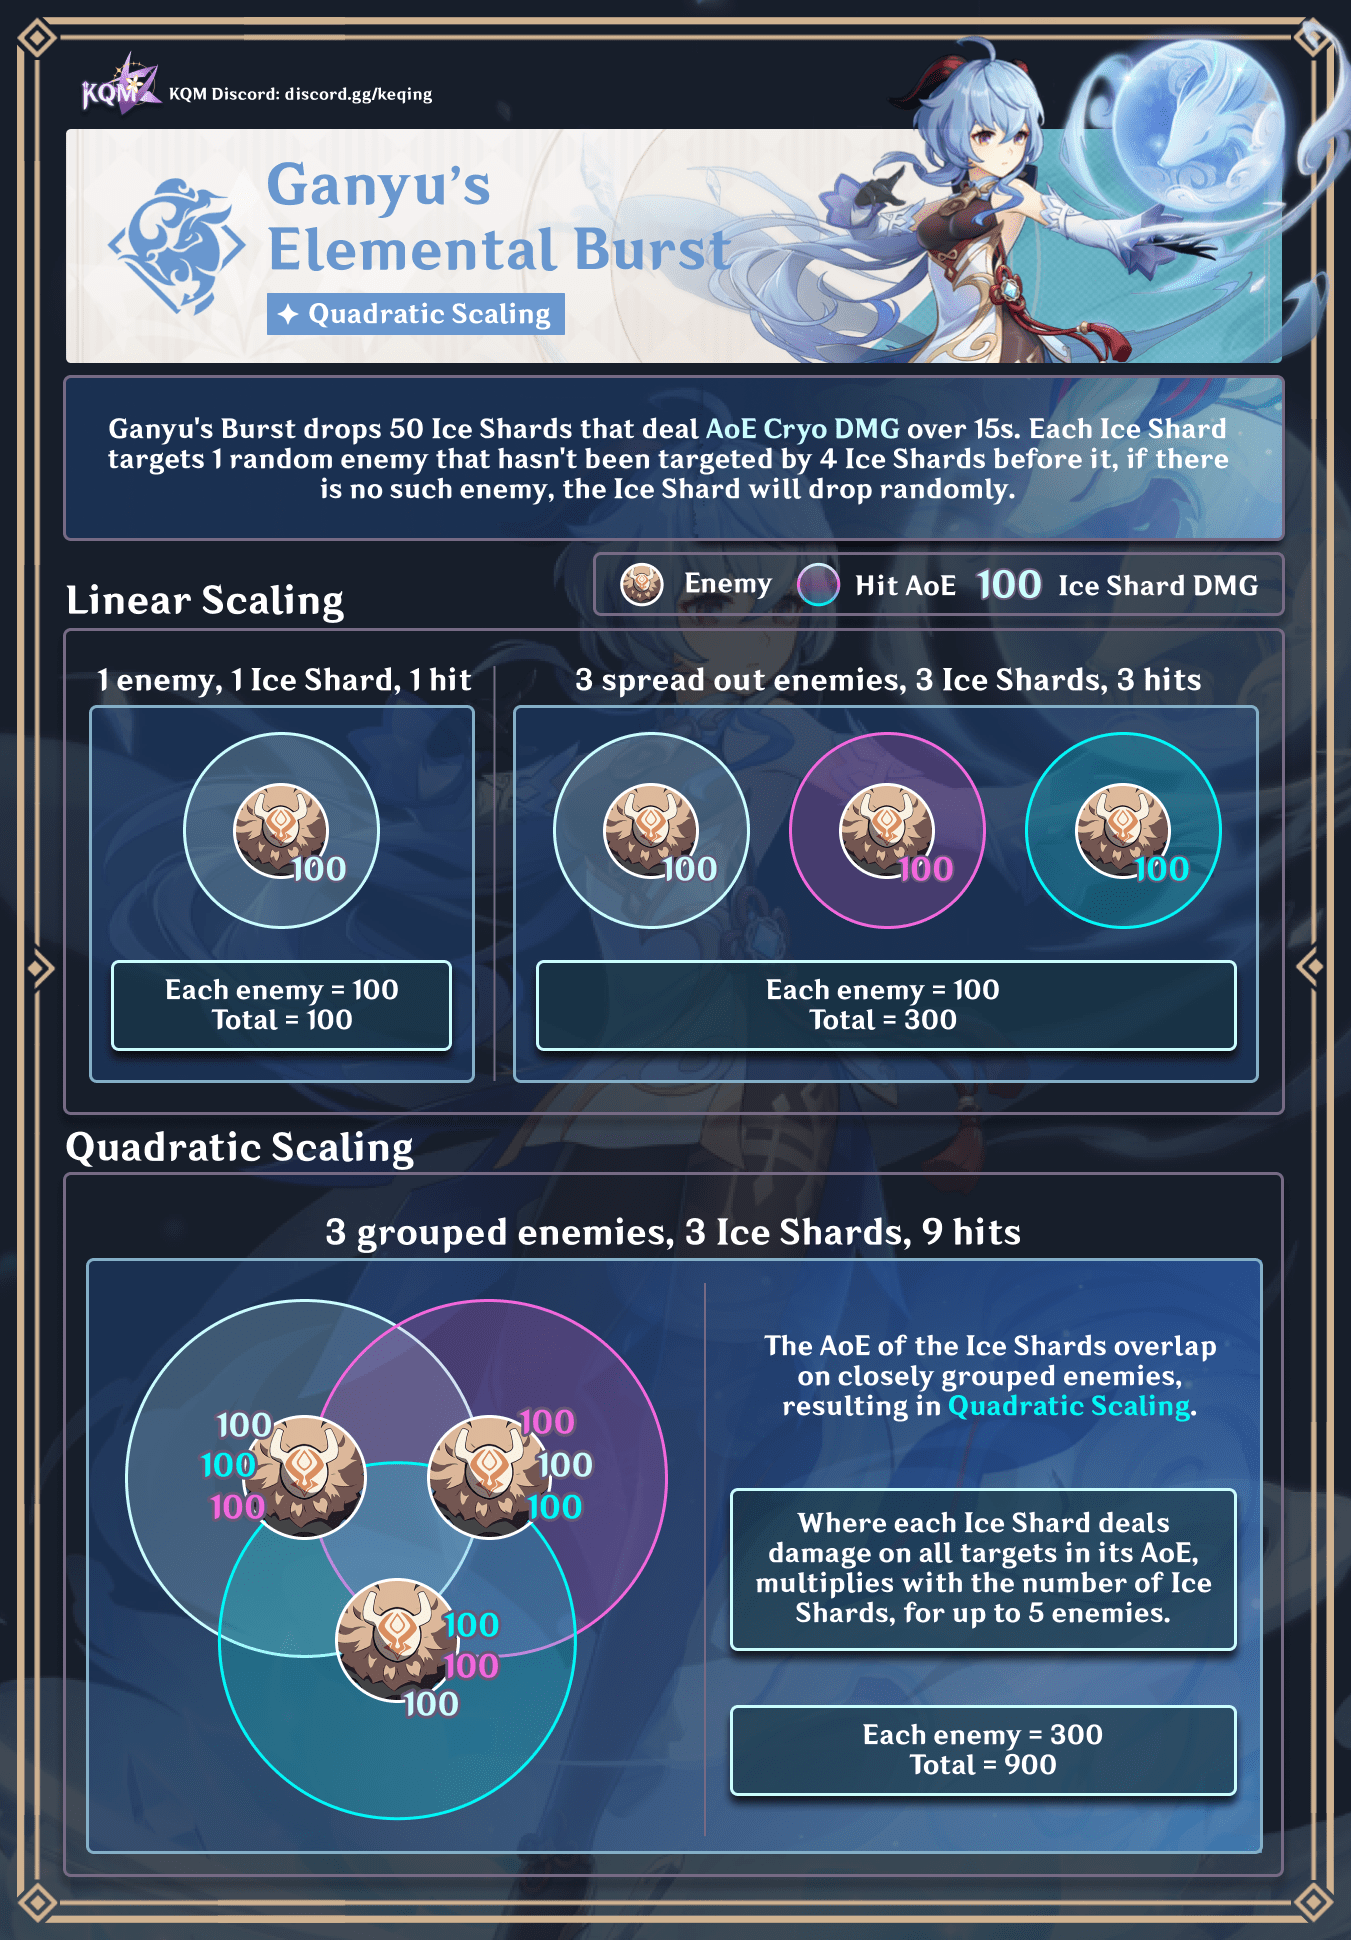
Quadratic Scaling
Individual droplets deal damage in a small AoE. Enemies that are grouped closely enough can take damage from droplets that target another enemy. This results in quadratic scaling damage; that is, the number of damage instances to each enemy can equal the number of enemies if they are grouped closely enough. For Ayato’s Burst, the quadratic scaling effect caps at 4 enemies.
The infographic below illustrates the concept of quadratic scaling for Ganyu’s Burst, but it applies just the same for Ayato’s Burst.
 Ascension 1 Passive | Kamisato Art: Mine Wo Matoishi Kiyotaki
Talent Description
Kamisato Art: Kyouka has the following properties:
- After it is used, Kamisato Ayato will gain 2 Namisen stacks.
- When the water illusion explodes, Ayato will gain a Namisen effect equal to the maximum number of stacks possible.
Ayato’s A1 Passive lets him start out with 2 Namisen stacks after casting his Elemental Skill. When his water illusion clone explodes, he gains the maximum amount possible of Namisen stacks (4 at C0–C1 or 5 at C2–C6).
Ascension 4 Passive | Kamisato Art: Michiyuku Hagetsu
Talent Description
If Kamisato Ayato is not on the field and his Energy is less than 40, he will regenerate 2 Energy for himself every second.
Ayato’s A4 Passive helps lower his ER requirements. Ayato typically uses his Burst at the start of a rotation and then swaps immediately off-field.
In his on-field DPS playstyle, he is usually off-field for 4-5s before returning to use his Skill and Shunsuiken attacks, so he can regenerate 8–10 Energy during this off-field time. After using his first Skill, he is usually at 40 Energy, so this passive doesn’t normally activate in his second period of downtime.
In 1 Skill rotations and his Burst-oriented DPS playstyle, Ayato is typically off-field for 5–10s before returning to the field. While his A4 Passive can regenerate 10–20 Energy during this time, his teammate particle generation helps push him well past 40 Energy before he returns to the field anyway (assuming you have enough ER%).
The Energy generated from this passive is Flat Energy, which is not affected by ER% stats. Do not build more ER% thinking that this passive will regenerate more Energy. ER% only affects incoming Energy gained from particles.
![]() Utility Passive | Kamisato Art: Daily Cooking
Utility Passive | Kamisato Art: Daily Cooking
Talent Description
When Ayato cooks a dish perfectly, he has a 18% chance to receive an additional "Suspicious" dish of the same type.
Ayato’s Utility Passive is amazing. Only Hu Tao can rival Ayato’s culinary “expertise”. It should come to no one’s surprise that Thoma really loves Ayato’s cooking.
In all honesty, there is no reason to use Ayato’s Utility Passive when cooking unless you are a 100% completionist who wants to obtain every Suspicious Dish without needing to use additional resources.
Or just do it for the memes. Why do we care?
Constellations
Ayato is perfectly fine at C0, and you do not need to pull any Constellations for him. None of his Constellations significantly expand his playstyle or notably increase quality of life. However, he does have one of the most consistent sets of Constellations in terms of personal damage increase.
If you want to pull for Constellations, Ayato’s C2 and C3 are good stopping points unless going for C6. It is not worth pulling solely for his C1. Ayato’s C5 has the lowest DPS increase among his Constellations.
Calcs for Constellation comparisons can be found here (last updated for Version 5.1).
 Constellation 1 | Kyouka Fuushi
Shunsuiken DMG is increased by 40% against opponents with 50% HP or less.
Ayato’s C1 is unreliable and dependent on enemy health. It has a minor impact on his damage in most cases. Theoretically, it provides on average20% DMG Bonus to his Shunsuiken attacks (including Namisen stacks); however, the average is slightly lower in practice since you almost always deal damage to below exactly 50% HP.
| DPS Increase from Previous: 6% | DPS Increase from C0: 6% |
 Constellation 2 | World Source
Namisen’s maximum stack count is increased to 5. When Kamisato Ayato has at least 3 Namisen stacks, his Max HP is increased by 50%.
Ayato’s C2 increases his usual cumulative Namisen stack damage from 57 stacks to 69 (assuming 15 Shunsuiken attacks per Skill), resulting in a significant damage increase. It also increases his Max HP by 50% if he has at least 3 active stacks.
The Max HP buff also affects Primordial Jade Cutter’s passive (Flat ATK buff based on Max HP), but it only results in a minor 2–3% DPS increase for Ayato.
| DPS Increase from Previous: 12% | DPS Increase from C0: 20% |
 Constellation 3 | To Admire the Flowers
Increases the Level of Kamisato Art: Kyouka by 3.
Maximum upgrade level is 15.
Ayato’s C3 is quite strong since it increases the damage from his Skill, the primary source of his damage. This Constellation also synergizes with his C2 by improving Namisen stack scaling.
| DPS Increase from Previous: 19% | DPS Increase from C0: 42% |
 Constellation 4 | Endless Flow
After using Kamisato Art: Suiyuu, all nearby party members will have 15% increased Normal Attack SPD for 15s.
Ayato’s C4 increases the whole team’s Normal Attack SPD, which allows him to perform 2–3 more Shunsuiken attacks per Skill. This results in a solid overall damage increase. In most rotations, his C4 Attack SPD buff runs out before the end of his 2nd Skill (unless on 4TF).
| DPS Increase from Previous: 14% | DPS Increase from C0: 62% |
 Constellation 5 | Bansui Ichiro
Increases the Level of Kamisato Art: Suiyuu by 3.
Maximum upgrade level is 15.
Ayato’s C5 increases his Burst’s damage, which results in a miniscule damage buff. Its value increases in multi-target scenarios with grouping, but it is ultimately unremarkable.
| DPS Increase from Previous: 2% | DPS Increase from C0: 66% |
 Constellation 6 | Boundless Origin
After using Kamisato Art: Kyouka, Ayato’s next Shunsuiken attack will create 2 extra Shunsuiken strikes when they hit opponents, each one dealing 450% of Ayato’s ATK as DMG.
Both these Shunsuiken attacks will not be affected by Namisen.
Ayato’s C6 provides a large amount of front-loaded damage after using his Skill, resulting in a considerable damage increase. Its value literally doubles if Ayato can trigger Vaporize on both additional hits. Since Ayato’s C6 hits do not have ICD and apply 1U Hydro, he can Vape both hits if Pyro is reapplied in time. Xiangling’s Burst and Jean Sunfire are the most consistent sources of Pyro application in this regard. Burning may also enable this, but further testing is required.
The second hit of Ayato’s C6 triggers Vape less consistently, especially if his Burst is active or if there is additional non-Pyro Elemental application. You can ensure that Ayato’s first NA does not hit or apply Hydro with an N1E cancel, which allows his C6 hits to more consistently Vape.
N1E Cancel
You can cancel Ayato’s 1st NA after using his Skill while still triggering his C6 by performing an N1E cancel. Perform a Physical NA immediately before using his Skill and another Normal Attack. If performed correctly, the C6 hits will deal damage before his normal Shunsuiken hit, which allows both C6 hits to Vape.
| Unvaped | DPS Increase from Previous: 18% | DPS Increase from C0: 96% |
| Vaped | DPS Increase from Previous: 36%+ | DPS Increase from C0: 126%+ |
Character Overview

I'm no stickler for doing things in a certain way. Whatever method you use, the important thing is that it delivers acceptable results.
Playstyles
Ayato is primarily an on-field DPS unit, but he does have some off-field potential via his Burst. This guide mainly focuses on Ayato’s on-field playstyle, but notes pertaining to his Burst-oriented playstyle appear when applicable.
On-Field DPS (2 Skills)
Ayato’s on-field DPS playstyle showcases every aspect of his kit design, so this is the best option if you want to get the most out of Ayato!
As an on-field DPS, Ayato uses two Elemental Skills per Burst with split field time; however, this extends rotations to roughly 26s since his Skill has a 12s cooldown. In this playstyle, Ayato’s primary source of damage is his Shunsuiken attacks (special Hydro Normal Attacks) over 6s of field time per Skill cast, but his Burst still contributes a fair amount of damage. In addition to his personal damage, Ayato can also enable or trigger Elemental Reactions in his teams.
A typical rotation in this playstyle is:
Ayato Q > Teammates > Ayato E N15 > Teammates > Ayato E N15 > repeat
Ayato splits his field time to accommodate his Skill’s cooldown. His Skill has a 12s cooldown but his Shunsuiken attacks only last around 6s, so his teammates need to fill the 6s downtime with their abilities.
Ayato’s best teams fill this downtime efficiently so you constantly deal damage and refresh abilities as needed. The split field time is also great for characters who have <12s Skill cooldowns or multiple Skill charges like Bennett, Fischl, Kazuha, Xiangling, Yelan, Baizhu, C4 Lynette, and C1 Sucrose.
Burst-Oriented DPS (1 Skill)
As a Burst-oriented DPS, Ayato uses only one Skill per Burst to decrease his field time. Instead of using his second Skill, he capitalizes on his Burst’s off-field AoE Hydro application to enable different reactions. While this playstyle is called “Burst-oriented”, Ayato’s Shunsuiken attacks (special Hydro Normal Attacks) still contribute a majority of his damage, unless there is significantly tight grouping with many enemies.
Using only 1 Skill per rotation considerably increases Ayato’s ER requirements, which means you have to divest from CRIT and ATK stats. Furthermore, his lower share of damage and lack of buffing utility means he often performs worse in this role compared to off-field Hydro units like Furina, Yelan, Xingqiu, Kokomi, and even Mona. Nevertheless, 1 Skill rotations can be optimal in certain Nilou Bloom teams, since it decreases rotation length and allows more consistent Bountiful Bloom generation.
A typical rotation in this playstyle is:
Ayato Q > Teammates > Ayato E N15 > (Teammates) > repeat
Ayato swaps off-field after using his Burst to maximize his A4 Passive’s Energy regeneration, and then he uses his Elemental Skill and special Hydro Normal Attacks towards the end of the rotation to recharge his Energy.
Since Ayato has higher ER requirements and a larger proportion of his damage comes from his Elemental Burst, 4pc Emblem of Severed Fate is usually the go-to artifact set in his Burst-oriented DPS playstyle.
Level and Talent Priority
Skill > Level 90 ≥ Burst
Ayato’s Skill Talent Level contributes the most to his personal damage output. His Shunsuiken attacks (special Hydro Normal Attacks), Namisen stacks, and Illusion damage all scale with his Elemental Skill Talent. Ayato’s Burst deals roughly 20% of his damage assuming 2 Skill casts, but its share of damage increases in multi-target scenarios with strong grouping and against larger enemy hitboxes. Even in 1 Skill rotations, Ayato’s Burst only accounts for roughly 33% of his overall damage, so his Skill should still be prioritized.
You should raise Ayato to Level 90 to maximize the damage from his Namisen stacks. In terms of prioritizing Ayato’s level or Burst, a level 90/90 Ayato with Level 6 Burst deals roughly the same damage as an 80/90 Ayato with Level 9 Burst.
Ayato’s special Hydro Normal Attacks (Shunsuiken attacks) do not scale with his Normal Attack Talent. The only circumstance where you would want to level Ayato’s Normal Attack Talent is if you pair him with Xianyun in a Plunging Attack DPS playstyle.
Rotations
Ayato has an interesting mix of Talent cooldowns and durations, which results in split field time in his on-field DPS playstyle.
Cooldowns, Durations and Downtime
The table below shows his Talent cooldown, duration, and the resulting downtime (difference in time) for Ayato’s Skill and Burst.
| Cooldown | Duration | Downtime | |
| Elemental Skill | 12s | 6s | 6s |
| Elemental Burst | 20s | 18s | 2s |
Ayato’s Skill has a 12s cooldown but only lasts for 6s or so (depending on hitlag). As a result, there is 6s of downtime until he can use his Skill again (assuming no cooldown reduction from teammates or 4pc Thundering Fury). Unfortunately, Ayato cannot fill this downtime himself since his only other option while on-field is to perform Physical Normal Attacks or drink boba. As a result, his teammates fill this downtime by casting and refreshing their abilities and buffs. Ultimately, you should accommodate 2 Skills in a rotation if possible, which requires at least 24s (in practice 25–26s).
Ayato’s Burst itself is relatively straightforward; however, its duration is only 18s while most Ayato rotations are 24–26s. As a result, his Burst is not active for the last 6–8s or so of a rotation (since he typically starts the rotation with his Burst). Consequently, Ayato’s last Normal Attack sequence cannot benefit from his Elemental Burst’s Normal Attack DMG buff. In some teams, Ayato uses his Burst in the middle of the rotation after his first Normal Attack sequence, but it is basically the same outcome in subsequent rotations.
Filling Downtime
Many of Ayato’s recommended teammates can accommodate this 12s cooldown – 6s downtime since their own abilities have cooldowns lower than 12s. Swapping 3 times usually results in 1–2s of additional field time not accounted for purely by character abilities. Since Ayato has 3 teammates, the sum of their abilities’ durations and swapping animations should wind up around 5–6s so Ayato can return to the field as soon as possible to deal more damage.
Here are a few notable teammate abilities that can be used during Ayato’s downtime. Note that most of these cooldowns are lower than 12s.
| Character | Ability | Cooldown | Field Time |
| Ayato | Burst | 20s | ~2s |
| Bennett | Tap Skill | 2–4s | ~1s |
| Xiangling | Skill | 12s | ~1s |
| Venti | Tap Skill | 6s | ~2s |
| Sucrose (C1) | Skill | 15s[1] | ~2s |
| Kazuha | Tap Skill | 6s | ~1s |
| Hold Skill | 9s | ~2s | |
| Fischl | Oz Refresh | 15/25s[2] | ~2s |
| Beidou | Tap Skill | 7.5s | ~1s |
| Hold Skill | 7.5s | ~2s | |
| Yelan | Tap Skill | 10s | ~1s |
| Hold Skill | 10s | ~3s | |
| Nahida | Tap Skill | 5s | ~1s |
| Hold Skill | 6s | ~2s | |
| Baizhu | Skill | 10s | ~2s |
[1]Sucrose can fill downtime with her Skill at C1 or with Sacrificial Fragments, due to the additional charge. Over successive rotations, the Skill will desync, so she can use her Burst when available instead.
[2]Fischl’s Skill has a 25s cooldown while her Burst has a 15s cooldown. This overall 25s cooldown fits in Ayato’s rotation length, and she alternates using her Skill and Burst to maintain Oz uptime.
Example
In a team like Ayato — Bennett — Kazuha — Fischl, you could fill downtime like:
Ayato > Bennett Skill > Fischl Burst > Kazuha Tap Skill > Ayato
In this example, the sum of Ayato’s teammates' field time is approximately 1 + 2 + 1 = 4s, which gives us 5–6s including swapping. This helps lower ER requirements, refresh buffs (4pc Viridescent Venerer and Kazuha’s A4 Passive), and refresh Fischl’s turret ability.
A full rotation could look like this:
Ayato Q > Bennett EQ > Fischl E > Kazuha N1 hEP Q > Ayato E N15 > Bennett E > Fischl Q > Kazuha N1 tEP > Ayato E N15 > repeat
4pc Thundering Fury
In certain Electro-Charged and Hyperbloom teams with Fischl, Ayato can hold 4pc Thundering Fury and lower his Skill cooldown by triggering Electro-Charged reactions. With enough Electro application, Ayato can reduce his Skill cooldown by 5–6s over the course of his Shunsuiken attacks. As a result, he can use his Skill again immediately after the first one. This not only “cuts out” 1 period of downtime in the rotation, but also allows all of Ayato’s Shunsuiken attacks to benefit from his Burst’s NA DMG% buff.
In a team like Ayato — Fischl — Shinobu — Nahida with Ayato on 4pc Thundering Fury, you could run a rotation like this:
Ayato Q > Nahida E > Shinobu E > Fischl E / Q > Ayato E N15 E N15 > repeat
This rotation is roughly 20s and both E N15 sequences occur during his Burst. Ayato’s 12s of continuous on-field Hydro application during Kuki’s Skill condenses Hyperbloom reactions into a shorter rotation. In a non-4TF playstyle, you’d need to run a ~30s rotation for full Shinobu Skill uptime since its cooldown and duration are 15s (insufficient for Ayato’s Skill cooldown timing). Fischl alternates using her Skill and Burst since the rotation is shorter than 25s.
Builds

Everything comes at a cost. And if you aspire to things that most could never dream of, then naturally, there will be an unimaginable price to pay.
Ayato’s recommended Nilou Bloom builds are noted in their own section after his typical build information.
ER Requirements
Ayato’s ER requirements vary depending on the number of Skills and Shunsuiken attack he performs per rotation. These numbers are approximate; ER requirements will vary depending on team and context. For a more accurate estimate of your ER requirements, use the Energy Recharge Calculator.
Calcs for ER requirements can be found here in this spreadsheet (last updated for 5.1). Every example team in this guide is included.
On-Field (2 Skills)
In most cases, you can get by with 135–140% ER, but you should still check your team’s specific requirement.
| # Skills | ER Requirement | |
| Solo Hydro | 2 | 130–160% |
| Double Electro | 2 | 115–145% |
| Double Hydro | 2 | 120–135% |
| Triple Hydro | 2 | 100–120% |
Burst-Oriented (1 Skill)
| # Skills | ER Requirement | |
| Solo Hydro (Freeze) | 1 | 155–175% |
| Double Hydro (Nilou) | 1 | 135–170% |
Assumptions:
- Safe particle generation
- Default enemy particles
- R3 Favonius weapons on teammates
- Zhongli 50% hit rate on pillar
- Guoba misses 1 hit without grouper
- Guoba misses 0 hits with grouper
- Units holding Favonius proc it every time they use their Skill as long as it is at least ~9s apart
Artifacts
 Sands |  Goblet |  Circlet |
| ATK% or ER% | Hydro DMG Bonus | CRIT DMG/Rate |
Substat Priority:
ER% (until requirement) > CRIT > ATK% > HP%
On-field DPS Ayato should always use an ATK% Sands. An ER% Sands can be used to meet Ayato’s ER requirements if he is used as a Burst-oriented DPS unit.
While Ayato can make use of HP% substats, they should not be prioritized over CRIT or ATK%. Even with Primordial Jade Cutter, ATK% outperforms HP% in both main stats and substats.
In Vape-related teams, Ayato can make use of EM substats, but since he is an inconsistent trigger for reactions, they still have lower overall value than CRIT and ATK% in most cases.
We recommend using Genshin Optimizer to compare your actual artifacts.
Artifact Sets
We recommend using Genshin Optimizer to compare your actual artifacts. The relative DPS of these artifacts is based on a very specific set of assumptions. What is best for you will change based on your team, weapon, and artifact substat quality.
Calcs for artifact comparisons can be found here (last updated for Version 5.1).
Assumptions:
• C0
• Talent Levels 9 / 9 / 9
• R1 Black Sword
• 133% ER Requirement
• ATK% | Hydro DMG% | CRIT DMG
DPS% ranges indicate unbuffed and buffed DPS values
Recommended Sets
| Artifact | DPS% | Notes |
 4pc Heart of Depth | 100% | 4pc Heart of Depth is one of Ayato’s best sets. It usually performs better without additional DMG% buffs from teammates or Ayato’s weapon, but the difference is minor. You do not have to worry about its passive since it always triggers for each E N15. Heart of Depth is available in the Strongbox, so you don’t have to farm its Domain. However, it may be a Resin-efficient option if you also play a Freeze DPS unit (like Ayato’s sister Ayaka). |
 4pc Gladiator’s Finale | 100–101% | 4pc Gladiator’s Finale performs very similarly to 4pc Heart of Depth. It performs slightly better with weapons that provide less ATK but more DMG% stats. Gladiator’s Finale does not have a Domain, but long-time players likely have good pieces from farming Bosses over the years. You can also use the Strongbox. |
 4pc Nymph’s Dream | 103–105% | 4pc Nymph’s Dream is a good option, performing on par with (or slightly better than) 4pc Gladiator’s Finale and 4pc Heart of Depth. Ayato can reach 3 stacks if his Skill’s water illusion clone hits an enemy. However, this can be difficult against highly mobile enemies. You should start the first rotation with a Physical Normal Attack to gain a stack before using Ayato’s Burst (since it snapshots). While slightly better than other 4-piece options, Nymph’s Dream shares its Domain with Vourukasha’s Glow, a typically Resin-inefficient option for most players (unless you also have Nilou). You can also use the Strongbox. Note: the calcs assume only 1 rotation. Nymph’s Dream is actually slightly better (2–4%) across rotations since Ayato’s Burst can snapshot 2 or 3 stacks in subsequent rotations. |
 4pc Echoes of an Offering | 7 Procs Per E 103–105% | 4pc Echoes is actually fine if you have high ping. Even if you get only 5 procs per Skill, the set still performs on par with 4pc Heart of Depth and 4pc Gladiator’s Finale. 4pc Echoes of an Offering provides an Additive Base DMG Bonus to Ayato's Normal Attacks; however, it heavily depends on your ping since the damage is calculated server-side. Despite this, even at 350ms ping, you can get at least 6 procs per Skill. Below 100ms, Ayato should typically proc the 4-piece effect for 7/15 NAs. The average expected proc rate at 0ms ping is 50.2% proc rate (or 7.53/15 NAs), but this is highly unrealistic. |
 2pc Hydro DMG% Combinations | 95–98% | • 2pc Hydro DMG% + 2pc Hydro DMG% • 2pc Hydro DMG% + 2pc ATK% • 2pc Hydro DMG% + 2pc Emblem of Severed Fate • 2pc Hydro DMG% + 2pc Marechaussee Hunter 2pc Hydro DMG% provides the strongest 2-piece set bonus for Ayato since it buffs all of his damage. Depending on your artifact substat quality, these 2-piece combinations may be your best option. 2pc Emblem of Severed Fate should not be overlooked since Ayato typically has ER requirements above 120%. The 20% ER is actually quite helpful! Use Genshin Optimizer to compare your actual artifacts. |
 Other 2pc Combinations | 93–94% | • 2pc ATK% + 2pc ATK% • 2pc ATK% + 2pc Emblem of Severed Fate • 2pc ATK% + 2pc Marechaussee Hunter • 2pc Marechaussee Hunter + 2pc Emblem of Severed Fate 2pc ATK% and 2pc Normal Attack DMG% are also valuable buffs to Ayato, but they do not buff his entire kit (in comparison to 2pc Hydro DMG%). Nonetheless, 2pc ATK% sets are plentiful, so these options can supersede the aforementioned sets depending on substat quality. Use Genshin Optimizer to compare your actual artifacts. |
 4pc Emblem of Severed Fate | 136% ER 92–94% | 4pc Emblem of Severed Fate is recommended for Ayato if he is the only Hydro character and he serves as a Burst-oriented DPS unit. However, it does have comparable damage to some of his 2-piece set combinations even in his on-field DPS playstyle. Since Emblem of Severed Fate is commonly farmed by the playerbase, it could be your best option depending on substats. |
Niche Sets
These sets depend on specific circumstances to be viable. They are not recommended to farm specifically for Ayato.
 4pc Marechaussee Hunter | 4pc Marechaussee Hunter is a great option in teams with Furina. However, you can easily overcap on CRIT Rate with CRIT Rate Swords. 4pc Marechaussee Hunter is not recommended outside of teams with Furina since Ayato cannot reliably trigger its 4-piece effect on his own. Corrosion in Spiral Abyss may be the only other circumstance that warrants its use. |
 4pc Thundering Fury | 4pc Thundering Fury is an option in certain Electro-Charged and Hyperbloom teams with 2 Electro characters, with at least one being Fischl. In these teams specifically, its 4-piece effect reduces Ayato’s Skill cooldown enough to perform consecutive Skill uses without a 6s break. The DPS increase from using this set is minor in Electro-Charged teams (around 5–6%); however, it is a larger DPS increase in Hyperbloom teams since Ayato can apply Hydro on-field for 12–13s straight. If Resin-efficiency is an issue but you enjoy playing 4pc TF Ayato, you can always Strongbox it! |
 4pc Blizzard Strayer | 4pc Blizzard Strayer is only viable in Freeze teams. It outperforms other options assuming high Freeze uptime. However, you can easily overcap on CRIT Rate with CRIT Rate Swords. It may be better for Ayato’s Cryo teammates to hold 4pc Blizzard Strayer instead and for Ayato to hold one of his recommended sets above, depending on your artifact availability. |
 4pc Unfinished Reverie | 4pc Unfinished Reverie is viable in specific Burgeon and Burnvape teams: Ayato — Thoma — Dendro — Dendro Ayato — Thoma — Nahida — Electro Ayato — Bennett – Xiangling – Nahida / Emilie These teams have consistent enough Burning uptime to maintain full stacks throughout the rotation. Other Burgeon teams have too much Elemental application for Burning to persist or appear enough throughout the rotation. Note that Beidou applies too much Electro in 2–3 enemy scenarios for consistent Burning uptime in Burgeon teams. Ayato receives the full 4-piece set bonus at the start of combat and can snapshot the buff onto his Burst even before a Burning reaction starts. In subsequent rotations, Burning needs to occur during his last Skill to ensure his Burst snapshots full stacks again. |
Weapons
Calcs for weapon comparisons can be found here (last updated for Version 5.1).
Assumptions:
• C0
• Talent Levels 9 / 9 / 9
• 4pc Heart of Depth
• 133% ER Requirement
• ATK% | Hydro DMG% | CRIT DMG
Unbuffed values assume no team buffs at all (Solo Ayato)
Buffed values assume Bennett and Kazuha in this rotation: Ayato Q > (Bennett EQ) > (Other Teammate) > (Kazuha EQ) > Ayato E N15 > (Team) > (Kazuha E) > Ayato E N15
Ayato’s first E N15 is buffed by Bennett, Kazuha, and his Burst
His second E N15 is buffed only by Kazuha.
Recommended Weapons
DPS% is in relation to R1 Black Sword.
| Weapon | Unbuffed | Buffed | Notes |
 Haran Geppaku Futsu Haran Geppaku Futsu | R1: 125% R5: 146% | R1: 123% R5: 142% | Haran Geppaku Futsu is Ayato’s Best-in-Slot. It provides Ayato with a myriad of beneficial stats. Ayato’s rotations almost always accommodate its passive effect, which requires teammates to use their Elemental Skills. |
 Primordial Jade Cutter Primordial Jade Cutter | R1: 124% R5: 145% | R1: 121% R5: 138% | Primordial Jade Cutter is Ayato’s second-strongest weapon. It provides high CRIT Rate and an unconditional passive effect. Primordial Jade Cutter is also a more universal weapon that performs better than Haran on other Sword characters. At C2+, this weapon may outperform Haran depending on available artifacts. You should still prioritize ATK% stats over HP% if you play Primordial Jade Cutter. |
 Mistsplitter Reforged Mistsplitter Reforged | R1: 118% R5: 137% | R1: 117% R5: 132% | Mistsplitter Reforged is Ayato’s third-best option. Ayato can struggle to maintain maximum stacks in his typical rotations, which makes it fall further behind his top two picks. The stack from casting his Burst only lasts 10s, so it persists only for the first E N15 sequence. He typically has 2–3 stacks for his Burst and first E N15 sequence, and then 1–2 stacks for the second E N15. |
 Uraku Misugiri Uraku Misugiri | No Geo R1: 108% R5: 115% With Geo R1: 115% R5: 127% | No Geo R1: 108% R5: 114% With Geo R1: 114% R5: 127% | Uraku Misugiri is a good option, even in teams without a Geo teammate. If you play Ayato with a Geo teammate (like Zhongli or Xilonen), its damage output can compete with Mistsplitter Reforged. Note that it is not worth forcing one just for Uraku. |
 Light of Foliar Incision Light of Foliar Incision | 40 EM R1: 107% R5: 112% 240 EM R1: 114% R5: 126% | 40 EM R1: 107% R5: 112% 240 EM R1: 113% R5: 124% | Light of Foliar Incision is a strong option for Ayato. At R1, it generally performs on par with R5 Black Sword, but its viability improves with EM buffs (e.g., Sucrose’s A1/A4, Kazuha’s C2, Nahida’s A1). You should not build EM for this weapon since other stats like CRIT and ATK% are still more impactful. |
 Absolution Absolution | No Bond of Life R1: 105% R5: 111% | No Bond of Life R1: 106% R5: 111% | Absolution is a solid stat stick that provides a lot of CRIT DMG. It is very rare for Ayato to increase a Bond of Life and benefit from the weapon’s DMG% passive in combat outside of Fontaine. |
 Summit Shaper Summit Shaper | No Shield R1: 104% R5: 108% Shield R1: 108% R5: 116% | No Shield R1: 99% R5: 103% Shield R1: 103% R5: 110% | Summit Shaper is a solid option in buffless teams, but it falls behind with ATK buffs from teammates like Bennett. It performs slightly better in teams with a shield, but it is still one of Ayato's lowest-performing 5-star options. |
 Splendor of Tranquil Waters Splendor of Tranquil Waters | No Passive R1: 102% | No Passive R1: 102% | Splendor of Tranquil Waters is a decent stat stick for Ayato if you have a spare. However, you may be better off giving this weapon to a character that can better use its passive. Even in teams where its passive can be triggered (like with Furina), the buff only increases his Skill’s water illusion damage and his HP (which affects Namisen stacks), but those account for a much smaller proportion of his overall damage compared to his Normal Attacks and Burst. |
 The Black Sword The Black Sword | R1: 100% R5: 106% | R1: 100% R5: 106% | The Black Sword is one of Ayato’s strongest 4-star weapon options. It provides a valuable CRIT Rate secondary stat and a Normal Attack DMG Bonus. Refinements from R1 to R5 only result in a 6–7% DPS increase. |
 Skyward Blade Skyward Blade | R1: 99% R5: 105% | R1: 99% R5: 105% | Skyward Blade helps meet Ayato’s ER requirements and performs roughly on par with R1 Black Sword. Ayato can execute a couple more slashes per Skill thanks to the Attack SPD buff from its passive. Note that the number of additional Normal Attacks depends on your frame rate, so it could be 1–3 additional attacks depending on your device. |
 Kagotsurube Isshin Kagotsurube Isshin | R1: 98% | R1: 94% | Kagotsurube Isshin is Ayato’s best free option, available from Kazuha’s second Story Quest. It provides ATK% and not much else. Ayato can snapshot its passive effect onto his Burst, so perform a single Normal Attack before using his Skill or Burst if you are using this weapon. |
 Sturdy Bone Sturdy Bone | R1: 95% R5: 100% | R1: 109% R5: 116% | Sturdy Bone is a gacha-exclusive weapon that buffs the damage from Ayato’s Shunsuiken attacks based on his total ATK stat after he dashes. It performs on par with The Black Sword when Ayato is unbuffed or paired solely with Bennett. However, its performance improves greatly with DMG buffs and Hydro RES Shred, rivaling R1 Mistsplitter Reforged in such scenarios. This weapon’s relative strength decreases in multi-target scenarios since the Normal Attack buff lasts for up to 18 instances of damage. For example, against 3 enemies, the buff runs out after just 6 Shuinsuiken attacks. As such, its strength is limited to single-target scenarios. While additional ATK stats are nice, do not prioritize them over CRIT stats even with this weapon. |
 The Flute The Flute | R1: 94% R5: 98% | R1: 90% R5: 93% | R5 Flute performs on par with Kagotsurube Isshin, so there is not much point in using it. Nonetheless, it matches Ayato’s aesthetic much more closely than Isshin, so feel free to use it for the drip. |
 Finale of the Deep Finale of the Deep | Cleared R1: 95% R5: 100% Uncleared R1: 92% R5: 94% | Cleared R1: 94% R5: 97% Uncleared R1: 90% R5: 92% | R1 Finale of the Deep performs on par with Kagotsurube Isshin if you can consistently clear the Bond of Life with a healer. It performs slightly better with refinements. You should not use Finale of the Deep if you play a team without a strong healer. Despite this, it matches Ayato’s aesthetic more closely than Isshin, so feel free to use it if you can consistently clear the Bond of Life. |
 Lion’s Roar Lion’s Roar | 80% Uptime R1: 96% R5: 103% | 80% Uptime R1: 92% R5: 101% | In Electro-Charged teams only, R5 Lion’s Roar is a strong 4-star option for Ayato. In teams with Fischl and another Electro unit, you can expect roughly 80% uptime on its passive. In other cases, Lion’s Roar performs very poorly. |
 Harbinger of Dawn Harbinger of Dawn | Passive R5: 101% No Passive R5: 82% | Passive R5: 103% No Passive R5: 84% | R5 Harbinger of Dawn is a strong option only if you can keep Ayato above 90% Max HP. It performs on par with R1 Black Sword in these circumstances. However, it is unusual for Ayato to maintain the passive effect due to his on-field presence and typical teammate selection (lack of shielders or healer other than Bennett). |
Not Recommended
These weapons may not be recommended for Ayato for a variety of reasons.
| Weapon | Unbuffed | Buffed | Notes |
 Wolf-Fang Wolf-Fang | R1: 96% R5: 99% | R1: 98% R5: 99% | If you want just an R1 Battle Pass Sword and not a weapon for Ayato specifically, pick R1 Wolf-Fang. It’s only 2–4% less DPS than R1 Black Sword and is preferred on more characters. If you are an Ayato main but can’t go for a 5-star, Black Sword is the better choice. Notable Sword DPS characters who prefer Wolf-Fang over Black Sword: Alhaitham Ayaka Chiori Furina Kaeya Xingqiu |
 Blackcliff Longsword Blackcliff Longsword | R1–R5: 90%(No Passive) | R1–R5: 91%(No Passive) | It is not worth the Starglitter to purchase Blackcliff Longsword. In single-target scenarios, you will never trigger its passive. If you can maintain 3 stacks on its passive in multi-target scenarios, then it performs on par with Black Sword at R1. However, since you need to defeat 3 enemies before then, the actual average DPS is lower. |
 Amenoma Kageuchi Amenoma Kageuchi | R5: 89% | R5: 89% | You should not use Amenoma Kageuchi on Ayato. Most of his rotations start with his Burst, so you cannot benefit from the passive until the second rotation. As a result, you still need to build enough ER% to meet his ER requirements without its passive. You should not delay using Ayato’s Burst later in the rotation to accommodate Amenoma’s passive; this significantly lowers DPS even with the lowered ER requirements across several rotations. |
Nilou Bloom EM Build
You can still use Ayato’s typical ADC build in Nilou Bloom teams. EM builds are optimal by roughly 10–15%.
Ayato’s optimal build for Nilou Bloom is very different from his typical ADC build, but you do not need to farm an entirely new set for him. The build information below is provided for min-maxing optimization and comprehensiveness. You could also employ a “hybrid” DPS build that has significantly more EM stats or even an EM Sands or Goblet. They are all fine to use as long as you meet Ayato’s ER requirements.
Nilou Bloom EM Build Artifact Stats
 Sands |  Goblet |  Circlet |
| EM or ER% | EM | EM |
Substat Priority:
ER% (until requirement) > EM >> CRIT > ATK% > HP%
Rough ER Requirements: 145–170% ER
In Nilou Bloom teams, Ayato should focus on EM stats since he is the primary Bloom trigger. An ER% Sands can be used to meet Ayato’s ER requirements if they cannot be met with substats and his weapon.
Ayato’s ER requirements here were calculated assuming certain teammates hold Favonius weapons. If there are no Favonius teammates, his ER requirements can be anywhere from 180–240% (since he typically only uses 1 Skill per rotation).
We recommend using Genshin Optimizer to compare your actual artifacts, along with one of the multi-opt configs below.
Nilou Bloom EM Build Artifact Sets
Ayato’s recommended artifact sets in Nilou Bloom maximize his EM stats and Bloom damage.
 4pc Flower of Paradise Lost | 4pc Flower of Paradise Lost is Ayato’s Best-in-Slot artifact set in Nilou Bloom. Its 2-piece set bonus provides 80 EM, and its 4-piece set bonus provides a strong boost to Bountiful Bloom damage. This set can be worth farming if you play a lot of different Nilou Bloom teams, but it shares its Domain with Desert Pavilion Chronicle, which is really only viable on Wanderer. You can also use the Strongbox. |
 4pc Gilded Dreams | 4pc Gilded Dreams is a good option in Nilou Bloom teams. However, its 4-piece effect only provides 100 EM in Ayato–Nilou teams, which is only 20 EM greater than another 2pc EM set. |
 2pc Mixed Sets | 2pc Gilded Dreams 2pc Flower of Paradise Lost 2pc Wanderer’s Troupe 2pc Emblem of Severed Fate These 2-piece sets provide Ayato with EM or ER% stats, his primary build targets in Nilou Bloom. They can be a great option if they have better substats than a 4-piece set. |
Nilou Bloom EM Build Weapons
Ayato’s best picks for Swords in a Nilou Bloom team maximize his EM stat or help him reach his ER requirements.
 Xiphos’ Moonlight Xiphos’ Moonlight | Xiphos’ Moonlight is one of Ayato’s top picks in Nilou Bloom since it provides an EM secondary stat and lowers team ER requirements. Its only drawback is that it is a banner-limited 4-star, so you are unlikely to have it. Nonetheless, it is a solid pick even at R1! |
 Favonius Sword Favonius Sword | Favonius Sword is one of Ayato’s best options in a Nilou Bloom team. Its ER secondary stat usually meets his requirements (assuming Favonius procs), which allows him to fully invest into EM. It also slightly lowers the ER requirements of his teammates. Some minor investment into CRIT Rate is necessary to consistently trigger its passive. |
 Fleuve Cendre Ferryman Fleuve Cendre Ferryman | Fleuve Cendre Ferryman is a free Sword awarded from fishing in Fontaine. It usually meets Ayato’s ER requirements by itself, which allows him to fully invest into EM for Nilou Bloom teams. This is basically a free-to-play replacement for Favonius Sword. After casting Ayato’s Burst, you should also cast Ayato’s Skill (without attacking) and swap off. This lets Ayato benefit from the ER% buff for 5s while he is off-field. Its passive buff only buffs his Skill’s water illusion damage; it does not buff his Shunsuiken attacks. |
 Iron Sting, Toukabou Shigure Iron Sting, Toukabou Shigure | Iron Sting and Toukabou Shigure are free-to-play 4-star Swords with an EM secondary stat. While their passives provide a DMG% buff to Ayato’s personal damage, it is fairly insignificant in relation to Ayato’s Bloom damage. If you have to choose between a 4-star EM Sword and a 4-star ER% Sword (that isn’t Xiphos’ Moonlight), you get more EM and ER% if you choose an ER% Sword with an EM Sands (assuming similar substat rolls). |
 Freedom-Sworn Freedom-Sworn | Freedom-Sworn has the highest EM secondary stat among Swords. Its passive buffs Ayato’s Shunsuiken attacks, but the buff is modest at best in Nilou Bloom teams since most of Ayato’s damage comes from Bountiful Bloom. |
 Sapwood Blade Sapwood Blade | Sapwood Blade is a craftable 4-star Sword with an ER% secondary stat. While its passive seems like a good option in Nilou Bloom, it has some limitations. The Leaf can be cumbersome or impossible to pick up in certain scenarios. In Nilou Bloom teams, Ayato is the primary trigger, so he would be the one to pick it up. While Nahida could pick it up to buff her EM, that is less impactful than directly buffing Ayato. In Nilou Bloom teams, Ayato activates the passive basically as soon as his Burst hits an enemy. The resulting leaf lasts 10s on-field and its buff lasts 12s. If Ayato picks up the Leaf near the start of the rotation, he can buff the Bountiful Blooms created by his Burst for a majority of its uptime. If Ayato returns to the field to pick up the Leaf within 5s before using his Skill, it will buff the Bountiful Bloom damage created by his Shunsuiken attacks. |
Synergies
Ayato currently shines in Dendro teams. One or two Dendro teammates can be used in his Hyperbloom, Burgeon, and Nilou Bloom teams.
 Nahida Nahida | Nahida is an excellent teammate in Ayato’s Hyperbloom, Burgeon, and Nilou Bloom teams. Nahida’s Dendro application can persist through an entire rotation, only needing to be reapplied for new waves of enemies. She also provides strong personal damage and an EM buff (that is mostly useful in Nilou Bloom teams or if Ayato holds Light of Foliar Incision). |
 Baizhu Baizhu | Baizhu is a strong defensive choice and good buffer in Ayato’s Dendro-related teams. Additionally, he can use his Skill twice per rotation thanks to Ayato’s split field time, thereby lowering his ER requirements. Note that Baizhu’s A4 buff is primarily relevant in Nilou Bloom since it only benefits the on-field character (i.e., Ayato doesn’t benefit in Hyperbloom or Burgeon). Ayato’s teams appreciate Baizhu’s healing, but Ayato himself doesn’t really benefit from his interruption resistance since Ayato has innate interruption resistance during his Skill. Baizhu is one of three defensive Dendro options available in Nilou Bloom teams, alongside Yaoyao and Kirara. |
 Yaoyao Yaoyao | Yaoyao is a 4-star alternative to Baizhu. She is a strong option for Nilou Bloom teams and a solid secondary option for Hyperbloom and Burgeon teams. She provides 15s of single-target Dendro application and healing with her Skill. Outside of Nilou Bloom teams, Yaoyao does not need to worry about using her Burst (except for emergency healing), which removes any need to build ER%. |
 Kirara Kirara | Kirara is viable in Nilou Bloom teams as a defensive Dendro option. Her shield provides 250% damage absorption against Dendro DMG, making her an ideal shielder. She lacks off-field Dendro application, which prevents her from being the sole Dendro character in Hyperbloom or Burgeon teams. She can be used as a second Dendro character to provide a shield and Dendro Resonance. Her 8–12s Skill cooldown syncs well with Ayato, allowing her to provide full shield uptime in Nilou Bloom teams. |
 Collei Collei | Collei is a great free option in Ayato’s Dendro-related teams since her cooldowns line up well. Her 12s Skill cooldown syncs perfectly with Ayato, while her 15s Burst cooldown can allow 30s Hyperbloom or Burgeon rotations. It can be difficult to position her Burst correctly, but she is a good option nonetheless. Collei can also hold Elegy for the End or Favonius Warbow to provide additional support to the team. |
 Dendro Traveler Dendro Traveler | Dendro Traveler is a decent free option. Their Burst can provide primary Dendro application in Bloom-related teams, but their Burst’s 20s cooldown and 15s duration prevents consistent Dendro Core production throughout the rotation. In Burgeon teams, their Elemental Burst must make contact with Hydro or Electro before Pyro to avoid exploding the Burst prematurely. |
 Emilie Emilie | Emilie is an off-field damage dealer who is only seen in Ayato’s Burnvape teams. Her Skill has a 14s cooldown and 22s duration, allowing rotations where she takes the field once or twice (24s or 28s rotation lengths). She is most commonly used alongside Bennett and Xiangling, but other teams with Thoma or Dehya could also work. |
Geo teammates (with the exception of Xilonen) are generally not recommended with Ayato; however, they can be viable in a few team archetypes.
 Xilonen Xilonen | Xilonen is a fantastic support for Ayato. She provides up to 36% Hydro RES Shred with her Skill and a 40% Hydro DMG buff with 4pc Scroll of the Hero of Cinder City (upon triggering Hydro Crystallize). Her Skill cooldown is 7s and her RES Shred lasts 15s, which means that her buffs have basically 100% uptime in teams with Ayato. She performs similarly to Kazuha in most teams, but there are a few notable differences. Xilonen can heal with her Burst and shred enemy RES without needing to Swirl; Kazuha can group enemies and enable “chain reactions” in reaction-based teams. Ultimately, Xilonen may be the preferred support against certain enemies and in single-target scenarios. |
 Zhongli Zhongli | Zhongli provides the strongest shield in the game and 20% Universal RES Shred against enemies. He can either hold 4pc Tenacity of the Millelith or 4pc Archaic Petra to further buff Ayato. However, these buffs may be unreliable due to issues like his Skill’s limited AoE and potential to despawn when damaged or placed on enemies. Zhongli is a comfortable replacement for an Anemo character in certain teams if you lack other viable healer or shielder options. |
 Chiori Chiori | Chiori is an option in Double Geo teams with Zhongli or Xilonen to enable Geo Resonance and deal consistent off-field Geo damage. With Zhongli she can create 2 Tamoto dolls, which increases her own damage. In teams without a Geo Construct teammate, she deals comparable damage to Albedo. |
 Albedo Albedo | Albedo is an option in Ayato’s Vape and Mono Hydro teams. His Skill can persist through an entire rotation, as long as it isn’t destroyed by an enemy. He pairs well with other Geo units to enable Geo Resonance in Ayato’s Hypercarry teams. While Albedo can provide a 125 EM buff with his Burst thanks to his A4 Passive, this buff is only useful for teams like Vape, Hyperbloom, and Burgeon. Use Albedo’s Burst to fill downtime as needed, but do not force a rotation that plays around it. |
 Yun Jin Yun Jin | Yun Jin generally underperforms with Ayato compared to off-field DPS options like Fischl or Xiangling. While her Normal Attack buff seems like a logical choice to increase Ayato’s damage, it runs out rather quickly in AoE scenarios and is outweighed by other characters’ more powerful damage and buffs. Ultimately, Yun Jin is only recommended with significant vertical investment into Ayato. |
 Kachina Kachina | Kachina is an off-field damage dealer who can employ 4pc Scroll of the Hero of Cinder City to provide a 40% Hydro DMG buff to Ayato. Despite this, her damage potential and 4pc Scroll buff do not make her worth using over most other units unless you desperately need a buffer. |
Anemo units are strongly recommended in Ayato’s non-Dendro teams due to their ability to hold 4pc Viridescent Venerer (which shreds enemy Hydro RES with Hydro Swirls).
 Kazuha Kazuha | Kazuha is one of Ayato’s most recommended Anemo teammates in all of his non-Dendro teams. He provides a DMG% buff with his A4 Passive, groups enemies with his Skill, and provides good off-field damage with his Burst. Kazuha maintains full uptime on his buffs (A4 Passive DMG% buff and 4pc VV RES Shred) in Ayato’s teams thanks to his short Skill cooldowns that sync with Ayato’s downtime. In most teams, Kazuha uses 1 Tap Skill and 1 Hold Skill. In a couple teams, Kazuha can use his Skill 3 times per rotation, but this is rare. He can also help with Ayato’s ER requirements by holding Favonius Sword or Xiphos’ Moonlight. Kazuha can easily proc the Favonius passive with his Skill Plunge sequence. While Kazuha does not typically enable quadratic scaling on par with Venti, his grouping is sufficient for Ayato’s Shunsuiken attacks and some additional Burst hits. |
 Venti Venti | Venti is a strong option in Ayato’s non-Dendro teams, especially Anemo Overvape, Electro-Charged, and Freeze. Venti’s Burst grouping enables Ayato’s Burst’s quadratic scaling, which increases his damage. Ayato’s Shunsuiken attacks can also hit fully-lifted enemies within Venti’s Burst. As such, Venti is a fantastic choice in high AoE mob content. In Anemo Overvape teams, Venti’s Burst should absorb Pyro to trigger Overvape. In Electro-Charged teams, Venti’s Burst should absorb Hydro by default, which lowers Ayato’s ER requirements due to his A4’s Energy refund. |
  Sucrose / Heizou Sucrose / Heizou | Sucrose and Heizou are good options in Ayato’s Vape, Anemo Overvape, and Electro-Charged teams. They buff team EM and can hold Thrilling Tales of Dragon Slayers to increase Ayato’s ATK. In Freeze teams, Heizou is preferred over Sucrose due to his higher personal damage and slightly easier grouping. Sucrose’s EM buffs are not important in Freeze teams. While Sucrose’s C6 seems like a good source of DMG Bonus, her Burst’s absorption is unreliable and her ER requirements are quite high if you want to use her Burst every rotation. |
 Lynette Lynette | Lynette is a viable option in Ayato’s non-Dendro teams thanks to her Taunt, minor ATK% buff, and single-target Elemental application (depending on which Element her Burst absorbs). Among Anemo characters, Lynette also has the highest personal, non-Swirl damage after Venti and Kazuha. If she manages to absorb Pyro into her Burst, then Ayato may be able to trigger a few additional Vapes. |
 Jean Jean | Jean is a notable teammate in Ayato’s Overvape teams thanks to the “Sunfire” interaction between her Burst and Bennett’s Burst. Her C2’s Attack SPD buff is also a nice buff to Ayato, letting him perform a couple more Shunsuiken attacks per Skill. Jean is also a recommended Anemo healer in Ayato’s teams with Furina thanks to her teamwide healing. |
 Sayu Sayu | Sayu is a 4-star alternative to Jean who provides decent healing. However, she cannot enable the “Sunfire” interaction. She also deals lower personal damage and has higher ER requirements. |
 Xianyun Xianyun | Xianyun enables a Plunging Attack DPS playstyle for Ayato. Since Ayato’s Skill only converts his Normal Attacks, Ayato performs Physical Plunging Attacks without external Infusion from teammates. As such, Ayato should be played as a Pyro DPS with C6 Bennett or a Hydro DPS with Candace in teams with Xianyun. For example, Ayato — Xianyun — C6 Bennett — Furina or Ayato — Xianyun — Bennett — Candace. Even if you don’t play Ayato as a Plunging Attack DPS, she is an effective alternative to Jean as a teamwide healer. |
Electro teammates allow for Hyperbloom, Electro-Charged, and Anemo Overvape team compositions.
 Fischl Fischl | Fischl is an excellent choice in any of Ayato’s playstyles (except for Freeze), especially at C6. She is a strong flex pick in Hyperbloom teams. She also helps battery a second Electro teammate. She can main near full Oz uptime in Ayato’s teams if she alternates using her Skill and Burst throughout rotations. Her 25s Skill cooldown lines up perfectly in many of Ayato’s teams since they usually have a 25s rotation. |
 Kuki Shinobu Kuki Shinobu | Kuki Shinobu is an excellent Hyperbloom trigger who also provides valuable healing. She is a comfort pick in Ayato’s Electro-Charged teams. Note that her Skill has a cooldown of 15s. For this reason, you can run a 30s fixed rotation where she uses her Skill exactly every 15s, or a 21–25s flexible rotation where she uses her Skill when available to recast. |
 Raiden Raiden | Raiden is a fantastic Hyperbloom trigger who also buffs Ayato’s Burst damage. She lacks the healing utility of Kuki Shinobu, so a defensive option in the Dendro or flex slot is likely necessary. While her Skill applies Electro to Dendro Cores more frequently than Shinobu, it can be more inconsistent against larger enemies since Dendro Cores and their targeted hitbox may be far apart. |
 Beidou Beidou | Beidou is an excellent option in Electro-Charged teams, especially against 2–3 enemies. Ayato can drive Beidou’s Burst with his Shunsuiken attacks. She provides some additional interruption resistance and damage reduction via her Skill. She is also a great flex pick in Hyperbloom teams since Burst hits do not target Dendro Cores. |
 Yae Miko Yae Miko | Yae Miko is a competitive option in Ayato’s Electro-Charged teams and a good flex option in Hyperbloom teams. However, rotations with Yae Miko can be tricky with Ayato due to their slightly different cooldowns. Ayato can accommodate full fox turret uptime due to his split field time, but Yae usually needs to cast her Burst to regain enough charges of her Skill in time. |
 Lisa Lisa | Lisa is a low-investment teammate who can provide DEF Shred and hold Thrilling Tales of Dragon Slayers, which greatly improves Ayato’s damage. She is most commonly seen as a second Electro in Hyperbloom and Electro-Charged. She has high ER requirements when she is the sole Electro unit on the team (like in Hypercarry teams). |
 Dori Dori | Dori is a possible Hyperbloom teammate who can also provide sustain via her healing. It is more difficult to make Dori work well with Ayato compared to Kuki Shinobu or Raiden, but she has more rapid Electro application and a useful Energy generation passive. Ayato’s Shunsuiken attacks are fairly static, so Dori’s Electro tether may not make contact with Dendro Cores unless you interrupt Ayato’s attacks by dashing. Dori could also be played in an Electro-Charged team as a sustain option, but she does not provide enough Electro application to enable 4TF. |
 Electro Traveler Electro Traveler | Electro Traveler is a free-to-play Hyperbloom teammate, although they have lower performance than Shinobu or Raiden. They also help lower Ayato’s ER requirements to 100% in Double Electro teams. Teammates like Beidou can also enjoy fairly low ER requirements. Despite lowering their teammates’ ER requirements, Electro Traveler has high ER requirements themselves. |
 Kujou Sara Kujou Sara | Sara provides a Flat ATK buff for Ayato and his teammates. Her 6s buff duration lines up well with Ayato’s cooldowns. At C6, she can further buff and battery Electro teammates. She also has non-negligible personal damage, primarily from her Burst. While Ayato generally prefers Bennett, he can make great use of Sara in teams where an Electro teammate is permissible. |
Ayato benefits greatly from Hydro teammates since they help lower his ER requirements. They are especially powerful in Burgeon, Mono Hydro, and Hypercarry teams.
 Nilou Nilou | Ayato is a great Hydro option in Nilou Bloom teams. Typically, Ayato runs 1 Skill rotations to decrease the rotation length and maintain consistent Bloom uptime. While 2 Skill rotations are possible and lower Ayato’s ER requirements, they usually have significantly lower DPS (10–20% less) due to the extended rotation. Read the team section on Nilou Bloom for more info. |
 Xingqiu Xingqiu | Xingqiu provides strong single-target damage and Hydro application, as well as Hydro RES Shred at C2 and defensive utility with his orbital Rainswords. Ayato can proc Xingqiu’s sword rain attacks with his Shunsuiken attacks. Ayato and Xingqiu’s Hydro Particle generation lowers both of their ER requirements by a fair degree. |
 Yelan Yelan | Yelan provides strong single-target damage and a ramping DMG% buff to Ayato when he is on-field. Ayato can proc Yelan’s Burst with his Shunsuiken attacks. Furthermore, Ayato’s split field time allows Yelan to cast her Skill twice per rotation, lowering her and Ayato’s ER requirements. |
 Furina Furina | Furina is a great option in Ayato’s Mono Hydro and Hypercarry teams, provided there is strong healing from a unit like Bennett, Jean, Xianyun, or Kokomi. She also appears in Vape teams, where Xiangling is the primary Vape trigger. Ayato typically uses his Burst in the middle of the rotation to make the most of Furina’s DMG% buff. Ayato can use 4pc Marechaussee Hunter when paired with Furina since it stacks almost immediately, but be careful not to overcap on CRIT Rate! |
 Candace Candace | Candace is a viable option in Ayato’s Mono Hydro and Hypercarry teams, providing a Normal Attack DMG Bonus with her Burst. She can help lower Ayato’s ER requirements and she performs on par with Yun Jin, even in single-target scenarios. It is not worth extending Ayato’s field time to use non-Shunsuiken Normal Attacks even with Candace’s Hydro Infusion since they deal lower damage and extend rotations (further lowering DPS). Candace can also be used to enable a Hydro Plunging Attack DPS playstyle with Xianyun. |
 Kokomi Kokomi | Kokomi can be a healer in Ayato’s Mono Hydro teams and Furina teams; however, Bennett, Jean, or Xianyun are usually better options as they provide additional buffs and party-wide healing that better stacks Furina’s Fanfare. While Kokomi can use her Burst to provide teamwide healing (but extend the rotation), it is usually better to simply cast her Burst as a refresh for her jellyfish. Kokomi can hold TTDS and 4pc TotM to buff Ayato. |
 Barbara Barbara | Barbara is an accessible Hydro defensive unit in Ayato’s Mono Hydro teams, but Bennett, Jean, and Xianyun are better options if available. She is an option in Bloom-related teams if you require additional healing; however, other options generally perform better. |
Pyro teammates enable and trigger Vaporize, Burgeon, or Burning in Ayato’s teams.
 Bennett Bennett | Bennett is essential to Ayato’s Vape and Anemo Overvape teams and is generally one of Ayato’s best buffers. He provides an excellent Flat ATK buff and strong healing to the on-field character within his Burst radius. He is also an excellent Pyro battery for units like Xiangling. Bennett’s Burst only lasts for 12s with a 15s cooldown. As a result, only 1 sequence of Ayato’s Shunsuiken attacks are buffed per rotation. In some teams, Bennett uses his Burst before Ayato uses his Burst, which lets Ayato snapshot the Flat ATK buff. However, this may not always be optimal depending on other required setups like Double Swirl. |
 Xiangling Xiangling | Xiangling is a great option in Ayato’s Vape teams, providing strong Pyro damage and application with her Burst. Ayato’s rotations enable Xiangling to cast her Skill twice per rotation, which lowers her ER requirements. While it is possible for Xiangling to be a Burgeon trigger, it is generally not recommended due to her high ER requirements and strong Pyro application as a solo Pyro unit. |
 Thoma Thoma | Thoma is Ayato’s best friend and the quintessential Burgeon trigger. Ayato’s Shunsuiken attacks can proc Thoma’s Burst and refresh his shield. It is important to meet Thoma’s ER requirements since his Burst is crucial in Burgeon. Thoma’s C1 allows him to use his Skill twice per rotation as long as the rotation is at least 27s. Ayato’s rotations can accommodate this to lower Thoma’s ER requirements without sacrificing DPS. Thoma’s C6 provides a nice buff to Ayato’s Normal Attack DMG–scaling abilities. |
 Dehya Dehya | Dehya provides damage mitigation and interruption resistance. She can be played as an off-field Burgeon trigger, but her Pyro application is even slower than Thoma’s. As a result, she may be best played with an Electro unit in a “Hyperburgeon” team. |
Cryo teammates generally appear in Ayato’s Freeze teams. Two Cryo teammates are required to enable Cryo Resonance.
 Rosaria Rosaria | Rosaria is a solid pick for Ayato in Freeze teams thanks to her strong personal damage and CRIT Rate buff. Her Burst’s small AoE may pose a problem without grouping from characters like Kazuha. Her short Skill cooldown allows her to cast 2–3 Skills per rotation. Note that Rosaria’s Burst cannot hit enemies fully lifted by Venti’s Burst. |
 Kaeya Kaeya | Kaeya is another solid pick in Ayato’s Freeze teams thanks to his personal damage. It is important to position Ayato closer to enemies to ensure Kaeya’s Burst also hits. His short Skill cooldown allows him to cast 2–3 Skills per rotation. |
 Ganyu Ganyu | Ganyu provides strong AoE damage and a Cryo DMG% buff to her Cryo teammate. Ayato and Ganyu’s Bursts both scale quadratically, which makes Venti the recommended Anemo option. |
 Layla Layla | Layla provides the second-strongest shield in the game (after Zhongli). She is a viable shield option even outside of Freeze teams, but Ayato rarely needs a shield since he is usually paired with a healer like Bennett. She also has non-negligible personal damage and can hold 4pc TotM and 4pc NO. Her 12s Skill cooldown lines up well with Ayato’s 2 Skill rotations, which enables near 100% shield uptime. |
 Diona Diona | Diona is a comfort pick in Ayato’s Freeze teams. However, since enemies tend to remain Frozen and cannot damage you, other Cryo teammates like Rosaria, Kaeya, or Ganyu are still safe options who provide more team DPS. |
 Mika Mika | Mika doesn’t offer much outside of his Skill’s Attack SPD buff and healing. He is generally not recommended with Ayato since he takes up a team slot from a character who can provide stronger buffs or damage. |
 Charlotte Charlotte | Charlotte is a comfort pick in Ayato’s Freeze teams, primarily with Furina. She can hold TTDS and 4pc Noblesse Oblige or 4pc Tenacity of the Millelith to further buff Ayato. |
 Shenhe Shenhe | Shenhe provides few buffs to Ayato besides her A4 Passive; however, her Icy Quill, Cryo RES Shred, and A1 Passive greatly help a Cryo DPS unit like Ganyu or Ayaka in a team with Burst-oriented Ayato. |
 Ayaka Ayaka | Just as Ayaka and Ayato are rarely seen together in the story, they are rarely seen together in the same team. Ayato applies enough Hydro via his Burst to maintain Freeze, but he has tremendous ER requirements. Ayaka prefers 20s rotations, which prevents Ayato from using his Skill twice per rotation. Moreover, as a Burst-oriented DPS unit, Ayato underperforms in comparison to Kokomi, Mona, and Furina. He lacks any form of buffs besides his Burst’s Normal Attack DMG buff, which is largely irrelevant for Ayaka. |
Teams

Variety is the spice of life.
Calcs for ER requirements can be found here in this spreadsheet (last updated for 5.1). Every example team in this guide is included.
Hyperbloom

Ayato performs well in Hyperbloom teams. The AoE Hydro application from his Shunsuiken attacks and Burst droplets produce a significant amount of Dendro Cores.
Kuki Shinobu and Raiden Shogun are the primary Hyperbloom triggers seen with Ayato; however, Dori and Electro Traveler can be played as well if you are daring. The best Dendro teammate is Nahida, but Dendro Traveler and Collei are free-to-play options that still do well. The flex slot can be an off-field Electro, Dendro, Hydro, or Geo teammate.
4pc Thundering Fury
Ayato can hold 4pc Thundering Fury and lower his Skill cooldown by triggering Electro-Charged reactions. With enough Electro application, Ayato can reduce his Skill cooldown by 5–6s over the course of his Shunsuiken attacks. As a result, he can use his Skill again immediately. This “cuts out” 1 period of downtime in the rotation, allows Ayato to continuously apply Hydro on-field increasing Dendro Core uptime, and lets both of his Skills benefit from his Burst’s NA DMG% buff.
Example Teams

This is a great Hyperbloom team. Fischl may occasionally steal Hyperblooms from Shinobu, but Fischl’s personal damage more than makes up for the difference. Ayato can also hold 4pc Thundering Fury in this team.
Sample Rotation
Ayato Q > Nahida E > Shinobu E > Fischl E / Q > Ayato E N15 E N15
You should not use Nahida’s Burst in this team since it decreases 4TF procs. Shinobu’s Skill must also consistently hit the enemy to apply enough Electro for 4TF.

This team performs on par with the team above, but it focuses slightly more on non-Hyperbloom damage. While there may be fewer Dendro Cores produced due to the higher rate of Hydro application, Xingqiu offers higher personal damage, shreds Hydro RES (at C2), and lowers Ayato’s ER requirements.
Sample Rotation
Ayato Q > Nahida E (Q) > Shinobu E > Xingqiu ED Q N1 > Ayato E N15 > Nahida N3 E N3C > Shinobu (Q) E N1 > Xingqiu N2 > Ayato E N15

This is a more free-to-play friendly Shinobu Hyperbloom team. There are two possible rotations: a shorter one with 1 Collei Burst, and a longer one with 2 Collei Bursts. Adapt your rotation as necessary for the enemy wave scenario. Collei can hold Sacrificial Bow to make rotations more forgiving, otherwise you have to time her Skills at least 12s apart.
Sample Rotation (1 Collei Burst)
Ayato Q > Shinobu E > Traveler EQ > Collei EQ > Ayato E N15 > Shinobu Q > Traveler E > Collei E > Ayato E N15
Sample Rotation (2 Collei Bursts)
Shinobu E > Traveler EQ > Collei Q E > Ayato E N15 Q > Traveler E > Shinobu (Q) E > Collei Q E > Ayato E N15
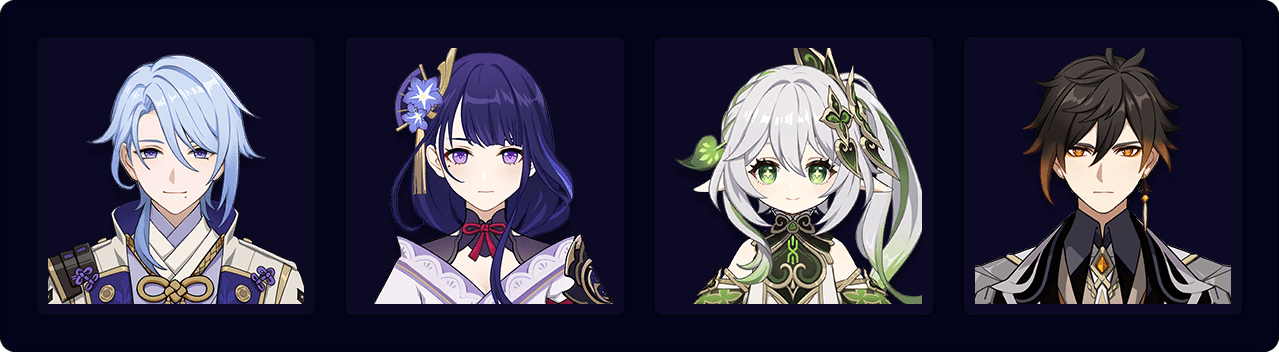
This is a strong Raiden Hyperbloom team with Zhongli for his shield and 20% Universal RES Shred. Zhongli can hold 4pc Deepwood Memories to buff Hyperbloom damage and allow Nahida to focus more on personal damage. However, Zhongli’s small pillar AoE may result in inconsistent uptime.
Sample Rotation (4TF)
Raiden E > Ayato Q > Zhongli hED > Nahida E Q > Ayato E N15 > Nahida N3 E N3C > Raiden E > Zhongli tE > Ayato E N15

Another strong Raiden Hyperbloom team with Baizhu for defensive utility, Dendro Resonance, and additional Dendro application.
Sample Rotation
Raiden E > Ayato Q > Nahida E (Q) > Baizhu EQ > Ayato E N15 > Raiden E > Nahida N3 E N3C > Baizhu E N2 > Ayato E N15

Dori is harder to play than Kuki Shinobu and Raiden, but her Hyperbloom teams remain viable.
Sample Rotation
Ayato Q > Nahida E (Q) > Fischl E > Dori EQ > Ayato E N15 > Nahida E N2 > Fischl Q > Dori E N2D > Ayato E N15
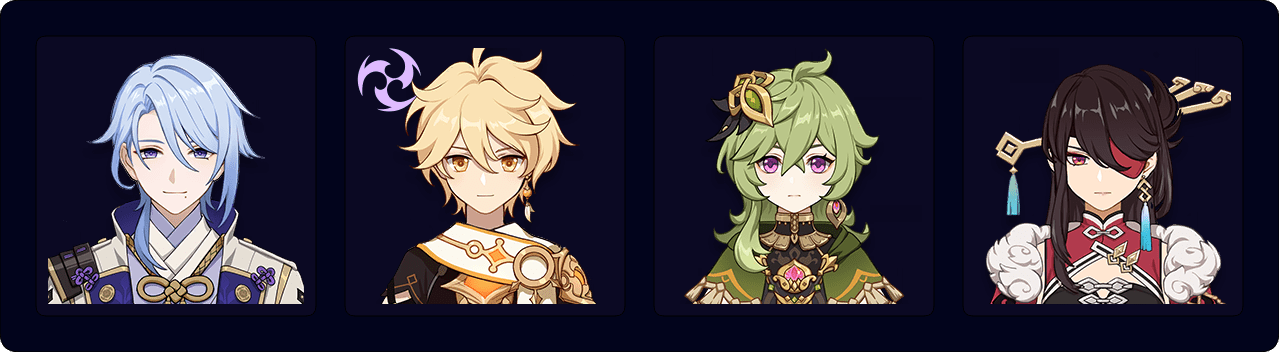
This is a free-to-play friendly Hyperbloom team if you lack Kuki Shinobu. Electro Traveler triggers Hyperblooms while Beidou provides some defensive utility and additional Electro damage, especially in multi-target scenarios. Electro Traveler also lowers ER requirements across the entire team. The rotation below accommodates 2 Skills and 1 Burst for Collei.
Sample Rotation
Ayato Q > Collei E > Traveler Q N1 E N1 > Beidou Q E > Collei Q > Ayato E N15 > Collei E > Traveler E N2 > Beidou E N1 > Ayato E N15
Burgeon

Ayato and Thoma Burgeon teams work quite well. Ayato’s AoE Hydro application is helpful in mitigating Burning (which limits Dendro Core production). Ayato’s Shunsuiken attacks proc Thoma’s Burst and refresh his shield. These teams should run a 27s rotation if you have C1+ Thoma; this allows Thoma to cast his Skill twice per rotation and significantly lower his ER requirements. This is a DPS gain since Thoma’s ability to invest more EM outweighs the ~2s extended rotation.
The flex slot is generally a Hydro, Electro, or Dendro teammate to maximize Dendro Core production. If you choose a Hydro flex teammate, Nahida is the only character who applies enough Dendro to maintain consistent Dendro Core production; however, the flex teammate’s personal Hydro damage can offset shorter or more inconsistent Dendro Core production with other Dendro units.
Example Teams
This is a high-investment Thoma Burgeon team. Baizhu’s defensive utility allows Thoma to fully invest into EM without sacrificing survivability. Ayato and Baizhu can use their Elemental Skills twice per rotation. Yaoyao and Kirara are also solid defensive picks instead of Baizhu.
Sample Rotation (Baizhu)
Ayato Q > Nahida E (Q) > Baizhu EQ > Thoma EQ > Ayato E N15 > Nahida N3E > Baizhu E > Ayato E N15
Sample Rotation (Yaoyao)
Ayato Q > Nahida E (Q) > Yaoyao E > Thoma EQ N1 > Ayato E N15 > Nahida N3E > Yaoyao Q > Thoma N1 E > Ayato E N15
This rotation assumes C1+ Thoma. Depending on how fast you execute the rotation, you may have to fill some downtime with additional Normal Attacks to accommodate Thoma’s Skill cooldown.
Sample Rotation (Kirara)
Ayato Q > Nahida E (Q) > Kirara shE > Thoma EQ N1 > Ayato E N15 > Nahida N3E > Kirara shE (Q) > Thoma N1 E > Ayato E N15
This rotation assumes C1+ Thoma. Depending on how fast you execute the rotation, you may have to fill some downtime with additional Normal Attacks to accommodate Thoma’s Skill cooldown.

This is one of Ayato’s stronger Burgeon teams. Fischl helps eliminate Burning and provides strong personal damage. Nahida can hold Prototype Amber to provide healing for the team since Thoma’s shield is often insufficient on a full EM build.
Sample Rotation
Ayato Q > Fischl E > Nahida E N1 Q > Thoma EQ N1 > Ayato E N15 > Fischl Q > Nahida N2 E N2 > Thoma N1 E > Ayato E N15
This rotation assumes C1+ Thoma. Depending on how fast you execute the rotation, you may have to fill some downtime with additional Normal Attacks to accommodate Thoma’s Skill cooldown.

Xingqiu is a solid pick in Burgeon teams since he lowers Ayato’s ER requirements, deals strong personal damage, and provides minor healing with his orbital Rain Swords. As with other teams, Nahida can also hold Prototype Amber to provide additional healing.
Sample Rotation
Ayato Q > Nahida E (Q) > Xingqiu ED Q N1 > Thoma EQ N1 > Ayato E N15 > Nahida N3E N3 > Xingqiu N3 > Thoma N1 E > Ayato E N15
This rotation assumes C1+ Thoma. Depending on how fast you execute the rotation, you may have to fill some downtime with additional Normal Attacks to accommodate Thoma’s Skill cooldown.

This is a more accessible Burgeon composition. Dendro Traveler’s Burst must first come in contact with Hydro to prevent it from exploding from Thoma’s Pyro application. Collei provides additional Dendro application and enables Dendro Resonance.
Sample Rotation
Ayato Q > Traveler EQ > Collei E > Thoma Q N1 E > Ayato E N15 > Traveler E N2 > Collei N1 Q E > Thoma E > Ayato E N15
This rotation assumes C1+ Thoma. Depending on how fast you execute the rotation, you may have to fill some downtime with additional Normal Attacks to accommodate Thoma’s Skill cooldown.
This is another accessible Burgeon team with Beidou providing additional Electro application to mitigate Burning, a minor shield, and decent AoE damage output. Favonius weapons are strongly recommended on at least 2 teammates.
Sample Rotation
Ayato Q > Traveler EQ > Thoma Q N1 E > Beidou EQ > Ayato E N15 > Traveler E N2 > Beidou E > Thoma E > Ayato E N10
This rotation assumes C1+ Thoma. Depending on how fast you execute the rotation, you may have to fill some downtime with additional Normal Attacks to accommodate Thoma’s Skill cooldown.
Nilou Bloom

Ayato works well in Nilou Bloom teams, an archetype that is incredibly strong in AoE scenarios. At least one of the Dendro characters must be a healer or shielder (Yaoyao, Baizhu, or Kirara). Typically, Ayato runs 1 Skill rotations to decrease the rotation length and maintain consistent Bloom uptime. Ayato can optimally run a triple EM build on 4pc Gilded Dreams or 4pc Flower of Paradise Lost since he is the primary trigger of Blooms in these teams; however, a standard DPS build is also okay.
Triple Hydro Nilou Bloom teams with Nahida are not recommended. Nahida would be the sole on-field Dendro enabler and there would be significantly lower Dendro Core production. Furthermore, Ayato would have almost no share of Bloom damage and his personal damage would be meager in comparison to the Bountiful Cores.
Example Teams
These teams have generally flexible rotations, so you don’t have to follow them exactly; however, ideally Ayato uses 1 Skill per rotation.

This is Ayato’s highest-performing Nilou Bloom team (with defensive units). Baizhu provides valuable defensive utility and increases damage from the active character’s Blooms. Nahida provides strong Dendro application and an EM buff.
Sample Rotation
Nahida E Q > Ayato Q > Nilou (Q) E N2 E > Baizhu EQ > Nahida N3E N3C > Ayato E N15 > Baizhu E N2

This is a solid Nilou Bloom team. Traveler should hold Favonius Sword.
Sample Rotation
Traveler EQ > Ayato Q > Nilou (Q) E N2 E > Baizhu EQ > Traveler E > Ayato E N15 > Baizhu E N2

A Nilou Bloom option if you lack Baizhu but have Nahida, with comparable damage. Yaoyao needs to use her Burst every rotation so the team can survive.
Sample Rotation
Nahida E Q > Ayato Q > Nilou (Q) E N2 E > Yaoyao Q 3[N3D] E > Nahida E N3C > Ayato E N15

This is a more accessible Nilou Bloom team. Yaoyao should use her Burst every rotation so the team can survive.
Sample Rotation
Traveler EQ > Ayato Q > Nilou (Q) E N2 E > Yaoyao Q 3[N3D] > Traveler E > Yaoyao E > Ayato E N15

Kirara's shield has greater absorption against Dendro DMG, including self-damage from Bountiful Cores, making her a viable solo sustain option.
Sample Rotation
Kirara shE > Nahida E Q > Ayato Q > Nilou (Q) E N2 E > Kirara (Q) shE > Nahida E N3C > Ayato E N15

Another accessible team. Kirara’s shield helps prevent Collei from being staggered during her long Skill and Burst animations. Dendro Traveler can also work instead of Collei.
Sample Rotation
Kirara shE > Collei E > Ayato Q > Nilou (Q) E N2 E > Kirara (Q) shE > Collei EQ > Ayato E N15
This rotation assumes R4+ Sacrificial Bow on Collei.
Anemo Overvape
Ayato’s Anemo Overvape teams (also known as Soup) are incredibly strong in both multi-target and single-target scenarios. These teams have strong personal damage in addition to many instances of reaction damage. The Anemo unit usually absorbs Pyro and simultaneously triggers Overloaded and Vaporize (hence Overvape) off an Electro-Charged aura via their Pyro damage and Swirls.
Bennett is almost always used thanks to his strong Flat ATK buff, healing, and self-applied Pyro within his Burst (which allows the Anemo unit to absorb Pyro). Fischl is the ideal Electro option due to her A4 Passive (and C6) and synergistic rotations with Ayato, but other off-field Electro characters can work (at a significant DPS loss).
Example Teams

This is one of Ayato’s highest-performing teams in both single-target and multi-target scenarios. The original “soup” team, this Anemo Overvape team is a classic Ayato option.
Sample Rotation
Ayato Q > Fischl E > Kazuha N1 hEP > Ayato E N15 > Bennett EQ > Fischl Q > Kazuha N1 tEP Q > Ayato E N15
Sample Rotation (Front-Loaded)
Ayato Q > Bennett EQ > Fischl E > Kazuha N1 hEP Q > Ayato E N15 > Bennett E > Fischl Q > Kazuha N1 tEP > Ayato E N15

This team can suffer from “Circle Impact” issues since the on-field character has to stay within both Bennett and Jean’s Bursts to enable the Sunfire effect. As such, it is only recommended in single-target or very-low–AoE scenarios.
Sample Rotation
Bennett EQ > Ayato Q > Fischl E > Jean EQ > Ayato E N15 > Bennett E > Fischl Q > Jean E > Ayato E N15

This is a very solid Anemo Overvape team in large AoE content. Venti almost always absorbs Pyro, so Venti’s A4 Passive alleviates Bennett’s ER requirements.
Sample Rotation
Bennett EQ > Ayato Q > Fischl E > Venti EQ > Ayato E N15 > Bennett E > Fischl Q > Venti E > Ayato E N15
Vape

Ayato is a viable Vape DPS in teams with Bennett and Xiangling. He inconsistently sustains Hydro auras on enemies, which means either him or Xiangling will be the Vaporize trigger. An Anemo, Electro, or Geo flex slot is typically recommended.
Example Teams

This Ayato Overvape team is incredibly powerful, especially in single-target scenarios. In the latter half of the rotation, Normal Attacks can be used to fill downtime between Ayato’s Skill. In practice, this could also be dashing to a new wave of enemies or waiting for boss invulnerability windows.
Sample Rotation
Ayato Q > Bennett EQ > Fischl N1 E > Xiangling QE > Ayato E N15 > Fischl N2 Q > Bennett N1 E > Xiangling N4 E > Ayato E N15

This Ayato-Furina Vape team is quite strong and gets even better the more you invest into Xiangling. Xiangling can Vape almost all of her Pyronado hits thanks to Ayato and Furina’s combined Hydro application.
Sample Rotation
Furina ED Q > Bennett Q E > Xiangling Q E > Ayato E N15 Q > Bennett E > Xiangling N2 E > Ayato E N15

Ayato has high ER requirements in this team, but Sucrose should still hold TTDS instead of Favonius Codex.
Sample Rotation
Bennett EQ > Sucrose ED N2 > Xiangling Q E > Ayato Q E N15 > Sucrose N1 Q E N2 > Bennett N1 E > Xiangling N1 ED > Ayato E N15

This is a VV Vape team for Ayato where he can Vape off both Xiangling and Kazuha’s Pyro application. However, achieving a Double Swirl is basically impossible in single-target scenarios, so you should only play this team against multiple enemies.
Sample Rotation
Ayato Q > Bennett Q E > Xiangling E > Kazuha hEP Q > Xiangling Q > Ayato E N15 > Bennett E > Xiangling N2 > Kazuha tEP > Bennett E > Xiangling E > Ayato E N15

This is a Burnvape team where Ayato can consistently trigger Forward Vape thanks to the team’s combined Pyro application. While Xiangling can trigger Burgeon, the primary focus of the team is their personal damage.
Sample Rotation (Nahida)
Nahida E (Q) > Bennett Q E > Xiangling Q ED > Ayato E N15 Q > Nahida E > Bennett N1 E > Xiangling N1 ED > Ayato E N15
Sample Rotation (Emilie)
(Bennett E)1 > Emilie E > Bennett Q E > Xiangling Q ED > Ayato Q E N15 > Emilie Q > Bennett N1 E > Xiangling N1 ED > Ayato E N15
1First rotation only.
Electro-Charged
Ayato’s Electro-Charged teams (also known as “Taser” by some) do not actually focus on the reaction. Rather, the Electro-Charged aura maintained on enemies allows Ayato to use Lion’s Roar and enables an Anemo unit to consistently Swirl both Hydro and Electro.
4pc Thundering Fury
Ayato can hold 4pc Thundering Fury and lower his Skill cooldown by triggering Electro-Charged reactions. With enough Electro application, Ayato can reduce his Skill cooldown by 5–6s over the course of his Shunsuiken attacks. As a result, he can use his Skill again immediately after the first one. This not only “cuts out” 1 period of downtime in the rotation, but also allows all of Ayato’s Shunsuiken attacks to benefit from his Burst’s NA DMG% buff.
If you are interested in a fun playstyle, especially in AoE content, then 4pc Thundering Fury Ayato may be a nice option to try out!
Example Teams

This team works quite well with Ayato on 4pc Thundering Fury. On another set, the rotation is extended by a few seconds to accommodate Ayato’s downtime.
Sample Rotation (4TF)
Ayato Q > Fischl E/Q > Venti EQ > Beidou EQ > Ayato E N15 E N15 > Beidou E > Venti E
Sample Rotation (Other Sets)
Ayato Q > Fischl E > Venti EQ > Beidou EQ > Ayato E N15 > Fischl Q > Beidou E N2 > Venti E N2 > Ayato E N15

Another Electro-Charged option. This rotation does not assume 4pc Thundering Fury.
Sample Rotation
Ayato Q > Shinobu E > Yae 3[E] > Kazuha hEP > Ayato E N15 > Yae Q 3[E] > Shinobu Q (E)[1] > Kazuha hEP Q > Ayato E N15
[1]Shinobu's Skill may come off cooldown a bit later in subsequent rotations, but you can easily swap in and refresh it at any point.
While this team is not Double Electro, it still has amazing damage output thanks to Fischl and Furina. Jean provides 4pc VV RES Shred and teamwide healing to counteract Furina’s HP drain. Xilonen provides RES Shred, DMG% buffs via 4pc Scroll, and healing. Ayato has incredibly low ER requirements if Jean or Xilonen also holds Favonius Sword.
Sample Rotation (Jean)
Furina ED Q > Fischl E > Jean EQ > Ayato E N15 Q > Fischl Q > Jean E N2 > Ayato E N15
Sample Rotation (Xilonen)
Furina ED Q > Xilonen Q E N2 > Fischl E > Ayato E N15 Q > Xilonen E N2 > Fischl Q > Ayato E N15

This is a more accessible Electro-Charged team with Sayu providing healing. Lisa can hold TTDS and 4pc Noblesse Oblige if she can meet her ER requirements.
Sample Rotation
Ayato Q > Fischl E > Sayu shEQ > Lisa tE Q > Ayato E N15 > Fischl Q > Sayu shE > Lisa hE > Ayato E N15
Freeze

Ayato’s Freeze teams generally do not perform as well as his other options. Nonetheless, they are viable in AoE scenarios with enemies that can be Frozen. Ayato can opt to use 4pc Blizzard Strayer; however, his Cryo teammates generally use the set better if you have limited artifact selection.
When played as a Burst-oriented DPS unit, Ayato underperforms in comparison to Kokomi, Mona, and Furina. He lacks any buffs besides his Burst’s Normal Attack DMG buff.
Example Teams

This team’s rotation is quite flexible due to their low cooldowns, and other rotations may be better based on wave content. It is possible to skip Ayato’s Burst every other rotation to accommodate a 15s rotation, which also alleviates his ER requirements.
Sample Rotation
Ayato Q > Rosaria E > Kazuha N1 hEP Q > Rosaria Q E > Kaeya E Q > Ayato E N15 > Kaeya E > Rosaria E > Kazuha N1 tEP > Ayato E N15

This Freeze team balances Ganyu’s damage with Ayato’s ER requirements. One Charged Shot from Ganyu takes about the same time as 5 of Ayato’s Shunsuiken attacks, but Ganyu’s Charged Shots deal significantly more damage at equal investment. As such, N10 rotations favor Ganyu’s damage while N15 rotations lower Ayato’s ER requirements.
Sample Rotation (Ganyu 1[C] + Ayato N15)
Diona (Q) hE > Ganyu EQ > Venti EQ > Ayato Q > Ganyu 1[C] > Venti E N1 > Ayato E N15
Sample Rotation (Ganyu 2[C] + Ayato N10)
Diona (Q) hE > Ganyu EQ > Venti EQ > Ayato Q > Ganyu 2[C] > Venti E N1 > Ayato E N10

Finally bringing Ayato and Ayaka together in the same team! Unfortunately, Ayato isn’t the best Hydro unit in Ayaka-Ganyu teams compared to Kokomi, Mona, and Furina. Nonetheless, the double quadratic scaling between Ayato and Ganyu’s Bursts lets this team perform well in multi-target scenarios with Freezable enemies.
Sample Rotation
Ayaka D N1E > Ganyu QE > Venti EQ > Ayato Q > Ayaka D N1EQ > Ganyu 1[C] > Venti E N1 > Ayato E N15
Mono Hydro and Hypercarry

Ayato’s Mono Hydro and Hypercarry teams can perform on par with his other teams thanks to the release of Furina. Teams without Furina can be viable depending on your Ayato’s level of investment and your other available teammates. Mono Hydro teams in particular lower all the Hydro teammates’ ER requirements.
Example Teams

This is one of Ayato’s best teams with Furina. Xilonen is a solid pick for Ayato’s Mono Hydro teams as she consolidates both healing and buffs. This role consolidation is especially valuable here since Ayato has no way to stack Furina’s Fanfare himself and would otherwise have to trade a dedicated buffer for a healer.
Sample Rotation (with Kazuha)
Xilonen Q > Furina ED N1 Q > Xilonen E N2 > Kazuha tEP > Ayato E N15 Q > Xilonen E N2 > Kazuha hEP > Ayato E N15
Sample Rotation (with Yelan)
Xilonen Q > Furina ED Q > Yelan Q N1 E N1 > Xilonen E N2 > Ayato E N15 Q > Xilonen N1 E N2 > Yelan N1 E N1 > Ayato E N15

This is another fantastic team with Furina. It has extremely high damage output in single-target scenarios and solid performance in multi-target scenarios. Ayato does not need to invest in any ER% if Jean also holds Favonius Sword.
Sample Rotation
Furina ED Q > Jean EQ > Yelan Q N1 E N1 > Ayato E N15 Q > Jean E N2 > Yelan N2 E > Ayato E N15

Furina, Bennett, and Kazuha all provide Ayato with fantastic buffs; however, Ayato and Furina deal roughly the same amount of damage. Despite this, the team itself is fairly weak in comparison to other options like Hyperbloom or even the Mono Hydro teams above since Ayato’s personal damage is wanting.
Sample Rotation
Furina ED Q > Bennett EQ > Kazuha hEP Q > Ayato Q E N15 > Bennett E > Kazuha tEP > Bennett E > Ayato E 15

This Mono Hydro team is a comfortable pick that performs well in single-target scenarios. Zhongli should hold 4pc Archaic Petra and pick up Hydro Crystallize shards when possible.
Sample Rotation
(Yelan C)* > Zhongli hED* > Xingqiu ED Q N1 > Ayato E N15 Q > Yelan Q N1 E N1 > Zhongli tE N1 > Ayato E N15
*Yelan performs a Charged Attack at the beginning of the first rotation so Zhongli can trigger Hydro Crystallize for 4pc Archaic Petra.

This team is not recommended unless you have significant investment into Ayato.
Sample Rotation
Ayato Q > Bennett EQ > Candace EQ > Kazuha N1 tEP Q > Ayato E N15 > Bennett E > Kazuha N1 hEP > Candace E > Ayato E N15

This is a meme team that maximizes Ayato’s Normal Attack SPD. Ayato usually whips out 5–6 additional Normal Attacks per Skill. He can also hold Skyward Blade to deal 1–2 more on top of that. You should use Favonius Lance on Yun Jin and Mika to maintain a decent Energy economy across rotations. Chongyun holds Sacrificial Greatsword so his Skill can be used for every Ayato Skill. If you have C2 Chongyun, Mika’s Skill cooldown can decrease enough to enable a more fluid rotation without waiting time.
You should not play this team in Spiral Abyss nor expect it to compete with any of Ayato’s truly recommended teams.
Sample Rotation
Ayato Q > Yun Jin EQ > Chongyun E > Mika E(Q) > Ayato E N20+ > Yun Jin E > Chongyun Q E > Mika E > Ayato E N20+
This rotation assumes Sacrificial Greatsword on C2 Chongyun.
Credits
I'm sure I've forgotten something... Not to worry, I'll simply send someone to fetch it. As soon as I remember what it was.
Authors: irokei, kolvii
Calcs: irokei (based on calcs by kolvii and luno_)
Readability Verification: idkanonymized, cuppacote
TC Verification: baloopy, haafr, madeofseaglass
Calc Verification: jamberry
Theorycrafting: luno_, baloopy, haafr, staryy_, jamberry
Version 4.8-5.1 TC: madeofseaglass, haafr, caramielle., clevernt, charliex3000, caxia5, nikatosaurus, baloopy, doomuh, spphrs, acerbus, pjeljr
Transcription: ausshuu
Quick Guide and Old Extended Guide: kolvii, luno_, irokei, reens, polomo, quinslay, bunnycookie, rrei., fritzzes, idk.anonymized, mina, seima, Leah, cinders_pear
References
- Ayato Mastersheet
- Ayato ERC
- Weapons
- Artifact Sets
- Constellations
Other Resources