Please refer to the Diluc Quick Guide for now!
The current Extended Guide is out of date, but we’re working on an update. Join our Discord to take part in the theorycrafting process!
Written by: Lucase2767#9329
Updated for Ver 2.8
Table of Contents
Preface
Diluc, of Mondstadt. Not interested in idle chit-chat. If you have things you want to get done, let me know.
Diluc, Hello
Welcome to the revamped and renewed Diluc guide. Since Diluc’s, and Genshin’s release, for that matter, the state of the game has changed quite a lot, so a more in-depth guide on the Pyro captain was long overdue.
As the poster boy of Pyro DPS, Diluc has stood the test of time better than most. He’s considered the most consistent Pyro DPS, and he is still used as a basis for Pyro carries. This guide will go over various aspects of playing Diluc—including teams, gears, and combos—to provide you a better grasp of the character and maybe entice you to dust off the Diluc that has been in the corner of your character list.
Without further ado, let’s start with a bit of a formality.
TL;DR
Misconceptions
A lot of characters are victims of various misconceptions, and Diluc is no exception. The popular sentiment regarding Diluc is that he was powercrept. However, the truth of the matter is that Diluc’s performance in most of the game content is very competitive, and to this day he is one of the safest investments in the 5* standard character pool.
At the same level of investment as other 5* Pyro carries, Diluc’s returns may be slightly lower, but he is nonetheless capable of clearing any content the other Pyro carries can.
Diluc’s kit doesn’t have anything that supports nuke showcases, but lacking a Pyro nuke doesn’t hurt his performance nearly as much as one might first think.
With all that said, let’s get to the guide properly.
Pros & Cons
Pros
- Easy and dynamic playstyle.
- Has access to amplifying reactions.
- Blunt + Pyro, allows him to break all common non-Elemental shield types.
- Has room for more mechanical depth if the player is willing to learn without being necessary.
- Can be played in a team that doesn’t use Xingqiu or Yelan (Melt).
- Quite durable, not stamina dependent.
- Can be swapped out without losing Pyro infusion.
Cons
- Has a useless A1 Passive.
- Extremely reliant on Bennett when playing him optimally.
- Melt team has very tight rotations and is Constellation dependent (on both Sucrose and Rosaria).
- Lower damage potential compared to other Pyro carries.
- No real signature weapon to amplify his damage.
- Requires a lot of field time.
- Vaporize teams require Xingqiu or Yelan.
Talents
You have already proven your determination. Well then, it is now time for you to witness my resolve.
About Us: Proof
 Normal Attack: Tempered Sword
Talent Description
Normal Attack
Perform up to 4 consecutive strikes.
Charged Attack
Drains Stamina over time to perform continuous slashes.
At the end of the sequence, perform a more powerful slash.
Plunging Attack
Plunges from mid-air to strike the ground, damaging opponents along the path and dealing AoE DMG upon impact.
4 attacks, fairly fast aside from 3rd and 4th attacks. His main source of damage along with his Skill, very easy to animation cancel.
 Elemental Skill: Searing Onslaught
Talent Description
Performs a forward slash that deals Pyro DMG.
This skill can be consecutively used 3 times. Enters CD if not cast again within a short period.
What Diluc is known for. His Elemental Skill can be cast 3 times in quick succession.
It only enters cooldown after some time has passed without using either the 2nd or 3rd Skill, or when you use the 3rd Skill. The cooldown will have started counting upon the use of the 1st Skill. Therefore, if you wait the maximum time to cast all Skills, it has functionally no cooldown.
It’s also fast and can cancel off or into anything but Diluc’s ending Burst animation.
How and when you use this Skill in conjunction with Normals determines how much damage any particular part of the rotation will contribute. Since this Skill has no ICD on Elemental Reactions, you can frontload four Vaporize or Melt Reactions in quick succession, or choose to have 7 spread out Reactions to form a longer but more balanced and overall more damaging rotation.
 Elemental Burst: Dawn
Talent Description
Releases intense flames to knock back nearby opponents, dealing Pyro DMG.
The flames then converge into the weapon, summoning a Phoenix that flies forward and deals massive Pyro DMG to all opponents in its path. The Phoenix explodes upon reaching its destination, causing a large amount of AoE Pyro DMG.
The searing flames that run down his blade cause it to be infused with Pyro.
The least important source of damage in Diluc’s kit, used instead for its utility, the Pyro infusion that comes after it. It’s a pretty straightforward ability for the most part, but has some little quirks that come with it:
- Firstly: the CD starts upon cast; therefore, when paired with his A4 passive, it’s possible to have full uptime on your Pyro infusion provided you have enough Energy to Burst off cooldown.
- Second: unlike most infusions, this one does not end when he is swapped out, allowing for some flexibility in rotations.
- Lastly: while it can be used to group little enemies, the Pyro DoT and falling damage afterwards are able to kill most small foes anyways.
 Ascension Passive 1: Relentless
Talent Description
Diluc’s Charged Attack Stamina Cost is decreased by 50%, and its duration is increased by 3s.
Among the worst Ascension Passives in the game. Since his gameplay is centered on weaving his Normals and Skills, and not using his Charged Attack, this Passive is almost entirely useless.
 Ascension Passive 4: Blessing of the Phoenix
Talent Description
The Pyro Infusion provided by Dawn lasts for 4s longer. Additionally, Diluc gains 20% Pyro DMG Bonus during the duration of this effect.
This allows Diluc to have 100% uptime on his infusion, as well as providing 20% free Pyro DMG Bonus.
 Utility Passive: Tradition of the Dawn Knight
Talent Description
Refunds 15% of the ores used when Forging Claymore-type weapons.
Free cost reduction when crafting Claymores? Why not? Nice to have, but there aren’t many great users or uses for craftable Claymores. Ranges from forgettable to mildly useful.
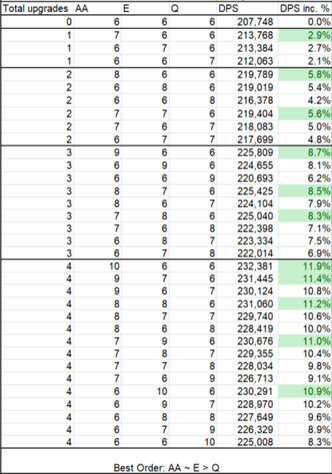
Talent Priority
Searing Onslaught = Tempered Sword > Dawn
Prioritize either Skills or Normals first
You might want to leave Dawn at Level 8 if you need the resources, as his Talent books are shared by the greatest amount of 5* units in the Mondstadt region, as well as Bennett.
Since the damage increase from maxing his Burst is minimal, it is often better to max out Bennett’s Burst or abilities for other units.
Constellations
 Constellation 1: Conviction
Constellation Description
Diluc deals 15% more DMG to opponents whose HP is above 50%.
Not amazing in any way, not bad either; it’s just free damage. Won’t change the time it takes for Diluc to kill an enemy by a lot, if at all.
This gives an average of 7% more damage when active.
 Constellation 2: Searing Ember
Constellation Description
When Diluc takes DMG, his ATK increases by 10% and his ATK SPD increases by 5%. Lasts for 10s.
This effect can stack up to 3 times and can only occur once every 1.5s.
Diluc has quite a few sources of ATK on his teams, so 30% more is fine, but not great. The ATK SPD buff is better, but not worth going out of your way to get hit for. Overall, it’s two buffs that don’t help a lot and an activation method that should be avoided.
This Constellation averages out at 4% damage increase per stack, up to 12% over C0.
Might be higher or lower depending on the weapon chosen.
 Constellation 3: Fire and Steel
Constellation Description
Increases the level of Searing Onslaught by 3.
Better than C5, since you use Skill more, but it’s just levels.
4.5% damage increase over C0.
 Constellation 4: Flowing Flames
Constellation Description
Casting Searing Onslaught in rhythm greatly increases damage dealt.
2s after casting Searing Onslaught, casting the next Searing Onslaught in the combo deals 40% additional DMG. This effect lasts for 2s.
This skill has phrasing issues, as you need to wait at least 2 seconds for it to activate, not within two seconds of the last Skill cast.
As a result you need to either use your Normals slower or weave in a 3rd Normal Attack in between Elemental Skills.
Trying to use this Constellation in a rotation is not recommended as it often causes buffs to run out, resulting in less of the rotation being buffed. Scenarios in which C4 can be activated without many issues are teams like Diluc Xingqiu Albedo Zhongli, due to Diluc’s teammates possessing long-lasting abilities.
Performing an Elemental Burst in between Skill casts results in an active C4.
If trying to use this Constellation, it gives 2% more damage total in triple and full weave over C0.
However, it is a team DPS loss of at least 4% to use this Constellation.
 Constellation 5: Phoenix, Harbinger of Dawn
Constellation Description
Increases the level of Dawn by 3.
It gives Diluc’s Burst a little more damage, but it’s just levels.
11% damage increase against smaller enemies over c0.
3.7% increase against bigger enemies over C0.
 Constellation 6: Flaming Sword, Nemesis of Dark
Constellation Description
After casting Searing Onslaught, the next 2 Normal Attacks within the next 6s will have their DMG and ATK SPD increased by 30%.
Additionally, Searing Onslaught will not interrupt the Normal Attack combo.
Diluc’s best Constellation; allows him to tap into his very good 4th Normal Attack scaling in his best combo, makes animation canceling less necessary but easier, as well as the 30% ATK SPD being a huge buff.
Although it makes Diluc faster, it has the downside of resetting upon dash or hard CC, so any dash or unlucky hit mid-combo could potentially make you lose DPS. Even when that happens, you can activate it again with another Skill, so it’s a worthwhile upgrade.
His biggest Constellation by far. Averages out to a 15% damage increase over C0.
Combos
Diluc has quite a few combos; they all follow the same “formula” with the only difference between them being how many Normals there are between each Skill cast. Let’s go over them all, and see each one’s pros and cons.
Notation
N – Normal Attacks
x – How many hits (e.g. N3 refers to 3 Normal Attacks)
E – Elemental Skill
Q – Elemental Burst
Double weave
Q-3(N2-E)
Best combo and the only combo you should commit to muscle memory. It almost perfectly fits into the buff window of Diluc teams. If in doubt, use this.
Single weave
Q-3(E-N1)
High upfront damage, but quickly falls off if you don’t kill the enemy within this combo. Useful when you want to deal a lot of damage in a short window.
Fast E combo
Q-(E-N1-E-E) or Q-(E-E-N1-E)
Great combo finisher, fast Vapes/Melts, and procs Xingqiu’s Rainswords or Yelan’s Burst attacks once. A better alternative to just spam E when Xingqiu is on the team.
However, you need to Q first or already have your Pyro infusion active in order for this to be most effective. Additionally if you are starting a rotation on a full HP mob, this combo is a poor choice, since it burns all your Skill uses for poor returns in the long run.
Spam E (Ex3)
E – E – E
Just E spam, potentially 3 Vapes due to not having an ICD. Use this to conserve Energy and finish off an Abyss chamber.
Triple weave
Q-3(N3-E)
Only used in comps without Bennett, an Anemo, or to activate C4. In a team with Bennett and an Anemo, buffs run out before the combo is finished, and thus this is not recommended to use in those cases.
Full weave
Q-3(N4-E)
Only used much like above, but if you have C6, since the ATK SPD steroids force you to go into N4 to activate C4. Has the greatest amount of time required and, without C6, only half of this combo is buffed by Bennett or an Anemo. Even if you have C6, double weave is preferred.
Full combo
Q-N2-E-N2-E-N2-E-N4-N3-E-N1-E-E
This is one full combo example, start with Q, use one double weave, end at N4, buy time with a N3 and use one fast combo to finish the rotation. If you have a C6 Xingqiu, proc his 3rd wave with a E-N1-Q, but cancel the N1. This allows you to have your Anemo absorb Pyro and still comfortably Vape everything.
Aside of that, Diluc gets a greater boost in rotation speed by having C6 Bennett on his side as this means he can “reverse” his combos, as an example:
Reverse double weave
(E-N2)-Q
With the power to reverse your combos, you can do this. An example:
E-N2-E-N2-E-N4-Q-E-N1-E-N1-E-N2
Do note that this full combo also requires C6 Xingqiu to work optimally. With C0 Xingqiu, Hydro application or Anemo buffs will be lost on the second part of the combo, depending on the rotation.
It might also be a good idea to not Burst with Diluc at all in some cases, since Bennett has a higher Energy Burst, but runs with higher ER and might get his Burst back faster than Diluc. This is helpful when you just want to end a floor or kill an enemy faster. Aside from that, given that you don’t need to wait 2 seconds for your Burst animation, Melt becomes less tight to execute, allowing for more comfort and higher DPS.
Dragonstrike
Dragonstrike is a technique which involves dashing, lunging and immediately jump canceling after, generating hitlag, which, if correctly made, will then drive Diluc upwards into Plunge range. Diluc can generate this hitlag with both his Normal Attacks and his Elemental Skill. Due to his high Plunge multiplier and the ability to have his Plunges infused with Pyro, Diluc can make great use of Dragonstrike to increase DPS.
However, this technique is difficult, especially without Movement Speed increasing effects such as Jean C2, Diona’s shield, or Anemo Resonance. A more in depth explanation can be found at the KeqingMains Theorycrafting Library.
Example here: https://imgur.com/a/QPaai8n
When should you use Dragonstrike? If your goal is being optimal, Dragonstrike would not be the correct route. If you either want to have fun or try a new playstyle, Dragonstrike is definitely a fun and unique choice.
If trying to use Dragonstrike, it really helps to have ATK Speed buffs like Yunjin C6, Anemo Resonance, or Jean’s C2. Even one Dragonstrike fail leads to substantial DPS loss in the rotation, so reliability is very important when executing this.
Burst > E > N1 > P > E > N1 > P > E > N1 > P
Burst > N1 > P > E > N1 > P > E > N1 > P > E > N1 > P
Burst > N1 > E > P > N1 > E > P > N1 > E > P
All of the above are viable rotations; use whichever you prefer after applying your buffs and Movement Speed boosts.
Gear
Artifacts
4pc Crimson Witch of Flames (4CW)

This set was made with Diluc in mind, being one of the few Pyro characters that can reliably max out its 4-piece effect. As such, this set is Diluc’s undisputed BiS (best in slot).
2pc +18% ATK/2pc Crimson Witch (2ATK/2CW)

This is the next best combination, but is quite far from full CW, requiring very good substats to be competitive. This also applies to the other 2 piece +18% ATK sets.
4pc Gladiator (4Glad)
It’s set effect works well but it doesn’t apply to Burst or Skill, so its even worse for the overall rotation damage. Still, if the substat disparity is high enough, it’s worth running this while farming for 4CW.
Main Stat Priority
Sands
ATK% / EM
Goblet
Pyro DMG%
Circlet
CRIT DMG/CRIT Rate
Sub Stat Priority
CRIT DMG/CRIT Rate > EM > ATK%
Elemental Mastery vs ATK% Sands
In conjunction with Bennett, EM is an upgrade for every weapon in almost any situation. However, you should only consider it when using a high ATK% weapon, like Wolf’s Gravestone, since the upgrade is marginal, if at all existent, on weapons that have more need of ATK, like Redhorn and Serpent Spine.
On the other hand, since ATK% Sands are more common drops, it is easier to get good CRIT substats on an ATK% sands. An EM sands is only better with equal or better substat rolls as an ATK% sands. In the end, it depends on what you have.
It is not recommended to farm an EM sands if you already have a good ATK% sands.
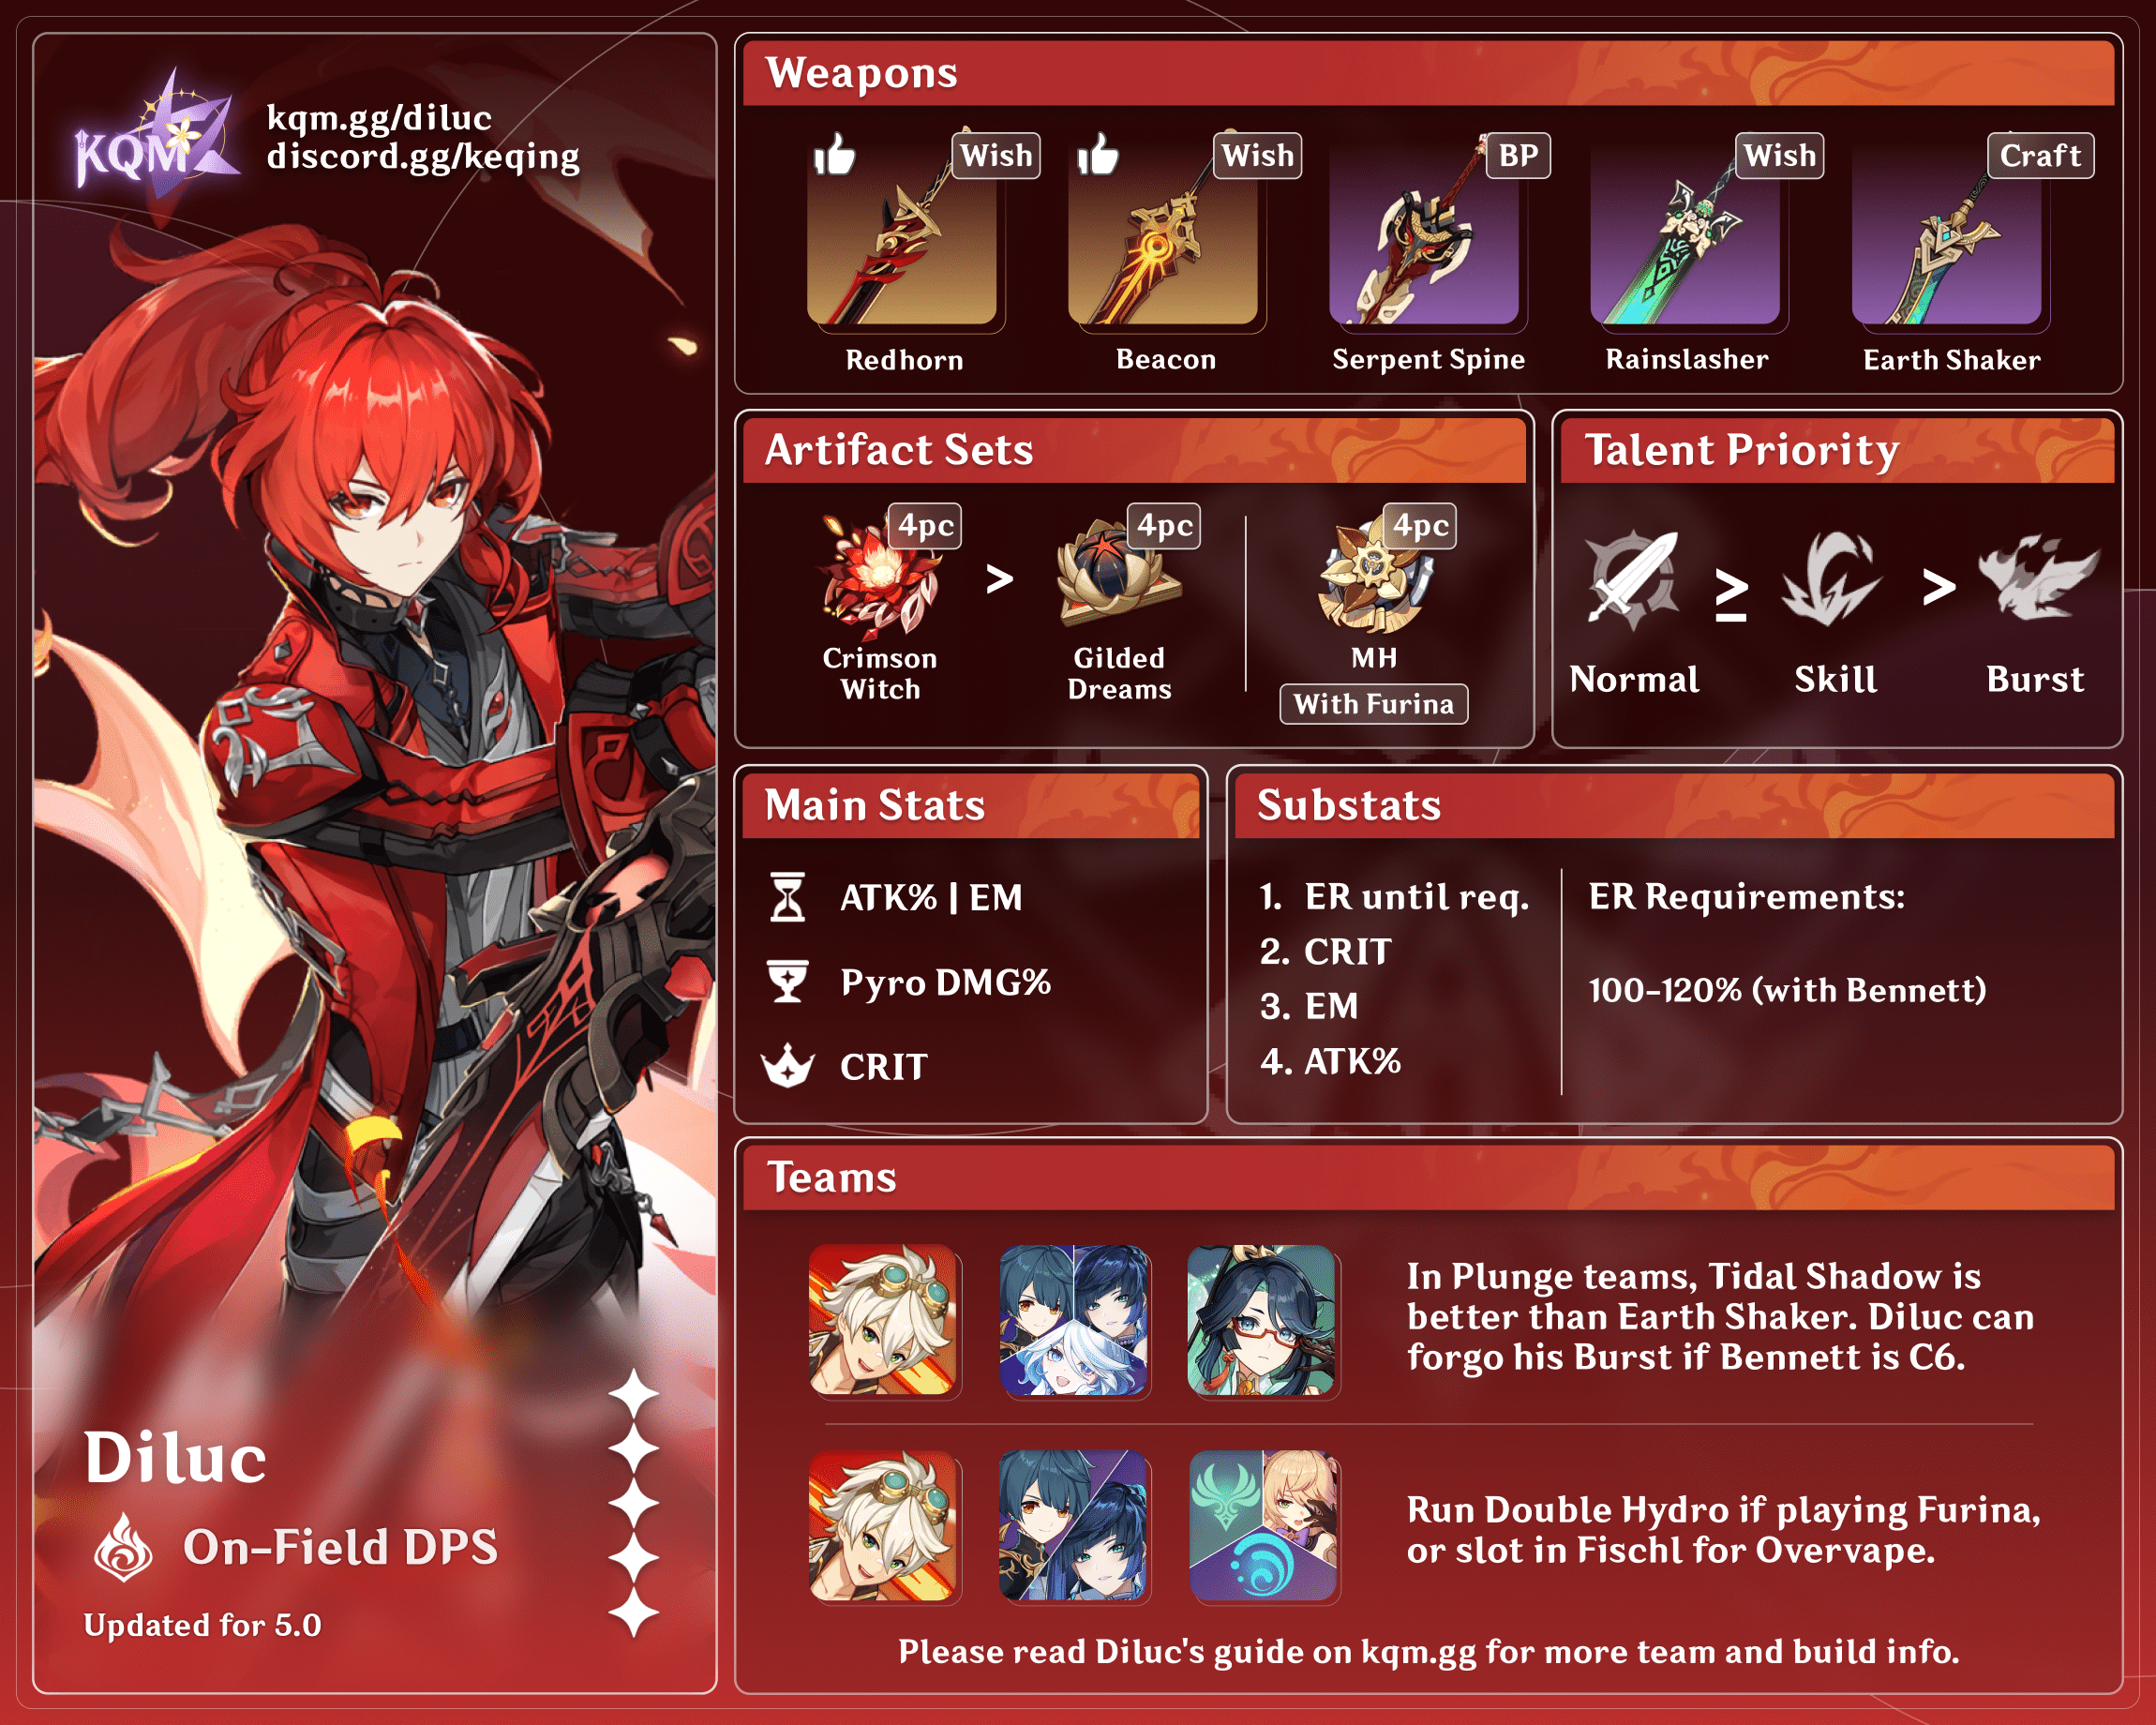
Weapons
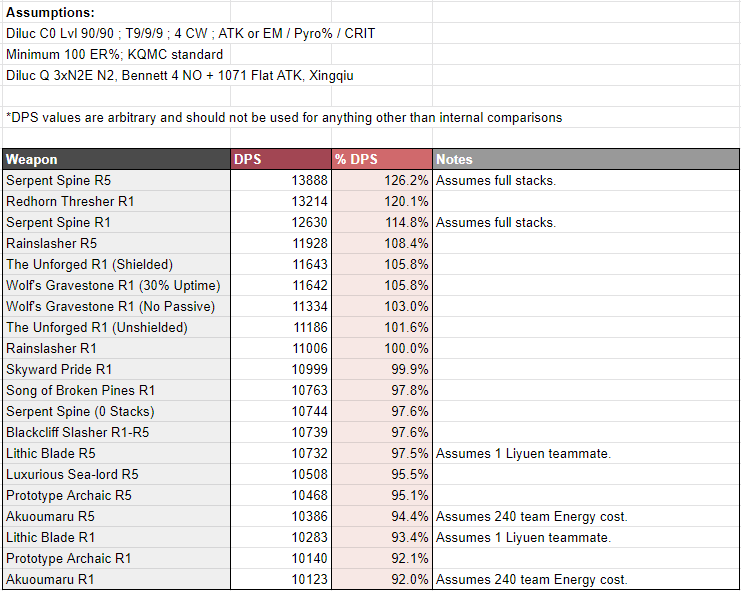
If a weapon isn’t featured on this list, it means that the weapon is not recommended to use on Diluc.
| Weapons | Notes |
Redhorn Stonethresher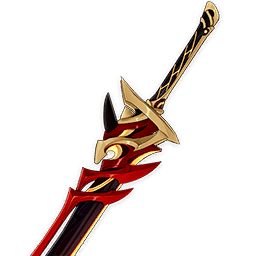 | This CRIT Claymore is great on Diluc, but it ties your Diluc to Bennett to supplement its relatively low Base ATK. This weapon can be the best weapon on Diluc or can fall off considerably, depending on whether or not Bennett is on the team. Aside from that, this weapon is easy to use, being just a large stat stick. However, if your only goal is to use this weapon on Diluc, it isn’t recommended to get this weapon. Even if it looks dope. DEF% scaling characters such as Itto or Noelle use this weapon way better than Diluc. |
Wolf’s Gravestone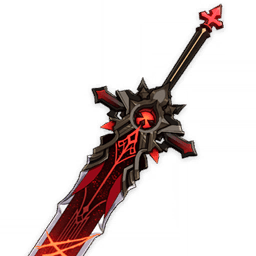 | The best generalist Claymore in the game. Consistently good, Gravestone trades a bit of damage for a lot of versatility and comfort. It also isn’t too hard to come by compared to other characters’ signature weapons, as its permanent availability means many players will get a copy eventually. The passive activation is pretty much useless unless you are fighting one high HP, high RES boss, since, against mobs, this weapon gives a massive buff that you don’t necessarily need to get better times. This weapon especially shines when Bennett isn’t on Diluc’s side due to the plentiful amount of ATK it provides, but works with Bennett nonetheless. |
The Unforged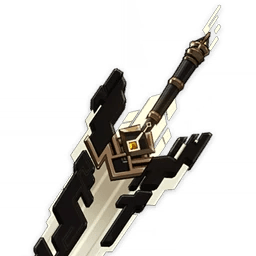 | Wolf’s Gravestone 2.0, except The Unforged requires Zhongli to consistently utilize its passive, which is often not ideal for damage. Since Wolf’s passive is likewise impractical, these two perform similarly most of the time. |
Serpent Spine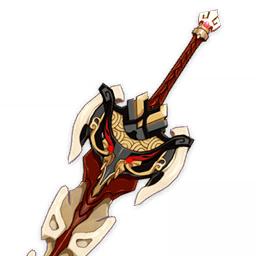 | Arguably the best 4* weapon in the game, Serpent Spine is an amazing choice on Diluc. At high refinements, it has the ability to compete with 5*s, or even be the best weapon on Diluc. However, it has a few downsides. Its low Base ATK means it falls off sharply on teams without Bennett. There is also the BP issue, as F2P players cannot get this weapon. Aside from that, its passive can be hard to keep maxed unless the player has the skill required to dodge all incoming enemy attacks, or use a shielder, which is often a DPS loss. Overall, it’s not the easiest weapon to pilot, but with enough player skill, time and investment, this weapon can become the best weapon on Diluc. |
Rainslasher | A good weapon on Diluc that is often overlooked, performing best in Vape teams. If you don’t have Blackcliff or Serpent, use this. |
Blackcliff Slasher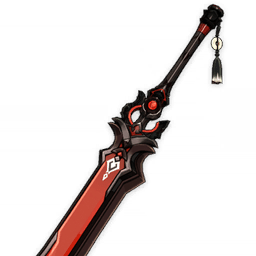 | The best competitor to Serpent Spine. At low refinements, Serpent outperforms it, however, at high refinements, this weapon can compete with R5 Serpent when there are mobs to stack its passive. Good weapon on paper, but not worth your Starglitter to get or refine it. |
Prototype Archaic / Luxurious Sea-Lord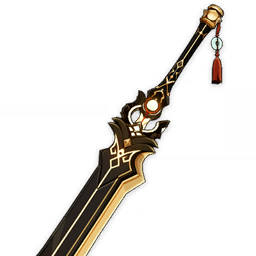  | These two weapons are extremely similar when Sea-Lord is at R5. If you have Sea-Lord, use it; if you don’t, craft yourself an Archaic but don’t refine it, as it’s not worth it on Diluc. |
Teams
Vaporize
Diluc’s main team, easiest to use, easiest to build. Diluc and Xingqiu/Yelan are the core units here, with Bennett and an Anemo being the most common choice for the other two. Zhongli and Albedo also work, as well as Zhongli + Bennett. Alternatively, players can opt to use an Electro off-field DPS to allow Diluc to trigger both Vaporize and Overload at the same time on enemies affected by Electro-Charged.
Pros
- Easy to pilot.
- Flexibility in teammates.
Cons
- Requires contested units to play optimally.
- Tied to Xingqiu or Yelan.
Note that both Xingqiu and Yelan fulfill the same role. Here is a quick comparison:
Yelan

- Offers higher team damage.
- Easier to build.
- Gives Diluc extra DMG%.
- Elegy gives another option for team buffing.
- Rotations are more strict.
Xingqiu

- Less Energy issues overall.
- More flexible, especially at C6.
- Provides some amount of survivability.
- Easier to get.
Xingqiu will be used as an example for all the teams since players have easier access to him; however, as stated, Yelan can take his spot with little changes to rotations and potential optimization.
Example Teams
Standard Vape
Diluc – Xingqiu – Bennett – Sucrose

Rotations
Diluc – Bennett – Xingqiu – Kazuha variation
Bennett E+Q -> Kazuha E -> Xingqiu E+Q+(E) -> Diluc Combo of choice
Diluc – Bennett (C6) – Xingqiu (C6)- Kazuha variation
Xingqiu E+Q+(E)-> Bennett EQ-> Kazuha EQ-> Diluc E-N2-E-N2-E-N4-Q-E-N1-E-N1-E-N2
Diluc – Bennett – Xingqiu – Sucrose variation (with Thrilling Tales of Dragon Slayers)
Xingqiu E+Q+(E)-> Bennett E+Q -> Sucrose E -> Diluc Combo of choice
Diluc – Bennett – Xingqiu – Sucrose variation (without Thrilling Tales of Dragon Slayers)
Bennett E+Q -> Sucrose E -> Xingqiu E+Q+(E) -> Diluc Combo of choice
Double Hydro
Diluc – Xingqiu – Yelan – Flex

Rotations
Diluc – Bennett – Xingqiu – Yelan variation
Bennett E+Q -> Xingqiu E+Q+(E) -> Yelan E+Q -> Diluc Combo of choice
Extra note: It is recommended to have one of them using a weapon to amplify damage while the other uses a Energy focused weapon. As such, depending on the weapons Yelan and Xingqiu are using, switch their place in the rotation so that the unit with higher energy recharge goes before the unit with a damage focused weapon, and make sure to funnel some particles to the unit with lower ER.
Overvape
Diluc – Xingqiu – Electro – Flex

Rotations
Diluc – Xingqiu – Bennett – Fischl variation
Bennett E+Q -> Xingqiu E+Q+(E) -> Fischl E/Q -> Diluc Combo of choice
Diluc – Xingqiu – Sucrose – Fischl variation
Sucrose Q-> Xingqiu E+Q+(E) -> Fischl E/Q -> Sucrose E+N1+E+(E)-> Diluc Combo of choice
Diluc – Xingqiu – Beidou – Fischl variation
Fischl E/Q-> Beidou E+Q -> Xingqiu E+Q+(E) -> Diluc Combo of choice
Geobros
Diluc – Xingqiu – Zhongli – Albedo

Rotations
Diluc – Xingqiu – Zhongli – Albedo variation
Zhongli E -> Albedo E -> Xingqiu E+Q+(E) -> Diluc combo of choice
Extra note: You can use Zhongli Q if you want to, as it isn’t a big DPS loss if he is well invested.
Melt
To start off, let’s clarify that Melt Diluc is by no means easy to use, especially when compared to its Vape counterpart. If you do decide to play this comp, be prepared for at least a few resets at the start, though with enough practice it becomes a consistent composition. For all of the rotations, any part that does not include Diluc has very strict timing. With C6 Bennett, Diluc mostly gains more freedom in combo routes, with any differences in the rotations clarified down below. Additionally, do not take these rotations as the only solution, as there are a lot of different scenarios in this game and you should adjust accordingly.
Pros
- Higher damage from Diluc himself.
- Higher scaling with number of enemies.
Cons
- Higher skill ceiling and floor.
- Sucrose requires C2+
- Rosaria requires C2+
- Slightly lower single target Damage.
The Four Variations
C2 Sucrose

Rotations
Rosa + Sucrose + Non-C6 Bennett setup
Bennett E+Q -> Sucrose E -> Rosa E+Q -> Sucrose Q -> Diluc E+Q+N1+E+N1+E+N4
Extra note: Make sure to dash away after Rosaria E to ensure Sucrose Q doesn’t absorb Pyro off your character. In AoE scenarios, move Sucrose Q to after Rosa Q to guarantee Cryo absorption. The same applies with C6 Bennett; here, Bennett’s C6 just gives more freedom in which Diluc combo you use.

Rotation
Kaeya + Sucrose + Non-C6 Bennett setup
Bennett E+Q -> Sucrose E+Q -> Kaeya E + Q -> Diluc E+Q+N1+E+N1+E+N4
In AoE scenarios, move Sucrose Q to after Kaeya Q to guarantee Cryo absorption. Again, the same applies with C6 Bennett having more combo variations.
Kazuha

Rotations
Without C6 Bennett
Kazu Q -> Bennett Q+E -> Kazu E -> Kaeya E+Q -> Diluc E+Q+N1+E+N1+E+N1
With C6 Bennett
Kaeya E -> Kazu Q -> Bennett Q+E -> Kazu E -> Kaeya E+Q -> Diluc N1+E+N1+E+N1+E+Q+N1 OR E+N2+E+N2+E+Q+N1

Rotations
Without C6 Bennett
Rosa E -> Kazu Q -> Bennett Q+E -> Kazu E -> Rosa E+Q -> Diluc Q+N1+E+N1+E+N1+E+N1
With C6 Bennett
Rosa E -> Kazu Q -> Bennett Q+E -> Kazu E -> Rosa E+Q -> Diluc E+N2+E+N1+E+Q+N4
C6 Kaeya Kazuha
Rotations
With C6 Bennett
Kaeya E -> Kazu Q -> Bennett Q+E -> Kazu E -> Kaeya E+Q -> Diluc N1+E+N1+E+N1+E+N1+Q
Bennett E+Q -> Kazu E -> Kaeya E+Q -> Diluc N2+E+N2+E+N2+E+N2+Q
Without C6 Bennett
Kaeya E -> Kazu Q -> Bennett Q+E -> Kazu E -> Kaeya E+Q -> Diluc E+Q+N1+E+N1+E+N4
Bennett E+Q -> Kazu E -> Kaeya E+Q -> Diluc Q+N2+E+N2+E+N2+E
C6 Kaeya Sucrose
Rotations
With C6 Bennett
Bennett E+Q -> Sucrose E+Q -> Kaeya E+Q -> Diluc N1+E+N1+E+N1+E+N1+Q
Bennett E+Q -> Sucrose E -> Kaeya E+Q -> Diluc N2+E+N2+E+N2+E+N2+Q
Without C6 Bennett
Bennett E+Q -> Sucrose E+Q -> Kaeya E+Q -> Diluc Q+N1+E+N1+E+N1+E+N1
Who do I pick?
Sucrose vs Kazuha
Sucrose

- Requires C2 but is easier to get than Kazuha.
- Depending on Diluc’s weapon, EM share might be more valuable than Elemental Damage Bonus.
Kazuha

- Harder to get than Sucrose.
- Higher personal damage.
- Able to buff multiple Elements.
- Can further increase damage with Constellations.
Final statement: both work well, with Kazuha having the higher ceiling.
Kaeya vs Rosaria
Kaeya

- Is free.
- Doesn’t require high Constellations.
- Having high Cons completely changes the playstyle.
- Faster Cryo application.
- Better in single target.
Rosaria

- Better AoE.
- Better Energy generation.
- Offers CRIT Rate buff.
- Requires C2.
Final statement: both work, Rosaria has a higher DMG ceiling than Kaeya as she gives a CRIT Rate buff, but requires C2. Kaeya has better application and personal DMG at C6.
The Bennettless Variations
Melt Diluc can be run without Bennett if you have Diona C6. This is especially useful if there is a higher need for Bennett on the other Abyss team, e.g. if the other team is using Xiangling or needs “Sunfire” with Jean.
Note that weapons with low Base ATK like Serpent and Redhorn suffer a major DPS loss without Bennett, so it is recommended to use this variation of Melt Diluc with a high ATK% weapon like Unforged or Wolf’s Gravestone and with an ATK% Sands.
Additionally, because Diona’s C6 EM share makes Sucrose’s EM share less valuable in turn, Kazuha becomes the superior choice of an Anemo here.
Bennett

- Higher damage floor and ceiling.
- Needs no Constellations. However, when Bennett becomes C6, the gap between Bennett and Diona widens further.
- Gets Energy from/gives Energy to Diluc.
- More weapon choices.
Diona

- Lowers the ER requirement of the other Cryo unit.
- Cryo Resonance gives a better stat: CRIT Rate instead of ATK%.
- Frees Bennett for use on another team.
- More expensive team.
Kaeya

Rotations
Diona with Kaeya (C6)
Diona E+(E)+Q -> Kazuha E+Q -> Diluc Q -> Kaeya E+Q -> Diluc N2+E+N2+E+N2+E+N2
Diona with Kaeya (C0)
Diona E+(E)+Q -> Kazuha E+Q -> Kaeya E+Q -> Diluc Q+N1+E+N1+E+N1+E+N1
Rosaria

Rotations
Diona with Rosaria (C2)
Diona E+(E)+Q -> Rosaria E -> Kazuha E+Q -> Rosaria Q -> Diluc Q+N1+E+N1+E+N1+E+N1
Final Statement
As Diluc is one of the oldest characters in Genshin, I myself didn’t think I would learn anything new when starting research for this guide. But I was surprised to find out that my initial thoughts were wrong, and I hope you learned something new as well.
I want to give a special thanks to the good people at the KQM for their help with math, rotations, and writing structure, but especially to Latiwings#3308 who helped with the looks of the guide and kol#1593 who helped with the writing. I’d also like to thank Ap#8207 from Diluc mains for the math and contribution to Melt teams. It’s only thanks to everyone involved that this guide came into fruition.
