Updated for Version 3.4

Credit to yai_sea_ball on IG!
“The name’s Shikanoin Heizou, the sharpest and most successful detective of the Tenryou Commission… Ooh, my goodness, life’s really put you through the wringer recently, hasn’t it? I can tell. Here, why don’t you take a seat, tell me the whole story.”
Table of Contents
Glossary
Explanation of terms used (in context of this guide)
| Term | Meaning |
|---|---|
| DPS | Refers to units who are responsible for a respectable bulk of the damage on a team. |
| Enabler | Refers to units who facilitate the elemental aura required for their teammates to proc reactions; ‘enabling’ them to deal more damage. |
| Support | Refers to units who can provide utility such as buffing, shielding, and/or healing in order to empower the DPS character(s) or to function comfortably. |
| Single-Target | Refers to damage that is highly, if not totally, concentrated on one enemy. |
| AoE | Refers to damage that can hit multiple enemies simultaneously. |
| ICD | Generally refers to any invisible timers in the game for a particular event, usually used in the context of Elemental application. More information on ICD here. |
| Snapshotting | Property by which an ability uses the stats present on a character during the casting of the ability throughout its duration. More information on the KQM TCL here. |
| VV | Viridescent Venerer |
| NO | Noblesse Oblige |
| TTDS | Thrilling Tales of Dragon Slayers |
| BiS | Best in Slot. Refers to the best option (e.g. weapon, artifact set, etc.) for a given unit or team composition. |
| N(#) | Refers to executing the given amount of Normal Attacks in a string. |
| E | Elemental Skill |
| Q | Elemental Burst |
Introduction
Heizou is a 4* Anemo Catalyst whose flexibility allows him to fulfill various roles as an on-field driver or a supportive quickswap DPS. Though Heizou is often overshadowed by his highly popular 5* Anemo boy counterparts, he possesses a highly unique and effective kit making him a strong addition to many rosters. Whether it be detective work or practical gameplay, knowledge is power; this guide seeks to instruct players on how to best optimize Heizou’s kit.
Pros
- Much more accessible as a 4* character compared to his mainly 5* competition
- Capable quickswap DPS unit, with a strong Elemental Skill
- Great as a driver due to to his fluid attack combos and low stamina cost Charged Attack
- Strong on-field Anemo application enables high rate of reactions
- Being an Anemo Catalyst user enables strong support artifact/weapon options—such as 4VV and TTDS
- Versatile build options as he can utilize both CRIT and EM builds effectively
- 4th Ascension Passive—Penetrative Reasoning—provides a simple yet potent EM buff to his teammates
- Constellations can be significant, but are not necessary to play Heizou
- You can punch enemies out of their ability to live
Cons
- Faces stiff competition from fellow Anemo units, namely Kazuha and Sucrose, who can offer stronger buffs and/or utility in comparison
- Does not have the liberty of Sucrose’s range as an on-field driver
- Weak grouping even with C2
- Wants Constellations and/or higher levels of investment for more offensive builds
- Weak Normal Attack scaling
Talents
Talent Priority
Quickswap: E > Q > NA
Driver: E > NA > Q
 Normal Attack | Fudou Style Martial Arts
Talent Description
Normal Attack
Performs up to 5 fisticuffs empowered by a mighty wind, dealing Anemo DMG.
Charged Attack
Consumes a set amount of Stamina to perform a sweeping kick, dealing Anemo DMG.
Plunging Attack
Calling upon the surging wind, Heizou plunges towards the ground from mid-air, damaging all opponents in his path. Deals AoE Anemo DMG upon impact with the ground.
Heizou’s Normal and Charged Attacks are quite special for those of a Catalyst character, being the only one to utilize melee attacks. His Normal and Charged Attacks all have fairly average scalings and deal AoE Anemo DMG. However, they’re useful for triggering Swirl and corresponding effects such as 4VV and Ascension 1 (A1) passive allowing him to gain Declension stacks for his Skill. This is made especially easy due to Heizou’s Charged Attack not sharing an ICD with his Normal Attacks, meaning that his Charged Attacks apply Anemo every time. It is worth noting Heizou’s Charged Attack has noticeable knockback on smaller enemies, and as such may sometimes need to be played around.
 Elemental Skill | Heartstopper Strike
Talent Description
Press
Wields the swift winds to launch a Heartstopper Strike that deals Anemo DMG.
Hold
Charges energy to unleash an even stronger blow. Heizou will obtain the Declension effect while charging, which will increase the power of the Heartstopper Strike. When the skill button is released or the skill duration ends, he will strike forward, dealing Anemo DMG.
Declension
Increases the power of the next Heartstopper Strike. Max 4 stacks. When you possess 4 Declension stacks, the Conviction effect will be produced, which will cause the next Heartstopper Strike to be even stronger and have a larger AoE.
The main source of Heizou’s damage when utilizing an Attack Damage CRIT (ADC) build. His Skill can be held to gain Declension stacks, although this is not recommended as it consumes valuable rotation time and these stacks can also be attained otherwise via his A1.
 Elemental Burst | Windmuster Kick
Talent Description
Leaps into the air and uses the Fudou Style Vacuum Slugger and kicks his opponent. The Vacuum Slugger will explode upon hit and create an Arresting Windtunnel that pulls in nearby objects and opponents, dealing AoE Anemo DMG.
When Fudou Style Vacuum Slugger hits enemies affected by Hydro, Pyro, Cryo or Electro, it afflicts them with Windmuster Iris. Moments later, Windmuster Iris explodes and dissipates, dealing AoE DMG of the corresponding elemental type.
Fudou Style Vacuum Slugger can afflict a maximum of four enemies with the Windmuster Iris. A single enemy cannot be afflicted by Irises of different elemental types at the same time.
Heizou’s Elemental Burst accounts for a significant portion of his damage, and, unlike the majority of his kit, it can be used from a distance. This is also his only source of grouping, although only noticeable at C2. His Elemental Burst has a low cooldown and Energy cost (12s cooldown, 40 Energy cost), allowing him to spam it in a quickswap team.
 Ascension 1 Passive | Paradoxical Practice
Talent Description
When Shikanoin Heizou activates a Swirl reaction while on the field, he will gain 1 Declension stack for Heartstopper Strike. This effect can be triggered every 0.1s.
This is an essential part of Heizou’s kit, allowing you to gain Declension stacks relatively easily, and is his main source of Declension stacks.
 Ascension 4 Passive | Penetrative Reasoning
Talent Description
After Shikanoin Heizou’s Heartstopper Strike hits an opponent, increases all party members’ (excluding Shikanoin Heizou) Elemental Mastery by 80 for 10s.
The only part of Heizou’s kit that has any supportive capabilities aside from being able to utilize Viridescent Venerer (VV) and various supportive weapons. This Ascension is useful for Electro-Charged or Vaporize teams where the extra Elemental Mastery (EM) can be utilized.
 Utility Passive | Pre-Existing Guilt
Talent Description
Decreases sprinting Stamina consumption for your own party members by 20%. Not stackable with Passive Talents that provide the exact same effects.
The only utility passive with notable combat applications due to its Stamina conservation. Always helpful to have.
Constellations
Preface:
Heizou’s Constellations are not needed when using him as a quickswap Viridescent Venerer support or as a Swirl driver, and he is fully functional at C0. However, they do improve his personal damage significantly, increasing his value on ADC builds, and provide other utility that can be valuable at times. The raw DPS value of some of his Constellations can therefore be hard to evaluate, due to their importance varying on both his team and the content faced.
 Constellation 1 | Named Juvenile Casebook
For 5s after Shikanoin Heizou takes the field, his Normal Attack SPD is increased by 15%. He also gains 1 Declension stack for Heartstopper Strike. This effect can be triggered once every 10s.
Nice to have quality of life Constellation, allowing Heizou to achieve maximum stacks within the first rotation. This Constellation will also shorten the rotation if performing a rotation containing 2 max Skill charges.
DMG increase over previous: –
Cumulative DMG increase: –
 Constellation 2 | Investigative Collection
The pull effect of the Arresting Windtunnel created by Windmuster Kick is enhanced, and its duration is increased to 1s.
Grants Heizou the ability to noticeably group enemies. Even with this Constellation, Heizou’s grouping isn’t as powerful as other Anemo units like Sucrose, Kazuha, or Venti.
DMG increase over previous: –
Cumulative DMG increase: –
 Constellation 3 | Esoteric Puzzle Book
Increases the Level of Heartstopper Strike by 3.
Generic Talent Level increase to his Skill Talent Level, increases damage by 4.4%
DMG increase over previous: 4.4%
Cumulative DMG increase: 4.4%
 Constellation 4 | Tome of Lies
The first Windmuster Iris explosion in each Windmuster Kick will regenerate 9 Elemental Energy for Shikanoin Heizou. Every subsequent explosion in that Windmuster Kick will each regenerate an additional 1.5 Energy for Heizou.
One Windmuster Kick can regenerate a total of 13.5 Energy for Heizou in this manner.
Useful within low-Energy generation teams or where Heizou only performs one Skill per rotation, drastically lowering the amount of Energy Recharge required. In other cases, the value of this Constellation is low or sometimes negligible.
DMG increase over previous: –
Cumulative DMG increase: 4.4%
 Constellation 5 | Secret Archive
Increases the Level of Windmuster Kick by 3.
Although not as significant as his C3, the additional Burst Talent Levels are appreciated.
DMG increase over previous: 3.6%
Cumulative DMG increase: 7.99%
 Constellation 6 | Curious Casefiles
Each Declension stack will increase the CRIT Rate of the Heartstopper Strike unleashed by 4%. When Heizou possesses Conviction, this Heartstopper Strike’s CRIT DMG is increased by 32%.
Greatly increases Heizou’s personal damage due to the generous amount of CRIT stats it provides.
DMG increase over previous: 12.25%
Cumulative DMG increase: 20.24%
Quickswap or Driver
Heizou’s two primary and most effective playstyles are Quickswap and Driver. Let’s dive into how each playstyle works and how to use his kit for each.
Quickswap
Quickswap Heizou swaps in to apply relevant buffs and deal a significant amount of damage with his Talents, then swaps out to allow other units to deal the majority of the team’s damage. In this case, you’ll almost always go with an Attack Damage CRIT build (ADC), which includes an Attack Sands, Anemo Goblet, and CRIT Rate/DMG Circlet. The goal of the quickswap playstyle is to use Heizou’s skill with maximum Declension stacks and then quickly swap off.
There are two combos to get Heizou to max stacks: N1CQE (N1QE for C1 and above) and 2N1CE (N1CE for C1 and above). The former is preferable when his Burst is available, while the latter is preferable when it is not. It can also be beneficial to use Heizou’s Skill earlier in the combo so that he can collect the particles it generates more easily—however, if you do use his Skill earlier in the combo, make sure to consistently use it earlier in subsequent rotations. If Heizou is used alongside characters whose effects trigger on using Normal Attacks (e.g. Xingqiu, Yelan), these combos can be further optimized by weaving N1s between various parts of the combo. The given combos will generally not give Heizou max stacks for his first Skill use in a chamber. To remedy this, you can perform a Normal Attack directly after the Burst to achieve max stacks; however, performing a full N1C combo after the Burst may prove more reliable. Alternatively, you may choose to proceed with the rotation without max stacks on your first combo, as it is typically not vital to clearing.
Driver
Heizou as a driver uses his high rate of on-field Anemo application to trigger both Hydro and Electro Swirls in an Electro-Charged team, allowing him to trigger significant Electro-Charged reaction damage. For artifacts, it is recommended to run triple EM (Sands, Goblet, Circlet) to maximize Swirl and Electro-Charged damage.
While combos are not needed for this playstyle and will usually depend on the rotation, N4C is the most effective and should be used for Electro-Charged teams due to its high Swirl rate and reasonably good value for driving off-field units. If Heizou is being used with Beidou, N2D becomes the most optimal if maximizing Stormbreaker triggers. If a shorter combo is necessary in situations where rotation timing is tight, N2C can also be used and is similar to N4C in performance.
Summary Table
| The combos below do not give maximum stacks on the first rotation. Players can perform the first rotation without maximum stacks, or perform an extra NA after Burst to fully stack his Skill |
| Playstyle: | Quickswap | Driver |
|---|---|---|
| Artifact Main Stats: | ATK/Anemo/CRIT | EM/EM/EM |
| Optimal Combos: |
|
|
Artifacts
Heizou’s stat requirements vary depending on his build and are discussed in the section above. His ER requirements also vary depending on the team, and it is best to use Zakharov’s Energy Recharge Calculator for a more accurate value. However, a rough estimate of Heizou’s ER requirements can be found in the table below.
| Conditions | C0-C3 | C4+ | |
|---|---|---|---|
| Quickswap | 1 Skill per Burst | >200% | 160-170% |
| 2 Skills per Burst | 120-130% | 100% | |
| Driver | 1 Skill per Burst | 170-180% | 130-140% |
| 2 Skills per Burst | 100-110% | 100% | |
Assumptions:
KQMC standards for substat distribution and weapons
1 Level 100 10% enemy resistance
Primary weapon used is R3 Mappa Mare
Level 90 Bennett with 4p NO and Pyro resonance
| Set Name | % of 4pc VV | Notes |
|---|---|---|
| Highly Recommended | ||
4pc Viridescent Venerer |
100% | This is the second best artifact for personal damage, while also improving team damage, making it the best set Heizou can use. If you have a taser driver, go triple EM; otherwise, go ADC. |
| Others | ||
| 4pc Lavawalker/ Thundersoother  |
103.30% | The best artifact set for personal damage, but still inferior to Viridescent Venerer in terms of overall team damage even if its conditions can be met. However, do not specifically farm for these sets. |
2pc + 2pc EM/ATK/Anemo DMG% |
94.48%-96.79% | Aside from a rainbow set, this is the easiest set to obtain. There isn’t much damage loss overall, but it lacks the team buffing abilities that Viridescent Venerer provides, so it should only be used if another 4pc VV holder is already present. |
Weapons
Heizou has a plethora of weapons at his disposal, some of which increase personal damage, while others increase team damage. What kind of weapon he prefers varies based on multiple factors, including but not limited to his teammates, investment, and Constellations unlocked.
For a quickswap playstyle, Heizou will almost always prefer supportive weapons at lower investments. TTDS is the prime candidate for this, particularly if only one teammate is contributing most of the team’s damage. However, at higher investments and Constellations, this gap tends to close—choosing Heizou’s weapon to benefit his personal damage becomes much more viable and often equally competitive.
As a reaction-based EM driver, Heizou will generally almost always use supportive weapon choices such as Hakushin Ring, Prototype Amber or TTDS. This is due to the weapon stats being much less relevant due to a large part of Heizou’s damage coming from reactions, making buffing teammates more effective. Nonetheless, weapons with EM substats will still tend to serve him well.
ADC
Assumptions:
KQMC standards for substat distribution
Calculated with the combo N1CQE > 2N1C E, with both skills having 4 Declension stacks
Buffed calcs assume +1071 Flat Attack and +20% ATK on N1CQE attack string, with a flat +25% ATK across all attack strings from Pyro Resonance
The Widsith is averaged based on the different note buffs and buff scenarios across 3 rotations
| Weapon Name | Unbuffed | Buffed | Notes |
|---|---|---|---|
R1 Skyward Atlas |
120.3% | 112.8% | Skyward Atlas is Heizou’s Best in Slot (BiS). It’s a stat stick with a passive that only requires you to hit the enemy with a Normal Attack, which means that it has no restrictions Calculated with 4 procs on the passive. |
R1 Memory of Dust (5 stacks, shielded) |
119.1% | 107.0% | Memory of Dust is one of the best weapons for unbuffed Heizou because of the immense amount of Attack that it provides. However, when buffed, Bennett’s Attack buff oversaturates Heizou’s Attack, making Memory of Dust less effective. If you run Memory of Dust with a shielder, it becomes one of the strongest catalysts for Heizou. However, this is generally rare. |
R1 Kagura’s Verity (3 stacks) |
116.1% | 113.5% | Kagura’s Verity is a good alternative to Skyward Atlas. However, note that obtaining 3 stacks on the passive requires at least 30 seconds, meaning that Heizou will deal less damage during the beginning of a fight. |
R1 Memory of Dust (5 stacks, unshielded) |
112.3% | 102.5% | Memory of Dust is still very strong, even if you’re not running a shielder. |
R5 The Widsith |
110.5% | 107.2% | The Widsith is the best 4-Star weapon that Heizou can use. However, its passive means that Heizou’s damage can fluctuate depending on what buffs he gets at certain points of the rotation. Calculated by averaging damage from all possible The Widsith buffs and buff scenarios + one rotation without any buffs. |
R1 Kagura’s Verity (1 stack) |
108.5% | 105.9% | This is the kind of damage you’ll deal at the beginning of a fight. The value of Kagura’s Verity falls off in short fights where Heizou doesn’t have time to gain enough stacks. In fights longer than 20 seconds, Heizou has the ability to build and maintain stacks and, as a result, does more damage than the calcs show. |
R1 Lost Prayer to the Sacred Winds |
108.1% | 106.5% | Lost Prayer to the Sacred Winds is carried by its 5 Star Base Attack and CRIT Rate secondary stat. Because ADC Heizou is played in quickswap teams, he doesn’t stay on-field long enough to make use of the passive, meaning that it’s effectively useless. Calculated with 0 stacks, and 1 stack for first E. |
R3+ Sacrificial Fragments |
107.3% | 107.0% | Sacrificial Fragments allows Heizou to use an extra E every rotation. Along with its EM substat, Heizou can build more offensive stats instead of focusing on ER. Even though the second E extends the rotation duration, Sacrificial Fragments is just that busted. R3 is recommended for consistency on resetting the Skill. Calculated with rotation extension accounted for. |
R5 Solar Pearl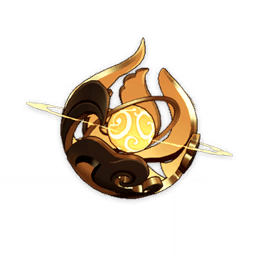 |
104.8% | 105.4% | R5 Solar Pearl is a marginal 5% increase over R1 Solar Pearl. Heizou easily procs both passives, but he usually won’t end up buffing his Normal Attacks. Because Solar Pearl also doesn’t buff his Swirl damage, its refinement value is significantly low and not worth pursuing. |
R5 Mappa Mare (2 stacks) |
104.6% | 101.1% | Mappa Mare is the best Free to Play (F2P) weapon as it only requires Catalyst billets. However, players might not have 4 extra billets for its refinements. |
R1 The Widsith |
102.9% | 100.9% | See R5 description. |
R5 Eye of Perception |
102.4% | 96.7% | Its passive is decent, but since it deals Physical Damage, it isn’t buffed by Anemo DMG%. If you have it and you’ve got nothing better, use it. If you don’t, don’t roll for it. |
R1 Solar Pearl |
100.0% | 100.0% | If you don’t have The Widsith and are willing to pay a bit of money, Solar Pearl can be worth getting. Otherwise, you should probably use Mappa Mare instead. |
R1 Eye of Perception |
99.4% | 93.7% | See R5 description. |
R5 Dodoco Tales |
99.4% | 92.3% | Its performance is similar to R1 Mappa Mare. Pretty good F2P weapon if you got it from the event. |
R1 Mappa Mare (2 stacks) |
98.7% | 93.9% | Your go-to F2P weapon. Mappa Mare performs well even with only 1 refinement and scales further with more on-field time delegated to Heizou. |
R5 Wine and Song |
98.5% | 92.5% | For a limited 4-Star weapon, its performance is pretty bad. It can help with Stamina management by reducing Charged Attack Stamina usage, but it isn’t really worth the drop in damage. |
R3+ Favonius Codex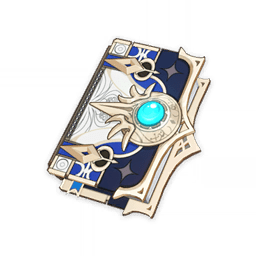 |
98.3% | 92.9% | Favonius Codex doesn’t provide any offensive stats, but the Energy and Energy Recharge it provides allows Heizou and his team to build less ER, increasing damage. Calculated assuming 2 Bursts per rotation. |
R5 Prototype Amber |
98.3% | 92.9% | Crafting a Mappa Mare would be better. However, the performance of R5 Amber for Heizou’s personal damage is still worth noting for those interested. Calculated assuming 2 Bursts per rotation. |
Blackcliff Agate (0 stacks) |
95.0% | 90.8% | Blackcliff Agate is bad because it is difficult to build and maintain stacks. Its passive requires Heizou to defeat enemies, which is difficult for a myriad of reasons. One reason is that Heizou has to defeat the enemies, and not anyone else in the team. Another reason is that when fighting high HP or boss enemies, it’s just impossible to build or maintain any stacks. |
R5 Hakushin Ring |
92.8% | 91.3% | A decent option on some Electro teams, due to its team buff—however, it does come at significant expense to Heizou’s own damage. |
R5 Thrilling Tales of Dragon Slayers |
75.1% | 74.4% | While it performs abysmally for his own damage, the buff it provides is so significant it can be worth using if it can be reliably passed to a teammate in need of the ATK%. |
EM
EM builds focus primarily on EM stats. Hence, the weapons are mainly gauged by the amount of EM stat value they supply, as well as their accessibility and—if applicable—other benefits such as buffs.
| Weapon Name | Notes |
|---|---|
R1 Sacrificial Fragments |
Sacrificial Fragments is Heizou’s best option as it has the highest 4-star EM substat in the game—the primary stat that EM Heizou builds want. Its passive also provides Heizou with additional AoE Swirls, which is a nice bonus to his personal damage in multi-target situations. |
R1-5 Magic Guide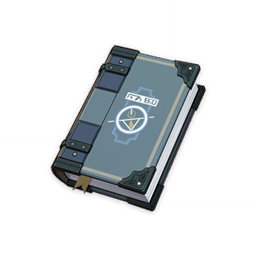 |
A decent option should players not have the aforementioned catalyst at their disposal. Whilst its passive does not affect Swirl damage, this 3-star weapon still supplies a rather high amount of EM for Heizou. |
R1 Mappa Mare |
Provides less EM than Magic Guide but is a largely more versatile weapon option should players want to tap into his ADC build, where Mappa Mare performs well in. However, do not craft this weapon if you’re only looking to play Heizou in EM builds as Magic Guide is a cheaper yet more accessible option. |
Support
Support weapons are NOT ranked in the table. Rather, the table should be looked at as a list of weapon options for Heizou as a support for players to pick from given the positives and negatives of using each of the weapons.
| Weapon Name | Notes |
|---|---|
R5 Thrilling Tales of Dragon Slayers |
A low-investment option with an extremely potent ATK buff of 48%, albeit only for one team member. Since the weapon passive limits the flexibility of rotations in order to be optimally utilized, it is most advisable to run this weapon when playing an already rotation-strict team to pass the buff effectively while the rotation remains fluid. |
R5 Hakushin Ring |
A potent weapon option that shines best in the Electro-Charged team archetype as it can buff both Electro and Hydro party members. This is owed to a strong multi-character buff with a flexible trigger condition past the initial set-up. |
R5 Prototype Amber |
For teams without healers, Prototype Amber has a unique passive that aids healer-less teams with micro-heals, in addition to managing his ER requirements when Heizou can only manage to use one Skill per Burst. In longer rotations, Prototype Amber can also enable 2 Bursts per rotation with the high reduction in ER requirements from its passive. Do note that the value of the Energy refund is diminished should the player have his C4, which already provides a large reduction to his ER requirements. |
Heizou vs Sucrose vs Kazuha


As an Anemo Catalyst user with an EM buff from his A4, it is difficult to talk about Heizou’s teams and use cases without discussing how he compares to other popular Anemo buffers—particularly Sucrose and, to a lesser extent, Kazuha too. It is worth noting that despite their strengths and shortcomings over each other, Anemo buffers are generally invaluable; having multiple of them is always advantageous.
Sucrose
In summary, Heizou mostly serves as a sidegrade to Sucrose. The table below summarizes the differences between them. However, it is recommended to read the write-up below for a more comprehensive analysis.
| Heizou | Sucrose |
|---|---|
| This table is a summary which does not cover all the nuances between the two units | |
| Quickswap | |
|
|
| Driver | |
|
|
As a quickswap VV support, Sucrose’s main advantages are her lower field time and much larger buff when invested in. However, in numerous team compositions, Heizou compensates for this with his own personal damage.
There are a few nuances to using Sucrose, namely:
- Sucrose’s Burst has a much stronger grouping capacity than Heizou’s. However, its higher Burst cost and low uptime makes it relatively inaccessible, its Elemental Absorption inconsistency can often mess with a team’s reactions, and it can also anti-group certain enemies with lower Interruption Resistance such as Bathysmal Vishaps.
- Sucrose’s Elemental Skill possesses the ability to Swirl Pyro off of Xiangling’s Guoba—enabling her to execute certain Pyro VV setups in situations that Heizou would not be able to replicate. More information on this interaction can be found on the Xiangling Guide.
- Though preventable through only entering precise inputs, Sucrose’s N1 is bugged to occasionally completely disappear, which can sometimes cause issues. On the flipside, her range makes some VV setups which rely on Normal Attacks much easier.
- Finally, compared to Heizou, Sucrose has unrivaled battery potential for units like Xiao.
Overall, Sucrose will generally be a slightly better choice in teams using Amplifying and especially Additive Reactions due to her advantages. That said, it can vary in reality, with the difference often depending on the team, and also the investment levels of not only Heizou and Sucrose but also their teammates. One exception to this is in Xiangling teams, where Guoba Swirls give Sucrose an uncontested advantage. While Heizou is an undeniable step up from Sucrose in Freeze teams, serving as a strong low rarity Anemo option, other units often outdo both Heizou and Sucrose in this role.
As an on-field EM driver, they are still mostly comparable with only minor playstyle differences between them. Heizou’s Normal Attack strings are mostly more fluid, while possessing a lower Stamina cost Charged Attack—this enables him to drive units like Beidou slightly better without difficult combos, while also being less Stamina-intensive. That said, Sucrose’s range can allow her to be a better option in practice as players would not need to worry about missing her Normal Attacks. Furthermore, her AoE on her Charged Attacks in combination with her Burst capacitates her to trigger more Reactions in certain situations.
Kazuha
| Heizou | Kazuha |
|---|---|
| This table is a summary which does not cover all the nuances between the two units | |
| Comparison | |
|
|
Sample Team Compositions
It is worth noting that due to Heizou’s personal damage, buffs, and further supportive capabilities through VV and potentially his weapon choice, he is extremely versatile and can fit on a wide variety of teams. The following list of archetypes is not exhaustive. Instead, they are meant to illustrate some of the teams Heizou fits most comfortably in and how he can be used.
(Faded characters have further caveats for their use)
The top left of Yanfei’s icon indicates what her role is; the sword implies that she’s an on-field DPS while the shield means she’s built as a shield bot—Yanfei can only fulfill this role at C4+.
Reverse Vape
| Pyro Carries are listed beside which Flexes they can use well | ||
| Pyro Carry & Flex (Pick One Carry and Flex)  |
Pyro On-field Carry | Pyro Flex |


|
|
|

|

|
|

|


|
|
| Hydro Enabler (Pick one) |

|
|
| Description | ||
|
In this team archetype, Heizou supports an on-field Pyro carry such as Diluc who, with the help of an off-field Hydro enabler, uses the Reverse Vape Reaction to deal significant damage. Due to his personal damage, EM buff, and ability to provide VV RES Shred, Heizou is particularly suited to this role. This is further bolstered by his lack of significant off-field Elemental application, meaning that he does not interfere with any reactions.
For most of these teams, Heizou can hold either TTDS or an offensive weapon such as The Widsith, with both being comparable for team damage at higher investments. One notable exception is Yoimiya, who prefers Thoma for his shielding and lacks any ATK buffs in her kit, causing her to particularly value Heizou’s ability to hold TTDS. These teams generally prefer ADC Heizou, however EM builds can be considered if running TTDS. While Xingqiu and Yelan can both generally enable the Pyro carry to consistently Reverse Vape, Xingqiu’s higher rate of Hydro application is particularly significant with Hu Tao; while it is possible to Reverse Vape her combos with just Yelan, it is exceedingly difficult and thus not recommended. Recommended Teams:
|
||
| Rotations | ||
|
The VV Setups for the Pyro DPS usually depend on the Pyro flex and Hydro enabler used, and not on the Pyro DPS. Shown below are some setups for Bennett and Thoma. Note it is important to weave N1s throughout Heizou’s combos to maximize damage from Yelan or Xingqiu.
Bennett and Xingqiu: Xingqiu Skill -> Burst -> Bennett Skill -> Burst -> Heizou Combo -> Pyro DPS -> Heizou Combo -> Bennett Skill -> Repeat Bennett and Yelan: Bennett Skill -> Yelan Burst -> N1 -> Skill -> N1 -> Bennett Skill -> Burst -> Heizou Combo -> Pyro DPS -> Heizou Combo -> Repeat Thoma and Xingqiu (somewhat inconsistent): Xingqiu Skill -> Burst -> N1 -> Thoma Skill -> N1 -> Burst -> Heizou Combo -> Pyro DPS -> Heizou Combo -> Repeat Thoma and Yelan: Yelan Skill -> Burst -> N1 -> Thoma Skill -> Burst -> Heizou Combo -> Pyro DPS -> Heizou Combo -> Repeat Example rotation with Diluc/Bennett/Xingqiu/Heizou Example setup with Hu Tao/Thoma/Xingqiu/Heizou |
||
Bennett + Xiangling Core
| Bennett and Xiangling (Pick both)  |
|
| Hydro Enabler (Pick up to one) |
|
| Other Flex (Pick up to one) |
|
| Description | |
|
Bennett and Xiangling together make a relatively self-sufficient core that between them can provide healing, buffing, significant off-field damage and high Pyro application. Heizou’s damage and buffs significantly bolster this, allowing the chosen fourth unit to take advantage of these effects in various ways. One important thing to note, however, is that Bennett needs time to funnel the particles from his Tap Skill to Xiangling to lower her ER requirements, without which she can struggle to generate enough Energy for her Burst. These teams generally prefer ADC Heizou, however EM builds can be considered if running TTDS.
If using a Hydro enabler, the team’s focus becomes Reverse Vaporizing Xiangling’s Pyronado. While Heizou is mostly inferior to Sucrose in this role due to Sucrose’s ability to Guoba Swirl trivializing setups, Heizou can still act as a good option who is able to provide VV RES Shred to both Hydro and Pyro if using Tartaglia or Xingqiu. With Xingqiu, it is even possible to have Heizou take field time, using Hydro Swirls to allow Xiangling to Reverse Vape in AoE situations. Alternatively, Rosaria can be used in the last slot to Reverse Melt her Skill and Burst off of the Pyro aura applied by Bennett and Xiangling. One can also choose to forsake reactions altogether in favor of using Kazuha for additional buffs, which also opens up Heizou to use other artifact sets. However, this is generally lower damage than the aforementioned options—it is nonetheless competitive, and works particularly well when said reactions cannot be triggered consistently. Faruzan is a potent buffer for Anemo damage, bolstering Heizou’s damage significantly enough that she can be a worthwhile slot-in on these teams. That said, she has a significant amount of her value locked behind C6 which bolsters her Energy generation, grouping, buffing power and offers a fair amount of quality-of-life. While her C6 is not absolutely necessary, it is worth noting that the team’s damage and comfort is reduced a fair amount without it. Recommended Teams:
|
|
| Rotations | |
|
With Tartaglia:
Tartaglia Skill -> Bennett Burst -> Xiangling Skill -> Heizou N1C -> Burst -> Skill -> Xiangling Burst -> Tartaglia Ranged Burst -> Skill -> Melee (~9s) -> Batterying -> Repeat (~26s) Batterying can be extended if necessary, and is commonly filled with about 2-3 Bennett funnels, 1-2 Tartaglia Aimed Shots and a Heizou Skill, with or without stacks as applicable. From the second rotation, the start of the setup can be changed to Bennett Skill -> Burst -> Tartaglia Aimed Shot -> Xiangling Skill. Rotation Link With Rosaria: Bennett Skill -> Burst -> Rosaria Skill -> Burst -> Heizou N1C -> Xiangling Burst -> Heizou Burst -> Skill -> N1 -> Bennett Skill -> Xiangling Skill -> Rosaria Skill -> Bennett Skill -> Xiangling Funnel -> Heizou N1C -> Skill -> Repeat Use Xiangling’s Skill as it is available. Given rotation is for C1 Heizou, C0 Heizou can use an extra N1C as needed for stacks. Rotation Link With Kazuha: Bennett Skill -> Burst -> Kazuha Tap Skill -> Burst -> Heizou Combo -> Bennett Skill -> Xiangling Burst -> Kazuha Tap Skill -> Bennett Skill -> Xiangling Skill -> Heizou Combo -> Repeat Rotation Link With Faruzan: Faruzan Burst -> Bennett Skill -> Burst -> Heizou N1 -> Skill -> Bennett Skill -> Xiangling Burst -> Bennett Skill -> Xiangling Funnel -> Heizou N1C -> Burst -> Skill -> N1C -> Bennett Skill -> Xiangling Funnel -> Repeat Rotation Link |
|
Freeze
| Cryo Units (Pick two)  |



|
| Hydro Enabler (Pick one) |



|
| Description | |
|
While his lack of significant buffs or grouping usually make him a worse pick than Kazuha or Venti as an Anemo option in Freeze, he serves as the next best option due to his high personal damage and support capabilities. He is also typically less contested than the aforementioned units, and his accessibility as a 4* make him a fairly good unit in Freeze teams.
Note that in teams with high Freeze uptime, it is possible to get away with less defensive utility than would generally be required due to the crowd control provided by Freeze, allowing you to opt for more damaging Cryo and Hydro units. Heizou tends to equip an offensive weapon in these teams — however, TTDS can be used at lower investments, or on Ayaka teams if there is no other holder. These teams generally prefer ADC Heizou, however EM builds can be considered if running TTDS. Ganyu is not recommended as highly as other options due to her quadratic scaling that highly appreciates strong grouping that Heizou cannot provide; that said, she can be very potent against in some situations where the extra grouping isn’t needed or with proper knowledge of enemy mechanics such that Heizou’s grouping suffices. Recommended Teams:
|
|
| Rotations | |
|
Heizou/Ayaka/Kokomi/Rosaria:
Ayaka Dash -> Skill -> N1C -> Rosaria Skill -> Burst -> Heizou Combo -> Kokomi Skill -> Ayaka Skill -> Dash -> Burst -> Rosaria Skill -> Ayaka N1C -> Heizou Combo -> Repeat Rotation Link Heizou/Rosaria/Kaeya/Xingqiu: Xingqiu Skill -> Burst -> Rosaria Skill -> Burst -> Heizou Combo > Rosaria Skill -> Kaeya Skill -> Burst -> Heizou N4C -> Rosaria Skill -> Heizou Skill -> Kaeya Skill -> Repeat Heizou can use extra N1Cs as needed to gain stacks. Do not forget to weave normal attacks to properly make use of Xingqiu. Rotation Link courtesy of Aftermath#7658 |
|
Electro-Charged + Hyperbloom
| Do not use characters that need a battery without a unit that can battery | ||
| Electro Flex (Pick one or two of)  |
Off-field DPS (battery) |
Off-field DPS (needs battery) |


|

|
|
| Hydro Flex (Pick one or two of) |


|
|
| General Flex (Pick up to one of) |



|
|
| Description | ||
|
The Electro-Charged team archetype, contrary to what the title may suggest, does not usually build around Electro-Charged reaction damage. Rather, this team composition is built around raw damage output and interactions that the Electro-Charged reaction enables because of the coexisting Hydro and Electro auras on the enemy. In Heizou’s case, this team composition comprises—other than Heizou himself—of both an Electro and a Hydro unit; with the last slot being flexible; usually a second Electro, Hydro, or Anemo character. A Dendro character can also be used to enable Hyperbloom — either using Kuki as a primary trigger, or utilizing Fischl alongside another Dendro character to trigger Hyperblooms with Electro Swirls. While Nahida has the highest damage ceiling for such a role, it is worth noting her strong Dendro application can make it difficult to reliably Swirl and will require playing around.
In this team composition, Heizou functions both as a VV support with mild grouping capabilities, in addition to filling the on-field driver role wherever necessary. His build options are very versatile in this playstyle, with EM and support builds being highly preferred while ADC builds still functioning relatively well. Although Heizou’s EM buff isn’t as significant in Electro-Charged teams, his other qualities still provide much benefit to his teammates. Additionally, his quick and easily accessible Anemo application makes him a perfect candidate for Swirling both Hydro and Electro, shredding their resistance with the aid of VV, and triggering reactions in the process. Since most Electro-Charged teams extend past the 24s mark in their rotation length, it is recommended for C4+ Heizou players—or those using ER weapons/Prototype Amber—to build the ER needed in order to Burst twice per rotation. This is both for the greater personal damage as well as the additional grouping it provides. Recommended Teams:
|
||
| Rotations | ||
|
Rotations for this style of team are generally flexible regardless of the flexes used so long as good uptime is maintained on the various abilities. The rotations shown are examples that have been optimized to ensure this.
Heizou/Xingqiu/Yelan/Fischl: Fischl Skill > Xingqiu Skill -> Burst -> Heizou N1C -> N3 -> Burst -> N1 -> Skill -> Yelan N1 -> Burst -> N1 -> Skill -> N2 -> Fischl N1 -> Burst -> Heizou N4C -> N4 -> Burst -> N3 -> Skill -> Yelan N1 -> Skill -> Heizou N3C Heizou can change his combos as needed without significant loss, provided Normal strings are simply optimal for timing. Rotation Link Heizou/Xingqiu/Yae/Fischl: Yae Skill x3 > Xingqiu Skill -> Burst -> Fischl N1 -> Burst -> Heizou N1 -> Burst -> N1CN1 -> Skill > Yae N1 -> Burst -> N1 -> Skill -> N1 -> Skill -> N1 -> Skill -> Fischl N1 -> Burst -> Heizou N4 -> Burst -> N4 -> Skill -> N3C Heizou can change his combos as needed without significant loss, provided Normal strings are simply optimal for timing. Rotation Link Heizou/Xingqiu/Beidou/Fischl: Fischl Skill > Xingqiu Skill -> Burst -> Beidou N1 -> Skill -> N1 -> Burst -> Heizou N2C -> N3 -> Burst -> N1 -> Skill -> Fischl N1 -> Burst -> Beidou N1 -> Skill -> Heizou N2C -> N3 -> Dash -> N2C -> N3 -> Skill -> Beidou Skill > Heizou N2C -> N1C Heizou can change his combos as needed without significant loss, provided Normal strings are simply optimal for timing. Rotation Link |
||
Closing Thoughts
Thank you for reading this guide! I hope it has solved the mysteries of our favorite detective so that you can use him to his fullest potential. While he might share a role with his supportive Anemo brethren, Heizou more than differentiates himself with his unique kit and it was a pleasure to delve into it. For any questions or concerns, feel free to contact me at Cuzimori#1535.
-Cuzi
Funny-punchy man actually kinda pog
-Luno
Acknowledgements
For their work as authors of this guide:
ultimate.noob, Luno#1337, sexyeboy69#2687, Cuzimori#1535
For providing calculations for Heizou, a special thanks to:
Luno#1337, Aftermath#7658, Rare Possum#0511, Prévisible#7440, ultimate.noob
For their assistance in editing the guide into its final, polished form, thanks to:
Aftermath#7658, Latiwings#3308, Seima#4597, Leah, euphorysm#1618, pweep#0150, juko#9358, acie#1290, koko#1111, Halleyscomet08#8285, idkanonymized#4166
For transcribing the guide, thanks to:
pai#3602
And further thanks to everyone in KQM for making this guide possible!
Calculations Repository
![]() Heizou Unbuffed Weapon Calcs
Heizou Unbuffed Weapon Calcs![]() Heizou Buffed Weapon Calcs
Heizou Buffed Weapon Calcs![]() Ultimate Noob’s Heizou Artifact Calcs
Ultimate Noob’s Heizou Artifact Calcs

