By CQLQRS#7853 and redd#1984
Version: [3.3]
“Kujou Sara may have forsaken the arrogant life of the tengu race, but she has never neglected their brilliance with the sword or their supernatural might.”
Table of Contents
Introduction
Kujou Sara is an Electro-fying 4-star Bow user with the ability to buff teammates and deal considerable damage. Though niche, she shines when she has synergy and high investment.
TL;DR
Credits to: euphorysm, cuppacote, baloopy, and KQM Staff
Why Play Sara?
Pros
- Significant AoE Electro damage from her Elemental Burst
- Strong ATK buff
- Can act as a battery in some teams
- Unique CRIT DMG buff to Electro damage from her C6
- Her buffs are not locked behind her Elemental Burst
- Her artifacts are Resin-efficient (Emblem of Severed Fate domain or Noblesse Oblige from the Strongbox)
- Scales well with investment and can outclass other supports for fast clear times
Cons
- Her full buffing potential is locked behind Constellations
- She competes with multiple other characters in her teams who you may have already built/prefer to play
- Short ATK buff duration weakens her versatility
- 80 Energy Cost on her Burst requires her to have high ER%
- Subjectively clunky and awkward playstyle which requires you to use her Charged Attack in order to generate Elemental Particles, and at C0, it is needed to buff ATK. You may also have to swap to her multiple times to refresh her ATK buff
- Prone to interruption while using her Charged Attack
FAQ
Is Sara a replaceable unit if she doesn’t have Constellations?
Yes. Due to her relatively restrictive gameplay and buffing ability, Sara has competition with several units and only becomes exceptional at C6. It’s not because Sara is a poor unit; rather, it’s because there are many other support alternatives in the game with a less clunky and less restrictive playstyle. For example, Lisa or Mona with Thrilling Tales of Dragon Slayers will provide similar value as C0 Sara in a Hyper Raiden team. Regardless, her ATK buff is still valuable and significant in teams where she has synergy.
How does Sara compare to Bennett?
The main similarity between Sara and Bennett is their powerful ATK buff. While it is true that people primarily use these two units for their buffing abilities, they are still rather different characters.
C5 Sara’s ATK buff is worse than Bennett’s, assuming they both have the same level of investment. At C6, Sara has a stronger buff than Bennett, but it’s exclusively for Electro characters. Sara’s buff is also less versatile as it does not have synergy with as many units due to its short duration, meaning it has to be paired with characters that frontload damage or require shorter field time. On the contrary, Sara tends to have better personal damage than Bennett. Players will generally find Bennett easier to utilize, but a combination of both can lead to extremely potent buffs.
Do I have to use Sara with other Electro units?
It is best if Sara is used in Electro-centric teams, but that does not mean that she is only locked to Electro units. For instance, characters like Ningguang who have short field time can utilize Sara’s ATK buff well.
Talents
Talent Priority
Elemental Skill > Elemental Burst > Normal Attack
Leveling Sara’s Elemental Burst yields higher personal damage than leveling her Elemental Skill, but not necessarily higher team damage. Moreover, most players prioritize using Sara as a buffer rather than a damage dealer, hence it is recommended to level her Elemental Skill first.
Talent Overview
 Normal Attack | Tengu Bowmanship
Description
Normal Attack: Perform up to 5 consecutive shots with a bow.
Charged Attack: Perform a more precise Aimed Shot with increased damage. While aiming, crackling lightning will accumulate on the arrowhead. An arrow fully charged with the storm’s might will deal Electro damage.
When in the Crowfeather Cover state, a fully-charged arrow will leave a Crowfeather behind after it hits.
Plunging Attack: Fires off a shower of arrows in midair before falling and striking the ground, dealing AoE damage on impact.
Undoubtedly the least important part of Sara’s kit. Leveling it isn’t recommended as it doesn’t increase her damage significantly, even in teams which use her Fully-Charged Aimed Shot or where Sara is an on-field driver for Beidou’s Elemental Burst.
 Elemental Skill | Tengu Stormcall
Description
Retreats rapidly with the speed of a tengu, summoning the protection of the Crowfeather. Gains Crowfeather Cover for 18s, and when Kujou Sara fires a fully-charged Aimed Shot, Crowfeather Cover will be consumed, and will leave a Crowfeather at the target location.
Crowfeathers will trigger Tengu Juurai: Ambush after a short time, dealing Electro damage and granting the active character within its AoE an ATK Bonus based on Kujou Sara’s Base ATK.
The ATK Bonuses from different Tengu Juurai will not stack, and their effects and duration will be determined by the last Tengu Juurai to take effect.
Arguably the most important Talent to level up and the highlight of her kit. Unlike Bennett, the ATK Buff from her Elemental Skill can only be triggered by the player manually using a Fully-Charged Aimed Shot which can make her feel clunky at times, but this is addressed by her A1 Ascension Passive and Constellation 2. Note that the ATK buff can be extended by hitlag.
Tengu Juurai: Ambush will generate Electro Particles upon explosion. The explosion must hit an enemy for this to happen. The Charged Attack itself does not have to hit the enemy to create Electro Particles–players can aim at the ground near the enemy.
 Elemental Burst | Subjugation: Koukou Sendou
Description
Energy Cost: 80.
Casts down Tengu Juurai: Titanbreaker, dealing AoE Electro damage. Afterwards, Tengu Juurai: Titanbreaker spreads out into 4 consecutive bouts of Tengu Juurai: Stormcluster, dealing AoE Electro damage.
Tengu Juurai: Titanbreaker and Tengu Juurai: Stormcluster can provide the active character within their AoE with the same ATK Bonus as given by the Elemental Skill, Tengu Stormcall.
The Attack Bonus provided by various kinds of Tengu Juurai will not stack, and their effects and duration will be determined by the last Tengu Juurai to take effect.
This is where the bulk of Sara’s damage comes from. Subjugation: Koukou Sendou deals substantial AoE damage that can be further amplified by Sara’s own ATK Buff from her Elemental Skill. Leveling up her Elemental Burst together with her Elemental Skill will allow players access to both a buffer and a damage dealer, giving Sara more versatility in general play. On average, Tengu Juurai: Titanbreaker will hit each enemy once while Tengu Juurai: Stormcluster will hit each enemy 2-3 times. The latter is usually a minor portion of her damage, but against enemies with large hitboxes, it can become quite significant and even double her total Burst damage in extreme cases.
Apart from dealing damage, Sara’s Elemental Burst can also apply and refresh her ATK buff. To do this, a character has to be hit by a Stormcluster, which is easily achieved by swapping to the desired character after using Sara’s Elemental Burst, as one of them will spread in Sara’s direction. This means that switching characters during the Burst’s duration makes it possible to buff multiple characters.
Successful Buff example
Video by Bobrokrot#0111
Unsuccessful Buff example
Video by Bobrokrot#0111
 1st Ascension Passive | Immovable Will
Description
While in the Crowfeather Cover state provided by Tengu Stormcall, Aimed Shot charge times are decreased by 60%.
Neat improvement to her Elemental Skill. Her A1 Passive reduces the clunkiness of her kit quite significantly.
 4th Ascension Passive | Decorum
Description
When Tengu Juurai: Ambush hits opponents, Kujou Sara will restore 1.2 Energy to all party members for every 100% Energy Recharge she has. This effect can be triggered once every 3s.
The wording of this Talent is misleading. It actually means Sara restores 0.012 Flat Energy to all party members for each 1% ER she has.
At 100% ER, Sara provides 1.2 Flat Energy, and at 200% ER, she will give 2.4. While she can trigger this effect again for up to 2.4-4.8 Energy, it isn’t particularly noteworthy.
 Utility Passive | Land Survey
Description
When dispatched on an expedition in Inazuma, time consumed is reduced by 25%.
This Talent allows Sara to speed up Expeditions in Inazuma by a few hours, which is always a nice bonus to have. She is the 5th unit with this Passive, which is nice for lining up Expeditions if players have all 5. The other 4 units with a similar Passive are Bennett, Fischl, Chongyun, and Keqing.
Constellations

“Power duly assimilated. Ready to receive instruction.”
 Constellation 1 | Crow’s Eye
Description
When Tengu Juurai grants characters Attack Bonuses or hits opponents, the CD of Tengu Stormcall is decreased by 1s. This effect can be triggered once every 3s.
This Constellation reduces Sara’s Skill cooldown upon utilizing her kit properly, which is helpful in maintaining her buff uptime and allows her to function as a better battery.
 Constellation 2 | Dark Wings
Description
Unleashing Tengu Stormcall will leave a weaker Crowfeather at Kujou Sara’s original position that will deal 30% of its original damage.
A very significant Constellation that makes Sara easier to play. This ability allows players access to her ATK buff without having to use a Fully-Charged Aimed Shot. It can also be used to buff an additional unit with a Fully-Charged Aimed Shot. Note that in order to generate particles, a Fully-Charged Aimed Shot will still need to be used. However, if the player does not care about generating more particles, the Aimed Shot can be skipped.
 Constellation 3 | The War Within
Description
Increases the Level of Subjugation: Koukou Sendou by 3. Maximum upgrade level is 15.
Levels on Sara’s main damage source are very welcome.
 Constellation 4 | Conclusive Proof
Description
The number of Tengu Juurai: Stormcluster released by Subjugation: Koukou Sendou is increased to 6.
The increased number of Tengu Juurai: Stormcluster allows Sara to hit more enemies with her Elemental Burst due to an increased AoE, especially for mobs with big hitboxes. This has the added benefit of allowing players to use her Elemental Burst as a buff trigger with much more ease.
C0 vs C4 side by side comparison
Sara C0 (left) and Sara C4 (right)
 Constellation 5 | Spellsinger
Description
Increases the Level of Tengu Stormcall by 3. Maximum upgrade level is 15.
This Constellation gives a significant increase to the main purpose of her kit, the ATK buff, which is very appreciated.
 Constellation 6 | Sin of Pride
Description
The Electro DMG of characters who have had their Attack increased by Tengu Juurai has its CRIT DMG increased by 60%.
The main star of Sara’s kit as a buffer. This unique Constellation gives Sara more value in Electro comps—it can make building Electro damage dealers more forgiving to a certain extent, as it allows players to focus on building other stats. It must be noted that this buff cannot be snapshotted. This means that this Constellation is best utilized in teams that can frontload most of their Electro DMG, such as Raiden-Bennett-Kazuha-Sara. However, it still has value with snapshotting sustained damage dealers like Fischl and Beidou as long as the buff is periodically reapplied.
~20% DPS increase for Electro characters during uptime. Mileage depends on CRIT ratio.
Sara’s Playstyle
Sara’s primary role in teams is to act as a potent buffer, complementing abilities that have a short duration but high impact such as the Raiden Shogun’s Elemental Burst. Sara also works well with abilities that snapshot, provided the player can properly manage her C6. This makes her build somewhat standardized across many team compositions, making her relatively easy to gear. With that being said, players should keep in mind that Sara’s Elemental Burst does a good amount of damage and they should invest in both her Elemental Skill and Burst if they are able to, so as to maximize her potential.
“My bow sounds in peak condition. One shot is all I need.”
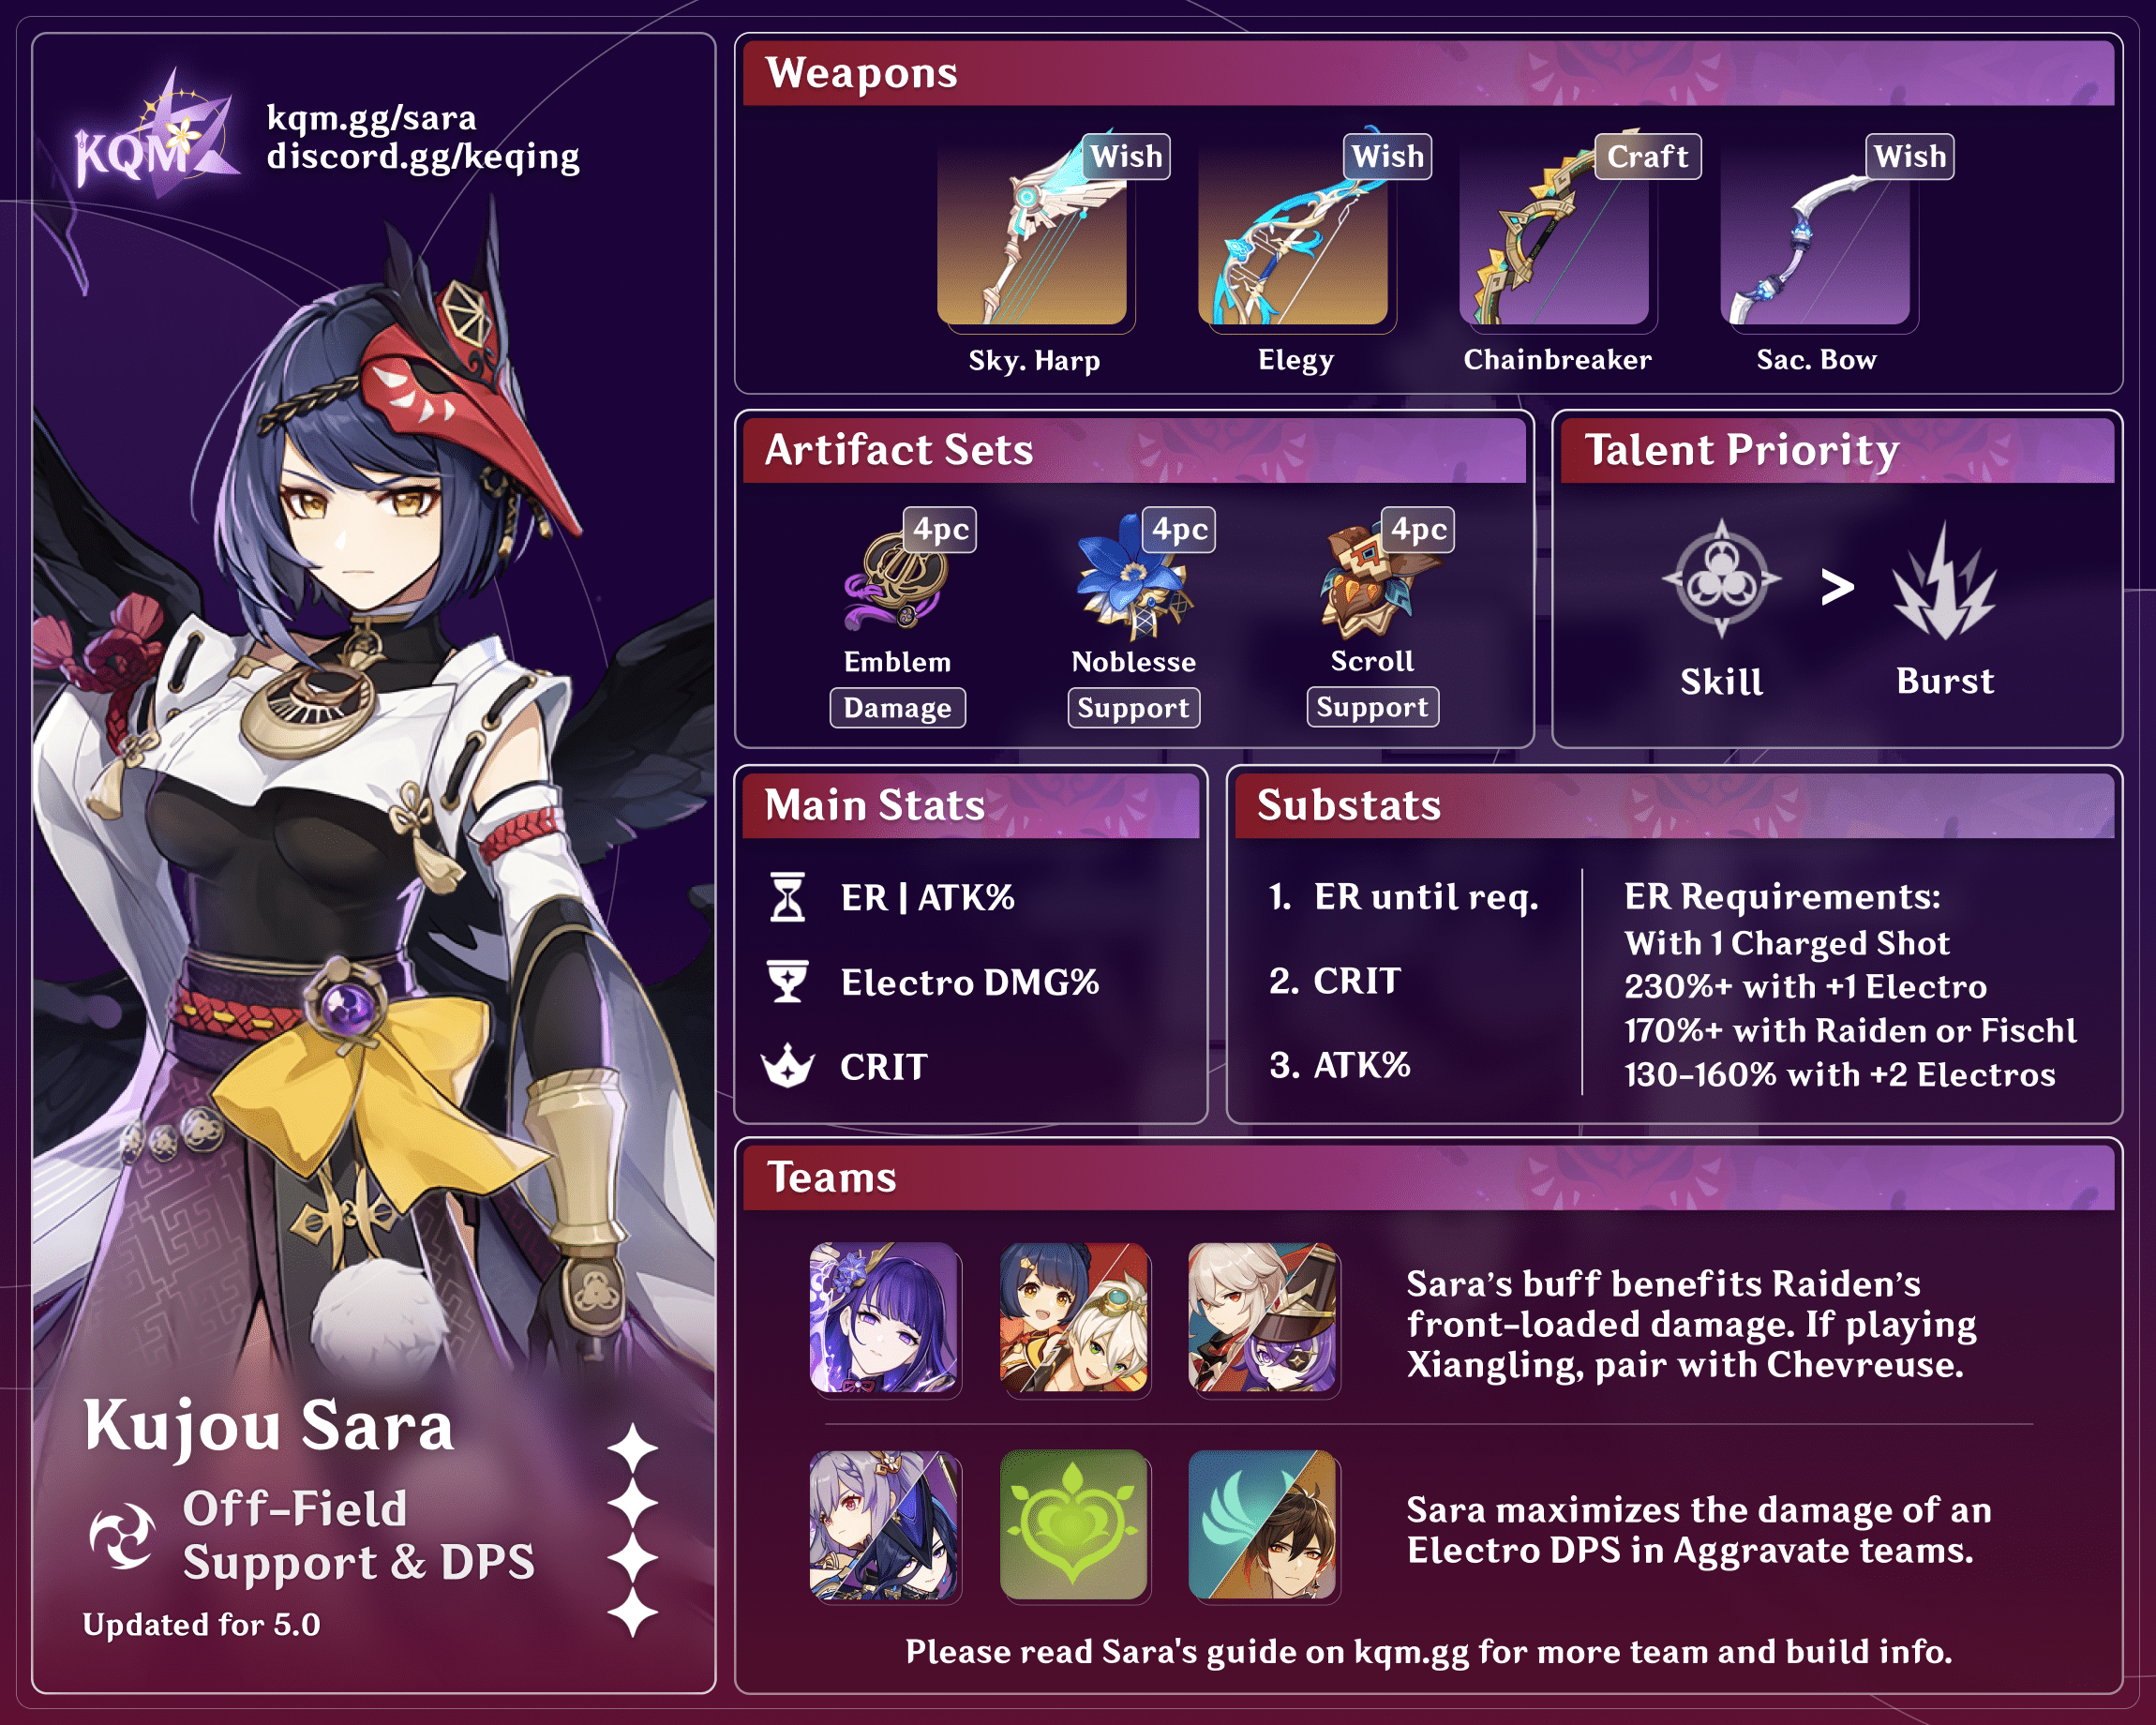
Gearing
Artifact Stats
 Sands |  Goblet |  Circlet |
| ATK% or ER% | Electro DMG% | CRIT Rate or CRIT DMG |
Building the General of the Tenryou Commission is a rather straightforward task, but it is still not without its twists and turns. Whether you use an ATK% or ER% Sands depends on whether you can meet Sara’s ER% requirements. The CRIT ratio to aim for is 1:2, so keep in mind that if Sara is C6, it will skew this ratio for both herself and the unit(s) she is buffing. Of course, if she is not buffing herself, there is no need to account for this. The Optimizer tool can be used to optimize your CRIT ratio.
The recommended ER for Sara is as follows, assuming she uses her Charged Attack once every rotation:
| Team Archetype | Energy Requirements |
| Triple Electro | 130-160% |
| Double Electro | 230%+ |
| Double Electro (With Raiden or Fischl) | 170%+ |
| Solo Electro | 300%+ |
Sara is quite demanding of ER even on Double Electro setups. Fortunately, some compositions may allow Sara to use her Charged Attack twice, which drastically reduces her ER needs. It should also be noted that ER requirements can be volatile depending on content and RNG. Having a bit more ER% than listed can smoothen gameplay.
Artifact Sets
Assumptions: C6 Sara Lvl. 80/90 TL6/12/12, Weapon Lvl. 90/90, 4EoSF ER or ATK%/Electro DMG%/CR% or CD%, 200 ER requirement, 20 fluid subs KQMC standards, Sara E ATK buff on her Elemental Burst only, Bennett 1000 ATK buff and 4NO buff.
| Artifact Set | Notes |
 4 Emblem of Severed Fate (4EoSF) | Sara’s BiS set. It provides everything Sara looks for: ER on 2-Piece and ER to Burst DMG% conversion on 4-Piece. The 4-Piece alone provides Sara with 20% ER and 30% Burst DMG%, even before building the ER Sara requires. There should be no reason not to run this set unless players are looking to maximize her buffing potential. |
 4 Noblesse Oblige (4NO) | Support set. Very good option for players who want to maximize Sara’s buffing capabilities and do not have a 4NO holder in the team yet. Provides 20% Burst DMG% on 2-Piece and an additional 20% ATK buff to the whole team after casting her Elemental Burst. |
 4 Tenacity of the Millelith (4TotM) | Support set. A more niche alternative for players who want to maximize Sara’s buffing capabilities but already have a 4NO holder in the team. However, because of Sara’s long Elemental Skill cooldown, the ATK bonus from the 4-Piece set will not be procced consistently, and the duration of the buff is not very good. For this reason, it is viable only when players are snapshotting her buff from her C2 or Fully-Charged Aimed Shot Crowfeather already. |
 Hybrid | Alternative sets. As usual, if you do not have a good 4-Piece for the sets mentioned, picking a combination of any 2 sets here can be a good substitute. 2-Piece sets of Thundering Fury, NO, Gladiator’s Finale/Shimenawa’s Reminiscence/Echoes of an Offering/Vermillion Hereafter, and EoSF are all viable options. |
Weapons
TL;DR
5 Star Weapons
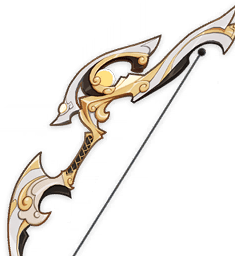
- If you want the strongest buff possible, use Elegy for the End.
- If you want a mix of damage and buffing, use Skyward Harp.
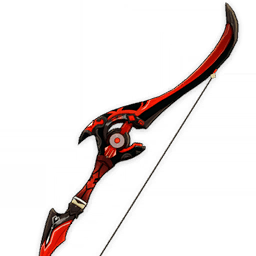
- If you want to maximize damage, use Polar Star.
4 Star Weapons
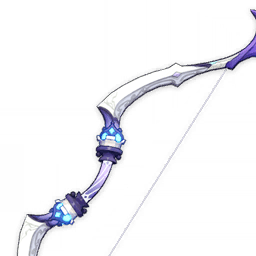
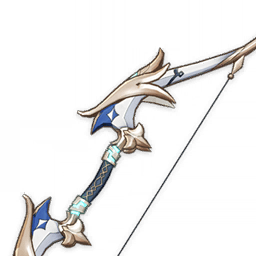
- Sara’s Best in Slot is R1+ Mouun’s Moon for both damage and buffing.
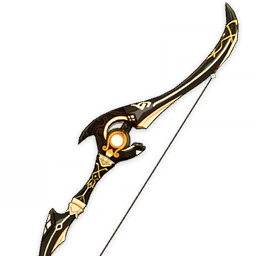
- R5 Fading Twilight is generally the best F2P option, followed by Prototype Crescent.
- Sacrificial Bow has niche use when batterying other Electro units.
Weapon Analysis
Weapons Ranked by Buffing Ability
| Base ATK (At Lvl. 90) | vs. 565 Base ATK Group | Weapons |
| 608 | 131.6% | R1 Elegy for the End (With passive up on Lvl90 “The Catch” Raiden) |
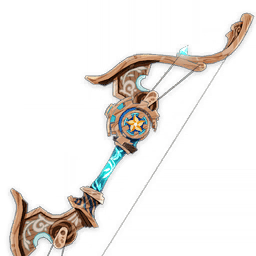
| 674 | 114.3% | Skyward Harp |
| 608 | 105.7% | Elegy for the End, Polar Star, Thundering Pulse, Amos’ Bow |
| 565 | 100.0% | Fading Twilight, Alley Hunter, Mouun’s Moon, Blackcliff Warbow, Sacrificial Bow |
| 542 | 97.0% | Aqua Simulacra, Hunter’s Path |
| 510 | 92.8% | The Stringless, Windblume Ode, The Viridescent Hunt, Prototype Crescent |
| 454 | 85.4% | Favonius Warbow |
Weapons Ranked by Damage Output
Assumptions: C6 Sara Lvl. 90/90, TL9/12/12M 4EoSF ER% or ATK%/DMG%/CR% or CD%, 180 ER requirement. 20 fluid subs KQMC standards. Buffs include 4NO + 998 ATK from Bennett + 24% Burst DMG from Raiden + 32% DMG from Kazuha + Sara’s ATK buff and C6
| Weapon | vs. Fading Twilight R5(4EoSF, Sara E ATK buff) | vs. Fading Twilight R5 (on Hyper Raiden team) | Notes |
 Polar Star R1 (3 stacks) | 126.0% | 127.1% | Using a N1, Sara can get 3 stacks from Polar Star, but it is typically a DPS loss to do so. While her Elemental Burst does not get the 4th stack, this Bow is still an incredible stat stick with a passive that increases Elemental Burst damage and a CRIT Rate substat. Rotation (C2+ Sara): N1 E CA > Swap > Q. |
Polar Star R1 (2 stacks) | 119.8% | 122.9% | Generally, Sara will only get 2 stacks from Polar Star. Even so, it is still her strongest weapon when it comes to personal damage. |
 Skyward Harp R1 (1 proc) | 118.3% | 121.2% | Sara’s best weapon for a combination of personal damage and buffing. Of every Bow, Skyward Harp has the second highest ATK buff with the additional benefit of strong Burst damage. |
 Mouun’s Moon R5 | 116.1% | 115.9% | Sara’s best 4-star Bow if your team’s Energy capacity allows for it, which is generally the case. Unfortunately, high refinements on this Bow are difficult to obtain as Mouun’s Moon can only be pulled as a rate-up on the Weapon Banner. Calculated at 290 Energy capacity (i.e Hyper Raiden team). |
 Hunter’s Path R1 | 114.9% | 121.3% | Similar stat stick to Aqua Simulacra, but with 8% less damage on its passive and with CRIT Rate as its substat. Like Aqua, it is strong for Sara’s personal damage but has a relatively weak ATK buff. |
 Aqua Simulacra R1 | 112.0% | 117.3% | Aqua Simulacra is a top contender for Sara’s personal damage with its high CRIT DMG and 20% DMG Bonus passive. Contratrily, its low Base ATK is even lower than some 4-star options, and you may prefer to use it on another Bow user. |
 Alley Hunter R5 | 110.9% | 109.7% | Calculated at max stacks. This Bow has a strong passive but like Mouun’s Moon, it is very difficult to get. Due to its stacking mechanic, it will be a bit weaker on the first rotation. |
 Thundering Pulse R1 | 110.8% | 114.1% | Sara cannot make use of the Normal Attack DMG% Bonus passive at all. The only consolation here is the CRIT DMG secondary stat and ATK% passive, which allows it to be a good stat stick for buffing and damage. |
Mouun’s Moon R1 | 103.4% | 104.8% | A strong option with a high Base ATK even at low refinements. Calculated at 290 Energy capacity (i.e Hyper Raiden team). |
 Amos’ Bow R1 | 103.3% | 103.1% | The passive is useless on Sara, but the Bow works as a Base ATK and ATK% stat stick. |
 Elegy for the End R1 | 101.9% | 102.2% | Sara’s best buffing weapon. It has a fairly high Base ATK, and an ER substat that Sara greatly appreciates. While its damage is weaker relative to the other 5-star Bows, it makes up for it with a 20% ATK and 100 EM buff for all party members. It can be difficult to proc the passive if Sara is not C2. Furthermore, the ATK buff will not stack with Freedom-Sworn. If another teammate has Freedom-Sworn equipped and the EM buff is not valued in your team, Skyward Harp is a better alternative. Check the Mechanics section for a rotation that allows you to proc this passive consistently with no drawbacks. |
Alley Hunter R1 | 100.8% | 101.7% | Calculated at max stacks. Due to its stacking mechanic, it will be a bit weaker on the first rotation. |
 Fading Twilight R5 | 100.0% | 100.0% | Sara’s best F2P option. It provides all the stats Sara wants: high Base ATK, Energy Recharge, and a passive that boosts DMG%. This weapon at R5 beats most of Sara’s other 4-star options with the notable exception of R1+ Mouun’s Moon and R1+ Alley Hunter. Passive is calculated at the average stage (i.e 20% DMG). |
 The Viridescent Hunt R1 (0.5 Proc) | 98.0% | 105.7% | This weapon serves as a stat stick if you need the CRIT Rate, and scales well with buffs. Though the grouping on its passive is appreciated, Sara may not always trigger it as she won’t be on-field for long. |
 The Stringless R5 | 95.1% | 98.9% | Even at R5, The Stringless is lackluster compared to other 4-star Bows, as Sara does not need its EM substat. Marginally better damage than Fading Twilight but with a worse ATK buff. Other Bow units will appreciate this weapon more. |
 Blackcliff Warbow R1-R5 | 90.7% | 96.7% | Its passive is useless on Sara as she will not be on-field, making it unrealistic to build stacks. Still one of her better 4-star options due to its high Base ATK and CRIT DMG secondary stat. However, Sacrificial Bow and Fading Twilight are competitive and don’t cost Starglitter, making this weapon less desirable. |
 Sacrificial Bow R1-R5 | 90.0% | 92.1% | Although Sara does not benefit from the passive in most teams, it can make her a better battery for Beidou. This Bow also has the highest Base ATK among 4-star Bows, is relatively easy to get, and comes with an ER substat that Sara very much needs. |
 Prototype Crescent R1-R5 | 89.3% | 92.4% | This weapon was calculated without its buff, as in most teams it will be a DPS loss to spend time on Sara trying to headshot. |
 Windblume Ode R5 | 86.5% | 90.3% | Its passive will buff her Burst in an E > Q rotation, but it’s not enough to make up for the unhelpful EM secondary stat. |
The Stringless R1 | 86.0% | 91.0% | At low refinements, Stringless is exceptionally unexceptional and is better off being used on another Bow user. |
 Favonius Warbow R1-R5 | 85.7% | 89.6% | This weapon allows Sara to go all out as a utility support. She can battery, buff, and deal damage with this Bow but will need some investment into CRIT Rate and the low Base ATK hurts her buff. |
“To strike your foe takes unity between mind, arrow, and bow.”
Synergy
Due to her short buff uptime and Energy issues, finding the ideal DPS for Sara to pair with can be challenging. Generally, Sara will prefer a quickswap unit who can deal most of their damage in a short window, a unit with high frontloaded damage, or a character who can snapshot buffs.
Common Sara teams typically include:
- Solo Electro: Sara/DPS/Flex/Flex
- Double Electro: Sara/Electro DPS/Anemo support/Flex
- Triple Electro: Sara/Electro DPS/Electro unit/Anemo or flex support
Electro Units
Kujou Sara works best with Electro units, even without her C6. With a high Energy Cost, Sara wants another Electro unit for extra Energy as well as Electro Resonance in order for her to shine. Furthermore, she will likely benefit from the same supports as her Electro teammates do. Her ATK buff on top of her C6’s 60% CRIT DMG is a significant damage increase for her teammates.
| Electro Character | Comments |
Raiden Shogun On-field DPS and battery | Raiden is able to dish out large amounts of AoE damage in a short amount of time and benefits directly from everything Sara provides. Additionally, she is an exceptional battery and drastically reduces Sara’s Energy requirements. A powerful pairing, especially if Sara is at C6. |
 Yae Miko Off-field DPS | A potent off-field damage dealer. Her Skill is primarily single-target, but her Burst has AoE. Yae’s totems cannot snapshot Sara’s buffs, so buff uptime is generally not very good. However, this issue is not exclusive to Sara—her totems do not snapshot any buffs at all. A portion of the totems’ strikes will still be buffed by Sara, unlike Bennett whose ATK buff is gone when Miko leaves the field. Still, a significant part of Yae’s damage comes from her powerful Elemental Burst boasting exceptional multipliers which can be fully buffed by Sara. In certain teams where Yae’s Elemental Burst is especially important (e.g Raiden-Yae-Sara core), there is excellent synergy between Sara and Yae. That being said, Sara alone is not enough to battery Yae’s Energy Cost of 90, so playing Triple Electro is recommended. |
Beidou Off-field DPS | Beidou boasts high AoE damage with her Elemental Burst as well as some survivability with her Constellations. She can snapshot Sara’s ATK buff, overlooking the short buff duration. While she is a potent Electro DPS, she is Energy-hungry and performs noticeably worse in single-target scenarios. Note: It is not recommended to play Beidou with Raiden in Mono Electro teams, as Raiden’s Burst attacks cannot trigger Beidou’s Burst discharges. |
Fischl Off-field DPS and battery | Fischl provides high single-target damage and a significant amount of Elemental Particles, all while being off-field. She makes great use of Sara’s ATK buff due to her ability to snapshot. While Fischl needs lower maintenance than Beidou, her AoE potential is limited. This can be overcome by pairing them together, as she has particularly good synergy with Beidou and can both drive and battery her. |
 Keqing On-field DPS or quickswap DPS | When Keqing is played in a quickswap team, her damage can be compressed into one small window, making it easy to maintain 100% buff uptime on her. She typically has multiple DPS windows within a rotation rather than a single continuous one, so Sara’s ability to refresh buffs is an asset for quickswap Keqing. |
Lisa Off-field DPS or support | Lisa’s Elemental Burst can snapshot, and her Elemental Skill packs a high amount of damage in a short period, making her the ideal candidate to receive Sara’s buffs. However, she also has a high Energy Cost, so it is difficult to battery her with only Sara. In reaction-based teams such as Hyperbloom or Overload where Lisa builds EM, ATK buffs are not significant for Lisa. Additionally, if you are using Lisa as a TTDS support for another unit, it is ill-advised to use her with Sara as rotations become awkward. |
 Kuki Shinobu Healer and off-field DPS Not recommended | While Sara’s ATK buff does not do much for Kuki, who prefers stats such as HP and EM, players may appreciate the healing and comfort she brings in their Mono Electro teams. Although she prefers Dendro teams, Kuki can co-exist in Mono Electro teams with Sara despite their lack of synergy. |
 Dori Healer Not recommended | Many players would build Dori as a healer support rather than for damage. Thus, there is little need to bring Sara who focuses on buffing damage. A DPS Dori will likely be used in an Aggravate team, where her Aggravate damage is not based off ATK, thus preferring other supports than Sara. |
Cyno On-field DPS Not recommended | Due to Cyno’s long field time, Sara’s 6-second buff does little for him and is not recommended. Moreover, Cyno’s teams tend to be reaction-based so ATK buffs are not as beneficial as they usually would be. |
 Razor On-field Physical DPS Not recommended | Like Cyno, Razor has long field time, and his damage is mixed between Electro and Physical. Thus, Sara’s short ATK buff and her CRIT DMG buff to Electro attacks are of little value to Razor. |
Non-Electro DPS Units
While Sara prefers to work with an Electro carry, she provides a significant ATK buff nonetheless which many characters can appreciate.
| Character | Comments |
 Kamisato Ayato On-field Hydro DPS | Ayato’s 6s DPS window fits perfectly with Sara’s buff duration. In teams where Ayato uses his Skill twice, he appreciates Sara’s ability to reapply buffs. One of his more popular teams is Taser, which usually includes a secondary Electro unit that may appreciate Sara’s presence. |
 Kamisato Ayaka On-field Cryo DPS | A surprising appearance. Ayaka’s Elemental Burst is where most of her damage comes from, and it can snapshot Sara’s substantial ATK buff. Besides that, there is not much else Sara provides, and spots on Ayaka’s Freeze teams are highly contested. Still, for players who are lacking in units, Sara can temporarily fill in. |
Xiangling Off-field Pyro DPS | Xiangling is able to snapshot both Bennett and Sara’s ATK buffs, amplifying her damage even further. Although Sara is not a bad pick, the chef has excellent synergy with other characters such as Bennett, a Hydro enabler to Vaporize her damage, or an Anemo unit. |
Ningguang On-field Geo DPS or quickswap DPS | Sara can slot in quite nicely with a quickswap Ningguang, who can condense most of her damage in a short time frame. Due to Geo not having any particular synergy with other Elements, support options on Ningguang-centric teams tend to be limited, making Sara shine in this case. |
Physical DPS | Want to play Physical Xiangling but C6’d your Bennett? No problem–Sara is here. Providing half of Superconduct and an ATK buff that can be refreshed, Sara is not a bad option for any meme Physical comps. Sara can be played with Razor and Eula, although it is not optimal. |
Flex Units
| Character | Comments |
Bennett | His ATK buff is second to none, and his Burst brings healing as well as damage to the table. Bennett and Sara buffing the same target is just an insane boost, nearly doubling the damage for most characters who are able to utilize the buffs effectively, while allowing the player to go for other necessities such as EM or ER. |
Kazuha | Kazuha’s Elemental DMG% buff and 40% Resistance Shred from the 4-Piece Viridescent Venerer (VV) set are very valuable pairings with Sara’s ATK and CRIT DMG buffs in most teams, especially in the Mono Electro team archetype. |
Sucrose | Sucrose is generally the best Anemo option after Kazuha. She brings EM sharing, VV Shred and a 20% DMG bonus at C6. She can also hold Thrilling Tales of Dragon Slayers to buff the team’s damage dealer, but it is very awkward to play with Sara and the weapon may not be used at all. |
 Heizou | Heizou can be used in place of Sucrose, but his grouping is weaker and he does not have the benefit of Sucrose’s C6. |
Venti | Venti’s A4 Talent refunds 15 Flat Energy to himself all teammates of the Element his Elemental Burst absorbs after the duration ends. He also brings major CC and VV Shred, while being able to buff teammates with Elegy for the End. However, he is a very volatile unit who can perform either exceptionally well or exceptionally lackluster, depending on enemy content. |
Jean | Jean serves as more of a defensive Anemo option than an offensive one. She is only able to provide some healing and damage while being a VV holder, which is much less valuable than other Anemo units that can battery and buff. |
Sayu | Similar to Jean. She is both a healer and VV holder, and can potentially provide more damage, although she comes across Energy issues more often than Jean. |
Zhongli | Zhongli provides a strong shield which grants a 20% Resistance Shred to all Elements. Additionally, he can either hold 4TotM to give 20% ATK to the team or 4-Piece Archaic Petra for a 35% DMG bonus. |
Mona | Mona is a decent partner when it comes to buffing teammates thanks to her Omen debuff that increases the damage dealt to enemies. Similar to Sara, Mona has a short buff uptime so they work well with the same DPS units, but setting up TTDS along with Sara’s buff can be extremely clunky and interfere with buff uptime. |
Dendro Units
The introduction of Dendro reactions in 3.0 has not changed much for Sara. Her low Electro application and lack of off-field damage does no favors for her own personal damage when it comes to Aggravate or Hyperbloom. Moreover, neither reactions scale with ATK, although her C6’s 60% CRIT DMG helps for Aggravate. Despite that, many other Electro units see play in Aggravate teams (e.g Keqing), and Sara can be found in flex spots to boost team damage. Therefore, while Sara can be found in Aggravate teams, it is moreso her synergy with the Electro unit rather than with the Dendro unit that earns her a spot on the team.
“Glory to the Shogun!”
Team Compositions
Raiden-Centric Teams
Kujou Sara has excellent synergy with the Raiden Shogun. In particular, Sara’s weaknesses are downplayed when played with Raiden.
- One of Sara’s glaring flaws is her short buff of only 6s: however, Raiden has relatively shorter field time compared to other carries, and while the tail end of her Burst duration does go unbuffed, ~30% of her damage is at the beginning of her Burst via the Musou no Isshin’s initial slash
- Raiden is often ATK-deprived due to her tendency to run ER artifacts or weapons, as well as the large amount of DMG% buffs in her kit. This makes ATK buffs especially powerful
- Sara can run significantly lower ER thanks to Raiden’s batterying capabilities
- Raiden’s Elemental Skill buffs Sara’s Burst damage
- Sara benefits from the same supports as Raiden does (e.g Kazuha, Bennett)
Evidently, (a C6) Sara and her Shogun bring out the best in each other while diminishing their flaws. Their circular synergy makes them a formidable duo with incredible AoE damage output, earning them a spot in many Spiral Abyss clears and even speedruns.

Raiden teams generally take the form of Raiden-Sara-Anemo-Flex, with the Anemo unit boosting damage through 4VV and their own buffs. The flex spot could be another buffer such as Bennett, a third Electro unit to add team DMG, an off-field damage dealer such as Yelan or Xingqiu, or even a Dendro unit to play Aggravate Raiden.
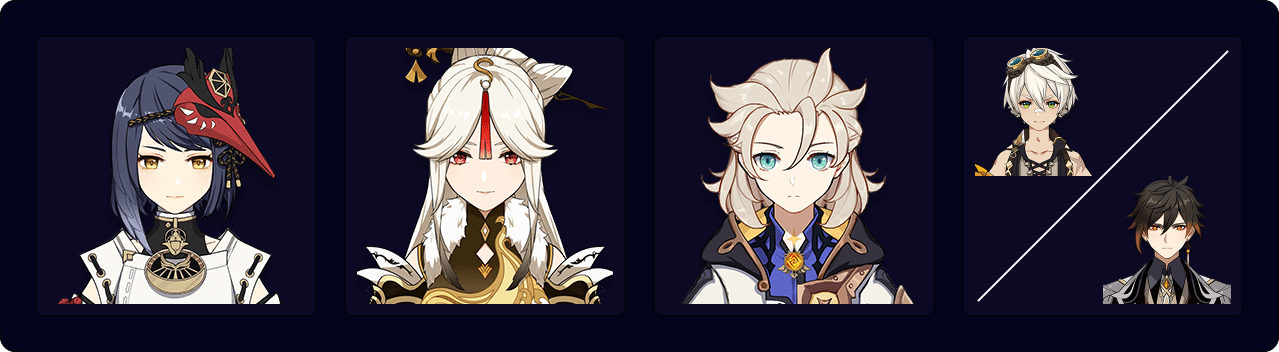
Hypercarry Raiden: Raiden — Sara — Kazuha — Bennett

Hypercarry Raiden is one of Sara’s most well-known teams, featuring Raiden as the primary on-field DPS, who has a 9-10s Elemental Burst uptime. This team is built around buffing Raiden as much as possible, maximizing her damage output in a short amount of time. Kazuha uses 4VV for Resistance Shred and buffs Raiden’s Elemental DMG%, while Bennett and Sara combine to give a hefty ATK buff. Sara’s C6 also enables Raiden to get an additional 60% CRIT DMG buff. In exchange, Raiden enables her supports by buffing their Elemental Bursts and drastically reducing their Energy needs. Although Raiden deals a majority of the team’s damage, Sara and Kazuha contribute their own share as well, enough to finish off waves of enemies in some cases. The frontloaded nature of this comp allows it to handle threats before they become a problem.
Team Gearing
| Raiden | Sara | Kazuha | *Bennett |
| Weapons: Engulfing Lightning, Wavebreaker’s Fin, “The Catch” | Weapons: Elegy for the End, Skyward Harp, Mouun’s Moon, Fading Twilight, any high Base ATK Bow | Weapons: Freedom-Sworn, Xiphos’ Moonlight, Iron Sting | Weapons: Mistsplitter Reforged, Aquila Favonia, any high Base ATK 5-star Sword, Sapwood Blade |
| Artifact Set: 4EoSF Sands: ATK/ER Goblet: Electro/ATK Circlet: CRIT | Artifact Set: 4EoSF Sands: ATK/ER Goblet: Electro Circlet: CRIT | Artifact Set: 4VV Sands: EM Goblet: EM Circlet: EM | Artifact Set: 4NO Sands: ER/HP/ATK Goblet: HP/Pyro Circlet: CRIT/Healing Bonus/HP |
| Recommended ER:~200%+ ER | Recommended ER: ~170-180% ER | Recommended ER: ~150-180 ER Depends on whether Kazuha catches his own particles or not. | Recommended ER: ~180-200% ER Depends on whether Bennett catches his own particles or not. |
*Bennett deals a very small portion of the team’s damage, so building him for damage is not at all necessary, and is only reserved for those who want to absolutely maximize output.
Team Rotation
Standard Rotation
Raiden E > Kazuha Hold E > Sara E CA > Kazuha Q > Bennett Q > (Kazuha Q)* > Sara Q > Raiden Q 2x N3C + 1x N1C + 1x N3C + E > Bennett E
*Using Kazuha’s Burst after Bennett’s causes his Burst to absorb Pyro instead of Electro, increasing the amount of Overload triggers and optimizing buff uptime. Unfortunately, this causes knockbacks against smaller enemies which is a significant detriment.
Fast Rotation
Raiden E > Bennett Q > Kazuha Q > Sara Q > Raiden Q 2x N3C + 1x N1C + 1x N3C
This condensed rotation still fully buffs Raiden, but it will result in the team waiting for their cooldowns to end as well as a worse Energy economy and worse team damage. Hence, it is not recommended unless you are about to end a chamber or speedrunning.
For even shorter rotations or if you want to save Sara’s Burst, simply use her Skill instead to buff Raiden.
Check the Mechanics section on how to extend the ATK buff duration.
Sara — Raiden — Bennett — Xiangling

This team takes both Sara and Bennett’s ATK buffs and combines them to triple buff Raiden, Sara, and Xiangling. Xiangling is able to snapshot the absurd amounts of ATK she receives, and Raiden also benefits from the buffs while restoring Energy for the entire team. A simple and effective team with strong AoE that overcomes common issues such as Xiangling’s high Energy Cost and Sara’s low buff uptime.
Team Rotation
Rotation 1
(Raiden E)* > Sara E CA > Xiangling > Bennett E Q > Xiangling E Q > Sara Q > Raiden Q + 2x N3C + 1x N1C + 1x N3C > Raiden E > Bennett E
*First rotation only.
Rotation 2
Raiden E > Bennett E Q > Sara E (CA) > Xiangling E Q > Sara Q > Raiden Q + 2x N3C + 1x N1C + 1x N3C
Sara’s Burst does not get her own buff in Rotation 1, but Bennett’s ATK buff has higher uptime, giving Raiden higher DMG output. Rotation 2 is an easier rotation that ensures Sara gets her own buff–her CA can also be left out for higher uptime on Bennett’s ATK buff.
Mono Electro Teams

Electro-centric teams are where Sara shines. Many other Electro units are very suited for quickswap rotations, which ties in very well with Sara’s short buff duration and allows for some exciting, fast-paced gameplay. Such teams also make full use of Sara’s C6. The teams here will generally consist of 3 Electro units including Sara and a flex slot, ideally an Anemo for VV Shred. As you may have noticed, there are several high maintenance Electro units with high Energy Costs. Sara has trouble batterying such units by herself, so a third Electro unit can ease Energy issues. For more information about specific Electro units or flex spots, refer to the Synergies Section 5.1: Electro Units and Section 5.3: Flex Units.
Sara — Raiden — Yae — Flex

The Sara-Raiden-Yae core is a popular Electro-based team with three AoE frontloaded nukes (i.e high damage in a short period of time), making it a good pick in speedruns and especially strong in multiwave content. Moreover, this comp does not forego good team synergy for “big numbers”; each unit contributes in their own meaningful way, making it a great team even for those not interested in speedrunning.
Raiden and Yae are already units with high damage profiles, and with buffs from Sara and a 4th unit, their damage is amplified even further. Their consecutive nuke potential allows players to overcome multiwave content with ease. Moreover, with three Electro units and Raiden batterying the team, Yae and Sara’s notoriously high Energy requirements become quite low, allowing them to build into offensive stats. Unfortunately, this team is prone to getting staggered.
Team Gearing
| Raiden | Sara | Yae Miko |
| Weapons: Engulfing Lightning, Wavebreaker’s Fin, “The Catch” | Weapons: Elegy for the End, Skyward Harp, any high Base ATK 5-star Bow, Mouun’s Moon, Fading Twilight | Weapons: Kagura’s Verity, The Widsith, Solar Pearl, Oathsworn Eye |
| Artifact Set: 4EoSF Sands: ATK/ER Goblet: Electro/ATK Circlet: CRIT | Artifact Set: 4EoSF Sands: ATK Goblet: Electro Circlet: CRIT | Artifact Set: 2pc mix and match (18% ATK, Thundering Fury, EoSF), 4EoSF, 4 Thundersoother  Sands: ATK Goblet: Electro Circlet: CRIT |
| Recommended ER:~200%+ ER | Recommended ER:~130-150% ER~110% ER with Venti | Recommended ER:~140-150% ER~120% ER with Venti |
Flex Spots
| Character | Notes |
Venti | Has the best CC in the game (when applicable) which can allow Yae’s totems to do AoE damage. Provides 4VV’s Resistance Shred, a 15 Energy refund decimating nearly all Energy requirements, and decent personal damage in AoE. |
Kazuha | Has stronger team buffs than Venti, but has weaker CC and does not provide much Energy. Has decent personal damage in AoE. |
Bennett | Strong team buffs and provides Electro Particles via Electro Resonance. Trades in CC in exchange for healing. However, he can only buff one unit at a time and confines the team to “circle impact”. |
| Others | 4VV Sucrose 4VV Jean4VV Sayu 4 Tenacity of the Millelith or 4 Archaic Petra Zhongli |
Team Rotation
Rotation with Venti
Raiden E > Sara E CA > Yae E x3 > Venti Q > Yae Q E x3 > Venti E > Sara (E CA) Q > Raiden Q + 2x N3C + 1x N1C + 1x N3C
Rotation with Kazuha
Raiden E > Sara E CA > Yae E x3 > Kazuha E > Yae Q E x3 > Kazuha Q > Sara (E CA) Q > Raiden Q + 2x N3C + 1x N1C + 1x N3C
Sara’s CA is generally recommended to self-buff and generate energy, but can be omitted if the extra damage and Energy Particles are not needed.
Double Electro
Double Electro is yet another common setup for Sara. Managing buff uptime is relatively easier with only one unit to buff, but Energy issues become more pronounced. For more information about specific Electro units or flex spots, refer to the Synergies Section 5.1: Electro Units.
Beidou — Sara — Anemo — Bennett
Unlike Raiden’s team which focuses on frontloading damage, Beidou’s team revolves around her ability to snapshot stacked buffs (reminder that Sara’s C6 cannot be snapshotted), allowing her to deal sustained damage from her Elemental Burst. This team comp is similar to Raiden’s, involving an Anemo unit to provide 4VV Resistance Shred and Bennett for his healing and ATK buff, but with Beidou substituting Raiden. Sucrose can be used instead of Kazuha to carry TTDS and drive Beidou’s Burst. Alternatively, Kazuha can be used for his Elemental DMG% buffing and personal damage, provided the player can manage timing his Skill to lose as few procs of Beidou’s Burst as possible. Sara is a reasonably good Beidou driver, battery, and buffer all in one, allowing this comp to perform very well.
Check the Mechanics section on how to extend the ATK buff duration.
Quicken Teams
With the introduction of Dendro in 3.0, Electro units are able to access the Aggravate reaction, which can add a substantial amount of damage to your Electro character. While Aggravate does not scale with Attack (but can scale with Sara’s C6), Sara is still appreciated. Once again, as Sara has few instances of Electro application, she herself does not make great use of Aggravate.
Keqing — Sara — Dendro —Flex

Keqing is one character who’s benefited significantly from the addition of Dendro reactions due to her relatively high amount of Electro application. She is able to be played as a quickswap unit with multiple short DPS windows within a rotation, thus benefiting from Sara’s ability to refresh buffs. Keqing typically uses 4 Thundering Fury in this composition, which further reduces hers and Sara’s ER needs. Due to the quickswap nature of this team, Sara is able to generate more Energy than she normally would while also getting additional Aggravate procs.
Taser Teams

Also known as Electro-Charged teams, Taser comps typically consist of one or two Electro units, a Hydro unit, and a flex spot.
Sara — Electro — Ayato — Flex

As discussed in Section 5.2, Ayato’s uptime lines up almost perfectly with Sara’s 6s buff. Him being able to switch off relatively quickly allows units like Beidou to generate Energy or to refresh buffs. It is also ideal for Fischl, as it lets her maintain higher uptime on Oz. Many players will find Ayato easier to play than Tartaglia, who requires micro-managing rotation times. His fast ATK speed and high amount of Hydro application makes him a good driver for the Taser archetype.
Tartaglia — Beidou/Fischl — Sara — Bennett

Childe is another on-field Hydro enabler with strong Hydro application and high AoE potential. Unlike Ayato, his rotations in Taser teams are not ideal. Ayato can use his Skill twice in a rotation and more freely refresh buffs, enabling a unit such as Fischl to maintain high uptime on Oz or Beidou to parry and regenerate Energy. As mentioned, Childe is also more difficult to pilot than Ayato and does not have good uptime on Sara’s buff, but ultimately is a fine Hydro driver. While this team can be clunky compared to the Beidou-Fischl variation, it does give increased net team DPS due to Beidou being able to snapshot Sara’s buff.
The team has a high number of buffs from Bennett, Sara, 4NO and 4TotM. For multiple targets (2 or more), Beidou would be a better option, but in single-target situations, Fischl is superior.For more in-depth information on this comp, click here for the Tartaglia guide by Risuke.
Team Demonstration
Team demonstration by Risuke#6743
Solo Electro Teams
Sara — Ningguang — Albedo — Bennett/Zhongli
This team can be dubbed “Two Stones, One Bird”, but jokes aside, Double Geo should be nothing new to most players. With Sara’s arrival, players can take the standard Ning-Albedo pair up a notch by using Sara to buff the team on short, snappy rotations of 15 seconds or less. The 15-second Bennett rotation provides Ningguang with a huge amount of ATK buffs from both Sara and Bennett, though the team may struggle with Energy issues. The 12-second rotation with Zhongli on Favonius Lance significantly alleviates Energy concerns and allows Sara’s short cooldowns on her ATK buff to shine in one of the shortest team rotations in the game. This team archetype might not match the output of Sara’s other teams but is a fun and decent option nonetheless.
Sample Rotations
Bennett version
by loriental#0040
Albedo E > Bennett E Q > Sara E Q > Ningguang E Q E > Sara CA > Albedo E Q > Repeat
Zhongli not using Burst
by Cuzimori#1535
Zhongli Hold E > Albedo E > Sara E CA > Ningguang N2C + E + Q + E + CA + N2C > Repeat
Zhongli using Burst
by Cuzimori#1535
Albedo E > Sara E > Zhongli Hold E Q > Sara CA > Ningguang N2C + E + Q + E + CA > Repeat
Albedo can skip his Skill usage every other rotation. Ningguang can only use the E Q E combo in succession if her C2 is unlocked, otherwise she’ll only be able to use E Q.
Mechanics
Fully-Charged Aimed Shot Crowfeather
Sara’s Elemental Skill will leave a Crowfeather behind after the player releases a Fully-Charged Aimed Shot and the arrow hits an enemy, the floor or a wall. Note that to generate Energy, a Fully-Charged Aimed Shot must be released after casting her Elemental Skill and the Crowfeather it leaves must hit an enemy upon exploding. It will buff the character standing in the AoE of the explosion.
Video by NZPIEFACE#8439
Buff Extension
Sara’s Elemental Burst can reapply her buffs through the successive Stormclusters. However, the on-field character has to be hit by the Stormclusters to obtain the buff.
Proccing Elegy
As mentioned previously, it will be difficult to proc the buffing passive from Elegy for the End consistently while avoiding desynced rotations without Constellations. However, if the player has at least C2 and preferably C4 or higher, here is the rotation to do so in a Raiden-Sara-Bennett-Kazuha team by Greyhound#7836.
Elegy Rotation by Greyhound#7836
Snapshot
Many abilities snapshot on cast or at a certain point during their skill animations. This records their current stats which will be used to determine the damage done for the whole duration of the skill, even if there are changes to it. Sara’s Elemental Skill and Elemental Burst can snapshot, but due to their short duration, in most cases this will not have a significant impact on gameplay. The ATK buff Sara provides can be snapshotted; however, it must be noted that her 60% Electro CRIT DMG buff from her C6 cannot. This is because only stats that are on a character’s stats page can be snapshotted, and Electro CRIT DMG is not one of them.
Escaping from Traps
Sara’s Elemental Skill has a unique mechanic that allows her to teleport a distance away from her original position. Players can utilize this to escape from the Mirror Maiden’s traps and avoid getting hit a second time.
Video by Mcpie#8672
Double Buff
Sara’s Elemental Skill can be used to buff 2 separate characters other than Sara herself, once with a Crowfeather from her C2 and once more with a Fully-Charged Aimed Shot, without having to swap back to Sara in between. While this can smoothen rotations by cutting out one swap, the timing for it is extremely difficult to get right, as the player will need to use ARCC or do a well-timed hold aim on the Attack button (or the left mouse button), which allows the player to cancel the finishing animation. With that being said, this is unlikely to be useful in actual combat. Furthermore, ARCC auto targets enemies, meaning the floor will not be a target and the buff will be wasted if the Crowfeather ends up too far from the character meant to be buffed.
ARCC Video by NZPIEFACE#8439
Hold Attack Button Video by BowTae#0141
Afterword
“The Shogun’s Army might as well just be me!”
Hey there! Welcome to the Sara Guide brought to you by CQLQRS#7853 from KeqingMains! Feel free to DM me if you have any questions regarding the guide! I will be updating it regularly to keep it up to date. I hope you guys will enjoy reading this guide as much as I enjoyed writing it!
Thank you again for being the readers to the first character guide I’ve ever written. If you’ve reached this point, it means that your training has been completed. But to ensure that your blade never dulls, remember to check back regularly for more training exercises!
Contributors
I would like to extend my sincerest thanks to:
Those who have previously worked on the Sara guide:
jamberry#7142 for providing calculations and helping with editing the guide
Sir_pick_the_prick#2209, kol#1593, and Ai#7362 for spotting my mistakes and correcting them
BowTae#0141 and NZPIEFACE#8439 who helped out with the Mechanics section
KQM’s editors for providing invaluable insight on the guide:
Raf#7220
Casdela#5121 (and for the art as well!)
acie#1290
idkanonymized#4166
KQM’s calc monkes for ensuring the accuracy of my calcs:
Luno#1337
The ones who helped make the amazing infographic:
fritzzes#2211
ang tahimik#9252
…as well as everyone else at KeqingMains who has helped and supported me as I wrote the guide.
References
Team images generated using the KQM Team Portrait Generator.
Calculations by jamberry#7142:
- 2.2 version: Sara Weapons Mastersheet (Bennett + 4NO)
- 2.2 version: Sara Weapons Mastersheet (own buff)
6-Minute Video Guide to Sara by KQM
Calcs (3.3 Version) by redd#1984
