Tartaglia Guide Page 2 is currently in the process of being updated (last updated: Version 2.7). Please join the KQM Discord for more information.
Table of Contents
Team Compositions
The following information is mostly a recommendation based on what is the most efficient. Genshin is a game where you can clear any content with enough investment so play what you feel is fun, even if it isn’t optimal. Do not feel obligated to pull or use “meta” characters or comps just because the community says so. What’s fun to you may not be fun to someone else. Always prioritize your fun. This is a game after all.
Reverse Vape
Because Childe cannot consistently vaporize all of his all melee attacks, it is better to allow others to reverse-vape instead. Reverse-Vape is a Pyro on Hydro reaction applying a x1.5 damage multiplier for the Pyro hit. These team comps have the highest damage ceilings out of all the Childe comps.
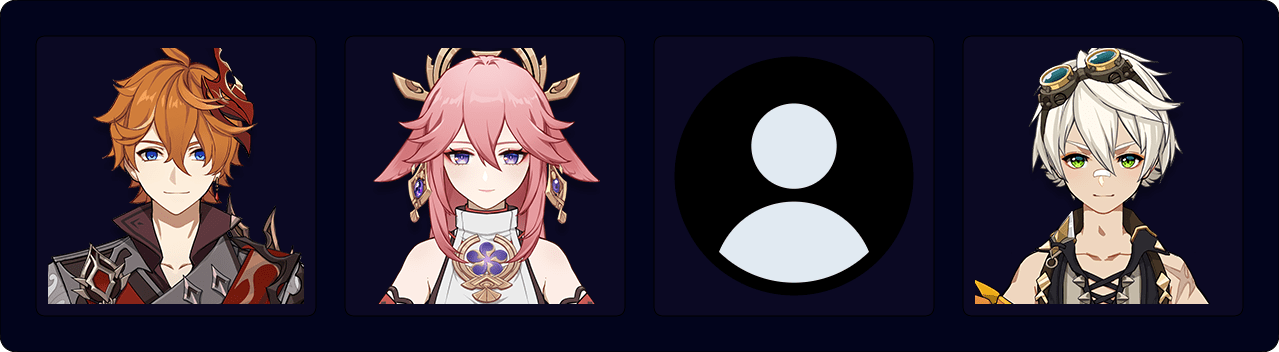
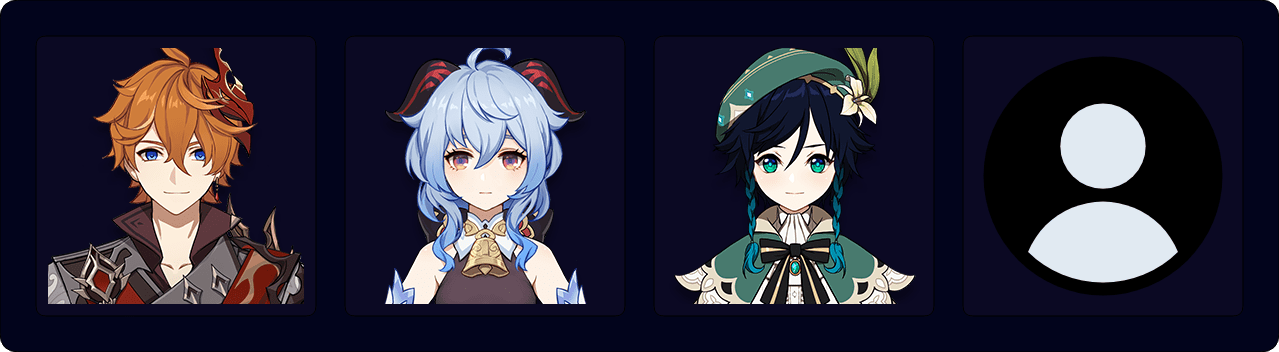
Xiangling
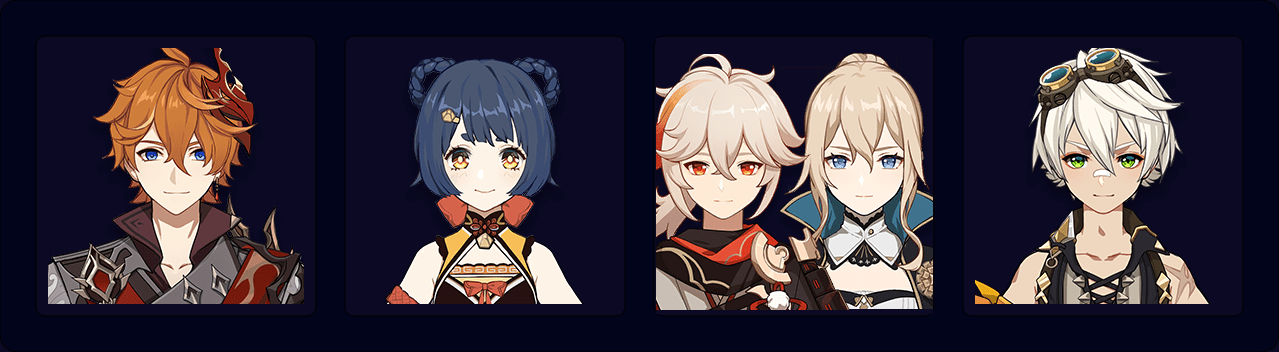
One of the two recommended Childe comps. In the right setting, this team can give players a taste of what it is like to have absurd levels of DPS for the duration of Xiangling’s Q. This is the easiest gateway team comp for faster clears in Abyss, but at the same time, the initial learning curve for this comp is fairly steep. You need to be mindful of energy generation for Xiangling, applying VV on the right element, and snapshotting. All while trying to get your rotations as close to 24s as possible.
Strengths
- Strong against anything not Pyro-immune/resistant
- Works at all levels of investment
- Utilizes amp reactions
- Flexible support options
Weaknesses
- High initial learning curve to learn rotations and VV setups
- Requires good energy funneling to Xiangling
- Guoba’s AI. This is a subjective weakness. Some players can deal with Guoba’s inconsistent aiming, others cannot stand it.
Recommended for players who are aiming for faster clear speeds in Abyss or players who want to try the vaporize variant of Childe’s team comps.
Videos Showcase by Crow | WL8#1761 (Beginner Guide)
Flex Options:
 Sucrose
Pros
- Low field time
- Offers Team EM by swirling (+50 EM to swirled elements)
- Can boost Childe or Xiangling with TTDS
- Easy to use
- Requires very little investment (A4 and artifacts only)
- Requires no talent investments
Cons
- Very high energy cost to burst every rotation
- Low personal damage
- Low quantities of swirl instances
- Low swirl damage against single target
- Burst occasionally toss away enemies
- Burst can pull enemies too high to melee (High level Sucrose)
Additional Notes
More often than not, using Sucrose’s burst is a DPS loss, regardless of her constellations. Her burst often creates inconsistent variables that prevent either Childe or Xiangling from properly hitting the enemies. Most of the time it is a waste of animation time and simply using E will offer better consistency and provide her main utility of EM sharing.
Elemental Infusion Priority
Pyro > Hydro > Electro > Cryo
Guoba Swirls
Guoba will self-infuse with Pyro for you to swirl when the exclamation mark pops up above his head. Unfortunately Sucrose’s A1 will not work for Pyro when swirling Guoba, but it will still apply Pyro VV.
Efficient Double VV
A slightly more efficient double VV that allows you to add Sucrose’s A1 to Pyro. It allows you to buff Guoba, double VV, and creates a smooth swap transition from TTDS Sucrose to Xiangling.
Double VV on Two Enemies
This is the standard method of applying double VV. This will work on every Anemo option. Apply Hydro on one enemy and Pyro on another before swirling both of them together. The AoE of the swirls will apply Hydro and Pyro VV to both enemies.
 Venti
Venti
Pros
- Pure unadulterated CC
- High multi-enemy damage (if they can be pulled and grouped)
- High quantity of swirl instances
- Low field time
- Easy to use
- Lowers Xiangling’s ER requirements
- Talent investments are optional
Cons
- Low swirl damage against mobile and non-pullable enemies
- Low swirl damage against single target
- Requires high levels for better swirl damage and CC
- Burst pulls small enemies too high for Childe or Xiangling to hit
- Positioning dependent
Additional Notes
Double VVing against two large enemies is sometimes inconsistent due to requiring both enemies to be very close to each other when you Tap E or Q. Some players will find it easier to only VV one element or to VV both elements separately and rely on Venti’s damage to make up for the DPS loss.
Elemental Infusion Priority
Pyro > Hydro > Electro > Cryo
Single Target Double VV
Venti can double VV one enemy by alternating his E and Charged Shot. Some content will allow you to use E and Q to double VV.
 Kazuha (International)
Pros
- Low cooldown pull that doesn’t lift enemies into the air
- Numerous swirl instances
- Easy to use
- Talent investments are optional
Cons
- High field time which leads to higher ER requirements or longer rotation cycles
- Requires high levels for better swirl damage and CC
- Low swirl damage against single target
Additional Notes
For players unaccustomed to Childe’s rotations, Kazuha can be difficult to NOT use. The more field time Kazuha has, the less energy you generate for Xiangling, which will increase the duration of each rotation cycle. This means that you’ll need a longer amount of time before you can utilize the Pyronado + Childe’s melee combo, which is the majority of your damage.
Elemental Infusion Priority
Pyro > Hydro > Electro > Cryo
Elemental Application on Burst
Kazuha’s burst swirls first before applying the infusion element. This means you can have the Hydro% buff refreshed while you melee with Childe as long as you reapply a Hydro aura while burst is active. Refreshing Pyro% is unnecessary as Xiangling snapshots the buff on Pyronado summon.
Single Target Double VV
Kazuha’s skill applies the infused element before swirling. This means you can swirl the infused element as long as you clear any existing auras. Hold E on a 1U Hydro aura will allow you to clear the Hydro, while Tap E will allow you to reverse-vape Kazuha’s A1.
 Anemo Traveler
Pros
- F2P
- High multi-enemy damage (if they can be pulled and grouped)
- Can provide an additional 20% elemental shred (C6)
Cons
- Very VERY difficult to use optimally
- High energy cost to have burst every rotation
- Linear burst that passes through large and non-pullable enemies
- Positioning dependent
- Low swirl damage against mobile and non-pullable enemies
- Requires high levels for better swirl damage and CC
- Non-transferable talent levels
Additional Notes
Traveler has the potential to deal Venti levels of damage and can use practical double VV, but the knowledge and skill required to do so is very steep. For many players, it will be easier to use another Anemo than it is to learn the nuances of how to play Anemo Traveler optimally with Childe.
Elemental Infusion Priority
Cryo > Pyro > Hydro > Electro
Only Traveler has a different elemental infusion priority. Every other Anemo has an infusion priority of: Pyro > Hydro > Electro > Cryo.
| Burst’s Initial Swirl on Two Enemies | |
| 1 Hydro, 1 None, Pyro-self | Hydro Swirl Only |
| 1 Pyro, 1 None, Hydro-self | Pyro Swirl Only |
| 1 Pyro, 1 Hydro | Hydro & Pyro Swirl |
Traveler’s C6 can be used on multiple elements, but it’s only consistent against small, liftable enemies. Against larger enemies, it is difficult to hit both enemies at the same time to allow double VV to happen. What often happens is the first enemy hit will be swirled but the second enemy won’t swirl their element due to swirl ICD, the burst missing, or having no element to swirl (because the first swirl cleared the aura). This means in most situations, Traveler’s C6 can only be practically applied to one element and Traveler’s Hold E should be used as the main means of applying double VV.
Efficient Hold 1 Release
Anemo Traveler’s skill will swirl before applying the infused element. This means you can do a quick double VV from Hold 1 Release. But this will generate less energy and swirl instances.
Optimal Hold 4 Release
On Hold 4 Release, you will get the max number of particles, the maximum release damage, and the max number of swirls. Hold 4 Release is only about 0.5s faster than the full Hold 6 Release so performing this may be too much min-maxing for some players
Full Hold 6 Release
The more casual friendly usage of the Hold E. But sometimes being 0.5s longer than what’s necessary will hurt you more than necessary.
 Jean
Jean
Pros
- Second Healer
Cons
- E and Q pushes enemies away from you
- High ER requirements to burst every rotation
- Few swirl instances (if not inside Bennett’s burst)
- Another healer, which leaves one less healer option for your other team
Single Target Double VV
Jean’s burst self-swirls any element on your team. Bennett’s burst applies his buff via a Pyro aura. This will allow Jean to VV Bennett’s buff and apply Pyro.
Make sure Jean is on the field long enough for the second swirl before swapping out. VV can only be applied if the wearer is on the field when the swirl happens.
 Sayu
Sayu
Pros
- Second Healer
Cons
- Accurate movement in Hold E requires time to get accustomed to
- Few swirl instances
- Another healer, which leaves one less healer option for your other team
Elemental Infusion Priority
Pyro > Hydro > Electro > Cryo
Single Target Double VV
Sayu requires an elemental infusion to double VV with her Hold E. Tap E cannot double VV.
Sayu’s E swirls before applying the infused element. This means you must hit the enemy at least twice before ending the E with her kick to double VV.
 Zhongli
Pros
- Easy to use
- Greatly reduce content’s difficulty
- Provides universal shred
- Able to utilize TotM set
Cons
- Long burst animation that will generally be a DPS loss
- Offers mediocre damage
- 4-set Petra can only buff one element
Additional Notes
Zhongli greatly reduces the technical skill of the team comp by offering a downgraded double VV shred from his E and the ability to ignore most of the enemies’ mechanics from his unreasonably bulky shields.
Occasionally, Zhongli’s E will remove the aura. The E summon will remove 1U and pulses will remove 0.5U. In practice, it won’t significantly hinder your DPS.
Zhongli’s burst takes up 2.4s of animation time. No matter when you use it, there is always something more productive that could’ve been done. Including E usages, it takes approximately 3 – 4s of field time if you use both E and Q. This could’ve been 2 – 3s of more Childe melee under Bennett buff or one more Bennett to Xiangling energy funnel.
 Albedo
Pros
- Easy to use
- Offers EM upon using burst
- Offers some shields to mitigate damage
- Offers damage with low field time required
Cons
- Requirement to burst for EM buffs
- Requires investment in his personal damage
- E has limited range
Additional Notes
A jack of all trades Sub DPS that deals good damage and buffs his team. With 4-set Husk, Albedo becomes one of the better Flex options. Albedo’s biggest strength lies in his ease of use, you don’t need to micro-manage the enemies’ aura to VV the right element. You only need to use Albedo’s burst to get the buff for your team.
Albedo’s E can be destroyed by enemies and can elevate Childe, preventing him from dealing damage or plunging.
 Xingqiu
Pros
- Intuitive to use
- Allows you to vape more Guoba hits
- Minor Hydro shred at C2
- Can battery Childe to allow more consistent melee bursts.
Cons
- Requires high investments to out damage Anemo options
- Offers little aside from raw damage
- Unable to snapshot Bennett’s buff
Additional Notes
Xingqiu is one of the least useful supports in this team comp. He’s only useful if you want easier gameplay or lack any of the supports to use. As the only Sub DPS who’s unable to snapshot, Xingqiu has some anti-synergy with Bennett since Xingqiu will have very little field time to refresh Bennett’s buff.
Forward Vape
An unintended byproduct of the standard reverse-vape comp with Anemos who can apply off-field Pyro. When there are three or more sources of Pyro application, they can temporarily overwhelm Childe’s Hydro application, allowing Childe to vape his attacks. This does not mean all of Childe’s attacks will vape. It only means about one in three attacks will vape due to ICD.
The most efficient and consistent usage of Forward Vaping will be to vape Stance Change, Melee Burst, and Riptide Blast. Beyond that it will be up to RNG if you can continue vaping.
You can also try to minimize the effects of Forward Vaping by using 2-3 strings of N1C or N2C to re-establish a Hydro aura as quickly as possible. Once you do, Forward Vaping will end and Xiangling will be able to reverse-vape again.
Strengths:
- Very high front-loaded damage
- Strong single target damage
Weaknesses:
- Forward Vape’s damage window is only 3 – 5s long
- Only practical if Childe’s investment is equal or higher than Xiangling’s
- Requires use of melee burst
- Inconsistent damage against multiple or spaced enemies
- Prevents Xiangling from reverse-vaping for the first half of Pyronado
- Only practical in one rotation or speedruns
Not recommended to intentionally use. It’s only practical if you’re performing speedruns. If you adjust Childe’s ER to melee burst every rotation, Forward Vape will be weaker than Reverse-Vape. If Xiangling’s investment is higher than Childe’s, Forward Vape will lower your DPS.
Electro-Charged
Despite the name, Electro-Charged is not a significant percentage of the total damage. It merely refers to the primary reaction that is triggered. Generally the Electro-Charged reaction consists of about 5% of the total damage. Most of the damage comes from the team synergy between Childe and the raw damage from the Electro characters.
Beidou
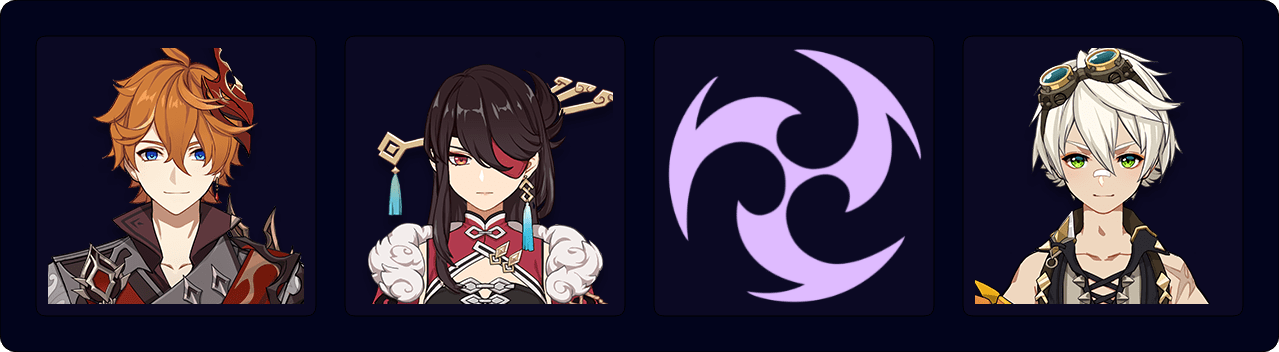
One of the two recommended Childe comps. This team builds around Beidou and her insanely high Elemental Burst damage. Beidou MUST be paired with another Electro character. Beidou alone will not generate enough energy to self-sustain her Burst in any reasonable amount of time. This comp works at all levels of investment, but has its largest power spike with a C2 Beidou.
At C0, Beidou’s burst hits a total of 3 times. It will bounce and hit enemy A, then enemy B, then back to enemy A. At C2, Beidou’s burst now hits for a total of 5 times. It will bounce from enemy A, B, A, B, A. This is a 66% damage increase to her burst. But however amazing Beidou’s damage is, it requires multiple enemies to take effect. Her damage caps at exactly two enemies. Against 1 enemy, she loses 66% – 80% of her burst damage and against 3+, her damage does not increase and becomes more spread out.
Strengths
- Easy to use
- Simple rotations
- Works at all levels of investment
Weaknesses
- No Flex option for shield breaks
- Rotations are difficult to optimize
- Strongest against exactly two enemies. Damage will drop drastically against one enemy and will not increase against 3+.
Recommended for players who’ve already invested into Fischl or Beidou OR who own a C2+ Beidou.
Electro Options:
 Fischl (Fireworks)
Pros
- Low field time
- Simple to use
- High single-target damage
- Low ER
Cons
- Limited multi-target damage
Additional Notes
Paired with Beidou, this creates the famous “Fireworks” team comp. Fischl supplements Beidou’s weaknesses by giving the team single-target damage and helps DPS against 3+ enemies. Well-rounded and easy to use.
 Kujou Sara (Super-Charged)
Pros
- Buffs Team DPS
- Strong Elemental Burst
- Better battery than Fischl
Cons
- High field time
- Highly technical rotations
- High ER
Additional Notes
Optimized rotations will have Sara funnel 3 E CS to Beidou which gives 27 energy. Fischl offers 6 – 7.2 off-field particles per Oz to Beidou which results in up to 21.6 – 26 energy to Beidou across a rotation.
Sara emphasizes the team’s strengths and weaknesses. She increases both Childe’s and Beidou’s multi-target DPS at the cost of being significantly weaker in single-target fights. Well built rotations will have Sara’s team DPS perform better than Fischl’s team. Buffing your main two damage sources is often better than adding another source of damage.
Alternatively, you can replace Beidou for Fischl to have higher single-target damage by lowering your multi-target DPS. You should pair Sara with the appropriate Electro for the content you’ll be fighting against.
 Electro Traveler
Pros
- F2P
Cons
- High ER
- High skill requirement (for Beidou)
Additional Notes
Electro Traveler is the worst battery of the three. Traveler allows Beidou to funnel herself better. Which means with bad gameplay, Traveler doesn’t actually lower Beidou’s ER. With good funneling and max parries, Traveler offers a similar ER reduction as a Fischl minus Fischl’s level damage. You should only use Traveler if you don’t own the other two.
TF Bennett
A variation of the Fireworks comp that aims to resolve the awkward downtime where charge shots are your highest form of downtime DPS.
It replaces Childe’s charge shots with Bennett’s E. Thundering Fury 4-set reduces E cooldowns by 1s every 0.8s if that character triggers a reaction. Bennett’s A1 reduces his E cooldown by 20% and his A4 reduces his E cooldown by another 50% if he uses his E with his Q buff. By having Fischl’s Oz active and using E to trigger overload, Bennett’s E now becomes a 1s cooldown skill. This allows Bennett to generate 2-3 Pyro particles every second and synergizes well with Fischl’s A4 and C6 (by weaving NA > E > repeat). This extra energy generation allows this comp to have a lower ER requirement than the original team comp.
Strengths
- Under the right conditions Bennett will significantly out-DPS Childe’s charged shots, making this the strongest EC team comp.
- Fixes the original comp’s lack of shield break.
- Allows Beidou to fully build into damage without worries of ER requirements.
Weaknesses
- Expensive because it requires four well invested characters to fully optimize the team DPS.
- Most optimally used against low to stagger resistant enemies. Most enemies will be knocked out of Benentt’s Q buff AoE reducing the effectiveness and DPS of Bennett’s overload spam.
- Wants to desync rotations and limit Childe’s melee inside Bennett’s Q or increase rotations to 30s.
Recommended for players who enjoy the Fischl Beidou Bennett team comp and want to try a variation or casual players who like trying unique builds.
Video Showcase by Risuke#6743 (1.3)
Fischl

This is a very comfy team comp to use and play due to the lack of complicated mechanics. This is also one of the best introductory team comp to learn how to rotate with Childe due to the low skill floor. However, it has a high skill ceiling to further optimize your DPS beyond the damage floor. The primary weakness of this comp is that it’s strongest against one enemy. Against multiple enemies, you’ll often find your damage to be lacking due to the limitations of Fischl’s DPS.
Strengths
- Easy to use
- Requires low levels of investment to see results.
- Versatile
Weaknesses
- Limited DPS due to Fischl being exclusively single-target
Recommended for players who want to learn how to rotate with Childe, single-target scenarios, or players who don’t want to play with complicated mechanics.
Video Showcase by Risuke#6743 (2.1)
Flex Options
 Anemo
Anemo
Pros
- Access to VV and grouping
- Downtime gapfiller
Cons
- Conflicting optimal rotations (VV or Vape rQ)
- Requires better rotation management
Additional Notes
Anemos will not have a problem vaping Childe’s burst after you double VVing one enemy. If you attempt to VV in multi-enemy content, Hydro swirls will prevent you from being able to vaporize Childe’s burst by establishing a higher than 2U Hydro on the enemy. Bennett will be unable to remove the Hydro aura with 2 hits (Q + Tap E). You’ll need at least 3 (Q + Half E) to establish a Pyro aura.
 Geo
Geo
Pros
- Shields
- Easier gameplay
Cons
- Lower DPS
- Limited utility
Additional Notes
Offers safe gameplay at the cost of lower DPS.
Kujou Sara (Super-Charged)
Pros
- Buffs Team DPS
- Strong Elemental Burst
Cons
- High field time
- Highly technical rotations
- High ER
Additional Notes
Buffs both Childe’s and Fischl’s damage at the cost of being more difficult to play. More skill is required to optimize rotations and damage.
Xingqiu
Pros
- Strong Single-Target damage
- Minor Hydro shred at C2
- Can battery Childe to allow consistent melee bursts
Cons
- Unable to snapshot Bennett’s buff
Additional Notes
Offers intuitive gameplay at the cost of amplifying the single-target strengths. Will struggle against multi-enemy content.
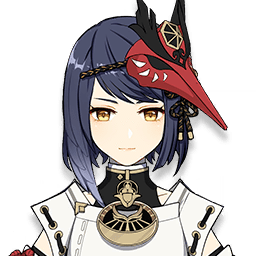
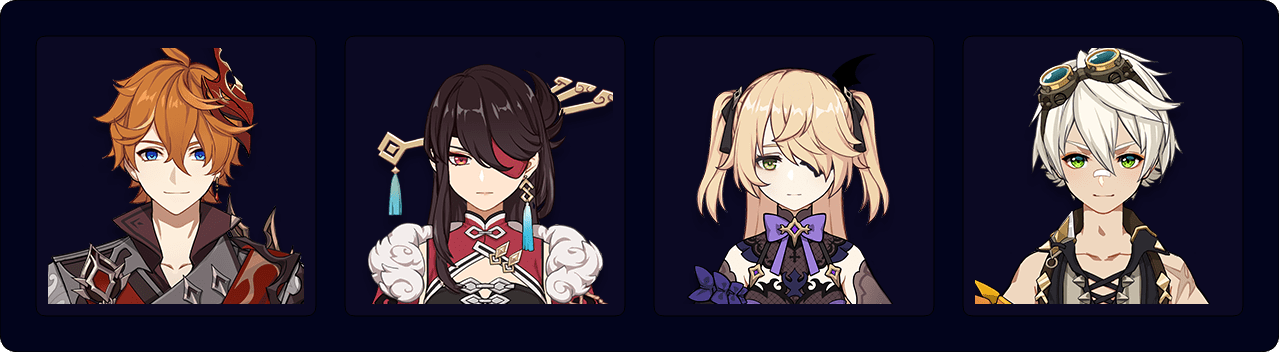
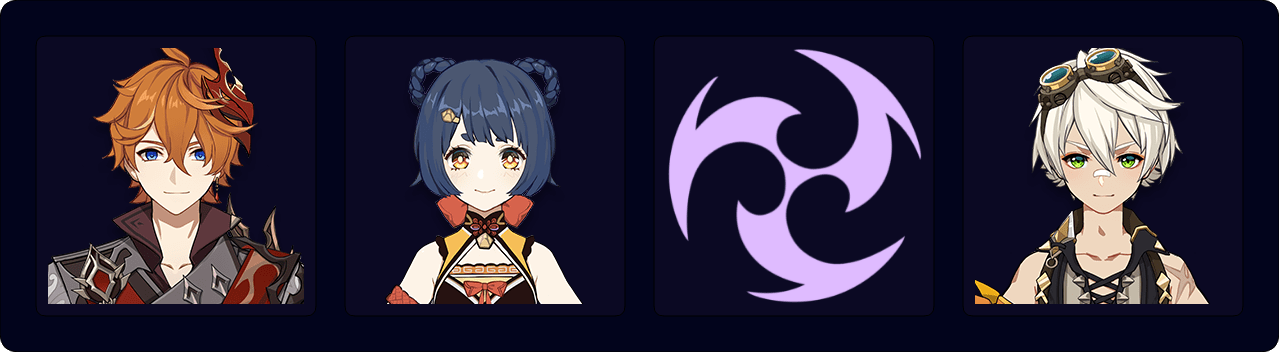
Yae
Yae brings single-target off-field electro damage as well as a multi-target electro nuke, but comes with the need to manage field time and uptime more effectively over a rotation. This variation of Childe Electro-charged teams aims to strike a balance between Childe and Yae, to produce more consistent damage over a larger variety of situations than either Beidou or Fischl focused teams. Yae adds more complexity to Childe Electro-charged, but is very effective when the units are utilized efficiently.
Strengths:
- Yae provides single-target and multi-target damage
- Versatile in both Multi-target and Single-target
Weaknesses:
- Rotations vary in complexity and some flex slots can prove difficult
- Yae requires high field time
- Yae cannot usually burst every rotation without very high ER or C1
Recommended for players who want to play Electro-Charged consistently in a variety of situations, or who already have an invested Yae.
Flex Options
 Beidou (Fireworks)
Pros:
- Strong multi-target damage
- Yae can battery Beidou’s burst
Cons:
- Beidou cannot battery Yae
Additional Notes:
A fireworks variant, this team pairs two off-field electro damage dealers to strengthen damage in multi-target situations. Beidou can be batteried by Yae to be able to Burst every rotation, but Yae will still struggle if you wish to burst every rotation. It is recommended to pair Yae with either Beidou or Fischl depending on the content you are fighting.
Fischl (Fireworks)
Pros:
- Low field time
- Simple to use
- High single-target damage
- Low ER
- Can battery Yae
Cons:
- Limited multi-target damage
Additional Notes:
A fireworks variant, this team pairs two turret units to maximize single-target damage. Fischl provides more passive particles and takes limited field time, making her a strong option, however vaporizing Childe’s Burst can become more difficult when both Oz and Yae’s turrets are up. It is recommended to pair Yae with either Beidou or Fischl depending on the content you are fighting.
Sara (Super-Charged)
Pros:
- Buffs Team DPS
- Strong Elemental Burst
- Can fund Yae’s Burst
Cons:
- High field time
- Highly technical rotations
- High ER requirements
Additional Notes:
Buffs both Childe’s and Yae’s damage at the cost of being more difficult to play. More skill is required to optimize rotations and damage, and if not played well can result in a loss in overall damage.
Anemo
Pros:
- Access to VV and grouping
Cons:
- Requires strong rotation management
- Can run into energy issues for all members
- Can require high field time
Additional Notes:
When introducing an Anemo unit to Childe and Yae, you now have to balance Childe’s melee uptime, Yae’s turret refreshing, and refreshing VV duration together to maintain buff and damage uptime. Add in Childe and Yae’s bursts wanting buff uptime and the rotation can become exceptionally complicated. Kazuha and Sucrose are the most recommended, however Kazuha can run into energy issues very easily in this team.
Geo
Pros:
- Shields
- Easier gameplay
- Can require limited field time
Cons:
- Lower DPS
- Limited utility
- Can run into energy issues for all members
Additional Notes:
Offers safe gameplay at the cost of lower DPS. Albedo is not recommended as his turret when paired with Yae’s turrets can make vaporizing Childe’s Burst difficult.
Freeze
Freeze comps trade damage for better playability and reduced mechanics. This means Freeze comps will generally always have one of the lowest damage ceilings of all the Childe team comps.
Permafreeze
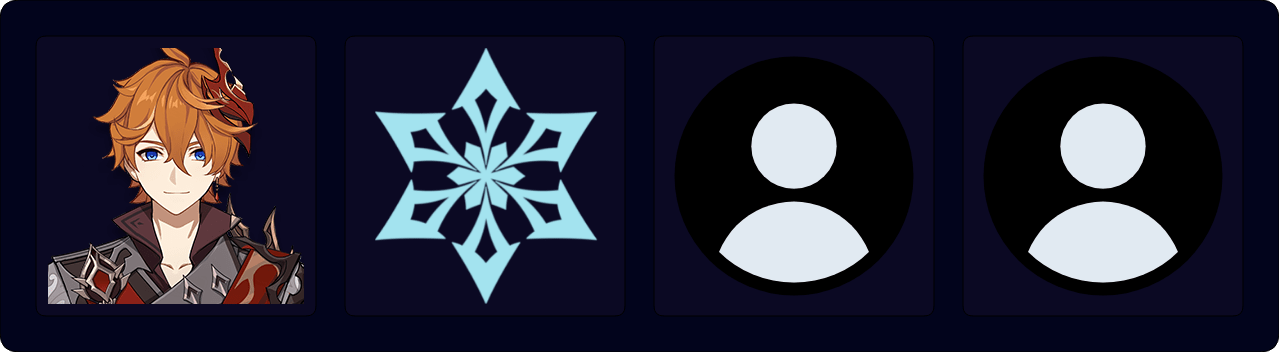
In a normal team comp, Childe enables his sub-DPS to deal more damage. This is one of the few team comps where the team enables Childe instead. However due to the nature of freeze, the majority of your damage will come solely from Childe and not your team. Unfortunately Childe isn’t the greatest hypercarry so this means freeze comps trade damage for minimal enemy resistance. Depending on the player, this might be more valuable than dealing more damage.
Strengths
- Easy to use
- Less enemy mechanics
- Subjectively fun
Weaknesses
- Limited damage ceiling
- There currently is no 4* Sub DPS who is strong enough to carry Freeze comps like Xiangling and Beidou does for other comps
- Elemental infusion will force you to deal with enemy mechanics
- Needs hyper invested Childe to be somewhat competitive to other team comps
- Wants to use melee burst to compensate for lack of damage
This comp is only recommended for casual players who are not strong mechanically or for players who are looking into alternative fun comps with Childe. Is not recommended to use Freeze comps to earn your first 36* in Abyss. You’ll be able to 36* Abyss with less investment with his two recommended team comps.
Video Showcase by Risuke#6743 (1.3)
Mono-Hydro
A challenge / fun comp more than anything else. Forcing Childe to play Hypercarry despite his kit not being made for Hypercarrying. Because of this, do not expect Childe to get similar levels of DPS as other Hypercarries.
Hypercarry Childe

The goal of the comp is to amplify Childe’s damage as much as possible. The two best methods to achieve this goal is by grouping enemies together to capitalize off of Childe’s quadratic scaling from riptides and shredding enemy resistances, which Anemo can do both.
The choice between Xingqiu and Mona depends on the content. Xingqiu is better for longer fights and smaller quantities of enemies. Mona is better against multiple enemies or if your Childe’s DPS is high enough to eliminate content within the short duration of Omen’s debuff.
Strengths
- Childe becomes a Hypercarry
- Subjectively fun
Weaknesses
- Requires high investment to be usable
- Limited damage ceiling
Only recommended for players who want to play different builds.
Video Showcase by Risuke#6743 (2.0)
Overload
A highly front-loaded team comp. It takes the strengths of both reverse-vape and electro-charged but adds an additional factor of the overload reaction, which may become a weakness depending on the content.
Xiangling Electro
A hybrid comp that mixes together two playstyles. Your melee offers high front-loaded damage in the form of raw Electro damage, reverse-vapes, overloads, and Electro-charge reactions.
The downtime has two different playstyles:
Xiangling Funnel
Xiangling funnel objectively offers the higher DPS since it lets you use Xiangling’s burst again in the second rotation but it requires you to deal with overloaded enemies as you try to land Bennett’s E into Xiangling while also batterying your Electro. But against stagger resistant enemies, you can double down on overload and utilize TF Bennett to more quickly funnel Xiangling.
Electro-Charge Rotation
Electro-Charge rotation offers significantly easier gameplay. You alternate between Overload melee and Electro-charged melee. However this is only practical with Fischl as your Electro slot. Beidou is strictly a one rotation comp due to the inability to fuel both Beidou and Xiangling’s burst in any reasonable amount of time.
| First Rotation Xiangling + Electro | > | Second Rotation Electro | > | Repeat |
Strengths
- High front-loaded damage
- Subjectively fun
Weaknesses
- Adds overload which is a situational weakness depending on the content
Only recommended for players who want to play different builds.
Bow Focus
A challenge / fun comp more than anything else.
Physical
Physical focus ignores half of Childe’s kit to maximize the damage from his normal attack arrows.
Due to how quickly you need to press the attack button, your fingers will be tired and sore after only minutes of attacking. Requires days of practice to adjust your finger muscles to sustaining Childe’s Physical DPS.
Strengths
- Strong single target DPS
- Can combat Hydro-immune enemies
- Subjectively fun
Weaknesses
- Only AoE comes from Ranged Burst
- High investment
- High skill requirement
Only recommended for players who want to challenge themselves or want to play different builds.
Video Showcase by Risuke#6743 (1.3)
Charged Shot
Charged Shot focus ignores half of Childe’s kit to maximize the damage from his vape charged shots.
Strengths
- Strong single target DPS
- Subjectively fun
Weaknesses
- Only AoE comes from Ranged Burst
- High investment
- High skill requirement
Only recommended for players who want to challenge themselves or want to play different builds.
Video Showcase by Ori#5463 (1.3)
One-Shot
The comps that give the highest “Damage Per Screenshot”. They are for players who want to showcase their highest possible numbers. It’s not very practical in Abyss because it requires either very high investments, overkills, or Abyss content simply isn’t well suited for one-shots.
“Damage per Screenshot”
This is not a practical Abyss comp. The goal is to produce the largest damage numbers in a single hit for screenshot or self-achievement purposes. You maximize team buffs for the highest Melee Burst damage from Childe.
The only time where this comp is usable in Abyss is once you’ve reached high enough DPS to essentially one shot the content. This generally only happens once you have multiple 5* weapons, high talent levels, great artifacts, and high constellations on every character in this team.
Is not recommended to use One-Shot comps to earn your first 36* in Abyss due to the extremely high investments required to make it practical. Once you reach the required high investments, One-Shot comps are usable for speedruns.
Anemo Options
Rotation
Apply Hydro > Sucrose E (VV Hydro), Q > Bennett E (Clear Hydro), Q (Pyro Infuse Sucrose’s Q) > Mona Q (Clear Pyro) > Wait for Sucrose’s Q to apply Pyro aura > Childe Melee Burst
Rotation
Stance Change > Bennett Q (reduces Hydro Aura) > Kazuha Q (Hydro VV) (Pyro Infuse Kazuha’s Q) > Mona Q (Clear Pyro) > Wait for Kazuha’s Q to apply Pyro aura > Childe Melee Burst
Double Carry
Double carry comps are inherently weaker than traditional comps. The main problem is that you can’t support both carries equally. You’ll need to prioritize one or the other and this means one of them will perform weaker than the other. Additionally the second carry generally has weaker support capabilities and only offers the team raw damage. This means that with the same levels of investment, a support will usually offer more DPS until the second carry has high levels of investment where they exceed the support’s damage ceiling.
Inefficiencies the Team Comp
Double carry comps are comps that generally work by virtue of overinvestment. Because of the inherent flaws of team synergy, most double carry comps are strictly one rotation. Most double carry comps cannot generate enough energy to consistently fuel the second carry’s burst.
Only viable players who don’t care about the limitations and/or have the resources to overcome the limitations. Not recommended for players who wish to 36* Abyss as soon as possible.
Ganyu
A Morgana comp that replaces Mona with Childe. There are two main playstyles with this comp.
Childe Focus
Childe focus has a rotational playstyle that utilizes Ganyu’s and Childe’s ability to quadratically scale their damage against grouped enemies from Venti’s burst Frozen enemies will not be lifted up by Venti’s Burst, allowing Childe to melee enemies while Venti’s Burst is active. Downtime has Ganyu gapfilling and funneling energy.
Ganyu Focus
Ganyu focus relegates Childe as burst bot. Usually used with C4 Childe. Playstyle is nearly identical to the original Morgana comp. Childe offers +1 AA talents, raw damage, and the occasional Hydro application if C4. Mona will offer both more team DPS and better playability than Childe. Childe is strictly a downgrade from Mona.
Strengths
- Very strong against multi-enemy content
- Subjectively fun
Weaknesses
- Damage drops against single target, mobile, or un-pullable enemies.
- Requires multiple 5* characters
- Requires high investment
Not recommended to use to earn your first 36* in Abyss. Only recommended if you enjoy Freeze Childe and have every character in this comp.
Ayaka
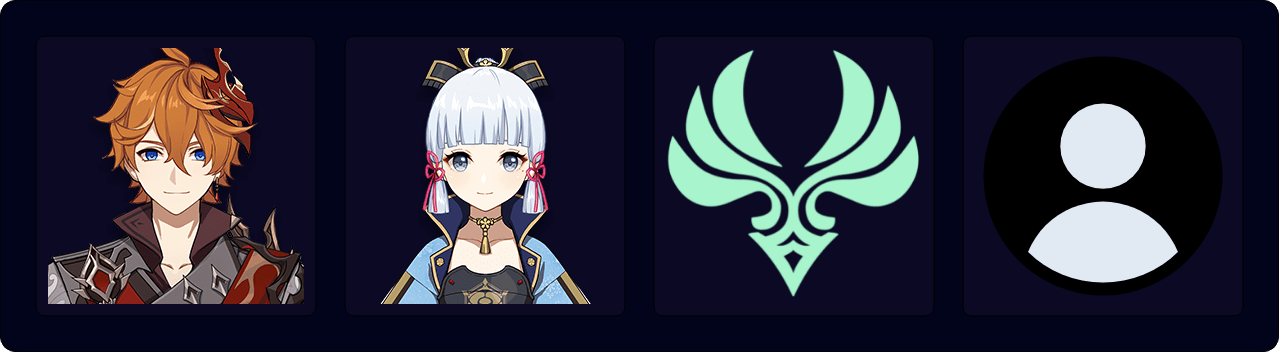
An Ayaka comp that replaces Mona with Childe. This is the strongest Childe Freeze comp currently available, but will still be weaker than pairing Ayaka with Mona.
Because Ayaka’s burst has a short duration, you can melee with Childe for a shorter amount of time (7-8s) before swapping into an Ayaka funnel downtime to create a 20s rotation cycle.
Strengths
- Strongest Childe Freeze team
- Subjectively fun
Weaknesses
- Requires multiple 5* characters
- Requires high investment
Not recommended to use to earn your first 36* in Abyss. Only recommended if you enjoy Freeze Childe and have every character in this comp.
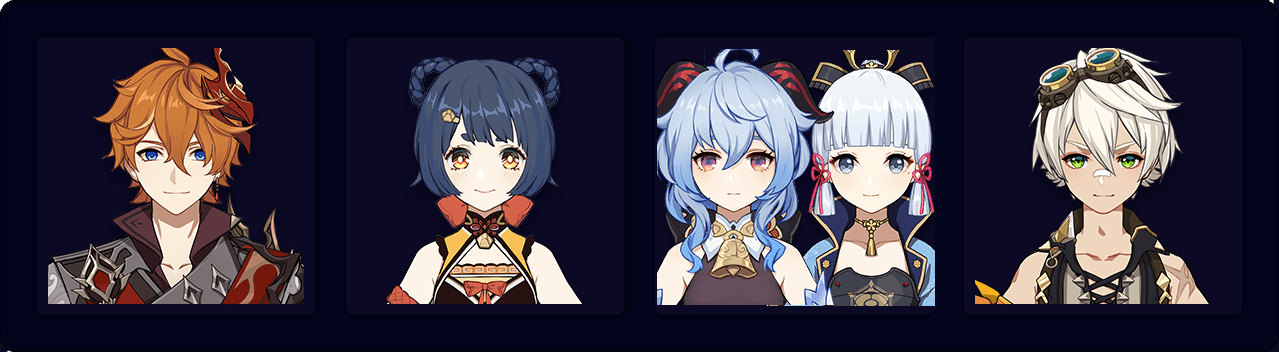
Melt Xiangling
Ganyu
A variant of the reverse-vape comp whose goal is to partially melt Xiangling’s Q through Ganyu’s Q during melee duration and provide a stronger gap-fill during Childe’s E cooldown. It realistically only melts 30 – 60% of Xiangling’s Pyronado. It also replaces Childe’s charge shots with Ganyu’s Charge Bloom Shots. The rotation’s margin of error is inhumanely narrow for an optimized rotation and at any point where you aren’t actively doing damage, it heavily falls behind the original team comp. This team heavily relies on Ganyu’s level of investment. For a good majority of Ganyu’s damage range, she will be weaker than the other Anemo options. This team comp is only practical once you’ve exceeded the replaced character’s damage ceiling.
This team comp would objectively be stronger if you were to play Melt Ganyu instead. This comp heavily relies on overinvestment. That means this comp will deal less damage than the original reverse-vape comp at low levels of investment.
Ayaka
Similar to Ganyu, you’ll only melt a fraction of Xiangling’s burst with some melts to Ayaka’s burst. Ayaka offers better flexibility and more consistent damage than Ganyu while maintaining similar ER problems.
Can I use another Cryo?
Utilizing any other Cryo character will make the comp perform significantly worse. The team heavily relies on the raw damage output of Ganyu and Ayaka. By lowering that raw damage output, you make the comp perform significantly worse than the original reverse-vape comp.
Strengths
- Ganyu / Ayaka is on the team
- Subjectively fun
Weaknesses
- Requires an extremely invested Ganyu / Ayaka to become practical. This means either high constellations, Amos (Ganyu), and/or very strong artifacts.
- High ER requirements on Ganyu / Ayaka
- Low energy generation
Not recommended to use to earn your first 36* in Abyss. Only viable for players who wish to forcefully pair Childe and Ganyu / Ayaka together and satisfies one of the means of making Ganyu’s / Ayaka’s damage higher than the replaced support’s team damage.
Hu Tao
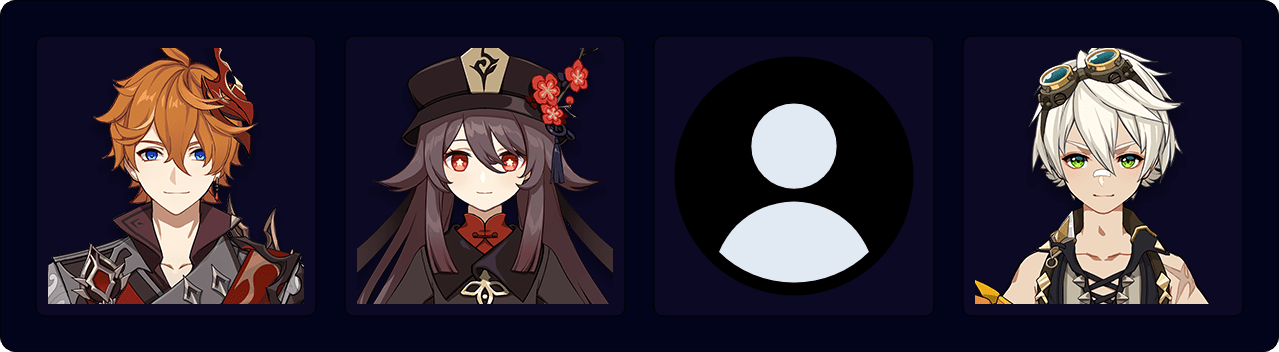
Childe and Hu Tao should not be paired together. Due to hitlag extending the duration of both Childe and Hu Tao, there’ll never be a downtime long enough to have a DPS window for both of them. You will always be trading one DPS window for the other the more optimized your rotation is.
The best way to fit both of them into the comp is to turn one of them into a burst bot to minimize their field time and then have the Flex slot support the main carry. If you want both of them to have some field time, you’ll have to lower their DPS by either creating a longer rotation cycle or by reducing their uptimes to reduce the rotation cycle. Both of which aren’t recommended because there is currently no Flex character who can support both Childe and Hu Tao enough to make this a net DPS gain.
Strengths
- High double burst damage
- Strong against multi-wave content
- Subjectively fun
Weaknesses
- Requires multiple 5* characters
- Requires high investment
- Low energy generation
Not recommended to use to earn your first 36* in Abyss.
Raiden Shogun

Despite looking like they could work well together, Childe and Raiden have some conflicting synergy. The problem mainly lies with the lack of supports. You want both Childe and Raiden to be buffed so they can deal good damage and, at the same time, they both want to hog the full duration of Bennett’s buff. This means the only way to make this work is to alternate which character uses Bennett’s buff, creating a longer rotation cycle, which will lower your overall DPS. On top of this, the long duration of Raiden’s E makes it more difficult to set up a vaporized Q for Childe, which will significantly lower Childe’s DPS if you don’t vape.
Every team comp you could create with Raiden will be a flashy reskin of an already existing Electro-Charged comp. Both Raiden’s and the original comp will deal similar DPS until Raiden is at high-invest where her damage ceiling will allow her to out DPS the original by virtue of being a 5*.
Strengths
- High double burst damage
- Strong against multi-wave content
- Subjectively fun
Weaknesses
- Requires multiple 5* characters
- Requires high investment
Not recommended to use to earn your first 36* in Abyss.
Video Showcase of Raiden Beidou Bennett by Risuke#6743 (Rotation Showcase)
Healers
Why Bennett? Can I replace him with another healer?
While Bennett is great in any team, he has a higher level of synergy with Childe than other characters. Childe + Bennett is comparable to Pyro + XQ with what Bennett offers to Childe. With our current roster of Pyro characters, few are able to clear a Hydro aura quickly. Bennett is able to clear most of Childe’s Hydro applications with both his Tap E and Burst (both apply 2U Pyro, which clears any 1U Hydro). This allows Childe to quickly set up a vaporized burst. With C4 Bennett, you can use Hold 1 E AA to clear a Hydro aura, deal two reverse vaporized hits, and apply a Pyro aura for the next charge shot to vaporize (Bennett’s C4 applies three instances of 1U Pyro, 2U will clear Hydro and the last 1U will apply Pyro aura).
In addition to the synergy with Childe, most Off-Field DPSs are able to snapshot their abilities on Bennett’s buff. This means they’ll take a “snapshot” of their stats upon summoning their duration abilities and keep Bennet’s buff for the entire duration of their skill or burst. This applies to all of the Off-Field DPSs except Xingqiu. Xingqiu is dynamic and only utilizes the buffs that are currently on him and doesn’t take a “snapshot” of his stats on cast.
If you don’t own Bennett or if you have Bennett reserved on your other team, you can still use the other healers. There will just be some reorganization of Childe’s rotation and no vaporize bursts, which will usually result in a significant decrease in DPS.
| General Rankings of Healers in Childe Team Comps | |
| Best Option | Bennett |
| Good Alternatives | Jean > Sayu |
| Alright Options | Kokomi > Barbara > Diona > Qiqi |
| These rankings are based on how much utility and damage increase each character offers, not best healing. | |
Character Info Cards
The following information is generalized information specifically for Childe comps. They do not accurately represent the recommended artifacts, mainstats, substats, or ER for non-Childe team comps. If used for non-Childe comps, some information will not be accurate and should be taken with a grain of salt.
Hydro
Childe
| Childe | Main DPS | Hydro | 5* |
| Artifact Set | 4 HoD ≥ 4 SR* ≥ 4 TS = 4 BS > HoD Glad/SR > HoD NO/WT | ||
| Main Stats |
Sands
ATK% |
Goblet
Hydro DMG% |
Circlet
CRIT Rate or CRIT DMG |
| Sub Stats | CRIT Rate / CRIT DMG > ATK% > EM > ER% | ||
| Talents | E > Q > AA** | ||
| Recommended ER |
100% – 110% ( Ranged )
150% – 170% ( Melee ) |
||
|
Due to the vast difference in ER, it is recommended to use ranged burst over melee burst. Additionally, Ranged Burst fills in time during his E cooldown and is easier to vape than the melee burst. Melee burst will eat up two seconds of your melee time and is much harder to vape due to stance change potentially taking the vape.
It is recommended to only use 4 TS with Electro-charged teams and 4 BS with freeze teams. 4 HoD will perform similarly in both of these team comps. *SR should only be used if you can defeat content within one rotation. The new ER requirements on the second rotation makes SR perform worse than HoD NO/WT. **The AA talent should be upgraded if you use charged shots with Childe. If you don’t use charged shots, it only increases riptide burst’s damage (on-kill) and contributes a very small fraction of your DPS. Otherwise, it’s fine to leave AA at T6(7). |
|||
Burst Childe
| Burst Childe | Burst DPS | Hydro | 5* |
| Artifact Set | NO HoD/WT > HoD Glad/SR > 4 EoSF > 4 HoD > 4 SR | ||
| Main Stats |
Sands
ATK% or EM |
Goblet
Hydro DMG% |
Circlet
CRIT Rate or CRIT DMG |
| Sub Stats | CRIT DMG > CRIT Rate > ATK% = EM | ||
| Talents | Q > E > AA | ||
| Recommended ER | 100% | ||
|
Burst Childe is only recommended if you can one-shot or almost one-shot content. This means Burst Childe is only practical with high levels of investment. It’s not recommended to use him strictly as a burst bot in other team comps because his alternative, Mona, will offer both more damage and support than what Childe can offer. Childe only has faster animation times which is more optimal for speedruns but for casual use, Mona will outperform Childe.
ER isn’t necessary because if you use Burst Childe, you will one rotation. If you can’t one rotation, Main DPS Childe will be more practical to use. |
|||
Barbara
| Barbara | Support | Hydro | 4* |
| Artifact Set | 4 NO = 4 Instructor > 4 Maiden > TotM Maiden | ||
| Main Stats |
Sands
ER% or HP% |
Goblet
HP% |
Circlet
Healing Bonus% or HP% |
| Sub Stats | ER% > HP% | ||
| Talents | E = Q | ||
| Recommended ER |
150% – 180% ( 48s )
280% – 320% ( 24s ) |
||
|
It is unrealistic to have Barbara’s burst every rotation. Her burst should be mainly used as a panic heal button and offer her utility through TTDS.
The number of HP thresholds you are able to hit will change the ER needed, so experiment to see what your ER requirements are for your rotations. |
|||
Xingqiu
| Xingqiu | Sub DPS | Hydro | 4* |
| Artifact Set | 4 EoSF = HoD NO > HoD/NO Glad/SR > 4 NO | ||
| Main Stats |
Sands
ER% or ATK% |
Goblet
Hydro DMG% |
Circlet
CRIT Rate or CRIT DMG |
| Sub Stats | CRIT Rate / CRIT DMG > ER% > ATK% > EM | ||
| Talents | Q > E | ||
| Recommended ER |
160% – 180% ( Sac Sword )
140% – 160% ( C6 ) |
200% – 220% ( Other Swords )
180% – 200% ( C6 ) |
|
|
It’s not recommended to use Xingqiu as your main Sub DPS because Childe is unable to enable him. Xingqiu’s strength is similar to Childe’s, enabling other characters. If both characters are unable to enable, their strengths and damage is much weaker. A solid Sub DPS option for freeze comps.
Using EQ, QE, EQE, or QEE depends on ER and constellations. Assuming C4, if you want faster rotations, use EQ(E). If you want more damage, use QE(E). It at most increases ER by about 5% if you don’t funnel the hydro particles. Under C4, EQ(E) is recommended because it’s faster. The number of HP thresholds you are able to hit will change the ER needed, so experiment to see what your ER requirements are for your rotations. |
|||
Mona
| Mona | Support | Hydro | 5* |
| Artifact Set |
4 NO ≥ 4 Instructor > 4 TotM ( Support )
4 EoSF > NO HoD > 4 NO ( Burst DPS ) |
||
| Main Stats |
Sands
ER% or ATK% |
Goblet
Hydro DMG% |
Circlet
CRIT Rate or CRIT DMG |
| Sub Stats | ER% > CRIT Rate / CRIT DMG > ATK% > EM | ||
| Talents | Q ≥ E | ||
| Recommended ER |
140% – 170% ( 2 E )
170% – 210% ( 1 E ) |
||
|
Mona’s main utility comes from increasing Childe’s burst damage. Aside from that she underperforms nearly every other support option. Mona’s niche is that she’ll allow for the fastest clear times if you can one-shot content if your Childe is invested enough. If your Childe isn’t strong enough, it’s not recommended to use Mona at all.
Recommended to use for the highest “Damage Per Screenshots”. The number of HP thresholds you are able to hit will change the ER needed, so experiment to see what your ER requirements are for your rotations. |
|||
Phys Barbara
| Phys Barbara | Not Support | Hydro | 4* |
| Artifact Set | PF BSC > 4 BS > PF/BSC Glad/SR/HoD > HoD Glad/SR | ||
| Main Stats |
Sands
ATK% |
Goblet
Physical DMG% |
Circlet
CRIT Rate or CRIT DMG |
| Sub Stats | CRIT DMG ≥ CRIT Rate > ATK% | ||
| Talents | AA ≥ E > Q | ||
| Recommended ER | 100% | ||
|
Requires Atlas or high refined EoP to use.
Atlas plays like a 30s cooldown Sub DPS while high-refined EoP plays like a 8-10s quickswap. Use at your own risk. |
|||
Kokomi
| Kokomi | Support | Hydro | 5* |
| Artifact Set | 4 ToTM > 4 NO ≥ 4 Instructor | ||
| Main Stats |
Sands
ER% or HP% |
Goblet
Hydro DMG% or HP% |
Circlet
Healing Bonus% or HP% |
| Sub Stats | ER% > HP% > ATK% | ||
| Talents | E > Q | ||
| Recommended ER |
140% – 170% ( 2 E )
180% – 220% ( 1 E ) |
||
|
Kokomi’s main utility will come from TTDS and ToTM.
The number of HP thresholds you are able to hit will change the ER needed, so experiment to see what your ER requirements are for your rotations. |
|||
Electro
Fischl
| Fischl | Sub DPS | Electro | 4* |
| Artifact Set |
4 TS* > TF Glad/SR ≥ TF Gambler ( Sub DPS )
4 TotM > TF Glad/SR > 4 NO ( Support )** | ||
| Main Stats |
Sands
ATK% |
Goblet
Electro DMG% |
Circlet
CRIT Rate or CRIT DMG |
| Sub Stats | CRIT Rate / CRIT DMG > ATK% > ER% | ||
| Talents | E > Q*** | ||
| Recommended ER | 100% – 130% ( 25s ) | ||
|
By alternating Oz durations with E and Q, Fischl will have fairly low ER requirements.
The number of HP thresholds you are able to hit will change the ER needed, so experiment to see what your ER requirements are for your rotations. *4 TS is Fischl’s strongest set, but it has a conditional. Enemies must be affected by Electro for the 4-set to work. This means any Abyss floor that’s heavy with slimes or elemental infusions will either have TS perform about the same as TF Glad or worse. Because of this, it’s not future-proof. It is recommended to use TF Glad for consistency against all content. **It’s only recommended to use Support Fischl if you don’t have another NO or TotM buffer or if you don’t have Bennett on the team. ***There’s little need to upgrade Q. The Oz summoned from Q will use E talents. |
|||
Beidou
| Beidou | Sub DPS | Electro | 4* |
| Artifact Set | 4 EoSF ≥ TF NO = 4 TS* ≥ NO Glad/SR ≥ 4 NO > TF Glad/SR | ||
| Main Stats |
Sands
ER% or ATK% |
Goblet
Electro DMG% |
Circlet
CRIT Rate or CRIT DMG |
| Sub Stats | CRIT Rate / CRIT DMG > ER% > ATK% | ||
| Talents | Q > E | ||
| Recommended ER with Fischl | 120% – 140% ( Max Parries ) | 150% – 170% ( Min Parries ) | |
| Recommended ER with Sara | 100% – 130% ( Max Parries) | 140% – 150% ( Min Parries ) | |
|
Depending on how skillful you are, perfect parries will be able to greatly reduce Beidou’s ER requirements. But due to how inconsistent enemy AI is, it’s not reliable to always obtain perfect parries. It is recommended to have between 150% – 170% ER so that you will always have enough energy with just no-hit parries.
The number of HP thresholds you are able to hit will change the ER needed, so experiment to see what your ER requirements are for your rotations. *4 TS will perform slightly better than TF NO, but it has the conditional of requiring enemies to be affected by Electro. Both TF NO and 4 TS give 35% to her Q, but TS gives 35% to E while TF NO gives 15% to E. Because the values are fairly close, TF NO is recommended over 4 TS because TF NO will always be active while 4 TS will not work against non-Electro slimes or elementally-infused enemies. |
|||
Electro Traveler
| Electro Traveler | Support | Electro | 5* |
| Artifact Set | 4 EoSF > EoSF Exile/Scholar > 4 NO > 4 TotM | ||
| Main Stats |
Sands
ER% |
Goblet
Electro DMG% |
Circlet
CRIT Rate or CRIT DMG |
| Sub Stats | ER% > CRIT Rate / CRIT DMG > ATK% | ||
| Talents | Q > E | ||
| Recommended ER |
240% – 260% ( 2 E )
250% – 270% ( 1 E ) |
||
|
The Sub DPS capabilities of Electro Traveler is fairly limited. It is barred behind a burst, which means it will have half the effective uptime compared to Fischl’s. Not only this, Electro Traveler’s burst procs are only comparable to Fischl’s A4. This means even if you focus on damage, Traveler will deal significantly less damage than Fischl’s.
Even with focusing on Electro Traveler’s main gimmick of ER sharing and energy generation, Traveler will still not be worth replacing Fischl. Fischl simply generates more relevant energy to Beidou with no loss in team DPS. The number of HP thresholds you are able to hit will change the ER needed, so experiment to see what your ER requirements are for your rotations. |
|||
Sara
| Sara | Support | Electro | 4* |
| Artifact Set | 4 TotM ≥ 4 NO > 4 EoSF > TF Glad/SR | ||
| Main Stats |
Sands
ER% |
Goblet
Electro DMG% |
Circlet
CRIT Rate or CRIT DMG |
| Sub Stats | ER% > CRIT Rate / CRIT DMG > ATK% | ||
| Talents | E > Q | ||
| Recommended ER |
180% – 200% ( 2 E )
220% – 240% ( 1 E ) |
||
|
Keep in mind ER recommendations only account for the number of E’s that are used after her burst.
Prioritize high Base ATK weapons and ER above all else. Sara’s personal damage is secondary to what she can offer to her team. Sara requires swap weaving buffs in order to optimally utilize her kit. Appropriately snapshot the buffs to the right characters in sequence. The number of HP thresholds you are able to hit will change the ER needed, so experiment to see what your ER requirements are for your rotations. |
|||
Yae
| Yae | Sub DPS | Electro | 5* |
| Artifact Set | TF ATK > WT TF = ATK ATK > ATK WT > EoSF* | ||
| Main Stats | Sands ER% |
Goblet Electro% |
Circlet CRIT Rate or CRIT DMG |
| Sub Stats | CRIT Rate / CRIT DMG > ER% > ATK% > EM | ||
| Talents | E>Q | ||
| Recommended ER | Burst every second rotation | Burst every rotation | C1 every rotation (3 Thunderbolts) |
| Beidou | 120% – 150% | 260% – 290% | 170% – 200% |
| Fischl | 100% – 110% | 180% – 210% | 130% – 160% |
| Solo Electro | 140% – 170% | 300% – 330% | 200% – 230% |
| Yae is a strong single-target Electro Sub DPS with a powerful multi-target nuke. She often wants high field time, which can make teams awkward, and strong rotations important. Yae often has energy issues so usually will use her Burst every second rotation, and likes a second Electro unit on her teams. * EoSF can be a strong option for Yae if her burst is buffed and she has enough ER to burst every rotation. If she cannot burst every rotation, it is very weak. The number of HP thresholds you are able to hit will change the ER needed, so experiment to see what your ER requirements are for your rotations. These cards assume no HP thresholds for ER recommendations, so it is likely you will require less ER. |
|||
Pyro
Bennett
| Bennett | Support | Pyro | 4* |
| Artifact Set | 4 NO > 4 Instructor > 4 TotM | ||
| Main Stats |
Sands
ATK% or ER% |
Goblet
Pyro DMG% |
Circlet
CRIT Rate or CRIT DMG |
| Sub Stats | ER% > CRIT Rate / CRIT DMG > ATK% > EM | ||
| Talents | Q > E | ||
| Recommended ER |
130% – 160% ( 3 E )
150% – 190% ( 2 E ) 170% – 250%( 1 E ) |
||
|
You can run HP focus for better healing. This is a viable low investment option but often unnecessary as the base healing from Q is more than enough for many players.
The number of HP thresholds you are able to hit will change the ER needed, so experiment to see what your ER requirements are for your rotations. |
|||
Overload Xiangling
| Overload Xiangling | Sub DPS | Pyro | 4* |
| Artifact Set | 4 CW > 4 EoSF = CW NO > CW/NO WT = CW/NO Glad/SR | ||
| Main Stats |
Sands
EM |
Goblet
Pyro DMG% |
Circlet
CRIT Rate or CRIT DMG |
| Sub Stats | CRIT Rate / CRIT DMG > ER% > EM > ATK% | ||
| Talents | Q > E | ||
| Recommended ER |
100% ( 30s )
120% – 140% ( 24s ) |
||
|
Overload Xiangling is strong at her niche of low to unstaggerable enemies. It’s a specialized build to kill these types of enemies as quickly as possible. It’s expected to double down on the overload reactions and utilize TF Bennett during downtime to fuel her energy to optimize the team comp.
The number of HP thresholds you are able to hit will change the ER needed, so experiment to see what your ER requirements are for your rotations. |
|||
TF Bennett
| TF Bennett | Sub DPS | Pyro | 4* |
| Artifact Set | 4 TF | ||
| Main Stats |
Sands
EM or ER% |
Goblet
EM orPyro DMG% |
Circlet
EM or CRIT Rate or CRIT DMG |
| Sub Stats | ER% > EM > CRIT Rate / CRIT DMG > ATK% | ||
| Talents | Q > E | ||
| Recommended ER ( Reverse-Vape) |
100% ( 30s )
130% – 160%
( 3 E) |
150% – 190%
( 2 E ) |
170% – 250%
( 1 E ) |
| Recommended ER ( Electro-Charged ) |
160% – 180%
( 3 E ) |
200% – 230%
( 2 E ) |
270% – 300%
( 1 E ) |
|
EM is the most important damage stat as of Update 1.6. EM EM EM out damages the previous best build of EM Pyro CRIT.
ER is still very high on the priority for fluid gameplay. Because Bennett is not using 4 NO, you’ll want to use some kind of attack buff on another member on the team. Ideally on Fischl or Xingqiu since the loss in team DPS isn’t that bad. Fischl with 4 TotM and Xingqiu with 4 NO. The number of HP thresholds you are able to hit will change the ER needed, so experiment to see what your ER requirements are for your rotations. |
|||
Vape Xiangling
| Vape Xiangling | Sub DPS | Pyro | 4* |
| Artifact Set | 4 EoSF ≥ 4 CW = CW NO > CW/NO WT = CW/NO Glad/SR | ||
| Main Stats |
Sands
ER% or ATK% |
Goblet
Pyro DMG% |
Circlet
CRIT Rate or CRIT DMG |
| Sub Stats | CRIT Rate / CRIT DMG > ER% > ATK% > EM | ||
| Talents | Q > E | ||
| Recommended ER |
140% – 170% ( 30s )
120% – 150% ( Funneled ) |
180% – 210% ( 24s )
150% – 180% ( Funneled ) |
|
|
It’s recommended to use ER weapons with ATK Sands or vice versa for general use. You can use a lower ER by exclusively funneling energy into Xiangling with Bennett’s E during downtimes. The ER recommended above assumes you are performing charged shots with a few Bennett E in between.
Each Favonius weapon proc reduces ER requirements by about 15-20%. Venti’s Q reduces ER requirements by about 25-30% The number of HP thresholds you are able to hit will change the ER needed, so experiment to see what your ER requirements are for your rotations. |
|||
Cryo
Ganyu
| Ganyu |
Sub Carry
Sub DPS |
Cryo | 5* |
| Artifact Set |
4 WT > BS Glad/SR > BS NO > 4 NO ( Sub Carry )
4 EoSF = BS NO > 4 NO > NO Glad/SR > 4 TotM ( Sub DPS ) | ||
| Main Stats |
Sands
ATK% or ER% |
Goblet
Cryo DMG% |
Circlet
CRIT Rate or CRIT DMG |
| Sub Stats | CRIT Rate / CRIT DMG > ATK% > ER% > EM | ||
| Talents | AA ≥ Q > E | ||
| Recommended ER | 100% ( One Rotation ) | 130% – 150% ( 24s ) | 170% – 200% ( 15s ) |
|
To be used as a Sub Carry, you’ll need to have either a highly invested Ganyu or an Amos. Otherwise she will not offer more damage than an Anemo’s VV shred.
130% – 150% ER is the recommended. It’s not necessary to have Ganyu’s Burst always active. It’s better to only have it up during Childe’s melee when you can occasionally melt Xiangling’s Burst. During downtime it’s not recommended to have it up so you can occasionally melt with Ganyu’s Bloom Charged Shots. The number of HP thresholds you are able to hit will change the ER needed, so experiment to see what your ER requirements are for your rotations. |
|||
Kaeya
| Kaeya | Sub DPS | Cryo | 4* |
| Artifact Set | 4 BS > NO BS ≥ 4 EoSF > 4 NO > NO Glad/SR | ||
| Main Stats |
Sands
ATK% |
Goblet
Cryo DMG% |
Circlet
CRIT Rate or CRIT DMG |
| Sub Stats | CRIT Rate / CRIT DMG > ATK% > ER% > EM | ||
| Talents | Q > E | ||
| Recommended ER |
140% – 160%
120% – 140% ( A4 ) 110% – 120% ( C6 ) |
||
|
“Kaeya’s hot, play him.” – August
“You’ll never get any of his constellations.” – synchr0 Compared to Rosaria, Kaeya has a more flexible burst that follows you and has a faster cryo application which allows for better permafreeze. Kaeya’s burst covers much less area than Rosaria’s which makes it better for freezing enemies in a more compact space. The number of HP thresholds you are able to hit will change the ER needed, so experiment to see what your ER requirements are for your rotations. |
|||
Rosaria
| Rosaria | Sub DPS | Cryo | 4* |
| Artifact Set | NO BS = 4 EoSF > 4 NO > NO Glad/SR > 4 BS | ||
| Main Stats |
Sands
ATK% |
Goblet
Cryo DMG% |
Circlet
CRIT Rate or CRIT DMG |
| Sub Stats | CRIT Rate / CRIT DMG > ATK% > ER% > EM | ||
| Talents | Q > E | ||
| Recommended ER |
140% – 160%
120% – 140% ( C4 ) |
||
|
At C2, Rosaria will offer more damage than Kaeya’s C2 because of how inconsistent it is to maintain Kaeya’s C2.
Compared to Kaeya, Rosaria is better at freezing a larger area. This is both good and bad. Good in that it offers a larger safety net and can hit more enemies. Bad in that enemies can be frozen too far away for Childe to hit multiple enemies at once as well as being a fixed AoE. The number of HP thresholds you are able to hit will change the ER needed, so experiment to see what your ER requirements are for your rotations. |
|||
Diona
| Diona | Support | Cryo | 4* |
| Artifact Set | 4 NO ≥ 4 TotM > 4 Instructor | ||
| Main Stats |
Sands
ER% or HP% |
Goblet
HP% |
Circlet
CRIT Rate or HP% |
| Sub Stats | ER% > HP% > CRIT Rate > CRIT DMG > ATK% | ||
| Talents | Q > E | ||
| Recommended ER |
Sacrificial Bow
150% – 220% 130% – 180% ( C4 ) |
Favonius Bow
190% – 220% 150% – 180% ( C4 ) |
Other Bows
210% – 260% 170% – 200% ( C4 ) |
|
Building for damage Diona isn’t a very efficient use of resin since she isn’t a significant percentage of the team’s total damage.
If using Favonius, prioritize CRIT Rate to trigger the passive. Diona’s paws will also naturally aim towards enemies’ weak spots which will guarantee a crit. Using Sacrificial requires more field time on Diona which may not be appealing for some players. The number of HP thresholds you are able to hit will change the ER needed, so experiment to see what your ER requirements are for your rotations. |
|||
Qiqi
| Qiqi | Support | Cryo | 5* |
| Artifact Set | 4 TotM > 4 Instructor > 4 NO | ||
| Main Stats |
Sands
ATK% |
Goblet
Cryo DMG% |
Circlet
CRIT Rate or CRIT DMG |
| Sub Stats | CRIT Rate / CRIT DMG > ER% > EM > ATK% | ||
| Talents | Q > E | ||
| Recommended ER | 150% – 180% ( 48s ) | 280% – 320% ( 24s ) | |
|
Due to Qiqi’s limited utility in increasing the team’s DPS, she is not recommended to use over any other healer.
Her main strength is healing and healing is subjectively useful. Good gameplay or quick clears reduces the need for healing and shields offer more utility than healing through stagger resistance and damage mitigation. The number of HP thresholds you are able to hit will change the ER needed, so experiment to see what your ER requirements are for your rotations. |
|||
Geo
Albedo
| Albedo | Sub DPS | Geo | 5* |
| Artifact Set | 4 Husk > Husk Petra > Husk NO = EoSF = Petra NO | ||
| Main Stats | Sands DEF% |
Goblet
Geo% |
Circlet
CRIT Rate or CRIT DMG |
| Sub Stats | CRIT Rate / CRIT DMG ≥ DEF% > ATK% > ER% | ||
| Talents | E > Q | ||
| Recommended ER | 100% ( No Burst ) | 110% – 130% ( 27s ) | 120% – 140% ( 24s ) |
|
If you use burst, it is recommended to go 10% – 20% above the recommended ER to cover for instances where you generate zero to low amounts of Geo particles due to inconsistent energy generation. Burst is generally recommended to be used for vaporise comps, but does not change the build. ATK% Sands is only recommended with four or more CRIT substats than DEF% Sands, or to achieve 4 Husk. ATK% Sands is slightly more versatile with a 5* weapon, but still not recommended unless it is a significant improvement. The number of HP thresholds you are able to hit will change the ER needed, so experiment to see what your ER requirements are for your rotations. |
|||
Zhongli
| Zhongli | Support | Geo | 5* |
| Artifact Set |
4 EoSF ≥ Petra NO > 4 NO > 4 Petra > 4 TotM ( Burst Focus )
4 TotM > 4 Petra > 4 NO ( Shield Focus ) | ||
| Main Stats |
Sands
ATK% or HP% |
Goblet
Geo DMG% |
Circlet
CRIT Rate or CRIT DMG or HP% |
| Sub Stats | CRIT Rate / CRIT DMG > ATK% > HP% > ER% | ||
| Talents |
E > Q ( Shield Focus )
Q > E ( Burst Focus ) |
||
| Recommended ER | 130% – 160% ( 24s ) | 220% – 250% ( 12s ) | |
|
Zhongli’s main role in Childe’s team is a shield bot or a lazy Anemo shredder. He objectively is weaker than every Anemo option, but he allows you to play without worrying about enemy mechanics. He’s a very comfy addition for many players who don’t want to deal with enemy mechanics.
Using Zhongli’s burst is generally not recommended other than to petrifying enemies or as a panic button. Childe teams value every second across the rotation and Zhongli’s Q takes up 2.4s without offering substantial damage or energy generation. The number of HP thresholds you are able to hit will change the ER needed, so experiment to see what your ER requirements are for your rotations. |
|||
Anemo
Sucrose
| Sucrose | Support | Anemo | 4* |
| Artifact Set | 4 VV > VV WT > 4 Instructor > 4 NO | ||
| Main Stats |
Sands
EM or ER% |
Goblet
EM |
Circlet
EM |
| Sub Stats | EM > ER% | ||
| Talents | E = Q | ||
| Recommended ER |
110% – 140% ( 48s )
100% – 120% ( C1 or Sac Frag ) |
220% – 260% ( 24s )
160% – 200% ( C1 or Sac Frag ) |
|
|
Due to Sucrose’s unique EM sharing kit, it’s recommended to use her burst once every other rotation because it is unlikely to get 200%+ ER while also using EM main stats on her artifacts.
The number of HP thresholds you are able to hit will change the ER needed, so experiment to see what your ER requirements are for your rotations. |
|||
Jean
| Jean | Support | Anemo | 5* |
| Artifact Set | 4 VV > VV NO > 4 NO | ||
| Main Stats |
Sands
ER% or ATK% |
Goblet
Anemo DMG% |
Circlet
CRIT Rate or CRIT DMG |
| Sub Stats | ER% > CRIT Rate / CRIT DMG > ATK% | ||
| Talents | Q ≥ E | ||
| Recommended ER | 150% – 200% ( 3 E ) | 190% – 240% ( 2 E ) | |
|
Due to being solo Anemo with high energy costs, it is recommended that you self-funnel her particles before swapping to reduce her ER as much as possible.
The number of HP thresholds you are able to hit will change the ER needed, so experiment to see what your ER requirements are for your rotations. |
|||
Venti
| Venti | Sub DPS | Anemo | 5* |
| Artifact Set | 4 VV > VV NO > 4 NO | ||
| Main Stats |
Sands
EM or ATK% |
Goblet
EM or Anemo DMG% |
Circlet
EM or CRIT Rate or CRIT DMG |
| Sub Stats | EM > ER% > CRIT Rate / CRIT DMG > ATK% | ||
| Talents | Q ≥ E | ||
| Recommended ER | 110% – 140% ( 24s 2 E ) | 150% – 170% ( 24s 1 E ) | |
|
It’s generally recommended to use Venti’s burst during Childe’s downtime. Smaller enemies will be pulled too high for Childe to melee them and using burst during downtime allows you to vaporize his charged shots.
Against larger enemies, you can use Venti’s burst to pull them together during Childe’s melee so you can scale his riptide damage. Using burst during downtime is also viable with no downsides. The number of HP thresholds you are able to hit will change the ER needed, so experiment to see what your ER requirements are for your rotations. |
|||
Anemo Traveler
| Anemo Traveler | Support | Anemo | 5* |
| Artifact Set | 4 VV > VV WT > 4 NO | ||
| Main Stats |
Sands
EM or ATK% |
Goblet
EM or Anemo DMG% |
Circlet
EM or CRIT Rate or CRIT DMG |
| Sub Stats | EM > ER% > CRIT Rate / CRIT DMG > ATK% | ||
| Talents | Q ≥ E | ||
| Recommended ER | 160% – 180% ( 3 E ) | 170% – 200% ( 2 E ) | |
|
Traveler is a very complicated character to use with Childe. There is a large learning curve that changes depending on content and the number and types of enemies. There is no consistent pattern in rotations other than Tap E for energy generation or single VV and Hold E for more damage or double VV. Q needs to be weaved somewhere into the rotation to take advantage of the additional -20% shred.
To maximize the damage from Hold E, allow at least 4 hits before releasing. Hold E has a wind-up mechanic to it. 0 – 2 hits will result in the weakest release damage and 3 – 6 hits will result in the highest release damage. At 4 hits, you will get the maximum of 3 swirls. The number of HP thresholds you are able to hit will change the ER needed, so experiment to see what your ER requirements are for your rotations. |
|||
Kazuha
| Kazuha | Sub DPS | Anemo | 5* |
| Artifact Set | 4 VV > VV WT > VV Glad/SR > VV NO > 4 NO | ||
| Main Stats |
Sands
EM or ER% |
Goblet
EM or Anemo DMG% |
Circlet
EM or CRIT Rate or CRIT DMG |
| Sub Stats | ER% > EM > CRIT Rate / CRIT DMG > ATK% | ||
| Talents | E = AA ≥ Q | ||
| Recommended ER for Hold E |
100% – 130%
( 4 Tap E ) |
110% – 150%
( 3 Tap E ) |
150% – 190%
( 2 Tap E ) |
| Recommended ER for Tap E |
110% – 150%
( 4 Tap E ) |
130% – 180%
( 3 Tap E ) |
170% – 210%
( 2 Tap E ) |
|
Self-funneled Anemo particles are on the lower end of ER and non-funneled Anemo particles are on the higher end of ER recommendations.
In the reverse-vape comp, it is recommended to minimize the number of Es used during Childe’s downtime. Every E used is one less Bennett E battery to Xiangling which will increase Xiangling’s ER requirement or increase the length of the rotation. Both of which will result in lower overall DPS. This is only significant if you require 2+ rotations to clear content. If you can clear in one rotation, the damage loss is much less significant. In the Electro-charged comp, it is recommended to maximize the number of Es used during Childe’s downtime. Childe’s downtime is mostly limited to Fischl’s Oz and Childe’s charged shot. So unless you utilize TF Bennett, more sources of damage will result in higher net DPS. The number of HP thresholds you are able to hit will change the ER needed, so experiment to see what your ER requirements are for your rotations. |
|||
Sayu
| Sayu | Support | Anemo | 4* |
| Artifact Set | 4 VV > VV WT > VV NO > 4NO | ||
| Main Stats |
Sands
EM or ER% |
Goblet
EM or Anemo DMG% |
Circlet
EM or CRIT Rate or CRIT DMG |
| Sub Stats | ER% > EM > CRIT Rate / CRIT DMG > ATK% | ||
| Talents | Q ≥ E | ||
| Recommended ER for Hold E |
140% – 200%
( 4 Hold E ) |
110% – 150%
( 3 Hold E ) |
150% – 190%
( 2 Hold E ) |
| Recommended ER for Tap E |
140% – 200%
( 4 Hold E ) |
180% – 230%
( 3 Hold E ) |
210% – 280%
( 2 Hold E ) |
|
Self-funneled Anemo particles are on the lower end of ER and non-funneled Anemo particles are on the higher end of ER recommendations.
Due to being solo Anemo with high energy costs, it is recommended that you self-funnel her particles before swapping to reduce her ER as much as possible. The number of HP thresholds you are able to hit will change the ER needed, so experiment to see what your ER requirements are for your rotations. |
|||
Page 2 Afterword
With this, the Childe guide is complete enough to share to the public. I have tirelessly theorycrafted Childe since his release in November 2020 and I think I’ve done an amazing job at compiling all the information into a concise and cohesive format.
I did my best to comprehensively cover as many relevant mechanics and team comps to cover the entire spectrum from casuals to tryhards. Unfortunately it will be impossible to cover every little nuance of Childe theorycrafting due to the amount of time it takes to take a deep dive into each topic, but I do hope that what has been covered here is enough to help you on your journey through Tevyat.
If you still have more questions, below are links to other helpful sources of information that can hopefully answer them.
With that, I hope you learn something new today that you can use to help improve your gameplay. I pray that each and every one of you have successful pulls in the future and have the best Genshin experience possible. I wish you only the best of luck for your future endeavors.
-Risuke
Other Useful Links
Change Logs
07/05/2022 – Added Aqua Simulacra to Weapons and Yae to Electro-Charged Team Comps, as well as a Yae card.
12/16/2021 – Added Mouun’s Moon and updated Weapon Generalizations. Updated Albedo information for 2.3.
11/09/2021 – Added Raiden to EC-Beidou. Added Electro options to Overload. Added Venti video to Rev-Vape.
10/13/2021 – Added Polar Star and updated Weapon Generalizations
10/7/2021 – Corrected C1 DPS gain and Generalizations to Burst DPS Weapon
10/3/2021 – Team Comp Section Complete
8/31/2021 – Childe Section Complete
3/31/2021 – Creation
