Please refer to the Bennett Quick Guide for now!
The current Extended Guide is out of date, but we’re working on an update. Join our Discord to take part in the theorycrafting process!

A Bennett Guide by Prévisible#7440
Updated for 2.6
Table of Contents
Preface
Although disregarded in his early days, Bennett is now an outstanding unit. He provides significant healing, valuable damage, one of the best and most straightforward ways of boosting ATK with his Elemental Burst, outstanding battery capabilities, and Pyro application—all while being an easily accessible 4*. As a result, he is one of the most contested and valued characters in the game.
In hopes of providing you with the tools to fully utilize this incredible unit, this guide will take an in-depth look at his playstyles, talents, and more.
Why should you play Bennett?
Pros
• Low field time
• Sufficient performance with relatively low to mid investment
• Unrivaled ATK boost
• Decent damage DMG output when invested
• Constant and significant healing
• Does not rely on any character
• Accessible artifacts and weapon choices
• Practically impossible to misplay
• Noteworthy Pyro application
• Versatile and universal
Cons
• You can’t duplicate him for another team
• No real AoE outside of the Elemental Burst
• Can restrict the player to a given area, often referred to as “Circle Impact”
Bennett sits comfortably as one of the most versatile units in the game, with various roles and playstyles. As such, this guide will focus on the most prevalent ways of playing him, while acknowledging and explaining the less common playstyles.
Roles
Disclaimer: You may come across various terms used in regards to the different roles Bennett can play, including “Burst Support”, “Carry Bennett”, etc. Seeing as how the meaning of these can vary wildly, this guide will only use the terms below, which might contain the less common ones.
Support:
Using Bennett as a Support means that you disregard his ability to deal damage, instead focusing on maximizing his healing and buffing ability.
This role technically only requires levels on himself, his Skill and Burst, and his weapon, as well as a usually minor amount of ER, meaning he needs relatively low investment to function. Even then, he can still provide tremendous amounts of healing.
While this is not a bad way to play him, as he still offers much to any team, this does not make the best use of his kit.
Invested Support:
Playing Invested Support Bennett is not much different from playing him as a Support, except that he now contributes much more noticeable amounts of damage to the team. This is done by investing more into him, leveling both his Skill and Burst, as well as giving him better artifacts. Stat priorities aren’t inherently different when compared to On-field DPS, rather, the time you spend on the field is less important, even minimal, which is one of its essential benefits.
On-field DPS:
When using Bennett as a On-field DPS, he spends significantly more time on-field. Therefore, the focus is now entirely on maximizing his damage-dealing abilities by investing even more or going for different weapons than you would for an Invested Support Bennett. Statistics priorities aren’t inherently different when compared to Invested Support, rather, the investment is higher.

TL;DR
Design: cuppacote
Content: KQM TC Staff
Talents
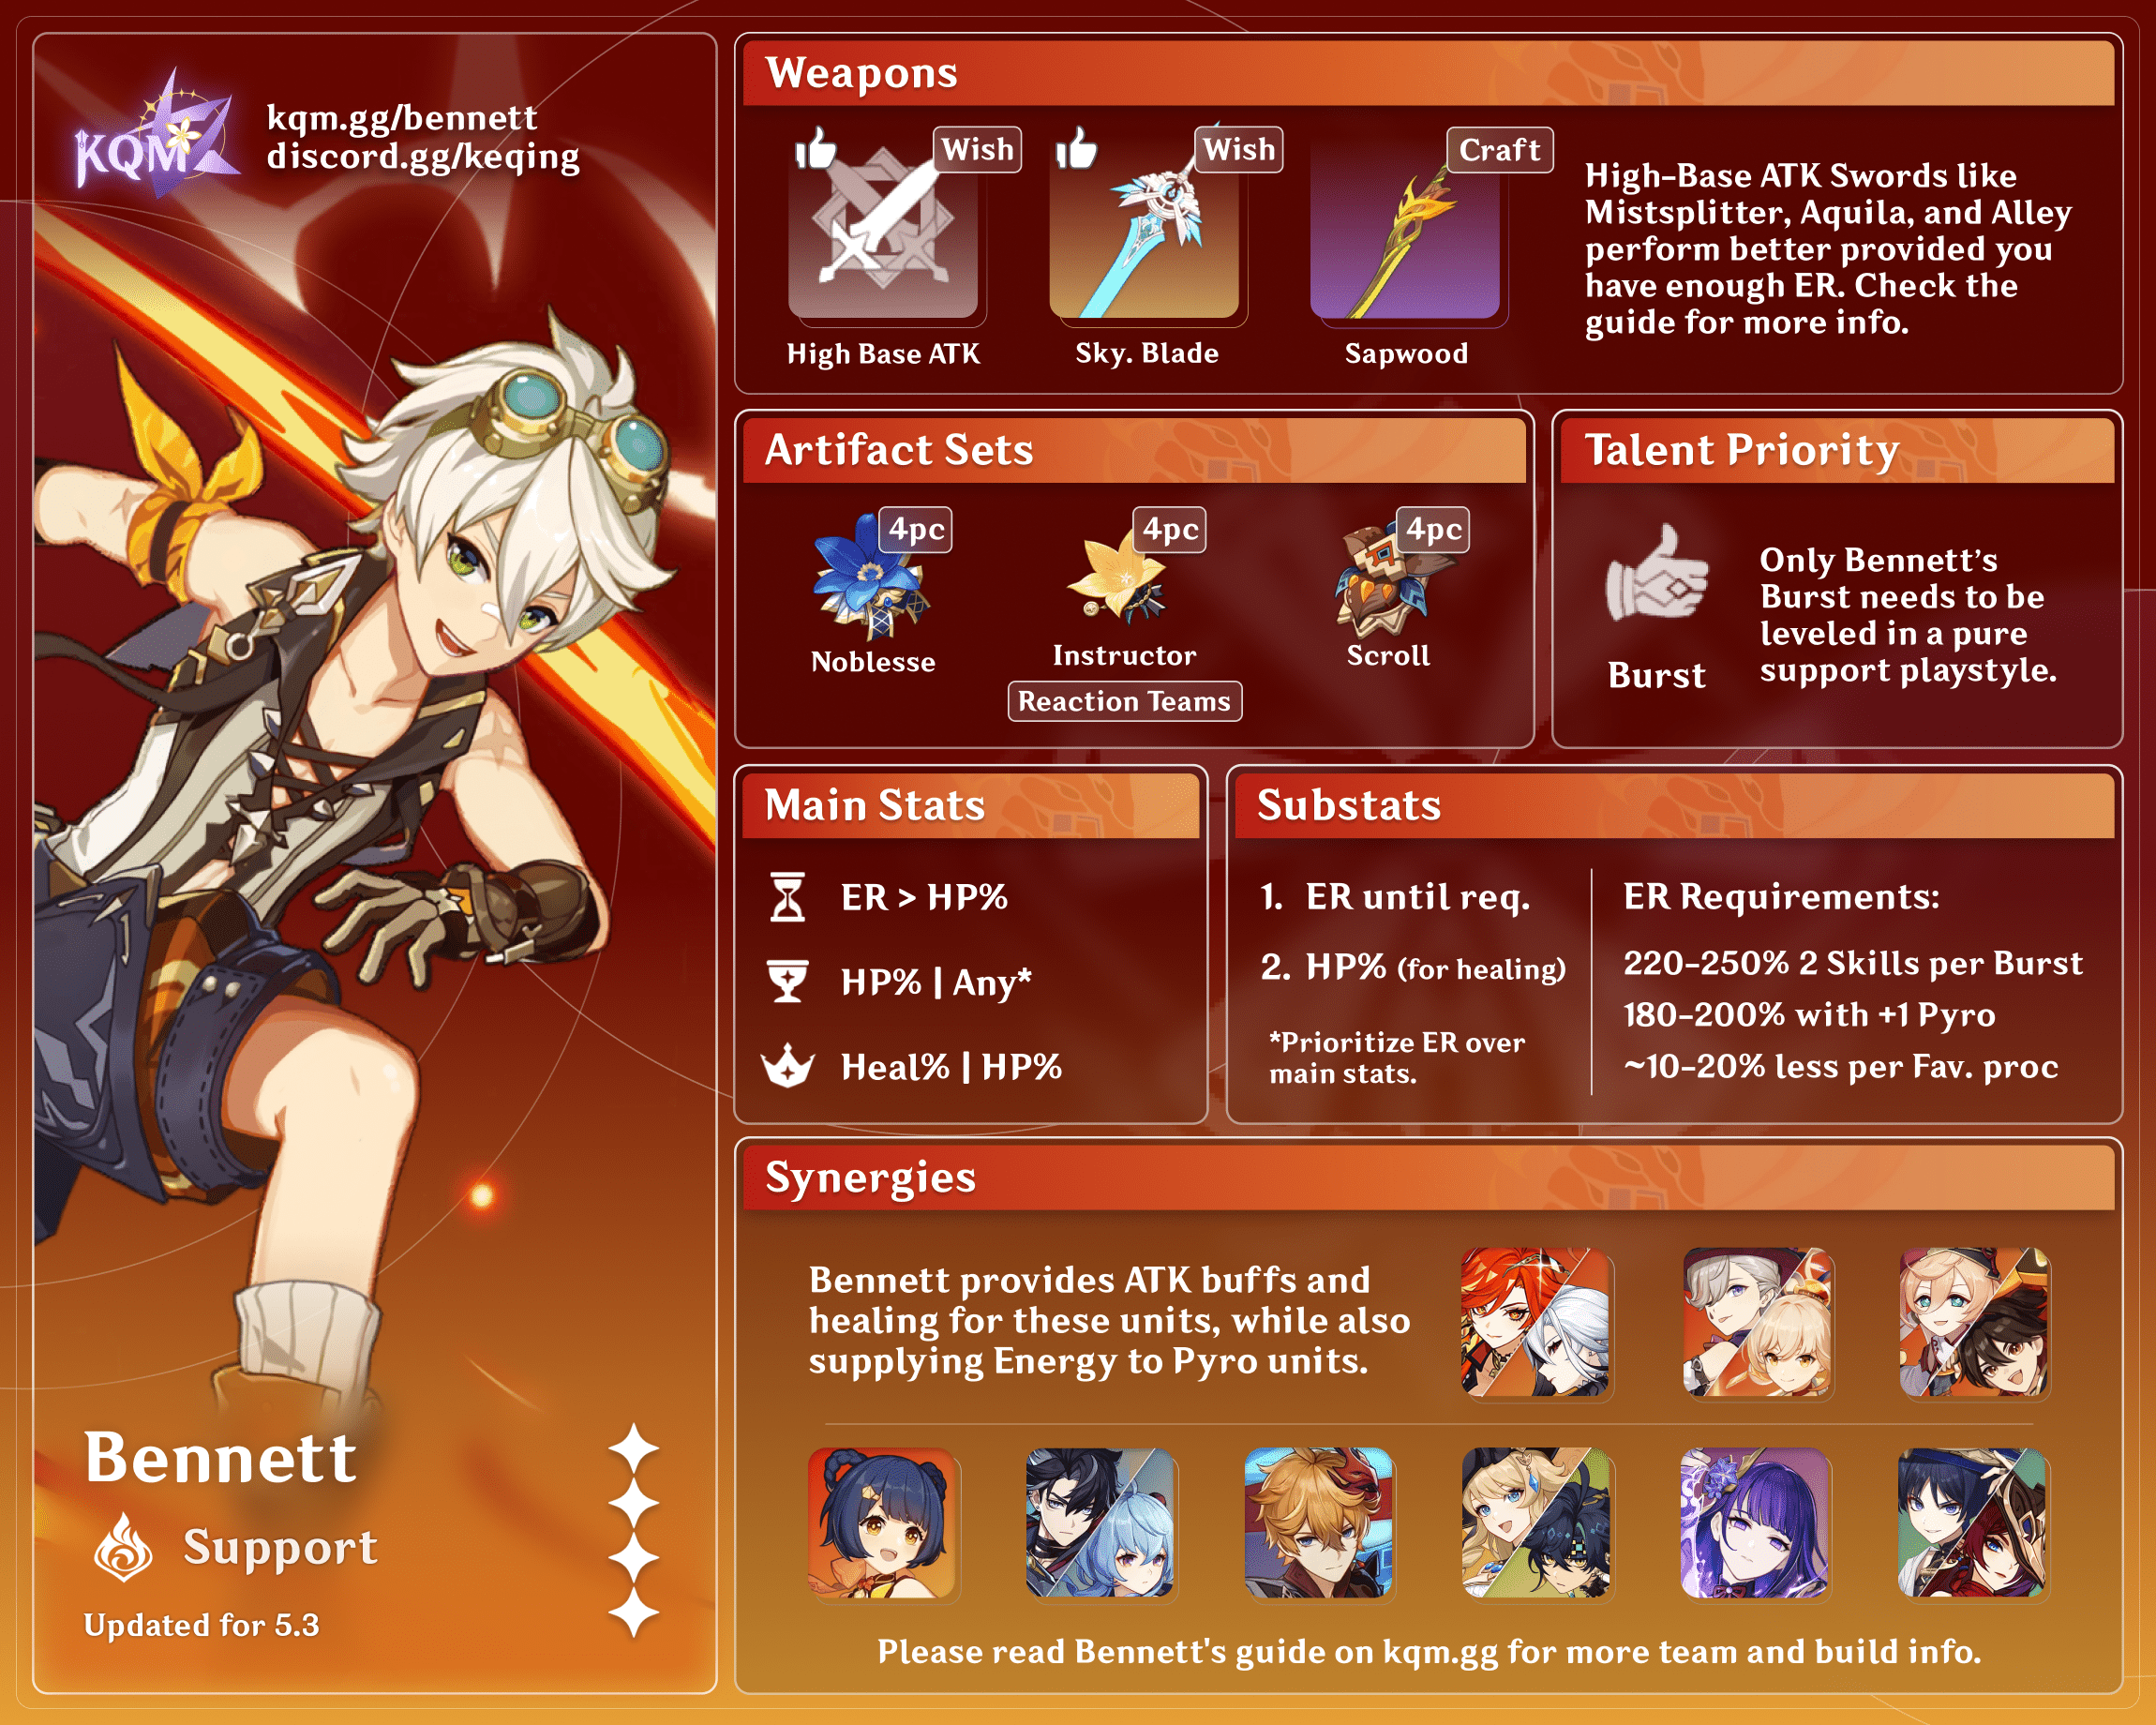
Talent Priority:
Elemental Burst > Elemental Skill > Normal Attack
Leveling Bennett’s Elemental Skill or Normal Attack is not required for Support playstyle. Instead, his Elemental Burst should always be prioritized regardless of playstyle, as his ATK buff and healing scales well with its levels. Outside of that, the Elemental Skill is also good for Invested Support and On-field DPS.
 Normal Attack: Strike of Fortune
Talent Description
Normal Attack
Perform up to 5 rapid strikes.
Charged Attack
Consumes a certain amount of Stamina to unleash 2 rapid sword strikes.
Plunging Attack
Plunges from mid-air to strike the ground below, damaging opponents along the path and dealing AoE upon impact.
A standard set of Sword attacks that is not exceptional in any way, and consequently does not need any investment.
Physical Bennett is not recommended.
 Elemental Skill: Passion Overload
Talent Description
Press
A single, swift flame strike that deals Pyro DMG.
Hold (Short)
Charges up, resulting in different effects when unleashed based on the Charge level.
• Level 1: Strikes twice, dealing Pyro DMG and launching opponents.
• Level 2: Unleashes 3 consecutive attacks that deal impressive Pyro DMG, but the last attack triggers an explosion that launches both Bennett and the enemy.
Bennett’s Elemental Skill is a simple but strong one, with its low cooldown allowing him to deal high damage in certain teams, as well as provide unparalleled Pyro Energy particle generation.
Typically, only the Tap variant of his Skill is used in each rotation; however, there are niche cases where Hold Skill is preferred, such as using Level 1 Hold Skill at C4 to break shields slightly faster. Bennett’s Hold Skill can also be used to guarantee 3 Pyro particles instead of 2, which can be useful if a little extra Energy is necessary for the scenario. Otherwise, it is almost always better to use Tap E.
Regarding the usage of Skill before Burst or Burst before Skill:
Use Skill before Burst if your Bennett does not have enough Energy Recharge to cast his Burst with 1 Skill, or if you want to maximize his Burst uptime. Otherwise, you can go with Burst before Skill, especially if you need to battery a character after the character swap—such as Xiangling, a technique often referred to as “(pre)funneling.”
 Elemental Burst: Fantastic Voyage
Talent Description
Bennett performs a jumping attack that deals Pyro DMG, creating an Inspiration Field.
Inspiration Field
• If the health of a character within the AoE is equal to or falls below 70%, their health will continuously regenerate. The amount of HP restored scales off Bennett’s Max HP.
• If the health of a character within the AoE is higher than 70%, they gain an ATK Bonus that is based on Bennett’s ATK.
• Imbues characters within the AoE with Pyro.
This Talent is Bennett’s bread and butter, and what makes him an amazing unit all around. It allows Bennett to provide a massive Flat ATK buff to any active character standing in the field created by his Burst while healing them. Bennett can also cleanse Ley Line Disorders such as Engulfing Storm and Condensed Ice with his Pyro self-application, increasing damage and survivability.
It is important to note that the ATK buff from his Elemental Burst scales with Bennett’s Base ATK, which is constituted of his natural ATK, and the ATK value on the weapon. ATK%/ATK, or his total ATK, does not affect it, meaning weapons with higher Base ATK have more value on Bennett than ones with lower Base ATK but more ATK%.
Although Bennett’s heal caps at 70% of the active character’s HP, he remains a valued healer that allows you to facetank the majority of content in the game, since his heals apply at a fast rate and most of the opponents you will face will not one hit you. In addition, you will often find yourself above 70% when healed by Bennett, because it heals effectively as long as you’re strictly under 70% HP, but will heal for more than 70% of your HP.
Additionally, the ATK buff lasts slightly longer (about a couple seconds) than the visual effects of Bennett’s Burst, specifically the circular red field on the ground.
The buff and healing do not apply instantaneously when swapped to another character; they apply at 1 second intervals. Therefore, ensure that the buff has actually been applied before casting a snapshotting skill. The self-aura application is applied at the same rate, meaning you can cleanse Ley Line Disorders in between 1 to 4 ticks, depending on the strength of the Ley Line. While you will usually be fine after at most 3 ticks, there can be a small window of time after the third tick where you will still be affected by Ley Lines despite having sufficiently cleansed the Ley Line. Make sure to always check above your HP bar, especially if Slowing Water (the Hydro debuff that increases Skill/Burst cooldown) is still active.
 1st Ascension Passive: Rekindle
Talent Description
Decreases Passion Overload’s CD by 20%.
A valuable Passive Talent, decreasing Bennett’s Elemental Skill cooldown from 5s to 4s, allowing Bennett to deal more DMG and generate more Energy particles.
 4th Ascension Passive: Fearnaught
Talent Description
Within the area created by Fantastic Voyage, Passion Overload takes on the following effects:
• CD is reduced by 50%.
• Bennett will not be launched by the effects of Charge Level 2.
This Talent further lowers his Elemental Skill cooldown if casted within his Burst radius. This reduces his Tap E cooldown to an incredibly short cooldown of 2s. As such, Bennett becomes an Energy factory and provides his primary source of damage as an On-field DPS.
Constellations
 Constellation 1: Grand Expectation
Constellation Description
Fantastic Voyage’s ATK increase no longer has an HP restriction, and gains an additional 20% of Bennett’s Base ATK.
Bennett’s best Constellation. It removes the health cap on his ATK buff and adds 20% of his Base ATK to the final ATK buff.
 Constellation 2: Impasse Conqueror
Constellation Description
When Bennett’s HP falls below 70%, his Energy Recharge is increased by 30%.
A negligible Constellation that slightly lowers Bennett’s ER needs. This is rarely active because his stellar healing keeps him above 70% HP almost all the time.
 Constellation 3: Unstoppable Fervor
Constellation Description
Increases the Level of Passion Overload by 3.
Very strong for an Invested Support or On-field DPS Bennett. However, it is not very useful for Support Bennett, because this variation does not need more Elemental Skill DMG.
 Constellation 4: Unexpected Odyssey
Constellation Description
Using a Normal Attack as the second attack of Passion’s Overload’s Charge Level 1 will perform a follow-up attack.
Questionable Constellation; does not add much due to Bennett’s Hold Elemental Skill not being recommended. However, it can still be useful in some niche situations requiring extra Pyro application.
 Constellation 5: True Explorer
Constellation Description
Increases the Level of Fantastic Voyage by 3.
A universally strong Constellation, increasing the damage and buff of Bennett’s Elemental Burst, which leads to a noticeable increase in team DPS for both Support and On-field DPS Bennett. It enhances Bennett’s already valuable Elemental Burst by increasing its ATK buff considerably.
 Constellation 6: Fire Ventures With Me
Constellation Description
Sword, Claymore, or Polearm-wielding characters inside of the Elemental Burst gain a 15% Pyro DMG Bonus, and their weapons are infused with Pyro.
On a side note, the description is wrong, and any weapon user can be receive the Pyro DMG% buff.
Pros:
• It does not override every character’s infusion
• Can be helpful in some situations by enabling or enhancing certain playstyles
• Increases the Pyro DMG% of ALL Pyro characters by a decent amount (despite what the wording of the Constellation implies, Catalyst and Bow users also receive the 15% Pyro DMG Bonus)
Cons:
• Cannot be reversed
• Ruins the synergy of some teams by overriding certain infusions
Explanations
A vast number of players completely refuse to activate Bennett’s C6, choosing to instead continue their journey with this ever-present notification.
The biggest problem arises from the fact that the game does not allow you to toggle Constellations at will. Without this option, the decision of whether or not to activate Bennett’s C6 is a highly disputable one.
Many characters in the current roster who have conversions cannot have them overridden by Bennett’s Pyro infusion, which effectively makes its drawbacks negligible for most teams. However, it can be troublesome for some teams or even completely ruin synergies, with notable examples including Keqing, Physical damage dealers, and Melt On-field DPS Bennett. Truthfully, it’s a decision that a player can only make for themselves, and depends largely on how much you value the existing and potential future ruined synergies. It boosts the damage of some teams, doesn’t affect most, and entirely destroys certain others.
Though, to be honest, Pyro Kazuha is really fun.
ER Requirements
Bennett’s ER requirement will vary depending on the number of Elemental Skills he casts per rotation, and whether or not there are other Pyro characters in the team.
| Playstyle, with a Pyro DPS | ER benchmark |
| 1 E per Q | 180%-200% |
| 2 Es per Q | 150%-170% |
| 3 Es per Q | 130%-150% |
| 4 Es per Q | 115%-135% |
| 5 Es per Q | 100%-120% |
| Playstyle, without a Pyro DPS | |
| 1 E per Q | 275%-350% |
| 2 Es per Q | 220%-250% |
| 3 Es per Q | 170%-200% |
| 4 Es per Q | 145%-160% |
| 5 Es per Q | 125%-135% |
(Credits go to Zajef77)
The Energy Recharge calculator by Zakharov should be used for more specific Energy requirements in your given composition and rotation.
Artifact Stat Priorities
⚠ Disclaimer:
Bennett Elemental Burst only scales from his Base ATK, which is essentially (Bennett ATK + Sword ATK).
Example: = (Bennett ATK at level 90 + Aquila Favonia) * Talent Level 12

Meaning you will get a 968 ATK Boost from Bennett Burst, with Bennett at level 90 and a 674 sword, regardless of your gearing, because it does not change the Base ATK.
Support
Main Stat Priority:
ER or HP% / HP% / HP%
Obtaining enough ER to use Bennett’s Burst when required is the first priority. After the necessary ER threshold is reached, HP% artifacts are an option for maximizing Bennett’s healing. They are, otherwise, not much relevant other than Bennett healing more.
As for Healing Bonus% circlets, they are rarer than other mainstats and consequently less likely to have desirable substats. Bennett’s healing is often sufficient in most content without the need for a Healing Bonus% circlet. Moreover, HP% pieces can be transferred to HP scaling characters while Healing Bonus’ usefulness is not as versatile.
Minimal Healing per tick
| ATK/Pyro/Crit Talent Level 8 | 2 HP% rolls | 5 HP% rolls | 10 HP% rolls |
| Level 70 | 2730 | 2878 | 3126 |
| Level 80 | 2891 | 3062 | 3345 |
| Level 90 | 3053 | 3245 | 3565 |
Substat Priority:
ER > HP% > Flat HP
Invested Support/On-Field DPS
Main Stat priority:
Sands: EM ~ ATK% > ER
Goblet: Pyro DMG%
Circlet: CRIT Rate or CRIT Damage
In regards to ATK% vs EM Sands, if Bennett is in compositions with reactions, like most (such as Melt, Overload, etc…), players should generally use whichever piece they have better substats on. Otherwise, ATK% sands is preferable in Pure Pyro compositions only.
ER Sands should be used only to meet ER requirements.
Substat Priority:
CRIT Rate ~ CRIT Damage > ATK% = EM = ER > HP%
Players should strive to find a balance between your Crit Ratio, ideally being around 1:2 / 1:1.5, and aim for ATK% and EM.
Weapons and Artifacts
Support/Invested Support
Weapons:
For the 2 PC variations, please consider using the Genshin optimizer along with its tutorial to see the differences between your pieces
| Weapon | Stats of the weapon | Additional notes |
Mistsplitter 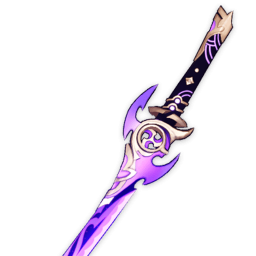 | 674 ATK 44.1% CDMG 5* | Highest base ATK Sword in the game, with appreciable CRIT DMG if you want your Bennett to deal DMG. Its passive might also be helpful in the right conditions. |
Aquila Favonia | 674 ATK 41.3% Phys 5* | With equal base ATK to Mistsplitter, it is the other highest base ATK sword in the game, though Bennett does not benefit from the weapon’s substat. Strictly worse than Mistsplitter, but a similarly good stat stick. |
Freedom Sworn | 608 ATK 198 EM 5* | Unlike most other weapon options, its passive can situationally provide an additional buff to the team, including 20% ATK and 16% Normal, Charged, and Plunging Attack damage for your team. A strong weapon for stacking team buffs. |
Alley Flash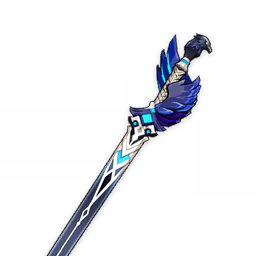 | 620 ATK 55 EM 4* | Highest base ATK in the game for a 4* weapon, greater than even some 5*s. A good budget option for maximizing Bennett’s base ATK buff. |
Skyward Blade | 608 ATK 55.1% ER 5* | Decent base ATK and a hefty amount of ER, which provides increased flexibility in artifact substats, for builds that care about having lots of Energy Recharge. |
Haran  | 608 ATK 33.1% CRate 5* | This Sword has a high base ATK and helpful CRIT Rate to balance your ratio. Its passive is slightly useful for DMG, though, you shouldn’t specifically use it at its peak because of the requirements it has. |
Summit Shaper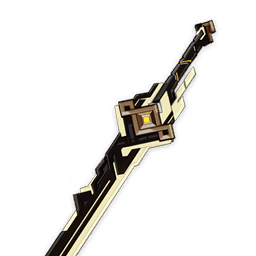 | 608 ATK 49.6% ATK 5* | Essentially an ATK stat stick. Its passive that buffs the user’s ATK further for each attack is situational and you consequently are not fully utilizing it since you’re playing Bennett as a support. |
Prototype Rancour | 565 ATK 34.5% Phys 4* | High base ATK weapon that is given to every player for free. Should be the basic requirement for Bennett assuming you have enough ER from other sources. |
Blackcliff 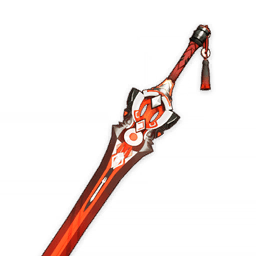 | 565 ATK 36.8% CDMG 4* | High base ATK for a 4*; however, Blackcliff Longsword is typically not a great use of your Starglitter, and especially not for Bennett. Prototype Rancour offers the same buffs at zero resource cost, and Crit Damage is not needed on a dedicated support build. |
Festering Desire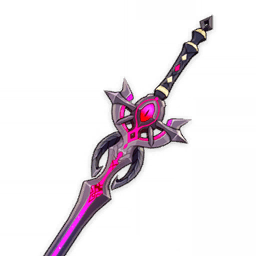 | 510 ATK 45.9% ER 4* | Merely has a decent base ATK but has a greatly appreciated ER substat. Occasionally Bennett may benefit from the small Skill buffs in Crit Rate and Damage, but not enough for Festering Desire to beat other weapon options. |
Sac and Favonius 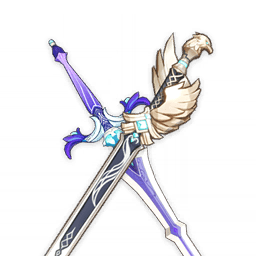 | 454 ATK 61.3% ER 4* | Low base ATK weapons that typically shouldn’t be used. An exception can be made for Favonius Sword in the case that the benefit from its clear particles is larger than the stat loss for the low base ATK. Note that running Favonius Sword requires some investment into CRIT Rate. |
Artifacts:
 | 4 PC Noblesse Oblige Provides a team wide ATK% buff when using Elemental Burst. The set is a great addition to Bennett’s buffing capabilities. Resin-efficient and more easily accessible thanks to its addition to the Strongbox system; this is the recommended set for Bennett and there is typically little reason to use something else. |
 | 4 PC Instructor Gives a team wide buff, helping the team with Elemental Mastery, slightly contributing to the Team DPS. Can be used if a character in the team is already holding 4 PC Noblesse Oblige, but can be difficult to proc depending on team and rotation. |
 | 4 PC Tenacity of the Millelith This set can be used to increase Bennett’s healing, while also providing a brief but nonetheless appreciable buff for character that snapshot and consequently make a good use of it. Can be used if a character in the team is already holding 4 PC Noblesse Oblige |
 | 2 PC Emblem of Severed Fate You can use 2-Piece variations you have, as long as they help with Energy Recharge, HP, or any offensive stat. Otherwise, you will lose a considerable team-wide buff. |
 | 4 PC Maiden Beloved Bad set for Bennett. Genuinely bad set. Astonishingly bad set. Awfully bad set. Pretend it does not exist. Please. Bennett’s healing is already adequate. Artifact sets that increase your team’s damage are preferable. |
On-field DPS Bennett
Weapons:
The ranking is subjective, seeing how it depends on your account
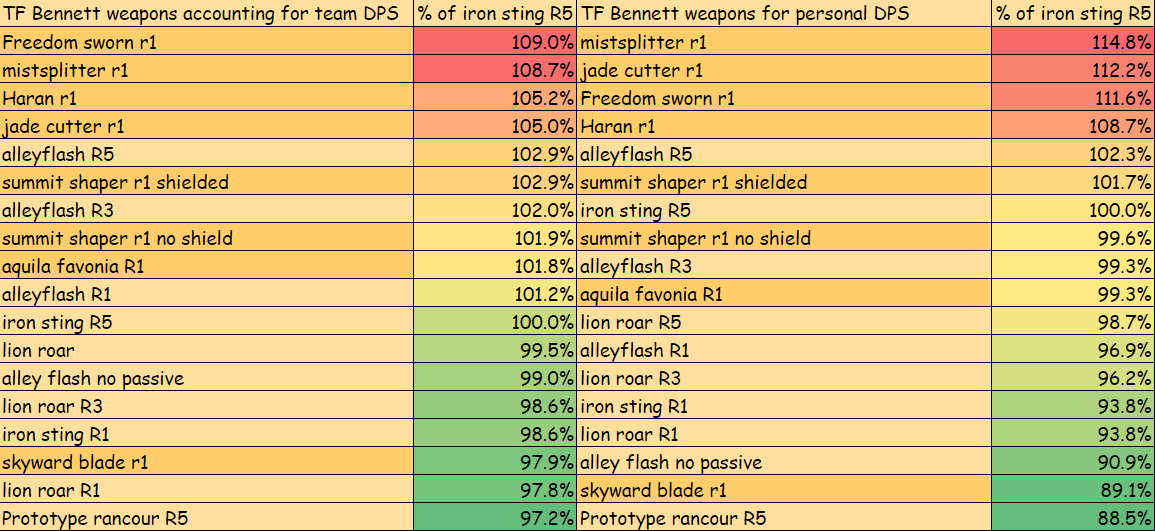
Please REMEMBER that it only considers Bennett personal DMG.
| Weapon | Stats of the weapon | Additional notes |
| Mistsplitter | 674 ATK 44% CDMG 5* | Unquestionably Bennett’s Best in Slot weapon. It has high base ATK, and superb passive for Bennett, boosting Elemental DMG Bonus, usually with 1 or 2 stacks, even 3 if you have C6 unlocked. |
Jade Cutter  | 542 ATK 44.1% CRate 5* | Excellent weapon, providing decent base ATK and appreciated CRate. The constant passive increasing ATK is also highly appreciated, while the HP% increase offers a modest buff to Bennett’s healing capabilities. |
| Freedom- Sworn | 608 ATK 198 EM 5* | Possessing high base ATK and appreciated EM, Freedom-Sworn also boosts the team’s DPS with its passive. An outstanding weapon for Bennett and the whole team. |
| Haran | 608 ATK 33.1% CRate 5* | High base ATK weapon, with a decent passive along with CRIT Rate second stat, which helps with Bennett’s personal DMG. |
| Summit Shaper | 608 ATK 49.6% ATK 5* | High base ATK, decent ATK% secondary stat; it helps with Bennett’s DMG output, although maximizing the passive uptime is tough, due to its nature of requiring units that are uncommon to on-field DPS Bennett teams. |
| Aquila Favonia | 674 ATK 41.3% Phys 5* | Another High base ATK weapon, though the secondary stat is not useful, except in some niche scenarios when you can fit in a few Normal or Charged Attacks. Nevertheless, it is still a good weapon, with a helpful passive and an ATK% boost. |
| Alley Flash | 620 ATK 55 EM 4* | Highest base ATK in the game for a 4*, with an appreciated passive and secondary stat. Will perform well with Bennett. However, it is gacha locked. |
Iron Sting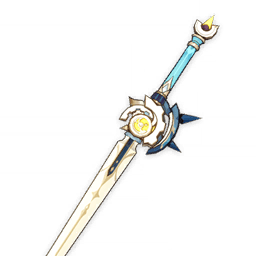 | 510 ATK 165 EM 4* | Good craftable weapon; the Iron Sting has a normal base ATK, paired with a decent EM secondary stat and a useful passive for Bennett’s damage. |
Lion’s Roar | 510 ATK 41.3% ATK 4* | When its passive works, Lion’s Roar is an option, with its average base ATK and ATK% secondary stat. Else, it’s just bad. |
| Blackcliff | 565 ATK 36.8% CDMG 4* | While spending Starglitter on these weapons is generally considered to be a bad idea, the Blackcliff Longsword provides a good base ATK, with a CRIT DMG secondary stat that helps to balance your Bennett’s CRIT Ratio. It is not recommended to purchase a Blackcliff Longsword for Bennett. |
The Black Sword | 510 ATK 27.6% CRate 4* | The Black Sword, although being locked behind the Battle Pass, is a good weapon, with normal base ATK and CRIT Rate secondary stat, helping to balance your Bennett’s Crit Ratio. |
| Festering Desire | 510 ATK 45.9% ER 4* | Locked behind an event in the early days, this weapon has an average base ATK and is somewhat ordinary. Its ER secondary stat suffers from the same problems as the other weapons do, while its passive only applies to the Elemental Skill. |
| Skyward Blade | 608 ATK 55.1% ER 5* | Great weapon, with decent base ATK and Energy Recharge. One thing to note is that the secondary stat usually makes the ER higher than needed, diminishing the weapon value. Essentially, the lower the ER requirements are, the lower its value is. |
| Amenoma Kageuchi  | 454 ATK 55.1% ATK 4* | Low base ATK weapon, low value stat stick. Still somewhat usable due to the secondary stat and the fact that it is a craftable weapon, and its passive helps with Bennett’s personal Energy. |
| Prototype Rancour | 565 ATK 34.5% Phys 4* | Decent base ATK, forgeable weapon. Its passive and secondary stat can be ignored, thus making it solely a stat stick. |
| Sac and Favonius | 454 ATK 61.3% ER 4* | Not advised for personal DMG, low base ATK weapons, mostly suffering from the secondary stats giving Bennett an excessive amount of ER. Nevertheless, it can be used to battery other characters that need the Energy. |
Artifacts:
 | 4 PC Crimson Witch of Flames Currently the uncontested best set for Bennett’s personal DMG in amp teams, with Bennett being one of the rare characters capable of reaching 3 stacks, due to his Skill cooldown being low. |
 | 2 PC CWoF – Glad – WT – NO Numerous variations of DMG dealing sets for amp teams; use whatever is laying around and have the best substats. |
 | 4 PC Thundering Fury Opens up a unique way of playing Bennett, utilizing the cooldown reduction of the set to spam his Skill when Off-field Electro application is present. Please note that when using this set, EM stats will matter more than for other sets. |
| 4 PC Noblesse Oblige Remains a decent option, providing both team buffs and helping with Bennett’s personal DMG. |
 | 4 PC Lavawalker Appears as a decent option in Mono-Pyro variations. It’s not particularly interesting otherwise. |
Character Synergies
Anywhere

The majority of characters in the game appreciate the presence of Bennett in the team. Whether they can fully utilize his Elemental Burst by snapshotting (see more details about snapshot and characters that make use of it here) or just appreciate the benefits listed in “Pros”, Bennett is a highly contested unit due to Spiral Abyss requiring 2 teams. As such, it is unneccessary to go in-depth about his synergy with every existing character in the game. Rather, if you’re interested in seeing if or how Bennett works with a character you like, please see their respective guide on the KeqingMains website.
Anemo
Anemo  | Numerous Anemo characters—can use the Pyro self-application of Bennett’s Burst to absorb Pyro into their Elemental Skills and Bursts, aiding in more easily triggering the 4 VV effect and shredding Pyro resistance, as well as allowing for high damage Overloads and other reactions. |
Jean | Jean and Bennett’s Bursts can interact to produce a unique interaction commonly known as “Sunfire.” When a character stands within an overlapping portion of their Bursts, Jean’s Burst will swirl the Pyro applied by Bennett’s Burst on the character, resulting in a powerful yet brief duration of Off-field Pyro application as well as a potential for significant damage. See xf3’s Jean guide for more. This can also be used to enable some specific team comps. |
Kazuha | Kazuha has a unique interaction with his Elemental Burst, where he supposedly prioritizes Pyro over all the other elements around for the infusion of his Burst. This can be useful to effectively apply the VV effect and Kazuha A4 to increase the damage dealt, without worrying about which element will be chosen. |

Team Compositions
Listing every team composition where Bennett works would probably leave you reading this guide for the rest of eternity. Feel free to look at each character guide if you’re interested in learning about their teams, many of which will likely include Bennett (unless, that is, their guides aren’t yet published).
Thanks to Muakasan’s Genshin Team Portrait Generator for the character icons.
Bennett-Xiangling-Xingqiu-Flex

One of, if not the most famous teams in Genshin Impact.
The synergy between these three characters is excellent; Xingqiu provides Off-field Hydro application for Xiangling to Vaporize every hit of her Pyronado, allowing Bennett to continuously prefunnel Xiangling and lower her ER requirement.
4th slot: Flex
Most characters that provide Off-field damage or some sort of utility can work in this team. Some notable examples are listed below.Raiden: Brings personal damage and Flat Energy refund. Additionally allows Xiangling to Overload off of her Electro application.
Sucrose: Provides grouping, 4VV, TToDS, and EM share.
Kazuha: Provides grouping, 4VV, and a DMG% buff, although having a different rotation.
Rotation example
Childe-Bennett-Xiangling-Flex

Childe’s main team, using Bennett and Xiangling to deal Pyro DMG, along with an Anemo character that allows Childe to deal continuous Hydro DMG while enabling Xiangling Vapes.
On a side note, Bennett can make use of Childe’s E to Vape his Burst.
4th slot
Kazuha: Provides a DMG% buff, grouping and can use Bennett’s Burst to self-absorb his Burst with Pyro for higher damage.
Sucrose: Sucrose is a good option in this slot, providing EM while being able to hold TToDS.
Flex: Any character you feel comfortable using, as long as they help the team.
Rotation example
Bennett-Xiangling-Cryo-Rosaria

This is a widely-known team because it is constituted of 4*s, makes a simple use of the Melt reaction to deal DMG, and is straightforward and easy to play.
3rd slot: Cryo flex
Kaeya: Has the biggest DMG contribution
Chongyun: Offers infusion with his Elemental Skill, though incompatible with Bennett C6.
Rotation example
Raiden-Electro-Bennett-Anemo

A Raiden team in which all three other slots are typically dedicated to buffing Raiden, allowing her to deal massive amounts of damage. Casting Raiden’s Skill followed by Bennett’s Burst will leave an Electro aura on the opponent(s), which can then be swirled by the Anemo character for 4 PC VV and other buffs.
3rd slot: Electro flex
Sara: With Constellations, can greatly boost Raiden’s damage through her ATK buff and C6, while providing some personal damage.Lisa: Provides DEF shred and ATK from TToDS, and is generally a superior choice to Sara until Sara is C6.
Fischl: Provides off-field damage via Oz.
Mona: Possible option if you don’t have any of the above character leveled up or available.
4th slot: Anemo flex
The Anemo flex provides 4 VV and preferably another buff or personal damage.Venti: When the content allows, Venti can be a great character for this team, providing the strongest grouping in the game.
Kazuha: Provides a DMG% buff, grouping and can use Bennett’s Burst to self-absorb his Burst with Pyro for high Overload damage.
Sucrose: Provides grouping and potentially other buffs.
Jean: With Bennett, provides the earlier-discussed “Sunfire,” which can trigger high-damage Overloads.
Rotation example
Ganyu-Bennett-Pyro Applicator-Flex

The core of a Melt Ganyu team. Here, Ganyu utilizes Bennett’s Elemental Burst to increase her DMG, receive heals, and potentially battery another Pyro character.
3rd slot: Pyro Application
Xiangling: Excellent Off-field Pyro application and decent personal damage when built well. As you want to spend as little time on Bennett and Xiangling as possible in this team, she has very high ER requirements here. To ensure that you have sufficient ER; Favonius Lance can help.
Kazuha: Has excellent Off-field Pyro application while also providing 4VV, DMG%, personal damage, and grouping.
Jean: Offers Pyro application and heals with her Elemental Burst.
4th slot
Zhongli: As being interrupted while charging is a DPS loss, a strong shield can be vital for a comfortable playstyle. He also provides a universal RES shred. Other options for shielding include Diona. Know that in some situations, you may be better off running another team over this one if you lack a strong shielder.
Venti: When the content allows for it, Venti can be a great choice in this team, providing 4VV, additional Pyro application, powerful grouping, Energy refund for the Energy-hungry Xiangling, and personal damage.
Kazuha: Can be ran alongside Xiangling for his buffs and grouping.
Sucrose: Provides grouping and an EM buff.
Diona: As being interrupted while charging is a DPS loss, a strong shield can be vital for a comfortable playstyle, which is what Diona provides.
Rotation example
On-Field DPS Teams
Melt Carry Bennett

This is DPS Bennett’s simplest comp. You use an Anemo unit to swirl Pyro, then Melt Bennett’s Skills over and over. This comp is the most compatible with a Hypercarry playstyle (where you only invest into your carry). When going for a Hypercarry playstyle, units like Chongyun, that have poor damage without specific cons but provide great utility and allows Bennett’s Normal Attacks to be Cryo Infused. This doesn’t mean you can’t use Chongyun when you reach a higher investment level in your supports, it just means Chongyun’s value is already mostly fulfilled without investing in him. However, Chongyun becomes a significant source of damage in his own right at C6, which is covered in the Chongyun Guide.
3rd and 4th slot
Any character that you feel comfortable using. Another Cryo character. An Anemo with 4VV, possibly providing crowd-control and buffs. A shielder or another healer if needed.Rotation example
Thundering Fury (TF) Bennett

Weirdest way to use Bennett out of all the possibilities.
This variation takes advantage of the synergy between Bennett’s Ascension Passives and the TF set, which are effectively two sources of cooldown reduction, decreasing his Elemental Skill cooldown to 1s. This allows Bennett to be played with different characters in a unique and fun way.
However, the Overload reaction might be annoying against low-stagger opponents.
2nd slot
After peer and in-depth investigations, we decided that the 3 options for this slot are: Xingqiu, Xingqiu and Xingqiu. You can use Kokomi because of her good AoE. Mona and Barbara are also options, but essentially worse than the 2 above.3rd and 4th slot
3rd and 4th slot: Any character that you feel comfortable using, good options including another Electro in order to maintain consistent 4 TF procs, such as:Lisa: Strongly preferred when ER needs are fulfilled; she has no caveats when enabling TF Bennett.
Beidou: Optimal against at least 2 targets.
Fischl: Single-target oriented unit.
Anemo: with 4VV, crowd-control and buffs would be appreciated. Please note that EM weapons have more value in those team variations.
Rotation example
Anywhere else

Bennett’s versatility allows him to be a member of a tremendous number of teams. Feel free to use him whether you need that ATK boost, his personal DMG, or his battery capacities.
Closing Thoughts
I’m thankful to anyone reading this guide, thanks for reaching this far.
This guide was brought to you by Prévisible#7440, also known as Taked
With my special thanks for giving feedback and contributing, in no specificial order, to:
Zajef77, writer of the 1st Bennett guide, with parts used throughout this one, you can find him here
Charisma#5567
Cuzimori#1535
Xreejan#1180
Nyande#0658
Merp#6832
Sir_pick_the_prick#2209
Doug#8888
kol#1593,
pai#3602
clrE#6290
nxriaki#6316
Emiliabyss#1641
Genshin combat simulator, gcsim
and everyone that helped me throughout this journey
