Updated for Version 4.8

Clorinde is a 5-star Electro Sword character in Genshin Impact. The Champion Duelist is an on-field Electro DPS unit who unleashes a flurry of lightning-fast ranged and melee attacks while sustaining herself. Learn about Clorinde’s best builds, best weapons, best artifacts, and best teams in this quick guide.
Note that the information given may change if new discoveries are made. More extensive testing is in progress.
Join our Discord to check on and participate in the theorycrafting process.
Table of Contents
New Content
 Emilie | Emilie is an off-field Dendro DPS who deals additional damage against Burning enemies. She can form “Quickburn” teams with Clorinde and a Pyro unit. |
Infographic
Design: euphorysm & cegewinne
Content: mikeskies
Character Overview
Pros
- Fast Normal Attacks that are good at driving off-field teammates
- High mobility via her lunging attacks
- Capability to fight outside of direct melee range
- Frequent self-healing that allows her to sustain herself
- High Electro application that can trigger numerous reactions
Cons
- Relatively long skill cooldown that can limit her damage window if disrupted
- Lack of innate interruption resistance without Constellations
- Reliance on low ping for her optimal combos
Playstyles
On-Field DPS
Clorinde acts as an on-field DPS unit. Using her Skill converts her Normal Attacks and subsequent Skill uses into Electro pistol and sword attacks, which grants her rapid Electro application that frequently triggers reactions like Aggravate and Hyperbloom. She is effective at driving off-field teammates, such as Fischl and Yelan, while dealing significant damage herself.
Talents
Level and Talent Priority
You should raise Clorinde to Level 90 to maximize her Aggravate and Hyperbloom damage.
Character Level > Skill > Burst
Clorinde deals the vast majority of her damage with her converted Normal Attacks, which scale with her Skill Talent level. Her Burst can be leveled afterwards. Clorinde does not use her Physical Normal Attacks in practical combat, so you do not need to level her Normal Attack Talent.
Talent Overview
 Normal Attack | Oath of Hunting Shadows
Talent Description
Normal Attack
Performs up to 5 rapid strikes.
Charged Attack
Consumes a certain amount of Stamina and fires Suppressing Shots in a fan pattern with her pistolet.
Plunging Attack
Plunges from mid-air to strike the ground below, damaging opponents along the path and dealing AoE DMG upon impact.
Clorinde boasts a flashy but otherwise unremarkable Physical Normal Attack sequence. Most of her damage comes from her Elemental Skill’s converted attacks instead. You do not need to level her Normal Attack Talent.
 Elemental Skill | Hunter’s Vigil
Talent Description
Preparing her pistolet, she enters the “Night Vigil” state, using steel and shot together. In this state, Clorinde’s Normal Attacks will be transformed into “Swift Hunt” pistolet attacks, and the DMG dealt is converted into Electro DMG that cannot be overridden by infusions, and she will be unable to use Charged Attacks. Using her Elemental Skill will transform it into “Impale the Night”: Perform a lunging attack, dealing Electro DMG. The DMG done through the aforementioned method is considered Normal Attack DMG.
Swift Hunt
- When her Bond of Life is equal to or greater than 100% of her max HP: Performs a pistolet shot.
- When her Bond of Life is less than 100%, firing her pistolet will grant her Bond of Life, with the amount gained based on her max HP. The shots she fires can pierce opponents, and DMG dealt to opponents in their path is increased.
Impale the Night
The current percentage value of Clorinde’s Bond of Life determines its effect:
- When the Bond of Life value is 0%, perform a normal lunging strike;
- When the Bond of Life value is less than 100% of her max HP, Clorinde is healed based on the Bond of Life value, and the AoE of the lunging attack and the DMG dealt is increased;
- When the value of the Bond of Life is equal to or greater than 100% of her max HP, use Impale the Night: Pact. The healing multiplier is increased, and the AoE and DMG dealt by the lunge is increased even further.
In addition, when Clorinde is in the Night Vigil state, healing effects other than Impale the Night will not take effect and will instead be converted into a Bond of Life that is a percentage of the healing that would have been received.
Clorinde will exit the “Night Vigil” state when she leaves the field.
Arkhe: Ousia
Periodically, when Clorinde’s Swift Hunt shots strike opponents, she will summon a Surging Blade at the position hit that deals Ousia-aligned Electro DMG.
On cast, Clorinde’s Skill activates an enhanced state, converting her Normal Attacks into Electro and changing all incoming healing into Bond of Life (BoL). Note that BoL persists through swaps until it is depleted.
She has two different attacks in this state: pistol shots and lunging attacks.
Pistol Shots (Normal Attack Inputs)
To begin with, Clorinde’s Normal Attacks now rapidly fire long-ranged pistol shots, repeating a 3-shot animation sequence. She also cannot perform Charged Attacks — holding the Normal Attack input instead fires her pistol shots continuously. Her pistol shots apply Electro at standard ICD (every 3 hits or 2.5s) and are further enhanced if fired while she has less than 100% BoL (displayed as half of the HP bar): each enhanced pistol shot pierces through enemies, deals additional damage, and grants her 35% BoL. The first pistol hit also launches an Ousia-aligned attack.
Lunging Attacks (Skill Inputs)
Additionally, Skill inputs after the initial Skill cast unleash lunging attacks that dash through enemies. These lunges are considered as Normal Attacks and can be used while her pistol shots are being fired. Lunges have different properties depending on how much BoL Clorinde has when used:
- Level 0 (No BoL) – no special properties
- Level 1 (1–99% BoL) – have increased damage and AoE, self-heal for 104% BoL
- Level 2 (100%+ BoL) – maximum damage and AoE, self-heal for 110% BoL
Clorinde preferably uses Level 2 lunges due to their greater damage, AoE, and self-healing. Each Level 2 lunge heals her for 10.5% of her HP, as part of the listed scaling is used to clear her current BoL. Healing Bonus buffs dramatically increase her self-healing: e.g., with 30% Healing Bonus, Level 2 lunges now heal for 150.15% of her Max HP, which after clearing her BoL restores 45.15% Max HP.
Preferred Combo
Clorinde’s preferred attack string comprises 3 pistol shots to build up 105% BoL followed by a Level 2 lunge, performed repeatedly until her enhanced state ends; her enhanced state lasts for 7.5s after Skill cast or until she swaps off. Since her pistol shots have little hitlag, she does not benefit much from hitlag extension.
 Elemental Burst | Last Lightfall
Talent Description
Grants herself a Bond of Life based upon her own max HP before swiftly evading and striking with saber and sidearm as one, dealing AoE Electro DMG.
Clorinde’s Burst deals 5 instances of AoE Electro damage and applies Electro twice. It also grants her a sizable Bond of Life; at Burst Talent Level 7 or greater, it provides enough BoL to use a Level 2 lunge.
Clorinde’s Burst isn’t strictly necessary to use, but it is nonetheless useful for dealing AoE damage, finishing off enemies, applying Electro for Swirl setups, or filling downtime in a rotation.
 Ascension 1 Passive | Dark-Shattering Flame
Talent Description
After a nearby party member triggers an Electro-related reaction against an opponent, Electro DMG dealt by Clorinde’s Normal Attacks and Last Lightfall will be increased by 20% of Clorinde’s ATK for 15s. Max 3 stacks. Each stack is counted independently. The Maximum DMG increase achievable this way for the above attacks is 1,800.
Clorinde’s A1 Passive increases her Electro damage whenever Electro reactions are triggered, stacking up to 3 times. It is possible to gain multiple stacks with the same reaction. With all 3 stacks of this passive, the buff caps when Clorinde has 3000 ATK; with 2 stacks, it caps at 4500 ATK.
 Ascension 4 Passive | Lawful Remuneration
Talent Description
If Clorinde’s Bond of Life is equal to or greater than 100% of her Max HP, her CRIT Rate will increase by 10% for 15s whenever her Bond of Life value increases or decreases. Max 2 stacks. Each stack is counted independently.
Additionally, Hunter’s Vigil’s Night Vigil state is buffed: While it is active, the percent of healing converted to Bond of Life increases to 100%.
Clorinde’s A4 Passive gives her 10% CRIT Rate when her BoL increases or decreases while over 100%, stacking up to two times; this is easily achieved after using 2 Level 2 lunges during her enhanced state. Together with her Ascension Stat, Clorinde can reach 44% CRIT Rate before factoring in her artifacts and weapon.
Additionally, this passive increases the BoL gained from external healing.
Constellations
If you want to vertically invest into Clorinde, her C1 or C2 can be a good stopping point before C6.
 Constellation 1 | “From This Day, I Pass the Candle’s Shadow-Veil”
While Hunter’s Vigil’s Night Vigil state is active, when Electro DMG from Clorinde’s Normal Attacks hit opponents, they will trigger 2 coordinated attacks from a Nightvigil Shade summoned near the hit opponent, each dealing 30% of Clorinde’s ATK as Electro DMG.
This effect can occur once every 1.2s. DMG dealt this way is considered Normal Attack DMG.
Clorinde’s C1 causes her attacks during her enhanced state to periodically trigger additional Normal Attack hits. Each wave of additional attacks applies Electro once, allowing her to trigger even more Aggravate reactions.
 Constellation 2 | “Now, As We Face the Perils of the Long Night”
Enhance the Passive Talent “Dark-Shattering Flame”: After a nearby party member triggers an Electro-related reaction against an opponent, Electro DMG dealt by Clorinde’s Normal Attacks and Last Lightfall will be increased by 30% of Clorinde’s ATK for 15s. Max 3 stacks. Each stack is counted independently. When you have 3 stacks, Clorinde’s interruption resistance will be increased. The Maximum DMG increase achievable this way for the above attacks is 2,700.
You must first unlock the Passive Talent “Dark-Shattering Flame.”
This Constellation enhances the scaling of Clorinde’s A1 Passive but does not change the ATK needed to hit the limit, leading to a sizable damage increase. It also provides a decent amount of interruption resistance (comparable to that provided by Xingqiu’s Rain Swords) when she has full stacks on her A1 Passive, which is trivial to achieve.
 Constellation 3 | “I Pledge to Remember the Oath of Daylight”
Increases the Level of Hunter’s Vigil by 3.
Maximum upgrade level is 15.
Additional levels to Clorinde’s Skill are nice but not very significant. Much of her damage is dealt through her A1 Passive, C1 procs, Aggravate, or Hyperbloom, which do not scale with Talent levels.
 Constellation 4 | “To Enshrine Tears, Life, and Love”
When Last Lightfall deals DMG to opponent(s), DMG dealt is increased based on Clorinde’s Bond of Life percentage. Every 1% of her current Bond of Life will increase Last Lightfall DMG by 2%. The maximum Last Lightfall DMG increase achievable this way is 200%.
Clorinde’s fourth Constellation greatly enhances her Burst with a free 200% DMG Bonus, since her Burst always grants her 100% BoL before dealing damage.
 Constellation 5 | “Holding Dawn’s Coming as My Votive”
Increases the Level of Last Lightfall by 3.
Maximum upgrade level is 15.
Although this Constellation gains additional value with Clorinde’s C4, her C5 remains her least impactful damage increase.
 Constellation 6 | “And So Shall I Never Despair”
For 12s after Hunter’s Vigil is used, Clorinde’s CRIT Rate will be increased by 10%, and her CRIT DMG by 70%.
Additionally, while Night Vigil is active, a Glimbright Shade will appear under specific circumstances, executing an attack that deals 200% of Clorinde’s ATK as Electro DMG. DMG dealt this way is considered Normal Attack DMG.
The Glimbright Shade will appear under the following circumstances:
- When Clorinde is about to be hit by an attack.
- When Clorinde uses Impale the Night: Pact.
1 Glimbright Shade can be summoned in the aforementioned ways every 1s. 6 Shades can be summoned per single Night Vigil duration.
In addition, while Night Vigil is active, the DMG Clorinde receives is decreased by 80% and her interruption resistance is increased. This effect will disappear after the Night Vigil state ends or 1s after she summons 6 Glimbright Shades.
Clorinde’s final Constellation is a strong upgrade both offensively and defensively.
Offensively, it grants massive CRIT buffs during her enhanced state. Additionally, it launches attacks by “Glimbright Shades” when Clorinde is about to be attacked or uses a Level 2 lunge (up to 6 shade attacks per Skill).
Defensively, while in her enhanced state and before launching all 6 shade attacks, she also receives immunity to interruption and significant damage reduction.
Combos
Combo Notation
- N = Normal Attack
- C = Charged Attack
- A = Aimed Shot
- P = Plunging Attack
- E = Elemental Skill
- tE = Tap Skill
- hE = Hold Skill
- Q = Elemental Burst
- D = dash (cancel)
- J = jump (cancel)
- W = walk (cancel)
- > = switch character
- ( ) = these actions are optional; please refer to the notes below
- [ ] = repeat these actions the specified number of times
The combos below are only general recommendations; it is possible to perform more or less attacks than the listed combos depending on factors such as ping, player reflexes, and buffs/debuffs. Additionally, Clorinde may need to dodge enemy attacks with either a dash or her weaker lunges.
Much of Clorinde’s damage comes from her reactions and her A1 Passive, so it isn’t too detrimental if you end up deviating from these combos in actual combat.
| E 6[N3E] | Clorinde’s standard combo. You can perform her lunging attack early if she gains enough BoL from external healing, but this risks accidentally using her lunging attack too early and requires a dedicated healer in the team. |
| (Q) 2[E] 5[N3E] N3 | This combo can be used if Clorinde already has over 100% BoL before using her Skill, such as from her Burst or from a previous Skill uptime that ended with an N3. It can lead to slightly higher personal damage, but is not strictly necessary to perform. |
Artifacts
ER Requirements
| 1 Skill per Burst | 2 Skills per Burst | |
| Solo Electro | 200%+ | 130–150% |
| Double Electro | 100–130% | 100% |
- The above ER% values assume C6 Fischl as Clorinde’s Electro teammate; without Fischl’s C6, Clorinde’s ER requirements increase by around 10%.
- Using a different Electro teammate generally increases ER requirements by 20%.
- Teammate Favonius procs reduce ER requirements by roughly 10% each.
- Use the Energy Recharge Calculator to determine exact requirements for your team and rotation.
Clorinde should generally not build Energy Recharge, as her Burst is not particularly crucial to her damage before C4; instead, use her Burst if it happens to be available. In many teams she can Burst every rotation with little to no ER% investment (0–4 substats), due to an Electro battery (primarily Fischl) and Electro Resonance.
Using 2 Skills per Burst (with the 4pc Thundering Fury set) greatly reduces Clorinde’s ER requirements, since it allows her and off-field units’ turrets to generate more particles per rotation.
Artifact Stats
 Sands |  Goblet |  Circlet |
| ATK% (or Elemental Mastery)* | Electro DMG Bonus | CRIT DMG or CRIT Rate |
Stat Priority: CRIT > ATK% > EM >> ER%
*An EM Sands can be preferable in Quickbloom teams, as it benefits both Hyperbloom and Aggravate damage. When selecting a CRIT Circlet, make sure to account for Clorinde’s A4 Passive to prevent her from overcapping on CRIT Rate.
ER% substats aren’t necessarily useless, but they aren’t worth specifically hunting for in artifacts, especially if it means sacrificing more useful stats.
Artifact Sets
Recommended Sets
Clorinde’s best sets. 4pc Fragment of Harmonic Whimsy is a significant upgrade damage-wise over its competition, whereas 4pc Thundering Fury uniquely enables rotations with 2 Skills, making it the best option for certain teams.
 4pc Fragment of Harmonic Whimsy | 4pc Whimsy provides strong buffs to Clorinde’s entire kit on gaining and losing Bond of Life — a condition that she easily fulfills —, making it a great generalist option for all team archetypes. |
 4pc Thundering Fury | 4pc Thundering Fury has lower damage potential compared to 4pc Whimsy, but it uniquely reduces Clorinde’s Skill cooldown in Quicken and Quickbloom teams. This can allow her Skill to sync better with teammates’ longer cooldowns or let her better handle multi-wave content by having her Skill available sooner. |
Other Sets
These sets can be used as substitutes for a 4pc Whimsy set if you do not have one available.
 4pc Gladiator’s Finale | A weaker alternative to 4pc Whimsy due to its lower DMG% buff that only affects Clorinde’s Normal Attacks. However, it is relatively easy to farm. |
 4pc Echoes of an Offering | A good option for Normal Attack–reliant damage dealers, assuming your ping is low (<100ms). |
 4pc Marechaussee Hunter | This set requires Furina to be used effectively. It grants a Normal Attack DMG Bonus and lots of CRIT Rate, although it can cause you to overcap on the latter stat. |
 2pc Mixed Sets | • ATK% • Electro DMG% (Thundering Fury) • EM • Normal Attack DMG% (Marechaussee Hunter) Mixed sets can be used while farming for 4pc sets. |
Weapons
Clorinde makes good use of weapons that provide DMG%, CRIT, ATK%, or high Base ATK. CRIT Rate weapons can cause her to overcap (CRIT Rate past 100% is useless), so your artifacts should account for this.
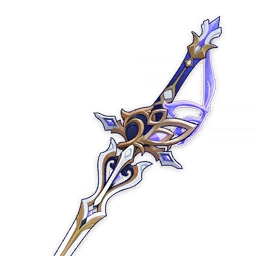 Absolution | Absolution is Clorinde’s signature weapon and her Best-in-Slot. This weapon performs excellently without caveats. |
 Haran Geppaku Futsu | Haran provides only slightly lower stats compared to Absolution, making it a great second option. |
 5-Star CRIT Swords | • Light of Foliar Incision • Mistsplitter Reforged • Primordial Jade Cutter • Uraku Misugiri • Splendor of Tranquil Waters • In lieu of Absolution or Haran, Clorinde can use other 5-star CRIT Swords to good effect. Their performance relative to each other is highly dependent on her artifacts, team buffs, and how well she can use conditional passives. Mistsplitter is most effective if she uses her Burst, Uraku works better with a Geo teammate, and Foliar benefits greatly from EM buffs. Note that it is very easy to overcap on CRIT Rate with Jade Cutter. |
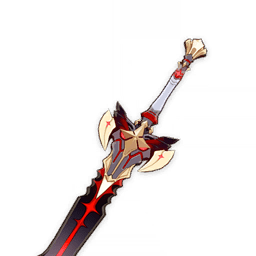 The Black Sword | A good Battle Pass option, especially at R5. Its low CRIT Rate secondary stat helps prevent overcapping. |
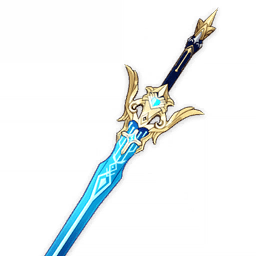 Freedom-Sworn | Freedom-Sworn is a strong option, particularly in Quickbloom teams, due to its high EM stat and Normal Attack DMG Bonus. Its teamwide ATK% buffs Clorinde and possibly any ATK-scaling teammates. However, this weapon should not be used outside of Dendro teams. |
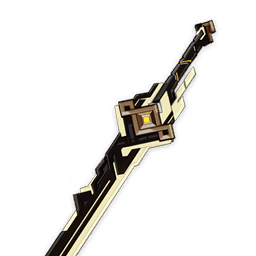 Summit Shaper | A good 5-star stat stick even without a shielder. |
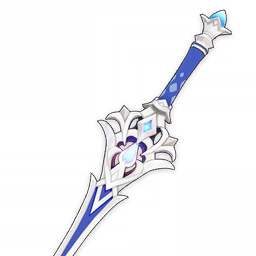 Finale of the Deep | Clorinde’s best free option since it provides a large amount of ATK%. Her ability to quickly generate and clear a large amount of Bond of Life easily caps out its passive. |
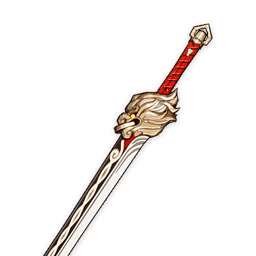 Lion’s Roar | Lion’s Roar is a good alternative to Finale of the Deep, especially at high refinements, since its passive has very high uptime in Clorinde’s teams. |
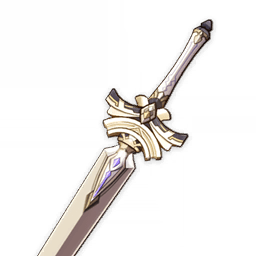 Harbinger of Dawn | A cheap but still effective option. Clorinde can often stay over 90% HP and maintain the passive due to her self-healing, even in Furina teams. |
Teams
Rotation Notation
- N = Normal Attack
- C = Charged Attack
- A = Aimed Shot
- P = Plunging Attack
- E = Elemental Skill
- tE = Tap Skill
- hE = Hold Skill
- Q = Elemental Burst
- D = dash (cancel)
- J = jump (cancel)
- W = walk (cancel)
- > = switch character
- ( ) = these actions are optional; please refer to the notes below
- [ ] = repeat these actions the specified number of times
Teambuilding
- Clorinde works well in Dendro teams due to her frequent Electro application.
- Electro teammates lower her ER requirements through additional Electro Particles and Electro Resonance.
- Clorinde’s self-healing can make it easier to run teams without healers or shielders, but units of these types can still be used for comfort.
- Clorinde’s team can either aim for shorter rotations (16–18s) or extended rotations (25s). The latter allows teammates to use their Skills between Clorinde’s uptimes to reduce ER requirements and refresh abilities.
Quicken and Hyperbloom

Clorinde’s high rate of Electro application allows her to frequently trigger Aggravate to greatly increase her damage. Aggravate teams require a Dendro unit to maintain Quicken. The remaining two slots are usually filled by an off-field Electro unit alongside an Anemo unit for 4pc VV RES Shred, grouping, and buffs. Clorinde’s self-healing reduces the need to run a sustain unit, allowing her to comfortably run more damage-oriented teammates like Fischl, Kazuha, and Nahida.
The inclusion of a Hydro unit instead of an Anemo unit creates a Quickbloom team, which aims to trigger Hyperblooms alongside Aggravate. To maintain Quicken aura, a relatively slow off-field Hydro applier and a fast off-field Dendro applier should be used.
Notable Teammates


Electro 
Off-field Electro units deal additional damage that also benefits from Aggravate, and they reduce Clorinde’s ER requirements via Electro Particles and Electro Resonance.
 Fischl | Fischl requires little field time, deals good off-field single-target damage, and generates plenty of Electro Particles. Additionally, Clorinde can frequently trigger Fischl’s A4 Passive, allowing the latter to deal substantial Aggravate damage. |
 Beidou | Beidou’s Burst deals good off-field damage in multi-target scenarios. It also provides survivability through damage reduction, interruption resistance, and a small shield at C1. |
 Kujou Sara | Sara’s ATK buff (and C6 CRIT DMG buff) can last for much of Clorinde’s enhanced state, making her a capable buffer. She can apply her buff with her enhanced Charged Attack, Burst, or C2, allowing her to possibly buff other units as well. |
 Yae Miko | Yae is a viable alternative to Fischl, though she requires more field time to deploy her Skill. Her Burst is best used to fill downtime in a rotation if it is available. |
Dendro 
Dendro units enable Quicken and Hyperbloom reactions. They can hold a variety of support weapons and artifact sets to buff team damage. For Aggravate-focused teams, sets like Instructor, Noblesse Oblige and Tenacity of the Millelith provide strong offensive buffs. In Quickbloom teams, a Dendro unit is usually the designated holder of 4pc Deepwood Memories, a set that is crucial for maximizing Dendro damage such as Hyperbloom.
 Nahida | Nahida’s Skill applies Dendro frequently to multiple targets at practically any range, making her the go-to offensive Dendro option for Dendro-based Clorinde teams. Her strong Dendro application can maintain a Quicken aura even with fast Hydro appliers on the team. Nahida also offers a massive EM buff for the on-field unit, and she can use supportive Catalysts such as Hakushin Ring or Wandering Evenstar. Prototype Amber is a notable option as it generates Fanfare for Furina’s Burst while also mitigating her own ER requirements. |
 Kirara | Kirara can provide a sturdy shield, and her low Dendro application is not a big issue in Quicken teams, though it is more consistent at C4. Nevertheless, she does not function well as solo Dendro in Quickbloom teams. While Kirara does not innately provide any team buffs until C6, she can hold a variety of supportive weapons such as Sapwood Blade, Freedom Sworn, or Key of Khaj-Nisut. |
 Emilie | Emilie deals off-field damage with full uptime, but she is heavily dependent on Burning to amplify her damage. She can work as a Dendro enabler and off-field DPS for Clorinde’s Quicken teams; however, she forces the inclusion of an off-field Pyro unit to be worth using over alternative options. |
 Yaoyao | Yaoyao’s Skill duration and consistent but low Dendro application synergize well with Clorinde when played in Quicken teams, and the emergency healing provided by her Burst can be useful if team HP gets low. However, she does not function well as solo Dendro in Quickbloom teams. |
 Baizhu | Baizhu provides some off-field Dendro application, combined with strong healing, small shields, and a small buff to Aggravate and Hyperbloom reactions triggered by the on-field unit. He functions well as a solo Dendro in Quickbloom teams. |
  Collei, Dendro Traveler | Accessible off-field Dendro appliers who can substitute for (but not entirely replace) Nahida’s Dendro application in Quickbloom teams. |
Hydro 
Off-field Hydro units generate some Dendro Cores for Quickbloom teams. Their Hydro application should be fast enough to consistently generate Dendro Cores, but slow enough to not remove Quicken aura.
 Furina | Furina provides long-lasting, off-field Hydro damage and application, the latter of which is slow enough to not remove a Quicken aura. Her Burst’s Healing Bonus greatly increases the healing done by Clorinde’s lunges; this in turn generates more Fanfare for Furina’s Burst, further increasing its teamwide DMG% and Healing Bonus. The long duration of her Skill makes her suitable even in longer rotations. |
 Yelan | Yelan is an effective off-field Hydro damage dealer who reliably applies Hydro in single-target scenarios. She also offers a ramping DMG% buff for Clorinde with her A4 Passive. |
 Xingqiu | Xingqiu also provides off-field Hydro application and damage, along with defensive utility via interruption resistance and damage reduction, but his high Hydro application can reduce Quicken uptime. |
 C6 Candace | At C6, Candace has enough off-field Hydro application to reliably create Dendro Cores for Hyperbloom. Additionally, her Burst provides a well-appreciated Normal Attack DMG Bonus. |
Anemo 
Anemo units shred enemy RES with 4pc Viridescent Venerer. They often bring team buffs and grouping capabilities as well. They can trigger Aggravate if they can somehow deal Electro damage through Electro-absorbed abilities or Electro Swirls (in multi-target scenarios).
 Kazuha | Kazuha brings an Elemental DMG% buff, convenient grouping, and sizable off-field damage, making him a stellar pick. |
 Sucrose | Sucrose offers big EM buffs through her passives and potentially a DMG% buff with her C6. As a Catalyst user, she has access to supportive picks like Thrilling Tales of Dragon Slayers (TTDS) or Hakushin Ring. Her Skill and Burst also have some grouping capability. |
 Heizou | As an Anemo Catalyst user, Heizou provides similar utility to Sucrose, just with a weaker teamwide EM buff. |
 Lynette | Lynette is an accessible Anemo option who also offers off-field damage, a Taunt, and a teamwide ATK% buff. |
Geo 
Geo units are decent flex options as they generally do not interfere with Quicken auras; they work well in pairs to enable Geo Resonance. Off-field Geo appliers can also trigger Crystallize, which offer some interruption resistance and potential buffs through 4pc Archaic Petra.
 Zhongli | Zhongli brings an incredibly strong shield with high uptime and Universal RES Shred against nearby enemies. He can also hold 4pc Archaic Petra to provide an additional buff. |
 Chiori | Chiori is a simple yet effective off-field Geo DPS unit who works excellently in shorter team rotations. She prefers to be partnered with Zhongli to activate Geo Resonance and generate another Tamoto doll to increase her Skill’s damage output. |
 Albedo | Albedo is another off-field Geo DPS unit. His Skill’s high uptime makes him more effective in longer rotations. However, his Skill can be destroyed by enemies, and it has limited range. It is generally not worth casting his Burst only for its meager EM buff. |
 Yun Jin | Yun Jin’s Burst applies an Additive Base DMG Bonus to her teammates’ Normal Attacks. Clorinde is a great user of this buff since she can consume most of Yun Jin’s Burst quota within a single Skill in single-target. |
Example Teams
This is not a comprehensive list of teams. The inclusion or exclusion of any given team does not necessarily reflect its power level.

This is a strong Quickbloom team for several reasons. Clorinde receives strong buffs from Furina and Nahida, consistently triggers Aggravate and Hyperbloom, and drives Fischl’s A4 and C6. Clorinde’s self-healing dramatically increases from the Healing Bonus granted by Furina’s Burst, which in turn leads to more Fanfare stacks and thus more DMG Bonus for the team.
Clorinde ideally uses 4pc Thundering Fury (TF) since its cooldown reduction allows her to use 2 Skills in a 25s rotation. This lets Fischl have nearly 100% Oz uptime, and makes great use of the high uptime on Furina and Nahida’s Skills. Yelan can also be used instead of Furina, though her ramping DMG Bonus only benefits Clorinde. Beidou can be an alternative to Fischl to provide interruption resistance and extra survivability; her damage scales well in multi-target fights.
Sample Rotation (Furina, Thundering Fury)
Furina ED Q > Nahida Q E > Fischl E > Clorinde combo > Fischl Q > Clorinde combo
Nahida can reapply her Skill’s mark between Clorinde’s field times to tag newly spawned enemies.
Sample Rotation (Furina, Non–Thundering Fury)
Furina ED Q > Nahida N1 E Q > Fischl E/Q > Clorinde combo Q
Sample Rotation (Yelan)
Yelan EQ N1 > Nahida E Q > Fischl E/Q > Clorinde combo Q

A potent Aggravate team. Since the majority of the team’s damage is Electro, Nahida can equip 4pc Tenacity of the Millelith to buff Clorinde and Fischl (since 4pc Deepwood Memories only buffs Dendro damage).
Sample Rotation (General)
(Fischl Q/E > Kazuha Q/tEP > Nahida E N1 > Clorinde combo)¹ >
Kazuha tEP > Clorinde Q > Nahida E > Fischl E/Q > Kazuha Q/tEP > Clorinde combo
¹First rotation only.
Sample Rotation (Thundering Fury)
Fischl Q/E > Nahida E Q > Kazuha Q > Clorinde combo > Fischl E/Q > Kazuha tEP > Clorinde combo > Kazuha tEP
Clorinde’s Burst can be used at any point in the rotation; it can be useful in multi-target scenarios. Nahida may use her Skill between Clorinde’s field times to mark newly spawned enemies.

An Aggravate team with 4-star teammates.
Sample Rotation (Non–Thundering Fury)
Fischl E/Q > Kirara shE¹(Q) N1 > Sucrose ED N1 (Q) > Clorinde combo² Q
¹Use Kirara’s Short Hold Skill for better particle generation and shield durability.
²Use the E 6[N3E] combo in the first rotation; use 2[E] 5[N3E] N3 for every rotation afterwards.
Sample Rotation (Thundering Fury)
(Clorinde Q)¹ > Sucrose ED(Q) > Kirara shE(Q) > Fischl E > Clorinde combo > Sucrose E > Kirara shE > Fischl Q > Clorinde combo
¹First rotation only.

A comfortable Aggravate team due to Zhongli’s shield, with Chiori providing additional off-field damage and Geo Resonance.
Sample Rotation
Zhongli hED > Chiori (Q) 2[E]¹ > Nahida E N1 (Q) > Clorinde (Q)² combo > Nahida N2CD N2
¹Chiori’s (double-tapped) Skill automatically swaps to the next character, so be sure to have the correct party order.
²If Clorinde’s Burst is not used, Nahida can perform an N3C before swapping to Clorinde to fill time.
Chevreuse Overloaded

Chevreuse offers substantial increases to Pyro and Electro damage, but she requires her entire team to belong to the aforementioned Elements, with at least one of each. Clorinde does not particularly synergize with these teams apart from being an Electro DPS unit, but they can still be strong options due to the sheer buffs and raw damage available to them.
Notable Teammates


Electro 
 Fischl | Fischl requires little field time, deals good off-field single-target damage, and generates plenty of Electro Particles. Even without Aggravate, she is still a top pick since she can snapshot buffs onto her Skill. |
 Beidou | Beidou’s Burst deals good off-field damage in multi-target scenarios. It also provides survivability through damage reduction, interruption resistance, and a small shield at C1. |
 Kujou Sara | Sara’s ATK buff (and C6 CRIT DMG buff) can last for much of Clorinde’s enhanced state, making her a capable buffer. She can apply her buff with her enhanced Charged Attack, Burst, or C2, allowing her to possibly buff other units as well. |
 Yae Miko | Yae is a viable alternative to Fischl, though she requires more field time to deploy her Skill. Her Burst is best used to fill downtime in a rotation if it is available. |
Pyro 
 Chevreuse | A core unit of “Overloaded” teams, Chevreuse provides excellent damage buffs that have high uptime and require little setup. She also has some healing and grouping capabilities. |
 Bennett | Bennett offers a massive Flat ATK buff but constrains movement within a limited AoE. Additionally, his buff loses some value due to the cap on Clorinde’s A1 Passive. |
 Xiangling | Xiangling brings off-field damage and Pyro application with her Burst and Skill. She can use her Burst every other rotation to allow for team rotations shorter than 20s; this also has the benefit of lowering her ER requirements. |
 Thoma | Thoma gives defensive utility with his shield and off-field Pyro application to refresh Chevreuse’s Electro and Pyro RES Shred. At C6, he also provides a Normal Attack DMG Bonus, but this is still worse damage-wise than bringing a buffer or off-field DPS unit instead. |
 Dehya | Dehya is an alternative defensive unit who offers interruption resistance and damage mitigation. Her off-field Skill damage makes her a good user of 4pc Tenacity of the Millelith. |
Example Teams
This is not a comprehensive list of teams. The inclusion or exclusion of any given team does not necessarily reflect its power level.

Chevreuse, Bennett, and Fischl are a strong core for any Overloaded team. Chevreuse’s Electro RES Shred lasts for 6s after an Overloaded proc, so it benefits most of Clorinde’s damage. However, this team can struggle in multi-wave content, since the lack of off-field Pyro application means that Chevreuse’s A1 Passive does not apply to newly spawned enemies.
Sample Rotation
Bennett EQ > Fischl E/Q > Chevreuse (Q) hE N1 > Clorinde Q N1¹ combo
¹If Bennett is C6, Clorinde can use a Pyro-infused Normal Attack to refresh Chevreuse’s RES Shred.

Xiangling can be used instead of Bennett, which offers off-field damage and higher uptime on Chevreuse’s RES Shred. Xiangling uses her Burst every other rotation to reduce her ER requirements and decrease rotation time.
Sample Rotation
(Fischl Q/E)¹ > Chevreuse Q hE > (Fischl E/Q)² > Xiangling (Q) ED N1 > Clorinde Q combo³
¹First rotation only.
²From the second rotation onward, Fischl deploys Oz after Chevreuse’s field time.
³There may be some downtime in the rotation, which can be occupied by some Physical Normal Attacks.

Sara can be used instead of Fischl, as Sara’s buffs allow herself, Clorinde, and Xiangling to deal high front-loaded multi-target damage. Since Sara and Xiangling have high ER requirements and long cooldowns, it may be preferable to use their Bursts every other rotation.
Sample Rotation
(Sara E)¹ > Chevreuse (Q) E > Sara E/C/Q > Xiangling Q/N2 ED > Sara E/C/Q > Clorinde Q combo
¹First rotation only.
Sara can use her Skill, enhanced Aimed Shot, and Burst at varying times to provide her Flat ATK buff as needed.
Other Teams

Clorinde can be used as an Electro DPS unit in other team archetypes that don’t fall under the previous categories, such as Electro-Charged (Taser). While her damage isn’t as good (especially at lower investment) without either Dendro reactions or Chevreuse’s buffs, she is still a viable on-field DPS unit and driver for teammates like Yelan or Beidou. Her high mobility, long-range, and self-healing can also make her comfortable to play. Furina is highly recommended in these teams, since her teamwide buff and personal output are great for shoring up team damage.
Example Teams
This is not a comprehensive list of teams. The inclusion or exclusion of any given team does not necessarily reflect its power level.

Sample Rotation
Clorinde Q > Furina ED Q > Beidou EQ > Yelan Q N1 E N1 > Clorinde combo > Beidou E > Yelan N1 E N1

Sample Rotation
Clorinde (Q) > Zhongli hED¹ > Furina ED Q > Chiori (Q) 2[E]² > Clorinde combo
¹Zhongli picks up the Crystallize shard if using 4pc Archaic Petra.
²Chiori’s (double-tapped) Skill automatically swaps to the next character, so be sure to have the correct party order.
Credits
Contact: nikatosaurus
Contributors: nikatosaurus; kbphan, caxia, haafr, polomo, casdela, irokei, mikeskies
Team images made with the KQM portrait generator.

