Updated for Version 5.7
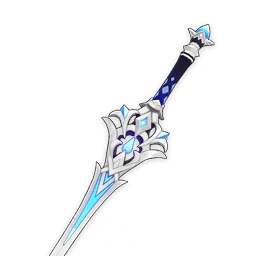
Skirk is a 5★ Cryo Sword character in Genshin Impact who deals massive on-field damage through either her Skill-state Normal Attacks or her Burst nuke. Learn about Skirk’s best builds, best weapons, best artifacts, and best teams in this quick guide.
Note that the information given may change if new discoveries are made. More extensive testing is in progress.
Join our Discord to participate in the theorycrafting process.
Table of Contents
Infographic
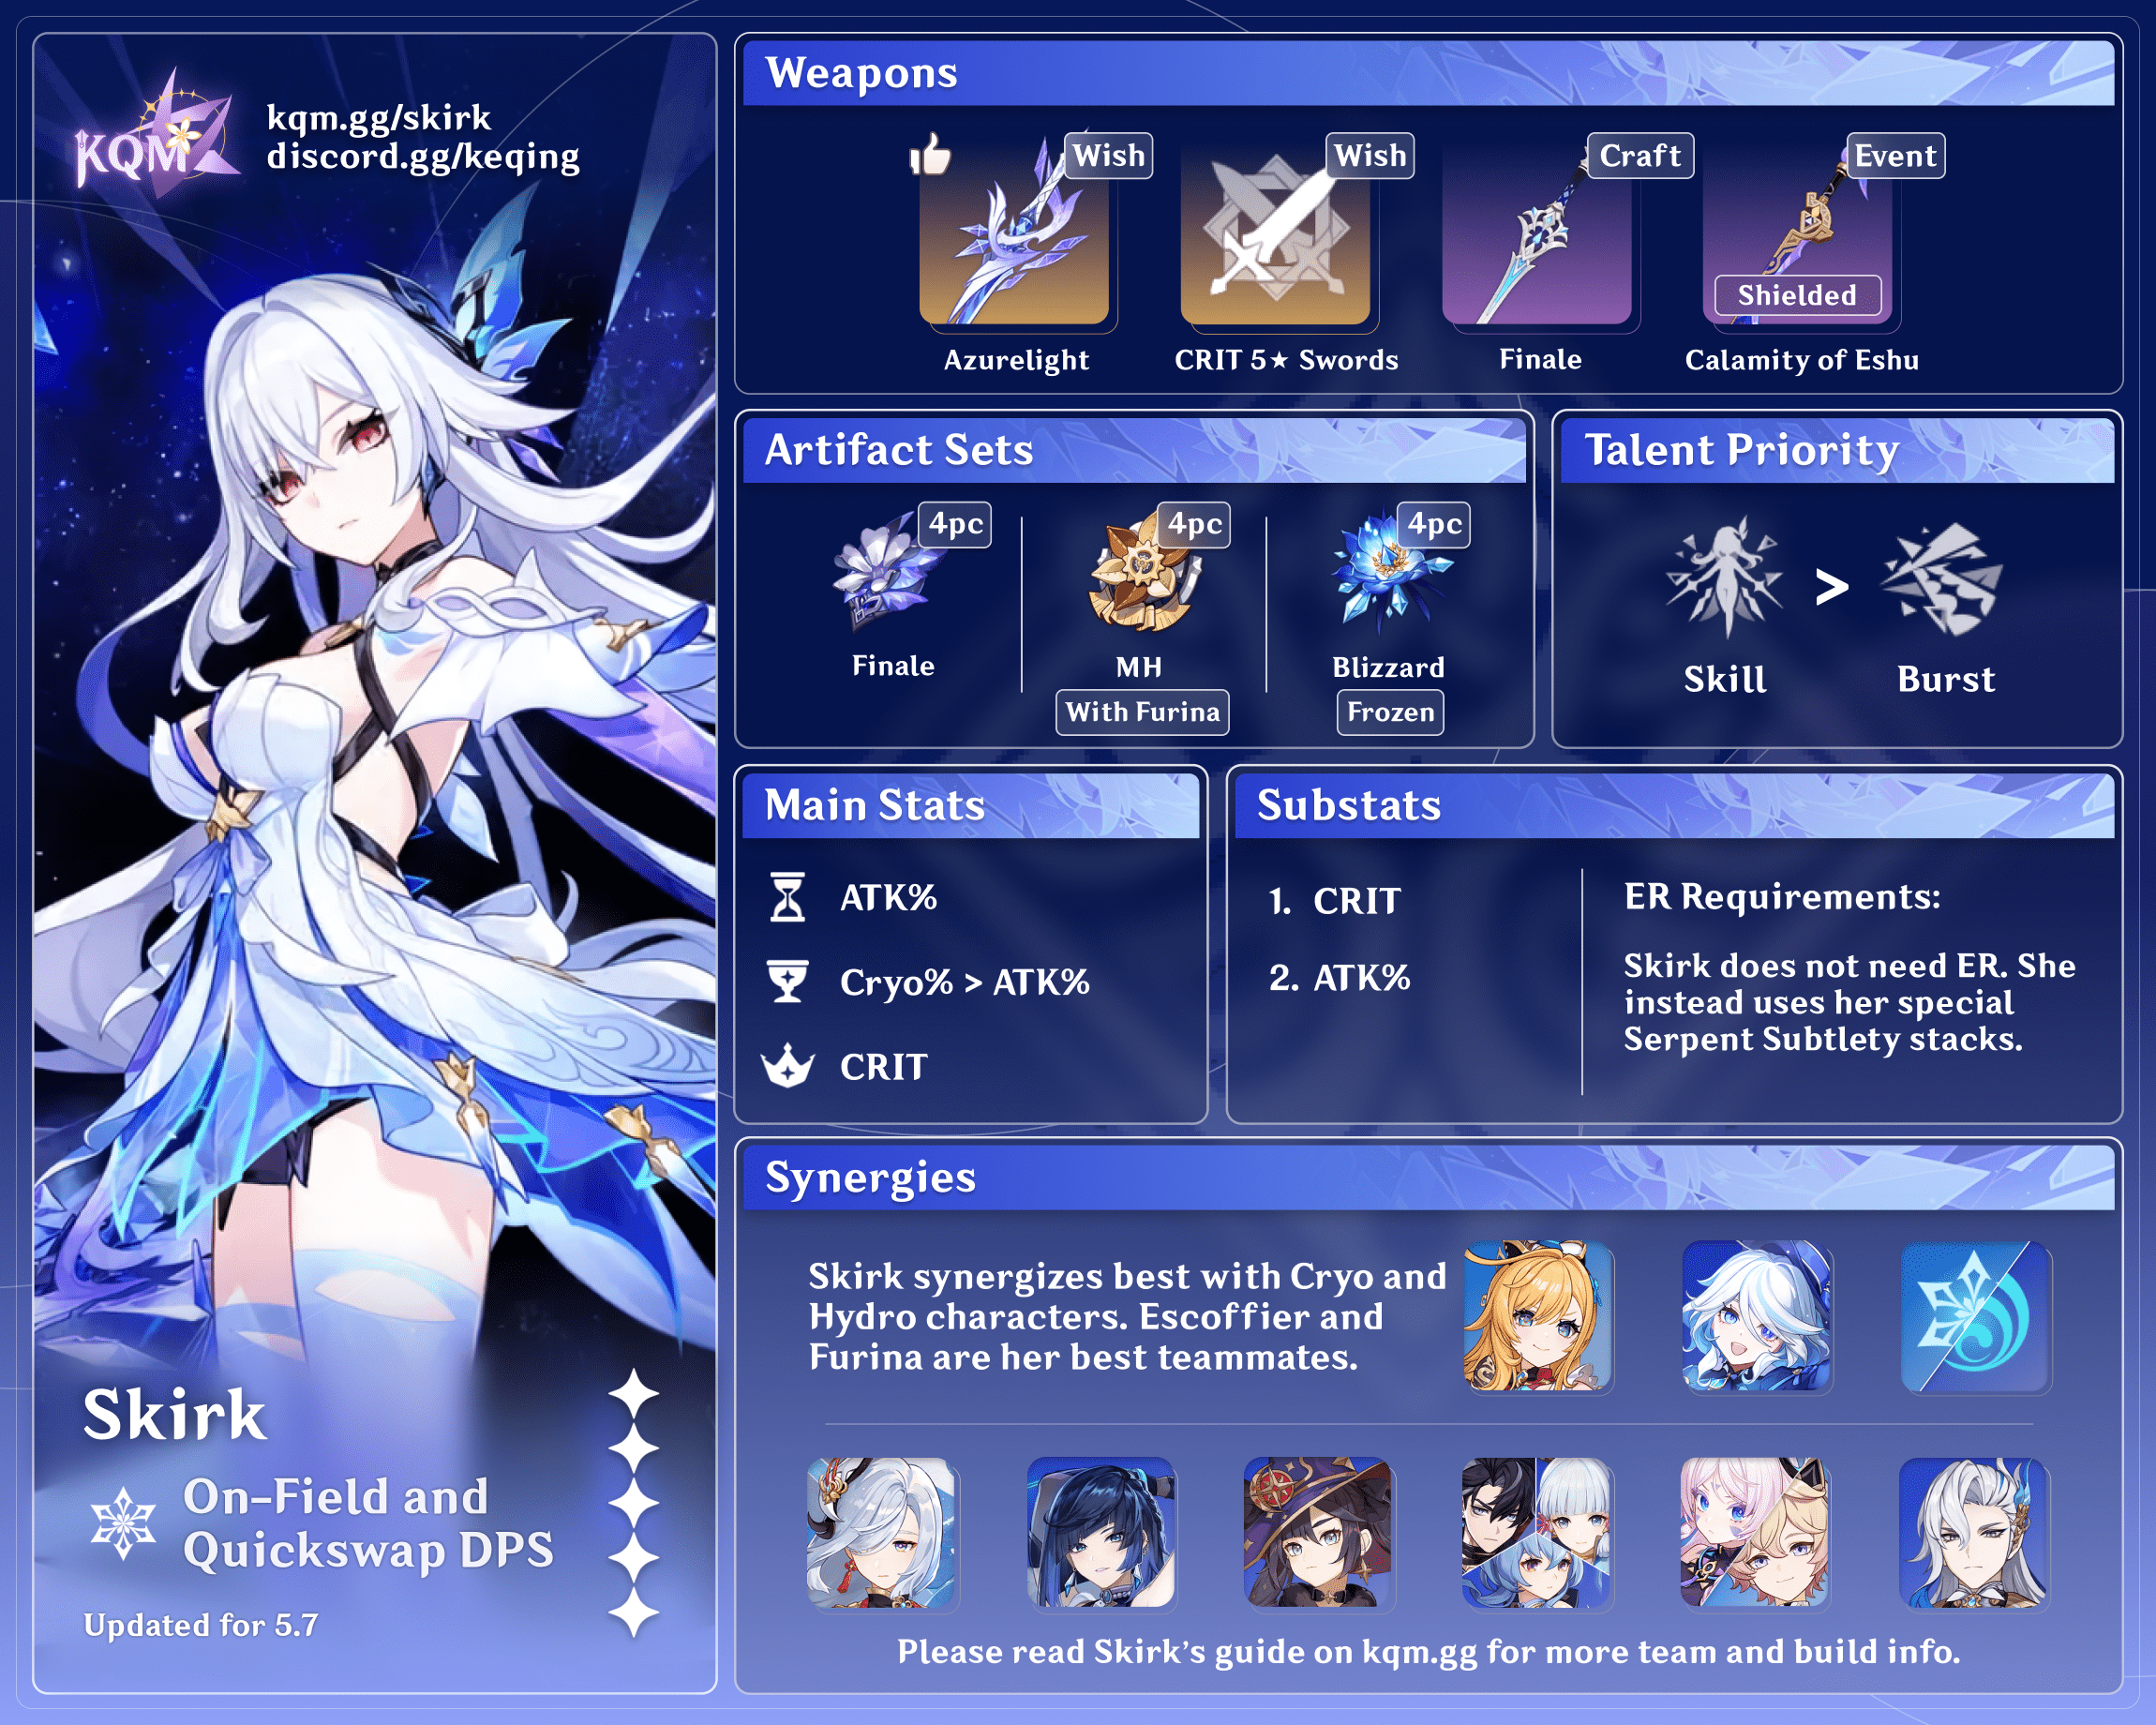
Credits to: euphorysm & plumetra
Character Overview
Pros
- Gorgeous animations with fast and snappy gameplay
- Able to choose between two playstyles, which offers variety
- Her best free-to-play weapons perform close to 5-star alternatives, and the gap between her signature and other weapons isn’t enormous
- A mobile playstyle, no stuck-in-place abilities, and strong artifact alternatives to 4pc Blizzard Strayer, which free her from the struggles that older Freeze teams had against unfreezable enemies.
- While her Escoffier-less teams are pitiful compared to her teams with Escoffier, they are still strong compared to other Cryo damage dealers’ teams
Cons
- Significantly lower damage output without Escoffier
- Extremely inflexible; she is essentially locked into either using only Hydro and Cryo teammates or deactivating half of her kit
- Her A1 Passive is both a key part of her kit and hard-countered by enemies with innate Pyro aura
- Terrible pet sitter for primordial beasts or Fatui Harbingers
Playstyles
On-Field DPS
Skirk enters her Seven-Phase Flash state with her Tap Skill to dish out massive damage with her Normal Attacks.
Quickswap DPS
Skirk can also play as a Burst-based quickswap DPS. She swaps in to use her Hold Skill, then nukes the enemy with her Burst, before swapping out to free up the field for a Cryo or Hydro on-field DPS.
Talents
Talent Priority
Skill > Burst
Skirk’s Skill makes up the majority of her damage in her on-field playstyle and should be leveled first. Her Burst should be prioritized in her quickswap playstyle. Leveling both eventually is recommended, regardless of playstyle; although her Burst deals no damage while she is in her Skill state, it’s still worth leveling in teams where she wants to use a split rotation, and having the option to on-field if needed in quickswap teams can be helpful in a pinch. Though the scaling is marginal (1% per level), the Normal Attack DMG Bonus from Skirk’s special Burst also scales with her Burst level.
While leveling Skirk to 90 is a pitiful damage increase relative to the cost, her damage share is large enough that it’s worth considering once you start running out of other things to improve. However, she should still be prioritized below HP-scaling teammates like Furina or Yelan.
There is no need to level Skirk’s Normal Attack.
Talent Overview
 Normal Attack | Havoc: Sunder
Talent Description
Normal Attack
Performs up to 5 consecutive attacks.
Charged Attack
Consumes a certain amount of Stamina to hurl a spinning crystal spear, dealing DMG to opponents ahead.
Plunging Attack
Plunges from mid-air to strike the ground below, damaging opponents along the path and dealing AoE DMG upon impact.
Since Skirk’s Skill-state attacks scale with Skill levels, her Normal Attack Talent is unremarkable.
 Elemental Skill | Havoc: Warp
Talent Description
Imitates the combat style of “The Foul.” Produces different effects depending on whether you Tap or Hold.
Tap
Skirk gains 45 Serpent’s Subtlety and switches to Seven-Phase Flash mode.
Hold
Skirk gains 45 Serpent’s Subtlety and will continuously move at high speed. Her interruption resistance is increased in this state.
During this time, Skirk can control her movement direction and move atop water. She can also use this Skill again to end rapid movement prematurely.
Skirk has two versions of her Skill — a Tap and a Hold variant. Both generate 45 Serpent’s Subtlety points on cast, and the Skill cooldown only starts ticking down once the Skill state ends. Neither deals any damage on the Skill cast itself.
The Tap Skill variant lets Skirk switch to her Seven-Phase Flash state, which grants her a Cryo Conversion, far more impressive damage multipliers, and a stylish outfit change. She also gains increased interruption resistance on par with Xingqiu’s Rain Swords. While in the Seven-Phase state, Skirk continually consumes Serpent’s Subtlety, and she exits the state either after 12.5s or upon running out of Serpent’s Subtlety. As a result, her A1 Passive is vital to ensure she can remain in her Tap Skill state for the full duration. Note that upon exiting her Seven-Phase Flash state, Skirk will clear any excess Serpent’s Subtlety points.
The Hold Skill variant instead lets Skirk enter a fast-movement state, which she can use to glide around while absorbing nearby Void Rifts through her A1 Passive, for an additional 8 Serpent’s Subtlety points per Rift. She can exit her Hold Skill by either tapping Skill again or letting the duration run out. Unlike with her Tap Skill, Serpent’s Subtlety points aren’t cleared when Skirk’s Hold Skill ends.
 Elemental Burst | Havoc: Ruin
Talent Description
Skirk’s Elemental Burst is not reliant on Elemental Energy but instead on Serpent’s Subtlety.
When Skirk has at least 50 Serpent’s Subtlety, she can expend all her Serpent’s Subtlety to unleash her Elemental Burst, ripping the space before her apart and using rapid consecutive slashes that deal AoE Cryo DMG. At the same time, the DMG dealt by an instance of this Elemental Burst will be increased by every point of Serpent’s Subtlety over 50 when it is unleashed. Up to 12 points can be counted for this purpose.
When Skirk is in Seven-Phase Flash mode, Havoc: Ruin will be replaced by Havoc: Extinction.
Havoc: Extinction
A special Elemental Burst that can be used even without consuming Serpent’s Subtlety.
After using it, Skirk will gain the “All Shall Wither” effect, which will last until Seven-Phase Flash ends. After unlocking the Passive Talent Reason Beyond Reason, she can also absorb nearby Void Rifts.
While “All Shall Wither” is active, every 0.1s, after Skirk’s Normal Attack hits an opponent, that Normal Attack will deal increased DMG. If she absorbed any Void Rifts while using Havoc: Extinction, this Normal Attack’s DMG will be further increased based on the number of Rifts absorbed.
This effect will be canceled when it has triggered 10 times.
Skirk has two Bursts, and which she uses depends on whether she is in her Seven-Phase Flash state or not.
Skirk’s regular Burst is a powerful multi-hit nuke, which uses Serpent’s Subtlety points instead of Energy. It has a cost of 50 Serpent’s Subtlety, which is usually regenerated through one Hold Skill; 45 points from the Skill cast itself, and the remaining 5 from absorbing at minimum one nearby Void Rift. The Burst damage is also increased by 32.85% ATK (TL9) for each overcapping point, up to 12. A total of three Void Rifts are required to both charge the Burst and cap out the damage increase, though the difference between absorbing two and three Void Rifts is minor — Skirk is already at 11 out of 12 extra points after absorbing two Rifts.
In her Seven-Phase Flash state, Skirk’s regular Burst is replaced by a special variant that costs no Serpent’s Subtlety to use. It has a significantly shorter animation length and deals no damage on cast. Upon using it, Skirk absorbs up to three nearby Void Rifts and gains a Normal Attack DMG Bonus that scales with the number of Void Rifts absorbed. The DMG Bonus lasts for 10 Normal Attacks and is considered regular DMG%.
 Ascension 1 Passive | Reason Beyond Reason
Talent Description
When nearby party members trigger Frozen, Superconduct, Cryo Swirl, or Cryo Crystallize reactions against opponents, a Void Rift will be created near this opponent. This effect can be triggered once every 2.5s. 3 Void Rifts created by Skirk herself can exist on the field at once.
Skirk can use the following methods to absorb nearby Void Rifts:
· When she hits an opponent with a Charged Attack in her Seven-Phase Flash mode.
· When she uses the special Elemental Burst Havoc: Extinction while in Seven-Phase Flash mode.
· When she Holds her Elemental Skill Havoc: Warp to engage in rapid movement.
Each Rift absorbed will grant her 8 Serpent’s Subtlety points.
A vital part of Skirk’s kit. Skirk’s A1 Passive lets her teammates generate Void Rifts upon triggering Cryo reactions. At most three Void Rifts can exist at once, and Skirk can absorb them by either using her Charged Attack, her special Burst, or her Hold Skill. Each absorbed Rift grants her 8 Serpent’s Subtlety points, and a Rift can be generated once every 2.5s. Depending on how the cooldown lines up, this lets her regenerate up to 64 points during her Tap Skill duration.
Void Rifts are generated upon triggering any Cryo reaction except Melt. Since consistently absorbing Rifts is vital for ensuring that Skirk’s Seven-Phase state doesn’t end prematurely from running out of points, and at least one Rift is necessary to charge her Burst fully in her quickswap playstyle, this leaves Skirk struggling against any enemy with an innate Pyro aura — unless she kills them before the 45 Serpent’s Subtlety points from her Skill cast runs out, of course.
 Ascension 4 Passive | Return to Oblivion
Talent Description
When nearby Hydro party members’ Hydro attacks hit opponents, or when nearby Cryo party members apart from Skirk hit opponents with Cryo attacks, Skirk will gain the “Death’s Crossing” effect for 20s. Max 3 stacks, each stack’s duration is counted independently.
Each character can grant Skirk at most 1 “Death’s Crossing” stack by this means.
Each “Death’s Crossing” stack increases the Normal Attack DMG dealt by Skirk in Seven-Phase Flash mode to 110%/120%/170% of its original DMG and the DMG dealt when using her Elemental Burst Havoc: Ruin to 105%/115%/160% of its original DMG.
Skirk’s A4 increases her damage relative to how many Cryo / Hydro teammates she runs. The damage of her Seven-Phase Flash attacks and her regular Burst increases for each teammate that hits enemies with Hydro or Cryo attacks, up to three stacks. Each teammate can only generate one stack, and Skirk herself is unable to generate stacks.
This is a multiplicative buff rather than a simple DMG Bonus, similar to Neuvillette’s Ascension 1 Passive. Combined with the jump in multiplier being much bigger from 2 Hydro / Cryo teammates to 3 than from 1 to 2, this heavily incentivizes using her intended “Mono Freeze” teams.
Since the stack generation is tied to attacking enemies rather than dealing damage, shielded or immune enemies pose no issue.
 Utility Passive | Mutual Weapons Mentorship
Talent Description
When all party members are either Hydro or Cryo, and if there is at least 1 Hydro and 1 Cryo character, your own party members’ Elemental Skill Level is increased by 1.
Like master, like disciple; similar to Childe, Skirk’s Utility Passive also offers a teamwide Talent Level increase — though for Skills and not Normal Attacks.
Much like the above, this passive also incentivizes teams with only Cryo and Hydro characters, though this one is limited to only teams with both Elements. On the upside, it provides a nice boost to Skirk’s damage in her on-field playstyle and synergizes with many of her best teammates (as both Escoffier and Furina are Skill-based damage dealers).
Constellations
 Constellation 1 | Far to Fall
Constellation Description
Enhances the effects of the Passive Talent Reason Beyond Reason: Every Void Rift absorbed will summon a crystal blade to attack nearby opponents, dealing 500% of Skirk’s ATK as Cryo DMG. This DMG is considered Charged Attack DMG.
You must first unlock the Passive Talent Reason Beyond Reason.
A solid boost to Skirk’s personal damage that benefits both her on-field and quickswap playstyles. The damage is considered Charged Attack damage, which means the Constellation neither benefits from nor deactivates 4pc Galleries’ DMG Bonus.
 Constellation 2 | Into the Abyss
Constellation Description
After unleashing her Elemental Skill Havoc: Warp, Skirk will gain 10 additional Serpent’s Subtlety points.
When using her Elemental Burst Havoc: Ruin, the DMG of this Elemental Burst instance will be increased by taking up to 10 more Serpent’s Subtlety points into account.
Additionally, within 12.5s after Skirk unleashes the special Elemental Burst Havoc: Extinction while in her Seven-Phase Flash mode, her ATK is increased by 70%. This effect will be canceled when she leaves the Seven-Phase Flash mode.
Increases the Serpent’s Subtlety points regenerated by Skirk’s Skill from 45 to 55, and grants Skirk a different buff depending on whether she uses her regular or special Burst. When using her regular Burst, Skirk counts up to an additional 10 Serpent’s Subtlety for the damage boost, raising the buff cap from 12 to 22. The number of absorbed Void Rifts needed to cap out the buff remains the same. When using her special Burst, Skirk instead gains a 70% ATK Bonus for the duration of her Seven-Phase Flash state.
This is a hefty damage increase for Skirk’s quickswap playstyle and a solid increase to her on-field playstyle (as long as she uses her special Burst).
 Constellation 3 | Serendipitous Sin
Constellation Description
Increases the Level of Havoc: Ruin by 3.
Maximum upgrade level is 15.
Talent levels for Skirk’s Burst. In addition to being a solid Constellation for her quickswap playstyle, it also shifts enough of her damage to her Burst to make split rotations better even in on-field teams.
 Constellation 4 | Fractured Flow
Constellation Description
Enhances the effects of the Passive Talent Return to Oblivion: Each Death’s Crossing stack also increases Skirk’s ATK by 10%/20%/40%.
You must first unlock the Passive Talent Return to Oblivion.
Up to 40% ATK to go with Skirk’s Ascension 4 multiplier. Although Freeze teams usually are ATK-starved, this Constellation is still far weaker than her others and should only be a stepping stone toward her C5 or C6.
 Constellation 5 | End of Wishes
Constellation Description
Increases the Level of Havoc: Warp by 3.
Maximum upgrade level is 15.
Talent levels for Skirk’s Skill. While Skirk’s C3 increased her Burst damage enough relative to her Skill to make split rotations preferred in her on-field teams, her C5 tips the scales to make her regular non-split on-field rotations better again.
 Constellation 6 | To the Source
Constellation Description
Each Void Rift Skirk absorbs via the effects of the Passive Talent Reason Beyond Reason will grant her 1 Havoc: Sever stack. She can consume such stacks to initiate coordinated attacks and decrease the DMG she takes while in Seven-Phase Flash mode. These stacks last for 15s, and each stack’s duration is counted independently (max 3 stacks).
You must first unlock the Passive Talent “Reason Beyond Reason.”
Havoc: Sever
· When Skirk uses the Elemental Burst Havoc: Ruin, she will consume all Havoc: Sever stacks to initiate a coordinated attack in which each Havoc: Sever stack will deal 750% of Skirk’s ATK as Cryo DMG. This DMG is considered Elemental Burst DMG.
· When she uses Normal Attacks while in Seven-Phase Flash mode, 1 Havoc: Sever stack will be consumed when her third or fifth sequenced attacks hit an opponent to launch 3 coordinated attacks. Each coordinated attack deals 180% of Skirk’s ATK as Cryo DMG. This damage is considered Normal Attack DMG.
· When Skirk takes DMG while in Seven-Phase Flash mode, 1 Havoc: Sever stack will be consumed to decrease this DMG instance by 80% and attack nearby opponents 3 times, with each attack dealing 180% of Skirk’s ATK as Cryo DMG. This DMG is considered Charged Attack DMG.
A strong capstone Constellation. Upon absorbing Void Rifts, Skirk gains special “Sever” stacks, which provide different effects depending on whether she is in her Seven-Phase Flash state or not. Each stack has an independent 15s duration, and she can have at most three stacks at a time.
Outside of her Seven-Phase Flash state, Skirk can consume C6 stacks by casting her regular Burst. This will consume all stacks to trigger up to three simultaneous coordinated attacks, significantly increasing her Burst damage. Since the damage is considered Burst damage, it benefits from 4pc Galleries.
In her Seven-Phase Flash state, Skirk will instead consume one stack at a time either through her third and fifth Normal Attacks or when she is hit by an enemy. Upon consuming a stack, she triggers three coordinated attacks. If the coordinated attack is triggered by her Normal Attacks, it’s considered Normal Attack damage (and benefits from 4pc Galleries). If it’s triggered by being hit, it’s considered Charged Attack damage (and neither benefits from nor deactivates 4pc Galleries).
As a result, Skirk’s C6 is a solid damage boost to both her on-field and quickswap playstyles.
Combos
Combo Notation
- N = Normal Attack
- C = Charged Attack
- A = Aimed Shot
- P = Plunging Attack
- E = Elemental Skill
- tE = Tap Skill
- hE = Hold Skill
- Q = Elemental Burst
- D = dash (cancel)
- J = jump (cancel)
- W = walk (cancel)
- > = switch character
- ( ) = these actions are optional; please refer to the notes below
- [ ] = repeat these actions the specified number of times
Note that Skirk’s suggested combos may change as new combos are tested. More extensive testing is in progress.
| tE with N5D (CD / sQ) spam | Tentative combo for on-field. She spams N5D chains, while weaving Charged Attacks and her special Burst to absorb Void Rifts when necessary. Squeeze in as many chains as possible until her Skill state runs out; the amount will depend on how good your cancels are and if there are any Attack SPD buffs. |
| team > hEQ > team > tE with N5D (CD) spam | What’s referred to as a split rotation. Skirk swaps in during setup to use her Burst nuke, then later takes the field to use her normal on-field combo. Can be used both in on-field teams and in quickswap teams with downtime (e.g. those with Wriothesley). |
| hEQ | Standard combo for Burst DPS Skirk. Hold Skill lets her charge her Burst without entering her Seven-Phase state, and the combo’s low field-time requirements free up field time for other on-field damage dealers. She usually does two Bursts per rotation. |
Artifacts
Artifact Stats
 Sands |  Goblet |  Circlet |
| ATK% | Cryo DMG Bonus / ATK% | CRIT > ATK% |
Stat Priority: CRIT > ATK% >>> Flat ATK
Like any ATK-scaling DPS, Skirk prefers an ATK% Sands, DMG Bonus Goblet, and CRIT Circlet. Depending on teammates, an ATK% Goblet can perform similarly to a DMG Bonus one; DMG% buffs like Furina’s Burst and 4pc Scroll tips the scales toward ATK% Goblet, while 4pc Tenacity and Shenhe’s buffs tip the scales toward a DMG Bonus Goblet. If running 4pc Marechaussee (or 4pc Blizzard Strayer), an ATK% Circlet can also be viable.
Since Skirk’s Burst doesn’t use Energy, she has no use for Energy Recharge. If using 4pc Marechaussee with a CRIT Rate weapon, she also quickly overcaps her CRIT Rate. As a result, she can be a headache to build since she is left with only three usable substats — one of which is Flat ATK.
Artifact Sets
 4pc Marechaussee Hunter | Marechaussee offers plenty of CRIT Rate and a Normal Attack DMG Bonus, which makes it on-field Skirk’s Best-in-Slot as long as she can maintain full stacks and never uses her regular Burst — in other words, in Furina teams with no split rotations. As an added bonus, it’s efficient to farm, and you may already have a 4pc set lying around. However, if Skirk uses her Burst, Marechaussee performs worse than Galleries due to the CRIT Rate buff only stacking on-field. As such, it’s a worse pick than Galleries for on-field Skirk’s split rotations, and significantly worse for quickswap. It also falls behind 4pc Galleries for on-field Skirk if using a CRIT Rate weapon. |
 4pc Finale of the Deep Galleries | Galleries performs less than ~2% worse than Marechaussee for Skirk’s on-field playstyle, a bit better than Marechaussee for split rotations, and significantly better for her quickswap playstyle. While it’s her best generalist set, it’s also far less Resin-efficient than Marechaussee — though it’s also far easier to build around if using a CRIT Rate weapon. The recommended option for players who want to play Burst DPS Skirk, or who don’t want to tie Skirk to Furina. |
 4pc Blizzard Strayer | Despite Blizzard Strayer slightly outperforming both Marechaussee and Galleries on paper, it’s unreliable due to its dependence on freezable enemies. This leaves its performance at the whim of HoYo’s endgame lineup choices, making it far less futureproof than the above options. Still, it’s a strong choice for anyone who has a set lying around and is confident they won’t face unfreezable enemies. |
 Placeholder Options | 4pc Gladiator’s Finale or 2pc Mixed Sets (Marechaussee Hunter, Cryo DMG Bonus, ATK%) Placeholder options while farming a 4pc Marechaussee or Galleries set for Skirk. Use whichever pieces have better stats. |
Weapons
 5★ Azurelight | Skirk’s signature offers high Base ATK, a CRIT Rate secondary stat, and an additional 48% ATK and 40% CRIT DMG from its passive, which Skirk has no issue maintaining. While the gap between it and her other alternatives aren’t as large as with some recent characters, it still outperforms her next closest alternatives by roughly 18–22%. |
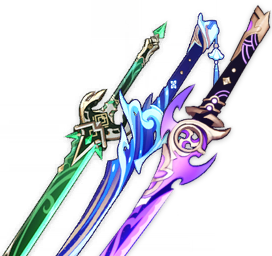 5★ Primordial Jade Cutter, Haran Geppaku Futsu, Mistsplitter Reforged | Recommended 5-star alternatives that all perform close to each other. Use them if available, but the gap from R5 Finale is too small to make them worth pulling specifically for Skirk. Note that the high CRIT Rate from Jade Cutter and Haran make them difficult to build around if using 4pc Marechaussee. |
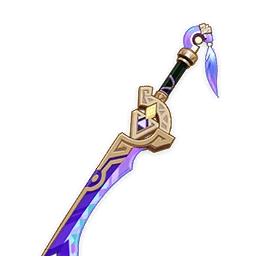 4★ Calamity of Eshu | An event weapon from Version 5.2, Eshu is an excellent free-to-play option for Skirk if she can activate the passive. It performs on par with the above 5-star options and slightly better than a similar-refinement Finale with 4pc Marechaussee, and on par with Finale if using 4pc Galleries. However, if playing quickswap, Eshu performs significantly worse than Finale. The gap between Eshu and Finale is also not large enough that it’s worth forcing a less-optimal shielder in on-field Skirk teams just to use Eshu when recommended shielders (Citlali and Dahlia) are unavailable. |
 4★ Finale of the Deep | Another excellent free-to-play option. Finale is quickwap Skirk’s best 4-star by a large margin, and on-field Skirk’s best 4-star in any team that doesn’t have a shielder to activate Eshu’s passive (or if she is using 4pc Galleries). The only exception is in the rare Skirk teams that don’t run a healer (i.e. no Escoffier, Charlotte, Mika, or even Barbara) and thus can’t fully activate the passive. |
 5★ CRIT Swords | Absolution, Light of Foliar Incision, Uraku Misugiri, Splendor of Tranquil Waters Other 5-star options that perform slightly worse than R5 Finale or Eshu. |
 4★ The Black Sword, Kagotsurube Isshin | For players who are unable to use Eshu or Finale and who don’t have any of the above 5-star options, these are placeholder alternatives while awaiting better teammates to enable one of the Swords’ passives or billets to craft R1 Finale. |
Teams
Rotation Notation
- N = Normal Attack
- C = Charged Attack
- A = Aimed Shot
- P = Plunging Attack
- E = Elemental Skill
- tE = Tap Skill
- hE = Hold Skill
- Q = Elemental Burst
- D = dash (cancel)
- J = jump (cancel)
- W = walk (cancel)
- > = switch character
- ( ) = these actions are optional; please refer to the notes below
- [ ] = repeat these actions the specified number of times
Freeze

The vast majority of Skirk’s kit is locked to teams with only Hydro and Cryo characters, which leaves Freeze as by far her strongest playstyle.
Skirk can be played as either an on-field carry or a quickswap Burst DPS. Her team-building remains largely the same; slot in buffers to increase her damage, a healer to stack Fanfare with Furina (ideally Escoffier), and keep the team limited to only Hydro and Cryo units. Cryo Resonance is appreciated for the extra CRIT Rate, while Hydro Resonance increases the damage of any HP-scaling teammates (e.g. Furina or Yelan). The main difference between the two playstyles is that Skirk’s quickswap teams slot in an on-field DPS to deal damage while her Burst is on cooldown.
Against unfreezable enemies, if using one of Skirk’s recommended 5-star Swords, and without either Furina or Escoffier available, the sustain slot can be traded for an additional buffer. Otherwise Skirk should run either a healer or shielder to enable Finale or Eshu, respectively, and preferably Escoffier regardless.
Notable Teammates
 Escoffier | Easily Skirk’s best teammate. Escoffier offers a massive 55% Cryo and Hydro RES Shred, healing to keep the team alive and stack Fanfare with Furina, and high personal damage. The majority of her damage also comes from her Skill, which makes Skirk’s Utility Passive a solid buff. |
 Furina | Furina provides plenty of DMG Bonus, can hold 4pc Tenacity to further buff Skirk, and deals decent off-field damage. Much like Escoffier, Furina’s damage also comes from her Skill and thus benefits from Skirk’s Utility Passive. The only caveat is that Furina requires a healer, but this is a non-issue in teams with Escoffier. |
 Yelan | Yelan deals solid off-field damage and offers a ramping DMG Bonus for the on-field character. She also enables Hydro Resonance to benefit both herself and any other HP-scaling Hydro unit, such as Furina. In addition to being an excellent second Hydro option in teams with Furina, Yelan can also be a competitive alternative to Furina for Escoffier-less players since she doesn’t require a healer. |
 Shenhe | A powerful Cryo buffer. Shenhe offers her Icy Quill buff, Cryo DMG Bonus and RES Shred, and, depending on whether she uses her Tap or Hold Skill, Burst and Skill DMG Bonus or Normal and Charged Attack DMG Bonus. |
Other Cryo
Citlali | Citlali offers the full DMG Bonus from 4pc Scroll, can hold Thrilling Tales, and her Hydro RES Shred benefits off-field Hydro damage dealers like Furina or Yelan. Although she doesn’t shred Cryo RES and her shield is of less use to Skirk than healing would be — due to Skirk’s increased interruption resistance and lack of ways to stack Fanfare — she is still a solid support option. |
 Mika, Charlotte | Cryo units that offer healing — though redundant in teams with Escoffier — and some buffs. Mika offers Attack SPD to let Skirk squeeze in more Normal Attacks, while Charlotte can hold Thrilling Tales. Both should equip Scroll or Noblesse to further buff Skirk. For players without Escoffier, Charlotte or Mika are also the best options to stack Fanfare for Furina. Mika is an especially strong pick thanks to Skirk’s short hitlag, making Attack SPD a solid buff for her. |
  Rosaria, Kaeya | Cheap options for players with limited rosters. Rosaria offers a CRIT Rate buff and deals some personal damage, while Kaeya is free. Both should equip support gear like Scroll or Noblesse, but they can forgo Favonius if none of Skirk’s teammates need the Energy, since she herself has no use for it. |
 Layla | Another Cryo sustain. Layla offers a shield rather than healing, which is either less desirable than healing if the team has no healer, or redundant if the team has a healer. Her main benefits are enabling Eshu’s passive and the modest Normal and Charged Attack buff from her C4. |
Other Hydro
Mualani | Mualani is a surprisingly strong support for Skirk by virtue of being able to both hold TTDS and activate the full 4pc Scroll DMG Bonus. She also generates 4–5 Hydro particles, which lets her battery other Hydro teammates like Furina or Yelan, and she enables Hydro Resonance for herself and any HP-scaling teammates. The only downside is that relegating Mualani to a TTDS and Scroll bot comes at the price of ignoring most of her kit. |
 Mona | Other Hydro Catalyst users that can hold TTDS while providing buffs or utility. Mona offers a hefty DMG Bonus through her Burst’s Omen debuff, which can be extended through Freeze to cover Skirk’s damage window. She can also hold 4pc Tenacity or Scroll, if available. |
 Dahlia | Skirk’s short hitlag duration makes Dahlia among her best 4-star teammate options, since his Attack SPD buff lets her squeeze in several extra Normal Attacks. He also enables Eshu for her, and his shield provides some additional comfort even with Skirk’s high interruption resistance. |
 Xingqiu | Xingqiu serves as a cheaper Hydro alternative to Yelan. He offers off-field damage, interruption resistance, and damage mitigation, but lacks direct ways to buff Skirk’s damage. While the interruption resistance is of limited use to Skirk, the damage mitigation offers some extra comfort. He also enables Hydro Resonance and batteries any Hydro teammates. Alternatively, Xingqiu can pair with Yelan for a Furina-less team — a solid option for Escoffier-less players who would otherwise have to slot in a healer to stack Fanfare. |
Candace | Another Hydro buffer. Candace offers an Additive Base DMG Bonus to Normal Attacks, scaling with her HP, and a 20% Normal DMG Bonus to increase on-field Skirk’s damage. However, her buff is limited to 9s at C0, and 12s at C2. |
Sigewinne, Kokomi | Decent healer options in Escoffier-less teams with Furina. Sigewinne offers teamwide healing to stack Fanfare and an Icy Quill–like buff for off-field Skill damage. Kokomi can hold Thrilling Tales and Tenacity to buff Skirk, but her Skill-only healing is both slow and single-target. Both enable Hydro Resonance and battery any Hydro teammate. Sigewinne and Kokomi are less valuable in teams with Escoffier where her healing is redundant, though her off-field Skill buff benefits Escoffier’s damage and Kokomi can still hold TTDS. |
 Barbara | Barbara is free and can hold Thrilling Tales, which makes her usable in a pinch for players with limited options. She also provides healing, albeit far less than other off-field healers, and can hold 4pc Scroll. |
 Neuvillette | Neuvillette is not free and heals less than Barbara, which makes him not very usable as an off-field TTDS bot for players with limited options (nor are they likely to own him). However, he is an excellent on-field option for Skirk’s quickswap teams; see the Dual Carry Options table. |
Dual Carries (Quickswap)
When played as a Burst DPS, Skirk generally pairs with a second DPS that deals damage from on-field while Skirk’s Burst and Skill are on cooldown. Note that these teams are even more Escoffier-reliant than Skirk’s regular on-field teams.
 Neuvillette | Neuvillette’s high personal damage, flexible rotations, and strong synergy with Skirk’s best teammates make him an excellent pick for Skirk’s quickswap teams. Since he stacks Fanfare on his own, he also solves Skirk’s reliance on healers with Furina — though the team still strongly wants Escoffier for her damage and buffs. While Neuvillette can theoretically hold Thrilling Tales to buff Skirk since he benefits from the HP% — albeit less than CRIT — their optimal rotations rarely allow it. |
 Ayaka | Ayaka is another strong dual-carry option thanks to her high personal damage. Since the majority of said damage is tied to her Burst, and her Cryo Infusion can be refreshed anytime with her dash, she also has no issue accommodating Skirk’s field-time requirements. Having both Skirk and Escoffier to battery her lowers her ER requirements to let her build even more for damage. |
 Wriothesley | Another Cryo DPS option. Since Wriothesley’s damage window is tied to his Skill, and its duration relative to its cooldown is too short to leave the rotation without downtime, Skirk often trades her second Burst to instead use her Tap Skill and deal on-field damage. |
 Ganyu | Similar to Ayaka, Ganyu has the flexibility to swap in and out freely to deal damage while accommodating Skirk’s field-time requirements. Her Burst’s Cryo DMG Bonus also benefits both herself and Skirk. She can opt to either remain on-field to perform Charged Attacks and let Skirk Burst twice, or trade some field time for a similar rotation to the Wriothesley variant. |
  Ayato, Childe | Other on-field Hydro DPS options for Skirk’s quickswap teams. Though weaker than the above alternatives for Skirk, they still offer fun gameplay and the damage is solid compared to their own other teams. |
Example Teams
This is not a comprehensive list of teams. The inclusion or exclusion of any given team does not necessarily reflect its power level.
On-Field Teams

Sample Rotation (Shenhe, split rotation)
Escoffier (N2)¹ E > Furina ED N1 > Shenhe N2 tE > Furina Q > Escoffier Q N1 > Skirk hEQ > Shenhe Q N1 hE > Escoffier N3 E > Skirk tE combo
¹Add N2 second rotation onward if Escoffier’s Skill is on cooldown.
Sample Rotation (Shenhe, normal rotation)
Furina ED Q > Escoffier EQ > Shenhe hEQ > Skirk tE combo
Sample Rotation (Citlali, no TTDS)
Furina E N1 Q > Citlali N1 E > Escoffier EQ > Skirk tE combo
Sample Rotation (Citlali, TTDS)
Furina ED Q > Escoffier EQ > Citlali N1 E > Skirk tE combo

Sample Rotation (Dahlia)
Furina ED Q > Escoffier EQ > Dahlia E N1 Q > Skirk tE combo
Sample Rotation (Yelan)
Furina ED Q > Escoffier EQ > Yelan EQ N1 > Skirk tE combo

Sample Rotation (Mualani)
Furina ED Q > Escoffier EQ > Mualani E [apply Mark] N1¹ > Skirk tE combo> Mualani E N1 E N2
¹Bite quickly instead of waiting for three stacks
Sample Rotation (Xingqiu)
Furina ED Q > Escoffier EQ > Xingqiu EQ N1 > Skirk tE combo
Sample Rotation (Mona)
Furina ED Q > Escoffier EQ > Mona EQ > Skirk tE combo

Sample Rotation (Shenhe)
Shenhe (N1)¹ tE N1 > Yelan E N1 > Escoffier E > Skirk hEQ > Shenhe Q hE > Yelan Q N1 E N1 > Skirk tE combo
¹Second rotation onward if Shenhe’s Skill is on cooldown.
Sample Rotation (Xingqiu)
Escoffier E (N2)¹ > Xingqiu Q N1 E N1 > Yelan Q N2 E N1 > Skirk tE combo
¹Add N2 from second rotation onward to fill time for cooldowns.

Sample Rotation
Xingqiu Q N1 E N1 > Yelan N1 Q N1 E N1 > Citlali N1 E N1 > Skirk tE combo

Sample Rotation (Mika)
Furina ED Q > Yelan EQ N1 > Mika Q N1 E > Skirk tE combo
Sample Rotation (Charlotte)
Furina ED Q > Yelan EQ N1 > Charlotte hE N1 Q N1 > Skirk tE combo
Quickswap Teams

Sample Rotation
Neuvillette E > Furina ED > Escoffier Q¹ / N2 Q N2¹ > Skirk hEQ > Escoffier E N2 > Furina Q > Neuvillette C E C Q > Skirk hEQ > Neuvillette 2[C]
¹Do “N2 Q N2” second rotation onward to fill time for Skirk’s Burst cooldown.

Sample Rotation
Furina ED N1 > Escoffier (N3)¹ EQ > Skirk hE > Ayaka D N2C > Furina Q > Skirk Q > Ayaka ED N1 Q N2C > Escoffier N1 E > Ayaka D N2C N2CD N2C > Skirk hEQ > Ayaka D E N2C
¹Add N3 second rotation onward to fill time for Escoffier’s Skill cooldown.

Sample Rotation
Furina ED Q > Escoffier EQ > Skirk hEQ > Wriothesley E 4[N3CJ] > Skirk tE combo > Wriothesley N1CD Q
Credits
caramielle., sew, lesterberne, PJelJr, plumetra, lostguide
Team images made with the KQM portrait generator.
