
Updated for Version 7.1

Escoffier is a 5★ Cryo Polearm character in Genshin Impact who contributes off-field damage, Cryo and Hydro RES Shred, and healing. Learn about Escoffier’s best builds, best weapons, best artifacts, and best teams in this quick guide.
Note that the information given may change if new discoveries are made. More extensive testing is in progress.
Join our Discord to participate in the theorycrafting process.
Table of Contents
New Content
 Stellar-Conduct | Escoffier is a viable support in Stellar-Conduct teams with an on-field Cryo DPS. Her Cryo RES Shred, albeit lower without her full A4 Passive, still buffs the team’s Cryo Stellar-Conduct damage. Additionally, she provides good off-field damage and consistent Cryo application with her Skill and can hold 4pc TotM (or 4pc NO) to further buff her teammates’ ATK-scaling damage. Her Cryo application not only allows for better Cryo Resonance uptime, but also helps with Polestar Field stacks for Stellar-Conduct damage. If Stellar-Conduct supports are unavailable, Escoffier is a fine alternative for units like Sandrone, Wriothesley, or Cryo Traveler. |
 Stellar Swirl | Escoffier can apply consistent off-field Cryo application, enable Cryo Resonance, and provide healing in Stellar Swirl teams. Since Escoffier does not have much synergy with Stellar Swirl beyond this, her Stellar Swirl teams will not be covered in this quick guide. |
 Vodyanitsa | Vodyanitsa is a great addition to Escoffier’s Freeze teams. Escoffier synergizes extremely well with Vodyanitsa in teams with only Hydro and Cryo units. She is also a viable option in Stellar-Conduct and Stellar Swirl teams. They offer tons of utility together: good healing, high RES Shred, decent off-field damage (from Escoffier) and valuable Additive DMG Bonus (from Vodyanitsa). Vodyanitsa’s healing also enables Furina’s Fanfare, allowing Escoffier to Burst every other rotation or skip it entirely so that she can build more offensive stats. |
 Lohen | Lohen appreciates Escoffier’s buffs to his personal damage in teams where he is the primary DPS. While this is typically in Freeze teams, Escoffier is also a fine addition to a Melt team with Durin. |
 Durin | Durin can act as an off-field Pyro Melt DPS with his Dark form’s Burst. Escoffier’s Cryo application can enable Melts, but another Cryo applier like Lohen or Citlali makes Cryo application more consistent and enables Cryo Resonance. |
 Varka | Escoffier is a good teammate for Varka’s Double Cryo teams thanks to her decent damage, good healing, and 10% Cryo RES Shred. |
 4★ Frostbreath | Frostbreath is a Battle-Pass Polearm alternative to Favonius Lance if teammates require Energy. However, its passive’s Energy regeneration does not affect Escoffier as the wielder. Compared to Favonius Lance, Frostbreath has lower Base ATK and a higher ER secondary stat, but provides 20–40% ATK with its passive. These pros and cons balance out the difference between them. Ultimately, you should just stick with Favonius Lance if it is available. Other Battle Pass weapons are more impactful. |
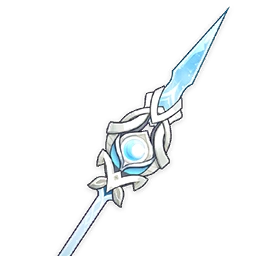 4★ Sacrificer’s Staff | Sacrificer’s Staff is a fantastic 4-star option for Escoffier if available. Its passive buffs her ATK and grants her ER. She can maintain max stacks indefinitely after the first 3 hits of her Elemental Skill. Its low CRIT Rate secondary stat also helps her avoid overcapping with Cryo Resonance and Mona’s C4. |
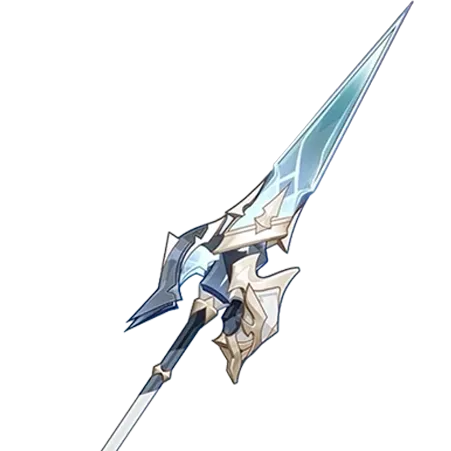 5★ Disaster and Remorse | Disaster and Remorse is a good 5-star stat stick for Escoffier thanks to its high Base ATK and solid CRIT Rate secondary stat. She only benefits from the passive’s Elemental Skill and Elemental Burst DMG% buff for 3s. This buff is great for her Burst damage immediately after using her Skill but mediocre for her Elemental Skill given its long uptime. Overall, this weapon performs on par with other 5-star Polearms with a CRIT Rate secondary stat. |
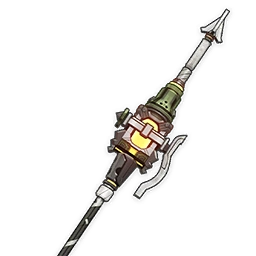 4★ Prospector’s Shovel | Prospector’s Shovel is Escoffier’s more recommended accessible weapon. It provides good ATK stats. Its passive is useless, so you only need to forge one copy. |
Infographic
Freeze
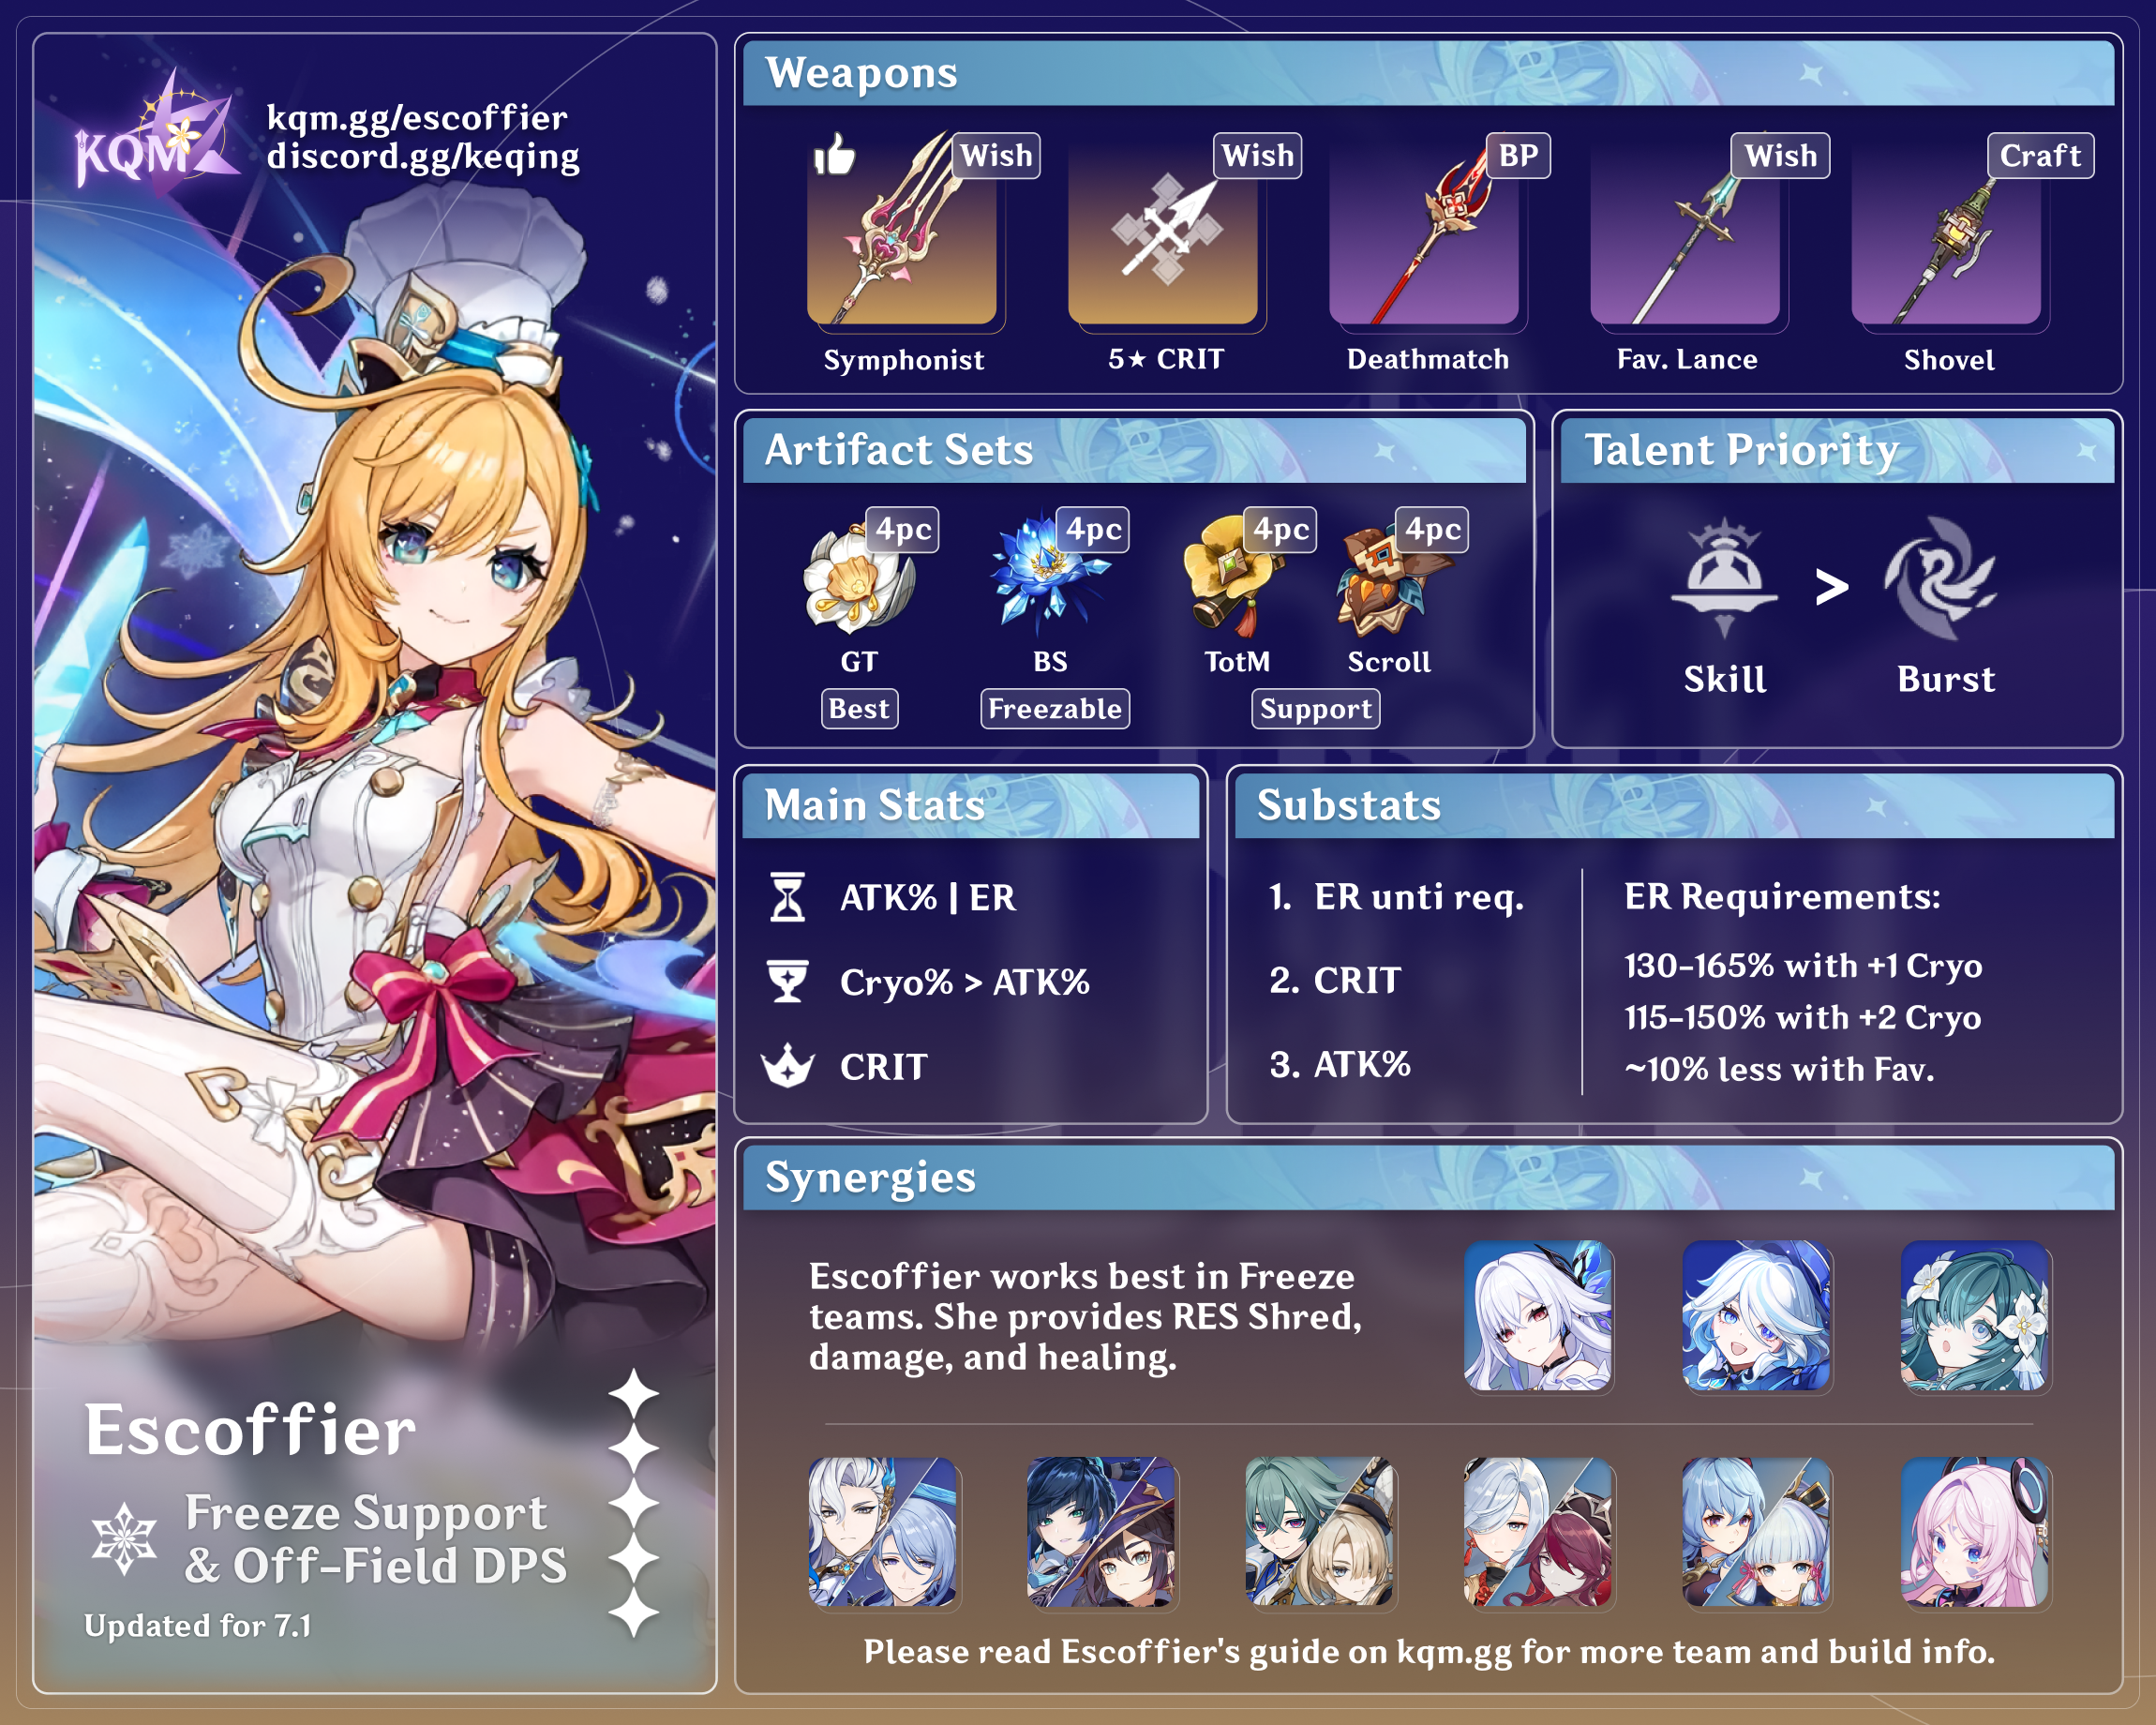
Credits to: kolvii, pjeljr, irokei, and KQM Staff
General Support
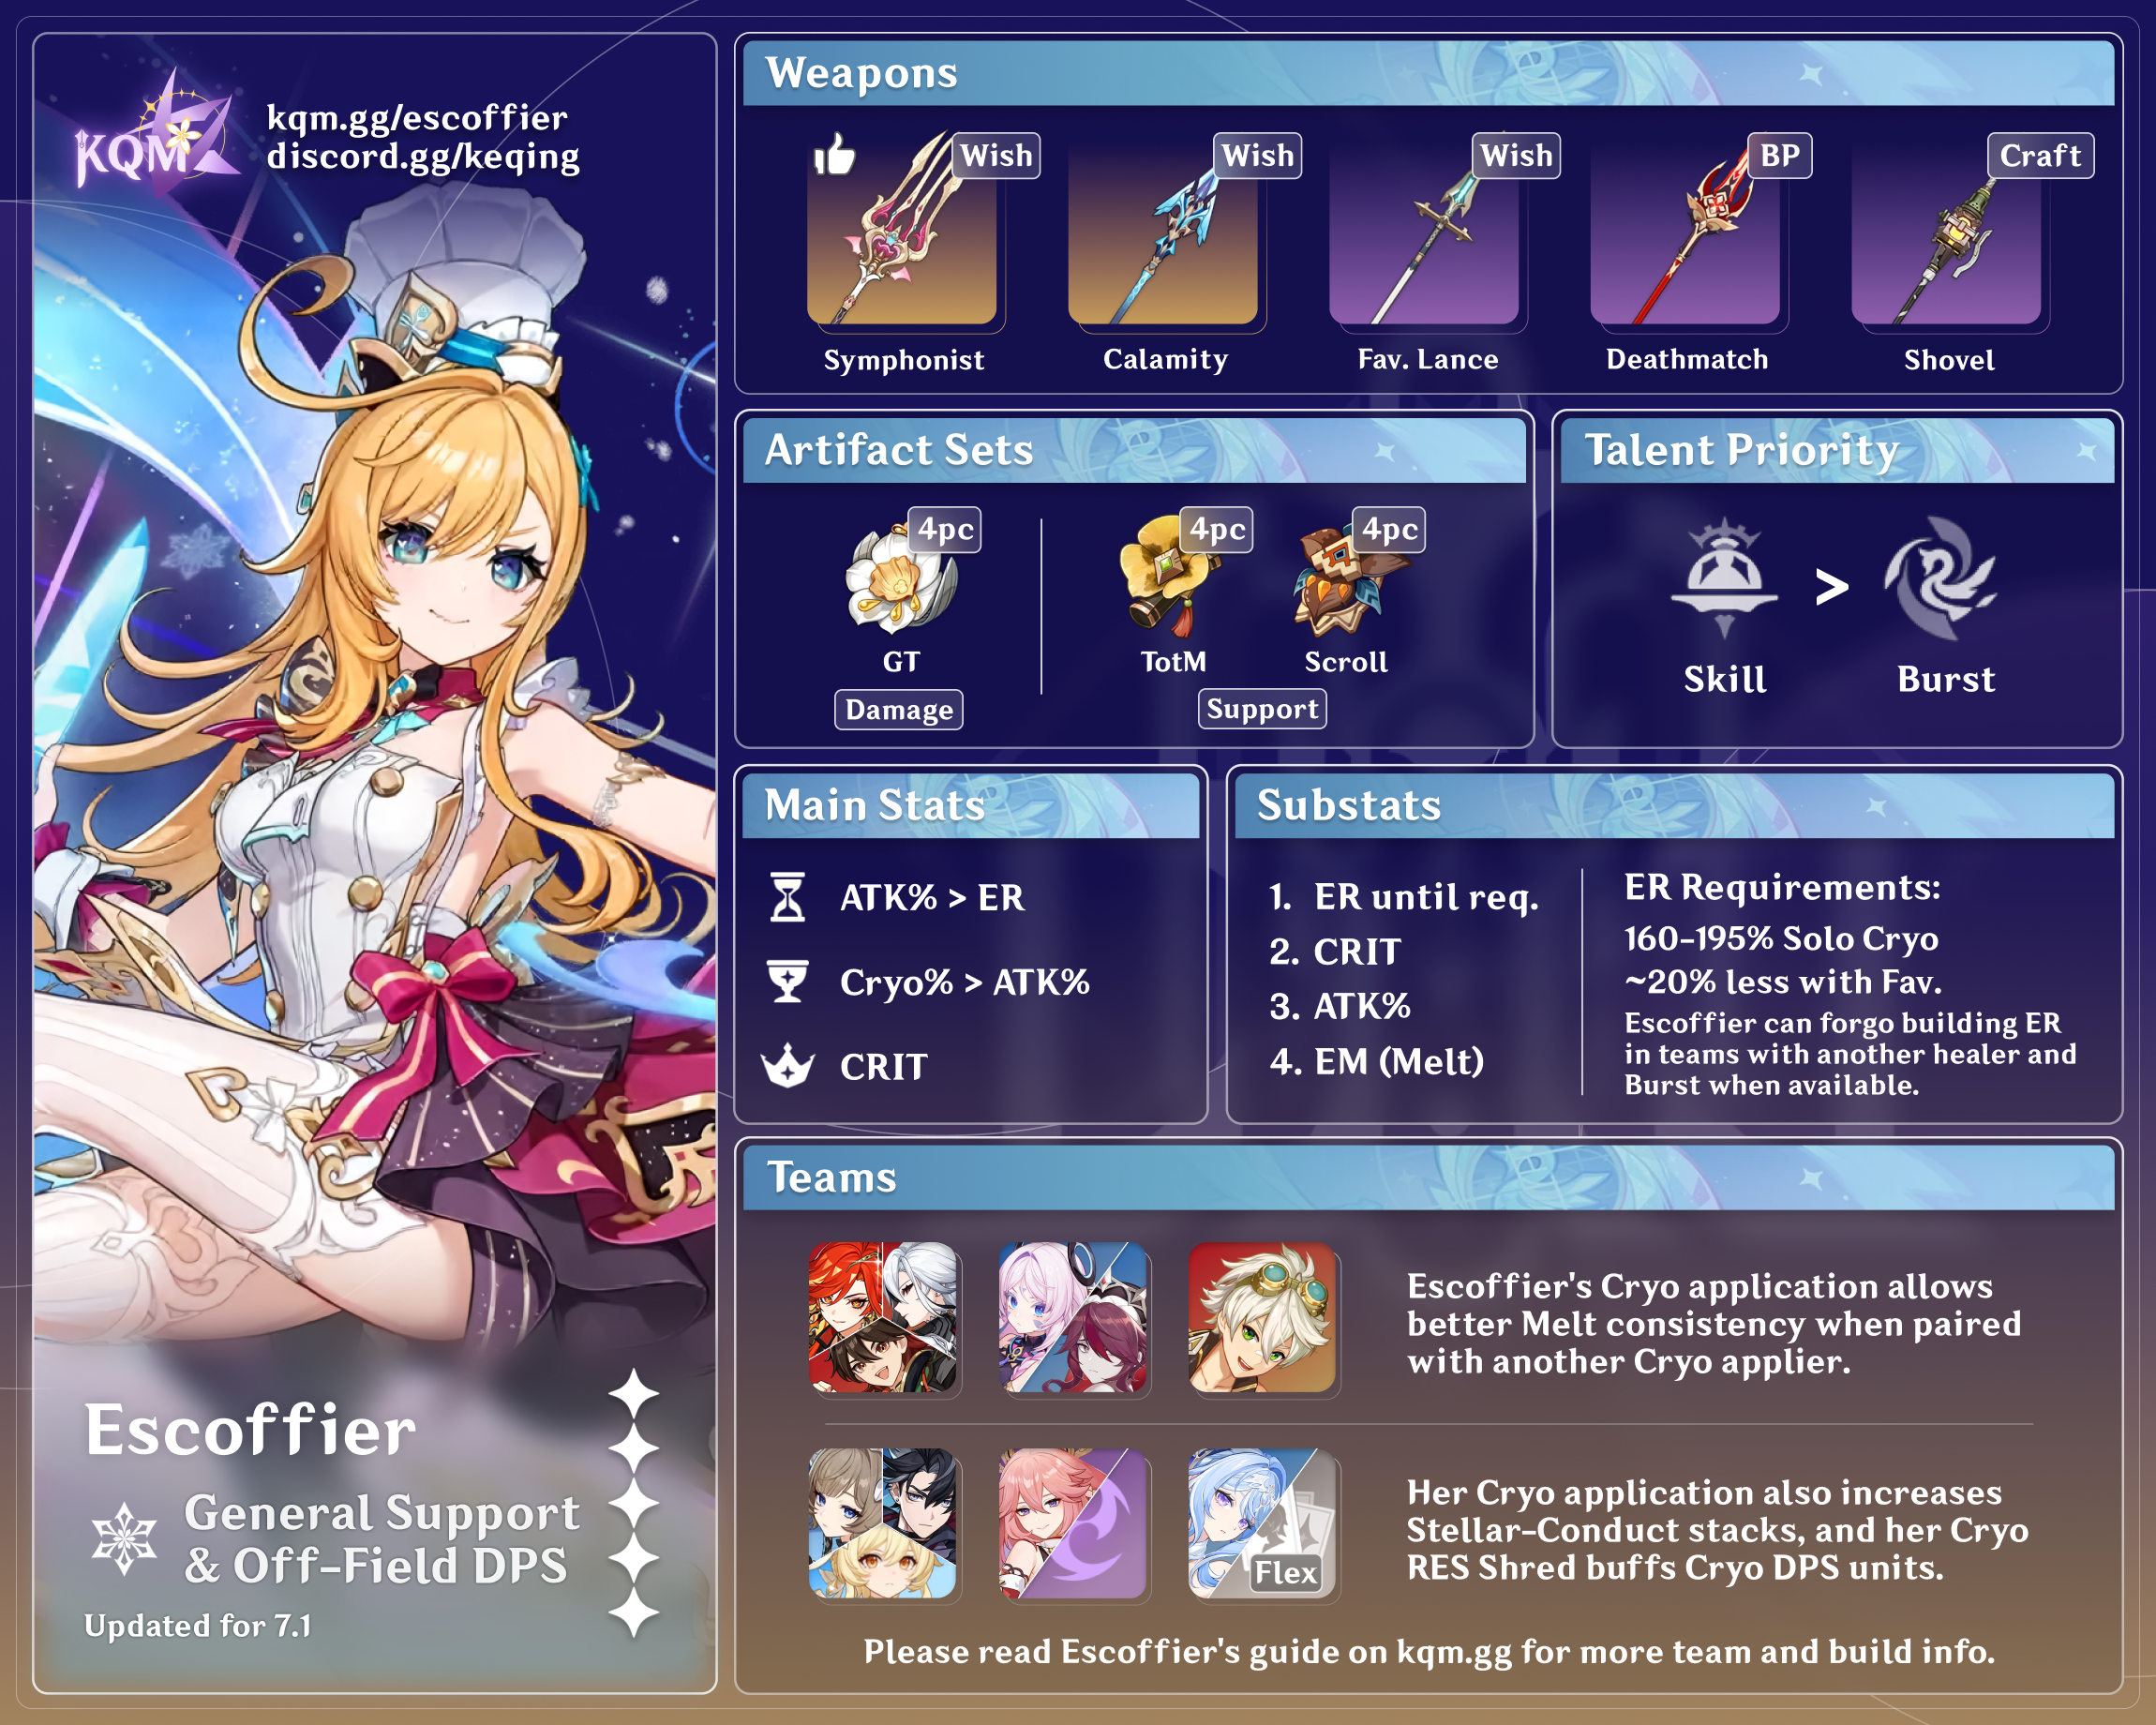
Credits to: kolvii, pjeljr, irokei, and KQM Staff
Character Overview
Pros
- Good personal damage and uptime on her Skill
- Buffs and damage that aren’t locked to enemies being Frozen
- Consolidation of RES Shred, off-field damage, and healing
- Her healing is nothing to Escoff at
Cons
- Primarily single-target damage
- Limits teambuilding to Cryo and Hydro teammates to fully use her RES Shred
- Lacks good free-to-play weapon options
Playstyles
Pure Cryo — Hydro Teams
Escoffier provides up to 55% Hydro and Cryo RES Shred in teams consisting of only those two Elements, with excellent uptime. Her Elemental Skill deals high single-target damage while her Elemental Burst heals all party members. Since her damage and debuffs don’t rely on enemies being Frozen, she can also be used against non-Freezable enemies without issue.
Melt
Escoffier’s off-field Cryo application can enable Melt reactions for other teammates, or let Escoffier Melt some of her damage. She doesn’t provide nearly as much Cryo RES Shred to these teams.
Stellar-Conduct
Escoffier is a viable support in Stellar-Conduct teams with an on-field Cryo DPS. Her Cryo RES Shred, albeit lower without her full A4 Passive, still buffs the team’s Cryo Stellar-Conduct damage. Additionally, she provides good off-field damage and consistent Cryo application with her Skill and can hold 4pc TotM (or 4pc NO) to further buff her teammates’ ATK-scaling damage.
Her Cryo application not only allows for better Cryo Resonance uptime, but also helps with Polestar Field stacks for Stellar-Conduct damage.
Talents
Talent Priority
Skill > Burst
The vast majority of Escoffier’s damage comes from her Skill, so it should be prioritized. Leveling Escoffier’s Burst is important too, as it improves her healing even though its damage share is much smaller.
Talent Overview
 Normal Attack | Kitchen Skills
Talent Description
Normal Attack
Performs up to 3 consecutive spear strikes.
Charged Attack
Consumes a certain amount of Stamina to perform an upward thrust.
Plunging Attack
Plunges from mid-air to strike the ground below, damaging opponents along the path and dealing AoE DMG upon impact.
Escoffier uses her tail to dexterously attack enemies in a 3-hit combo. Though nice to look at, she will rarely use her Normal Attacks in combat.
 Elemental Skill | Low-Temperature Cooking
Talent Description
Tap
Activates her All-Spectrum Multi-Use Cooking Mek in its Cold Storage mode and deals AoE Cryo DMG to nearby opponents.
Cooking Mek: Cold Storage Mode
Follows the current active character and fires Frosty Parfaits at nearby opponents at intervals, dealing Cryo DMG.
Arkhe: Ousia
At intervals, Escoffier will summon a Surging Blade when activating her Cooking Mek in Cold Storage mode, dealing Ousia-aligned AoE Cryo DMG.
Hold
Activates her All-Spectrum Multi-Use Cooking Mek’s Off-the-Cuff Cookery Mode.
Off-the-Cuff Cookery Mode
Cooking Mek: Off-the-Cuff Cookery Mode
· Places the Cooking Mek on the field. The Cooking Mek can absorb elemental attacks. When the absorbed elemental energy hits a certain limit, Escoffier can convert the ingredients placed within it into wonderful food.
· Escoffier needs time to purchase new ingredients, so she can only make a certain number of dishes like this each week. The number of dishes Escoffier can make resets every Monday at 4:00 AM.
Escoffier’s Skill is her main source of damage. Her Tap Skill summons a Cooking Mek, which deals high single-target damage and will constantly apply her A4 debuff onto enemies she hits. The Cooking Mek will also follow the active character.
When using Escoffier’s Tap Skill, she will also proc an Ousia-aligned Arkhe hit, which can temporarily paralyze or break the shields of Pneuma-aligned Fontaine enemies. Escoffier generates 4 Cryo Particles when her Tap Skill hits an opponent.
The Hold version of Escoffier’s Elemental Skill has no in-combat application. Instead, it deploys the Cooking Mek to make a limited amount of unique dishes, with the dish limit resetting at the weekly reset.
 Elemental Burst | Scoring Cuts
Talent Description
Displaying her exceptional knife skills, Escoffier deals AoE Cryo DMG and restores HP to all nearby party members based on her ATK.
Escoffier’s Elemental Burst deals one instance of AoE Cryo damage and heals all party members based on Escoffier’s ATK stat. It also activates her A1 Passive’s healing over time.
 Ascension 1 Passive | Better to Salivate Than Medicate
Talent Description
After using the Elemental Burst Scoring Cuts, Escoffier will obtain the Rehab Diet effect for 9s: Restores HP for nearby active characters every 1s based on 138.24% of Escoffier’s ATK.
After Escoffier uses her Elemental Burst, she will provide one instance of healing to the active character every second for 9s.
 Ascension 4 Passive | Inspiration-Immersed Seasoning
Talent Description
When there are 1/2/3/4 Hydro or Cryo characters in the party, Escoffier will decrease the Hydro RES and Cryo RES of any opponents hit by her Elemental Skill, Low-Temperature Cooking, or her Elemental Burst, Scoring Cuts, by 5%/10%/15%/55% for 12s.
Escoffier’s most impactful Talent for both teambuilding and personal damage. Upon hitting enemies with her Skill or Burst, Escoffier will decrease the enemy’s Hydro and Cryo RES for 12s. The RES Shred scales with the number of Hydro and Cryo characters on the team: 1 / 2 / 3 / 4 Hydro or Cryo teammates reduce an enemy’s RES by 5% / 10% / 15% / 55%. While Escoffier’s RES Shred activates regardless of what Elements her teammates are (unlike Chevreuse, for example), the massive jump from 15% RES Shred to 55% RES Shred heavily incentivizes running only Hydro and Cryo teammates. It is worth noting that replacing one teammate with a 4pc VV Anemo holder results in an equal amount of effective RES Shred. With Xilonen, the effective RES Shred is only slightly lower.
Although Escoffier’s Skill only has a small AoE, the Hydro and Cryo RES Shred lasts for 12s, and her Skill attacks every second for a total of 20s. This helps mitigate any issues she might encounter with applying her debuff in multi-target scenarios. Additionally, the RES Shred is applied on Burst hit, so Escoffier can, if necessary, ensure her RES Shred is applied to a specific enemy before the team’s main damage window begins. Her Elemental Skill’s long uptime also allows her to continuously trigger the RES Shred across multiple waves of enemies.
Constellations
Escoffier is perfectly functional at C0. Her C1 is a good stopping point for vertical investment in general as her later Constellations are lackluster for their Primogem investment. Additional Constellations on her teammates, especially the team’s main DPS, should result in higher DPS increases.
 Constellation 1 | Pre-Dinner Dance for Your Taste Buds
Constellation Description
When 4 party members are Hydro or Cryo, all nearby party members will have their Cryo DMG CRIT DMG increased by 60% for 15s after Escoffier uses her Elemental Skill Low-Temperature Cooking or Elemental Burst Scoring Cuts.
You must first unlock the Passive Talent “Inspiration-Immersed Seasoning.”
Escoffier’s Constellation 1 offers a teamwide Cryo CRIT DMG buff in teams that are composed of only Hydro and Cryo characters. A simple yet powerful teamwide increase to her teams that are focused around the Cryo characters, as long as they fulfill its trigger condition.
 Constellation 2 | Fresh, Fragrant Stew Is an Art
Constellation Description
When Escoffier activates her Cooking Mek in its Cold Storage Mode, she will gain the “Freshly-Prepped Delicacy” effect for 15s. During this time, Escoffier will gain 5 Cold Dish stacks. When nearby active characters apart from Escoffier deal Cryo DMG with a Normal, Charged, or Plunging Attack, or an Elemental Skill or Elemental Burst, they will expend 1 Cold Dish stack to increase their DMG dealt by 240% of Escoffier’s ATK.
If you hit multiple opponents with a single instance of Cryo DMG, Cold Dish stacks will be consumed based on the number of opponents hit.
Cold Storage Mode
Tap
Activates her All-Spectrum Multi-Use Cooking Mek in its Cold Storage mode and deals AoE Cryo DMG to nearby opponents.
Cooking Mek: Cold Storage Mode
Follows the current active character and fires Frosty Parfaits at nearby opponents at intervals, dealing Cryo DMG.
This Constellation gives 5 Cold Dish stacks, which are an Additive DMG Bonus to Cryo damage (similar to Shenhe’s Icy Quill), and scales with Escoffier’s ATK. Note that Cold Dish stacks are shared by the team, so Escoffier should go on-field right before the team’s Cryo DPS’s field time. Escoffier herself doesn’t benefit from this Constellation.
 Constellation 3 | The Bakery Magic of Caramel Browning
Constellation Description
Increases the Level of Low-Temperature Cooking by 3.
Maximum upgrade level is 15.
A straightforward increase to Escoffier’s Skill Talent level. Given how her Skill is her main source of damage, this Constellation is very impactful for her personal damage.
 Constellation 4 | Secret Rosemary Recipe
Constellation Description
Rehab Diet lasts 6 more seconds. While it is active, you have a chance of healing 100% extra HP and restoring 2 Energy to Escoffier when you trigger healing through Rehab Diet. This chance corresponds to Escoffier’s CRIT Rate. You can trigger this effect 7 times during any one Rehab Diet’s duration.
You must first unlock the Passive Talent “Better to Salivate Than Medicate.”
This Constellation increases Escoffier’s A1 healing duration and the average healing per instance. It also restores a small amount of Energy per proc, with the proc chance following her CRIT Rate. Given how Escoffier naturally wants CRIT Rate for her personal damage, you should reliably get the maximum of 7 procs for an extra 14 Energy per rotation.
Overall, a solid improvement to her already plentiful healing, while also giving her Flat Energy which reduces her ER requirements. This Constellation’s value is dependent on the team, with it gaining value when Escoffier’s ER requirements are high.
 Constellation 5 | Symphony of a Thousand Sauces
Constellation Description
Increases the Level of Scoring Cuts by 3.
Maximum upgrade level is 15.
A straightforward increase to Escoffier’s Burst Talent level. Since her Burst is a minor part of her personal damage and her healing is already high, this Constellation is pretty lackluster.
 Constellation 6 | Tea Parties Bursting With Color
Constellation Description
Cooking Mek: Cold Storage Mode is enhanced:
· When your party’s active character’s Normal, Charged, or Plunging Attacks hit opponents, Cooking Mek: Cold Storage Mode will fire off another Special-Grade Frosty Parfait, dealing 500% of Escoffier’s ATK as AoE Cryo DMG. This DMG is considered Elemental Skill DMG.
This effect can be triggered once every 0.5s, and this effect can be triggered 6 times within the duration of one Cooking Mek: Cold Storage Mode.
Cold Storage Mode
Tap
Activates her All-Spectrum Multi-Use Cooking Mek in its Cold Storage mode and deals AoE Cryo DMG to nearby opponents.
Cooking Mek: Cold Storage Mode
Follows the current active character and fires Frosty Parfaits at nearby opponents at intervals, dealing Cryo DMG.
Escoffier’s strongest Constellation for personal damage, as it adds 6 powerful instances of AoE Cryo Skill damage per rotation that require your active character to perform Normal / Charged / Plunging Attacks.
Combos
Combo Notation
- N = Normal Attack
- C = Charged Attack
- A = Aimed Shot
- P = Plunging Attack
- hP = High Plunge
- lP = Low Plunge
- E = Elemental Skill
- tE = Tap Skill
- hE = Hold Skill
- Q = Elemental Burst
- D = dash (cancel)
- J = jump (cancel)
- W = walk (cancel)
- > = switch character
- ( ) = these actions are optional; please refer to the notes below
- [ ] = repeat these actions the specified number of times
| EQ | Escoffier’s default combo. She catches her own Skill particles to battery her Burst. |
| Q E | Escoffier can use her Skill after her Burst to battery a teammate. While this reduces her Burst’s damage on the first rotation, as she will not shred the opponent’s Cryo RES, her Burst only makes up a small portion of her total DPS output and still benefits from RES Shred in subsequent rotations. |
Artifacts
ER Requirements
Calcs for ER requirements can be found here (last updated for Version 5.6).
The following table already assumes a reasonable amount of Favonius procs when it is desirable for the team. Additional Favonius procs lower Escoffier’s ER requirements by 10–30%. Escoffier’s C4 is assumed to provide 14 Flat Energy to herself.
In Solo Cryo teams, Escoffier should be equipped with Favonius Lance or Burst every other rotation.
| C0 | C4 | |
| Triple Cryo | 120–150% | 100–115% |
| Double Cryo | 130–165% | 100–125% |
| Skirk Triple Cryo | 155-175% | 120-135% |
| Skirk Double Cryo | 185-200% | 145-150% |
| Solo Cryo | 160–195% | 125–150% |
Use the Energy Recharge Calculator to determine exact requirements for your team and rotation. For more details on how Favonius weapons will affect your team, please use Ac1d’s Favonius Mastersheet.
Artifact Stats
 Sands |  Goblet |  Circlet |
| ATK% / Energy Recharge | Cryo DMG Bonus ≥ ATK% | CRIT Rate / CRIT DMG |
Stat Priority: ER (until requirements) > CRIT > ATK%
Escoffier can forgo her Burst if her healing is not needed and instead focus on building for damage.
Escoffier can utilize either a Cryo DMG% or an ATK% Goblet. A Cryo Goblet performs slightly better overall, but with plentiful external sources of DMG% (e.g., from 4pc Golden Troupe and Furina) an ATK% Goblet can perform fine. An ATK% Goblet also provides additional healing, but this isn’t a high priority. When paired with Shenhe, a Cryo Goblet becomes better.
Artifact Sets
 4pc Support Sets | • 4pc Tenacity of the Millelith (TotM) • 4pc Scroll of the Hero of Cinder City (Scroll) • 4pc Noblesse Oblige (NO) These 4pc sets focus on buffing the team’s damage at the price of Escoffier’s own. As such, they are mainly used when Escoffier’s personal damage is a minor part of the team’s damage. This usually happens when her ER requirements are incredibly high, she doesn’t have access to many buffs, or her teammates deal a disproportionately high amount of damage (often the case with Skirk). Escoffier can maintain excellent uptime on 4pc TotM, and she can give 12% DMG Bonus to the Elements she reacts with using 4pc Scroll. Escoffier usually holds 4pc NO when other teammates already use the aforementioned 4pc sets. |
 4pc Golden Troupe | 4pc Golden Troupe is Escoffier’s default set for personal damage. However, it is rarely the optimal option in terms of team DPS because 4pc support sets usually perform better overall. |
 4pc Blizzard Strayer | Blizzard Strayer can situationally perform slightly better than 4pc Golden Troupe when facing Freezable opponents. Against enemies that cannot be Frozen, however, it loses out on 20% CRIT Rate and thus performs significantly worse, making it overall less consistent than 4pc Golden Troupe. Escoffier both ascends with CRIT Rate and often has access to extra CRIT Rate from Cryo Resonance or a CRIT Rate weapon, so this set’s CRIT Rate buff can be difficult to build around. |
 2pc Mixed Sets | 2pc Set Bonuses: Cryo DMG Bonus, Skill DMG Bonus, ATK%, Energy Recharge Alternative budget options that should only be used while farming for a dedicated 4pc set. |
Weapons
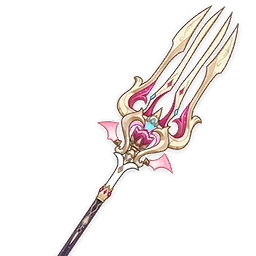 5★ Symphonist of Scents | Escoffier’s Best-in-Slot weapon by a significant margin. Symphonist provides both plenty of CRIT for her and an ATK% buff for herself and the active character whenever she heals. This requires Escoffier to use her Elemental Burst. This weapon’s 3s ATK% buff is maintained by Escoffier’s A1 Passive, which periodically heals the active character, and has particularly great synergy with characters whose attacks snapshot, such as Ganyu or Ayaka. |
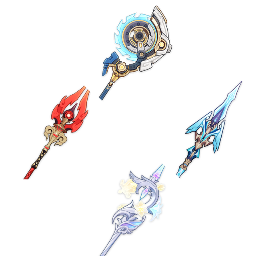 5★ Fractured Halo, Calamity Queller, Staff of Homa, Lumidouce Elegy | Great 5-star Polearms that perform above the rest thanks to their secondary stats and useful passives. Calamity Queller is a slightly stronger option when there’s a lack of ATK% or ATK-related buffs like Shenhe’s Icy Quill. Fractured Halo and Staff of Homa perform marginally better with Shenhe on the team. |
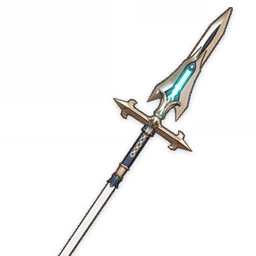 4★ Favonius Lance | Favonius Lance is an underwhelming option for Escoffier’s personal damage, but it can be used in teams where the Energy from its passive is needed, in particular with teammates who have limited particle generation. If Escoffier’s ER requirements are high, it also helps her meet her ER requirements more easily. |
4★ Frostbreath | Frostbreath is a Battle-Pass Polearm alternative to Favonius Lance if teammates require Energy. However, its passive’s Energy regeneration does not affect Escoffier as the wielder. Compared to Favonius Lance, Frostbreath has lower Base ATK and a higher ER secondary stat, but provides 20–40% ATK with its passive. These pros and cons balance out the difference between them. Ultimately, you should just stick with Favonius Lance if it is available. Other Battle Pass weapons are more impactful. |
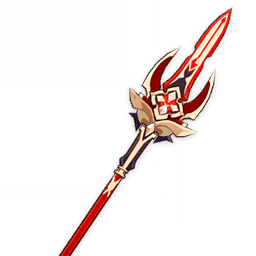 4★ Deathmatch | Escoffier’s best 4-star weapon. At high refinements in single-target scenarios, it outperforms some 5-star Polearms. Its high CRIT Rate secondary stat can make it hard to build around. |
4★ Sacrificer’s Staff | Sacrificer’s Staff is a 4-star fantastic option for Escoffier if available, performing slightly worse than Deathmatch at equal refinements. Its passive buffs her ATK and grants her ER. She can maintain max stacks indefinitely after the first 3 hits of her Elemental Skill. Its low CRIT Rate secondary stat also helps her avoid overcapping with Cryo Resonance and Mona’s C4. |
 5★ CRIT Rate Polearms | Primordial Jade Winged-Spear, Crimson Moon’s Semblance, Staff of the Scarlet Sands, Disaster and Remorse Other 5-star Polearms that are overall decent options due to their base stats. Their CRIT Rate secondary stat can make it hard to build around Escoffier’s CRIT Rate Ascension Stat and Cryo Resonance. |
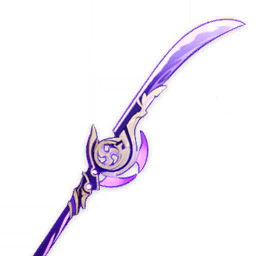 5★ Engulfing Lightning | Engulfing Lightning’s performance heavily depends on Escoffier’s ER requirements. It is on par with her best 5-star options at high ER requirements but performs only similarly to her 4-star options at low ER requirements. Its massive ER stat lets her easily meet her ER needs. |
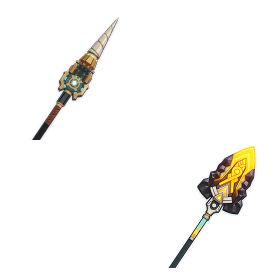 4★ Prospector’s Drill, Mountain-Bracing Bolt | These limited banner 4-star weapons are decent options at high refinements; however, getting refinements on them can be challenging since they are only available through the weapon banner. With Prospector’s Drill, Escoffier should use her Burst before her Skill on the first rotation in order to activate its passive. This, however, will make you need slightly more Energy, as Escoffier won’t be catching her own particles. Note that the passive lasts for 10s, which will not cover all of Escoffier’s damage. The ER secondary stat of Mountain Bracing Bolt can make it more powerful in teams where Escoffier’s ER requirements are higher. |
4★ Prospector’s Shovel | Prospector’s Shovel is Escoffier’s more recommended accessible weapon. It provides good ATK stats. Its passive is useless, so you only need to forge one copy. It performs on par with Blackcliff Pole, so you do not need to forge it if you already have Blackcliff. |
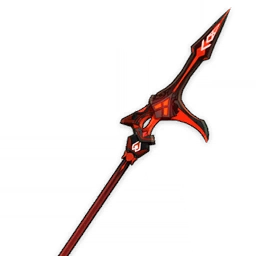 4★ Blackcliff Pole | Blackcliff Pole is one of Escoffier’s best accessible weapons, although by a small margin even when you don’t account for its passive. Unless this weapon is already owned or the other alternatives are inaccessible, it’s not recommended to purchase this weapon. |
 5★ Skyward Spine | Skyward Spine is only recommended if Escoffier faces high ER requirements. In such scenarios, its high ER secondary stat and Base ATK allow it to perform on par with other 5-star stat sticks. Avoid using Skyward Spine at low ER requirements or when Escoffier can forgo using her Burst. |
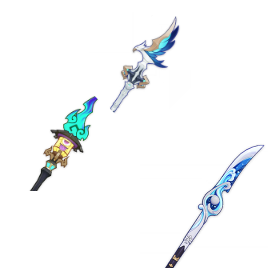 4★ Missive Windspear, Tamayuratei no Ohanashi, Wavebreaker’s Fin | Missive Windspear and Tamayuratei no Ohanashi are event 4-star weapons. Missive performs slightly better on average due to Tamayuratei’s limited 10s uptime. However, Tamayuratei’s ER secondary stat helps Escoffier reach her ER requirements easier. Wavebreaker’s Fin performs similarly due to its high Base ATK. |
Teams
Rotation Notation
- N = Normal Attack
- C = Charged Attack
- A = Aimed Shot
- P = Plunging Attack
- E = Elemental Skill
- tE = Tap Skill
- hE = Hold Skill
- Q = Elemental Burst
- D = dash (cancel)
- J = jump (cancel)
- W = walk (cancel)
- > = switch character
- ( ) = these actions are optional; please refer to the notes below
- [ ] = repeat these actions the specified number of times
Freeze / Mono Cryo

Escoffier’s main niche; her Freeze teams pair her with exclusively Cryo and Hydro teammates to maximize her A4 Passive’s debuff. She covers the team’s sustain role through the party-wide healing from her Elemental Burst, which can be beneficial against opponents that can’t be Frozen or to stack Fanfare in teams with Furina.
Most of Escoffier’s teams will pair her with a second Cryo character to take advantage of Cryo Resonance’s CRIT Rate buff and to lower her ER requirements, but she can also run as the only Cryo unit — at the price of high ER requirements.
Escoffier can also run in a pure Mono Cryo team, but there is currently a lack of good Cryo off-field damage dealers or buffers to fill the last teammate slot. As such, forcing a team of four Cryo characters is rarely worth it over simply running a Freeze team.
Notable Teammates
Cryo On-Fielders
 Skirk | Skirk’s optimal teams require only Cryo or Hydro teammates due to her A1 Passive, which aligns nicely with Escoffier’s A4 Passive. Escoffier provides healing, Cryo and Hydro RES Shred, and decent personal damage, all of which make her an overall excellent teammate for Skirk. To gain Serpent Subtlety points, Skirk’s teammates must trigger Cryo reactions except Melt, making Hydro teammates a requirement. The majority of Escoffier’s damage comes from her Skill, which makes Skirk’s Utility Passive (+1 Skill Talent Level) a solid buff. |
 Ayaka | Escoffier can take the place of Anemo supports in Ayaka’s teams to provide Cryo RES Shred. Escoffier also deals high off-field damage, can stack Fanfare in Furina teams through her healing, and enables Ayaka to fully activate Finale of the Deep’s condition, which is Ayaka’s strongest 4-star weapon. |
Lohen | Lohen appreciates Escoffier’s buffs to his personal damage in Freeze teams where he is the primary DPS. Mona is an ideal teammate if available. |
 Ganyu | Escoffier’s buffs and personal damage make Ganyu’s Freeze teams powerful in single-target scenarios. Venti and Kazuha can still be used for grouping if necessary since 4pc VV compensates for Escoffier’s lower RES Shred. |
 Wriothesley | Escoffier’s high uptime on her RES Shred and personal damage has great synergy with Wriothesley’s extensive field time. While Escoffier’s healing sustains his enhanced Normal Attacks’ HP drain, it will result in Wriothesley getting fewer enhanced Charged Attacks since his HP will remain high. Nonetheless she is an excellent teammate for him. |
 Eula | While Eula’s damage is mainly Physical, Escoffier can benefit from Eula’s own Cryo RES Shred to amplify her damage. She also provides healing to stack Fanfare in Eula’s teams with Furina. In order to further reduce Eula’s ER requirements, a third Cryo option like Rosaria, Shenhe, or Mika is strongly recommended. |
 Freminet | Freminet has two distinct playstyles: as an on-field Cryo or Physical DPS. He fulfills Escoffier’s A4 condition while dealing damage and driving teammates’ skills. |
Cryo Off-Fielders
 Shenhe | Shenhe is an off-field support that provides multiple buffs to Cryo (and Physical) teammates, including her Icy Quill effect and, through her Elemental Burst, Cryo and Physical RES Shred and Cryo DMG%. In Escoffier’s teams, Shenhe will usually use her Tap Skill twice per rotation, which results in Escoffier and the rest of her Cryo teammates getting 10 instances of their damage buffed by her Icy Quill. |
 Citlali | As a Natlan character, Citlali is capable of triggering the full effect of 4pc Scroll to buff both Cryo and Hydro units with a 40% DMG Bonus. Additionally, as a Catalyst user, she can hold TTDS or Favonius Codex to further support the team. While Citlali cannot shred Cryo, Escoffier already covers Cryo RES Shred, and the additional 20% Hydro Shred Citlali provides is helpful to teammates like Neuvillette, Furina, or Ayato. |
Other Cryo characters can provide off-field damage, defensive utility and lower ER requirements.



Hydro On-Fielders
 Neuvillette | While Neuvillette traditionally prefers to run different Elemental types, Escoffier strongly incentivizes him to exclusively run Cryo and Hydro teammates, consequently only getting one stack of his A1 Passive. However, Escoffier’s RES Shred and high single-target damage compensate for this damage loss, making her a powerful teammate for him. |
 Ayato | Ayato is an on-field Hydro DPS who can perform well in multi-target scenarios thanks to his AoE horizontal slashes. Escoffier’s high uptime on her buffs and damage are welcome in his teams, as his rotations can be long and her healing is helpful to stack Fanfare with Furina. |
 Kokomi | Kokomi can be played as an off-field source of AoE Hydro application and healing, or she can take the field to deal damage and drive other teammates’ abilities like Yelan or Xingqiu through her Normal Attacks. Since she provides plenty of healing, she can let Escoffier forgo her Burst if her ER requirements are high. |
Hydro Off-Fielders
 Furina | Since Escoffier is a healer, she naturally synergizes extremely well with Furina, who actively needs a source of healing to stack Fanfare and offset her HP drain. Furina also benefits from Escoffier’s Hydro RES Shred for her personal damage, and Escoffier in turn benefits from Furina’s DMG Bonus. |
Vodyanitsa | Vodyanitsa is a great addition to Escoffier’s Freeze teams. Escoffier synergizes extremely well with Vodyanitsa in teams with only Hydro and Cryo units. They offer tons of utility together: good healing, high RES Shred, decent off-field damage (from Escoffier) and valuable Additive DMG Bonus (from Vodyanitsa). Vodyanitsa’s healing also enables Furina’s Fanfare, allowing Escoffier to Burst every other rotation or skip it entirely so that she can build more offensive stats. |
 Mona | Mona is a great buffer in many Freeze teams thanks to her Omen debuff and additional buffs from her C4. Her Omen duration can be extended against enemies that can be Frozen or if another Hexerei character is present. |






Example Teams
This is not a comprehensive list of teams. The inclusion or exclusion of any given team does not necessarily reflect its power level.

Skirk acts as a powerful on-field Cryo damage dealer and has great synergy with Escoffier and Furina. Vodyanitsa is the ideal last slot for her great buffs; she should hold 4pc TotM and TTDS. Shenhe provides buffs, while Yelan provides a ramping DMG% bonus and personal damage.
Skirk can either run her regular rotation or use a split rotation that uses her Burst every rotation in the team with Shenhe.
Sample Rotation (Vodyanitsa)
Furina ED Q > Escoffier E(Q)¹ > Vodyanitsa E (Q)¹ > Skirk combo
¹Alternate between the two Bursts each rotation.
Sample Rotation (Shenhe, Normal Rotation)
Furina ED Q > Escoffier EQ > Shenhe hEQ > Skirk tE combo
Sample Rotation (Shenhe, Split Rotation)
Escoffier (N2D)1 E > Furina ED N1 > Shenhe tE > Furina Q > Escoffier Q N1 > Skirk hE Q > Shenhe Q hE > Escoffier N3 E > Skirk tE combo
1Add N2D second rotation onward if Escoffier’s Skill is on cooldown.
Sample Rotation (Yelan)
Furina ED Q > Escoffier EQ > Yelan EQ N1 >Skirk tE combo

Escoffier lowers Ayaka’s ER requirements while providing damage of her own, buffs, and healing to stack Fanfare. Shenhe provides further buffs to increase Ayaka and Escoffier’s damage, while Rosaria provides a CRIT Rate buff and damage. Both also provide Cryo Particles to help Ayaka and Escoffier’s ER requirements.
Thanks to Furina, Ayaka can use 4pc Marechaussee Hunter instead of 4pc Blizzard Strayer.
Sample Rotation (Shenhe)
Furina ED Q > Escoffier EQ > Shenhe Q tE > Ayaka ED (N1)1 Q N1CD 2[N2C] > Shenhe N2 tE > Ayaka ED N1C
1If Ayaka is using Mistsplitter Reforged.
Sample Rotation (Rosaria)
Furina ED Q > Escoffier EQ > Rosaria Q E > Ayaka ED (N1)1 Q N1CD 2[N2C] > Rosaria E > Ayaka ED N1C
1If Ayaka is using Mistsplitter Reforged.

This is one of Lohen’s preferred Freeze teams. Escoffier should hold 4pc Noblesse or 4pc Scroll while Furina should hold 4pc TotM. Vodyanitsa should hold 4pc TotM and an HP% Catalyst like Prototype Amber or Ash-Graven Drinking Horn; her healing allows Escoffier to not Burst every rotation. Mona should hold 4pc Celestial Gift and TTDS if she can reach her ER requirements.
Sample Rotation (Furina)
Furina ED N1 Q > Escoffier EQ > Mona EQ N1 > Lohen combo
Sample Rotation (Vodyanitsa)
Vodyanitsa E > Escoffier E (Q)¹ > Mona EQ N1 > Lohen combo
¹Escoffier can use her Burst every other rotation or when available.

Citlali provides 4pc Scroll and a shield that Neuvillette greatly appreciates, while Shenhe offers her Icy Quill to Escoffier, a Charged Attack buff to Neuvillette, and a Skill DMG buff to both Furina and Escoffier (albeit late in the rotation).
Sample Rotation (Citlali)
Neuvillette E > Furina ED > Citlali E N1 > Escoffier EQ > Furina Q > Neuvillette C Q E C > Citlali N21 > Neuvillette 2[C]
1To trigger Favonius Codex.
Sample Rotation (Shenhe)
Neuvillette E > Furina ED > Shenhe hEQ > Escoffier EQ > Furina Q > Neuvillette C E C Q > Shenhe tE N2 > Neuvillette 2[C]

Ayato or Kokomi can act as an on-field DPS and driver for Yelan. With Ayato, Escoffier needs to Burst every rotation for Fanfare, resulting in high ER requirements as she’s the only Cryo character. With Kokomi, Escoffier forgoes ER to build purely offensive stats as she’s not required to Burst every rotation when Kokomi already provides enough healing.
Sample Rotation (Ayato)
Furina ED Q > Escoffier EQ > Yelan Q N1 E N1 > Ayato E N15 Q N1 > Escoffier N2 > Yelan N1 E N1 > Ayato E N15
Sample Rotation (Kokomi)
Furina ED > Kokomi E > Furina Q > Escoffier (Q)1 E > Yelan Q N1 E N1 > Kokomi N1 Q 5[N3D] > Yelan E N2
1Use Escoffier’s Elemental Burst if it’s available.

Ganyu can similarly take advantage of Escoffier and Furina’s buffs while performing ranged Charged Attacks.
Sample Rotation
Ganyu E > Furina ED N1 Q > Escoffier EQ > Shenhe tEQ > Ganyu C EQ 2[C] > Shenhe tE N3 > Ganyu C

Freminet acts as an on-field Cryo DPS while fulfilling Escoffier’s team condition. Shenhe provides Cryo RES Shred and other buffs to Escoffier and Freminet.
Sample Rotation
Furina ED Q > Escoffier EQ > Shenhe Q N1 tE > Freminet E Q E 4[EE N2] EE > Shenhe tE N2

Dahlia provides a modest Attack SPD buff and a shield, but lacks off-field Hydro application. As such, an off-field Hydro applier like Xingqiu helps generate Skirk’s Void Rifts and maintain Freeze auras. As a shielder, Dahlia enables the event weapon Calamity of Eshu, which is notably better than Skirk’s other free-to-play weapon options.
Layla also enables Calamity of Eshu through her durable shield. She can also help maintain higher Cryo Resonance and Freeze uptime thanks to her additional off-field Cryo application. Layla’s only direct buff is from her C4, but she can hold 4pc TotM or 4pc NO for an additional boost.
Charlotte acts as a TTDS holder and lets Escoffier cast her Burst every other rotation, which allows her to build less ER and more offensive stats.
Sample Rotation (Dahlia)
Xingqiu ED Q N1 > Escoffier E N1 Q N1 > Dahlia EQ > Skirk tE combo
Sample Rotation (Layla)
Xingqiu ED Q N1 > Escoffier E N1 Q N1 > Layla Q N1 E > Skirk tE combo
Sample Rotation (Charlotte)
Xingqiu ED Q N1 > Escoffier E (Q/N3)1 > Charlotte E (N3/Q)1 > Skirk tE combo
1Alternate between using Escoffier and Charlotte’s Elemental Bursts to stack Fanfare. Use some Normal Attacks to catch their Cryo particles and wait for the cooldown of Skirk’s Elemental Skill.

An affordable alternative Escoffier Freeze team with flexible field times. Rosaria uses her Elemental Skill when available to deal damage and lower the team’s ER requirements.
Sample Rotation
Furina ED Q > Escoffier EQ > Rosaria EQ > Xingqiu ED Q N1 > Rosaria N3 E 2[N3CD] N3E N3
Melt

Alongside a second Cryo character, Escoffier can provide Cryo Resonance and enable Melt for on-field Pyro damage dealers. Citlali is the preferred second Cryo option, although other Cryo units such as Rosaria or Kaeya can work. Even in teams where Citlali applies enough Cryo on her own, Escoffier still brings personal damage, and the extra Cryo application helps make Melt uptime more consistent. Although Escoffier’s A4 RES Shred is not maximized and does not benefit the team’s Pyro DPS, Escoffier still contributes plentiful off-field damage.
High Pyro application or Burning can enable Melt for Escoffier, but Escoffier prefers Freeze teams for her own personal damage due to her A4 Passive.
Notable Teammates
Pyro
 Mavuika | Mavuika is the premier on-field Melt DPS available and can deal massive damage through Melting most of her attacks. In addition to extra Cryo application, Escoffier brings her own personal damage and the ability to buff Mavuika with supportive gear like 4pc Tenacity. |
 Arlecchino | Paired with a second Cryo character, Escoffier makes Arlecchino’s combos in her Melt teams more forgiving. Escoffier’s 15s cooldowns and short field time are appreciated as Arlecchino tends to run short rotations. |
 Gaming | Gaming is a powerful on-field DPS who amplifies his enhanced Plunging Attacks through Melt. Escoffier pairs well with his pre-existing Cryo teammates and can enable more Melt Plunges through her extra Cryo application and long Skill uptime. |
Durin | Durin can act as an off-field Pyro Melt DPS with his Dark form’s Burst. Escoffier’s Cryo application can enable Melts, but another Cryo applier like Lohen or Citlali makes Cryo application more consistent and enables Cryo Resonance. |




Cryo
 Citlali | Citlali is an excellent second Cryo option thanks to her Pyro RES Shred and ability to activate the full 4pc Scroll DMG Bonus. Additionally, she provides supplemental Cryo application for the on-field DPS while enabling Cryo Resonance. Her shield also provides quality of life. |
Lohen | Lohen is an excellent on-field Melt enable for off-field Pyro Melt DPS units like Durin. Escoffier provides supplemental Cryo application and buffs Lohen’s personal damage. |


Example Teams
This is not a comprehensive list of teams. The inclusion or exclusion of any given team does not necessarily reflect its power level.

A Double Cryo Melt team where Escoffier enables Cryo Resonance and deals damage from off-field. Citlali buffs the team’s Pyro DPS with her Pyro RES Shred, and the whole team with 4pc Scroll.
Sample Rotation (Mavuika)
Mavuika E > Escoffier E > Bennett EQ > Citlali EQ N1> Mavuika Q combo
Sample Rotation (Arlecchino)
Arlecchino E > Bennett EQ > Escoffier E > Citlali EQ > Arlecchino C combo

Rosaria and Escoffier provide sufficient Cryo application to let Gaming Melt his damage.
Sample Rotation
Escoffier E(Q) > Bennett EQ > Rosaria EQ > Gaming Q 7[EP] > Bennett E > Rosaria E > Gaming EP

Escoffier covers the role of a healer for Furina while letting Hu Tao Melt most of her Charged Attacks against Freezable enemies.
Sample Rotation
Furina ED Q > Escoffier EQ > Yelan Q N1 E N2 > Hu Tao E combo > Yelan E N21
1Wait for Yelan to catch her own particles.

Escoffier and Furina buff Lohen more than Durin in this team, which results in Lohen dealing a greater share of the team’s damage. Ideally, Escoffier holds 4pc Noblesse or 4pc Scroll and Furina holds 4pc TotM.
Sample Rotation
Furina ED Q > Escoffier EQ > Durin E N1 Q > Lohen combo

A Burnmelt team built around Kinich’s damage. Mavuika holds 4pc Scroll in order to buff Kinich and Escoffier.
Sample Rotation
Escoffier E(Q) > Mavuika Q E > Bennett Q E > Kinich E combo (Q)
1Use Escoffier’s Elemental Burst if it’s available.
Stellar-Conduct

Escoffier is a viable support in Stellar-Conduct teams with an on-field Cryo DPS. Her Cryo RES Shred, albeit lower without her full A4 Passive, still buffs the team’s Cryo Stellar-Conduct damage. Additionally, she provides good off-field damage and consistent Cryo application with her Skill and can hold 4pc TotM to further buff her teammates’ ATK-scaling Stellar-Conduct damage.
Multiple Cryo characters enable a consistent Cryo aura, which permits high uptime on Cryo Resonance’s CRIT Rate buff. Her Cryo application not only allows for better Cryo Resonance uptime, but also helps with Polestar Field stacks for Stellar-Conduct damage.
If the on-field DPS cannot enable Stellar-Conduct by themselves, then someone who enables the reaction (like Odette, Cryo Traveler, or Sandrone) is required on the team.
Cryo Stellar-Conduct DPS
Escoffier can funnel her Skill’s Cryo particles for units like Sandrone and Cryo Traveler to lower their ER requirements.
 Sandrone | Escoffier grants Cryo RES Shred, decent off-field damage, consistent Cryo application, and healing for Tidal Shadow for Sandrone if needed. Escoffier can hold Favonius Lance if available to help lower Sandrone’s and her teammates’ ER requirements. |
 Wriothesley | Wriothesley appreciates Escoffier’s buffs but not her healing. As such, Escoffier should never use her Burst in teams with Wriothesley, even if she holds Symphonist of Scents. This allows her to focus more on personal damage. Additionally, Odette or Cryo Traveler are required to enable Stellar-Conduct. While off-field Sandrone can work in a pinch, she has very little synergy with Wriothesley. |
 Cryo Traveler | Cryo Traveler is a great on-field Stellar-Conduct DPS unit thanks to their accumulated stat increases and ability to utilize Exaiphanes Blade. They can also act as a quickswap DPS in teams with Sandrone or Wriothesley on-field. |
Electro
An Electro teammate is required to enable Stellar-Conduct and the Polestar Field. The best characters provide consistent off-field Electro application, Stellar-Conduct buffs, and other utility. Units that provide high Electro application may reduce Cryo Resonance uptime but enable setups for weapons like Blade of Atonement or Forged by the Golden Melody.
 Yae Miko | Yae Miko is a best-in-slot Electro teammate thanks to her personal damage and buffs to Stellar-Conduct damage. She becomes even better at C1. Yae Miko typically does not use her Burst. |
 C6 Beidou | Beidou provides solid buffs at C6 to Stellar-Conduct damage with her Burst. It also applies many instances of Electro in multi-target scenarios. Beidou is not worth considering as a Stellar-Conduct support prior to C6. |
 Alyosha | Alyosha is a decent support in Stellar-Conduct teams and becomes significantly better at C2 and C6. He provides consistent off-field Electro application, healing, fair Stellar-Conduct DMG% and ATK% buffs, and can hold 4pc support sets. Alyosha only buffs the on-fielder, which can limit his synergy with off-field DPS teammates like Odette and Yae Miko. Additionally, Alyosha is not recommended with Wriothesley as Tugarin’s healing interferes with Wriothesley’s empowered Charged Attacks. |






Cryo
Multiple Cryo characters enable a consistent Cryo aura, which permits high uptime on Cryo Resonance’s CRIT Rate buff. These characters provide Stellar-Conduct buffs.
 Odette | Odette is a premium Cryo off-field support and DPS teammate. She deals good personal damage and can buff the team with 4pc Heart of the Furnace and her Stellar Jubilee Passive. Odette also enables Stellar-Conduct. |
 Qiqi | Qiqi is another solid Cryo teammate thanks to her buffs to Stellar-Conduct. She typically holds 4pc TotM and Favonius Sword prior to C6. Here healing allows Escoffier to focus on personal damage. At C6 specifically, Qiqi’s Stellar-Conduct buff scales with her ATK stat, so she should use her Burst and equip a Sword that offers high ATK stats. 4pc Noblesse also becomes a viable artifact set option, especially since Escoffier can hold 4pc TotM. |
Cryo Traveler | In addition to their on-field DPS playstyle, Cryo Traveler is a great quickswap DPS in teams with Sandrone or Wriothesley on-field. They also enable Stellar-Conduct. |
 C6 Diona | At C6, Diona grants 200 EM and a 40% DMG buff to Stellar-Conduct to characters within her Burst AoE, which makes her one of the few viable buffers available. Her healing, shielding, and Cryo particle generation allow Escoffier to focus more on personal damage. Diona is not worth considering as a Stellar-Conduct support prior to C6. |
Flex
 Sucrose | Sucrose shreds enemy Cryo RES with 4pc Viridescent Venerer and grants a nice EM buff to the team. She can hold R5 TTDS to buff the on-fielder or Wandering Evenstar to buff the entire team. |
 Xilonen | Xilonen shreds enemy Cryo RES without the need to Swirl and can buff team EM by holding 4pc Instructor. |
 Nicole | Nicole grants a solid Flat ATK buff and shield. While she does not directly buff Stellar-Conduct, the current lack of competitive supports specifically for Stellar teams can make her a worthwhile option. As Nicole does not use her Burst nor does the team require Elemental DMG% buffs, Nicole should opt to maximize her ATK stat with a 2pc + 2pc ATK% combo (or 4pc Rising Winds) in lieu of a 4pc support artifact set. |
Vodyanitsa | Vodyanitsa is a viable option in Stellar-Conduct teams. She offers good healing, high Cryo RES Shred, and valuable Additive DMG Bonus. |



Example Teams
This is not a comprehensive list of teams. The inclusion or exclusion of any given team does not necessarily reflect its power level.

This is one of Sandrone’s best team paradigms. Yae Miko is best, but C2+ Alyosha is a great alternative if she is unavailable. Odette is the unequivocal best-in-slot teammate for Stellar-Conduct teams. Odette’s Burst is a slight DPS loss before C4.
Sample Rotation (Yae Miko)
Yae Miko 3[E] > Escoffier (Q)² E > Odette 2[E] (Q)¹ > Sandrone combo
¹Skip Odette’s Burst before her C4.
²Use Escoffier Burst for healing if needed or for Symphonist of Scents.
Sample Rotation (Alyosha)
Escoffier (Q)² E > Odette 2[E] (Q)¹ > Alyosha EQ³ > Sandrone combo
¹Skip Odette’s Burst before her C4.
²Use Escoffier Burst for healing if needed or for Symphonist of Scents.
³Use Alyosha Burst every other rotation at C2+.

This is one of Sandrone’s best team paradigms with Yae Miko and Qiqi as her core off-fielders. Qiqi can hold 4pc TotM or 4pc NO (especially at C6)
Sample Rotation (Qiqi on 4pc NO)
Yae Miko 3[E] > Escoffier (Q)² E > Qiqi E Q¹ > Sandrone combo
¹Use Qiqi Burst if she is C6.
²Use Escoffier Burst for healing if needed or for Symphonist of Scents.
Sample Rotation (Qiqi on 4pc TotM)
Yae Miko 3[E] > Qiqi E (Q)¹ > Escoffier (Q)² E > Sandrone combo
¹Use Qiqi Burst if she is C6.
²Use Escoffier Burst for healing if needed or for Symphonist of Scents.
Sample Rotation (Nicole)
Nicole E > Yae Miko 3[E] > Escoffier (Q)¹ E > Sandrone combo
¹Use Escoffier Burst for healing if needed or for Symphonist of Scents.

Yae Miko and Odette form the best team core for Wriothesley and on-field Cryo Traveler.
Sample Rotation (Wriothesley)
Yae 3[E] > Odette 2[E]¹ > Escoffier E > Wriothesley combo
¹From second rotation onwards, start with Odette first.
Sample Rotation (Cryo Traveler)
Yae 3[E] > Odette 2[E]¹ > Escoffier (Q)² E > Traveler combo
¹From second rotation onwards, start with Odette first.
²Use Escoffier Burst for healing if needed or for Symphonist of Scents.
Limited Roster Alternatives

This freely accessible team can be used if you lack 5-star Stellar-Conduct characters or lack C6 on 4-star units like Beidou and Diona.
Sample Rotation
Alyosha EQ³ > Escoffier E (Q)¹ > Sucrose N1 ED (Q)² > Traveler combo
¹Use Escoffier Burst for healing when needed.
²Use Sucrose Burst when available.
³Use Alyosha Burst every other rotation at C2+.
Credits
pjeljr, caramielle., sew, baloopy, lesterberne, acerbus, caxia5, lostguide, cosmic_wanderer, the_real_alchemist, irokei, idkanonymized, antiguaa, Vesera
Team images made with the KQM portrait generator.