Updated for Version 4.0
Mona is a 5-star Hydro Catalyst character in Genshin Impact who has a powerful Burst and can be played as either a support unit or an on-field DPS. Learn about Mona’s best builds, Talent priority, best weapons, best artifacts, and best teams in this quick guide.
Note that the information given may change if new discoveries are made. More extensive testing is in progress.
The full-length guide is available here.
Table of Contents
New Content
 Dehya | Since Dehya’s Burst cannot trigger Xingqiu or Yelan’s Bursts, Mona is an option for her Hydro application and Elemental DMG% buff. Note that playing on-field Dehya is a choice of personal preference since other teams generally perform better. |
 Lynette | Lynette is a flexible Anemo unit with an Ousia-aligned Skill. She can hold 4pc Viridescent Venerer, has a teamwide ATK% buff, and provides weak grouping at C1. |
 Flowing Purity | A craftable Catalyst with high Base ATK, an ATK% secondary stat, and a conditional passive that provides Elemental DMG%. For DPS Mona, it is outshined by Mappa Mare in Vaporize and Hakushin Ring in Electro-Charged. |
Infographic
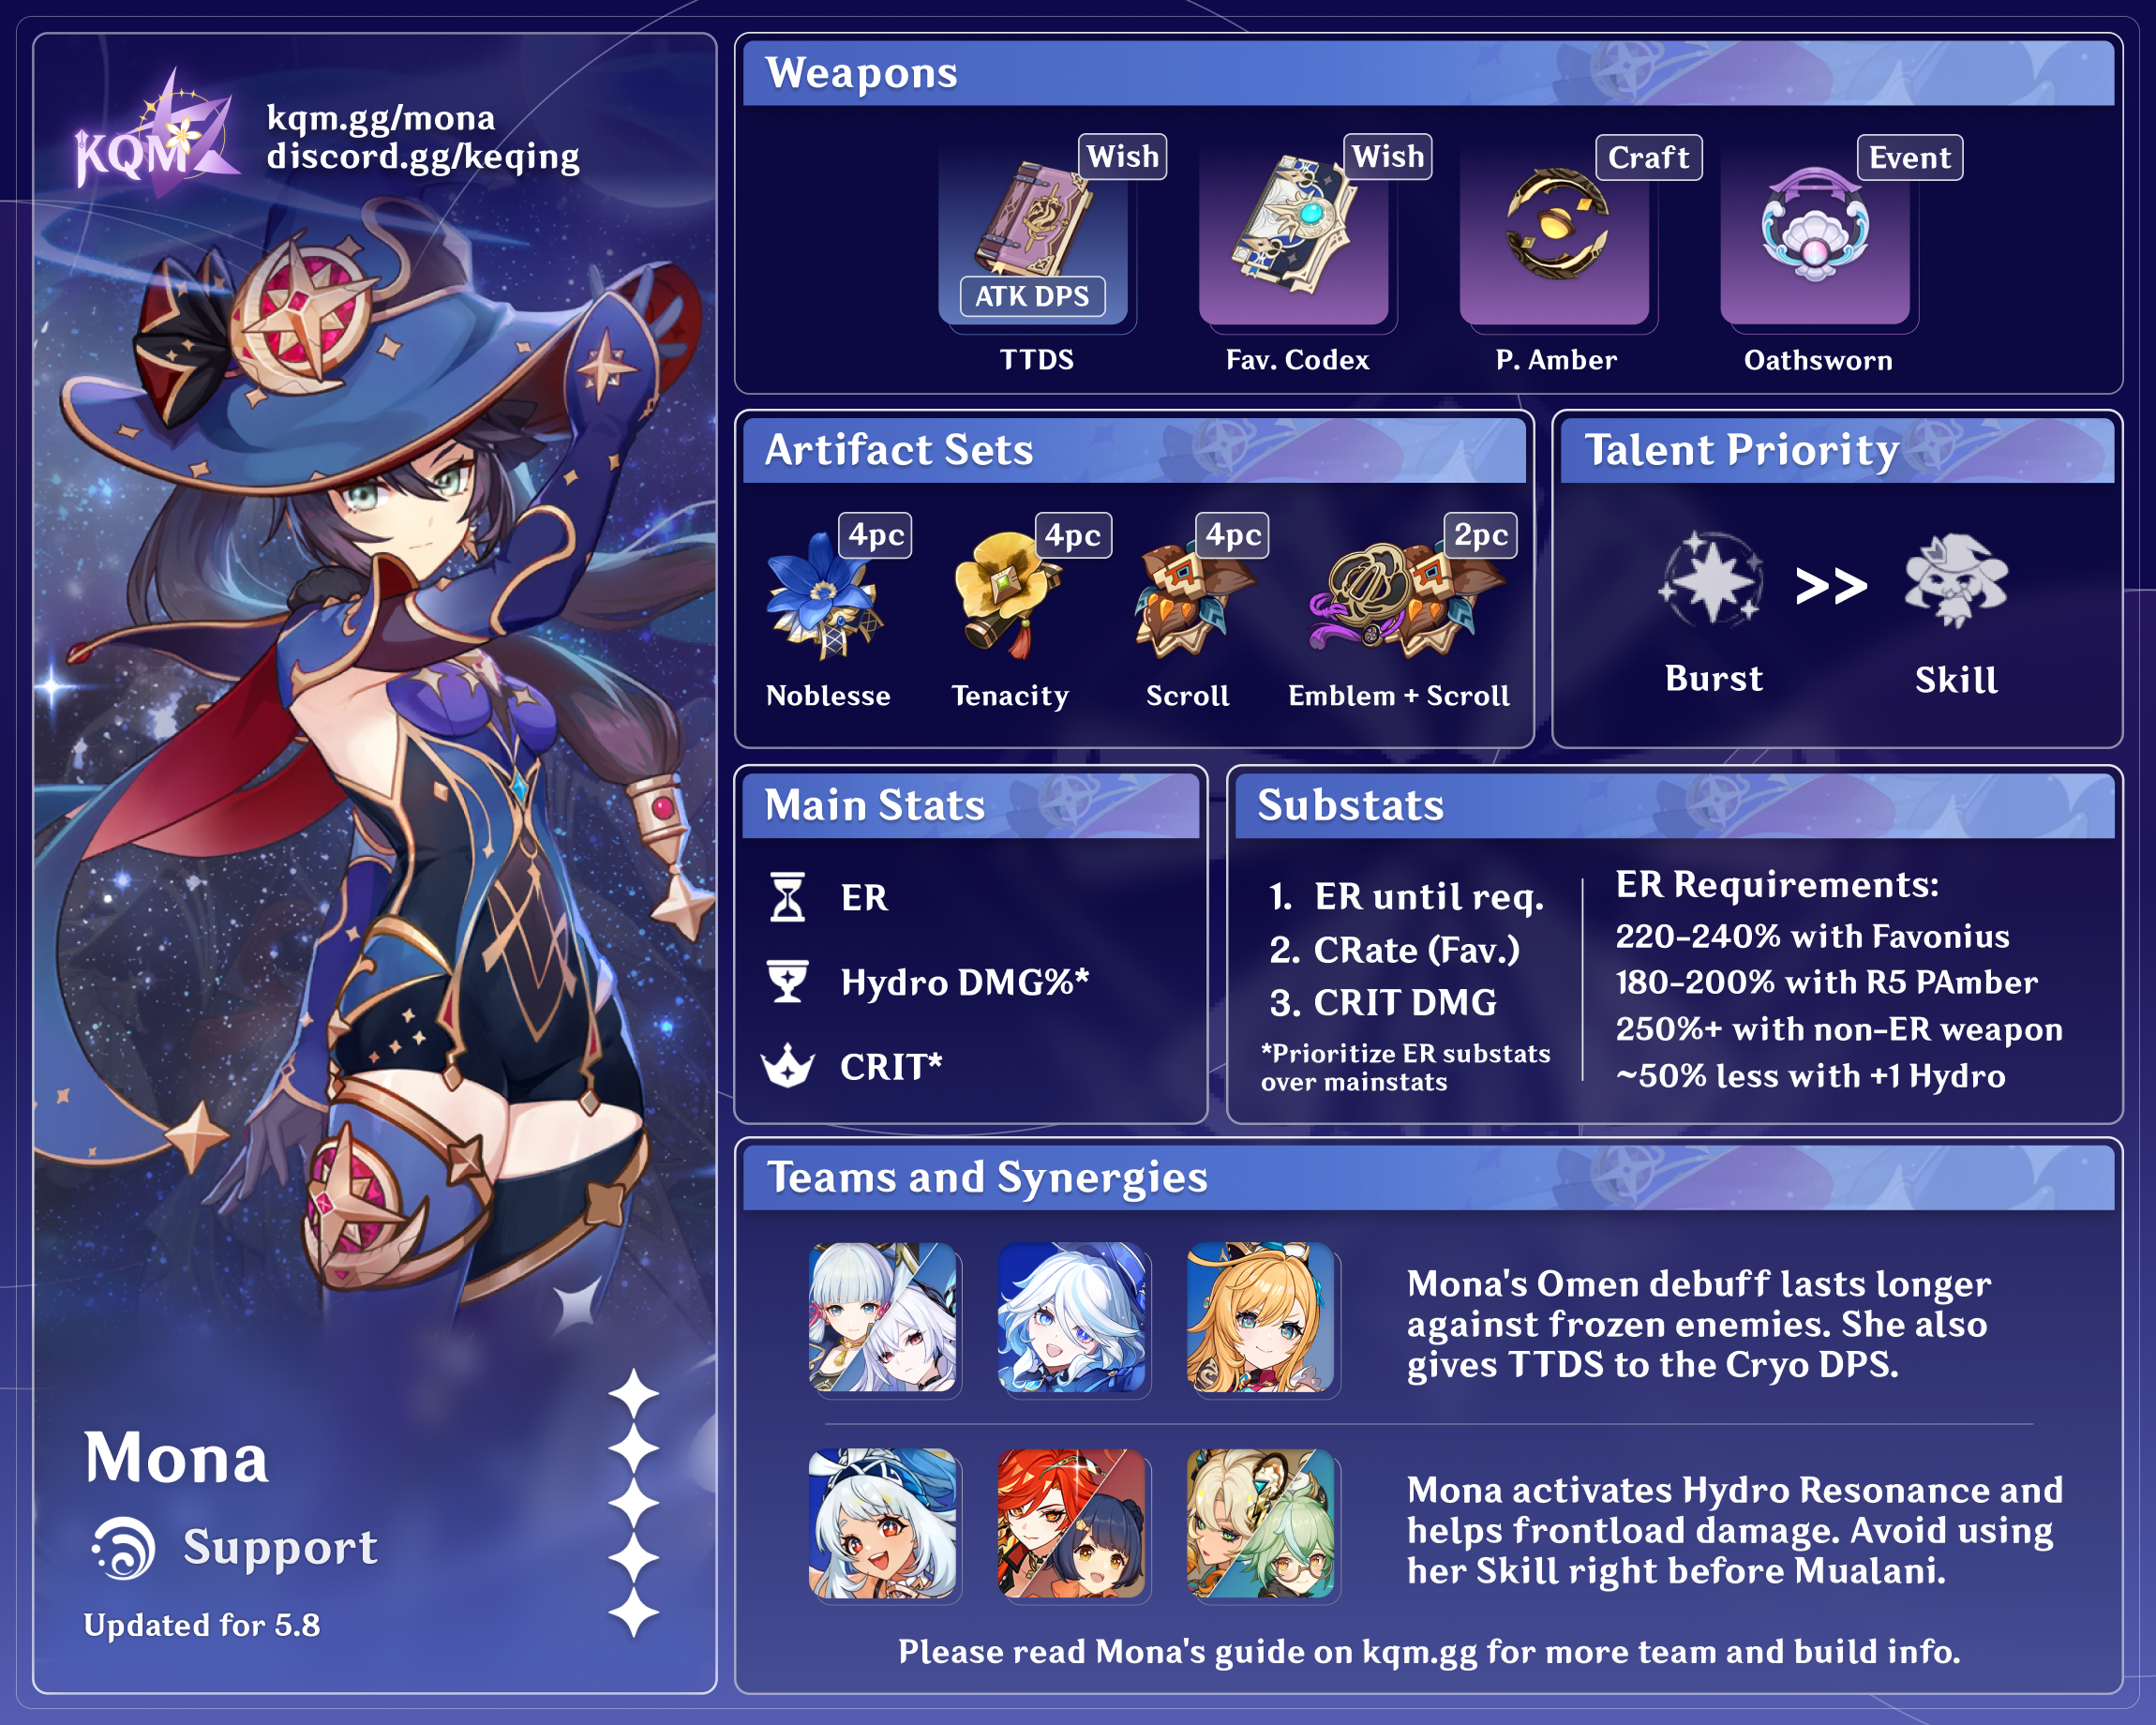
Credits to: cuppacote, auraolis, baloopy, acerbus
Character Overview
Playstyles
Support
The Omen buff from Mona’s Burst has a short duration, but provides an excellent DMG Bonus for teams that can take advantage of it. Mona is also able to taunt enemies with her Skill and buff a teammate by holding TTDS.
DPS
The Hydro application from Mona’s Normal Attacks can be used to trigger reactions such as Vaporize, Freeze, and Electro-Charged. Mona’s Burst can also act as a nuke, usually at the start of the rotation, while simultaneously buffing her teammates’ damage.
Talents
Talent Priority
Talent Priority
Support: Burst > Skill > Normal Attack
On-field DPS: Burst ≥ Normal Attack > Skill
Mona’s Burst makes up the bulk of her damage and team contribution. As an on-field DPS, her Normal Attack Talent (specifically her Charged Attack) is also important to level.
Talents
 Normal Attack | Ripple of Fate
Talent Description
Normal Attack
Performs up to 4 water splash attacks that deal Hydro DMG.
Charged Attack
Consumes a certain amount of Stamina to deal AoE Hydro DMG after a short casting time.
Plunging Attack
Gathering the might of Hydro, Mona plunges towards the ground from mid-air, damaging all opponents in her path. Deals AoE Hydro DMG upon impact with the ground.
Mona’s Normal Attacks do not have particularly high multipliers. However, they can be used to trigger reactions such as Vaporize or Freeze since Mona’s Skill and Burst are not optimal for consistent Hydro application. Mona’s Normal Attacks follow standard ICD (every 2.5 seconds/3 hits).
Each of Mona’s Normal Attacks also has a small AoE, which synergizes well with units who provide grouping. The third attack of Mona’s Normal Attack string causes her to teleport forward or backward (depending on her distance from the enemy) and is often a DPS loss.
Mona’s Charged Attack deals respectable damage and has no ICD, making her a viable on-field unit for Vaporize teams. Learning to cancel Mona’s Charged Attack is recommended due to its relatively long animation; jump canceling is preferred over dash canceling to help mitigate Stamina issues.
 Elemental Skill | Mirror Reflection of Doom
Talent Description
Creates an illusory Phantom of Fate from coalesced waterspouts.
Phantom
Has the following special properties:
- Continuously taunts nearby opponents, attracting their fire.
- Continuously deals Hydro DMG to nearby opponents.
- When its duration expires, the Phantom explodes, dealing AoE Hydro DMG.
Hold
Utilizes water currents to move backwards swiftly before conjuring a Phantom.
Only one Phantom created by Mirror Reflection of Doom can exist at any time.
Mona’s Tap Skill summons a Phantom that snapshots Mona’s current stats, lasts for 5 seconds, taunts nearby enemies, and deals periodic Hydro damage with standard ICD. The initial cast does not apply Hydro to the enemy and is followed by 4 ticks of damage (once per second) before a final explosion. In total, Mona applies 2 instances of Hydro with her Skill.
Mona’s Hold Skill replaces her current location with a Phantom as she teleports backwards. The teleport has i-frames that can be useful for dodging enemy attacks.
It is important to note that Mona’s Skill only generates Elemental Particles if the final explosion hits an enemy, making her Energy generation inconsistent. There is a known bug where Mona’s Skill will sometimes generate Energy particles on cast, but this is unreliable and should not be taken into account when playing her (see the KQM TCL for more).
 Elemental Burst | Stellaris Phantasm
Talent Description
Mona summons the sparkling waves and creates a reflection of the starry sky, applying the Illusory Bubble status to opponents in a large AoE.
Illusory Bubble
Traps opponents inside a pocket of destiny and also makes them Wet.
Renders weaker opponents immobile.
When an opponent affected by Illusory Bubble sustains DMG, it has the following effects:
- Applies an Omen to the opponent, which gives a DMG Bonus, also increasing the DMG of the attack that causes it.
- Removes the Illusory Bubble, dealing Hydro DMG in the process.
The mechanics of Mona’s Burst can be quite complex. The initial cast of Mona’s Burst applies the Illusory Bubble status and Omen status to enemies within its AoE. The Illusory Bubble status applies Hydro and renders smaller enemies immobile, but does not deal damage. The Omen status applies an Omen DMG% buff based on Burst Talent level.
Subsequent damage done to enemies under the Illusory Bubble status will pop the Bubble. The popping of the Illusory Bubble itself deals a big instance of damage — the source of Mona’s nuking potential. Both the attack that triggers the Illusory Bubble pop and Mona’s damage from the Illusory Bubble pop are affected by the Omen DMG% buff.
It is recommended to level Mona’s Burst to at least Level 7 so that the Omen can last for its maximum duration (5 seconds). The Omen DMG% buff increases with Mona’s Burst Talent level as well.
There are many intricacies with Mona’s Burst such as correctly Vaporizing her Burst and extending the Omen’s duration. For information on these topics, please visit the Mona Extended Guide.
 Alternate Sprint | Illusory Torrent
Talent Description
Alternate Sprint
Mona cloaks herself within the water’s flow, consuming stamina to move rapidly.
When under the effect of Illusory Torrent, Mona can move at high speed on water.
Applies the Wet status to nearby opponents when she reappears.
Despite its appearance, Mona can still be hit while in her Alternate Sprint form. However, like other characters’ regular dash, Mona’s Alternate Sprint still has short invincibility frames (i-frames), although the timing may take time to get used to. When Mona reappears from her Alternate Sprint form, she will apply Hydro.
 Ascension 1 Passive | “Come ‘n’ Get Me, Hag!”
Talent Description
After she has used Illusory Torrent for 2s, if there are any opponents nearby, Mona will automatically create a Phantom.
A Phantom created in this manner lasts for 2s, and its explosion DMG is equal to 50% of Mirror Reflection of Doom.
Unfortunately, this passive does not see much use as there are few situations where Mona would want to use her Alternate Sprint for more than 2s. Instead, it is better to use those 2s attacking and/or preparing for the next rotation.
 Ascension 4 Passive | Blazing Eye
Talent Description
Increases Mona’s Hydro DMG Bonus by a degree equivalent to 20% of her Energy Recharge rate.
A useful passive that pairs well with Mona’s ER Ascension Stat. It is generally not recommended to stack ER past Mona’s ER requirements. However, since Mona’s ER requirements can be quite variable, there are some teams where Mona has extremely high ER requirements and gains a sizable damage boost from this passive.
 Utility Passive | Principium of Astrology
Talent Description
When Mona crafts Weapon Ascension Materials, she has a 25% chance to refund a portion of the crafting materials used.
Mona is always looking for methods to save Mora — mathematically similar to the “10% chance to double” Utility Passive, but nonetheless appreciated to save materials.
Constellations
 Constellation 1 | Prophecy of Submersion
Constellation Description
When any of your own party members hits an opponent affected by an Omen, the effects of Hydro-related Elemental Reactions are enhanced for 8s:
- Electro-Charged DMG increases by 15%.
- Vaporize DMG increases by 15%.
- Hydro Swirl DMG increases by 15%.
- Frozen duration is extended by 15%.
At the time of writing, Mona’s C1 has a bug where, unlike what it says, it does not increase Frozen duration at all. Apart from that, Mona’s C1 is a welcome damage increase to Hydro-related reactions, considering that Mona has very few teams that do not utilize such reactions. It is important to note that the 15% increase to Vaporize damage does not affect Mona’s damage from the first Illusory Bubble pop, but will affect all subsequent pops in a multi-target scenario.
 Constellation 2 | Lunar Chain
Constellation Description
When a Normal Attack hits, there is a 20% chance that it will be automatically followed by a Charged Attack.
This effect can only occur once every 5s.
The Charged Attack from Mona’s C2 does not consume Stamina or interrupt her Normal Attack animations and combos. With enough Pyro application (such as the “Sunfire” composition of Bennett and Jean), it is inconsistent but technically possible to Vaporize back-to-back with Mona’s C2.
 Constellation 3 | Restless Revolution
Constellation Description
Increases the Level of Stellaris Phantasm by 3.
Maximum upgrade level is 15.
A simple +3 Talent levels but a significant damage increase to Mona’s Burst.
 Constellation 4 | Prophecy of Oblivion
Constellation Description
When any party member attacks an opponent affected by an Omen, their CRIT Rate is increased by 15%.
Arguably Mona’s best Constellation — a powerful CRIT Rate buff under the condition that enemies have the Omen status applied to them. The CRIT Rate buff applies to Mona’s own damage from the Illusory Bubble pop. In Freeze teams that can extend the Omen buff duration, this Constellation allows characters on the team to build for other offensive stats.
 Constellation 5 | Mockery of Fortuna
Constellation Description
Increases the Level of Mirror Reflection of Doom by 3.
Maximum upgrade level is 15.
A simple +3 Talent levels to Mona’s Skill, but not particularly significant.
 Constellation 6 | Rhetorics of Calamitas
Constellation Description
Upon entering Illusory Torrent, Mona gains a 60% increase to the DMG of her next Charged Attack per second of movement.
A maximum DMG Bonus of 180% can be achieved in this manner. The effect lasts for no more than 8s.
Boosts the damage of Mona’s next Charged Attack by 60% for every second she is in her Alternate Sprint, maximum 3 seconds for a 180% DMG Bonus. While it is fun to watch Mona’s wrist glow when her C6 is active, there is unfortunately little gain in using it. C6 does not activate until a full second of Mona’s Alternate Sprint form has passed, and the DMG Bonus is not significant enough to justify its clunky timing.
Combos
N# = Corresponding number of consecutive Normal Attacks
C = Charged Attack
E = Elemental Skill
Q = Elemental Burst
J = Jump
| Combos | Usage |
| N2C(J) | On-field DPS Mona’s optimal combo. Mona’s third Normal Attack is often a DPS loss and should be canceled with a Charged Attack. Jump canceling Mona’s Charged Attack is not required but is highly recommended. |
| EQ | The standard Skill into Burst combo, where the Burst cancels the ending animation of Mona’s Skill. Due to the nature of Mona’s particle generation, it is nearly impossible to pre-funnel particles into her Burst. The closest equivalent is to proc Favonius with Mona’s Skill while she is in her Burst animation. |
| Q E | Using Mona’s Skill after her Burst improves her Hydro application. Recommended for Freeze teams. |
Support Build
Artifacts
ER Requirements
Assumes that Mona Bursts every rotation.
| Favonius (1 proc per rotation) | ~220–240% |
| Prototype Amber (R1) | ~200–220% |
| Prototype Amber (R5) | ~180–200% |
| Other | ~250–300% |
Support Mona generally has high ER requirements, since her Skill’s particle generation often occurs when she is off-field.
However, Mona’s ER requirements are highly variable depending on her weapon, her teammates’ Energy generation, the rotation length, and more. For example, with Raiden alone, Mona’s ER requirements can drop by ~80%, making it possible to run Mona with R5 Prototype Amber and 100% ER. Meanwhile, in the popular “Morgana” team, Mona’s ER requirements can easily skyrocket to >300%. Realistically speaking, it is very common to have additional Favonius users on the team; every additional Favonius proc can lower Mona’s ER requirements by ~30%.
Use the Energy Recharge Calculator to determine exact requirements for your team and rotation.
Artifact Stats
 Sands |  Goblet |  Circlet |
| Energy Recharge or ATK% | Hydro DMG Bonus or ATK% | CRIT Rate or CRIT DMG |
Substats: ER (until requirements) > CRIT Rate = CRIT DMG > ATK%
ER should always be Mona’s first priority since her Burst contributes the most to both the team and her personal damage. Oftentimes, she requires an ER Sands. Only when her ER requirements are met can an ATK% Sands be viable.
Note that in teams where there are few ATK buffs and/or Mona has an abundance of Elemental DMG Bonus (e.g., Omen buff, A4 Passive, Emblem of Severed Fate artifact set), an ATK% Goblet can be competitive to a Hydro DMG% Goblet.
CRIT Rate should be prioritized over CRIT DMG if Mona is using Favonius Codex. Otherwise, choose whichever best achieves the ideal 1:2 ratio.
Artifact Sets
 4pc Noblesse Oblige (4NO) | Since there are very few instances where Mona does not use her Burst every rotation, 4NO is one of her best supportive sets. It provides a valuable teamwide ATK% buff that Mona herself can also take advantage of with the big damage from her Burst. |
 4pc Tenacity of the Millelith (4TotM) | Mona’s Skill does not trigger the 4TotM set bonus on cast, but rather with each tick of damage. Due to the short duration of Mona’s Skill, the ATK% buff does not have the best uptime. However, other units can still snapshot the buff, and it is a viable option if another unit on the team is holding 4NO. |
 4pc Emblem of Severed Fate (4EoSF) | Support Mona generally has high ER requirements, which can synergize well with 4EoSF. This set lacks supportive capabilities and pushes Mona to build more damage-oriented stats. Generally not recommended to farm for. |
 Mixed 2pc sets (ER%, Burst DMG%, ATK%, Hydro DMG%) | Less support-oriented compared to 4NO and 4TotM and generally has a lower damage output compared to 4EoSF. However, mixed 2pc sets can be a temporary option if still farming for a good 4pc set. |
Weapons
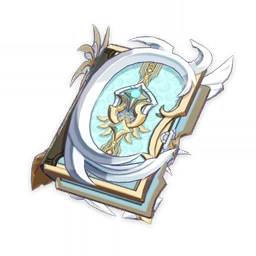
 Favonius Codex | With an ER% secondary stat and a passive that generates Energy particles, this weapon is one of the best options to help meet Mona’s ER requirements. |
 Prototype Amber | A craftable Catalyst that noticeably lacks offensive stats but refunds Flat Energy with its passive, drastically lowering Mona’s ER requirements. In teams that can scrape by without a healer, most notably Freeze teams, the healing from Prototype Amber can be a welcome addition. |
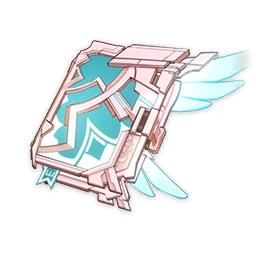
 Thrilling Tales of Dragon Slayers (TTDS) | A fully support-oriented weapon that provides a hefty ATK% boost (which can be snapshot) to the next character in the rotation. However, TTDS requires rotation management and can make it challenging to reach Mona’s ER requirements. |
 Oathsworn Eye | A free Event-limited weapon from Version 2.5 that generally performs worse than the above options, but has a useful ATK% secondary stat and a passive that helps reach Mona’s ER requirements. |
DPS Build
Artifacts
ER Requirements
Assumes that Mona Bursts every rotation.
| Favonius (1 proc per rotation) | ~160–200% |
| Other | ~200–250% |
Unlike when she is used as a support, DPS Mona takes up more field time and is more likely to catch her own particles from her Skill. However, DPS Mona’s ER requirements can still vary greatly depending on her teammates. Additional Favonius holders on the team are greatly appreciated.
Use the Energy Recharge Calculator to determine exact requirements for your team and rotation.
Artifact Stats
Sands | Goblet | Circlet |
| ATK% or Elemental Mastery* | Hydro DMG Bonus | CRIT Rate or CRIT DMG |
Substats: ER (until requirements) > CRIT Rate = CRIT DMG > ATK% > EM*
*EM is generally only a valuable stat when Mona is able to consistently Vaporize her Burst and Charged Attacks. In those teams, an EM Sands will be competitive with an ATK% Sands and the choice should be made based on substat quality.
Apart from that, DPS Mona follows the standard ADC build. A CRIT Rate or CRIT DMG Circlet should be chosen based on which best achieves the ideal 1:2 ratio.
Artifact Sets
 Mixed 2pc sets (Hydro DMG%, Burst DMG%, ATK%, ER%, EM) | Universal mixed 2pc sets are quite competitive with the 4pc sets. Unlike the 4pc options, stats such as Hydro DMG% and ATK% benefit all portions of Mona’s kit. 2pc sets are also convenient to farm, which makes it likely that they have good substats. EM is only recommended for Vaporize teams. |
4pc Emblem of Severed Fate (4EoSF) | 4EoSF does not buff Mona’s Charged Attack. However, it is Mona’s best option to set up a Burst nuke, most notably in Vaporize teams. Farming 4EoSF is also Resin-efficient, since the 2pc combination of +20% ER (from EoSF) and +18% ATK (from Shimenawa’s Reminiscence — in the same domain) is a viable option. |
 4pc Gilded Dreams | A competitive option for Mona’s Vaporize teams due to the EM and ATK% it supplies. |
 4pc Wanderer’s Troupe (4WT) | The 2pc EM set bonus is nice for Vaporize teams since, ideally, Mona is able to Vaporize most, if not all, of her Charged Attacks. This set does not buff Mona’s Burst. |
 4pc Heart of Depth (4HoD) | The 4HoD set effect lasts for 15 seconds and Mona’s Skill has a 12-second cooldown, so she is able to maintain 100% uptime. This set does not buff Mona’s Burst and works best in Electro-Charged teams. |
Weapons
 Lost Prayer to the Sacred Winds, Kagura’s Verity | CRIT weapons with passives that conditionally provide Elemental DMG%. For Lost Prayer, the condition is to stay on-field for at least 4 seconds; for Kagura’s, the condition is to use Mona’s Skill 3 times. DPS Mona will generally have an easier time taking advantage of Lost Prayer’s passive, but both are fine and perform rather similarly. |
 Memory of Dust | Can be comparable to Lost Prayer and Kagura’s, especially when Mona is paired with a shield unit. Note that building enough CRIT from artifacts alone may be difficult. |
 A Thousand Floating Dreams | A good option, but only for Vaporize teams. Gives a chunk of EM to Mona while sharing EM and Elemental DMG% with the rest of the team. |
 Skyward Atlas | Skyward Atlas can provide the highest damage potential, but with some challenges. First, it does not supply any CRIT, which can be difficult to build around. Second, the orb generated from its passive can prematurely pop Mona’s Illusory Bubble, resulting in disrupted rotations and a DPS loss. Some workarounds include not using Normal Attacks (e.g., using Charged Attacks instead) or utilizing the passive’s 15-second downtime. |
 The Widsith | One of Mona’s best 4-star options and competitive with 5-star options. It has a CRIT DMG secondary stat, and its passive randomly provides either ATK%, Elemental DMG%, or EM for 10s. The EM buff is not as useful outside of Vaporize teams. Its passive also has a lengthy 20-second downtime. |
 Dodoco Tales | Obtained for free from the Version 1.6 Event, Dodoco Tales synergizes quite well with Mona’s optimal N2CJ combo. A very good F2P option if you have it. |
 Solar Pearl | Solar Pearl’s passive does not last long enough to properly set up a Vaporized Mona Burst nuke. However, for teams that do not care about the nuke — such as Electro-Charged and Freeze teams — it is a rather good option. Solar Pearl also provides CRIT Rate. |
| Other CRIT weapons | CRIT weapons are viable even if their passives are not taken advantage of. Examples include Tulaytullah’s Remembrance, Blackcliff Agate, and Sacrificial Jade. |
 Mappa Mare | A solid F2P choice that provides Elemental DMG%. Its EM stat makes it work better in Vaporize teams, but still an overall viable option. |
 Hakushin Ring | Limited to only Electro-Charged teams, but a strong option in those teams for its shared Elemental DMG%, high Base ATK, and ER% secondary stat. |
Favonius Codex | Despite having practically no offensive stats, Favonius Codex provides comfort when it comes to Burst uptime, which can be quite valuable. |
Teams
Freeze

One of Mona’s more popular teams since the Freeze reaction is able to extend Mona’s Omen duration. See the Mona Extended Guide for more information on how to extend Mona’s Omen duration.
Mona’s Freeze teams generally consist of an on-field Cryo DPS, a Cryo battery, and an Anemo unit for VV Shred and grouping.
Notable Teammates
  Ganyu, Ayaka | Two powerful Cryo DPS units who are often used with Mona. Both are able to snapshot buffs from TTDS, 4NO, and 4TotM while taking full advantage of the Omen extension mechanic in a Freeze team. |
 Venti, Kazuha, Sucrose, Heizou, Lynette | Able to hold 4VV for RES Shred and also provide valuable grouping. Venti can refund Flat Energy, Kazuha provides Elemental DMG%, Sucrose and Heizou are able to hold TTDS, and Lynette grants a teamwide ATK% buff. Heizou and Lynette have comparably weaker grouping. |
Example Teams
This is not a comprehensive list of teams. The inclusion or exclusion of any given team does not necessarily reflect its power level.
Mona — Ganyu — Venti — Diona

Mona — Ayaka — Kazuha — Shenhe

On-Field Vaporize

Learning to properly Vaporize Mona’s Burst and Charged Attacks can be technically challenging but will maximize Mona’s personal damage.
Notable Teammates
 Xiangling | Xiangling is practically mandatory to apply enough Pyro to consistently Vaporize Mona’s attacks. |
 Bennett | Bennett provides a strong ATK buff (that can be snapshot) and can battery Xiangling. |
Kazuha, Sucrose, Lynette | All can group — although Lynette’s is weaker — and hold the 4pc Viridescent Venerer artifact set for Elemental RES Shred. Kazuha provides an Elemental DMG% buff through his A4 Passive; Sucrose is able to hold TTDS and share EM; Lynette has a teamwide ATK% buff with her A1 Passive. |
Example Teams
This is not a comprehensive list of teams. The inclusion or exclusion of any given team does not necessarily reflect its power level.
Mona — Xiangling — Kazuha — Bennett

Quickswap Electro-Charged

Good Electro-Charged uptime allows for an Anemo unit holding 4VV to Swirl and therefore shred enemy RES to both Electro and Hydro. The short duration of Mona’s Omen is generally not taken full advantage of in Electro-Charged teams, but she is still a viable option nonetheless. Her build in this team tends to be a mix of both support and DPS.
The fourth slot is flexible and can be a driver, a healer, a shielder, another Hydro unit, another Electro unit, and/or another Anemo unit.
Notable Teammates
  Fischl, Yae | Strong choices for off-field Electro application and damage. While they tend to be primarily single-target units, particularly Fischl, this is generally not an issue since they are almost always paired with Beidou and/or an Anemo unit to Swirl. |
 Beidou | Powerful Burst and great synergy with Fischl, works best in multi-target scenarios. |
Venti, Kazuha, Sucrose, Heizou, Lynette | Provide grouping, VV Shred, and damage through Swirls. Venti can refund Flat Energy; Kazuha provides Elemental DMG%. Sucrose and Heizou are both able to hold TTDS and share EM, though Heizou tends to emphasize personal damage over supportive capabilities. Lynette provides a teamwide ATK% buff and, at C6, gains an Anemo Infusion on her Normal Attacks. |
Example Teams
This is not a comprehensive list of teams. The inclusion or exclusion of any given team does not necessarily reflect its power level.
Mona — Fischl — Venti — Beidou

General Support

Mona’s Omen DMG% buff and ability to hold TTDS make her great in teams that deal large amounts of damage in a short timespan — preferably before Mona’s Omen buff expires. This generally includes nuke/hypercarry teams and, of course, damage-per-screenshot comps.
Notable Teammates
| Character | Description |
| Any DPS who deals big damage in a short amount of time | Mona is best paired with a DPS who can take advantage of the Omen buff and its short duration. Examples: Raiden, Dehya, Hu Tao (nuke) |
| Characters who synergize well with the DPS unit (see above) | Other teammates can provide Elemental application, RES Shred, shields/healing, personal damage, more buffs, and other utility. Examples: Bennett, Kazuha, Sucrose |
Example Teams
This is not a comprehensive list of teams. The inclusion or exclusion of any given team does not necessarily reflect its power level.
Mona — Raiden — Bennett — Kazuha

Mona — Dehya — Bennett — Kazuha

Credits
Mona Mains, chasing_haze, gibbigobo, nociii, cuppacote, nikatosaurus, seima, idkanonymized, fritzzes, irokei, polomo, casdela, alehannita