Updated for Version 4.7 by mishkaxp and caxia5

Fireworks are for now, but friends are forever.
Table of Contents
Introduction
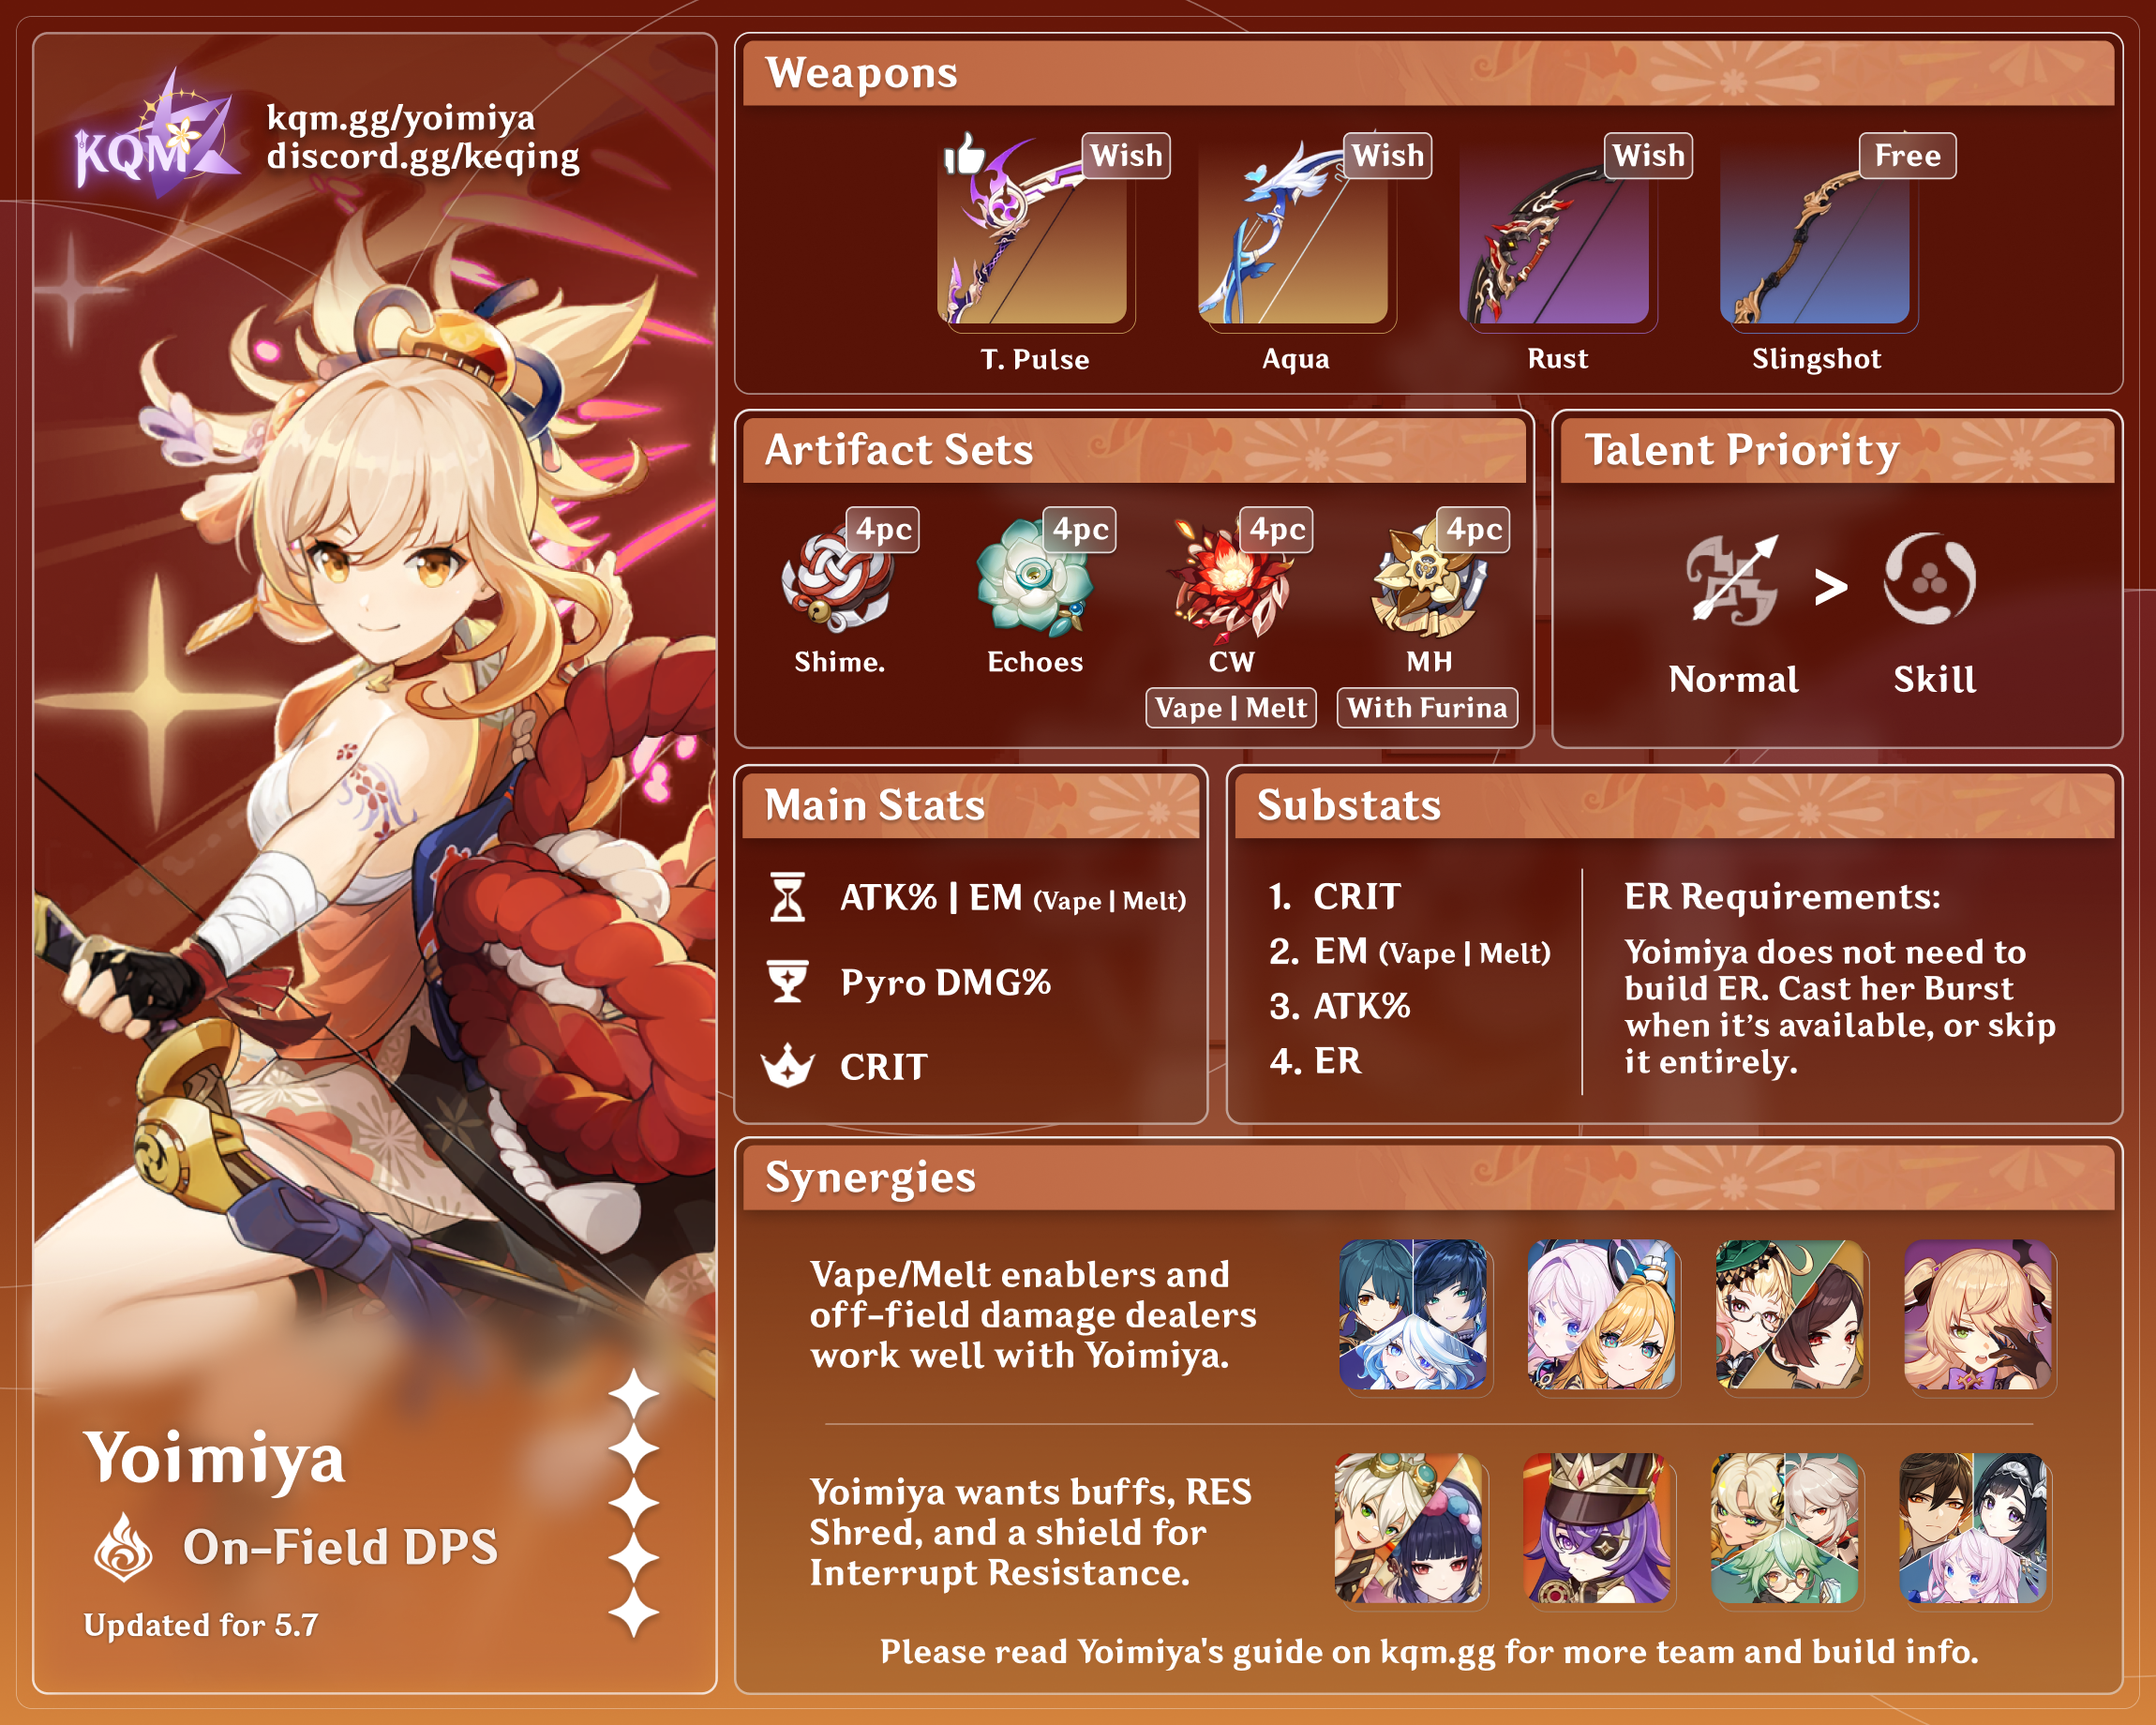
Yoimiya is a 5-star Pyro Bow character in Genshin Impact with high flexibility in her builds and teams. She is a ranged on-field DPS unit, and she excels with off-field teammates who provide damage or support.
This guide examines Yoimiya’s kit in-depth to help you better understand her best builds, best teams, best weapons, best artifacts, synergies, Talents, Constellations, and more!
Why Play Yoimiya?
Yoimiya occupies her own niche amongst Pyro DPS units. She faces strong competition from other Pyro DPS units like Klee, Hu Tao, Xiangling, Lyney, and Arlecchino. However, she avoids many of their technical demands (except Arlecchino) because she relies solely on her Normal Attack string to deal damage. This makes her a good option for players looking for a straight-forward and easy-to-use character. Furthermore, Yoimiya’s range can be very valuable against many enemies.
For those interested in learning Yoimiya’s mechanics at a deeper level, Yoimiya also has a diverse array of teams. The “best” team largely depends on the enemy scenario (although VV Vape tends to pull ahead with vertical investment). If one team composition does not work, you can always try another one! Adaptability is one of Yoimiya’s greatest strengths.
Pros
- Decent single-target damage
- Easy gameplay and execution
- Decent range
- Accessible weapon choices
- Flexible artifact set options
- Diverse team compositions for different scenarios
Cons
- Tough competition in the Pyro DPS role
- Weaker performance in multi-target scenarios since her own damage is strictly single-target
- High vulnerability to interruption, which necessitates a strong shield or game knowledge to dodge effectively
- Higher investment requirement for certain teams to be competitive
TL;DR
Credits to: cuppacote, auraolis, irokei, caxia5, and KQM TC Staff
Glossary
FAQ
Is Yoimiya a hypercarry?
Yoimiya can be a hypercarry, but she is not limited to that role. She does benefit from teammates who maximize her damage such as Bennett, Yelan, Furina, Kazuha or Yun Jin. However, she has other team options that can be simpler or more effective. For example, she can trigger additional reactions such as Overloaded, or she can drive off-field DPS units such as Xingqiu, Yelan, Fischl, or Beidou. While hypercarry is certainly one of her stronger team options, it is not the only one.
Does Yoimiya miss her Normal Attacks?
On release, Yoimiya’s auto-targeting was inconsistent. Later changes have since improved her targeting, but she may still miss arrows at long range against highly mobile enemies or those with weird hitboxes, like Geovishap Hatchlings or the Golden Wolflord.
Is Yoimiya’s damage low?
Yoimiya’s single-target damage is lower than top-performing teams, but her main drawback is her inability to hit multiple enemies, slowing her down in multi-target content. She also scales worse with vertical investment compared to her competitors. However, with the right team, she can still excel in scenarios beyond single-target.
Is Yoimiya limited to single-target scenarios?
Yoimiya deals primarily single-target damage with her Normal Attacks. However, suitable teammate choices, proper positioning, Transformative Reactions, and the range of Yoimiya’s Normal Attacks can all help address some of her issues in multi-target scenarios. Although Yoimiya’s issues in multi-target are not entirely eliminated, she is still viable in multi-target content.
Yoimiya’s Range
A factor often overlooked in gameplay is the time spent chasing enemies. Characters with a limited melee range often need to chase enemies, which is especially true in multi-wave content where enemies spawn far apart. Yoimiya’s range reduces the time spent repositioning in such scenarios. It should be noted that unlike Charged Attack units such as Lyney and Ganyu, Yoimiya still needs to stay within a certain range to not miss any Normal Attacks.
Transformative Reactions and Teammates
Depending on the team, Yoimiya and her teammates can trigger Transformative Reactions such as Swirl, Overloaded, Electro-Charged, and Burgeon — which all deal AoE damage. Units like Kazuha, Xiangling, Beidou, and Furina have abilities that deal damage to multiple enemies in a decently large AoE.
Does Yoimiya need a shield?
It depends on a lot of factors.
The primary goal when playing Yoimiya is to prevent her from being interrupted, especially in Vape teams where she loses a significant amount of damage if her Vaping sequence is disrupted. Shields are generally the easiest and most accessible way to avoid being staggered, and going shieldless is impractical against highly aggressive enemies such as Consecrated Beasts. However, shields are not the only method to prevent interruption, and opting for a buffer or off-field damage dealer instead of a shielder can tremendously increase team damage output.
Players who are interested in shieldless gameplay and want to min-max their damage with Yoimiya can find great success with some practice. Please take into consideration the following aspects of Yoimiya’s gameplay when opting out of a shield:
 Interruption Resistance | Xingqiu and Beidou give Yoimiya interruption resistance with their abilities. Individually the interruption resistance they provide make it possible to tank some lighter hits, although it is not a sufficient replacement for a shield. However, when Xingqiu and Beidou are paired together, they can effectively replace a shielder as long as you meet their ER requirements. |
 Game Knowledge and Positioning | Understanding enemy attack patterns is crucial for shieldless gameplay. If you can understand where the enemy is moving, when they are immobile or invulnerable, and how they deal damage, you can safely position Yoimiya to let her perform her full N5 combo. Additionally, certain abilities such as Sucrose’s Skill and Burst, Kazuha’s Skill and Burst, Yelan’s Skill, and Yoimiya’s Burst can stagger some enemies, giving Yoimiya a safer DPS window. |
 Dashing | Yoimiya can safely dash after every N5 combo without losing any damage. In a typical rotation, this means Yoimiya gets 3 dashes while on-field, which is around once every 2.5s. Dashing itself has some i-frames and more broadly can be used to move away from incoming attacks. Dashing prematurely before Yoimiya’s last Normal Attack breaks her attack string. This results in a DPS loss in many teams since the final 3 Normal Attacks in the string deal the most damage. Dashing early does not amount to a significant DPS loss in non-Vape teams or teams with multiple off-field DPS teammates. |
 Shields from Crystallize | Geo teammates can produce Elemental Shards through the Crystallize reaction. When picked up, these shards grant a small shield. While they break somewhat easily, they do provide interruption resistance. Yun Jin usually produces 1–3 shards per rotation, which are enough to tank 1-2 attacks if you can pick them up. |
 Team Damage > Shields | Sometimes opting for a shielder is an unnecessary DPS loss. Even if Yoimiya gets interrupted during her Normal Attack string, her teammates can compensate for the difference. In multi-target scenarios, a powerful grouper like Venti or Kazuha or an off-field DPS like Furina or Xiangling give better results than a shielder, since a lot of the team’s damage comes from their abilities. |
 Knockback from Overloaded | Electro units allow Yoimiya to trigger Overloaded, which staggers most enemies that are not heavy or Bosses. The stagger interrupts enemies and pushes them back, preventing them from attacking or getting close enough to land attacks. Yoimiya’s range reduces the time needed to dash closer to enemies who are knocked back from Overloaded. |
 I-Frames | Invulnerability frames (i-frames) are moments when the on-field character is invulnerable to damage and knockback during their ability animations. Dashing and Elemental Bursts are the most common sources of i-frames. I-frames can be used to avoid enemy attacks while setting up teammate abilities before Yoimiya takes the field. This is most effective against Bosses with a set of heavy attacks followed by a longer period of vulnerability or easier-to-avoid attack patterns that Yoimiya can take advantage of. Yoimiya’s Burst itself can be used for i-frames if available and appropriate to use. |
 Crowd Control (CC) | Some of Yoimiya's shieldless teams include Kazuha, not only for his strong buffs but also for his CC, which can be important for shieldless gameplay by staggering or immobilizing enemies to prevent interruptions to Yoimiya's attack string. |
Character Overview
The higher they fly, the louder the explosion!
Playstyles
On-Field DPS
Yoimiya is an on-field Pyro DPS character who deals damage via her Pyro-converted Normal Attacks. It is never recommended to play Yoimiya as an off-field support since her Burst is unreliable at applying Pyro, only provides a mediocre ATK% buff, and deals low damage. Furthermore, she is not recommended as a “Quickswap” DPS unit since she loses her Normal Attack’s Pyro Conversion upon switching out.
Archetypes
Yoimiya is viable in a variety of Pyro-oriented team archetypes, with Vaporize-related teams being among her top performing options. Read the Teams section for in-depth information on each of her recommended team compositions.
 Vape | Yoimiya’s most popular and easiest team archetype. This is a beginner and mobile-friendly team composition when played with a shield. |
 VV Vape | A variant of Vape that incorporates an Anemo unit to trigger both Pyro and Hydro Swirls and shred enemy RES via 4pc Viridescent Venerer (4VV). This team archetype is a bit more complicated since it requires careful Swirl setups. |
 Overvape | A variant of Vape that adds an Electro unit. Yoimiya can trigger both Overloaded and Vaporize off an Electro-Charged aura enabled by Electro and Hydro teammates. |
 Overloaded | This composition focuses on Yoimiya’s raw Pyro damage with the added bonus of Overloaded damage. Chevreuse is the core of this playstyle where she functions similarly to an Anemo unit holding 4VV in VV Vape. Chevreuse’s RES Shred only works for Pyro and Electro but has much easier setups and better uptime. |
 Mono Pyro | This archetype focuses on Yoimiya’s raw Pyro damage without Elemental Reactions. These teams are relatively easy and flexible to play; they can include strictly buffer characters such as Yun Jin or Bennett or other off-field DPS units such as Xiangling or Chiori. |
Talents
Talent Priority
 >>
>>  >
> 
Normal Attack >> Skill > Burst
If Yoimiya does not use her Burst, it is not necessary to level her Burst.
Yoimiya’s Normal Attacks constitute almost all of her damage — 92-96% when using her Burst, and 100% when not using it — so they should be prioritized first. Her Skill also increases her Normal Attack damage, but leveling it should be a lower priority since it is more efficient to level Yoimiya’s Normal Attack. Leveling her Burst is a minor damage increase, so it can be leveled after her Skill.
Talent Overview
Normal Attack | Firework Flare-Up
Talent Description
Normal Attack
Performs up to 5 consecutive shots with a bow.
Charged Attack
Perform a more precise Aimed Shot with increased DMG.
While aiming, flames will accumulate on the arrowhead before being fired off as an attack. Has different effects based on how long the energy has been charged:
- Charge Level 1: Fires off a flaming arrow that deals Pyro DMG.
- Charge Level 2: Generates a maximum of 3 Kindling Arrows based on time spent charging, releasing them as part of this Aimed Shot. Kindling Arrows will home in on nearby opponents, dealing Pyro DMG on hit.
Plunging Attack
Fires off a shower of arrows in mid-air before falling and striking the ground, dealing AoE DMG upon impact.
Yoimiya’s Normal Attacks make up the vast majority of her damage — even when she uses her Burst, her Normal Attack still accounts for 92-96% of her damage.
Yoimiya’s Normal Attack string consists of 5 Normal Attack inputs. The first and fourth attacks are dual hits, which brings the total number of hits to 7 over the entire string. Her highest damaging combo in most teams will be 3[N5], which is her entire Normal Attack string repeated 3 times. If you dash cancel (N5D) or aim cancel (N5RR), you can fit in a couple extra attacks after the third N5.
An example of performing N5RR.
Video credit to Staryy
Detailed information on the RR cancel can be found in KQM’s Theorycrafting Library entry.
Yoimiya’s fifth Normal Attack alone makes up 25–30%* of her Normal Attack string damage, so finishing the string is extremely important. Yoimiya tends to prefer teammates who provide interruption resistance (such as a shield), since getting interrupted before she performs her final hit is a damage loss. However, a shield is not always necessary for players of a higher skill level.
*30% assumes Yoimiya Vapes her N1-1, N3, and N5.
Charged Shot
Yoimiya’s Charged Shot is not worth focusing on, since her Level 2 Charged Shot does very little damage. During her Skill’s uptime, Yoimiya should use her Normal Attacks. In her downtime, you should rotate through her teammates’ abilities. There generally is not enough time in team rotations for Yoimiya to perform Charged Shots.
There are very niche scenarios where a Charged Shot can be used to apply Pyro for an Anemo teammate to Swirl if there is not another Pyro character in the team.
Outside of combat, Yoimiya's Level 2 Charged Shot can be nice for hunting groups of animals and solving some puzzles.
Hitlag and Attack SPD
As a ranged character, Yoimiya has no hitlag. This means that she gains the full effect of Attack SPD buffs, making buffs like C2 Jean and C6 Yun Jin potent. However, DMG Bonus or ATK buffs will often still result in higher damage output.
Note: In Vaporize teams, multiple Attack SPD buffs can actually cause Yoimiya to attack too fast, making her unable to reliably trigger Vaporize on her desired hits. This is a damage loss compared to if she were Vaporizing according to her standard Vaporize pattern.
Normal Attack ICD
Internal Cooldown (ICD) refers to the cooldown when characters can apply Elements and trigger Reactions. Yoimiya has standard ICD: she can only apply Pyro every 3rd hit or every 2.5s, whichever occurs first. Read more in the TCL entry on Internal Cooldown.
Because Yoimiya has standard ICD, she triggers reactions on the 1st, 4th, and 7th hits of her Normal Attack string (N1-1, N3, and N5 respectively). After Yoimiya performs her final Normal Attack, 2.5s will have passed, which allows her to trigger reactions on the 1st hit in the subsequent Normal Attack string.
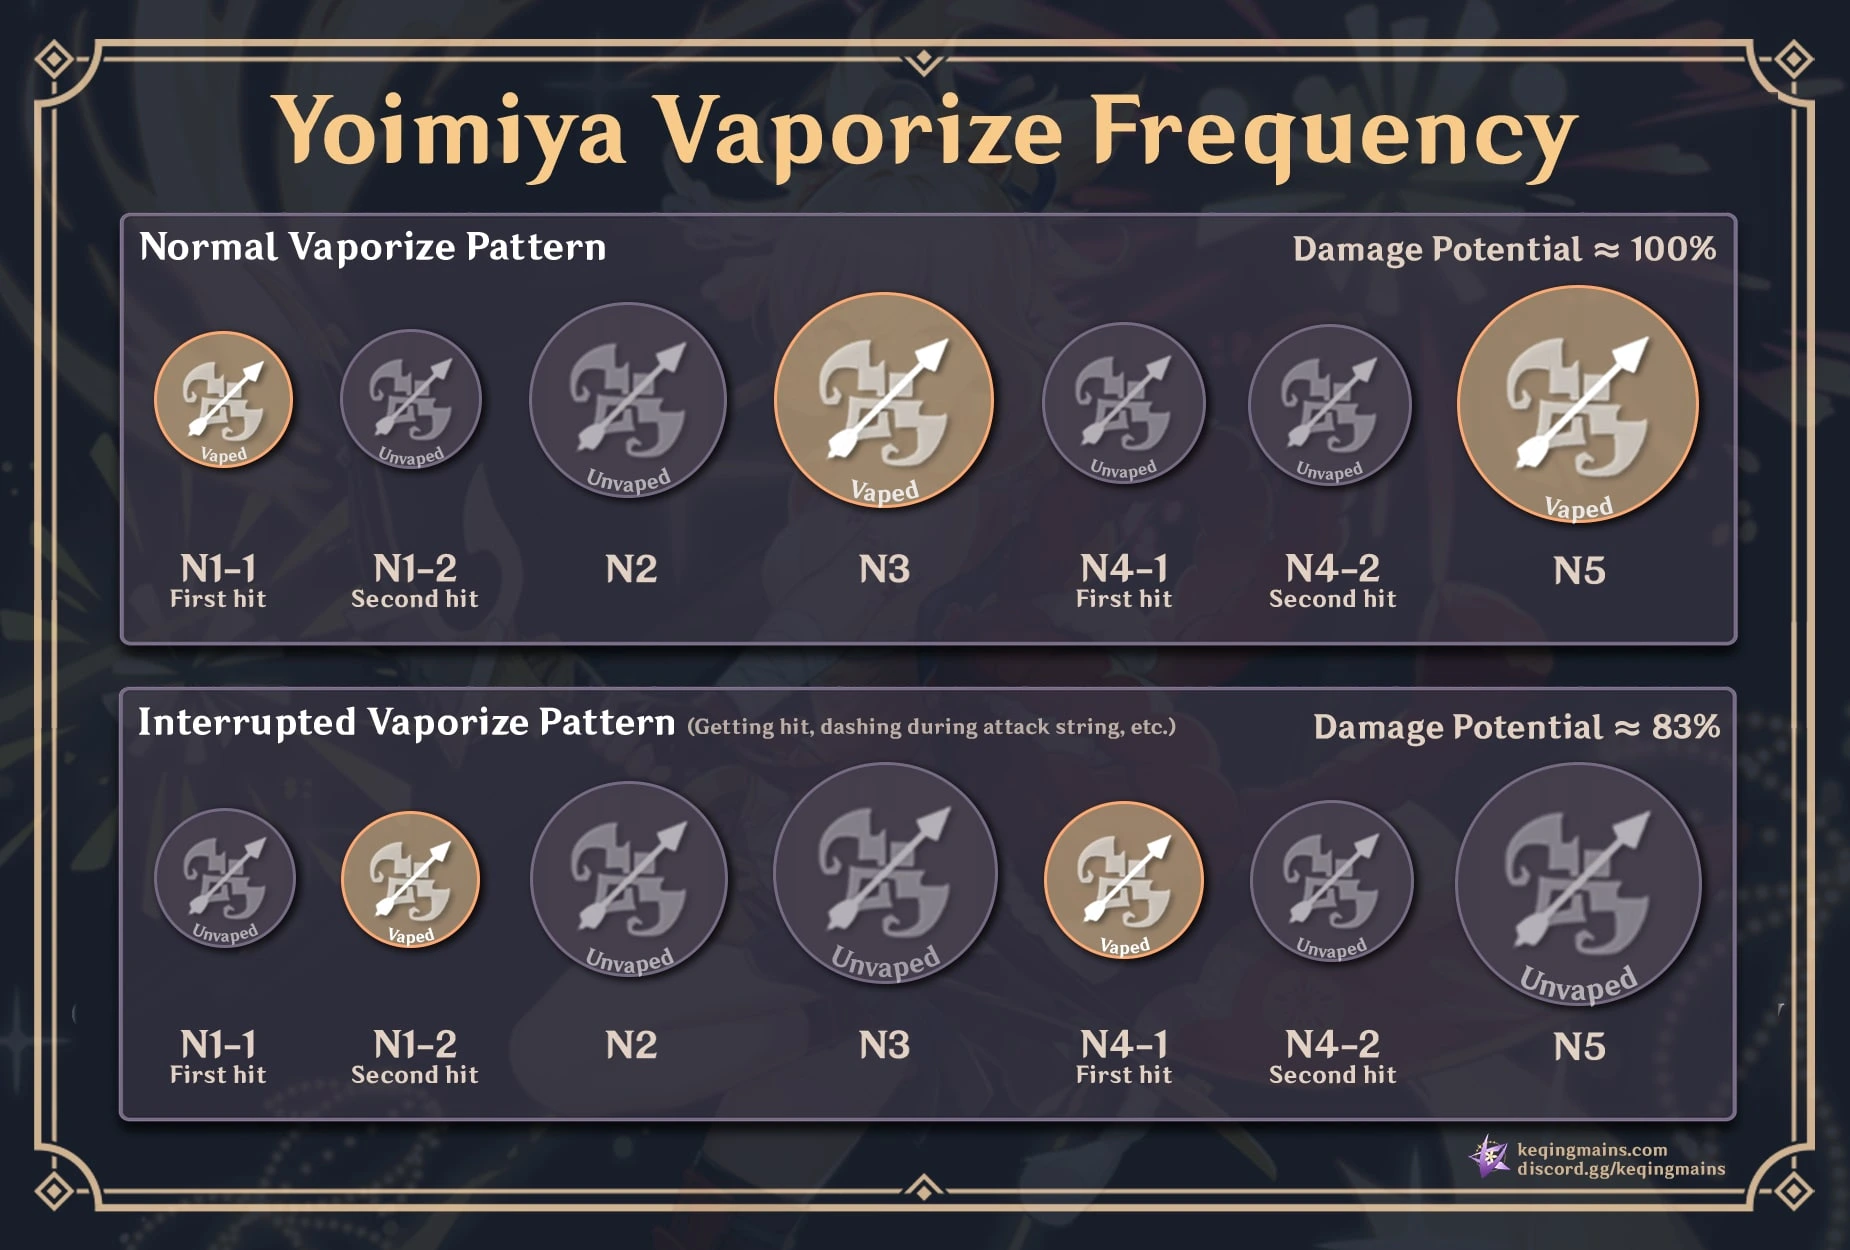
There are two key things to note with Yoimiya’s Normal Attack Vaporize sequence:
1. Yoimiya should consistently perform a full attack string without being interrupted.
If she is interrupted, her ICD becomes offset. Her 4th and 7th hits — N3 and N5, which have the largest multipliers — may no longer apply Pyro to trigger Reverse Vaporize. For example, if Yoimiya’s ICD becomes offset by one hit, her 2nd and 5th hit triggers Reverse Vaporize instead of her 1st, 4th, and 7th hit, which leads to a damage loss.
However, if Yoimiya dashes immediately before her 4th and 7th hit, then her ICD stays within the preferred sequence. Additionally, dashing again after losing the preferred Vape patterns often fixes the ICD issue.
2. Yoimiya should dash or RR cancel after defeating an enemy.
ICD is not shared between enemies. This means that the sequence above only applies to attacks on the same target. If Yoimiya switches her attacks to another enemy in the middle of her Normal Attack string, her ICD resets and can become offset. For example, if Yoimiya defeats an enemy with her Vaporized 4th hit, then her 5th hit triggers Reverse Vaporize on a new enemy and misaligns her ICD. In this scenario, after defeating an enemy, you should immediately either dash or RR cancel to restart Yoimiya’s attack string and stay in the preferred Vaporize sequence.
Elemental Skill | Niwabi Fire-Dance
Talent Description
Yoimiya waves a sparkler and causes a ring of saltpeter to surround her.
Niwabi Enshou
During this time, arrows fired by Yoimiya's Normal Attack will be Blazing Arrows, and their DMG will be increased and converted to Pyro DMG.
During this time, Normal Attack: Firework Flare-Up will not generate Kindling Arrows at Charge Level 2.
This effect will deactivate when Yoimiya leaves the field.
Yoimiya’s Elemental Skill is fairly straightforward.
- Yoimiya’s Normal Attacks are converted to Pyro attacks for 10 seconds.
- Her Normal Attack damage is multiplied by a percent value that scales with her Elemental Skill’s Talent Level.
- This is a separate multiplier so it increases the effectiveness of all other stats like DMG%, CRIT, ATK, etc.
- Pyro-converted Normal Attacks are considered Normal Attack DMG. They are NOT considered Elemental Skill DMG.
- Normal Attack DMG% buffs from Thundering Pulse, Rust, and Slingshot all apply to the Pyro-converted Normal Attacks.
- In a full 3[N5D] combo, Yoimiya generates 4-5 Pyro Particles.
Elemental Burst | Ryuukin Saxifrage
Talent Description
Yoimiya leaps into the air along with her original creation, the "Ryuukin Saxifrage," and fires forth blazing rockets bursting with surprises that deal AoE Pyro DMG and mark one of the hit opponents with Aurous Blaze.
Aurous Blaze
All Normal/Charged/Plunging Attacks, Elemental Skills, and Elemental Bursts by any party member other than Yoimiya that hit an opponent marked by Aurous Blaze will trigger an explosion, dealing AoE Pyro DMG.
When an opponent affected by Aurous Blaze is defeated before its duration expires, the effect will pass on to another nearby opponent, who will inherit the remaining duration.
One Aurous Blaze explosion can be triggered every 2s. When Yoimiya is down, Aurous Blaze effects created through her skills will be deactivated.
Yoimiya’s Elemental Burst applies a mark called Aurous Blaze to an enemy. Any damage dealt by Yoimiya’s team members (but not Yoimiya herself) can trigger the mark, which causes it to explode and deal AoE Pyro damage. If the enemy with the mark is defeated, the mark jumps to another nearby enemy. Explosions can occur every 2s. Hydro teammates can trigger Vaporize off these explosions.
Burst Mechanics
There are a few relevant mechanics for Yoimiya’s Elemental Burst.
- It has standard ICD, which means that Yoimiya only triggers an Elemental Reaction on every other hit of her Elemental Burst (due to the 2.5s rule).
- It does not snapshot, so she cannot take advantage of buffs from characters like Bennett or Xiangling on her Burst after switching away.
- Yoimiya’s initial hit of her Elemental Burst can miss.
- Upon cast, Yoimiya fires an arrow downwards, which applies the mark to the hit enemy.
- If the enemy moves and the arrow misses, Aurous Blaze will not be applied to any enemy.
- The mark does not jump to another enemy when a new wave spawns.
- Off-field abilities can trigger Aurous Blaze. This means that although Yoimiya herself cannot trigger Aurous Blaze, it can be triggered while she is on-field if she is driving off-field abilities from other characters.
Overall, Yoimiya’s Elemental Burst is fairly subpar. While it can deal some damage, it is an insignificant portion of Yoimiya’s damage in most teams (about 4-8%). It also has a long animation, so it can extend the rotation. The poor damage and minor ATK% buff (via her A4) can’t compensate for that DPS loss. Additionally, not all teammates scale with ATK (such as Yelan, Furina, and Yun Jin), which means they won’t benefit from the ATK% buff.
However, Yoimiya can use her Burst for other reasons. For example, it can fill rotation downtime, activate Thundering Pulse’s passive (especially if not using 4pc Shimenawa’s Reminiscence), provide i-frames, or apply Pyro without using her Normal Attacks.
 Ascension 1 Passive (A1) | Tricks of the Trouble-Maker
Talent Description
During Niwabi Fire-Dance, shots from Yoimiya's Normal Attack will increase her Pyro DMG Bonus by 2% on hit. This effect lasts for 3s and can have a maximum of 10 stacks.
Yoimiya’s A1 Passive gives her a 2% Pyro DMG buff when her Normal Attacks hit opponents. Multi-hit attacks give two stacks, so Yoimiya’s first Normal Attack (2 hits) gives her a 4% Pyro DMG buff. Each stack has a duration of 3s, which is refreshed when a new stack is gained. Yoimiya can obtain a maximum of 10 stacks, which translates to a 20% Pyro DMG buff. This Passive can also boost her Burst damage while Yoimiya is on-field using her Normal Attacks.
 Ascension 4 Passive (A4) | Summer Night's Dawn
Talent Description
Using Ryuukin Saxifrage causes nearby party members (not including Yoimiya) to gain a 10% ATK increase for 15s. Additionally, a further ATK Bonus will be added on based on the number of "Tricks of the Trouble-Maker" stacks Yoimiya possesses when using Ryuukin Saxifrage. Each stack increases this ATK Bonus by 1%.
Yoimiya’s A4 Passive provides her teammates with a 10% ATK buff immediately after using her Elemental Burst. An additional 1% ATK Bonus is given for every stack of her A1 Passive, for a total maximum of 20% ATK. If Yoimiya runs off-field DPS units who scale with ATK — such as Xingqiu, Fischl, Xiangling, or Beidou — this Passive can slightly buff team damage. Since Yoimiya does not Burst frequently, the damage increase is small on average.
 Utility Passive | Blazing Match
Talent Description
When Yoimiya crafts Decoration, Ornament, and Landscape-type Furnishings, she has a 100% chance to refund a portion of the materials used.
A useful Utility Passive for Serenitea Pot mains!
Constellations
Yoimiya’s Constellations are not particularly valuable for her. The majority of her Constellations are very underwhelming, and even her sixth Constellation is not particularly powerful. This makes her a relatively complete unit at C0.
Players who want to increase her damage through Constellations or weapons should instead consider investing into her teammates. Constellations and Best-in-Slot weapons on Yelan, Furina, and Kazuha result in much more damage for both Yoimiya's teams and Yoimiya herself.
Assumptions for Constellation calculations can be found here. Numbers are ranges for the two following teams:
- Yoimiya – Yelan – Zhongli – Bennett
- Yoimiya – Yelan – Zhongli – Yun Jin
Constellations are compared based on the increase to Yoimiya’s personal damage.
 Constellation 1 | Agate Ryuukin
The Aurous Blaze created by Ryuukin Saxifrage lasts for an extra 4s.
Additionally, when an opponent affected by Aurous Blaze is defeated within its duration, Yoimiya's ATK is increased by 20% for 20s..
| DPS Increase from C0: 1-2% |
Yoimiya’s first Constellation slightly increases the damage dealt by her Elemental Burst by increasing its duration from 10s to 14s. Given that Yoimiya’s Elemental Burst does not represent a significant portion of her damage, this effect is negligible. The slight ATK% buff is appreciated, but Yoimiya is typically used with units who buff ATK, meaning that the buff is not particularly valuable. Additionally, the ATK buff cannot be obtained when facing only one enemy since you cannot defeat an opponent to activate it.
 Constellation 2 | A Procession of Bonfires
When Yoimiya's Pyro DMG scores a CRIT Hit, Yoimiya will gain a 25% Pyro DMG Bonus for 6s.
This effect can be triggered even when Yoimiya is not the active character.
| DPS Increase from C1: 8% | Total DPS Increase from C0: 9–10% |
Yoimiya’s second Constellation functionally gives her an almost permanent 25% Pyro DMG buff. It requires CRIT hits, but her CRIT Rate Ascension Stat makes it easier to build enough CRIT Rate to consistently trigger this Constellation. This Constellation is the largest DPS increase aside from her C6.
 Constellation 3 | Trickster's Flare
Increase the Level of Niwabi Fire-Dance by 3.
Maximum upgrade level is 15.
| DPS Increase from C2: 3–5% | Total DPS Increase from C0: 12-16% |
This Constellation does not really do much for Yoimiya. She does not gain much damage from Talent Levels on her Elemental Skill.
 Constellation 4 | Pyrotechnic Professional
When Yoimiya's own Aurous Blaze triggers an explosion, Niwabi Fire-Dance's CD is decreased by 1.2.
| DPS Increase from C3: 0% | Total DPS Increase from C0: 12-16% |
Yoimiya’s fourth Constellation is only effective if her Burst is used consistently and if Yoimiya’s Skill cooldown is the limiting factor for the rotation length. Unfortunately, there are not many teams where this is the case. Nevertheless, this Constellation does provide a small quality of life buff in Co-Op and combat events.
 Constellation 5 | A Summer Festival's Eve
Increases the Level of Ryuukin Saxifrage by 3.
Maximum upgrade level is 15.
| DPS Increase from C4: 1% | Total DPS Increase from C0: 13–17% |
This Constellation has the same problem as Yoimiya’s third Constellation — Yoimiya’s Burst simply is not very important for her damage, which makes Burst Talent Levels pretty useless.
 Constellation 6 | Naganohara Meteor Swarm
During Niwabi Fire-Dance, Yoimiya's Normal Attacks have a 50% chance of firing an extra Blazing Arrow that deals 60% of its original DMG. This DMG is considered Normal Attack DMG.
| DPS Increase from C5: 12–15% | Total DPS Increase from C0: 28–32% |
With Yoimiya’s C6, she has a 50% chance to fire an additional Pyro-converted arrow for each Normal Attack. While this Constellation is theoretically a 20–30% DPS increase, its value varies since the additional Pyro-converted arrows share ICD with her regular attack string and can thus interfere with her Vaporize pattern! In Mono Pyro and Overloaded teams, she reaches the theoretical 20–30% DPS increase since those teams focus almost entirely on pure Pyro damage.
Vaporize Pattern
Yoimiya’s Vaporize pattern changes at C6 since the additional Pyro-converted Normal Attacks share ICD with her regular Normal Attacks. For example, if the first Normal Attack fires an additional arrow, then the attack sequence is N1-1 → N1-2 → C6 Arrow → N2 → N3, etc. This causes her N2 to Vaporize instead of her N3, resulting in a damage loss. If her N3 fires an additional arrow, then the sequence continues as N3 → C6 Arrow → N4-1 (Vaporized) → N4-2 → N5. This means that her N5, the Normal Attack with the largest multiplier, will not be Vaporized.
From the example above, you can see how Yoimiya’s C6 interferes with her ideal Vaporize sequence. This makes the actual damage increase in Vape, VV Vape, and Overvape teams significantly lower, even approaching as little as 8%.
Note that C6 Xingqiu and even a C0 Yelan still apply enough Hydro for C6 Yoimiya to consistently trigger Vaporize. However, C6 Yoimiya may not always Vaporize her desired hits (i.e., the strongest ones).
Yun Jin
The additional Blazing Arrows triggered by Yoimiya’s C6 also benefit from Yun Jin’s buff. Additionally, Yun Jin’s buff applies after the 60% multiplier to Yoimiya’s damage, which makes Yun Jin even more effective for a C6 Yoimiya. Note that C6 Yoimiya may deplete Yun Jin’s buff before the end of her damage window since the additional Blazing Arrows consume Yun Jin’s buff quota.
Multi-Hit Normal Attacks (N#1 and N#4)
Yoimiya’s C6 can only fire one additional arrow per Normal Attack. This means her N1 and N4 cannot trigger the effect twice. In terms of damage, the 60% damage increase applies to both hits of her N1 and N4.
For example, at Talent Level 9, Yoimiya’s N1 has a Talent Multiplier of 59.94% for each hit (N1-1 and N1-2). If her N1 triggers her C6, the additional arrow would have a Talent Multiplier of 0.6*(59.94*2)%, or 71.93%.
Artifacts
The loveliest fireworks go along with the most wondrous moments.
Artifact Sets
Artifact Set Overview
The following 4pc artifact sets are not listed in order of strength.
4pc Shimenawa’s Reminiscence | 4pc Shimenawa’s Reminiscence (SR) is Yoimiya’s most consistent option. While other sets can technically outperform depending on the scenario, 4pc SR is the baseline recommendation for almost all of Yoimiya’s possible teams. It is worth noting that some of her teammates such as Yelan and Xingqiu use 4pc Emblem of Severed Fate, which can be farmed in the same domain as 4pc SR. Yoimiya must have 15 or more Energy when she uses her Skill to trigger the 4pc effect. See ER Requirements and Burst Use for more information on Energy management with 4pc SR. |
 4pc Echoes of an Offering | 4pc Echoes of an Offering (Echoes) is the best alternative option. Its 4pc effect does not rely on Elemental Reactions unlike 4pc Crimson Witch or 4pc Gilded Dreams, making the set relatively versatile between archetypes. 4pc Echoes can outperform 4pc SR in teams without Yun Jin, since both Yun Jin and 4pc Echoes grant Additive Base DMG Bonus. But 4pc SR can be competitive or even outperform it if Yoimiya uses her Burst when available. With 4pc Echoes, Yoimiya’s damage may fluctuate, especially on Vaped hits. This is due to the semi-random nature of the 4pc effect compared to other sets which have consistent 4pc effects. The proc rate of the 4pc effect is affected by ping; the higher the ping, the lower the proc rate. However, the exact losses between different pings have not been investigated in detail. |
 4pc Crimson Witch of Flames | 4pc Crimson Witch of Flames (CW) is an alternative option that can be used in Vape-related teams, but is not worth using otherwise. In Overvape teams and Xingqiu Vape teams where Yoimiya can use her Burst without extending the rotation significantly, 4pc CW with Burst can be comparable to 4pc SR without Burst. Yoimiya gains 1 stack of its 4pc effect in a typical rotation. |
 4pc Gilded Dreams | 4pc Gilded Dreams (GD) is similar to 4pc CW. It is effective in Vape-related teams thanks to the EM it provides, but falls behind otherwise. It is comparable to 4pc CW in most Vape-related teams, though it is slightly worse in Xingqiu Vape teams with Yoimiya’s Burst. However, it is a more Resin-efficient option than 4pc CW since it shares the same Domain as Deepwood Memories, a strongly recommended set in most Dendro teams. An ATK% Sands should be used with this artifact set. An EM Sands can be worse since the 2pc and 4pc set bonuses already provide a high amount of EM. |
2pc + 2pc Mixed Set | 2pc Set Bonuses: ATK%, EM, Crimson Witch of Flames, Marechaussee Hunter These 2pc combinations are great generalist or transitional sets while farming for 4pc SR. Depending on substats, a 2pc + 2pc mixed set can even outperform the 4pc sets. They are more effective in teams filled with multiple off-field DPS units such as Overvape, since Yoimiya’s personal performance is less important for the team’s DPS. |
 4pc Marechaussee Hunter | 4pc Marechaussee Hunter is only viable with Furina, but it is by far the best option in such teams. With Furina and this artifact set, an ATK% or EM Goblet can be viable depending on substats. Bennett’s high Flat ATK buff will make such Goblets less viable, but additional DMG Bonus buffs provided by Yelan A4, Kazuha A4, or Furina’s early Constellations can make them competitive or even better depending on the rotations. The DPS increase from this set is unquantifiable given our calculation assumptions, but it is considerably better than other sets with Furina. |
 4pc Retracing Bolide | 4pc Retracing Bolide (RB) is not recommended. It performs worse than 4pc SR even with a shielder. Additionally, 100% shield uptime is not guaranteed in practice, since even Zhongli’s shield can break in the hardest content. |
Artifact Set Comparison
Xingqiu Vape
Assumptions:
Xingqiu — Zhongli — Bennett / Yun Jin
Yoimiya C0 90/90 R3 Rust or R1 TPulse (3 stacks with 4pc SR, 2 stacks otherwise).
EM Sands (except 4pc GD), Pyro DMG% Goblet, CRIT Rate Circlet.
3[N5] with Vapes on N1-1, N3, N5
Burst every 2 rotations, 4pc SR never Bursts.
4pc Echoes assumes a 43% proc rate with around 300 ping.
4pc Tenacity Zhongli, C5 Bennett T12 998 ATK, C5 Yun Jin T12 2875 DEF.
Listed % are based on Personal DPR compared to 4pc SR.
For more information on the sands and possible team combinations, please check the sheet here.
Xingqiu Vape with Bennett
| Artifact Sets | R3 Rust | R1 Thundering Pulse |
| 4pc Shimenawa’s Reminiscence (Without Burst) | 100% | 100% |
| 4pc Echoes of an Offering | 105% | 102% |
| 4pc Crimson Witch of Flames | 100% | 97% |
| 4pc Gilded Dreams | 98% (ATK% Sands), 98% (EM Sands) | 95% (ATK% Sands), 93% (EM Sands) |
| 4pc Retracing Bolide | 98% | 95% |
| 2pc CW + 2pc ATK% | 95% | 90% |
Xingqiu Vape with Yun Jin
| Artifact Sets | R3 Rust | R1 Thundering Pulse |
| 4pc Shimenawa’s Reminiscence (Without Burst) | 100% | 100% |
| 4pc Echoes of an Offering | 98% | 98% |
| 4pc Crimson Witch of Flames | 99% | 95% |
| 4pc Gilded Dreams | 96% (ATK% Sands), 94% (EM Sands) | 92% (ATK% Sands), 89% (EM Sands) |
| 4pc Retracing Bolide | 97% | 95% |
| 2pc CW + 2pc ATK% | 94% | 90% |
Yelan Vape
Assumptions
Yelan — Zhongli — Bennett or Yun Jin
R3 Rust assumes no Burst.
R1 TPulse assumes Burst every other rotation, except 4pc SR with no Burst.
EM Sands (except 4pc GD / 2pc EM + 2pc EM), Pyro DMG% Goblet, CRIT Rate Circlet.
4pc Echoes assumes a theoretical 50.2% proc rate with 0 ping.
4pc Tenacity Zhongli, 4pc Noblesse C6 Bennett, 4pc Husk C6 Yun Jin.
Listed % are based on Team DPS compared to 4pc SR.
Calcs can be found here.
Yelan Vape with Bennett
| Artifact Sets | R3 Rust | R1 Thundering Pulse |
| 4pc Shimenawa’s Reminiscence | 100% | 100% |
| 4pc Echoes of an Offering | 101% | 98% |
| 4pc Crimson Witch of Flames | 96% | 94% |
| 4pc Gilded Dreams | 94% (ATK% Sands), 95% (EM Sands) | 93% (ATK% Sands), 93% (EM Sands) |
| 4pc Retracing Bolide | 95% | 93% |
| 2pc Mixed Sets | 92–93% | 90–91% |
Yelan Vape with Yun Jin
| Artifact Sets | R3 Rust | R1 Thundering Pulse |
| 4pc Shimenawa’s Reminiscence | 100% | 100% |
| 4pc Echoes of an Offering | 96% | 94% |
| 4pc Crimson Witch of Flames | 95% | 94% |
| 4pc Gilded Dreams | 95% (ATK% Sands), 94% (EM Sands) | 94% (ATK% Sands), 92% (EM Sands) |
| 4pc Retracing Bolide | 95% | 93% |
| 2pc Mixed Sets | 92–93% | 90–92% |
Overvape
Assumptions
Xingqiu — Fischl — Bennett: Burst every 2 rotations, 4pc SR Burst every 2 rotations or no Burst.
Yelan — Fischl — Zhongli: Burst every 2 rotations. 4pc SR Burst every 3 rotations or no Burst.
Both teams with R3 Rust.
EM Sands (except 4pc GD / 2pc EM + 2pc EM), Pyro DMG% Goblet, CRIT Rate Circlet.
4pc Echoes assumes a theoretical 50.2% proc rate with 0 ping.
4pc Tenacity Zhongli, 4pc Noblesse C6 Bennett.
Listed % are based on Team DPS compared to 4SR (without Burst).
Calcs can be found here.
| Artifact Sets | Xingqiu — Fischl — Bennett | Yelan — Fischl — Zhongli |
| 4pc Shimenawa’s Reminiscence (With Burst) | 102% | 102% |
| 4pc Echoes of an Offering | 102% | 102% |
| 4pc Shimenawa’s Reminiscence (Without Burst) | 100% | 100% |
| 4pc Crimson Witch of Flames | 100% | 100% |
| 4pc Gilded Dreams | 99%(ATK% sands), 100%(EM sands) | 102%(ATK% sands), 101%(EM sands) |
| 4pc Retracing Bolide | - | 98% |
| 2pc Mixed Sets | 97–99% | 97–100% |
Stat Priorities
 Sands |  Goblet |  Circlet |
| ATK% / EM | Pyro DMG% | CRIT Rate / CRIT DMG |
Substat Priority:
CRIT > ATK% ≥ EM > ER%
EM is desired in teams where Yoimiya triggers Elemental Reactions, except in Pure Overloaded teams. Vape teams with Bennett or Yun Jin and Overvape teams with high Electro application (namely, C6 Fischl) will prefer an EM Sands over an ATK% Sands. In Pure Overloaded teams, while EM increases Overloaded damage, it is always better to focus on ATK% and CRIT.
We recommend using Genshin Optimizer to compare your actual artifacts.
ER Requirements and Burst Use
Yoimiya’s Burst should only be used when it is available (typically every 2 or 3 rotations) or skipped entirely. It is not necessary to build ER%.
| Skipping Burst entirely (rotation does not have downtime) | Not having downtime is common in shorter rotations (around 18s), but is also possible in some longer rotations (>20s). As long as it does not extend the rotation or interfere with the next rotation due to cooldowns, prioritize a second Elemental Skill use from units with short cooldowns, such as Bennett, Kazuha, or Beidou. Doing so is a better use of potential rotation downtime as it will lower the team’s ER requirements. |
| Burst when available (rotation has some downtime) | Longer rotations are more likely to have downtime compared to shorter rotations, even after certain teammates use two Elemental Skills per rotation. In that case, Yoimiya can use her Burst when it is available, providing a small ATK% buff and some damage without extending the rotation. These rotations usually include teammates with cooldowns longer than the 18s cooldown for Yoimiya’s Elemental Skill; examples of such teammates include Xingqiu, Furina, Beidou, and Xiangling. Although uncommon, some shorter rotations have downtime. They tend to include units that have not only short cooldowns but also short field times, such as Fischl or Chiori. However, even in shorter rotations with downtime, there may not be enough time to fit in Yoimiya’s Burst without extending the rotation especially if not played frame-perfectly. |
One notable exception is if using both Thundering Pulse and an artifact set other than 4pc SR. In order to keep the third stack from Thundering Pulse's passive, Yoimiya should Burst even if it extends the rotation, since the only way to decrease Yoimiya's Energy in this case is to use her Burst.
As previously mentioned, Yoimiya’s Burst is not a significant part of her kit. There is no need to build ER% on her to use her Burst frequently. Her tremendously high ER requirements — even moreso if using 4pc SR — also disincentivize building ER%.
Energy Management with 4pc Shimenawa’s Reminiscence
4pc SR further increases her already high ER requirements by requiring 15 more Energy. Since she does not use her Burst in a meaningful way, the 15 Energy consumption from 4pc SR becomes harmless.
If using Yoimiya’s Burst with 4pc SR, you need to recover 15 Energy before using her Elemental Skill again. Teammates who hold Favonius weapons or provide Pyro particles can help Yoimiya recover 15 Energy between her Burst and her next Skill.
Weapons
The loveliest fireworks go along with the most wondrous moments.
Assumptions
Yelan — Zhongli — Bennett or Yun Jin
4pc SR with EM Sands and no Burst (except TPulse and Polar Star).
TPulse assumes Burst every 3rd rotations or no Burst
Polar Star assumes 3 scenarios: no Burst, Burst every 3rd rotation, or Burst every 3rd rotation with a short Aimed Shot before E.
4pc Tenacity Zhongli, 4pc Noblesse C6 Bennett, 4pc Husk C6 Yun Jin
Listed % are based on Team DPS compared to Slingshot R5 with Bennett.
Calcs including comparisons to Slingshot R5 with Yun Jin can be found here.
Recommended Bows
| Weapon | % of Slingshot R5 | Notes |
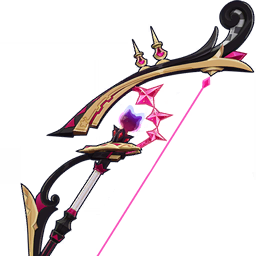
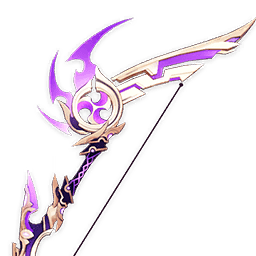 Thundering Pulse | R5: 126% R1: 111% | Thundering Pulse is Yoimiya’s best option. This is the only 5-star Bow worth pulling for Yoimiya. It is relatively easy to maintain three stacks since Yoimiya’s Burst is not up frequently. The Energy consumption from 4pc SR also helps maintain stacks. This is beneficial in shorter rotations with Yelan since using Yoimiya’s Burst to drain Energy extends the rotation. |
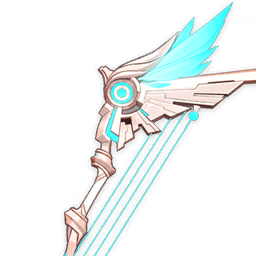
 Aqua Simulacra | R1: 105% | Aqua Simulacra is Yoimiya’s 2nd-best 5-star option, performing slightly better than R5 Rust. The passive requires you to be within 8 meters from the enemy, which is slightly longer than 3 abyss tiles (~7.6m). This can be inconvenient as Yoimiya’s Normal Attack sequence moves her backwards, but especially so against multi-wave content or mobile enemies. It is better used by Yelan or Fischl, but if they are not in Yoimiya’s team, feel free to use it. Do not pull Aqua Simulacra just for Yoimiya. |
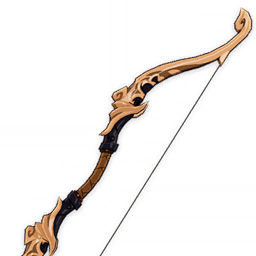
 Rust | R5: 103% R3: 99% R1: 94% | Rust is Yoimiya’s best 4-star weapon at R5, providing a huge 80% Normal Attack DMG Bonus. It performs better than every 5-star Bow except Thundering Pulse and Aqua Simulacra. At R5, Rust is only surpassed by R5 Slingshot in teams where both Yun Jin and Bennett are present. |
 Slingshot | R5: 100% | Slingshot is a 3-star Bow obtained from wishing, and it performs better than every 4-star Bow except R4+ Rust, on the condition that either Bennett or Yun Jin is in the team. Slingshot can even outperform R5 Rust if Yoimiya is buffed by both Bennett and Yun Jin. Slingshot does have a range requirement, but it is not too difficult to maintain. Note: You can get a free Slingshot by talking to Vasco, an NPC located in Port Ormos of the Sumeru region. |
Other 5-Star Bows
These 5-Star Bows below do not outperform high-refined Slingshot or Rust by significant amounts. 5-star CRIT Bows are often better used by other Bow users, such as Fischl.
| Weapon | % of Slingshot R5 | Notes |
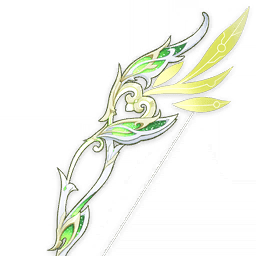
 The First Great Magic | R1: 104% | The First Great Magic (TFGM) has the same Base ATK and CRIT DMG secondary stat as Thundering Pulse, but its passive only grants ATK% and Movement SPD, which is wasted on Yoimiya who does not need to be as mobile as other characters. The ATK% from TFGM depends on the number of Pyro teammates in the team. It performs slightly better than R5 Rust with Bennett, and is equal to R5 Slingshot with Yun Jin. It is not worth pulling for Yoimiya. |
 Skyward Harp | R1: 102% | Skyward Harp performs decently, providing high Base ATK and a modest amount of CRIT stats, but it is outperformed by Rust R5. Skyward Harp’s performance can marginally increase in multi-target scenarios since its proc effect deals AoE damage, but this damage is fairly insignificant. |
 Hunter’s Path | R1: 101% | Hunter’s Path is a viable stat stick, providing high CRIT Rate and DMG% Bonus. This DMG% Bonus is unconditional but lower than what Aqua Simulacra provides. It performs on par with R5 Slingshot for Yoimiya. |
 Polar Star | R1 : 98–100% | Polar Star is a viable option if you have a spare lying around. In shorter rotations with Yelan, using Yoimiya’s Burst and/or a short Physical Aimed Shot for its ATK% passive extends the rotation, offsetting the buff and leading to a minor team DPS loss (about 1-2%) at low refinement. Therefore, it is not necessary to pre-stack the weapon passive in such teams unless there is spare time. |
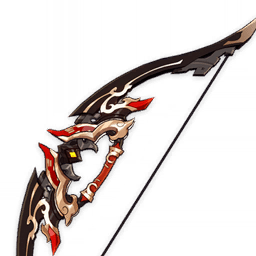
 Amos’ Bow | R1: 95% | Amos’ Bow is not worth using on Yoimiya. It performs worse than R5 Slingshot. Note: Yoimiya’s Level 2 Kindling Arrows from her Charged Shot can almost always gain 5 stacks because of their long travel time, but Yoimiya’s Level 2 Charged Shot is never worth using in combat. |
Synergies
Let's watch the fireworks together in silence.
Rating System
- S: Best in many teams
- A: Strong in a variety of teams
- B: Viable in some teams and scenarios
- C: Subpar compared to other units in the same niche
- D: Not recommended


Pyro Units
 Bennett Synergy: S+ | Main Role: Buffer, Healer Secondary Role: Enabler, Battery Weapon: Highest Base ATK Sword Artifact Set: 4pc Noblesse Oblige, 4pc Instructor, 4pc Song of Days Past (Furina) Artifact Stats: ER%, HP% Teams: Almost any team Scenarios: Whenever you can Bennett is Yoimiya’s best support. His Burst provides a strong Flat ATK buff, a self-applied Pyro aura that is required for VV setups, and healing for the on-field character. His Skill generates Pyro Particles, lowering Yoimiya’s ER requirements. Bennett also buffs teammates who can snapshot his Flat ATK buff. Examples of such characters include Fischl, Xiangling, and Beidou. In teams with these characters, replacing Bennett with another unit is a damage loss, to the point where running a different team might be preferable. Bennett in Furina Teams In Yoimiya’s teams with Furina, Bennett is the best healer available. He should prioritize ER%, HP%, and Healing Bonus stats since his healing is necessary to counteract Furina’s teamwide HP drain. In these teams, 4pc Song of Days Past can be better than 4pc Noblesse Oblige if Yoimiya is the only ATK-scaling DPS. Although Bennett is not a teamwide healer, his Burst provides high healing per tick, which can overheal characters who don’t scale on HP. The Healing Bonus buff granted by Furina’s Burst further increases his healing, helping him stack a decent amount of Fanfare. |
 Chevreuse Synergy: S | Main Role: Buffer, Overloaded Team Enabler, Healer Secondary Role: Quickswap DPS (with Bennett) Weapon: Favonius Lance, Dialogues of the Desert Sages, Rightful Reward (at C6), Black Tassel, DPS-oriented Polearms (for DPS Build) Artifact Set: 4pc Noblesse Oblige, 4pc Song of Days Past, 4pc Emblem of Severed Fate (for DPS Build) Artifact Stats: HP%, ER%, CRIT & ATK% (for DPS Build) Teams: Overloaded Scenarios: Single-target, AoE Chevreuse makes Overloaded teams a competitive archetype for Yoimiya. Most notably, the Fischl — Bennett — Chevreuse variant is comparable to Vaporize teams. After Overloaded is triggered, Chevreuse’s Hold Skill provides an ATK% buff to the whole team. As long as the team triggers Overloaded consistently and consists of only Pyro and Electro units, she also provides valuable Pyro and Electro RES Shred. Chevreuse’s ability to conveniently shred Pyro and Electro RES is especially valuable against enemies where it is difficult to set-up Swirls. Furthermore, because Yoimiya’s Normal Attack ICD does not matter in Overloaded teams, Chevreuse teams are easier to use without shields, and they are also easier to use in multi-target and multi-wave scenarios. Using Bennett over a Pyro shielder is highly recommended, as dodging is not a significant damage loss. Moreover, against enemies with an innate Hydro aura, Overloaded teams transform into Overvape teams, significantly increasing in performance. Chevreuse also provides some healing for the on-field character with her Elemental Skill, and her C6 provides additional teamwide healing. At C6, she also provides Pyro and Electro DMG Bonus to the teammates healed by her. Her Ousia-aligned damage can be useful against some Fontaine enemies, such as automatons. Quickswap DPS Chevreuse with Bennett With Bennett’s high Flat ATK buff, Chevreuse can be a Quickswap DPS who deals bursts of high damage within her short field time — especially if Chevreuse is C4. Building CRIT and ATK instead of HP reduces the ATK% buff from her A4, but she can still provide more than ~20% ATK without any HP% mainstats. Bennett’s Flat ATK buff and her own personal damage compensate for the lowered ATK% buff. Do note that building Chevreuse for Quickswap DPS requires relatively high investment on her, such as her Talent Levels and Artifacts. Such investments may be better spent on other characters. |
 Xiangling Synergy: A+ | Main Role: Off-Field DPS, Secondary Role: Buffer, Enabler Build: Typical DPS build Teams: Mono Pyro, “National” Scenarios: AoE, single-target Xiangling is an outstanding teammate in Yoimiya’s Mono Pyro teams. Her excellent damage, Pyro RES Shred at C1, and Pyro DMG% buff at C6 are particularly noticeable in multi-target, making up for Yoimiya’s lackluster personal AoE. Yoimiya — Bennett — Xiangling performs noticeably better with Furina than Kazuha in single-target scenarios. Yoimiya can also be played with the Xiangling — Bennett — Xingqiu core (commonly referred to as “National”). C6 Xingqiu is necessary to keep up with the Pyro application from both Yoimiya and Xiangling. This team is only recommended in single-target since the team lacks grouping and is limited to single-target Hydro application. Note that against enemies with large hitboxes, Xiangling’s Pyronado will hit twice per swing and cause both her and Yoimiya to miss Vapes. |
 Thoma Synergy: B | Main Role: Shielder Secondary Role: Buffer Weapon: ER% or HP% secondary stat Artifact Set: 4pc Noblesse Oblige, 4pc Instructor Artifact Stats: ER%, HP% Teams: Vape (most notably Double Hydro), VV Vape Scenarios: Single-target Thoma is a good comfort option for Yoimiya if Zhongli is not available. Yoimiya’s Normal Attacks constantly refresh his shield to ensure interruption resistance while performing her combo. Thoma’s Burst applies Pyro on cast, allowing an Anemo unit like Sucrose or Kazuha to Swirl in a VV Vape team. At C6, he provides a 15% DMG Bonus to Yoimiya’s Normal Attack. • However, Thoma has 3 primary issues that you should be aware of: In Vape compositions with either pre-C6 Xingqiu or C0 Yelan, Thoma’s Pyro application can potentially interfere with Yoimiya’s ability to trigger Vape. As such, he is recommended with C6 Xingqiu or Double Hydro teams for more consistency. • His shield is not strong enough to absorb all the damage from hard-hitting enemies, although it still provides interruption resistance against the breaking hit. • Multi-hit attacks from enemies can also break through Thoma’s shield, even if Yoimiya continues with her Normal Attacks. This defeats the purpose of running a shielder, so you should run an off-field damage dealer or buffer instead. |
 Dehya Synergy: C | Main Role: Defensive Support Secondary Role: N/A Weapon: Favonius Greatsword, Sacrificial Greatsword Artifact Set: 4pc Tenacity of the Millelith, 4pc Instructor Artifact Stats: HP%, CRIT Rate (Favonius) Teams: Vape (with Bennett) Scenarios: Single-target Dehya is a usable shielder replacement in Yoimiya’s teams. Her Skill provides a significant amount of interruption resistance, which makes Yoimiya quite comfortable to play. However, Dehya’s damage mitigation is not enough for her to act as the sole sustain support, so Bennett or another healer is necessary. Additionally, Dehya’s increased interruption resistance (from her A1 Passive) only lasts 9s, which is not enough to fully cover Yoimiya’s attack window. Dehya can hold a high-refined Sacrificial Greatsword to reduce her Skill’s long 20s cooldown; she can also hold Favonius Greatsword for Energy generation. |
 Yanfei (C4+) Synergy: D | Main Role: Shielder Secondary Role: N/A Weapon: R5 Prototype Amber Artifact Set: 4pc Noblesse Oblige, 2pc Mixed Sets Artifact Stats: HP%, ER% Teams: Vape, VV Vape Scenarios: Single-target Yanfei provides a decent shield with her C4 and minor healing from R5 Prototype Amber. However, Shieldbot Yanfei has extremely high ER requirements and should really be avoided at all costs with Yoimiya. She is basically a last resort option if you lack any other shield option or Pyro enabler in VV Vape. |
 Xinyan Synergy: D | Main Role: Shielder Secondary Role: N/A Weapon: Favonius Greatsword Artifact Set: 4pc Tenacity of the Millelith, 4pc Noblesse Oblige Artifact Stats: DEF%, ER%, CRIT Rate (Favonius) Teams: Vape, VV Vape Scenarios: Single-target Xinyan provides a shield that lasts 12s, but it is weaker than other alternatives. Her off-field Pyro application may also interfere with Yoimiya’s Vapes. She does not provide useful utilities or buffs compared to other shielders. |
Hydro Units
 Yelan Synergy: S+ | Main Role: Off-Field DPS, Enabler, Buffer Secondary Role: N/A Weapon: Favonius Warbow, Elegy for the End, or DPS-oriented Bow Artifact Set: 4pc Emblem of Severed Fate Artifact Stats: ER%, CRIT, HP% Teams: Vape, VV Vape, Overvape Scenarios: Single-target, AoE Yelan is the premier Hydro unit in Yoimiya’s teams even at C0. She provides strong off-field Hydro damage, a ramping DMG% buff to the on-field character, and enough Hydro application for Yoimiya to Vape all her preferred Normal Attacks. Her cooldowns enable perfectly loopable rotations without any downtime (in contrast to Xingqiu). However, in solo Hydro teams where she only uses one Skill, her ER requirements are extremely high. In VV Vape teams, Yelan’s Skill can deal substantive AoE damage, which helps Yoimiya in AoE scenarios. Comparison to Xingqiu: • Higher personal damage potential • Shorter cooldowns • Better scaling with vertical investment • Useful mobility with Skill • Lower Hydro application at C0 (compared to C6 Xingqiu), though still enough for Yoimiya • No defensive utility Aside from added mobility, Yelan does not provide Yoimiya with any defensive utility, which makes playing shieldless Yoimiya noticeably harder compared to Xingqiu. Yelan and Xingqiu can also be used together in Double Hydro Vape teams. |
 Furina Synergy: S | Main Role: Off-Field DPS, Enabler, Buffer Secondary Role: N/A Weapon: Key of Khaj-Nsut, DPS-oriented Sword, ER% secondary stat Sword Artifact Set: 4pc Golden Troupe, 4pc Tenacity of the Millelith Artifact Stats: ER%, HP%, CRIT Teams: Vape, VV Vape, Overvape, Mono Pyro Scenarios: Single-target, AoE; with another Hydro Furina is another great Hydro unit in Yoimiya’s teams. She can perform on par with Yelan in VV Vape — although Furina is harder to use in VV Vape (see below) — and can replace Xingqiu in Double Hydro with Bennett. Additionally, she makes Double Hydro Burgeon teams with Baizhu viable in AoE. Yoimiya-Furina teams deal comparable team damage to Yoimiya’s previously established Yelan Vape, Overvape, and Bennett–Yun Jin teams. To mitigate Furina’s HP drain and stack her Fanfare, playing with a healer is highly recommended. Bennett is the preferred healer, although Jean, Mika, Charlotte, and others still work. Note that Yoimiya may not contribute as much personal damage with other healers compared to with Bennett. Furina’s Hydro application is inconsistent as the sole Hydro unit in the team. The only recommended team with solo Hydro Furina is Yoimiya — Bennett — Kazuha — Furina, since Kazuha’s Burst can absorb Hydro to aid with Hydro application. In AoE scenarios, Kazuha’s Hydro-absorbed Burst applies too much Hydro, making it impossible to Swirl Pyro without missing Vapes. Double Hydro Furina teams are generally easier to play. Her Ousia/Pneuma-aligned damage can be useful against some Fontaine enemies, such as automatons. |
 Xingqiu Synergy: A+ | Main Role: Off-Field DPS, Enabler, Defensive Support Secondary Role: N/A Weapon: Favonius Sword, Sacrificial Sword, DPS-oriented Sword Artifact Set: 4pc Emblem of Severed Fate, 4pc Noblesse Oblige Artifact Stats: ER%, CRIT, ATK% Teams: Vape, VV Vape, Overvape Scenarios: Single-target, AoE Xingqiu is a valuable teammate for Yoimiya. While outclassed by Yelan in most Yoimiya teams due to his longer cooldowns, Xingqiu provides interruption resistance, damage reduction, minor healing, and stronger Hydro application at C6 (compared to C0 Yelan). If players are struggling to survive, he is a very good option. It should be noted that Xingqiu’s C6 is important to increase his Hydro application, reduce his ER requirements, and altogether increase his damage; but pre-C6 Xingqiu still works well with Yoimiya. Xingqiu is the best Hydro unit to use with Beidou. Their combined damage reduction and interruption resistance makes it nearly impossible for Yoimiya to die (especially with Bennett). Xingqiu can also be paired with Yelan or Furina in Double Hydro teams. Bennett is the recommended last slot, although this can be difficult as it means playing without a shield. While Zhongli as the last slot is a viable option, Yoimiya’s damage without ATK buffers falls off quite a bit. It is better to either go shieldless or change to a standard Vape team with one Hydro unit, Bennett/Yun Jin, and a shielder. Comparison to Yelan: • Lower personal damage potential • Longer cooldowns • Stronger Hydro application at C6 (compared to C0 Yelan) • Useful defensive utility in the form of slight interruption resistance, damage reduction, and minor healing Overall, Xingqiu is a more defensive comfort pick for Yoimiya. |
 Kokomi Synergy: C | Main Role: Healer Secondary Role: Buffer Weapon: Thrilling Tales of Dragon Slayers Artifact Set: 4pc Tenacity of the Millelith Artifact Stats: HP% Teams: Vape, Overvape Scenarios: With another Hydro Kokomi offers consistent healing and increases Yoimiya’s damage via ATK% buffs from TTDS and 4pc TotM. She provides slow AoE Hydro application with her Elemental Skill, which is barely enough by itself to enable Yoimiya to Vape. However, it is limited to a circle and less consistent than using a dedicated Vape enabler like Xingqiu, Yelan, or even Furina. She is a decent teammate for her support capabilities in conjunction with another Hydro character such as Yelan, Xingqiu, or Furina. |
 Candace Synergy: C | Main Role: Buffer, Enabler Secondary Role: N/A Weapon: Favonius Lance Artifact Set: 4pc Noblesse Oblige Artifact Stats: ER%, HP% Teams: Vape, Overvape Scenarios: With another Hydro Candace’s Normal Attack buff is usually not enough to warrant her placement in a team over other units like Yun Jin, Bennett, Fischl, or a different Hydro character. Furthermore, even at C6, solo Hydro Candace cannot enable Yoimiya to Vaporize all her Normal Attacks, so she should only be used in Double Hydro teams alongside Yelan or Furina to enable Hydro Resonance and slightly buff Yoimiya’s damage. Generally, Candace is a suboptimal pick. |
Electro Units
 Fischl Synergy: S | Main Role: Off-Field DPS, Enabler Secondary Role: Weapon: DPS-oriented Bows Artifact Set: 4pc Golden Troupe Build: DPS-oriented build Teams: Overvape, Overloaded Scenarios: Single-target, AoE (heavy enemies) Fischl is the best Electro character to pair with Yoimiya, especially at C6. She provides consistent single-target damage and Electro application for Overvape and Overloaded teams, especially thanks to her A4 Passive and C6. Yoimiya is also one of the best drivers for Fischl’s C6 since each of Yoimiya’s Normal Attacks (all 5) trigger an additional attack from Oz. Her high particle generation lowers ER requirements for non-Electro teammates by 5–10%. Additionally, Fischl is a valuable battery for Beidou in Double Electro teams. Always build Fischl for damage instead of utility — her personal damage contribution is far greater than what the ATK% buff from 4pc Tenacity of the Millelith brings. Before C6, solo Electro Fischl Overvape is not recommended since pre-C6 Fischl struggles to apply enough Electro for consistent Overloaded triggers. |
 Beidou Synergy: B+ | Main Role: Off-Field DPS Secondary Role: Enabler, Defensive Support Weapon: DPS-oriented Claymores with Fischl, ER secondary stat otherwise Artifact Set: 4pc Emblem of Severed Fate Build: DPS-oriented build Teams: Overvape, Overloaded Scenarios: AoE (heavy enemies) Beidou is an off-field Electro DPS who deals remarkable damage via her Elemental Burst when against 2–3 enemies. She also provides damage reduction and interruption resistance, which can fully replace a shield when paired with Xingqiu’s orbiting Rain Swords). Yoimiya’s personal damage is very dependent on having buffers in the team, which usually leaves no room for a battery for Beidou. That is, Fischl and Beidou together are usually a suboptimal option for Yoimiya. As such, Beidou as the only Electro character in the team should build at least ~250% ER, generally requiring an ER% Sands and Favonius Greatsword. Beidou can snapshot Bennett’s Flat ATK buff to make up for her missing ATK stats. While it is still possible to use Beidou and Fischl together in Yoimiya teams, running Double Electro in Overvape or Chevreuse Overloaded teams means not using Bennett. This significantly decreases Yoimiya and Fischl’s damage contribution, making the team much worse in single-target. |
 Yae Miko Synergy: C | Main Role: Off-Field DPS Secondary Role: Weapon: DPS-oriented Catalysts Artifact Set: 4pc Golden Troupe Build: DPS-oriented build Teams: Overvape, Overloaded Scenarios: Single-target, AoE Yae Miko is an off-field Electro DPS who can be used with Fischl in Overloaded Teams or as an alternative to Fischl in Overvape or Overloaded Teams. Yae’s Burst is one of the few sources of AoE damage in Yoimiya teams. However, it is not recommended to build ER on Yae to Burst every rotation since her ER requirements are too high and its long animation is likely to be a DPS loss. Instead, it is better to skip her Burst entirely or to use it every other rotation during rotation downtime. Yae is a suboptimal teammate in Overvape and Overload teams since she applies less Electro than C6 Fischl and needs significantly more field time. Her Skill also does not snapshot buffs such as Bennett’s Flat ATK buff. |
 Lisa Synergy: C | Main Role: Buffer, Enabler Secondary Role: N/A Weapon: Thrilling Tales of Dragon Slayers, Favonius Codex Artifact Set: 4pc Noblesse Oblige Artifact Stats: ER%, CRIT Rate (Favonius) Teams: Overvape, Overloaded Scenarios: Single-target, AoE (heavy enemies) Lisa is another option for an Electro unit in Yoimiya’s teams. She provides DEF Shred via her A4 Passive and a potent ATK% buff via Thrilling Tales of Dragon Slayers (TTDS) and 4pc Noblesse Oblige. In the rotation, she should use her abilities right before Yoimiya’s to trigger TTDS, especially because her DEF Shred and TTDS have relatively short duration (10s). On top of that, Lisa wants to use her hold Skill to meet her high ER requirements. Because of this, Lisa can cause Yoimiya to lose valuable buff uptime, such as Bennett’s buff. It is very difficult to reach Lisa’s ER requirements without Fischl in the team, limiting team options. Bennett is often the best last slot thanks to his buffing and utility, but this results in a shieldless team. If Zhongli is chosen instead, this results in a massive DPS loss compared to using Bennett. |
Anemo Units
 Kazuha Synergy: S+ | Main Role: Buffer, Grouper, Enabler Secondary Role: Off-Field DPS (AoE) Weapon: Favonius Sword, Xiphos’ Moonlight, Freedom-Sworn Artifact Set: 4pc Viridescent Venerer Artifact Stats: ER%, EM, CRIT Rate (Favonius) Teams: VV Vape, Mono Pyro, Overvape Scenarios: AoE, single-target Kazuha provides potent buffs, valuable grouping and enemy stagger utility, and decent personal AoE damage. He provides a DMG% buff with his A4 Passive, RES Shred via 4pc Viridescent Venerer, and grouping with his Elemental Skill. VV Vape Kazuha is very important in multi-target scenarios for Yoimiya’s Vape teams, since his buffs enable Hydro teammates to deal massive damage, often through vaporizing their Elemental Skill. Kazuha also has extremely easy Double VV setups in single-target when paired with Yelan and Bennett. Mono Pyro Kazuha is the best pick for Mono Pyro due to his A4 Passive’s DMG% buff. His grouping helps Xiangling deal damage to multiple enemies. Gameplay Notes • Snapshotting: For units who snapshot their off-field abilities such as Xiangling or Fischl, use Kazuha’s Skill to Swirl the corresponding Element and apply his A4 DMG% buff before snapshotting the desired ability. • Using Burst: In single-target scenarios, pre-C2 Kazuha should not use his Burst in VV Vape since it interferes with Yoimiya’s Vape sequence. The exception is if playing VV Vape with Furina as the sole Hydro option, which requires him to absorb the Burst with Hydro. • Innate Enemy Auras: Kazuha cannot trigger a Pyro Swirl on enemies with innate Hydro, Electro, or Cryo auras. In such circumstances, it is better to use a different Anemo unit to Swirl Pyro. For example, Sucrose can Guoba Swirl, C6 Lynette with C6 Bennett can Swirl her weapon, or Jean with Bennett can self-Swirl (also known as “Sunfire”). |
 Sucrose Synergy: A | Main Role: Buffer, Grouper, Enabler Secondary Role: Off-Field DPS (AoE) Weapon: Thrilling Tales of Dragon Slayers, Favonius Codex, Sacrificial Fragments, Wandering Evenstar Artifact Set: 4pc Viridescent Venerer Artifact Stats: EM, ER% Teams: VV Vape, Mono Pyro, Overvape Scenarios: Single-target, AoE Sucrose offers EM buffs via her A1 and A4 Passives, RES Shred via 4pc Viridescent Venerer, and an ATK% buff with Thrilling Tales of Dragon Slayers. While these utilities are valuable for Yoimiya and her teammates, Sucrose is generally not the first pick since Yoimiya prefers strong off-field damage and defensive utility. Against light enemies, using Sucrose's Burst can cause Yoimiya to miss her Normal Attacks. Moreover, Sucrose has trouble with Double Swirl setups with Yelan since the initial hit of Yelan’s Burst applies 2U Hydro, making it difficult to Swirl Pyro. Additionally, while EM buffs can be valuable in VV Vape, Yoimiya appreciates DMG% and ATK% buffs more. Note, however, that Sucrose is the best pick for the highest possible damage nuke on Yoimiya’s N5. |
 Lynette Synergy: B | Main Role: Buffer, Enabler Secondary Role: Taunter Weapon: Favonius Sword Artifact Set: 4pc Viridescent Venerer Artifact Stats: ER%, EM, ATK%, CRIT Teams: VV Vape, Mono Pyro Scenarios: Single-target, AoE Lynette, who is available for free upon reaching AR 25, is a decent option thanks to her unique utility among Anemo units. Her A1 Passive grants a modest teamwide ATK% buff, her Burst provides a Taunt and additional off-field Elemental application, and her C1 allows for some grouping. Additionally, at C6 she gains an Anemo infusion after using her Elemental Skill which, paired with C6 Bennett’s Pyro infusion, can immediately grant a Pyro Swirl on the enemy regardless of whether they have a Pyro Aura. Against enemies with innate auras, she is a better pick than Kazuha or Sucrose. Additionally, she can outperform Kazuha with Furina in VV Vape teams in AoE, as she offers faster Fanfare stacking and again, guarantees the Pyro Swirl. Her Ousia-aligned damage can be useful against some Fontaine enemies, such as automatons. Overall, Lynette is usually a second or third best Anemo option for VV Vape teams, after Kazuha and Sucrose. |
 Jean Synergy: B | Main Role: Buffer, Healer Secondary Role: Enabler Weapon: Favonius Sword, Amenoma Kageuchi, Freedom-Sworn Artifact Set: 4pc Viridescent Venerer Artifact Stats: ER%, EM Teams: Mono Pyro, VV Vape, Furina Scenarios: Single-target, AoE (2–3 enemies) Jean offers strong teamwide healing, decent personal damage via Swirls when paired with Bennett, and can hold 4pc VV and Freedom-Sworn — all of which Yoimiya appreciates. At C2, Jean also offers an Attack SPD buff, which benefits Yoimiya. Jean’s variety of abilities allows her to act as a suitable replacement for Kazuha or Sucrose, which frees them up for another team in Spiral Abyss. However, her lack of additional buffs still makes her a generally inferior pick. Nonetheless, when paired with Bennett, Jean can Swirl Pyro via the “Sunfire” effect, which makes her the ideal 4pc VV support against enemies with an innate Hydro, Cryo, or Electro auras. Issues with Vape Jean cannot work with Bennett in VV Vape since their Bursts cause the Sunfire effect, which rapidly applies Pyro and prevents Yoimiya from triggering Vape. In Furina teams, it is difficult to Swirl Pyro, so it makes more sense to run a Double Hydro Vape team for more emphasis on the Hydro teammates' damage. Since these teams lack ATK% buffs, Yoimiya’s personal DPS is better with Bennett compared to Jean. |
 Venti Synergy: B | Main Role: Buffer, Grouper, Enabler Secondary Role: Off-Field DPS (AoE) Weapon: Favonius Warbow, Elegy for the End, The Stringless Artifact Set: 4pc Viridescent Venerer Artifact Stats: ER%, EM Teams: Overvape, Mono Pyro Scenarios: AoE, especially against many enemies or waves Venti provides unmatched grouping and strong AoE damage. His Energy refund is valuable for units with high ER requirements, such as Xiangling in Mono Pyro. However, Venti is still a less-than-ideal option for Yoimiya since they have disparate strengths. Yoimiya prefers single-target and low AoE scenarios, while Venti prefers high AoE scenarios. Furthermore, Yoimiya cannot take full advantage of the tight grouping provided by Venti's Burst since her Normal Attacks are still only single-target. Although the Aurous Blaze from Yoimiya's Burst provides AoE damage that can hit multiple enemies in Venti's Burst, its actual damage is simply too low. |
 Xianyun Synergy: B | Main Role: Healer Secondary Role: N/A Weapon: Favonius Codex, Prototype Amber, Oathsworn Eye Artifact Set: 4pc Viridescent Venerer Artifact Stats: ER%, ATK% Teams: Mono Pyro, Furina Vape Scenarios: Single-target, AoE (2–3 enemies) Similar to Jean, Xianyun is an Anemo teamwide healer and 4pc VV holder, but her Plunging Attack buff is wasted on Yoimiya and her ER requirements are too high to hold TTDS. Since she has no other utility other than strong teamwide healing, her main usage is in Furina teams — mainly the Double Hydro ones — where Xianyun’s stronger healing over time is preferred over Jean’s. |
 Heizou Synergy: C | Main Role: Buffer, Grouper Secondary Role: N/A Weapon: Thrilling Tales of Dragon Slayers Artifact Set: 4pc Viridescent Venerer Artifact Stats: ER%, EM Teams: VV Vape, Mono Pyro Scenarios: Single-target Heizou is a slightly worse alternative to Sucrose. His EM buff is lower, but he has potentially shorter field time. If you lack Kazuha, Sucrose, and Lynette C6, he is the next best pick for VV Vape. |
Geo Units
 Zhongli Synergy: S | Main Role: Shielder, Buffer Secondary Role: N/A Weapon: Favonius Lance, Black Tassel Artifact Set: 4pc Tenacity of the Millelith, 4pc Archaic Petra, 4pc Instructor Artifact Stats: HP%, CRIT Rate with Favonius Lance Teams: Vape, Mono Pyro, Overvape Scenarios: Single-target, maximum comfort Zhongli is an amazing teammate for Yoimiya as he provides the strongest, longest lasting shield in the game and allows Yoimiya to comfortably finish her Normal Attack string. Additionally, his 20% Universal RES Shred can make up for the lack of 4pc Viridescent Venerer RES Shred in teams where Pyro Swirls may be impossible. 4pc Archaic Petra In Mono Pyro teams, Zhongli can make use of 4pc Archaic Petra, further buffing Yoimiya’s damage. To make best use of the 4pc effect, Zhongli should be placed in the rotation immediately before Yoimiya’s extended field time; he should use his Hold Skill to trigger Crystallize and create a Pyro Shard, pick the shard up himself, and then swap to Yoimiya. Burst and Damage Potential Overall, it is not worth building Zhongli for damage. Increasing the durability of his shield through HP stats is often better. However, his Burst can help finish off waves or immobilize hard-hitting enemies so that they don’t break his shield too quickly. |
 Yun Jin Synergy: A+ | Main Role: Buffer Secondary Role: Crystallize Enabler Weapon: Favonius Lance, Prototype Starglitter, Engulfing Lightning Artifact Set: 4pc Husk of Opulent Dreams, 4pc Noblesse Oblige, 4pc Archaic Petra, or 2pc Emblem + 2pc Husk Artifact Stats: ER%, DEF% Teams: Vape, Mono Pyro Scenarios: Single-target Yun Jin provides a potent Normal Attack buff (Additive Base DMG Bonus to Normal Attacks). This makes her a powerful teammate for Yoimiya, although not necessarily the “best” support. While Yun Jin is great for Yoimiya, she buffs only Yoimiya. Other supports like Bennett (via snapshotting) or Anemo units can provide buffs for the whole team. Yun Jin’s best use case is as the last team slot in a “Hypercarry” Vape team or Mono Pyro team that focuses on maximizing Yoimiya’s Normal Attack damage. Additionally, Yun Jin tends to face drastically higher ER requirements as the only Geo unit in the team, which means allocating more ER and less DEF to her, reducing the buff she provides for Yoimiya's Normal Attacks. Even in teams with another Geo unit, she still has high ER requirements. Bennett or Yun Jin? Usually, Bennett. However, Yun Jin is comparable to him in Yoimiya’s teams with Zhongli and Yelan/Xingqiu. Yun Jin cannot enable VV Vape setups, so Bennett is obviously preferred there. If you are comfortable without a shielder and really want to use Yun Jin in Vape, it is recommended to play both her and Bennett together. C6 Attack SPD Buff Attack SPD buffs reduce the difficulty of RR cancels. With perfect timing, it is possible to perform 3[N5] N2 on Yoimiya with C0–C5 Yun Jin. With C6 Yun Jin, Yoimiya can perform 3[N5] N4. With frame-perfect cancels*, 4[N5] is possible. *This is BowTae, an extremely skilled player; don't think you can be BowTae. |
 Chiori Synergy: A | Main Role: Off-Field DPS Secondary Role: Crystallize Enabler Weapon: Cinnabar Spindle, Harbinger of Dawn, DPS-oriented Sword Artifact Set: 4pc Golden Troupe, 4pc Husk of Opulent Dreams Artifact Stats: DEF%, Geo DMG%, CRIT Teams: Vape, Mono Pyro Scenarios: Single-target, AoE Chiori is a strong off-field Geo DPS when it is possible to generate a Geo construct. This means she can shine when paired with Zhongli, who is already popular with Yoimiya. Similar to Yae Miko, she should not build ER to Burst every rotation, but should instead use it when available for AoE damage during rotation downtime. She does not directly increases Yoimiya’s personal damage outside of activating Geo Resonance. Instead, she contributes to the team with impressive damage of her own, and she can scale well with vertical investment (i.e., her signature weapon and good Constellations). |
 Albedo Synergy: C | Main Role: Off-Field DPS Secondary Role: Buffer, Crystallize Enabler Weapon: Cinnabar Spindle, Harbinger of Dawn Artifact Set: 4pc Golden Troupe, 4pc Husk of Opulent Dreams Artifact Stats: DEF%, Geo DMG%, CRIT Teams: Vape, Mono Pyro Scenarios: Single-target, AoE Albedo provides consistent off-field Geo damage. His Burst grants the team 125 EM for 10s via his A4 Passive; however, casting his Burst can take up time from other buffs. When paired with Zhongli or Yun Jin, Yoimiya benefits from Geo Resonance. Despite these positive attributes, Yoimiya still prefers the buffs granted by Bennett, Yun Jin, or another Hydro character. One team where Albedo is potentially valuable is Yoimiya — Bennett — Xingqiu/Yelan, where he deals additional damage, provides his EM buff, and enables Crystallize for defensive utility should you lack Zhongli. |
Cryo Units
 Layla Synergy: B | Main Role: Shielder Secondary Role: Buffer, Enabler Weapon: Favonius Sword, HP secondary stat, Freedom-Sworn Artifact Set: 4pc Tenacity of the Millelith, 4pc Instructor Artifact Stats: HP%, ER%, CRIT Rate (Favonius) Teams: Vape (Vapemelt) Scenarios: Single-target Layla has the second strongest shield in the game after Zhongli, and it lasts 12s. While this seems like a long time, it places her at odds with Yun Jin, whose buff also lasts 12s. If they are used together, Yoimiya has to make a trade-off between shield or buff uptime. Layla’s most notable use after her shield is her Cryo application, which can enable Vapemelt. However, the Cryo application is only consistent in single-target scenarios. Note that Vapemelt seldom occurs against Bosses since Bosses cannot be Frozen. In these cases, it is best to avoid using Layla’s Elemental Burst and use only her Skill as Layla’s Cryo application ends up consuming the Hydro aura instead of preserving it. Layla should prioritize team utility. The 4pc Tenacity of the Millelith buffs ATK% and increases shield strength, and 4pc Instructor is also an option for additional EM at the cost of shield HP. She can also reliably trigger Freedom-Sworn’s passive, as she is always the one triggering Frozen. |
 Diona Synergy: B | Main Role: Shielder, Healer Secondary Role: Buffer, Enabler Weapon: Favonius Warbow, Sacrificial Bow, Elegy for the End Artifact Set: 4pc Noblesse Oblige Artifact Stats: ER%, HP%, CRIT Rate (Favonius) Teams: Vape (Vapemelt) Scenarios: Single-target, AoE (2–3 enemies) Diona is a safe pick for Yoimiya but rarely an ideal one. She condenses the role of shielder and healer with some additional buffs and utility depending on her build and Constellations. At C6, she grants Yoimiya a 200 EM buff while within her Burst AoE. Diona’s shield is significantly weaker than Layla’s, so if Diona’s shield breaks often, it is often better to pick a different character to use. If her shield does not break in combat, Diona can be a great shielder, especially at C6. The Cryo application from Diona’s Burst can enable Yoimiya to trigger some Melts, even in AoE. However, her Burst has standard ICD, and because it ticks every 2s, Diona only applies Cryo every 4s, making it basically impossible for Yoimiya to properly Melt without making use of Frozen (Vapemelt). Pure Melt teams do not work outside of nuke showcases. |
 Charlotte Synergy: C | Main Role: Healer Secondary Role: Enabler Weapon: Prototype Amber, Oathsworn Eye, Favonius Codex, Thrilling Tales of Dragon Slayers Artifact Set: 4pc Noblesse Oblige, 4pc Song of Days Past, 4pc Ocean Hued Clam Artifact Stats: ER%, ATK%, CRIT Rate (Favonius) Teams: Furina Vape Scenarios: Single-target, AoE (2–3 enemies) Charlotte is mainly used as teamwide healer with Furina, easily stacking Fanfare. Her high ER requirements limit her ability to use TTDS if only using her Tap Skill, but she does not have any valuable buffs otherwise. Her Tap Skill has a shorter animation but generates fewer Cryo particles compared to her Hold Skill, and its duration of Cryo application is too short to enable Yoimiya to Melt her entire Normal Attack string. On the other hand, her hold E generates more Cryo particles and doubles its duration of Cryo application (from 6s to 12s), but it has a very long animation. As a Catalyst user, she can be easily staggered by enemy attacks during the animation. Her Pneuma-aligned damage can be useful against some Fontaine enemies, such as automatons. |
 Mika Synergy: C | Main Role: Attack SPD Buffer, Healer Secondary Role: N/A Weapon: Favonius Lance, Black Tassel, Dialogues of the Desert Sages, Rightful Reward Artifact Set: 4pc Noblesse Oblige Artifact Stats: ER%, HP%, CRIT Rate (Favonius) Teams: For fun, Furina Vape Scenarios: Single-target Mika does not offer much for Yoimiya beyond an Attack SPD buff and teamwide healing. The Attack SPD buff is not valuable enough to justify using Mika, since he faces stiff competition from C6 Yun Jin and C2 Jean — both of whom offer much more in terms of buffs. Still, if you want to try a fun, high Attack SPD “machine gun” Yoimiya team, Mika can be used alongside both C6 Yun Jin and C2 Jean. Mika does offer teamwide healing, which can counteract Furina’s HP drain, but he is outclassed by Bennett or Anemo healers in this regard. |
 Ayaka Synergy: Speedruns | Main Role: Enabler, Burst DPS Secondary Role: N/A Artifact Set: 4pc Noblesse Oblige, 4pc Blizzard Strayer, 4pc Emblem of Severed Fate Build: Burst DPS-oriented Teams: Melt speedrun Scenarios: Single-target speedrun Ayaka is only recommended with Yoimiya in very high investment, single-chamber speedruns against Bosses. Ayaka is not recommended in any other circumstance. Ayaka’s Burst provides unrivaled Cryo application during its short duration, which Yoimiya can use to Melt her Normal Attacks. Her personal damage at the expected investment level for speedruns is incredibly high as well. |
Dendro Units
 Baizhu Synergy: B+ | Main Role: Healer Secondary Role: Enabler, Shielder, Buffer Weapon: Prototype Amber, Favonius Codex, Thrilling Tales of Dragon Slayers Artifact Set: 4pc Noblesse Oblige, 4pc Deepwood Memories, 4pc Instructor, 4pc Ocean Hued Clam Artifact Stats: ER%, HP%, CRIT Rate (Favonius) Teams: Furina Vape Scenarios: AoE, single-target Baizhu has decent synergy with Yoimiya since he provides interruption resistance and healing. However, two Hydro units are required to limit Burning, which prevents Dendro Core production and leads to fewer instances of Burgeon. Baizhu is a strong partner with Furina since his healing counteracts her teamwide HP drain. Burgeon teams with Baizhu and only one Hydro unit are not recommended unless facing enemies with innate Hydro, Cryo, or Electro auras (since the aura limits Burning). |
 Kirara Synergy: C | Main Role: Shielder Secondary Role: Buffer Weapon: ER% secondary stat Swords Artifact Set: 4pc Noblesse Oblige Artifact Stats: ER%, HP% Teams: Mono Pyro, Vape Scenarios: Single-target, AoE Kirara primarily acts as a shielder in Yoimiya teams who can generate some Dendro Cores. However, she may also trigger Burning, especially at C4 and above, which steals Vapes from Yoimiya. Moreover, Kirara’s shield only lasts 12s and needs 2s to fully stack, which creates awkward rotations and less-than-ideal buff uptimes. Players can use “short hold E” instead to balance field time and shield strength. |
Teams

I love playing with everyone!
Combo Notation
- N = Normal Attack
- C = Charged Attack
- A = Aimed Shot
- P = Plunging Attack
- E = Elemental Skill
- tE = Tap Skill
- hE = Hold Skill
- Q = Elemental Burst
- D = dash (cancel)
- J = jump (cancel)
- W = walk (cancel)
- > = switch character
- ( ) = these actions are optional; please refer to the notes below
- [ ] = repeat these actions the specified number of times
Vape

Overview
Yoimiya’s Vape team archetype is her most popular thanks to its relatively simple gameplay and high damage output. Xingqiu or Yelan provide consistent off-field Hydro application, which Yoimiya uses to trigger Vaporize with her Pyro-converted Normal Attacks. A shielder such as Zhongli is strongly recommended so Yoimiya can properly Vape her Normal Attack string.
VV Vape and Overvape variations of this archetype are explored in more detail in their own sections.
Pros
- Easy when played with a strong shielder
- Mobile-friendly gameplay
- Flexible teambuilding
- Solid single-target damage
- Decent performance against 2–4 enemies in teams without a shielder
Cons
- Dependent on a shield
- Highest damage ceiling can only be reached without a shielder
- Weak damage output against 3+ enemies in teams with a shielder
- Poor ability to break Hydro shields
Gameplay Notes
Optimal Vaporize Pattern
Ideal gameplay in a Yoimiya Vape team has her trigger Vaporize on certain hits of her full Normal Attack string. Please refer to the Normal Attack Talent Section for the details about her Normal Attack ICD.
Shielding
A shield is strongly recommended to ensure Yoimiya can maintain her ideal Vaporize sequence. However, hard-hitting enemies such as Consecrated Beasts and Bosses tend to break through most shields. If you find that your shield continuously breaks — causing Yoimiya to be interrupted — then it may be best to replace the shielder with an off-field DPS unit, or play an entirely different team archetype where dashing is not a significant damage loss (e.g., Mono Pyro or Overloaded).
Shieldless Gameplay
If you are comfortable executing Yoimiya’s Normal Attack string without a shielder, you can instead opt for an additional buffer or off-field DPS unit to deal more damage. If you have the necessary game knowledge, shieldless Vape teams have considerably stronger performance in both single-target and especially AoE scenarios.
Playing a Yoimiya Vape team without a shield is not recommended for casual or mobile gameplay.
Notable Teammates
Buffers
Bennett and Yun Jin are the preferred buffers for traditional Yoimiya Vape teams. They can even be played together to maximize Yoimiya’s damage output at the expense of a shielder. When choosing between Bennett or Yun Jin in a Yoimiya Vape team, Yun Jin is generally only competitive when paired with Zhongli. When not using Zhongli, Yun Jin’s ER requirements sometimes reach 250% or more. Yun Jin also does not provide any utility other than her buffs. On the other hand, Bennett can heal, enable VV Setups and buff other allies via snapshotting, which makes him strictly better in other archetypes.
Shielders
 Zhongli | Zhongli is the optimal shield option for Yoimiya’s Vape teams. He provides the strongest shield in the game and offers 20% Universal RES Shred, making him a comfortable alternative to an Anemo unit in analogous VV Vape teams. Additionally, he can further buff Yoimiya’s damage with artifact sets such as 4pc Tenacity of the Millelith, 4pc Instructor, or 4pc Archaic Petra. |
Thoma | Thoma is a viable alternative to Zhongli. If Yoimiya is close enough to the enemy for Thoma’s coordinated Pyro damage to hit, Thoma may potentially steal Vapes from her if paired with pre-C2 Yelan or pre-C6 Xingqiu. In his best non-VV Vape teams with Yoimiya, this is not an issue since the team has both Yelan and Xingqiu. |
Layla | Layla is another good shield option for Yoimiya in Vapemelt teams. With Layla’s off-field Cryo application, Yoimiya can trigger Melt instead of Vape on roughly 3–5 Normal Attacks in her full 3[N5D] attack sequence at C0 (5–7 Normal Attacks at C6). Note that said “Vapemelt” teams are only viable in single-target scenarios against an enemy that can be Frozen. Against Bosses, Yoimiya cannot maintain her Vape pattern, as Layla’s Cryo application ends up consuming the Hydro aura, preventing Vaporize completely. Skipping Layla’s Burst mostly solves this issue and is recommended in such scenarios. However, this means that Layla loses most of her buffing utility, as additional Melts are what she provides over alternative units. |
Recommended Vape Teams

- Gameplay Difficulty: Easy
- Defensive Utility: Shielder
- Recommended Enemy Scenario: Single-Target
(Yoimiya Q) > Zhongli hED > Yelan EQ > Yun Jin EQ > Yoimiya E combo > Yun Jin E
Rotation Video
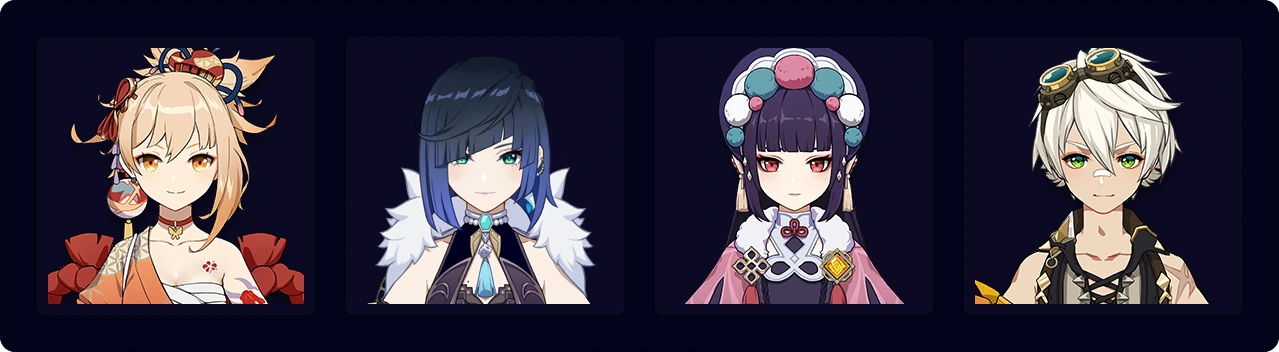
- Gameplay Difficulty: Medium
- Defensive Utility: Healer + Crystallize
- Recommended Enemy Scenario: Single-Target
(Yoimiya Q) > Yelan EQ > Bennett EQ > Yun Jin EQ > Yoimiya E combo > Yun Jin E
Rotation Video
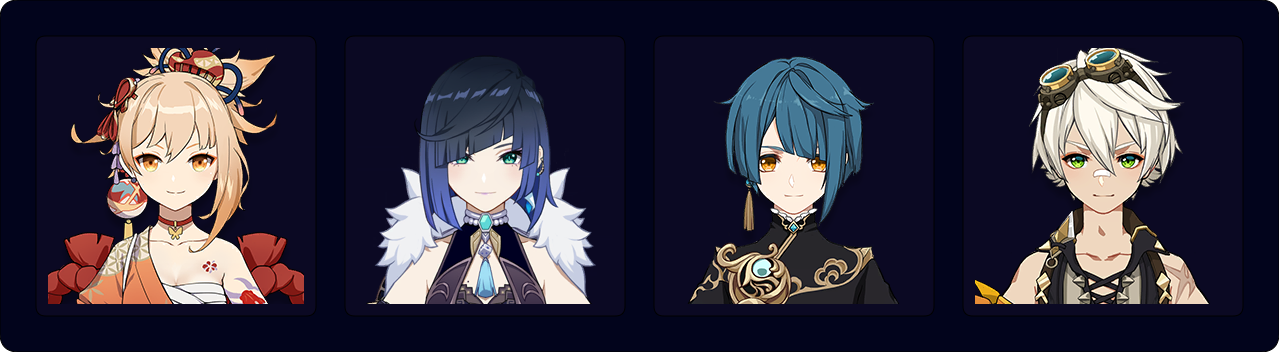
- Gameplay Difficulty: Medium
- Defensive Utility: Healer + Damage Reduction
- Recommended Enemy Scenario: Single-Target and high AoE with low HP Enemies
Yelan E > Xingqiu Q ED (E) > Yelan Q > Bennett E N1 Q > Yoimiya (Q)1 E combo > Bennett E
1Use Yoimiya’s Burst if available and Yoimiya is not holding 4pc SR.
Rotation Video
Alternative rotation:
Xingqiu ED Q N1 > Yelan EQ N1 > Bennett EQ N1 > Yoimiya E combo (Q)1 > Bennett E
1Use Yoimiya’s Burst if available. Otherwise do an N3D to drive Xingqiu or Yelan’s Burst.
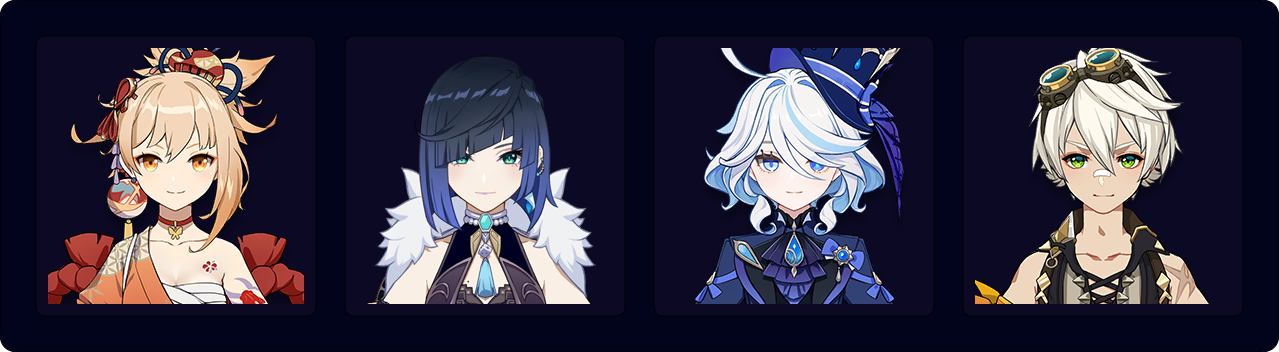
- Gameplay Difficulty: Medium
- Defensive Utility: Healer
- Recommended Enemy Scenario: Single-Target and high AoE with low HP Enemies
- High Damage output
Furina ED Q > Yelan Q > (Yoimiya Q) > Bennett Q E > Yelan E > Yoimiya E combo
Rotation Video
Other Vape Teams
- Gameplay Difficulty: Easy
- Defensive Utility: Shielder
- Recommended Enemy Scenario: Single-Target
Zhongli hED > Yelan EQ N31 > Chiori 2[E] > Yoimiya E combo (Yoimiya/Chiori Q)2
1To maximize Yelan’s A4, players can use Yelan Q N1 E N3–4 (i.e., catch her particles after E) instead.
2Use either Yoimiya’s or Chiori’s Burst if available.
- Gameplay Difficulty: Easy
- Defensive Utility: Shielder + Healer + Damage Reduction, Freeze
- Recommended Enemy Scenario: Single-Target (1–2 Freezable enemies)
(Yoimiya Q) > Xingqiu ED Q (E) > Bennett EQ > Layla Q E > Yoimiya E combo > Bennett E
Rotation Video

- Gameplay Difficulty: Easy
- Defensive Utility: Shielder and Healer, Freeze
- Recommended Enemy Scenario: Single-Target (1–2 Freezable Enemies)
(Yoimiya Q) > Yelan EQ > Bennett EQ > Layla Q E > Yoimiya E combo
Rotation Video
- Gameplay Difficulty: Easy
- Defensive Utility: Shielder + Damage Reduction
- Recommended Enemy Scenario: Single-Target
(Yoimiya Q)1 > Thoma EQ > Xingqiu ED Q (E) > Yelan EQ > Yoimiya E combo
1Use Yoimiya’s Burst if available. Otherwise, do an N3D to drive Xingqiu or Yelan’s Burst.
Rotation Video
Alternate Rotation for when you want to maximize Yelan’s DMG Bonus:
(Yoimiya Q)1 > Xingqiu ED Q (E) > Yelan EQ > Thoma EQ > Yoimiya E combo
1Use Yoimiya’s Burst if available. Otherwise, do an N3D to drive Xingqiu or Yelan’s Burst.
- Gameplay Difficulty: Medium
- Defensive Utility: Healer
- Recommended Enemy Scenario: Single-Target (mostly bosses)
Furina ED Q > Yelan EQ > (Yoimiya Q)1 > Jean EQ > Yoimiya E combo > Jean E
1Use Yoimiya’s Burst if available. Otherwise, there is some rotation downtime due to 20s cooldowns of Furina and Jean.
Rotation Video
- Gameplay Difficulty: Easy
- Defensive Utility: Healer + Shielder
- Recommended Enemy Scenario: Single-Target and AoE
Yoimiya consistently triggers Vape since the Hydro application maintains a stable Hydro aura.
Yoimiya’s Pyro-converted Normal Attacks do not target Dendro Cores. Instead, her Burst effect triggers every 2s in a decent AoE and consequently triggers Burgeon. Frequent Burst usage will maximize Burgeon procs. 4pc SR is not recommended for this team.
Note: Yoimiya’s Normal Attacks can technically trigger Burgeon since the Pyro-converted arrows themselves apply Pyro to the Dendro Cores when close enough; however, this is mostly by coincidence and is not controllable by the player.
Burgeon scales with character level and Elemental Mastery (EM). While Yoimiya still prefers her typical DPS build, EM becomes more valuable to increase her Burgeon damage, so EM sands are recommended in this team.
Furina ED Q > Yelan EQ > Baizhu EQ > Yoimiya E combo Q > Baizhu E > Furina Q ED > Yelan EQ > Baizhu Q > Yoimiya E combo Q
Rotation Video
VV Vape
Overview
Yoimiya’s VV Vape teams retain the same goals as her regular Vape teams, with the additional requirement of triggering 4pc Viridescent Venerer’s RES Shred (at least for Pyro, and ideally Hydro as well). This is possible with the help of a Pyro support who applies Pyro earlier in the rotation for the Anemo teammate to Swirl. The RES Shred and other utilities provided by the Anemo unit allow VV Vape teams to compete with Yoimiya’s other archetypes.
Due to the VV setups and lack of a shielder, VV Vape teams are high risk but high reward. If you can execute Swirl setups properly and maintain Yoimiya’s preferred Normal Attack Vape sequence, Yoimiya’s VV Vape teams (with Bennett) have the highest damage ceiling. If you find yourself struggling with VV Vape, you may have more success with a traditional Vape team or an Overloaded Chevreuse team instead since they do not require intricate setups or provide more comfort by allowing for a strong shielder.
Pros
- Solid single-target damage
- Good AoE potential with Vape setups for the Hydro unit’s Skill
- Great ability to break non-Hydro shields when using Kazuha
- Helpful grouping from preferred Anemo teammates
Cons
- Harder gameplay than her other archetypes
- High vulnerability in teams with Bennett due to lack of shield and self-applied Pyro aura
- Some difficult VV setups (depending on teammates and enemy scenarios)
Gameplay Notes
Swirl Setups
At the very least, the Anemo unit needs to have 4pc Viridescent Venerer equipped and trigger a Pyro Swirl while on-field prior to Yoimiya taking the field. This means a typical rotation looks like:
Hydro Enabler > Pyro Support > Anemo Support > Yoimiya
Depending on the timing of the Anemo application, a Hydro Swirl may also occur via a Double Swirl setup. The VV setups for the recommended teams below have achievable Double Swirls in most cases; however, a couple can be quite tricky in single-target scenarios.
Teammate Abilities
Yelan and Xingqiu can Vape their Elemental Skill in multi-target scenarios with proper setup, which is a massive help to Yoimiya in AoE scenarios she would otherwise struggle in.
Kazuha and Yelan/Xingqiu help Yoimiya perform significantly better in multi-target scenarios thanks to their AoE abilities. When paired together, they are one of Yoimiya’s top-performing teams in AoE scenarios, and also in general...
Notable Teammates
  Yelan, Xingqiu | Yelan is the preferred Hydro support thanks to her DMG% buff and easy Double Swirl setups. Xingqiu is the next best option, though his Double Swirl setups tend to be much more difficult due to his orbitals. However, he does grant interruption and damage resistance, which is valuable especially if playing shieldless. |
Furina | Furina is significantly harder to use in Yoimiya’s VV Vape teams since her setups are dependent on her Guests’ attacks. Her Hydro application is not consistent and can potentially remove the Pyro aura entirely in single-target scenarios before the Anemo unit can trigger a Pyro Swirl. In AoE scenarios, due to Kazuha’s Hydro-absorbed Burst applying too much Hydro, Double Swirl setups with Furina become impossible if you still want your Yoimiya to Vape. Due to Furina’s inconsistent Hydro application, there is a chance that a Pyro aura may overtake the enemy, which causes Furina to be the Vape trigger. This is not often a big DPS loss and may actually be optimal in AoE scenarios. Ultimately, if you can pull off the Double Swirl and maintain a Hydro aura, Furina becomes a better option than Yelan. |
Kazuha, Sucrose, Lynette | Kazuha is the preferred Anemo support thanks to his A4 Passive’s DMG% buff, his grouping, and his relatively easy Swirl setups. Sucrose is the next best option thanks to her EM buffs and ability to hold Thrilling Tales of Dragon Slayers. Lynette at C6 is the go-to option against enemies with innate Elemental auras since her C6 Anemo infusion paired with C6 Bennett immediately Swirls Pyro off her Sword in a small AoE. Sucrose (without Xiangling’s Guoba) and pre-C6 Kazuha are unable to Swirl Pyro against these types of enemies. Additionally, Lynette can outperform Kazuha with Furina in VV Vape teams in single-target scenarios, as she offers faster Fanfare stacking and, again, guarantees the Pyro Swirl without a complicated setup. |
Bennett | Bennett is the preferred Pyro support since he makes VV Swirl setups much easier and provides massive buffs. However, this means the team lacks a shielder, which is problematic for lower-skilled, mobile, or high-ping players. If you can manage without a shielder, Bennett performs considerably better than other Pyro options. |
Thoma | Thoma is the preferred Pyro shielder option for Yoimiya in VV Vape teams. However, his VV Swirl setups are difficult to execute in single-target scenarios. Additionally, his shield may not refresh fast enough against frequent enemy hits. Nonetheless, he is still a better option than Xinyan, Dehya, or C4 Yanfei. Generally, running a normal Zhongli Vape team instead of VV Vape with a shielder is better and noticeably easier. |
Recommended VV Vape Teams
- Gameplay Difficulty: Medium
- Defensive Utility: Healer, CC
- Recommended Enemy Scenario: Single-Target and AoE
Single-Target Rotation
Yelan EQ > Bennett Q > Kazuha hEP > Yoimiya E combo > Kazuha tEP > Bennett E
Rotation Video
Multi-Target Rotation
Bennett tE1 > Yelan Q > Bennett Q2 > Kazuha hEP > Yelan E N33 > Yoimiya E combo
1Bennett starts the rotation by using his Skill on one enemy (but not all).
2Bennett uses his Burst on all enemies.
3For Yelan to catch her Skill particles.
Rotation Video
- Gameplay Difficulty: Difficult
- Defensive Utility: Healer, CC
- Recommended Enemy Scenario: Single-Target Only
- High Damage output with vertical investments.
Furina ED Q > Kazuha Q > Bennett Q N1/E1 > Kazuha tEP > Yoimiya E combo > Bennett E
1If using C6 Bennett, use N1 as it has easier timing
Rotation Video
- Gameplay Difficulty: Difficult
- Defensive Utility: Healer, CC
- Recommended Enemy Scenario: Single-Target, AoE
Bennett E > Yelan QE > Bennett Q E > Sucrose E N2 > Yoimiya E combo
Other VV Vape Teams
- Gameplay Difficulty: Medium
- Defensive Utility: Healer + Damage Reduction, CC
- Recommended Enemy Scenario: Single-Target and AoE
The optimal Double Swirl setup in this team is inconsistent in single-target scenarios since it depends on Xingqiu’s orbital Hydro application. An alternative setup depends on Kazuha’s Burst.
Xingqiu ED Q (E) > Bennett EQ > Kazuha N1 hEP > Yoimiya E combo > Bennett E
Alternative rotation using Kazuha’s Burst:
Xingqiu Q N1 ED N2 > Kazuha Q > Bennett N1 EQ > Kazuha hEP > Yoimiya E combo > Kazuha tEP
- Gameplay Difficulty: Difficult
- Defensive Utility: Shielder, CC
- Recommended Enemy Scenario: Single-Target and Low AoE
(Yoimiya Q) > Yelan Q N1 E N1 > Thoma EQ > Sucrose N3 E > Yoimiya E combo
Rotation Video
Overvape

Overview
Overvape is a Vape team with an Electro applier. The combined Electro and Hydro application enables an Electro-Charged aura on which Yoimiya can trigger Overloaded and Vaporize simultaneously. While Overloaded is typically a nuisance due to its knockback, Yoimiya’s range mitigates this issue. Furthermore, knocking back enemies means that Yoimiya can finish her Normal Attack string more safely.
Note that in single-target scenarios, two Electro units are required to maintain a stable Electro-Charged aura. The exception is if using C6 Fischl, who can maintain said aura on her own.
Pros
- Great single-target damage, especially with C6 Fischl
- Decent AoE performance
- Good ability to break enemy shields
- Lower reliance on Vaped Normal Attacks for team damage, reducing the damage loss from being interrupted
- A lot of big (and small) colorful numbers
Cons
- Huge reliance on Bennett and C6 Fischl to reach Overvape team’s damage ceiling
- Possibility of missing shots against light enemies who are far away due to Overloaded knockback
Gameplay Notes
Artifacts
While you should not build for full EM, Yoimiya appreciates EM more in Overvape teams than typical Vape teams, since Overloaded contributes considerable Transformative Reaction damage. Therefore, EM Sands and substats are generally better than ATK% Sands and substats. Overvape is also an archetype where other 4pc artifact sets can be comparable to 4pc Shimenawa’s Reminiscence in terms of team DPS (see Artifact Sets). These alternatives also have the quality-of-life upside of being able to use Yoimiya's Burst more frequently.
Burst Use
Yoimiya’s Burst is more beneficial in Overvape teams. It contributes a greater proportion of damage compared to in other archetypes since the extra Pyro application may result in more reactions.
Notable Teammates
C6 Fischl | C6 Fischl is required to unlock the full potential of Yoimiya’s Overvape teams. At C6, she enables a constant Electro-Charged aura by herself. Yoimiya is also one of the best drivers for Fischl’s C6 since each of Yoimiya’s Normal Attacks (all 5) trigger an additional attack from Oz. |
 Beidou | Beidou is an off-field Electro DPS option for Yoimiya’s Overvape teams in low AoE scenarios. When paired with Xingqiu, the combined interruption resistance is sufficient to replace a shield. While using Beidou (with Xingqiu) rather than C6 Fischl is a DPS loss, the team is very comfortable to play and can allow Bennett to be used on the other half of Spiral Abyss. |
Bennett | Bennett’s Flat ATK buff is great for buffing the raw damage of Yoimiya and her Electro teammates. While opting for Bennett over a unit who provides interruption resistance makes the team less comfortable to play, the team’s damage output becomes much higher. |
Recommended Overvape Teams
- Gameplay Difficulty: Easy
- Defensive Utility: Healer, Interruption Resistance, Damage Reduction
- Recommended Enemy Scenario: Single-Target and Low AoE
Xingqiu ED Q (E) > Bennett EQ > (Yoimiya Q)1 > Fischl Q/E > Yoimiya E combo > Bennett E
1Use Yoimiya’s Burst if available and Yoimiya is not holding 4pc SR.
Rotation Video
- Gameplay Difficulty: Medium
- Defensive Utility: Healer, Overload Knockback
- Recommended Enemy Scenario: Single-Target and Low AoE
- High Damage output.
Yelan EQ > Bennett EQ > Fischl E/Q > Yoimiya E combo > Bennett E

- Gameplay Difficulty: Easy
- Defensive Utility: Healer, High Damage Reduction, Interruption Resistance
- Recommended Enemy Scenario: Low AoE
- Low Damage output in Single-Target.
Xingqiu ED Q (E) > Bennett EQ > Beidou EQ > Yoimiya E combo > Beidou E N1 > (Yoimiya Q)1
1Use Yoimiya’s Burst if available. Otherwise, do Bennett E N2 instead to fill the rotation downtime.
Other Overvape Teams
- Gameplay Difficulty: Easy
- Defensive Utility: Shielder, Overload Knockback
- Recommended Enemy Scenario: Single-Target
(Yoimiya Q)1 > Zhongli hED > Yelan EQ > Fischl E/Q > Yoimiya E combo
1Use Yoimiya’s Burst if available. Otherwise, do an N3D to drive Yelan’s Burst and Fischl’s C6.
Rotation Video
- Gameplay Difficulty: Very Difficult
- Defensive Utility: CC, Overload Knockback
- Recommended Enemy Scenario: AoE
This is one of Yoimiya’s top-performing teams in multi-target content; however, it lacks any defensive utility and has a very strict rotation, so it is not recommended for casual gameplay nor in single-target scenarios.
Yoimiya’s Burst enables Kazuha’s Burst to absorb Pyro, which results in him triggering Overloaded and Vape as well. Additionally, Kazuha can Swirl Hydro, Electro, and Pyro to effectively buff the entire team’s damage.
Yoimiya Q/C > Kazuha tEPQ > Yelan Q E > Fischl E/Q > Kazuha N1 tEP > Yoimiya E combo > Yoimiya C/Q > Kazuha tEPQ > Yelan N1 EQ > Fischl Q/E > Kazuha tEP > Yoimiya E combo
Rotation Video

- Gameplay Difficulty: Easy
- Defensive Utility: Damage Reduction, Interruption Resistance, Overload
- Recommended Enemy Scenario: Low AoE
- Low Damage output.
(Yoimiya Q)1 > Xingqiu ED Q (E) > Beidou EQ > Fischl E/Q > Yoimiya E combo > Beidou E
1Use Yoimiya’s Burst if available. Otherwise, do an N3D to drive Xingqiu’s Burst, Beidou’s Burst, and Fischl C6.
Overloaded
Overview
Chevreuse is a strong option in Yoimiya’s teams (see Synergies). To benefit from her Pyro and Electro RES Shred as well as her teamwide ATK% buff, these teams must consist of only Pyro and Electro units and must trigger Overloaded consistently. Unlike difficult VV setups in VV Vape teams, this can be easily done by making a team with one off-field Electro applier and a synergistic Pyro or Electro unit. Additionally, unlike the VV set, Chevreuse’s RES Shred is much less painful to achieve in multi-wave content and can also be triggered while she is off-field.
Yoimiya does not need to Vape her Normal Attack string in this archetype, allowing her to dash during her combo without losing significant damage. Overloaded knockback is less problematic thanks to Yoimiya's ranged attacks, and the knockback is additionally helpful for shieldless gameplay.
Overloaded teams without Chevreuse will not be covered due to their low damage output.
Against enemies with an innate Hydro aura, Overloaded teams transform into Overvape, significantly increasing their performance.
Pros
- Solid single-target damage
- Ability to dodge freely, making shields much less important
- Easy gameplay
- Good ability to break Geo shields
Cons
- High reliance on C6 Fischl and C6 Chevreuse to reach Overloaded teams’ damage ceiling
- High ER requirement for Beidou without another Electro teammate
- Possibility of missing shots against light enemies who are far away due to Overloaded knockback
Gameplay Notes
Elemental Mastery
Yoimiya usually owns a majority of the Overloaded reactions in the team. While this means she can make use of EM stats, she does not need to specifically build EM in her Overloaded teams. Full EM builds are never recommended on Yoimiya.
Burst Use
Yoimiya’s Burst is quite useful in Overloaded teams. It triggers her A4 Passive, which provides at least 10% ATK (if not more) to other ATK-scaling teammates such as Fischl, Beidou, or DPS Chevreuse. However, 4pc Shimenawa’s Reminiscence is still the recommended set in Overloaded teams. Yoimiya can still Burst fairly regularly with 4pc SR, as these teams tend to generate more Energy particles than Yoimiya's other teams. This is due to a combination of Fischl often being in these teams as well as the fact that all team compositions are either 2 Pyro + 2 Electro (activating Electro Resonance) or 3 Pyro + 1 Electro (usually with Bennett).
Notable Teammates
C6 Fischl | C6 Fischl is required to unlock the full potential of Yoimiya’s Overloaded teams. Yoimiya is one of the best drivers for Fischl’s C6 since each of Yoimiya’s Normal Attacks (all 5) trigger an additional attack from Oz. Furthermore, Fischl’s A4 can proc off Overloaded. |
Bennett | Bennett’s Flat ATK buff is great for buffing the raw damage of Yoimiya and her teammates. While opting for Bennett over a unit who provides interruption resistance makes the team less comfortable to play, the team’s damage output becomes much higher. |
Beidou | Beidou is an off-field Electro DPS option for Yoimiya’s Overloaded teams in low AoE scenarios, especially against heavy enemies. Her interruption resistance can additionally help with survivability. Despite this, she is an overall DPS loss compared to C6 Fischl. If playing Beidou as the sole Electro unit, she has extremely high ER requirements (at least ~250%). Running her with Fischl in a Double Electro Overloaded team is possible, but this team suffers against very light enemies. Overloaded knockback can move enemies away from each other, to the point that Beidou’s Burst cannot bounce between them. Additionally, running Double Electro Overloaded means sacrificing Bennett. |
Recommended Overloaded Teams

- Gameplay Difficulty: Medium
- Defensive Utility: Healer, Overload Knockback
- Recommended Enemy Scenario: Single-Target and Low AoE (heavy enemies)
- High Damage output especially with C6 Chevreuse.
With Healer Build Chevreuse:
(Fischl E)1 > Chevreuse Q hE > (Yoimiya Q)2 > Bennett Q E > Fischl N1 E/Q > Yoimiya E combo > Bennett E
1,2First rotation only. In the first rotation, you should use Yoimiya’s Burst or spend the equivalent amount of time so that Fischl's E is off-cooldown for the second rotation.
(Fischl C)1 > Chevreuse Q hE > Bennett QE > Fischl N1 E/Q > Yoimiya E combo > Bennett E
1First rotation only. It can be skipped with a minor DPS loss. Use this Fischl Charged Shot variant when Fischl does not have Energy to use her Burst in the first rotation.
With DPS Build Chevreuse:
(Fischl E)1 > Bennett EQ > Chevreuse Q 3[hE]2 > Fischl N1 E/Q > Yoimiya E combo (Q)3
1First rotation only.
2Requires C4 Chevreuse; use only one hold E with pre-C4.
3Use Yoimiya’s Burst if available or spend the same amount of time at the first rotation to wait for Fischl's E to be off cooldown in the second rotation. You can also start with “Fischl E > Yoimiya Q” in the first rotation.
(Fischl C)1 > Bennett EQ > Chevreuse Q 3[hE]2 > Fischl N1 E/Q > Yoimiya E combo (Q)3
1First rotation only. It can be skipped with a minor DPS loss. Use this Fischl Charged Shot variant when Fischl does not have Energy to use her Burst in the first rotation.
2Requires C4 Chevreuse; use only one hold E with pre-C4.3Use Yoimiya’s Burst if available. Otherwise, do an N3D.
- Gameplay Difficulty: Medium
- Defensive Utility: Healer, Overload Knockback
- Recommended Enemy Scenario: Single-Target and Low AoE
With Healer Build Chevreuse:
Yae 3[E] > Chevreuse Q hE > Bennett EQ > (Yae Q 3[E])1 > Yoimiya E combo (Q)2 > Bennett E
1,2Use both Yae Miko and Yoimiya’s Burst in the same rotation and skip both of them in the next rotation. This locates one 5-star unit’s Burst between each Yoimiya E to manage Yoimiya’s 18s cooldown efficiently while not extending the rotation.
With DPS Build Chevreuse:
Yae 3[E] > Bennett Q E > Chevreuse Q 3[hE]1, 2 > Yoimiya E combo > Bennett E
1In AoE, you can instead do Chevreuse (Q) hE > Yae Q 3[E] to deal frontloaded AoE damage if her Burst is available.
2Requires C4 Chevreuse, use only one hold E with pre-C4.
Other Overloaded Teams
- Gameplay Difficulty: Medium
- Defensive Utility: Healer, Overload Knockback
- Recommended Enemy Scenario: Single-Target and Low AoE
Yae 3[E] > Chevreuse Q hE > Fischl N2 E/Q > (Yae Q 3[E])1 > Yoimiya E combo (Q)2
1,2Use both Yae Miko and Yoimiya’s Burst in the same rotation and skip both of them in the next rotation. This locates one 5-star unit’s Burst between each Yoimiya E to manage Yoimiya’s 18s cooldown efficiently while not extending the rotation.
- Gameplay Difficulty: Easy
- Defensive Utility: Healer + Damage Reduction, Overload Knockback
- Recommended Enemy Scenario: Low AoE
- Low Damage output with Pre-C6 Chevreuse
Beidou EQ N1 > Chevreuse Q hE N1 > Fischl N3 E/Q > Beidou E > Yoimiya E combo (Q)1
1Use Yoimiya’s Burst if available.
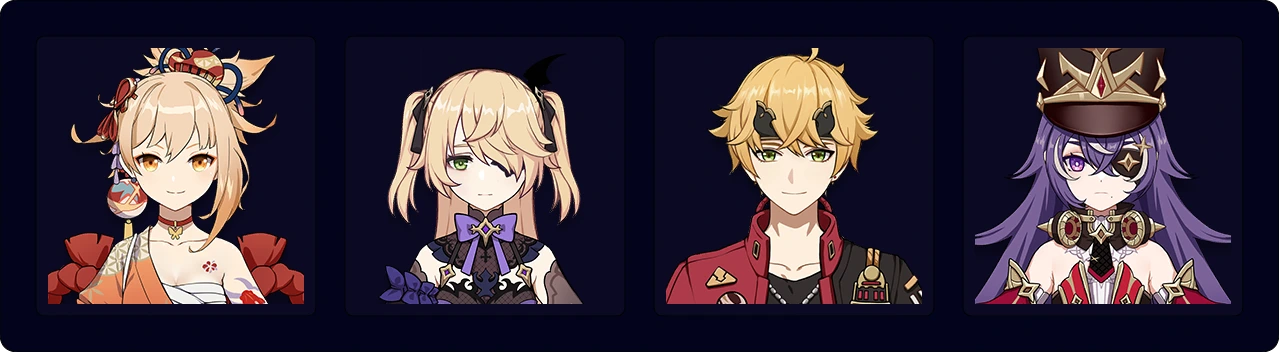
- Gameplay Difficulty: Easy
- Defensive Utility: Healer + Shielder, Overload Knockback
- Recommended Enemy Scenario: Single-Target
- Low Damage output with Pre-C6 Chevreuse
(Fischl E)1 > Chevreuse Q hE > (Yoimiya Q)2 > Thoma N1 EQ N1 > Fischl E/Q > Yoimiya E combo (Q)3
1,2First rotation only.
3Use Yoimiya’s Burst if available. Otherwise, do an N3D.
(Fischl C)1 > Chevreuse Q hE > Thoma N1 E Q N1 > Fischl E/Q > Yoimiya E combo (Q)2
1First rotation only. It can be skipped with a minor DPS loss. Use this Fischl Charged Shot variant when Fischl does not have Energy to use her Burst in the first rotation.
2Use Yoimiya’s Burst if available. Otherwise, do an N3D.
Mono Pyro
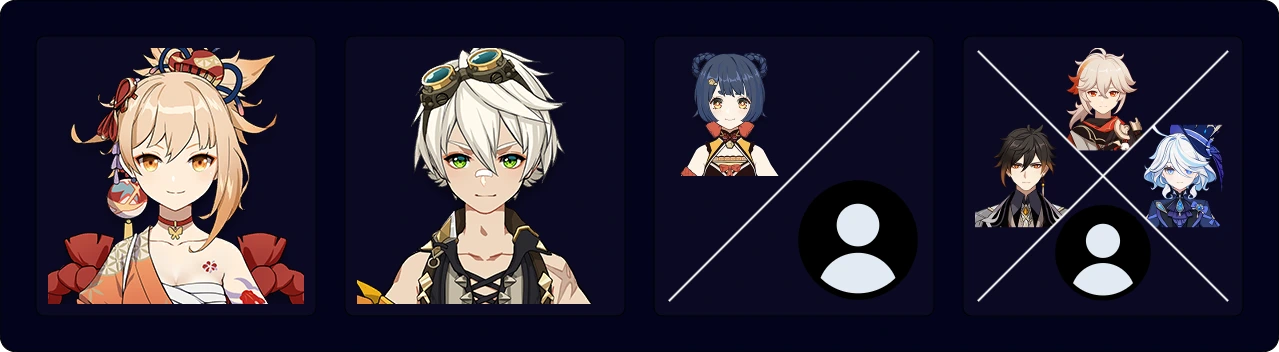
Overview
Yoimiya’s Mono Pyro teams prioritize different buffs or off-field damage rather than Vaped Normal Attacks. This archetype is much more forgiving to play than Vape variants since interrupting Yoimiya’s Normal Attack string is less devastating to team DPS. This allows Mono Pyro to go head-to-head with Yoimiya’s other compositions while also benefiting from team utility and easier gameplay.
Mono Pyro teams, however, do tend to underperform compared to Vape and Overloaded variants in single-target scenarios. Despite this, Mono Pyro teams with Xiangling perform much better in AoE scenarios and are generally more comfortable to play.
Against enemies with an innate Hydro aura, Mono Pyro teams transform into Vape, significantly increasing performance. However, it should be noted in these scenarios that Kazuha can only Swirl Pyro if he himself is C6 and is paired with C6 Bennett.
Pros
- Good single-target damage
- Solid AoE damage with Xiangling
- Simple rotations and easy gameplay
- General viability across different enemy scenarios
- No reliance on Vaped Normal Attacks, reducing the damage loss from being interrupted
Cons
- Basically unplayable against Pyro-immune enemies
- Stiff competition from better Mono Pyro DPS units such as Arlecchino and Lyney
- Strictly worse DPS compared to Vape and Overloaded variants, especially without off-field DPS units
- Limited AoE potential without Xiangling
Gameplay Notes
Normal Attack String
Mono Pyro teams have a larger share of teammate DPS and focus on maximizing Yoimiya’s raw damage instead of relying on Vapes. While Yoimiya still prefers to finish her entire Normal Attack string to perform the strongest final hit, she can still dash prematurely without incurring as severe of a DPS loss as she would in her Vape teams. Additionally, if Yoimiya defeats an enemy, she does not need to dash to reset her Normal Attack ICD; she can continue her Normal Attack string against different enemies.
Burst Use
Yoimiya’s Burst is quite useful in Mono Pyro teams. It triggers her A4 Passive, which provides at least 10% ATK (if not more) to other ATK-scaling teammates such as Xiangling.
Repositioning for Xiangling
Xiangling’s Pyronado has a smaller range than Yoimiya’s Normal Attacks. As such, Yoimiya needs to occasionally reposition herself with dashes to ensure that Xiangling’s Burst actually hits the enemies — while still staying within Bennett’s Burst).
Since Yoimiya does not have to worry about Vapes, she has more flexibility on when she can dash. While ideally Yoimiya completes the entire 3[N5D] sequence, dashing so that Xiangling’s Pyronado can hit enemies is often better, unless you have a hyper-invested Yoimiya.
Notable Teammates
 Xiangling | Xiangling is the best option in the third team slot. She provides strong AoE Pyro damage with her Burst and can grant additional buffs: her C1 shreds enemy Pyro RES, and her C6 gives Yoimiya a Pyro DMG% buff. Furthermore, both Yoimiya and Xiangling benefit greatly from Bennett’s and Kazuha’s buffs. Xiangling greatly increases Yoimiya’s viability in AoE scenarios. |
Anemo Units | Anemo units are preferred in the fourth team slot thanks to their ability to hold 4pc Viridescent Venerer and shred Pyro RES. Kazuha is the ideal unit in the last team slot for his A4 Passive Pyro DMG% buff, grouping, and decent AoE damage. However, pre-C6 Kazuha cannot trigger a Pyro Swirl on enemies with innate Hydro, Electro, or Cryo auras. In such circumstances, it is better to use a different Anemo unit to Swirl Pyro. For example, Sucrose can Guoba Swirl, C6 Lynette with C6 Bennett can Swirl her weapon, or Jean with Bennett can self-Swirl (also known as “Sunfire”). Venti is a potential alternative to Kazuha, especially against many liftable enemies or if Kazuha is better used on the other Abyss team. However, Xiangling’s Pyronado cannot hit enemies that are fully lifted by Venti’s Burst. |
Zhongli | Zhongli is a great comfort pick in Mono Pyro teams. He also provides 20% Universal RES Shred and can easily trigger 4pc Archaic Petra. While Zhongli is generally a DPS loss compared to Kazuha, his shield is valuable if you find yourself struggling without one. |
Chiori | Chiori is a strong off-field Geo DPS when it is possible to generate a Geo construct. This means she can shine when paired with Zhongli, who is already popular with Yoimiya. She does not directly increases Yoimiya’s personal damage outside of activating Geo Resonance. Instead, she contributes to the team with impressive damage of her own, and she can scale well with vertical investment (i.e., her signature weapon and good Constellations). |
Furina | Furina is a great addition to the Yoimiya — Bennett — Xiangling core. Despite being a Hydro unit on the team, her Hydro application is slow, and the combined Pyro application from Yoimiya and Xiangling is extremely fast. Thus, it is rare for the Pyro units to Vape. Furina’s personal damage contribution and teamwide DMG% buff place her as a competitive alternative to Kazuha in the fourth team slot, outperforming him in single-target scenarios. Furina owns almost all the Vapes in this team, so EM obtained from substats or Key of Khaj-Nisut becomes useful. |
 Yun Jin | Yun Jin is a potential alternative to Xiangling in the third team slot; however, Yun Jin's variation of Mono Pyro is entirely focused on Yoimiya’s single-target damage, which limits its viability. She is best paired with Zhongli to enable Geo Resonance. While Yun Jin can replace Bennett in the team archetype to make a Bennett-less Hypercarry team, this disables the use of Xiangling and is often a significant DPS loss. |
Recommended Mono Pyro Teams
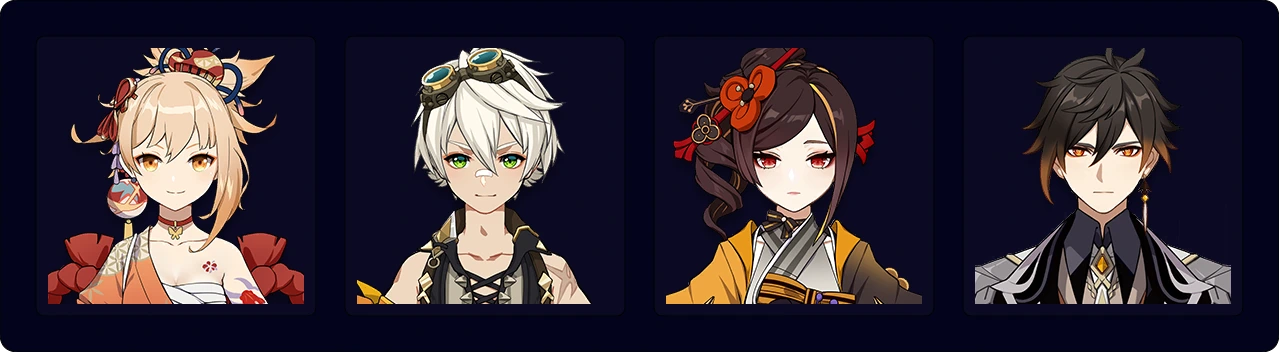
- Gameplay Difficulty: Easy
- Defensive Utility: Shielder + Healer
- Recommended Enemy Scenario: Single-Target
Zhongli hED > Chiori 2[E] > Bennett Q E > Yoimiya E combo > (Yoimiya/Chiori Q)1 > Bennett E
1Use either Yoimiya’s or Chiori’s Burst if available.
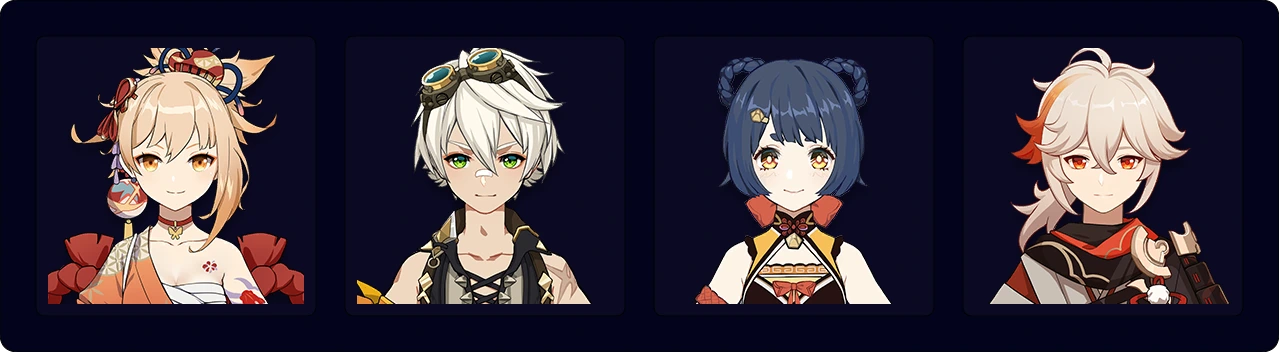
- Gameplay Difficulty: Medium
- Defensive Utility: Healer
- Recommended Enemy Scenario: Single-Target and Any AoE
(Yoimiya Q/Bennett E)1 > Kazuha tEPQ > Bennett Q E > Xiangling Q E > Kazuha tEP > Yoimiya E combo > Bennett E
1In the first rotation, one or the other is mandatory. In later rotations, Bennett E is not needed although Yoimiya should use her Burst if available.
- Gameplay Difficulty: Medium
- Defensive Utility: Healer
- Recommended Enemy Scenario: Single-Target and Low AoE
Furina ED Q > (Yoimiya Q) > Bennett Q E > Xiangling Q E > Yoimiya E combo > Bennett E
Rotation Video
Other Mono Pyro Teams
- Gameplay Difficulty: Easy
- Defensive Utility: Shielder + Healer
- Recommended Enemy Scenario: Single-Target and Low AoE
- Low Damage output.
(Yoimiya Q)1 > Zhongli hED > Bennett Q E > Xiangling Q E > Yoimiya E combo > Bennett E > Xiangling N2
1Use Yoimiya’s Burst if available. Otherwise, wait a bit for Xiangling’s 20s cooldown.
Rotation Video
- Gameplay Difficulty: Easy
- Defensive Utility: Healer, CC, Crystallize
- Recommended Enemy Scenario: Single-Target
- Low Damage output.
(Yoimiya Q/Bennett E)1 > Kazuha tEP Q > Bennett EQ > Yun Jin EQ > Kazuha tEP > Yoimiya E combo > Yun Jin E
1In the first rotation, one or the other is mandatory. In later rotations, Bennett E is not necessary although Yoimiya should use her Burst if available.
Rotation Video
- Gameplay Difficulty: Easy
- Defensive Utility: Shielder + Healer
- Recommended Enemy Scenario: Single-Target
- Low Damage output.
(Yoimiya Q) > Zhongli hED > Bennett EQ > Yun Jin EQ > Yoimiya E combo > Yun Jin E
Rotation Video
Credits
Question time! So, what should you do after watching fireworks all day? Hehe, the answer is... to watch them again in your dreams, of course! Good night. See you tomorrow!
4.7 Guide Update
Author: mishkaxp, caxia5
Calculations: edisonsmathclub, caxia5
Theorycrafting: luno_, nociii, staryy_, .athene., haafr
Editing: irokei, mocha_biscuit, nikatosaurus, cuzimori, clevernt, leah2212, chasing_haze
Other Contributors: nickjr
Transcription: alehannita
2.8 Original Guide
Authors: ayzel, cuzimori, rockidayo, euphorysm, jan, Leah
Contributors: latiwings, reens, edisonsmathclub, raf0055, davjac123
References
- Artifact Calcs by edisonsmathclub
- Artifact, Weapon, and Constellation Calcs by caxia5
- Yoimiya Quick Guide
- Yoimiya TCL Entry
- Yoimiya Evidence Vault