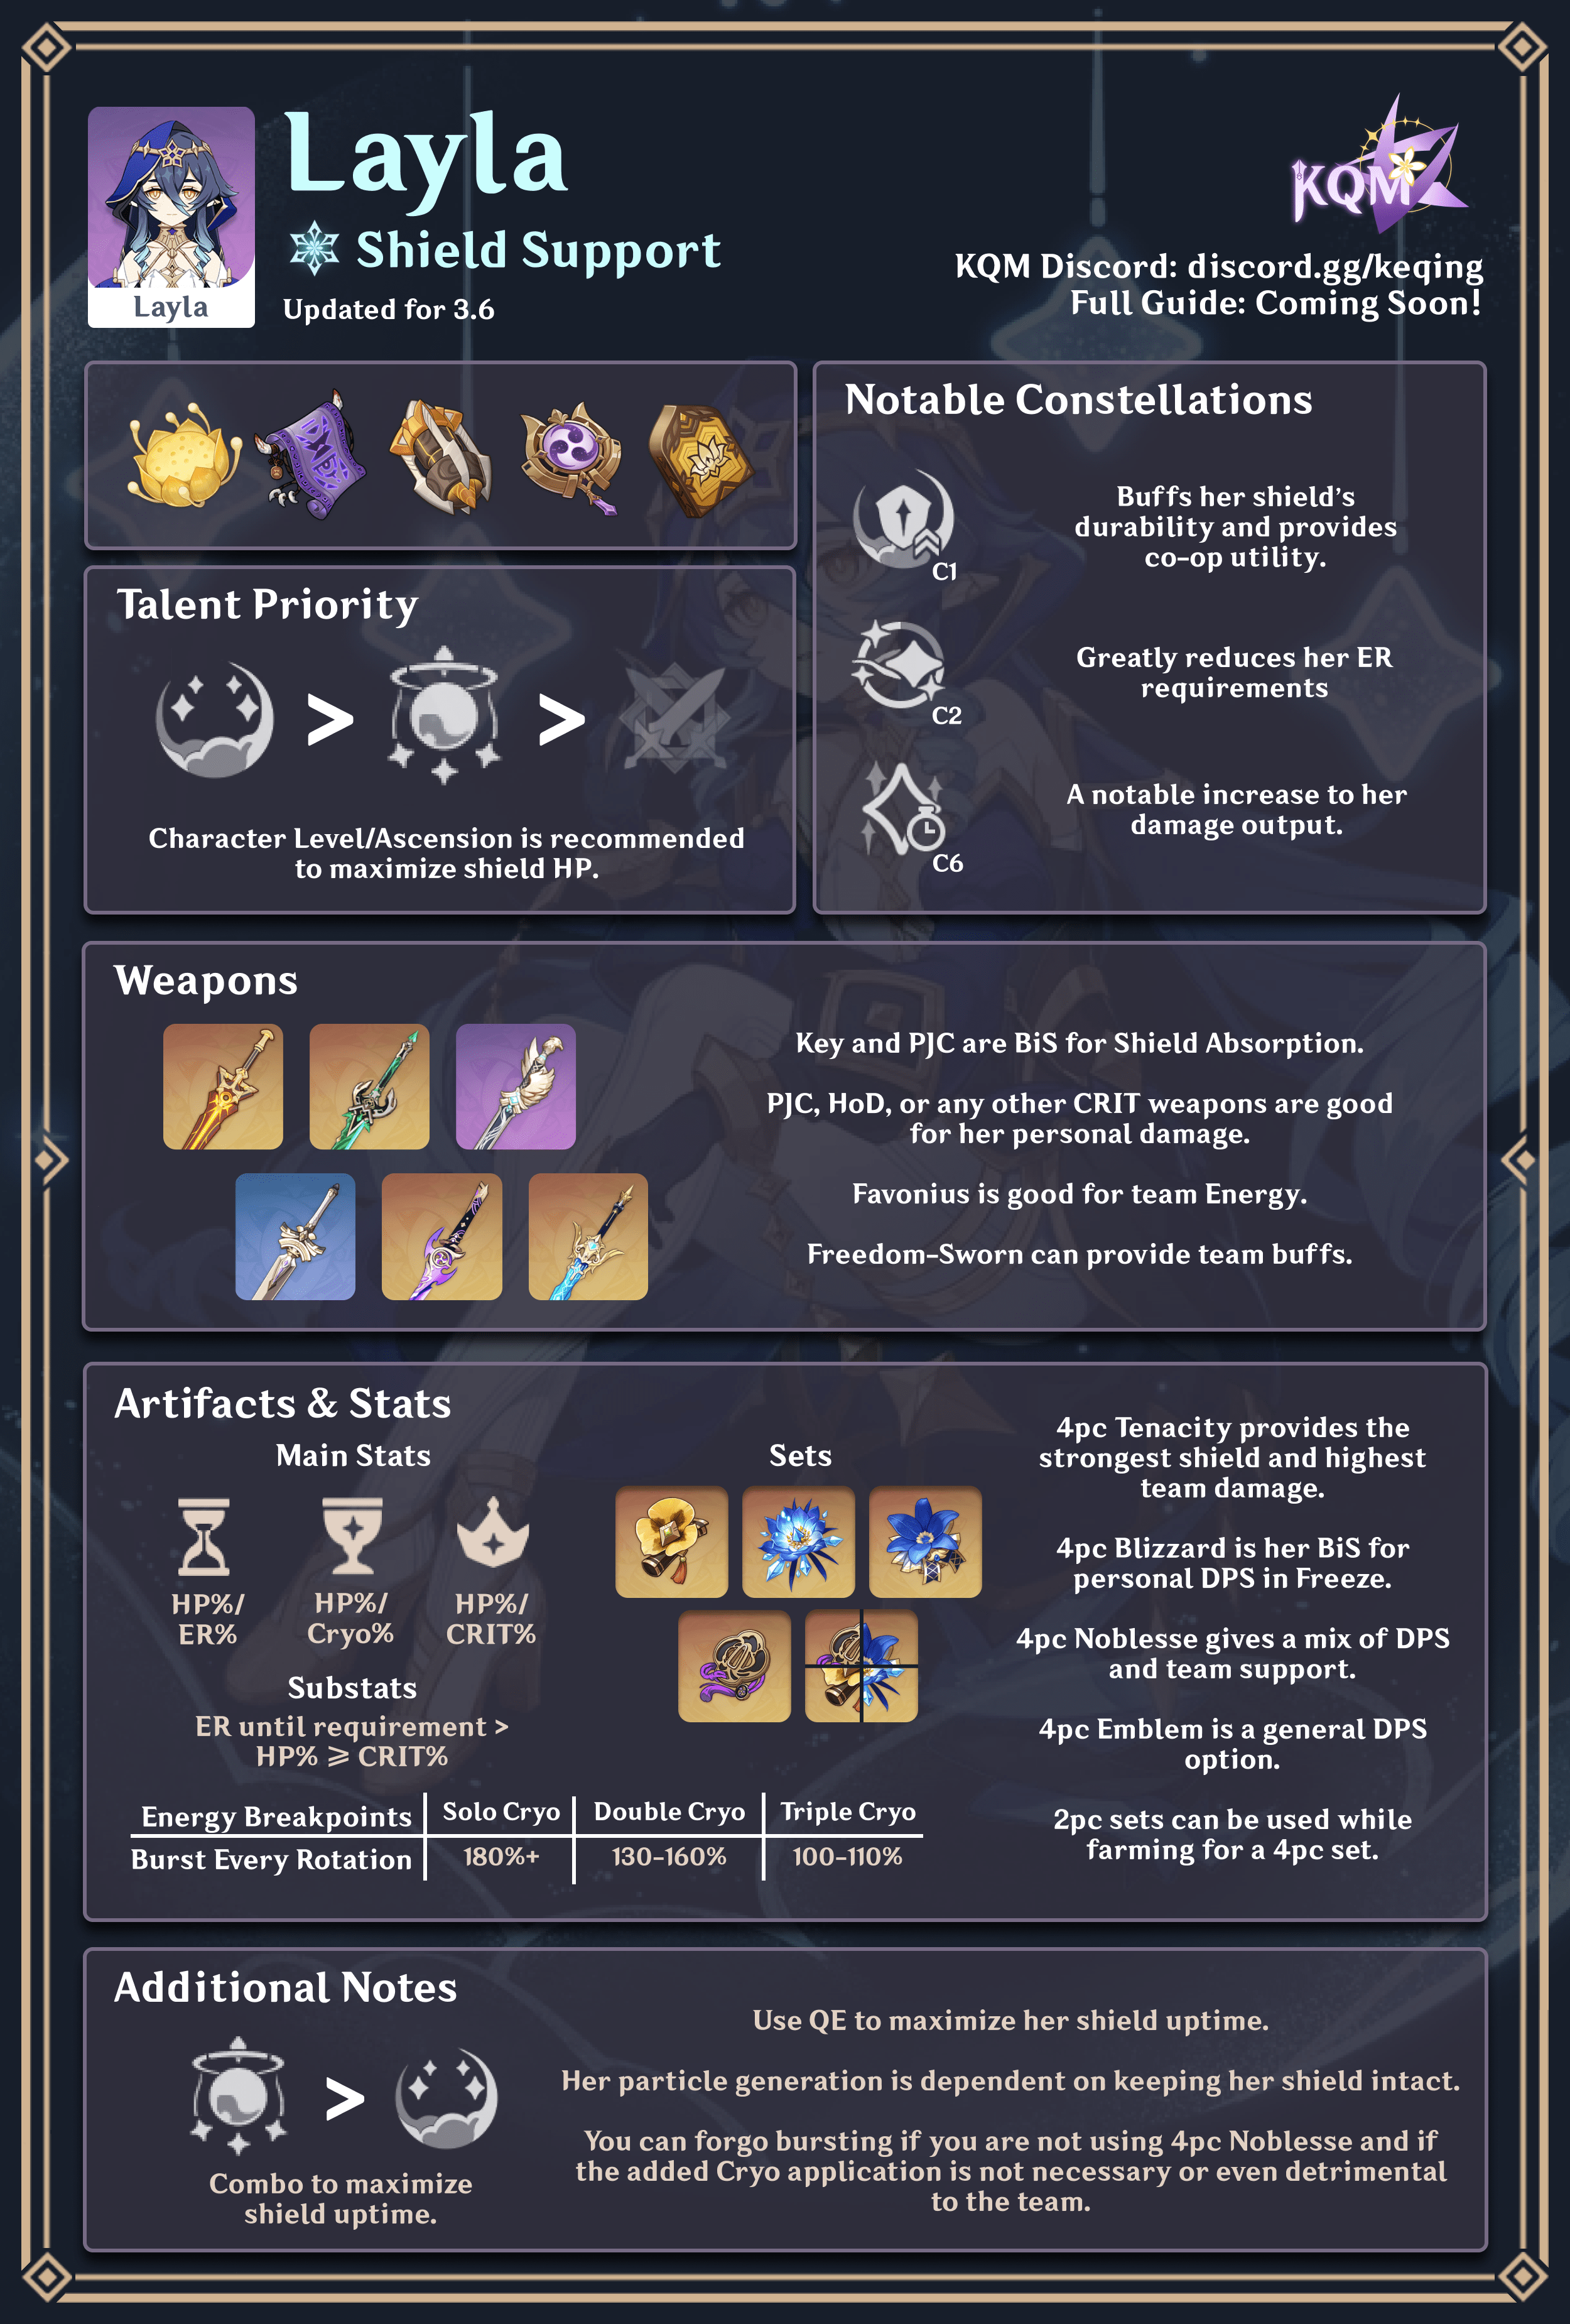
Updated for Version 3.8
A Layla Guide
by Nikatosaurus#5639
I’ve heard of her, the famous ‘Sleepwalking Eccentric.’ The rumors about her sleepwalking are really quite absurd…
– Tighnari
Table of Contents
Introduction
Layla is a Cryo Sword character released in Version 3.2. Her kit focuses on providing good shielding while applying consistent Cryo over the duration of her Skill and Burst. This guide will review Layla’s best weapons, best artifact sets, best teams, Talent priority, mechanics, preferred artifact stats, and more!
While Layla works best in Cryo-focused teams, her strong shield and low cooldowns make her a versatile character for teams looking for defensive options. The sleepy scholar keeps your team alive and awake!
Why Play Layla?
…You wanna team up with me? No, no, it’s not that I don’t want to, I’m just not sure my crazy sleep schedule will really work for you…
Pros
- Provides a large shield on a low 12s CD with an equal duration, allowing for 100% uptime with frequent swaps
- Consistent off-field Skill damage makes her an excellent holder of Tenacity of the Millelith for buffing team ATK and Shield Strength
- Low Burst cost that is further reduced by her C2, which alleviates her ER requirements
- HP% scaling makes low weapon Base ATK a non-issue
- Generates a decent amount of Cryo Particles while off-field
- Cryo application is often nonintrusive to Elemental Reactions such as Bloom or Vaporize
- Benefits well from her Constellations
Cons
- Her shield downtime leaves vulnerability periods in rotations that do not fit her 12s cooldowns
- Has no supportive buffs in her kit apart from her C4.
- Does not greatly benefit from ATK buffs
- Energy generation is reliant on her shield remaining intact
- Lower damage ceiling compared to other Cryo options, especially without her Constellations
- Single-target Cryo application and damage
- Like other shielders, her protection is bypassed by Corrosion
TL;DR
Glossary
| aura | A status effect that signifies that an entity, usually enemies or the player, is affected by an Element. Application of another Element onto existing auras can trigger Elemental reactions. |
| DPS | Damage per second. A colloquial metric that generalizes a unit’s damage output. It can also refer to units whose primary role in a team is dealing damage on-field or off-field. |
| ER | Energy Recharge. A stat that increases the Energy a unit receives from particles. |
| funnel | The act of generating Elemental Particles with one unit, and then catching them with another unit, usually of the same Element. The unit who generates particles for another teammate is known as a “battery”. |
| ICD | Internal Cooldown. A mechanic that limits how frequently certain game effect instances can occur in a short period, it is often used to describe the rate at which attacks can apply their Element or trigger reactions. Standard ICD for Elemental application is every 3 hits or 2.5s. |
| NO | Noblesse Oblige. An artifact set that grants a +20% Elemental Burst DMG Bonus and grants a partywide 20% ATK buff when the holder uses their Elemental Burst. |
| shield | A defensive buff that negates damage taken by the on-field unit until it is destroyed or expires. The amount of damage a shield can negate is known as Shield Absorption. Note that enemy Elemental shields work differently from player shields. |
| shielder | A unit whose main role is to create a shield for other units on the team. Shielders may act as alternatives to healers. |
| snapshot | A property of certain Talents wherein the character’s stats at the time the Talent is cast are used for calculating damage dealt over its entire duration, regardless of the character’s stats afterwards. |
| TotM | Tenacity of the Millelith. An artifact set that gives a personal HP% boost and grants a partywide ATK% and Shield Strength buff when the equipping unit deals Skill damage, even while off-field. |
| TTDS | Thrilling Tales of Dragon Slayers. A 3-star Catalyst whose passive increases the ATK of the next unit to be swapped in after the holder. |
Combo Notation
| N# | Normal Attack. # indicates the number of Normal Attacks used before a different action is performed. |
| CA | Charged Attack or Charged Shot (for Bow users). |
| P | Plunging Attack. |
| E | Elemental Skill. ‘tE’ indicates the Tap variant, while ‘hE’ indicates the Hold variant. |
| Q | Elemental Burst. |
| D | Dash. |
Example Combo Notation
| 2(N2C) E N2C | N2C refers to using two Normal Attacks followed by a Charged Attack. ‘2(N2C) E N2C’ denotes performing the N2C twice before using an Elemental Skill, followed by another N2C. |
FAQ
How strong is Layla’s shield?
Quite good. While Layla’s shield is not as strong as Zhongli’s, it still takes second place in terms of raw shield strength, with a noticeable lead over other shielders. Her shield is created with her Skill; this means she does not need to devote many stats, if any, to Energy Recharge, allowing her to focus on HP%.
Layla can even substitute the team’s healer slot, as her shield can withstand much punishment with good investment. Against enemy Cryo damage, Layla’s shield is even more effective than Zhongli’s shield.
Does Layla need Constellations?
Not at all. While Constellations do provide improvements to her shield and other utilities, Layla fills her primary role of shielder well even at C0, especially with good investment. Constellations up to C3 reward you with a decently stronger shield, while her C6 is a nice boost for personal damage.
Is Retracing Bolide a good artifact set for Layla?
No. The 2-piece effect only provides Shield Strength to the character holding the set, and does not benefit other team members. It is not recommended to only use the 2pc effect, as it provides no offensive utility. The full 4pc set should only be used by on-field units in teams with shielders instead of said shielders; even then it is rarely the best option for on-field DPS characters even if fully exploiting its effects.
There is an artifact set that does improve her shield’s strength — Tenacity of the Millelith.
Talents
 Normal Attack | Sword of the Radiant Path
Talent Description
Normal Attack
Performs up to 3 rapid strikes.
Charged Attack
Consumes a certain amount of Stamina to unleash 2 rapid sword strikes.
Plunging Attack
Plunges from mid-air to strike the ground below, damaging opponents along the path and dealing AoE DMG upon impact.
Standard Physical Normal Attacks with no extra mechanics. Generally not advised to level due to their low scaling. Even if Layla is used as an on-field driver, her Normal Attacks are simply used to drive off-field abilities.
 Elemental Skill | Night of Formal Focus
Talent Description
Puts forth a shield known as the Curtain of Slumber, dealing AoE Cryo DMG.The Curtain of Slumber’s DMG Absorption is based on Layla’s Max HP and absorbs Cryo DMG with 250% effectiveness. When the shield is deployed, Layla will have Cryo applied to her briefly.
Night Stars and Shooting Stars
While the Curtain of Slumber is active, it will create 1 Night Star that will be attached to it every 1.5s. When a character protected by this shield uses an Elemental Skill, 2 Night Stars will be created. Night Stars can be created once every 0.3s in this way. A maximum of 4 Night Stars can be accumulated at any one time.
Once the Curtain of Slumber has accumulated 4 Night Stars and there are opponents nearby, these Night Stars will transform into homing Shooting Stars that will be fired off in sequence, dealing Cryo DMG to any opponents hit.
If the Curtain of Slumber’s duration ends or it is destroyed, the Night Stars will disappear. If they are already being fired off as Shooting Stars, these Shooting Stars will last until this wave of shots ends.
New Night Stars cannot be created until the previous wave of Shooting Stars has been fired completely.
Layla’s Elemental Skill is the core of her kit. When cast, she creates a Cryo shield. While the shield exists, she generates a Night Star every 1.5s. Night Stars can also be generated by using the Elemental Skills of characters protected by the shield, at a rate of 2 Stars per Skill, with an ICD of 0.3s. When 4 Night Stars have been created, they are fired off one by one as Shooting Stars in a wave over ~1.5s, dealing Cryo damage to opponents hit. Shooting Stars will home in on the nearest target available when they are fired.
Each wave of Night Stars fired generates 1 Cryo Particle, with a 30% of generating an additional particle. The Skill’s application ICD is unique: it applies 1U of Cryo every 4 Star hits (once per wave). If the shield expires or is destroyed, any active Night Stars are also destroyed unless they are being fired off. You can expect at least 2 waves of Shooting Stars per Skill, though it is possible to generate more waves with certain rotations and teammates.
Recasting the Skill while the shield is active extends the duration of any generated Night Stars.
 Elemental Burst | Dream of the Star-Stream Shaker
Talent Description
Unleashes a Celestial Dreamsphere that constantly fires Starlight Slugs at opponents within its AoE, dealing Cryo DMG.
When a Starlight Slug hits, it will generate 1 Night Star for nearby Curtains of Slumber. Each Curtain of Slumber can gain 1 Night Star this way every 0.5s.
Layla’s Elemental Burst primarily serves to complement her Elemental Skill’s Night Star generation. On cast, she summons a Celestial Dreamsphere, creating a field in which Starlight Slugs are fired at enemies within its AoE every 1.5s. These Slugs have a very small AoE (effectively single-target without tight grouping), apply 1U Cryo at standard ICD (3 hits-2.5s), and each generate a Night Star if her Elemental Skill shield is active. Like her Shooting Stars, Starlight Slugs will target the nearest enemy in range.
The Slugs’ damage scales with HP, and snapshots Elemental DMG% buffs such as Kazuha’s A4 and HP buffs such as Yelan’s C4.
It is recommended to use Layla’s Burst before her Skill to maximize her shield uptime for teammates and get a slight boost to Night Star generation with an early Starlight Slug hit.
 Ascension 1 Passive | Like Nascent Light
Talent Description
While the Curtain of Slumber is active, the Deep Sleep effect will activate each time the Curtain gains 1 Night Star:
- The Shield Strength of a character under the effect of the Curtain of Slumber increases by 6%.
- This effect can have a maximum of 4 stacks and persists until the Curtain of Slumber disappears.
Every time Layla gains a Night Star, the Deep Sleep effect will activate, which grants Layla 6% Shield Strength, up to 4 stacks (24%). The maximum Shield Strength bonus is reached once the first wave of Night Stars has been generated.
This effect is NOT removed until the shield either expires or is destroyed. Recasting the shield while it is active maintains the current Shield Strength bonus.
 Ascension 4 Passive | Sweet Slumber Undisturbed
Talent Description
The DMG dealt by the Shooting Stars fired by Nights of Formal Focus is increased by 1.5% of Layla’s Max HP.
The damage dealt by Layla’s Shooting Stars is increased by 1.5% of her Max HP, which can benefit from DMG modifiers such as Cryo DMG Bonus and CRIT DMG.
This means both Layla’s Skill and Burst now scale with HP, allowing her to concentrate on building HP rather than splitting between ATK and HP.
 Utility Passive | Shadowy Dream-Signs
Talent Description
When Layla crafts Character Talent Materials, she has a 10% chance to receive double the product.
Identical to Eula’s Utility Passive. Occasionally saves Resin when crafting Talent Books.
Level and Talent Priority
Level = > >>>
Level = Skill > Burst >>> Normal Attack
It is recommended to raise Layla to Level 90 in all playstyles, as both her shield and personal damage scale with her HP. However, it is best to prioritize leveling characters who contribute more damage over Layla.
Constellations
 Constellation 1 | Fortress of Fantasy
The Shield Absorption of the Curtain of Slumber generated by Nights of Formal Focus is increased by 20%.
Additionally, when unleashing Nights of Formal Focus, she will generate a shield for any nearby party members who are not being protected by a Curtain of Slumber. This shield will have 35% of the absorption of a Curtain of Slumber, will last for 12s, and will absorb Cryo DMG with 250% effectiveness.
Good Constellation that increases Layla’s Shield Absorption, which is multiplicative with Shield Strength buffs such as Layla’s A1 Passive and 4pc TotM.
This Constellation also provides good Co-Op value, as Layla now generates weaker shields for every other player, similar to Diona’s C2. Unfortunately, these shields do not fire any Night Stars, nor do they speed up the generation of Night Stars by Layla’s own shield.
| DPS Increase from C0: 0% | Shield HP Increase from C0: 20% |
 Constellation 2 | Light’s Remit
When Shooting Stars from Nights of Formal Focus strike opponents, they will each restore 1 Energy to Layla. Each Shooting Star can restore Energy to her in this manner once.
Great Constellation that eliminates a huge chunk of Layla’s ER needs. You can expect 8-12 Energy to be restored in this manner in a typical rotation. This can also indirectly increase her shielding or personal damage in teams where she has high ER requirements, as she can reallocate more ER substats into HP% or CRIT DMG.
However, this Constellation is much less impactful if you use an ER weapon such as Favonius Sword, as said weapons already cover most if not all of her Energy requirements, or if she is run in teams where she has minimal ER requirements.
| DPS Increase from C1: 12% | Shield HP Increase from C1: 0-6.6% |
| Total DPS Increase from C0: 12% | Total Shield HP Increase from C0: 20-27.9% |
 Constellation 3 | Secrets of the Night
Increases the Level of Nights of Formal Focus by 3.
Maximum upgrade level is 15.
Increases Layla’s shield strength significantly; a good stopping point for a pure shielder build. Only increases the ATK scaling of her Shooting Star damage, leading to a negligible damage increase.
| DPS Increase from C2: 2.1% | Shield HP Increase from C2: 19.2% |
| Total DPS Increase from C0: 14% | Total Shield HP Increase from C0: 43-52.4% |
 Constellation 4 | Starry Illumination
When Nights of Formal Focus starts to fire off Shooting Stars, it will grant all nearby party members the Dawn Star effect, causing their Normal and Charged Attack DMG to increase based on 5% of Layla’s Max HP.
Dawn Star can last up to 3s and will be removed 0.05s after dealing Normal or Charged Attack DMG.
Provides an Additive Base DMG Bonus, similar to Shenhe/Yun Jin, to Normal and Charged Attacks. The Dawn Star effect is obtained as soon as the first Star is fired, and lasts up to 3s or until used. The buff’s short duration means it can only be used for one attack. The exceptions to this are AoE attacks and multi-hit attacks. Unlike other Base DMG Bonus buffs like Shenhe’s Icy Quill, Layla’s C4 benefits every instance of damage when hitting multiple enemies simultaneously, making it particularly potent in AoE.
Attacks that have multiple instances of damage (such as Ayaka’s Charged Attack) can benefit from the buff on all hits. However, few characters can actually perform such attacks; melee Charged Attacks must also be preceded by a Normal Attack, which can consume the Dawn Star buff prematurely. On characters like Hu Tao or Yoimiya, it is also difficult to ensure the attacks that consume this buff also trigger either Vaporize or Melt.
This Constellation is overall a marginal team DPS increase at best.
| DPS Increase from C3: 0% | Shield HP Increase from C3: 0% |
| Total DPS Increase from C0: 14% | Total Shield HP Increase from C0: 43-52.4% |
 Constellation 5 | Stream of Consciousness
Increases the Level of Dream of the Star-Stream Shaker by 3.
Maximum upgrade level is 15.
Good Constellation that increases personal damage by quite a bit, especially in an off-field DPS build. Effective regardless of playstyle, since her Elemental Burst damage scales directly with HP.
| DPS Increase from C4: 11.9% | Shield HP Increase from C4: 0% |
| Total DPS Increase from C0: 27.76% | Total Shield HP Increase from C0: 43-52.4% |
 Constellation 6 | Radiant Soulfire
Shooting Stars from Nights of Formal Focus deal 40% increased DMG, and Starlight Slugs from Dream of the Star-Stream Shaker deal 40% increased DMG.
Additionally, the interval between the creation of Night Stars via Nights of Formal Focus is decreased by 20%.
The best Constellation for her damage, providing an unconditional 40% DMG Bonus for both her Skill and Burst, which results in a decent DPS increase. The DMG Bonus is especially potent in conjunction with Shenhe’s Icy Quill buff, and the 20% generation speed boost improves the consistency of firing 3 Shooting Star waves per Skill. However, firing 4 or more waves per Skill is still highly impractical.
| DPS Increase from C5: 30.1% | Shield HP Increase from C5: 0% |
| Total DPS Increase from C0: 66.2% | Total Shield HP Increase from C0: 43-52.4% |
Playstyles and Gearing
…Who’s ‘her’? Ah, well, a very weary Layla who’s constantly stressed about her schoolwork, of course. …And me? Hehe, I’m Layla too.
ER Requirements
| Team | ER Requirement |
| Solo Cryo, 20s rotation | 200%+ |
| Double Cryo, 15s rotation | 140–160% |
| Double Cryo, 20s rotation | 130-150% |
| Triple Cryo, 20s rotation | 100-110% |
Layla’s second Constellation lowers her ER requirements by 30-60%, depending on the number of Shooting Stars fired. With Favonius weapons, her ER requirements decrease by around 15% for each passive proc.
Though Layla can theoretically have near-100% uptime on her Skill and Burst, attempting 12s or 15s rotations is unfeasible with most teammates. In teams that operate in 24s rotations where Layla Bursts every 12s, her ER should account for the half of the rotation with lower Energy generation.
For an accurate estimate of her ER requirements based on your specific team and gear, use Zakharov’s Energy Recharge Calculator.
Artifact Stats
Main Stats
 Sands |  Goblet |  Circlet | |
| Pure Shielder | HP% | ER% | HP% | HP% > CRIT Rate |
| Off-field DPS | HP% | ER% | Cryo DMG Bonus | HP% | CRIT |
Substat Priority
Pure Shielder
ER% until requirement > HP% > CRIT Rate (w/ Favonius) > Flat HP
Off-field DPS
ER% until requirement > CRIT ≥ HP% > Flat HP
HP% is a valuable stat for all of Layla’s builds, as both her shielding and damage scale with her HP; the value of HP% also increases due to the rarity of HP% buffs compared to other stats. In an off-field DPS build, it is possible for HP% Circlets (with good substats) to be comparable to CRIT Circlets, especially if her weapon provides a large amount of CRIT, such as Harbinger of Dawn.
Energy Recharge for the most part should not be neglected, as her Burst improves the consistency of her Night Star generation. This in turn improves her Cryo application, particle generation, and uptime on Skill-damage based effects. However, in teams where Layla does not Burst, you can instead focus on getting more HP% stats for her shielding.
Pure Shielder Builds
Layla’s most comfortable playstyle, where her primary role is to provide consistent shielding for the team. This build focuses on stacking HP% to maximize her Shield Absorption, often to the point that she can replace a dedicated healer. Her Burst improves her Cryo application and particle generation through consistent Night Star production.
This build is highly recommended in teams where Layla’s shield is relied upon for survivability, such as when there are no healers in the team or on-field units are unable to dodge attacks frequently. It is also encouraged if Cryo Particles are highly needed by her teammates, as her Energy generation is cut short should the shield be destroyed.
Pure Shielder Weapons
Shield Comparison
Assumptions: C6 Layla, 4pc TotM, HP/HP/HP, 140% ER requirement, 100% Cryo Resonance uptime, 3 Volleys of Shooting Stars (12) + 8 Star Slugs
| Weapon | % Shield Absorption of PJC R1 |
| Key of Khaj-Nisut R5 | 117% |
| Key of Khaj-Nisut R1 | 113% |
| Primordial Jade Cutter R5 | 104% |
| Primordial Jade Cutter R1 | 100% |
| ER% Weapons | 96% |
| Other weapons (depending on Layla’s ER requirement) | 90-96% |
Damage Comparison
Assumptions: C6 Layla, 4pc TotM, HP/HP/HP, 110% ER requirement, 100% Cryo Resonance uptime, 3 Volleys of Shooting Stars (12) + 8 Star Slugs
| Weapon | % DPS of PJC R1 |
| Primordial Jade Cutter R5 | 109.23% |
| Primordial Jade Cutter R1 | 100.00% |
| Harbinger of Dawn R5 | 98.45% |
| Key of Khaj-Nisut R5 | 88.79% |
| Key of Khaj-Nisut R1 | 85.16% |
| Harbinger of Dawn R5 (No Passive) | 79.36% |
| Favonius Sword | ~66% |
Favonius Sword | Recommended option, as its high ER% substat helps fulfill Layla’s ER requirement while its passive provides valuable team Energy. To maximize the chance of proccing the passive, perform N1QE. The first Slug from Layla’s Burst will hit during her Skill animation, allowing for 3 hits in quick succession. |
Key of Khaj-Nisut | Best weapon for maximizing Layla’s shield by far thanks to its massive HP% bonus. It is generally not worth trying to trigger its passive, as it requires Layla to be on-field when her Shooting Stars hit; this is generally a DPS loss and reduces shield uptime for her teammates. |
Primordial Jade Cutter | Good option, as it is currently the only other Sword that provides HP%. It also allows Layla to deal respectable personal damage even with a pure shielder build. However, this weapon should be prioritized for damage-focused units. |
Sacrificial Sword | Has an identical ER% stat to Favonius Sword, but loses out on the powerful particle-generating passive. |
Freedom-Sworn | It may slightly weaken her shield in high ER requirement scenarios, but can be worth using in teams that make good use of its buffs such as Vapemelt. Note that Layla has difficulty triggering the buff in Freeze teams, and cannot trigger it at all in Mono Cryo teams. |
| Festering Desire, Skyward Blade, Skyrider Sword  | ER stat sticks used to meet Layla’s Energy requirements if the above options are unavailable; they provide lower ER than either Favonius Sword or Sacrificial Sword. Their passive effects are irrelevant for pure shielder builds. |
Harbinger of Dawn | If Layla does not need an ER% weapon or Sands to meet her ER requirements and other options are not available, this weapon can squeeze out some additional DPS. If above the passive’s 90% HP requirement, its damage output is similar to that of an R1 Primordial Jade Cutter. |
Pure Shielder Artifacts
Assumptions: C6 Layla, Triple HP%, Favonius Sword, 140% ER requirement
| Artifact | % of 4pc TotM Shield Strength | Notes |
4pc Tenacity of the Millelith (TotM) | 100% | Highly recommended, as it provides the strongest shield by a large margin due to its HP% bonus and Shield Strength buff. Layla’s high uptime on the partywide ATK% buff also makes it potent for team damage. |
4pc Noblesse Oblige (NO) | 77% | Has a similar ATK% buff to 4pc TotM, but requires Layla to Burst frequently on cooldown to maintain uptime and provides a weaker shield. Its Burst DMG buff is largely wasted. |
2pc TotM + 2pc Vourukasha’s Glow | 83% | Two HP% set bonuses bolster her shield, but the combination still falls far behind 4pc TotM. |
| 2pc TotM + 2pc Emblem of Severed Fate (EoSF)  | 81% | ER and HP% are highly appreciated stats on Layla, but this set combination does not provide any buffs for team damage. |
4pc Deepwood Memories | 77% | Layla can be a decent holder of this set in Dendro teams if no other team member uses it, as she procs its effect easily with her Skill and Burst. The opportunity cost of using this set on Layla is quite low, especially if it allows her teammates to equip more damaging sets. |
4pc Instructor  | 69% | Allows Layla to provide a sizable teamwide EM buff, but requires her to trigger a reaction while on-field, most likely with her Skill cast. Its 4-star stats will result in a significantly weaker shield. |
4pc The Exile  | 69% | Can be used to mitigate the ER requirements of Layla’s teammates, but results in a significantly weaker shield due to its 4-star stats. |
Off-Field DPS Builds
This playstyle sacrifices some of Layla’s shielding to improve her damage contribution, mainly through her Burst. In this build, Layla acts as an off-field Cryo DPS while still providing a decent amount of shielding and Interruption Resistance for her team. However, her off-field damage and AoE potential is noticeably lower than other Cryo units such as Rosaria or Kaeya. Note that it is generally preferable to use equipment that provide team buffs or extra utility over solely improving Layla’s personal damage.
It is recommended to use this build when the team is less reliant on Layla’s shield due to other forms of damage mitigation such as Freeze or healers, as it trades some of Layla’s redundant defensive utility for additional team damage.
Off-Field DPS Weapons
Shield Comparison
Assumptions: C6 Layla, 4pc ToTM, HP/Cryo/CRIT, 110% ER requirement, 100% Cryo Resonance uptime, 3 Volleys of Shooting Stars (12) + 8 Star Slugs
| Weapon | % Shield Absorption of PJC R1 |
| Key of Khaj-Nisut R5 | 120% |
| Key of Khaj-Nisut R1 | 115% |
| Primordial Jade Cutter R5 | 105% |
| Primordial Jade Cutter R1 | 100% |
| ER% Weapons | 95% |
| Other weapons (depending on Layla’s ER requirement) | 85-95% |
Damage Comparison – TotM
Assumptions: C6 Layla, 4pc TotM, HP/Cryo/CRIT, 110% ER requirement, 100% Cryo Resonance uptime, 3 Volleys of Shooting Stars (12) + 8 Star Slugs\
| Weapon | % DPS of Harbinger of Dawn R5 |
| Primordial Jade Cutter R5 | 118.87% |
| Mistsplitter Reforged R5 | 111.55% |
| Primordial Jade Cutter R1 | 107.58% |
| Haran Geppaku Futsu R5 | 103.83% |
| Light of Foliar Incision R5 | 102.95% |
| Harbinger of Dawn R5 | 100.00% |
| Light of Foliar Incision R1 | 99.97% |
| Mistsplitter Reforged R1 | 98.65% |
| Haran Geppaku Futsu R1 | 97.65% |
| Key of Khaj-Nisut R5 | 96.80% |
| Key of Khaj-Nisut R1 | 92.05% |
| Harbinger of Dawn R5 (No Passive) | 83.48% |
| Freedom-Sworn R5 | 79.94% |
| Festering Desire R5 | 76.93% |
| Freedom-Sworn R1 | 76.06% |
| Skyward Blade R5 | 75.76% |
| Skyward Blade R1 | 73.98% |
| Favonius Sword R1-R5 | 70.72% |
Damage Comparison – Blizzard Strayer
Assumptions: C6 Layla, 4pc BS, HP/Cryo/CRIT, 110% ER requirement, 100% Cryo Resonance uptime, 3 Volleys of Shooting Stars (12) + 8 Star Slugs
| Weapon | % DPS of Harbinger of Dawn R5 |
| Primordial Jade Cutter R5 | 117.13% |
| Mistsplitter Reforged R5 | 109.18% |
| Primordial Jade Cutter R1 | 105.99% |
| Haran Geppaku Futsu R5 | 102.30% |
| Light of Foliar Incision R5 | 101.56% |
| Key of Khaj-Nisut R5 | 100.39% |
| Harbinger of Dawn R5 | 100.00% |
| Light of Foliar Incision R1 | 99.41% |
| Mistsplitter Reforged R1 | 97.29% |
| Haran Geppaku Futsu R1 | 96.85% |
| Key of Khaj-Nisut R1 | 95.20% |
| Festering Desire R5 | 83.08% |
| Freedom-Sworn R5 | 80.86% |
| Harbinger of Dawn R5 (No Passive) | 79.56% |
| Skyward Blade R5 | 78.87% |
| Freedom-Sworn R1 | 77.20% |
| Skyward Blade R1 | 76.68% |
| Favonius Sword R1-R5 | 71.95% |
| Primordial Jade Cutter | General Best-in-Slot that also bolsters her Shield Absorption. It may provide an excess of CRIT Rate in combination with 4pc Blizzard Strayer. |
| Harbinger of Dawn | Recommended free-to-play option. Easily obtainable 3-star weapon that performs similarly to her 5-star options, assuming its passive is maintained. Its low Base ATK is a non-issue as most of Layla’s damage scales with HP. Its HP requirement is easy to maintain as Layla does not spend much time on-field. Even if its passive gets disabled in combat, its performance is only behind that of Key of Khaj-Nisut and CRIT weapons at lower ER requirements. |
| Mistsplitter Reforged, Haran Geppaku Futsu, Light of Foliar Incision  | CRIT stat sticks that have similar performance to Harbinger of Dawn, without its HP restriction. Layla can maintain up to 2 stacks of Mistsplitter’s passive using her Burst. It is not worth trying to exploit the passive effects of Foliar and Haran, as Layla’s Normal Attacks are unimportant in her off-field playstyles. |
| Key of Khaj-Nisut | Decent weapon. While not the best damage-wise, it provides the strongest shield out of all options. While the EM share on the passive may seem enticing, triggering it requires additional field time on Layla, which wastes precious shield uptime and is generally a DPS loss. |
| Favonius Sword | Low personal DPS, but fulfills Layla ER requirements easily. The added particle generation can amount to higher team damage by lowering the team’s ER requirements. |
| Freedom-Sworn | Lower personal damage, but its teamwide buffs can improve overall team damage; best used in Vapemelt teams. Note that Layla has difficulty triggering the buff in Freeze teams and cannot trigger it at all in Mono Cryo teams. |
| Sacrificial Sword | Has an identical ER% stat to Favonius Sword, but loses out on the powerful particle-generating passive. |
| Festering Desire, Skyward Blade, Skyrider Sword | ER stat sticks used to meet Layla’s Energy requirements if the above options are unavailable; they provide lower ER than either Favonius Sword or Sacrificial Sword, while also losing out on Favonius Sword’s team utility. Festering Desire’s passive is underwhelming as Layla’s Elemental Skill accounts for only a third of her total damage. Skyward Blade provides a tiny amount of CRIT Rate but its passive is useless for off-field units. Skyrider Sword is obtained easily as a 3-star weapon. Its passive is of very little effect. |
Off-Field DPS Artifacts
Assumptions: C6 Layla, Favonius Sword, HP/Cryo/CRIT, 110% ER requirement, 100% Cryo Resonance uptime, 3 Volleys of Shooting Stars (12) + 8 Star Slugs
| Artifact | % of 2pc TotM / 2pc BS | Notes |
4pc Blizzard Strayer (BS) | Shield 95% DPS 105.76% DPS (Freeze) 114.6% | A powerful option in Freeze teams, providing Layla with an unconditional Cryo DMG buff as well as a huge CRIT Rate buff in Freeze or Mono Cryo teams. The added CRIT Rate helps her reliably proc Favonius Sword and allows her to build more HP% and CRIT DMG stats to improve both her shield and damage. |
4pc Emblem of Severed Fate (EoSF) | Shield 95% DPS 96.83% DPS (160%+ ER) 107.01+ | Packs a substantial Burst DMG buff while also accommodating for Layla’s ER requirements, which are fairly high in certain teams. |
| 4pc Noblesse Oblige (NO) | Shield 95% DPS 94.13% | Grants a teamwide ATK% buff, and its personal Burst DMG buff is better utilized by Layla when she is built as a damage dealer. |
| 4pc Tenacity of the Millelith (TotM) | Shield 124% DPS 92.55% | Provides less in terms of personal damage but compensates with a significantly stronger shield and a consistent teamwide ATK% buff, which can be more valuable for overall team damage. Its HP% stat still contributes towards her personal damage. |
2pc HP% / NO / BS / EoSF combos | Shield 100% DPS ~100% | Can be used in the process of farming 4pc sets, but loses out on potent set bonuses such as teamwide buffs or significant personal damage bonuses. |
Mechanics
Cold, mine to command.
Shield Uptime
Layla’s shield is the most valuable part of her kit, so knowing how to maximize its uptime is crucial to her performance. Since Layla’s Skill has both a 12s shield duration and cooldown, it is theoretically possible to achieve near 100% shield uptime on Layla. Unfortunately, many of Layla’s teams operate in 15 to 20s rotations, preventing her from recasting her Skill mid-rotation without desynchronizing it in further rotations.
This can be addressed in two ways: extending the rotation to 24s to accommodate 2 Skill uses, or simply accept 3-8s of shield downtime. Going for the former option is generally not advised as it leads to a significant DPS loss in most of her teams.
In teams with a dedicated on-field unit, such as Yoimiya or Ganyu, it is best to use Layla’s Skill before swapping to them to maximize her shield uptime for said character; however, this leaves their teammates vulnerable. The alternative is to use her Skill earlier in the rotation, but this causes her shield to deactivate during the on-field unit’s field time; this is less of an issue if the team uses 15s rotations, as there is only 3s of downtime.
If the team already operates on ~25s rotations, try to use Layla’s shield on cooldown to maximize shield uptime, which allows her to protect the team near-permanently while also generating more Energy per rotation. Teams often default to 25s rotations when using consecutive 12s rotations (such as Tighnari teams with Fischl) or in “double-carry” setups like in Eula-Raiden teams.
Burst Usage
Even in a pure shielder build that forgoes personal damage, Layla’s Burst is still helpful for applying Cryo and generating Night Stars, which in turn provide additional Cryo application, particle generation, and potential buffs; it is recommended to Burst before each Skill use when possible. Her Burst’s low cost makes it relatively accessible without greatly sacrificing her Shield Absorption. This is especially true if a player does not own Key of Khaj-Nisut or Primordial Jade Cutter, as no other Swords (at the time of writing) provide any benefit to Layla’s shield; in such cases, her next best options are ER% weapons that easily cover Energy requirements.
Regardless, prioritizing HP% for a stronger shield, even at the expense of Burst uptime, is still a valid option. This includes using her Burst every two Skill uses in teams with very high ER requirements, such as in Solo Cryo teams, which allows her to equip an HP% Sands and even a HP% weapon. Depending on player preferences, the added comfort can be more valuable than maintaining the utilities provided by her Burst.
In some cases however, it is more useful to not use her Burst at all. In a Melt Ganyu team, Layla’s Burst’s modest Cryo application can steal Melts from Ganyu’s Frostflake Arrows, greatly reducing team damage. In Vapemelt teams, since Freeze does not leave a Cryo aura on Bosses but still removes Hydro aura, her Burst’s Cryo application can be actively detrimental to the Pyro unit’s reactions.
Generating Stars
Layla’s Night Stars are needed to generate particles and trigger many weapon or artifact passives. There are 3 ways in which Night Stars can be generated: passive accumulation (1 per 1.5s), teammate Skill use (2 per Skill, every 0.3s), or Burst hit (1 per hit). Night Star generation is bottlenecked by the fact that each wave of Night Stars must be completely fired off (taking 1.5s) before a new wave can be generated.
In most team rotations, Layla generates 2-3 waves of Night Stars per Skill, depending on her teammates’ Skill usage. Certain character Skills count as two “uses” and generate extra Night Stars; these include Yelan’s Hold Skill, Fischl repositioning Oz, and Keqing’s double-tapped Skill. It is not recommended to modify your team’s rotation or composition just to generate more waves; simply treat them as a nice utility bonus.
Layla vs. Other Shielders
Stars, shine for me.
Layla vs. Diona


Layla’s most obvious competitor is Diona, another Cryo shielder. Notably, Layla trades Diona’s healing for much more durable shielding and better damage output.
Layla is generally the superior shielder for characters that desire Interruption Resistance; even with only one HP% artifact, her shield is still stronger than that of Diona equipping 3 HP% artifacts. Her ability to maintain the TotM buff and higher damage scalings also make her more offense-oriented.
Diona has a much weaker shield, but she provides healing on her Burst. This mitigates damage taken during her shield downtime in 15-20s rotations, something that Layla cannot do. Her particle generation is front-loaded and is not dependent on shield durability, unlike Layla.
Effective Shield HP Comparison
Assumptions:
• Talent 9/9(12)/9(12), 4 Stacks Layla A1, Diona’s shield does not benefit from TotM 4pc effect.
• HP% weapon indicates Level 90 Key of Khaj-Nisut for Layla or Recurve Bow for Diona
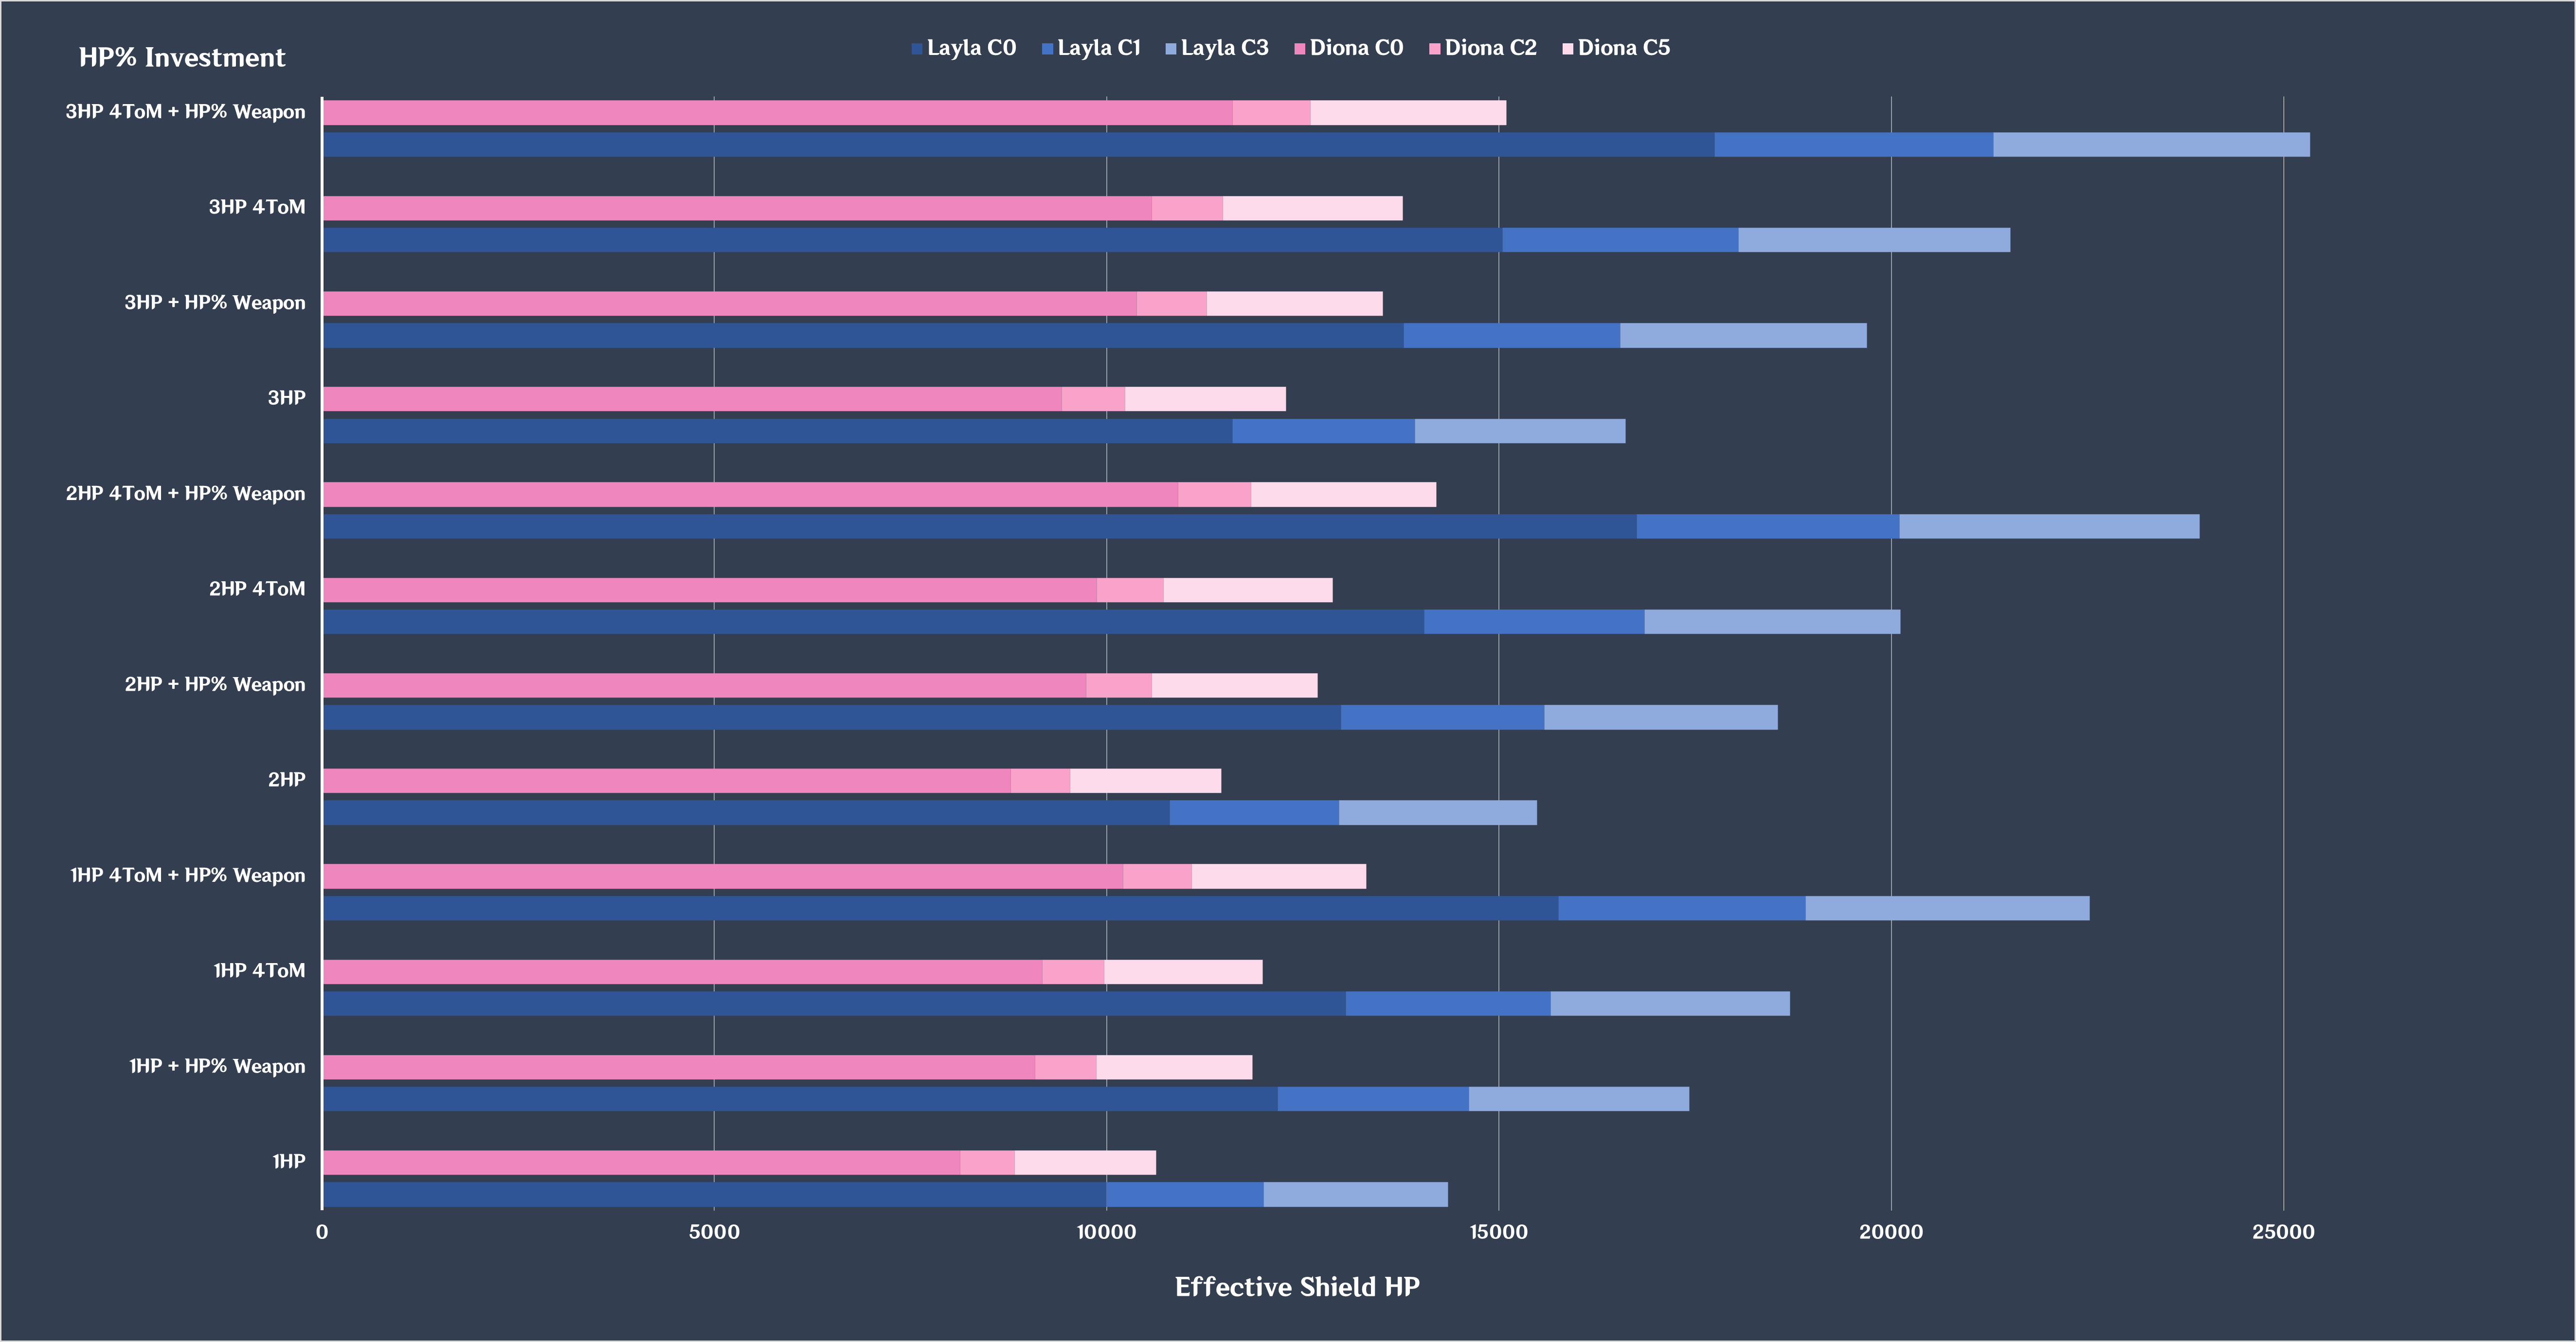
Layla vs. Diona Effective Shield HP Comparison
Further Comparisons
Layla
- Much greater shield durability
- Potentially higher shield uptime if she can use her Skill off-cooldown
- Can maintain high uptime on the Tenacity of the Millelith Shield Strength buff
Diona
- Decent healing on her Burst, which can cover shield downtime and counteract Corrosion damage
- Very minor enemy ATK debuff on her Burst via her A4 Passive
Layla
- Much higher personal damage especially at C6
- Can maintain high uptime on the Tenacity of the Millelith ATK% buff
- Can maintain high uptime on the Noblesse Oblige ATK% buff with frequent Burst usage
- Can trigger the effects of Freedom-Sworn off-field in Vapemelt teams
- Provides a small Additive Base DMG Bonus buff for Normal and Charged Attacks at C4
- Can trigger the effects of Key of Khaj-Nisut, albeit with longer field time requirements
Diona
- 200 EM buff on her Burst at C6
- Can hold 4pc Noblesse Oblige for team buffs, but with lower uptime
- Can trigger the effects of Elegy for the End, but with some inconsistency
- Stamina consumption reduction with her A1 Passive, which is helpful for characters reliant on Charged Attacks or Dash cancels
- Provides a Movement SPD buff with her A1 Passive that can enable consistent Dragonstrikes
Layla
- Back-loaded: Generates Cryo Particles over time and completely off-field; especially useful for Eula, who cannot pre-funnel particles for her Burst
- Can generate more Particles in total in 24s+ rotations with Favonius Sword assuming 2 Skill uses
Diona
- Front-loaded: Generates a large amount of Cryo Particles quickly especially with Sacrificial Bow; more straightforward, but can occupy precious field time
- High hit counts on Hold Skill synergize well with Favonius Warbow and Sacrificial Bow
Layla
- Cryo application follows the active character
Diona
- Can hit enemy weak points with Aimed shots to disable them (such as with the Aeonblight Drake) or guarantee Favonius Warbow procs
Layla vs. Zhongli

Layla provides the second strongest shield in the game, only beaten by Zhongli. As both their shields can be cast without Energy and have good Shield Absorption, they fill similar roles despite their different Elements and mechanics. Layla is often the closest equivalent to Zhongli amongst 4-star shielders; this can be valuable if a player does not have him or is using him in the other Abyss team.
Zhongli is generally the preferred shielder, as his shield provides unparalleled protection and comfort thanks to its high scaling, long duration, short cooldown, and effectiveness against all damage types. He also offers potent offensive utility via his shield’s Universal RES Shred. However, Layla’s ability to apply Cryo and generate Cryo Particles while off-field give her unique advantages over Zhongli in teams that benefit from her Element.
Effective Shield HP Comparison
Assumptions:
• Talent 9/9(12)/9(12), 4 Stacks Layla A1, 5 Stacks Zhongli A1, Non-Cryo damage
• HP% weapon indicates Level 90 Key of Khaj-Nisut for Layla or Black Tassel for Zhongli
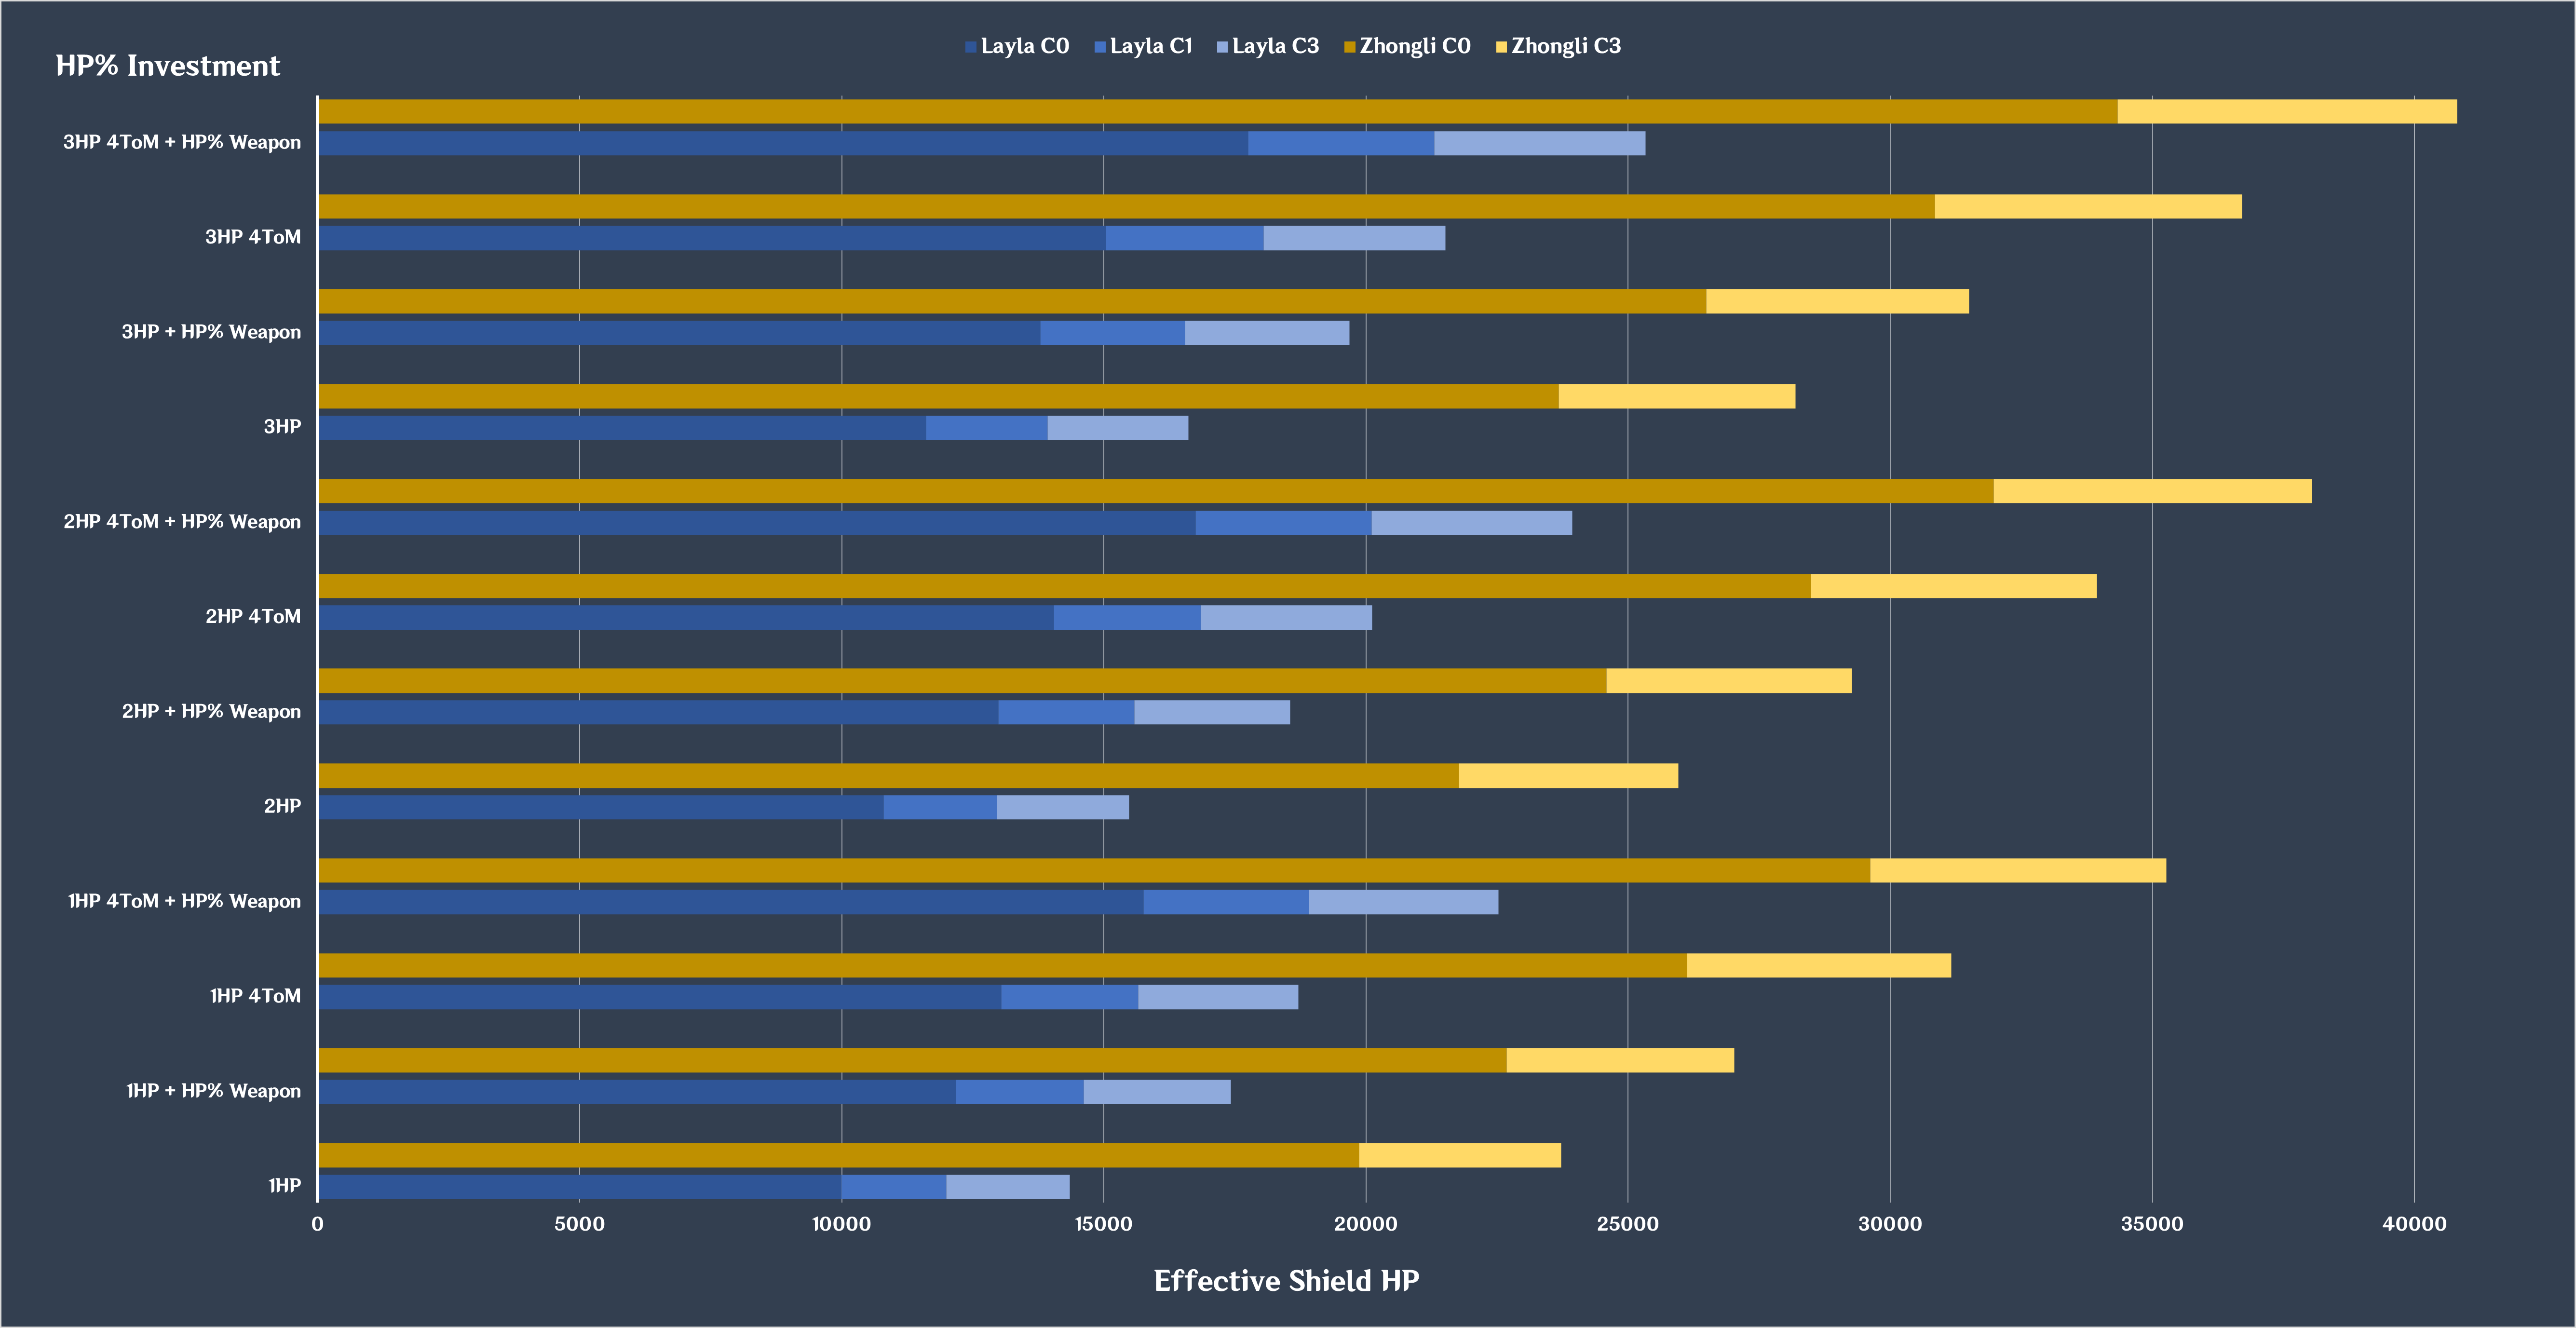
Layla vs. Zhongli Effective Shield HP Comparison
Further Comparisons
Layla
- Significantly higher Shield Absorption against Cryo damage
- Provides crowd control via Freeze in teams with consistent Hydro application
Zhongli
- Much stronger shield even at C0
- Greater shield duration that well exceeds its cooldown and allows for more flexible rotations
- His Burst has generous i-frames and applies the Petrification status in a large AoE
Layla
- Enables Cryo Resonance when paired with a second Cryo unit
- Allows Pyro units to trigger a few Melts alongside Vaporize
- Triggers Superconduct when used with Electro units
- Can provide team buffs with Freedom-Sworn or Key of Khaj-Nisut
- Minor damage buff with her C4
- Higher single-target damage with lower field time requirement
Zhongli
- 20% Universal RES Shred that effectively has full uptime
- Enables Geo Resonance with a second Geo unit, often Albedo
- Can use 4pc Archaic Petra to provide an Elemental DMG Bonus buff for his team, though it is somewhat unwieldy
- His damage from both Skill and Burst can scale better in AoE
- Faster Normal Attack combos for driving off-field units
Layla
- Generates a decent amount of Cryo Particles while off-field, but requires her shield to stay intact
Zhongli
- Random chance to generate some Geo Particles, but requires his Stone Stele to be intact and hit enemies
Layla
- Her particle generation and TotM uptime is not constrained within a static AoE
- Her particle generation is more consistent
- Does not interfere with movement (unlike Zhongli’s Stone Stele)
- Does not trigger Shatter (unlike Zhongli’s Stone Stele)
Zhongli
- Often does not need to Burst frequently or at all, lessening his ER requirements
- His Burst is potent for shield-breaking due to its AoE 4U Geo application
- Cannot be disrupted while creating his shield
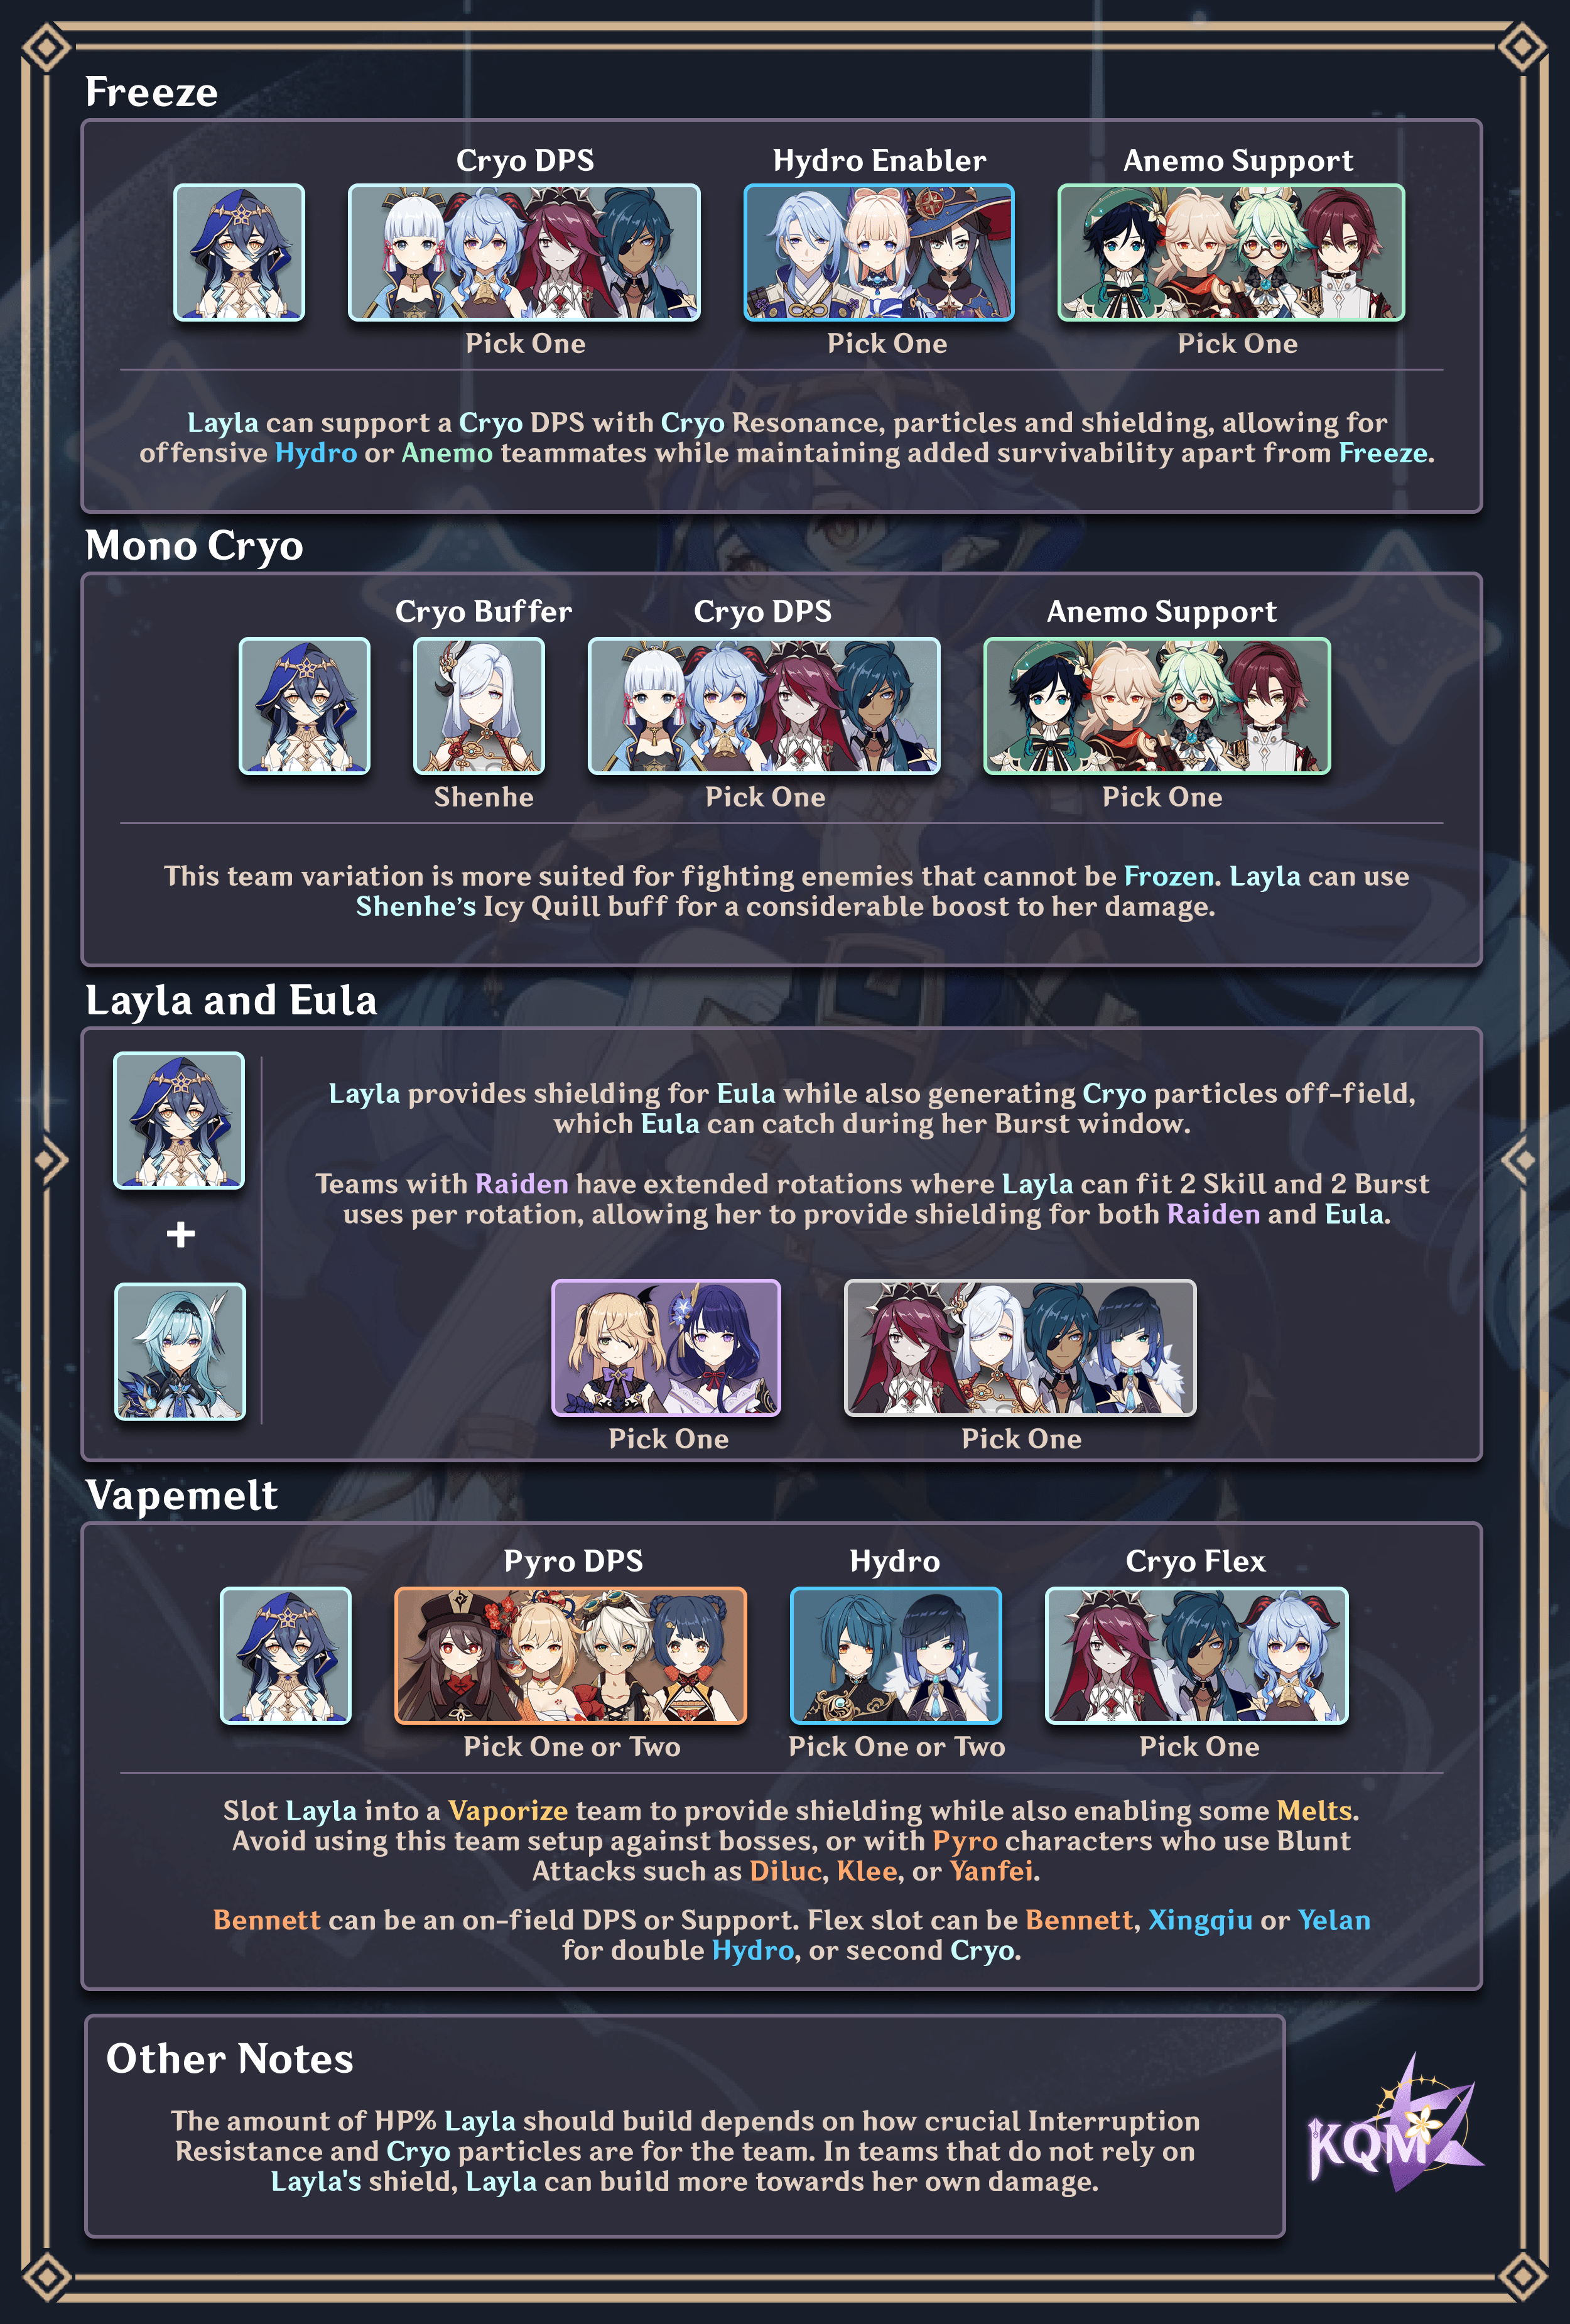
Teams
Even when we’re not looking up at the stars, they’re always there, watching over us.
Freeze
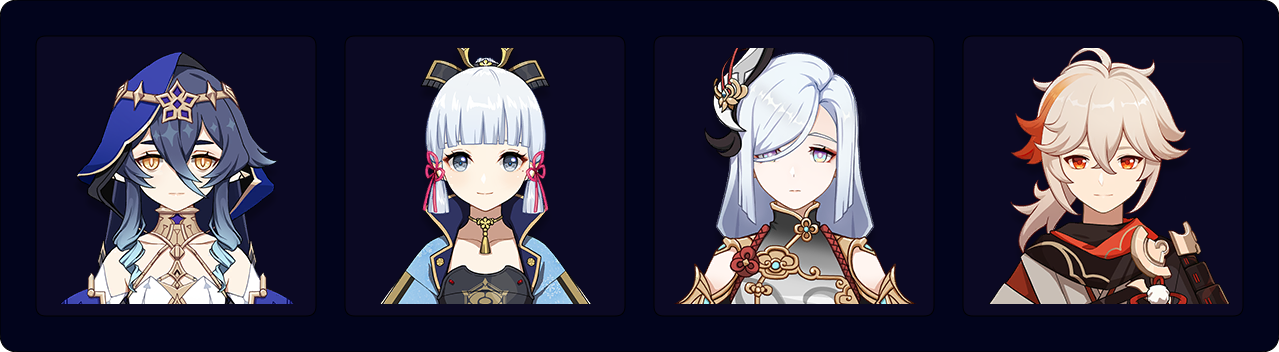
In a classic Freeze team, Layla brings survivability, enables Cryo Resonance, and generates Energy for a Cryo DPS. Ayaka and Ganyu generally fill the role of Cryo DPS due to their high damage output; teams with other Cryo units can still function but have lower damage ceilings. The rest of the team slots should be filled by a Hydro unit to maintain Freeze, and an Anemo unit to provide grouping and RES Shred via the Viridescent Venerer (VV) set.
Layla’s inclusion comes at the cost of deploying another more damage-oriented Cryo unit such as Rosaria and Shenhe, who also provide buffs while contributing higher personal damage. Her shielding can be redundant for players who can keep enemies Frozen consistently, even more so if the team includes a healer.
Notable Freeze Teammates
Cryo
 Ayaka | Ayaka is a potent Cryo damage dealer who makes good use of external buffs as her Burst front-loads much of her damage and can snapshot buffs. She also appreciates Layla’s off-field Cryo Particle generation to help recharge her 80-cost Burst. Ayaka can also utilize Layla’s C4 buff well, as her Charged Attack is composed of several AoE attacks that hit in quick succession. |
 Ganyu | Ganyu’s Burst can deal immense damage to tightly grouped enemies due to its quadratic scaling, especially since it can snapshot buffs. She can also fill in rotation gaps with her enhanced Charged Attacks, which gain some benefit from Layla’s C4 buff. Note that it is not possible to buff both the initial Frostflake Arrow and the subsequent Frostflake Bloom. In AoE scenarios, it can be beneficial to intentionally miss the initial hit, as the buff can apply to every damage instance of the Frostflake Bloom. This is particularly the case under the following conditions: Layla has high Max HP, Ganyu has relatively low ATK, and there are 3+ enemies that can be hit. |
 Rosaria | Rosaria functions as an off-field or quickswap Cryo DPS, who also provides a potent CRIT Rate team buff and good particle generation with her short cooldown Skill. It is also much easier to keep enemies inside her Burst AoE with Freeze. Teams running both Layla and Rosaria function best in a quickswap playstyle to make frequent use of her Skill, or in conjunction with a Hydro on-field DPS like Ayato. |
 Kaeya | A free-to-play alternative to Rosaria, Kaeya trades her CRIT Rate share for improved particle generation thanks to his A4 Passive. His Burst follows the active character, which can be useful for chasing enemies, but has a short range. |
Hydro
 Mona Mona | Mona is a staple choice in Freeze teams, as the reaction can extend the duration of her Burst’s Omen debuff, which makes up for the team’s lack of damaging reactions. She can also provide offensive buffs with Thrilling Tales of Dragon Slayers (TTDS) and 4pc Noblesse Oblige (NO). However, her Skill and Burst’s minimal Hydro application can have difficulty in keeping enemies permanently Frozen, leaving periods of vulnerability. Layla’s shielding can mitigate this issue by protecting the team while enemies are not Frozen. Prototype Amber provides minor healing to the team, but it may not be enough for some players. |
 Kokomi Kokomi | Kokomi acts as a more comfortable alternative to Mona, trading the Omen debuff for more consistent off-field AoE Hydro application, healing, and high 4pc TotM uptime. This can free up Layla for an off-field DPS build. Her healing in conjunction with constant Freeze can make the protection offered by Layla’s shield unnecessary. |
 Barbara Barbara | Barbara acts as a free-to-play alternative to the 5-star Hydro Catalyst users if they are not available; she can also carry TTDS and provide some off-field AoE Hydro application. However, her lack of particle generation increases the entire team’s Energy needs and makes using her own Burst regularly practically impossible. Her Skill also has a very long cooldown and short range, which significantly reduces Freeze uptime especially in Ganyu teams. |
 Ayato Ayato | Ayato acts as a “dual-carry” in Freeze teams alongside the Cryo DPS. His Burst is useful for providing off-field AoE Hydro application to keep enemies Frozen, and he can spend time on-field to deal further AoE damage with his Skill. The gaps between his Skill uses allow teammates to frequently use short cooldown Skills. In longer rotations where Ayato uses his Skill twice, Layla can recast her Skill and Burst for greater uptime on shielding, TotM buffs, damage, and Cryo Particle generation. |
 Xingqiu Xingqiu | Xingqiu is a decent option in Freeze, able to apply Hydro off-field with his Burst and Rain Sword orbitals. However, he can have difficulty maintaining Freeze uptime in AoE. He is not recommended in Ganyu teams, as she can not trigger his Burst with her Aimed Shots. |
Tartaglia | Childe functions as an on-field Hydro DPS in Freeze teams, but his lack of consistent off-field Hydro application and strict field time requirements make him much more awkward to use than Ayato. His damage is also somewhat unimpressive without hyperinvestment, especially as he cannot Vaporize his Burst in this team. Freeze does allow for more consistent enemy grouping to exploit the quadratic scaling of his Riptides. |
Anemo
 Kazuha Kazuha | Kazuha provides a powerful Cryo DMG% buff with his A4 in addition to VV Shred. He also provides instantaneous grouping with his Elemental Skill. If in a team with Mona, beware that using his Elemental Skill’s Plunging Attack triggers Shatter on Frozen enemies and allows them to escape from Burst AoEs if Freeze is not reapplied immediately after. |
| Venti’s Burst has unparalleled crowd control in Freeze teams, as even heavy enemies such as Ruin Guards are pulled towards it while they are Frozen. He also provides a nifty Energy refund with his A4, which can greatly reduce the ER requirements of Layla and the team’s Cryo DPS. His Burst’s tight grouping can even allow Layla’s Burst to hit multiple targets with each Starlight Slug, improving her damage potential in AoE scenarios. | |
 Sucrose Sucrose Heizou Heizou | Sucrose and Heizou fill the role of Anemo grouper in Freeze teams if neither Venti nor Kazuha are available. They can also hold TTDS to provide an ATK% buff to the Cryo damage dealer. Both of their EM buffs are wasted in this team archetype. Sucrose provides a Cryo DMG% buff with her C6; however, absorbing her Burst with Cryo can be inconsistent in practice. Heizou has better personal damage if well invested, but he does not provide team buffs (with his base kit) and has worse grouping. |
Freeze Example Teams & Rotations
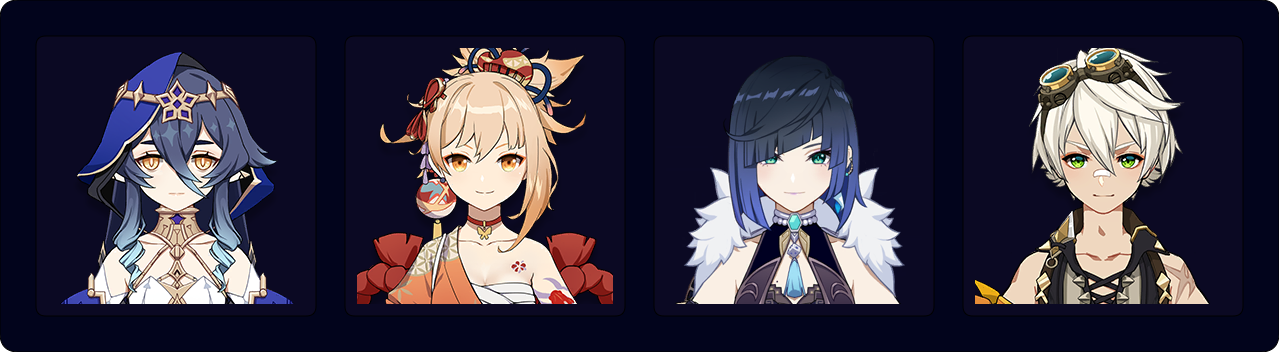
Ayaka D (first rotation) > Kazuha Q > Layla QE > Kazuha tEP > Mona QE > Ayaka D N1 E Q > Kazuha tEP (wait) > Ayaka D 2(N2C) E N2C
Rotation Video
Layla | Ayaka | Mona | Kazuha Rotation – Credit to skylarke#0001

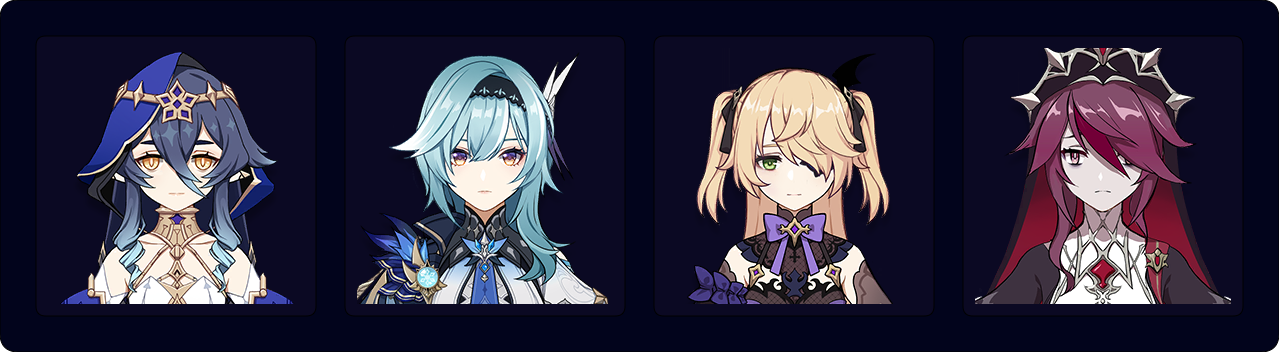
Ganyu Q > Venti EQ > Layla QE > Mona EQ > Ganyu CA > Venti E > Ganyu 2CA
Rotation Video
Layla | Ganyu | Mona | Venti Rotation – Credit to Rare Possum#0511
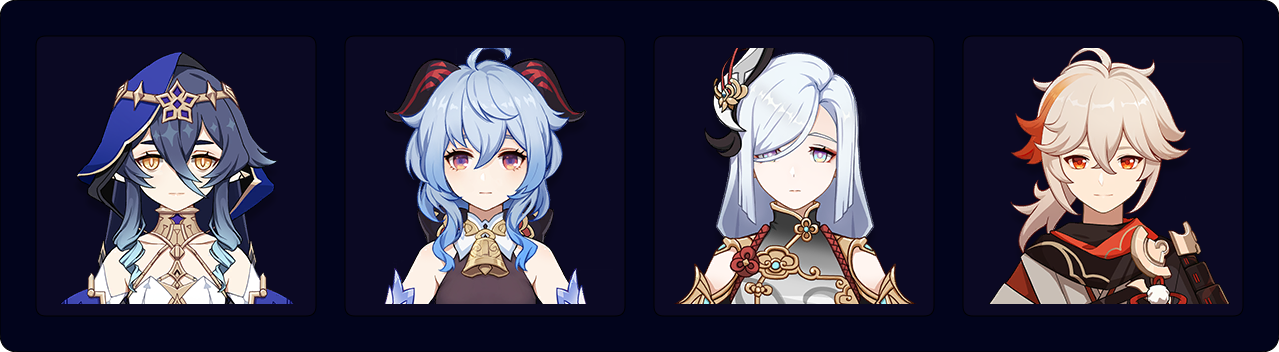
Mono Cryo
Layla fits in well in Mono Cryo teams, which focus on dealing raw Cryo damage. They cater more towards content where Freeze is less advantageous, such as against Bosses. The abundance of Cryo Particles greatly alleviates Layla’s ER requirements.
Many Mono Cryo teams allow for frequent swapping and Skill usage that make good use of Layla’s 12s cooldowns while also firing her Night Stars consistently. The last team slot is ideally an Anemo unit to provide grouping and VV Shred, but a fourth Cryo unit can still function well.
In Shenhe teams, Layla is able to serve as an additional Cryo DPS while also consolidating good defensive utility. This frees up the remaining team slots to be filled in by more offensive Cryo or Anemo picks without sacrificing comfort.
Notable Mono Cryo Teammates
Cryo
 Shenhe | Shenhe is the premier choice for Mono Cryo teams due to her plethora of buffs and unique Icy Quill mechanic, which incentivizes stacking units who deal Cryo damage. The Icy Quill buff provides a Base DMG Bonus to Cryo damage, which scales with DMG% and CRIT stats. An off-field DPS Layla build can use this buff to offset her low Talent scalings and deal respectable damage on her Skill and Burst while still providing adequate shielding. However, the Icy Quill’s Trigger Quota makes the Base DMG Bonus buff less impactful in AoE scenarios, as each enemy hit consumes separate Icy Quill procs. This is somewhat offset by the other buffs she provides, which do scale in AoE. |
 Ayaka | Ayaka’s Burst still decimates enemies that cannot be Frozen with good timing and positioning, especially if they cannot be staggered. The abundance of Cryo Particles in Mono Cryo teams lessens her ER requirements. |
 Ganyu | In Mono Cryo teams, Ganyu often focuses more on her Charged Attacks, as the lack of Freeze reduces her Burst’s effectiveness against Bosses. She greatly appreciates Layla’s sturdy shield to prevent her Charged Shots from being disrupted by enemy attacks. |
Rosaria | Rosaria serves as a capable off-field DPS who also provides a useful CRIT Rate buff for her team, which helps make up for the lack of Freeze to enable Blizzard Strayer’s full passive. Her short Skill cooldowns help generate more Night Stars for Layla in quickswap teams. |
Kaeya | Kaeya is an alternative choice for off-field Cryo DPS to Rosaria. While he cannot make use of his A4 Passive, he still generates a good amount of particles with his low cooldown Elemental Skill. His Burst follows the active character but requires them to fight in melee range, which makes Layla’s shield more valuable. |
Anemo
| Kazuha | Kazuha can easily maintain his A4 Passive for a considerable increase for the team’s Cryo DMG. He can also deal AoE Cryo damage with his Cryo-absorbed Skill and Burst, allowing him to benefit from his A4 and Shenhe’s Icy Quill. |
 Venti Venti | Venti’s strong crowd control offsets the lack of Freeze in fights against enemy mobs. His Burst can deal Cryo damage via Absorption, making good use of Shenhe’s Icy Quill buff. His tight grouping against light enemies allows Layla to consistently deal AoE damage with her Burst. However, Mono Cryo teams are often used against Bosses, which are Venti’s weakest matchup. |
 Sucrose Sucrose Heizou Heizou | Sucrose and Heizou are 4-star Anemo grouping options. Grouping is especially valuable in this archetype due to the lack of Freeze. They can use TTDS to provide an ATK% buff to the primary Cryo DPS at the expense of personal damage. Like in Freeze, their EM buffs are not used by their teammates. Sucrose can utilize Shenhe’s Icy Quill with her Cryo-absorbed Burst, which also provides a teamwide Cryo DMG% buff at C6. Heizou has worse grouping than Sucrose, but can deal respectable Talent damage. He is able to use Shenhe’s Icy Quill with his Burst’s Windmuster Iris. |
Mono Cryo Example Teams & Rotations
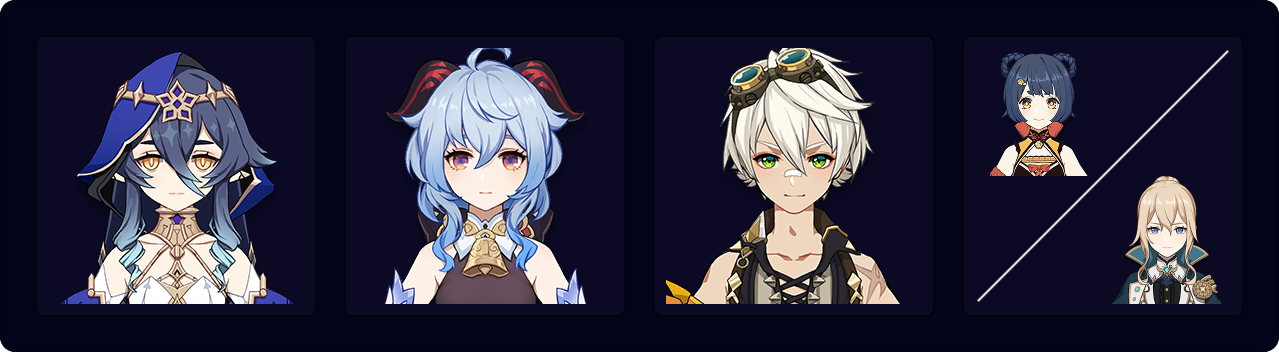
Ayaka D (first rotation) > Kazuha tEP Q > Shenhe tE N1Q > Layla Q N1E > Ayaka D E N1Q > Kazuha tE > Shenhe E > Ayaka D N2CD E N2C
Rotation Video
Layla | Ayaka | Shenhe | Kazuha Rotation – Credit to Nikatosaurus#5639
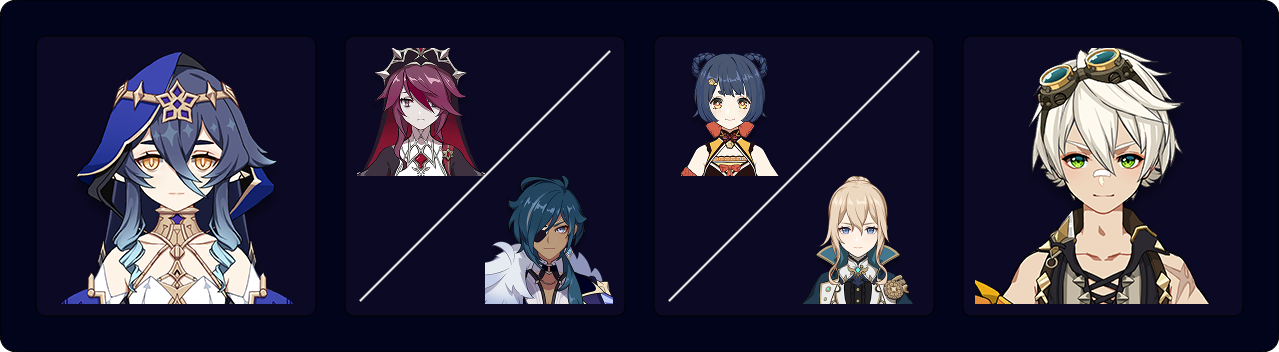
Ganyu E > Shenhe Q tE > Kazuha tEP Q > Layla Q N1 E > Ganyu Q E CA > Shenhe N1 E > Kazuha tEP > Ganyu 2 CA
Rotation Video
Layla | Ganyu | Shenhe | Kazuha Rotation – Credit to Reimu#1626
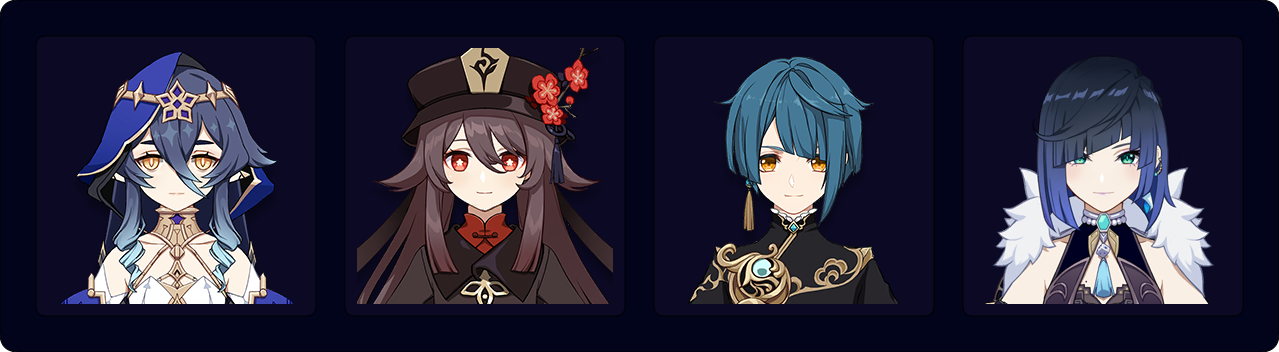
Vapemelt

Layla supplies Cryo application in Vaporize teams to Freeze enemies and occasionally allow a Pyro DPS to trigger Forward Melt for additional damage. It is not recommended to use Pyro DPS units that use Blunt Pyro attacks, as such attacks when used on Frozen enemies trigger Shatter first without triggering either Melt or Vaporize afterwards.
There are multiple options for the team’s flex slot. Bennett is a natural choice for supporting Pyro DPS units, thanks to his massive Flat ATK buff, particle generation, and C6 Pyro DMG Bonus. A second Hydro unit allows for Hydro Resonance, which strengthens Layla’s shield, and additional Hydro application. A second Cryo unit helps maintain both Cryo Resonance and Freeze uptime, which provides added comfort as well as a few more Melts.
Beware that against enemies immune to Freeze, such as Bosses, the Freeze reaction consumes Cryo and Hydro auras without any effect on the enemy. This prevents the Pyro unit from triggering either Melt or Vaporize, leading to a significant damage loss. Double Hydro teams circumvent this through their exceptional Hydro application, though it is recommended to avoid using Layla’s Burst to ensure that Hydro aura is maintained.
Notable Vapemelt Teammates
Pyro
Hu Tao | Hu Tao’s A4 Passive (and the passive of Staff of Homa) encourages her to remain below 50% HP to maximize her damage, which incentivizes her teams to run shielders over healers. Layla provides shielding for Hu Tao’s entire DPS window, and her C4 is a minor buff to Hu Tao’s damage. Layla can also run 4pc Instructor as well as Freedom-Sworn to provide Hu Tao with a slew of much appreciated EM buffs. N1C combos allow her to trigger more Melts with her Charged Attacks. Hu Tao works especially well in Double Hydro teams as her damage benefits from Hydro Resonance, in addition to more consistent Vapes due to increased Hydro application. |
 Yoimiya | While Yoimiya does not have an aversion to healers like Hu Tao, she arguably requires shielders even more; this is because disrupting Yoimiya’s Normal Attack string for any reason leads to a noticeable damage loss. Layla can shield Yoimiya for the duration of her Niwabi Fire-Dance, allowing Yoimiya to use her Normal Attacks uninterrupted. Yoimiya also appreciates buffs from Layla such as 4pc TotM, Freedom-Sworn, and her C4. Freeze uptime keeps enemies relatively stationary, which can prevent Yoimiya from missing her ranged attacks. |
 Xiangling | Xiangling’s Pyronado deals considerable off-field damage, and synergizes well with external buffs such as 4pc TotM as it snapshots. However, she requires particle funneling from Bennett to mitigate her substantial ER requirements. Xiangling’s damage isn’t reliant on performing specific combos, so her teams often don’t need shielders at all. |
 Bennett | Generally considered the premier buffer, Bennett is used in Reverse Melt teams and can also be used in Mono Cryo. Bennett provides a substantial Flat ATK buff, Pyro Particles, healing, and debuff cleanse. He can also be a potent DPS himself by taking advantage of his own buffs and his Skill’s shortened cooldown in his Burst. Before C6, he can consistently trigger Forward Melt with his Skill by using Chongyun’s Cryo Infusion. |


Hydro
| Xingqiu | Xingqiu provides off-field single-target Hydro damage and application with his Burst and Rain Sword orbitals. His Rain Sword’s damage reduction increases Layla’s effective Shield Absorption tremendously. |
 Yelan Yelan | Yelan deals single-target Hydro damage and application from off-field with her Burst, similar to Xingqiu. She also grants a ramping DMG% buff for the on-field character. However, she can have difficulty maintaining Hydro aura for Hu Tao by herself. She can be paired alongside Xingqiu to form the potent Double Hydro core. This has a host of benefits for Yelan, including Hydro Resonance, reduced ER requirements for both her and Xingqiu, and Xingqiu’s C2 Hydro RES Shred. Double Hydro also enables consistent Vapes against Bosses even with Layla’s Cryo application. |
Cryo
Rosaria | Rosaria can provide potent buffs such as 4pc NO and her A4 CRIT Rate to the whole team. Her Burst’s lack of ICD allows her to apply Cryo frequently to maintain Freeze and set up occasional Melts for the Pyro DPS. |
Kaeya | Kaeya has less utility and lower Cryo application than Rosaria, but his Burst’s ability to follow the active character may be useful against mobile enemies. |
Ganyu | As an off-field support, Ganyu requires significant ER investment to use her Burst every rotation. It is also difficult to make use of her Burst’s quadratic scaling due to the lack of grouping or consistent Freeze uptime. Ganyu shines best in this role when she is equipped with Elegy for the End, as it covers her ER needs while also providing valuable EM and ATK% buffs for the team’s Pyro DPS. |
 Chongyun | A niche pick if using pre-C6 Bennett as a DPS. Chongyun’s Cryo Infusion allows Bennett to apply Cryo with his Normal Attacks and subsequently trigger Forward Melt with his Skill. Outside of this, he is an inferior option to other Cryo units, as he has no direct off-field Cryo application, lower damage output, and worse buffing potential. |
Vapemelt Example Teams & Rotations
Simplified Rotation
Xingqiu Q N1 ED N1 > Yelan Q N1 E N1 > Layla Q N1 E N1 > Hu Tao Combo
Simplified Rotation Video
Layla | Hu Tao | Xingqiu | Yelan Simplified Rotation – Credit to Reimu#1626
Advanced Rotation
Layla QE > Xingqiu Q N1 > Yelan Q N1 > Xingqiu E N1 > Yelan E N1 > Hu Tao Combo > Yelan E N2 > Xingqiu N2
Advanced Rotation Video
Layla | Hu Tao | Xingqiu | Yelan Advanced Rotation – Credit to Reimu#1626
Yelan EQ N1 > Layla Q N1 E N1 > Bennett E N1 Q N1 > Yoimiya E 3N5D > Bennett E
Rotation Video
Layla | Yoimiya | Yelan | Bennett Rotation – Credit to Nikatosaurus#5639
Eula Teams

Layla can slot in as an important survivability option for Eula while also generating Cryo Particles, maintaining Cryo Resonance, and providing other buffs such as 4pc TotM. Eula’s inability to pre-funnel particles is less of a concern, as Layla can generate Cryo Particles while Eula is on-field.
It is recommended to run a shield-focused build along with Favonius Sword, since Layla’s shielding and particle generation are especially crucial for this team. In 24s or longer rotations, Layla’s particle generation becomes especially potent as she can use her Skill, Burst, and Favonius Sword’s passive twice.
Notable Eula Teammates
Electro
Raiden | Eula’s most notable Electro teammate, Raiden provides a potent mix of full uptime off-field Electro application for Superconduct, consistent team Burst DMG buff, and teamwide Energy refund that benefits not only Eula but also many of Eula’s preferred teammates. However, Raiden needs significant field time to fully utilize her Burst, and often lacks buffs and support during this period. Layla’s 12s cooldowns line up well in these longer rotations, wherein she casts her Skill and Burst twice to provide shielding and buffs for both Eula and Raiden; using Layla’s Burst twice per rotation also provides Raiden with more Resolve stacks. |
 Fischl | Fischl maintains high Superconduct uptime, deals considerable off-field Electro damage, and generates substantial Energy for the team, all while requiring little field time. While Fischl’s A4 Passive is not used as effectively as in other teams, she is nonetheless a strong Electro option for Eula. |
 Beidou | Beidou is a potent off-field Electro DPS in multi-target scenarios while also offering some defensive utility. However, she faces numerous issues in Eula teams such as the lack of buffs for her Burst to snapshot and inability to use her Skill frequently. Beidou generally needs to be paired with either Raiden or Fischl to meet her high ER requirements alongside Perfect Parries. Her damage also falls dramatically in single-target, especially since Eula’s Normal Attacks are not ideal for proccing her Burst discharges. |
 Lisa | Lisa works as a buff support for Eula, providing DEF Shred with her Burst and an ATK% buff through TTDS. However, she cannot generate Energy with her Tap Skill, and requires both very high ER investment and an Electro battery to Burst every rotation. She also deals negligible personal damage in this role. Since Lisa must come before Eula in the rotation to utilize TTDS, she will also take away precious shield uptime. |
Cryo
Rosaria | Rosaria is a potent Cryo support, offering good off-field damage, high Cryo Particle generation, teamwide CRIT Rate share, and Physical RES Shred that lasts for Eula’s whole Burst duration at C6. Her high rate of Cryo application helps maintain Cryo Resonance. Unfortunately, Eula’s Lightfall Sword rarely benefits from Rosaria’s A4, especially if Layla must first deploy her Skills before Eula enters the field. |
Shenhe | While Eula is not a Cryo-focused damage dealer, she nonetheless greatly benefits from Shenhe’s Burst DMG buff, Physical RES Shred, and to an extent her Icy Quill buff. She works especially well with other Cryo teammates who can also make use of her Icy Quill buff, including Layla, which allows for Mono Cryo Eula compositions. |
Kaeya | Kaeya functions as a free-to-play alternative to Rosaria; however, he provides far fewer buffs and often cannot utilize his A4 Passive. While his Burst follows the active character, he is generally an inferior option to Rosaria. |
Flex
Bennett | Bennett’s Flat ATK buff and healing are still well appreciated in Eula teams, especially in teams with off-field DPS units who snapshot his Burst’s buff, such as Fischl or Rosaria. However, his Burst’s limited AoE greatly constricts the area the team can fight in without losing his buffs. Furthermore, his C6 makes him very anti-synergistic with Eula, as it reduces the damage of Eula’s Normal Attacks and prevents the team from benefiting from Cryo Resonance. |
Yelan | Yelan provides potent single-target damage and a ramping DMG% buff that synergizes well with Eula’s back-loaded damage. Her Hydro application Freezes enemies occasionally, which provides some crowd control. As a solo Hydro unit, Yelan requires high ER investment and may need to use her Skill twice per rotation to make her Energy requirements more manageable. |
 Nahida (C2+) | While Eula does not benefit from Dendro reactions or EM, Nahida can work as a potent if unconventional buffer with her second Constellation’s DEF Shred; she easily maintains the debuff when paired with off-field Electro application. Nahida can provide further buffs such as TTDS and 4pc TotM, which frees Layla to run other artifact sets. However, Nahida’s personal damage is poor in this role, and her Dendro application is not well utilized in this team. She struggles to reapply her Skill onto new waves of enemies due to Eula’s long field time. |
Eula Example Teams & Rotations

Raiden E > Eula E > Layla QE > Shenhe tEQ > Eula Q N4 hE N4 > Shenhe tEN1 > Layla QE > Raiden Q 3N4D N2
Rotation Video
Layla | Eula | Raiden | Shenhe Rotation – Credit to Nikatosaurus#5639
Fischl E/Q > Rosaria E > Eula E > Layla N1QE > Rosaria Q > Eula Q N4 hE N4 > Rosaria E > Eula N4
Rotation Video
Layla | Eula | Fischl | Rosaria Rotation – Credit to TWICE#9958
Melt Ganyu
Melt Ganyu typically desires a shielder for practical usage, as either dodging or getting staggered prevents her from unleashing her fully Charged Shots, which are the core of the team’s damage output. If players do not have Zhongli, Layla acts as a substitute; she offers a strong shield which has a low cooldown, no ER requirements, and does not require Ganyu to perform Normal Attacks. However, her shield’s Absorption, duration, and offensive utility are still inferior to Zhongli’s shield.
Apart from shielding, Layla can provide offensive buffs such as 4pc TotM, Freedom-Sworn, and her C4; 4pc Instructor is also an option, but greatly weakens her shield. In Sunfire team variants where Ganyu uses her Burst, Layla’s particle generation is also appreciated.
Layla’s Burst can steal Melts from Ganyu, greatly reducing team damage. Even the minimal Cryo application on her Skill alone makes alternative Pyro application methods like Kazuha’s Pyro-absorbed Burst or Burning inconsistent. It is recommended to forgo using Layla’s Burst, and instead fully invest into her shield to ensure that it does not get destroyed during Ganyu’s field time.
A more detailed explanation of Ganyu’s Melt playstyle can be found here.
Reverse Melt Quickswap
Layla can work as an off-field DPS in Reverse Melt teams; she has a lower damage ceiling than other Cryo options but provides the comfort of a shield. These teams typically run both Bennett and Xiangling as a staple combination to sustain a Pyro aura. Bennett’s healing also allows Layla to comfortably trade some of her Shield Absorption for offensive potential. Jean can work as an alternative to Xiangling, but greatly confines the area where the team can fight effectively.
As Layla does not deal much damage even with the occasional Melt, the last slot should be a Cryo DPS who can trigger Melt frequently. You should frequently swap characters to use low cooldown Skills for particle generation and damage.
Razor Teams

Layla provides steady Cryo application that follows Razor, triggering Superconduct to enhance his Physical damage output. Her shielding allows Razor to focus on completing his Normal Attack combos without being damaged or interrupted for most of his Burst uptime. However, Layla’s 12s shield uptime either extends team rotations to 24s to use her Skill twice, or leaves at least 8s of the team rotation unshielded, which includes up to 3s of Razor’s uptime.
Razor himself has fairly low ER requirements thanks to his Talents and Ascension Passives. The remaining two team slots are occupied by off-field damage dealers or buffers for a wide plethora of playstyles, such as Physical, Aggravate, Hyperbloom, or even hybrid builds. For a more in-depth look at his potential teams, refer here.
Hyperbloom & Burgeon
Layla can fill in the flex slot in Hyperbloom or Burgeon teams, providing defensive utility and certain benefits from her off-field Cryo application.
In these team archetypes, Layla does not contribute much personal damage, and is instead relied upon for her shielding if the team does not have healers like Kokomi or Kuki. She should equip a set that improves team damage, such as 4pc Instructor or 4pc Deepwood Memories. Freedom-Sworn and Key of Khaj-Nisut are potent picks for increasing the trigger unit’s EM. Key of Khaj-Nisut, however, requires good timing to minimize her field time, as Layla must swap in before her Shooting Stars hit to trigger its passive; this is best done in teams without strict rotations.
She also maintains decent Freeze uptime especially in Hyperbloom teams, which controls enemy movement and indirectly mitigates damage. Freeze also aids Dendro Core generation through an interaction commonly known as “Fridge“, where Hydro application on coexisting Cryo and Dendro auras triggers Frozen before Bloom. This interaction reduces the amount of Dendro aura consumed by Hydro application, which can allow for more Blooms to be triggered per Dendro application. However, this approach to building Bloom variant teams is generally not the most effective option.
General Shield Flex

With a decently strong shield that isn’t reliant on Energy, Layla can be easily slotted into teams that simply need a shield for comfort, even if they do not care much for her Cryo application. Shields are especially useful for on-field DPS units that are vulnerable to disruption.
Note that it is often not possible to use her Skill twice per rotation, and her shield only has 12s of uptime. Shield uptime should be reserved for the team’s on-field DPS, but this leaves other team members vulnerable.
Credits
Thanks for reading this far!
We greatly appreciate it, and hope that you enjoyed this guide and found it helpful.
If I don’t end up staying at the Akademiya after graduation, I think I’ll come travel the world with you. What do you think?
Written by:
Nikatosaurus#5639
Calculations by:
Nikatosaurus#5639, Sew#2409, and Athena#2444
Editing by:
idkanonymized#4166, acie#1290, an odd medium#6288, anticipaste#8704, and Reddraegon#0019
Theorycrafting Advice and Contributions by:
Sew#2409, Athena#2444, TWICE#9958, Reimu#1626, Rare Possum#0511, Leah, and skylarke#0001
Transcription by:
irokei#6189
Infographics by:
ang tahimik#9252
Art Permissions Handled by:
Hypermaniac#2523, Casdela#5121, and koko#1111
Special thanks to Reens#9389 and Atomic#3770 for writing the initial draft of this guide.
Combined weapon images designed by Casdela#5121.
Team images courtesy of the KQM Team Portrait Generator.
References
- Layla Mastersheet by Nikatosaurus#5639, special thanks to Chasing Haze#3014
- Layla Artifacts (Shield) by Sew#2409
- Shielder Comparison by Nikatosaurus#5639, based on calcs by Zakharov#5645
- Layla Quick Guide