Updated for Version 3.8

Heizou is a 4-star Anemo Catalyst character in Genshin Impact who typically acts as a quickswap support or on-field driver. He is also viable as a quickswap or on-field DPS. Learn about Heizou’s best builds, artifacts, weapons, and teams in this in-depth review.
Note that the information given may change if new discoveries are made.
The full-length guide is available here.
Table of Contents
New Content
 Tulaytullah’s Remembrance | A 5-star Catalyst that serves as a decent stat stick, but its passive lacks synergy with Heizou since it buffs Normal Attacks only after a Skill cast. |
 Desert Pavilion Chronicle | This artifact set is generally not recommended for Heizou since a majority of his damage comes from his Skill and Burst. Stick with the other artifact sets mentioned in the Artifacts section. |
 Faruzan | Faruzan is an Anemo support that allows Heizou to be played more effectively as a quickswap or on-field Anemo DPS. |
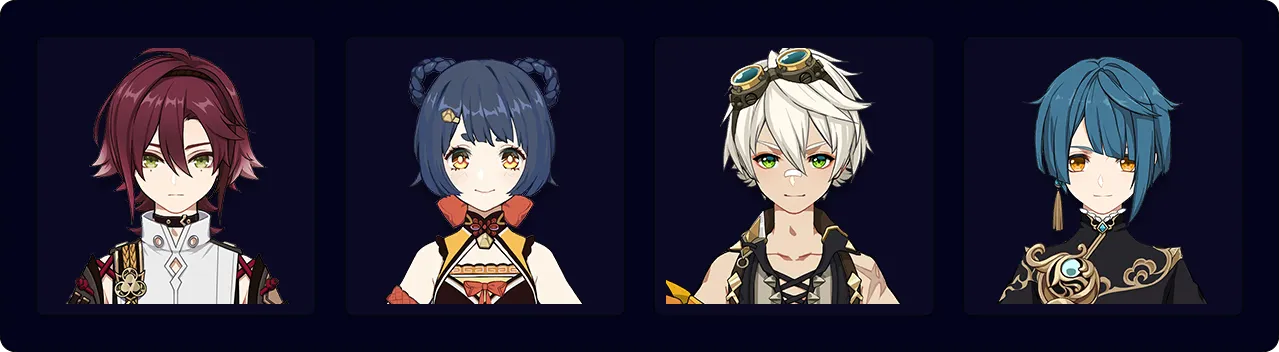
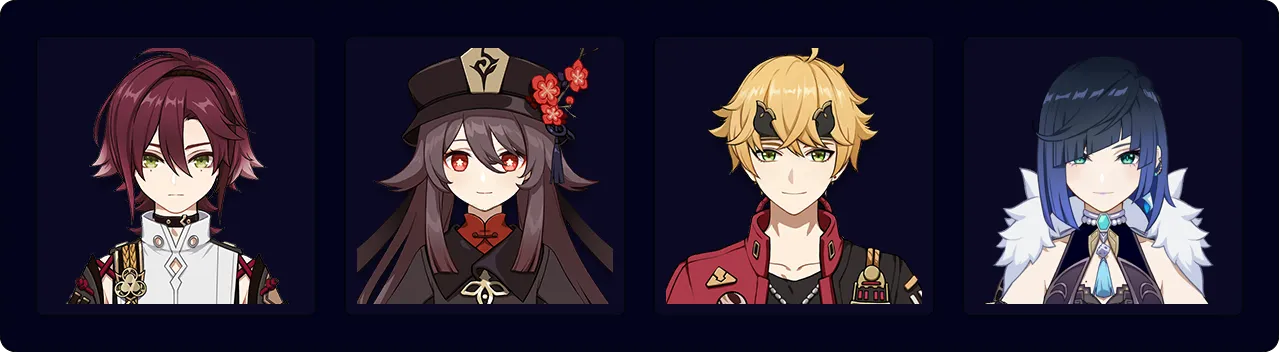
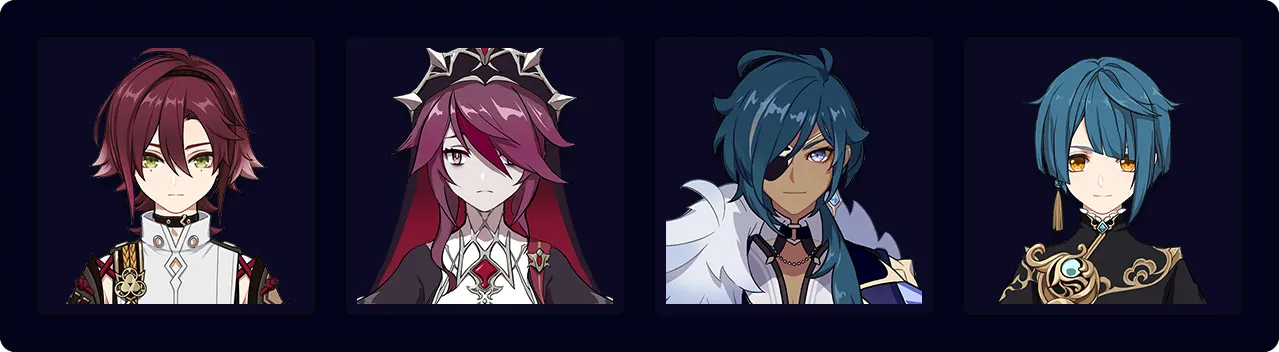
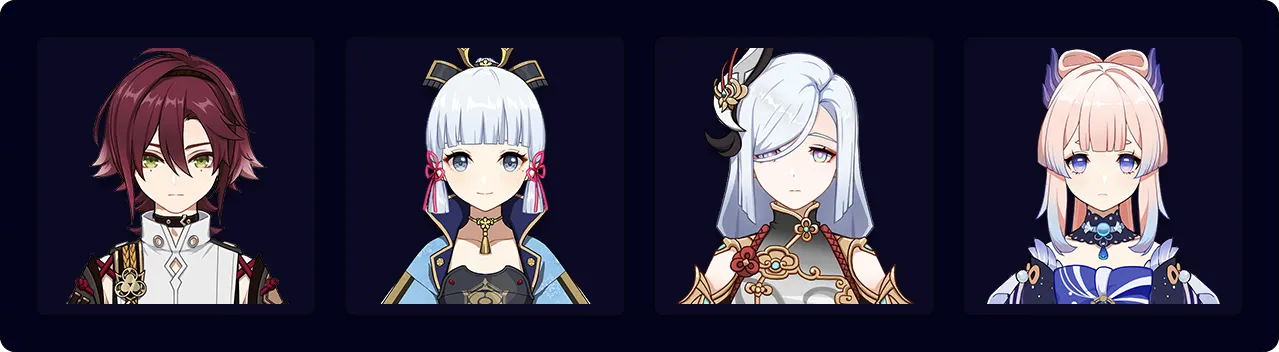
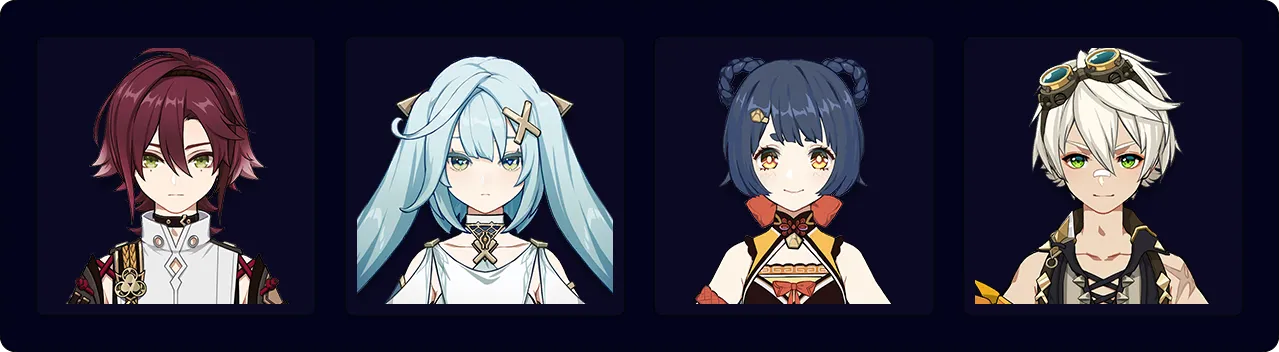
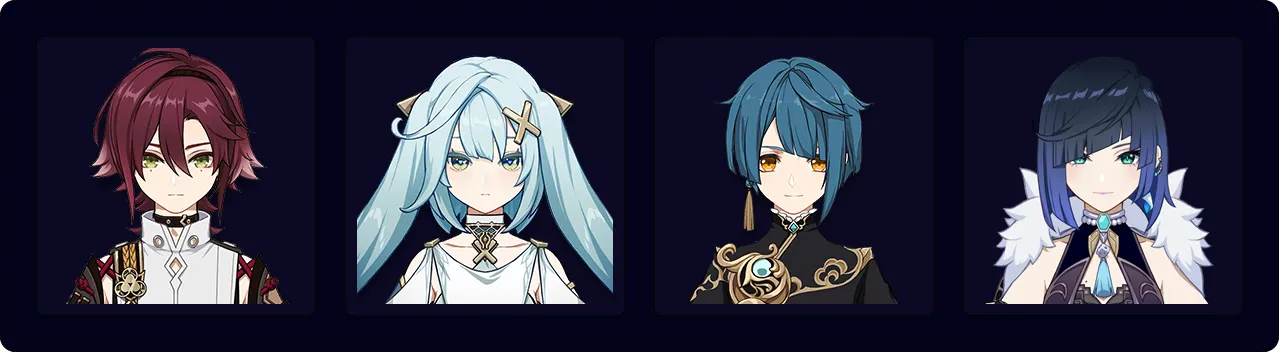
Infographic
Driver
DPS
Support

Credits to: cuppacote, cegewinne, baloopy, and KQM Staff
Character Overview
Playstyles
Quickswap Support
Heizou can be a support with 4pc Viridescent Venerer and a weapon like Thrilling Tales of Dragon Slayers or Hakushin Ring. He can use a quick sequence of attacks to trigger Swirls and obtain max stacks for his Skill. In some teams, especially when using support weapons, he can forgo his full combo, yielding field time to another DPS unit so they can maximize team buffs.
On-Field Driver
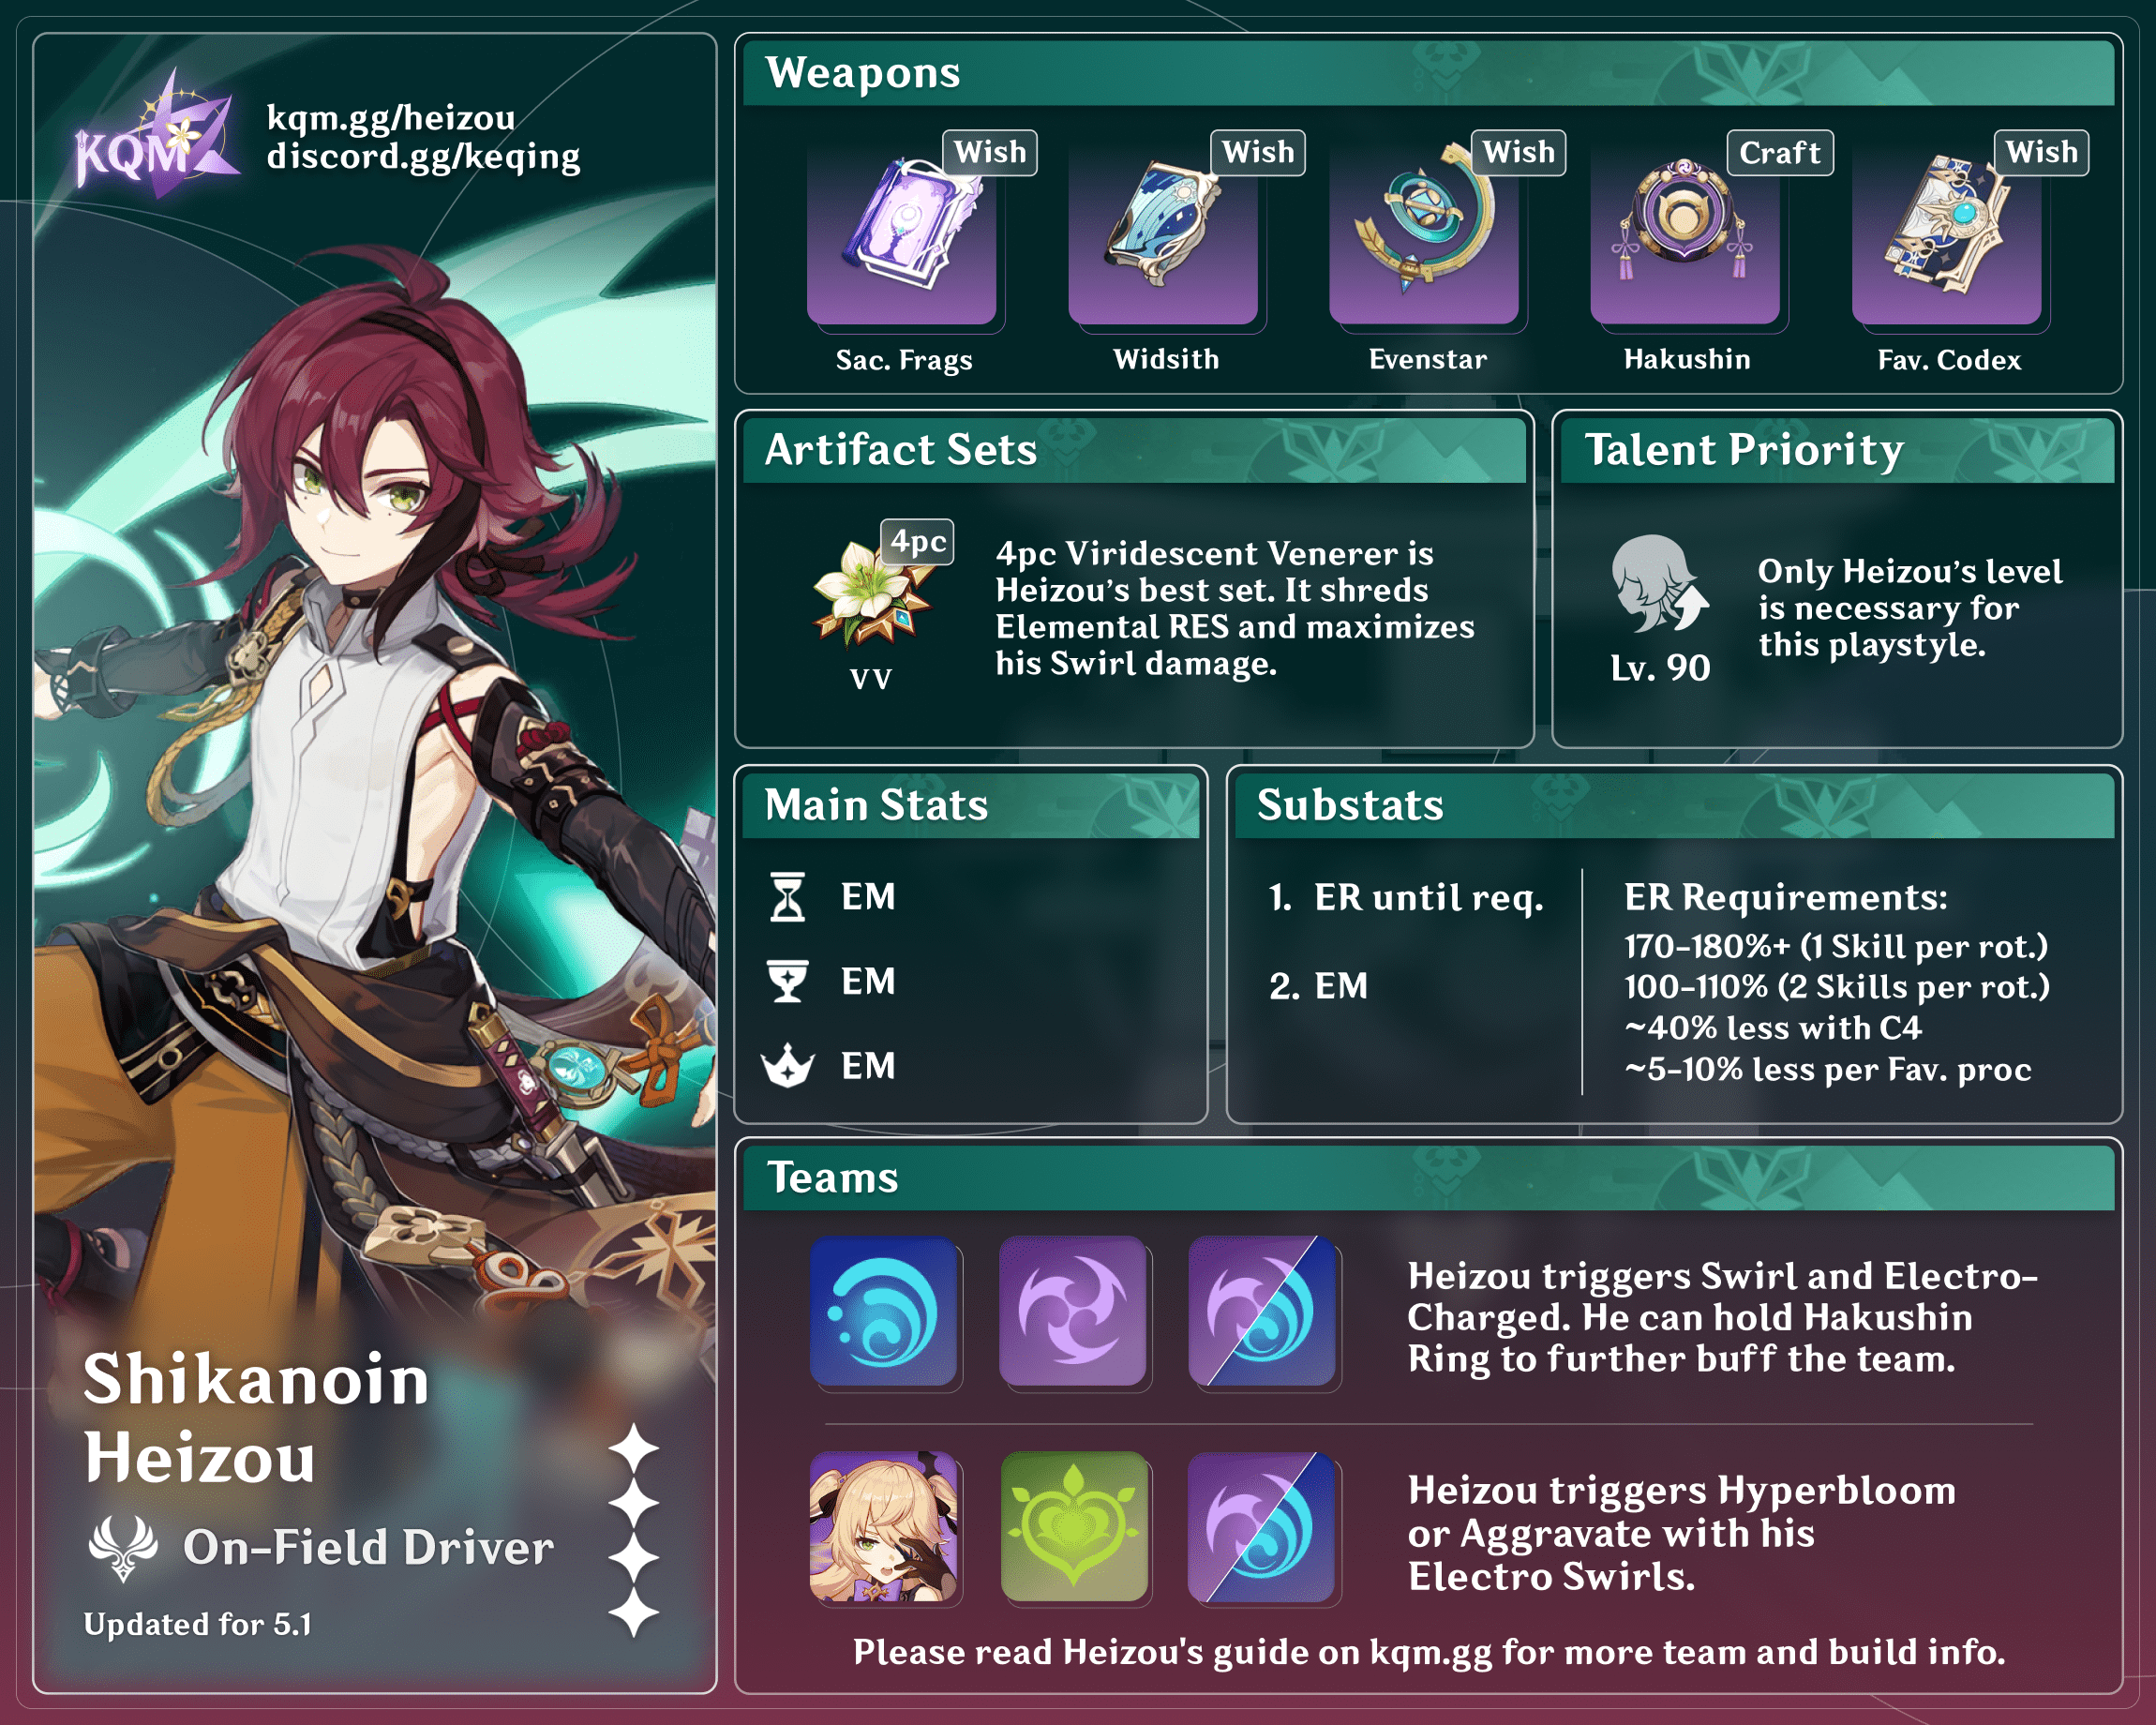
Heizou uses his fast on-field Anemo application to rapidly trigger Hydro and Electro Swirls, allowing him to deal significant Electro-Charged reaction damage. He can also drive reactions in Vaporize, Aggravate, or Hyperbloom teams. This playstyle requires Heizou to build full EM for maximum Swirl DMG.
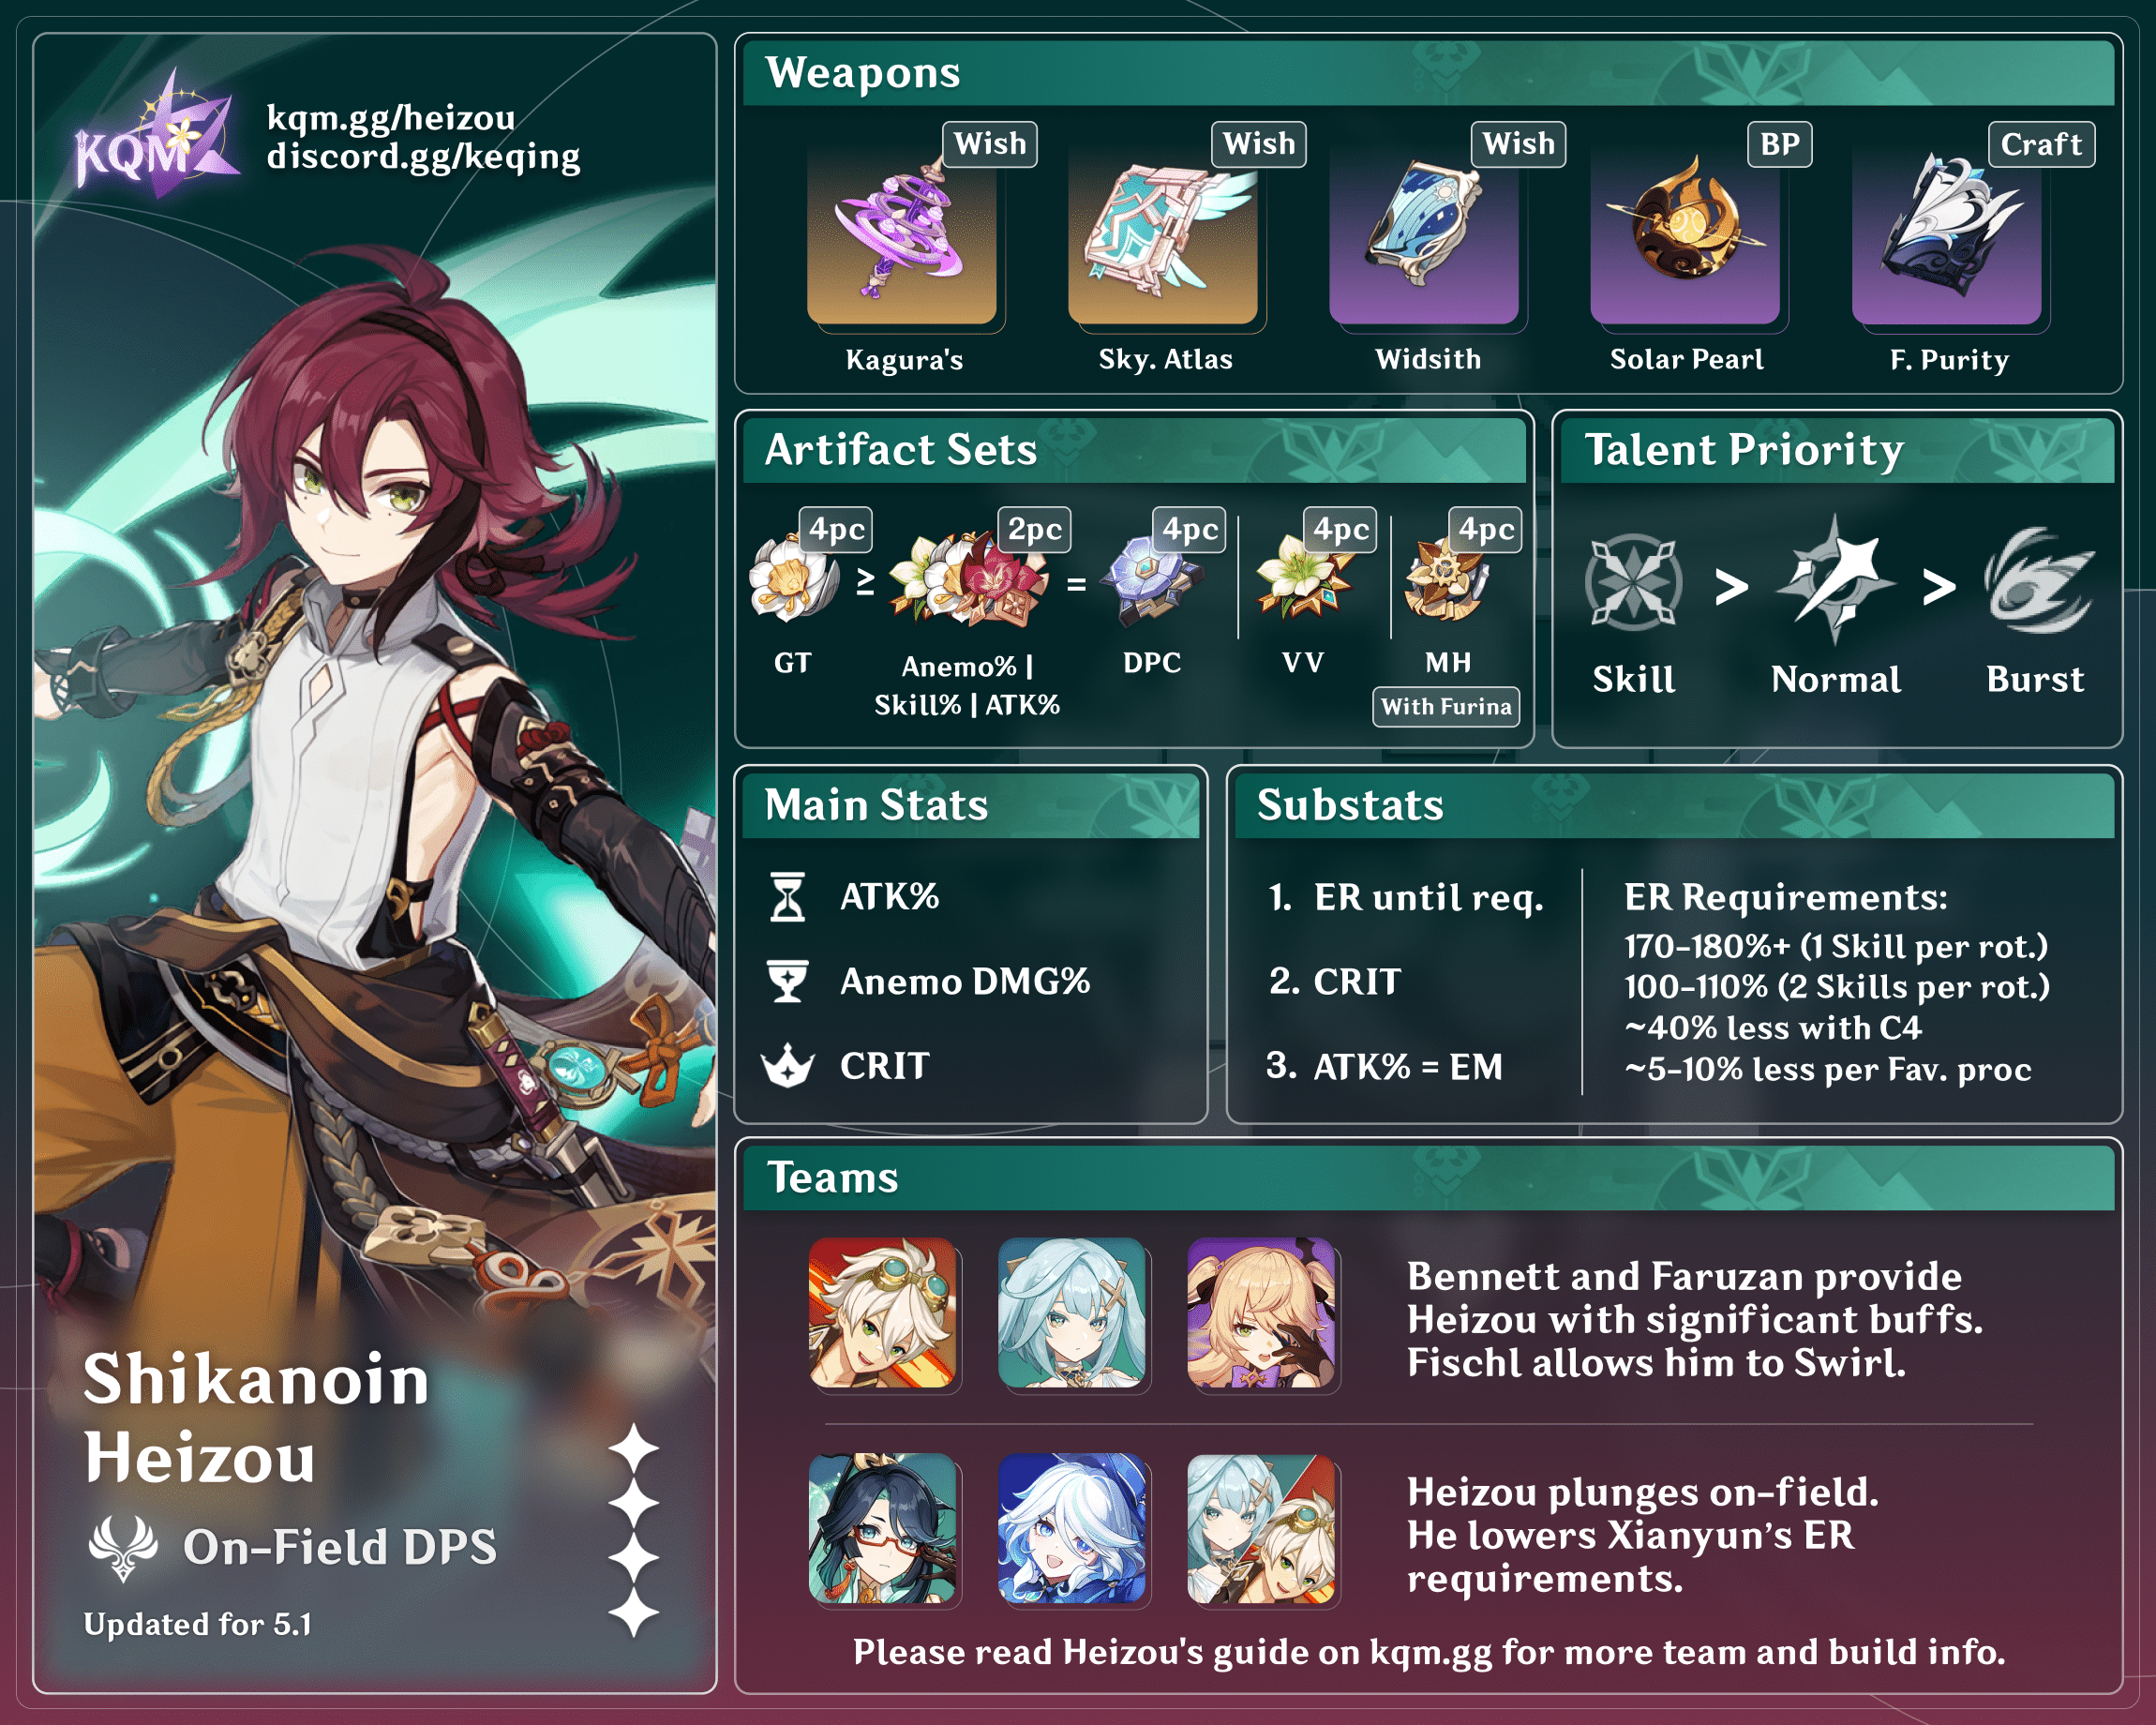
Quickswap or On-Field Anemo DPS
Heizou can also be played as a quickswap or on-field Anemo DPS, especially in conjunction with Faruzan. This playstyle can be similar to his driver playstyle in some teams, but he typically uses an ADC build.
Talents
Level and Talent Priority
Talent Priority
Quickswap Support: Skill > Burst > NA
On-Field Driver or Quickswap DPS: Skill > NA > Burst
If played as a driver, level Heizou to 90 to improve his Swirl damage.
Talent Overview
 Normal Attack | Fudou Style Martial Arts
Talent Description
Normal Attack
Performs up to 5 fisticuffs empowered by a mighty wind, dealing Anemo DMG.
Charged Attack
Consumes a certain amount of Stamina and performs a sweeping kick that deals Anemo DMG.
Plunging Attack
Calling upon the surging wind, Heizou plunges towards the ground from mid-air, damaging all opponents in his path. Deals AoE Anemo DMG upon impact with the ground.
Heizou is one of the few Catalyst users who use melee attacks. His Normal Attack Talent scaling is fairly average, but his Normal Attacks allow him to trigger Swirl and obtain Declension stacks. Heizou’s Charged Attacks can be used in his attack combos to increase his Anemo application because they do not share an ICD with his Normal Attacks.
 Elemental Skill | Heartstopper Strike
Talent Description
Press
Wields the swift winds to launch a Heartstopper Strike that deals Anemo DMG.
Hold
Charges energy to unleash an even stronger blow. He will obtain the Declension effect while charging, which will increase the power of the Heartstopper Strike. When the skill button is released or the skill finishes charging, he will strike forward, dealing Anemo DMG.
Declension
Increases the power of the next Heartstopper Strike. Max 4 stacks. When you possess 4 Declension stacks, the Conviction effect will be produced, which will cause the next Heartstopper Strike to be even stronger and have a larger AoE.
Heizou’s Skill is his primary source of damage on an ADC build. Heizou obtains Declension stacks by using his Burst or triggering Swirl. These Declension stacks increase the damage of his Skill.
While Heizou can hold his Skill to charge Declension stacks, this is not recommended since it extends rotations and can cut into buff time.
 Elemental Burst | Windmuster Kick
Talent Description
Leaps into the air and uses the Fudou Style Vacuum Slugger and kicks his opponent. The Vacuum Slugger will explode upon hit and create an Arresting Windtunnel that pulls in nearby objects and opponents, dealing AoE Anemo DMG.
When Vacuum Slugger hits opponents affected by Hydro/Pyro/Cryo/Electro, these opponents will be afflicted with Windmuster Iris. This Windmuster Iris will explode after a moment and dissipate, dealing AoE DMG of the corresponding elemental type.
Vacuum Slugger can afflict a maximum of 4 opponents with the Windmuster Iris. A single opponent cannot be under the effect of Windmuster Irises of different elements at the same time.
Heizou’s Burst accounts for a significant portion of his damage and provides grouping (more noticeably at C2). Its 12s cooldown and 40 Energy Cost allow him to spam it in quickswap teams.
 Ascension 1 Passive | Paradoxical Practice
Talent Description
When Shikanoin Heizou activates a Swirl reaction while on the field, he will gain 1 Declension stack for Heartstopper Strike. This effect can be triggered every 0.1s.
This passive allows Heizou to gain Declension stacks more easily through Swirls. It is his primary way of obtaining stacks and shortens his required field time.
 Ascension 4 Passive | Penetrative Reasoning
Talent Description
After Shikanoin Heizou’s Heartstopper Strike hits an opponent, increases all party members’ (excluding Shikanoin Heizou) Elemental Mastery by 80 for 10s.
Heizou’s only innate support capability. Useful in teams where allies can utilize the extra EM.
 Utility Passive | Penetrative Reasoning
Talent Description
Decreases sprinting Stamina consumption for your own party members by 20%.
Not stackable with Passive Talents that provide the exact same effects.0s.
A decrease in Stamina consumption is nice in practice since dashing is often necessary for movement and dodging. As a melee-ranged Catalyst user, Heizou benefits from this more than other Catalyst users might.
Constellations
 Constellation 1 | Named Juvenile Casebook
For 5s after Shikanoin Heizou takes the field, his Normal Attack SPD is increased by 15%. He also gains 1 Declension stack for Heartstopper Strike. This effect can be triggered once every 10s.
Heizou’s C1 allows him to reach 4 Declension stacks more quickly, decreasing the field time he needs to perform a fully charged Heartstopper Strike.
 Constellation 2 | Investigative Collection
The pull effect of the Arresting Windtunnel created by Windmuster Kick is enhanced, and its duration is increased to 1s.
Marginally improves Heizou’s grouping, though even with this Constellation, Heizou’s grouping isn’t as powerful as that of other Anemo units like Sucrose, Kazuha, or Venti.
 Constellation 3 | Esoteric Puzzle Book
Increases the Level of Heartstopper Strike by 3.
Maximum upgrade level is 15.
This Constellation improves his personal damage slightly by providing a nice boost to his Skill damage.
 Constellation 4 | Tome of Lies
The first Windmuster Iris explosion in each Windmuster Kick will regenerate 9 Elemental Energy for Shikanoin Heizou. Every subsequent explosion in that Windmuster Kick will each regenerate an additional 1.5 Energy for Heizou.
One Windmuster Kick can regenerate a total of 13.5 Energy for Heizou in this manner.
Alleviates Heizou’s ER requirements, which allows him to build more offensively and make his Burst casts more consistent. This Constellation can be useful in teams with low Energy generation or where Heizou only performs one Skill per rotation, but it is otherwise low value.
 Constellation 5 | Secret Archive
Increases the Level of Windmuster Kick by 3.
Maximum upgrade level is 15.
Although not as significant as his C3, the additional Burst damage is appreciated.
 Constellation 6 | Curious Casefiles
Each Declension stack will increase the CRIT Rate of the Heartstopper Strike unleashed by 4%. When Heizou possesses Conviction, this Heartstopper Strike’s CRIT DMG is increased by 32%.
Provides a 16% CRIT Rate and 32% CRIT DMG boost to Heizou’s fully charged Elemental Skill. Greatly increases Heizou’s personal damage due to the generous amount of CRIT stats provided.
Combos
N# = Corresponding number of consecutive Normal Attacks
C = Charged Attack
E = Elemental Skill
Q = Elemental Burst
D = Dash
Note that N1C is executed by simply holding Heizou’s Normal Attack since he is a melee character.
Quickswap Combos
Heizou can weave a Normal Attack between his Burst and Skill uses to proc Swirls more consistently. This additional Normal Attack also allows an additional proc of certain abilities like Xingqiu or Yelan’s Burst.
| N1C Q (N1) E | C0 combo when his Burst is available. You can perform an additional Normal Attack before Heizou’s Skill if you want to fully stack it in the first rotation. |
| 2[N1C] E | C0 combo without Burst. |
| N1 Q E | C1+ combo when his Burst is available. |
| N1C E | C1+ combo without Burst. |
Driver Combos
Exact combos are often unnecessary in practice. You do not need to worry about performing these combos consistently unless you are super sweaty.
| N4C | The most effective combo in Electro-Charged teams. |
| N2D | The optimal combo for driving Beidou’s Burst. |
| N2C | Used where rotation timing is short and Heizou needs to lower his on-field time. |
Artifacts
ER Requirements
Quickswap Support
| C0–3 | C4+ | |
| 1 Skill Use | 200%+ | 160–170% |
| 2 Skill Uses | 120–130% | 100% |
On-Field Driver or DPS
| C0–3 | C4+ | |
| 1 Skill Use | 170–180% | 130–140% |
| 2 Skill Uses | 100–110% | 100% |
Use the Energy Recharge Calculator to determine exact requirements for your team and rotation.
Artifact Stats
Heizou has two potential build paths: an ADC build that focuses on his personal damage or a triple EM build that focuses on his Swirl damage. A mixed build is also possible depending on your available artifacts, but these are his two primary build archetypes.
ADC Build
 Sands |  Goblet |  Circlet |
| ATK% / (ER) | Anemo DMG% | CRIT |
Substats: ER (until requirements) > CRIT ≥ ATK% > EM
Heizou’s ADC build is his best option when played as a quickswap support or DPS. An ER Sands can be used in lieu of an ATK% Sands if he is played as an off-field TTDS support. While an ADC build is also possible for a driver playstyle in Electro-Charged teams, it generally performs worse than the EM build below.
EM Build
Sands | Goblet | Circlet |
| EM | EM | EM |
Substats: ER (until requirements) > EM > ATK% > CRIT
Heizou’s EM build is primarily used when he serves as an on-field driver in Electro-Charged or Hyperbloom teams.
Artifact Sets
 4pc Viridescent Venerer (VV) | 4pc Viridescent Venerer is by far Heizou’s most recommended set since it boosts his teammates’ damage. It is Heizou’s second-best set in terms of personal damage. |
2pc + 2pc Combos EM / ATK / Anemo DMG | Only use these set combos if your team has another 4pc VV holder or if Heizou is the primary Anemo DPS in a team with Faruzan. These artifact combos only see a minimal damage increase compared to 4pc VV but lack any team buffing potential, which makes them fall behind in terms of overall team damage. |
 4pc Lavawalker / Thundersoother | These are Heizou’s best sets for personal damage as long as a Pyro or Electro aura can be maintained, but are inferior to Viridescent Venerer for team damage. Do not specifically farm for these sets. |
Weapons
ADC Build
 Skyward Atlas | Skyward Atlas is Heizou’s BiS weapon for an ADC build. |
 Kagura’s Verity | Kagura’s Verity is a good option, but obtaining 3 stacks on its passive requires a minimum of 30s of combat time. |
 The Widsith | The Widsith is Heizou’s best 4-star weapon. Its randomized passive with poor uptime can result in quite a lot of variance, but on average it performs quite well. |
 Lost Prayer to the Sacred Winds | A good 5-star stat stick. Heizou cannot make full use of its passive in a quickswap playstyle. |
 Sacrificial Fragments | At R3+, Sacrificial Fragments lets Heizou use his Skill an additional time per rotation. It slightly extends rotations, but the additional Skill use still results in higher damage. |
 Solar Pearl | Heizou can proc both of Solar Pearl’s passive effects, but he generally ends up only having buffed Skills and Bursts in quickswap playstyles. Refinements are not worth buying. |
 Mappa Mare | Mappa Mare is Heizou’s best F2P option on an ADC build. It is also a noteworthy weapon for an EM build in a driver playstyle, making it an attractive option if you play Heizou in a variety of playstyles. |
EM Build
Sacrificial Fragments | Sacrificial Fragments is Heizou’s best option for an EM build. At R3+, its passive lets Heizou use his Skill an additional time per rotation. |
 Magic Guide | Magic Guide is a decent F2P option in Electro-Charged teams because of its EM stat and passive effect. It is a 3-star weapon that is easily obtained through wishes. |
Mappa Mare | Mappa Mare provides less EM than Magic Guide, but its solid performance in an ADC build can make it an efficient weapon to use if you want to play Heizou in both an ADC and EM build. Do not craft Mappa Mare if you only want to play an EM build since Magic Guide performs better. |
Support
 Thrilling Tales of Dragon Slayers | TTDS is a great option for buffing ATK-scaling DPS units in teams with fixed rotations. |
 Hakushin Ring | Hakushin Ring is a fantastic craftable weapon for Electro-Charged teams since it buffs both Electro and Hydro party members. |
 Prototype Amber | Prototype Amber can be an option in teams without a healer, while also lowering Heizou’s ER requirements. In longer rotations, Prototype Amber can allow two Bursts per rotation. |
Teams
This is not a comprehensive list of teams. The inclusion or exclusion of any given team does not necessarily reflect its power level.
Electro-Charged and Hyperbloom
Electro-Charged teams with Heizou employ strong off-field Hydro and Electro DPS units. In this team composition, Heizou functions both as a Viridescent Venerer support and as an on-field driver.
Hyperbloom teams with Heizou operate similarly, with the last team slot being occupied by an off-field Dendro unit. Heizou’s EM buff is more significant in these teams.
Notable Teammates
Hydro Options: Xingqiu, Yelan, Kokomi | Xingqiu and Yelan offer significant single-target damage and Hydro application. Kokomi provides AoE Hydro application and great healing if you need it. |
Electro Options: Fischl, Kuki Shinobu, Beidou, Yae Miko | Fischl and Kuki Shinobu serve as off-field damage dealers, Electro appliers, and Electro batteries. Beidou and Yae Miko are off-field DPS units that require either Fischl or Kuki Shinobu to use their Burst consistently. |
Dendro Options: Collei, Dendro Traveler, Yaoyao, Nahida | These are solid off-field Dendro units that can fit into Heizou’s Hyperbloom teams. Nahida can interfere with Heizou’s ability to Swirl due to her strong Dendro application. |
Other Options:  Kazuha, Venti, Albedo, Zhongli | An additional Anemo unit with strong grouping and off-field damage like Kazuha and Venti are viable picks. Albedo provides consistent off-field damage, and Zhongli offers additional RES Shred and the strongest shield in the game. |
Example Teams
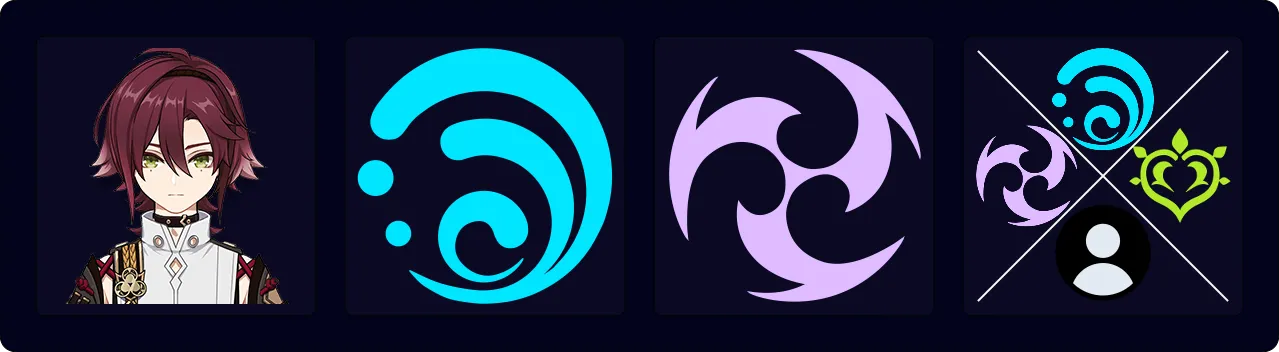
Reverse Vape

Heizou can effectively support an on-field Pyro DPS in Reverse Vape teams due to his EM buff and ability to hold 4pc Viridescent Venerer as well as Thrilling Tales of Dragon Slayers.
With an off-field Pyro DPS like Xiangling, Heizou can serve as an on-field driver.
Notable Teammates
Pyro DPS Options: Xiangling, Hu Tao, Yoimiya, Yanfei, Diluc | These Pyro units are all viable Reverse Vape Pyro DPS characters. They require different Viridescent Venerer setups with Heizou, which you can check in the Extended Heizou Guide. |
| Pyro Support Options: Bennett, Thoma, Xinyan, Yanfei (C4) | These Pyro units are all viable defensive supports that can enable Pyro Swirls for Viridescent Venerer. Bennett is the most notable option because of his Flat ATK buff. |
| Hydro Options: Xingqiu, Yelan, Tartaglia | Xingqiu and Yelan enable the on-field Pyro DPS to consistently trigger Vaporize. Heizou is an efficient driver of their Bursts. Tartaglia is a viable on-field Hydro applier with Xiangling; Heizou is delegated to a more quickswap or off-field support role in this specific team combination (as opposed to with Xingqiu and Xiangling). |
Example Teams
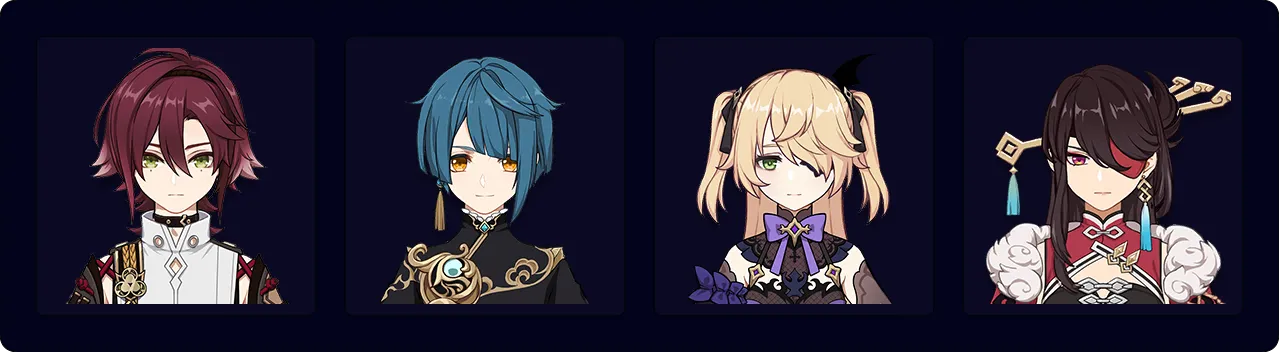
Freeze

Heizou is a viable support in Freeze teams if you lack other options like Kazuha or Venti. His strong personal damage, Viridescent Venerer RES Shred, and ability to hold Thrilling Tales of Dragon Slayers make him an effective option. His Burst’s minor grouping is also helpful.
Notable Teammates
Cryo DPS Options: Ayaka, Ganyu, Rosaria, Kaeya | These are all good Cryo DPS units that work well with Heizou. However, Ganyu generally prefers Venti or Kazuha due to the quadratic scaling of her Burst. |
| Cryo Support Options: Shenhe, Rosaria, Kaeya, Layla, Diona | These Cryo support units are all good picks with the aforementioned Cryo DPS units. Shenhe, Rosaria, and Kaeya are more offense-oriented, while Layla and Diona are more defensive picks. |
| Hydro Options: Xingqiu, Yelan, Kokomi, Mona | Xingqiu and Yelan are strong single-target Hydro units. Their lack of AoE Hydro application can limit Frozen uptime. Kokomi and Mona are strong AoE Hydro units. Heizou should opt for a more offensive option when paired with them since either one can hold TTDS. |
Example Teams
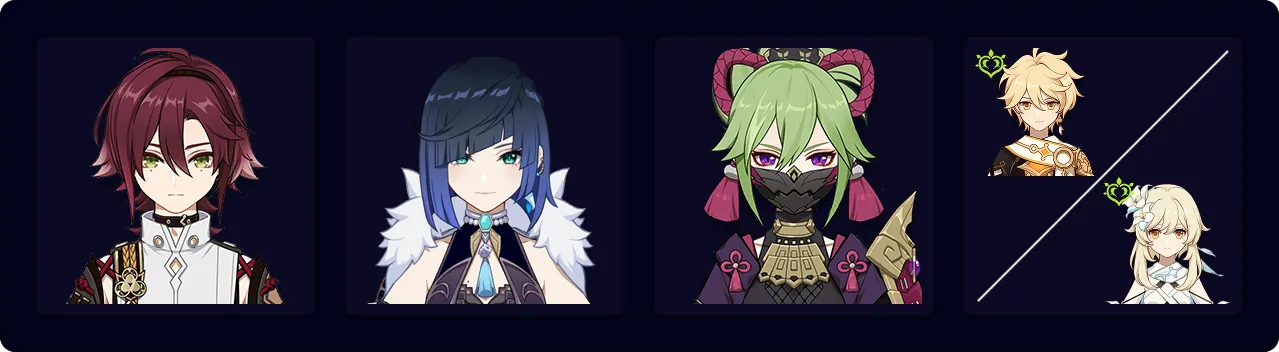
Quickswap / On-Field DPS

Anemo DPS units see a higher damage potential with the introduction of Faruzan, making Heizou’s quickswap DPS playstyle more viable and increasing the strength of Triple Anemo teams. Off-field Elemental DPS units like Xingqiu, Yelan, Xiangling, Bennett, and Fischl are all viable choices.
Notable Teammates
 Faruzan | Faruzan provides considerable buffs to Anemo DMG, even at C0. However, she faces significant ER issues prior to C6. |
 Kazuha | Kazuha is a good choice in a team with off-field Elemental DPS units. His Elemental DMG buffs, off-field damage, strong grouping, and short cooldowns make him a good fit in a quickswap-oriented playstyle with Heizou. He is also viable in a Triple Anemo team with Faruzan and Heizou. |
Example Teams
Credits
irokei, cuppacote, cuzimori, aiesar, lostguide, nociii
Team images courtesy of the KQM portrait generator.