Updated for Version 5.3
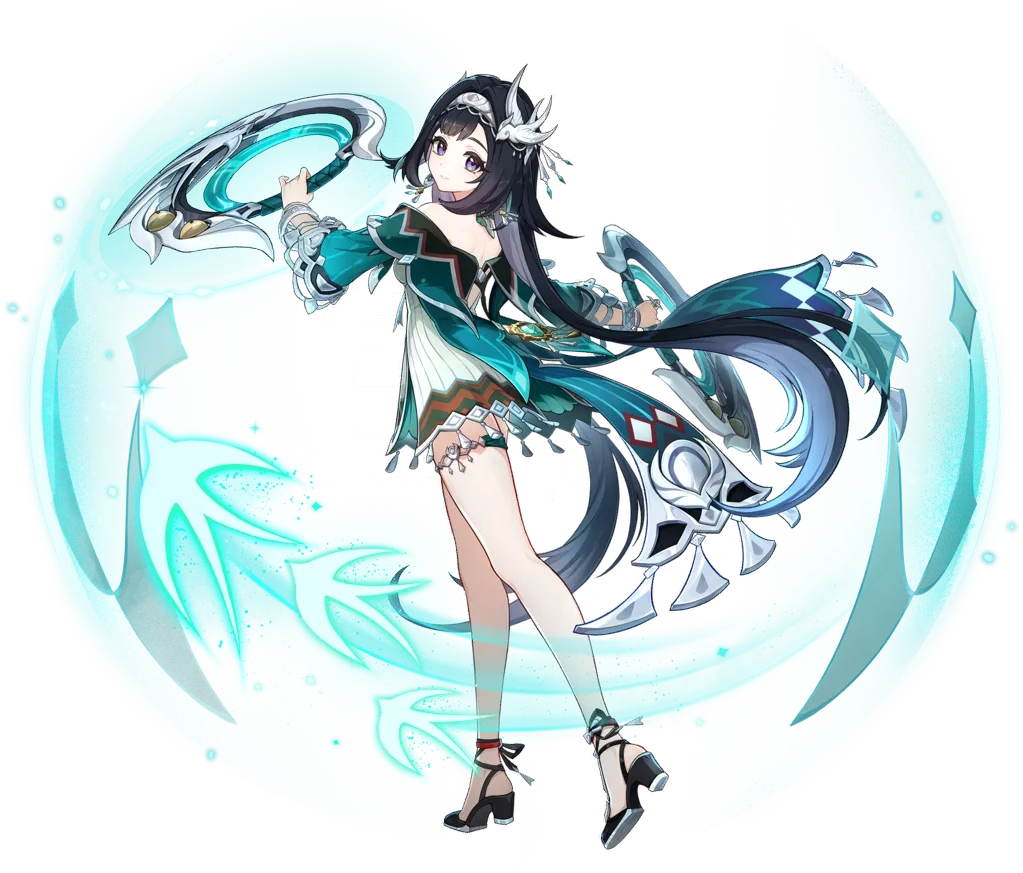
Lan Yan is a 4★ Anemo Catalyst character in Genshin Impact who provides shielding with her Skill and increases team damage through 4pc Viridescent Venerer. She can also serve as an on-field driver with her Anemo Normal Attacks. Learn about Lan Yan’s best builds, best weapons, best artifacts, and best teams in this quick guide.
Note that the information given may change if new discoveries are made. More extensive testing is in progress.
Join our Discord to participate in the theorycrafting process.
Table of Contents
Infographic
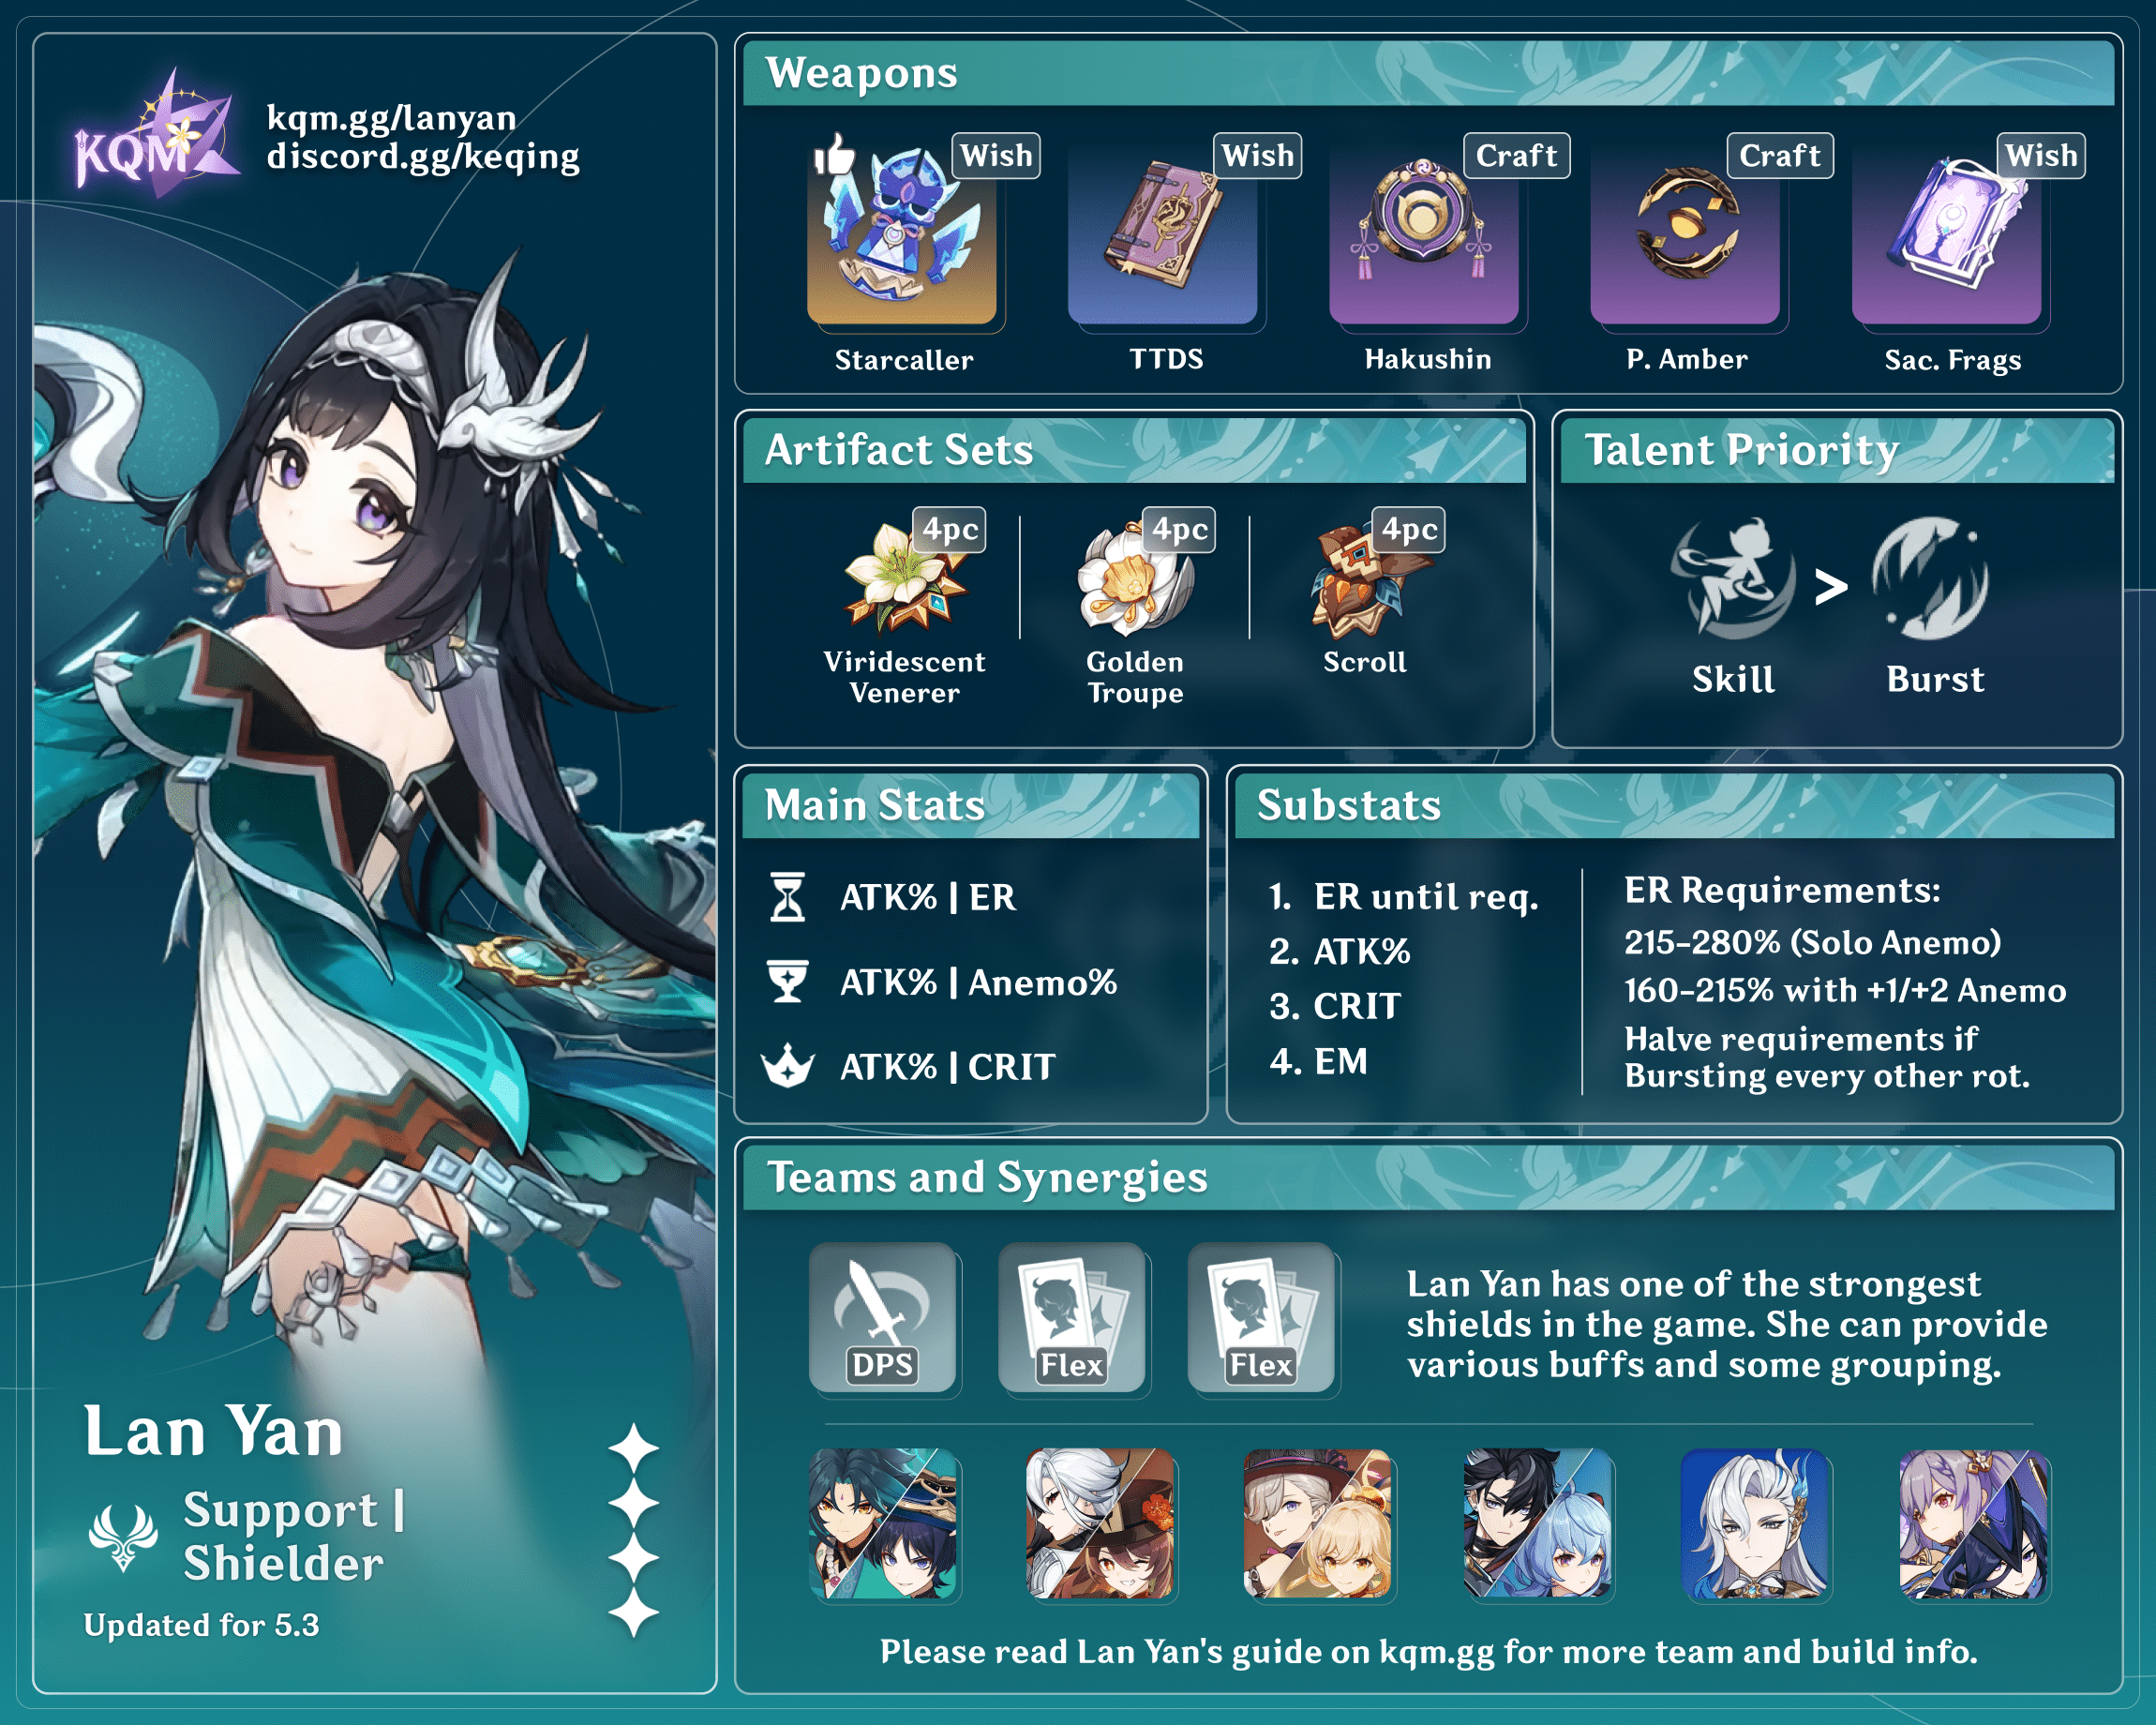
Credits to: cuppacote, haafr, and KQM Staff
Character Overview
Pros
- One of the strongest shielders at C0, with C2 greatly increasing effective shield HP.
- Boosts team damage with 4pc Viridescent Venerer and supportive weapons such as TTDS.
- Quality of life from her grouping on Burst.
- Decent personal damage when built for damage and receiving buffs.
Cons
- Shield duration is relatively short.
- 16s cooldown is awkward to slot into some rotations.
Playstyles
Shield Support
Lan Yan provides a strong shield and increases damage through 4pc VV and supportive weapons.
On-Field Driver
Lan Yan drives on-field with her Anemo Normal Attacks to trigger Swirl.
Quickswap DPS
Lan Yan is built for damage with 4pc Golden Troupe and swaps in to deal damage with her Skill.
Talents
Level and Talent Priority
Shield Support: Skill > Burst > Character Level
On-Field Driver: Character Level > Skill > Burst
Talent Overview
 Normal Attack | Black Pheasant Strides on Water
Talent Description
Normal Attack
Wields her Feathermoon Rings to perform up to 4 attacks, dealing Anemo DMG.
Charged Attack
Consumes a certain amount of Stamina to throw out a Feathermoon Ring, dealing Anemo DMG.
Plunging Attack
Gathers the power of Anemo and plunges towards the ground from mid-air, damaging all opponents in her path. Deals AoE Anemo DMG upon impact with the ground.
Lan Yan dances on her enemies, throwing 4 sets of rings and dealing Anemo damage. While the raw damage of these attacks is not particularly impressive, she can drive reaction-based teams with them.
 Elemental Skill | Swallow-Wisp Pinion Dance
Talent Description
Summoning forth the Swallow-Wisp Shield, a secret art passed down across generations, Lan Yan dashes forward and, upon making contact with her target, will leap back into the air.
The Swallow-Wisp Shield’s DMG absorption scales based on her ATK, and has a 250% absorption efficiency against Anemo DMG.
While in mid-air due to the effects of her Elemental Skill: Swallow-Wisp Pinion Dance, pressing her Elemental Skill again or pressing Normal Attack will cause Lan Yan to hurl her Feathermoon Rings at an opponent, and they will spin between nearby opponents twice upon hit, dealing Anemo DMG.
Holding the Skill will cause it to behave differently.
Hold
Enter Aiming Mode to adjust the dash direction.
On cast, Lan Yan will dash into the air and summon a shield with health that scales on her ATK. Her shield will snapshot whatever her ATK is at the time, so this ability can be used while transient ATK buffs, such as Bennett Burst, are active for maximum strength. When dashing forward, she will also absorb Pyro, Hydro, Electro, or Cryo if her A1 is unlocked, enhancing her shield’s absorption to those Elements. She can hold her Skill to aim the direction of the initial dash.
After dashing and while airborne, Lan Yan can unleash her Feathermoon Rings once by pressing her Skill or Normal Attack button. Feathermoon Rings will bounce between enemies for 3 Anemo attacks per ring. Lan Yan can throw 1 ring for 3 Anemo attacks at C0, or 2 rings for 6 Anemo attacks at C1+. If her dash absorbs an Element and her A1 is unlocked, each Anemo attack will unleash an additional attack of the absorbed Element for 50% of its original damage, totaling 6 attacks (C0) or 12 attacks (C1+). Her Feathermoon Rings will apply Anemo twice per Skill, regardless if Lan Yan is C0 or C1.
Before C6, Lan Yan is limited to one Skill per rotation due to its 16s cooldown. Her shield’s relatively short 12.5s duration means you want to cast her Skill close to the beginning of your on-fielder’s field time. The main limitation to Lan Yan’s shield will be its duration, as its health makes it unlikely to break first, especially from C2.
 Elemental Burst | Lustrous Moonrise
Talent Description
Lan Yan creates a Feathermoon Swallow Array, pulling in nearby opponents and objects and dealing multiple instances of AoE Anemo DMG.
Lan Yan summons a vortex around her, dealing 3 hits of Anemo damage and pulling enemies in. This attack will apply Anemo once.
 Ascension 1 Passive | Four Sealing Divination Charms
Talent Description
When the dash from the Elemental Skill Swallow-Wisp Pinion Dance hits a target, if it interacts with Hydro/Pyro/Cryo/Electro, the Swallow-Wisp Shield will undergo Elemental Absorption, with the converted shield absorbing DMG from the corresponding element with 250% efficiency.
Additionally, if this use of Swallow-Wisp Pinion Dance causes the Swallow-Wisp Shield to undergo Elemental Absorption, the Feathermoon Rings that Lan Yan throws at her foes additionally deal Elemental DMG equal to 50% of the original in the corresponding Elemental Type. This DMG is considered Elemental Skill DMG.
Lan Yan’s initial dash can absorb Pyro, Hydro, Electro, or Cryo. Her shield will convert on contact and its damage absorption against that Element will increase to 250%; alongside that, an additional hit of the absorbed Element will accompany each Feathermoon Ring hit, with 50% of the scaling of an Anemo hit, for additional 3 hits per Skill at C0 or 6 hits per Skill at C1+.
Elements can be absorbed from either an aura on an enemy or an aura applied to Lan Yan through an attack or an ability like Bennett’s Burst. Since enemies with an innate aura will usually deal damage of that type, Lan Yan’s shield is especially strong against those enemies.
 Ascension 4 Passive | Skyfeather Evil-Subduing Charm
Talent Description
The Elemental Skill Swallow-Wisp Pinion Dance and the Elemental Burst Lustrous Moonrise deal increased DMG equal to 309% and 774% of Lan Yan’s Elemental Mastery respectively.
Adds EM scaling to Lan Yan’s Skill and Burst, making EM boost her damage a similar amount to ATK; however, since it does not boost shield HP, building ATK is still preferred.
In on-field teams where Lan Yan builds EM, this passive helps boost her Talent damage, though not by much.
 Utility Passive | Thought and Intent, Like Silken Scent
Talent Description
When Lan Yan is in the party, your characters will not startle Crystalflies and certain other animals when getting near them.
Check the “Other” sub-category of the “Living Beings / Wildlife” section in the Archive for creatures this skill works on.
With Lan Yan in the party, you can approach wildlife under the “other” section of the Archive without startling them. This category includes Crystalflies, crabs, lizards, and other similarly small creatures. Note that wildlife will still be startled if you hit other animals or get too close. This ability does not apply to larger animals, such as boars.
Constellations
 Constellation 1 | “As One Might Stride Betwixt the Clouds”
After triggering the Elemental Absorption from the Passive Talent “Four Sealing Divination Charms,” this instance of Lan Yan’s Elemental Skill Swallow-Wisp Pinion Dance will produce another Feathermoon Ring when they are thrown at opponents.
You must first unlock the Passive Talent “Four Sealing Divination Charms.”
Lan Yan will unleash an additional Feathermoon Ring during her Skill, doubling her total hits from 6 to 12. This additional ring will also trigger her A1’s additional hits. This additional ring does not allow her to trigger more Swirls on the same target, although it can bounce to different targets, thereby increasing Swirls. This is a significant increase to her personal damage.
 Constellation 2 | “Dance Vestments Billow Like Rainbow Jade”
While the Swallow-Wisp Shield is active, when your active party member’s Normal Attacks deal DMG, 40% of the Shield’s DMG absorption will be restored, up to its original maximum absorption. This effect can occur once every 2s.
Every 2s, whenever a party member’s Normal Attacks deal damage, Lan Yan’s shield will be replenished by 40%. Note that this will not increase the Max HP of your shield, only replenish what has been lost. This has a maximum of 7 triggers for +280% shield HP, but will almost always trigger less as your characters are not constantly Normal Attacking. Nonetheless, in rotations with Normal Attacking on-fielders, this Constellation makes Lan Yan’s shield practically immortal unless it is one-shot.
 Constellation 3 | “On White Wings Pierce Through Cloud and Fog”
Increases the Level of Swallow-Wisp Pinion Dance by 3.
Maximum upgrade level is 15.
A straightforward Talent level increase to Lan Yan’s Skill, increasing her damage and shield strength.
 Constellation 4 | “With Drakefalcon’s Blood-Pearls Adorned”
After Lan Yan uses her Elemental Burst Lustrous Moonrise, the Elemental Mastery of all nearby party members increases by 60 for 12s.
A small, but appreciated, team buff of 60 EM after using Lan Yan’s Burst. Further incentives Bursting every rotation with Lan Yan.
 Constellation 5 | “Having Met You, My Heart is Gladdened”
Increases the Level of Lustrous Moonrise by 3.
Maximum upgrade level is 15.
A straightforward Talent level increase to Lan Yan’s Burst, although not particularly impactful due to its low damage.
 Constellation 6 | “Let Us Away on Slyphic Wing, the Silvered Ornaments to Ring”
Swallow-Wisp Pinion Dance gains 1 additional charge.
Adds an additional charge to Lan Yan’s Skill. Allows her to use two Skills in longer rotations such as Neuvillette’s, although this will desync after 4 / 5 rotations.
Artifacts
ER Requirements
Calcs for ER requirements can be found here (last updated for Version 5.3).
| 1E | 2E (1 Caught, 1 Not) | 2E (Both Caught) | |
| Solo Anemo | 215–280% | 180–220% | 160–200% |
| Double Anemo, On-Field | 160–200% | 140–165% | 130–150% |
| Triple Anemo, Off-Field | 165–210% | 150–175% | 135–160% |
| Triple Anemo, On-Field | 120–140% | 110–125% | 100–115% |
Lan Yan does not usually Burst every rotation. Halve requirements for Bursting every other rotation. Double Anemo off-field teams were not included because those are not usually run.
Use the Energy Recharge Calculator to determine exact requirements for your team and rotation. For more details on how Favonius weapons will affect your team, please use Ac1d’s Favonius Mastersheet.
Artifact Stats
Off-Field Shield Support
 Sands |  Goblet |  Circlet |
| ATK% | ER | EM | ATK% | Anemo DMG Bonus | ATK% | CRIT |
Stat Priority (for damage): ER until requirement > CRIT > ATK% > EM
Prioritize ATK% over CRIT for shield strength.
EM, Anemo DMG Bonus, and CRIT increase Lan Yan’s damage, while ATK% increases her shield health. Although EM provides a similar damage increase to ATK% due to her A4, ATK% is recommended as it increases her shield health. Forgoing ER and Bursting when available is best for both Lan Yan’s personal damage and her shield HP when Solo Anemo, due to its high ER requirements.
With C2, Lan Yan’s shield is mostly limited by its duration and not its health, making it viable to focus on her damage, especially with Bennett in her team.
On-Field-Reaction Driver
Sands | Goblet | Circlet |
| EM | ER | EM | EM |
Stat Priority: EM > ATK% > CRIT
Lan Yan can replace an EM main stat with an ATK% main stat for greater shield HP, but she should not need to post-C2.
Artifact Sets
 4pc Viridescent Venerer | Lan Yan’s best set for almost all teams. Its RES Shred increases the damage of Pyro, Hydro, Electro, and Cryo teammates and its Swirl damage increase is useful when Lan Yan is on-field. |
 4pc Scroll of the Hero of Cinder City | A strong option for Wanderer / Xiao teams for its 12% Anemo DMG Bonus buff, simply provided by Lan Yan triggering Swirl. |
 4pc Golden Troupe | Lan Yan’s best set for damage due to her high proportion of Skill damage, though not typically worth using over a buffing set. |
Weapons
Off-Field Support
 Starcaller’s Watch | Lan Yan’s best weapon. Its EM increases her personal damage and she can easily trigger its passive. When doing two Skill rotations with C6, this weapon’s passive may have 50% uptime due to its 14s cooldown between triggers. |
 Thrilling Tales of Dragon Slayers (TTDS) | Her best general option, providing a strong 48% ATK buff. However, her shield is weaker due to its low base ATK. |
 Hakushin Ring | Provides a strong team-wide buff when with Electro teammates. Preferred in Aggravate teams over TTDS for its swap-free passive, team-wide buff, higher Base ATK, and ER secondary stat. |
 Wandering Evenstar | Provides a team-wide Flat ATK buff if Lan Yan is on an EM build. |
 Favonius Codex | Helps Lan Yan meet her ER requirements and lowers team ER requirements. However, a buffing weapon will usually support the team more. |
 Prototype Amber | A comfy option, providing healing and Energy. |
 Sacrificial Fragments | Provides EM and refreshes Lan Yan’s Skill. Lan Yan easily triggers the passive even at low refinements due to her high amount of Skill hits. In longer rotations (i.e. Neuvillette teams) before Lan Yan is C6, this weapon can allow Lan Yan to use two Skills per rotation. |
 A Thousand Floating Dreams | While this weapon provides abundant EM for Lan Yan and a small EM buff for teammates, it is typically not recommended over other buffing weapons. |
On-Field Driver / Quickswap DPS
The above weapons in the off-field support section are still viable for on-field Lan Yan, but below are some weapons that are specific to this playstyle or perform especially well.
Sacrificial Fragments | Lan Yan is able to make full use of Sacrificial Fragments’ Skill reset without an on-fielder preventing her from getting field time. Not only does this provide much better shield uptime, but the damage and Swirls from an additional Skill is appreciated. |
 A Thousand Floating Dreams/Starcaller’s Watch | These 5-star weapons shine when on-field as their higher base stats matter more, and Lan Yan especially appreciates EM. |
Favonius Codex | While on-field, Lan Yan can trigger its passive many times, reducing team ER requirements. |
Teams
Rotation Notation
- N = Normal Attack
- C = Charged Attack
- A = Aimed Shot
- P = Plunging Attack
- E = Elemental Skill
- tE = Tap Skill
- hE = Hold Skill
- Q = Elemental Burst
- D = dash (cancel)
- J = jump (cancel)
- W = walk (cancel)
- > = switch character
- ( ) = these actions are optional; please refer to the notes below
- [ ] = repeat these actions the specified number of times
Teambuilding
- Lan Yan supports the team through 4pc VV, various supportive weapons, and her C4 while also providing a shield.
- ATK buffers will also increase Lan Yan’s shield HP.
- For Anemo DPS units, Lan Yan provides 4pc Scroll and Energy instead of 4pc VV.
- When Faruzan is on the team, Lan Yan also provides decent personal damage.
- She can serve as an on-field driver with her Anemo Normal Attacks.
Generalist Anemo Support

As an Anemo unit with access to 4pc Viridescent Venerer, Lan Yan provides support to almost every Pyro, Hydro, Electro, or Cryo DPS. She is particularly notable for units that want a shielder as she consolidates sustain and buffing in one slot. Lan Yan is also particularly useful for ATK scalers or Electro units due to her ability to hold Thrilling Tales of Dragon Slayers and Hakushin Ring.
Notable Teammates
 Bennett | Lan Yan is able to snapshot Bennett’s ATK buff to greatly increase her shield HP. |
Pyro
Pyro DPS units often want shields and appreciate Lan Yan’s ATK buffing through TTDS. Pyro Resonance will further increase Lan Yan’s shield HP.


Electro
Lan Yan is a strong Anemo option for Aggravate teams since her shielding allows her to run more offensively orientated Dendro teammates. Her C4 EM buff will often come in useful. She usually holds Hakushin Ring for its team-wide buff and less restrictive rotations.


Cryo
Lan Yan’s Burst grouping is particularly relevant for Freeze teams, and she is able to use Shenhe’s quills with her A1 damage. However, TTDS is often run by your Hydro option, thus she should hold Favonius Codex or some other supportive weapon instead. Ganyu in Melt teams and Wriothesley both appreciate her shield.


Hydro
Although HP-scaling DPS units don’t take advantage of TTDS’s ATK buffing, Lan Yan’s shielding and 4pc VV still make her a valuable choice. Both her buffing and grouping come in handy for Childe.


Dendro
Lan Yan does not provide much buffing for Dendro units, but they will run with her in Aggravate teams.


Example Teams
This is not a comprehensive list of teams. The inclusion or exclusion of any given team does not necessarily reflect its power level.

Lan Yan is particularly notable for Aggravate teams as she allows you to run Nahida and still have a sustain. Hakushin Ring and Wandering Evenstar are preferred over Thrilling Tales of Dragon Slayers as they buff the whole team and don’t require a specific rotation.
Sample Rotation (Clorinde)
Opener: Fischl Q > Lan Yan E N1 > Nahida E N1 > Clorinde E Combo > Lan Yan Q > Clorinde Q
Ongoing Rotation: Nahida E (Q) > Fischl E / Q > Lan Yan N1 E N11 > Clorinde E Combo > Lan Yan Q > Clorinde Q
1Lan Yan’s E is used here for greater VV and shield uptime. It can be moved before her Q so she catches her particles.
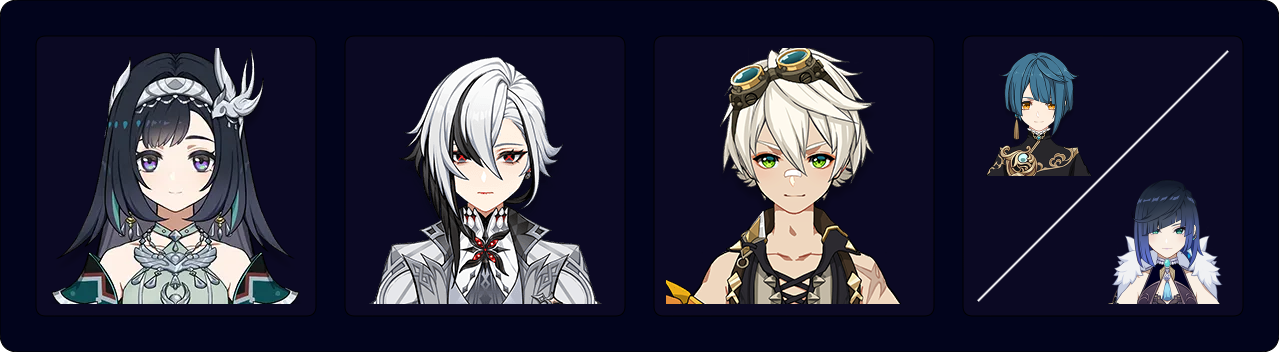
Arlecchino greatly appreciates Lan Yan’s shield, 4pc VV, and ATK buff through TTDS. When using Xingqiu, be careful that his orbitals do not ruin Pyro Swirl in setup.
Sample Rotation (Yelan)
Arlecchino E > Yelan EQ / Xingqiu EQ > Bennett Q E > Lan Yan 1 E N1 (Q)2 > Arlecchino Combo
1Wait here until Bennett’s Burst applies Pyro to Lan Yan. This ensures her Skill can apply Pyro for VV.
2Burst with Lan Yan if available.
Lan Yan requires C6 or Sacrificial Fragments to provide consistent shield uptime for Neuvillette. With C6, you must skip a Skill every few rotations, but this should not be an issue.
Sample Rotation (C6 or Sacrificial Fragments)
Neuvillette E > Furina ED > Xilonen EQ N2 > Lan Yan E N1 Q > Furina Q > Neuvillette C E C Q > Xilonen E N2 > Lan Yan E N1 > Neuvillette 2[C]
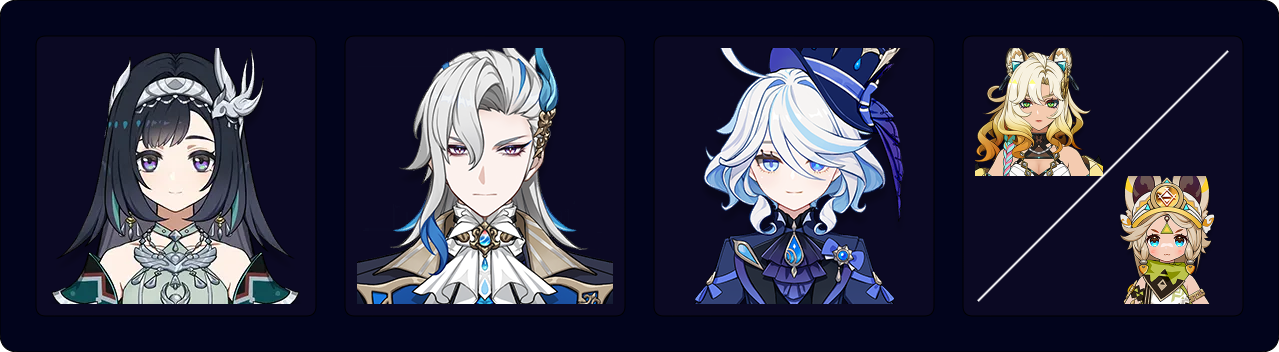
Supports who also provide sustain are very valuable for Mualani teams, especially on accounts without Xilonen. Mualani requires specific setups to Swirl Hydro.
Sample Rotation (Xilonen)
Mualani N1 > Xilonen E N2 > Lan Yan E N1 (Q)1> Xiangling E (Q)2 > Mualani E Combo (Q)3
1Lan Yan’s Q can be skipped if grouping is not needed and her C4 is not unlocked.
2Burst every other rotation on Xiangling.
3Use Mualani’s Burst on rotations where Xiangling’s Burst is used.
Sample Rotation (Candace)
Candace EQ > Lan Yan E N1 > Xiangling Q E > Mualani E Combo Q > Candace E > Lan Yan E N1 > Xiangling E > Mualani E Combo
1Lan Yan’s Q can be inserted after either of her Skills if grouping or her C4 buff is desired.

Lyney’s long Charged Attack animation makes him heavily appreciate a shield. Mono Pyro makes for easy Swirling for 4pc VV. This team can run a 17s rotation.
Sample Rotation
(Lyney C)1 > Xilonen E N2 > Bennett EQ > Lan Yan E N1 > Lyney 3[C] (Q / C)2 E
1First rotation only. Applies Pyro for Xilonen to Crystallize.
2Burst with Lyney if available, otherwise Charged Attack.
Lan Yan is Ayaka’s best 4-star teammate due to her grouping, shielding, and ability to hold TTDS. If you have Kokomi or Mona, run them on TTDS and Lan Yan on Favonius Codex instead.
Sample Rotation
Xingqiu EQ > Rosaria EQ N1 > Lan Yan E N1 Q > Ayaka N1 EDQ > Rosaria N1 E > Ayaka D 2[N2C] > Lan Yan N2 > Rosaria N1 E > Ayaka E N2C
Anemo DPS Support / Quickswap DPS

Providing Energy, shielding, and buffing through TTDS and 4pc Scroll, Lan Yan is a great support for many Anemo DPS units. Lan Yan will also deal significant personal damage due to lower ER requirements and ample buffs. With 4-star DPS, units Lan Yan can run a damage build and serve as a quickswap damage dealer.
Notable Teammates
Faruzan | Faruzan provides Energy and significant Anemo buffing for both your DPS and Lan Yan. She is the best support for Anemo DPS teams. Not only does she buff, but she can also serve as an on-field DPS on her own. |
Bennett | As usual, Bennett is an incredibly potent buffer and strong teammate for Lan Yan. His value is further amplified as Anemo damage does not have access to many buffers. |
Anemo DPS Units
These Anemo units serve as on-field DPS units. With Heizou, Lynette, and Faruzan, Lan Yan also serves as a quickswap DPS, as those DPS units can swap off and their lower damage means Lan Yan has a greater damage share.


Supports
These increase your Anemo DPS units’ damage.


Example Teams
This is not a comprehensive list of teams. The inclusion or exclusion of any given team does not necessarily reflect its power level.

A shielder helps Wanderer execute his combos unbothered.
Sample Rotation
Faruzan E Q > Bennett EQ > Lan Yan E N1 Q > Wanderer E Combo Q

Lan Yan’s shield and TTDS buff will not last Xiao’s full rotation.
Sample Rotation
Furina ED Q > Xianyun EP Q > Lan Yan Q E N1 > Xiao 2[E] Q Combo

A quickswap team with damage from both Lan Yan and Faruzan. Sacrificial Fragments is preferred for its additional Skill. Either Lan Yan or Faruzan can use 4pc VV to increase Furina’s damage.
Sample Rotation
Furina ED Q > Bennett EQ > Faruzan E Q > Lan Yan E N1 > Faruzan 2[C] E > Lan Yan (E N1)1 Q > Bennett E > Faruzan 2[C] (E 2[C])2
1Use a second Lan Yan Skill before her Burst if using Sacrificial Fragments or C6 provides a Skill.
2Do an additional E and 2 Charged Attacks on Faruzan if Lan Yan only uses one Skill.
Anemo Driver
Lan Yan’s driver teams give you an opportunity to see her beautiful Normal Attack animations. Her Anemo Normal Attacks allow her to trigger Swirls and other reactions to deal damage with a full EM build while still supporting her team. She is a comfortable driver due to her shielding and long-ranged attacks.
Driver teams fall into three categories: Electro-Charged, Aggravate, and Quickbloom. In Electro-Charged teams, Lan Yan triggers Electro-Charged, Electro Swirl, and Hydro Swirl while supporting strong off-field DPS units. Since Swirls are able to Aggravate, Lan Yan will deal additional reaction damage while triggering Fischl’s A4. Lastly, Hyperbloom teams have Lan Yan swirling Electro from another teammate to trigger Hyperbloom.
Notable Teammates
 Fischl | Fischl deals significant personal damage, batteries, and provides abundant Electro application. She is one of the strongest Electro options for all of Lan Yan’s driver teams. She is also the best option for Quickbloom teams. |
Electro Units
Electro characters provide off-field damage and Electro application. Beidou and Yae require a second Electro due to their ER requirements.


Hydro Units
Hydro characters allow Lan Yan to trigger Hydro Swirl and Electro-Charged. Xingqiu and Yelan are best for their off-field damage and application.


Example Teams
This is not a comprehensive list of teams. The inclusion or exclusion of any given team does not necessarily reflect its power level.

Electro-Charged teams feature a strong spread of personal damage. Rotations are flexible with teammates swapping in to use their Skill and Bursts. Lan Yan uses her Normal Attacks when other characters are on cooldown. The rotation below forgoes maximum uptime on all abilities in favor of being loopable.
Sample Rotation (Yae)
Ororon Q E > Yae 3[E] > Yelan EQ > Lan Yan E N1 Q 2[N3D] > Yae Q 3[E] > Yelan E > Lan Yan 3[N3D]1
1Use Skill instead of first N3D if C6 / Sacrificial Fragments
Sample Rotation (Beidou)
Ororon Q E > Beidou EQ > Yelan E Q > Lan Yan E N1 Q N3 > Beidou E > Lan Yan 3[N3D]

Lan Yan triggers Electro-related reactions on-field to trigger Fischl’s A4. Sacrificial Fragments is preferred before C6 for its EM secondary stat and shield uptime.
Sample Rotation
Yae 3[E] > Fischl E > Collei EQ > Lan Yan E N1 Q 3[N3D] > Yae Q 3[E] > Fischl N2 Q > Collei E > Lan Yan (E N1)1 3[N3D]
1Skip this Skill if not C6/using Sacrificial Fragments.

Lan Yan swirls off Fischl’s Electro application to trigger Hyperbloom. Sacrificial Fragments is preferred for its high EM secondary stat and shield uptime. At C6, Lan Yan can opt to use A Thousand Floating Dreams or Starcaller’s Watch for their higher EM stats.
Sample Rotation
Nahida Q E N1 > Fischl N2 Q > Xingqiu EDQ N1 > Lan Yan E N1 Q 3[N3D] N1 > Nahida E N1C > Fischl E N1 > Lan Yan (E N1)1 Q 3[N3D]
1Skip this Skill if not C6 nor using Sacrificial Fragments.
Credits
baloopy, caramielle., caxia5, haafr, lostguide, clevernt
Team images made with the KQM portrait generator.