Updated for Version “Luna VIII”
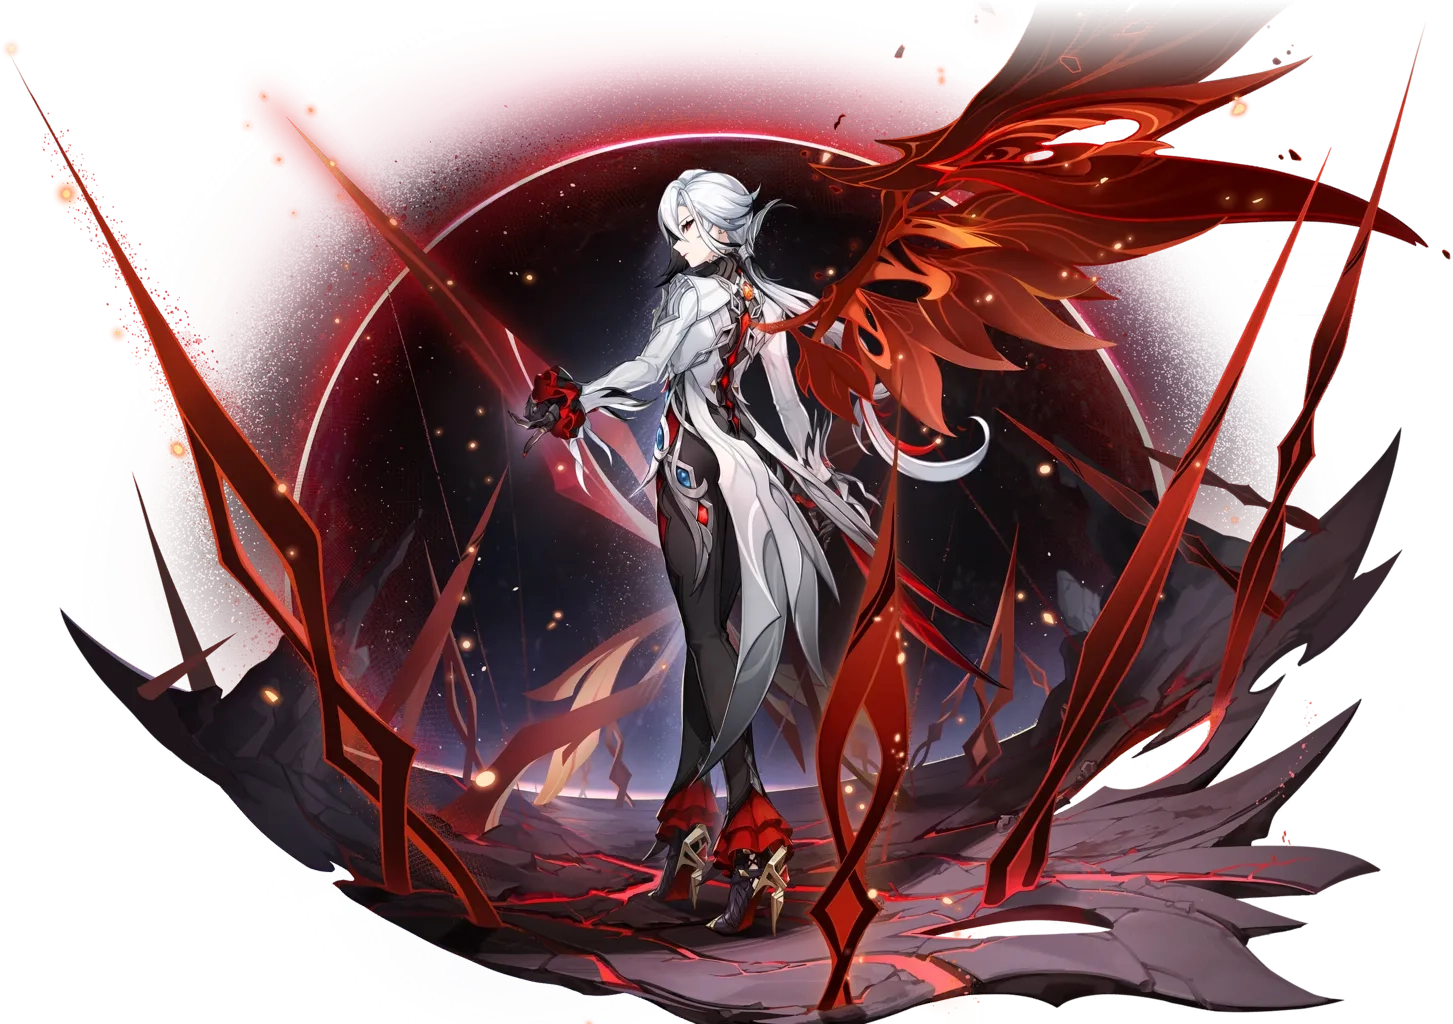
Arlecchino is a 5-star Pyro Polearm character in Genshin Impact who deals on-field damage by empowering her attacks through a unique Bond of Life mechanic. Learn about Arlecchino’s best builds, best weapons, best artifacts, and best teams in this quick guide.
Note that the information given may change if new discoveries are made. More extensive testing is in progress.
Join our Discord to participate in the theorycrafting process.
Table of Contents
New Content
Ororon | Viable Electro off-fielder that can be used in Overloaded and Overvape teams. However, he tends to perform worse than Fischl in both. |
Citlali | Arlecchino’s best Melt enabler, buffing her a great amount. Citlali also provides a shield. |
 Mavuika, Pyro Traveller | Can be used in certain Overloaded or Vape teams, although their effectiveness is not high. |
Lan Yan | A good Anemo unit that consolidates 4pc VV and shielding into one slot. |
Iansan | Because Arlecchino’s combo incorporates lots of dash cancels, she can maintain Iansan’s higher ATK buff with proper combo execution. |
 Escoffier | Escoffier can be played in a Double Cryo team for better Melt consistency while dealing decent off-field damage. |
 Dahlia | Dahlia provides shielding with Attack SPD, which speeds up Arlecchino’s combos and rotations. |
 Ineffa | When played in an Overvape team, Ineffa deals good off-field Lunar-Charged damage while providing Arlecchino a decent shield and an EM buff. Ineffa is also a good shielder in Chevreuse Overloaded teams. |
Aino | A freely obtainable 4-star unit that can be used to enable Vaporize for Arlecchino. Her application improves when paired with another Moonsign character (e.g. Ineffa). |
Durin | Durin can be used in Overloaded teams to deal good personal damage and shred enemies’ Pyro and Electro RES. He also synergizes with Fischl in the team, by enabling her buffs via the Hexerei: Secret Rite state. |
 Fischl | After completing her Witch’s Homework quest, teams containing Fischl and an additional Hexerei teammate are provided with an EM or ATK% buff when Electro-Charged or Overloaded is triggered, respectively. |
Columbina | Columbina is a Hydro applier with good Lunar-Charged damage output when used with Ineffa. |
Nicole | A powerful ATK buffer and shielder for Arlecchino. She should be played with another Hexerei teammate to unlock the full effect of the Celestial Gift artifact set. |
Prune | A good Anemo teammate that can provide an up to 50% DMG Bonus buff, and an additional 350 Flat ATK buff at C6. |
 Night of the Sky’s Unveiling | A comparable set to 4pc FHW for Arlecchino in Ascendant Gleam teams with off-field Lunar-Charged damage dealers such as Ineffa and Columbina. |
 Silken Moon’s Serenity | A set for supports in teams with at least a Moonsign character. It provides a teamwide buff of up to 120, which is greatly appreciated for Arlecchino’s Vaporize attacks. |
 Celestial Gift | This set is a decent buffing option on Durin as the solo Hexerei unit, and it becomes a universally good set on any Hexerei teammates for its long-lasting and easy-to-trigger 40% DMG Bonus. |
    Fractured Halo, Symphonist of Scents, Bloodsoaked Ruins, Disaster and Remorse | Decent stat sticks whose passives Arlecchino cannot fully trigger or benefit. |
Infographic
Amplifying Pyro DPS
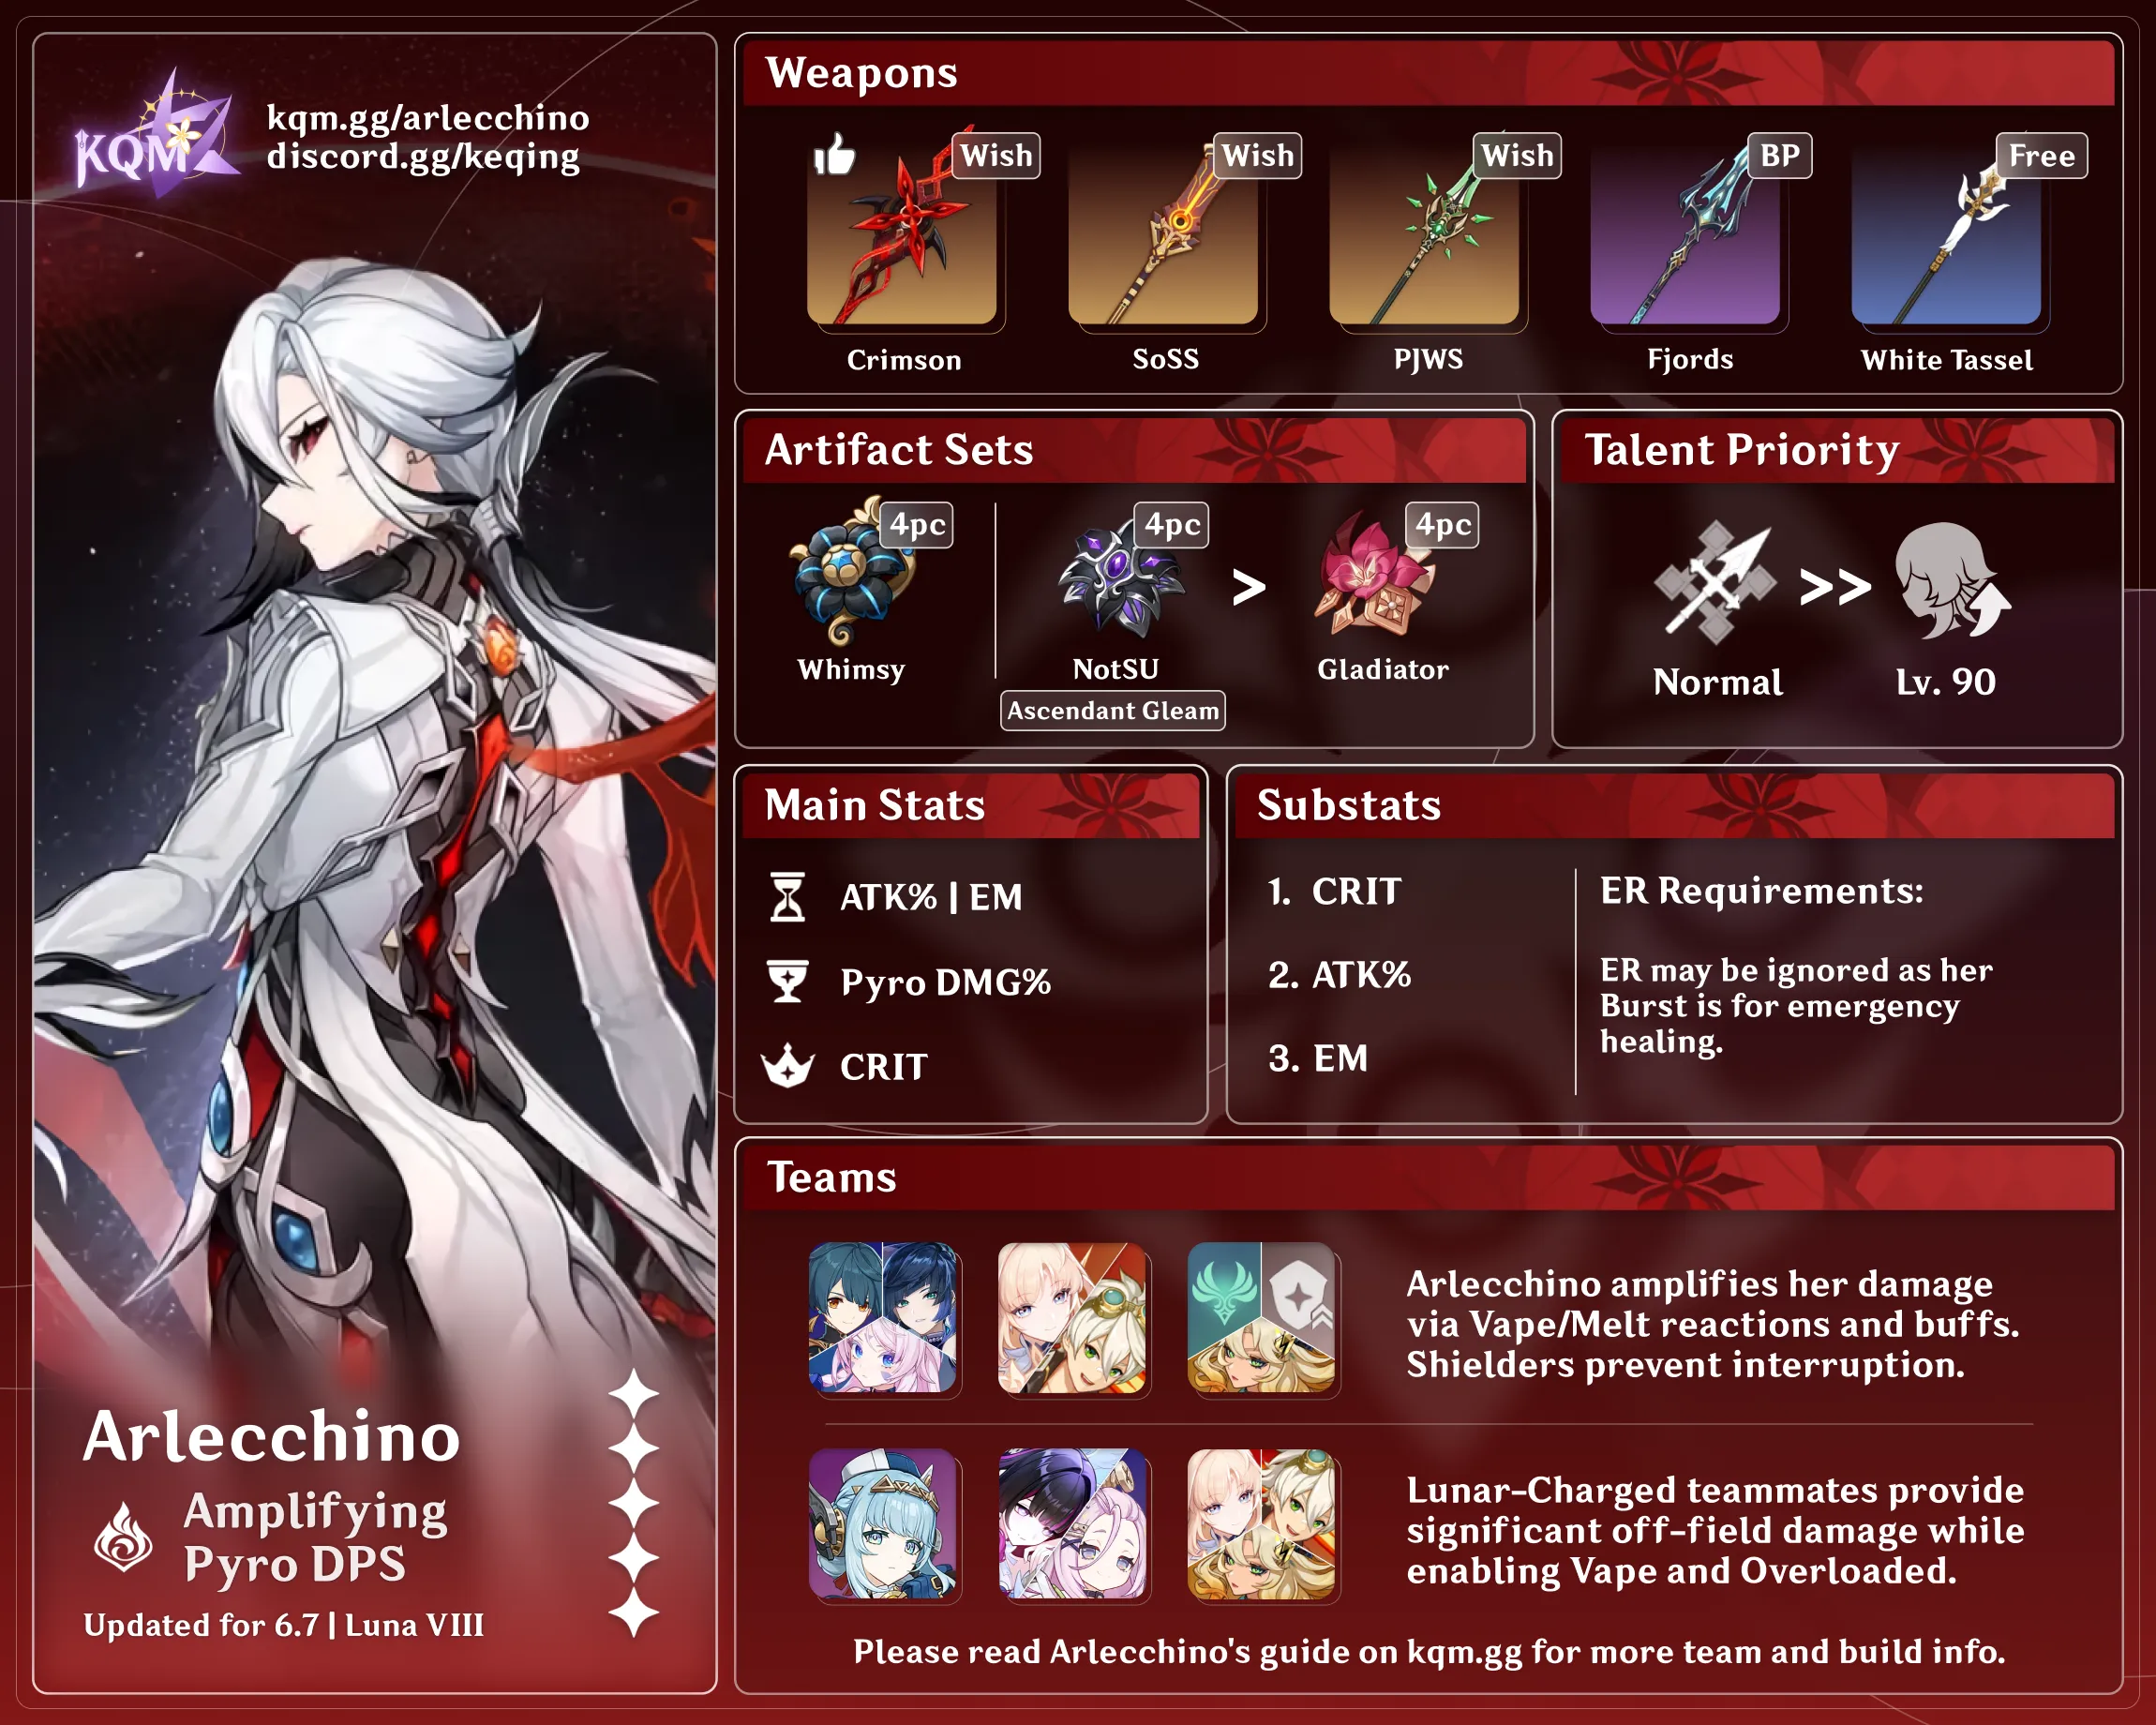
Credits to: euphorysm, auntyplay and KQM Staff
Pure Pyro DPS
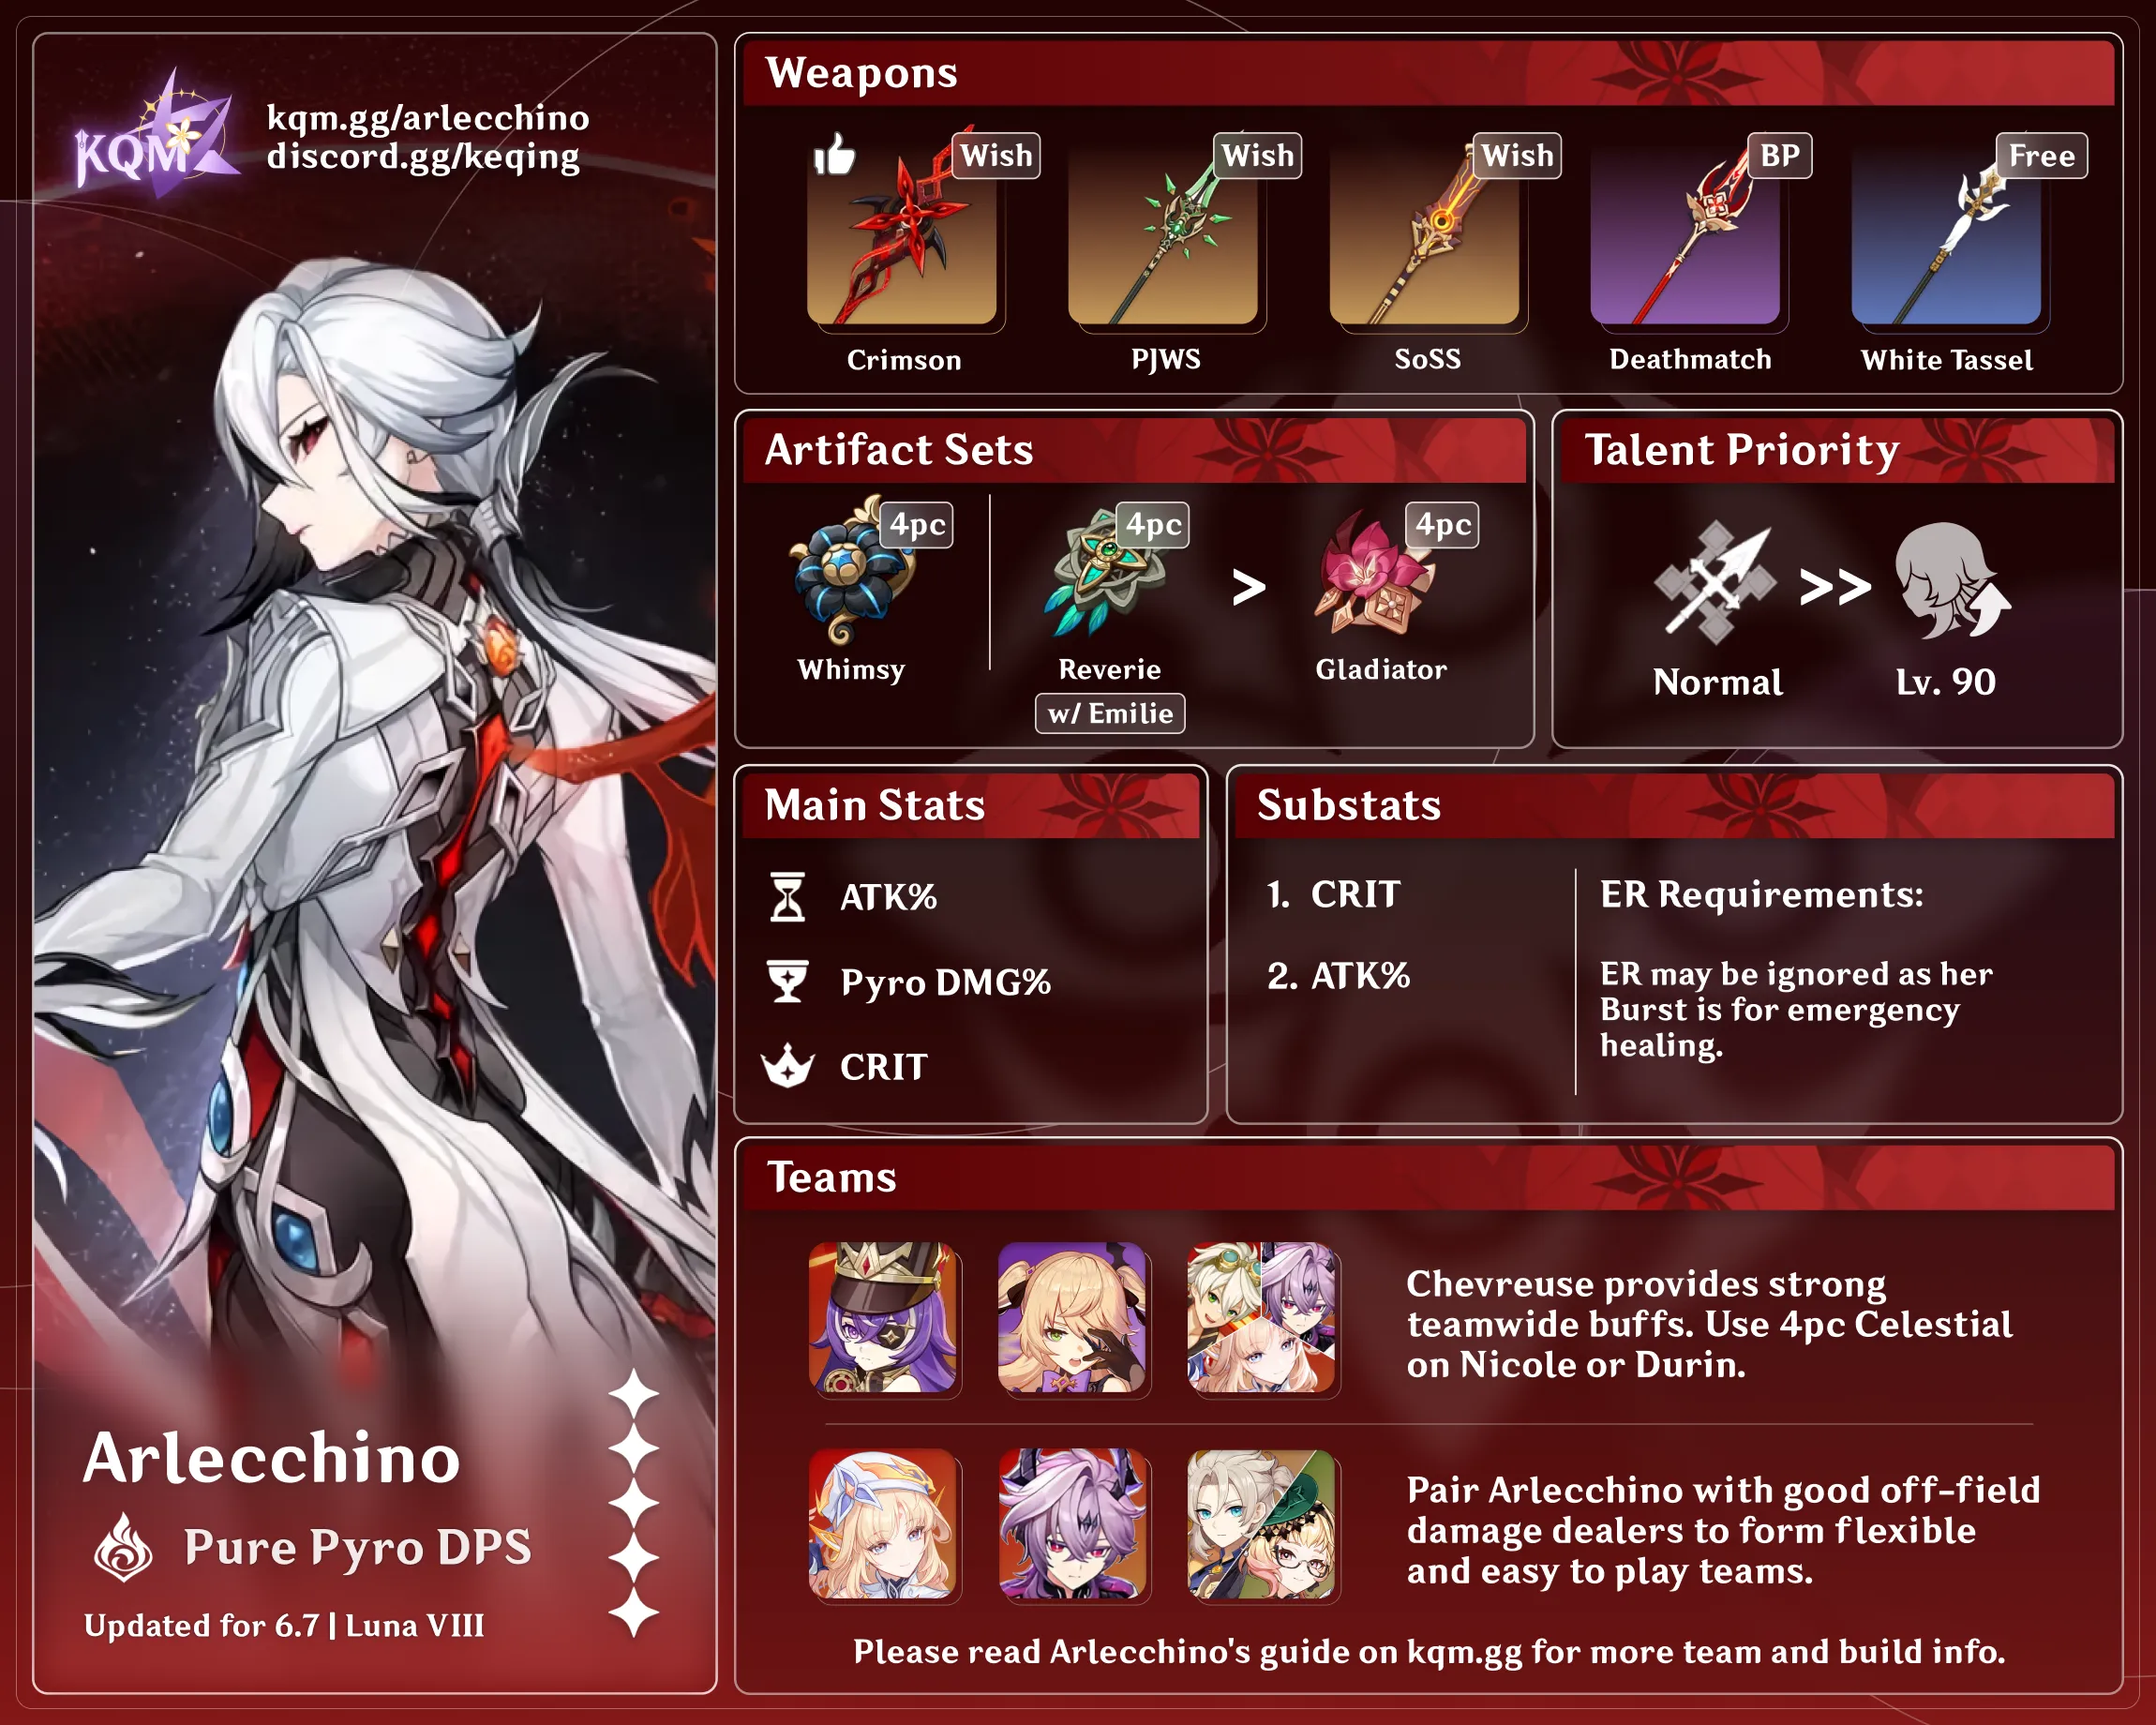
Credits to: euphorysm, auntyplay and KQM Staff
Rotations
Character Overview
Pros
- Flexible teambuilding and rotations.
- Can swap out during field time without losing her Pyro Conversion and Bond of Life.
- Not reliant on her Burst to deal damage.
- Good early Constellations that front-load her damage.
- Controlled off-field Pyro application helps with buff setups.
Cons
- Cannot rely on healers for survivability; personal healing is tied to a fairly high-cost Burst
- Requires fairly precise combo execution in Melt teams for proper reactions.
Playstyles
On-Field DPS
Arlecchino’s playstyle revolves around gaining and consuming from a Bond of Life, and it is the epitome of high risk, high reward. She has excellent damage potential, especially if you do not use her Burst’s healing, but cannot receive any healing apart from her Burst during combat — this can make her challenging to play without defensive teammates.
Arlecchino first applies her Skill’s mark onto enemies before swapping to other teammates, with her mark dealing damage while she is off-field. Upon returning to the field, she can clear mark with Charged Attacks to receive a Bond of Life that enhances her Normal Attacks and converts them to Pyro, with the Bond of Life being slowly consumed in the process. The Bond of Life and subsequent Pyro Conversion persist upon swapping, allowing some adaptability in rotations.
Talents
Level and Talent Priority
Normal Attack ≫ Character Level > Burst > Skill
Arlecchino’s Normal Attacks make up the vast majority of her damage and thus take first priority. Her Skill and Burst do not contribute nearly as much damage, and have much lower leveling priority.
Note that her Burst’s healing is not dependent on Talent levels.
Talent Overview
 Normal Attack | Invitation to a Beheading
Talent Description
Normal Attack
Performs a maximum of 6 consecutive strikes.
Charged Attack
Consumes a fixed amount of Stamina, dashing toward a nearby opponent and cleaving once.
Continuously holding this button will cause Arlecchino to consume Stamina and engage in up to 5s of high-speed movement.
Plunging Attack
Plunges from mid-air to strike the ground below, damaging opponents along the path and dealing AoE DMG upon impact.
Masque of the Red Death
When Arlecchino has a Bond of Life equal to or greater than 30% of her Max HP, she will enter the “Masque of the Red Death” state, where her Normal, Charged, and Plunging Attacks will be converted to deal Pyro DMG. This cannot be overridden.
When in the “Masque of the Red Death” state, Arlecchino’s Normal Attacks will deal extra DMG to opponents on hit that scales off her ATK multiplied by a certain ratio of her current Bond of Life percentage. This will consume 7.5% of said current Bond of Life. Her Bond of Life can be consumed this way every 0.03s. When her Bond of Life is consumed in this manner, All Is Ash’s CD will decrease by 0.8s.
Arlecchino’s Normal Attacks are her primary means of dealing damage. She enters the Masque of the Red Death enhanced state if she has a Bond of Life (BoL) equal to at least 30% of her HP. While in this state, Arlecchino’s melee attacks are converted to Pyro, and her Normal Attacks will consume 7.5% of her current BoL per hit. Consuming BoL this way increases her Normal Attack damage based on her current BoL and slightly reduces the cooldown of her Skill.
Arlecchino’s Charged Attacks can be initiated without a preceding Normal Attack, or used after any attack in her Normal Attack string. They are not relied upon for damage since they cannot consume BoL. Instead, they are used to interact with her Skill to gain BoL. Holding down the Charged Attack will initiate a fast but Stamina-intensive “dash” that lasts for 5s.
 Elemental Skill | All is Ash
Talent Description
Summons forth Balemoon Bloodfire, dealing Pyro DMG to multiple nearby opponents and performing a dash-cleave against one of them, dealing AoE Pyro DMG.
Opponents hit by the aforementioned attack will have a Blood-Debt Directive applied to them.
Blood-Debt Directive
- Lasts 30s. Every 5s, it will deal 1 instance of Pyro DMG to the opponent. Max 2 instances. This DMG will be considered Elemental Skill DMG.
- When Arlecchino uses a Charged Attack or Balemoon Rising, she will absorb and clear nearby Blood-Debt Directives. Each Directive absorbed grants her a Bond of Life worth 65% of her Max HP.
- The maximum value of the Bond of Life she can be granted through Blood-Debt Directives within 35s after using her Elemental Skill is 145% of her Max HP. Using the Elemental Skill again during this duration will restart the count on duration and the limit on the value of Bond of Life she may gain from Blood-Debt Directives.
Arlecchino’s Skill is a long-ranged dash that deals AoE damage and marks nearby enemies with Blood-Debt Directive. Arlecchino can remove Directives with her Charged Attack to obtain a Bond of Life (BoL) worth 65% of her Max HP. Furthermore, enemies marked with Directives receive 2 more damage instances over 10s, though the Directives can persist for another 20s.
Arlecchino’s Directives are her main method of gaining BoL to sustain her enhanced state. The BoL gained for each Skill use is capped to 145% HP, but it does not expire and can even be carried over to Arlecchino’s next Skill use if her Burst isn’t used. This means that her damage can actually increase over multiple rotations as she builds up BoL.
This Skill generates 5 Pyro Particles on cast. Its long 30s cooldown is generally not an issue, as it can be reduced significantly through Arlecchino’s Normal Attacks.
 Elemental Burst | Balemoon Rising
Talent Description
Arlecchino’s great wing of Balemoon Bloodfire beats as she absorbs and clears Blood-Debt Directives around her. She deals AoE Pyro DMG before clearing the CD of All Is Ash and healing herself. The healing is based on her Bond of Life value and ATK.
Arlecchino’s Burst initially deals a single hit of AoE damage. Its damage is not particularly noteworthy in most cases considering its long cast animation. In addition, its 60 Energy cost makes it a loss of damage to build enough ER% for a Burst every rotation.
Similar to Arlecchino’s Charged Attack, her Burst will remove any active Blood-Debt Directives on enemies and grant her a corresponding amount of Bond of Life (BoL). However, her Burst will immediately consume the entire BoL afterwards and effectively restore HP based on 50% of the BoL and 150% of her ATK (a portion of the stated 150% is used in clearing the current BoL). Casting the Burst also resets the cooldown of her Skill, allowing her to continue with her normal rotation if her Burst is used at the start of the rotation.
Arlecchino’s Burst is best reserved as an emergency heal at the start of a rotation, due to its relatively low damage output, long cast time, and the fact that it is her only source of healing. Her Burst often reduces damage output by removing BoL accumulated from previous rotations. Additionally, using it during her Normal Attack combo causes her to desync with the rest of her team. However, it can be useful in clearing out weaker enemy waves.
Using Arlecchino’s Burst every rotation does reduce her team’s ER requirements due to her second Skill’s particles, but as Arlecchino typically deals the vast majority of team damage, it is still ideal to avoid using her Burst.
 Ascension 1 Passive | Agony Alone May Be Repaid
Talent Description
Blood-Debt Directives have the following characteristics:
- Arlecchino will be granted a Bond of Life worth 130% of her Max HP when an opponent to which she herself applied a Directive is defeated.
- 5s after a Directive is applied, it will be upgraded to a Blood-Debt Due. When absorbed, it will instead grant Arlecchino a Bond of Life worth 130%.
A Bond of Life created in the aforementioned ways cannot exceed the original limit on the value of Bonds of Life obtained through All is Ash.
Arlecchino’s Blood-Debt Directives are changed to Blood-Debt Dues 5s after application. Dues are distinguished by their larger appearance and glowing effect, and can be cleared in the same fashion as Directives, but grant 130% BoL instead. This encourages using her Skill earlier in the rotation to later extend Arleccchino’s enhanced state. Note that clearing Dues still cannot exceed the 145% HP BoL limit per Skill.
Additionally, defeating enemies marked with Directives still grants Arlecchino 130% BoL, even if she is not on-field or does not perform the killing blow. This prevents Directives from being wasted.
 Ascension 4 Passive | Strength Alone Can Defend
Talent Description
Arlecchino gains 1% All Elemental and Physical RES for every 100 ATK she has in excess of 1,000. The maximum RES increase she can gain this way for each is 20%.
This passive slightly increases Arlecchino’s survivability, but it is still not recommended to tank hits, especially without a shield.
 Passive Talent | The Balemoon Alone May Know
Talent Description
While in combat, Arlecchino gains a 40% Pyro DMG Bonus and can only be healed through Balemoon Rising.
Arlecchino cannot utilize any form of healing apart from the heal granted by her Burst cast while in combat, preventing her Bond of Life from being depleted outside of using her Normal Attacks and Burst. This restriction includes teammate Bursts with party healing, Prototype Amber, and even the Spiral Abyss Benediction that heals on Bursts cast. As such, she is very reliant on her Burst’s high but infrequent self-healing to restore any lost HP.
In exchange, Arlecchino’s Bond of Life gains a substantial and permanent Pyro DMG Bonus, greatly improving her offensive potential.
Note that Arlecchino can be healed as normal when not in combat, but this will remove any BoL she has in the process.
Constellations
 Constellation 1 | “All Reprisals and Arrears, Mine to Bear…”
Constellation Description
Masque of the Red Death is further enhanced, the value of the increase is 100%. Additionally, Arlecchino’s interruption resistance is increased when she performs Normal or Charged Attacks while affected by the Masque of the Red Death.
A very useful early Constellation, providing a simple but significant buff to Arlecchino’s Normal Attacks when they consume Bond of Life. She also gets immunity to interruption while using her Normal and Charged Attacks, making her more comfortable to play without shielders.
 Constellation 2 | “All Rewards and Retribution, Mine to Bestow…”
Constellation Description
Blood-Debt Directives are now already Blood-Debt Due when first applied.
When Arlecchino absorbs such a Due, she unleashes Balemoon Bloodfire in front of her, dealing 900% of her ATK as AoE Pyro DMG and increasing her All Elemental RES and Physical RES by 20% for 15s. This effect can trigger once every 10s.
You must first unlock the Passive Talent “Agony Alone May Be Repaid.”
Arlecchino’s Skill now applies Blood-Debt Dues by default, removing the need to first set up her Skill, indirectly increasing her Burst’s healing, and alleviating issues posed by using her Burst early. Clearing Dues now also unleashes an AoE attack; if Dues are cleared with her Burst, the attack will hit first. This new AoE attack deals decent front-loaded damage, particularly if its damage can trigger Vaporize or Melt. Clearing Dues also increases Arlecchino’s survivability and works in conjunction with her A4 Passive.
 Constellation 3 | “You Shall Become a New Member of Our Family…”
Constellation Description
Increases the Level of Normal Attack: Invitation to a Beheading by 3.
Maximum upgrade level is 15.
Additional Talent levels to Arlecchino’s primary damage source.
 Constellation 4 | “You Shall Love and Protect Each Other Henceforth…”
Constellation Description
When Arlecchino successfully absorbs a Blood-Debt Directive, Balemoon Rising’s CD will decrease by 2s and 15 Elemental Energy will be restored to her. This effect can occur once every 10s.
Reduces Arlecchino’s ER requirements, allowing for more accessible healing, though her Burst remains mediocre for damage until C6. The Burst cooldown decrease is not very useful.
 Constellation 5 | “For Alone, We Are as Good as Dead…”
Constellation Description
Increases the Level of Balemoon Rising by 3.
Maximum upgrade level is 15.
Increases the damage dealt by Arlecchino’s Burst. Not very impactful without her C6.
 Constellation 6 | “From This Day On, We Shall Delight in New Life Together.”
Constellation Description
The DMG of Balemoon Rising is increased by Arlecchino’s ATK multiplied by 700% of Arlecchino’s current Bond of Life percentage.
For 20s after Arlecchino uses All Is Ash, both her Normal Attacks and Elemental Burst gain 10% increased CRIT Rate and 70% increased CRIT DMG. This effect can be triggered up to once every 15s.
An enormous damage increase to Arlecchino’s Burst, making it well worth using offensively especially if it can trigger Vaporize or Melt. She also gains substantial CRIT buffs upon using her Skill, allowing her to easily finish off enemies that somehow survived her Burst.
A strong capstone Constellation.
C1 vs. R1
C1 Arlecchino with R5 White Tassel (her best F2P option) has similar damage performance as C0 Arlecchino with R1 Crimson Moon’s Semblance (CMS). With a Battle Pass or a 5-star weapon, Arlecchino’s C1 becomes better. This does not include the fact that Arlecchino gains interruption resistance at C1, making playing her extremely more comfortable. However, the aesthetic aspect of CMS turning into a full Crimson Scythe on Arlecchino should not be ignored if damage is not the only factor to consider.
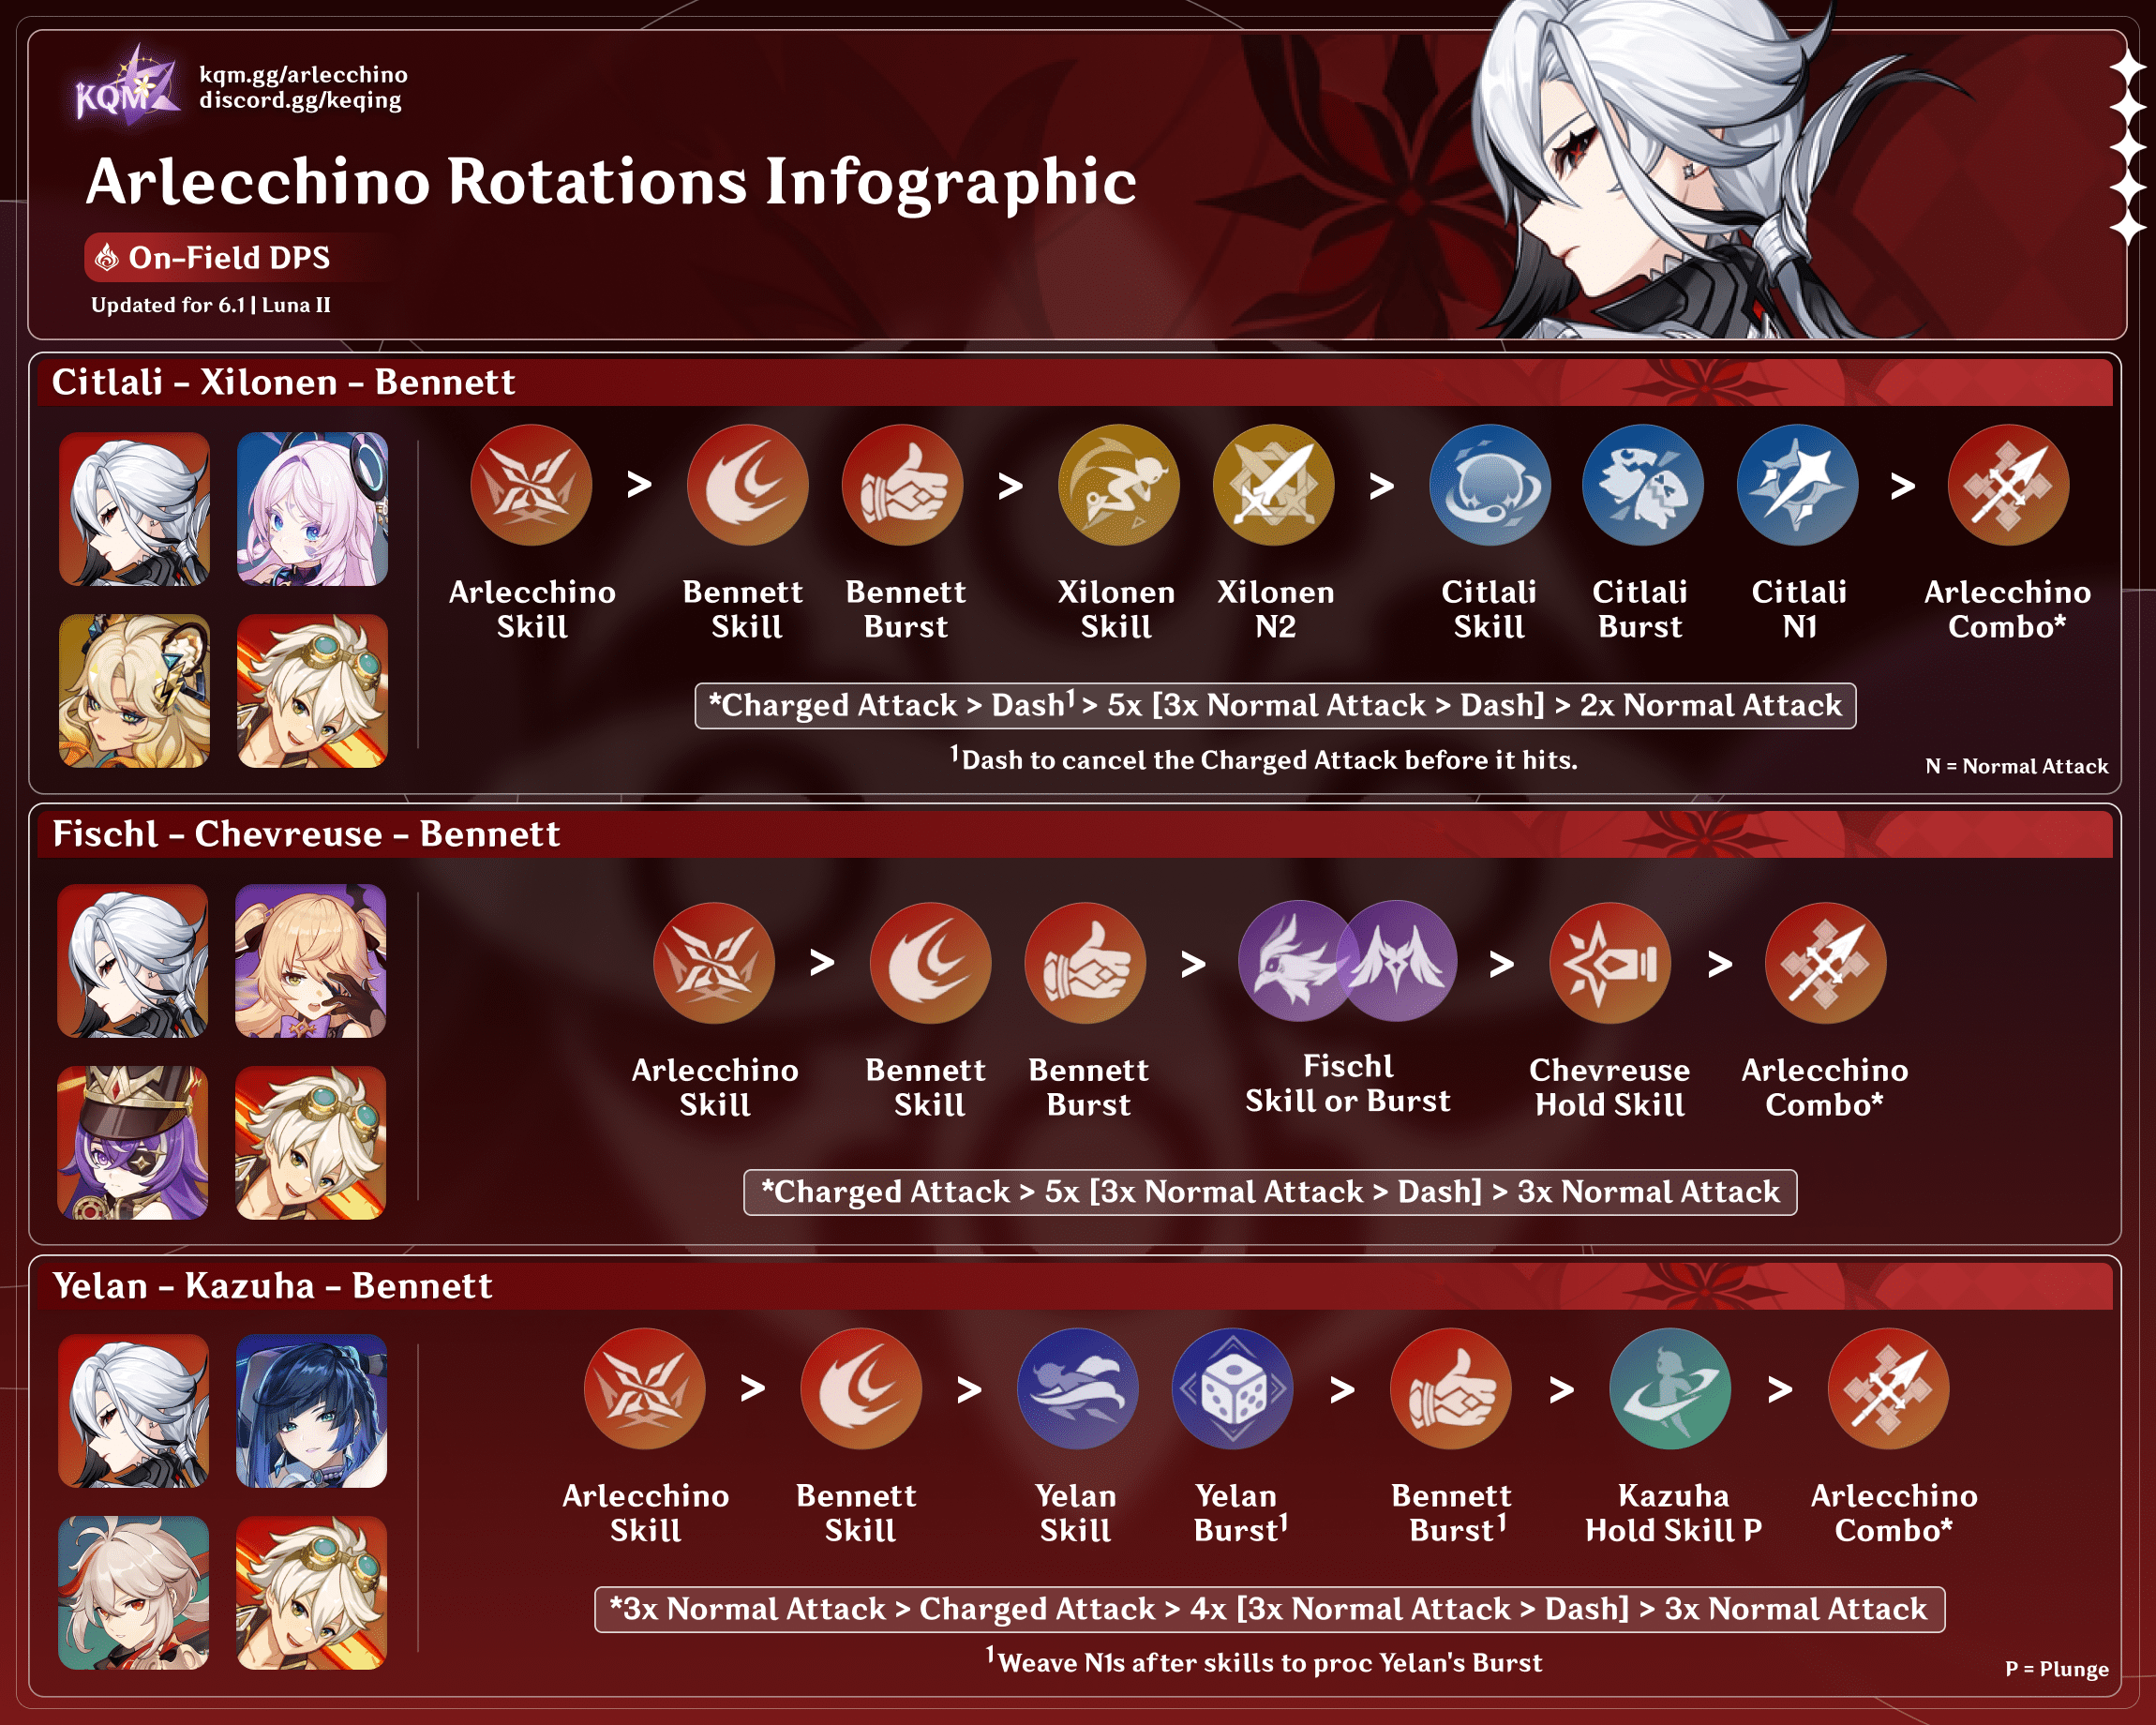
Combos
Combo Notation
- N = Normal Attack
- C = Charged Attack
- A = Aimed Shot
- P = Plunging Attack
- E = Elemental Skill
- tE = Tap Skill
- hE = Hold Skill
- Q = Elemental Burst
- D = dash (cancel)
- J = jump (cancel)
- W = walk (cancel)
- > = switch character
- ( ) = these actions are optional; please refer to the notes below
- [ ] = repeat these actions the specified number of times
Arlecchino isn’t very picky about her specific Normal Attack string, as much of her damage comes from the extra damage granted by her Pyro Conversion, which is independent of her Normal Attack scalings. Listed below are some suggested combos. It is generally advised to dash cancel to skip her sixth Normal Attack (pulling her weapon from the ground), which has a very long animation.
| N3D | Arlecchino’s most recommended combo for general use. This combo accommodates frequent dashing, which can aid in survivability. |
| N5D | This combo is easy to execute and much less Stamina-intensive. |
| N2C and N3C | While Arlecchino’s Charged Attacks are not buffed by her BoL mechanic, using them together with her Normal Attacks yields a higher Vaporized reaction count, thus resulting in more DPS output provided a fast Hydro applier such as Yelan or Xingqiu is used. |
| Walk cancel | By pressing or holding the direction key/wheel at a specific time, players can cancel the ending animation of Arlecchino’s Normal Attacks. With precise execution, this allows similar attack cancel in terms of saved time while not costing any Stamina. |
| Charged Attack cancellation | Arlecchino’s Charged Attack can be cancelled very early before it deals damage by a dash or a jump. This allows her to collect Blood-Debt Directives/Dues without applying Pyro and ruining timing-sensitive aura setups. Note that this will result in not obtaining the extra BoL her signature weapon provides, so normally hitting CA should be done outside of such windows like at the start of the rotation setup. |
| N3 before the first Charged Attack | Use 3 Normal Attacks before the first Charged Attacks to establish Hydro aura from Xingqiu’s/Yelan’s Burst as needed. This allows Arlecchino’s most hard-hitting hit — her first Normal Attack after claiming the Blood-Debt Directives/Dues — to Vape. |
Arlecchino can utilize around 18 buffed Normal Attacks with the BoL granted by a single Blood-Debt Due. In some cases she may continue attacking after her Pyro Conversion runs out to make the rotation accommodate her teammates’ cooldowns.
However, Arlecchino should follow specific team rotations to ensure that she can claim the maximum BoL by first allowing her Blood-Debt Directives to upgrade into Dues. Additionally, she must use her Burst at specific times to avoid desynchronizing her Pyro Conversion with her teammates’ cooldowns.
| (EQ) E (N1) > Team > C combo | Arlecchino’s standard team rotation, wherein her marks are allowed to upgrade during the time occupied by her teammates. You should use her Burst (preceded by a Skill) at the start of the rotation if its healing is needed. Against less than 3 targets, if the team’s setup is faster than 5s, you should wait for Arlecchino’s Directives to upgrade into Dues or pad out time with a Normal Attack after her Skill. |
E > Team > C combo E C combo Q | In some cases it is more useful to extend Arlecchino’s field time rather than setting up another rotation to exploit enemy vulnerability windows. This can be done by using her Skill as it comes off cooldown into a Charged Attack to immediately gain BoL. Afterwards, her Burst is used to reset her Skill cooldown to proceed to the next rotation. |
Bond of Life
What It Is and How to Obtain It
Bond of Life (BoL) is normally a debuff that requires healing to be removed, currently applied by Fontaine’s craftable weapons as well as by certain attacks from Fatui Operatives. While the BoL is active, it will absorb any healing received until it is depleted, but otherwise has no effect on the character’s current HP.
However, Arlecchino’s mechanics make her BoL function as a resource to be built up and consumed. The BoL is displayed as a percentage of Max HP, with the cap of 200% BoL occupying her full HP bar. The BoL will persist for some time even outside of combat, which is especially convenient for Overworld.
Arlecchino must have at least 30% BoL to enable her enhanced state. Her primary method of gaining BoL is by using a Charged Attack near enemies marked with her Skill’s Blood-Debt Directive; the Charged Attack does not actually need to hit enemies to do so. Arlecchino’s Directives upgrade into Blood-Debt Dues 5s after being applied, granting double the BoL when claimed. Up to 145% BoL can be obtained per Skill; this cap can be reached if claiming Blood-Debt Dues from 2 enemies, or Directives from 3 marked targets.
Since her teammates generally spend at least 5s of field time anyway, pre-C2 she should always cast her Skill early in the rotation to claim Dues instead of Directives if there are less than 3 marked enemies, even if this means waiting a few seconds if she does return too early. To avoid wasting buff uptime, it is preferable to add filler Normal Attacks early into the rotation. Additionally, defeating marked enemies also grants 130% BoL.
Its Effects and How to Manage It
In single-target combat, Arlecchino starts off with a Bond of Life worth 130% (155% when using her signature weapon), and slowly consumes it via Normal Attacks. If BoL ever drops below 30%, her enhanced state deactivates and her attacks no longer consume BoL. Any BoL remaining afterwards will be added to her next Skill state’s; this means that Arlecchino’s damage can increase slightly over multiple rotations as she builds up more BoL, up to a maximum value of 200% BoL.
Arlecchino’s Burst is her only form of healing, clearing any Directives and her current BoL and then healing her by 50% of the consumed BoL and 150% of her ATK. To maximize the healing, use her Skill before Burst to gain additional BoL. However, using her Burst will also remove any surplus BoL gained from previous rotations and deactivates her Pyro Conversion, necessitating an immediate Skill use to reactivate.
It is not recommended to use Arlecchino’s Burst in the middle of her Normal Attack combos. While her Skill cooldown reset allows her to quickly regain her Pyro Conversion, claiming Directives immediately results in much less BoL without her C2. Additionally, using Skill this way desynchronizes its cooldown with those of her teammates, complicating subsequent rotations. To avoid such issues, it is ideal to delay her Burst until the start of the next rotation, indicated by her Skill coming off cooldown.
Artifacts
ER Requirements
Burst Every Rotation (Not Recommended)
| Solo Pyro | 150%+ |
| Double Pyro | 140–150% |
| Triple Pyro | 120% |
The above ER requirements assume Arlecchino uses her Burst every rotation. However, Arlecchino’s Burst is generally not optimal for damage, and should instead be reserved for emergency healing. In such cases where her Burst is used only once every two or more rotations, she will not need to build any ER%.
Use the Energy Recharge Calculator to determine exact requirements for your team and rotation.
Artifact Stats
 Sands |  Goblet |  Circlet |
| ATK% or EM | Pyro DMG Bonus | CRIT Rate or CRIT DMG |
Stat Priority: ER% until requirement (if using Burst) > CRIT > ATK% ≥ EM (Vaporize)
You should only use Arlecchino’s Burst if you desire the comfort of consistent healing, primarily in shieldless teams; otherwise, avoid building any ER% and instead allocate substats to offensive stats for better damage output. Furthermore, Arlecchino should not build HP — her damage is ATK-scaling and Bonds of Life are considered by their percentage value, which does not get increased by a higher HP stat.
EM and ATK% Sands are both viable options in Vaporize and Melt teams; however, an ATK% Sands should always be used in teams that do not use Vaporize nor Melt. An ATK% Goblet with better substats can outperform a Pyro DMG% Goblet in specific circumstances, or if you do not have a good Pyro DMG% Goblet available. Use tools such as the Genshin Optimizer to find specific build recommendations given your available artifacts and teams.
Artifact Sets
Recommended Sets
 4pc Fragment of Harmonic Whimsy (FHW) | Arlecchino’s general Best-in-Slot set grants DMG Bonus according to Bond of Life. She can easily maintain full stacks with her normal playstyle. |
 4pc Night of the Sky’s Unveiling (NotSU) | 4pc NotSU performs just slightly behind 4pc FHW for Arlecchino’s personal output in Ascendant Gleam teams. However, if the team has Ineffa and Columbina, it can be considered over 4pc FHW for its teamwide 10% Lunar-Charged DMG buff. |
 4pc Unfinished Reverie | This set is strictly limited to use in Burning teams, wherein it performs similarly to 4pc Whimsy. It can also be farmed alongside 4pc Whimsy, which can help with Resin-efficiency. |
 4pc Gladiator’s Finale | Arlecchino’s second-best set after 4pc FHW in general, providing an unconditional buff to Normal Attacks, her main source of damage. A good option if you have pieces with great substats. You can also farm it passively through World Bosses. |
Other Sets
 4pc Echoes of an Offering | This set provides a strong Base DMG Bonus to Normal Attacks, but it requires low ping (<100ms) to be consistent. |
 4pc Desert Pavilion Chronicle | While this set’s Anemo DMG% is useless on Arlecchino, its Normal Attack DMG% is still quite strong. |
 4pc Retracing Bolide | A good option that gives a Normal Attack DMG Bonus when shielded; it also increases survivability with a buff to Shield Strength. However, its condition locks you into always running a shielder and causes damage to plummet if your shield breaks. |
4pc Shimenawa’s Reminiscence | This set gives a large DMG Bonus to Arlecchino’s Normal Attacks in exchange for some Energy. However, it requires C2 to be useful against less than 3 enemies, since its buff is wasted in Arlecchino’s “early Skill” rotation. The Energy drain also greatly reduces the availability and effectiveness of her Burst’s healing. |
 4pc Crimson Witch of Flames | This Pyro damage–centered set is generally comparable to 2pc mixed sets, and it becomes a slight improvement over them in Vaporize teams. |
 4pc Gilded Dreams | An alternative to 4pc Crimson Witch in Vaporize teams. This set can increase EM and ATK%. |
 2pc Mixed Sets | 2pc Bonuses: ATK%, Pyro DMG% Mixed sets can be used while farming for 4pc sets. |
 4pc Marechaussee Hunter | 4pc Marechaussee does not outperform 4pc Fragment even in Furina teams. Additionally, Arlecchino has questionable synergy with Furina, making this set rather underwhelming for her. |
Weapons
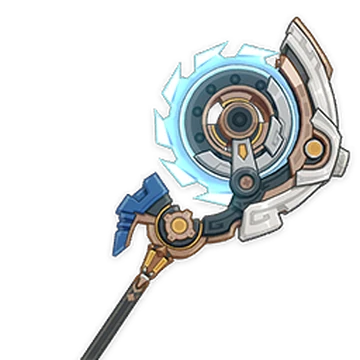
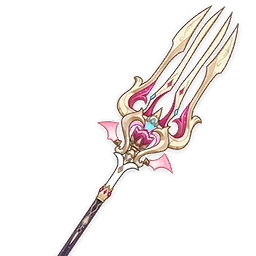
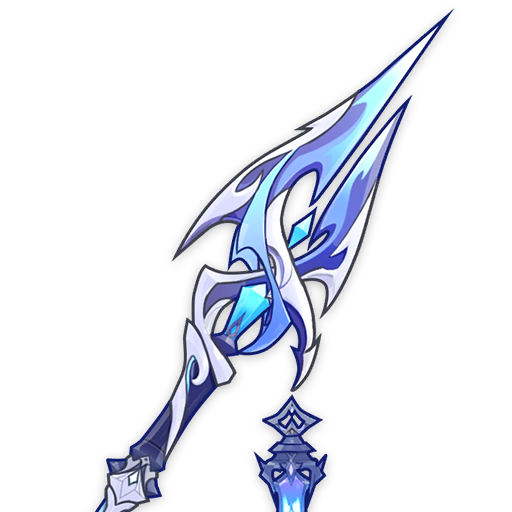
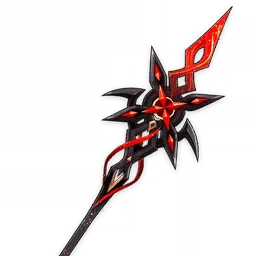 5★ Crimson Moon’s Semblance | Arlecchino’s signature weapon; it is tailored to her BoL mechanics and performs noticeably better than her next best options, while also improving quality-of-life through additional BoL. This weapon takes on an exclusive scythe form when equipped on Arlecchino. In some Melt teams, Arlecchino cancels her Charged Attack with a dash to preserve Cryo aura for her Normal Attacks. To do this while still getting the BoL increase from CMS’s passive, use a Charged Attack before Arlecchino’s Skill cast. |
 5★ Primordial Jade Winged-Spear | Arlecchino’s general second-best weapon, providing similar base stats to her signature weapon and a useful passive that she can easily stack. However, in teams with heavy ATK buffs, it only performs similarly to other 5-star weapons. |
 5★ Staff of the Scarlet Sands | A close competitor to Jade Spear, particularly in Vaporize teams where Arlecchino equips an EM Sands. |
5★ Fractured Halo | Arlecchino’s best stat stick weapon (assuming above 50% HP for Homa). |
 5★ Staff of Homa | Another excellent 5-star option, performing well even if Arlecchino is above 50% HP. |
 5★ Lumidouce Elegy, Symphonist of Scent | Other 5-star CRIT stat sticks with similar damage output. Lumidouce Elegy’s performance can improve in Burning teams, but you may want to prioritize using this weapon on Emilie. |
 4★ Deathmatch | A good option from the Battle Pass, particularly in single-target scenarios. |
 4★ Ballad of the Fjords | An upgrade to Deathmatch specifically in Vaporize teams that include a third Element. |
 5★ Calamity Queller, Vortex Vanquisher, Bloodsoaked Ruins, Disaster and Remorse | These 5-star stat sticks have similar performance to low-refinement Battle Pass Polearms. |
 3★ White Tassel | Arlecchino’s best free option. It works best in teams with Bennett to compensate for its low Base ATK. |
 4★ Blackcliff Pole | While it has a passing resemblance to Arlecchino’s signature, this weapon is not recommended. It isn’t much better than R5 White Tassel while also costing Starglitter. |
Teams
Rotation Notation
- N = Normal Attack
- C = Charged Attack
- A = Aimed Shot
- P = Plunging Attack
- E = Elemental Skill
- tE = Tap Skill
- hE = Hold Skill
- Q = Elemental Burst
- D = dash (cancel)
- J = jump (cancel)
- W = walk (cancel)
- > = switch character
- ( ) = these actions are optional; please refer to the notes below
- [ ] = repeat these actions the specified number of times
Teambuilding
- Arlecchino’s high damage scaling incentivizes the use of buffers to greatly increase her personal damage output.
- Off-field damage dealers further increase team output through their own damage and by enabling Arlecchino to trigger reactions such as Vaporize and Melt.
- Since Arlecchino cannot rely on healers, teams must either use shielders or units with similar defensive utility for additional survivability, though often at the expense of some team damage potential.
- Alternatively, Arlecchino’s teams can lean fully into offense, relying on dodging attacks and her Burst’s healing to sustain her. In return, her high damage output can result in shorter combat encounters.
- Arlecchino’s Pyro Conversion persists through swapping characters. This can be situationally useful; for example, you can swap to Kazuha to regroup enemies before continuing Arlecchino’s combo.
Notable Teammates


Pyro
Pyro units enable Pyro Resonance and provide supportive effects such as buffs, shields, or even off-field damage. They are especially relevant for Chevreuse teams.
Nicole | Nicole is an amazing buffer and shielder when paired with a Hexerei unit. She provides Flat ATK, DMG Bonus (through 4pc Celestial), and coordinated attacks that scales with Arlecchino’s stats, on top of a sturdy shield that lasts 20s. However, the 300 Flat ATK buff of Nicole’s A1 Passive will not be active for the first 3s after Arlecchino takes the field. This affects Arlecchino’s output greatly due to Arlecchino’s BoL mechanics frontloading most of her damage in the first few Normal Attacks. As such, outside of teams where Nicole enables the Hexerei effects for other teammates, she is rarely a significant upgrade over Bennett unless players have her Constellations or need her shield. |
 Bennett | Despite Bennett’s inability to heal Arlecchino, he remains a top-tier buffer thanks to his massive Flat ATK buff that significantly increases her damage. However, his Burst’s limited AoE can be restrictive in combat. |
 Chevreuse | Chevreuse limits to only Pyro and Electro units. In return, she provides strong buffs that have high uptime and follow the active character. Note that Chevreuse’s C6 still buffs Arlecchino despite not healing her, and both her C6 and A4 buffs do not require a full Pyro–Electro team. |
Durin | Durin is a good off-field damage dealer in Overloaded or “Mono Pyro” teams. He shreds 20% Pyro RES when Pyro reactions are triggered (excluding Vape and Melt), and this RES increases to 35% when there’s another Hexerei in the team. Additionally, he is a good holder of 4pc Celestial. |
 Xiangling | A decent damage dealer in “Mono Pyro” teams with some buffs from her A1 and C6. Using her is often worse than further buffing Arlecchino with a proper support. |
 Thoma | Thoma provides consistent shields and a modest buff with his C6. Only recommended if you need a shield, and should not be used in Melt teams or Vape teams with slow Hydro appliers. |
Hydro
Hydro units apply Hydro from off-field, enabling Arlecchino to Vaporize a portion of her attacks.
 Yelan | Yelan deals good off-field single-target damage, especially in Double Hydro teams. She provides a strong ramping DMG% buff to Arlecchino. |
 Xingqiu | Xingqiu is a more defensive-oriented alternative to Yelan, providing interruption resistance and damage reduction. His long Skill cooldown may cause Arlecchino’s Pyro Conversion to deplete before the rotation ends. However, he can alternate between his Burst and Skill every rotation for shorter rotation while still providing enough Hydro application with just his orbital Rain Swords. |
Columbina | Even in a typical Vaporize team, Columbina is a good enabler for Arlecchino with her consistent Hydro application and her ability to hold 4pc TotM and TTDS while requiring little field time. However, Columbina synergizes best in an Overvape team where she converts the Electro-Charged reaction into Lunar-Charged and deals significant Lunar-Charged damage herself. The best Electro unit to use with Columbina is Ineffa. |
Mona | Mona provides a hefty amount of DMG Bonus from her Burst and 4pc Celestial, 15% Vaporize Reaction DMG Bonus from her C1, 80 EM from her C2 and 15% CRIT Rate from her C4. All these buffs make her a surprisingly good enabler for Arlecchino, especially with another Hexerei teammate such as Sucrose or Nicole. Mona’s drawbacks are her high ER requirements and her limited Hydro application in terms of mobility and duration. |
 C6 Candace | C6 Candace provides mobile, off-field AoE Hydro application and a decent Normal Attack DMG Bonus. However, she suffers from mediocre damage output and high ER requirements, especially as a solo Hydro. Pre-C6 Candace is not recommended. |
 Nilou | Nilou offers off-field AoE Hydro application that follows the active character and is frequent enough to allow for consistent Vapes. She can provide an EM buff with Key of Khaj-Nisut and 4pc Instructor. |
 Aino | Aino can be used as a decent F2P enabler option for Arlecchino. Aino can either use 4pc Instructor or 4pc SMS to buff Arlecchino, with the second set being more superior in an Ascendant Gleam team. |
 Furina | Furina provides off-field damage and a strong teamwide DMG% buff. However, Arlecchino’s inability to receive external healing and preference for Bennett (a single-ally healer) or a shielder hamper Fanfare generation, which greatly reduces Furina’s effectiveness. Furina’s constant HP drain also puts Arlecchino at great risk of dying if unshielded. As such, she is not generally recommended due to this significant anti-synergy, especially in extended combat. These issues are alleviated with Furina’s early Constellations (particularly C2), which make up for the Fanfare deficit. Using Arlecchino’s Burst more often also helps in this regard. |
 Kokomi | Kokomi’s off-field AoE Hydro application is enough to provide consistent Vapes, and she can hold TTDS and 4pc TotM to provide ATK% buffs. However, she does not aid Arlecchino’s survivability, has long cooldown, applies in a restrictive, stationary AoE, and contributes negligible damage. |
Dahlia | While Dahlia does not apply Hydro and enable Vaporize for Arlecchino, he brings a shield and some Attack SPD buffs, which speed up her combos and rotations. |
Cryo
Among these characters, only Citlali, Kaeya, and Rosaria can apply Cryo fast enough for Arlecchino’s Forward Melt on their own, although the timings for most of them are tight. Using two Cryo units eases the aura management and enables Cryo Resonance.
Citlali | The premier Melt enabler for Arlecchino with her Pyro RES Shred, 4pc Scroll, TTDS, and some shielding. Citlali also has great Constellations to further buff Arlecchino. |
 Kaeya | Kaeya has fast Cryo application that becomes unmatched at C6. While he still does some personal damage, especially in Double Cryo teams, it is still not much. |
 Rosaria | Rosaria deals off-field damage, applies Cryo consistently, and buffs CRIT Rate through her A4 Passive. |
 Escoffier | As the solo Cryo unit, Escoffier struggles to remove Bennett’s 2U of Pyro to establish a Cryo aura for Arlecchino without building excessive ER to Burst every rotation. However, she fulfills the role of second Cryo teammate, who increases Melt consistency and deals respectable off-field damage. |
 Qiqi | Qiqi can provide enough Cryo application for Arlecchino with minimal field time requirement. Other than holding 4pc TotM, she does not provide anything else. |
 Shenhe | Shenhe applies off-field Cryo, buffs another Cryo damage dealer, and can provide a small Normal Attack DMG Bonus via her A4 Passive. |
 Layla | Layla provides a good shield and off-field Cryo application; plus, she can use 4pc TotM to grant a teamwide ATK% buff. |
 Diona | Diona has a weaker shield and slower off-field Cryo application than Layla, but she provides a large EM buff with her C6. However, her EM buff and half of her application are locked behind a 20s-cooldown Burst. |
 Charlotte | Charlotte’s Burst rapidly applies AoE Cryo within a short duration. Coupled with TTDS, this enables Arlecchino to front-load a huge amount of damage. However, her high ER requirements limit her practicality in longer fights. |
Electro
Electro units are an essential part of Chevreuse teams. They also enable Arlecchino to trigger Overvape in Vaporize teams.
Fischl | Fischl is a staple Electro option by virtue of her high off-field damage, fast Electro application, and good particle generation. With another Hexerei unit, Fischl also provides 22.5% ATK or 90 EM (that doubles at C6) when Overloaded or Electro-Charged is triggered. This makes her a good buffer in some Overloaded and Overvape teams. Fischl can sacrifice her personal damage to hold 4pc Celestial to further buff the team. However, other characters such as Nicole are better off equipping this set, and Fischl needs to use Sacrificial Bow or recast her Skill on rotations that Oz is summoned by her Burst, in order to trigger 4pc Celestial consistently. |
 Ineffa | Ineffa is a powerful Electro character to use in Arlecchino’s Overvape teams. The Lunar-Charged reaction that she enables consumes Hydro aura less frequently and deals more damage than the typical Electro-Charged. She also contributes significant personal damage and provides a decent shield as well as an EM buff for Arlecchino. |
Iansan | If Bennett is not available, Iansan is a decent consideration who provides 40% DMG Bonus from 4pc Scroll and her own Flat ATK buff that Arlecchino can maintain with her combos full of dash cancels. Try to dash away from enemies to maximize Arlecchino’s traveling distance for Iansan’s Nightsoul point regeneration. |
 Yae Miko | Yae is an alternative off-field Electro DPS to Fischl, but she takes more field time to set up her turrets. Her Burst is ideally reserved for finishing off enemies and reaching other enemy breakpoints. A supportive build with 4pc TotM and Hakushin Ring on Yae can be optimal if Yae is not highly invested. |
 Raiden | Raiden is a simple but effective Overloaded enabler with her high-uptime Skill in Chevereuse teams. She should use a full EM build and use 4pc TotM to buff Arlecchino. |
Ororon | In Overvape teams, with the right setup, Ororon can trigger Overloaded and provide the full effect of 4pc Scroll for Arlecchino. He also gives a 30% ATK buff at C6 and deals some personal damage in AoE. He is still generally worse than Ineffa or Fischl for the slot. |
 Beidou | Beidou can be considered for her damage reduction, interruption resistance buff, her C1 shield, and some personal damage. However, she is rarely a worthwhile option for damage due to her poor performance in single-target scenarios and her long Burst cooldown. |
Anemo
An Anemo buffer is often used for their buffs and their ability to carry 4pc VV. They often have crowd control as well.
 Sucrose | Sucrose buffs team EM and can hold TTDS or Wandering Evenstar to buff Arlecchino’s ATK. Her EM buff is very strong in Vaporize and Melt teams. She also enables the Hexerei Passive of other Hexerei teammates and allows them to run 4pc Celestial for more buffs. |
Prune | Prune is a strong Anemo teammate for Arlecchino, as she gives a teamwide DMG Bonus buff based on her ATK, and, at C6, a 350 Flat ATK buff to the on-fielder. She also enables the Hexerei Passive of other Hexerei teammates and allows them to run 4pc Celestial for more buffs. |
 Kazuha | Kazuha provides strong grouping and a highly versatile DMG% buff. |
Lan Yan | While Lan Yan does not have a strong EM buff like Sucrose, she still holds TTDS and provides a strong shield to protect Arlecchino. |
 Venti | While not providing any buffs to Arlecchino, with a careful setup, Venti can still group scattered enemies and apply Hydro/Cryo aura on them. This makes him somewhat viable in Arlecchino’s teams against mob content. |
 Lynette | Lynette’s Burst provides a teamwide ATK% buff, off-field damage, and a Taunt that can aid in survivability. However, her Burst tends to absorb Pyro instead of Hydro, so make sure to use a fast Hydro applier such as Xingqiu or Yelan. |
 Xianyun | Xianyun enables a viable Plunging Attack–based playstyle, which also increases survivability by allowing Arlecchino to jump over enemy attacks. Arlecchino should use the N1JP combo, since her Plunging Attacks don’t consume (and thus benefit from) her BoL. Xianyun’s teamwide healing makes Furina a viable Hydro option. |
Geo
Geo units provide defensive utility through shields, Crystallize, and/or Geo Resonance. They often bring other kit-specific benefits, such as buffs or off-field damage.
Xilonen | Xilonen is an outstanding buffer with comfortable setups. Her Elemental Skill’s RES Shred is similar in magnitude to 4pc VV, but has a longer 15s duration and persists across multiple waves. She also holds 4pc Scroll to provide a teamwide DMG Bonus to Pyro and Geo. |
 Zhongli | Zhongli is a very strong defensive option by virtue of his sturdy and long-duration shield. He also provides some offensive utility through his Universal RES Shred. |
 Albedo | As an off-field Geo DPS, Albedo is mostly used in teams where Arlecchino does not trigger reactions to avoid messing up with her Vape/Melt. He is usually paired with a Hexerei teammate to enable each other’s Hexerei Passive. For Albedo, when this teambuilding condition is met, his personal damage increases significantly, and he also gives Arlecchino an up to 12% DMG Bonus buff. Additionally, he is a good 4pc Celestial user to further buff Arlecchino with up to 40% DMG Bonus. |
 Chiori | Chiori tends to perform better than Albedo if there is no other Hexerei unit in the team. She greatly appreciates a Geo teammate that can provide a Geo Construct to improve her Skill’s damage prior to her C1. |
 Kachina | Kachina can hold 4pc Scroll and trigger Pyro Crystallize to provide a teamwide 40% Pyro and Geo DMG Bonuses. This not only buffs Arlecchino, but can also benefit a Pyro or Geo off-field damage dealer such as Xiangling or Chiori. Additionally, this enables another unit to potentially hold 4pc Archaic Petra for another DMG% buff to Arlecchino. |
 Yun Jin | Yun Jin’s Additive Base DMG Bonus is additive to the damage increase from Arlecchino’s BoL, so her buff is not as effective as the ATK buffs from other supports such as Bennett or Nicole. |
Dendro
Arlecchino does not have good synergy with most Dendro units, as building EM for Burgeon takes away from more useful offensive stats.
Additionally, Burgeon and Burning’s high risk of self-damage is highly detrimental given Arlecchino’s limited survivability.
Emilie | Emilie functions as an off-field damage dealer in Mono Pyro teams. Her unique passive greatly reduces Burning self-damage, but shielders are nonetheless appreciated due to Arlecchino’s limited self-sustain. |
 Kirara | Kirara provides a sturdy shield and can funnel particles to Emilie. She also provides a small DMG% buff at C6. |
Reverse Vaporize

Fast off-field Hydro appliers allow Arlecchino to Vaporize a decent amount of her damage whilst also contributing their own off-field damage. The last two slots can be occupied by buffers, off-field damage dealers, or shielders according to preference.
Example Teams
This is not a comprehensive list of teams. The inclusion or exclusion of any given team does not necessarily reflect its power level.

VV Vape teams greatly enhance Arlecchino’s personal damage output, but they require careful execution of Swirl setups to maximize team DPS output. Xilonen provides similar team performance to Kazuha and Sucrose, but her RES Shred lasting across waves of enemies gives her an advantage against multi-wave content. This particular team is fully focused into offense, leaving no defensive utility.
Bennett’s most optimal artifact set is 4pc Instructor, and Yelan’s recommended set is 4pc Noblesse or 4pc Archaic Petra (with Xilonen). However, running 4pc Noblesse on Bennett and 4pc EoSF on Yelan is fine.
Sample Rotation (Xilonen)
Arlecchino E > Bennett E > Xilonen E N2 > Yelan EQ > Bennett Q N1 > Arlecchino N3C 5[N3D] N1
Sample Rotation (Kazuha)
Arlecchino E > Bennett E > Yelan EQ > Bennett N1 Q > Kazuha hEP > Arlecchino N3C 5[N3D] N1
Sample Rotation (Sucrose)
Yelan EQ N1 > Arlecchino E > Bennett EQ > Sucrose N3 ED > Arlecchino N3C 5[N3D] N1

In terms of buffing power, Nicole is mostly a sidegrade to C6 Bennett for Arlecchino. However, she provides a much appreciated shield and has better vertical investment from her Constellations and signature weapon.
A high Constellation Mona, despite dealing much worse personal damage and applying less Hydro application in mobility and duration compared to Yelan, can still compete with her thanks to her good amount of buffs that can last for the whole Arlecchino’s field time.
Sample Rotation (Yelan)
Yelan EQ N1 > Arlecchino E > Nicole EQ > Sucrose N1 ED (Q)¹ > Arlecchino 5[N3C] N3
¹Burst whenever available.
Sample Rotation (Mona)
Arlecchino E > Nicole EQ > Sucrose N1 ED (Q)¹ > Mona Q N1 E > Arlecchino CD² 5[N3D] N3
¹Burst whenever available.
²Dash cancel this Arlecchino’s Charged Attack.

While Lan Yan does not have any innate team buff from her kit, she is still a good option that can hold 4pc VV, TTDS and provide a good shield for Arlecchino
Sample Rotation
Arlecchino E > Yelan E Q N1 > Bennett EQ > Lan Yan 2[E]¹ (Q/N1D)² > Arlecchino 5[N3C] N1
¹Wait here until Bennett’s Burst applies Pyro to Lan Yan. This ensures her Skill can apply Pyro for VV.
²If Lan Yan is C0, use either her Burst or an N1D.

When paired together Nicole and Fischl provide a lot of buffs to Arlecchino: Flat ATK, DMG Bonus (4pc Celestial) from Nicole, and ATK%, EM from Fischl. Moreover, Fischl deals respectable personal damage, while Nicole creates a sturdy shield and gives coordinated attacks from her Burst that scales with Arlecchino’s stats. All of this results in a strong Arlecchino’s Overvape team that is also comfortable to play.
Sample Rotation
Arlecchino E > Yelan EQ N1 > Nicole EN1Q > Fischl E N1 / N2 Q > Arlecchino 5[N3C] N1

Columbina and Ineffa form a formidable core that can be used in many teams while still dealing significant Lunar-Charged damage on their own. 4pc NotSU is a comparable set to 4pc FHW on Arlecchino in this team, as it gives an appreciated Lunar Reaction DMG Bonus to her two Lunar-charged teammates with high-damage profiles.
Sample Rotation (Rosaria)
Arlecchino E > Ineffa E (Q)¹ > Columbina E (Q)¹ > Xilonen E N2 > Arlecchino C 6[N3D] N3
¹Use whenever available, or use each Burst alternatively every other rotation.

Xingqiu is a decent single-target applier for those who do not own Yelan. While his Skill and Burst have long cooldown, he can alternate between them to shorten the rotations and have lower ER requirements. 4pc Scroll should be used on Xingqiu.
Sample Rotation (TTDS Sucrose)
Arlecchino E > Xingqiu Q N1 > Bennett ED¹ Q > Sucrose N1 ED Q/N1 > Arlecchino 2[N1C] 5[N3C]² E > Bennett EQ > Sucrose N1 ED > Xingqiu ED > Arlecchino N3C 2[N5D] N3
¹Dash backwards to avoid the Hydro application from Xingqiu’s orbital Rain Swords.
²Or 5[N3D] N3

C6 Candace provides mobile, off-field AoE Hydro application and a decent Normal Attack DMG Bonus.
Sample Rotation
Arlecchino E > Bennett EQ > Xilonen E N2 > Candace EQ > Arlecchino C 5[N3D] N3
¹First rotation only

Arlecchino can function well in Xianyun teams as a Plunging Attack DPS, though this playstyle does not fully utilize Arlecchino’s kit nor does she have any particular advantages compared to other Pyro units. Xianyun’s teamwide healing allows Furina to gain sizable Fanfare despite Arlecchino’s passive.
Sample Rotation
Furina N1 ED Q > Arlecchino N1 (EQ) E > Xianyun EPQ > Yelan Q N1 E > Arlecchino C 8[N1JP] > Yelan E N2
Forward Melt

As Melt reactions consume more Cryo aura than Vaporize do Hydro aura, it is harder to ensure consistent Melts with Arlecchino’s relatively fast attacks. However, Forward Melt’s high scaling allows damage to be front-loaded effectively even if the aura cannot be maintained, especially in tandem with her powerful front-loaded damage.
Example Teams
This is not a comprehensive list of teams. The inclusion or exclusion of any given team does not necessarily reflect its power level.

The standard Forward Melt team setup for Arlecchino. Citlali should use TTDS if she does not have Starcaller’s Watch. However, because Citlali’s ER requirements are high in this team, she can use Sacrificial Fragments, Prototype Amber or Favonius Codex if players cannot meet her ER requirements from artifacts alone.
The Arlecchino’s NA combo below is one of the easier ones to play with. More optimized combos exist, but they are harder to execute for minimal damage gain.
Sample Rotation (Xilonen)
Arlecchino E > Bennett EQ > Xilonen E N2 > Citlali EQ > Arlecchino C¹ 2[N5D] N5²
¹Can be skipped by a dash for more reliable NA Melts or when she has C2.
²Wait a bit between each N5 for Cryo aura to be applied.
Sample Rotation (Sucrose)
Arlecchino E > Bennett EQ > Sucrose E/N1¹ ED > Citlali EQ > Arlecchino C² 2[N5D] N5³
¹To help set up Cryo aura.
²Can be skipped by a dash for more reliable NA Melts or when she has C2.
³Wait a bit between each N5 for Cryo aura to be applied.
Sample Rotation (Kazuha)
Arlecchino E > Bennett EQ > Kazuha tEP > Citlali EQ > Arlecchino C¹ 2[N5D] N5²
¹Can be skipped by a dash for more reliable NA Melts or when she has C2.
²Wait a bit between each N5 for Cryo aura to be applied.

C0 Nicole is similar to Bennett in buffing Arlecchino, but she offers a stronger shield than Citlali, which can be helpful against powerful enemies. However, Nicole’s Burst is not worth using due to its low multipliers on Arlecchino.
Sample Rotation
Arlecchino E > Nicole E(Q) > Sucrose ED > Citlali EQ > Arlecchino C¹ 2[N6] N3
¹Can be skipped by a dash for more reliable NA Melts or when she has C2.

Using a Double Cryo setup enables Cryo Resonance and allows Arlecchino to get her Melts more reliably. Escoffier is preferred for her good personal damage and low field time requirement, but Layla is not that far off as an alternative.
The Arlecchino’s NA combo below is one of the easier ones to play with. More optimized combos exist, but they are harder to execute for minimal damage gain.
Sample Rotation (Escoffier)
Arlecchino E > Bennett EQ > Escoffier E > Citlali EQ > Arlecchino C¹ 2[N6] N3
¹Can be skipped by a dash if Arlecchino has C2.
Sample Rotation (Layla)
Layla E Q > Arlecchino E > Bennett EQ > Citlali EQ > Arlecchino C¹ 2[N6] N3
¹Can be skipped by a dash if Arlecchino has C2.

C6 Kaeya can enable Arlecchino’s Melts with his fast Cryo application. While the timing with Kaeya is not as lenient as with Citlali, he remains the best Cryo applier after her.
Use 4pc Archaic Petra on Kaeya and pick up the Pyro shard left on the field by Xilonen with a dash.
Sample Rotation (C6 Kaeya)
Arlecchino E > Bennett EQ > Xilonen E N2 > Kaeya E(D)¹Q > Arlecchino C² 5[N3D] N3
¹To get Pyro shard for 4pc AP.
²Can be skipped by a dash for more reliable NA Melts or when she has C2.

This team performs surprisingly well despite Escoffier and Venti providing no buffs to Arlecchino. While Escoffier tends to struggle with removing Bennett’s 2U of Pyro to establish Cryo aura in most scenarios, the Melt setup in this team is enabled by Venti’s strong Anemo application, and his Burst Absorption providing extra Cryo application for Arlecchino.
Sample Rotation
Arlecchino E > Bennett EQ > Venti EQ N1 > Escoffier E > Arlecchino C¹ 2[N6] N3
¹Can be skipped by a dash if Arlecchino has C2.
Overloaded
In this team archetype, Overloaded damage itself is not the main focus; instead, teams rely on raw Pyro and Electro damage, boosted by Chevreuse’s strong, high uptime buffs. However, they have more restrictive teambuilding requirements due to restrictions set by Chevreuse’s passives.
Overloaded’s knockback can scatter light enemies around , so the archetype tends to be more convenient against heavy enemies and Bosses.
Despite the aforementioned drawbacks, Overloaded is a strong archetype that excels against enemies with innate auras such as Hydro, Dendro, or Electro. It also performs well in general without requiring aura management with Arlecchino’s combos.
Example Teams
This is not a comprehensive list of teams. The inclusion or exclusion of any given team does not necessarily reflect its power level.

Fischl and Nicole form a powerful ATK-buffing core in many Chevreuse teams, including Arlecchino’s. Nicole’s durable shield also gives Arlecchino a comfortable gameplay experience.
Sample Rotation
Arlecchino E > Nicole EQ > Fischl N1 E/Q > Chevreuse hE Q¹ > Arlecchino N1C 5[N3D] N3
¹On second rotation and onwards, use Chevreuse before Fischl for 4pc Noblesse buff.

A team with immense offensive power due to Bennett and Chevreuse buffing both Arlecchino and Fischl significantly. Using Ineffa trades Fischl’s higher personal damage for a comfortable shield that is buffed by Bennett’s ATK. With an EM build for Overloaded damage, her performance is not that far off.
Sample Rotation (Fischl)
Arlecchino E > Bennett EQ > Fischl N1 E/Q > Chevreuse (Q)¹ hE N1 > Arlecchino N1C 5[N3D] N3
¹Use whenever available.
Sample Rotation (Ineffa)
Arlecchino E > Bennett EQ > Ineffa E > Chevreuse (Q)¹ hE N1 > Arlecchino N1C 5[N3D] N3
¹Use whenever available.

Durin can be a good replacement for Nicole or Bennett. His main contribution is his RES Shred and good off-field AoE damage. He also enables the ATK-buffing Hexerei Passive of Fischl, and frees Arlecchino from Bennett’s restrictive circle. He also scales well with vertical investment (Constellations and Athame Artis), resulting in much higher team performance than a C6 Bennett.
Sample Rotation
Arlecchino E > Durin 2[E]Q > Fischl N1 E/Q > Chevreuse hE Q¹ > Arlecchino N1C 5[N3D] N3
¹On second rotation and onwards, use Chevreuse before Fischl for 4pc Noblesse buff.

This team is usable if players want a shield for greater comfort and Nicole is not available. Thoma provides good defensive utility through his constantly refreshing shields. Yae generally does not use her Burst in this team, but it can be situationally useful for front-loading damage.
Sample Rotation
Yae E¹ > Arlecchino E > Chevreuse Q hE N1 > Thoma N1 EQ > Yae 3[E] > Arlecchino C 6[N3D]
¹First rotation only
Other Teams (“Mono Pyro”)

These teams forgo reactions altogether, instead focusing on stacking buffers and non-reactive off-field damage dealers. They also have trivially easy setups for 4pc VV and 4pc AP, since Pyro is the only aura on the enemy.
Example Teams
This is not a comprehensive list of teams. The inclusion or exclusion of any given team does not necessarily reflect its power level.

Arlecchino is hyperbuffed in this team by all of her three teammates. Bennett provides massive ATK buffs while both Xilonen and Kazuha offer strong Pyro RES Shred and Pyro DMG Bonus via their kits and artifact sets (4pc Scroll and 4pc VV). Using 4pc AP on Bennett and letting him pick up the shards generated by Xilonen is a DPS gain over using his traditional 4pc NO set.
Sample Rotation
Arlecchino E > Xilonen E N2 > Bennett ED¹Q > Kazuha tEP > Arlecchino C 5[N3D] N3
¹Dash to pick up Pyro shards.

Emilie functions as an off-field damage dealer in Mono Pyro teams. Her unique passive greatly reduces Burning self-damage, but shielders are nonetheless appreciated due to Arlecchino’s limited self-sustain.
Sample Rotation
Arlecchino E > Bennett EQ > Emilie Q/E > Lan Yan E N1 > Arlecchino C 5[N3D] N3

Double Geo teams are comfortable yet effective options, since Geo Resonance increases Arlecchino’s damage while also strengthening shields. Zhongli holds 4pc Archaic Petra to provide a Pyro DMG Bonus and shreds both Pyro and Geo RES. Kachina buffs both Arlecchino and Chiori with 4pc Scroll, and enables Bennett to equip 4pc Archaic Petra if Zhongli is not doing so already.
Sample Rotation (Zhongli)
Arlecchino E N1 > Chiori 2[E] > Zhongli hED N1¹ > Bennett EQ > Arlecchino C 5[N3D] N3
1Zhongli should pick up a Pyro Crystallize shard if holding 4pc AP.
Sample Rotation (Kachina)
Arlecchino E > Kachina N1 E/Q1 > Chiori (Q) 2[E] > Bennett EQ2 > Arlecchino C 5[N3D]
1C2+ Kachina should alternate between her Skill and Burst to bypass her Skill’s cooldown. Otherwise, Arlecchino should perform another N3D string to fit a 20s rotation.
²Dash to pick up Pyro shards if Bennett is holding 4pc AP.

This team frees Arlecchino from Bennett’s circle while still providing high off-field damage from her teammates. Nicole is a stronger buffer than Xilonen for this team while also giving a sturdy shield for Arlecchino. Nicole should hold 4pc Celestial, while the other two teammates use their personal damage sets (4pc Rising Winds for Durin and 4pc Husk/GT for Albedo). If Xilonen is played, put 4pc Celestial on either Durin or Albedo, with the other uses their personal damage set.
Sample Rotation (Nicole)
Arlecchino E > Durin 2[E]Q > Nicole EQ > Albedo E N1 (Q) > Arlecchino C 5[N3D] N3
Sample Rotation (Xilonen)
Arlecchino E > Durin 2[E]Q > Xilonen E N2 > Albedo E > Arlecchino C 5[N3D] N3

A Bennett-less team that focuses more on buffing Arlecchino’s and Durin’s damage with the use of Nicole and Prune.
Sample Rotation (Nicole)
Arlecchino E > Durin 2[E]Q > Nicole EQ > Arlecchino N2¹ > Prune EQ > Arlecchino C 5[N3D] N3
¹To trigger Nicole’s coordinated attack on Arlecchino.
Limited Roster Alternatives
These teams are meant for newer players whose limited roster prevents them from using the teams above; as such, the teams below result in lower damage output.

Even with a full 4-star teammate setup, Arlecchino can still receive plenty of buffs and good survivability. This emphasizes Arlecchino’s flexibility in teambuilding and her beginner-friendly nature.
Sample Rotation
Arlecchino E > Bennett N2 > Kachina N1 E/Q¹ > Bennett EQ > Lan Yan E N1 > Arlecchino C 5[N3D]
¹C2+ Kachina should alternate between her Skill and Burst to bypass her Skill’s cooldown. Otherwise, Arlecchino should perform another N3D string to fit a 20s rotation.
Credits
acerbus114, nikatosaurus, caxia5, polomo, leifa, emiliabyss, kol, nociii, clevernt, rezmir, luke_260, luwunae, Vesera
Team images made with the KQM portrait generator.