Updated for Version 5.7
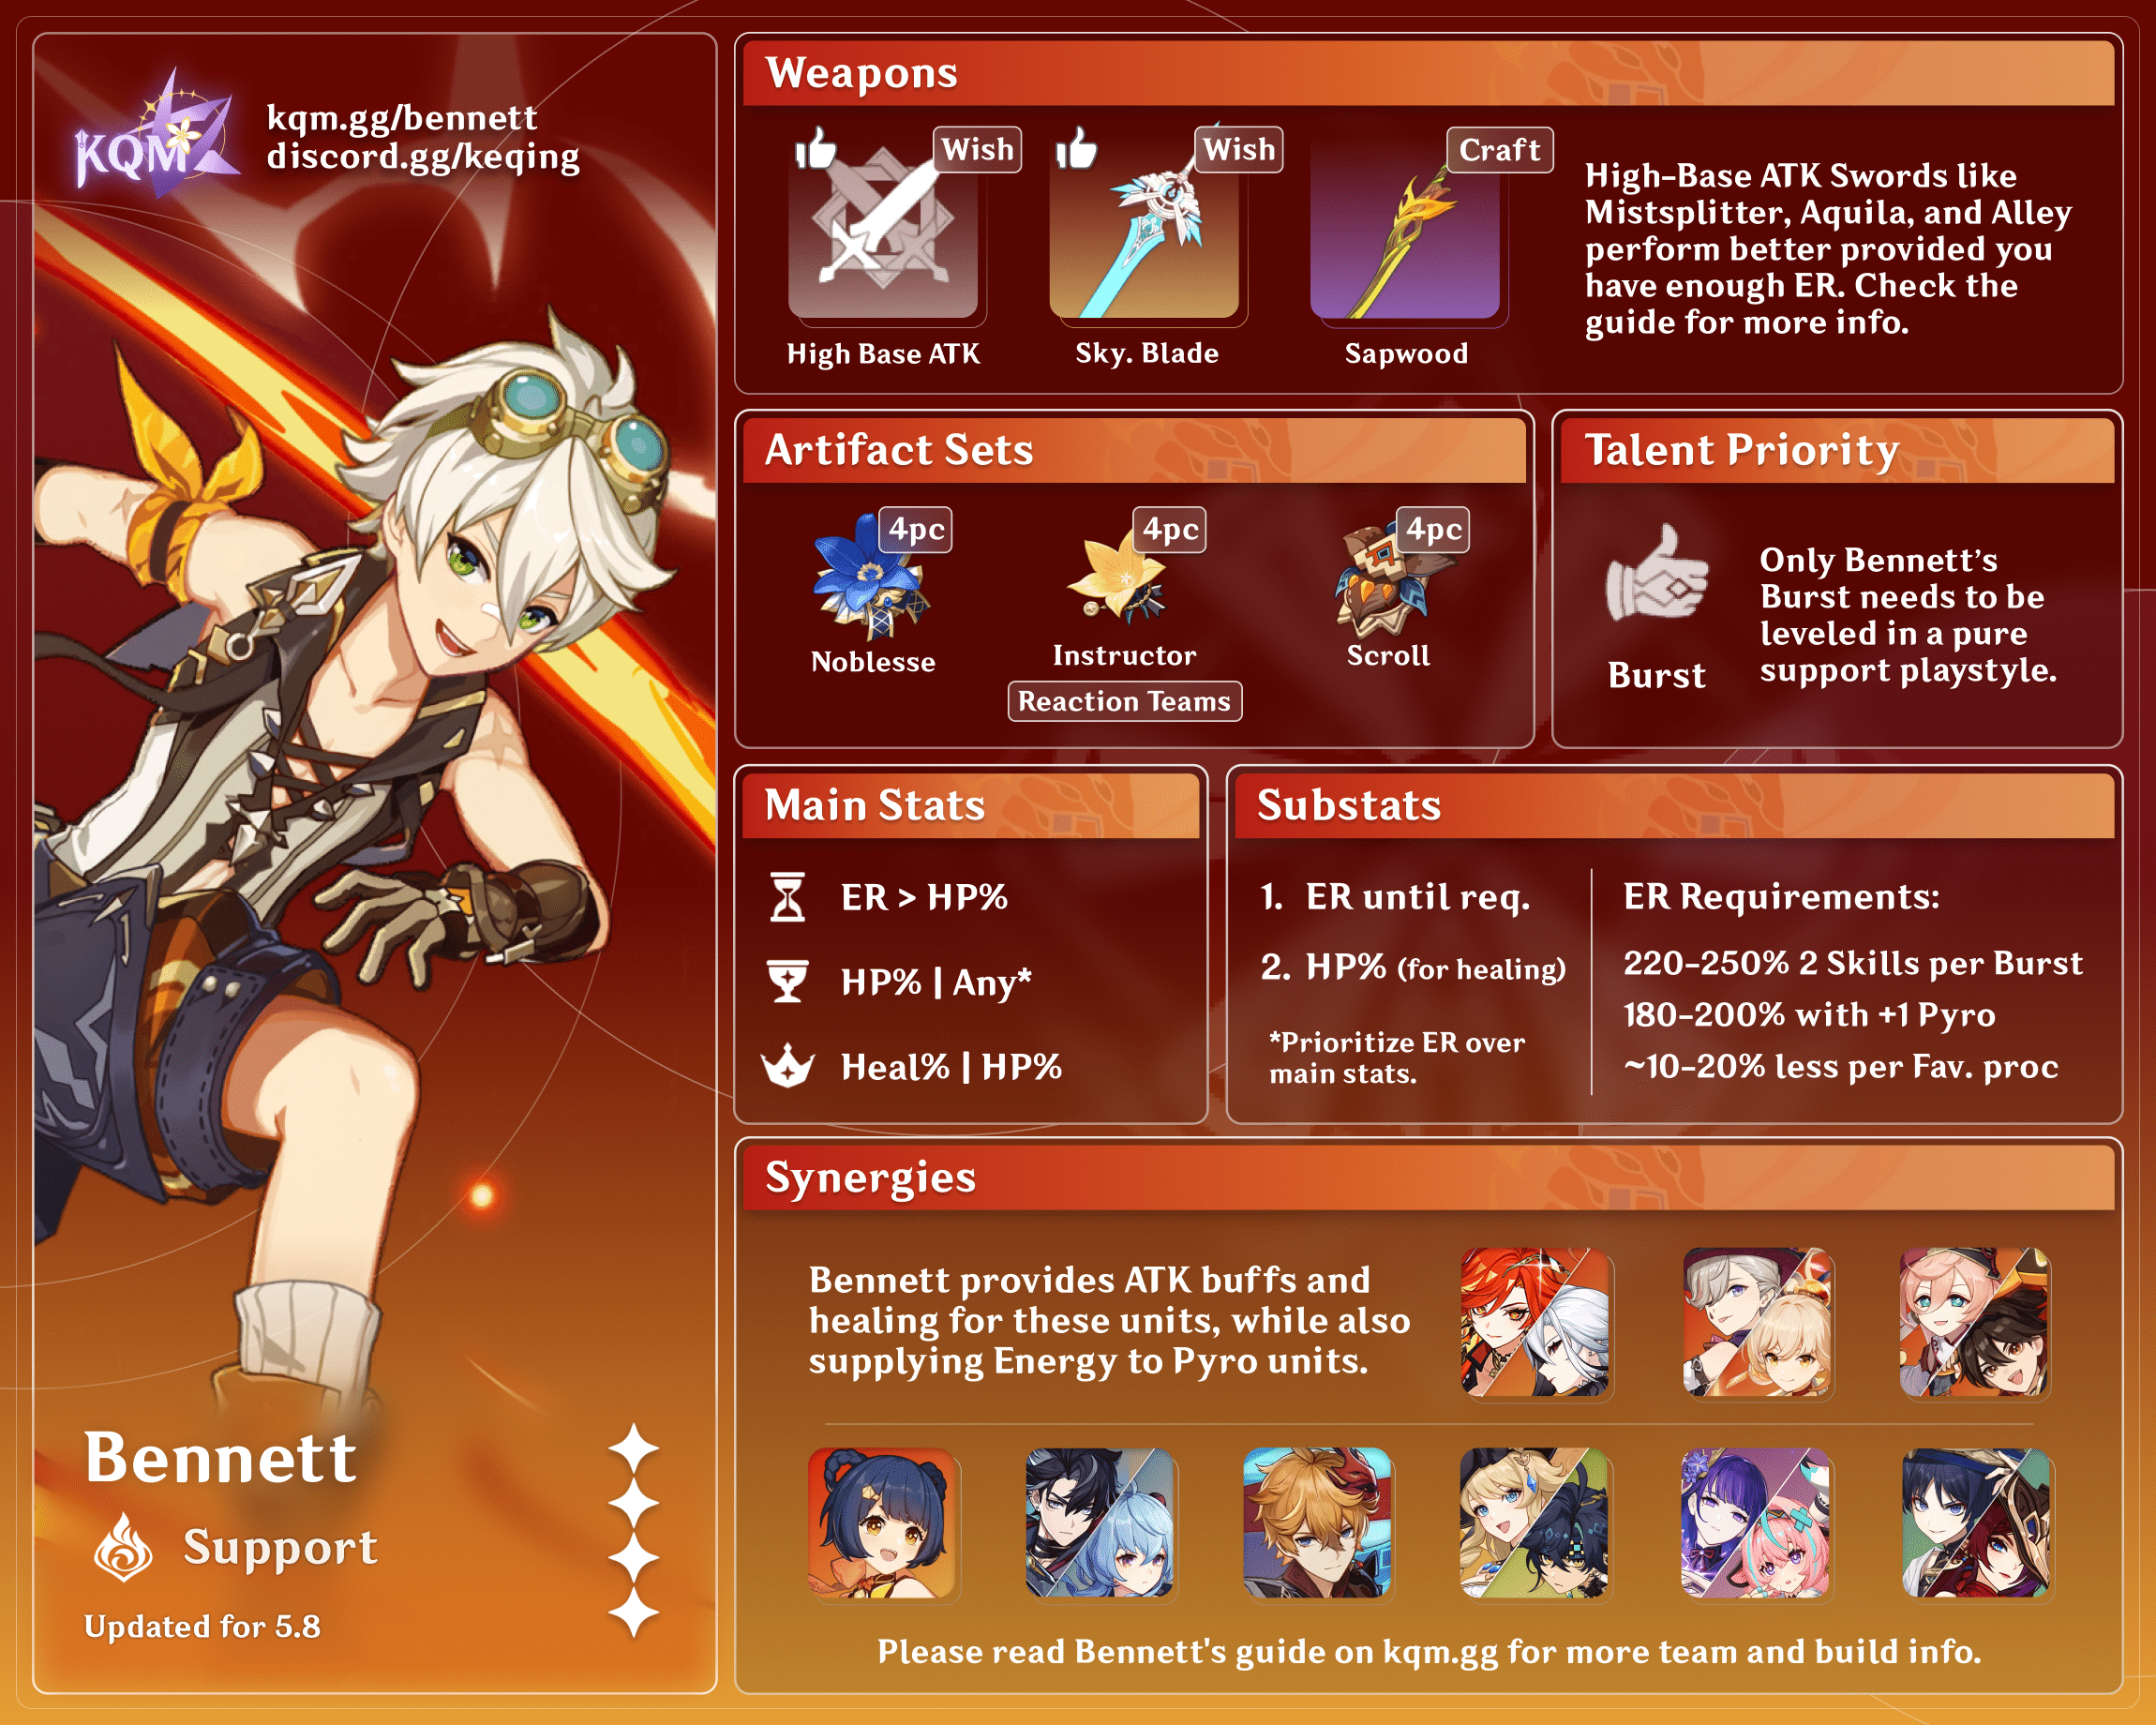
Bennett is a 4★ Pyro Sword character in Genshin Impact who provides excellent support through his healing, Flat ATK buff, battery capabilities, personal damage, and Pyro application. Learn about Bennett’s best builds, weapons, artifacts, and teams in this quick guide.
Note that the information given may change if new discoveries are made. More extensive testing is in progress.
The full-length guide (currently being updated) is available here.
Join our Discord to check on and participate in the theorycrafting process.
Table of Contents
Infographic
Credits: cuppacote, auraolis, KQM TC Staff
Character Overview
Pros
- Offers an unmatched Flat ATK buff with decent uptime, which makes him the BiS buffer for many characters and teams
- Has high Pyro application during his field time, which is useful for reaction setups
- Generates plenty of particles with his short-cooldown Skill
- Has good single-target healing
- Is relatively easy to build as a support
- Can stay on-field to contribute personal damage
Cons
- Does not heal characters with more than 70% HP, making him unable to trigger certain effects
- Wants his C1 to work with certain characters, such as Arlecchino or Furina
- Limits the on-field character to his Circle Impact™
- Self-aura can allow enemy attacks to trigger reactions and deal more damage
- There is only one Bennett
Playstyles
Quickswap or Off-Field Support
Bennett is primarily a support. His Burst provides healing and a Flat ATK buff, and his Skill generates Pyro particles and helps apply Pyro to enemies.
On-Field DPS
Bennett can also be played as an on-field DPS in Forward Melt, Reverse Vape, Overvape, Overloaded, and Burgeon teams. This guide does not go in-depth into most of the team archetypes, so please refer to the Bennett Extended Guide for more information.
Talents
Level and Talent Priority
Burst > Skill >> Normal Attack
Prioritize Bennett’s Burst since its Flat ATK buff and healing scale directly with Talent level. Bennett’s Elemental Skill is leveled on an invested support or on-field DPS build. His Normal Attack Talent is unnecessary to level outside of an on-field DPS build.
Leveling Bennett to 90 can be important in teams where he triggers a large number of Burgeon or Overloaded reactions.
Talent Overview
 Normal Attack | Strike of Fortune
Talent Description
Normal Attack
Performs up to 5 rapid strikes.
Charged Attack
Consumes a certain amount of Stamina to unleash 2 rapid sword strikes.
Plunging Attack
Plunges from mid-air to strike the ground below, damaging opponents along the path and dealing AoE DMG upon impact.
A basic sequence of Sword attacks. It is not recommended to invest in Bennett’s Normal Attack Talent outside of his on-field DPS playstyle.
 Elemental Skill | Passion Overload
Talent Description
Bennett puts all his fire and passion for adventuring into his sword. Results may vary based on how fired up he is...
(Press/Tap)
A single, swift flame strike that deals Pyro DMG.
Hold (Short)
Charges up, resulting in different effects when unleashed based on the Charge Level.
- Level 1: Strikes twice, dealing Pyro DMG and launching opponents.
- Level 2: Unleashes 3 consecutive attacks that deal impressive Pyro DMG, but the last attack triggers an explosion that launches both Bennett and the enemy.
Bennett takes no damage from being launched.
Bennett’s Skill has a low cooldown and consistent particle generation, which makes it essential to batterying. Bennett’s Skill variations all have good Pyro application: 2U from Tap Skill; 2 instances of 1U from Level 1 Hold Skill (and another additional 1U from C4); and 3 instances of 1U from Level 2 Hold Skill.
Generally, it is better to use the Tap variation instead of either Hold variation. Bennett’s Hold Skill can be used to apply Pyro 2 to 3 times in quick succession, which is essential for certain reaction setups. See Combos for further information.
 Elemental Burst | Fantastic Voyage
Talent Description
Bennett performs a jumping attack that deals Pyro DMG, creating an Inspiration Field.
Inspiration Field
- If the health of a character within the AoE is equal to or falls below 70%, their health will continuously regenerate. The amount of HP restored scales off Bennett’s Max HP.
- If the health of a character within the AoE is higher than 70%, they gain an ATK Bonus that is based on Bennett’s Base ATK.
- Imbues characters within the AoE with Pyro.
Characters within Bennett’s Burst radius gain a massive Flat ATK buff, a Pyro self-aura, and a good amount of healing every second. The Burst’s circle applies healing, an ATK buff, and self-aura to the active character every second, and the buffs last 2.1s after being applied.
Please note that the ATK buff from his Elemental Burst scales only with his Base ATK. Bennett’s Base ATK is the sum of his innate ATK stat and weapon’s Base ATK stat. ATK% (and Flat ATK) from weapons and artifacts do not contribute anything to his ATK buff.
Bennett’s Base ATK can be viewed on his stat details page; it is the white number on the character stat screen. The green portion of his ATK stat does not contribute to his ATK buff.
 Ascension 1 Passive | Rekindle
Talent Description
Decreases Passion Overload’s CD by 20%.
A Passive Talent which decreases Bennett’s Elemental Skill cooldown from 5s to 4s. It basically makes end-of-rotation batterying a bit quicker.
 Ascension 4 Passive | Fearnaught
Talent Description
When inside Fantastic Voyage’s circle, Passion Overload’s CD is decreased by 50% and Bennett cannot be launched by this skill’s explosion.
This Talent further lowers his Elemental Skill cooldown if the Skill is cast within his Burst radius. His Tap Skill cooldown is reduced to a mere 2s. Bennett’s A4 Passive makes him an incredible Pyro battery and hastens his primary source of damage as an on-field DPS.
Constellations
 Constellation 1 | Grand Expectation
Constellation Description
Fantastic Voyage’s ATK increase no longer has an HP restriction, and gains an additional 20% of Bennett’s Base ATK.
Bennett’s best Constellation. It removes the HP limit on his ATK buff and adds 20% of his Base ATK to the final ATK buff.
 Constellation 2 | Impasse Conqueror
Constellation Description
When Bennett’s HP falls below 70%, his Energy Recharge is increased by 30%.
A negligible Constellation that slightly lowers Bennett’s ER needs. It is rarely active because his healing almost always keeps him above 70% HP.
 Constellation 3 | Unstoppable Fervor
Constellation Description
Increases the Level of Passion Overload by 3.
Maximum upgrade level is 15.
Very strong for an invested support or on-field DPS Bennett. However, it is not very useful for a support Bennett as he does not need more Elemental Skill damage.
 Constellation 4 | Unexpected Odyssey
Constellation Description
Using a Normal Attack as the second attack of Passion Overload’s Charge Level 1 will perform a follow-up attack.
This additional attack does 135% of the second attack’s DMG.
This Constellation is pretty insignificant because Bennett’s Hold Elemental Skill is generally not recommended to use. However, it can still be useful in some niche situations which require extra Pyro application.
 Constellation 5 | True Explorer
Constellation Description
Increases the Level of Fantastic Voyage by 3.
Maximum upgrade level is 15.
A universally strong Constellation that increases the damage and ATK buff of Bennett’s Elemental Burst. This Constellation provides a noticeable increase in team DPS for both a support and on-field DPS Bennett.
It is recommended to stop here and weigh the potential pros and cons of unlocking Bennett’s final Constellation.
 Constellation 6 | Fire Ventures With Me
Constellation Description
Sword, Claymore, or Polearm-wielding characters inside Fantastic Voyage’s radius gain a 15% Pyro DMG Bonus and their weapons are infused with Pyro.
Bennett’s most contentious Constellation. The arguments for and against unlocking this Constellation are briefly discussed below.
| Pros | Cons |
| – The Pyro Infusion synergizes well with: Diluc, Gaming, Pyro Xinyan, and Bennett himself – Does not override these characters’ Elemental Conversions / Infusions: Alhaitham, Ayato, Candace, Clorinde, Cyno, Iansan’s special Charged Attack, Itto, Kaveh, Navia, Nilou, Noelle, Raiden Shogun, Xiao, Xilonen, C6 Furina, C6 Emilie – Enables a few very niche team compositions, such as Melted / Vaporized Pyro Plunge with Xianyun – The 15% Pyro DMG Bonus buffs the Pyro damage dealers and is particularly good in Mono Pyro teams – Removes the red (!) dot on the Character icon | – Incompatible with Physical DPS builds, notably for: Eula, Razor, Zhongli, Freminet – Overrides these characters’ Elemental Infusions: Ayaka, Chiori, Chongyun, Keqing, C6 Kazuha, C6 Dori, C6 Lynette – Prevents an on-field Melt DPS Bennett build with Chongyun – Currently irreversible, so may conflict with future characters |
Note: While the Pyro Infusion applies for only Sword, Claymore, and Polearm-wielding characters, the 15% Pyro DMG Bonus buff applies to any character regardless of their weapon.
Combos
Combo Notation
- N = Normal Attack
- C = Charged Attack
- A = Aimed Shot
- P = Plunging Attack
- hP = High Plunge
- lP = Low Plunge
- E = Elemental Skill
- tE = Tap Skill
- h1E = Level 1 Hold Skill
- h2E = Level 2 Hold Skill
- Q = Elemental Burst
- D = dash (cancel)
- J = jump (cancel)
- W = walk (cancel)
- > = switch character
- ( ) = these actions are optional; please refer to the notes below
- [ ] = repeat these actions the specified number of times
| tEQ | Bennett should generally use this combo when he is the only Pyro unit on the team. He catches the Energy particles generated from his Elemental Skill before swapping to another character. For players with low ping, dashing in between the Skill and Burst use may be necessary for Bennett to drain his Energy before catching the particles. |
| Q tE | This combo lets Bennett battery another teammate such as Xiangling. |
| Q h1EN1 or h1EN1 Q | Bennett’s Level 1 Hold Skill at C4 can be used to quickly apply 3 instances of Pyro application (1U each) in a short time. This allows him to clear almost any existing aura applied by other teammates. Coupled with his 2U worth of Pyro from his Burst, Bennett can easily establish a Pyro aura for further reaction setups such as 4pc VV Swirl or 4pc Scroll. At the end of a rotation, a Level 1 Hold Skill also guarantees that 3 Pyro particles will be generated for batterying purposes. Otherwise, a Tap Skill is preferred. |
| Q tE N1 or tEQ N1 | Another setup combo that utilizes Bennett’s C6 Infusion to apply Pyro instead of using his C4’s Level 1 Hold Skill. From an Elemental Application perspective, this gives the same amount of Gauge Units as the above method; however, Bennett’s normal Normal Attack can trigger teammates’ coordinated attacks that can wipe out the newly applied Pyro. As such, this combo is not recommended to use with characters such as Yelan, Xingqiu, Beidou, or C6 Fischl. |
| (N#) tE spam | This combo is used in on-field DPS Bennett teams. When Bennett is paired with Xingqiu, Yelan, Beidou or C6 Fischl, weave 1 to 3 Normal Attacks between Skill uses to maximize damage from reactions. |
Self-Aura Mechanics
Bennett’s Burst applies Pyro aura onto the active character every 1s along with his other utility, like his healing and ATK buff. The self-application is both an advantage and a disadvantage depending on the scenario. On one hand, it can allow reactions that trigger special effects on self-auras such as Anemo Absorption (Kazuha’s A1 and Burst, Lynette’s Burst, etc.) or direct reaction damage (Jean’s “Sunfire” Pyro Swirl, Dori’s Burst’s Overloaded, etc.), or it can cleanse unwanted auras. On the other hand, Bennett’s self-Pyro application can be used against the players by enabling reactions on enemy attacks, thus dealing additional damage and annoying effects on your character (Hydro Tulpa’s “Vape nuke,” Thunder Manifestation’s Overloaded, etc.).
Artifacts
ER Requirements
Calcs for ER requirements can be found here (last updated for Version 5.7).
| Solo Pyro | Double Pyro | Triple Pyro | With Raiden | On-field (with 4+ Skill uses) |
| 195-255% | 175-220% | 160-190% | 145-210% | 100-135% |
The ER requirements given in the table above assume a general 20s rotation setup. 1 to 2 Favonius procs from teammates are assumed when applicable. It is not recommended to run Solo Pyro teams or some Double Pyro variants with low particle generation without Favonius users.
A 25s rotation with teammates that have good particle generation (Fischl, Nahida, etc.) lowers Bennett’s ER requirements by ~20%.
A shorter rotation with teammates that do not reliably generate particles (Zhongli, Xiangling, etc.) increases Bennett’s ER requirements by ~30–50%.
Use the Energy Recharge Calculator to determine exact requirements for your team and rotation. For more details on how Favonius weapons will affect your team, please use Ac1d’s Favonius Mastersheet.
Artifact Stats
Note: Bennett’s Elemental Burst ATK buff only scales with his Base ATK (Bennett’s inherent ATK stat plus his Sword’s primary Base ATK stat). ATK% and Flat ATK from artifacts or weapons do not contribute to his buff.
Healing Support
 Sands |  Goblet |  Circlet |
| ER / HP% | HP% | Healing Bonus / HP% |
Stat Priority: ER (until requirements) > HP% >> ATK% = EM > CRIT
As a healing support, an ER Sands is usually necessary. In cases where his ER requirement can be met through substats alone, an HP% Sands can provide more healing instead.
Invested Support or DPS
Sands | Goblet | Circlet |
| EM* / ATK% / ER | Pyro DMG Bonus | CRIT Rate or CRIT DMG |
Stat Priority: ER (until requirements) > CRIT > EM ≥ ATK% > HP%
*As an invested support or on-field DPS, an EM Sands is usually Bennett’s best option in teams where he triggers reactions. However, an ATK% Sands provides more flexibility since Bennett is not the trigger in all his teams. An ER Sands is likely necessary in cases where Bennett’s ER requirement is high, since his Burst is very important.
Burgeon / Overloaded Trigger
Sands | Goblet | Circlet |
| EM* / ER | EM | EM |
Stat Priority: ER (until requirements) > EM > CRIT > ATK% > HP%
*With a high Burgeon / Overloaded ownership, Bennett can use a full EM build to maximize his reaction damage. Meeting his ER requirements is important as his Burst’s ATK buff is still relevant, and it also decreases his Skill cooldown as well as enables his C6’s Infusion, allowing for more frequent Pyro application.
Artifact Sets
Reccomended Sets
 4pc Noblesse Oblige (NO) | 4pc Noblesse Oblige is a great addition to Bennett’s buffing capabilities since it provides a teamwide ATK% buff. This is typically Bennett’s best set, unless his team does not benefit from the ATK% buff. |
 4pc Scroll of the Hero of Cinder City (Scroll) | 4pc Scroll has comparable buffing to 4pc NO on ATK-scaling damage dealers. It can also buff HP, DEF, or EM-scaling characters with the DMG Bonus buff, making it notable in teams where the DPS units do not benefit from 4pc NO. In teams with Natlan characters, the 2pc effect can be triggered and reduce Bennett’s ER requirements by a decent amount. |
 4pc Instructor | 4pc Instructor can be optimal in teams where Elemental Mastery is important for reaction-based DPS units. If another character on the team can hold 4pc NO, this option is better for overall team DPS, like in some Reverse Vape teams. |
Other Sets
 4pc Thundering Fury (TF) | 4pc Thundering Fury is used in Bennett’s on-field DPS playstyle if he is played with off-field Electro units like Fischl or Lisa. |
 4pc Crimson Witch of Flames (CW) | 4pc Crimson Witch is a great set for an on-field DPS build in Vaporize and Melt teams. With his low Skill cooldown, Bennett can consistently maintain the full 3 stacks of the 4pc effect. |
 4pc Marechaussee Hunter (MH) | 4pc Marechaussee Hunter is another good set for Bennett’s on-field DPS build in teams with Furina. |
 4pc Long Night’s Oath (LNO) | A niche set used for Bennett’s special Plunging playstyles enabled by Xianyun. Bennett can easily maintain the full stacks of the set thanks to his low Skill cooldown. |
 4pc Gilded Dreams (GD) 4pc Flower of Paradise Lost (FoPL) | These sets should only be used in Burgeon teams where Bennett is the on-field Burgeon trigger. Bennett’s Burgeon damage will be higher due to the 2pc EM bonus and 4pc set effect. 4pc Gilded Dreams can be used in his other Vape / Melt teams thanks to its useful EM and ATK% buff. |
 4pc The Exile | 4pc Exile is a useful support option for newer players. Other options like 4pc NO and 4pc Instructor are still preferred to maximize team DPS. |
 4pc Maiden Beloved | Bennett already heals enough without this set, so it is generally not recommended to run 4pc Maiden Beloved. However, Bennett can opt to use this set in Furina teams to overcap teammates’ healing and activate Furina’s A1 Passive. |
Weapons
Note: Weapon Base ATK is displayed at Level 90.
Recommended Swords
| Sword | Base ATK | Notes |
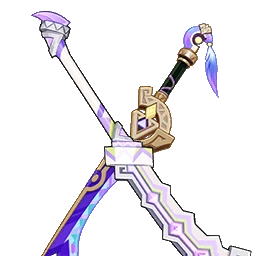
 5★ Mistsplitter Reforged | 674 | This Sword shares the highest Base ATK among Swords in the game, which maximizes Bennett’s potential ATK buff. Its secondary CRIT DMG stat and the passive’s Elemental DMG Bonus make it the Best-in-Slot option for any build when Bennett’s ER requirements can be met through artifacts alone. |
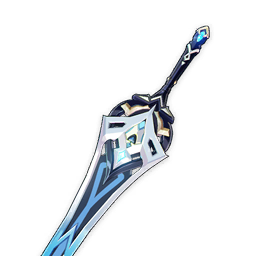
 5★ Azurelight | 674 | Azurelight shares the same Base ATK with Mistsplitter but gives CRIT Rate as the secondary stat instead. Bennett cannot utilize the full passive of this Sword in his on-field DPS playstyle due to the Energy restriction, making its performance generally weaker than Mistsplitter. However, his Burst can take advantage of the full passive, allowing Azurelight to become the best option for a Vape / Melt Burst nuke. |
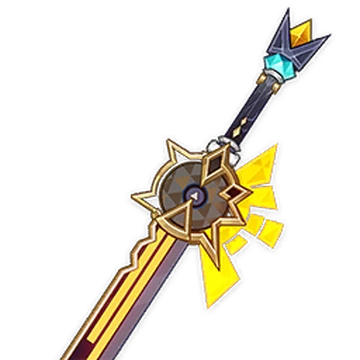
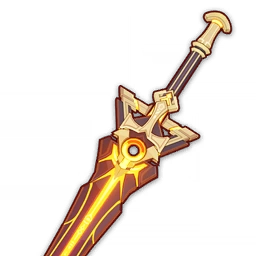
 5★ Absolution | 674 | Absolution also has the same Base ATK and 44.1% CRIT DMG secondary stat as Mistsplitter Reforged, but its 20% CRIT DMG passive is generally worse than Mistsplitter’s passive. |
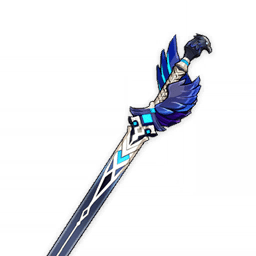
 5★ Aquila Favonia | 674 | Aquila Favonia shares the same 674 Base ATK, but its passive and Physical DMG% secondary stat make it the least preferred option among the 674 Base ATK Swords. |
 5★ Skyward Blade | 608 | Skyward Blade is a great option when Bennett’s ER needs are high because of its high Base ATK and significant ER secondary stat. |
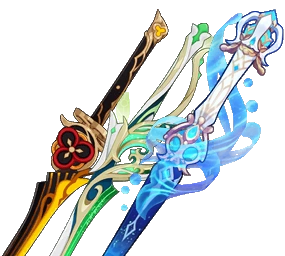
 5★ Freedom-Sworn | 608 | Freedom-Sworn’s buffs cannot be triggered in Bennett’s teams where he does not trigger two reactions in a typical rotation, which include but are not limited to Mono Pyro, Anemo Hypercarry, Mono Geo, Childe Reverse Vape, and Melt Ganyu. Its high Base ATK still makes it better than his free options, nonetheless. Freedom-Sworn is particularly good for Bennett when he triggers high amounts of reactions thanks to its EM secondary stat. |
 5★ Peak Patrol Song | 542 | Do 2 Normal Attacks on Bennett to trigger the weapon’s passive. Peak Patrol Song is a potent support weapon on Bennett with a teamwide DMG Bonus buff that makes up for its relatively low Base ATK. This weapon is most notable at high refinements, where it can surpass other Swords with 674 Base ATK in terms of buffing capability. Bennett should stack DEF main stats and substats to increase the weapon’s passive. |
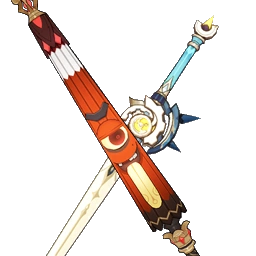
 4★ The Alley Flash | 620 | The Alley Flash is the 4-star Sword with the highest Base ATK in the game. Its EM secondary stat also helps an on-field DPS Bennett that triggers Elemental Reactions. |
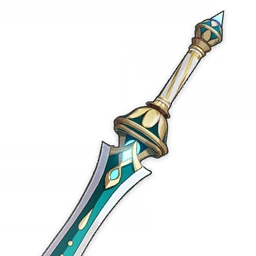
 4★ Sapwood Blade | 565 | Bennett’s Best-in-Slot free option. With the second-highest Base ATK among 4-stars and a vital ER secondary stat, Sapwood Blade is ideal for Bennett’s ATK buffing capabilities while helping meet his ER requirement. As a craftable weapon, every player has access to it after completing the prerequisite World Quests in Sumeru. |
 4★ Favonius Sword | 454 | Favonius Sword can be Bennett’s best option when his team has incredibly high ER requirements. The batterying capability of Favonius Sword can offset its lower Base ATK by allowing more investment into his teammates’ damage. |
Other Swords
| Sword | Base ATK | Notes |
 5★ Haran Geppaku Futsu | 608 | Haran Geppaku Futsu can provide a substantial boost to Bennett’s personal damage in an invested support or DPS build thanks to its high Base ATK, CRIT Rate substat, and decent passive |
 5★ Summit Shaper | 608 | A high Base ATK stat stick with a decent ATK% secondary stat that helps with Bennett’s damage output. However, maximizing its passive’s uptime requires a shielder, which is uncommon outside of Lyney and Ganyu teams. |
 5★ Jade Cutter | 542 | Jade Cutter possesses the lowest Base ATK among 5-star Swords, and a lower Base ATK than 4-star Swords like Sapwood Blade. It can still be good in an on-field DPS playstyle, however. |
 Other 5-star CRIT Swords with 542 Base ATK | 542 | Uraku Misugiri, Light of Foliar Incision, Splendor of Tranquil Waters Other good CRIT stat stick options for Bennett’s DPS build with similar performance to each other, but below other Swords such as Jade Cutter, Freedom-Sworn, or Mistsplitter. Splendor of Tranquil Waters requires Furina for reliable passive activation, and it performs noticeably worse without the passive activated. |
 5★ Key of Khaj-Nisut | 542 | Although the Key of Khaj-Nisut’s Base ATK is lower than other Swords, the HP% substat helps maximize Bennett’s healing. Triggering its passive effect, which grants an EM buff to his team, is quite difficult on the first rotation, but easier starting from the second rotation. A decent choice for teams that value EM and healing over Bennett’s ATK buff, like some Burgeon teams. |
 4★ Finale of the Deep | 565 | Finale of the Deep, a craftable Sword from Fontaine, has the same Base ATK as Sapwood Blade, but its ATK% secondary stat and passive buffs do not increase Bennett’s Flat ATK buff. Stick with Sapwood Blade as the free and accessible option unless opting for a F2P DPS-oriented build. |
 4★ Calamity of Eshu, Sturdy Bone | 565 | Calamity of Eshu and Sturdy Bone are also high Base ATK stat stick 4-star options. However, they do not have an ER secondary stat like Sapwood Blade, and their passives are not as good as Finale of the Deep’s since a large portion of Bennett’s damage comes from his Skill and Burst. |
 4★ Prototype Rancour | 565 | Every player is given a Prototype Rancour at AR10, which makes it a fine option for newer players who do not have access to Sapwood Blade yet. Having the same Base ATK as Sapwood Blade means Prototype Rancour can enable the same ATK buff, but it makes it more difficult to fulfill Bennett’s ER requirements. |
 4★ Wolf-Fang | 510 | Wolf-Fang is a good option for Bennett’s on-field DPS playstyle, especially with 4pc TF, where he can spam more Elemental Skills to utilize the big CRIT Rate buff that the weapon passive offers. At higher refinements, this Sword is competitive with other 5-star Swords |
 4★ Fleuve Cendre Ferryman | 510 | A F2P choice that gives a lot of ER to fulfill Bennett’s Energy needs; however, given its low Base ATK and lack of team utility, it is not worth using over Sapwood Blade or Favonius Sword — weapons that provide more to Bennett’s teams. |
 4★ Xiphos’ Moonlight | 510 | Xiphos’ Moonlight, despite having a mid-low Base ATK, is still a good weapon for Bennett with its valuable EM secondary stat and teamwide ER buff from its passive. It is one of Bennett’s best Swords in Burgeon teams, where his Burst’s ATK buff is not as important as his reaction damage. |
 4★ Iron Sting, Toukabou Shigure | 510 | Other good options for an on-field reaction DPS build with EM and DMG Bonus stats. They perform similarly to each other. |
 3★ Harbinger of Dawn | 401 | A niche but great F2P option for the Plunging DPS playstyle with Xianyun, where Xianyun’s Additive Base DMG Bonus buff makes Harbinger of Dawn’s low Base ATK less of an issue. It performs on par with his top-performing 5-star Swords when its passive is kept at high uptime, which is relatively easy with Xianyun’s great healing. |
Teams
Rotation Notation
- N = Normal Attack
- C = Charged Attack
- A = Aimed Shot
- P = Plunging Attack
- E = Elemental Skill
- tE = Tap Skill
- h1E = Bennett’s Level 1 Hold Skill
- h2E = Bennett’s Level 2 Hold Skill
- Q = Elemental Burst
- D = dash (cancel)
- J = jump (cancel)
- W = walk (cancel)
- > = switch character
- ( ) = these actions are optional; please refer to the notes below
- [ ] = repeat these actions the specified number of times
Teambuilding
- Bennett’s massive ATK buff makes him one of the most contested units in teambuilding. Most ATK-scaling units can benefit from Bennett’s buffing and healing capability. His good particle generation can also help Pyro units with their Energy management.
- Oftentimes, Bennett spends little field time to cast his abilities and then stays off-field for the rest of the rotation.
- Bennett can act as the team’s on-field DPS who can both deal competitive damage and support the team with his ATK buff and healing.
- There are numerous teams where Bennett is good, thus the guide will only list the most noteworthy of them.
- And hell breaks loose from here.
Mono Pyro
Bennett is essential to the Mono Pyro team archetype. Mono Pyro teams focus on raw Pyro damage instead of reaction-based damage from Melt or Vaporize. The frequent generation of Pyro particles considerably lowers the ER requirements for the Pyro characters on the team. C6 Bennett also enables characters like Xinyan to become on-field Pyro DPS units through his Burst’s Pyro Infusion.
Notable Teammates
Pyro
Xiangling | Xiangling is notable for dealing considerable off-field damage and providing Pyro RES Shred and Pyro DMG Bonus to her Pyro teammates. The particles generated by other Pyro units in return help her build lower ER to focus more on CRIT and ATK stats. |
 Lyney | Bennett is Lyney’s best teammate in Mono Pyro teams (and arguably Lyney’s best partner everywhere) thanks to his big buffs and healing to counter Lyney’s self–HP drain. Lyney’s passive incentivizes the use of off-field Pyro characters (e.g. Xiangling, Mavuika), but Xilonen or Kazuha can replace them without issue. |
 C6 Chevreuse | Even though Chevreuse’s designated team archetype is Pure Overloaded, a C6 Chevreuse can still be a solid buffer thanks to her powerful Pyro DMG Bonus of up to 60%. Nonetheless, it is recommended to use her Pure Overloaded teams when applicable. |
Thoma | While not a Pyro DPS, being a shielder allows Thoma to fit nicely into Mono Pyro teams where the on-field units prefer interruption resistance to help dish out their Normal Attack chains. His C6 also buffs Normal, Charged, and Plunging Attacks. However, using Thoma is often just a comfort pick, and the difference between him and other offensive options can be felt. |


Anemo
An Anemo unit shreds Pyro RES via 4pc Viridescent Venerer and can provide further buffs through their kit. Kazuha is notable for providing Pyro DMG Bonus through his A4 Passive.


Other Flex
☆ Emilie | Emilie can be used to contribute significant personal damage in a Mono Pyro team. She can also stay on-field to benefit from Bennett’s Flat ATK buff and, with his C6, to deal some decent Pyro Normal Attacks. |
☆ Xilonen | Xilonen shreds Pyro RES and gives Pyro DMG Bonus (via 4pc Scroll) with usually full uptime in Mono Pyro teams. This makes her one of the best supports that is both comfy and effective. |
  Chiori, Albedo | Chiori or Albedo can work as an off-field Geo DPS. They are best paired with a second Geo unit for Geo Resonance, especially one who can summon a Geo Construct in the case of C0 Chiori. |
 Zhongli | Zhongli is an amazing shielder who also provides Universal RES Shred. He is great at breaking Geo shields as well. |
 Kachina | Kachina is a F2P option who can trigger the full effect of 4pc Scroll to give the entire team 40% Pyro and Geo DMG Bonus. |
☆ Citlali | Despite being a good Forward Melt enabler, Citlali can still work great as a support for Mono Pyro teams. Her excellent buffs include 4pc Scroll (which she can activate the full effect of), TTDS / Starcaller’s Watch, and 20% Pyro RES Shred to the Pyro carries. Her shield is also useful for characters who want to perform their combos unbothered. |
Example Teams
This is not a comprehensive list of teams. The inclusion or exclusion of any given team does not necessarily reflect its power level.

As a Charged Shot DPS, Lyney requires interruption resistance from a shielder like Zhongli to avoid being staggered out of his charging animation. In this team specifically, using Kazuha’s Burst is a DPS loss in single-target scenarios; skipping the Burst allows Lyney to fit one more Charged Shot in the rotation. Xilonen is an alternative to Kazuha with a similar buffing volume. She can also enable Geo Resonance, which would result in higher team DPS in single-target scenarios.
Sample Rotation (Kazuha)
Lyney C > Zhongli hED N1 > Bennett tEQ > Kazuha (Q) tEP > Lyney 2-3[C]¹ QE²/C³ E
¹Do 2 Charged Shots if Kazuha’s Burst is used
²Cancel Lyney’s Burst with his Skill after colliding with enemies
³You can substitute Lyney’s Burst with an additional Charged Shot if his Burst is unavailable
Sample Rotation (Xilonen)
Lyney C > Xilonen E N2 > Bennett tEQ > Zhongli hED N1 > Lyney 3[C] QE¹/C² E
¹Cancel Lyney’s Burst with his Skill after colliding with enemies
²You can substitute Lyney’s Burst with an additional Charged Shot if his Burst is unavailable

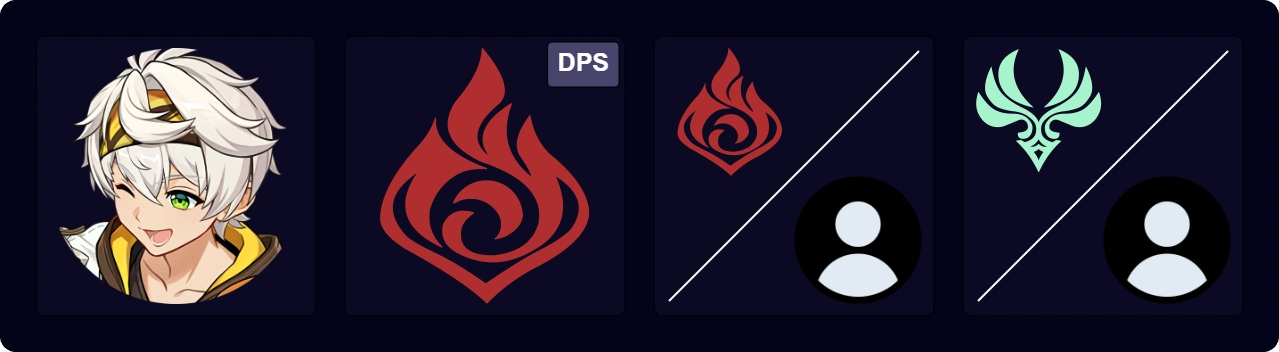
A classic Mono Pyro team. Klee is a potent on-field Mono Pyro DPS character. Kazuha provides crucial buffs, grouping, and 4pc Viridescent Venerer RES Shred. Xiangling provides great off-field DPS with her Burst, which pairs well with Klee’s semi-ranged on-field playstyle.
Sample Rotation
Bennett tE > Kazuha tEPQ > Bennett Q tE > Xiangling Q E > Kazuha hEP > Klee N1 EQ (E) 4[N1C] N1
Variants of this rotation can be found in the Klee Extended Guide.
Chevreuse Overloaded

With the introduction of Chevreuse, Overloaded teams have become competitive for many Pyro and Electro damage dealers. While these characters cannot trigger Vape / Melt or Aggravate for increased Talent damage, Chevreuse’s various buffs with high uptime compensate for it.
As many Pyro and Electro DPS units scale with ATK, Bennett is undoubtedly one of the most popular teammates for these Pure Overloaded teams. Besides the common support role, Bennett can take the field to perform as a decent damage dealer.
Notable Teammates
 Chevreuse | The bread and butter of modern Overloaded teams, capable of providing 40% Pyro / Electro RES Shred from her A1, up to 40% ATK from her A4, and 60% Pyro / Electro DMG Bonus from her C6. Chevreuse requires the team to be made up of entirely Pyro and Electro characters, and her RES Shred requires periodical Overloaded reactions to maintain its uptime. Therefore, an off-field Pyro unit is highly appreciated for a team consisting of Chevreuse, Bennett, and an on-field Electro DPS, as neither Bennett nor Chevreuse has meaningful off-field presence |
On-Field Pyro
Similarly to Mono Pyro teams, all Pyro characters can be used in Overloaded to capitalize on the large amounts of buffs from Chevreuse and Bennett.


Off-Field Pyro
Pyro characters with off-field application can be useful for Electro DPS units that have a relatively long field time.


On-Field Electro
For Energy purposes, on-field Electro DPS characters like to be paired with a second Electro. This creates a dilemma for a team of Chevreuse, Bennett, and an on-field Electro — players either use an off-field Pyro character to maintain Chevreuse’s RES Shred and have the solo Electro character bear the cost of high ER requirements, or they can use a second Electro and potentially have poor uptime on Chevreuse’s RES Shred if the primary Electro unit requires a lot of field time. Fortunately, most Electro DPS characters can freely swap back to Bennett to trigger Overloaded.


Off-Field Electro
Necessary for on-field Pyro DPS characters. Such characters can also be paired with on-field Electro units, or even with another off-field Electro unit in teams where Bennett takes the field. Iansan and Sara have close to no off-field Electro application, so they are best paired with other Electro units.


Example Teams
This is not a comprehensive list of teams. The inclusion or exclusion of any given team does not necessarily reflect its power level.

This is one of Arlecchino’s best teams in single-target performance due to the enormous buffing Bennett and Chevreuse provide to both Arlecchino and Fischl. The sample rotation below does not have Fischl snapshot Chevreuse’s ATK in the first rotation. To make her snapshot the buff, trigger an Overloaded with her Charged Attack first and rotate to Chevreuse before her.
Note that if Bennett is not C1, Arlecchino will not receive his ATK buff once her HP drops below 70% as she does not receive healing from teammates.
Sample Rotation
Arlecchino (EQ)¹ E > Bennett tEQ > Fischl N2 E/Q > Chevreuse (Q) hE > Arlecchino C 5[N3D] N3
¹If healing is needed

Varesa can freely swap to Bennett to refresh Overloaded for Chevreuse’s RES Shred uptime without interrupting her combo. This makes Bennett one of the best options for Varesa–Chevreuse teams.
Sample Rotation
(Varesa N1)¹ > Chevreuse (Q)² hE > Iansan E N1 Q > Bennett tEQ > Varesa EN1P EN1P sQ CP CP EN1P > Bennett tE > Varesa EN1P EN1P sQ
¹First rotation only
²Not needed for second rotation and onwards

An on-field Bennett team where Lisa triggers Overloaded from off-field to maintain Chevreuse’s RES Shred. Xiangling is a good damage dealer that provides slight buffs to Bennett. Her ER requirement in this team is also low thanks to Bennett’s multiple uses of his short-cooldown Skill.
Sample Rotation
Lisa hEQ N1 > Bennett Q tE > Chevreuse Q 3[hE]¹ > Xiangling Q ED > Bennett (N#) tE spam
¹If Chevreuse is not C4, you can use N3 while waiting to catch particles, or swap early to feed them to Xiangling
Reverse Vaporize & Overvape
In Vaporize-focused teams, Bennett can serve as the premier support for on-field ATK-scaling units or become an on-field Pyro DPS himself (especially at C6). Bennett’s Pyro application allows Anemo characters to shred enemy Pyro RES with 4pc Viridescent Venerer prior to bringing the Pyro DPS on-field.
Electro characters with sufficient application can turn the team into Overvape, a sub-archetype of Reverse Vape. Because Pyro reacts with Electro before Hydro, the Electro aura acts as a “brake,” preventing Pyro units from overconsuming the Hydro aura. This is particularly useful when the Hydro application is on the weaker side compared to the Pyro application. Additionally, Pyro units can benefit from the extra Overloaded damage, which raises the value of EM stats on them.
Notable Teammates
Pyro DPS
Pyro DPS characters benefit substantially from Bennett’s Flat ATK buff and his Pyro DMG% buff if Bennett is C6. Bennett can reduce their ER requirements by funneling Pyro particles with his Elemental Skill, and he provides healing to keep them healthy. At C6, Bennett can enable any Sword / Polearm / Claymore user to deal Pyro-infused Normal, Charged, and Plunging Attacks, which also benefits some Pyro DPS characters that either do not have Pyro Infusion / Conversion, like Xinyan and Gaming, or have their Pyro Infusion / Conversion locked behind their Burst, like Diluc.
Pyro units with strong Pyro application, such as Klee and Yanfei, may need a second Hydro unit or an Electro unit to make sure they can Vaporize all their hits.


Hydro Enabler
A Hydro character is needed to apply Hydro for Pyro abilities to Vaporize. An on-field Hydro character (e.g. Childe, Ayato, or Kokomi) can be used for off-field Pyro units such as Xiangling. Otherwise, use off-field Hydro appliers for on-field Pyro DPS units (including Bennett).
A Double Hydro pair can be used to increase Vaporize consistency and the damage dealt by each Hydro unit, through the reduced ER requirements. The most popular core includes two of Furina, Yelan, and Xingqiu.


Anemo
An Anemo character is crucial for 4pc Viridescent Venerer RES Shred. Absorbing Hydro in these characters’ Bursts can enable more consistent Vaporize ownership for the Pyro DPS.
 Jean | Jean’s Burst applies Anemo to the active character, which can react with the Pyro self-aura from Bennett’s Burst, resulting in Pyro Swirl off the on-fielder. This interaction (colloquially called “Sunfire”) allows Jean to deal good Vaporized Pyro Swirl damage with adequate Hydro application, and extra Overloaded damage if an Electro character is used. |
 Xianyun | Xianyun provides healing and 4pc VV while also enabling a unique Plunging playstyle, which many Pyro DPS characters enjoy. With C6 Bennett’s Infusion, a DPS can deal powerful Vaporized Plunges, regardless of their original kit |


Electro
Electro characters can be used for their application, which can help stabilize the Vaporize reactions, or for their own damage and other utility.


Flex
As long as a character does not interfere with the Vape reactions, they can be used as a flex pick to contribute their personal damage, buffing, or other utility.
☆ Xilonen | Xilonen brings RES Shred to both Pyro and Hydro Elements without the need to trigger any reactions. Unlike Viridescent Venerer, Xilonen’s RES Shred persists across multiple waves of opponents and works against enemies with innate Hydro auras, where Pyro characters would not normally have VV’s RES Shred. Xilonen also provides the full effect of 4pc Scroll to the team, making her buffing potential comparable to Kazuha’s and Sucrose’s. |
 Zhongli | Similar to Xilonen, Zhongli’s Universal RES Shred, albeit with smaller value, does not require reactions and is long-lasting. The interruption resistance from his sturdy shield also helps the on-field character, who is easily staggered otherwise. |
 C6 Chevreuse | A niche option who can be used outside of her designed archetype. Chevreuse at C6 provides up to 60% Pyro DMG Bonus to the Pyro DPS. She also buffs the Pyro and Electro characters with her A4’s ATK buff in an Overvape team. Her added Pyro particles also help reduce the ER requirements of her Pyro teammates. |
Example Teams
This is not a comprehensive list of teams. The inclusion or exclusion of any given team does not necessarily reflect its power level.

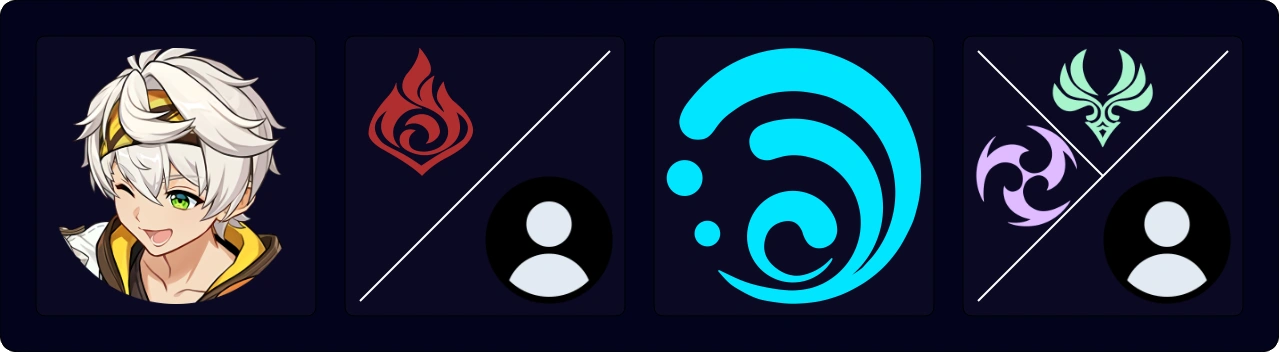
This team, referred to as “International” in some circumstances, is great in single-target and multi-target scenarios. It benefits greatly from vertical investment into both Childe and Xiangling. Proper management of Childe’s Skill cooldown is crucial to playing the team optimally.
Sample Rotation
First Rotation (Double Swirl)
Childe E > Bennett Q > Kazuha Q hEP > Xiangling Q E > Childe Q E 6[N2CD] > Downtime
For a Double Swirl in multi-target, Childe’s Skill cast must make contact with at least one enemy, and Bennett’s Burst must hit at least one different enemy.
Downtime
Bennett tE > Xiangling N2 > (Kazuha tEP / Childe C) > Subsequent Rotations
Repeat this sequence until Xiangling’s Burst is almost full (usually 2–3 times).
Subsequent Rotations (Double Swirl)
Childe C > Xiangling E > Kazuha hEPQ > Bennett Q tE > Xiangling Q > Childe Q E 6[N2CD] > Downtime
Childe’s Charged Shot must hit an enemy marked with Riptide or without a pre-existing Pyro aura.
Subsequent Rotations (Pyro Swirl only)
Kazuha tEPQ > Bennett Q tE > Xiangling Q E > Childe Q E 6[N2CD] > Downtime
Use this in situations where enemies make it tough to double Swirl.

A classic Yoimiya Vape team featuring Yelan for off-field Hydro application and Zhongli for RES Shred and interruption resistance. Yoimiya’s Burst is non-essential to her on-field Vape DPS playstyle, which means you should only use it when it is up and not worry about her ER.
Sample Rotation
(Yoimiya Q) > Zhongli N1 hED > Yelan EQ N1 > Bennett tE N1 Q N1 > Yoimiya E 3[N5D] N1 > Bennett tE

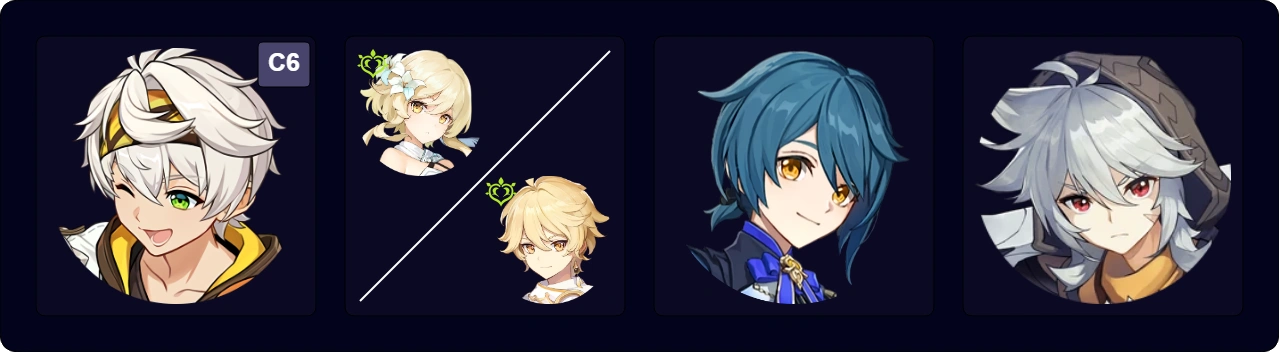
Vaporize is one of Gaming’s main teams. With the sheer amount of buffs from Bennett (Flat ATK, 4pc NO / Scroll / Instructor, C6’s Pyro DMG Bonus), Furina (DMG Bonus, 4pc TotM), and Sucrose (EM, TTDS, 4pc VV), Gaming can deal immense damage through his Plunges, which have no ICD and can all Vape.
Sample Rotation
Furina ED Q > Bennett Q tE (N1)¹ > Sucrose N1 E > Gaming combo > (Bennett tE)
¹If Bennett is C6 and needs to re-establish Pyro aura

This team deals tremendous single-target damage. The Double Hydro and Double Pyro core helps lower the team’s ER requirements, which enables more investment into damage. Weaving in a Normal Attack between Skills and Bursts increases team DPS substantially.
Sample Rotation
Yelan Q N1 E N1 > Xingqiu Q N1 > Bennett tE N1 Q > Xiangling N1 Q N1 E > Xingqiu N2 > Bennett N1 tE > Yelan N1 E N1 > Xingqiu N1 ED N2 > Bennett N2¹ tE > Xiangling N2 > Bennett N1 tE > Xiangling N2
¹Use two Normal Attacks on Bennett to consistently get the CD reduction on his Elemental Skill

An on-field DPS Bennett team where he deals competitive damage with his Plunging Attacks buffed by Xianyun and the entire kit buffed by Furina. Xingqiu deals decent personal damage, reduces Furina’s ER requirements, and provides additional Hydro so that Bennett can Vaporize all his Plunge and Skill uses.
4pc Long Night’s Oath is Bennett’s BiS set in this team; however, 4pc Marechaussee Hunter or 4pc Crimson Witch of Flames are also viable if you have a good set already available.
The sample rotation below skips Pyro Swirl for simplicity. Xianyun can still use 4pc VV to buff the Hydro units or switch to 4pc Song of Days Past to increase Bennett’s damage.
Sample Rotation
Furina ED Q > Xingqiu EDQ N1 > Xianyun EPQ N1 > Bennett Q 4[N1 tEJP N1JP] N1 tE

A comfortable but powerful Overvape team with Kokomi on-fielding to enable Vaporize for Xiangling while also dealing solid personal damage. Fischl can snapshot Bennett’s buff to deal significant single-target damage; she also allows Xiangling to trigger Overloaded and have more consistent Vape with Kokomi’s application, all from off-field and with little field time required.
Sample Rotation
Kokomi E > Bennett Q tE > Fischl N2 E > Xiangling Q N1 ED > Kokomi Q combo¹ > Fischl N2 Q > Bennett N1 tE > Xiangling N2 E > Kokomi N2D N2 > Bennett N1 tE > Xiangling N2 > Kokomi N2D
¹Until Oz disappears or for around 10s

A modern Overvape TF Bennett where he is buffed by Furina’s DMG Bonus and Ororon’s 4pc Scroll and C6’s ATK% buff. Bennett can use a traditional Talent DPS build, a full EM build, or a hybrid one without much noticeable performance difference.
Sample Rotation (with 4pc TF)
Furina ED Q > Ororon Q > Bennett tEQ N1 > Ororon E N1 > Fischl N2 E/Q > Bennett 7[N2 tE]
Forward Melt

Forward Melt happens when a Pyro attack triggers the Melt reaction on an enemy with a Cryo aura. Bennett is one of the best buffers for on-field Pyro DPS units in a Forward Melt team. He can also stay on-field as the Pyro DPS himself with the same setup.
Notable Teammates
Pyro DPS
As Forward Melt is on the stronger side of the Pyro–Cryo reaction (read more on this TCL page for Elemental Gauge Theory), only Pyro DPS units with relatively slower application can be played in the archetype. However, they all benefit significantly from Bennett’s Flat ATK buff and his Pyro DMG% bonus if he is C6. Bennett’s Pyro particles help lower the Pyro damage dealer’s ER requirements, and his healing sustains them throughout the fight. Bennett’s C6 can also let any Sword / Polearm / Claymore users deal infused attacks and become the on-field Pyro DPS regardless of their intended kits.
  Mavuika, Gaming, Amber | Melt is the best archetype for these characters since a large proportion of their attacks can Melt and deal tremendous damage. At the same time, their hit rate is not as fast, so they can let Cryo enablers catch up with the application rate more easily. Mavuika wants Natlan teammates such as Citlali or Xilonen in her team to stack Fighting Spirit. |


Cryo Enabler
Cryo characters are often used for their fast Cryo application or good buffs, or both, like in Citlali’s case. Some Cryo units also contribute sizable damage themselves, especially if they can snapshot Bennett’s Flat ATK buff. A Double Cryo core can be desired for better Melt consistency.
Characters marked with a “☆” are capable of applying enough Cryo application on their own for some popular Forward Melt Pyro DPS units.
☆ Citlali | The premier Cryo enabler option for Forward Melt teams. Citlali’s application and buffing (4pc Scroll, Pyro RES Shred, and TTDS or Starcaller’s Watch) are among the best, if not the best, that a Pyro DPS could ask for. She also provides a much-needed shield for interruption resistance and damage protection. |
 Chongyun | Chongyun, at C2, reduces the team’s Skill and Burst cooldown, which could lead to a small increase in team DPS. He is most notable for pre-C6 on-field DPS Bennett, where he allows Bennett to Melt his Skills with his own Normal Attacks. |


Flex
The flex slot of a Forward Melt team is usually for buffers who enhance the Pyro DPS’s damage further by additional stat increases or enemy debuffs, such as RES Shred (e.g. from Anemo units’ 4pc VV). Some Anemo characters can absorb Cryo to supplement the primary Cryo enabler, for example Kazuha and Lynette.
Xianyun | Xianyun provides healing and 4pc VV while also enabling a unique Plunging playstyle, which many Pyro DPS characters enjoy. With C6 Bennett’s Infusion, a DPS can deal powerful Melted Plunges, regardless of their original kit. |
 C6 Chevreuse | A niche option who can be used outside of her designed archetype. Chevreuse at C6 provides up to 60% Pyro DMG Bonus to the Pyro DPS. Her added Pyro particles also help reduce the ER requirements of her Pyro teammates. |
 Hydro Characters | While Hydro characters can enable more reactions for some characters compared to only using a Cryo applier, the Freeze reaction leads to no aura for either Vape or Melt against bosses, and it is also detrimental to Pyro damage dealers with blunt damage. Thus, using Hydro units in a Melt team is generally not recommended. |


Example Teams
This is not a comprehensive list of teams. The inclusion or exclusion of any given team does not necessarily reflect its power level.

The conventional Melt Mavuika featuring her best supports — Citlali, Bennett, and Xilonen. This team is both comfy and powerful to play, thanks to Mavuika’s full interruption resistance during Burst and her innately high stat lines being multiplicatively increased by all three great buffers.
Sample Rotation
Mavuika tE > Xilonen E N2 > Bennett tEQ > Citlali EQ (N1) > Mavuika Q Melt combo

Amber’s Melt performance also receives significant results with the similar setup of Bennett, Citlali, and Sucrose. Citlali’s shield is also valuable for Amber while she is using her Charged Attacks.
Sample Rotation (C4+ Amber)
Bennett Q tE > Amber Q > Sucrose E > Citlali EQ > Amber 2[E + C to detonate] > Sucrose Q > Amber 3[C]

Sample Rotation
Bennett (tE)¹Q (N1)² > Xilonen E N2 > Rosaria EQ > Kaeya EQ > Bennett tE³ 2[N3 tE] N3
¹First rotation only
²Used to establish new Pyro aura for subsequent rotations; for C6 Bennett
³Wait until Bennett has been affected by his Burst’s Pyro self-application before casting his first Skill
Reverse Melt

Reverse Melt teams function by dealing Cryo damage to enemies affected by Pyro to trigger Melt. An off-field Pyro applier like Xiangling is needed to maintain a consistent Pyro aura so the Cryo DPS unit(s) can consistently trigger Melt on enemies.
Notable Teammates
Cryo DPS
Bennett is often the best support for Cryo damage dealers thanks to his immense Flat ATK buff and comfortable healing. On-field Bennett can apply a decent amount of Pyro for off-field Cryo DPS characters, especially if he is at C6.
  Ganyu, Wriotheseley | On-field DPS units that use their Normal or Charged Attacks to deal powerful Melt damage. They need off-field Pyro application such as Xiangling’s Burst, Jean’s Sunfire, or the Burning reaction. |
  Rosaria, Kaeya | Off-field DPS units that primarily damage through their Melted Burst. Both Rosaria and Kaeya can snapshot Bennett’s buff. However, as Rosaria’s Burst has no Internal Cooldown, she tends to deal better damage than Kaeya. They can be used together to form a decent quickswap Reverse Melt team regardless. On-field Pyro appliers (including Bennett) can be used to enable Melt for these two Cryo units. |
 Escoffier | Without Escoffier’s Pure Freeze / Mono Cryo teams, she loses a decent chunk of Cryo RES Shred to the party. However, she still deals sizable damage in a Reverse Melt team. Escoffier can stay on-field to get Bennett’s ATK buff as her Skill does not snapshot. |
 Chongyun | Chongyun can deal great Burst nukes whose hits can all Melt with enough Pyro application. He is generally used with another Cryo DPS and helps the team through his C2’s cooldown reduction. |
 Shenhe | Shenhe deals some decent damage in Reverse Melt teams with her Burst, and she buffs the other Cryo DPS with her Skill’s Icy Quill, DMG Bonus, and Cryo RES Shred. She pairs well with a quickswap Cryo DPS, such as Rosaria or Kaeya. |
Pyro Enabler
For an off-field Cryo DPS, on-field Bennett plus any form of additional off-field Pyro application is enough to maintain reaction uptime. However, for Ganyu and Wriothesley, stronger off-field application must be used. Xiangling is by far the easiest and most consistent option to play. Kazuha and Jean apply Pyro through their Bursts. Emilie and Nahida apply Pyro via Burning, with the help of additional Pyro application from Pyro Traveler, Dehya, or Thoma.


Flex
The flex slot of a Forward Melt team is usually for buffers who enhance the Cryo DPS’s damage further by additional stat increases or enemy debuffs, such as RES Shred (e.g. from Anemo units’ 4pc VV).
Example Teams
This is not a comprehensive list of teams. The inclusion or exclusion of any given team does not necessarily reflect its power level.

With all the buffs from Bennett, Xilonen, and Mavuika, Ganyu can deal formidable Melted Charged Attacks. However, this team provides no shield or interruption resistance to Ganyu, so it is a high-risk, high-reward team.
Rotation variant 1 uses Mavuika’s Burst just before Bennett’s buff uptime runs out, so it is tight to perform, especially without interruption resistance on Ganyu.
Sample Rotation (Variant 1)
Mavuika tE > Xilonen E N2 > Bennett tEQ > Ganyu E 5[C] > Mavuika Q 4[C]
Sample Rotation (Variant 2)
Ganyu E > Xilonen E N2 > Mavuika Q tE > Bennett tEQ > Ganyu 6[C]

A Burnmelt team. Emilie deals good personal damage and maintains Burning together with Dehya. Dehya’s interruption resistance is welcomed by Wriothesley. Dehya can use R5 Sacrificial Greatsword to shorten rotation length.
Sample Rotation
Emilie E/Q > Bennett tEQ > Dehya 2[E] > Wriothesley E combo > (Bennett tE)

A potent quickswap team with all teammates contributing respectable damage. Bennett’s on-field and Xiangling’s off-field Pyro application ensure Rosaria can Melt all her hits, even with the added Cryo application from Shenhe.
Sample Rotation (C6 Bennett)
Shenhe tEQ > Bennett Q tE > Rosaria E N1 Q > Xiangling Q E > Shenhe tE N1 > Rosaria E > Bennett N2¹ tE > Xiangling N2 > Bennett N1 tE > Xiangling N2 > Rosaria E > Shenhe N1
¹Use two Normal Attacks on Bennett to consistently get the CD reduction on his Elemental Skill
Burgeon

Burgeon teams are better in multi-target scenarios due to Burgeon’s AoE damage. These teams need a consistent Hydro applier to avoid Burning. Bennett works well in Burgeon teams since he can heal back the self-inflicted Burgeon damage.
Bennett can be an on-field Burgeon trigger or enable other characters to trigger Burgeon (through Pyro Absorption or his C6 Pyro Infusion).
As a support, Bennett should hold 4pc Instructor and Favonius Sword or Sapwood Blade (R5 if possible). As a Burgeon trigger, Bennett should hold 4pc Gilded Dreams or Flower of Paradise Lost and a Sword with an EM secondary stat.
Notable Teammates
Dendro
Off-field Dendro appliers with good uptime such as Nahida and Dendro Traveler are the primary choices for a Burgeon team. Emilie and Kinich can also be used, but it is the Burning reaction, not Burgeon, that they are after.
 Nahida | One of the best off-field Dendro appliers in the game. Nahida takes care of all the Dendro application needs and boosts the Burgeon damage dealt by the active character. Nahida holds 4pc Deepwood. |
 Dendro Traveler | A F2P alternative to Nahida. Dendro Traveler’s Burst must make contact with Hydro after being cast. If it makes contact with Pyro, then the Burst explodes and ends prematurely. Dendro Traveler holds 4pc Deepwood. |
   Collei, Yaoyao, Baizhu | Additional Dendro application for when Nahida is not used. |
 Emilie | As long as there is some Burning uptime, Emilie can apply a decent amount of Dendro and deal considerable personal damage. Emilie can be on-field to capitalize on Bennett’s Flat ATK buff while the off-field Pyro unit triggers Burgeon; she can also trigger Burgeon herself with Bennett’s C6. |
 Kinich | Kinich uses Bennett as one of his best universal buffers. In a Burgeon team, Kinich acts as the on-field damage dealer and Dendro applier, enabling Burgeon to stack Nightsoul points for his Scalespiker Cannons. |
Hydro
Cannot have Burgeon without Bloom, and cannot have Bloom without a Hydro enabler.
 Xingqiu | At the time of writing, Xingqiu possesses the best off-field Hydro application, which helps Dendro Core production by triggering Bloom more often and mitigating Burning uptime. |
  Yelan, Furina | Other good off-field Hydro appliers. Although their application rate is slower than that of Xingqiu, they can compensate with their DMG Bonus in some teams that focus more on Talent damage rather than Burgeon damage. |
  Childe, Ayato | Ayato and Childe are viable on-field Hydro appliers with their Skills and subsequent Normal / Charged Attacks. They benefit from Bennett’s ATK buff and healing. |
Burgeon Trigger
When Bennett is not the on-field Burgeon trigger, other Pyro characters with off-field Pyro application can do the job (e.g. Thoma). Otherwise, any on-field Pyro characters can take the role; and with C6 Bennett, any Sword / Polearm / Claymore users.
  Kazuha, Lynette | Kazuha or Lynette can be a Burgeon trigger by absorbing Pyro with their Elemental Burst. |
 Razor | Razor is a rather niche choice who can be played as an on-field Burgeon trigger with C6 Bennett. He triggers a multitude of reactions in this team, including Burgeon, Hyperbloom, Overloaded, and Quicken. |


Flex
Off-field damage dealers that help reduce Burning uptime, thus increasing Dendro Core generation. Cryo units may occasionally Freeze enemies.


Example Teams
This is not a comprehensive list of teams. The inclusion or exclusion of any given team does not necessarily reflect its power level.

Bennett provides healing and an ATK buff to Ayato in this team. His Pyro particle generation also lessens Thoma’s ER needs.
Sample Rotation
Ayato Q > Nahida E Q > Thoma EQ > Bennett tEQ > Ayato E N15 > Nahida N1 E (C) > Thoma E N2 > Bennett N1 E > Ayato E N15

This on-field Bennett Burgeon team has high single-target damage. Fischl should alternate using her Skill and Burst in rotations.
Sample Rotation
Nahida E Q > Xingqiu EDQ N1 > Bennett tE N1 Q > Fischl N2 E/Q > Bennett N2 tE 4[N4 tE]
Sample Rotation
Razor ED > Xingqiu EDQ N1 > Dendro Traveler EQ N1 > Bennett tE N1 Q > Razor ED N1 Q N1 ED 2[N3D] N2 ED N3D N3 > Bennett tE N2
General Support

Bennett’s well-rounded utility lets him fulfill several roles while only taking up one team slot (often referred to as role consolidation). His substantial Flat ATK buff allows ATK-scaling DPS characters to deal much more damage.
Example Teams
This is not a comprehensive list of teams. The inclusion or exclusion of any given team does not necessarily reflect its power level.

In this Hypercarry Navia team, Bennett provides a massive Flat ATK buff to Navia and helps stack Furina’s Fanfare with his healing.
Sample Rotation
Bennett tE > Kachina Q E > Furina ED Q > Bennett tEQ > Navia Q hE combo > Kachina N3¹ > Navia hE combo
¹To proc Favonius

A classic Raiden Hypercarry team. Sara is really only recommended at C6 over other options like Lisa or Fischl. The rotation below is the easiest variation to execute consistently.
Sample Rotation
(Raiden E > Kazuha hEP)¹ > Sara E C > Bennett Q > Kazuha Q > Sara Q > Raiden Q combo > Kazuha hEP N1 > Bennett tE
¹First rotation only

A classic Burning Kinich team with Bennett and Emilie.
Sample Rotation
Emilie E/Q > Pyro Traveler E Q > Bennett tEQ > Kinich shE combo > (Bennett tE)

A standard Hypercarry Wanderer team. Bennett, Lan Yan, and Faruzan deploy their Skills and Bursts before Wanderer takes the field to deal damage. Lan Yan can use either TTDS to buff Wanderer or offensive weapons to increase her personal damage.
Sample Rotation
Faruzan E (C) Q > Bennett tEQ > Lan Yan 2[E]Q > Wanderer C E combo Q > Bennett tE

Chasca deals Pyro, Hydro, and Electro damage in this team, which all benefit from Bennett’s Flat ATK, Furina’s DMG Bonus, and Ororon’s DMG Bonus from 4pc Scroll.
Sample Rotation
Furina ED Q > Ororon Q > Bennett tEQ N2¹ > Ororon E > Chasca E 4[C] (Q/C)²
¹If Bennett is not C6, do Q tE instead at the cost of tighter timing for Ororon’s Overloaded
²Burst when available, otherwise hold Chasca’s Charged Attack until she falls to the ground

This Anemo Overvape team (sometimes called “Soup”) is incredibly potent in AoE scenarios. With proper execution, Ayato can snapshot Bennett’s Flat ATK buff onto his Burst in subsequent rotations.
Sample Rotation
Ayato Q > Fischl E > Kazuha tEP > Ayato E N15 > Kazuha tEP > Bennett tEQ > Fischl Q > Kazuha Q > Ayato E N15
Credits
irokei, fourmana, idkanonymized, nociii, the boombox gremlin, Leah, Davjac123, acie, Rathalos, asterix2978, polomo, caxia, eastonair, acerbus114, lesterberne, lostguide, jamccleskey
Team images made with the KQM portrait generator.