Updated for Version 3.4

Credit to @makohouse on IG!
Table of Contents
Introduction
“Let’s forgo the formalities. I’m here to finish a job. Just leave the dirty work to me.”
Rosaria is a 4-star Cryo Polearm who has a versatile and powerful kit, capable of filling many roles and performing all of them admirably. The Cryo Element is a powerful Element filled with many characters famous for their strength—and often as a result, Rosaria goes unnoticed in the shadows. But the shadows are where Rosaria works best, and her kit is no less lethal despite hiding amongst them; any player interested in using her will soon notice the effect she has on the battlefield. This guide seeks to teach such players how to best utilize her and her kit so as to get maximum mileage from her.
Why Play Rosaria?
Pros
- All damage instances of her Skill and Burst can be Melted for large damage
- Consistent off field Cryo application
- Short Skill cooldown allows for decent Particle generation over time
- One of the rare sources of team CRIT buffs
- Able to function in a multitude of teams, in a multitude of roles
- Her Skill is one of the few instant gap closers in the game
- Works extremely well with other Cryo characters she would otherwise compete with
- Is extremely cool in doing what she does—pun fully intended
Cons
- Faces stiff competition from other Cryo characters, who can often perform similar roles
- Immobile Burst often restrains teams to Circle Impact™
- While not entirely reliant on Constellations, some of her Constellations—most notably her second—are fairly significant to her performance
- Will remind you that you have a job, and thus a real life, in her idle voice lines
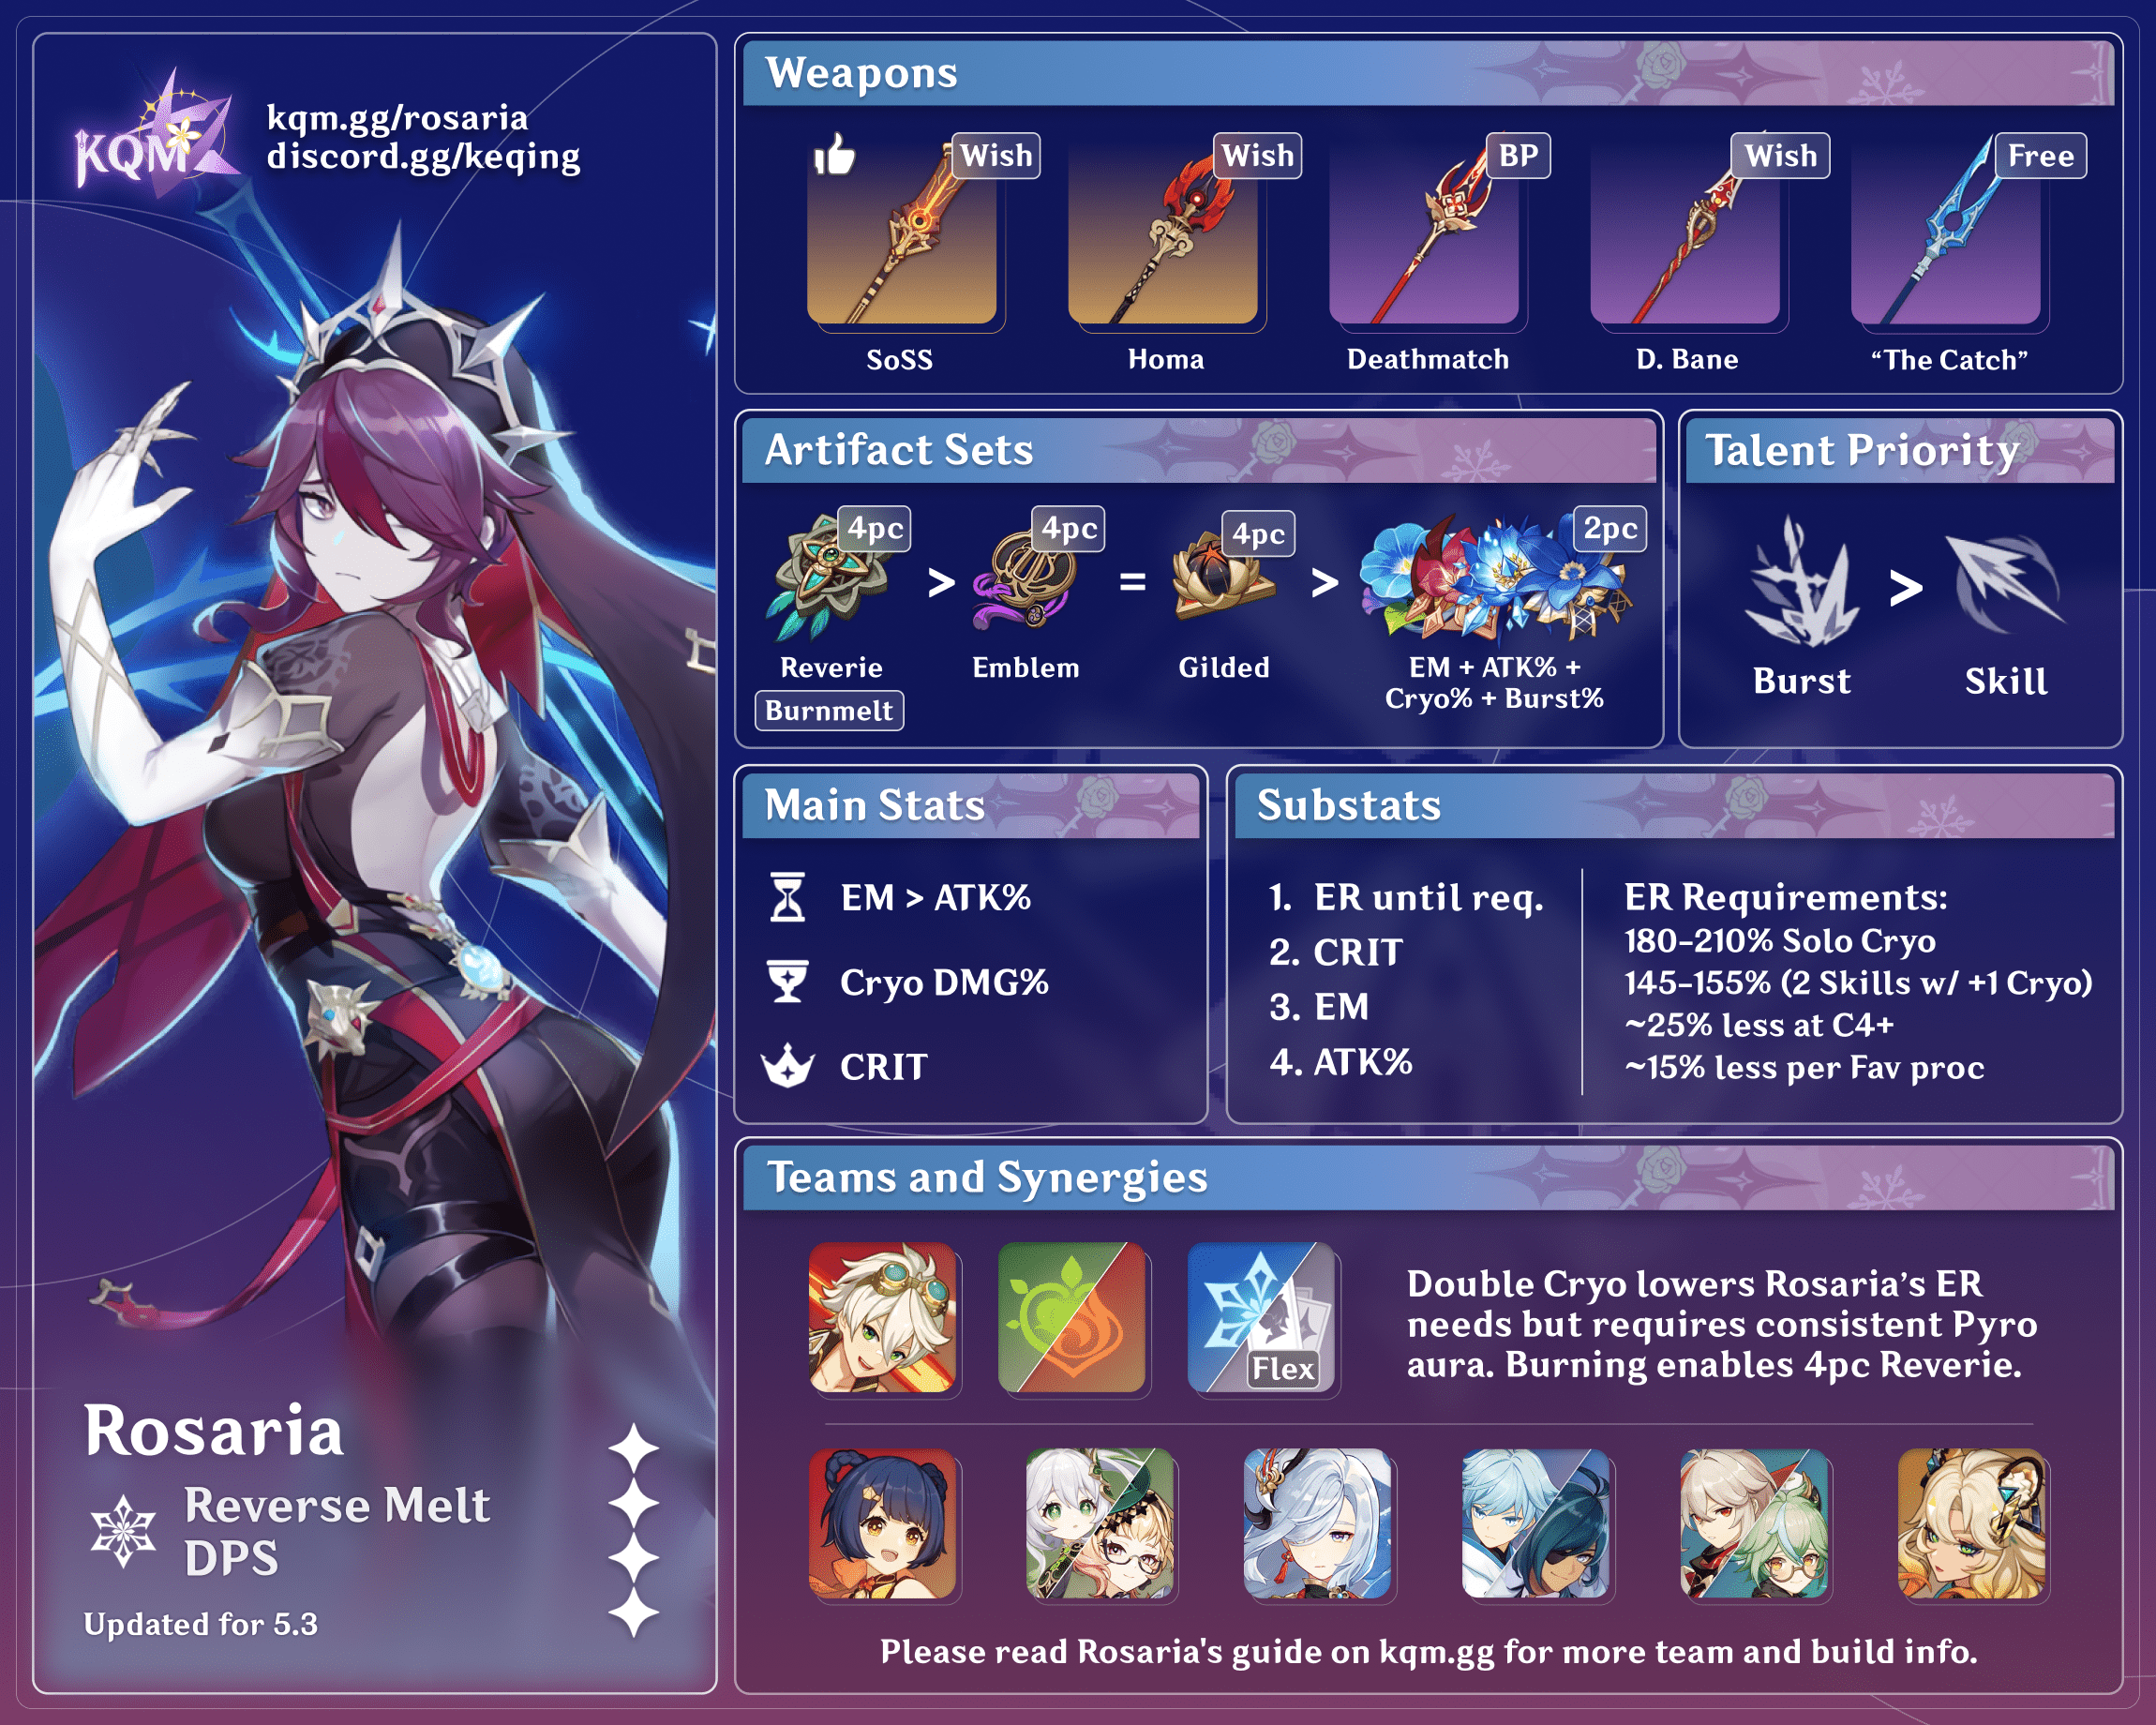
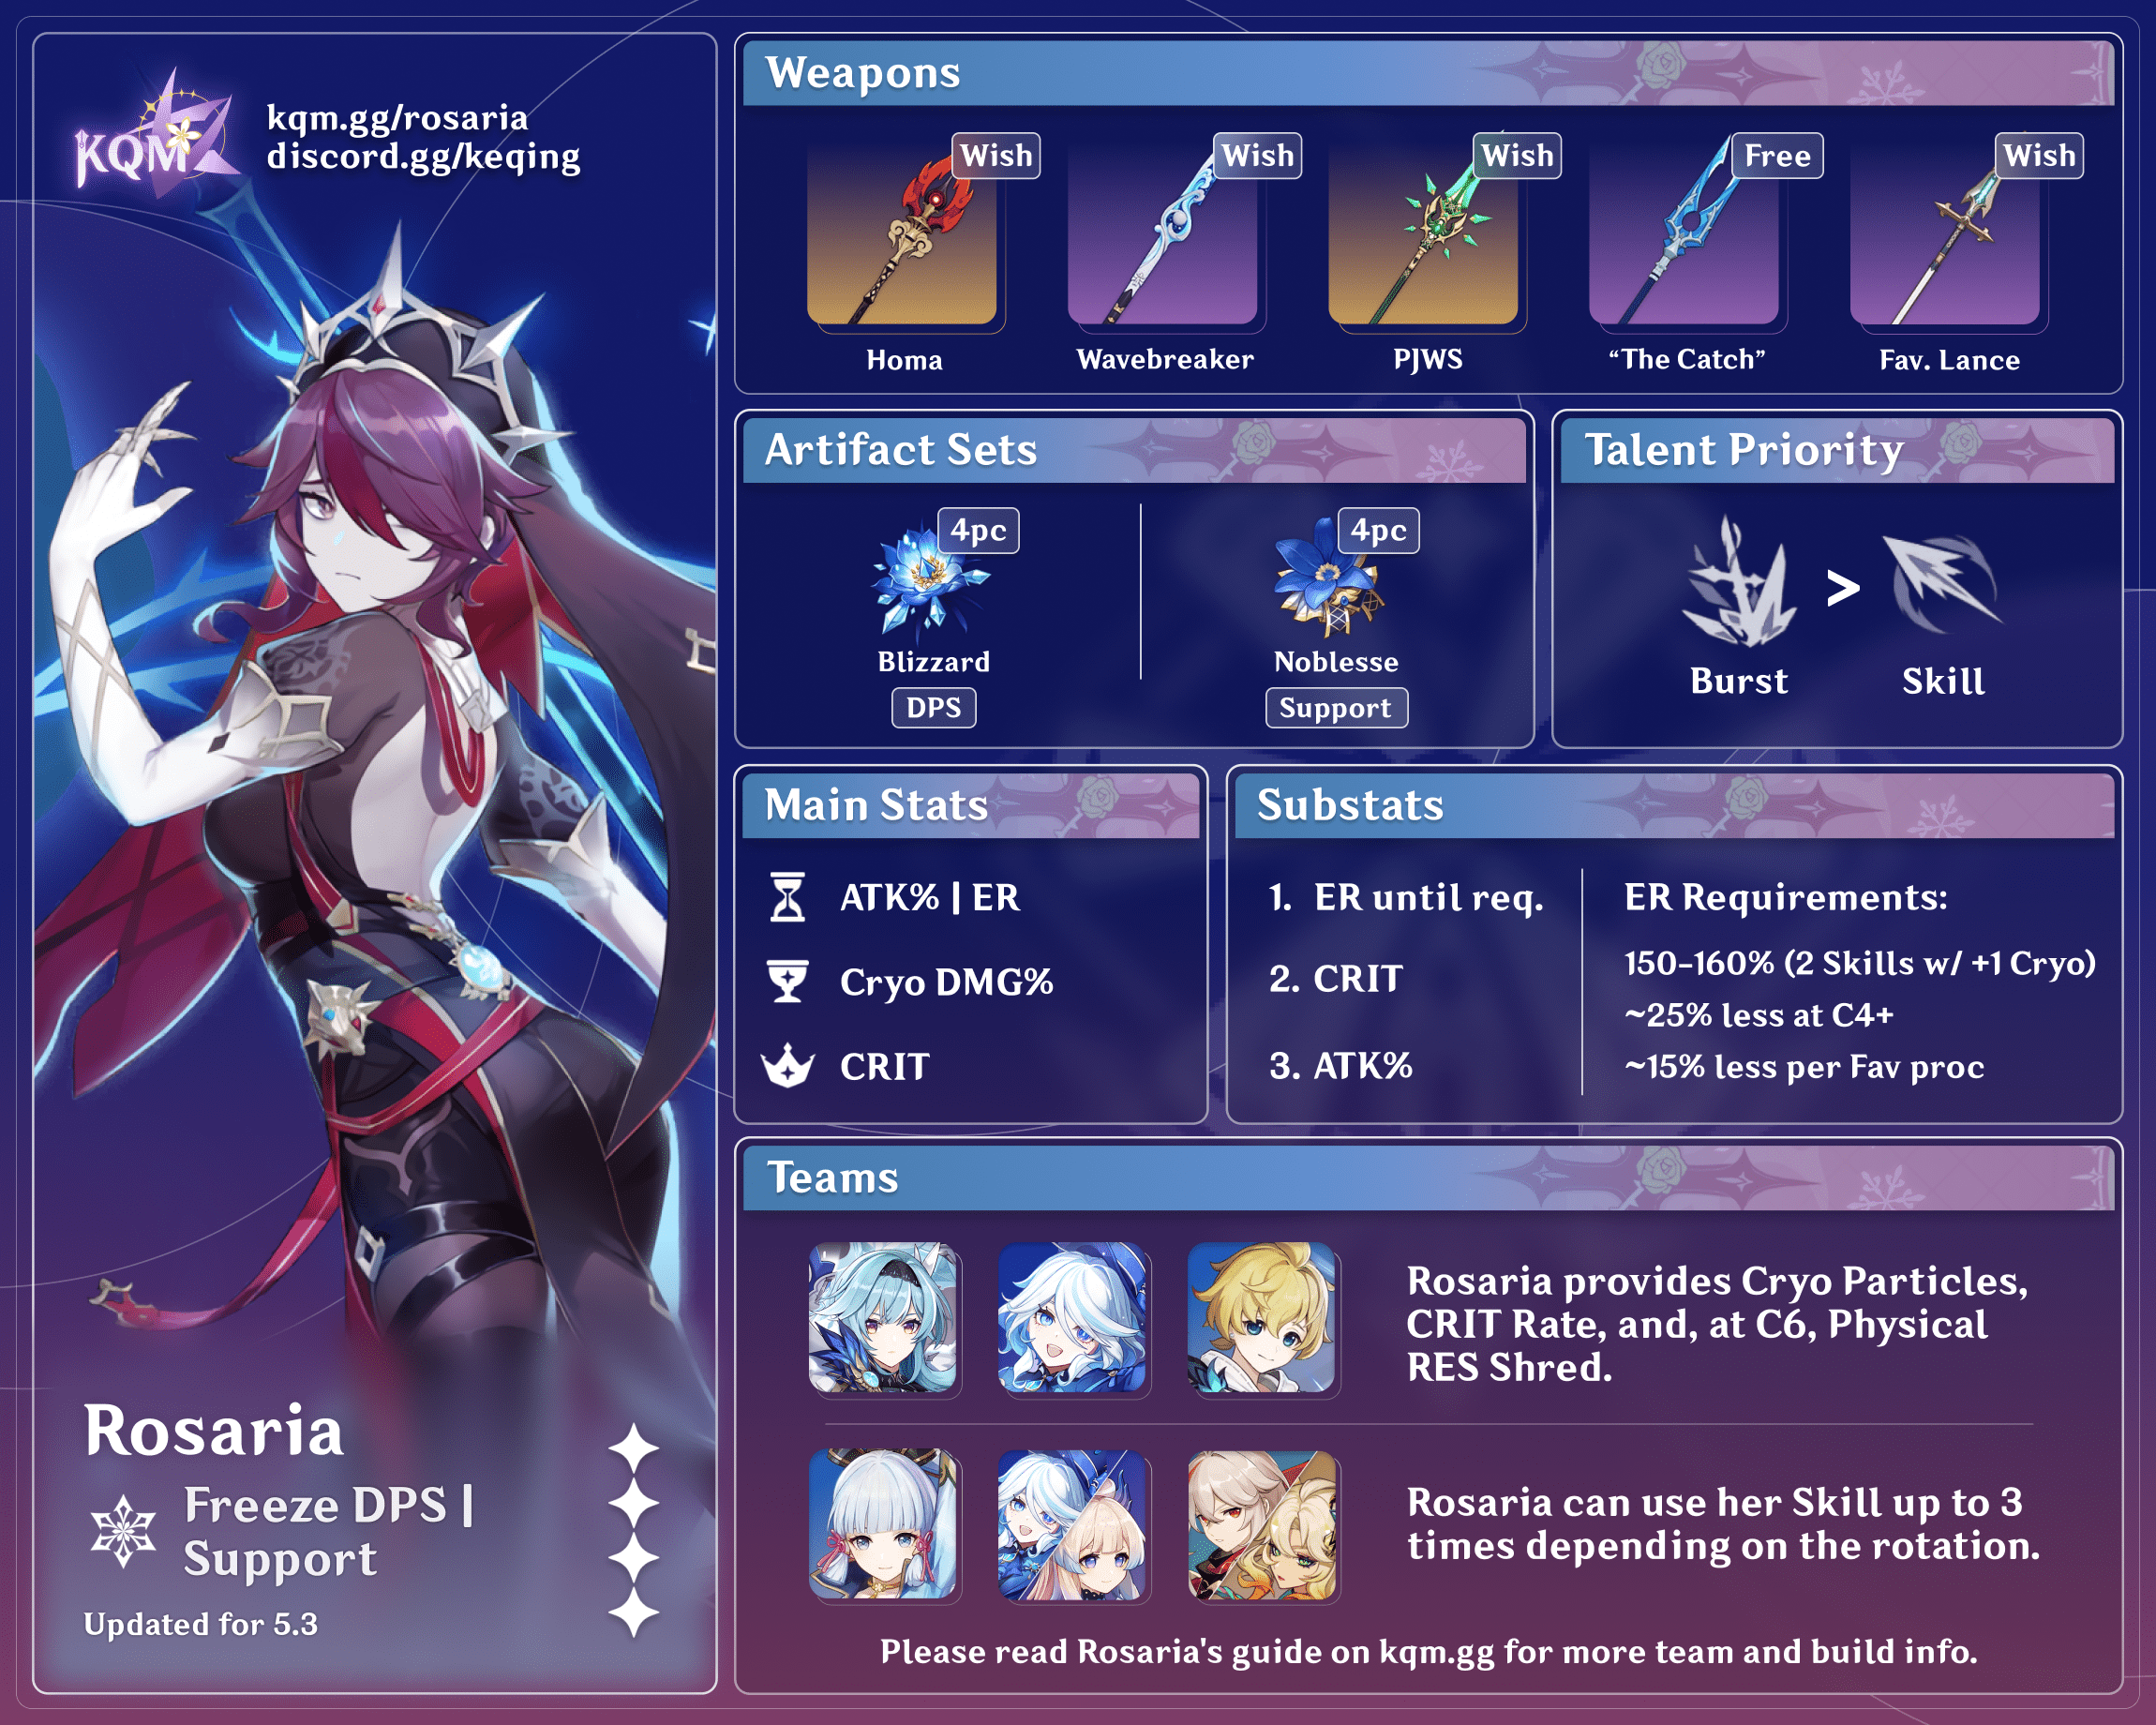
TL;DR
Design: kol & icedsquid
Content: KQM TC Staff
Talents
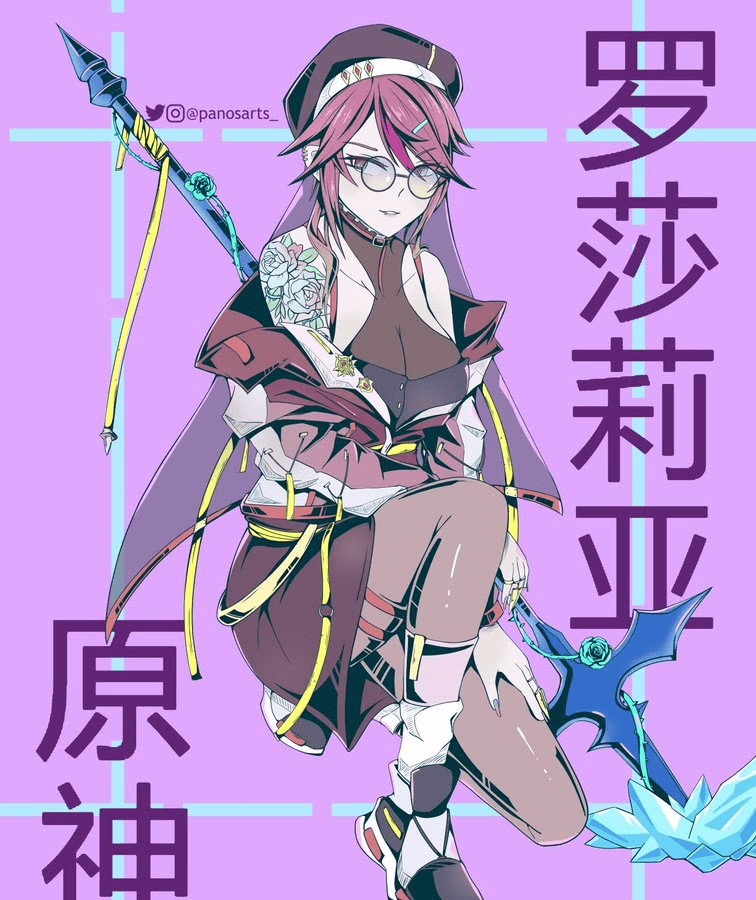
Credits to @panosarts_ on Twitter!
“A Vision… Could be proof of strength, or a medal for having survived… who knows? There are two sides to every coin. I won’t limit my Vision with ceremonies and definitions. It witnesses me, and I witness it, that’s all.”
Talent Priority
Elemental Burst > Elemental Skill > Normal Attack
For on-field DPS Rosaria with Chongyun, Talent priority is:
Elemental Burst > Normal Attack > Elemental Skill
 Normal Attack: Spear of the Church
Description
Normal Attack
Performs up to five consecutive spear strikes.
Charged Attack
Consumes a certain amount of Stamina to lunge forward, dealing damage to opponents along the way.
Plunging Attack
Plunges from mid-air to strike the ground below, damaging opponents along the path and dealing AoE DMG upon impact.
A standard set of Polearm Normal, Charged, and Plunging Attacks. All things considered, Rosaria’s Normal Attacks [NAs] are simply not worth building for. When compared to her Elemental Burst, they are lackluster at best. While Chongyun can uniquely let Rosaria infuse her Normal Attacks with Cryo, they are still usually not worth using over a higher damage option. See the Team Compositions section for Freeze and Reverse Melt for more.
 Elemental Skill: Ravaging Confession
Description
Rosaria swiftly shifts her position to appear behind her opponent, then stabs and slashes them with her polearm, dealing Cryo DMG.
This ability cannot be used to travel behind opponents of a larger build.
Upon casting her Elemental Skill, Rosaria will shift behind an enemy before quickly dealing Cryo damage to them twice. She will not travel behind certain enemies, usually larger ones such as Shielded Mitachurls.
While Rosaria’s Elemental Skill is mostly used for Cryo Particles and her A1 passive, if it can be used multiple times in a rotation, it can contribute a non-negligible amount of damage—albeit still unimpressive compared to her Burst. It is also one of the few instant gap closers in the game, situationally handy to not have to spend stamina and time chasing enemies.
 Elemental Burst: Rites of Termination
Description
Rosaria’s unique take on this prayer ritual: First, she swings her weapon to slash surrounding opponents; then, she summons a frigid Ice Lance that strikes the ground. Both actions deal Cryo DMG.
While active, the Ice Lance periodically releases a blast of cold air, dealing Cryo DMG to surrounding opponents.
Rosaria deals Cryo damage twice as she swings her weapon and plants an Ice Lance into the ground. Afterwards, the Ice Lance will deal a tick of Cryo damage over its AoE once every 2 seconds, for a total of 4 times pre-C2, and 6 times post C2. Rosaria’s Elemental Burst “snapshots”—that is, the stats on Rosaria at the time of the cast will persist throughout the duration of the Burst, whether or not they persist on Rosaria herself.
Rosaria’s Elemental Burst is the centerpiece of her kit: the bulk of her damage is loaded into her Burst, it provides off-field Cryo application and team CRIT share through her A4 Passive.
It is also worth noting that Rosaria’s Elemental Burst does not have an Internal Cooldown (ICD) on Elemental application. Most units have limitations on their attacks or abilities that prevent them from reacting continuously with multiple Elemental applications from a single ability. Rites of Termination has no such limitation, and can consecutively trigger Elemental Reactions with each of its ticks.
 Ascension 1 Passive: Regina Probationum
Description
When Rosaria strikes an opponent from behind using Ravaging Confession, Rosaria’s CRIT Rate increases by 12% for 5s.
If Rosaria’s Elemental Skill strikes an enemy from behind, Rosaria’s CRIT Rate will increase by 12% for 5 seconds.
This CRIT Rate increase is included in her Ascension 4 Talent’s CRIT Rate share. As such, it is recommended that you use her Elemental Skill before casting her Burst, both for extra damage and for team CRIT Rate share.
 Ascension 4 Passive: Shadow Samaritan
Description
Casting Rites of Termination increases CRIT Rate of all nearby party members (except Rosaria herself) by 15% of Rosaria’s CRIT Rate for 10s.
CRIT Rate Bonus gained this way cannot exceed 15%.
Casting Rosaria’s Elemental Burst will grant all nearby party members 15% of her CRIT Rate. This CRIT Rate share caps at 15%, and will only include the CRIT Rate that appears in her stat page—as such, conditional CRIT such as those from Blizzard Strayer or Cryo Resonance will not be included.
This is one of the rare sources of team CRIT Rate share in the game, and one of the even rarer ones that can be fully taken advantage of, thanks to her many other supportive abilities.
 Exploration Passive: Night Walk
Description
At night (18:00 – 6:00), increases the Movement SPD of your own party members by 10%.
Does not take effect in Domains, Trounce Domains, or Spiral Abyss. Not stackable with Passive Talents that provide the same effects.
Keeping in line with having unique mechanics, Rosaria’s Utility Passive, though not useful in Domains or Spiral Abyss, increases Movement Speed by 10% between 18:00-6:00 in game—a nifty speed boost that can make adventuring easier, and the only Movement Speed Utility Passive in the game.
Constellations
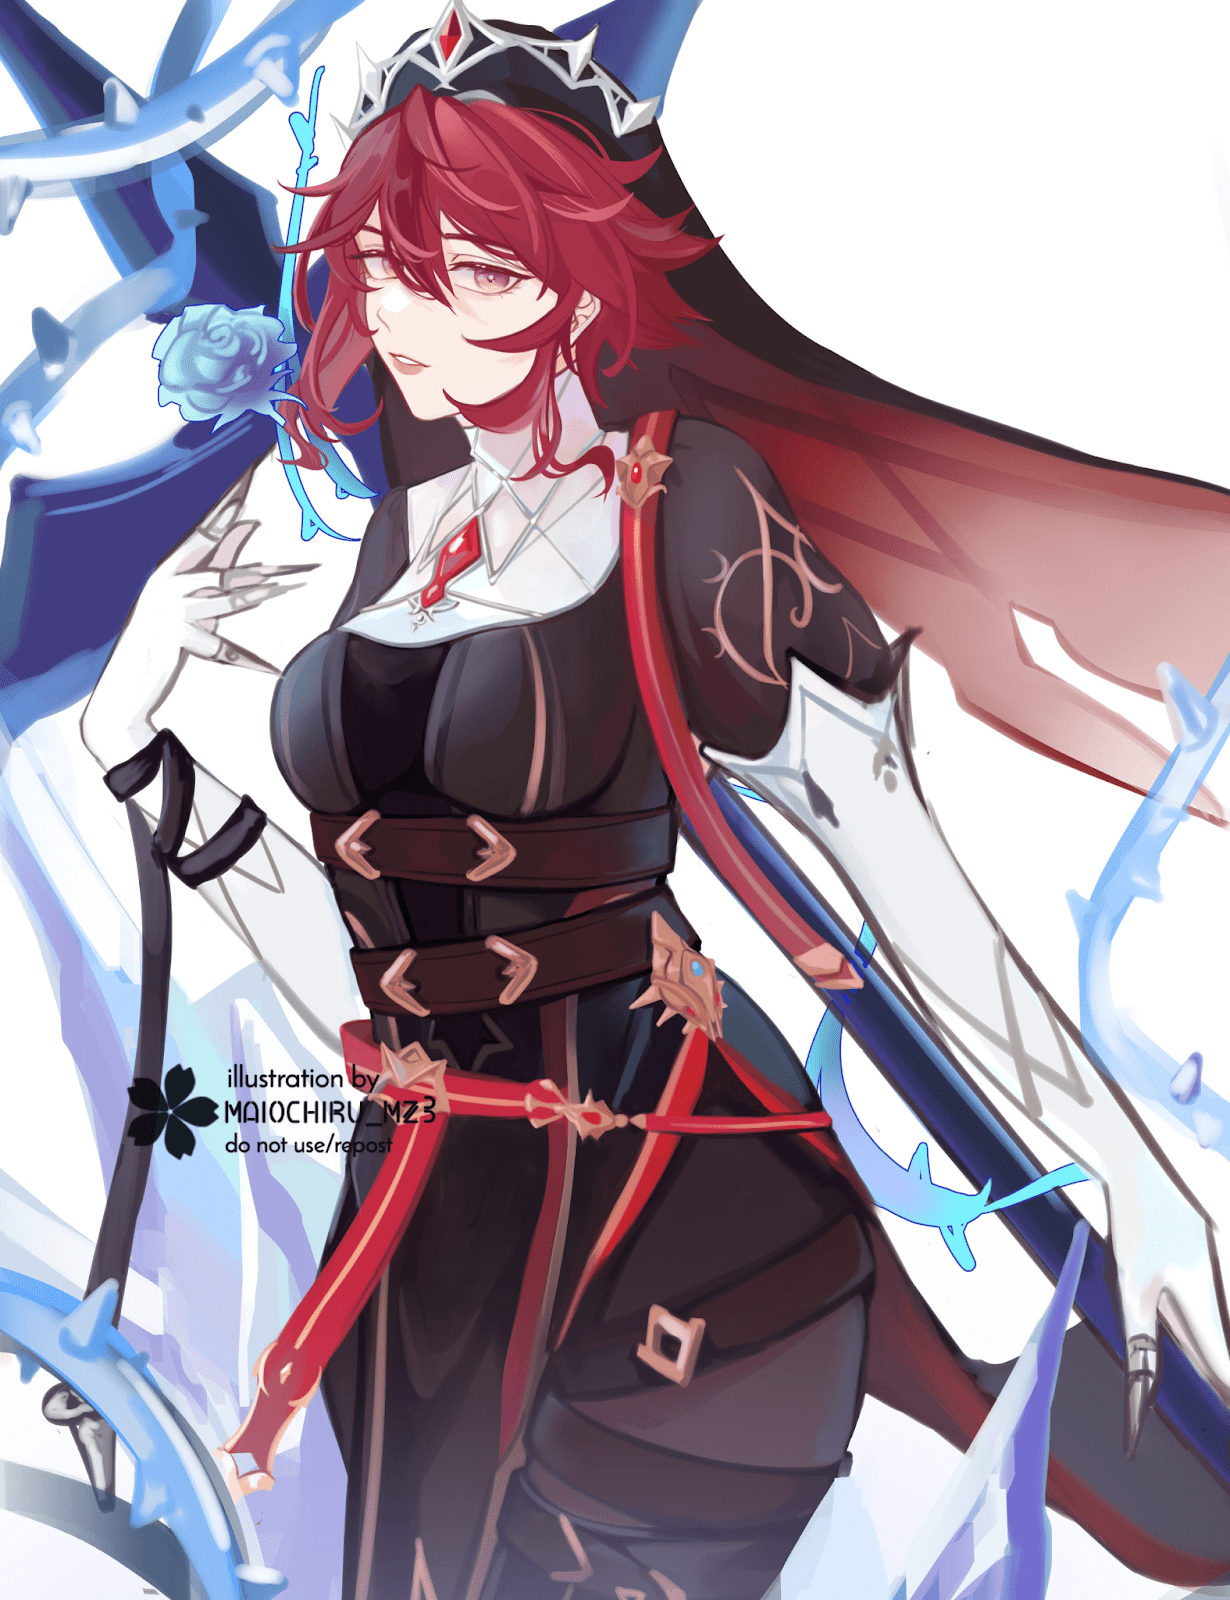
Credit to @maiochiru_mz3!
“I’m no stranger to spilling blood, but never have I possessed such power before. For such blessings, I give you thanks.”
 Constellation 1: Unholy Revelation
When Rosaria deals a CRIT Hit, her ATK SPD increases by 10% and her Normal Attack DMG increases by 10% for 4s.
Even in teams where Rosaria does use her Normal Attacks and has full uptime on this Constellation, it provides a mostly insignificant damage increase of around 2%.
 Constellation 2: Land Without Promise
The duration of the Ice Lance created by Rites of Termination is increased by 4s.
With this Constellation, Rosaria’s Burst deals 2 more ticks of DoT, for a total of 6 ticks.
This Constellation is significant for Rosaria’s damage and support capabilities alike; it is a massive 23% DPS increase for off-field Rosaria, and the extended duration allows Rosaria to apply Cryo off-field for a longer period of time. Undoubtedly her most valuable Constellation.
 Constellation 3: The Wages of Sin
Increases the level of Ravaging Confession by 3.
As Rosaria’s Skill is not the main focus of her damage profile, this Constellation does not provide much of a damage increase.
 Constellation 4: Painful Grace
Raviging Confession’s CRIT Hits regenerate 5 Energy for Rosaria. Can only be triggered once each time Ravaging Confession is cast.
This Constellation regenerates Energy for Rosaria only. The Energy generation is flat, meaning it is not affected by ER%.
The value of this Constellation depends greatly on Rosaria’s ER% requirements, as well as a player’s flexibility in stats. If Rosaria needs ER%, and the player can convert a proportionate amount of ER% to offensive stats, this Constellation can provide a slight damage increase. If not, it is mostly a quality of life Constellation.
 Constellation 5: Last Rites
Increases the level of Rites of Termination by 3.
Much of Rosaria’s damage comes from her Burst; therefore, this Constellation provides a fairly substantial damage increase of around 12% over C4.
 Constellation 6: Divine Retribution
Rites of Termination’s attack decreases opponents’ Physical RES by 20% for 10s.
This Constellation is generally not of much use to Rosaria herself (see Why Not Physical Rosaria?). However, it can further increase her utility in teams where she supports a Physical carry, such as Eula.
Character Mechanics
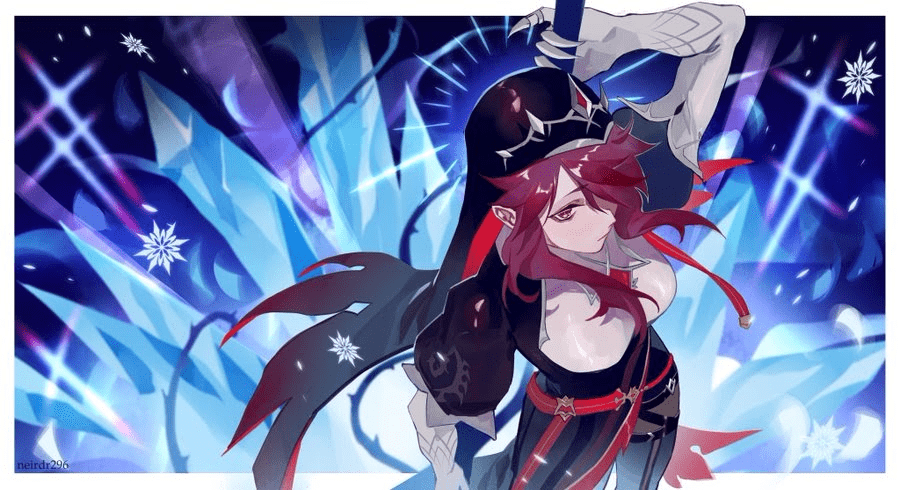
Credits to @neirdr1 on Twitter!
“What’s weird about a Sister without reverence for the gods? There are hunters who don’t eat pork, and fishermen who don’t eat fish, aren’t there? Just because you do something doesn’t mean you love to do it. That’s how every job goes.”
Why Not Physical Rosaria?
A precursory glance over Rosaria’s kit may suggest that her intended and best role would be as a Physical on-field DPS; indeed, her C1 benefits her Normal Attacks, her C6 reduces enemies’ Physical Resistance, and as a Cryo character, she is one-half of the equation for Superconduct.
However, it is soon apparent that this is not the case. First, Rosaria’s capability to deal Physical damage pales in comparison to other Physical-building characters’. This is compounded by her relative lack of multi-hits and slow Normal Attacks, making her a worse user of Crescent Pike than most other Polearms. Her C1 and C6 are not nearly enough to make up for the aforementioned problems.
Matters are only made worse when Rosaria’s Burst is taken into account. A Physical Rosaria’s most ideal conditions are a team with her C6 and Superconduct active – however, even in such conditions, the Cryo damage from her Burst accounts for almost one third of Rosaria’s damage, and a Rosaria built for Cryo damage in these same conditions ends up outputting similar damage to her Physical counterpart. Thus, it can be seen that her Cryo damage is such a significant portion of her damage profile that even in the best case scenario for Physical Rosaria, the build is at most equivalent to building her for Cryo damage, while being less DPS in every other situation.
In general, Rosaria will net her highest personal and team damage in teams where she builds for Cryo damage. Note that this is not meant to discourage people who want to play Physical Rosaria, instead, it is meant as an advisory that in all situations, for those seeking to optimize, building Rosaria for Cryo damage will be superior to building her for Physical damage.
Rosaria and the Golden Ratio
One of the more well known numbers when it comes to character building and Genshin optimization is the widespread 1:2 ratio for CRIT—that is, balancing CRIT Rate and CRIT Damage in a 1:2 ratio, including external sources, is the most optimal for maximum DPS, and players should strive to balance those stats accordingly. Rosaria’s A4 talent providing CRIT share, however, presents an interesting conundrum exclusive to her.
While the 1:2 ratio is widely known and generally true, the DPS loss of deviating from this “Golden Ratio” is less acknowledged—for example, going from a 1:2 ratio to a 1:1.5 ratio is generally only a DPS loss of about 2.1%. Rosaria sharing her CRIT Rate means that this personal damage loss is very often accounted for by powerful teammates who appreciate the extra CRIT—and means that until about 85% CRIT Rate, CRIT Rate has generally more value for her than any other stat. There are exceptions to this: some teams do not take advantage of her A4, and getting ER until requirements are met is always the primary target. Nonetheless, this is an important facet of her building to keep in mind—for an example, from a team damage perspective, a Rosaria with a 85:127 ratio often performs better than one with the comparatively “optimal” 74:149.
Freeze

“You don’t always know why good things happen, or why we should be happy about them. Heh… But if you ever face a problem too big to handle, don’t give up hope. You never know, someone may be there to help, even if you can’t see them.
Freeze utilises Rosaria’s consistent Cryo application to keep enemies Frozen alongside a Hydro unit, and then uses this state to make full use of Blizzard Strayer’s 4pc effect. This, compounded by Cryo Resonance, gives Rosaria a hefty 55% effective CRIT Rate, and combined with her A1 Talent and base CR, allows Rosaria to stack up to 72% CRIT Rate with no stats dedicated to it. As such, she is able to freely build for CRIT Damage, and so despite the lack of damaging Reactions to bolster her output she is nonetheless capable of dealing significant damage. Rosaria’s self-sufficiency and lack of a need for field time in this role allow her teams to be incredibly flexible, and the team’s nature to keep enemies Frozen results in a very smooth playstyle that is nonetheless fast paced due to Rosaria’s short cooldowns.
Pros / Cons
Pros
- Innate CC via Freeze makes the team safe and comfortable
- Rosaria’s A1, Cryo Resonance, and 4 BS (4 Blizzard Strayer) means she can prioritize just ATK and CDMG
Cons
- Significantly weaker against enemies that cannot be Frozen
- Her A4 is notably under-utilized due to the extensive CRIT provided by 4 BS and Cryo Resonance
Weapons
It should be noted that all weapon and artifact listings provided here on out were determined based on fixed assumptions according to KQM standards. Each player’s situation varies, and while the rough value of the following weapons still will generally hold true, using tools such as Genshin Optimizer can determine if a different weapon performs better for Rosaria under each individual player’s circumstances.
Assumptions: All weapons 90/90, Rosaria C6 90/90 T9/12/12, 4BS ATK%/Cryo DMG%/CD 20 fluid subs KQMC standards, 2 Es 1 Q, Cryo Reso + 4NO.
Refer to the Calculation Repository for more details. Note that the given numbers are under these specific assumptions, and are not meant to be used out of context. Calcs provided courtesy of jamberry#7142.
| Weapon | %vs The Catch R5 | Description |
 Wavebreaker’s Fin R5 | 130% | Calculated at 260 total team Energy, the best case scenario. Due to the abundance of CRIT Rate and comparative lack of Attack buffs in Freeze teams, Wavebreaker’s Fin pulls ahead of its contemporaries even in teams where its passive is under-utilized due to multiple 60 Energy Burst cost units. This makes it Rosaria’s undisputed BiS in Freeze teams for those lucky enough to have it. |
 Staff of Homa R1 | 124% | Calculated at above 50% HP. Despite losing its usual crown as BiS to Wavebreaker’s Fin R5, Staff of Homa is nonetheless her second best option, and by quite a large margin compared to all the weapons below it. However, Staff of Homa is a heavily contested spear for usage, and it can be more worthwhile at times to give it to units who deal a higher portion of their team’s DPS—nonetheless, if usable, it proves an extremely strong option for Rosaria. |
 Wavebreaker’s Fin R1 | 115% | In optimal conditions for their respective uses, Wavebreaker’s Fin outperforms Vortex Vanquisher and other options even at R1, and has considerably less conditions attached to its usage. |
 Vortex Vanquisher R1 | 115% | Calculated at 3 stacks, shielded. Vortex Vanquisher, despite performing about equally to Wavebreaker’s Fin at R1, is ranked lower due to the team building restraints it forces—in Freeze teams, it essentially mandates using Diona to activate its passive, thus reducing overall team damage in scenarios where a more damage-oriented teammate could be chosen. Without its passive, this weapon is not worth running. If running Vortex Vanquisher, using a quick Normal Attack when switching into Rosaria can help to obtain an additional stack, as well as triggering Xingqiu’s Rainswords if using him on the team. |
 Primordial Jade-Winged Spear R1 | 111% | Calculated at 3 stacks. While the abundance of CRIT Rate makes this weapon lose some luster, it is still nonetheless a solid choice and helps give a small boost to Rosaria’s A4 as well. However, this weapon can be difficult to build around without overcapping on CRIT Rate, so care should be taken so this does not occur. It is also better by a decent margin than the options below it. |
 Skyward Spine R1 | 104% | Though Skyward Spine’s passive is almost useless save a trace amount of CRIT Rate, its high Base Attack and ER mainstat give it a decent placing in Rosaria Freeze teams. Having an ER mainstat also helps meet requirements easier, and allows more stats in artifacts to be allocated to offensive options. |
 Lithic Spear R5 | 104% | Calculated at 1 stack. Lithic Spear’s main issue in Freeze teams is its inability to accumulate stacks due to the lack of good Liyue options for freeze – the only viable options for teammates are Xingqiu and Ganyu, both of whom possess anti-synergy with each other. At two stacks and R5, it can rival even PJWS, but its value drops considerably with a more reasonable one stack. |
 Engulfing Lightning R1 | 102% | Engulfing Lightning can act as a good cushion for teams in which Rosaria’s ER requirements are high. Though this is usually not the case in Freeze teams due to running 2 Cryo units, it is nonetheless possible – using tools such as Genshin Optimizer can help determine whether Engulfing Lightning can outperform options listed above it. Note that this weapon never makes stacking Energy Recharge worthwhile, use the same stats as normal. |
 Lithic Spear R1 1 Stack | 102% | At only 1 stack, refinements do not change the value of Lithic Spear much. |
 Blackcliff Pole R1-5 | 100% | Blackcliff Pole, without any stacks, is about equivalent to The Catch. While this means its damage is good, and can potentially even be better than the above options if stacks can be obtained, its inconsistency means it is generally not worth buying. However, if The Catch is unavailable for Rosaria to use, and the player has none of the other listed options, it can be worth considering to get a R1 – nonetheless, 24 Starglitter is not inexpensive and thus it must be stressed this weapon will usually not be worthwhile. |
 The Catch R5 | 100% | Rosaria’s F2P option, and a good one. Rosaria greatly appreciates the ER substat, which usually allows her to be fully built for offensive stats, and the bonus Damage% and CRIT Rate for Burst is also utilised well as her Burst constitutes the majority of her damage. It should be noted that the CRIT Rate it offers is conditional and thus does not affect her A4. Nonetheless, it is a solid option, and the damage difference between it and even Skyward Spine is rather marginal. |
 Deathmatch R1 | 92% | Deathmatch provides large amounts of CRIT Rate, often causing the player to nearly cap on CR and making building Rosaria difficult. Nonetheless, when built properly, it is a decent option—albeit worse than The Catch. It does provide some unconditional CR for Rosaria’s CRIT Share, though the true value of this is hard to gauge, and generally not worth considering too much on Freeze teams. Refinements are not worth getting. |
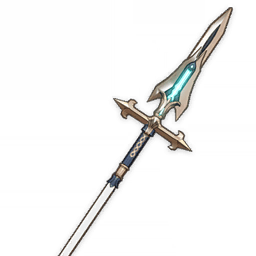 Favonius Lance R1-5 | 89% | While Favonius Lance is considerably worse in terms of damage than all above options, its Energy generation passive can reduce ER requirements for the entire team. If it is the only way to achieve reasonable ER values for the party, it is worth using. |
Artifacts
Rosaria’s Energy requirements vary a great amount between her potential teams depending on who is used, as well as each player’s playstyle with them. For accurate ER requirements, it is best to use the Energy Recharge Calculator (ERC). A tutorial on how to use the ERC can be found here. Keep in mind it is usually recommended to build slightly above the minimum requirements for smooth rotations.
| Set Piece | Mainstat | Substat | Description |
 Flower | HP | CRIT DMG > CRIT Rate > ATK%, ER | On all pieces, ER until requirements always takes precedence. After that, CRIT Damage will usually be the most beneficial stat to stack due to the abundance of CRIT Rate provided by 4BS, however, assuming a 1:2 ratio is roughly maintained, CRIT Rate can be valuable due to Rosaria’s A4, despite its underutilization in Freeze. |
 Feather | ATK | CRIT DMG > CRIT Rate > Atk%, ER | Same as Flower. |
 Sands | ATK% | CRIT DMG > CRIT Rate > ATK%, ER | ER sands will generally hurt Rosaria’s damage too much to be considered worthwhile, while also often overshooting requirements and are thus unnecessary. It is recommended to meet ER requirements through substats instead. |
 Goblet | Cryo DMG Bonus | CRIT DMG > CRIT Rate > ATK%, ER | As covered earlier, building Rosaria for Cryo damage will always produce the best results. |
 Circlet | CRIT DMG | CRIT Rate > ATK%, ER | While most characters can use either a CRIT Damage or CRIT Rate Circlet, 4BS users almost always need a CRIT DMG Circlet. The only exception is if Rosaria has >200 CDMG from her weapon and/or substats, and a CRIT Rate circlet would not cause her to overcap on CRIT Rate. |
| Artifact Set | Description |
 4 Blizzard Strayer | There are no other alternatives to this set in Freeze, and it far outperforms any other options. 4BS is the only set that can capitalise on opponents being Frozen, and 40% CRIT Rate, as well as 15% Cryo DMG Bonus are both hugely appreciated stats for Rosaria. |
 4 Noblesse Oblige | Specifically for the Freeze Sub-DPS role, if the player has no other decent 4BS pieces due to prioritizing it on the main carry, Rosaria can opt to hold 4NO for the team. While this is not recommended, it is still a good placeholder option. With this set, Rosaria can also consider using weapons shown in the Support section. |
 Other Artifacts | All other sets are inferior to 4 BS and not recommended. A 2pc combination of 2BS, 2NO and/or 2 Glad/Shime can be run as a placeholder, but 4BS does not have any good replacements. |
Team Compositions
All team images generated with muakasan#2792’s tool
Quickswap Freeze

In this team, Rosaria and the other team members constantly rotate through Elemental Skills and Bursts, with Normal and Charged Attacks only being used to trigger skills such as Xingqiu’s Elemental Burst or some other utility. The damage distribution of such teams will generally be more evenly split amongst team members; as such, it is recommended to invest into all team members, with exceptions elaborated on further along. Rosaria is one of the primary damage dealers of the team, while providing Cryo application for Freeze as well as being one half of Cryo Resonance.
Cryo Flex
The Cryo Flex provides Cryo application, is the other half of Cryo resonance, and provides damage or some other utility.
| Character | Rating | Details |
 Kaeya | S | Kaeya’s A4 Talent makes him uniquely suited to Freeze teams, turning him into the best Cryo battery in the game given ample opportunities to cast his Skill, which is possible in this team. Additionally, he provides personal damage comparable to that of Rosaria’s. |
 Ganyu | S | Ganyu has a powerful Burst that also boosts the team’s Cryo damage, and can fill in rotation gaps with her charged shots. She can also provide taunts, which combined with Freeze’s innate CC, can potentially be enough defensive utility for players to run without healers. That said, she is not the best option for Quickswap, and her inclusion often shifts the team to a different playstyle, one of which is covered in the Sub-DPS Freeze section. Nonetheless, her damage profile is significant and she is an excellent inclusion. |
 Shenhe | A | Shenhe has potential in Rosaria Freeze teams. Due to not needing 4BS, she can alleviate competition for the artifact, and instead can provide sizable buffs through her A1, A4, Burst, 4NO all while contributing personal damage through her Icy Quills. The Quickswap nature of the composition also allows her to refresh said Icy Quills throughout the rotation. However, her 20 second cooldown, lower personal damage, and ER needs raise some caveats to her use, but she is nonetheless a solid option. She can also uniquely enable mono-Cryo by replacing the Hydro unit for an additional Cryo flex. While generally weaker than Freeze, it is better when enemies cannot be Frozen. |
 Diona | B | Diona has excellent Particle generation with her usual weapon options of Sacrificial or Favonius Bow, and provides healing and shielding for the team. While these can be invaluable, her personal damage is almost nonexistent, and her 20 second cooldown on Burst means that, in a 15 second rotation, she can either Burst only once every other rotation, or the rotation has to be extended, reducing DPS and making her a poor Noblesse user. |
 Chongyun | C | Chongyun’s C2 can help to cut the rotation time, his Burst also deals decent damage, especially with C6. He also functions as a very good user of 4 NO. However his inclusion shifts the team’s playstyle towards Main-DPS Freeze Rosaria, as his Skill infuses the team’s Normal Attacks with Cryo. |
 Aloy | C | While Aloy has a decent, low Energy cost Burst and generates a fair number of particles on her Skill, the latter’s 20 second cooldown means her Particle generation over time is relatively lackluster. So unless she is already invested in, there is little reason to use her over her also free, higher-damage, higher-Particle generation counterpart: Kaeya. |
Hydro Flex
The Hydro Flex provides Hydro application for Freeze, and often damage or some other utility.
| Character | Rating | Details |
 Mona | S | Mona’s Omen debuff, already powerful, can be extended using Freeze to last even longer. This, alongside TTDS for more buffs, or Prototype Amber or Favonius Codex for Energy generation to meet her high ER demands as well as some minor healing in Prototype Amber’s case, makes her a strong option for the team. However, her lackluster Hydro application means that enemies will generally be left un-Frozen for at least part of the time. |
 Kokomi | S | Kokomi offers perhaps the most role compression amongst the Hydro units listed – she has long lasting, consistent AoE Hydro application and powerful healing via her Skill (with its duration refreshed by her Burst), some damage with Ocean-Hued Clam, and team buffs via Thrilling Tales of Dragon Slayers and potentially Tenacity of Millelith. However, in situations where her role compression is not needed, she can contribute less to team damage than the units listed above. |
 Xingqiu | A | Xingqiu has high personal damage and unmatched off-field single-target Hydro application, and with the Anemo unit it can sometimes be swirled to provide application in AoE. Further, his damage reduction and pseudo-healing can often allow Freeze teams to not need a dedicated healer. Though he is not without his flaws—his Hydro application is locked to single-target, his long cooldowns gates rotations, and he lacks any team buffing capabilities, he is nonetheless a premier pick. |
 Ayato | A | Ayato offers strong on-field damage while providing long-lasting AoE Hydro application through his Burst. While his required field time and inability to provide buffs to the team makes him relatively inflexible compared to his competition, he remains a powerful option for the Hydro slot. |
 Yelan | A | Yelan brings many of the advantages Xingqiu has, with some notable nuances. Yelan tends to possess higher personal damage, and her ramping A4 buff—despite not being fully utilized due to the tendency of units to rapidly swap in this team—is a welcome boost. Further, the fact she does not possess rainsword orbitals eases Cryo absorption into Anemo abilities. However, the lack of Xingqiu’s defensive utility can be noticeable in Freeze compositions not running a dedicated healer, and her lower Burst duration—as well as the Freeze uptime—can also prove problematic. Further, she shares Xingqiu’s weakness of only having single-target Hydro application. Despite these issues, she is a formidable option. |
 Barbara | B | Barbara performs similar roles to Kokomi, condensing healing and other utility into a single slot, but is significantly worse at every one of them. While she can hold Thrilling Tales of Dragon Slayers and provide some Hydro application, said Hydro application is the most lackluster of all options listed, further compounded by her long cooldowns and non-existent contribution to team damage outside of aforementioned buffs and providing Freeze. |
Anemo Flex
The Anemo Flex provides 4-piece Viridescent Venerer’s RES shred and additional crowd control.
| Character | Rating | Details |
 Kazuha | S | Kazuha is, undoubtedly, the strongest damage option for the team. A low cooldown Skill with strong grouping, a 15 second cooldown Burst, 4 VV, and significant personal damage cement him as a worthy contender already, but his A4 talent—providing 30-40% Elemental Damage Bonus for the rest of the team—is what allows him to shine over others. |
 Venti | S | While he does not provide the Elemental Damage Bonus Kazuha can, Venti has the strongest grouping potential in the game, and combined with his significant personal damage, low cooldown Skill, and Energy refund his power cannot be ignored. However, some units may struggle to reach into his Burst, including Rosaria herself, although Frozen enemies will not be lifted by his Burst. |
 Heizou | A | Heizou has solid personal damage with his fully stacked Elemental Skill as well as decent grouping with C2. Alternatively, he can choose to sacrifice some of his personal damage to use TTDS or Prototype Amber for team utility. While a definitive step down from Kazuha and Venti, Heizou’s versatility allows him to serve as a strong option on Rosaria Freeze. |
 Jean | B | Though the need for healing in Freeze teams is reduced, it can still be necessary—and in these situations, Jean can be an invaluable addition. Her low CD Skill and Burst have high multipliers, as well as powerful healing. However, her Burst CD is 20 seconds and she lacks the grouping and/or the buffing capability of the above options, and so whether she is the best option depends on the need for healing. |
 Sayu | B | Sayu’s contribution to a team is incredibly similar to Jean, exchanging higher personal damage and a large burst of healing for consistent healing and more accessibility by virtue of being a 4*. |
 Sucrose | B | While Sucrose can provide decent grouping and TTDS, her EM buff is entirely wasted in Freeze teams and her Skill and Burst have long cooldowns. While certainly not a bad option, her potential is diminished in Freeze teams. In these teams, it is best to stack enough Energy Recharge to get Sucrose’s Burst every rotation, as the grouping it provides is very valuable. |
 Anemo MC | B | Anemo Traveler is actually a surprisingly good option when used correctly: 20% additional shred at their F2P C6 and low cooldowns with good grouping can allow them to contribute quite well. The issue stems from being able to use them properly; while Anemo Traveler will not pick up Frozen enemies, and can lock enemies against walls, this needs to be ensured or else damage is lost as enemies are repositioned, often to outside of Rosaria’s Burst range. |
Rotation
Optimization follows strict and rigorous rotations in order to properly make calculations and optimally control factors such as buff uptime and field time, however for practical play, the playstyle can be simplified to some general guidelines for those seeking a more flexible alternative – though rotations are made in such a way to follow these guidelines as much as possible as part of the rotation. Some guidelines for Rosaria Quickswap Freeze are as follows:
- Generally starting with the Hydro unit, switch between units, casting their Skills and Bursts as quickly as possible or as they come off of cooldown, respectively. This is the most important part to follow.
- If using an Anemo unit, use a Cryo unit’s Skill before swapping them in order to properly Swirl Cryo for Viridescent Venerer’s and buffs, as well as to absorb Cryo into related abilities.
- If using buffers such as Kazuha, apply said buffs before casting Rosaria’s Burst as it snapshots, making buffs applied after much less impactful. While Mona’s Omen is a debuff on the enemy, and thus is not snapshot, she may be holding TTDS whose buff is snapshot.
- Different Hydro units come with their own caveats in playstyle. If using Xingqiu, Normal Attack when switching in a unit and after casting their abilities to get maximum Rainsword triggers. Moreover, his Rainsword orbitals can occasionally ruin Cryo VV, so it is best to maintain distance from enemies as much as possible. For Kokomi, do not forget to Burst after about 10 seconds after deploying her jellyfish to refresh the duration of her Skill, or Hydro will not be applied for a duration. If she is holding TTDS, swap to Rosaria every other time she swaps in in order to properly transfer the buff to Rosaria.
Below are some sample rotations, provided courtesy of Luno#1337 using Xingqiu.
Rosaria / Kaeya / Sucrose / Xingqiu Rotation
Rosaria / Kaeya / Kazuha / Xingqiu Rotation
Main-DPS Freeze

While similar to Quickswap Freeze in composition, this team has a fundamentally different playstyle. Now, Rosaria stays on-field for the majority of the time to take advantage of Chongyun’s Cryo infusion, using Normal and Charged Attacks to deal additional damage. Chongyun can also cut rotation times with his C2, and at C6 his Burst can deal decent damage while being a very good wearer of Noblesse Oblige.
In this team, Rosaria uses N1CD – essentially, 1 Normal Attack, followed by a Charged Attack, whose ending animation is canceled by a dash. This is done by performing a click and hold for the N1C combo, then dashing as soon as the Charged Attack connects.
Although Quickswap Freeze will eventually outscale this team with investment into other team members—due to Rosaria’s somewhat lackluster Normal and Charged Attacks, and how poorly Chongyun’s personal damage scales with investment—this team is a cheap alternative that performs just as well if not better than Quickswap Freeze if a player does not currently have the resources to invest into characters beside Rosaria.
Note that if resources become available, switching to a team more like Quickswap Freeze would be of consideration, due to the aforementioned problems.
For flex options, refer to Quickwap Freeze—though shorter Skill cooldowns are less of a benefit in this team due to Rosaria’s extended field time, the overall benefits of drawbacks listed remain entirely the same.
Listed below is a sample rotation of the team involving Xingqiu and Kazuha provided by virtue of Luno#1337 – note that Chongyun’s field is still present when switching in Xingqiu. This allows Xingqiu, whose cooldowns gate the team’s rotation time, to benefit from C2 Chongyun’s CDR. Different units will result in different rotations, however, most of the guidelines for Quickswap Freeze still apply with the exception of Rule 1.
Rosaria Chongyun Freeze Rotation
Sub-DPS Freeze

In this team, Rosaria’s primary role is to support another Cryo character, providing particles and CRIT Rate share; however, unlike the team comps in the Support section, these teams benefit more from Rosaria building for damage than leaning fully into her support role. The other Cryo character in this situation takes over the main DPS role. However, Favonius Lance gains more value in some compositions where ER requirements for the other units are unreasonably high.
Cryo Flex
| Character | Details |
 Ayaka | Ayaka’s Burst is incredibly powerful, but is limited by its high cost. This necessitates the inclusion of an additional Cryo, and Rosaria fills this role well. Ayaka works best against low mob counts with high HP, so she can make full use of her devastating Elemental Burst. She will also typically take some field time to use her Charged Attacks, though not nearly enough to classify her as a selfish carry. |
 Ganyu | As elaborated upon earlier, Ganyu has an Elemental Burst which can have terrifying potential, especially in AoE due to its high quadratic scalings. Her Frostflake Blooms are also not to be ignored, though in typical rotations she will not get much of a window of time to capitalize off of them. |
Hydro Flex
While the general ranking of the Hydro Flex options remains mostly the same with Quickswap Freeze, some special notes have to be made in regards to Xingqiu and Yelan. Their longer cooldowns are not as relevant to Ayaka who is already fixed to a minimum 20 second rotation; however, they have a particular anti-synergy with Ganyu who prefers to use her Level 2 Charged Attack, making the triggering of their Bursts awkward.
Anemo Flex
While the general ranking of the Anemo Flex option also remains mostly the same as Quickswap Freeze, a special note should be made about Venti, whose unadulterated CC is an absolutely tremendous boon when functional in its ability to increase the damage of Ganyu’s quadratically scaling Burst. It should also be noted Jean and Sayu’s 20 second cooldown on their Burst is less apparent with Ayaka; however, they are still lower damage options in comparison.
Rotation
Rosaria Ganyu Freeze Rotation
Credit to Charliex3000#9403 for the rotation. For those who prefer a written rotation:
Ganyu Skill -> CA -> Mona Skill -> Venti Skill -> Burst -> Rosaria Skill -> Burst -> Ganyu Q -> Mona Q -> Venti E -> Rosaria E -> Repeat
Rosaria Ayaka Freeze Rotation
Props to Luno#1337 for the rotation. While absorbing Hydro on the Burst is generally a damage loss, if it is desired for AoE Hydro application using Ayaka’s Skill after Rosaria’s initial Skill cast will give a Hydro absorption.
Reverse Melt
Credit to @_1_pilot on Instagram!
Reverse Melt abuses the lack of ICD on Rosaria’s kit by Reverse Melting the damage from her Burst and Skill, amping up her damage profile to significant levels through a consistent Pyro applicator, further amplified by the significant buffs Rosaria can snapshot onto her Burst in such teams. These teams also benefit in turn significantly from Rosaria’s A4, due to her tendency to build for CRIT Rate, thus creating very synergistic high damage compositions. While it can be difficult to play due to Rosaria’s fixed range, for those accustomed to it these teams are a powerful choice.
Pros and Cons
Pros
- Offers high damage potential by fully utilizing the fact Rosaria can Reverse Melt all hits of her Burst and Skill.
- Rosaria’s A4 is often well utilised by strong teammates.
Cons
- Is often extremely relegated to “Circle Impact”, confining the player to a fixed radius of play outside of which a huge DPS loss is sustained.
- Requires Bennett, who is highly contested.
- Swirling Cryo can be challenging.
Weapons
Assumptions: Rosaria C5 Lvl 90/90 ; T9/12/12 ; Lvl 90/90 Weapon ; 4pc Gilded Dreams ; EM / Cryo / CR/CD, Minimum 120 ER% ; 2 preallocated rolls into each stat ; 20 liquid stats distributed into ER% until minimum, rest distributed optimally, Pyro Resonance ; 2 Skill, 1 Burst w/ 1071 ATK Bennett buff and 4 NO; All Skill hits Melted, 4 Burst hits melted and 2 Burst Hits not melted; 21 second rotation.
Refer to the Calculation Repository for more details. Note that the given numbers are under these specific assumptions, and are not meant to be used out of context. Calcs provided courtesy of Sew#2409.
| Weapons | % vs R3 Dragon’s Bane | Description |
 Staff of the Scarlet Sands | 121.73% | Buff is dynamically calculated. The weapon’s high CRIT Rate mainstat already makes it a strong contender; further, the EM to Attack conversion from its Passive is highly valuable given Rosaria’s stat requirements. Note its value is not quite as high without 4pc Gilded Dreams and/or high EM builds; even then, it is her best option. |
 Staff of Homa R1 | 109.24% | Calculated at >50% HP. Staff of Homa is one of the best offensive polearms in general, however, it is no longer as ahead of its contemporaries as it was in Freeze. Nonetheless, it remains a powerful option, though the opportunity cost of not using it should be kept in mind when giving it to Rosaria. |
 Wavebreaker’s Fin R5 | 108.94% | Calculated at 280 team energy. The inclusion of Bennett and his large Attack buff stifles Atk% weapons — nonetheless, R5 Wavebreaker’s Fin remains an incredibly strong weapon and Rosaria’s best 4 star option. |
 Deathmatch | 104.66% -109.30% | Calculated at one target. Despite having the lowest base ATK of any 4 star polearm, it makes up for it by having a very high CRIT Rate sub and additional ATK% from its passive, all of this in addition to Pyro Resonance and Bennett buff make the low base ATK a non-issue. While refinements do improve its value decently, it is not recommended to buy them. |
 Dragon’s Bane R5 | 103.64% | Dragon’s Bane’s EM mainstat and passive are perfect for Rosaria in a Reverse Melt team, where enemies are almost always imbued with a pyro aura that she reacts on. The value of this weapon is significantly higher if Rosaria does not have much Elemental Mastery from her artifacts. |
 Wavebreaker’s Fin R3 | 103.31% | All the same advantages of R5 Wavebreaker’s Fin, simply with a scaled down passive. |
 Primordial Jade Winged Spear R1 | 102.43% | Though PJWS’s passive cannot be properly utilized due to Rosaria’s low field time, its high base attack and CRIT Rate mainstat allow it to rank solidly high amongst its competitors. Its mainstat assisting with Rosaria’s A4 is not included in calculations. |
 Dragon’s Bane R3 | 100% | All the same advantages of R5 Dragon’s Bane, simply with a scaled down passive. |
 Calamity Queller R1 | 99.20% | Calculated at full stacks on 2 Skills without Bennett buff and 4 NO. Calamity Queller also Suffers from Rosaria being unable to fully use the weapon’s passive due to snapshotting – however, it still remains a competitive option. It outperforms R1 Vortex Vanquisher without a shield, R1 Dragon’s Bane, and R1 Wavebreaker’s Fin in most scenarios, but will generally underperform compared to them with refinements or if their respective passives are more utilized. |
 Wavebreaker’s Fin R1 | 97.67% | All the same advantages of R5 Wavebreaker’s Fin, simply with a scaled down passive. |
 “The Catch” R5 | 96.42% | A helpful ER mainstat, an incredible passive, all tied up in a neat F2P package for Rosaria. While generally a good go to, it has some issues – its CRIT Rate does not contribute to A4 due to being conditional, and Reverse Melt Rosaria often runs with Xiangling, who can use “The Catch” even better. Nonetheless, a solid choice. |
 Dragon’s Bane R1 | 96.36% | All the same advantages of R5 Dragon’s Bane, simply with a scaled down passive. |
 Blackcliff Pole | 96.16% | Similar to Freeze, though its performance without stacks is on par to “The Catch”, and it has greater potential if stacks are accumulated, this is inconsistent to the point it is generally not worth buying. Unlike Freeze, Reverse Melt has 3 solid F2P alternatives, making it even less worthwhile. |
 Vortex Vanquisher R1 | 94.26% | Vortex Vanquisher suffers from having an Atk% mainstat in a team with strong Attack buffs, as well as an inability to fully utilize its passive due to two factors: Rosaria’s low field time prevents her accumulating multiple stacks, and the only synergistic shielder for Rosaria on Reverse Melt is Zhongli. |
 Missive Windspear | 94.82% | Missive Windspear provides Rosaria with useful stats with an easy to activate passive; it serves as a good F2P option for players who have it, albeit worse than “The Catch”. That said, since “The Catch” is commonly reserved for Xiangling, this serves as a backup for Rosaria. |
 Skyward Spine | 92.91% | Despite being worse than “The Catch”, this weapon is listed for if “The Catch” is on a different unit and the player owns a Skyward Spine. It is otherwise unremarkable. |
 Lithic Spear R5 | 92.24% | In most of Rosaria’s Reverse Melt teams, Lithic Spear can generally only manage to get 1 stack at most through Xiangling, greatly lowering the value of this weapon even at R5. If using Shenhe, Chongyun or Zhongli as the flex, however, the value of this weapon increases, enough to overtake “The Catch”. |
 Kitain Cross Spear R5 | 91.14% | With an EM mainstat and energy restoration passive, as well as high Base Attack, Kitain Cross Spear performs competitively and is the preferred F2P choice for Rosaria if “The Catch” is being used on a different unit. The weapon’s passive causes 3 energy to drain as soon as Rosaria hits an enemy with her Skill, and then restores 5 energy every 2 seconds over 6 seconds – nonetheless, it is still possible for Rosaria to cast her Skill and Burst in quick succession before the initial energy drain hits. |
 Engulfing Lightning | 90.34% | Similar to Freeze, though generally worse, Engulfing Lightning can perform better than some of the above options if Rosaria has a naturally high ER requirement. Tools such as GO can help find out if this is the case for the player. |
 Lithic Spear R1 | 89.26% | Without refinements, Lithic Spear is not worth using. |
 Favonius Lance | 83.72% | As in Freeze, despite performing worse than all other options, its energy generation passive can make it worth using in niche scenarios. |
Artifacts
Reverse Melt Rosaria’s artifacts are generally within quite a close damage margin of each other, and with good enough substats, can overtake “better” listed options – however, substat quality varies incredibly between players, and thus is beyond the scope of this guide to cover.
Assumptions: Rosaria C5 Lvl 90/90 ; T9/12/12 ; Lvl 90/90 Weapon ; R3 Deathmatch ; EM / Cryo / CR/CD, Minimum 120 ER% ; 2 preallocated rolls into each stat ; 20 liquid stats distributed into ER% until minimum, rest distributed optimally, Pyro Resonance ; 2 Skill, 1 Burst w/ 1071 ATK Bennett buff and 4 NO; All Skill hits Melted, 4 Burst hits melted and 2 Burst Hits not melted ; 21 second rotation.
Refer to the Calculation Repository for more details. Note that the given numbers are under these specific assumptions, and are not meant to be used out of context. Calcs provided courtesy of kol#1593.
| Set Piece | Mainstat | Substat | Description |
 Flower | HP | CR > CDMG > EM ≥ Atk%, ER | As mentioned earlier in the guide, Rosaria does not generally follow the 1:2 ratio. While building some CDMG is still beneficial, CRIT Rate will generally give more value overall due to her A4 CRIT Share. The value of EM or Attack will depend on a multitude of factors, such as external buffs, her other artifacts, and her choice of weapon. Thus, using GO is recommended for perfect optimization. Finally, as always, priorities meeting ER requirements first. |
 Feather | ATK | CR > CDMG > EM ≥ Atk%, ER | Same as Flower. |
 Sands | EM or ATK% | CR > CDMG > EM ≥ ATK%, ER | Generally, Rosaria will prefer an EM mainstat sands. However, external EM buffs—primarily from Sucrose—can cause the balance to tip, thus, it is best to check the optimizer to see the best option for sands. |
 Goblet | Cryo DMG Bonus | CR > CDMG > EM ≥ ATK%, ER | As always, building Rosaria for Cryo damage is the way to go. |
 Circlet | CRIT Rate | CDMG > EM ≥ ATK%, ER | Rosaria will generally prefer CRIT Rate to CRIT Damage, however, if already at higher CRIT Rate values through substats and/or a CRIT Rate weapon, a CRIT Damage Circlet can be used. |
| Set | %vs 2 BS 2 NO | Description |
 4 Gilded Dreams | 101.37% | 4pc Gilded Dreams is a worthwhile option for players, being very closely comparable to Lavawalker and EoSF at low ER albeit scaling worse with external Atk% and EM buffs. The set also has generally good value on other characters – that said, it is not quite as efficient as farming EoSF. |
 4 Lavawalker | 101.32% | 4 Lavawalker is one of Rosaria’s strongest options and can be worth farming especially if CWoF is needed for a different unit. Nonetheless, its damage is not greater to the point its alternatives are unviable, and it is also generally inflexible outside of a Reverse Melt role. Therefore, it is not worth specifically farming unless CWoF is also needed. |
 4 EoSF | 100.5% at 120% ER, better at higher requirements. | 4 EoSF’s value greatly depends on Rosaria’s ER requirement on a given team, as though it on its own does not justify building for ER, it provides a good cushion for doing so. At higher ER requirements (>130%), it can even overtake 4 LW, whilst also having the bonus of being a very flexible set, and the domain it is from being extremely resin efficient to farm. However, it is also a highly contested set, and thus there can be opportunity cost in using it if it is more required elsewhere – for example, on Xiangling. |
 2 Blizzard Strayer 2 Noblesse Oblige | 100% | 2 BS 2 NO is a very good generalist set for Rosaria. Though having lower damage potential than both 4 EoSF and 4 Lavawalker, it can outperform 4 EoSF at lower ER requirements, and still remains competitive otherwise. Moreover, both 4 NO and 4 BS are irreplaceable BiS artifacts for Rosaria in other roles, thus, having half of their set can prove valuable, and NO is also a generally valuable set. This cements it as one of Rosaria’s best generalist options, and a highly competitive option in Reverse Melt. |
| 2 BS 2 WT > 2 NO 2 WT > 2 WT 2 GD | 97.8%-100.10% | Despite the nominal difference between these sets, they perform very similarly to each other and thus come under a substat difference between them, as well as the presence of external buffs. |
| 2 ATK 2 BS > 2 ATK 2 NO > 2 ATK 2 WT | 95.41%-96.5% | Due to the abundance of ATK and lack of Elemental Mastery in Reverse Melt teams 2 PC ATK combos generally fall behind other available options, although difference between the 2PC sets is highly dependent on the substats. |
| 2 Glad 2 SR | 91.88% | Similar to the above, there is a very minor difference between these sets despite the nominal greater than symbol, and the choice between them should be made based on substats and external buffs. |
Team Compositions
With Xiangling

| Second Slot | Description |
 Bennett | Though by technicality not needed, Bennett provides so much to Rosaria’s Reverse Melt teams that his slot is indispensable. Besides healing along with a powerful Attack boost that Xiangling, Rosaria and potentially the flex can snapshot, in this composition he performs the vital duty of batterying Xiangling in order to drastically lower her ER requirements. |
| Third Slot | Description |
 Xiangling | Xiangling, like Rosaria, has a powerful Burst with high scalings that functions off field, and is freed from the shackles of ICD. In this comp, enabled by her standard support Bennett, she is the main source of consistent Pyro application, enabling Rosaria to Reverse Melt. Nonetheless, her own damage profile is significant, and damage is often split between Rosaria, Xiangling and the flex slot itself. It should be kept in mind Xiangling’s inclusion naturally extends rotation times to a minimum of 20 seconds. |
| Fourth Slot | Description |
 Kaeya | Kaeya’s inclusion as the flex slot sacrifices options for increased survivability or further buffs on Rosaria and Xiangling for his own significant personal damage as well as reduced ER requirements for both him and Rosaria. Even when limited by ICD on his Burst, his damage contribution is sizable, if lower than the other two members of the comp, and as such he should be given investment accordingly. Moreover, in content where it can activate, his own C2 can provide a considerable damage increase—albeit being difficult to obtain, due to not being a featured character in event banners. |
 Shenhe | Shenhe is a new Cryo character introduced in 2.4, and though her kit is not fully explored yet, she seems to have high potential in Reverse Melt teams with Rosaria, Xiangling and Bennett. She can freely use 4 Noblesse Oblige so Bennett can use 4 Instructor to provide further buffs—moreover, she provides a large amount of buffs for the team, such as up to 15% Cryo Resistance Shred, 15% Burst damage, and 15% Cryo Damage Bonus, as well as sizably bolstering Rosaria’s damage through her Icy Quill mechanic. Nonetheless, her kit is complex and needs further experimentation, so her value to Reverse Melt is still yet to be cemented. Shenhe is only recommended to use in this team with a Favonius Lance, and it is important to build some CRIT Rate on her to properly trigger it. |
 Chongyun | Chongyun, besides his own personal damage, reduces rotation time with his C2 and can provide Cryo Resistance Shred. Moreover, he can hold 4NO to allow Bennett hold 4 Instructor, and he can potentially hold WGS for further team buffs. However, his Constellations contribute significantly to his value—in particular are C2, C3 and C6, and it is not recommended to build him before C2. Furthermore, his inclusion importantly does not warrant, when playing optimally, to let Rosaria take field time to use her Normal or Charged Attacks—conversely, his inclusion in fact boosts Xiangling’s share of damage by allowing her to achieve occasional Melts. |
 Kazuha | Kazuha, as an Anemo unit, provides access to VV shred, grouping, as well as his sizable A4 buff and personal damage contribution through Swirls. It should be noted double VV setups in this comp are difficult to achieve and maintain over multiple rotations, but even Swirling just Pyro can provide a good buff to team damage as Xiangling has a sizable contribution of it. |
 Sucrose | Sucrose can also provide VV shred and grouping, however she trades a DMG Bonus buff and personal damage for her ability to hold TTDS and her EM share, which is valuable in Reverse Melt compositions. She also, however, suffers from the difficulty of double VV over multiple rotations the team has, and her grouping is subpar in comparison to Kazuha. |
 Zhongli | Zhongli trades the team DPS ceiling for unmatched comfort, providing easy 20% Resistance Shred for both Pyro and Cryo and an extremely bulky shield, as well as potential buffs from TotM (Tenacity of the Millelith). This can also prove to be a net DPS increase for the team if the other above options are not utilized properly – still, he is more of a comfort pick than a damage-oriented one. |
Rotation
Rosaria Xiangling Kaeya Rotation
In practical play, it is not necessary nor always possible to follow this exact rotation – in general, after the initial setup, switching between the E skills of Bennett, Rosaria and potentially the flex with proper timing can suffice. It is important to “funnel” the Energy Particles Bennett generates to Xiangling, in order to lower her ER requirements – that is, switch to Xiangling after Bennett to catch the Particles with Xiangling on screen. More information about funneling can be found on the Xiangling Guide. Rosaria’s Burst is used before Xiangling’s in order to snapshot Rosaria’s A4 CRIT buff. If using an Anemo unit instead, be sure to use their abilities before Xiangling and Rosaria to snapshot any buffs they provide.
Rosaria / Shenhe / Xiangling / Bennett Rotation
Variant 1
Variant 2
Credit to Zamo#6399.
With Shenhe, in order to maximize usage of the buffs she provides, Rosaria instead casts her Burst at the end of the initial setup. Due to Xiangling casting her Burst much earlier in the first rotation, it will be necessary to rely on Bennett’s E and/or Guoba in order to reliably Melt the last tick of Rosaria’s Burst, causing rotations to be fairly tight. The second rotation is a simpler adaptation that trades some uptime on Shenhe’s resistance shred for easier Melts.
Rosaria Chongyun Reverse Melt Rotation
Credit to ProfHugo#6478
As stated earlier, Chongyun’s inclusion does not enable Rosaria to use her Normal Attacks. Nonetheless, the utility he provides is significant and allows for extremely competitive damage. It is important to be able to cast Xiangling’s Burst in the field of his Skill, in order to reduce the composition’s rotation time.
With Sunfire

| Second Slot | Description |
 Bennett | This team makes use of a special interaction between Jean’s and Bennett’s Bursts dubbed “Sunfire” to Melt Rosaria’s and Kaeya’s damage. The interaction works due to Jean and Bennett both “cleansing” the active unit by constantly applying an Element onto them—in Bennett’s case, this Element is Pyro. When Jean subsequently applies Anemo onto the active character, it reacts with Bennett’s Pyro to trigger a Pyro Swirl around the active character, dealing damage to surrounding enemies and applying Pyro onto them. This constant application is strong enough to Melt the Cryo units’ damage in a proper rotation. As mentioned earlier, Bennett’s team Attack buffs and healing already makes him nearly indispensable for most of Rosaria’s Reverse Melt teams—in this composition, he provides further utility by being one half of the “Sunfire” tech that drives this composition. It should be noted that Sunfire’s duration is too short to properly Melt all of Rosaria’s Burst ticks on its own, however, Bennett can use his E skill to reapply Pyro for this purpose. |
| Third Slot | Description |
 Jean | When using Sunfire, Jean builds for Elemental Mastery, allowing her to achieve decent personal damage. Moreover, she also provides VV shred and even more healing for the team. Jean’s inclusion also extends the comp’s rotation time to a minimum 20 seconds. Furthermore, she provides a considerable amount of additional healing to the team. |
| Fourth Slot | Description |
 Kaeya | Due to the already high survivability brought by having two healers on the team, as well as the presence of VV shred, Kaeya cements his spot as the best option for the fourth slot. With his aforementioned sizable damage contribution, Cryo Particles, and simplification to access to Cryo VV, he serves as the strongest option for the fourth slot. |
 Shenhe | Albeit not as valuable here as compared to the Xiangling variation due to only significantly buffing Rosaria and the team’s access to Resistance Shred, Shenhe is nonetheless a strong option for much the aforementioned reasons, while possessing much the same problems. |
Rotation
Rosaria Reverse Melt Sunfire Rotation
It can be difficult to always Reverse Melt all of Rosaria’s Burst ticks in practical play, as the duration of Sunfire is shorter than the duration of Rosaria’s Burst after C2, and therefore the player has to rely on Bennett’s E skill to Reverse Melt a tick. However, the ability to do this will rarely be the make or break for a properly built team.
If using Shenhe, it is best to use her Skill and Burst at the beginning of the rotation, before Bennett.
With Nahida

| Second Slot | Description |
 Nahida | While Burning is often the neglected child of Dendro reactions — and for mostly valid reasons — the fact it can enable a consistent Pyro aura on the enemy allows it to be used to Reverse Melt Rosaria’s Burst. That said, once a Pyro aura is lost it can be incredibly difficult to get it back in these styles of teams, as the team does not have any inherent consistent off-field Pyro application among its members. This makes setups rather fragile and finicky, and players are highly recommended to have additional Pyro applications with one or both of C6 Bennett or Kazuha. For her part, Nahida’s strong, long-lasting off-field Dendro application, reasonable personal damage and her snapshottable EM buff make her the by far the best option for these teams compared to her competitors. She can also maintain decent ownership of Burning, which further bolsters her own damage contribution significantly due to her tendency to build EM. |
| Third Slot | Description |
 Bennett | Bennett is invaluable on this team as he is on most of Reverse Melt Rosaria teams; while his slot can technically be filled by another Pyro unit, none of his competition can boast additionally being able to condense both healing and a powerful buff. Further, Bennett’s strong Pyro application with his spammable Skill helps maintain a Pyro aura on enemies, and his C6 is additionally highly useful for ensuring consistency. |
| Fourth Slot | Description |
 Kazuha | Without C6 Bennett, Kazuha is highly recommended for these teams to make sure Rosaria can reliably Reverse Melt, as his Burst’s additional application from the Pyro absorption he obtains from Bennett’s Burst makes the team much easier to play. While it is fairly difficult for Rosaria to be able to snapshot his A4 buff, he can nonetheless provide both VV support and his own personal damage; it is also worth noting that he improves the team’s Burning damage as ownership of the reaction will be shared largely by him and Nahida, who both primarily build Elemental Mastery. |
 Shenhe | While she highly appreciates C6 Bennett, Shenhe serves as a potent buffing option for Rosaria while also helping assuage her Energy needs. Her slower rate of Cryo application is a blessing in these teams, making her less obstructive in comparison to other Cryo units, and the huge boost she provides to Rosaria’s damage cements her as a powerful option. |
 Chongyun | Chongyun can be considered on these teams as he can enable a considerably short rotation due to his short cooldowns and C2 — further, after Reverse Melting his Burst his Cryo application is minimal as his infusion can be overridden by Bennett’s C6 or the player can just avoid using Normal Attacks on Rosaria and Bennett, allowing him to battery Rosaria without disrupting Pyro. The frequency with which he can cast his Burst also gives him fairly significant damage. |
Rosa – Chongyun – Nahida – Bennett
The rotation for this team is incredibly tight, and requires somewhat precise inputs to consistently maintain Burning aura. That said, it is a perfect fit for those who enjoy the fast-paced gameplay it offers.
General Support

It is important to know that Rosaria’s personal damage in her teams, when invested, will be non-negligible. Even when using her as a Support, it is oftentimes worth still investing into offensive stats to allow Rosaria to still contribute some damage. However, as Rosaria is not the primary contributor of damage in the below team compositions, prioritizing maximizing her support ability over her personal damage may be better for team damage overall.
Moreover, she should not be the main choice when it comes to investment, and the priority should be given to the main DPS of the team. However, even then, she still appreciates offensive stats when possible. It is important to note the teams listed below are merely the most prominent examples of her use, and she can flex onto more teams than those listed. Moreover, her Cryo application can be helpful to break Hydro and Electro shields, thus speeding up Abyss runs in some teams she could be considered a DPS loss in depending on content.
Pros and Cons
Pros
- Has consistent Cryo application for Vape Melt and/or Cryo Resonance.
- Consistent Particle generation, and synergises well with Favonius Lance.
- Combined with A4 CRIT Share, can provide a good chunk of CRIT Rate for the team.
- Non-negligible personal damage even as a support.
- Extremely flexible usage wherever her Cryo application does not interfere.
- Good shieldbreaking.
Cons
- Personal damage suffers due to investment in supportive capabilities.
- Her Cryo application can actively interfere in Reactions, limiting her team comps.
- Provides no defensive utility to her team in any capacity, often causing teams to need to dedicate a separate slot for that purpose.
Weapons
Weapons on Support Rosaria are not built around maximizing her damage, whose comprehensive list can be found under her Sub-DPS section. Instead, weapons in this section are based around those that either have passives which support the team, or assist in Rosaria’s supportive capabilities for the team by providing her CRIT Rate to share with her A4. At higher investments, assuming CRIT Rate and ER requirements are achieved through artifacts more damaging options such as Staff of Homa and Wavebreaker’s Fin can be used.
| Weapon | Description |
 Favonius Lance | Favonius Lance’s passive is the only one amongst all the Polearms to provide a useful passive that directly benefits Rosaria’s teammates. The clear Particles it generates can lower ER requirements for the entire team, and in particular for the main DPS, allowing them to run more offensive substats and enabling Rosaria as a much more efficient battery. The activation condition for its passive also synergises well with Rosaria’s desire to build CRIT Rate. Moreover, its ER mainstat allows Rosaria, in optimal scenarios, to dedicate more CRIT Rate in her artifact substats. For a supportive role, this is Rosaria’s undisputable BiS—however, it does hurt her damage a fair bit. |
 Deathmatch | Deathmatch’s CRIT Rate mainstat, highest amongst all the Polearms, makes it Rosaria’s second best option, bolstering her A4 CRIT share. Its passive is also quite strong, and can allow Rosaria’s personal damage contribution to the team to increase, though its main attraction is the CRIT Rate mainstat—however, the weapon is Battle Pass only, and buying it just for Support Rosaria is not recommended. |
 Primordial Jade Winged Spear | While stronger than Deathmatch for Rosaria’s personal damage, PJWS’ CRIT Rate mainstat is significantly lower, causing it to rank below Deathmatch. Moreover, due to Rosaria’s low field time in a supportive role, its passive is essentially wasted, and PJWS is a relatively highly contested Polearm for units with more significant damage—thus, giving it to other units takes priority. However, if you do not have any of the above options and happen to have one lying around, Support Rosaria can use it well. |
 Engulfing Lightning | Engulfing Lightning, though likely made better use of by different units, serves Support Rosaria well—it provides large amounts of ER, allowing Rosaria to specialize into CRIT Rate as much as possible. |
 Skyward Spine | Skyward Spine’s ER mainstat allows Rosaria to dedicate more of her artifacts for CRIT Rate, this, combined with its trace amount of its own CRIT Rate, makes it a suitable pick on Rosaria. Its high Base Attack, though a bit wasted, helps contribute to Rosaria’s personal damage—and Skyward Spine is not a highly contested Polearm, allowing players unlucky enough to roll one to make use of it. |
 The Catch | While “The Catch” is an extremely strong F2P option for Rosaria’s personal damage, and its ER mainstat can allow Rosaria to dedicate more artifact rolls to CRIT Rate, this weapon is highly contested by a number of units, who often take priority over Support Rosaria. Nonetheless, it is her indisputable F2P BiS. |
 Prototype Starglitter | Simply put, Prototype Starglitter is a worse “The Catch”, meant to be used only if players have none of the other options and “The Catch” is being used by a different unit. Nonetheless, it possesses the same ER mainstat value, making Rosaria easier to build and allowing her to dedicate more to CRIT Rate in her artifacts. |
| Any Other Weapon | None of the other weapons have any significant value for Rosaria in a supportive role. If interested in her personal damage, options such as Staff of Homa or Wavebreaker’s Fin can be considered – however, as her personal contribution to damage is not the main focus, and none of the other weapons help her in a supportive role, it is recommended to simply use one of the above options instead. |
Artifacts
Similarly to the weapons, Support Rosaria’s artifacts and preferred stats are allocated into maximising her supportive capabilities. Note that investment into Rosaria should always be a second priority, and that the Main DPS should always be invested into first.
Artifact Stats TL;DR: ER until requirements > CR >> CDMG > Atk% >>> ER >>> Anything Else
Artifact Set TL;DR: 4pc Noblesse Oblige in most compositions
4pc Instructor in Hu Tao Vapemelt
| Set Piece | Mainstat | Substat | Description |
 Flower | HP | CRIT Rate, ER | In all cases, ER until requirements will always take priority. After that, focusing on CRIT Rate will generally prove more beneficial to the team – other offensive stats are appreciated, but do not contribute to her supportive capabilities. |
 Feather | ATK | CRIT Rate, ER | Same as Flower. |
 Sands | ATK% or ER | CRIT Rate, ER | While the substat priority remains same as the above two pieces, generally, an ATK% sands is preferred—however, an ER sands should be used if there is no other way to reasonably meet Rosaria’s ER requirements in a team. |
 Goblet | Cryo DMG Bonus | CRIT Rate, ER | As there are no CRIT or ER main stats for goblets, it is best to focus on Rosaria’s personal damage and opt for Cryo DMG Bonus for it—however, if an ATK% goblet has high ER and CRIT Rate in substats, it can be considered as an alternative. |
 Circlet | CRIT Rate | ER, CDMG, ATK% | A CRIT Rate circlet will almost always be preferred in comparison to CRIT Damage. If ER requirements are met, CRIT Damage is worthwhile to focus as the main substat priority, with ATK% also being appreciated—however, ER until requirements will always take priority. |
| Artifact Set | Description |
 4 Noblesse Oblige | 4pc Noblesse Oblige is undeniably Rosaria’s BiS in most compositions where she provides a supportive role. It provides a useful 20% team Attack buff with good uptime, and Rosaria herself can benefit from both the 2pc and 4pc effect, meaning that it also provides well for her own damage. Thus, 4NO should be the go to set in most of Support Rosaria’s teams. |
 4 Instructor | Due to the huge share of DPS Hu Tao contributes in most of her teams, it is generally a worthwhile investment to sacrifice Rosaria’s damage to further bolster Hu Tao. This allows Rosaria to be run at very low investment in said team. However, while its EM buff is hefty, Instructor, being a 4* set, reduces the potency of her A4 CRIT share, as well as heavily shafts Rosaria’s personal damage. The 5* off piece should generally be the CRIT Rate Circlet, however if there is no other way to meet Rosaria’s ER requirements, a 5* ER sands can be used. |
Team Compositions
Razor Core

Razor is a strong hypercarry who appreciates Superconduct support to bolster his Physical damage, which constitutes the major portion of his output. Rosaria steps up as a prime offensive pick for this role—her consistent Cryo application makes getting the Reaction easy, and her good off field personal damage and CRIT share are all factors Razor appreciates. Furthermore, her C6 can enable further Physical Resistance Shred, further improving damage. The composition is extremely flexible with its remaining units—Fischl, Xingqiu, Bennett, Xinyan, Zhongli, Albedo, Kaeya, Diona are among the viable options that can be used depending on what the player feels they need for the team. Check out the Razor Guide for more information.
Eula Core

In terms of damage, Eula’s kit is incredibly self-sufficient—packing strong Normal Attacks, in-built Physical Resistance Shred, and a monstrously powerful back-loaded Elemental Burst dealing mostly Physical damage. However, its high cost of 80 necessitates having a battery for Eula, and Rosaria steps up as one of the offensive options for the role. While she complements Eula well, she does come with some caveats—her A4 buff is too inconsistent to extend to Eula’s Burst detonation, and the lack of an Electro healer or shielder means the last slot generally has to be dedicated to one due to Eula’s fragility. While her C6 provides appreciated Physical Resistance Shred, its value is slightly diminished in this composition due to the abundance of Resistance Shred from Eula and Superconduct. Nonetheless, she is an extremely good choice. One flex slot is always an Electro character, in order to enabler Superconduct for Eula – generally Fischl or Raiden. The last slot is flexible, but usually reserved for a shielder or healer, such as Qiqi, Diona or Zhongli. Check out the Eula Guide for more information.
Hu Tao Vape Melt

In this team, Rosaria uses her Cryo application in order to achieve some quantity of Forward Melt on Hu Tao. Though theorycrafting has shown the Vapemelt teams do not result in the most optimal damage for Hu Tao, it nonetheless remains a potent option in conjunction with Rosaria’s own damage capability and CRIT share, which is further enhanced by Hu Tao’s own A1 CRIT buff. It is important to note Hu Tao’s most accessible competitive weapon, Dragon’s Bane, is actively anti-synergistic with Vape Melt. As in most Hu Tao teams, the final slot is flexible—another Cryo unit such as Kaeya can be run in order to activate Cryo Resonance, increase the frequency of Hu Tao’s Forward Melts, as well as provide their own damage and/or utility. Alternatively, Zhongli’s shield serves as a very comfortable option while also providing Resistance Shred for Hu Tao, Xingqiu and Rosaria – just be sure to place his pillar away from enemies. Check out the Hu Tao Guide for more information.
Diluc Melt

While unconventional, with proper rotations Rosaria and Sucrose together can enable Diluc to Forward Melt the bulk of his Normal string. This allows Diluc to offer competitive damage without Xingqiu, thus freeing the latter for a different team. However, the optimal team composition and rotations are rigid, and more information about them can be found in the Diluc Guide.
Bennett Melt

While usually played as a Support unit, Bennett can abuse his own Attack buff, controlled Pyro application, and his Elemental Skill’s 2 second cooldown when cast in his Burst to act as a main DPS by Forward Melting his Skill casts. Rosaria is an excellent inclusion on these teams, providing sufficient Cryo application for Bennett to Melt, whilst simultaneously doing significant Sub-DPS damage and her own CRIT Share. At lower investments into members other than Bennett, Chongyun will generally be a better choice due to providing Cryo Application alongside significant utility with minimal investment, her personal damage allows Rosaria to emerge as a powerful choice once invested. The final two slots are reserves for flexes – generally, an Anemo unit is used for VV shred and their own buffs, while the last slot is flexible as long as the unit does not interfere in Reactions – Zhongli, Xingqiu, Albedo, or another Cryo unit such as Kaeya or Chongyun are all good choices. Refer to the Bennett Guide for more information.
Bloom Support

These teams utilize the unique interaction between Dendro, Cryo and Hydro to increase Dendro Core production for a teammate to trigger Hyperblooms or Burgeons off of. Dendro and Cryo do not react, and thus both auras can exist simultaneously on an enemy; when Hydro is applied, it first reacts with the Cryo aura to Freeze the enemy before reacting with the Dendro aura. This essentially reduces the amount of Dendro consumed to trigger Bloom, giving room for further reactions. Burgeon additionally appreciates Cryo units as they can make use of and react away any potential Burning on enemies which would impede the generation of additional Dendro cores. Rosaria is a good fit on these style of teams thanks to her reliably off-field Cryo application, decent personal damage and teamwide CRIT share. More info on this can be found on the Dendro Guide.
Afterword
Credit to @olfy_op on Instagram!
“I sometimes feel that my former selves from years past still exist alongside me, urging me on. I’m sure you know the feeling, too. Even if you decide to venture down a new path, don’t just abandon the former you. For that is the foundation upon which you now take footing. Do not fear your past, and do not be scared to come to grips with it.”
Congratulations on making it this far, and thank you for reading this guide! This is my first time undertaking a project of this scale and it goes without saying that this work would not have been possible without everyone who helped me with it. A special mention goes out to kol#1593 – aside from writing a good portion of this guide, they performed much of the behind the scenes work of collating and calculating data that made writing this guide feasible. Aside from those specially mentioned, I would also like to extend my gratitude to the KQM community as a whole for establishing an atmosphere where such contributions can be made. Rosaria is an incredibly versatile and underrated 4* unit, and hopefully this guide has helped in its intended purpose to teach readers about her.
-Cuzim
Writers
Cuzimori#1535
kol#1593
Special Thanks
Ai#7362
Batts64#3967
BowTae#0141
Charliex3000#9403
jamberry#7142
elnawawi#7114
Emiliabyss#1641
jamie#9248
Longing#8998
loriental#0040
Luno#1337
nxriaki#6316
Prévisible#7440
ProfHugo#6478
Sew#2409
Sir_pick_the_prick#2209
Veggie#0581
Xreejan#1180
Zamo#6399
Calculation Repository
Please note that the below calculations are intended for rough reference, and are all calculated under specific given assumptions, some of which are toggled to compare between different situations. Do not take these numbers out of context.
Rosaria Freeze Constellation Comparison – kol#1593
Rosaria RM EoSF vs 2BS 2NO – Sew#2409
Rosaria RM Artifact Calcs – Sew#2409
Rosaria RM Constellation Comparison – kol#1593
Rosaria RM Weapon Calcs – Sew#2409
Rosaria Cryo vs Physical – kol#1593
Rosaria Freeze Weapon Calcs – jamberry#7142
Rosaria Sub-DPS Weapon Calcs – jamberry#7142

