Updated for Version 3.1

A Yun Jin Guide
Written by DishWasher#4561
Table of Contents
Introduction
Welcome to the Yun Jin Guide!
Yun Jin, an operatic icon in the world of Teyvat, is a fairly straight-forward character to understand. But as with many opera shows, there is depth to what she provides for your team.
In this guide, we will explain everything you need to know about this elegant performer!
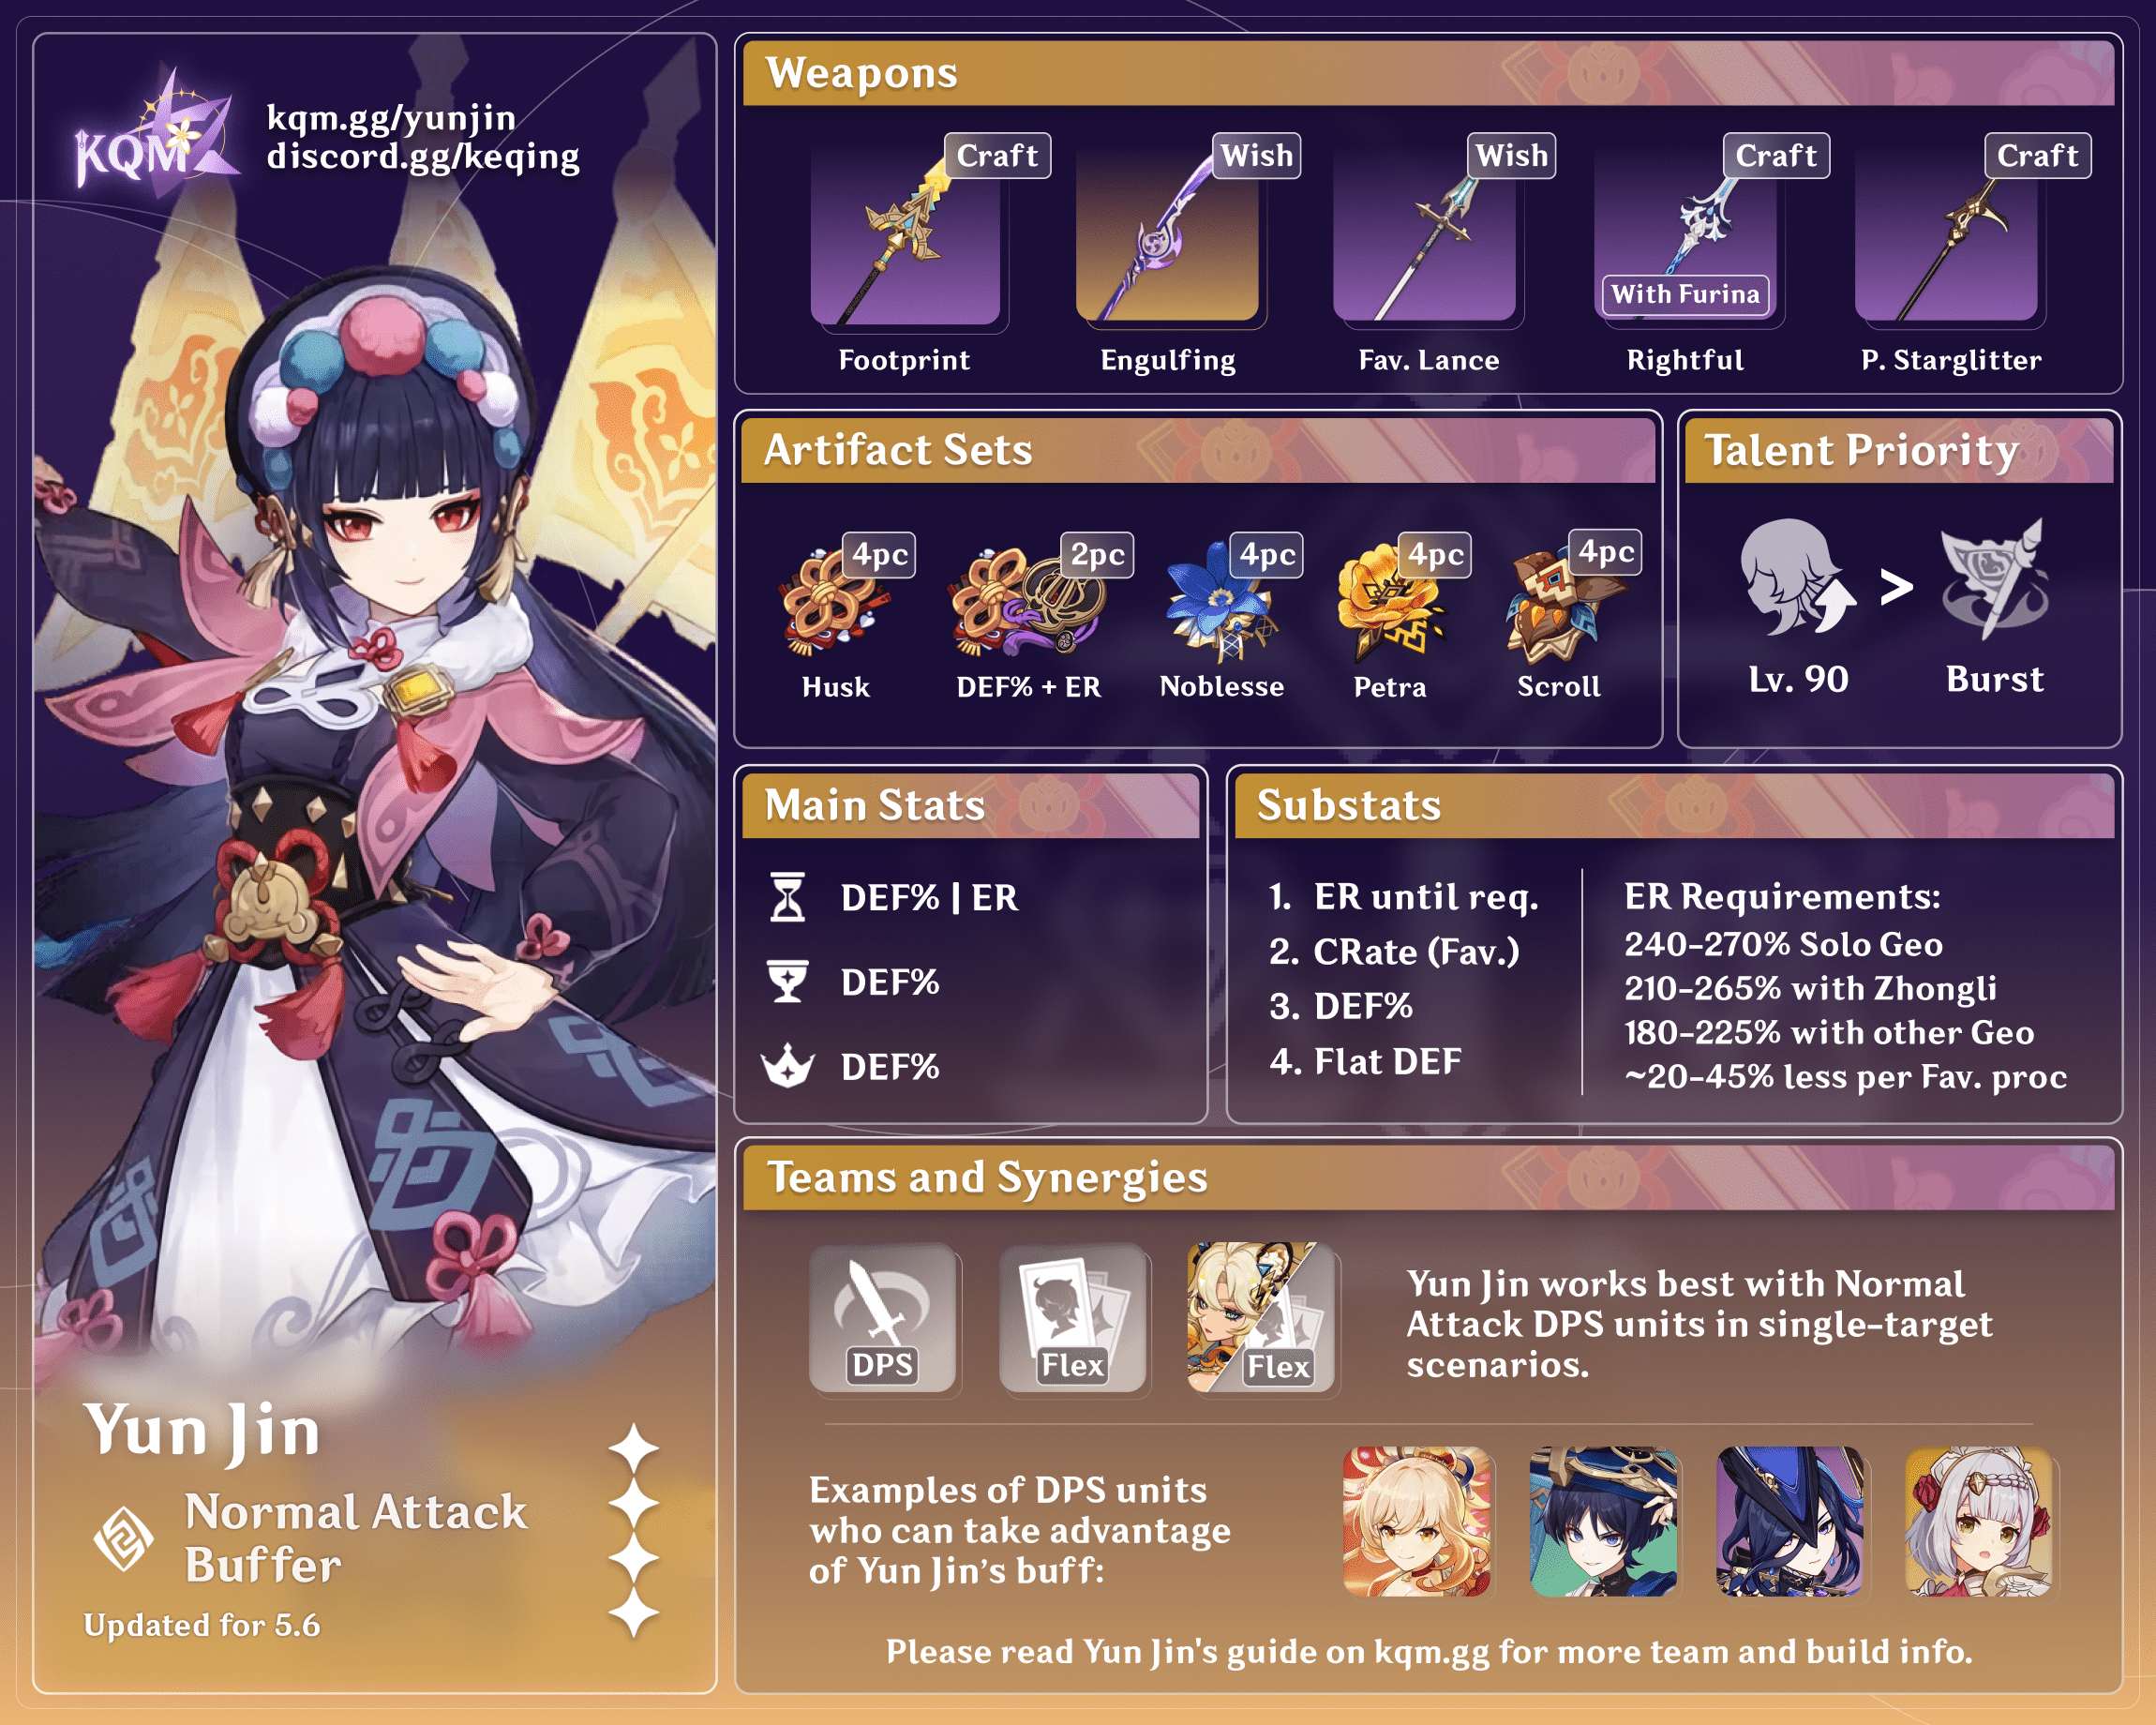
Why Play Yun Jin?
Yun Jin is a 4-star Geo Polearm user that specializes in increasing your team's Normal Attack (NA) DMG output with her Elemental Burst. Similar to several other Geo characters, she scales heavily off her DEF stat, making her very easy to build and giving her access to strong artifact options such as the Husk of Opulent Dreams set. If you have an on-field DPS that uses NA strings in their rotations, it is worth exploring how Yun Jin may benefit your team.
Pros
- Has a significant Elemental Burst that can rival top tier buffers like Bennett under some conditions
- Relatively easy to build due to low to mid investment required
- Works well in both Geo and non-Geo teams
- Low Geo application that does not interfere with reactions
- Does not need Constellations to perform well as a character
- Has long term value as a support for potential NA focused carries in the future
Cons
- When compared to other supports, she does not provide anything more than extra damage
- Poor diversity in weapon choices (at the time of writing)
FAQ
Is Yun Jin a shielder?
Yun Jin is not a shielder. Though her Elemental Skill creates a temporary shield, it only lasts for the duration of holding her Skill, and its purpose is to allow Yun Jin to counter (parry) incoming attacks without taking damage. Building HP is not recommended and does not benefit her kit in any way.
Does Yun Jin work with Gorou?
As an off-field support, Yun Jin Elemental Burst does not benefit from Gorou’s DEF buff. As it only applies to on-field characters, and Yun Jin’s Elemental Burst being dynamic (checks Yun Jin’s stats every instance) means that she will not benefit from Gorou’s buff unless she is on-field.
TL;DR
Credits to: kol and KQM staff
Talents
 Normal Attack | Cloud-Glazing Strike
Description
Normal Attack
Performs up to five consecutive spear strikes.
Charged Attack
Consumes 25 stamina to lunge forward, dealing damage to opponents along the path.
Plunging Attack
Plunges from above to strike the ground below, damaging opponents along its path and dealing AoE damage upon impact.
Yun Jin’s Normal Attacks are average in comparison to other Polearm characters.
 Elemental Skill | Opening Flourish
Description
Press
Flourishes her Polearm in a cloud-grasping stance, dealing Geo DMG.
Hold
Takes up the Opening Flourish stance and charges up, forming a temporary shield. DMG Absorption is based on Yun Jin's Max HP and has 150% effectiveness against all Elemental DMG and Physical DMG. The shield only lasts until she finishes unleashing her Elemental Skill.
When the Skill is released, when its duration ends, or when the shield breaks, Yun Jin will unleash the charged energy as an attack, dealing Geo DMG. Based on the time spent charging, it will either unleash an attack at Charge Level 1 or Level 2.
Note: Any of Yun Jin’s Hold Elemental Skill variations provide a shield for its entire duration. This prevents her from being staggered. This allows her to activate Geo Resonance’s resistance shred immediately on hit.
Press:
This variation is best used when you want Yun Jin to take as little field time as possible, as it has the shortest animation time. This will be your preferred option in most situations.
Press Example
Charge Level 1:
This variation is used for a chance at generating more particles while taking less field time than a full charge. It is generally not recommended as it takes more field time than the Press variant and is inferior to a full charge.
Charge Level 1 Example
Charge Level 2:
This variation is used to maximize damage and energy generation at the cost of field time. It is situationally recommended due to the long cast time (2.5 seconds).
Charge Level 2 Example
Note: it is not necessary to hold Yun Jin’s Skill for its full duration to unleash Charge Level 2. As shown above, releasing immediately after the second stance change will still result in a Charge Level 2 Skill.
Perfect Counter:
Unlocking Yun Jin’s 1st Ascension Passive, True to Oneself, will allow Yun Jin to instantly release a Charge Level 2 Skill if she casts her Skill at the exact moment she is attacked via either Press or Hold.
This is the best variation of Yun Jin’s Skill when possible. It allows you to maximize damage and Energy generation, without the caveat of charge time.
Perfect Counter Example
 Elemental Burst | Cliffbreaker’s Banner
Description
Deals AoE Geo DMG and grants all nearby party members a Flying Cloud Flag Formation.
Flying Cloud Flag Formation
When Normal Attack Damage is dealt to opponents, Bonus Flat DMG will be dealt based on Yun Jin's current DEF.
The effects of this skill will be cleared after a set duration or after being triggered 30 times.
When one Normal Attack hits multiple opponents, the effect is triggered multiple times according to the number of opponents hit. The number of times that the effect is triggered is counted independently for each party member with Flying Cloud Flag Formation.
This is the heart of Yun Jin’s kit. Her Burst provides significant Bonus Flat DMG for your active character’s Normal Attacks, and it is generally her main contribution to a team.
Note: Yun Jin’s Elemental Burst does not snapshot.
Burst Example
 Ascension 1 Passive | True to Oneself
Description
Using Opening Flourish at the precise moment when Yun Jin is attacked will unleash its Level 2 Charged (Hold) form.
This talent enables Yun Jin’s Elemental Skill to immediately unleash its Charge Level 2 when timed correctly. See the section under Elemental Skill for more details.
 Ascension 4 Passive | Breaking Conventions
Description
The Normal Attack DMG Bonus granted by Flying Cloud Flag Formation is further increased by 2.5%/5%/7.5%/11.5% of Yun Jin's DEF when the party contains characters of 1/2/3/4 Elemental Types, respectively.
This Ascension Passive helps Yun Jin provide a larger buff with her Elemental Burst. However, it is not recommended to prioritize maximizing this Passive, as it is more important to consider team synergies rather than trying to fit 4 different Elements on a single team.
 Utility Passive | Light Nourishment
Description
When Perfect Cooking is achieved on Food with Adventure-related effects, there is a 12% chance to obtain double the product.
A nice food-related Utility Passive.
Damage Calculation
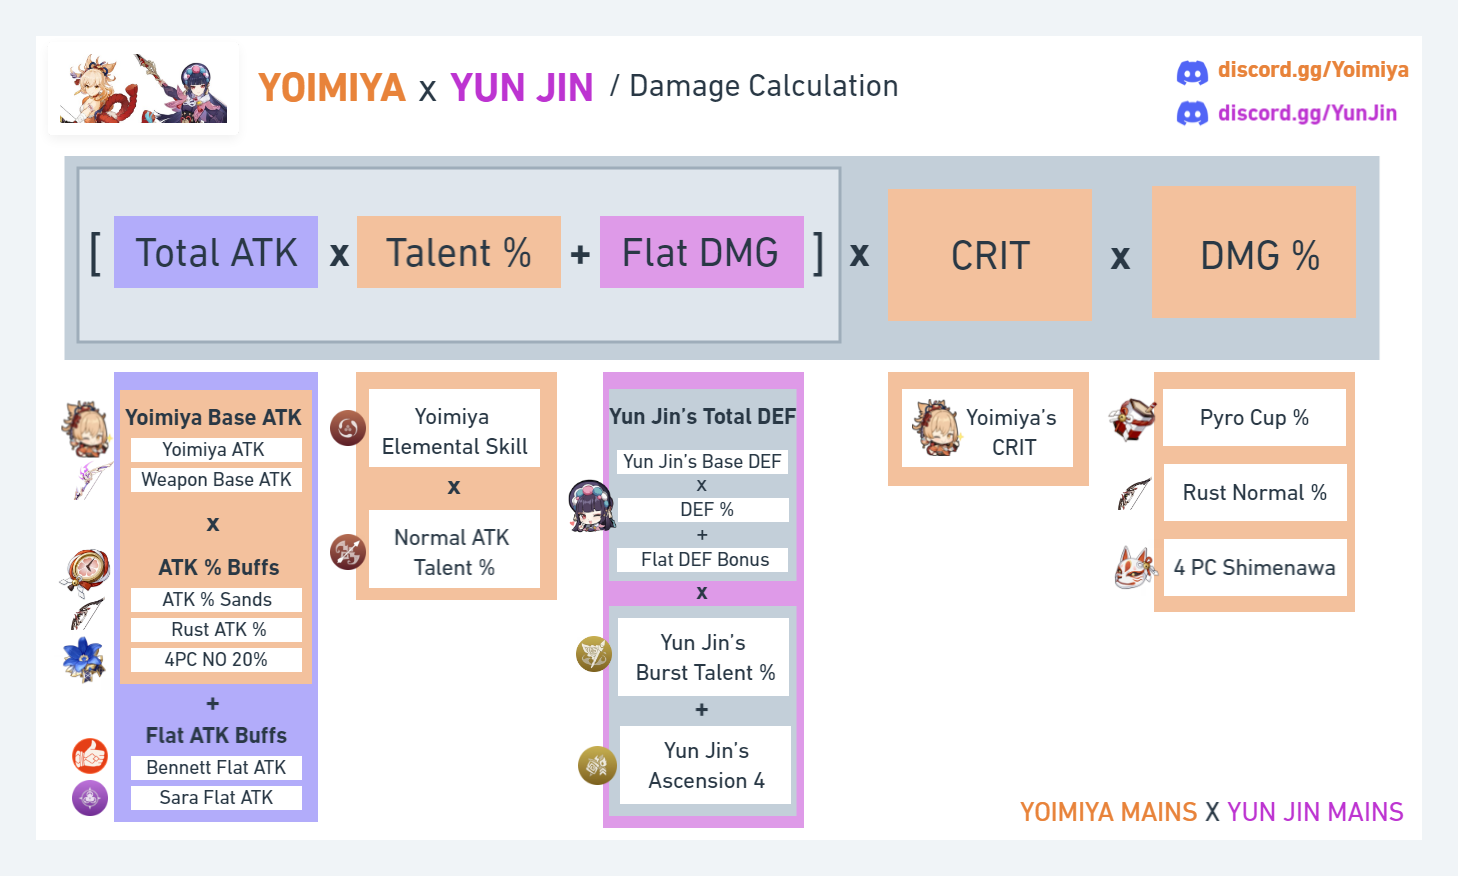
Infographic by Swiftfyre#0502
The infographic above shows Yun Jin’s Bonus Flat DMG in calculation. It explains that the current on-field character’s ATK stat and Normal Attack talent% does not affect Yun Jin’s Bonus Flat DMG. This means characters with high DMG Bonus% and high Crit multipliers can capitalize on Yun Jin’s Burst effectively.
This also means that characters that have faster/multi-hit Normal attacks benefit more from Yun Jin’s burst than those who do not.
Why Normal Attack Hit Count Matters
To have a complete perspective, let’s compare two hypothetical characters.
| Character A | Character B |
| - Deals 10 hits - Each hit deals 50 damage 10 x 50 = Total Damage | - Deals 5 hits - Each hit deals 100 damage 5 x 100 = Total Damage |
| Total Damage: 500 | Total Damage: 500 |
You can see that both characters deal a total of 500 damage. Which doesn’t say much at the moment.
Now let’s add Yun Jin into the mix. If you have been reading carefully from earlier then you would remember that her Bonus Flat DMG activates per hit.
| Character A | Character B |
| Yun Jin adds another 50 damage per hit | |
| - Deals 10 hits - Each hit deals 50 damage 10 x (50 + 50) = Total Damage | - Deals 5 hits - Each hit deals 100 damage 5 x (100 + 50) = Total Damage |
| Total Damage: 1000 | Total Damage: 750 |
As we can see, characters that are able to hit more by either faster attack speed or from AoE benefit more from Yun Jin than those who do not.
Moreover, this illustrates how Yun Jin’s Bonus Flat DMG functions as a flat amount of damage added. As such, the actual damage per hit is irrelevant to the amount of damage Yun Jin adds. For technical details regarding Yun Jin's skills, visit the KQM Theorycrafting Library.
Constellations
Yun Jin's entire kit works at C0. Her Constellations are more or less optional, but are nonetheless great upgrades to her kit.
 Constellation 1 | Thespian Gallop
Opening Flourish's CD is decreased by 18%.
This Constellation makes Yun Jin’s rotations more forgiving by reducing her Skill cooldown to 7.38 seconds. It allows extra Skill casts on certain teams with more flexible rotations.
 Constellation 2 | Myriad Mise-En-Scène
After Cliffbreaker's Banner is unleashed, all nearby party members' Normal Attack DMG is increased by 15% for 12s.
This Constellation is a nice extra DMG Bonus% for the duration of Yun Jin’s Burst, further improving both her supportive abilities and her own damage contribution. This bonus is not tied to her Flag Count, and is among her strongest Constellations.
 Constellation 3 | Seafaring General
Increases the Level of Cliffbreaker's Banner by 3.
This Constellation is a significant upgrade to Yun Jin’s Burst. This is among her strongest Constellations, and is a great stopping point for those aiming for low Constellations on their Yun Jin.
 Constellation 4 | Flower and a Fighter
When Yun Jin triggers the Crystallize Reaction, her DEF is increased by 20% for 12s.
A slight bonus to Yun Jin’s DEF with a condition that can easily be met. Increases the Bonus Flat DMG provided by her Burst.
 Constellation 5 | Famed Throughout the Land
Increases the Level of Opening Flourish by 3.
A slight upgrade to Yun Jin’s Skill damage. In most teams, the damage contribution of this Constellation is near nonexistent.
 Constellation 6 | Decorous Harmony
Characters under the effects of the Flying Cloud Flag Formation have their Normal ATK SPD increased by 12%.
Allows your active character to unleash more Normal Attacks. Because of how ATK SPD works, the value of this Constellation varies largely from team to team, ranging from mostly neglectable to a substantial increase in QoL and team damage.
It is tied to Flying Cloud Flag Formation’s duration. If your active character uses all 30 stacks, they will also lose the buff from C6. This will not affect the majority of scenarios, but is important to keep in mind.
Note: Characters that cannot trigger the Bonus Flat DMG from Yun Jin’s Elemental Burst can still benefit from this Constellation (i.e. Raiden in her Musou Isshin state).
For a more detailed analysis on constellation comparisons, see kol#1593’s Yoimiya Yun Jin constellation comparisons.
Playstyles

Normal Attack Support
This type of playstyle is what Yun Jin excels in. Providing significant Bonus Flat DMG to Normal Attacks makes her viable with most characters, especially those whose playstyles revolve around their Normal Attacks.
Pros
- Yun Jin’s Burst is one of the best at boosting NA-focused teams
- Easy to build:she only needs DEF% and ER% as she benefits from the stats of the on-field DPS
- Despite only benefiting NAs, this playstyle has very flexible team options
Cons
- Yun Jin will generally be on-field much less often
- Yun Jin will be limited in using her Elemental Skill, as her teammates will want field time to maximize their NA damage
In this playstyle, Yun Jin will be swapping in to cast her Elemental Skill and Burst, and then swapping out immediately, usually to the on-field DPS. It is usually better to use Skill > Burst in that order, as it allows her to catch the Particles generated from her Skill.
Skill > Burst Example
Note: It is generally not worth significantly delaying rotations to land a Charge Level 2 Skill or a perfect parry. Unless a perfect opportunity arises, using a quick Press Skill -> Burst is generally better for team DPS.
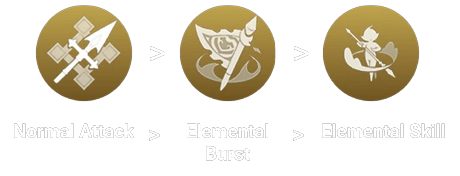
Support Talent Priority

On-Field Physical DPS
Yun Jin’s Normal Attacks aren’t all that special: her scalings are relatively weak, and she does not boast any significant attack speed, thus making her generally outclassed as an on-field NA-using DPS.
However, as a Polearm user, Yun Jin has access to Crescent Pike, one of the best Physical DPS weapons in the game. When playing her as an on-field DPS, she makes use of her own Elemental Burst alongside Pike to boost her Normal Attack damage. Having a team that enables Superconduct is recommended.
Pros
- She has 2 multi-hits in her NA string to take advantage of her Elemental Burst and Crescent Pike passive
- Her minimal Geo application does not interfere with Superconduct
- She can run lower ER as she gains more Energy from being on-field
Cons
- She falls behind in DPS compared to other Physical teams
On-Field DPS Talent Priority
Weapons
At the time of writing this guide, there is not a Polearm that synergizes particularly well with Yun Jin’s kit. The next best option for Yun Jin is equipping her with an ER Polearm to help meet her ER requirements, which includes the following:
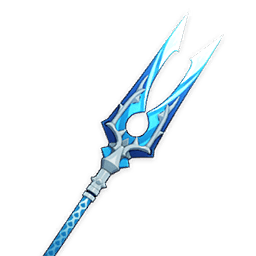
 Favonius Lance | Providing 30.6% ER for Yun Jin along with its passive, which generates clear particles for her and her team, Favonius Lance is one of her safer options in many of her teams. Using this Polearm may encourage investment into CRIT Rate for its passive. However, it is still recommended to continue to prioritize DEF% and ER% as investing into CRIT Rate causes Favonius Lance to fall off in teams that do not require extra energy. In general, around 45% CRIT Rate is recommended to consistently activate its Passive if you choose to invest for it. |
 Engulfing Lightning | Providing 55.1% ER and even more after casting Burst makes this weapon quite powerful on Yun Jin. However, using this weapon on Yun Jin has a huge opportunity cost, since other characters such as Raiden utilize its Passive much better. Furthermore, although it triumphs over other ER stat sticks, it does not do so by very much. Nonetheless, it is still a solid weapon if no other character in your account wants it. |
 The Catch | Providing 45.9% ER for Yun Jin makes this weapon a good F2P pick. However, similarly to above, using this weapon comes at a huge opportunity cost, as characters like Xiangling or Raiden can make better use of its powerful Passive. (Also comes at the cost of your sanity; good luck fishers.) |
 Prototype Starglitter | Providing 45.9% ER for Yun Jin makes this weapon another good F2P pick. Exactly the same ER as The Catch, but with less opportunity cost and a generally worse passive, but requires a Polearm billet which may or may not be a problem depending on your account. |
 Kitain Cross Spear | While Kitain may seem like a good choice by providing Flat Energy for Yun Jin through its Passive, it is simply worse than other options that provide raw ER, such as the other options above. To perform similarly, Kitain requires weapon refinements which are resource-expensive. Furthermore, its Passive complicates rotations by preventing the standard Skill -> Burst combo. While it works as an alternative option, it is generally not recommended. |
 Skyward Spine | Providing 36.8% ER for Yun Jin makes this weapon usable, but there are better 4 star and 5 star options for her. Not recommended. |
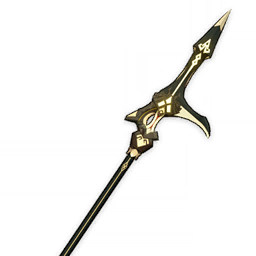
 Deathmatch | The only Polearm in the game that provides DEF% for Yun Jin. Even at R5, it provides less total useful stats than other options listed above, and also loses all of its value in single target scenarios. Not recommended unless trying to maximize DEF for showcases. |
For a more detailed analysis on weapon comparisons, see kol#1593’s Yoimiya Yun Jin weapon comparisons sheet.
Artifacts
ER Requirements
The amount of ER that Yun Jin needs will heavily depend on her team comp and the usage of weapons such as Favonius Lance. Here is a brief summary:
| Yun Jin with Albedo | 140% - 160% |
| Yun Jin with another Geo Character | 160% - 200% |
| Yun Jin as Solo Geo | 200% - 270% |
Use the Energy Recharge Calculator by Zakharov#5645 to determine exact requirements for your team and rotation.
Artifact Stats
Main Stats
 Sands ― DEF% / ER% | DEF% is recommended so that the Bonus Flat DMG from her Elemental Burst is maximized. ER% is only recommended to reach her requirement in the case that you have below par substat rolls. |
 Goblet ― DEF% | DEF% is recommended as it furthers your total DEF to increase her Bonus Flat DMG. This option is generally best even when prioritizing her Elemental Skill damage, since both her Skill and Burst benefit from DEF%. Geo DMG Bonus% is only recommended for niche builds that prioritizes her Elemental Skill damage or her initial Burst damage. Otherwise DEF% is strictly better since Yun Jin only deals Geo damage 2-3 times per rotation and you generally get higher team DPS with DEF%. |
 Circlet ― DEF% | DEF% is recommended to maximize Yun Jin’s Elemental Burst Bonus Flat DMG. If using Favonius Lance, DEF% is also the better option whether or not you already have enough CRIT Rate from Substats to reliably trigger Favonius Lance’s Passive. CRIT Rate% is situationally recommended when you are using Favonius Lance to more reliably activate its Passive. |
Substats
Substat Priority
ER% = DEF% = CRIT Rate% > Flat DEF
It is recommended to prioritize ER% when you have yet to reach Yun Jin’s ER requirements.
DEF% is recommended when Yun Jin’s ER is satisfactory, and helps increase Yun Jin’s Bonus Flat DMG from her Elemental Burst.
CRIT Rate% is recommended only when Yun Jin is equipped with Favonius Lance.
Flat DEF and flat stats in general get a bad reputation, but flat DEF is significant and more beneficial than typical offensive stats (e.g. ATK% or CRIT) for Yun Jin as a Normal Attack Support.
Artifact Sets
 4pc Husk of Opulent Dreams (Husk) | Providing a total set bonus of 54% DEF and 24% Geo DMG. This artifact set is currently her best set for support builds due to its reliability and ease of use. Pre-stacking Husk is simple (wait 6 seconds at the beginning of a chamber while not in the first slot of a team), and maintaining stacks is similarly easy, as Yun Jin usually yields field time to the on-field DPS. |
 2pc Husk + 2pc Emblem of Severed Fate | Best used for balancing ER% and DEF% Substats on Yun Jin. This is a great option especially if you have great Substats on your Emblem pieces. |
 4pc Noblesse Oblige | While providing an ATK% bonus for the entire team is beneficial, Yun Jin should not prioritize this set as her first choice since other characters may utilize the set with a lower opportunity cost. However, if no one else in the team can use the artifact set, it is generally equivalent to 4pc Husk for team DPS. |
 4pc Archaic Petra | Providing a large Elemental DMG Bonus% for your team makes this set have high potential for some teams (higher than Husk in all team comps). Performing Yun Jin’s Skill -> Burst combo allows her to pick up the Crystallized shard semi-consistently:Using Archaic Petra ExampleHowever, there are many caveats that should be considered when using 4pc Archaic Petra: Crystallizing the correct Elemental Shard may be challenging in certain rotations, especially in reaction teams. Sometimes Yun Jin may not collect the Shard immediately. Dashing to collect a Shard can be difficult depending on enemy size and other factors, which costs field time and may result in either a DPS loss from the extra time spent or a DPS loss from just not being able to pick up the Shard at all. Once you acknowledge these caveats and can account for them when using Archaic Petra, you will see high returns in team comps that can utilize the buff. |
For a more detailed analysis on artifact comparisons, see kol#1593’s Yoimiya Yun Jin artifact comparisons sheet.
Teams and Synergies
Many characters make use of their Normal Attacks for damage as such, Yun Jin can be placed in a wide variety of team comps. Since there is a lot to cover, we will be focusing on some of Yun Jin’s key synergies and team comps.
Yoimiya
Yoimiya relies on her NAs to do the majority of her damage. Therefore, Yun Jin is naturally one of her best supports. In most cases, Yun Jin’s Burst is comparable to or greater than Bennett’s Burst for overall team DPS, at similar Constellations.
Here is a generalized example of a Yoimiya team with Yun Jin as a support:

Because Yun Jin’s Burst does not interfere with reactions, Yoimiya is free to run many team variations, such as pure Pyro, Vaporize, Double Geo, or Overload. Additionally, unlike Bennett, Yun Jin does not restrict gameplay to within a small circle, allowing Yoimiya to fully utilize her mobility.
In many cases, Yun Jin can replace Bennett, freeing him up for the other team in the Spiral Abyss.
Pros
- Scales with investment on Yoimiya
- Does not interfere with reactions
- Not limited to a circle (Bennett)
- Can free up supports for other teams
Cons
- High ER requirement
Visit the Yoimiya guide for more information!
Yoimiya + Yun Jin Showcase
Yoimiya Yun Jin Team DPS Comparisons by EdisonsMathsClub#6469
Hu Tao
Since Hu Tao's release, her Double Geo team (Xingqiu Zhongli Albedo) has always been one of the most popular end-game team comps, combining her unrivaled Single-Target damage output with strong shields and simple, flexible rotations. However, while incredibly powerful, this team requires three limited 5 stars, making the team inaccessible to many players.
With enough practice using Hu Tao's N2C combo (2 NAs into a CA), Yun Jin serves as a good alternative to Albedo in this team. Compared to a similarly invested Albedo, Yun Jin will perform very slightly worse at C0 and similarly at C3 or higher.
Here is the best Hu Tao team with Yun Jin as a support:

Pros
- Scales with investment on Hu Tao
- Scales with better combos
- Does not interfere with reactions
- Not limited to a circle
- Usable vs bosses (unlike Albedo)
Cons
- Requires good combos on Hu Tao
- More energy management required
Visit the Hu Tao guide for more information!
Hu Tao + Yun Jin Showcase
Hu Tao Yun Jin Team DPS Comparisons by Steno#0119
Ayato
Ayato is another character that relies on their NAs to provide a considerable amount of damage. Yun Jin can be slotted in several team compositions and raises Ayato’s personal damage by a considerable amount. However, keep in mind that Yun Jin can be outshined by other characters that provide more team damage and utility.
Here is a generalized Ayato team with Yun Jin as a support:

Unlike most other On-field Normal Attack DPS, Ayato bypasses the caveats of attack sequence reliance, auto-locking hell, and chasing after enemies when using his Elemental Skill. Which means that Yun Jin herself improves in the team in comparison to other DPS variants as she is able to provide more Bonus Flat Damage for the team through continuous attacks.
Pros
- Scales with investment on Ayato
- Does not interfere with reactions
- Not limited to a circle
Cons
- Hard to build a team around outside of Hyper-Ayato
- Potentially outclassed by other options in other team variations
Visit the Ayato guide for more information!
Noelle
Although Noelle does not have very high attack speed, the large AoE of her swings allows her to easily hit multiple enemies per NA. This allows her to make good use of Yun Jin’s Bonus Flat DMG.

Noelle’s teams are very flexible beyond this two-unit core and can be tailored to content; with GMC, Albedo, Gorou, Fischl and Beidou all being examples of viable options.
Pros
- Activates Geo Resonance
- Can funnel particles to Noelle easily, flexible field time
- Flexible team building, since battery/healing roles are covered
Cons
- Unable to maximize Yun Jin’s A4 for Mono Geo
- Slightly lower team DPS than using Albedo/Gorou/Fischl in single-target Situations
Visit the Noelle guide for more information!
Ningguang
Both Ningguang’s N1C and N2C combos allow her to benefit from Yun Jin's Elemental Burst, making Yun Jin a decent fit for her teams. Each of Ningguang’s Normal Attacks hits twice, and each individual hit benefits from Yun Jin’s Burst. The two can also help by batterying each other and activate Geo Resonance, creating decent synergy between them.
However, Ningguang generally does not have extended field time in her teams, making her unable to capitalize on Yun Jin’s Burst very effectively. When possible, she often prefers other Geo teammates such as Albedo or Zhongli over Yun Jin.
Here is a generalized example of a Ningguang team with Yun Jin as a support:

Pros
- Activates Geo Resonance
- Each NA is 2 hits, benefits twice from Yun Jin’s Burst
- They help battery each other
Cons
- Unable to maximize Yun Jin’s A4 for Mono Geo
- Cannot fully utilize Yun Jin’s Burst due to low field time
Visit the Ningguang guide for more information!
Zhongli
Because Zhongli’s NA string has many fast multi-hits, he makes very good use of Yun Jin’s Burst. Combined with his extra HP scaling on his A4 talent and additional damage from Crescent Pike, Yun Jin works well with an on-field Physical DPS Zhongli build, often more than doubling his Physical damage output.
Here is a generalized example of a Zhongli team comp with Yun Jin as a support:

Note: Replacing the Cryo character with Beidou is also a viable team and may yield higher DPS in AoE scenarios.
Pros
- Doubles Zhongli’s Physical damage
- Flexible field time allows Yun Jin to freely swap in and parry
Cons
- Single-target oriented
- High opportunity cost in using Zhongli as an on-field DPS
Visit the Zhongli guide for more information!
Afterword

Thank you for reading through this guide! If you have any more questions, feel free to hop on the Yun Jin Mains Discord to ask about any Yun Jin related content!
Credits
Written by DishWasher#4561
Special thanks to the following for helping write the guide!
- Steno#0119
- kol#1593
- blade430#8720
- EdisonsMathsClub#6469
- jamie#9248
Thanks to everyone below for helping edit, proofread, or do math for the guide!
- Cuzimori#1535
- Xreejan#1180
- juxtaplicity#1936
- zefunman#8255
- duwucell#1450
- biyu#2772
- sheeρ#9995
- enegue#4272
- irokei#6189
