Updated for Version “Luna V”
Albedo is a 5★ Geo Sword character in Genshin Impact who specializes in consistent off-field Geo damage. Learn about Albedo’s best builds, best weapons, best artifacts, and best teams in this quick guide.
This guide covers Albedo’s new Hexerei buffs, which are a massive upgrade to his kit. Be sure to complete the individual Witch’s Homework quests for him and all other Hexerei characters that you use in his teams.
Note that the information given may change if new discoveries are made. More extensive testing is in progress.
The full-length guide is available here (last updated for 4.0).
Table of Contents
New Content
Kachina and Xilonen | These Geo units from Natlan can activate Geo Resonance and make full use of 4pc Scroll of the Hero of Cinder City (Scroll). Additionally, Xilonen can shred Geo and PHEC RES by up to 36% (at C0), and Kachina gives a DEF% buff from her C4 that Albedo can snapshot. |
Durin and Hexerei | Durin can shred Geo and other Elemental RES (excluding Hydro and Cryo). He was released with the Hexerei Team Bonus, allowing him and certain other units to be paired with Albedo to gain buffs. |
Columbina and Lunar-Crystallize | Columbina significantly buffs Lunar Reactions and has the ability to turn certain reactions into Lunar Reactions. She allows Geo units like Albedo to trigger Lunar-Crystallize, allowing for more team damage. |
Zibai | Zibai is a 5-star Geo Sword on-field DPS who specializes in Lunar-Crystallize damage. She can use Albedo in her Lunar-Crystallize teams. |
Illuga | Illuga is a 4-star Geo Polearm user who specializes in buffing Lunar-Crystallize damage. He buffs Albedo with CRIT stats from his A1 Passive, and Flat DEF from his C4. |
 Flute of Ezpitzal | This Sword is a good F2P option for those who have missed Cinnabar Spindle. It increases DEF for his personal damage and his Hexerei Passive’s DEF requirements. |
 Peak Patrol Song | R1 Peak Patrol Song can be Albedo’s BiS weapon over R1 Uraku, where the difference depends on Albedo’s investment, his team’s investment, and your preference. |
 4pc A Day Carved From Rising Winds | Tailored towards ATK-scaling units, Albedo does not make full use of this set and it should not be farmed for him. |
Infographic
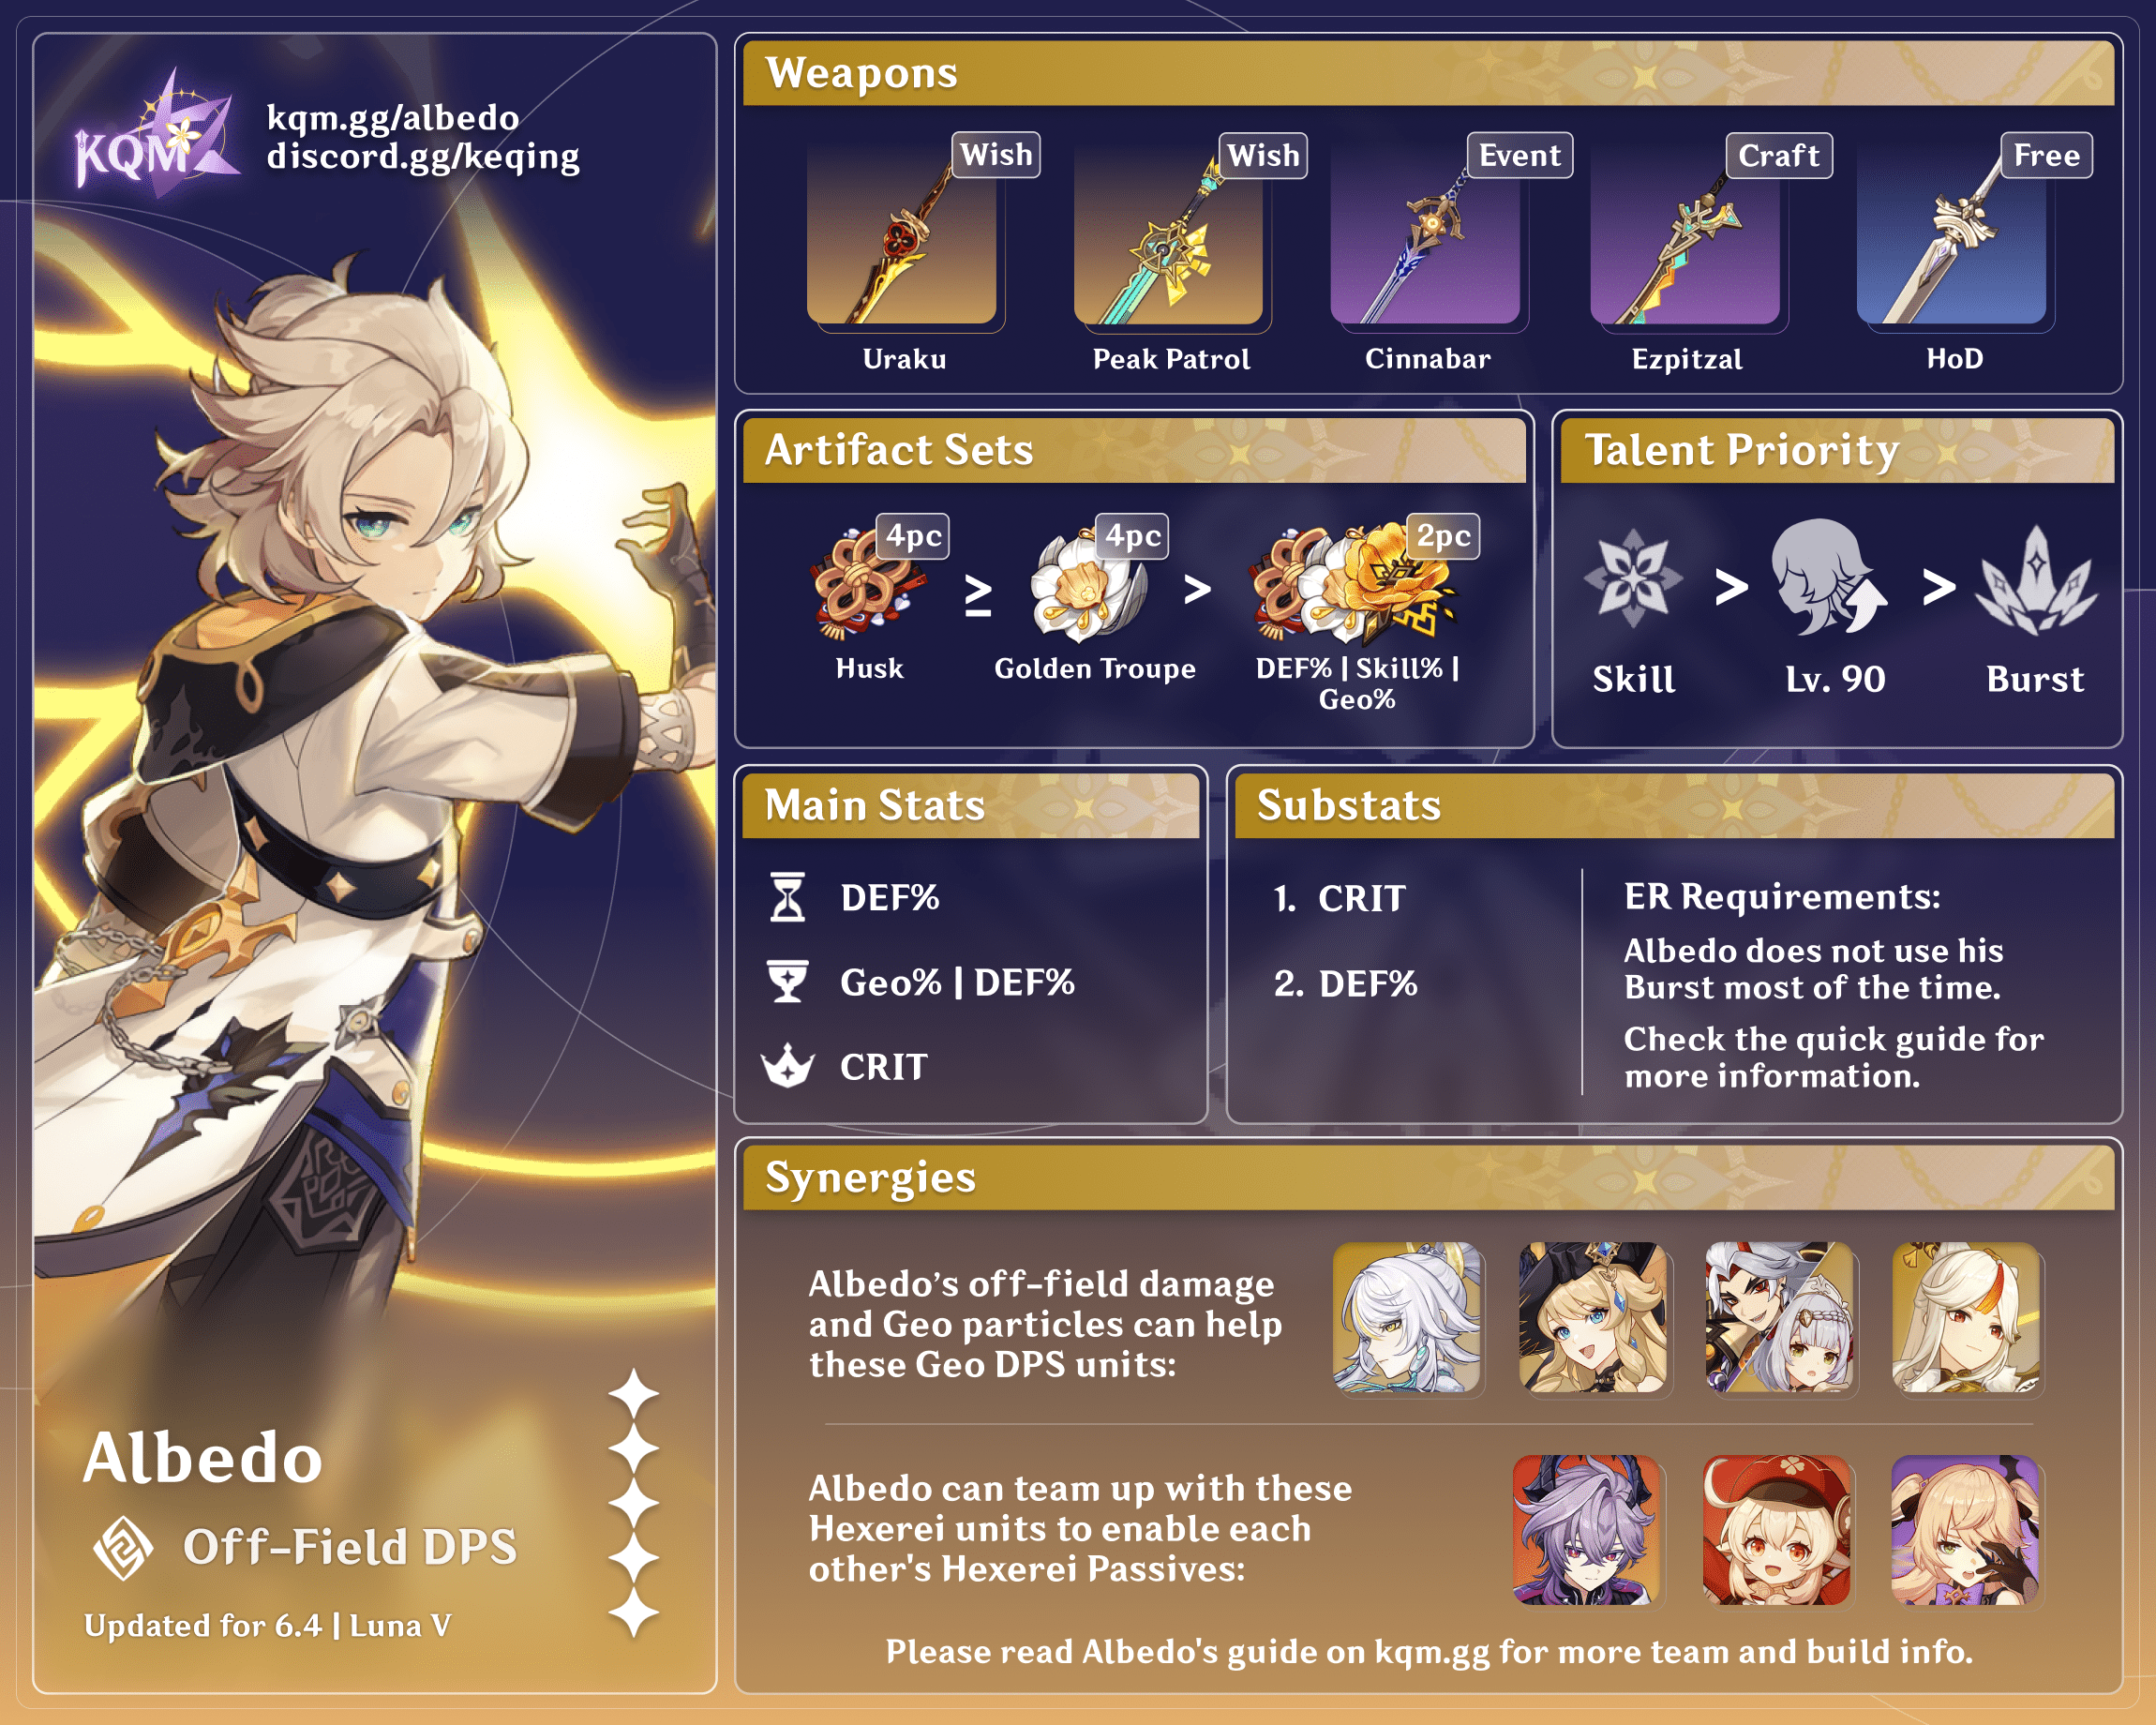
Credits to: cuppacote, hearttofhope, baloopy, acerbus114, and KQM Staff
Character Overview
Pros
- Low field time requirement.
- Has many F2P weapon options.
- Can activate other characters’ Hexerei passives.
- Good off-field Geo particle generation.
- Good DMG Bonus buffs to Hexerei teammates.
- Flexible in teambuilding.
- Skill elevator can take you to the false sky.
Cons
- Skill’s Construct can break easily, which severely impacts personal damage outside of Hexerei teams.
- Requires a Hexerei teammate for maximized damage output.
- His hair is still the same as before.
Playstyles
Off-Field DPS
Albedo is almost exclusively played as an off-field Geo DPS using his Skill. He sometimes uses his Burst too, but even then he remains primarily off-field.
Talents
Level and Talent Priority
The vast majority of Albedo’s damage comes from his Skill, especially with his new Hexerei Passives. While ATK-scaling characters have access to additional ATK from weapons and buffs, there are fewer ways to buff DEF. This makes leveling Albedo to 90 relevant as it gives him valuable DEF by raising his base stats.
Skill > Character Level >> Burst > Normal Attack
Albedo’s Normal Attacks can be left unleveled, since they are rarely used. If you don’t use his Burst, it can be left unleveled too.
Talent Overview
 Normal Attack | Favonius Bladework – Weiss
Talent Description
Normal Attack
Performs up to 5 rapid strikes.
Charged Attack
Consumes a certain amount of Stamina to unleash 2 rapid sword strikes.
Plunging Attack
Plunges from mid-air to strike the ground below, damaging opponents along the path and dealing AoE DMG upon impact.
A beautifully animated set of attacks that deal Physical damage based on Albedo’s ATK. These are not used in normal combat outside of a quick N1 to proc his Skill.
 Elemental Skill | Abiogenesis: Solar Isotoma
Talent Description
Albedo creates a Solar Isotoma using alchemy, which deals AoE Geo DMG on appearance.
Solar Isotoma
has the following properties:
- When opponents within the Solar Isotoma field take DMG, the Solar Isotoma will generate Transient Blossoms which deal AoE Geo DMG. DMG dealt scales off Albedo’s DEF.
- Transient Blossoms can only be generated once every 2s.
- When a character is located at the locus of the Solar Isotoma, the Solar Isotoma will accumulate Geo power to form a crystallized platform that lifts the character up to a certain height. Only one crystallized platform can exist at a time.
- Solar Isotoma is considered a Geo construct. Only one Solar Isotoma created by Albedo himself can exist at a time.
Hold to designate the location of the skill.
The bread and butter of Albedo’s kit. Albedo places a Geo Construct in the shape of a flower (Solar Isotoma), which creates a field around it. If an enemy takes damage within that field, it will proc a Transient Blossom, which deals Geo damage. The field lasts for 30s and Transient Blossoms can occur every 2s. There is a 67% chance for a Transient Blossom to generate a Geo particle, which makes Albedo one of the best Geo batteries.
Albedo’s flower (Solar Isotoma) is destroyed by certain enemies like Bosses or by placing it in certain terrain like Rhodeia of Loch’s platform. Its destruction is not detrimental anymore due to his new Hexerei Passive. You can also stand on the flower to use it like an elevator, but this is a DPS loss and the resulting Plunging Attack to get down is not worth the time.
 Elemental Burst | Rite of Progeniture: Tectonic Tide
Talent Description
Under Albedo’s command, Geo crystals surge and burst forth, dealing AoE Geo DMG in front of him.
If a Solar Isotoma created by Albedo himself is on the field, 7 Fatal Blossoms will be generated in the Solar Isotoma field, bursting violently into bloom and dealing AoE Geo DMG.
Tectonic Tide DMG and Fatal Blossom DMG will not generate Transient Blossoms.
Albedo does one big hit of Geo damage in an AoE in front of him. If his Skill is present, seven Fatal Blossoms will be generated within the field. At C0, all of his Burst damage scales with ATK.
It is generally not worth it to use his Burst nor to build extra ATK to invest in his Burst damage. Still, it can be useful for i-frames. It can also be used to trigger his A4 Passive buff in teams that benefit from EM like Burgeon, Lunar-Charged, or Lunar-Crystallize.
If Albedo is C2–C5, not using Albedo’s Burst is a damage gain thanks to the saved field time and better damage output from his C2 procs. However, this changes with Albedo’s C6 as he prefers to Burst every rotation now.
 Ascension 1 Passive | Calcite Might
Talent Description
Transient Blossoms generated by the Elemental Skill Abiogenesis: Solar Isotoma deal 25% more DMG to opponents whose HP is below 50%.
Additionally, if there is a Silver Isotoma on the field that was created by Albedo, the DMG dealt will also be increased by 240% of Albedo’s DEF.
This passive buffs Albedo’s damage when enemies are at low health. Its uptime is spotty due to the reliance on enemy health. Additionally, when a Silver Isotoma (requires another Hexerei teammate) is on the field, this passive significantly increases his Transient Blossom’s damage through an Additive Base DMG% buff. This increase allows Albedo’s Transient Blossom to deal twice its damage at Talent level 10 (without other Additive Base DMG% buffs such as Cinnabar Spindle’s passive).
 Ascension 4 Passive | Homuncular Nature
Talent Description
Using Rite of Progeniture: Tectonic Tide increases the Elemental Mastery of nearby party members by 125 for 10s.
Allows Albedo to buff his team’s EM when he uses his Burst (or when he triggers his C2 damage procs). This is relevant in Lunar-Crystallize teams. However, in Mono Geo teams, this passive is virtually useless.
 Witch’s Eve Rite Passive | Book of Blinding Light
Talent Description
After completing Witch’s Homework: Beyond the Lesson, Albedo will become a Hexerei character. When the party includes at least 2 Hexerei characters, you will gain the Hexerei: Secret Rite effect, which enhances Hexerei characters.
Hexerei: Secret Rite
- When Albedo hits an opponent with his Elemental Skill within 20s of using an Elemental Skill, it will generate Silver Isotomas near the opponent that last for 10s. When there are no Solar Isotomas created by Albedo on the field, and as long as Albedo is not downed, a single Silver Isotoma will begin generating Transient Blossoms, just as Solar Isotomas would. There can be up to two Silver Isotomas generated by Albedo on the field at any one time.
- After creating a Solar Isotoma, nearby party members’ Normal Attack, Charged Attack, Plunging Attack, Elemental Skill, and Elemental Burst DMG are increased by 4% for every 1,000 DEF Albedo has for 20s. The maximum increase that can be achieved this way is 12%.
- After generating a Silver Isotoma, nearby Hexerei party members’ Normal Attack, Charged Attack, Plunging Attack, Elemental Skill, and Elemental Burst DMG are increased by 10% for every 1,000 DEF Albedo has for 20s. The maximum increase that can be achieved this way is 30%.
After becoming a Hexerei character through the required quest and being in a team with at least one other Hexerei character, Albedo’s personal damage and buffing capability increase greatly, and the issue of his Skill’s Construct is mostly resolved:
- Every time Albedo deals Elemental Skill’s cast damage or Transient Blossoms hit enemies, he generates a Silver Isotoma, of which two can exist at a time. If Albedo’s flower (Solar Isotoma) gets destroyed, the Silver Isotomas can keep proccing Transient Blossoms. This allows Albedo to keep dealing damage even if his Solar Isotoma is broken.
- While Albedo’s Silver Isotomas are active, his Transient Blossom damage is greatly increased via his A1 Passive.
- With at least 3000 DEF, he now gives a 12% Normal, Charged, Plunging Attack, Skill, and Burst DMG Bonus to all teammates and an additional 30% DMG Bonus for Hexerei teammates. These buffs also apply to Albedo himself.
Constellations
 Constellation 1 | Flower of Eden
Constellation Description
Transient Blossoms generated by Albedo’s Elemental Skill Abiogenesis: Solar Isotoma regenerate 1.2 Energy for Albedo.
Additionally, the use of Albedo’s Elemental Skill Abiogenesis: Solar Isotoma also increases his DEF by 50% for the next 20s.
This Constellation lowers Albedo’s ER requirements and increases his DEF by 50% after using his Skill. This is a nice stat boost and is helpful in achieving his Hexerei Passive’s DEF requirements.
 Constellation 2 | Opening of Phanerozoic
Constellation Description
Transient Blossoms generated by Abiogenesis: Solar Isotoma grant Albedo Fatal Reckoning for 30s:
- Unleashing Rite of Progeniture: Tectonic Tide consumes all stacks of Fatal Reckoning. Each stack of Fatal Reckoning consumed increases the DMG dealt by Fatal Blossoms and Rite of Progeniture: Tectonic Tide’s burst DMG by 30% of Albedo’s DEF.
- This effect stacks up to 4 times.
Additionally, when Albedo is not on the field and when the stack count of Fatal Reckoning reaches 4, all stacks of Fatal Reckoning are consumed. This generates 3 Fatal Blossoms near your character, which will violently bloom to deal AoE Geo DMG equal to 300% of Albedo’s DEF, DMG that will also be considered Elemental Burst DMG. Where the Passive Talent Homuncular Nature has also been unlocked, the Elemental Mastery of nearby party members will also increase by 125 for 10s.
Whenever Albedo’s Transient Blossoms deal damage, he gains 1 stack of Fatal Reckoning (4 stacks maxed) that can be used in two ways:
- When Albedo casts his Burst, he consumes all Fatal Reckoning stacks to increase all the Burst damage instances by 30% of his DEF for each stack consumed.
- When Albedo is off-field, once he gains 4 Fatal Reckoning stacks, he consumes all of them and generates 3 Fatal Blossoms that deal AoE damage equal to 300% of his DEF. These damage procs are considered Burst damage and also trigger his A4 Passive, which gives EM buff to the team.
Overall, Albedo should not use his Burst at C2, as the damage instances from the second method are significantly more powerful than the increase to his normal Burst damage from the first method. C2 is also one of Albedo’s best Constellations to have.
 Constellation 3 | Grace of Helios
Constellation Description
Increases the Level of Abiogenesis: Solar Isotoma by 3.
Maximum upgrade level is 15.
Adds 3 levels to Albedo’s Skill, his main source of damage. However, due to his A1’s Additional Base DMG Bonus, and his C2 damage proportion, Albedo’s C3 is less of an increase after his Hexerei kit rework.
 Constellation 4 | Descent of Divinity
Constellation Description
Active party members within the Solar Isotoma field have their Plunging Attack DMG increased by 30%.
Additionally, when a nearby active character on the team jumps near a Silver Isotoma, the Silver Isotoma will be destroyed while greatly increasing the height of that jump, and for the next 3s, said character will deal 30% more Plunging Attack ground impact DMG. This effect is removed 0.1s after Plunging Attack ground impact DMG is dealt.
A highly niche support Constellation that provides a good buff to Plunging Attack damage. If Albedo’s Silver Isotomas exist on the field, he can destroy one of them and allow any character to jump high enough for a Plunging Attack that gets an increased 30% DMG% buff in addition to the base 30% from this Constellation. Overall, this is a decent Constellation when Albedo is played with a Plunging DPS such as Xiao. However, constant plunging in Hexerei teams can quickly consume all Silver Isotomas, which deactivates Albedo’s A1 Passive and reintroduces the old issue of Solar Isotoma breaking.
 Constellation 5 | Tide of Hadean
Constellation Description
Increases the Level of Rite of Progeniture: Tectonic Tide by 3.
Maximum upgrade level is 15.
The 3 extra levels to Albedo’s Burst only buff his ATK-based multipliers, not his DEF scaling from C2. The damage gained from this Constellation is minimal.
 Constellation 6 | Dust of Purification
Constellation Description
Active party members within the Solar Isotoma field who are protected by a shield created by Crystallize have their DMG increased by 17%.
Additionally, use of the Elemental Burst Rite of Progeniture: Tectonic Tide destroys all Silver Isotomas present on the field, and whenever a Silver Isotoma is destroyed this way the current instance of Elemental Burst will also remove 4 stacks of Fatal Reckoning from the Constellation Opening of Phanerozoic. This increases the DMG dealt by Fatal Blossom by 250% of Albedo’s DEF for the next 20s.
Albedo’s C6 has two effects.
First, it gives a small DMG% buff to active teammates who have a shield, or have Lunar-Crystallize’s Moondrifts be nearby. This increases Albedo’s supporting capabilities, but it does not make him optimal in teams where he was not already.
Secondly, if Silver Isotomas are on the field, using Albedo’s Burst clears them and always grants the maximum C2 bonus damage, no matter how many Fatal Reckoning stacks were actually used. It also increases all of his Burst damage (including C2 procs) by 250% of his DEF for 20s. This considerably boosts his personal damage and makes his Burst worth using again.
Combos
Combo Notation
- N = Normal Attack
- C = Charged Attack
- A = Aimed Shot
- P = Plunging Attack
- hP = High Plunge
- lP = Low Plunge
- E = Elemental Skill
- tE = Tap Skill
- hE = Hold Skill
- Q = Elemental Burst
- D = dash (cancel)
- J = jump (cancel)
- W = walk (cancel)
- > = switch character
- ( ) = these actions are optional; please refer to the notes below
- [ ] = repeat these actions the specified number of times
| E (N1) | At minimum, Albedo can just put down his flower and swap out. Optionally, his Skill cast can be followed up with a quick Normal Attack to immediately proc a Transient Blossom. |
| E Q | Casting Albedo’s Skill too soon after his Burst will negate Fatal Blossom damage, so if you plan to use Albedo’s Burst, cast Skill and then Burst. |
Artifacts
ER Requirements
| C0 | C1+ | |
| 2+ Geo Units | ~120–140% | 100% |
| Solo Geo | ~130–150% | ~100–110% |
If you do not use Albedo’s Burst, you can ignore ER altogether. If you do want to Burst every rotation, the above values are a rough estimate.
Note that it is not recommended to use Albedo’s Burst if he has C2 due to the Burst’s ineffective use of his C2 Fatal Reckoning stacks. However, Albedo uses his Burst again at C6.
Use the Energy Recharge Calculator to determine exact requirements for your team and rotation. For more details on how Favonius weapons will affect your team, please use Ac1d’s Favonius Mastersheet.
Artifact Stats
 Sands |  Goblet |  Circlet |
| DEF% | DEF% or Geo DMG% | CRIT Rate or CRIT DMG |
Stat Priority: ER (until requirements) > CRIT > DEF% (> ATK%)
ER and ATK% are only valuable if you use Albedo’s Burst every rotation, which is only optimal in a few teams. DEF% and Geo DMG% Goblets are comparable, and one can lead ahead if Albedo has an abundance of the other stat buffs. Additionally, a DEF% Circlet can be competitive with CRIT Circlets if Albedo is not paired with Gorou, preferably with a high CRIT weapon. In general, stick with CRIT Circlets.
At least 3000 DEF is recommended in order to maximize his Hexerei Passive’s buff. However, forcing Albedo to reach 3000 DEF and losing CRIT stats in the process is not advisable, and a standard Albedo build is already close to 3000 DEF.
Artifact Sets
Hover over artifact images for more information.
 4pc Husk of Opulent Dreams (Husk) | 4pc Husk gives Albedo a lot of stats, which he can snapshot when he casts his Skill. You can pre-stack its set bonus before combat by not having Albedo in your first slot and waiting for 12s. Albedo tends to prefer 4pc Husk over 4pc GT if he receives a lot of DMG Bonus from his teammates (e.g. Furina’s Burst, Xilonen’s 4pc Scroll). However, the difference is mostly minimal. At C2+, 4pc Husk performs better than 4pc GT due to C2 damage being Burst damage. |
 4pc Golden Troupe (GT) | 4pc GT can be better than 4pc Husk with Flute of Ezpitzal or DEF buffs, but the difference is small. Which set you farm is ultimately up to your preferences and what other characters you are building. Due to his Hexerei Passive, a DEF% Goblet is recommended with the use of 4pc GT. This is to both not have too much DMG Bonus and to more easily reach his Hexerei Passive’s DEF requirement. |
 2pc Mixed Sets | 2pc Set Bonuses: Skill DMG%, DEF%, Geo DMG% There’s a significant gap in performance between these mixed sets and the above 4pc sets. You can settle for 2pc sets if you are still farming for a full 4pc set or if neither the Husk nor GT Domain appeal to you. |
Weapons
Hover over weapon images for more information.
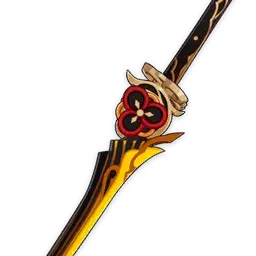
R5 Cinnabar Spindle, Flute of Ezpitzal, and Harbinger of Dawn are all competitive with R1 Uraku Misugiri and R1 Peak Patrol Song, so it is generally not worth pulling for them.
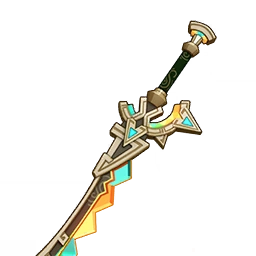
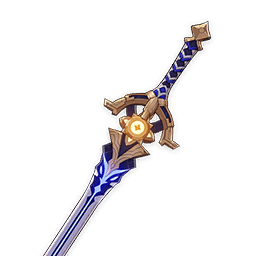
 Uraku Misugiri | Albedo’s Best-in-Slot when prioritizing his personal damage. Uraku Misugiri is very strong thanks to its high CRIT DMG secondary stat, Elemental Skill DMG Bonus, and DEF% buff. Albedo can trigger the passive bonus on cast, so it should have good uptime in most teams. |
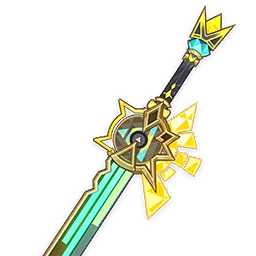
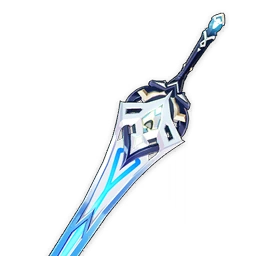
Peak Patrol Song | Albedo’s Best-in Slot when prioritizing his team’s damage. Peak Patrol Song is very strong thanks to its high DEF% secondary stat, DEF% buffs, personal Elemental DMG Bonus, and teamwide Elemental DMG Bonus. Albedo can trigger the passive with two Normal Attacks, so it should have good uptime in most teams. |
 Cinnabar Spindle | Albedo’s best 4-star option. If you have it, use it. Cinnabar Spindle was only obtainable as part of an Event during Version 2.3. |
Flute of Ezpitzal | Flute of Ezpitzal is a good F2P option for Albedo if Cinnabar Spindle is not available. If Albedo is not C1+ or does not receive any DEF buffs, Flute is recommended over Harbinger of Dawn to meet his Hexerei Passive’s DEF requirements more easily. It is also more reliable than Harbinger of Dawn if Albedo cannot consistently maintain his HP over 90%, especially with Furina teams. |
 Harbinger of Dawn | Recommended if you do not have Cinnabar Spindle. Harbinger of Dawn still performs admirably, especially considering its 3-star status. Just be careful with HP-draining effects, since the CRIT Rate buff from its passive will disappear if Albedo is below 90% HP. With a full passive uptime, Harbinger of Dawn performs better than Flute of Ezpitzal. However, Albedo might struggle to max out his Hexerei Passive with this Sword at C0. |
 Wolf-Fang | Can perform marginally better than Harbinger of Dawn at R5, but it is definitely not worth buying the Battle Pass five times. At R1, Wolf-Fang is not recommended over any of the above listed options. |
 5★ CRIT Swords | Primordial Jade Cutter, Light of Foliar Incision, Haran Geppaku Futsu, Mistsplitter Reforged These 5-star options are decent stat sticks if you already have one on hand. The primary advantage of using these weapons is that Albedo does not have to craft R5 Flute of Ezpitzal or stay above 90% HP for Harbinger of Dawn. It is not recommended to pull a 5-star weapon specifically for Albedo. Just use Flute of Ezpitzal or Harbinger of Dawn if possible. |
Teams
Rotation Notation
- N = Normal Attack
- C = Charged Attack
- A = Aimed Shot
- P = Plunging Attack
- E = Elemental Skill
- sE = special skill
- tE = Tap Skill
- hE = Hold Skill
- Q = Elemental Burst
- rQ = ranged Burst (Childe)
- D = dash (cancel)
- J = jump (cancel)
- W = walk (cancel)
- > = switch character
- ( ) = these actions are optional; please refer to the notes below
- [ ] = repeat these actions the specified number of times
Teambuilding
- Albedo shines in teams with at least one other Hexerei character to capitalize on his Hexerei Passives’ new Silver Isotomas and damage buffs.
- He can be slotted in anywhere as long as his Geo application is not actively detrimental to Elemental Reactions like Vaporize or Melt.
Off-Field Flex

Albedo is a highly flexible off-field DPS in a variety of teams with many different units. He can fit into most teams due to his slow Geo application. On-field DPS units synergize well with his off-field playstyle, but quickswap teams also enjoy his long-lasting Skill. At least one other Hexerei character is required to maximize his damage and buffing and at least one other Geo character activates Geo Resonance.
Notable Teammates
Hexerei Characters
Hexerei teammates and Albedo complement each other by enabling Hexerei kit effects that increase personal damage, buffs or various self or team utility. Through the Witch’s Homework Event, you can obtain one of Fischl, Razor, or Sucrose, so Albedo is guaranteed at least one Hexerei teammate in every account.
★ Durin | Durin is a strong Pyro unit. He and Albedo form an effective pairing as they both provide valuable team buffs and off-field personal damage. His White form shreds enemy Elemental RES and his Dark form allows him to be a viable Melt or Vaporize DPS. |
 Fischl | Fischl is a premier off-field Electro DPS who can buff ATK if Overloaded occurs and EM if Electro-Charged or Lunar-Charged occurs. These buffs double at C6. |
   Klee, Razor, Venti | On-fielders that can slot Albedo in their teams. Out of the three, Klee has better synergy with Albedo, as her Vaporize teams appreciate his A4’s EM buff. |
 Mona | With her Hexerei Passive, Mona can provide a buff of up to 60% DMG Bonus that lasts 13s to the whole team. This makes her a decent support for all teams that use Albedo. |
 Sucrose | Sucrose is rarely used with Albedo as their kits do not synergize well with each other. However, as both of them can give a teamwide EM buff, they can be viable together in reaction teams where other options are not available. |
Geo Characters
Geo teammates activate Geo Resonance, which shreds Geo RES and gives the on-field character a DMG Bonus buff. Albedo’s particle generation helps other Geo units’ ER requirements, and he benefits from a handful of buffs from his Geo teammates. As such, Albedo’s most synergistic teams are Geo-centered ones.
★ Xilonen | Xilonen is one of the best buffers for Albedo’s damage, and overall one of his best Geo partners for Geo Resonance. This is due to her good Geo and PHEC RES Shred as well as DMG Bonus from 4pc Scroll. She can also heal, which stacks Fanfare for Furina — another good support for Albedo’s personal damage. |
| On-Field DPS Units | Arataki Itto, Noelle, Navia, Ningguang These characters can use Albedo to activate Geo Resonance, or simply for his simple but effective off-field damage. |
Zibai | Zibai uses Albedo in her teams for his decent personal damage and his useful A4 EM buff, which boost Lunar-Crystallize damage, despite the fact that the teams rarely have a second Hexerei teammate. Additionally, Albedo can be the unit that gives the team the Lunar Reaction DMG Bonus from the Ascendant Gleam’s Team Bonus, of which his DEF is recommended to reach 3600 for maximized buff. |
 Chiori | Albedo’s Isotomas can enable Chiori’s second doll, which greatly increases her personal output. Together, they form a Double Geo off-field core that can be put in many teams. |
 Gorou | While Gorou’s buffs are good for Albedo’s personal damage, it is not recommended to run him solely to buff Albedo. Instead, Albedo treats Gorou’s buffs as a bonus in teams where Gorou is already used to buff characters such as Itto or Noelle. |
Illuga | Similarly, Illuga is mostly used in Lunar-Crystallize teams, and Albedo happens to be able to play in those teams. Illuga’s buffs to Albedo consist of his CRIT buff from his A1, and Flat DEF buff from his C4. |
| Other Off-Field Supports | Kachina, Zhongli Other off-field supports that can be used with Albedo. Kachina can trigger the full effect of 4pc Scroll and provides a DEF% buff from her C4. Zhongli’s shield is sturdy and he has a Universal RES Shred. |
Other
Columbina | Columbina “upgrades” the Geo-Hydro reaction into Lunar-Crystallize. This allows Geo and Hydro teammates (including Albedo) to deal additional damage that scales off their Character Level and EM. However, due to the nature of Lunar-Crystallize teams being abundant with EM or Reaction Bonus buffs, building EM on Albedo over DEF or CRIT is not recommended. |
Example Teams
This is not a comprehensive list of teams. The inclusion or exclusion of any given team does not necessarily reflect its power level.

This is a viable alternative to Albedo’s Mono Geo teams with Itto. While the team lacks a dedicated shielder, Pyro Crystallize shards can be used as a shield to maintain Geo Resonance uptime.
Sample Rotation
Albedo E > Durin 2[E] Q > Gorou Q E > Itto combo

Fischl’s short cooldowns and field time allow Navia to run a tight 18s rotation with her short N3 D N2 combo.
Sample Rotation
Navia (tE)1 Q > Bennett E Q > Fischl E / Q > Albedo E > Navia hE combo > Bennett E > Navia hE combo
¹First rotation only

This Double Pyro Double Geo team frees Arlecchino from Bennett’s circle while still outputting solid damage from all teammates.
Sample Rotation
Arlecchino E > Durin 2[E]Q > Albedo E > Chiori 2[E] > Arlecchino C 5[N3D] N3

Despite being the only Hexerei unit, Albedo is still one of the better options for this team’s fourth slot, especially with his C1. He generally wants to aim for 3600 DEF to max out the Ascendant Gleam’s Team Bonus.
Use Prototype Amber on Columbina for healing.
Sample Rotation
Columbina E (Q)¹ > Albedo E Q > Illuga EQ > Zibai combo
¹Can be used every other rotation.

This team focuses more on Albedo’s personal damage while still having solid off-field damage from Columbina and the teamwide Lunar-Crystallize damage.
Sample Rotation
Columbina E Q > Albedo E N1 > Xilonen E N2 Q > Mona Q N3 E N3 > Xilonen E N2 > Albedo Q > Columbina N3D spam¹
¹Until her Skill is ready.

In this team, Childe applies Hydro to enable Vape for Durin. Durin’s Dark form is used in single-target scenarios, while his White form is preferred against groups of enemies.
Sample Rotation
First rotation: Albedo E Q > Durin EN1Q > Childe E N2 > Xilonen E N1 Q N1 > Childe rQ E 4[N2C]
Subsequent rotations: Albedo E Q > (Xilonen N3)¹ > Durin EN1Q > Xilo E Q N2 > Childe rQ E 4[N2C]
¹To trigger Favonius if necessary.

One of the best Albedo teams with Klee. Xilonen enhances Albedo’s damage capabilities, and he gives DMG Bonus for the whole team. Xilonen can also wield Favonius Sword to battery Klee and Furina, allowing them to focus on offensive stats.
Sample Rotation
(Klee N1)¹ > Xilonen E N2 Q > Furina E D Q > Albedo E Q > Xilonen E N2 > Klee combo
¹First rotation only.
Limited Roster Alternatives
These teams are meant for newer players whose limited roster prevents them from using the teams above; as such, the teams below result in lower damage output.

This team is solid despite it being in this Limited Roster Alternatives section. Favonius Warbow is heavily needed on Gorou to reduce Noelle’s ER requirements.
Sample Rotation
Fischl E > Gorou E Q > Albedo E N1 > Noelle E Q N3 D N3 > Fischl Q > Gorou E > Noelle 3[N3D] N3

This team is for players whose Fischl is busy somewhere else. Without a Hexerei teammate, Albedo faces the old issue of Solar Isotoma breaking mid-fight. However, Ningguang can easily switch back to Albedo to recast his Skill without losing much.
Sample Rotation
Albedo E N1 > Dahlia/Layla E Q > Bennett E Q > Ningguang N1 E(E)¹ D N1C Q CN2C > Bennett E
¹Cast her Skill again if her C2 refreshes the Skill’s cooldown.
Credits
Writer(s): joeykn, acerbus114
Contributors: luke_260, luwunae, nociii, chasing_haze, cuzimori, idkanonymized, irokei, polomo, cinders_pear, hearttofhope
Team images made with the KQM portrait generator.