
A Shenhe Guide
by Vladone ツ#9281 & revy#4377
Updated for Version 3.5
Table of Contents
Introduction
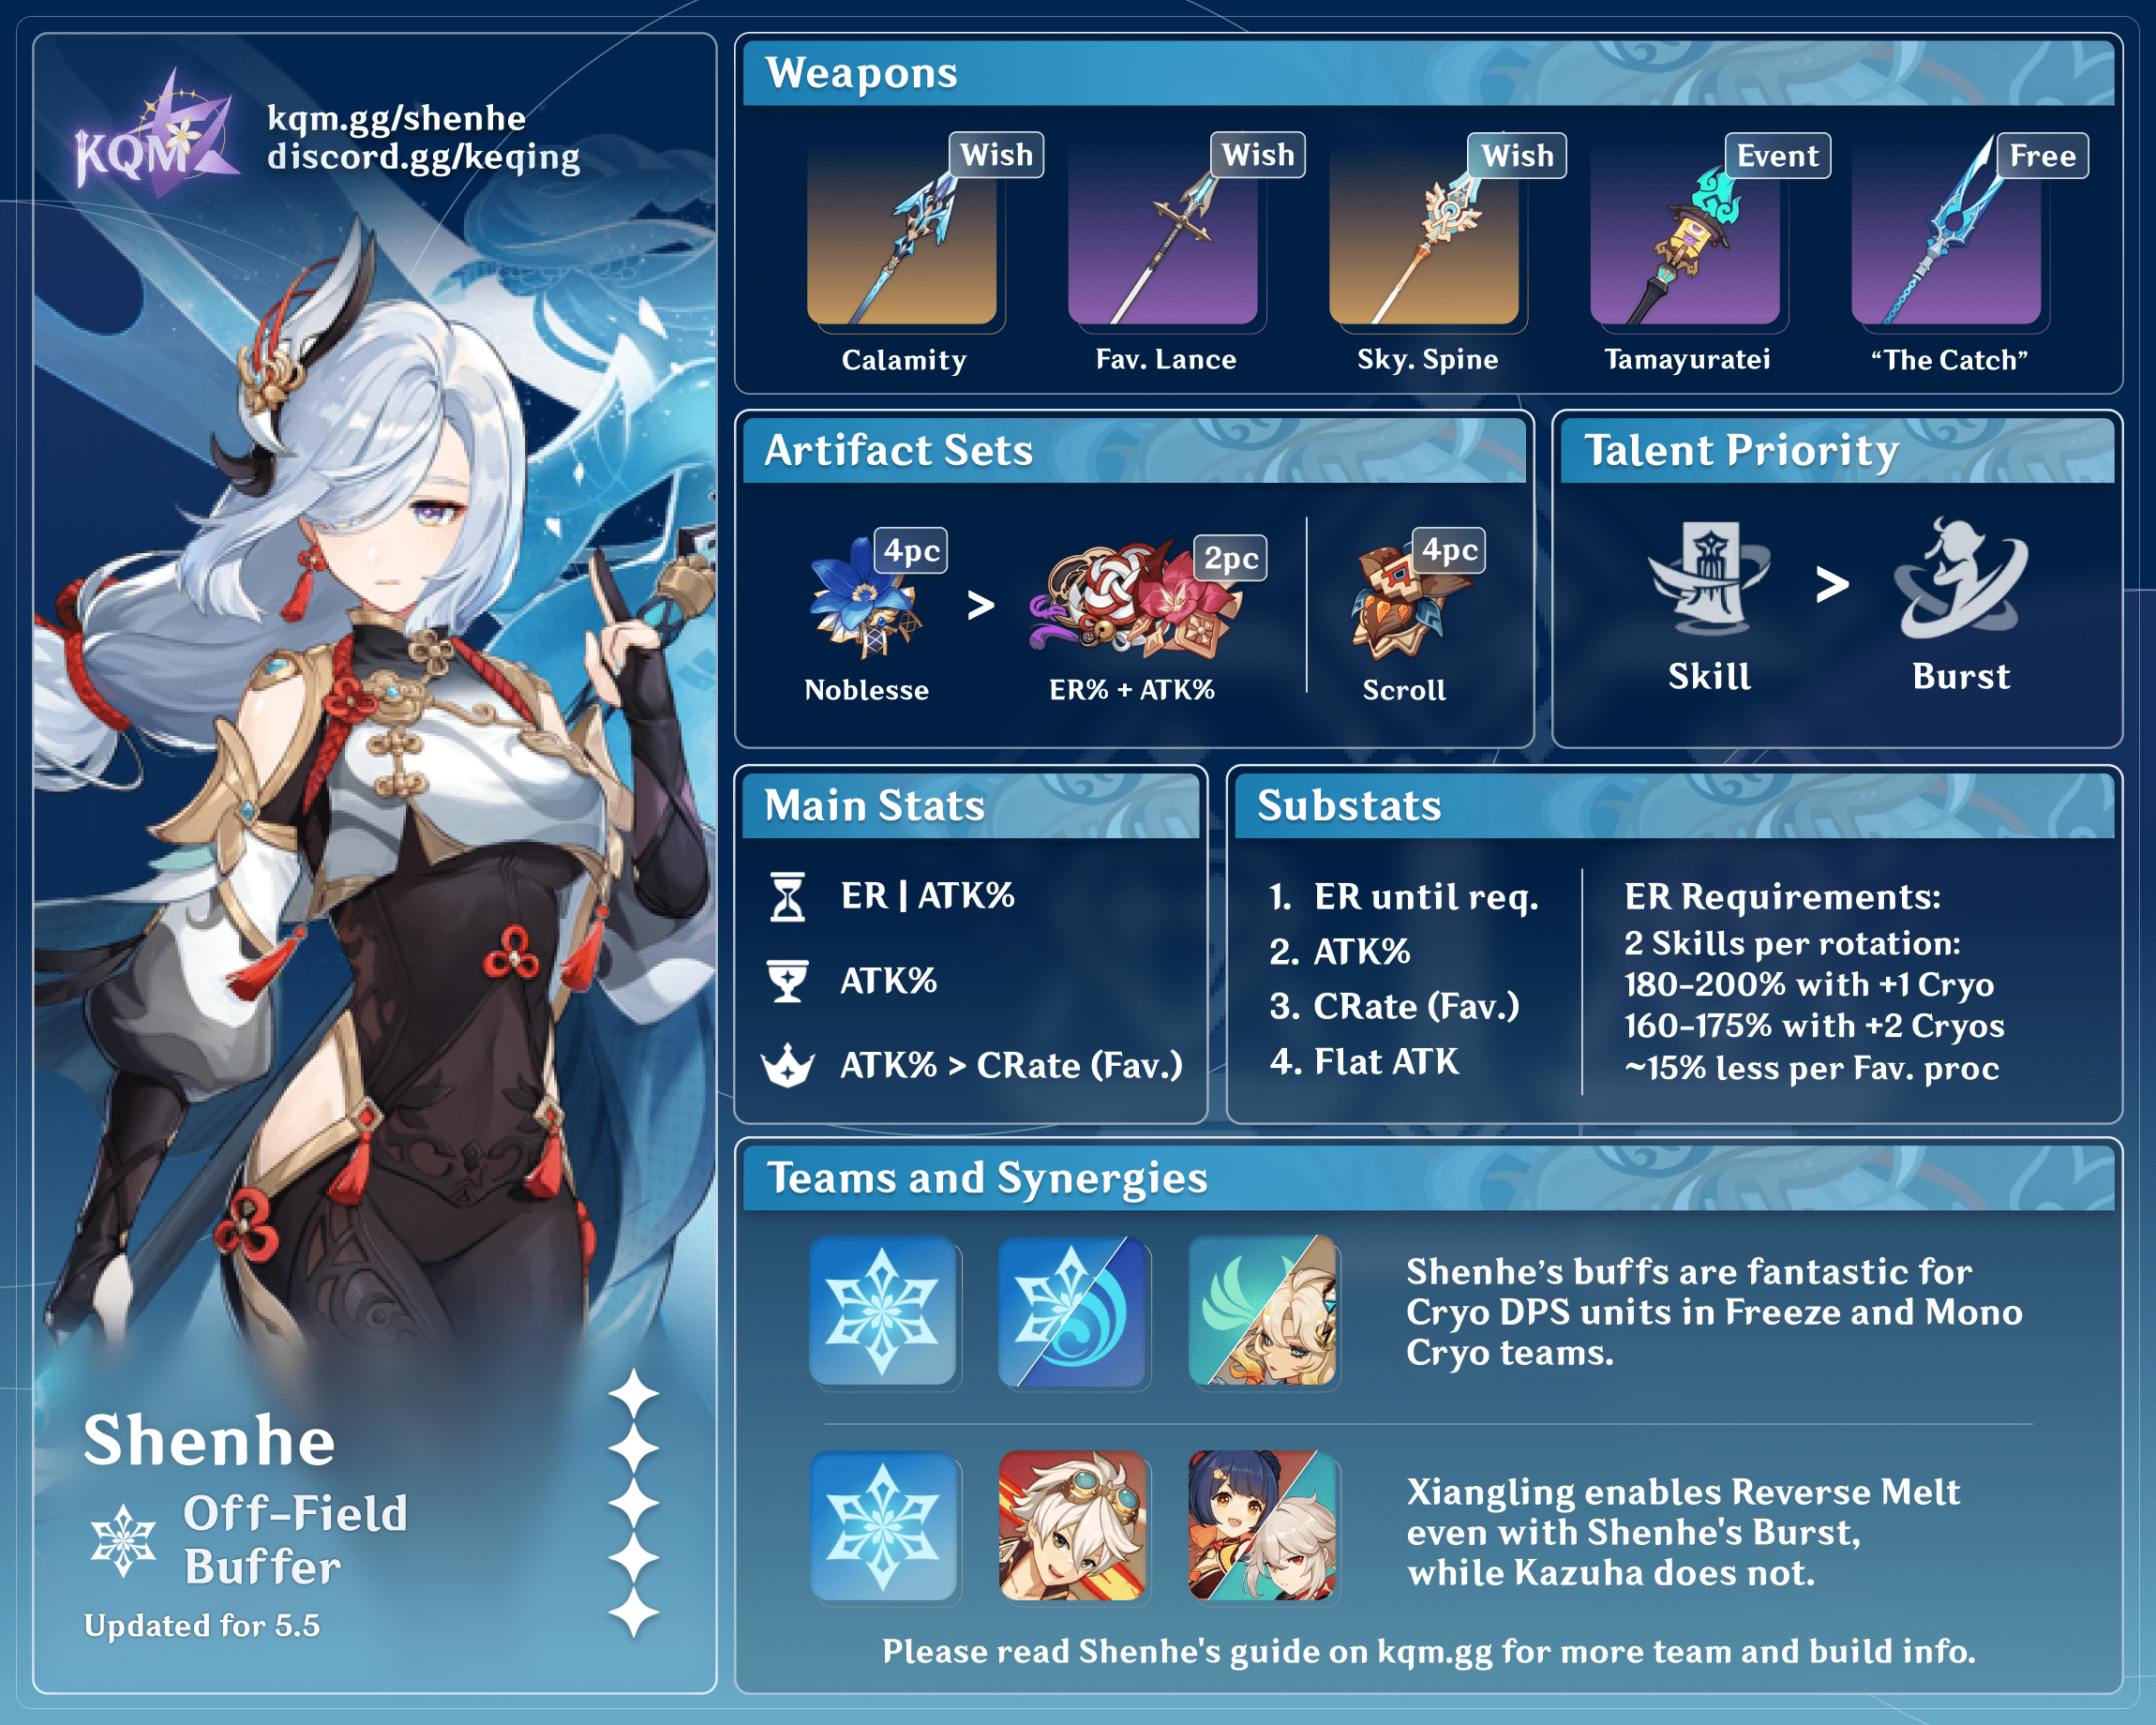
Shenhe is a 5-star Cryo Polearm character in Genshin Impact who specializes in off-field support for Cryo DPS units. Shenhe is the premiere Cryo support in most Cryo damage focused teams that can utilize her buffs and debuffs. This guide will review her best builds, best weapons, best artifacts, best teams, Talent priority, team rotations, and much more!
Why Play Shenhe?
Pros
- Cheap to build; only requiring ATK% and Energy Recharge, as well as CRIT Rate if using Favonius Lance. She is not reliant on good substats.
- Can Provide a 15% or 30% DMG Bonus to Cryo Elemental Skills & Bursts and Normal, Charged and Plunge Attacks depending on how you use her Skill, as well as built-in Cryo and Physical RES Shred.
- Anemo units that have Cryo Absorption (e.g. Kazuha or Venti) can also trigger Icy Quill procs, supplementing their damage.
- Icy Quill procs are dynamic and can apply to off-field abilities after they are cast. This allows for more flexibility in rotations.
- Shenhe’s Icy Quill buff is highly effective in single-target, which alleviates the primary “weakness” of Freeze comps.
- Does not require a lot of field time.
- Universally good with Cryo units, giving her high flexibility in teams that deal mostly Cryo damage.
- Rewards high investment on Shenhe’s teammates as Icy Quill damage scales with the triggering character’s stats.
- Opens up non-traditional Cryo teams, such as Mono Cryo, that are effective against Bosses that cannot be Frozen.
- Effective in Physical comps (Eula).
- As Icy Quill is quickly consumed, her damage contribution is mainly frontloaded.
Cons
- High Energy Recharge requirements.
- Low personal damage.
- Requires a strong core Cryo team to take full advantage of her abilities.
- Icy Quill procs are consumed for every instance of damage dealt, meaning Shenhe’s Icy Quill becomes less impactful as target count increases. This is somewhat offset by her DMG% buffs for teammate abilities that can hit in AoE.
- Less valuable in teams without Cryo or Anemo units that can use her Icy Quill effect.
TL;DR
Design: kolvii & cegewinne
Content: KQM TC Staff
Glossary
| C# | Constellation # |
| R# | Weapon Refinement # |
| BiS | Best-in-Slot |
| DPS | Damage per Second |
| DPR | Damage per Rotation |
| DoT | Damage over Time |
| GO | Genshin Optimizer |
| Config | Genshin Optimizer Multi-Optimization Target Config |
| CR / CD | CRIT Rate / CRIT DMG |
| ER / ER% | Energy Recharge |
| Fav | Referring to Favonius weapons |
| Flex | Flexible Character Slot |
| Snapshot | Some abilities, once cast, take a “snapshot” of the character’s stats, and use them for the entire duration of the ability, even if some of the buffs the character may have had expired when damage is dealt. |
| A1 / A4 | Ascension 1 / Ascension 4 Passive |
| VV | Viridescent Venerer artifact set |
| 4pc NO / 2pc NO | 4-piece Noblesse Oblige / 2-piece Noblesse Oblige |
| 4pc BS / 2pc BS | 4-piece Blizzard Strayer / 2-piece Blizzard Strayer |
| 2pc ATK | Any 2-piece set with an 18 ATK% bonus, such as 2-piece Gladiator’s Finale or Shimenawa’s Reminiscence |
| 4pc TotM | 4-piece Tenacity of the Millelith |
| 4pc EoSF / 2pc EoSF | 4-piece Emblem of Severed Fate / 2-piece Emblem of Severed Fate |
Combo Notation
| N# | N – Normal Attack, # – Number of attacks performed |
| C | Charged Attack |
| E | Elemental Skill |
| Q | Elemental Burst |
| D | Dash Cancel |
| #N2C | # – Number of the combo (N2C in this case) performed |
| tE | Tap Skill – Tap the Elemental Skill |
| tEP | Tap Skill into Plunge – Used for Kazuha in rotations |
| hE | Hold Skill – Hold the Elemental Skill |
| h1E | Level 1 Hold Skill – Used when Bennett shortly holds his Skill |
FAQ
Should I pull Shenhe or Mistsplitter for Ayaka?
Shenhe and Mistsplitter grant similar team DPS increases, although Amenoma Kageuchi + C0 Shenhe usually has lower team DPS than C2 Rosaria + Mistsplitter Reforged. Shenhe C0 + Amenoma are mostly equivalent to C0 Rosaria + Mistsplitter, with single-target scenarios favoring the former and multi-target scenarios the latter.
Additionally, using more external ATK% buffs favors Mistsplitter, while having more DMG% buffs favors Shenhe. This is not the whole picture, though, as different combat scenarios can favor the use of either. For more details you may consider checking the Mastersheet.
For instance, Mistsplitter Reforged buffs all of your damage regardless of content, whereas Shenhe’s Skill can be used in a more frontloaded manner to clear in less rotations.
Another thing worth mentioning is that the Weapon Banner needs 129 wishes for a 60% chance at Mistsplitter, while the Character Banner needs fewer wishes at 92. For more information check gachacalc. In addition, the second 5-star in the Weapon Banner may be undesirable. Characters also provide more versatility and variety of gameplay than weapons do.
All these factors should be taken into consideration before wishing so that you can make an informed decision. Ultimately, it’s not a make or break decision and neither is a bad choice.
Is Shenhe better than Rosaria or Kaeya?
In most Freeze teams (especially Ayaka / Ganyu teams), Shenhe is a decent upgrade over Rosaria and Kaeya. While Shenhe has a longer Elemental Skill cooldown, in most rotations Kaeya and Rosaria aren’t able to use their Skills more times regardless. Shenhe also brings much more in terms of buffs, which makes her a better pick in most cases.
It is worth mentioning that Shenhe, Rosaria and Kaeya perform similarly in Reverse Melt and Physical teams.
Is Shenhe good outside of single-target?
Shenhe’s advantage over other Cryo supports is greater in single-target content. However, even in multi-target, Shenhe is usually the premier choice, since Icy Quill (her unique component that gets “weaker” in AoE) damage doesn’t change, but stays stagnant. Her kit still includes buffs that do scale in multi-target.
What about “Main DPS” Shenhe?
While Shenhe can be used in various ways, it’s not recommended to use her as an on-field DPS. Attempting to optimize a sub-optimal playstyle is not the focus of this guide. However, with significant investment, it is still possible to clear Spiral Abyss using Shenhe as an on-field DPS.
Is Shenhe “worth it”?
“Worth it” is very subjective, and heavily depends on your current roster. Shenhe can be a valuable addition to Cryo teams (and even Physical teams such as Eula) for players planning to use them frequently. However, keep in mind that she may not be your top priority. Consider investing in her as a “luxury” upgrade to elevate your Cryo teams’ potential.
Can I make everyone into a Cryo DPS with Shenhe?
You can use Chongyun’s Elemental Skill to infuse most Sword, Claymore and Polearm-wielding characters’ Normal Attacks with Cryo so that they can be buffed by Icy Quill. However, without Shenhe’s C6, Icy Quill is consumed quickly, so unless you want to try the team for fun, it’s not a very good option.
C1 or Calamity Queller?
While C1 is typically recommended in most scenarios, it’s also important to consider the weapon featured alongside Calamity Queller as it could maximize the potential benefits to your account. Pursuing the alternative weapon could lead to obtaining Calamity Queller, making it a better choice over C1. Therefore, it’s crucial to evaluate your playstyle and needs before making a decision.
Should I give the TTDS buff to Shenhe or Ayaka?
You should give the TTDS buff to Ayaka in almost all scenarios. At Talent Level 10, Shenhe’s Skill only gives 82.18% of her own ATK to Ayaka, instead of the 1:1 ratio you get when giving to Ayaka directly. Furthermore, the TTDS buff would only be applied to hits buffed by Shenhe’s Icy Quill, rather than all of them if you had given the buff to Ayaka.
The only niche scenario to consider giving the TTDS buff to Shenhe is when you have her C3R1 and you are predominantly using Icy Quill buffed hits for some incredibly short speedruns. Shenhe still gives only 97% of her ATK at Talent Level 13; however, Calamity Queller’s Base ATK is higher than Mistplitter’s, so in this niche scenario the damage from Shenhe’s Icy Quill would be higher, leading to (potentially) faster speedrunning times.
Is it worthwhile to level Shenhe from 80/90 to 90/90?
Leveling Shenhe from 80/90 to 90/90 would only increase her Base ATK by 21.36, which translates to an increase of around 50-70 Total ATK after considering ATK% artifact stats, which generally is a ~0.8% team DPS increase. While extra ATK is nice to have, it’s not necessary, so generally only consider ascending and leveling Shenhe to 90/90 after you level her appropriate Talents, upgrade her artifacts, and invest properly into other characters you use.
Should I pull Shenhe for Eula? What about Physical in general?
Shenhe is a solid unit even in Physical teams, but not a necessity. She appears in some of Eula’s top teams; however, she is not a must-have for Eula to perform at her best. Keep in mind that C6 Rosaria’s performance is nearly identical to Shenhe in Physical teams.
Shenhe Talents
These things… What are they used for?

 Normal Attack | Dawnstar Piercer
Talent Description
Normal Attack
Performs up to five consecutive spear strikes.
Charged Attack
Consumes a certain amount of Stamina to lunge forward, dealing damage to opponents along the way.
Plunging Attack
Plunges from mid-air to strike the ground below, damaging opponents along the path and dealing AoE DMG upon impact.
Shenhe’s Normal Attack Talent is not a priority to level, as Normal Attacks are not a significant part of her kit; their multipliers are low and they are seldom used, as Shenhe doesn’t spend much time on-field.
Nevertheless, you can use her Normal Attacks in order to proc Favonius Lance’s passive. Even in this scenario, however, they represent a negligible damage contribution.
 Elemental Skill | Spring Spirit Summoning
Talent Description
The frosted dew, silvery and dense, shall exorcise all demons.
Grants all nearby party members the Icy Quill effect and deals Cryo DMG in different ways based on whether it is pressed or held.
Press
Rushes forward together with a Talisman Spirit, dealing Cryo DMG to opponents along the path.
Hold
Commands the Talisman Spirit to deal AoE Cryo DMG.
Icy Quill
When Normal, Charged, and Plunging Attacks, Elemental Skills, and Elemental Bursts deal Cryo DMG to opponents, the DMG dealt is increased based on Shenhe’s current ATK.
The Icy Quill’s effects will be cleared once its duration ends or after being triggered a certain number of times.
When held rather than pressed, the Icy Quill’s effect lasts longer and can be triggered more times.
When one Cryo DMG instance strikes multiple opponents, the effect is triggered multiple times based on the number of opponents hit. The number of times the effect is triggered is calculated independently for each party member with the Icy Quill.
Shenhe’s kit offers a unique benefit to her team, providing 5 (Tap) or 7 (Hold) Icy Quill procs to each member. These procs are consumed upon Cryo damage (not including Cryo Swirls) dealt by any unit and operate in a manner similar to Yunjin’s Normal Attack buff. These procs scale both with Shenhe’s ATK and the stats of the triggering unit, such as CRIT and DMG Bonus.
This is a complex topic which requires advanced knowledge about the damage formula to fully understand. If you are interested in learning the details, you can find an in-depth explanation in the Icy Quill Procs Calculation section.
At C0, it is generally preferred to use Tap Skill due to its shorter cooldown and better Energy generation. While Hold Skill generates more particles per usage, you most likely are not able to fit two Hold Skills in the same rotation. On the contrary, Tap Skill can be easily used twice within the same rotation, resulting in more overall particles and lower Energy needs.
Shenhe’s Skill also has a nice benefit that can be missed when looking just at numbers. Her Tap Skill moves her closer to enemies, which is useful in certain scenarios. For example, in some chambers of Spiral Abyss, enemies have a very short window for being grouped after the chamber starts. You can use Shenhe’s Skill to close the distance and apply Cryo, and then use Anemo abilities to group them.
 Elemental Burst | Divine Maiden’s Deliverance
Talent Description
Unleashes the power of the Talisman Spirit, allowing it to roam free in this plane, dealing AoE Cryo DMG.
The Talisman Spirit then creates a field that decreases the Cryo RES and Physical RES of opponents within it. It also deals periodic Cryo DMG to opponents within the field.
Shenhe’s Elemental Burst deals an instance of damage upon cast and then two ticks of DoT every 2s, for a total of 12 ticks (or 18 at C2). In addition, it provides Cryo and Physical RES Shred.
Shenhe’s Burst is her main source of personal damage and the best way to proc her own Icy Quill; it is worth leveling this Talent and building enough ER% to use it every rotation. While it deals less damage than other Cryo units’ abilities, its damage is by no means negligible. It is worth mentioning that Shenhe’s Burst can snapshot various buffs.
 Ascension 1 Passive | Deific Embrace
Talent Description
An active character within the field created by Divine Maiden’s Deliverance gains 15% Cryo DMG Bonus.
This dynamic buff is applied only to on-field units within Shenhe’s Burst, but can be snapshot onto various characters’ abilities.
It is worth mentioning that Shenhe’s Burst itself cannot snapshot this Passive.
 Ascension 4 Passive | Spirit Communion Seal
Talent Description
After Shenhe uses Spring Spirit Summoning, she will grant all nearby party members the following effects:
- Press: Elemental Skill and Elemental Burst DMG increased by 15% for 10s.
- Hold: Normal, Charged, and Plunging Attack DMG increased by 15% for 15s.
This Passive provides great DMG% buffs depending on how you use Shenhe’s Elemental Skill. The durations of these buffs are independent and you can maintain full uptime on one of them.
These buffs cannot be snapshot, but are added dynamically to snapshotting abilities throughout their duration. The choice of which buff to use depends on the specific team composition.
 Utility Passive | Precise Comings and Goings
Talent Description
Gains 25% more rewards when dispatched on a Liyue Expedition for 20 hours.
Allows Shenhe to go on dates with Yelan, who has the same Passive.
Talent Priority
> >>>
Skill > Burst >>> Normal Attack
Shenhe Constellations
The power I harness… It grows stronger.
Shenhe’s Constellations are relatively weak and generally not worth going for unless the rest of the team is already at high investment. In that case, good stopping points for Constellations are C1 and C2.
 Constellation 1 | Clarity of Heart
Spring Spirit Summoning can be used 1 more time.
A useful Constellation whose value is most apparent when clearing within one or two rotations. The extra charge improves Shenhe’s buffing potential by providing more Icy Quill procs and reduces Energy Recharge requirements.
This Constellation can increase flexibility in rotations and slightly reduce ER% requirements. However, its value decreases when playing more rotations. The cooldown for using both Elemental Skills is longer than that of a rotation; using both charges after the first rotation results in a significant sacrifice of rotation time.
Additionally, this Constellation can allow both of Shenhe’s A4 buffs to be active simultaneously.
Using both Skill charges back-to-back won’t stack their Icy Quill procs, but instead overwrites the previous effect. C2 Ayaka avoids this problem since Icy Quill will have already been consumed by her Burst before Shenhe’s second Skill can be cast.
Estimated C0R5 Amenoma Ayaka Team DPS Increase
From C0: 3.06% Single Rotation, 0.66% Multiple Rotations
 Constellation 2 | Centered Spirit
Divine Maiden’s Deliverance lasts for 6 seconds longer.
Active characters within the skill’s field deal 15% increased Cryo CRIT DMG.
A Constellation that increases Shenhe’s personal damage and the team’s Cryo damage. The duration extension allows for 6 additional DoT ticks for a total of 18. This in turn extends the duration of her A1 Passive and Burst’s RES Shred. It’s worth noting that the 15% Cryo CRIT DMG buff the Constellation provides cannot be snapshot.
The Burst duration extension is especially valuable in Eula teams. The additional 6s allow the RES Shred to be active during Eula’s entire Burst duration, which is not possible at C0 or C1.
This Constellation’s value is lower in single rotation clears and speedruns compared to C1.
Estimated C0R5 Amenoma Ayaka Team DPS Increase
From C1: 3.24% Single Rotation, 5.14% Multiple Rotations
From C0: 6.4% Single Rotation, 5.84% Multiple Rotations (Cumulative)
 Constellation 3 | Unstoppable Fervor
Increases the Level of Spring Spirit Summoning by 3.
Maximum upgrade level is 15.
Increases her Elemental Skill Talent by 3 levels. While this Constellation boosts the most important part of her kit, the upgrade is not significant and the damage increase compared to previous Constellations is rather minor.
Estimated C0R5 Amenoma Ayaka Team DPS Increase
From C2: 3.27% Single Rotation, 2.77% Multiple Rotations
From C0: 9.88% Single Rotation, 8.76% Multiple Rotations (Cumulative)
 Constellation 4 | Insight
When characters under the effect of Icy Quill applied by Shenhe triggers its DMG Bonus effects, Shenhe will gain a Skyfrost Mantra stack:
• When Shenhe uses Spring Spirit Summoning, she will consume all stacks of Skyfrost Mantra, increasing the DMG of that Spring Spirit Summoning by 5% for each stack consumed.
• Max 50 stacks. Stacks last for 60s.
While this Constellation helps Shenhe’s personal damage, its impact on the team’s overall DPS is negligible; it is not worth going for C4 if not pulling for C6.
It is worth noting that C4 does make focusing on Shenhe’s personal damage a bit better. However, many C4 Shenhe owners are likely to have Constellations or 5-star weapons on their hypercarries. Even with this Constellation, it’s still recommended to prioritize Shenhe’s buffing capabilities and consider her personal damage as a nice bonus via substats.
In standard teams you can only get around a 75% (15 stacks) DMG Bonus increase. Although more is possible in Mono Cryo teams, in most cases the maximum DMG Bonus is 115% (23 stacks).
It should be noted that getting maximum Skyfrost Mantra stacks is not possible without C6.
Estimated C0R5 Amenoma Ayaka Team DPS Increase
From C3: 0.67% Single Rotation, 0.90% Multiple Rotations
From C0: 10.62% Single Rotation, 9.74% Multiple Rotations (Cumulative)
 Constellation 5 | Divine Attainment
Increases the Level of Divine Maiden’s Deliverance by 3.
Maximum upgrade level is 15.
Shenhe’s Burst RES Shred caps out at Level 10, so this does not increase her support capabilities in any way, only her personal damage.
Estimated C0R5 Amenoma Ayaka Team DPS Increase
From C4: 1.01% Single Rotation, 1.05% Multiple Rotations
From C0: 11.74% Single Rotation, 10.89% Multiple Rotations (Cumulative)
 Constellation 6 | Mystical Abandon
When characters trigger Icy Quill’s effects using Normal and Charged Attack DMG, it does not count toward the Trigger Quota.
Insignificant depending on the scenario. In most Ayaka rotations, only 2–4 more Icy Quill procs are gained from C6. It does alleviate Shenhe’s “weakness” of Icy Quill’s Trigger Quota being consumed faster in AoE scenarios, but that alone does not make it worth going for.
Where this Constellation really shines is against enemies who are not tanky enough to warrant using Ayaka’s Burst. This usually happens in chambers with waves of weaker enemies. Essentially, this Constellation increases Ayaka’s damage outside of her Elemental Burst significantly, but does not justify a completely Burst-less playstyle.
In scenarios where sustained damage is necessary without relying on Ayaka’s Burst, her most effective Normal Attack combo is N4C to maximize C6 Icy Quill procs. However, in practice, the optimal combos depend on the content, making them subject to change.
C6 Shenhe is also beneficial for Melt Ganyu, especially if Ganyu is also at C6. With C6 Ganyu, her Frostflake Arrow’s charging time is removed, making shielders less impactful and allowing Shenhe to slot in easily. C6 Ganyu’s Icy Quill-buffed Charged Attacks can be Melted with unparalleled AoE capability with sufficient Pyro application.
Additionally, having C1 Shenhe means that Shenhe’s Tap Skill can be used early in the rotation to buff Ganyu’s Burst if cast, while Shenhe’s Hold Skill can be used before Ganyu’s CA window; this effectively uses both of Shenhe’s A4 buffs.
C6 Shenhe also enables some fun but not necessarily optimal teams revolving around Chongyun’s Cryo Infusion. The duo turns almost anyone into a solid on-field Cryo DPS. Characters with fast, multi-hitting Normal Attacks, such as Zhongli, utilize this better.
Estimated C0R5 Amenoma Ayaka Team DPS Increase*
From C5: 9.18–10.49% Single Rotation, 4.76–13.76% Multiple Rotations
From C0: 22–23.47% Single Rotation, 16.18–26.16% Multiple Rotations (Cumulative)
*Depends on how adept you are at modifying the rotation to take advantage of it.
Shenhe Artifacts
Adepti treasures have special powers… Hmm, what about mortal ones?
Artifact Sets
In nearly all cases, having the right main stats and enough Energy Recharge is more important than set bonuses. As usual, use Genshin Optimizer to figure out what build works best for your account.
Assumptions
• Percentages are based on team DPS, not just Shenhe’s personal DPS.
• Freeze team includes Ayaka — Mona — Kazuha.
◦ Calamity Queller R1 assumes 178% ER on Shenhe.
◦ Favonius Lance R1 assumes 161% ER on Shenhe.
◦ Kazuha triggers 1 proc of Favonius Sword.
◦ 4TotM assumes 4NO on Mona instead of Shenhe.
• Mono Cryo team includes Ayaka — Ganyu — Kazuha.
◦ Calamity Queller R1 assumes 152% ER on Shenhe.
◦ Missive Windspear R5 assumes 152% ER on Shenhe.
• Ayaka holds Amenoma Kageuchi.
• For more details on the numbers provided below, check the Mastersheet.
| Artifact Set | Team DPS vs. 4NO (Freeze) | Team DPS vs. 4NO (Mono Cryo) | Notes |
 4-piece Noblesse Oblige (NO) | Calamity Queller R1 100% Favonius Lance R1 100% | Calamity Queller R1 100% Missive Windspear R5 100% | Provides a teamwide 20% ATK buff that lasts for 12s. Since this effect cannot stack, only use 4pc NO if no other party members hold it. Otherwise, use an alternative. |
 4-piece Blizzard Strayer (BS) | Calamity Queller R1 97.55% Favonius Lance R1 97.37% | Calamity Queller R1 96.29% Missive Windspear R5 96.18% | Prioritizes Shenhe’s personal damage over her buffing capability. While not recommended in most scenarios over 4pc NO, 4pc BS can be a good option in Freeze teams, especially if you run 4pc NO instead of 4pc TotM on your Hydro unit. It should be noted that the CRIT Rate provided by the 4-piece set bonus does improve Favonius Lance passive proc chance. |
 2-piece/2-piece Mix (18% ATK or EoSF) | Calamity Queller R1 ~96.7% Favonius Lance R1 ~96.6% | Calamity Queller R1 ~96.5% Missive Windspear R5 ~96.4% | ATK% is the most desired stat on Shenhe once you reach her Energy Recharge requirement. Therefore, it is highly recommended to run 2pc ATK/2pc ATK or 2pc ATK/2pc EoSF in teams where another unit already holds 4pc NO and Freeze is not present for 4pc BS. |
 4-piece Emblem of Severed Fate (EoSF) | Calamity Queller R1 96.82% Favonius Lance R1 96.83% | Calamity Queller R1 96.47% Missive Windspear R5 96.37% | 4pc EoSF prioritizes Shenhe’s personal damage over her buffing capability, which is not recommended in most scenarios. Performs better with higher ER% requirements. |
 4-piece Tenacity of the Millelith (TotM) | Calamity Queller R1 95.92% Favonius Lance R1 95.95% | Calamity Queller R1 95.81% Missive Windspear R5 95.87% | Even if its buff can be snapshot, 4pc TotM is still not recommended. It is much better to use this set on a Hydro unit such as Mona or Kokomi and 4pc NO on Shenhe rather than the other way around. |
 2-piece/2-piece Mix (BS/NO or EoSF) | Calamity Queller R1 ~95.9% Favonius Lance R1 ~96% | Calamity Queller R1 ~95.7% Missive Windspear R5 ~95.7% | While you can also use 2pc BS/2pc NO, its performance is slightly worse than 2pc EoSF + 2pc ATK at comparable substats. The gap between 2-piece/2-piece mix and 4pc NO widens the more invested your hypercarry is relative to Shenhe. |
Artifact Stats
 Sands |  Goblet |  Circlet |
| ATK% / ER% | ATK% > Cryo DMG% | ATK% > CRIT% |
| Provided you have enough Energy Recharge to Burst every rotation, ATK% Sands is the strongest option on Shenhe. | ATK% is the best choice. Going for Cryo DMG% for Shenhe’s personal damage is not recommended, but viable. The gap between ATK% and Cryo DMG% widens the more invested your hypercarry is relative to Shenhe. | Once again, ATK% is going to be your best bet. However, if you need the CRIT Rate for Favonius, or happen to have a lot of ATK% substats on your CRIT Rate Circlet, it can be the best option available for you. The gap between ATK% and CRIT% widens the more invested your hypercarry is relative to Shenhe. |
Substats
ER (until requirement) > ATK% > CRIT Rate% (for Favonius Lance) ≥ CRIT DMG% >> Flat ATK
Shenhe’s substats are pretty simple. In a perfect scenario, you would have ATK% Sands, ATK% Goblet, and ATK% Circlet, while meeting ER requirements through substats. If this is not possible, an ER% Sands can be used instead. It is recommended to prioritize ATK% on Shenhe’s artifacts along with CRIT for her personal damage. This assumes ER requirements are met to Burst off cooldown.
Flat ATK is generally worse than ATK%, but you can’t choose how your artifacts roll. If you have a high Flat ATK piece and wonder how much ATK% it “equals”, refer to the table below.
How much Flat ATK do I need to “beat” ATK%?*
| Weapon Base ATK | 4.1 ATK% | 4.7 ATK% | 5.3 ATK% | 5.8 ATK% |
| 741 | 42.61 | 48.67 | 54.83 | 60.89 |
| 674 | 39.91 | 45.58 | 51.35 | 57.02 |
| 620 | 37.69 | 43.05 | 48.50 | 53.86 |
| 608 | 37.20 | 42.49 | 47.87 | 53.16 |
| 565 | 35.44 | 40.47 | 45.60 | 50.64 |
| 542 | 34.50 | 39.40 | 44.39 | 49.30 |
| 510 | 33.19 | 37.90 | 42.70 | 47.42 |
| 454 | 30.93 | 35.33 | 39.80 | 44.20 |
*Assumes Level 90 Shenhe
How much ATK in total should Shenhe have as a baseline?
| ER% Sands | ATK% Sands | |
| Any 5-star Weapon | 2220–2525 ATK | 2615–2920 ATK |
| Any 4-star Weapon | 2000–2300 ATK | 2380–2650 ATK |
These values should be easily achievable without buffs or substats. All you need to do is level the weapon and Shenhe to Level 90 and use ATK%/ATK%/ATK% or ER%/ATK%/ATK% main stats with level 20 artifacts. The thresholds are just a baseline, not indicative of something exceptional or “fully built“ at all.
How much ATK total should Shenhe have at KQMC*?
Total ATK is calculated with no external buffs (including Pyro Resonance and Calamity Queller’s passive).
| Weapon | ER% Sands | ATK% Sands |
| Calamity Queller | 3146–3522 ATK | 3529–3905 ATK |
| Skyward Spine | 2806–3158 ATK | 3165–3517 ATK |
| Wavebreaker’s Fin | 2797–3129 ATK | 3135–3468 ATK |
| Missive Windspear | 2728–3020 ATK | 3026–3319 ATK |
| Favonius Lance | 2530–2843 ATK | 2850–3161 ATK |
*KQMC is the calculation standard used to get the values shown above. It assumes that you are running level 20 artifacts. In the case of ATK/ATK/ATK main stats you will have 6 ATK% substat rolls, and 8 rolls instead if using ER Sands. The ranges provided are calculated on 4NO for the lower end and 2pc ATK/2pc ATK for the higher end.
Note there are many people with builds significantly beyond KQMC, and having a build that reaches KQMC does not make it “exceptional”, it’s just something you can consider a reasonably good build.
What about CRIT stats?
In general, CRIT is not a main priority, but is still useful for Shenhe’s personal damage. If you can get some CRIT rolls while sacrificing minimal ATK, it can be worthwhile. This is especially true in the case of Favonius Lance, where ~30-40% CRIT Rate is recommended for reliable procs. Ideally you should reach this value without any buffs present. The CRIT Rate provided by the Cryo Resonance is also appreciated.
These values should only be used as a reference rather than a goal to achieve. For example, having less ATK% than listed here but more CRIT or ER may perform better. It is highly encouraged to use Genshin Optimizer to figure out what build works best for your account.
Shenhe Energy Requirements
Energy Recharge is a crucial part of building Shenhe unless you are optimizing for single-rotation clears, as it is recommended to use her Burst every rotation for its buffs. The exact amount of Energy Recharge needed varies depending on the team and content — important variables to consider are:
• The teammates you run Shenhe with.
• The number of Favonius weapon procs per rotation.
• The number of Skill uses you get on each team member per rotation.
• Your level of investment.
◦ The higher your damage, the faster you reach HP particle drop thresholds. With enough damage, you may not even need more than 1 rotation to clear the content you are facing.
• The type of enemies faced.
◦ Abyss chambers with Bosses tend to drop fewer HP particles than chambers with waves of mobs, which increases the ER needed.
The following values are from the calculated averages of several team compositions. They represent general values and vary depending on the team. For a more accurate result for your scenario, use the Energy Recharge Calculator.
| 2 Skill Uses | Normal | Venti* | Eula** | 1 Fav Proc | 2 Fav Procs |
| Double Cryo | 193% | 157% | 174% | 173% | 157% |
| Triple Cryo | 166% | 126% | 172% | 151% | 138% |
**Eula teams are calculated either with Raiden or with Favonius procs on other party members.
Rule of thumb: A Favonius proc reduces ER requirements by roughly 10-20% Energy Recharge.
Using Genshin Optimizer
Using GO (Genshin Optimizer) for Shenhe can be rather tricky, so it will be covered in this section here.
For people who are completely new to GO, it is highly recommended to check out the official tutorials on frzyc’s (GO Lead Developer) YouTube channel to get a basic understanding of how it works here.
Add this Multi-Optimization Target Config (assumes C0 Shenhe) by copying the text below and paste it in the Multi-Optimization Target Config Menu.
{"name":"Shenhe Damage Target","targets":[{"weight":2,"path":["skill","press"],"hitMode":"avgHit","bonusStats":{}},{"weight":1,"path":["burst","dmg"],"hitMode":"avgHit","bonusStats":{}},{"weight":12,"path":["burst","dot"],"hitMode":"avgHit","bonusStats":{}}]}Then follow along the basic video guide below.
You can also set “Artifact Level Filter” to 1 (instead of the default 0) if you have many Level 0 artifacts in your database to speed up the optimization process.
Shenhe Weapons
My polearm doesn’t distinguish friend from foe, and there is clearly a limit to the red ropes’ power.
The most important weapon stats to look for are high Base ATK, ATK% and Energy Recharge, depending on what’s available. Naturally, Shenhe’s signature weapon, Calamity Queller, is her overall BiS. Favonius Lance, with its relatively high Base ATK and ER% substat, is her ideal 4-star weapon, since its passive generates particles and reduces the team’s Energy needs.
It is worth noting that Team DPS becomes more important relative to personal DPS when the on-field Cryo DPS is at higher investment than assumed here.
Assumptions
• Weapons not mentioned are either niche or underwhelming on Shenhe.
• Freeze team includes Ayaka — Mona — Kazuha.
◦ (Amenoma) assumes Amenoma Kageuchi on Ayaka.
◦ (Mistsplitter) assumes Mistsplitter Reforged on Ayaka.
◦ Kazuha triggers 1 proc of Favonius Sword.
• Mono Cryo team includes Ayaka — Ganyu — Kazuha.
◦ Assumes Amenoma Kageuchi on Ayaka.
• Favonius Lance assumes 161% ER on Shenhe and 1 proc of its passive.
• All other weapons assume 178% ER on Shenhe.
• For more details on the numbers provided below, check the Mastersheet.
| Weapon | DPS vs. Favonius Lance | Notes |
 Calamity Queller 741 Base ATK | 16.5 ATK% | Team DPS R1 – 103.23% R5 – 105.52% Personal DPS R1 – 119.55% R5 – 130.47% | Shenhe’s signature weapon, and generally her BiS. Calamity Queller provides the highest Base ATK for Polearms and ATK% from both its substat and passive. Is more powerful than shown here in situations where ER% is less of a concern. Refinements are of poor value for their Primogem cost. |
 Favonius Lance 565 Base ATK | 30.6 ER% | Team DPS 0 Proc – 98.00% 1 Proc – 100% 2 Proc – 100.72% Personal DPS 0 Proc – 93.89% 1 Proc – 100% 2 Proc – 106.99% | Shenhe’s best 4-star option. Favonius Lance provides good Base ATK and ER%, with a passive that significantly lowers her and her team’s ER requirements, allowing for higher investment in offensive stats. Higher refinements are recommended for consistency. Normal Attacks can be weaved in before swapping in order to proc its passive. This weapon loses effectiveness if your Cryo teammates can meet their ER requirements without its passive procs. It is also difficult to guarantee passive procs without significant CRIT Rate investment. |
 Engulfing Lightning 608 Base ATK | 55.1 ER% | Team DPS R1 – 102.28% R5 – 104.74% Personal DPS R1 – 122.47% R5 – 133.55% | Engulfing Lightning provides high Base ATK and a lot of ER%, with a passive that gives you more ATK% the more ER% you have. Really close second and arguably a better pull option if you don’t care about single-rotation performance, since it can be a generalist option on many other characters. Performs better in higher ER requirement conditions. |
 Skyward Spine 674 Base ATK | 36.8 ER% | Team DPS R1 – 101.23% R5 – 101.72% Personal DPS R1 – 112.25% R5 – 119.56% | Skyward Spine provides very high Base ATK and a decent amount of ER%, but its passive is generally not beneficial to Shenhe. Best 5-star Standard Banner option. |
 Vortex Vanquisher 608 Base ATK | 49.6 ATK% | Team DPS R1 – 100.58% R5 -100.94% Personal DPS R1 – 107.00% R5 – 108.05% | Vortex Vanquisher provides high Base ATK and a lot of ATK%, with a stack-building passive that gives even more ATK%. Not recommended to pull for, as it is generally an undesirable weapon. While it can perform better in teams with Layla/Diona or other shielders, these are generally units Shenhe replaces in such teams. It is not recommended to change your team composition to benefit from the shield-related passive. |
 Staff of Homa (Above 50% HP) 608 Base ATK | 66.2 CD% | Team DPS R1 – 100.53% R5 – 102.22% Personal DPS R1 – 121.18% R5 – 129.66% | Staff of Homa is an expensive alternative to the above weapons, offering high Base ATK and a lot of CRIT DMG, with a passive that gives more Flat ATK depending on your character’s HP. Nothing in Shenhe’s kit encourages building HP%, but the weapon is still a solid choice. It becomes better if she is below 50% HP, although such scenarios are rare; even then, it is still worse than Shenhe’s best options. It is also a highly contested weapon — characters like Hu Tao or Xiao use it better. |
 Wavebreaker’s Fin 620 Base ATK | 13.8 ATK% | Team DPS R1 – 99.27% R3 – 99.82% R5 – 100.37% Personal DPS R1 – 108.46% R3 – 114.24% R5 – 120.02% | Wavebreaker’s Fin provides high Base ATK and a small amount of ATK%, with a passive that amplifies Shenhe’s personal damage. Solid option at any refinement. |
 Primordial Jade Winged-Spear 674 Base ATK | 22.1 CR% | Team DPS R1 – 100.13% R5 – 100.35% Personal DPS R1 – 114.41% R5 – 115.33% | Primordial Jade Winged-Spear provides very high Base ATK and CRIT Rate, with a stack-building passive that gives more ATK%. It is not recommended to extend your rotation just to maximize the passive. |
 Staff of the Scarlet Sands 542 Base ATK | 44.1 CR% | Team DPS R1 – 98.78% R5 – 99.02% Personal DPS R1 – 117.53% R5 – 118.74% | Staff of the Scarlet Sands does not have great synergy with Shenhe in her usual Freeze teams, but can be a good choice in Reverse Melt. Its value increases if the team has external EM buffs such as Elegy for the End, C2 Kazuha, and C6 Diona. Generally, it is not recommended to adjust your team for more EM buffs to maximize the weapon’s passive. Many Reverse Melt teams also run Rosaria, who is able to use it significantly better, making it less of an upgrade in practice. |
 Lithic Spear 565 Base ATK | 27.6% ATK% | Team DPS R1 – 98.43% R3 – 98.70% R5 – 98.94% Personal DPS R1 – 99.21% R3 – 101.24% R5 – 103.12% | Lithic Spear seems very powerful, and it can be on many characters. However, in Shenhe’s case, most teams featuring her do not run more than 2 Liyue characters; even then, its performance is not exceptional without high refinements. It is not recommended to adjust your team just to maximize the passive. |
 The Catch R5 510 Base ATK | 45.9 ER% | Team DPS R5 – 98.95% Personal DPS R5 – 111.81% | One of the best F2P weapons. “The Catch” performs relatively well on Shenhe due to its high ER% substat and not useless passive. Even if it is fully F2P to obtain, other characters use it better than Shenhe, so other options mentioned here should be considered instead. |
 Deathmatch 454 Base ATK | 36.8 CR% | Team DPS R1 – 96.93/97.41% R3 – 97.41/98.12% R5 – 97.88/98.83% Personal DPS R1 – 105.29/107.71% R3 – 107.71/111.35% R5 – 110.14/114.99% | Deathmatch can be obtained from the Battle Pass. It is not a great option on Shenhe due to its low Base ATK and substat that prioritizes personal damage, both of which would be better used by other Polearm characters. It is not recommended to use this weapon, even at higher refinements, unless there are no other viable options. |
 Missive Windspear R5 510 Base ATK | 41.3 ATK% | Team DPS R5 – 97.38% Personal DPS R5 – 93.61% | Missive Windspear is a weapon that was obtainable from the “Of Ballads and Brews” event in Version 3.1 While this weapon may be a decent choice, it doesn’t have great synergy with Shenhe in Freeze/Mono Cryo teams beyond the ATK% substat. Only use this weapon if you have no other viable options available. While its passive usually can’t be utilized in Freeze or Mono Cryo, it can be valuable in Reverse Melt teams, potentially making it a good pick. It is not recommended to extend your rotation just to maximize the passive. |
| Weapon | DPS vs. Favonius Lance | Notes |
Calamity Queller 741 Base ATK | 16.5 ATK% | Team DPS R1 – 100.76% R5 – 102.89% Personal DPS R1 – 119.55% R5 – 130.47% | Shenhe’s signature weapon, and generally her BiS. Calamity Queller provides the highest Base ATK for Polearms and ATK% from both its substat and passive. Is more powerful than shown here in situations where ER% is less of a concern. Refinements are of poor value for their Primogem cost. |
Favonius Lance 565 Base ATK | 30.6 ER% | Team DPS 0 Proc – 95.91% 1 Proc – 100% 2 Proc – 104.02% Personal DPS 0 Proc – 93.89% 1 Proc – 100% 2 Proc – 106.99% | Shenhe’s best 4-star option. Favonius Lance provides good Base ATK and ER%, with a passive that significantly lowers her and her team’s ER requirements, allowing for higher investment in offensive stats. Higher refinements are recommended for consistency. Normal Attacks can be weaved in before swapping in order to proc its passive. This weapon loses effectiveness if your Cryo teammates can meet their ER requirements without its passive procs. It is also difficult to guarantee passive procs without significant CRIT Rate investment. |
Engulfing Lightning 608 Base ATK | 55.1 ER% | Team DPS R1 – 99.82% R5 – 102.11% Personal DPS R1 – 122.47% R5 – 133.55% | Engulfing Lightning provides high Base ATK and a lot of ER%, with a passive that gives you more ATK% the more ER% you have. Really close second and arguably a better pull option if you don’t care about single-rotation performance, since it can be a generalist option on many other characters. Performs better in higher ER requirement conditions. |
Skyward Spine 674 Base ATK | 36.8 ER% | Team DPS R1 – 98.88% R5 – 99.30% Personal DPS R1 – 112.25% R5 – 119.56% | Skyward Spine provides very high Base ATK and a decent amount of ER%, but its passive is generally not beneficial to Shenhe. Best 5-star Standard Banner option. |
Vortex Vanquisher 608 Base ATK | 49.6 ATK% | Team DPS R1 – 98.29% R5 – 98.64% Personal DPS R1 – 107.00% R5 – 108.05% | Vortex Vanquisher provides high Base ATK and a lot of ATK%, with a stack-building passive that gives even more ATK%. Not recommended to pull for, as it is generally an undesirable weapon. While it can perform better in teams with Layla/Diona or other shielders, these are generally units Shenhe replaces in such teams. It is not recommended to change your team composition to benefit from the shield-related passive. |
Staff of Homa (Above 50% HP) 608 Base ATK | 66.2 CD% | Team DPS R1 – 98.14% R5 – 99.70% Personal DPS R1 – 121.18% R5 – 129.66% | Staff of Homa is an expensive alternative to the above weapons, offering high Base ATK and a lot of CRIT DMG, with a passive that gives more Flat ATK depending on your character’s HP. Nothing in Shenhe’s kit encourages building HP%, but the weapon is still a solid choice. It becomes better if she is below 50% HP, although such scenarios are rare; even then, it is still worse than Shenhe’s best options. It is also a highly contested weapon — characters like Hu Tao or Xiao use it better. |
Wavebreaker’s Fin 620 Base ATK | 13.8 ATK% | Team DPS R1 – 97.02% R3 – 97.50% R5 – 97.99% Personal DPS R1 – 108.46% R3 – 114.24% R5 – 120.02% | Wavebreaker’s Fin provides high Base ATK and a small amount of ATK%, with a passive that amplifies Shenhe’s personal damage. Solid option at any refinement. |
Primordial Jade Winged-Spear 674 Base ATK | 22.1 CR% | Team DPS R1 – 97.80% R5 – 98.01% Personal DPS R1 – 114.41% R5 – 115.33% | Primordial Jade Winged-Spear provides very high Base ATK and CRIT Rate, with a stack-building passive that gives more ATK%. It is not recommended to extend your rotation just to maximize the passive. |
Staff of the Scarlet Sands 542 Base ATK | 44.1 CR% | Team DPS R1 – 96.69% R5 – 96.47% Personal DPS R1 – 117.53% R5 – 118.74% | Staff of the Scarlet Sands does not have great synergy with Shenhe in her usual Freeze teams, but can be a good choice in Reverse Melt. Its value increases if the team has external EM buffs such as Elegy for the End, C2 Kazuha, and C6 Diona. Generally, it is not recommended to adjust your team for more EM buffs to maximize the weapon’s passive. Many Reverse Melt teams also run Rosaria, who is able to use it significantly better, making it less of an upgrade in practice. |
Lithic Spear 565 Base ATK | 27.6% ATK% | Team DPS R1 – 96.28% R3 – 96.52% R5 – 96.74% Personal DPS R1 – 99.21% R3 – 101.24% R5 – 103.12% | Lithic Spear seems very powerful, and it can be on many characters. However, in Shenhe’s case, most teams featuring her do not run more than 2 Liyue characters; even then, its performance is not exceptional without high refinements. It is not recommended to adjust your team just to maximize the passive. |
The Catch R5 510 Base ATK | 45.9 ER% | Team DPS R5 – 96.68% Personal DPS R5 – 111.81% | One of the best, if not the best,F2P weapons. “The Catch” performs relatively well on Shenhe due to its high ER% substat and not useless passive. Even if it is fully F2P to obtain, other characters use it better than Shenhe, so other options mentioned here should be considered instead. |
Deathmatch 454 Base ATK | 36.8 CR% | Team DPS R1 – 94.78/95.22% R3 – 95.22/95.88% R5 – 95.66/96.54% Personal DPS R1 – 105.29/107.71% R3 – 107.71/111.35% R5 – 110.14/114.99% | Deathmatch can be obtained from the Battle Pass. It is not a great option on Shenhe due to its low Base ATK and substat that prioritizes personal damage, both of which would be better used by other Polearm characters. It is not recommended to use this weapon, even at higher refinements, unless there are no other viable options. |
Missive Windspear R5 510 Base ATK | 41.3 ATK% | Team DPS R5 – 95.30% Personal DPS R5 – 93.61% | Missive Windspear is a weapon that was obtainable from the “Of Ballads and Brews” event in Version 3.1 While this weapon may be a decent choice, it doesn’t have great synergy with Shenhe in Freeze/Mono Cryo teams beyond the ATK% substat. Only use this weapon if you have no other viable options available. While its passive usually can’t be utilized in Freeze or Mono Cryo, it can be valuable in Reverse Melt teams, potentially making it a good pick. It is not recommended to extend your rotation just to maximize the passive. |
| Weapon | DPS vs. Favonius Lance | Notes |
Calamity Queller 741 Base ATK | 16.5 ATK% | Team DPS R1 – 105.90% R5 – 108.03% Personal DPS R1 – 113.85% R5 – 117.26% | Shenhe’s signature weapon, and generally her BiS. Calamity Queller provides the highest Base ATK for Polearms and ATK% from both its substat and passive. Is more powerful than shown here in situations where ER% is less of a concern. Refinements are of poor value for their Primogem cost. |
Favonius Lance 565 Base ATK | 30.6 ER% | Team DPS 1 Proc – 100% Personal DPS 1 Proc – 100% | Shenhe’s best 4-star option. Favonius Lance provides good Base ATK and ER%, with a passive that significantly lowers her and her team’s ER requirements, allowing for higher investment in offensive stats. Higher refinements are recommended for consistency. Normal Attacks can be weaved in before swapping in order to proc its passive. This weapon loses effectiveness if your Cryo teammates can meet their ER requirements without its passive procs. It is also difficult to guarantee passive procs without significant CRIT Rate investment. |
Engulfing Lightning 608 Base ATK | 55.1 ER% | Team DPS R1 – 103.12% R5 – 104.40% Personal DPS R1 – 112.16% R5 – 121.54% | Engulfing Lightning provides high Base ATK and a lot of ER%, with a passive that gives you more ATK% the more ER% you have. Really close second and arguably a better pull option if you don’t care about single-rotation performance, since it can be a generalist option on many other characters. Performs better in higher ER requirement conditions. |
Skyward Spine 674 Base ATK | 36.8 ER% | Team DPS R1 – 103.23% R5 – 103.81% Personal DPS R1 – 117.45% R5 – 124.18% | Skyward Spine provides very high Base ATK and a decent amount of ER%, but its passive is generally not beneficial to Shenhe. Best 5-star Standard Banner option. |
Vortex Vanquisher 608 Base ATK | 49.6 ATK% | Team DPS R1 – 103.88% R5 – 104.34% Personal DPS R1 – 105.17% R5 – 106.07% | Vortex Vanquisher provides high Base ATK and a lot of ATK%, with a stack-building passive that gives even more ATK%. Not recommended to pull for, as it is generally an undesirable weapon. While it can perform better in teams with Layla/Diona or other shielders, these are generally units Shenhe replaces in such teams. It is not recommended to change your team composition to benefit from the shield-related passive. |
Staff of Homa (Above 50% HP) 608 Base ATK | 66.2 CD% | Team DPS R1 – 103.29% R5 – 105.14% Personal DPS R1 – 120.10% R5 – 127.85% | Staff of Homa is an expensive alternative to the above weapons, offering high Base ATK and a lot of CRIT DMG, with a passive that gives more Flat ATK depending on your character’s HP. Nothing in Shenhe’s kit encourages building HP%, but the weapon is still a solid choice. It becomes better if she is below 50% HP, although such scenarios are rare; even then, it is still worse than Shenhe’s best options. It is also a highly contested weapon — characters like Hu Tao or Xiao use it better. |
Wavebreaker’s Fin 620 Base ATK | 13.8 ATK% | Team DPS R1 – 102.30% R3 – 102.87% R5 – 103.44% Personal DPS R1 – 109.32% R3 – 115.96% R5 – 122.60% | Wavebreaker’s Fin provides high Base ATK and a small amount of ATK%, with a passive that amplifies Shenhe’s personal damage. Solid option at any refinement. |
Primordial Jade Winged-Spear 674 Base ATK | 22.1 CR% | Team DPS R1 – 103.19% R5 – 103.48% Personal DPS R1 – 113.83% R5 – 114.56% | Primordial Jade Winged-Spear provides very high Base ATK and CRIT Rate, with a stack-building passive that gives more ATK%. It is not recommended to extend your rotation just to maximize the passive. |
Staff of the Scarlet Sands 542 Base ATK | 44.1 CR% | Team DPS R1 – 101.04% R5 – 101.40% Personal DPS R1 – 116.39% R5 – 108.47% | Staff of the Scarlet Sands does not have great synergy with Shenhe in her usual Freeze teams, but can be a good choice in Reverse Melt. Its value increases if the team has external EM buffs such as Elegy for the End, C2 Kazuha, and C6 Diona. Generally, it is not recommended to adjust your team for more EM buffs to maximize the weapon’s passive. Many Reverse Melt teams also run Rosaria, who is able to use it significantly better, making it less of an upgrade in practice. Note: Mono Cryo Personal DPS is lower at R5 than at R1 because optimization is based on Team DPS. At R5, calculations prioritize EM substats over personal damage for higher team damage. At R1, the EM scaling is not enough to warrant a shift in optimization settings. |
Lithic Spear 565 Base ATK | 27.6% ATK% | Team DPS R1 – 101.97% R3 – 102.50% R5 – 103.01% Personal DPS R1 – 101.60% R3 – 105.55% R5 – 109.35% | Lithic Spear seems very powerful, and it can be on many characters. However, in Shenhe’s case, most teams featuring her do not run more than 2 Liyue characters; even then, its performance is not exceptional without high refinements. It is not recommended to adjust your team just to maximize the passive. |
The Catch R5 510 Base ATK | 45.9 ER% | Team DPS R5 – 100.08% Personal DPS R5 – 113.63% | One of the best, if not the best,F2P weapons. “The Catch” performs relatively well on Shenhe due to its high ER% substat and not useless passive. Even if it is fully F2P to obtain, other characters use it better than Shenhe, so other options mentioned here should be considered instead. |
Deathmatch 454 Base ATK | 36.8 CR% | Team DPS R1 – 98.97/99.49% R3 – 99.49/100.26% R5 – 100.00/101.04% Personal DPS R1 – 104.12/106.33% R3 – 106.33/109.65% R5 – 108.54/112.96% | Deathmatch can be obtained from the Battle Pass. It is not a great option on Shenhe due to its low Base ATK and substat that prioritizes personal damage, both of which would be better used by other Polearm characters. It is not recommended to use this weapon, even at higher refinements, unless there are no other viable options. |
Missive Windspear R5 510 Base ATK | 41.3 ATK% | Team DPS R5 – 100.07% Personal DPS R5 – 92.12% | Missive Windspear is a weapon that was obtainable from the “Of Ballads and Brews” event in Version 3.1 While this weapon may be a decent choice, it doesn’t have great synergy with Shenhe in Freeze/Mono Cryo teams beyond the ATK% substat. Only use this weapon if you have no other viable options available. While its passive usually can’t be utilized in Freeze or Mono Cryo, it can be valuable in Reverse Melt teams, potentially making it a good pick. It is not recommended to extend your rotation just to maximize the passive. |
Shenhe Mechanics
Mind be purged, world be saved.
Icy Quill Procs Calculation
The following section assumes you already have basic knowledge of the Damage Formula.
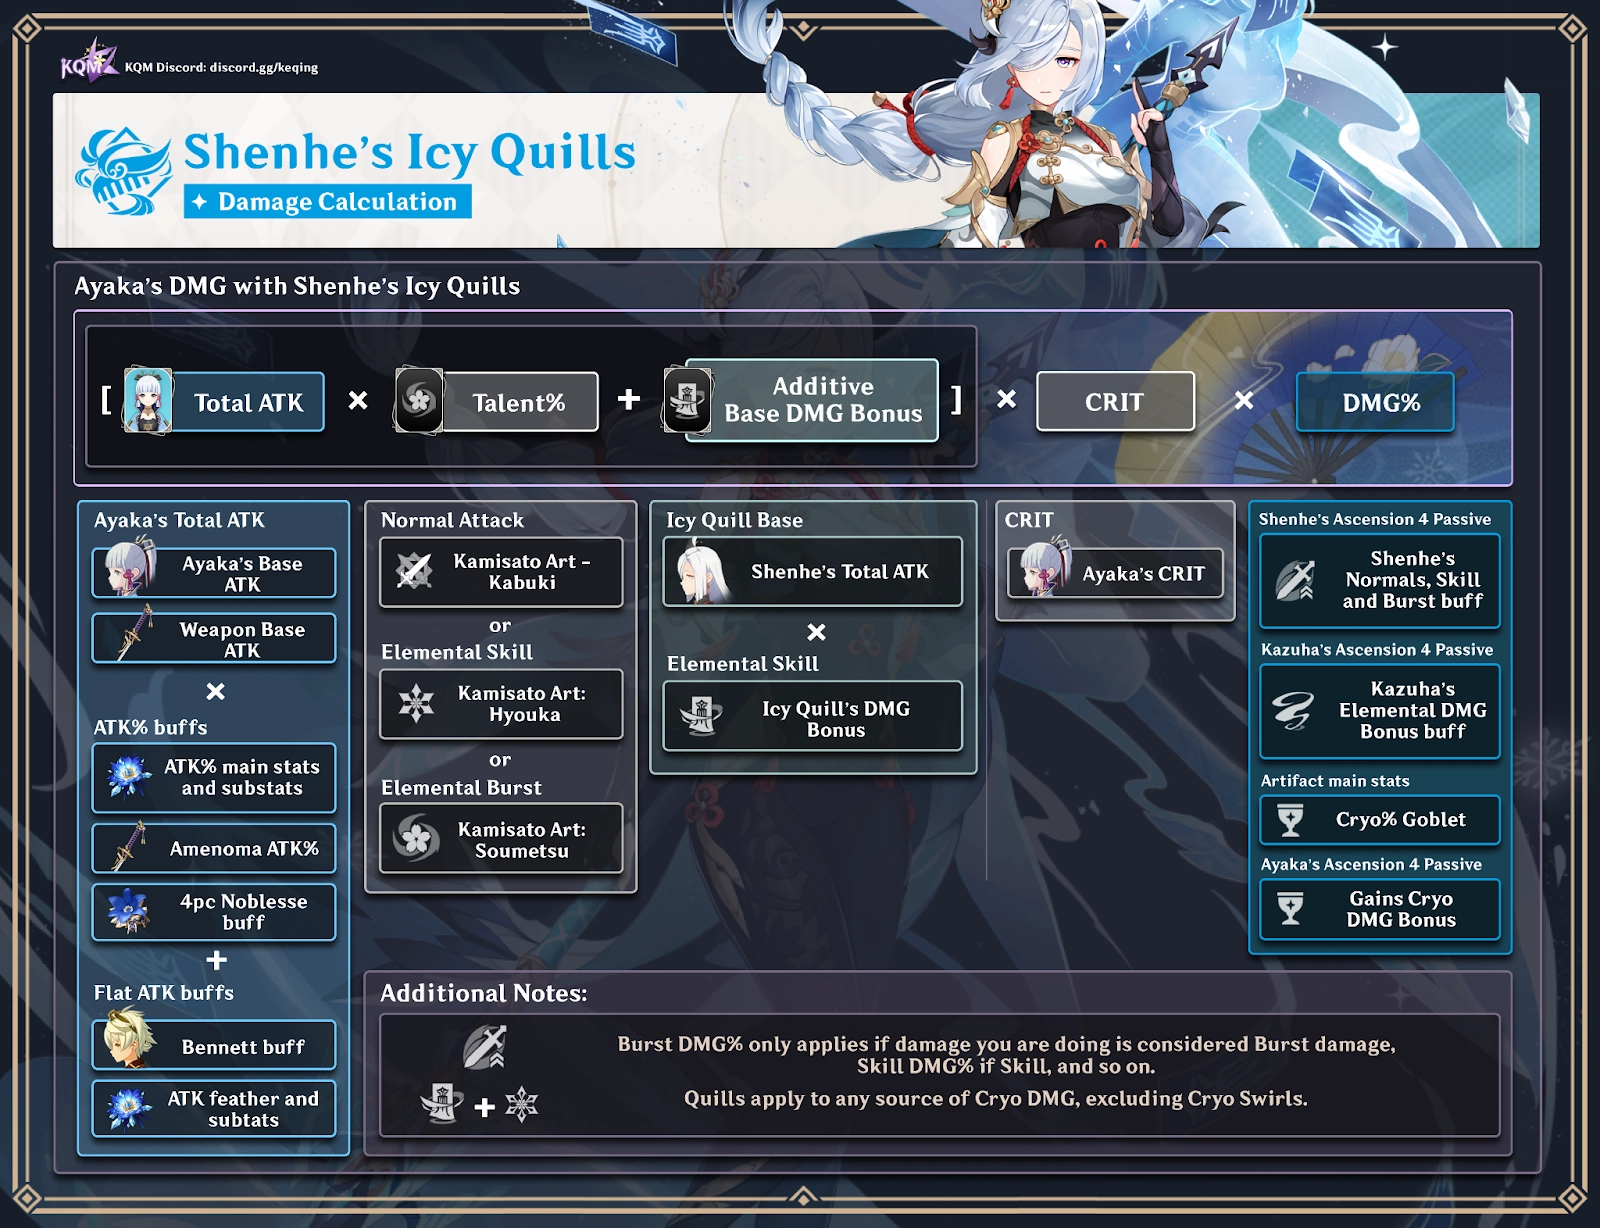
Shenhe’s Icy Quill procs have a unique way of calculating damage compared to other sources of damage. The damage is calculated as an additional additive source, which is referred to as “Additive Base DMG Bonus”.
To calculate the Base DMG Bonus, start by calculating the Base DMG like any other source of damage: Talent% × ScalingStat (in Shenhe’s case, IcyQuillTalent% × Total ATK). However, to calculate the net outgoing damage, other damage modifiers like CRIT and DMG% Bonus are multiplied with the Base DMG differently.
Icy Quill procs use the damage modifiers of the character who triggers the Icy Quill’s effect. Therefore, only the triggering character’s damage modifiers (i.e. CRIT and DMG% Bonus) contribute to the Icy Quill’s outgoing damage, while Shenhe’s damage modifiers do not.
For example, if Ayaka triggers the Icy Quill’s effect with her Skill, the damage is calculated as follows: Ayaka’s Skill’s Base DMG and the Icy Quill’s Base DMG are added together, then that sum is multiplied by Ayaka’s damage modifiers (i.e. CRIT and DMG% Bonus).
With this in mind, the final outgoing damage is visualized in the infographic below.
Shenhe Teams
What exactly is teamwork?
Synergies
While Shenhe’s team archetypes are rather set in stone, it is still important to understand which characters synergize with her to maximize team damage. The following section covers information about all relevant characters.
Featured Cryo Units
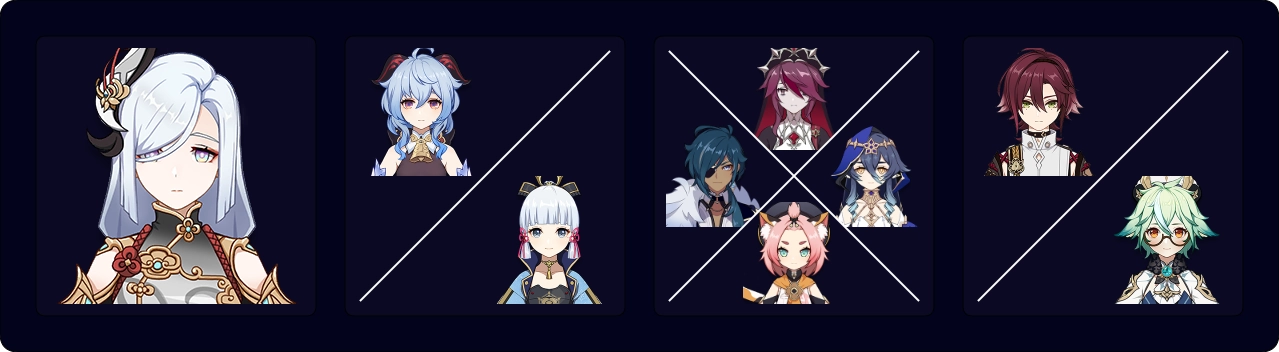
 Ayaka Ayaka | A strong Cryo DPS that can fully utilize Shenhe’s kit. Ayaka can consume Icy Quill quickly for frontloaded damage. This means you don’t have to wait as long to cast multiple instances of Shenhe’s Skill in quick succession, or at all if Ayaka is at C2. Furthermore, many Ayaka teams include DMG% buffers such as Mona and Kazuha, maximizing Icy Quill damage. |
 Ganyu Ganyu | Shenhe is able to boost Freeze Ganyu’s damage respectably, despite her presence extending rotations to 20s due to her cooldowns. Ganyu’s extra CRIT Rate on her Charged Attacks and ability to snapshot her Burst (despite Icy Quill procs and A4 being unaffected) boost this synergy further. Shenhe can also be played in a Melt Ganyu team, though she almost always competes with the shielder slot, something Melt Ganyu greatly desires due to the lengthy charging time on her Frostflake Arrows. Her true potential shines when Ganyu’s C6 is unlocked and she can forgo a shielder — as she no longer has to charge her shots — with Shenhe’s C6 only serving to bolster this synergy. With fast enough Pyro application, Ganyu can quickly frontload Melted Charged Shots, each of which is buffed by Icy Quill against any number of enemies. |
 Eula Eula | Although the two seem anti-synergistic since Shenhe focuses on Cryo damage and Eula on Physical, Shenhe is still a good option in Eula teams. Eula’s Press Skill, Hold Skill, and Burst initial hit use up 5 Icy Quill procs, while Shenhe’s Physical RES Shred on Burst and A4 Passive benefit Eula well. A C0 Shenhe provides the same amount of Energy as Rosaria. |
Notable Cryo Units
 Rosaria Rosaria | Rosaria can be used alongside Shenhe to support Ayaka or Ganyu in a Mono Cryo team. She can also slot in a Triple Cryo Eula team; however, these teams generally require a healer or shielder in the final slot. Rosaria’s additional Cryo Particles and CRIT Rate share benefit the team well, and she can use damage-oriented sets if Shenhe holds 4pc NO. Shenhe’s buffs are used well in Rosaria’s Reverse Melt teams, and as a second Cryo unit she reduces Rosaria’s ER needs. Her slow Cryo application rarely interferes with Rosaria’s Melts and allows her to Melt her own damage, though it may still be a problem depending on the Pyro applier(s) used. Rosaria also has good synergy with Favonius Lance, due to her kit desiring higher CRIT Rate and her multi-hitting abilities. |
 Kaeya Kaeya | Kaeya is another solid Cryo option, more or less similar to Rosaria. He effectively holds Favonius Sword, but the weapon’s value decreases significantly in teams with lower ER requirements, giving more room for damage-oriented stats. |
 Chongyun Chongyun | Chongyun is generally valuable only in “fun” teams where you use his Cryo Infusion on Shenhe or another unit to make them an on-field Cryo DPS. This type of playstyle is much more effective if Shenhe is C6. These teams aren’t optimal, but are more of a fun thing to try. |
 Layla Layla | Layla’s strong shielding and off-field Energy generation are beneficial to Mono Cryo and Eula teams. She can also hold 4pc TotM (which also benefits her shield) for a teamwide buff. Her ability to trigger Icy Quill procs allows her to contribute noticeable damage, especially with her C6. Layla’s Energy generation stops if her shield is destroyed, making HP investment recommended. |
 Diona Diona | Diona is a decent option to run as a healer and shielder if you don’t have Layla. While she doesn’t increase the team’s DPS as much as other units, she provides more survivability. Additionally, Diona can effectively use both Sacrificial Bow and Favonius Warbow, making her a solid Cryo battery for the team. Lastly, she can use 4pc NO or 4pc TotM; using a snapshotting ability quickly after using her Elemental Skill allows Shenhe to run a more damage-focused set. |
Featured Hydro Units
 Mona Mona | Mona’s Omen buff provides a huge amount of DMG%, synergizing neatly with Shenhe’s Icy Quill damage. She can also carry Thrilling Tales of Dragon Slayers (TTDS) and 4pc TotM, while her C4 provides a CRIT Rate buff. However, her Hydro application is rather lackluster, leaving enemies unfrozen for the bulk of the rotation; this is less of a problem in Ayaka teams due to Ayaka’s frontloaded damage. In order to Burst consistently, she needs a large amount of ER%, which often necessitates Favonius Codex or Prototype Amber. Prototype Amber provides minor healing to the team, but it may not be enough for some players. |
 Kokomi Kokomi | Kokomi’s consistent Hydro application and comfort make her a good option in Freeze teams. Compared to Mona, she holds TTDS much more easily due to not requiring ER% investment. Her best set for this role is 4pc TotM. Kokomi’s unparalleled healing is valuable since Shenhe replaces the defensive unit in many Freeze teams. It should be noted that Kokomi requires significantly less field time than Mona, which can be advantageous. |
Notable Hydro Units
 Yelan Yelan | Yelan offers single-target Hydro application and a ramping DMG% buff through her A4, while contributing good personal damage. However, her Hydro application and lack of orbitals requires consistent Normal Attacks, which heavily reduces her synergy with units like Ganyu, who are primarily Charged Attack-focused. Her A4 is also limited to the on-field unit. Yelan performs better in Ayaka teams in scenarios that prefer sustained and multi-wave damage, where Ayaka’s normal teams may struggle due to her frontloaded damage. Yelan’s damage allows her to work well in Eula teams, as Eula’s back-loaded kit uses Yelan’s A4 Passive well. Many Eula teams allow Yelan to cast her Skill twice per rotation, lowering her ER requirements. |
 Xingqiu Xingqiu | Similar to Yelan, Xingqiu provides strong Hydro application and personal damage, but trades her A4 buff for some defensive utility with his orbitals. However, these orbitals may interfere with Cryo Absorption, and his Hydro application is generally single-target. Despite his sword rain attacks being mostly single-target, the AoE Hydro application provided by his orbitals is crucial and is one of the biggest differences between him and Yelan. With this in mind, he can be a preferred choice over his 5-star alternative in AoE scenarios. |
 Barbara Barbara | Barbara is the premier free-to-play friendly Hydro unit and can be used if the options above are not available. While she isn’t the greatest option, she can still perform decently. She can hold TTDS and provide healing; however, she is significantly worse than Kokomi in these roles. Her Hydro application is unimpressive in frequency, uptime, and range, while her non-existent Energy generation may be detrimental. |
Featured Anemo Units
 Kazuha Kazuha | Kazuha is unsurprisingly the preferred Anemo character thanks to his useful buff and crowd control. Besides the significant Cryo DMG% he offers, Freedom-Sworn is even more beneficial to Shenhe’s Icy Quill procs due to how they scale. Moreover, Kazuha can absorb Cryo onto his Skill and Burst, triggering Icy Quill procs to bolster his damage. However, Cryo Swirls cannot proc them. In low Energy scenarios, e.g., using an EM substat weapon instead of Favonius Sword and having no Favonius weapons on teammates, you can use his Burst every other rotation rather than going for ER% Sands, assuming you cannot reach his ER requirements with just substats. Kazuha’s main downsides are that he is highly contested and requires more field time than other Anemo supports. |
 Venti Venti | Venti has amazing crowd control and damage potential against groupable enemies, while providing an Energy refund to Cryo units via his A4. Additionally, Venti’s Cryo-absorbed Burst can trigger Icy Quill procs. Shenhe and Venti’s common teammates, such as Ayaka and Ganyu, are able to hit enemies lifted by his Burst. He can hold Favonius Warbow to alleviate team ER requirements, or Elegy for the End to provide a teamwide buff. In most situations, Icy Quill is not enough to make Cryo% Goblet better than Anemo% on Venti, even in situations where CRIT build Venti is better than Triple EM build. However, Venti’s primary utility is heavily diminished when enemies cannot be pulled into his Burst, such as Bosses. While he is still usable in such scenarios, alternatives may perform better. |
Notable Anemo Units
 Sucrose Sucrose | Sucrose is a decent option if Kazuha and Venti are not available. She can hold TTDS, trigger Icy Quill procs with her Burst, and provide acceptable grouping. Her C6 — while useful — can be difficult to trigger due to her Burst’s unreliable Absorption. Her Burst may also ungroup enemies such as Vishaps when used incorrectly in non-Freeze scenarios. For a more detailed explanation, it is recommended to check KQM’s Sucrose Guide. Sucrose’s EM buffs are often negligible for Freeze teams. However, for Hunter’s Path Ganyu or Foliar Ayaka, her EM share provides some benefits. Even then, it is usually not worth changing weapons or teams just to make use of Sucrose’s EM share. |
 Anemo Traveler (AMC) Anemo Traveler (AMC) | Traveler is a good option if the player is skilled enough to aim their tornado into a wall. By holding their Elemental Skill, they are able to trigger Icy Quill procs via Cryo Absorption and their C6 provides a further 20% Cryo RES Shred via their Burst. Anemo Traveler is especially effective at this due to their unique Absorption priority: Cryo > Pyro > Hydro > Electro. Additionally, they are great Favonius Sword or Freedom-Sworn holders. |
 Heizou Heizou | Fulfills a similar role to Sucrose. He can use either TTDS or damage-oriented weapons if a TTDS holder is already present. That said, his ability to proc the Icy Quill effect is limited, and his grouping is rather mediocre even at C2. |
 Jean Jean | Consolidates healing and VV Shred into one slot. Although Jean can fulfill the healer role, she has limited synergy with most of Shenhe’s team comps. Her Skill and Burst are unable to proc the Icy Quill effect while having the tendency to launch enemies away, and her grouping leaves much to be desired. She can hold Favonius Sword to alleviate team Energy requirements, or Freedom-Sworn to provide a teamwide buff. In Reverse Melt teams, Jean can be used for Pyro application via the “Sunfire” effect. |
 Sayu Sayu | Sayu is similar to Jean and can hold Favonius Greatsword. While she is not necessarily better than Jean, she is worth taking into consideration; not only does she do the same job as Jean, but she is also more accessible as a 4-star unit. An important difference between her and Jean is their off-field Swirls. Sayu will constantly Swirl Cryo, while Jean can Swirl other Elements if your on-field unit is affected by them. |
Notable Pyro Units
 Bennett | Generally considered the premier buffer, Bennett is used in Reverse Melt teams and can also be used in Mono Cryo. It is important to note that the Icy Quill buff is a dynamic effect, which means that it cannot snapshot Bennett’s Flat ATK buff. However, Shenhe’s Burst DoT can, so it is worthwhile to do so when possible. Some rotations also involve Shenhe swapping back on-field during Bennett’s Burst uptime to recast her Skill. Since Shenhe’s Icy Quill is dynamic, it can benefit from Bennett’s flat Attack buff. While this interaction is most commonly seen in Reverse Melt teams, Bennett can be used over Mona or Kokomi in Freeze teams, particularly in speedrun scenarios. While not generally recommended, players who run on-field DPS Bennett pre-C6 can utilize Chongyun + Shenhe to “supercharge” the Cryo NAs Bennett does before every Skill usage. |
 Xiangling | Xiangling’s excellent Pyro application makes her a popular pick for Reverse Melt teams. She is usually paired with Bennett due to their remarkable synergy: Xiangling is able to snapshot Bennett’s Flat ATK buff, while Bennett is able to funnel Pyro Particles to Xiangling, mitigating her high ER requirements. Additionally, Xiangling can benefit from Shenhe’s A4 buff. |
Notable Geo Unit
 Zhongli Zhongli | Zhongli is commonly used in Melt Ganyu teams to alleviate her vulnerability to interruption, but he is usually the slot Shenhe is replacing, rather than being run alongside. Zhongli is also a good flex unit in Mono Cryo teams thanks to his Cryo RES Shred and defensive utility. However, he is not recommended in Freeze teams since he triggers Shatter unless his pillar is deliberately placed away from combat. Cryo DPS Zhongli is a viable, albeit not recommended, “fun” team that has great synergy with C6 Shenhe. This is due to his N5 hit having 4 instances of damage and his relatively fast Normal Attack animations. While it’s possible to play Zhongli with C0 Shenhe, the driving reason for this playstyle — infinite Icy Quill procs on NAs — is lost. |
Team Compositions
A general note about Shenhe’s teams and rotations is that many teams, especially Freeze and Mono Cryo, have pretty flexible rotations.
Most rotations are made with an “average” scenario in mind, without any irregularities like enemy position or waves, and are just a good starting point.
To fully utilize Shenhe and her teams, you should develop at least a basic understanding of various buffs and why actions are done in a certain order, so that you can adapt your playstyle to skip or reorder parts of the rotation to match the content you are facing.
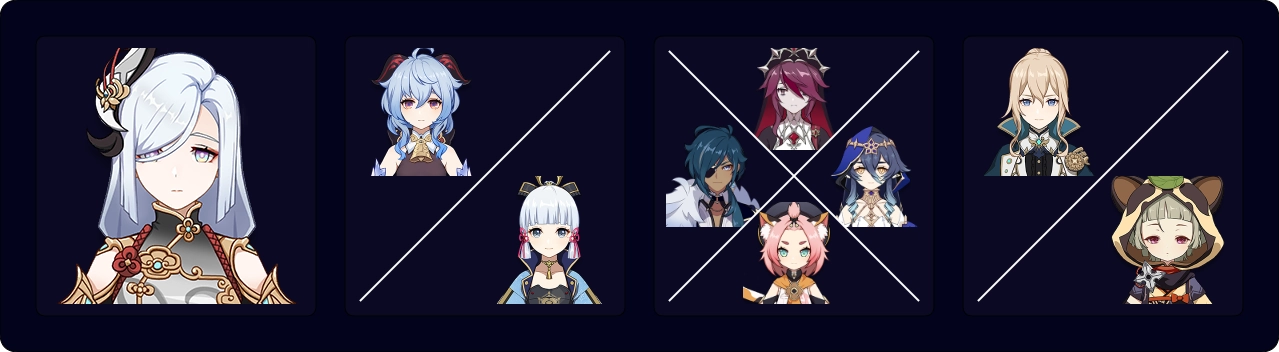
Cryo Carry Freeze

This team includes a Hydro applier for Freeze in order to fully utilize 4-piece Blizzard Strayer and provide some crowd control. In some cases, the Hydro unit also fills the healer role with Kokomi or Prototype Amber. An Anemo support is included to shred Cryo RES via 4pc VV. In the case of Jean / Sayu, they also fill the healer role.
Most popular teams featuring Shenhe will fall under this category.
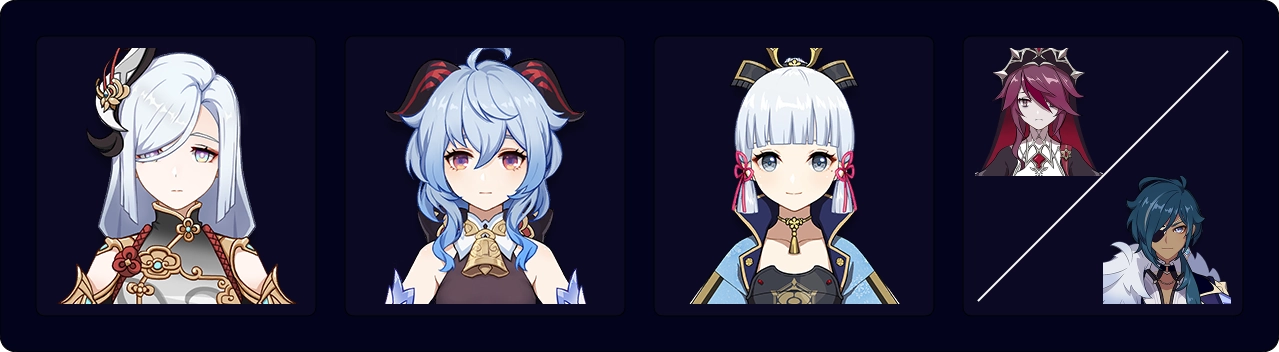
Ayaka Freeze
Ayaka with Shenhe is one of the most popular teams where Shenhe is used. In this Freeze variation, Shenhe fills the roles of a Cryo buffer, off-field DPS, and battery.
Generalized pull recommendations for this team:
Kazuha C0 ≈ Mistsplitter Reforged R1 ≈ Shenhe C0 > Ayaka C2 > Shenhe C1 ≈ Ayaka C3 > Ayaka C4 > Shenhe C2 ≈ Freedom-Sworn R1 > Shenhe C3 > Mistsplitter Reforged refinements > Shenhe C6 ≈ Kazuha C2 ≈ Freedom-Sworn refinements > Ayaka C6 > Calamity Queller R1 > Kazuha C6 ≈ Calamity Queller refinements
Note: This mostly assumes you are starting from scratch. Depending on what you already have, certain options may gain or lose value, e.g. Kazuha’s importance decreases significantly if one already has Venti. In regards to Mona / Kokomi, the reason they aren’t mentioned is because you can’t cost effectively pull Mona on purpose, and Kokomi’s pull value for Freeze is massively affected by that factor and how comfortable you are without a healer.
Example Teams & Rotations

The Mona variant is usually healerless with TTDS. Prototype Amber can be used for some healing, but if healing is required Kokomi is preferable.
Rotation
Ayaka D (1st Rotation) > Kazuha EP Q > Shenhe E Q > Mona Q E > Ayaka D E N1 Q > Kazuha tEP > Shenhe E N1 > Ayaka D N2C N2 E N2C

Rotation
Ayaka D (1st Rotation) > Kazuha tEP Q > Shenhe E Q > Kokomi E > Ayaka D E N1 Q > Kazuha tEP > Shenhe E N1 > Ayaka D N2C N2 E N2C

Generally worse than Kazuha damage-wise, although Venti’s Energy refund makes the gap not as big as it may seem, assuming you can adjust your characters’ builds to take advantage of the lowered ER requirement.
Rotation
Ayaka D (1st Rotation) > Venti E Q > Shenhe E Q > Mona Q E > Ayaka D E N1 Q > Venti E N1 > Shenhe E N1 > Ayaka D N2C N2 E N2C

Generally worse than Kazuha damage-wise, although Venti’s Energy refund makes the gap not as big as it may seem, assuming you can adjust your characters’ builds to take advantage of the lowered ER requirement.
Rotation
Ayaka D (1st Rotation) > Venti E Q > Shenhe E Q > Kokomi E > Ayaka D E N1 Q > Venti E N1 > Shenhe E N1 > Ayaka D N2C N2 E N2C
Heizou’s Skill can be used with his Burst but it is not necessary. The field time spent using a second Heizou Skill is better spent on Ayaka.
Rotation
Ayaka D (1st Rotation) > Heizou N1 E > Shenhe E Q > Mona Q E > Ayaka D E N1 Q > Heizou Q > Shenhe E N1 > Ayaka D N2C N2 E N2C D N2C
Heizou’s Skill can be used with his Burst but it is not necessary. The field time spent using a second Heizou Skill is better spent on Ayaka.
Rotation
Ayaka D (1st Rotation) > Heizou N1 E > Shenhe E Q > Kokomi E > Ayaka D E N1 Q > Heizou Q > Shenhe E N1 > Ayaka D N2C N2 E N2C D N2C

Sucrose can be useful due to her 20% DMG Bonus from C6 and much less field time requirement than Kazuha. Freeze prevents Sucrose’s Burst from knocking enemies up, which lets them get close enough to the center to enable Cryo Absorption.
Rotation
Ayaka D (1st Rotation) > Sucrose N1 E D Q > Shenhe E Q > Mona Q E > Ayaka D E N1 Q > Sucrose N3 > Shenhe E N1 > Ayaka D N2C N2 E N2C D N2C

Sucrose can be useful due to her 20% DMG Bonus from C6 and much less field time requirement than Kazuha. Freeze prevents Sucrose’s Burst from knocking enemies up, which lets them get close enough to the center to enable Cryo Absorption.
Rotation
Ayaka D (1st Rotation) > Sucrose N1 E D Q > Shenhe E Q > Kokomi E > Ayaka D E N1 Q > Sucrose N3 > Shenhe E N1 > Ayaka D N2C N2 E N2C D N2C
Jean provides extra survivability that is especially useful if Mona is your Hydro unit.
Rotation
Ayaka D (1st Rotation) > Jean E Q > Shenhe E Q > Mona Q E > Ayaka D E N1 Q > Jean E > Shenhe E N1 > Ayaka D N2C N2 E N2C D N2C
Rotation
Ayaka D (1st Rotation) > Jean E Q > Shenhe E Q > Kokomi E > Ayaka D E N1 Q > Jean E > Shenhe E N1 > Ayaka D N2C N2 E N2C D N2C
Sayu provides extra survivability that is especially useful if Mona is your Hydro unit.
Rotation
Ayaka D (1st Rotation) > Sayu E Q > Shenhe E Q > Mona Q E > Ayaka D E N1 Q > Sayu E > Shenhe E N1 > Ayaka D N2C N2 E N2C D N2C
Rotation
Ayaka D (1st Rotation) > Sayu E Q > Shenhe E Q > Kokomi E > Ayaka D E N1 Q > Sayu E > Shenhe E N1 > Ayaka D N2C N2 E N2C D N2C
Ganyu Freeze
Ganyu’s Freeze teams share similarities with the Ayaka’s, and they are also one of the primary teams where Shenhe is used. In this Freeze variation, Shenhe fills the role of a Cryo buffer, off-field DPS, and battery.
Mona’s value decreases slightly compared to Kokomi since Ganyu’s consistent damage output outside of C6 makes Mona’s lackluster Hydro application more troublesome.
Example Teams & Rotations

Prototype Amber can be used on Mona for some healing, but if healing is required Kokomi is preferable.
Rotation
Ganyu CA > Kazuha tEP Q > Shenhe EQ > Ganyu E Q > Kazuha tEP > Mona E Q > Shenhe E N1 > Ganyu CA E CA

Prototype Amber can be used on Mona for some healing, but if healing is required Kokomi is preferable.
Rotation
Ganyu CA > Kazuha tEP > Shenhe E Q > Kokomi E > Ganyu E Q > Kazuha tEP Q > Ganyu CA > Shenhe E N1 > Ganyu CA E 2CA

Generally worse than Kazuha damage-wise in low target count scenarios, but can be very strong with higher target count to abuse Ganyu and Venti’s Bursts synergy.
Rotation
Shenhe Q E > Ganyu E Q > Venti E Q > Mona E Q > Ganyu CA > Shenhe E N1 > Ganyu E CA > Venti E N1 > Ganyu CA

Generally worse than Kazuha damage-wise in low target count scenarios, but can be very strong with higher target count to abuse Ganyu and Venti’s Bursts synergy.
Rotation
Shenhe E Q > Kokomi E > Ganyu E CA Q > Venti E Q > Shenhe E N1 > Ganyu CA E CA > Venti E N1 > Ganyu CA
Heizou’s Skill can be used with his Burst but it is not necessary.
Rotation
Shenhe E Q > Mona Q E > Ganyu E CA Q > Heizou E Q > Shenhe E N1 > Ganyu CA E 2CA > Heizou N1 E
Heizou’s Skill can be used with his Burst but it is not necessary.
Rotation
Shenhe E Q > Kokomi E > Ganyu E CA Q > Heizou E Q > Shenhe E N1 > Ganyu CA E 2CA > Heizou N1 E

Sucrose can be useful due to her 20% DMG Bonus from C6 and much less field time requirement than Kazuha. Freeze prevents Sucrose’s Burst from knocking enemies up, which lets them get close enough to the center to enable Cryo Absorption.
Rotation
Shenhe E Q > Mona Q E > Ganyu E CA Q > Sucrose E D Q > Shenhe E N1 > Ganyu CA E 2CA > Sucrose N3

Sucrose can be useful due to her 20% DMG Bonus from C6 and much less field time requirement than Kazuha. Freeze prevents Sucrose’s Burst from knocking enemies up, which lets them get close enough to the center to enable Cryo Absorption.
Rotation
Shenhe E Q > Kokomi E > Ganyu E CA Q > Sucrose E D Q > Shenhe E N1 > Ganyu CA E 2CA > Sucrose N3
Jean provides extra survivability that is especially useful if Mona is your Hydro unit.
Sayu provides extra survivability that is especially useful if Mona is your Hydro unit.
Triple Cryo Freeze

This team archetype forgoes any sort of VV support, instead having Freeze and three Cryo units simultaneously. While this is not a primary recommendation, it is a viable playstyle.
Options for the third slot include Rosaria, Kaeya, Diona, and Layla. Rosaria and Kaeya contribute more damage, while Diona and Layla provide defensive support.
Example Teams
Mono Cryo

In scenarios where Freeze is either undesirable or just impossible, such as against Bosses, these teams are a good option. Having more Cryo units, each with their own quota of Icy Quill procs, increases Shenhe’s value in the team. Furthermore, the high amount of Cryo Particle generation significantly reduces ER requirements. In some scenarios, such as when facing enemies that cannot be Frozen, this team is one of the best options.
Triple Cryo Anemo Flex (Mono Cryo)
Venti’s performance in these teams is relatively lower; his Energy refund has less value due to the Cryo units’ reduced ER requirements and the team is commonly used against Bosses, which do not need crowd control. However, he is still a decent option.
Options for the third slot include Rosaria, Kaeya, Diona, and Layla. Rosaria and Kaeya contribute more damage, while Diona and Layla provide defensive support.
Example Teams & Rotations
Rotation
Ayaka D (1st Rotation) > Kazuha EP Q / Venti E Q > Shenhe Q E > Ganyu Q E > Ayaka D E N1 Q N1C > Kazuha tEP / Venti E N1 > Shenhe E N1 > Ganyu CA E > Ayaka D N1 E
Rotation
Ayaka D (1st Rotation) > Sucrose E D Q / Heizou N1 E > Shenhe Q E > Ganyu Q E > Ayaka D E N1 Q N1C > Sucrose N3 / Heizou Q > Shenhe E N1 > Ganyu CA E > Ayaka D N1 E
Both Jean and Sayu fill the healer role in these teams.
Rotation
Ayaka D (1st Rotation) > Jean E Q / Sayu E Q > Shenhe Q E > Ganyu Q E > Ayaka D E N1 Q N1C > Jean E / Sayu E > Shenhe E N1 > Ganyu CA E > Ayaka D N1 E
Quadruple Cryo (Pure Cryo)
It is not ideal to run four Cryo units due to the advantages of VV Shred. Nevertheless, it is a valid option and maximizes Icy Quill procs, while having low ER requirements due to an abundance of Cryo Particles.
Example Teams


Triple Cryo Other Flex

Teams that do not fit neatly into other Mono Cryo archetypes, but are still worth mentioning.
Example Teams

Reverse Melt
Solid team archetype where Shenhe works outside of a classic playstyle. These teams are also relatively cheap as her strongest teammates are 4-star units.
Melt Ganyu Is another popular team choice featuring Shenhe.
Double Pyro Melt Ganyu

This is a non-Double Swirl setup. It is much easier to play than Double Swirl teams, but does not include shielders.
Bennett provides his Flat ATK buff and Pyro Particles for Xiangling, who in turn provides Pyro application through her Pyronado. Both Pyro units have rather high ER requirements in this team.
Rotation
Shenhe hE Q > Bennett Q E > Xiangling Q E > Ganyu E 5CA E CA > Bennett E
Double Swirl Melt Ganyu

This section covers team variations with Double Swirl setups, which are generally harder to play, especially since they do not include a shielder.
Bennett is used for his Flat ATK buff and Pyro self-application. He also enables the “Sunfire” interaction in Jean teams. Additionally, Jean can hold Freedom-Sworn to further buff Ganyu. It should be noted that Bennett has high ER requirements as a solo Pyro, as does Jean as a solo Anemo.
These teams are less recommended without C6 Ganyu, as her long charging times often require a shielder. While Ganyu can still be played without a shielder before then, it is highly inadvisable for general content. She is set free from these limitations at C6, allowing her to perform well, especially if Shenhe is also at C6.
Example Teams & Rotations

Rotation
Ganyu CA E > Shenhe hE Q > Bennett Q > Jean E Q > Ganyu 4CA > Jean E > Bennett h1E
Ganyu CA E > Shenhe hE Q > Bennett Q > Jean E Q > Ganyu 4CA > Bennett E > Jean E > Bennett E (much harder)

This team relies on AoE for Venti to provide sufficient Pyro for Ganyu to Melt. However, the window is very short. In addition, it is important for Benentt’s Es to hit only one enemy to Swirl Cryo.
Rotation
Ganyu CA E > Shenhe hE Q > Bennett Q E > Venti E Q > Bennett E > Ganyu 4CA > Venti E N1 > Bennett E
Cryo Flex Double Pyro

Solid team archetype where Shenhe works outside of a classic playstyle. These teams are also relatively cheap as her strongest teammates are 4-star units. This team features the duo of Xiangling and Bennett, who are frequently seen in Melt teams. The buffs and Pyro application these two provide synergize well with the Cryo teammates, resulting in strong, consistent Melt reactions.
Example Teams

Rosaria is the preferred Cryo flex as she is also able to Melt most, if not all, of her Burst hits.
Rotation
Shenhe E Q > Bennett Q E > Rosaria E Q > Xianging Q E > Shenhe N1 E > Rosaria E > Bennett N2 E > Xianging N2 > Bennett E > Xiangling N2 > Rosaria E

This team allows Shenhe to spend more time on-field than usual due to Chongyun’s Cryo Infusion. You can also play a rotation focused on maximizing Chongyun’s Burst damage.
Eula

Shenhe’s performance in Eula teams is similar to Rosaria; she provides Cryo and Physical RES Shred with her Burst and buffs through her A4 Passive. Although Eula’s damage is primarily Physical, she can still trigger Shenhe’s Icy Quill effect through her Skill and Burst. Notably, Shenhe’s A4 benefits common teammates such as Raiden as well, increasing their synergy in Eula teams.
Eula-Shenhe teams can be broken down into Double Cryo and Triple Cryo variants. The remaining slots are flexible; one healer or shielder is generally recommended because of rigid field time requirements.
For more information about Eula synergies, it is recommended to read KQM’s Eula Guide.
Double Cryo Eula

The general Eula team archetype. The last slot in these teams is flexible; preferred picks include Zhongli and Bennett, but other characters like Yelan are also appreciated.
Example Teams & Rotations
It is generally not recommended to use Zhongli’s Burst unless its Petrification or i-frames are urgently needed.
Rotation
Raiden E > Zhongli hE > Shenhe Q E > Eula E Q N4 hE N4 > Shenhe E N1 > Eula N2 > Raiden Q 3N3C
Triple Cryo Eula

More focused on the Cryo Element, it is a strong option with appreciable flex spots. The third Cryo unit can either be damage or survivability-oriented, like Rosaria and Diona / Layla respectively. The last slot has more options to choose from such as Bennett, Zhongli, Yelan and Kuki Shinobu.
Example Teams & Rotations

It is generally not recommended to use Zhongli’s Burst unless its Petrification or i-frames are urgently needed.
Rotation
Zhongli hE > Rosaria E > Eula E > Shenhe Q E > Rosaria Q > Eula Q N4 hE N4 > Shenhe E N1 > Eula N2 > Rosaria E > Eula N4
Rotation
Shinobu Q E (N1) > Rosaria E > Eula E > Shenhe Q E > Rosaria Q > Eula Q N4 hE N4 > Shenhe E N1 > Eula N2 > Rosaria E > Eula N4
Conclusion
The sky is clearing up, and so is my mood. I just hope no one shows up to bother me… if they do, I’ll just make them disappear.
To summarize, Shenhe is an amazing Cryo support with decent off-field DPS abilities that will likely stay relevant for any high investment Cryo team.
In terms of Constellations, Shenhe’s “worthwhile” Constellations besides her C6 are all early. They are relatively decent and enhance the capabilities of Freeze and Mono Cryo teams. They primarily focus on maximizing your team’s potential rather than Shenhe herself. However they may not be essential, especially if your other units lack Constellations and/or 5-star weapons.
Additionally, one of her best weapon options is a relatively accessible 4-star, Favonius Lance.
Overall, it is important to note that Shenhe is not a “must-have” even when playing Cryo units, but she can certainly be a valuable asset to your team.
Credits
Feel free to rest. I’m a light sleeper, if I hear anything in the vicinity, I’ll investigate it for you.
For anyone who reached the end of our guide, we thank you and really appreciate it. We hope you enjoyed the read and found our work helpful.
Here is the Shenhe Mastersheet by Vladone ツ#9281, revy#4377 and Charliex3000#9403.
Additionally, we appreciate the kindness of the theorycrafters who wrote the previous guide and gave us permission to use some of their findings for our rewrite:
XenoVX#6150, Zamo#6399, KB#1111, ApolloIV#8177, Sitri#9504
Lastly, massive thanks to everyone who contributed to this guide and helped us write it even with such a tight deadline:
KB#1111, Charliex3000#9403, Leah, TWICE#9958, Nikatosaurus#5639, fritzzes#2211, Karma ツ#3271, Davjac123#0413, Polomo#8430, idkanonymized#4166, Sew#2409, Rathalos#2875, Rare Possum#0511, irokei#6189
Team images generated using the KQM Team Portrait Generator.
