Written by jamie9248
Updated for 4.5

Spark Knight Klee of the Knights of Favonius, reporting for duty! …There’s some more, but uh, I forgot. I’m not so good at remembering…
Table of Contents
Preface
Inarguably the cutest playable character in Genshin Impact, Klee was the headline act of the second limited-time Event Banner from version 1.0. With a mixture of adorableness and Genshin’s arguable peak popularity in Genshin’s 1st year, Klee was unofficially recorded with the Highest Single Day iOS Sales in China, 2nd Highest Overall Banner iOS Sales in China, 2nd Highest Overall Banner iOS + Android Sales in Japan. This year there have been a few banners which have matched and eclipsed Klee’s initial run, but her initial dominance made its mark.
Whilst Klee may not be the most popular choice for late-game content, well practiced players are easily able to blow through late-game content. Her personal gameplay is very unique and skill expressive; fluent veterans will squeeze out tons of utility and mileage from her. Overall, Klee is a bundle of joy both as a character and in combat, and investing into her will bring you happiness.
*Source: CN iOS sales via chandashi.com JP iOS + Android sales via game-i.daa.jp credit aljini10 for work https://www.reddit.com/r/Genshin_Impact/comments/o0qvrq/banner_sales_as_of_june_14th/


Strengths and Weaknesses
Klee’s Strengths
Play to these strengths.
Playstyle
- Very skill expressive character with tons of movement and animation cancels.
- Her “strongest combo” damage wise, N1C, is also the simplest to play, allowing you to focus on this skill expression.
- Charged Attacks have very high poise damage allowing you to juggle/stunlock enemies.
- Stunlocked enemies are unable to attack Klee therefore shields aren’t needed.
- Elemental Skill and Burst snapshots buffs.
- Elemental Skill can be used for off-field damage.
Team Building
- High synergy with Genshin Impact’s most popular supports.
- Provides great teamwide Energy generation through her A4 Talent and Elemental Skill.
- Entire kit has AoE damage and works even better with grouping.
- Doesn’t need Xingqiu.
- High Pyro application to enable Reactions from teammates.
Build
- Has several viable artifact options so easy to build.
- Viable F2P weapon options.
- R5 Widsith is a 4-star Catalyst and has a higher damage ceiling than any 5-star Catalyst, on top of being “easier” to acquire.
Klee’s Weaknesses
Considerations you may need to take.
Playstyle
- Kit identity suggests she was designed to excel in Co-Op.
- Mobile players and players of lesser skill may find her tricky to play.
- Players who cannot maintain the offense may feel uncomfortable without a shield.
- Elemental Burst has the smallest AoE in her kit, enemies need to be well grouped/consolidated.
Team Building
- Strongest teams use some of the game’s most popular supports, can make it hard to field a second team.
- Bennett can be considered essential.
- Klee is not really a hypercarry, so investment in the entire team is recommended.
Build
- Marechaussee Hunter is a huge damage boost but requires Furina in teams to fully utilise.
- Weapons with ramp-up buffs like Lost Prayer and Memory of Dust will not scale with her entire kit.
- 5-star Catalysts have lackluster passives and are mainly used as stat sticks. The better Catalysts require Furina’s HP drain for consistent passive activation.
Talent Breakdown
Talent Level Priority
Normal Attacks = Skill > Burst
The value of Klee’s Charged Attacks vary a lot depending on her team compositions and field time. Longer field time leads to higher overall damage from Charged Attacks, especially if she’s benefitting from Amplifying Reactions.
Her Elemental Skill and Burst are also a decent portion of her damage, especially in popular Mono Pyro teams. For highly invested players, her Elemental Skill can be her most powerful Talent. For example, in a Mono Pyro team with Bennett, Kazuha, and Xiangling, her damage distribution against one enemy can be calculated to be as follows:
- 1st rotation: 35% NA/CA, 40% Skill, 25% Burst
- Consecutive rotations: 46% NA/CA, 24% Skill, 30% Burst
Note that these distributions are assuming fully completed rotations. The faster enemies are defeated, the more relevant her Skill is, as it is more front-loaded. Therefore despite popular beliefs, it’s hard to describe Klee as a “Charged Attack focused character”.
Even with Constellations, Klee’s Talent priority doesn’t change. At C4, if she’s being used as a quickswap DPS or a support, then only focus on her Elemental Skill Talent.
Talents
 Normal Attack | Kaboom!
Normal Attack
Klee’s Normal and Charged Attacks are considered heavy attacks. Resultantly, in combat she can break Geo shields and constructs quickly, and shatter freeze. Outside of combat she can mine ores.
If aiming to play optimally to any degree, Klee’s full 3-hit Normal Attack combo should never be used in any circumstance. Due to a mixture of talent scaling and slow speed, both her 2nd and 3rd hits are objectively weaker than just repeating her 1st hit over & over with animation cancels, known as Machine Gun. The guide will touch on later how to achieve this. Though understand that ultimately even situations which warrant Machine Gun spamming are rare due to her high Charged Attack damage, which you almost always want to weave into your combos instead. Note, when Normal Attacks deal DMG, Klee has a 50% chance to obtain an Explosive Spark, via her 1st Ascension Passive, Pounding Surprise.
Her Normal Attacks are mainly single-target with poor AoE. These attacks (and her Charged Attacks) are projectile based, compared to most other Catalyst users which are hitscan, meaning due to its lobbing animation it does give her a limited range.
Charged Attack
Consumes 50 Stamina normally, and 0 Stamina whilst under the effects of Pounding Surprise.
One of the pillars of Klee’s kit, the simplest (and overall strongest) way to weave this into gameplay is to simply double-click. Klee will do the 1st hit of her Normal Attack and quickly follow this up with a Charged Attack, denoted as N1C. Spamming this double-click in rhythm provides Klee with her highest Talent% combo, though even with Pounding Surprise procs, this will deplete her Stamina rapidly.
However, it is possible to quickly queue a second Charge Attack and get two Charge Attacks benefiting from a single Explosive Spark proc, increasing both damage output and consuming less stamina. For example, after using her Skill (and gaining a Explosive Spark), doing N1C dash C can consume just the stamina required from the dash. Example (timestamp 0:15).
Klee’s Charged Attack is very noticeable in that it has a high stagger potential. She will often break enemies’ poise and send them flying. This also serves as a defensive function. This ability can also be used in conjunction with Venti’s Elemental Burst, where her Charged Attack can throw even the largest enemies in the air and make them locked into Venti’s burst. This knockback direction is independent of an enemy’s position within the hitbox, meaning the Charged Attack does not diverge groups of enemies.
The hitbox and overall range for her Charged Attack is much larger than one would assume, both horizontally and vertically. Practical application of this means this hits enemies inside Venti’s burst, even if they are fully staggered and lifted. It also forms a large part of her AoE damage coverage.
Plunge Attack
Like other Catalyst users, her Plunge Attack is Elemental. However it is un-notable and irrelevant for 99% of gameplay. This is not considered a heavy attack.
 Elemental Skill | Jumpy Dumpty
Klee throws Jumpy Dumpty which bounces 3 times, with sizable AoE damage potential with each bounce. After this, the bomb splits into 8 mines, which will set off if an enemy comes into its small range. Hitting an enemy will produce 4 Pyro Elemental Particles, though each usage of the Skill can only produce this once.
With two charges, this provides heavy front-loaded damage but with a long 20 second cooldown, allowing Klee to potentially terminate an enemy if there’s enough damage to bypass the following cooldown issue. When using the two charges in succession, the mines of the first one will explode early to make way. Whilst hitting an enemy with either the initial Jumpy Dumpty damage or the following mines, Klee has a 50% chance to obtain an Explosive Spark via her 1st Ascension Passive—Pounding Surprise. Therefore, one can weave in charge attack combos in between Jumpy Dumpty charge uses, but it is not recommended.
The initial Jumpy Dumpty hits have a fair amount of AoE—both horizontal and vertical—and will hit enemies caught in Venti’s burst for example. Kazuha’s suction also keeps Jumpy Dumpty pulled in whilst it is active. As for the mines, Sucrose’s, Kazuha’s, Anemo Traveler’s, and Jean’s suction abilities will suck in these mines, allowing more damage opportunities. However, none of Venti’s skills will move these mines. This is acknowledged by Mihoyo as not a bug but a design decision.
Each mine has its own ICD on Pyro application; however, these mines share an ICD on Pyro application with her Normal Attacks. Meaning, they can both steal reactions and allow Klee to do more reactions due to increased amounts of attacks. See the ICD Theory page for more in-depth info.
If using 4pc Crimson Witch or Kagura’s Verity
Pro Tip: By immediately cancelling her Skill with her Burst (Press E then Q really fast), before Jumpy Dumpty even gets thrown or goes on CD, the game will consider a Skill to have been casted while Klee still has the Skill charge left.
Example:
E > Press Q Fast > E > E
Klee will gain one more stack than what is normally possible from both 4pc Crimson Witch passive and Kagura’s Verity passive, for a total of 3 stacks with 2 succesful Skill casts. (Update: A variation of this bug has been patched as of Version 2.6)
Note: This is a separate mechanic to cancelling her Skill with her Burst just after Jumpy Dumpty is thrown, an animation cancel used to cut down on Klee’s Skill animation. This will be covered in the Animation Cancels section.
 Elemental Burst | Sparks ‘n’ Splash
For 10 seconds, summons groups of projectile hits every 2 seconds which home in on nearby enemies. It deals damage in 6 waves, and on each wave, there is a 35% chance for 3 hits to occur, 50% chance for 4 hits to occur, and 15% chance for 5 hits to occur.
Make sure to hold a direction when casting (WASD key or D-Pad), the Burst animation lockout will finish roughly 0.5s quicker when Klee moves. If you ever notice she is frozen for a bit after using her Burst, it’s probably due to not doing this.
If you switch out within 10 seconds, the Burst effects end and will not continue. Therefore, it is encouraged to use her Burst as soon as she swaps in (or after Normal/Charged attacks if needed to buff her with specific weapon conditions).
Klee’s attributes are snapshotted on cast, meaning buffs like Bennett’s Elemental Burst, Noblesse Oblige 4pc Set Bonus, Instructor 4pc Set Bonus, etc. will increase the damage of Sparks ‘n’ Splash for the whole duration as long as they were present when the Elemental Burst was casted.
 Ascension 1 Passive | Pounding Surprise
When Jumpy Dumpty (both initial bounces and the following mines) and Normal Attacks deal DMG, Klee has a 50% chance to obtain an Explosive Spark. This Explosive Spark is consumed by the next Charged Attack, which costs no Stamina and deals 50% increased DMG. Whilst Klee is using this Explosive Spark, she has increased interruption resistance. This will prevent her from being staggered.
This spark can only be generated every 4 seconds, and both methods of obtaining it share this cooldown.
Explosive Spark DMG increase:
Assuming Level 90 (additive so 50% spark + 46.6% Pyro Goblet + 28.8% Ascension + 15% CW or 35% LW)
w/Crimson Witch (CW) 2pc
240.4/190.4 = 26% DPS increase
w/Crimson Witch 4pc + 3 Stacks
262.9/212.9 = 23% DPS increase
w/Lavawalker 4pc
260.4/210.4 = 23% DPS increase
 Ascension 4 Passive | Sparkling Burst
When Klee’s Charged Attack results in a CRIT, all party members gain 2 Elemental Energy.
Energy obtained is flat and therefore not affected by the Energy Recharge% attribute of Klee nor other members of the team. Despite not doing damage, “would have been” crits on shielded enemies will also proc this passive.
Constellations
 Constellation 1 | Chained Reactions
Attacks and Skills have a certain chance to summon sparks that bombard opponents, dealing DMG equal to 120% of Sparks ‘n’ Splash’s DMG.
If Klee is used as an enabler (roles are covered later), this is strictly an upgrade in both damage and Elemental application. However in Vaporize carry teams, this brings more inconsistency to her Vaporize% with Xingqiu as a support, although minimal if Xingqiu has Constellation 6. Therefore it can be either a DPS loss or gain depending on where these procs do occur.
This additional damage is considered as Elemental Burst damage, therefore the Noblesse Oblige 2pc Set Bonus boosts this, and additionally Solar Pearl’s passive both boosts this and its own application counts as a condition to boost her Normal Attack damage too.
 Constellation 2 | Explosive Frags
Being hit by Jumpy Dumpty’s mines decreases opponents’ DEF by 23% for 10s.
Her overall best Constellation and one of the few sources of DEF Shred in the game. A huge boost to both her and her team’s damage output that also allows for her to justifiably be played in a supportive role. The Team DPS increase will typically range from 13% to 18% depending on the enemy’s level, which is significant. Note that Constellation 4 is also needed in conjunction to truly transition, however in practical gameplay it is not necessary and also comes with a steeper cost.
Further Constellations are practically out of reach for F2P and light spenders. If the player has the resources to do so, C2 is definitely the recommended stopping point to boost both Klee’s ceiling and future proof potential without being unrealistic.
 Constellation 3 | Exquisite Compound
Increases the level of Jumpy Dumpty by 3.
A multiplicative increase in Skill damage by roughly 18-21% depending on talent level.
 Constellation 4 | Sparkly Explosion
If Klee leaves the field during the duration of Sparks ‘n’ Splash, her departure triggers an explosion that deals 555% of her ATK as AoE Pyro DMG.
Practically, this is significant as it allows Klee to be fully realised as both a debuff support and a Sub DPS with huge a Burst potential. As an on-field DPS, this is also a strict DPS increase when triggered shortly before the Burst expiration, and allows more versatility as previously she loses damage when switching early. This Burst has a higher-than-normal Elemental application gauge at 2B. As great as this is, especially in conjunction with C2, is it only within the reach of heavy spenders.
 Constellation 5 | Nova Burst
Increases the Level of Sparks ‘n’ Splash by 3.
A multiplicative increase in Burst damage by roughly 18-21% depending on Talent Level.
 Constellation 6 | Blazing Delight
While under the effects of Sparks ‘n’ Splash, other members of the party will continuously regenerate Energy. When Sparks ‘n’ Splash is used, all party members will gain a 10% Pyro DMG Bonus for 25s.
Arguably her least useful constellation. 10% Pyro DMG Bonus isn’t a lot in the grand scheme, and as with her 4th Ascension Passive, the Energy produced is flat and not affected by Energy Recharge% modifiers. However, the amount of Energy is still noticeable (9 energy in total will be restored for every character in the team once the Burst runs its course) and will alleviate a fair amount of weight from her supports, allowing them to be built for more damage. Ultimately, this C6 isn’t anywhere near as as strong as other 5-star C6 like Ganyu’s, Hu Tao’s, or Eula’s; so acquire this purely for completionists sake.
Learning How To Control And Enhance Klee
Relative to other characters in Genshin Impact, Klee is a high ceiling character with a learning curve. Learning the basics can go a long way to improving the feel of Klee gameplay.
Klee is at a disadvantage if you are unable to break her free of her base shackles. Her default, uninterrupted Normal Attack combos are slow and clunky. Klee also deals a lot of her damage through strong but slow charge attacks. She is also naturally easily staggered, so getting hit in a slow animation can send this kid flying. When played badly, things can get ugly.
On the flipside, almost everything in her kit can be animation cancelled, meaning these slow individual attacks can be shortened and chained together to paste overall smoother and higher damage ceiling combos. Klee is also uniquely able to move in between combos, which is a crucial time save and optimisation due to her explosions often throwing even the biggest enemies all over the place. Learning when to mix in dash cancels, jump cancels, or even when to just stay put makes a huge difference.
But.. you don’t need to be a FGC pro player in order to play Klee. In fact, N1C combos are simple and also the most commonly used, even when it comes to speedrunning. Playing Klee to a high level does not need to be complex.
Note: Klee has numerous different cancels, many of which are not covered in this guide. What is covered below are cancels you should learn and will be doing for the majority of your Klee gameplay. These are the most relevant and useful.
Learning Animation Cancels
The examples below show common animation cancelling strategies and timing. You can use movement; walking, jumping, or dashing to cancel animations with the appropriate timing.
Normal Attack
Animation cancelling Klee’s basic attack is also known as “Machine Gun”. Hold a directional key while clicking attack. The timing is precise.
However, a common misconception is players thinking they really need to learn Machine Gun and frequently utilise it in their gameplay. As mentioned earlier, situations which warrant Machine Gun spamming are rare due to her high Charge Attack damage, which you almost always want to weave into your combos instead. Still, when you have ran out of stamina for example, using Machine Gun can be an effective playstyle adjustment.
| Attack (Talent Level 6) | Frames | Talent %/s |
| Default 3 Hit Combo | 148 | 127 |
| Machine Gun | 36 | 168 |
Around a 32% DPS increase (depending on timing). Use it!
Dash Cancels
Jump Cancels
Moving whilst attacking is more relevant than purely using Machine Gun. You can do this either with dashing or jumping between attacks. Dashing is both slightly faster and safer due to i-frames, but has the heavily downside of depleting your stamina reserve, which is crippling for Klee in most cases. Jump cancelling can used, though as well as being slightly slower, is dangerous to use in practice due to having no resistance to interruption in the air.
N1C/N2C
N1C: Normal to Charged Attack
N2C: Machine Gun x2 to Charged Attack (higher chance of acquiring an Explosive Spark)
Charged Attacks are ideally cancelled by Normal Attacks, which require you to click again immediately after the laser fires. Simply, you double-click in rhythm. You can also jump or dash in between double-clicks if you need to move. Again, dash cancelling has the highest DPS and survivability, but when combined with constant Charged Attacks, Klee’s Stamina reserve rapidly depletes. N2C is used in several situations: to get more consistent sparks, to slow down Stamina depletion rates, and also to increase reaction rates in certain Vaporize teams.
FAQ: Staying Still vs Dash Cancel vs Jump Cancel
Staying still or dash canceling have the highest DPS. Staying still can also have resistance to interruption when using an Explosive Spark. Dashing gives extra i-frame survivability in exchange for stamina. Jumping is slower than both, as well as lacking any resistance to interruption.
Double Spark Tech
It is possible to quickly queue a second Charge Attack and get two Charge Attacks benefiting from a single Explosive Spark proc, increasing both damage output and consuming less stamina. For example, after using her Skill (and gaining a Explosive Spark), doing N1C dash C can consume just the stamina required from the dash. Example (timestamp 0:15).
| Attack (Talent Level 6) | Frames | Talent% | Talent%/s |
| N1C | 78 | 321 | 246 |
| w/Spark | 378 | 290 | |
| N2C | 118 | 422 | 214 |
| w/Spark | 479 | 243 |
FAQ: When should I use N1C vs N2C?
Spam N1C:
- Generally for maximum damage per second.
- When you have high amounts of Stamina available.
- To initially break an enemy’s poise the fastest and start the technique of juggling.
Spam N2C:
- To conserve Stamina due to it applying more Pounding Surprise bonuses per Charged Attack.
- For more consistency in keeping enemies permanently juggled/stunlocked.
Alternate between them:
- When played with Xingqiu to consistently vaporize her Charged Attacks.
- For a middle ground of high DPS and Stamina conservation.
Elemental Burst Cancelling
Klee’s Sparks ‘n’ Splash can be used to cancel any animation. It just needs to be casted at the right time, before another attack is fully released. It is important to find the correct timing, as cancelling the Jumpy Dumpty animation too early will actually stop that attack from happening.
As mentioned throughout in the guide, this commonly has 2 usages.
- Cancelling Jumpy Dumpty after it leaves Klee’s hands, in order to save time on the animation.
- Cancelling Jumpy Dumpty before it even appears, i.e. pressing Burst very fast. This doesn’t actually use Jumpy Dumpty and the charge remains, however the game still registers this as a use. The reason for this is to gain an extra passive stack on either 4pc Crimson Witch or Kagura’s Verity.
Juggling/Stunlocking Enemies
The best defence is a good offence! Klee’s Charged Attacks are very useful for breaking enemies poise, and maintaining offence through consistent Charged Attacks can allow her to juggle most enemies and keep them stunlocked. Becoming proficient in these techniques is key to taking Klee further beyond, and can enable you to trivialise many fights. In fact, mastering juggling is what enables many players to solo the Spiral Abyss using only Klee.
Once enemies’ poise is broken, the recommended way to keep them juggled is with N2CJ or N1CJ. This both reduces Stamina expenditure and allows Klee to follow enemies and stay on top of things. The key is consistent Charged Attacks to prevent enemies from getting a chance to recover.
Klee can juggle Fatui and prevent them from even getting a shield up.
Klee stunlocking and completely dismantling the big bad wolves in Floor 12 of the Abyss. EZ
As mentioned earlier, these juggled enemies can be thrown into Venti’s Vortex even if they are originally too heavy for it. This is a huge benefit to the two characters’ synergy by giving you multiple layers of grouping and crowd control.
Jumpy Dumpty Usage And Being Strategic With It
As covered in the initial Talents section, Klee’s Elemental Skill Jumpy Dumpty starts with two initial charges, and therefore from the start of combat one can use these two however and whenever to suit the situation. Its drawback being, each charge (excluding cooldown reduction shenanigans) will take 20 seconds per use to reload. Essentially, this means that the 1st rotations will have 2 Jumpy Dumpty uses (and therefore from the start of every Abyss chamber) with each following rotation only typically having access to 1*. This gives a strategic element to how one can take advantage of this.
*Some niche teams can end up rotating faster than 20s, which can make them awkwardly desync with Jumpy Dumpty’s cooldown. Adjust as needed
Here are 2 popular ways you can use this:
- Using the 1st charge to battery the team (if using The Widsith, Klee needs to already be in the 1st team slot position). Most notably in Mono Pyro compositions, rotations can be led with Jumpy Dumpty, instead of something else to apply initial Pyro aura application onto enemies. This is typically followed up with a teammate’s Swirl for early buffs, debuffs and potential grouping. This initial usage has two benefits.
– Providing a surge of Pyro Elemental Particles to help battery up the team’s Elemental Bursts between chambers. This smoothes out gameplay and lessens concerns of finishing chambers without Bursts being fully charged up.
– Although lacking many buffs compared to being used later in rotations during Klee’s damage window, Jumpy Dumpty and the ensuing mines, especially in conjunction with Kazuha’s Elemental Skill for suction, still typically would produce higher front-loaded upfront damage than whatever you would typically use for initial Pyro application.
The second Jumpy Dumpty can be used later in Klee’s main damage window as normal, after the team has fully set up.
- Using both charges consecutively during Klee’s main on-field damage window. Unlike many other carries in Genshin Impact, she doesn’t have a “nuke” option. This generally gives these other characters big advantages not just in speedrunning, but importantly, front-loaded damage is inherently optimal against HP-thresholded enemies and fights with limited damage windows. In fact, dealing similar amounts of total damage but faster is ideal as downtime doesn’t matter once all the opponents are cleared. Well Klee doesn’t have this single instance of nuke damage, but she does have something.
When using two charges in succession, the mines of the first will explode early to make way. This means in a period of a few seconds, you can potentially see 6 Jumpy Dumpty bounces, 16 mine explosions, 5 Burst lasers, as well as any Normal and Charged Attack uses, all fully buffed and highly concentrated. Now in conjunction with the rest of the team’s off-field attacks, like Xiangling’s Guoba and Pyronado, Kazuha’s field and swirls, it’s not far off from a “nuke”.
Weapons
Weapon Comparison Tables
Full sheet with details can be found in the resources section. Weapons that are not mentioned are not relevant enough and not recommended for consideration.
Mono Pyro
Team: Klee Bennett Xiangling Kazuha
Buffs: 32% Pyro DMG via Kazuha, 1070 Flat ATK via Bennett, 30% Pyro DMG via Xiangling and Bennett’s C6, 20% ATK from 4pc NO
Combo: Klee EQ 4[N1C] N1 (* indicates slight differences)
Note: Kagura’s Verity uses a bug and is subject to being patched
| Weapons | % of R1 Widsith |
| 1st Rotation | |
| R5 The Widsith* (1st rotation w/ 2x E nukes) | 147.2% |
| R1 “Polar Star Catalyst” (1st rotation w/ 2x E nukes) | 135.6% |
| R1 “Jade Cutter Catalyst” (1st rotation w/ 2x E nukes) | 135.5% |
| R1 Kagura’s Verity* (1st rotation w/ 2x E nukes) | 130.0% |
| R1 LPSW* (1st rotation w/ 2x E nukes) | 123.0% |
| R5 The Widsith (1st rotation w/ 1x E) | 120.8% |
| R1 Skyward Atlas* (1st rotation w/ 2x E nukes) | 119.4% |
| Klee starts fights with multiple charges of her Elemental Skill. This gives these rotations a huge surge in burst damage, and some weapons can even scale slightly better. | |
| Miscellaneous | |
| R1 LPSW* (1st rotation w/E battery opener) | 112.1% |
| This is just an example of using Klee’s extra charge at the start of fights to battery the team instead. | |
| Sustained | |
| R1 “Jade Cutter Catalyst” (sustained) | 111.1% |
| R5 The Widsith (2 good buffs over 60s) | 110.2% |
| R1 “Polar Star Catalyst” (sustained) | 110.5% |
| R1 LPSW (sustained) | 101.2% |
| R1 Kagura’s Verity (sustained w/ bug) | 101.1% |
| R5 The Widsith (only 1 good buff over 60s) | 100.0% |
| R1 The Widsith (2 good buffs over 60s) | 100.0% |
| R5 Solar Pearl (fully buffed rotation) | 99.2% |
| R1 Skyward Atlas (sustained) | 98.5% |
| R1 Tulaytullah’s Remembrance (sustained) | 98.2% |
| R1 Solar Pearl (fully buffed rotation) | 94.7% |
| R1 Memory of Dust (no shield) | 93.0% |
| The Widsith (no passive on) | 89.8% |
| R5 Dodoco Tales (normal rotation) | 85.8% |
| This is the damage you can expect when using only 1x Jumpy Dumpty per rotation for sustained fights over a long period. | |
Furina Team
Team: Klee Bennett Furina Kazuha
Buffs: Average of 40% Common DMG via Furina, 32% Pyro DMG via Kazuha, 1070 Flat ATK via Bennett, 15% Pyro DMG via Bennett’s C6, 20% ATK from 4pc NO
Combo: Klee N1 EQ N1CD C N1
Note: Klee only uses 1 Skill, results can shift slightly with different combos
| Weapons | % of R1 Widsith (2 DMG% buffs) |
| The Widsith R5 (2 DMG% buffs over 60s) | 110.3% |
| Tome of Eternal Flow R1 (3 stacks) | 109.9% |
| The Widsith R5 (2 ATK% buffs over 60s) | 108.9% |
| Cashflow Supervision R1 (3 stacks) | 108.6% |
| Skyward Atlas | 100.6% |
| The Widsith R5 (only 1 good buff over 60s) | 100.0% |
| The Widsith R1 (2 DMG% buffs over 60s) | 100.0% |
| Lost Prayer to the Sacred Winds R1 | 99.8% |
| The Widsith R1 (2 ATK% buffs over 60s) | 99.3% |
| Solar Pearl R5 | 98.4% |
| Solar Pearl R1 | 94.1% |
| Flowing Purity (Bond of Life cleared) | 90.6% |
| The Widsith (no passive on) | 89.7% |
TL;DR: The Widsith is great at all levels but one should consider this more of an indication that the current 5-star catalyst weapon roster is lackluster and mostly stat sticks with poorly utilised passives.
NOTE: With The Widsith you generally want 2 out of 3 buffs (either elemental damage% or attack%), and for most builds the damage output is very close between the two. If you are using a team in which Klee is regularly causing “amplified reactions”, she will also benefit from the EM buff. Please understand that when using The Widsith in compositions where Klee is an enabler instead, that should you proc this EM buff, it essentially does nothing and for this period Widsith’s value will be heavily hampered. Even when this unbuffed situation occurs, know that Widsith is still an inherently solid weapon with a Crit Damage substat. Note for Abyss gameplay: If you get this EM buff—denoted ingame as ♪♬—and you care about clear time, it is advised to reset the chamber.
Weapon Overview
 4★ The Widsith | The Widsith is, with caveats, by far her strongest 4-star weapon, and can even eclipse 5-star weapons. When played correctly, it is so far ahead of its contemporaries even considering downtime. Do not be fooled by the 10s on, 20s off impression. Since Klee front-loads her Jumpy Dumpties and snapshots her Burst when she switches in, she generally doesn’t want to be on the field much longer than 10 seconds anyway. If you can clear the content in this one rotation, then fantastic, The Widsith at R5 even significantly outperforms 5-star weapons. If you can’t, then no buff will be obtained for the second rotation. But the buffs will be back for the 3rd duration, so as you can see this huge buff can have uptime ranging from 100% to 50% to 66%. Again to stress, The Widsith still dominates factoring in the downtime. r1 > r5 is approximately a 10% increase in Klee’s total damage. The caveats are that aside from Vaporize compositions with Klee carrying, other teams do not benefit from the EM buff, denoted ingame as ♪♬. This will occur 33% of the time, and requires plowing through or restarting a chamber. |
 5★ Tome of the Eternal Flow, Cashflow Supervision | These weapons are very similar and both require Klee to be played in Furina teams for consistent HP fluctuation. In those teams these weapons create a solid gap between themselves and alternative 5-star options, and therefore become the most justifiable 5-star weapon upgrades. Over sustained fights, they even outperform The Widsith R5. However it’s still important to know The Widsith will still have higher output in a burst period. The differences between the two are small mathematically, although Tome of the Eternal Flow has lower Base ATK with more CRIT, and restores extra Energy to Klee. Therefore generally it can perform slightly better in common teams. It also gives a small HP% increase to Klee to help survivability in these teams. Meanwhile Cashflow Supervision has high Base ATK and ATK%, therefore can pull ahead in teams without Bennett. The ATK SPD increase is insignificant. |
 5★ Kagura’s Verity | Can be considered BiS in non-Furina teams for players who don’t want to deal with The Widsith’s RNG. Caution: Its power with Klee is entirely reliant on a bug, and one of these beneficial bugs has already been patched as of Version 2.6. Don’t specifically pull for Kagura’s Verity without understanding this. How to abuse the stacking bug (similar to 4pc CW): E > Press Q Fast > E > E Using this method, her Elemental Skill will get up to 3 stacks of Kagura’s Verity’s passive, which in turn activates a small Elemental DMG Bonus that buffs all of Klee’s abilities. Note, that this trick cannot be maintained for subsequent rotations, but E > Press Q Fast > E can still be used to increase Klee’s Elemental Skill damage. Link to Kagura’s Verity investigations by solo#3333 Note: The investigations above are from Version 2.5, check Klee’s Evidence Vault for the most updated information. |
 5★ Lost Prayer to the Sacred Winds | Marginally weaker than Kagura’s Verity over time, but still highly recommended due to it coming from the Standard Banner/Off Rates rather than needing to put dedicated pulls towards it. While the passive looks strong on paper, the bonus resets upon swap-out, and the long ramp-up time means that Klee’s Elemental Burst will never benefit from it fully. It’s amazing in 4-player co-op as well as exploration, for when you have Klee on the field nearly all the time. If Klee has heavy ATK stat saturation via buffs like Bennett’s Burst and Noblesse Oblige, which are fairly common, Lost Prayer is essentially the same or slightly stronger than Skyward Atlas. Importantly it can then be considered fairly better due to its stat spread enabling higher CRIT value to benefit Klee’s Ascension 4 Passive. Also note, if Klee is swapped out whilst the passive is at 0 stacks but with time on the internal counter, say 3 seconds out of the 4 needed, when she switches back in this counter will resume and only 1 second will need to pass for the first stack to be live. The movement bonus is also very noticeable and useful. |
 5★ Skyward Atlas | Good 5-star option generally speaking, though overtaken by both The Widsith R5 when used properly, and often Lost Prayer to the Sacred Winds in a fully buffed team. It boasts a very high Base ATK, provides additional unconditional stats and summons clouds that deal additional damage to enemies over time. The clouds’ damage are considered Physical DMG and account for less than 4% of Klee’s total damage. Although the damage is minor, it is important to note that, once activated, the clouds will continue attacking even after Klee has left the field. |
 5★ Tulaytullah’s Remembrance | This weapon performs similarly to Skyward Atlas. Its increase to Normal Attacks in isolation is powerful, however, Normal Attacks are not a significant part of Klee’s total damage. Since this weapon doesn’t really give anything to her other attacks, and has lower overall CRIT stats than Kagura’s Verity and LPSW, it lags behind. Nonetheless, the higher Base Attack can be valuable when playing in teams without Bennett. In practice, Klee’s Normal Attacks also have little AoE and range compared to the rest of her kit, further hampering the benefits of this weapon. Not recommended to pull this for Klee, but it’s a solid choice if already obtained. |
 5★ Memory of Dust | Very similar raw power to Skyward Atlas, but thematically designed to be played alongside a shielder. Mathematically, it’s difficult to be precise about comparing it due to the intrinsic differences in regards to building stacks per hit and designing different teams. Regardless, in a 1 to 1 comparison, Skyward Atlas’s Elemental DMG Bonus and cloud hits will generally make it perform better. Practically too, at present it is challenging to build a composition to take advantage of this. Using a “weaker” team to accommodate such a shielder just to get an additional 20% ATK is a net loss, even if that shielder is Zhongli. However, this is only from the lens of overall team damage min-maxing, so if you want to optimise Klee’s damage and intend on playing with a shielder, then it thematically goes hand in hand with Memory of Dust. |
 4★ Dodoco Tales | Obtained for free at R5 in version 1.6, alongside her rerun, Dodoco Tales is a very viable weapon. It is overall much weaker than The Widsith, but regardless trumps most 4-star weapons. In a fully buffed team this weapon gets significantly weaker due to ATK and DMG Bonus saturation. This weapon’s strengths are its significant boost to Klee’s Charged Attacks, so if one were to extend Klee’s damage windows playing expressively, it is possible to close the gap with The Widsith. For this playstyle, you will want to start her field time with an N1C before using her Elemental Skill cancelled into her Burst. This is needed in order to snapshot the weapon passive’s buffs correctly. This is noticeably annoying and fairly counterintuitive. However for more tight rotations, noticeably with Mono Pyro’s quickswap playstyle, it’s not really worth delaying her Skill and Burst; the small ATK% buff to both does not outweigh her Burst being active for longer. Also note the Charged Attack that initially activates the ATK% buff does not benefit from it. |
 4★ Solar Pearl | Obtained via Battle Pass, Solar Pearl is also amongst Klee’s strongest 4-star weapons. Alongside its strength in damage, the CRIT Rate boost also synergises with her Ascension 4 Passive, so you will see a slight increase in team Energy gain. The drawback is pretty clear. It’s passive boosts everything apart from Charged Attacks. That’s not to say Klee’s Charged Attacks are weak with this weapon, rather it could’ve been a lot better. Solar Pearl also requires a slight change in playstyle in order to properly buff all her damage sources. At minimum you must start Klee’s field time with a Normal Attack. It is recommended to animation cancel this Normal Attack into her Elemental Skill followed by an animation cancel using her Elemental Burst. |
 4★ Flowing Purity | Probably the best F2P guaranteed, craftable 4-star option and can perform well in Furina teams. The Bond of Life passive requires Klee to be played alongside a healer to fully clear it. Do note that Bennett will not heal Klee to clear the Bond of Life if her HP is above 70%. However, if a player can get ahold of even 1 copy of The Widsith, that would be stronger as far as 4-star weapon options goes. |
 4★ Sacrificial Fragments | Used in Burgeon teams. Jumpy Dumpty generates a lot of Pyro particles, provides off-field Pyro application, and its damage is a very big part of Klee’s kit. To balance it, the Skill cooldown is a very high 20s. Therefore, Sacrificial Fragments giving her increased Skill uses always had potential. Unfortunately until recently, Klee never really had teams or playstyles where she would benefit from the EM substat to fully utilise this weapon. Until now… (since Klee builds full EM in Burgeon teams, unfortunately the damage from Jumpy Dumpty doesn’t matter) |
Artifacts
Artifact Stats
 Sands | Goblet | Circlet |
| ATK% | Pyro DMG Bonus | CRIT Rate / CRIT DMG |
Stat Priority: ER (until requirement) > CRIT > ATK% ≈ EM (Reaction DPS)
Only a few rolls of ER are needed if paired with another Pyro unit. If Klee is solo Pyro, then her ER requirements are closer to 140%.
In teams where Klee is triggering Vaporize or Melt, EM becomes as important of a substat as ATK%. An EM mainstay can be used if it has strong substats, but ATK% is still preferred as even in reaction teams, Klee performs a lot of non-reacted damage.
Artifact Sets
Actual artifact performance can vary significantly depending on substat rolls on your personal account. Know that Klee does not have a specific artifact set effect that transcends stats, like Viridescent Venerer would for an Anemo character, Blizzard Strayer on a freeze team, or also how Diluc or Bennett Main DPS can make full use of Crimson Witch of Flames stacking passive. Therefore all recommendations for Klee are fairly close to one another, and rankings will shift for you depending on how good your pieces are. Overall, with equal substats, BiS sets can do around 2-5% more damage (depending on teams), which is valuable or insignificant entirely depending on how much you want to min-max.
 4pc Marechaussee Hunter | If Klee is played with Furina, then using this set is extremely advised since it significantly outperforms all other options (provided a good set can actually be farmed). It can generally be around 15-20% of an increase compared to mixed sets depending on the scenario. This is huge because Klee benefits from both the 2pc and 4pc set effect bonuses, and being a character who has innate Pyro DMG Bonus via her ascension. She also never gained too much from previous options since she has plenty of ATK, and often uses The Widsith, she has plenty of those stats already. Therefore the 36% CRIT Rate here is perfect and the increase is massive. Although Klee’s Skill and Burst snapshot CRIT Rate, Furina’s HP drain rate is fast enough that it’s not difficult to fully buff those abilities. |
 2pc Pyro DMG Bonus + 2pc ATK% | Combining a 2pc Crimson Witch of Flames set with a 18% ATK creates Klee’s most universal set. This combination is competitive for all builds, whether or not Klee is triggering Reactions. Pairing two 2pc ATK% together is also viable. Importantly, many players could easily have Gladiator’s Finale or Shimenawa’s Reminiscence artifacts with strong substats, therefore this combination could make up your overall strongest set. With good substats, 2pc EM can be used if Klee is triggering Amplifying Reactions. Additionally, if you happen to have Klee’s C1, its damage is boosted by 2pc Noblesse Oblige making this 2pc a solid substitute for any composition if you have good substats. |
 4pc Lavawalker | Teams using Klee as an Enabler revolve around her constantly applying Pyro to enemies. 4pc Lavawalker provides 35% DMG Bonus to all attacks in this scenario, which – given equal substats – makes this set the overall strongest in these compositions. It is important to note that some enemies like Slimes have innate Elemental auras, meaning damage will be lost due to the inability to maintain a Pyro aura on them. |
 4pc Crimson Witch of Flames | If the player is lucky to have obtained strong 4pc Crimson Witch of Flames pieces, this set is good in teams where Klee triggers Reactions. Note that the Vaporize/Melt damage boosts stacks additively with Elemental Mastery. The 15% Pyro DMG Bonus from the 2pc is combined with 7.5%-15% additional Pyro DMG Bonus depending on Jumpy Dumpty charges used. By abusing the stacking bug, Klee can gain an extra stack (2 or 3 total stacks) than normally possible from the 4pc. With 2 charges: E > Press Q Fast > E > E (gains 3 stacks) With 1 charge: E > Press Q Fast > E > (gains 2 stacks) (Update: A variation of this bug has been patched as of version 2.6) |
So what teams could I run?

Klee is a very versatile character. As with most other pyro carries, with hydro supports, she can be played as a main carry who’s damage is “amped” by vaporise reactions to unleash strong personal damage. Moreover, due to her explosive mayhem via consistently strong and frequent pyro application, she is also able to be used as an “enabler”, where she lays the pyro foundation for powerful reaction damage from teammates like Furina to create teams with more “shared” damage. Lastly, one of her most popular uses is with “Mono Pyro” compositions, where teams forgo Reactions and Klee is run alongside characters like Bennett and Xiangling with grouping and Viridescent Venerer support via a final Anemo member. With fully synergistic teammates, (and Energy requirements being alleviated due to shared Pyro Particles) this madness has enough buffs to make sure you don’t take brute force lightly.
A word of caution: Do not try to play teams with both Cryo and Hydro support. As touched on earlier, Klee’s attacks are heavy attacks, and therefore the shatter reaction is prioritised before vaporize or melt, which is significantly weaker in performance than either.
An important note about shields/resistance to interruption
As touched on earlier, Klee is more squishy than the average character, meaning she is more prone to getting staggered out of an attack than most others. This is compounded by her relatively limited range, promoting in-your-face gameplay. Therefore she cannot keep distance over enemies and therefore fairly susceptible to melee attacks. Fortunately, there are several ways to alleviate this issue.
Shields: Zhongli (Hold Elemental Skill), Beidou (Elemental Burst with Constellation 1), Diona (Elemental Skill)
Interrupt Resistance
Talent: Whilst casting a Charge Attack with an Explosive Spark active, Klee has increased interrupt resistance. This will prevent her from being staggered.
Characters: Zhongli (Hold Elemental Skill), Beidou (Elemental Burst), Xingqiu (Elemental Skill), Geo Traveler (Elemental Burst but uncommon in Klee Teams)
Note, Xingqiu’s resistance to interruption isn’t actually that strong by itself to render Klee stagger proof against most stronger attacks. However this will stack with other’s for example when combined with Beidou, you get full resistance.
However, it is important to understand that by having to use one of these supports you may be restricting her team diversity and potentially having to remove another supportive character who could contribute more to her overall team damage. For instance, a Reverse Melt composition with Zhongli would have to forgo either Bennett (who 1. provides significant damage to both Klee and the Cryo Sub DPS, 2. without him Klee may encounter energy issues), or the Anemo grouper (Venti/Sucrose/Kazuha), which losing that crowd control would again hamper both Klee and the stationary Sub DPS Rosaria.
Overall, although it may require a lot more skill and care with Klee, improving your dodging skills and not having to rely on shields/resistance to interruption as a crutch gives you much more freedom and in many instances, allows you to run overall stronger teams.
FAQ: Does Klee need a shield?
Use a shield if you:
- Are playing special events (i.e. Vagabond) with very high damaging enemies.
- Already meet DPS checks easily and want to complete end-game content more comfortably.
- Play on mobile and cannot play fluidly without it.
- Have difficulty managing Stamina or keeping Klee safe.
- Do not consider yourself skilled.
- Are playing without a healer.
Don’t use a shield if you:
- Are able to consistently crowd control enemies via Anemo grouping or Klee’s juggling/stunlocking.
- Are good at dodging and timing attacks carefully to not leave yourself vulnerable.
- Want to play Klee’s highest damage potential teams which don’t have a shielder.
- Consider the team’s healing adequate.
How synergistic is she with the current roster?
Klee has particularly good synergy with the Pyro and Anemo cast, both damage and utility wise. Therefore she excels in Mono Pyro teams. She also synergises incredibly well with Furina, and Klee’s playstyle functions similarly to Mono teams except Furina is Vaporizing on top. It is highly encouraged to read and digest the team building sections of this guide, and then go in game and finetune your own teams to fit your own playstyle.
FAQ: Why is Vaporize less important on Klee?
Contrary to popular belief, it actually has little to do with her applying “too much Pyro to work”, since there are teams and playstyles which can get her Vaporising consistently.
Many Pyro carries in Genshin Impact deal damage with one Talent source at a time.
- A typical Hu Tao uses her Normal and Charged Attacks, and will pause those to use her Burst.
- Diluc has his Burst and then alternates between Normal Atks and Elemental Skills.
- Xiangling does initially have both Guoba and Pyronado as DMG sources, but the majority of her window, especially in AoE uses Pyronado as her single reactive source.
- Bennett alternates with Normal Attacks, Elemental Skill and Bursts.
Klee is unlike these others, and failure to understand this is the root source of misplay and poor analysis of her strategies.
She weaves Normal and Charged Attacks with Burst lasers firing and mines explode around them. By herself, she is constantly dealing damage distributed almost evenly from all 3 of her Talents, and furthermore all these Talents provide DMG via multiple fast, smaller, and sustained hits.
For the other characters, especially with favorable Elemental application ICD, their type of playstyle scales well with Vaporize/Melt. Their power budget in an attack sequence being generally distributed through 1 attack at a time makes great use of these Reaction multipliers. Vaporize is only a multiplier after all. Purely a 1.5x or 2x multiplier that also unlocks Elemental Mastery for an additional unique multiplier. The more frequently a character can react the more consistent their access to these multipliers are.
Yet, as insinuated, these Amplifying Reactions are ultimately only multipliers. For Klee, even if one were to practice a gameplay style which allows consistent Vaporize Reactions for one of these Talent sources, like her Normal and Charged Attacks, this is only adding a multiplier onto what is normally around 1/3 of her total damage.
Instead, why not look for ways to 100% of her total damage via universal Pyro DMG buffs like Kazuha’s A4 or Xiangling’s C6? Even if these multipliers may appear smaller, the ability for these to boost her Skill and Burst can make them much more synergistic overall.
It can help to see similarities with a more understood character, Tartaglia. Whilst a minority do try his playstyle in Forward Vape/Sunfire teams, the vast majority recognize that his performance is stronger, flexible and more practical outside of this. Klee is like this too.
What future teammates does Klee look out for?
Look out for future off-field damage dealers that stand to gain from a “driver” like Klee who can sustain significant pyro application on field. Even more so if their attacks are mobile and can move with Klee amidst the chaos. Overall, Klee as an reaction enabler is in the position to utilise a support like this much better than her pyro contemporaries, so solidifying a stronger niche in the future will keep her in good stead.
4.1 Update: We predicted Furina, woohoo!
In terms of indirect buffs as a whole, Klee luckily has several unique identifiers that are not currently exploited in-game, but have a shot at being targeted in the future:
- High hit count. Hit count mechanics are not something explored much in Genshin Impact, but are common in Honkai Impact 3rd, Genshin’s sister game. Examples would range from Skills that scale higher the more hits are dealt, to Bosses with Shields that need take a certain amount of hits to be taken down.
Klee in full swing has a barrage of hits across the game period, but if you consider things like a new artifact set or Support for Pyro characters, or a Catalyst weapon, narrowing the prospective characters even further makes Klee stand out more in these situations.
Whilst Genshin hasn’t moved much in this scale, it is possible to see signs of small advancements considering characters like Yunjin’s Buffs or Quicken reactions. Whilst these do not consider Hit count directly, additive increases like these, typically, are designed to be beneficial towards attacks which hit fast with lower multipliers (with Quicken also factoring in Elemental application rate), as opposed to slower hits with higher base multipliers.
- Full range of attack sources. Klee is one of the few characters, who in their natural role is attacking with Normal Attacks, Charge Attacks, Elemental Skill hits and constant Elemental Burst hits. For Bow characters, Polar Star already exists as an example weapon that increases in performance with diverse attack activation. Even then, Polar Star’s Buffs last 12s per attack, a fairly long time. Klee could maintain uptime of Buffs with far shorter durations. There aren’t many other Catalyst or Pyro characters who tread into this territory, so anything new here can also be effective.
General Synergies
So we’ve covered Klee’s strengths, weaknesses, and considerations that need to be made when building a team. It is important to stress that despite not having access to an amazingly synergistic Sub DPS teammate currently, Klee does have synergy with strong supports who often appear as the consistent backbone to the wide variety of compositions available.
 Bennett | Is Bennett needed in every Klee team? Due to the large variety of strategies, not really, but it is important to understand how well he synergises with Klee, and therefore how borderline irreplaceable he is. Firstly, he enables Klee to require essentially no additional energy recharge bonuses to produce her Burst on demand. Secondly, Klee herself and the vast majority of team mates regardless of exact composition have snapshottable abilities, on top of benefitting hugely from Bennett’s huge attack buff in general, so his supportive boosts provide huge increases in overall team DPS. When can he be replaced? 1. Xiangling can substitute for additional Pyro Energy to Klee, and her personal output is strong enough that to a degree it can mitigate overall team damage loss from losing Bennett’s attack buff. Generally speaking, given Xiangling has enough Energy Recharge to accommodate, she can work as a universal replacement outside of Vaporize teams. The main downside to using her instead is having to adjust for a potentially longer rotation. 2. In tough content, a full shield may be preferable to relying on Bennett’s healing. Zhongli himself can fill Bennett’s shoes, with his strong shield that also decreases the Elemental RES and Physical RES of opponents nearby by 20%. Note, in 99% of situations, this resulting damage increase will be noticeably weaker than what Bennett would have provided, but it does work as a substitute. Also understand that Zhongli replacing Bennett will leave Klee needing much more Energy Recharge bonus to cover for the resulting loss in Pyro Energy, so for example you can say Zhongli+Xiangling are needed in order to fill Bennett’s slot. |
Xiangling | Due to Xiangling’s high off-field damage and high Pyro application rate, she is often played in a wide variety of teams in Genshin Impact. However, a common theme with her teams is that they generally have to accommodate her high Energy demands, and therefore most of her teams either spend significant portions of time having to battery her, or have higher than average rotation lengths. Due to Klee’s prowess in Energy generation, especially high Pyro Particle generation with her initial two charges of Jumpy Dumpty, this allows Klee-Bennett-Xiangling teams to be one of the few Xiangling teams where her costly Burst is not burdensome and easily used off-cooldown. Further synergy is provided with Xiangling’s C1 and C6 constellations (even Klee’s C6 for high spenders), small damage increases however, they can add up. Notably, since Xiangling’s Burst does not normally snapshot her C6, therefore it is typically considered a weak constellation, Klee is able to perfectly make use of it. Xiangling’s Pyronado will also follow Klee around, and Snapshots team buffs similar to Klee’s Burst, allowing the duo tons of freedom for movement and positioning as needed with little drawback. Many people may look at Xiangling’s EM ascension stat and Pyronado’s reaction potential and then write off her multipurpose kit for synergy in Pyro teams with Klee. However, we should remember that the small starting roster was designed to cover for multiple team variations in mind. It is perfectly reasonable to conclude these two were also intended to be paired together by Hoyoverse. |
 Venti | Although he doesn’t suck up Klee’s mines, Venti deals very strong damage (when he actually aims straight!) and has incredible synergy with Klee and many of her teammates. As incredible as Venti is, his main drawback is due to throwing enemies into his burst, there are a relatively limited number of characters who can continue onslaughts of damage to enemies within his burst. Aside from Normal Attacks which have a tendency to be thrown too low, Klee can do this with all her attacks. Furthermore, Venti’s burst provides elemental infusion which is extremely helpful especially in conjunction with Xingqiu, as this constant Hydro application allows Klee to Vaporize Jumpy Dumpty hits she otherwise could not. With Reverse Melt teams, this infusion allows Cryo supports to be melting even before Klee switches in. It is an extremely advantageous position to be a character that can synergise with Venti. However please note Mihoyo has steadily scaled back on Venti favorable content and you might find limited effectiveness of his strengths in current end-game situations. |
 Kazuha | Kazuha is a key top tier support character that synergises incredibly with Klee. On the surface, unlike Venti his suction ability is able to pull in Klee’s Jumpy Dumpty and mines, but most importantly is his general prowess in easily applying Viridescent Venerer debuffs in both mono-elemental and reaction teams. He typically performs much better applying this than other Anemo characters.This is in addition to his ability to give himself and his teammates an Elemental DMG Bonus when swirling an element. This puts him in a position where his team damage boosting benefits are often too hard to ignore. To top it off, his suction effects, although weaker than Venti’s, do not have the potential to send enemies flying in the air, giving him much better synergy with common Klee teammates Rosaria and Xiangling. Overall, although in a strict 1:1 comparison he may not be as useful as Venti in certain mobbing combat situations where Venti’s crowd control expertise is too valuable, these factors make him inarguably much more synergistic in the majority of other situations with Klee. You will probably find he is often an ideal fit no matter what idea or team play style you decide on building. Klee Guide | Kazuha = Amazing Synergy |
 Sucrose | Venti and Kazuha can be somewhat substituted with Sucrose. She brings additional sources of damage boosts to the table via her Elemental Mastery sharing talents and potential to wield Thrilling Tales of Dragon Slayers. She can also provide elemental infusion and gathering, although not as strong. Importantly, she is a 4-star character who also does her job at low constellations and with a 3-star weapon, making her very handy and cheap for any account. Ultimately, Venti’s significantly stronger crowd control, personal damage and energy refunds via his Ascension 4 Passive Talent, Stormeye, his overall contribution is sizably larger and therefore make up stronger Klee teams. Moreover, Kazuha’s damage boosts can in a vacuum be smaller, but his ability to better execute VV debuffs ultimately synergises a lot better with Klee’s teams by being able to buff multiple members with Elemental DMG Bonus. This is especially important as Klee teams often have high amounts of non-reaction damage. |
 Zhongli | With Klee’s teams never relying purely on her own damage, Zhongli’s universal RES Shred via his shield is incredibly handy to increase the output of several team damage sources. In addition, as mentioned earlier Klee can benefit highly from his Interrupt Resist, allowing her to plow through damage without getting staggered from incoming hits. This can be especially important in compositions where Klee is the Enabler, as losing hits from her also results in weaker output from the rest of the team. An unfortunate weakness with Zhongli is that teams are limited to 4 members, and due to his weak energy output, slotting him in place of someone else can leave Klee teams, especially herself, in an energy deficit. Additionally, his slot in Klee teams is often competing with Bennett or Venti, who have both proven to provide tons of energy and boost teams to generally much higher damage output. When using Zhongli, this loss in energy and damage output is something you have to weigh out. |
Teams
Rotation Notation
- N = Normal Attack
- C = Charged Attack
- A = Aimed Shot
- P = Plunging Attack
- E = Elemental Skill
- tE = Tap Skill
- hE = Hold Skill
- Q = Elemental Burst
- D = dash (cancel)
- J = jump (cancel)
- W = walk (cancel)
- > = switch character
- ( ) = these actions are optional; please refer to the notes below
- [ ] = repeat these actions the specified number of times
Energy Recharge Guidelines
Note: Multiple ballpark figures are given. For average players, in order to prepare for all situations, build for the higher value. Starts of fights/Abyss Chambers will allow Klee two uses of her Skill, meaning you can build lower if you can avoid sustained fights. If you do not meet these Energy requirements, it’s not the end of the world as you can easily create Energy with the team’s Elemental Skills, as the small cost of a longer rotation. Due to Klee’s low reliance on Amplification, most teams easily allow this flexibility.
※ Vaporize ※
With Furina’s release in 4.2, Klee finally gained a long awaited playstyle update where another teammate could take advantage of her Pyro application rate and trigger their own reactions. Furina synergised even more though, since she also buffs Klee (and the whole team) in return.
To further explain, the two are very synergistic. The ideal reaction partner for Klee has always been theorised to be a slow hitting, but high damage off-field character with a good enough elemental ICD rate to Vaporize or Melt most of their damage. Luckily, Furina’s hardest hits are from Mademoiselle Crabaletta, who can also Vaporize every hit. Her other pets also can vaporize but not all hits. She can also vaporize the initial hits from her Elemental Skill and Burst casts. Lastly, being able to vaporize allows Furina’s damage to scale from EM. This is very helpful because HP scaling damage dealers have limited buff sources, so opening this avenue for more damage is great. Overall for Furina, the damage she can gain from Vaporize is very valuable.
Not only does Klee benefit from Furina’s damage% buffs from Fanfare stacks, but Furina enables very significant gear upgrades for Klee. Marechausse Hunter is a very powerful artifact set enabled by Furina’s HP drain, netting on average a 15-20% increase for Klee over her previous mixed artifact sets. Furina’s HP drain also allows Klee to fully utilise 5-star catalysts like Tome of the Eternal Flow and Cashflow Supervision which also pull ahead of previous 5-star catalysts and are more competitive with The Widsith.
Klee is notably also relatively on the lower end of HP levels. Once built at Level 90 players will usually have around 16-18k HP. Whilst an initial concern may be that this is not great synergy with Furina, it’s arguably the opposite. This means Klee is relatively very easy to heal, and in particular easy overheal. This is very helpful to utilise Furina effectively, and is another key reason why the pair is able to effectively use powerful healers like Bennett.
Finally, Furina teams offer more improvements with constellations than previous Klee teams, in particular early ones like Furina’s C1 and C2 being sizable increases (Furina also benefits nicely from Klee’s C2 as a rare source of DEF shred). This allows Klee to maintain strength and gives greater incentive to vertically invest.
Furina Example Team #1
Klee — Bennett — Furina — Kazuha
Team Description
- A big advantage with Furina compared to Xiangling, is that Xiangling needs to use her abilities after Bennett’s Burst is cast, whereas Furina doesn’t. This allows for faster, flexible setups as well as wasting less of Bennett’s Burst uptime, potentially giving Klee a longer damage window too.
- Furina’s pets are portable and adjust to enemy positions, so just like Xiangling this team can navigate a chaotic battlefield alongside Klee.
- The strength of Bennett and Kazuha in this team is the ease at which they can perform “Double Swirl” setups in order to buff/debuff for both the Pyro and Hydro teammates. This team is no exception, and there’s multiple setups to adapt for different situations.
- The team also stacks the 3 strongest buffers for Klee, boosting her personal damage. Whilst Furina doesn’t benefit from Bennett’s ATK buffs, he still benefits Klee (remember Klee’s attacks can snapshot team buffs) and the team more than enough to be the best option. Furthermore as mentioned, he is key for smooth “Double Swirl” setups.
- Bennett wants a healing focused build, but an actual healing adjacent set is not necessary. This is because with HP and Healing Bonus stats, he can easily heal for over 8000 per tick, therefore low HP teammates like Klee and Kazuha can even be overhealed in 1 tick. These overheals activate Furina’s Ascension 1 Talent for extra teamwide healing.
- Overall, all these benefits make Bennett a stronger option than alternative teamwide healers who may be better at fully healing the team consistently to maximise Furina, but offer little else especially in comparison to Bennett’s huge buffs to Klee.
- Starting with Furina QE can help with performing “Double Swirl” setups. Kazuha’s Burst can also be skipped.
Team Gearing
| Klee | Bennett | Furina | Kazuha |
| Example Weapons: The Widsith Tome of the Eternal Flow Artifacts: 4pc Marechaussee Hunter ATK/Pyro/CRIT ER% Ballpark: 130% w/long fights 105% w/fights under 40s | Example Weapons: Aquila Favonia Sapwood Blade Artifacts: 4pc Noblesse Oblige ER/HP/Healing Bonus ER% Ballpark: 175% w/long fights 150% w/fights under 40s Try to build 200%+ | Example Weapon: Festering Desire Key of Khaj-Nisut Artifacts: 4pc Golden Troupe HP or ER/HP or Hydro/CRIT ER% Ballpark: 175% w/long fights 160% w/fights under 40s | Example Weapons: Favonius Sword Xiphos’ Moonlight Artifacts: 4pc Viridescent Venerer EM/EM/EM ER% Ballpark: 155% w/long fights 140% w/fights under 40s |
Furina Example Team #2
Klee — Bennett — Furina — Xiangling
Team Description
- Alternative for players without Kazuha. Although losing his suction means losing consistency with all of Klee’s mines exploding, this variant is still very strong. Particularly in Single Target.
- The team didn’t necessarily need Xiangling’s extra Pyro application for Furina to Forward Vaporize, but it’s still something.
- This team can also help players utilise a well built Xiangling who otherwise may not have many options in another team without Bennett. It can also free up Kazuha for that other team.
Team Gearing
| Klee | Bennett | Furina | Xiangling |
| Example Weapons: The Widsith Flowing Purity Artifacts: 4pc Marechaussee Hunter ATK/Pyro/CRIT ER% Ballpark: 130% w/long fights 105% w/fights under 40s | Example Weapons: Aquila Favonia Sapwood Blade Artifacts: 4pc Noblesse Oblige ER/HP/Healing Bonus ER% Ballpark: 165% w/long fights 140% w/fights under 40s Try to build 200%+ | Example Weapon: Festering Desire Key of Khaj-Nisut Artifacts: 4pc Golden Troupe HP or ER/HP or Hydro/CRIT ER% Ballpark: 200% w/long fights 180% w/fights under 40s | Example Weapons: “The Catch” Artifacts: 4pc EoSF ATK/Pyro/CRIT ER% Ballpark: 210% w/long fights 180% w/fights under 40s |
Example Team #3
Klee — Bennett — Xiangling — Xingqiu
Team Description
- Klee’s version of “National”, for use when Kazuha is not available. For players who typically substitute him with Sucrose, this is a bossing alternative and with Xingqiu it can have higher single-target performance.
- Similarly to Raiden, Klee batteries the team whilst also enabling higher dmg output from Xingqiu
- Constant pyro application via multiple sources can allow Xingqiu to double Vaporize his E, and regular amounts of his rainswords (although not most).
- Since Xingqiu’s Burst doesn’t snapshot Bennett’s Burst buff, and the team is more Energy hungry than most, it is a worthwhile consideration to use Favonius Sword on Bennett to generate more energy with smaller downsides.
- This team, whilst using only 4-star teammates, does take some of the most valuable and diverse ones, potentially leaving your second team short of options. However, you are notably free to run strong freeze teams.
- Note this is not considered “stronger” than either Raiden National or Mono Pyro w/Kazuha, it’s just an accessible alternative.
Team Gearing
| Klee | Bennett | Xiangling | Xingqiu |
| Example Weapons: The Widsith Flowing Purity Artifacts: 2pc ATK/2pc CW ATK/Pyro/CRIT ER% Ballpark: 140% w/long fights 100% w/fights under 42s | Example Weapons: Sapwood Blade Favonius Sword Artifacts: 4pc Noblesse Oblige ER/Pyro/CRIT or ATK/Pyro/CRIT ER% Ballpark: 160% w/long fights 100% w/fights under 42s | Example Weapon: “The Catch” Artifacts: 4pc EoSF ATK/Pyro/CRIT ER% Ballpark: 210% w/long fights 180% w/fights under 42s | Example Weapons: Sacrificial Sword Favonius Sword Artifacts: 4pc EoSF ATK/Hydro/CRIT ER% Ballpark: 160% w/Sacrificial Sword and C6 190% without C6 |
Gameplay Example
Overall Conclusion on Furina Teams
Pros:
- Utilises Klee’s Pyro application. Furina’s damage increases and she provides buffs for Klee in return.
- Klee has stronger artifact and weapon options thanks to Furina’s HP drain.
- Better vertical investment potential than other teams.
- Multi element teams have more flexible shield breaking potential.
Cons:
- Heavily benefits from Furina.
- Requires more complex setups than Mono Pyro teams. Also the teammates will be fluctuating with lower HP due to Furina’s drain. Therefore they can be overall harder teams to play.
※ Reverse Vaporize ※
As with all Pyro characters, Klee’s damage can be amplified in a Reverse Vaporize team. (Hydro application via a support, Pyro damage dealer reacts to cause Vaporize for a base 1.5x damage modifier). Note: this is generally not recommended, as touched on in FAQ: Why is Vaporize less important on Klee
Hydro Applicator Options
NOTE: It is never recommended to withhold Klee’s Elemental Burst for “consistent” Vape strategies. It is a big part of her damage.
 Xingqiu | Xingqiu, an accessible 4-star, has a long lasting Elemental Burst providing Klee high uptime of Vaporise Reactions. His Hydro swords produced from his Burst fire from range, and often apply before Klee’s projectile attacks hit. He will also provide additional Hydro application from the radiating swords if Klee hugs enemies, which is crucial to maintain consistency of application. Note, his hydro swords only fire when Klee uses a Normal Attack, which can make for unnatural gameplay. He does however come with more downsides. Due to the inconsistent nature of both his and Klee’s projectile-based attacks, and situations where Klee is not hugging enemies, at base these Reactions can be inconsistent. Occasionally, Klee’s Pyro attacks will become the aura instead, and Xingqiu will end up dealing a weak Vaporize hit instead. Nevertheless, this inconsistency is virtually solved if his Constellation 6 is acquired. Now, every third hit will apply an additional two swords, which provide an extra application of Hydro aura onto the enemy that Klee is about to hit. This acts as a hard reset to solve any situations with an unexpected Pyro aura. When using Xingqiu as the sole Hydro applier, it is recommended as Klee to use N2C N1C combos repeatedly to sync for consistent Vaporized Charged Attacks. |
 Yelan | Yelan will also work well in these teams, mainly due to her own natural synergy with Xingqiu. Functioning similarly by requiring Normal Attacks, alone she will not be able to provide Hydro application for the Vaporize composition to function sufficiently (in fact, Klee will enable Yelan to Forward Vaporize her own attacks for a 2x damage multiplier). Yet together with Xingqiu, the increased application can allow Klee to spam anything, notably N1C combos instead of workarounds. Her Ascension 4 Talent will also provide buffs to Klee’s output, as well as team repositioning and mini-grouping via her Hold E Skill. These damage buffs and dynamic movement are much appreciated, especially as the fixed core of Klee-Xingqiu-Yelan leaves a lot needed from the 4th teammate. |
Reverse Vaporize Example Team
Klee — Bennett — Xingqiu — Yelan
Team Description
For players without Kazuha or want to play Vaporise compositions, this is a good pick. As explained above, the relentless Hydro application from the team will allow Klee to do whichever combos you wish and Vaporise her Charged Attacks consistently. Furthermore, as also mentioned Yelan provides DMG%, repositioning, and mini-grouping which are helpful to cover Kazuha’s impact. In fact her repositioning is actually pretty useful as it allows Stamina regeneration.
However, not all is well. The lack of proper Anemo grouping not only reduces the consistency of Klee’s mines being used, but even in general reduces QoL without proper crowd control. Secondly, as mentioned throughout the guide, even with perfect Hydro application, Klee is still Vaporising only around ⅓ of her Normal Attacks, Elemental Skill and Burst due to standard ICD on those hits. Lastly, whilst Bennett is essential for completing the team with healing, Energy and significant buffs to Klee, his buff will not apply to the Hydro pair. This leaves the team synergy much to be desired.
Nonetheless, this team is a strong alternative option mainly for Bossing encounters. The extra Hydro application can also have great value for shield-breaking content.
Team Gearing
| Klee | Bennett | Xingqiu | Yelan |
| Example Weapons: The Widsith Flowing Purity Artifacts: 2pc ATK/2pc CW or 4pc CW ATK/Pyro/CRIT ER% Ballpark: 125% w/long fights 100% w/fights under 42s | Example Weapon: Sapwood Blade Artifacts: 4pc Noblesse Oblige or Instructor ER/Pyro/CRIT ER% Ballpark: 170% | Example Weapons: Sacrificial Sword Favonius Sword Artifacts: 4pc EoSF or 4 Noblesse Oblige ATK/Hydro/CRIT ER% Ballpark: 160% w/Sacrificial Sword and C6 185% below C6 | Example Weapon: Favonius Warbow Artifacts: 4pc EoSF HP/Hydro/CRIT or HP ER% Ballpark: 165% |
Gameplay Example
Overall Conclusion on Reverse Vaporize Teams
Pros:
- Requires less overall team investment, due to most of the team damage funneled into Klee. Therefore very feasible for players not yet at late game levels of investment.
- Elemental Mastery becomes a very useful offensive stat for Klee, therefore you have more opportunities for overall stronger artifacts.
- Hydro teammates can break Pyro shields.
Cons:
- Xingqiu is essentially mandatory support on many other teams, but he is not essential for Klee. So this would limit options for your other team, some of which are able to utilise him to a higher overall performance.
- With Xingqiu, rotations are awkward due to his longer cooldowns, and with Mona, Hydro application can be poor if rotations are not performed efficiently.
- Xingqiu support gets substantially better at C6, so not that accessible.
- It is borderline a requirement for Xingqiu to either wield a Sacrificial Sword or Favonius Sword, so further emphasising that it may not be accessible to be played efficiently. Players without these weapons will probably encounter poor uptime, which is extremely detrimental in teams that use both Bennett’s buff and Venti’s Wind’s Grand Ode.
※ Mono Pyro ※
FAQ: Why Mono Pyro? Aren’t big Vaped Charged Attack numbers stronger?
Important: A common misconception of newer players is thinking that this team is played as a consolation, because Klee “cannot take advantage of Reactions”. This is incorrect, this team is played due to the incredible synergy between all 4 characters. It just happens to not have Reactions (beyond Swirl). High DMG per screenshot ≠ High DMG per second! Charged Attacks are only a portion of Klee’s natural damage output, whereas these teams amplify 100% her output (see Talent Priority to learn more).
A team having or not having Reactions like Melt/Vaporize has zero predisposition to whether it makes a good team. Do not be fooled into thinking Reactions are the be all and end all for team building. To learn more about the team, in particular see Team Description and Circular Synergy Breakdown.
Mono Pyro Recommended Team #1
Klee — Bennett — Xiangling — Kazuha
Team Description
The premise is simple: Viridescent Venerer’s Pyro infused debuff provides a 27.7% damage increase against the typical enemy (who has 10% base resistance). Without having to worry about reactions and controlling aura application, it is extremely simple and easy to keep this debuff on enemies. Coupled with Xiangling’s inconsistent C1 debuff and her small but solid 15% Pyro DMG boost from her C6, team damage is amplified enough to not have to fret about not using amplification reactions. The main drawback is due to going all in with Pyro, it is not as efficient for shield breaking scenarios, which are fairly common in end game content.
Kazuha is a tremendous addition to the roster, as not only is he very good at applying VV, but unlike Sucrose’s EM sharing, his team buffs will benefit non-reaction teams with the additional Pyro DMG bonus. He also has additional synergy with Klee and Xiangling as his Skill will draw in mines and Gouba. Another benefit to Kazuha is his respectable damage whilst on the field using Skills and regenerating energy. Xiangling Elemental Burst has a longer cooldown than the others, so the team’s rotations generally extend to around 20-22s to accommodate her.
This team is very rotationally flexible and feels smooth to play in both Single Target and AOE content. Rotationally flexible, meaning you can easily delay Xiangling’s burst until needed, add extra Kazuha Skill usage for on demand grouping, or even stay on Klee longer or shorter depending on if juggling is valued or the enemies are already dead. This is in comparison to some other Hypercarry lead teams in the game which can have strict set-ups and set infusion/damage windows.
One significant value proposition with this team is its high floor on damage output. Essentially, aside from Klee’s basic attacks, the entire team’s output snapshots a ton of buffs and abilities do not require triggers like needing constant normal attacks. Xiangling’s Pyronado will spin regardless, Klee’s Burst will home onto enemies, and even her leftover mines will be pulled to wherever the player positions Kazuha. This can make the team easier to pilot than other Klee teams and even other Xiangling teams as there can be less variance in total output from a skilled player vs one of less skill; by the time Klee EQE’s, most of the work is done. Of course, skilled players effectively positioning, animation canceling and Charge Attacking during Klee’s damage window will produce greater numbers, but the team’s combined sources of guaranteed damage is sizable.
The point isn’t even finished, as this is not only referring to the damage itself, but team Energy too. Even though Klee’s Charge Atks generate good tail-end energy for the team, the rest of the team’s Skills, including potentially two of Klee’s Skill charges, are front-loaded before Klee’s basic attack damage window. This means whether enemies are defeated earlier than expected, or at the end of a rotation, it’s highly likely you will start the next Abyss chamber with the team’s Energy in a healthy situation. This is exemplified by Klee being able to start an alternate rotation with her first Skill charge, allowing her to even patch up the team before a fight really starts. This makes the team incredibly fluid across an entire Abyss Floor, and is proven with consistently strong performances in Continuous speedruns.
Team Gearing
| Klee | Bennett | Xiangling | Kazuha |
| Example Weapons: The Widsith Flowing Purity Artifacts: 2pc ATK/2 CW or 4pc Lavawalker ER% Ballpark: 125% w/long fights 100% w/fights under 40s | Example Weapon: Sapwood Blade Artifacts: 4pc Noblesse Oblige ER/Pyro/CRIT or ATK/Pyro/CRIT ER% Ballpark: 155% w/long fights 125% w/fights under 40s | Example Weapon: “The Catch” Artifacts: 4pc EoSF ATK/Pyro/CRIT ER% Ballpark: 200% w/long fights 170% w/fights under 40s | Example Weapons: Iron Sting Favonius Sword Artifacts: 4pc Viridescent Venerer ER/EM/EM or EM/EM/EM ER% Ballpark: 170% w/long fights 160% w/fights under 40s |
Rotation Example
Sample Rotation (Default)
(Bennett E)1 > Kazuha tEPQ > Bennett Q E > Xiangling Q E > Kazuha tEP2 > Klee N1 EQ (E) 4[N1C] N1
1Use Klee’s Skill instead if available and Energy is required.
2Use Kazuha’s hold Skill if stronger grouping is needed.
Sample Rotation (Fast Setup)
(Klee N1)1 > Kazuha Q > Bennett Q E > Xiangling Q E > Kazuha tEP2 > Klee N1 EQ E 4[N1C] N1 > Kazuha tEP
1First rotation only.
2Use Kazuha’s hold Skill if stronger grouping is needed.
Rotation Example w/ Sucrose
Sample Rotation (Sucrose w/ C1 and Sacrificial Fragments)
(Klee E)1 > Sucrose EQ > Bennett Q E > Xiangling Q E > Sucrose E > Klee N1 EQ 5[N1C] N1 > Bennett E
1First rotation only.
If you’re interested in this team, I highly recommend watching the video guide for a thorough breakdown on concepts and many different ways this team can be played.
Gameplay Example
Abyss Gauntlet Runs
VS PMA
VS Golden Wolflord
Circular Synergy Breakdown
 Kazuha | • Pyro-only teammates make it easy for him to swirl the correct Element. • Mono reaction team means all party members utilise his DMG% buff. • Suction for both Klee’s mines and Guoba. Klee’s mines dramatically increase the power of his Skill. |
 Klee | • Maximises all team buffs and debuffs (Xiangling C1, C6, Bennett C6, easy 100% VV uptime). Amplifies all her damage. • Kazuha’s stamina reduction via Passive Talent improves dash cancel and Charged Attack flexibility. • Makes full use of Xiangling’s C6 which typically has low value. • Front-loaded Skill and its energy generation allows flexible play to be adapted as needed. |
 Xiangling | • C1 inflicts a small debuff and C6 provides a small buff for the entire team. • Pyronado follows the player model so works effectively with both Kazuha’s and Klee’s forms of crowd control. • More Pyro teammates to fluidly generate Energy for her Burst. |
 Bennett | • Entire team has abilities that can Snapshot his buffs. • Large amounts of Pyro energy particles allows him to easily build for damage. Note: Bennett rarely benefits from others. |
Note: This is categorised as an Enabler team due to its playstyle and rotation strategies having similarities with other more true “reaction enabling” teams. However Klee is still technically the main dps of this team and outputs the most damage in both Single Target and AOE situations.
However in mob situations, there is an opportunity to achieve better performance with the King of trash compacting himself, Venti. His synergy refunds all Pyro teammates 15 energy after Wind’s Grand Ode ends, as well as generating extra Anemo particles for Kazuha. Since the whole team now has matching cooldowns, this allows a very smooth and constant rotation of characters, and Klee now doesn’t even need to be on the field that long.
Mono Pyro Recommended Team #2
Klee — Bennett — Venti — Kazuha
Team Description
This variation scales incredibly well in AoE content with tons of enemies (though unfortunately this is happening less and less in the Abyss). On the surface one could argue that Klee is the member getting carried, and while it is true that she ends up being the least important component of the team, she brings enough to the table to where she would become the best choice for the 4th character.
- With her Skill and Charged Attack, she generates a lot of Energy for the brief time she is on-field, further lowering Energy Recharge requirements.
- Shielding support isn’t too justified due to the team’s constant crowd control.
- Unlike Xiangling, Klee can comfortably hit enemies within Venti’s Vortex.
- Moreover, some enemies are too heavy to be thrown into Venti’s Vortex naturally, however Klee’s Charged Attacks can fling these enemies and force them into it. In fact in general, with her solid natural crowd control due to high staggering ability, this team’s themes are further highlighted.
- Strictly looking at damage, Klee actually has strong front-loaded damage dealing capabilities, and this team does not need her to be on the field long dealing dwindling sustained damage. Burst, 1 or 2 Jumpy Dumpties and around 3 N1C’s can do the job, whilst also leaving mines off-field for Kazuha to draw in.
Team Gearing
| Klee | Bennett | Venti | Kazuha |
| Example Weapons: The Widsith Flowing Purity Artifacts: 2pc ATK/2 CW or 4pc Lavawalker ATK/Pyro/CRIT ER% Ballpark: 140% w/long fights 100% w/fights under 30s | Example Weapon: Sapwood Blade Artifacts: 4pc Noblesse Oblige ER/Pyro/CRIT or ATK/Pyro/CRIT ER% Ballpark: 150% w/long fights 120% w/fights under 30s | Example Weapons: Favonius Warbow The Stringlesss Artifacts: 4pc Viridescent Venerer EM/EM/EM ER% Ballpark: Additional substats not necessary | Example Weapons: Iron Sting Favonius Sword Artifacts: 4pc Viridescent Venerer ER/EM/EM or EM/EM/EM ER% Ballpark: 140% w/long fights 130% w/fights under 30s |
Rotation Example
Sample Rotation (Example 1)
(Klee N1)1 > Kazuha hEPQ > Bennett EQ > Venti EQ > Klee (N1 E)1 Q N1 E 3[N1C] (N1)2 > Venti E
1First rotation only.
2Second rotation onwards.
Sample Rotation (Example 2)
Bennett EQ > Kazuha hEPQ > Venti EQ > Klee Q N1 E 3[N1C] N1 > Venti E
Gameplay Examples
Mono Pyro Recommended Team #3 (using Zhongli w/Archaic Petra)
Klee — Bennett — Zhongli — Xiangling / Kazuha
Pros & Cons
Pros:
- Makes a solid substitute for Kazuha with the added benefit of a shield: Provides 20% universal debuff + 35% Pyro DMG boost which is easily obtainable due to only having Pyro teammates.
- Alternatively can be played alongside Kazuha to form a team with both strong grouping and shielding.
Cons:
- Having to farm a full Archaic Petra set. Generally very niche so most players may not even have pieces.
- Due to the shards often spawning slightly away from Zhongli, it is ultimately not amazingly convenient to pick up and makes awkward moments.
- Can pick up wrong elemental shards when fighting enemies with innate elemental auras. The team’s damage output gets moderately neutered in this situation.
- Whilst this has similar damage buffs in theory, you lose grouping and crowd control plus Kazuha’s naturally strong sub-dps output.
Rotation Example
Sample Rotation
Bennett E > Zhongli hED > Bennett Q E > Xiangling Q E > Klee N1 EQ 4[N1C] N1 > Bennett E > Xiangling N2
Niche Substitutes
 Sucrose | Can fill in for Kazuha. At Constellation 6, to a degree she can emulate Kazuha’s DMG Bonus, but this is not necessary, as her grouping, Viridescent Venerer debuff and burst damage bring value regardless. Needs to be built for Elemental Burst spamming, rather than her typical builds which stack Elemental Mastery stats as high as possible. Recommended ER depends on execution and frequency of Elemental Skill usage, but generally you are looking at over 200% with Favonious Codex. Sacrificial Fragments is great and Thrilling Tales of Dragon Slayers is possible, especially with her further boosting the team through passing 48% ATK% bonus to Xiangling, however with the large energy requirements needed, using TTDS may be tough. |
 Jean | Can fill in for Kazuha or Venti to cover Viridescent Venerer debuff duties. Unlike others, she will not provide additional buffs/debuffs to the team, hence her being an overall downgrade however her additional healing in tandem with Bennett’s can improve survivability (this can be handy to combat corrosion). She can also position Klee’s bombs through holding her Elemental Skill. Ultimately, she is Klee’s carer so this is fun for role playing purposes. |
 Thoma | Can fill in for any position, providing a solid shield as well as Pyro application and damage, albeit neither in substantial amounts. As Xiangling is rarely played without Bennett, the most viable slot for Thoma is replacing Bennett. The team will lose a chunk of attack (a well built Bennett Burst typically provides somewhere around a 40-50% total damage increase to characters), but Thoma’s shield can be very comfortable, and importantly will allow you the luxury of playing Bennett on your other team. Overall, if you really need a shield, the aforementioned Zhongli team is still much stronger. |
Overall Conclusion on Mono Pyro Teams
Pros:
- The buffs and debuffs are consistent and strong enough to rival and even surpass reaction teams in output.
- The two most popular variants are Klee’s strongest teams. Both are highly competitive with top meta teams in the game.
- No need to worry about reactions. Therefore it is very beginner-friendly to play.
- The popular teams make full use of Klee’s kit, and accommodate her strengths, enabling a lot of fluidity, skill expression, and creativity for how long/short you want her to be on field and what actions to do.
- Generates a lot of Pyro Particles, alleviating energy requirements significantly. Therefore not reliant on funneling, which makes Xiangling much easier and straightforward to play than her more traditional teams.
- Mono Pyro can uniquely be played with two Anemo units like Kazuha and Venti. High damage, strong grouping, strong crowd control. This is straightforward.
Cons:
- Very restricted team when facing shield breaking content. Although Anemo supports can break shields well in AoE situations, it’s still overall inefficient compared to having the “correct” elements
- Furthermore, content with required shield breaking often requires it for both chambers. Both Bennett and Xiangling are very useful for this content, therefore not only is your other team losing them as general damage options, but also shield breaking options.
- Teams are noticeably weaker without Constellations on Xiangling. Her C1 and C6 are small but contribute well to overall team damage. Her C4 is obviously huge for her personal output.
- Xiangling’s accuracy is very poor when enemies are thrown into Venti’s Burst. It is not recommended to play both together due to this anti-synergy.
- Mono Pyro compositions suffer the most from the player not having Kazuha, There are several solid substitutions but ultimately still downgrades. Therefore it is not actually that accessible. Furthermore playing both Venti and Kazuha makes the team a potentially inaccessible triple 5-star comp.
- No shields within these specific lineups, there are alternatives but crowd control must be sacrificed with small moderate overall damage loss.
※ Burgeon (Burger) ※
Core: Klee + Nahida + Hydro
Hydro Options: Xingqiu/Yelan/Kokomi/Candace
Sustain: Kirara/Baizhu/Zhongli/Kuki Shinobu
Niche: Kazuha/Sucrose
Firstly, this team composition is a great way for those wanting to play both Klee and Nahida together. Secondly, Klee has always had potential with Burgeon.
1) The blast radius of her Pyro attacks are very effective at hitting Dendro Cores to create the explosions. For easy gameplay, Klee can just spam Normal Attacks in these teams.
2) Being a catalyst user she has on-demand access to Pyro attacks. Notably, she does not require her Elemental Burst for access to Pyro attacks, as well as the Burst itself not really bringing anything key in this role. Ultimately, this means she can fully build for EM without having to worry about Energy Recharge, or similarly having to use less offensive weapons. Being an On-Field Burgeon trigger, she also has potential to benefit from various buffs that only apply to the On-Field character.
3) The potential of Sacrificial Fragments. Klee theoretically has great synergy with it, providing she had a use for its high EM substat (It is also the only weapon of the Sacrificial series to have an EM substat).
What’s the synergy? Her Elemental Skill, Jumpy Dumpty generates a lot of Energy particles, provides Off-Field Pyro application, and its damage is a very big part of Klee’s kit. To balance it, the Skill cooldown is a very high 20s. Therefore, Sacrificial Fragments giving her increased Skill uses always had potential.
This is also more relevant due to, in general, there not being many 4-star and 5-star catalysts with useful passives. As covered earlier, in fact most 5-star catalysts are primarily used as stat sticks. So, a weapon option with an actual functional passive was always interesting. However, Klee never really had much use for EM, so these ideas didn’t amount to much until now.
Note: unfortunately, due to Klee building EM and neglecting ATK, DMG, Crit etc. in this role, the damage of Jumpy Dumpty is less abusable in Burgeon.
4) She also has the adaptability to heighten her amounts of Pyro application through adding in her Skill, Charge Attacks, or even Burst. Whilst less relevant for typical Burgeon consistency, this can significantly help when needing to shield break enemies, particularly enemies with Cryo shields. In comparison, an alternative character like Thoma may struggle.
However, the teams have taken a while to get online, namely due to the lack of synergistic teambuilding with its release. With Burgeon explosions dealing heavy recoil damage, along with the potential for self-inflicted Burning damage, the teams have dire need for defensive utility. Burgeon also requires at least one Hydro and one Dendro teammate, severely limiting teammate options.
Teammate Discussion
 Kokomi | Originally, Kokomi was one of the few viable options. She has very strong off-field healing with her Elemental Skill, along with taking the Hydro applicator slot. Although she still works fine, relying on her does present many functional issues. Firstly, the range of her Skill can feel pretty restrictive, especially with the chaotic nature of Burgeon teams. It’s very easy to be fighting enemies outside of its range. This can be particularly problematic as Klee is usually already using Sacrificial Fragments for additional Skill uses herself, and not Kokomi. Secondly, since she is just being used off-field, the Hydro application of her Skill without being supplemented with Hydro Basic Attacks isn’t always enough. It’s very easy for enemies to just be Burning, and therefore crippling Dendro Core production and the Burgeon reactions themselves. |
  Baizhu, Kirara | Eventually, Baizhu and Kirara arrive and feel much more synergistic in this role. Furthermore, using Double Dendro activates Dendro Resonance giving team EM for even more Burgeon damage. The main benefit to these supports is that Xingqiu can function extremely well as an offensive Hydro teammate. His Hydro application is mobile, allowing for easy repositioning, and he has two sources with both his Burst’s Sword Rain hits and the orbiting Rain Swords from his Skill. Furthermore, although his damage reduction doesn’t reduce Burgeon recoil damage, it will significantly strengthen teammate’s shields and reduce enemies actual damage. Lastly, him being a 4-star character, as well as Kirara being a 4-star character herself helps alot with the accessibility of Burgeon teams. Nahida is fairly critical to these teams, since her Dendro application is consistent enough to allow for some stability of Burgeon reactions. Relying on just Baizhu or Kirara will very quickly lead to instability. Nahida’s Elemental Burst also can provide significant EM to Klee. Comparing them as options, both work well with differences. Baizhu is more of a healer than a shielder, and his Elemental Burst has a long 14s duration meaning he requires less swapping into. Whereas with Kirara, her shield is very strong, but she does not contribute with Off-Field Dendro application without her C4. She also doesn’t have healing, although this isn’t much of an issue. Lastly, Baizhu’s A4 Talent will buff Klee’s Burgeons whereas Kirara’s C6 will buff the team’s Elemental DMG. |
Burgeon Example Team #1
Klee — Nahida — Xingqiu — Kirara
Team Description
Set up teammates Skills and Bursts, then spam Klee’s Normal Attacks with Elemental Skill uses in between. Make sure to switch back to Kirara frequently to refresh her shield, as well as switching to Nahida to refresh her Elemental Skill when new enemies enter the battle.
Team Gearing
| Klee | Nahida | Xingqiu | Kirara |
| Example Weapons: Sacrificial Fragments Artifacts: 4 FoPL or 4 GD EM/EM/EM ER% Ballpark: Burst not needed | Example Weapons: The Widsith Artifacts: 4 Deepwood Memories EM/EM or Dendro/CRIT ER% Ballpark: 115-120% | Example Weapon: Favonius Sword Artifacts: 4 ESOF ATK/Hydro/Crit ER% Ballpark: 180% w/ Fav Sword and C6 200% below C6 | Example Weapons: Sacrificial Sword Artifacts: 2 ToTM/2 VG HP/HP/HP ER% Ballpark: 160%~ |
Gameplay Example
Burgeon Example Team #2
Klee — Nahida — Xingqiu — Baizhu
Team Gearing
| Klee | Nahida | Xingqiu | Baizhu |
| Example Weapons: Sacrificial Fragments Artifacts: 4 FoPL or 4 GD EM/EM/EM ER% Ballpark: Burst not needed | Example Weapons: The Widsith Artifacts: 4 Deepwood Memories EM/EM or Dendro/CRIT ER% Ballpark: 115-120% | Example Weapon: Favonius Sword Artifacts: 4 ESOF ATK/Hydro/Crit ER% Ballpark: 180% w/ Fav Sword and C6 200% below C6 | Example Weapons: Prototype Amber Artifacts: 2 ToTM/2 VG or 4 OHC HP or ER/HP/HP ER% Ballpark: 170%~ |
Gameplay Example
Overall Conclusion on Burgeon Teams
Pros:
- Explosive playstyle to suit Klee’s nature. Klee and Nahida are together an unstoppable force of cuteness.
- Klee is able to fully build into EM to maximise Burgeon damage, and can benefit from Nahida’s Burst EM buffs and Baizhu’s reaction DMG buffs by being an On-Field Burgeon trigger.
- Can forgo investment into Klee’s talent levels.
- Play teams with new characters and new reactions. Importantly, these teams also value Kazuha less than older compositions.
- Has intrinsic access to all the hard counters for Pyro, Hydro, Electro, and Cryo shields compared to other Klee teams. Combined with Klee’s Heavy Attacks and Pyro application, these teams are very versatile for shield breaking content.
- Many recent Abyss blessing buffs provide incentives like increased EM or Reaction buffs when utilising Dendro teams.
Cons:
- Literally requires Pyro, Dendro, and Hydro teammates. Leads to restrictive team building (though ultimately not much more limiting than other playstyles).
- Due to the way Dendro core production and Burgeon itself scales in AoE with multiple enemies, the playstyle can see a performance dropoff in Single Target.
- Although recoil damage is mitigated with shields and healers, it’s still a dangerous playstyle and still requires moderate attention to avoid knockouts.
- Without Anemo grouping, the consistency of Klee’s Jumpy Dumpty can be hit-or-miss.
- Previous investment into Klee’s talent levels and Crit artifacts is “wasted”.
※ Melt ※
Melt Recommended Team
Klee — Xianyun — Kaeya — Diona
Team Description
- Synergistic plunging team with a ton of team buffs. Klee’s mines provide sufficient off-field Pyro application for both Diona to activate Instructor EM buffs, her C6 EM buffs, as well as Xianyun activating Viridescent Venerer Pyro debuffs and her huge Plunge DMG buffs. Kaeya lastly gives Noblesse Oblige buffs and rapid Cryo application. Klee herself being a catalyst user is able to Melt her attacks without needing extra help Bennett.
- Can be a very strong and flexible playstyle in Single Target fights, but ideally still need to take care to stay inside Diona’s Burst circle due to the 200 EM her C6 can provide.
- Klee can just spam Plunge attacks after the team is setup, she doesn’t need to cast her Burst. Therefore 4pc Shimenawa Reminiscence can certainly be a good set option.
- Ideally using C6 Kaeya to benefit both from the extra Cryo application and energy generation.
- The biggest issue with the team would be energy generation. Favonius weapons on supports will help a lot.
Team Gearing
| Klee | Xianyun | Kaeya | Diona |
| Example Weapons: The Widsith Artifacts: 4pc Crimson Witch 4pc Shimenawa EM or ATK/Pyro/CRIT ER% Ballpark: Burst unused | Example Weapon: Favonius Codex Crane’s Echoing Call Artifacts: 4pc Viridescent Venerer ATK/ATK/ATK ER% Ballpark: 220%+ | Example Weapons: Favonius Sword Artifacts: 4pc Noblesse ER/Cryo/CRIT ER% Ballpark: 250%+ | Example Weapons: Favonius Warbow Artifacts: 4pc Instructor ER/HP/CRIT ER% Ballpark: 250%+ |
※ Reverse Melt ※
Teammate Discussion
 Rosaria | Played with a wide variety of teammate variations, Rosaria is a very strong Sub DPS option due to her ability to Melt every hit of every attack she does. Her recommended ER% when played as the only Cryo is 150%, and as long as that is met she also has a strong amount of weapon variety to choose from. Favonius Lance can further decrease the requirement to below 140%, or Dragon’s Bane can be utilised perfectly by her especially if attack boosts are provided via Bennett’s Burst. Lastly, Deathmatch can also be used perfectly due to both high damage and her CRIT Rate sharing talent, Shadow Samaritan, which synergises perfectly with the incoming Klee. |
 Venti | Rosaria does not synergise perfectly with Venti. Although both his grouping and energy refunding talent is highly valued to boost her performance, smaller enemies and humans who are caught flying inside his Burst can be unfortunately timed to be too high in the air at Rosaria’s Burst tick to be hit. However this is not an issue when fighting tall or heavy enemies, although at which point the grouping benefit may feel less significant. |
 Kazuha | Practically, Kazuha would have the most synergy overall, as he would boost team damage and provide solid grouping. Although he does not lift enemies too high, caution must still be taken with the horizontal plane, as his Skill grouping is definitely not as tight as Venti’s, and furthermore his Kazuha Slash can throw enemies away from Rosaria’s Burst. |
  Bennett, Xiangling | Both Bennett and Xiangling can be played in this composition as the core Pyro support, as both of their strengths are highly valued. Furthermore, they can be played at the same time, as Bennett will significantly boost Klee’s, Xiangling’s and Rosaria’s damage output and between the three Pyro characters there is a potential surplus amount of pyro energy particles to avoid energy issues. This team is very strong if Anemo grouping is not needed. |
 Kaeya | You can also double down on Cryo support, as Kaeya can be ran alongside Rosaria for Sub DPS damage. He will also drastically reduce Rosaria’s energy requirements. He does, however, come with heavy anti-synergy.Kaeya’s anti-synergy (click to expand)
|
Reverse Melt Recommended Team
Klee — Bennett — Rosaria — Kazuha
Team Description
In order to use Rosaria most effectively, it is recommended to position her order in the team rotation carefully. Since she is always recommended to combo her Elemental Skill immediately into Burst, she requires either pre-existing 2B Pyro application from Bennett immediately preceding her or ongoing Pyro application via Xiangling’s Burst or Anemo Elemental Absorption. Pay attention when played before an Anemo grouper. For example, when fighting one enemy, going from Bennett EQ > Sucrose E > Rosaria EQ would result in her Burst not Melting on the last hit, as Sucrose will reduce the aura just slightly below the threshold. However this would work if fighting multiple enemies, as Pyro aura swirled off multiple enemies maintains a strong enough foundation (and can even increase with strong swirl application from Venti or Kazuha’s Held Skill). Note, using Venti or Kazuha’s Burst applies constant Pyro anyway, so they will be more universal and easier than using Sucrose.
For gearing Rosaria, Favonius Lance and Dragon’s Bane are great options, but her strongest and most flexible pick is Deathmatch. This is mainly down to her Timepiece artifact. An Energy Recharge% main stat artifact is overkill, and therefore between ATK% and EM, (with general substats) ATK% gives weaker returns due to oversaturation from Bennett’s Burst. Therefore Deathmatch with it’s high Crit Value wins due to the best balance. Whilst weaker, using Favonius Lance is equally recommended purely due to otherwise needing 140% ER+ via substats only, making gearing potentially hard. Using it, you can focus on building for all the multiple damage sources.
Team Gearing
| Klee | Bennett | Rosaria | Kazuha |
| Example Weapons: The Widsith Flowing Purity Artifacts: 2pc ATK/2pc CW ATK/Pyro/CRIT ER% Ballpark: 130% | Example Weapon: Sapwood Blade Artifacts: 4pc Noblesse Oblige ER/Pyro/CRIT ER% Ballpark: 220% | Example Weapons: “The Catch” Deathmatch Artifacts: 4pc Lavawalker EM/Cryo/CRIT or ATK/Cryo/CRIT ER% Ballpark: 160% w/long fights 145% w/fights under 40s | Example Weapons: Iron Sting Favonius Sword Artifacts: 4pc Viridescent Venerer ER/EM/EM or EM/EM/EM ER% Ballpark: 150% |
Rotation Example
Sample Rotation (Single Target)
Rosaria E > Kazuha tEP > Bennett Q E > Kazuha Q > Rosaria Q E > Kazuha tEP > Klee N1 EQ 4[N1C]
Sample Rotation (AoE)
Rosaria E1 > Bennett E1 > Kazuha tEP > Bennett Q > Kazuha Q > Rosaria EQ > Klee N1 EQ combo
1Use Rosaria’s E on an enemy and Bennett’s E on a different enemy to Swirl both Pyro and Cryo.
Overall Conclusion on Reverse Melt Teams
Pros:
- Constellations on Klee provide supportive nature which benefit this team structure much more than Vaporize.
- Very flexible with 2 slots on the team, therefore once the core team is built up and invested in, teammates can be tailored both to suit content difficulties, as well as accounts with limited roster options.
- Artifact sets across the board are very versatile. Teammates including Klee can run Lavawalker, and Klee can use most of the options outlined in the earlier Artifact section to great success. Therefore it is very efficient gearing this team artifact wise.
- Generally has shorter and smoother rotations than vaporize teams. Apart from Xiangling, all other combinations run characters with 60 Energy Cost and 15s Cooldowns on Bursts.
- Strong team overall for versatile shield breaking. Teams with Pyro, Anemo, Cryo & Klee’s heavy attacks cover almost all ground.

Cons:
- Much more awkward to play in single-target than in AoE situations vs multiple enemies, especially when trying to utilise buffers/debuffers like Kazuha and Sucrose.
- Rosaria has a significant power increase at C2 with her Burst duration increasing from 8s to 12s. Depending on your other team options, not having C2 could be crippling enough to warrant looking elsewhere.
- Rosaria’s Burst, although having a sizable AoE, plots in a fixed position. While in general it can be manageable to contain enemies within this range, with Klee’s chaotic nature and high stagger potential, it is very awkward to play around this position without an Anemo grouper.
- It’s incredibly awkward to play with Sucrose if attempting to minmax. Sucrose has potential to Double VV, pass a TTDS buff to Rosaria, Elemental Burst for additional Pyro application, and EM share. However it is not possible to do these together, at least without having uncomfortable and long rotations. If played, from experience it’s recommended to just choose a few and just find the most comfortable rotation.
- Overall, despite its strengths, the composition can “feel” like you are just playing Mono Pyro but Rosaria is just along for the ride. In fact, the increased annoyance in having to accommodate to boost the Cryo damage and work her into your rotations can make things not worth it.
- If you need to play with a shielder, a valuable team slot will have to be sacrificed, more so than other teams due to the core synergies and benefits amplification and grouping can provide to them. To mitigate this loss, swapping the Anemo grouper for Zhongli is most recommended. Alternatively, a C6 Diona both shields, proves Cryo particles and a 200 EM boost whilst inside her Burst area. Her Cryo application is also relatively weak, therefore a team of Klee/Xiangling/C6 Diona/Rosaria can work well. In this team composition, Rosaria is recommended to use an ATK% Timepiece. Do note, using Diona creates another limitation on movement with an even smaller radius than Rosaria’s Burst. In addition, although she will substitute finely in boosting Rosaria’s damage, the increase in EM does nothing for Klee and Xiangling’s damage.
※ Overload ※
Overload is a very interesting composition with Klee. For the benefit of players of all skill, combining Klee’s innate high stagger potential with Overload’s makes clearing content easier due to enemies barely being able to attack. Not to undermine its damage output, as Chevreuse as a core teammate is specifically designed to elevate a Pyro and Electro team. This creates an overall versatile playstyle as you can essentially freely mix between multiple supports depending on both your limitations and content. The general strategy is to try your best to provide a constant electro aura for Klee to funnel attacks into to create Overload reactions. Note, this will never be perfectly clean due to Overload’s chaotic nature.
Overload Team #1
Klee — Chevreuse — Bennett — Fischl
Team Gearing
| Klee | Chevreuse | Bennett | Fischl |
| Example Weapon: The Widsith Flowing Purity Artifacts: 2pc ATK/2pc CW ATK/Pyro/CRIT ER% Ballpark: 110% | Example Weapon: Favonius Lance Rightful Reward Artifacts: 4pc Song of Days Past or Anything HP/HP/HP ER% Ballpark: 170% | Example Weapon: Sapwood Blade Artifacts: 4pc Noblesse ER/Pyro/CRIT ER% Ballpark: 200% | Example Weapon: Stringless Alley Hunter Artifacts: 4pc Golden Troupe ER% Ballpark: 100% |
Rotation Example
Sample Rotation
Bennett EQ > Fischl N1 E/Q > Chevreuse Q hE > Klee N1 EQ combo
Overload Team #2
Klee — Bennett — Fischl — Beidou
Team Description
For players who lack Chevreuse, Beidou can combine well with Fischl. However she does have some anti-synergies, and hence isn’t part of the Overload core. Firstly, a core optimisation with any Beidou team is reducing her Energy Recharge requirements via regular perfect parries. However, due to enemies constantly being staggered and thrown about, the actual ability for her to perform this with Klee is low. Therefore not only does she bring inconsistency but realistically she has to invest fairly strongly into Energy Recharge substats. Klee’s Energy producing passive talent can only mitigate so much. 160% ER is recommended on Beidou to comfortably sustain fluid rotations. Moreover, as is typical with Klee teams, you don’t really get a huge amount of normal attacks in, and so Beidou’s high potential isn’t realized. Nevertheless, she is still a formidable option.
- Effortless poise breaking, enemies generally are even unable to even attack.
- Teammates’ off-field damage is not particularly limited by range, therefore this team synergises well with the natural Overload mayhem.
- It’s very comfortable to snapshot Fischl and Beidou’s damage, no aura management required.
- Generally unrealistic to expect Perfect Parries from Beidou, since enemies are infrequently attacking. Needs fair amounts of ER% investment.
Team Gearing
| Klee | Bennett | Fischl | Beidou |
| Example Weapon: The Widsith Flowing Purity Artifacts: 2pc ATK/2pc CW ATK/Pyro/CRIT ER% Ballpark: 140% w/long fights 110% w/fights under 40s | Example Weapon: Sapwood Blade Artifacts: 4pc Noblesse Oblige ER/Pyro/CRIT ER% Ballpark: 190% w/long fights 150% w/fights under 40s | Example Weapon: The Stringless Alley Hunter Artifacts: Any mixed set with strong substats ATK/Electro/CRIT ER% Ballpark: 100% | Example Weapon: Prototype Archaic Serpent Spine Artifacts: 4pc EoSF ATK/Electro/CRIT or ER/Electro/CRIT ER% Ballpark: 165-175% without Perfect Parry 145-150% w/1 Perfect Parry |
ER recommendations have to be taken with a grain of salt, since Beidou’s Elemental Skill requires adapting on the fly. This also means, especially in this team rotations should be used only as very rough guidelines, and it’s encouraged to switch off characters to parry with Beidou opportunistically.
Rotation Example
Sample Rotation
Bennett EQ > Fischl N1 E/Q > Beidou EQ > Klee N1 EQ (E) 4[N2C]1 > Beidou E N1 > Bennett E > Klee N2C
1Do “2[N1C] 2[N2C]” on the first rotation instead.
Gameplay Example
Alternative Characters
 Xingqiu | Bennett can be safely swapped out for Xingqiu. He benefits the team by preventing chaotic situations with Klee’s Pyro aura, due to her now also Vaporizing. This will allow more control, although the team’s damage will take a hit due to teammates like Klee, Fischl, Beidou and Venti not being able to take advantage of Bennett’s Burst. |
 Sucrose | There is also a niche idea involving Sucrose. When she reacts on a Pyro aura, due to Viridescent Venerer’s debuff lowering this Pyro resistance, not only does this improve Klee’s damage, but this also increases overload damage for the whole team. Combined with her EM share further boosting overload damage, it is possible to build Fischl for EM damage in a team with Klee and Xiangling maintaining a Pyro aura. Due to difficulties in measuring this damage, it is hard to gauge whether fischl’s damage is overall higher with the EM build, however due to using Sucrose instead of Venti or Kazuha, we can surmise that regardless this team’s DPS isn’t the highest. |
Overall conclusion on Overload Teams
Pros:
- Chevreuse breathes new life into this playstyle, and the upgrades can definitely be felt in terms of playability and ease of execution.
- Both Fischl and Beidou don’t have skills which have limited range. Therefore there is no need to worry about attacks missing or enemies being out of range.
- As touched on earlier, Klee’s high stagger potential combined with Overload gives enemies little room to attack. This benefit can also be combined with Beidou’s Burst at C1, so overall this team even without huge shields from Zhongli has some of the high survivability.
- Fischl by herself does not require much additional energy to sustain her Burst, and Electro Resonance can generate high amounts of Electro particles too. So overall these teams do not have tough Energy requirements to meet.
Cons:
- Chevreuse is a key core teammate, and many players may not have her. Furthermore, although not required she does have powerful constellations that both increase smoothness and team damage.
- As with many overload teams, it can be very hard to control aura application on enemies, therefore it’s difficult to justify building much EM on characters. Fortunately, Chevreuse is arguably designed to focus more on strengthening the raw damage of these teams rather than promoting an EM focused playstyle.
- Although Klee’s attacks do have range, things still get hectic when combined with Overload, therefore it is almost required to be able to jump cancel between attacks to account for enemies movement. Not doing so will often leave enemies out of range.
- As mentioned earlier, Beidou needs higher ER% than usual due to her inability to perfect parry consistently in these teams.
※ Support ※
Support Klee Example Team
Klee — Yelan — Kazuha — Flex

*Note: This team is only advised for high invested players. Klee’s C2 for DEF Shred and Yelan’s C1 and Aqua Simulacra for multiple Skill uses and sufficient output is recommended as an ideal starting point.
Flex options: Mona, Nilou, Venti, Zhongli
Team Description
One of the most outstanding teams for highly invested accounts, this core takes advantage of stacking several multipliers to buff Yelan’s output. Whilst she is most often known for her Burst’s Exquisite Throw hits, she has a lethal Skill when conditions are optimised for it. Due to Yelan’s HP scaling, she is tricky to maximise buffs on, so this is a perfect example of Klee’s use as a support.
Examples of stacked multipliers: Kazuha’s A4 DMG% buff, Kazuha wielding 4pc VV for RES Shred, Klee’s Jumpy Dumpty providing Pyro application for the Vaporize multiplier, C2 for DEF Shred, 4pc Instructor for EM, Mona (who is commonly used as the flex) casting her Burst for Omen’s DMG% bonus, her C1 providing a further slight increase to Vaporize. She will also activate Hydro Resonance giving extra HP% to Yelan. Players fortunate enough to have Kazuha’s C2 can also gain a significant EM buff, and A Thousand Floating Dreams on one of the Catalyst supports can also provide a small EM increase. In mobbing content, Venti with Elegy for the End can also provide an EM buff.
Note: this guide does not necessarily endorse acquiring many of these buff sources. This is mostly used as an informative piece.
For gearing, Klee will commonly use Sacrificial Fragments for the additional utility of multiple Skill casts. Although she can be built for damage despite mainly playing a supporting role, it’s not necessary at all. The flexibility for Pyro application meanwhile is very helpful.
Team Gearing
| Klee | Yelan | Kazuha | Example: Mona |
| Example Weapon: Sacrificial Fragments Artifacts: 4pc Instructor | Example Weapon: Aqua Simulacra Artifacts: 2pc Heart of Depth/2pc Tenacity of the Millileth or 4pc EoSF | Example Weapon: Favonius Sword Xiphos’ Moonlight Artifacts: 4pc Viridescent Venerer EM/EM/EM | Example Weapon: Favonius Codex Artifacts: 4pc Noblesse Oblige Build as much ER% as possible |
More Support Klee Examples
Klee — Lyney (C6) — Bennett — Kazuha
Klee — Navia (C6) — Bennett — Gorou

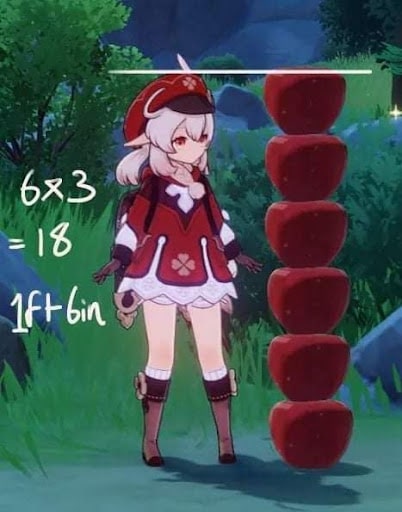
Original Reddit post
FAQ
When should I use N1C vs N2C?
Covered in Animation Cancels section
Does Klee need a shield?
Covered in Shields section
What future teammates does Klee look out for? Where is her niche?
Covered in Synergies section
Why is Vaporize less important on Klee?
Covered in Synergies section
Why Mono Pyro? Aren’t big Vaped Charged Attack numbers stronger?
Covered in Mono Pyro/Pure Pyro section
Credits
jamie#9248
discord.gg/klee – Join the community!
yodums#1267 – Regular Klee limit breaking and limit testing
puka#0967 – Early rotation and gameplay testing
alehannita – Transcription update
Resources
Klee Weapons Sheet:
Mono Pyro
https://docs.google.com/spreadsheets/d/1VWV-TXqjW_qRAmgmIpIGZI_cmfLoRVVxt4QBnBfb_F4/edit?usp=sharing
Furina Vaporize
https://docs.google.com/spreadsheets/d/1mSY1kaNY1tDIXesdbuJ_WM9ZDiU1b1Dz0fUFlT6nvjk/edit?usp=sharing
Jamie’s YouTube Klee Guide:
https://youtu.be/NmbyC2VrD5w?si=R_Dbta__OH6gQT5y
Abyss Kleer Library:
https://docs.google.com/document/d/e/2PACX-1vQ9j-WopCiJcThS0YhA5OplI6z-dJk6sqdu6bQsRU1I9BIw64fz6pJ0a3vHLUwsP_P-zcQBvyI_Z9dd/pub
Genshin Optimizer:
https://frzyc.github.io/genshin-optimizer/#/artifact
