Updated for Version 5.0
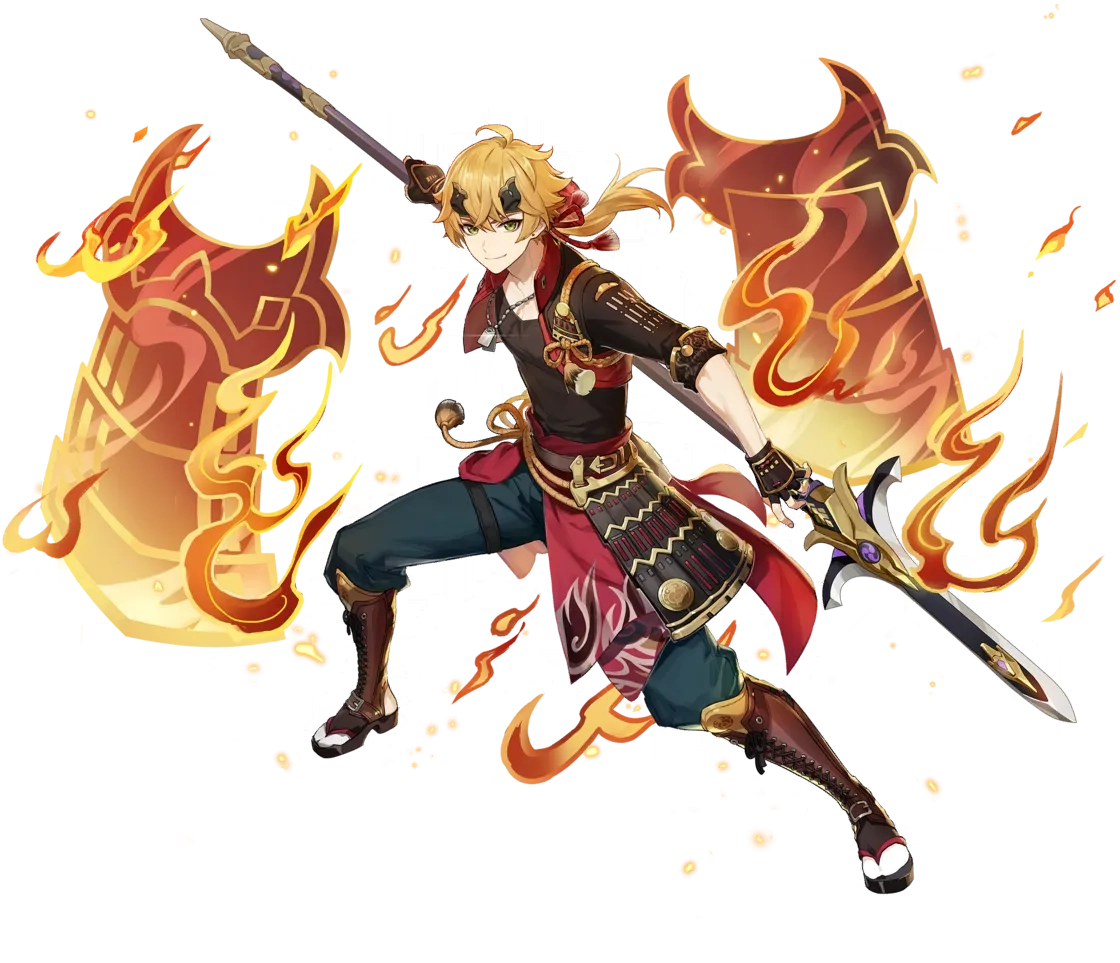
Thoma is a 4-star Pyro Polearm character in Genshin Impact typically used off-field either as a shielder or as a trigger for Burgeon reactions. Learn about Thoma’s best builds, Talent priority, best weapons, best artifacts, and best teams in this quick guide.
More extensive testing is in progress. Note that the information given is subject to change if and when new discoveries are made.
The full-length guide (currently in the process of being updated) is available here. Join our Discord to check on and participate in the theorycrafting process.
Table of Contents
New Content
 Dialogues of the Desert Sages | This Event-exclusive Polearm from Version 4.5 has an HP% secondary stat lower than Black Tassel and its passive ability doesn’t benefit Thoma, so it’s not worth leveling up just for him. |
 Arlecchino | Thoma offers Arlecchino a valuable shield to compensate for her inability to be healed, along with a nice buff to her Normal Attacks at C6. Note that, in Arlecchino’s Vaporize teams, his off-field Pyro application can potentially steal Vapes. |
 Clorinde | Clorinde can use Thoma in her Chevreuse Overloaded teams. She benefits from his defensive utility and off-field Pyro application to refresh Chevreuse’s Electro and Pyro RES Shred. Additionally, Thoma’s NA DMG Bonus at C6 also benefits Clorinde. |
 Sigewinne | Sigewinne can be included as a Hydro applier and healer in teams that require Hydro application, or if additional defensive utility beyond Thoma’s shield is needed. |
 Mualani | With Mualani’s relatively slow Hydro application, Thoma can be a powerful enabler and shielder, as well as a buffer at C6. |
 Kinich | Thoma is a great support unit in Kinich’s burning teams due to his shield’s resistance to Pyro DMG. Additionally, Thoma is often the best choice to hold 4pc Deepwood Memories in these teams to maximize team damage. Kinich is also an option for the Dendro slot in Thoma’s Burgeon teams. |
Infographic
Credits to: euphorysm, cuppacote, nova_licious, and KQM Staff
Credits to: euphorysm, cuppacote, nova_licious, and KQM Staff
Character Overview
Playstyles
Burgeon
This is where Thoma shines as a damage dealer; Burgeon excels at dealing multi-target damage. Thoma’s ER requirements can be high in this playstyle because secondary Pyro units will interfere too often when setting up Burgeon and are, therefore, not recommended on Burgeon Thoma’s teams.
It is important to note that Burgeon is a Transformative Reaction: its damage only scales with Elemental Mastery and Thoma’s level.
Shield Support
Thoma provides a shield for his teammates and may buff them using support-oriented artifacts. His shield is fairly strong but requires an on-field character to use Normal Attacks in order to maintain it. His Burst’s Fiery Collapses may interfere with reactions in some teams.
Talents
 Normal Attack | Swiftshatter Spear
Description
Normal Attack
Performs up to four consecutive spear strikes.
Charged Attack
Consumes a certain amount of Stamina to lunge forward, dealing damage to opponents along the way.
Plunging Attack
Plunges from mid-air to strike the ground below, damaging opponents along the path and dealing AoE DMG upon impact.
Four consecutive Normal attacks with low multipliers. Thoma generally does not utilize these.
 Elemental Skill | Blazing Blessing
Description
Thoma vaults forward with his polearm and delivers a flame-filled flying kick that deals AoE Pyro DMG, while also summoning a defensive Blazing Barrier.
At the moment of casting, Thoma’s Elemental Skill applies Pyro to himself.
The DMG Absorption of the Blazing Barrier scales off Thoma’s Max HP.
The Blazing Barrier has the following traits:
- Absorbs Pyro DMG 250% more effectively.
- When a new Blazing Barrier is obtained, the remaining DMG Absorption of an existing Blazing Barrier will stack and its duration will be refreshed.
The maximum DMG Absoprtion of the Blazing Barrier will not exceed a certain percentage of Thoma’s Max HP.
Thoma’s Skill deals an initial hit of AoE Pyro damage that creates a Blazing Barrier, a shield that lasts for 8 seconds. This Skill also applies Pyro to Thoma, cleansing any debuffs from other Elements that are present on him.
 Elemental Burst | Crimson Ooyoroi
Description
Thoma spins his polearm, slicing at his foes with roaring flames that deal AoE Pyro DMG and weave themselves into a Scorching Ooyoroi.
Scorching Ooyoroi
While Scorching Ooyoroi is in effect, the active character’s Normal Attacks will trigger Fiery Collapse, dealing AoE Pyro DMG and summoning a Blazing Barrier.
Fiery Collapse can be triggered once every 1s.
Except for the amount of DMG they can absorb, the Blazing Barriers created in this way are identical to those created by Thoma’s Elemental Skill, Blazing Blessing:
- Absorbs Pyro DMG 250% more effectively.
- When a new Blazing Barrier is obtained, the remaining DMG Absorption of an existing Blazing Barrier will stack and its duration will be refreshed.
The maximum DMG Absorption of the Blazing Barrier will not exceed a certain percentage of Thoma’s Max HP.
If Thoma falls, the effects of Scorching Ooyoroi will be cleared.
An integral part of both Burgeon and Shield Support Thoma’s playstyles.
An initial hit of AoE Pyro damage which enacts the Scorching Ooyoroi effect, a pair of flaming armor plates that spin around the active character for the duration of Thoma’s Burst. While this effect is active, Normal Attacks by the on-field character will create a Fiery Collapse up to once per second.
Fiery Collapses deal AoE Pyro damage in front of the active character and create a Blazing Barrier whose durability is added on top of any existing Barrier. When the Blazing Barrier stacks, it will also refresh the duration of the previously existing one.
Note that the Scorching Ooyoroi is not a shield. Thoma’s Burst only creates shields through Fiery Collapses.
 Ascension 1 Passive | Imbricated Armor
Description
When your current active character obtains or refreshes a Blazing Barrier, this character’s Shield Strength will increase by 5% for 6s.
This effect can be triggered once every 0.3 seconds. Max 5 stacks.
Increases the Shield Strength of the active character. This increase in Shield Strength helps to decrease the amount of damage Thoma’s shield takes, extending its duration.
Note that this effect does not persist after swapping characters.
 Ascension 4 Passive | Flaming Assault
Description
DMG dealt by Crimson Ooyoroi’s Fiery Collapse is increased by 2.2% of Thoma’s Max HP.
Slightly increases the damage dealt by Thoma’s Burst based on his HP. This does not hold value for Burgeon and Shield Support playstyles, as Burst damage is not their focus.
Constellations
 Constellation 1 | A Comrade’s Duty
When a character protected by Thoma’s own Blazing Barrier (Thoma excluded) is attacked, Thoma’s own Blazing Blessing CD is decreased by 3s, while his own Crimson Ooyoroi‘s CD is decreased by 3s. This effect can be triggered once every 20s.
A good quality-of-life Constellation that reduces Thoma’s Skill and Burst cooldowns. Some characters’ Skills and Bursts can trigger Thoma’s C1 without taking damage: see the Constellations section of the Extended Guide for more details.
 Constellation 2 | A Subordinate’s Skills
Crimson Ooyoroi’s duration is increased by 3s.
Increases Thoma’s Burst duration, offering 100% shield uptime and extending the time in which Thoma is able to trigger Burgeon.
 Constellation 3 | Fortified Resolve
Increases the Level of Blazing Blessing by 3. Maximum upgrade level is 15.
Skill Talent upgrade. This is particularly noteworthy for Shield Support Thoma as it increases his shield’s HP.
 Constellation 4 | Long-Term Planning
After using Crimson Ooyoroi, 15 Energy will be restored to Thoma.
This is Thoma’s best Constellation, as it reduces his ER requirements significantly.
 Constellation 5 | Raging Wildfire
Increases the Level of Crimson Ooyoroi by 3. Maximum upgrade level is 15.
Burst Talent upgrade. Not particularly useful for Shield Support or Burgeon Thoma; the increase in his shield HP is inconsequential.
 Constellation 6 | Burning Heart
When a Blazing Barrier is obtained or refreshed, the DMG dealt by all party members’ Normal, Charged, and Plunging Attacks is increased by 15% for 6s.
Buffs the on-field character; useful for both Shield Support and Burgeon builds.
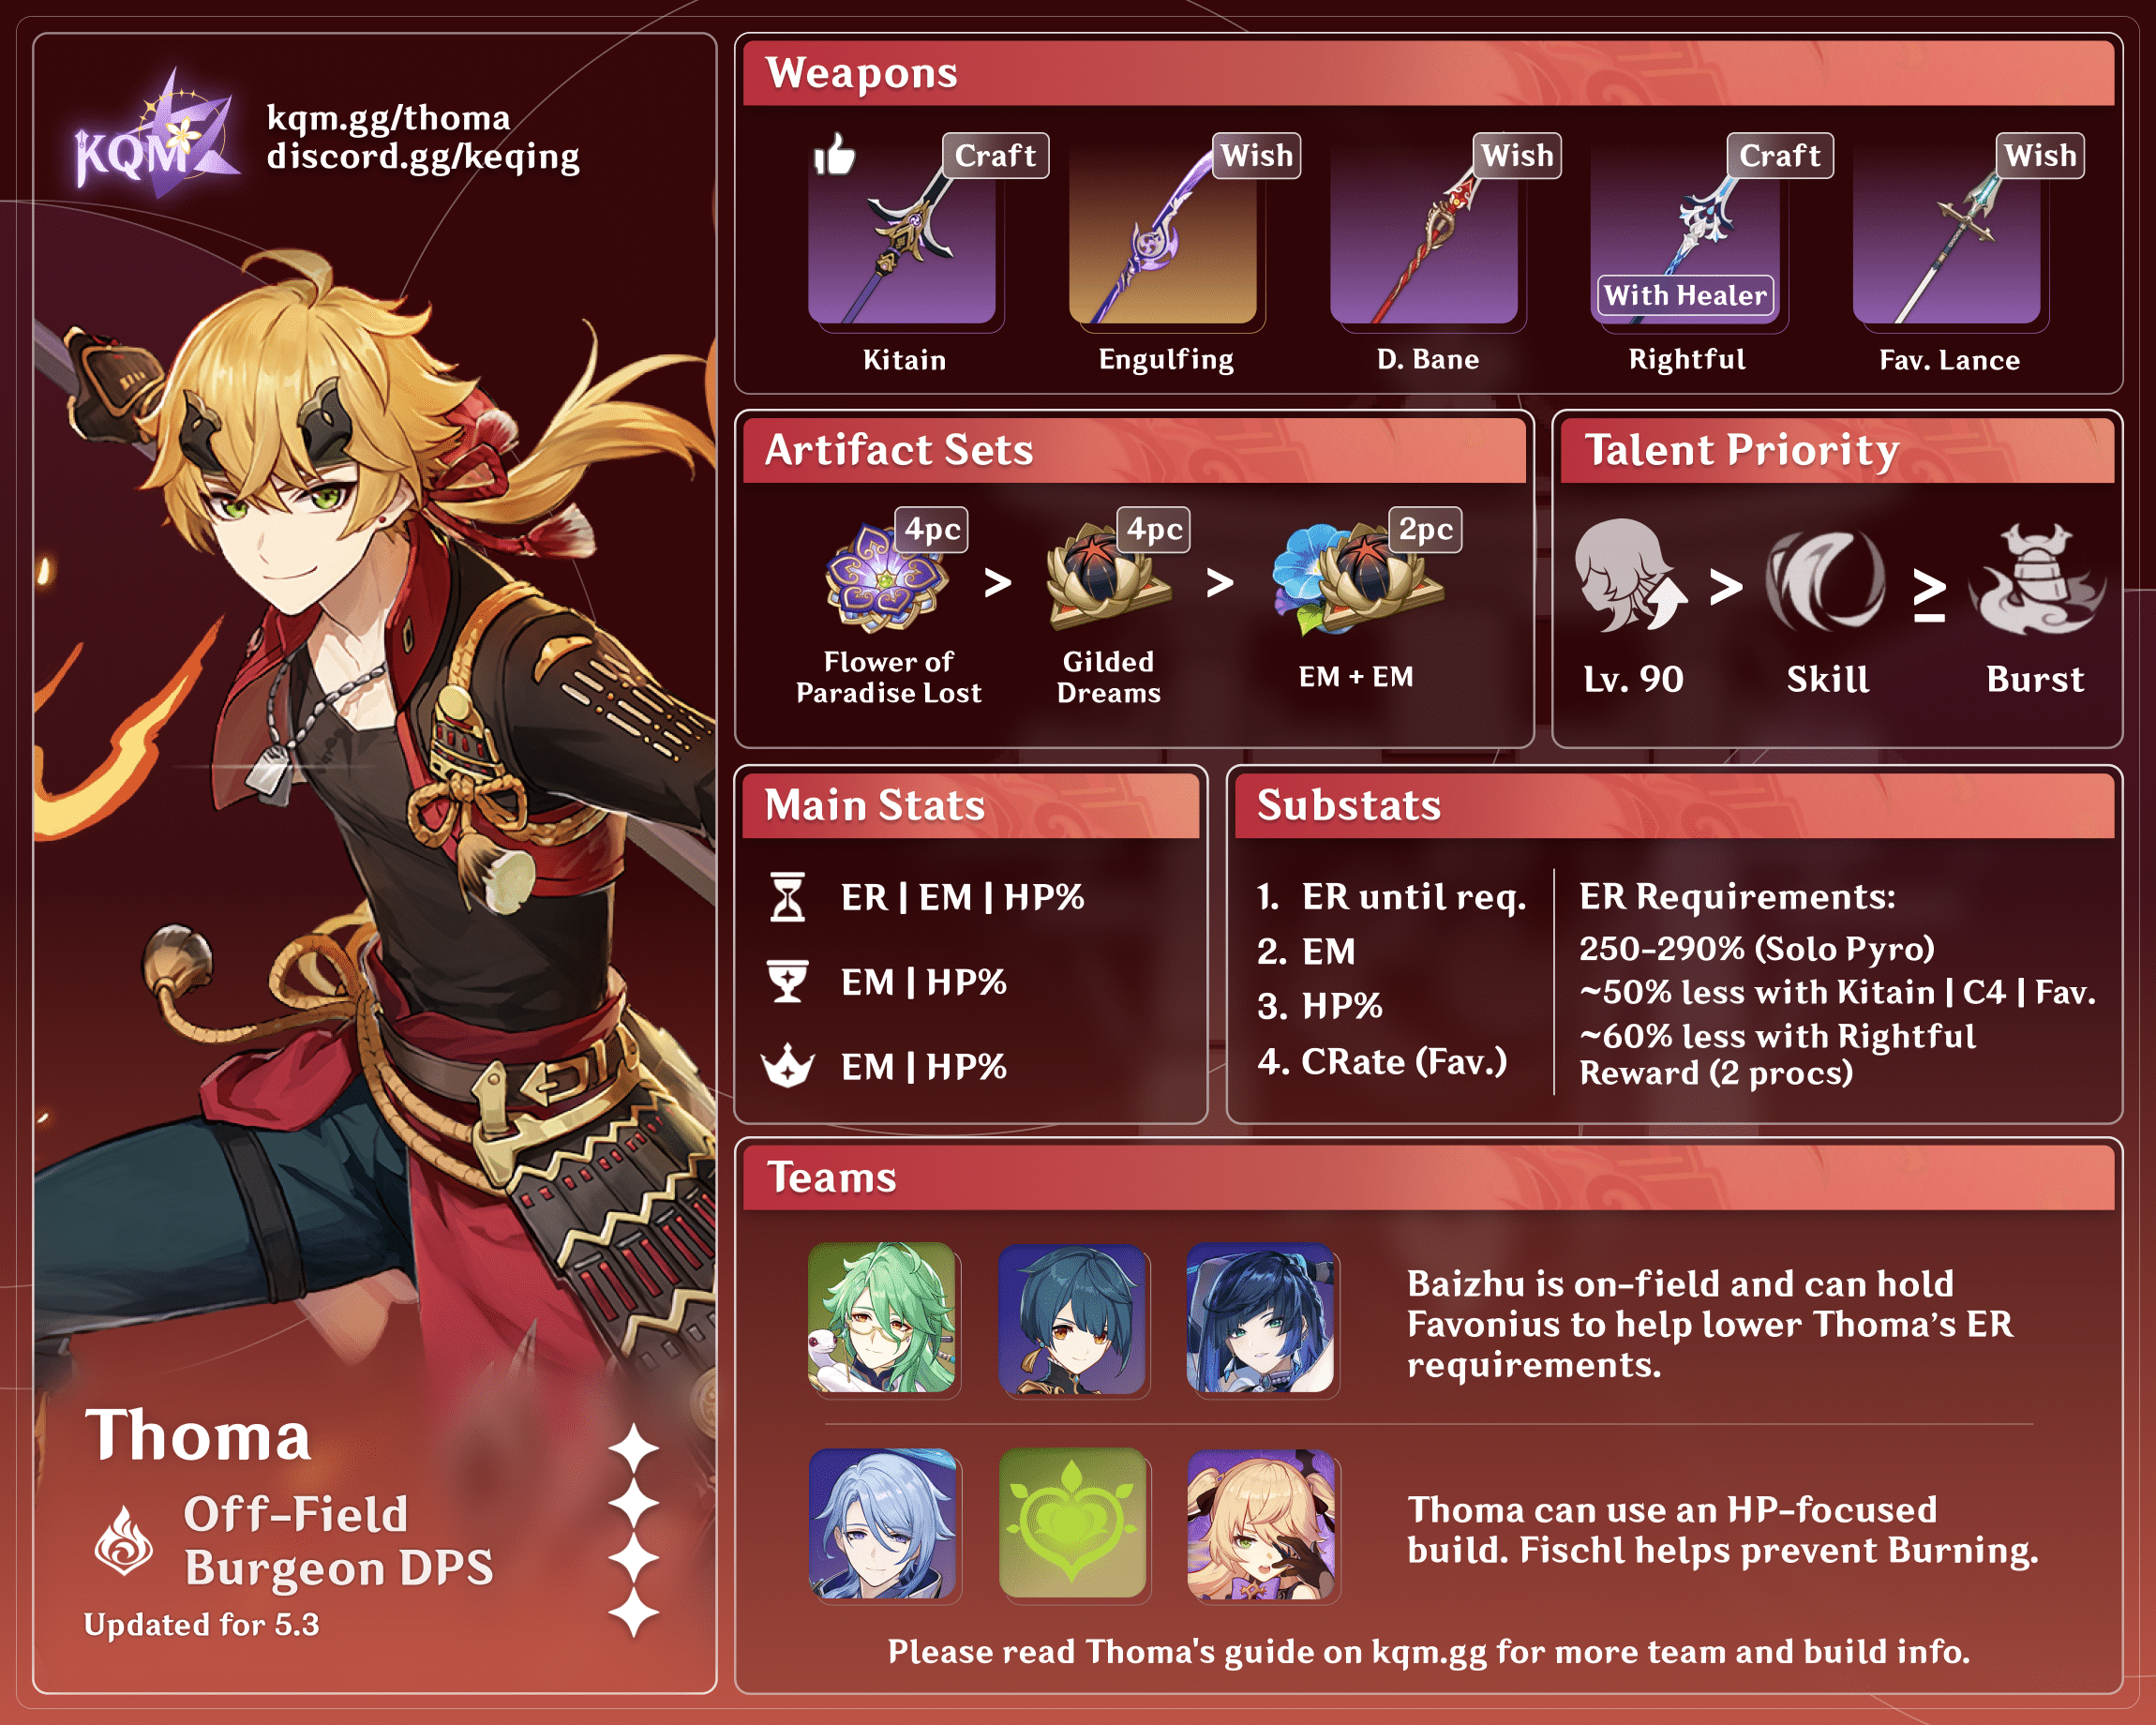
Burgeon Thoma
Level and Talent Priority
Level 90 > Skill = Burst
It is extremely important to level Thoma to 90 in this playstyle, as that increases Burgeon damage by ~30% when compared to Level 80.
Burgeon Thoma’s Talent levels do not considerably increase his damage and can remain unleveled. However, leveling his Burst and Skill may increase survivability and resistance to interruption in the form of a stronger shield.His Normal Attacks can remain unleveled as playing Thoma on-field is not recommended.
Artifacts
ER Requirements
| Solo Pyro, 2 Favonius teammates | One Skill | Two Skills |
| C0–C3, R3 Kitain | ~240% | ~210% |
| C4+, R3 Kitain | ~190% | ~165% |
- Funneling a teammates’ Favonius proc to Thoma lowers ER requirements by 15–25%.
- Use the Energy Recharge Calculator to determine the exact requirements for your team and rotation.
- Thoma’s Burst is an integral part of dealing Burgeon damage as it is his main source of Pyro application— you should have enough ER to cast his Burst every rotation consistently. With Thoma’s high ER requirements, Kitain Cross Spear is an excellent option as it simultaneously lowers ER requirements with its passive and increases Burgeon damage with its EM secondary stat. Each refinement increases the amount of Energy given by Kitain’s passive so refinements are highly recommended.
Artifact Main Stats
 Sands |  Goblet |  Circlet |
| EM / ER% | EM | EM |
| HP% / ER% | HP% | HP% |
Substats: ER until requirement > EM
HP% main stats can be used as necessary to allow Thoma to function as the sole defensive unit in the team, thus opening a slot for a more offensive teammate such as Childe or Fischl; Thoma still does decent Burgeon damage, and the team as a whole suffers a minimal DPS loss. Artifact set and weapon recommendations remain the same as those for a triple EM build.
Artifact Sets
 4pc Flower of the Paradise Lost | Best-in-slot by a slight margin compared to 4pc Gilded. However, Gilded Dreams has a more Resin-efficient Domain. |
 4pc Gilded Dreams | One of Thoma’s best sets in a Burgeon playstyle. The set typically provides 230 EM with its 2pc and 4pc effect combined, as it is not recommended to have Pyro teammates in Burgeon teams. |
 2pc EM + 2pc EM | A useful placeholder until a 4pc set is obtained, as it provides 160 EM. It is also accessible, as 2pc Wanderer’s Troupe can be farmed passively. |
 2pc EM + 2pc ER% | 2pc Emblem’s ER% helps fulfill Thoma’s ER requirements, while the other set still provides EM. |
 4pc Crimson Witch | 4pc Crimson technically benefits Burgeon damage, but it is inferior to 4pc Gilded. Only use it if you already have a set on hand and don’t want to farm a new one. |
It is recommended that a team member (typically the Dendro unit) equips 4pc Deepwood Memories as Burgeon damage benefits heavily from Dendro RES Shred.
Weapons
 Kitain Cross Spear | Kitain reduces Thoma’s ER needs and provides him with EM. Refinements are recommended. When using Kitain, use Thoma’s Burst before his Skill. |
 Dragon’s Bane | Dragon’s Bane provides EM and slightly increases Talent damage; however, it does not assist with ER requirements. |
 Rightful Reward | Rightful Reward strengthens Burgeon Thoma’s shield through its HP secondary stat and can lower ER requirements through its passive’s Flat Energy. However, its passive is only useful if the team has healing. Calculations are still being done on this weapon so this weapon may be better or worse than the other options within this list. Even then, its ranking will depend on what healer (if any) you have on a team. |
 Favonius Lance | Favonius helps fulfill Thoma’s ER needs and reduces teamwide ER needs. However, it does not provide any EM. |
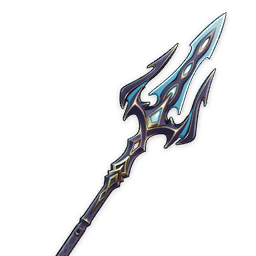 Ballad of the Fjords | Fjords provides EM only with its passive. At refinement 5, it provides more EM than Dragon’s Bane, but at lower refinements, it gives less. It also doesn’t provide any ER%. |
Teams
Burgeon

Thoma — Dendro — Hydro — Flex
Thoma is paired with a Dendro character and a Hydro character, in order for Bloom to occur. Burgeon is then triggered on the Dendro Cores generated by Bloom with Thoma. A defensive unit must be included if Thoma does not have sufficient HP, as Burgeon damages on-field units. It is generally only recommended to run HP% main stats if the on-field unit also makes a significant contribution to team damage (e.g., Ayato and Childe).
Dendro Slot
 Nahida | The best Burgeon support. Nahida applies a considerable amount of Dendro both as a driver and from off-field. Her Burst can usually be ignored, as its EM buff does not typically hold value to the on-field unit. |
 Baizhu | As a Burgeon support, Baizhu brings important aspects for survivability: shields and healing. As the sole Dendro unit in the team, Baizhu’s Dendro application can fall behind; however, using his Normal Attacks on-field can provide considerable single-target application. |
 Dendro Traveler | A viable option. It is extremely important to transmute Dendro Traveler’s Burst with either Hydro or Electro, as the Pyro transmutation will stop Dendro application, and thus all Burgeon damage, prematurely. |
 Yaoyao | Yaoyao excels particularly with teams that lack a healer otherwise (for example, those with Childe or Ayato). However, her Dendro application from off-field is lackluster and she should be a secondary Dendro unit in most teams. |
 Kirara | Kirara is a good shielder for Burgeon teams; however, she should not be relied on as the sole Dendro applier from off-field. Additionally, using her on-field is inadvisable as she cannot use Normal Attacks to proc Hydro application or Thoma’s Burst. |
 Collei | Collei has relatively short cooldowns, but also a short duration on her Burst which forces shorter team rotations. This is particularly conflicting with Thoma as he has longer cooldowns and a long-lasting Burst. Because of this, Collei is only recommended as a second Dendro unit. |
 Kaveh | An interesting choice for Burgeon teams; Kaveh is able to mitigate Burgeon self-damage with his A1, but his Dendro Core detonation can sometimes steal Dendro Cores from Thoma — though this can be partially mitigated with timing. Additionally, Kaveh himself has extensive ER issues, making energy management in a Kaveh-Thoma Burgeon team much more of a problem. Kaveh is explicitly not recommended if you have him at C6 as even his Normal Attacks will detonate cores prematurely. |
 Alhaitham | Deals lower damage outside of his Spread teams. Alhaitham should not be run with a second Dendro unit to avoid triggering Burning. Fischl should be used as a Flex unit to add to Alhaitham’s personal damage without taking much from Thoma’s Burgeon. 4pc Deepwood can be equipped by a non-Dendro unit if running other sets increases Alhaitham’s damage. |
Kinich | Although generally not recommended, Kinich is still a viable option in pure Burgeon teams. Compared to other compositions (such as those discussed later on in the shield support section), Kinich’s personal damage is reduced. A second Dendro unit, such as Nahida, should be used alongside Kinich to ensure good Dendro application and allow Kinich to run Obsidian Codex to improve his personal damage. |
Hydro Slot
 Ayato | Ayato applies Hydro from both on- and off-field while also contributing to team damage. A top contender for allowing Thoma to use two Skills per rotation due to Ayato’s more flexible rotations. |
 Kokomi | Kokomi provides on-field and off-field Hydro application with immense healing, something often lacking in Burgeon Teams. However, Kokomi will want to Burst every rotation for Skill uptime as well as increasing her on-field damage, so her ER requirements in these teams may be higher. |
 Childe | Childe has excellent AoE Hydro application and damage while on-field in melee stance, but this application drops off outside of that stance. Best used with C2+ Thoma so he can Vaporize his Burst. |
 Furina | Furina provides off-field Hydro application and decent personal damage. She is best used alongside a second Hydro unit and a teamwide healer. Note that her Burst’s DMG% buff does not affect Burgeon damage. |
Sigewinne | Sigewinne provides Burgeon teams with healing, much like Kokomi; however, she has significantly worse Hydro application. She is best used alongside another Hydro unit and can work as a healer for Furina |
 Xingqiu | Xingqiu provides excellent off-field Hydro application and gives damage reduction. However, Xingqiu’s application is single-target, which can conflict with Burgeon wanting to be used in AoE circumstances. |
 Yelan | Yelan is similar to Xingqiu, but can buff the on-field character’s damage and generally deals more personal damage, albeit with slightly less Hydro application. |
Flex Slot
 2nd Dendro | A second Dendro unit activates Dendro Resonance, buffing EM, and can increase Dendro Core production. Additionally, the unit can run 4pc Instructor to further increase the team’s EM. See Dendro teammates for more details. |
 Fischl | Provides excellent off-field single-target damage while creating Quicken and Electro-Charged auras that extend Dendro application. Oz targets Dendro Cores last, so she will not steal many Dendro Cores. |
 Albedo / Chiori | Steady off-field damage dealers. Although Albedo’s Burst buffs the team’s EM, it is often inconsequential. |
 Cryo Units | Allow for compositions that extend Dendro application by applying Cryo (Freeze Bloom also called Fridge) while also removing the Pyro aura to prevent Burning. Additionally, the Frozen reaction results in crowd control. |
 Kazuha | An excellent grouping option for enemies and Dendro Cores alike. Can additionally buff an on-field Hydro character by Swirling Hydro. |
 Sucrose | Provides some grouping and an EM buff; however, Sucrose is usually used as an on-field unit which decreases overall Dendro Core production compared to an on-field Hydro unit such as Kokomi or Ayato. |
 2nd Hydro | This unit can be a healer if the team uses an on-field Hydro, or either Yelan or Xingqiu to reduce the Hydro unit’s ER requirements. The additional Hydro application is useful in capitalizing on high Dendro application (for example, in the case of an on-field Nahida). See Hydro characters for more details. |
It is not recommended to have a Pyro unit in the flex slot.
Example Teams
This is not a comprehensive list of teams, and the inclusion of a certain team or lack thereof does not necessarily indicate the power level of the team in question.

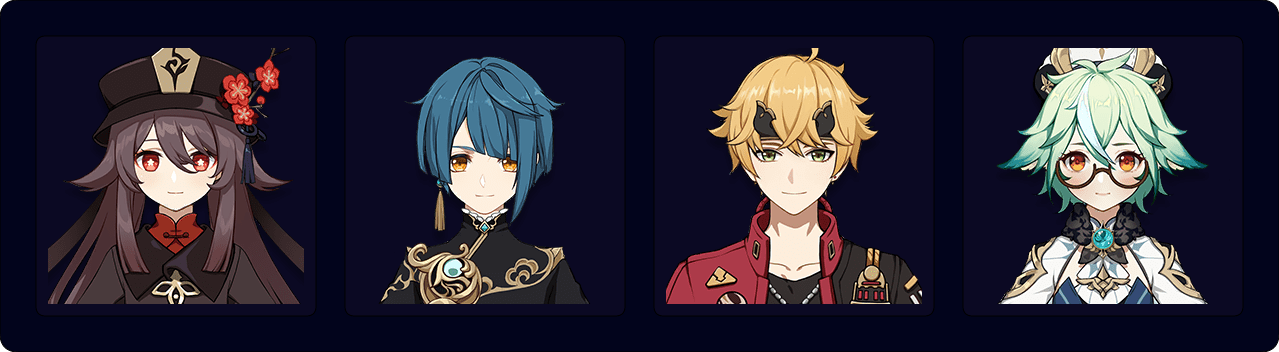
Baizhu — Thoma — Xingqiu — Yelan
Kokomi — Nahida — Dendro Traveler — Thoma
Ayato — Nahida — Fischl — Thoma
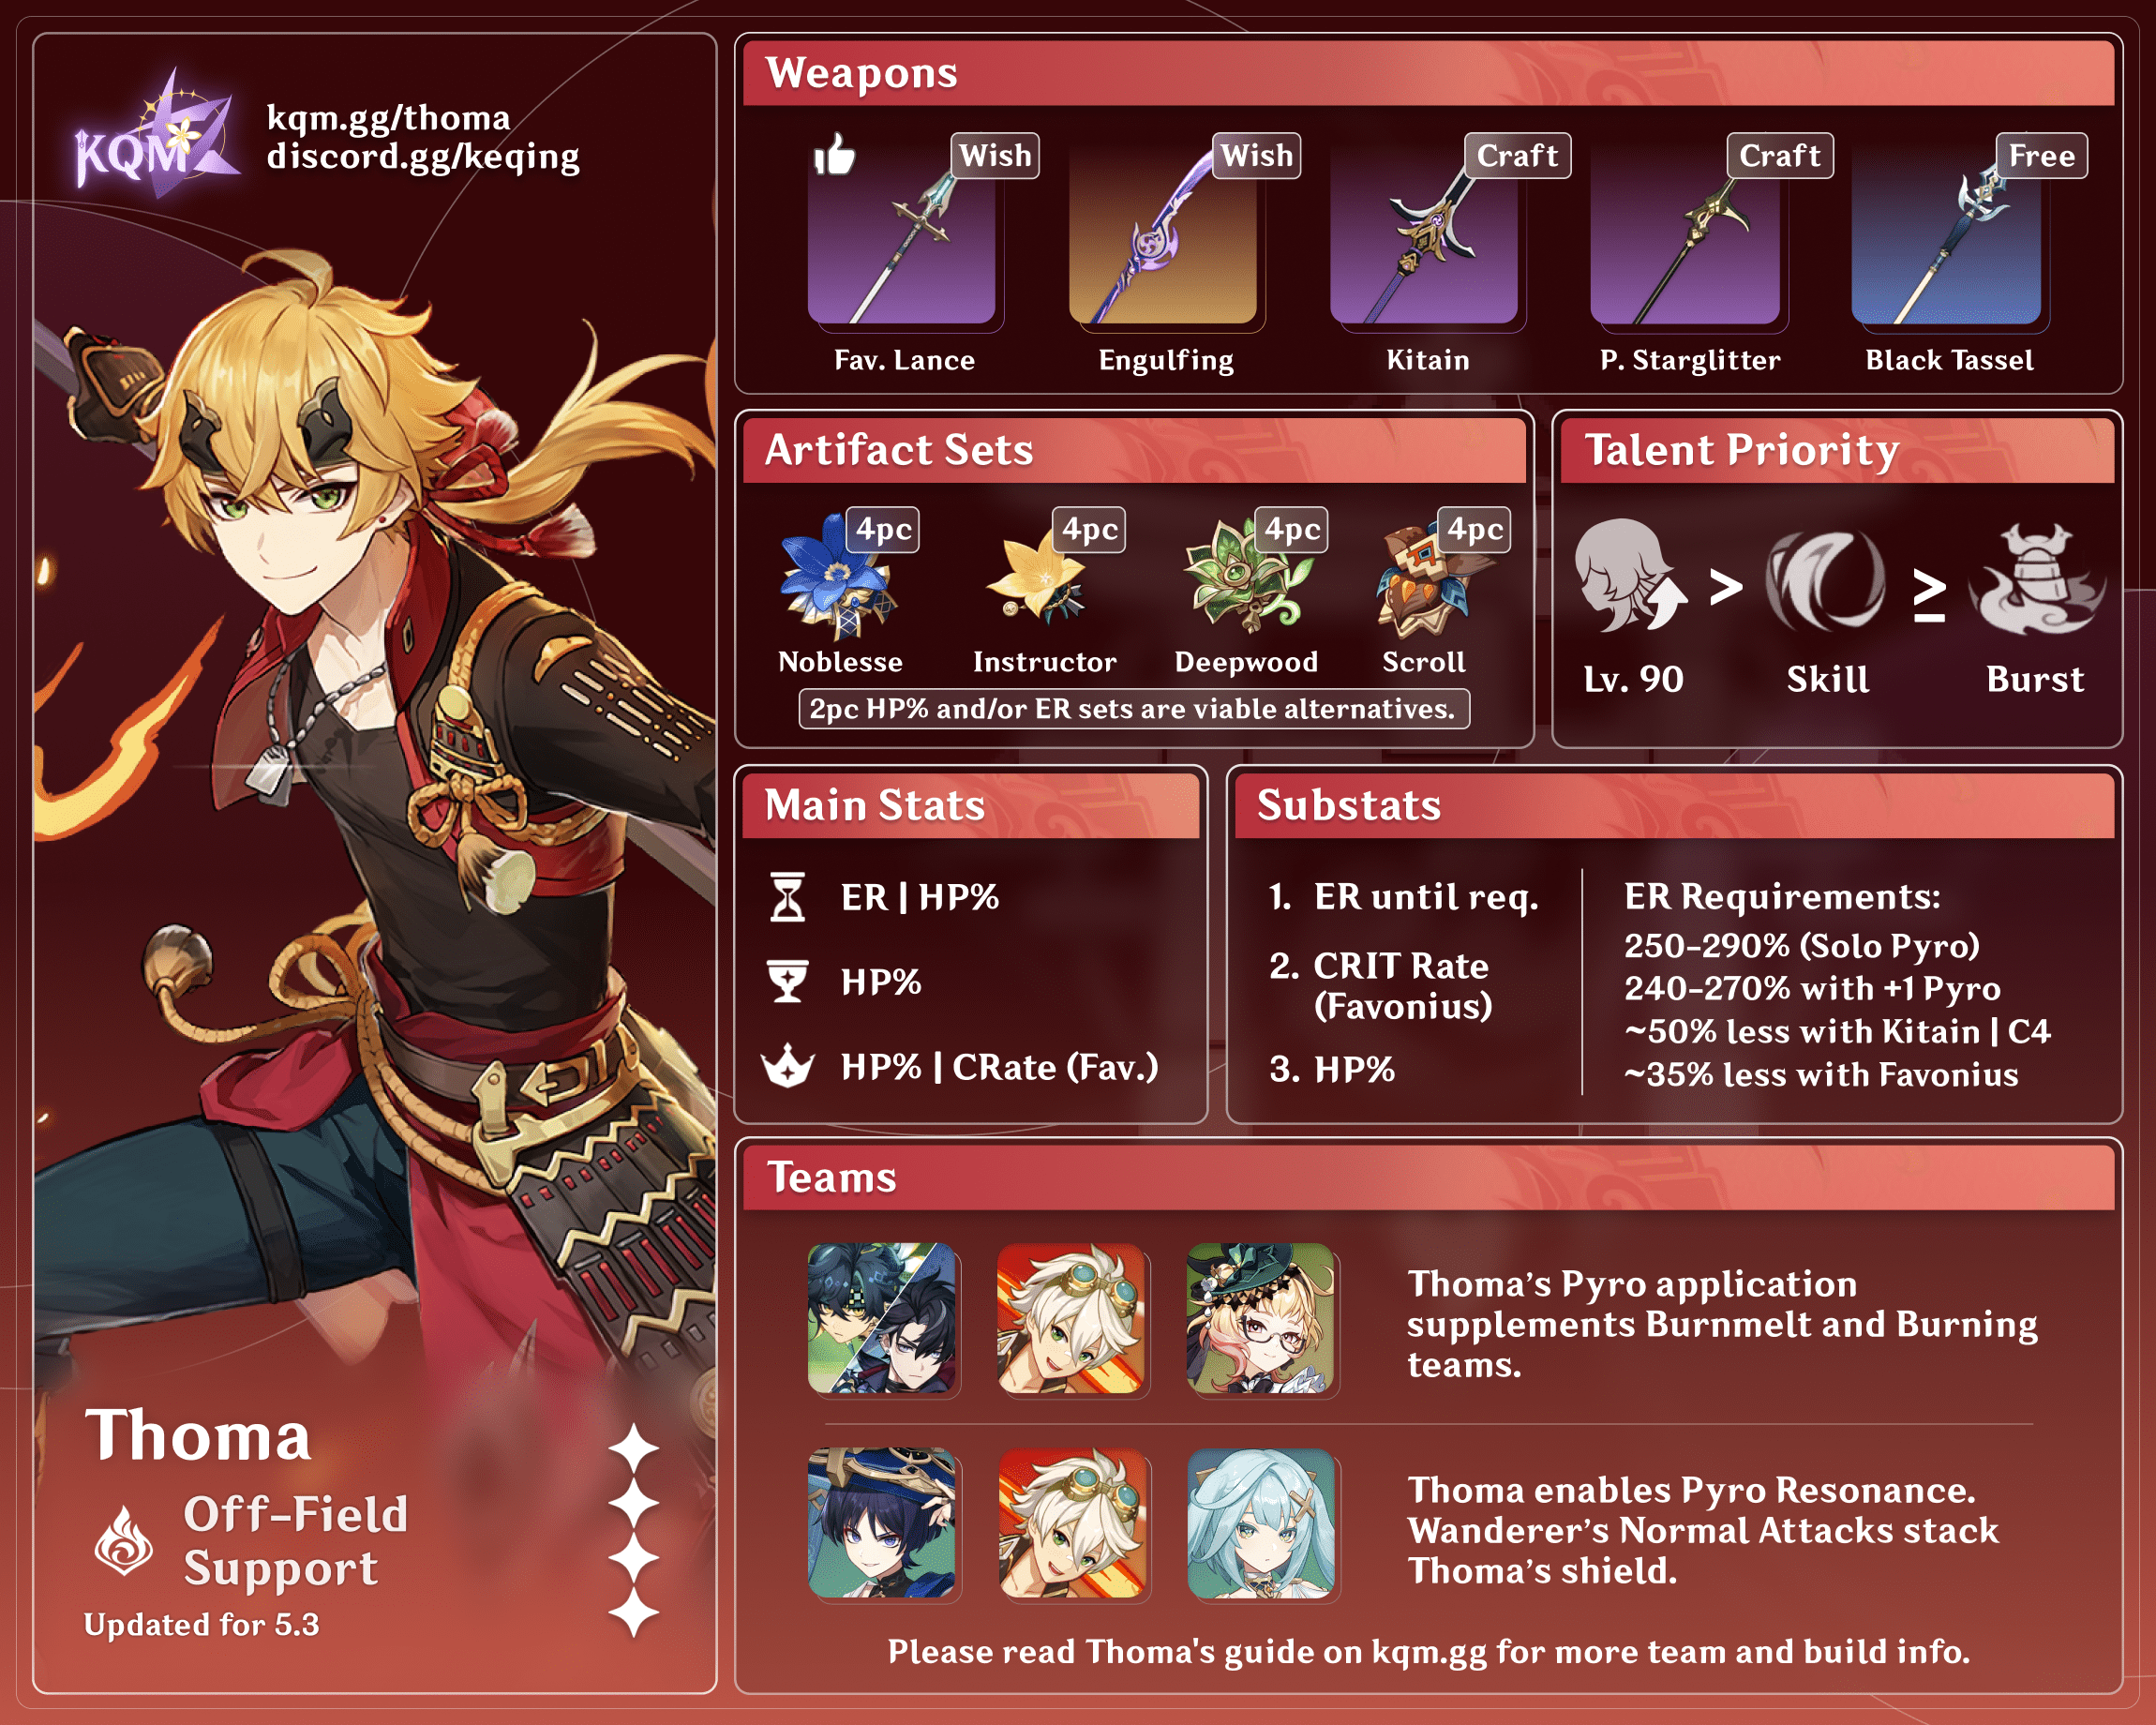
Shield Support Thoma
Talent Priority
Skill = Burst
Leveling Thoma’s Skill and Burst increases the strength of his shield. Thoma’s Normal Attacks can remain unleveled as playing him on-field is not recommended.
Artifacts
ER Requirements
| Double Pyro | R3 Favonius Lance | R3 Kitain |
| C0–C3 | ~210% | ~220% |
| C4+ | ~170% | ~175% |
Thoma being the single Pyro unit in a team will increase his ER requirements by 25%+.
Thoma’s Burst is an essential part of his role as a shielder in any team composition to keep his shield strong. It is imperative that you build enough ER to cast his Burst on every rotation.
Artifact Stats
Sands | Goblet | Circlet |
| ER / HP% | HP% | HP% or CRIT Rate (if using Favonius) |
Substats: ER (until requirements are met) > HP% > CRIT Rate (if using Favonius) > Flat HP
Artifact Sets
 4pc Noblesse Oblige | 4pc Noblesse Oblige gives Thoma’s team a useful ATK% buff after using his Burst. |
 2pc HP% + 2pc Emblem of Severed Fate | 2pc Emblem makes it easier to fulfill ER needs, while 2pc HP% strengthens Thoma’s shield. |
Additionally, any combination of HP%, Emblem, and rainbow (pieces that don’t make a set bonus) artifacts may be used depending on ER requirements, as better substats may be more useful than set bonuses.
Weapons
Favonius Lance | Favonius as a useful ER% main stat. Its passive also reduces ER requirements teamwide. For consistent Favonius Lance passive procs, it’s recommended to build ~40% CRate at R3 and ~30% at R5. This number assumes 2–3 NAs are weaved in. |
Kitain Cross Spear | Kitain has a wasted EM main stat but reduces Thoma’s ER requirements through its passive. Refinements are recommended. If using Kitain, cast Thoma’s Burst before his Skill. |
 Black Tassel | Black Tassel’s HP% main stat makes for a stronger shield, but it doesn’t help with ER requirements. |
Rightful Reward | This Polearm also has an HP% main stat, alongside a passive that can possibly be useful by providing Energy. Due to many of Shield Support Thoma’s teams not having healers, the passive on this weapon is often wasted. |
 Dialogues of the Desert Sages | Dialogues of the Desert Sages offers a lower HP% secondary stat than Black Tassel. Additionally, its passive doesn’t provide any benefit for Thoma. Just use Black Tassel instead. |
Teams
Team-Building
- It is recommended to use Thoma on a team with a character that uses on-field Normal Attacks to stack his shield.
- On some teams, Thoma’s Fiery Collapses may interfere with reactions.
Pyro DPS Support

Shield Support Thoma’s most popular use. He acts as a support for a Pyro on-field DPS (e.g., Yoimiya or Hu Tao) by providing a shield, Pyro Resonance, and often helping set up VV.
Notable Teammates
Below are the Pyro on-field DPS characters with whom Thoma has notable synergy. For an understanding of the supports used alongside these units, please refer to their respective guides.
 Yoimiya | Thoma has great synergy with Yoimiya as he provides survivability and resistance to interruption (things Yoimiya needs) while she maintains his shield through her Normal Attacks. Thoma’s Pressurized Collapses rarely interfere with reactions, due to Yoimiya’s range. |
 Hu Tao | Thoma provides a strong shield and resistance to interruption to Hu Tao. This is particularly useful, as she does not want healers in her teams. Thoma is also useful for setting up Viridescent Venerer RES Shred. Thoma may steal Vaporizes from Hu Tao if using a pre-C6 Xingqiu, but this is not an issue in Double Hydro compositions. |
Arlecchino | Thoma’s shield is particularly valuable for Arlecchino since she cannot be healed. Additionally, at C6, he provides a nice buff to her Normal Attacks. As with Hu Tao, Thoma’s off-field Pyro application may steal Vaporizes from Arlecchino. |
Example Teams
This is not a comprehensive list of teams, and the inclusion of a certain team or lack thereof does not necessarily indicate the power level of the team in question.

Yoimiya — Xingqiu — Thoma — Sucrose
Hu Tao — Xingqiu — Thoma — Sucrose
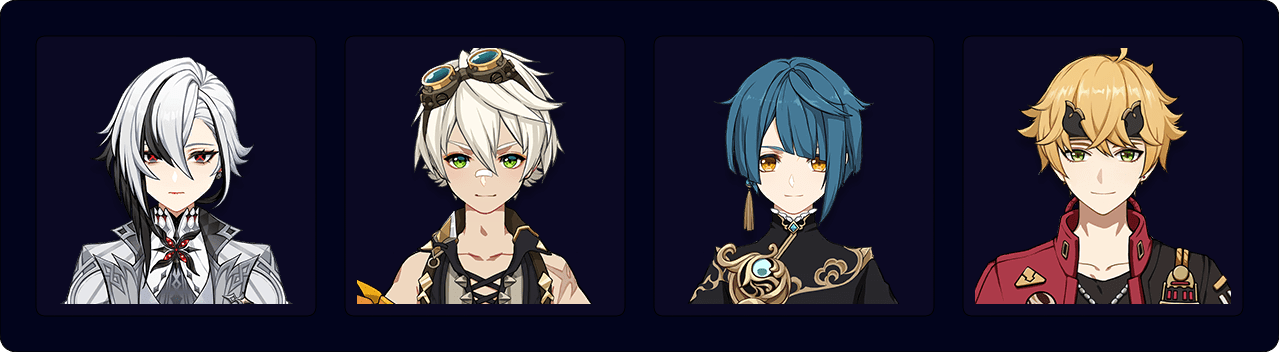
Arlecchino — Bennett — Xingqui — Thoma
General Shielder

Thoma can be generally useful as a shielder, as long as the on-field unit uses Normal Attacks.
Notable Teammates
Below are damage dealers who can use Thoma as a shielder. See their respective guides for detailed information on their teams.
 Wriothesley | In Wriothesley’s Burnmelt teams, Thoma is an excellent shielder option. Thoma can also maintain Burning with his Fiery Collapses and, at C6, give a Normal and Charged Attack DMG Bonus. Wriothesley requires stronger sustain from teammates due to his HP drain. Alongside Bennett, Thoma provides strong survivability — something particularly important for a C0 Wriothesley. |
 Wanderer | Thoma is one of Wanderer’s options for a shielder, which Wanderer values heavily. When paired with Bennett, Thoma allows Wanderer to take advantage of Pyro Resonance, while also giving his Normal and Charged Attacks a DMG Bonus with C6. |
 Xiao | Xiao benefits from Thoma for similar reasons as Wanderer; however, it is essential to use NA cancels while plunging with Xiao in order to maintain Thoma’s shield. |
 Cyno | Thoma acts as a shielder in Cyno’s Quickburn and Chaos teams. Thoma’s shield is able to last through the entirety of Cyno’s Burst, which allows Cyno to take full advantage of Thoma’s interruption resistance and NA DMG Bonus at C6. |
 Itto | Another on-fielder that uses Normal Attacks and benefits from the interruption resistance provided by Thoma’s Shield. |
Clorinde | Clorinde can use Thoma in her Chevreuse Overloaded teams, as she benefits from his defensive utility and off-field Pyro application to refresh Chevreuse’s Electro and Pyro RES Shred. Additionally, Clorinde does also appreciate Thoma’s NA DMG Bonus from his C6. |
Mualani | Thoma acts as a sustain unit and also as an enabler, allowing Mualani to vaporize her Sharky’s Surging Bite. The survivability from Thoma’s shield, as well as his NA DMG Bonus at C6, also benefit Mualani while she’s on her Sharky Surfboard. |
Kinich | Similar to Wriothesley, Thoma is an excellent option as a sustain unit for Kinich’s Burning teams. His shield has increased resistance against Pyro DMG and Thoma’s C1/C4 enable slightly shorter rotations which Kinich prefers. |
Example Teams
This is not a comprehensive list of teams, and the inclusion of a certain team or lack thereof does not necessarily indicate the power level of the team in question.
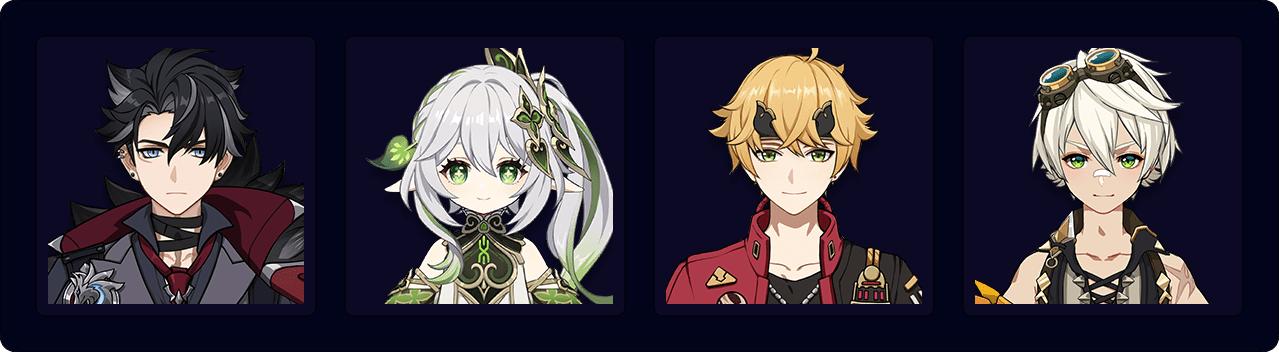
Wriothesley — Nahida — Thoma — Bennett

Wanderer — Faruzan — Thoma — Bennett

Itto — Gorou — Albedo — Thoma

Clorinde — Chevreuse — Thoma— Fischl
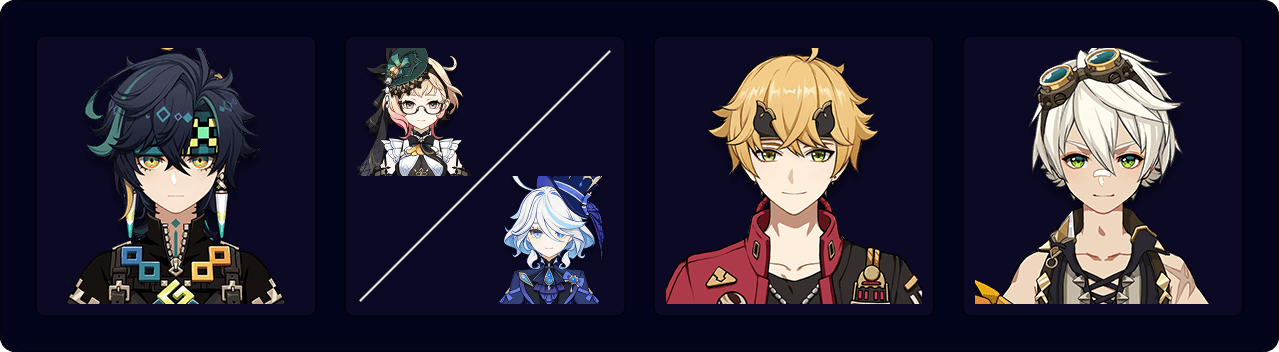
Kinich— Emilie/Furina — Thoma— Bennett
Credits
vazellea, jukoist, miannes, dorketh, raven9205, mystathi, cuzimori, grankrathalos, polomo, clevernt, haafr, madeofseaglass, jamccleskey
Team images courtesy of the KQM portrait generator.