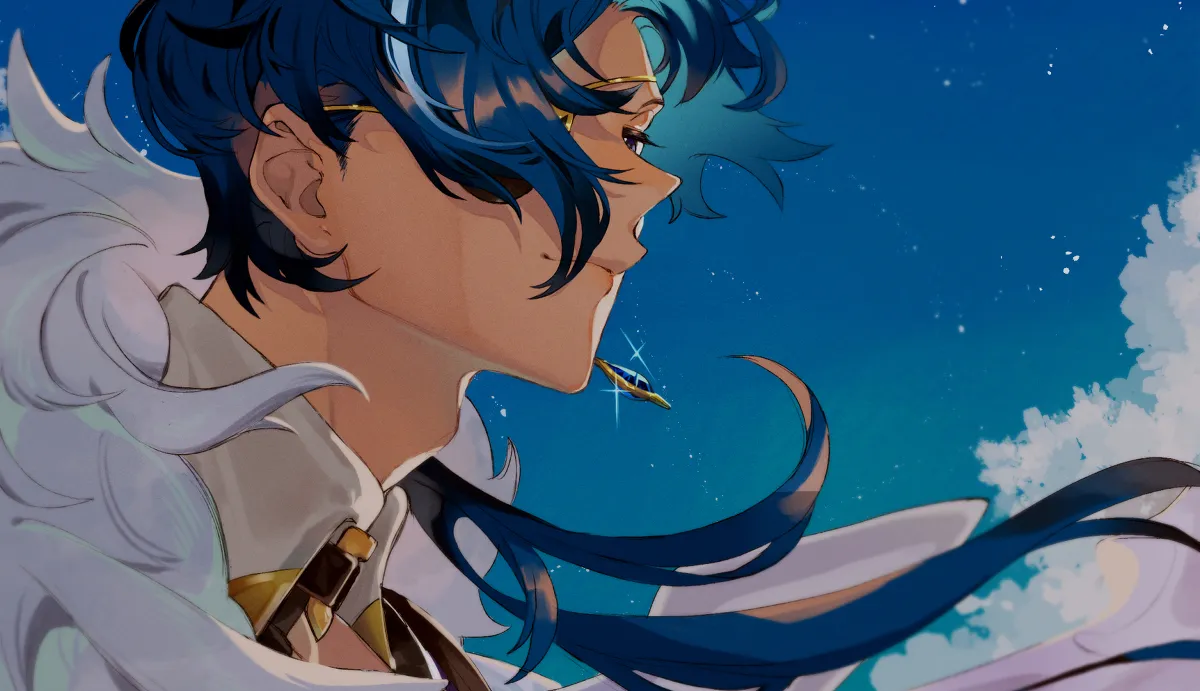
A Kaeya Guide
Written by Jdha#2508, Cuzimori#1535, and Alpha Flyte#2031
Updated for Version 3.8
“Kaeya. Knight of Favonius. Please, allow me to join you on your journey. Guarding you on your journey sounds far more entertaining than any of the usual Favonius stuff.”
Table of Contents
Introduction
Kaeya is a free 4-star Cryo Sword unit in Genshin Impact who is given to players shortly after the start of the game. His simple yet powerful kit excels in various teams like Freeze and Reverse Melt. This guide will review Kaeya’s best builds, best weapons, best artifacts, best teams, Talent priority, combos, and much more.
Why Play Kaeya?
"Kaeya is an excellent knight overall - this is a fact no one can deny." - Jean
Pros
- The best Cryo battery for Freeze teams because of his Ascension 4 Passive
- Straightforward kit
- Fast, off-field Cryo application and low field time
- Very low ER requirement in Freeze teams that is almost met with his Ascension Stat alone
- High Talent multipliers enable Kaeya to do good damage without Amplifying Reactions
- Decent exploration utility from his model’s height and his Stamina Passive, which is useful in both the Overworld and the Spiral Abyss
Cons
- Elemental Burst has a rather small radius, leading to weak synergy with ranged units like Ganyu, vertically mobile units like Xiao and Wanderer, and certain crowd control units like Venti
- Freeze teams have many Battery options that bring better utility
- Short base uptime of Cryo application through Burst limits potential as an enabler
- Constellations are significant boosts to Kaeya’s personal damage but are only obtainable via the Standard Banner and Starglitter Exchange
TL;DR
Credits: cuppacote, haafr, cuppacote, & baloopy
Credits: cuppacote, haafr, cuppacote, & baloopy
FAQ
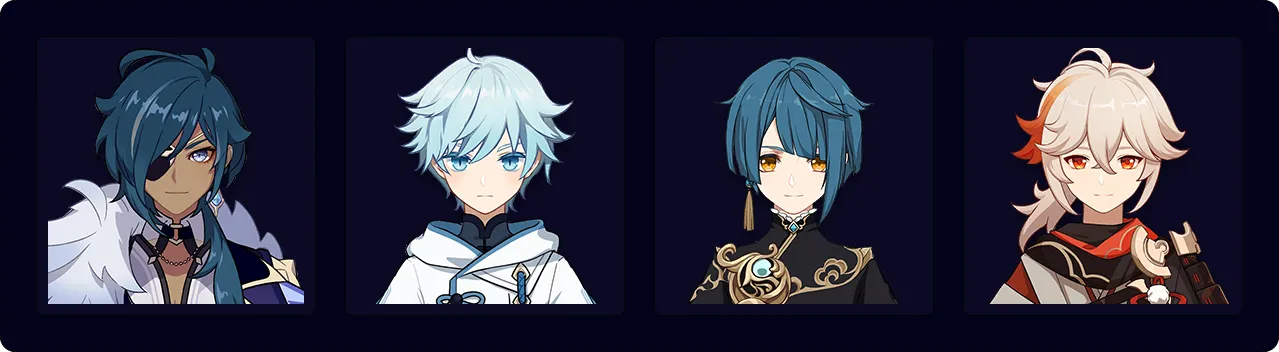
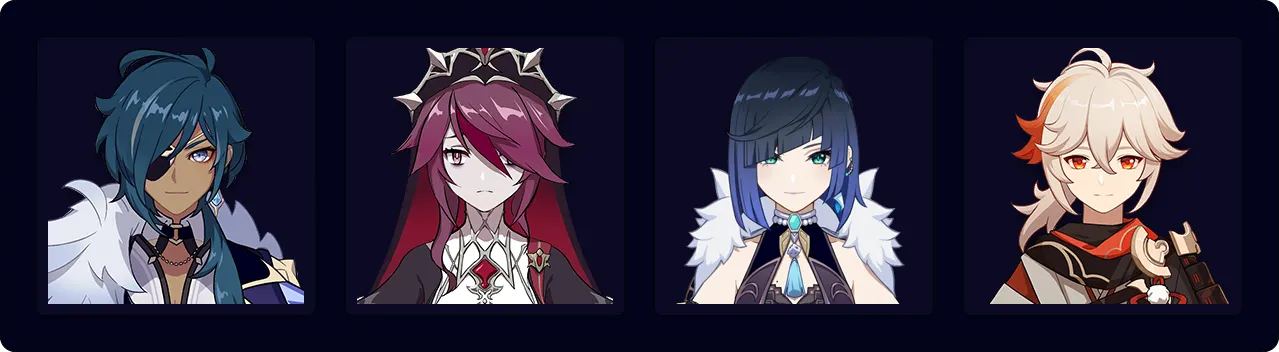
Kaeya or Rosaria?
Kaeya and Rosaria have similar kit, playstyles, cooldowns, and the same rarity and Element. However, factors like Kaeya’s Burst ICD and Rosaria’s stationary Burst separate their best uses. Below is a comparison table between the two that delves into more detail.
| Kaeya |
Rosaria |
|
|---|---|---|
| Elemental Skill |
|
|
|
|
|
| Elemental Burst |
|
|
|
|
|
| Utility Passive |
|
|
| Ascension Stat |
|
|
| Accessibility and Cost to Obtain |
|
|
| Summary |
|
|
Can Kaeya be paired with Rosaria?
Kaeya and Rosaria form a good pair as a result of their particle generation lowering both their ER requirements, their Talent cooldowns aligning well, and their Bursts covering each other’s weakness in Cryo application, mobility, and uptime. They can combine to be the main source of damage in Freeze and Reverse Melt teams alike.
What characters have issues with Kaeya’s Burst?
Kaeya’s Burst follows the vertical movement of the active character, so Xiao and Wanderer hardly make any use of it. Venti’s Burst also lifts small enemies above Kaeya’s Burst, making the two somewhat incompatible. In Venti’s case, however, Kaeya can choose to use his Burst after Venti’s.
Is Kaeya a viable on-field Physical DPS?
Kaeya’s Normal Attacks (NA) have high multipliers, but his low Attack SPD, small range, and lack of buffs make it difficult to get good results from Physical Kaeya teams without excessive and impractical levels of investment. This guide will not cover Physical Kaeya builds or teams.
Should I spend Starglitter to obtain Kaeya’s Constellations?
The Starglitter Exchange is the only easy way to obtain Kaeya’s Constellations, but Free-to-Play (F2P) and Welkin players will not have enough Starglitter to buy every character in the shop. Kaeya’s Constellations are especially tricky to go for as C2 is a conditional boost and C5 and C6 are too expensive to make them worth considering. Going from C0 and C6 will also take about three years of purchasing Constellations from Starglitter Shop. Unless a few Kaeya Constellations are luckily obtained from Standard Banner, it is typically better to invest Starglitter into Intertwined Fates or units that get unconditional boosts from earlier Constellations.
Is Kaeya a viable endgame unit?
Kaeya faces stiff competition from other Cryo units with similar upsides and better utility. However, he is more than capable of clearing endgame content. Kaeya may still be a good pick depending on how much you value his self-sufficiency, unrivaled Cryo particle generation in Freeze teams, and convenient gameplay.
Glossary
Talents
Talent Priority
Kaeya focuses on applying Cryo and dealing Cryo damage. As such, his Elemental Skill and Burst are the most important parts of his kit. However, most of the power in his Skill comes from its Cryo application and battery potential, which do not increase with Talent level. As a result, his Burst becomes his main priority, followed by his Skill. His NA Talent may be ignored if Kaeya is mostly off-field. If playing Kaeya on-field, his Normal Attacks may be leveled with similar or slightly less priority to his Skill.
 >
>  >>
>> 
Burst > Skill >> Normal Attack
Talent Overview
Normal Attack | Ceremonial Bladework
Talent Description
Normal Attack
Performs up to 5 rapid strikes.
Charged Attack
Consumes a certain amount of Stamina to unleash 2 rapid sword strikes.
Plunging Attack
Plunges from mid-air to strike the ground below, damaging opponents along the path and dealing AoE DMG upon impact.
Kaeya has the highest Normal Attack (NA) multipliers among Sword users, and his Charged Attack (CA) multipliers are also decent. His 4th and 5th NA strikes are quite slow compared to the first 3 strikes though, so avoid using them. Regardless, Kaeya's Normal Attack Talent is not the main focus of his kit; his Normal Attacks are not enough to offset his poor on-field scaling. Thus, it is generally suggested to use another character as your on-field damage dealer.
Combos
2 NAs followed by a CA (N2C) is his best combo without performing animation cancels. However, 1 NA followed by a dash canceled CA (N1CD, which deals damage equivalent to 109.994% of N2C) overtakes both N2C and N2CJ when performing dash cancels. N1C and N3C are both slightly worse than N2C.
There are a few caveats: Kaeya's N1C and N1CD combos use unsustainable amounts of Stamina, meaning that he will run out of Stamina over the course of combat. The problem is somewhat mitigated by Kaeya’s ability to Freeze enemies, which prevents him from knocking enemies away and reduces the need to dodge; however, it is still an issue in longer rotations. For these reasons, N2C is his overall preferred combo. In practice, players may perform a mix of the aforementioned combos, provided that they can manage their Stamina consumption in drawn-out fights.
For more detailed information, check the spreadsheet with Kaeya's NA string calculations in the References section below.
Elemental Skill | Frostgnaw
Talent Description
Unleashes a frigid blast, dealing Cryo DMG to opponents in front of Kaeya.
Kaeya's Elemental Skill is a simple, short-range Cryo attack that hits enemies in a cone. The reach on his Skill is further than that of his Burst, but only reaches 8m (roughly 3 Abyss tiles) in front of him. It also has poor vertical reach with a height of only 2.2m, which may be an issue against enemies on different elevations.
His Skill applies 2 Elemental Gauge Units (2U) of Cryo and generates 2.67 particles on average, which is augmented by his 4th Ascension Passive (A4). His Skill’s strong Cryo application and low cooldown make it ideal for breaking Elemental shields, and its high particle generation makes it ideal for recharging other Cryo characters’ Bursts.
Elemental Burst | Glacial Waltz
Talent Description
Coalescing the frost in the air, Kaeya summons 3 icicles that revolve around him.
These icicles will follow the character around and deal Cryo DMG to opponents in their path for the ability's duration.
Kaeya's Burst is his largest source of damage. At baseline, it lasts 8s with a 15s cooldown (CD), and costs 60 Energy. The icicles revolve around the active character roughly once every 2s, meaning at Constellation Level 0 (C0) they make 4 full revolutions for the duration of the Burst. Once Glacial Waltz ends, the icicles shatter and deal one last hit of damage. This Burst snapshots Kaeya's stats some time after casting, but before his Energy drains. This allows Kaeya to make use of buffs with short durations.
Glacial Waltz is also Kaeya's best source of Cryo application. The icicles deal 1U of Cryo and are subject to the standard 2.5s / 3-hit Internal Cooldown (ICD). Each icicle also has a separate 0.5s cooldown, during which it will not damage or affect any enemies. This CD is not shared between icicles. Kaeya can thus run around a single enemy counter-clockwise, allowing the icicles to hit a target more often and minimizing wasted damage windows.
Burst ICD Demonstration
In this clip, Kaeya’s Burst hits the first three hilichurls to the left, dealing AoE damage and applying Cryo. The Burst is then locked out from dealing damage until after it has passed the fourth hilihurl, so the icicles move through it without triggering any additional instances of damage. Footage from Nociii.
While the hitbox of Glacial Waltz's icicles extends a bit past their visual position, the Burst still has quite a short range and needs mobs to be roughly 2.5m (1 Abyss tile) away from the active character. However, since Kaeya’s Burst follows the active character, you can chase down enemies regardless of their location.
This Burst’s biggest issue is its vertical range. Glacial Waltz follows not only your lateral movement, but also your vertical movement; as a result, it is incompatible with certain abilities that manipulate enemy or character elevation, such as Venti's Burst, Xiao's Plunging Attacks, or Wanderer's Skill.
Vertical Range Demonstration
Kaeya's Burst misses due to Wanderer hovering above the Eremites. Footage from Casdela#5121.
 Ascension 1 Passive | Cold-Blooded Strike
Talent Description
Every hit with Frostgnaw regenerates HP for Kaeya equal to 15% of his ATK.
Kaeya's A1 Passive slightly increases his self-sustainability. To illustrate, Kaeya only regenerates 300 HP per hit at 2,000 ATK. This may not seem like much, but Freeze teams generally take minimal damage. As a result, even this tiny amount of healing can alleviate the need for a dedicated healer and allow Kaeya to be run in fully damage-oriented teams.
 Ascension 4 Passive | Glacial Heart
Talent Description
Opponents Frozen by Frostgnaw will drop additional Elemental Particles.
Frostgnaw may only produce a maximum of 2 additional Elemental Particles per use.
This Passive Talent is arguably Kaeya's strongest asset and makes him the best Cryo battery in Freeze teams. The description of the Talent is a little misleading: enemies hit by Frostgnaw that are already Frozen will also drop particles. Assuming at least 2 opponents are hit, this bumps Kaeya's average particle generation from 2.67 to 4.67 particles per Skill cast or 46.7 particles per minute, the highest generation rate among all Cryo units.
This Passive effectively reduces the Energy Recharge (ER) requirements for both Kaeya and his Cryo teammates, allowing them to build for more damage. Should team Energy needs be high, Kaeya can forgo damage-focused weapons in favor of support options such as Favonius Sword or Sacrificial Sword.
A4 Demonstration
Kaeya uses his Skill to Freeze slimes, generating 3-5 Cryo Particles from his Skill and additional Hydro Particles from Hydro slime HP thresholds. Footage from Nociii.
Unfortunately, this Passive can only be used consistently with a Hydro teammate, and is only effective in Freeze teams. It also does not work against Bosses, despite the Freeze reaction text appearing.
 Utility Passive | Hidden Strength
Talent Description
Decreases sprinting Stamina consumption for your own party members by 20%.
Not stackable with Passive Talents that provide the exact same effects.
This Passive Talent is currently shared with Razor, Kazuha, and Heizou. However, Kaeya benefits the most from the Talent because he has a tall male model and thus a faster running speed. Additionally, this is one of the few Utility Passives that is useful in combat: it allows you to dodge more often or reserve Stamina for more Stamina-hungry characters who rely on Charged Attacks for damage.
Constellations
Note that the DPS increases from Constellations listed below can vary a lot in practice. Kaeya’s icicles have inconsistent hit counts based on his C2’s extension, players’ positioning, and enemies’ hitbox and behaviors. For the sake of consistency, these calculations are conservative and assume that Kaeya and his enemies remain in the same position; the increases listed will not be as high as in practice. For further information on assumptions, refer to the calculation sheets from the References section.
 Constellation 1 | Excellent Blood
The CRIT Rate of Kaeya's Normal and Charged Attacks against opponents affected by Cryo is increased by 15%.
Kaeya’s C1 is only useful when running him as an on-field DPS, and even then his Normal Attacks are not the majority of his damage. It can have some synergy with the Blizzard Strayer 4pc set effect and Cryo Resonance, since they also take effect when enemies are Frozen. It is possible to raise Kaeya's NA and CA CRIT Rate by a total of 70% through the aforementioned means; however, you now run the risk of overcapping on CRIT Rate.
DPS Increase: 0.2%
 Constellation 2 | Never-Ending Performance
When Glacial Waltz is in effect, for each opponent defeated, its duration is increased by 2.5s, up to a maximum of 15s.
Kaeya's C2 is useless against Bosses and single targets but absolutely incredible against waves of smaller, weaker enemies. Note that the 15s maximum indicated in the description includes the 8s base duration; the maximum extension is thus 7s.
DPS Increase from previous Constellation (0 extension): NA
DPS Increase from previous Constellation (1-3 extensions): 18.4%~61.3%
DPS Increase from C0 (0 extension): 0.2%
DPS Increase from C0 (1-3 extensions): 18.5%~61.5%
 Constellation 3 | Dance of Frost
Increases the Level of Frostgnaw by 3.
Maximum upgrade level is 15.
A nice upgrade, though it doesn't improve the most important aspects of Frostgnaw, which are its Cryo application and Energy generation. Nevertheless, extra damage is always appreciated.
DPS Increase from previous Constellation (0 extension): 2.6%
DPS Increase from previous Constellation (1-3 extensions): 1.6%~2.2%
DPS Increase from C0 (0 extension): 2.7%
DPS Increase from C0 (1-3 extensions): 21.1%~63.8%
 Constellation 4 | Frozen Kiss
Triggers automatically when Kaeya's HP falls below 20%:
Creates a shield that absorbs damage equal to 30% of Kaeya's Max HP. Lasts for 20s.
This shield absorbs Cryo DMG with 250% efficiency.
Can only occur once every 60s.
The additional survivability granted by this Constellation is welcome, but ultimately unreliable. It triggers at an unfortunately low HP threshold and will not activate if Kaeya gets one-shot from above this threshold. The shield itself is fairly weak, cannot be transferred to other units, and has a long 60s cooldown. One of Kaeya’s weaker Constellations.
DPS Increase from previous Constellation: NA
DPS Increase from C0 (0 extension): 2.7%
DPS Increase from C0 (1-3 extensions): 21.1%~63.8%
C4 Shield Demonstration
Kaeya’s C4 shield is activated upon taking damage from a lawachurl. 52k HP makes for a strong shield, but an impractical build. Footage from Nociii.
 Constellation 5 | Frostbiting Embrace
Increases the Level of Glacial Waltz by 3.
Maximum upgrade level is 15.
This Constellation buffs Kaeya's largest source of damage, and works well with any of Kaeya's playstyles. A valuable Constellation.
DPS Increase from previous Constellation (0 extension): 13.8%
DPS Increase from previous Constellation (1-3 extensions): 11.4%~15.2%
DPS Increase from C0 (0 extension): 16.7%
DPS Increase from C0 (1-3 extensions): 38.4%~84.1%
 Constellation 6 | Glacial Whirlwind
Glacial Waltz will generate 1 additional icicle, and will regenerate 15 Energy when cast.
Kaeya's C6 is a great Constellation. It not only grants a raw damage increase but also improves Kaeya’s Cryo application due to the extra projectile revolving around the active character. Additionally, the 15 Energy refunded upon casting Glacial Waltz effectively reduces its Energy cost by 25%, allowing Kaeya to forgo ER for damage-focused stats.
DPS Increase from previous Constellation (0 extension): 24.8%
DPS Increase from previous Constellation (1-3 extensions): 26.8%~31.3%
DPS Increase from C0 (0 extension): 45.6%
DPS Increase from C0 (1-3 extensions): 81.7%~133.3%
C6 Icicle Demonstration
Kaeya’s burst at C6, with four icicles revolving around him. The shield around the character is from Zhongli. Footage from .jdha.
Playstyles and Gearing

“His nature is obscure, his fate is a mystery, and his speech a vexing tapestry of both fact and fiction… Perhaps he and I share the burden of mystical sight…” - Fischl
ER Requirements
Kaeya has low ER requirements in Freeze teams because of his A4 Passive and the fact that you normally run him alongside another Cryo unit. The table below shows a few examples of ER requirements based on the number of Cryo Particles that are generated while Kaeya is off-field.
Freeze
| Two Rosaria Skills (6) | Three Rosaria Skills (9) | |
| 2 Skills | 140-160% | 130-140% |
| 3 Skills | 120-140% | 110-120% |
Reverse Melt
| Two Rosaria Skills (6) | Three Rosaria Skills (9) | |
| 2 Skills | 190-220% | 160-180% |
| 3 Skills | 160-190% | 140-170% |
Mono Cryo
| Two Ayaka Skills & Two Layla Volleys (10-14) | Two Ayaka Skills & Two Diona Hold Skills (14-18) | |
| 1 Skill | 160-210% | 150-180% |
| 2 Skills | 140-190% | 130-160% |
When not played in Freeze teams, Kaeya should catch his own particles from his Skill at least once per rotation in order to keep his ER requirements reasonable. To minimize field time, Kaeya can quickly use his Skill and then Burst to catch particles. However, prefunnelling can be inconsistent because Kaeya’s Energy drains shortly after the Burst is initially cast.
The Energy Recharge Calculator can help determine more accurate ER thresholds based on specific enemies, particle RNG, and teammates. The tables above assume that enemies do not drop particles at certain HP thresholds, so Kaeya’s actual ER requirements may be lower.
Kaeya has higher ER requirements if he performs fewer Elemental Skills, has no Cryo teammates, or is unable to use his A4 Passive.
- In general, each Favonius weapon proc reduces Kaeya’s ER requirements by about 10% or less.
- C6 also lowers Kaeya’s ER requirements by refunding Flat Energy.
Freeze
“Come on, let’s get moving. We’re not frozen in place after all.”
Freeze teams make good use of Kaeya’s full potential: massive Cryo particle generation through Kaeya's A4 Passive, short field time and cooldown, off-field damage, and self-sufficiency. Kaeya can function as both a member of a quickswap team or a support for a Cryo carry. Quickswap teams are often built without a dedicated on-field unit; they generally have more flexible rotations and room for error.
Though Freeze teams can use many other units that have slightly worse Cryo particle generation and provide other utilities, Kaeya’s particle generation keeps him in contention in all stages of the game.
Pros
- Makes full use of Kaeya’s kit and gives him unparalleled Cryo particle generation
- Freeze is a powerful status effect
- 4pc Blizzard Strayer’s CRIT Rate buff makes Kaeya’s stat priorities simple; he can forgo CRIT Rate for other important stats like CRIT DMG and ATK%.
Cons
- A weak team choice against enemies that cannot be Frozen
- Lack of team buffs can lower his value compared to competition if played as a support, especially if his teammates can meet their ER requirements without his additional particle generation
Stat Priorities
 Sands |  Goblet |  Circlet |
| ATK% | Cryo DMG% | CRIT DMG/Rate |
Keep in mind that a 1:2 CRIT Rate to CRIT DMG ratio is optimal when choosing artifacts. 4pc Blizzard Strayer (BS) with Cryo Resonance already provides enough CRIT Rate for Kaeya, so use a CRIT DMG Circlet to maximize his personal damage. You can use a CRIT Rate Circlet instead if he uses 4pc Noblesse Oblige (NO) with Favonius Sword.
Substat Priority:
(ER% until requirement) > ATK% > CRIT DMG > CRIT Rate
Weapons
Assumptions: KQM Standards, 4pc BS, full uptime on 4pc NO and 4pc Viridescent Venerer’s RES Shred, 2 Skills, 14 Burst ticks, one Normal Attack, no extra ER% from fluid subs required.
| Weapon | DPS% | Notes |
Mistsplitter Reforged R1 | 121% | Even though Kaeya cannot make full use of Mistsplitter’s passive, it is his Best-in-Slot (BiS) in Freeze teams because of its high Base ATK, CRIT DMG secondary stat, and useful passive. |
Light of Foliar Incision R1 | 110% | Light of Foliar Incision is a useful stat stick for Freeze Kaeya, despite its useless passive. |
Haran Geppaku Futsu R1 | 109% | Haran’s high Base ATK and CRIT Rate secondary stat make it a good option, though the CRIT Rate may overcap when using 4pc BS. Similar to Light of Foliar Incision, its passive is somewhat wasted on Kaeya outside of the 12% DMG Bonus. |
Summit Shaper R1 (no shield) | 107% | Summit Shaper provides a copious amount of ATK%, which is fairly valuable in Freeze teams. However, as it is both difficult to slot a shielder in Kaeya’s teams and have him build stacks, Summit Shaper’s passive is somewhat neutered. |
Primordial Jade Cutter R1 | 106% | Primordial Jade Cutter tends to overcap Kaeya’s CRIT Rate in conjunction with 4pc BS and Cryo Resonance. Nevertheless, it is still a powerful option, and gains significant value if Kaeya uses 4pc NO rather than 4pc BS. |
Aquila Favonia R1 | 102% | Aquila has a very high Base ATK and decent passive; these traits make it usable despite its useless Physical DMG Bonus secondary stat. |
The Alley Flash R5 | 101% | Similar to Aquila, Alley Flash remains competitive with refinements thanks to its high Base ATK and decent passive despite a useless secondary stat. |
Kagotsurube Isshin | 100% | Kagotsurube Isshin is Kaeya’s go-to F2P option. Note that you need to perform one Normal Attack before casting his Burst to properly make use of its passive. |
| The Alley Flash R1 | 95% | Without refinements, Alley Flash significantly drops in value. |
Blackcliff Longsword (no stacks) | 94% | Blackcliff has extremely poor purchase value thanks to both its mediocre performance without stacks and its high inconsistency in gaining them. |
Harbinger of Dawn R5 (with passive) | 93% | Maintaining Harbinger of Dawn’s passive becomes reasonably achievable when playing teams where Kaeya has a short field time and when fighting against enemies that can be Frozen. However, the stats it provides is diluted by 4pc BS and Cryo resonance. |
Amenoma Kageuchi | 91% | Amenoma’s Energy refund passive does very little for Kaeya, as his ER requirements are met very easily in Freeze teams. Even when attempting to battery another Cryo unit, Favonius Sword exists as a better option for the team’s overall energy economy. |
The Black Sword R1 | 91% | Black Sword is not worth buying specifically for Freeze Kaeya because CRIT Rate is not needed and the weapon performs worse than F2P options. |
| Harbinger of Dawn R5 (no passive) | 76% | Without its passive, Harbinger of Dawn is significantly worse. |
Favonius Sword | 74% | While Favonius Sword is a very poor option for damage, it can be a good option if Kaeya is acting as a battery for Energy-hungry units such as Ayaka. |
Artifacts
Assumptions: KQM Standards, Kagotsurube Isshin, full uptime on 4pc NO and 4pc Viridescent Venerer’s RES Shred, 2 Skills, 14 Burst ticks, one Normal Attack, no extra ER% from fluid subs required.
| Artifact | DPS% | Notes |
4pc Blizzard Strayer | 123% | Kaeya’s BiS for personal damage. Blizzard Strayer’s 4pc effect is tailor-made for Freeze; the copious amounts of CRIT Rate it provides pulls it far ahead of its competitors. |
2pc NO + 2pc BS | 100% | While players should try to get 4pc BS or 4pc NO for Freeze Kaeya, 2pc NO + 2pc BS serves as a good transitional set while players farm the 4pc set. |
4pc Emblem of Severed Fate | 100% | 4pc EoSF is somewhat hamstrung by Kaeya’s generally low ER requirements in Freeze teams. On the rare occasion where this is not the case, its value can increase — albeit not more than 4pc BS. Note that 2pc Emblem can be considered for 2pc combinations listed below in such a situation. |
2pc ATK% + 2pc NO/BS | 98% | Decent 2pc sets for those not willing to farm 4pc BS. |
2pc ATK% + 2pc ATK% | 95% | While generally worse than the above listed options, 2pc combinations of ATK% artifacts can pull ahead with better substats. |
4pc Noblesse Oblige | 92% | 4pc NO is a rather poor option if there is another holder in the party. That said, if there are no other viable holders and Kaeya’s teammates benefit from its buff, 4pc NO is the best option for overall team damage while also performing similarly to 2pc ATK% + 2pc NO on Kaeya himself. |
Reverse Melt
“Kaeya Alberich? He’s a Pavo Ocellus. Destined for greatness and grandeur, and to hide ugly realities behind a layer of charm and elegance.” - Mona
When played in Rosaria Reverse Melt teams, Kaeya lowers both his and Rosaria’s ER requirements while Melting some of his Element Burst hits (though not all of them due to ICD). While Kaeya can be considered as a solo Cryo character in Reverse Melt, he will have much higher ER requirements and will not make too good use of EM buffs due to his low Melt rates. As such, he is more potent as a pick to function alongside Rosaria.
The most important part of playing Reverse Melt teams is making sure that everyone (including Kaeya) snapshots appropriate buffs with their Elemental Bursts. The preferred rotation starts with Bennett and then Rosaria, so that the full team snapshots Bennett’s Flat ATK buff and Rosaria’s CRIT Rate buff. Kaeya cannot use his A4 in this team archetype and may have reduced field time, so he has to build more ER than in Freeze teams.
Further details on this archetype can be found from Rosaria Guide.
Pros
- High damage potential from Amplifying Reactions and snapshotting significant buffs from Bennett and other sources
- Relatively simple and forgiving rotations
Cons
- Higher ER requirements
- Weak against mobile enemies due to Rosaria and Bennett’s stationary Bursts
- Frequent uses of Skills are interrupted more easily due to lack of Freeze
Stat Priorities
Sands | Goblet | Circlet |
| ATK%/EM/ER | Cryo DMG% | CRIT Rate/DMG |
Despite Kaeya’s low Melt rate, ATK Sands and EM Sands perform similarly in Reverse Melt. Though less ideal, ER Sands can work due to Kaeya’s higher ER requirements in Reverse Melt. Players should use an appropriate Circlet to achieve a balanced CRIT ratio of 1:2.
Substat Priority:
ER% (until meeting requirement ) > CRIT > ATK% > EM
Weapons
Assumptions: KQM Standards, 2pc NO + 2pc BS, 149% ER Requirement, Pyro Resonance, dynamic uptime on Cryo Resonance and 4pc NO, 2 Skills (both Melted), 14 Burst ticks, 5 Melts), no NA hits.
| Weapon | DPS% | Notes |
| Primordial Jade Cutter R1 | 124% | Without refinements on other 5-star weapons, Primordial Jade Cutter becomes a Best-in-Slot weapon in this archetype thanks to a hefty CRIT Rate secondary stat and a straightforward, unconditional Flat ATK buff from its passive. |
| Mistsplitter Reforged R1 (C6 Bennett) | 123% (w/ C6 Bennett) - 118%(w/o C6 Bennett) | Stacks calculated dynamically. With C6 Bennett, Kaeya can gain one more stack by using a Pyro-infused Normal Attack. Even without the additional stack from an Element-infused Normal Attack, Mistsplitter’s high Base ATK, CRIT DMG secondary stat and helpful passive make it a strong choice. |
| Haran Geppaku Futsu R1 | 116% | While Haran’s passive is mostly useless for Kaeya, the weapon is still a solid stat stick. |
| Light of Foliar Incision R1 (C6 Bennett) | 115% (w/ C6 Bennett) - 114% (w/o C6 Bennett) | Light of Foliar Incision’s massive CRIT DMG stat outweighs Kaeya’s poor utility of its passive. With C6 Bennett, Kaeya’s Skill becomes slightly stronger. As Kaeya’s damage mostly comes from his Burst, the lack of C6 Bennett makes hardly any difference with his overall damage. |
Freedom-Sworn R1 | 110% | Calculated with its sigil buff proccing ONLY for Kaeya. While it is difficult for his teammates to make use of the sigil buff in a standard rotation, Freedom-Sworn can still function as a good stat stick. |
Lion’s Roar R5 | 110% | Assumes full uptime on its passive. Lion’s Roar, with refinements, pulls far ahead of many weapons. The stats it provides Kaeya are generally helpful, and the passive is extremely potent in Reverse Melt and has an easy trigger condition. |
| Toukabou Shigure R5  | 106% | Toukabou Shigure is potentially Kaeya’s strongest F2P option in Reverse Melt for those who obtained it from its event. That said, it scales worse in multi-target situations compared to other weapon options due to its passive only affecting one target. Furthermore, its value depends on having the passive up during Kaeya’s Burst; this can be done by following a strict rotation and not starting the first rotation with Kaeya’s Skill. This technique is reliable but somewhat difficult to execute, which further lowers the weapon’s strength. |
| Harbinger of Dawn R5 (with passive) | 106% | Harbinger of Dawn is surprisingly strong when its passive is active. That said, it can be hard to meet its HP requirement even with off-field Kaeya given that Bennett, who serves as the main healer for these teams, cannot reliably heal units above the 90% threshold. |
| Summit Shaper R1 | 102% | Calculated with no shield. Summit Shaper suffers from both Kaeya’s inability to properly gain stacks while off-field, as well as the difficulty of comfortably slotting in a shielder in Reverse Melt teams. |
| The Alley Flash R5 | 102% | Assumes Kaeya does not get hit. A fantastic Base ATK, helpful EM stat, and good passive make Alley Flash a strong option for those who have it. That said, it loses value if Kaeya is continuously taking damage due to effects such as Corrosion. |
| Lion’s Roar R1 | 101% | Even without refinements, Lion’s Roar is a competitive choice. |
| Kagotsurube Isshin | 100% | Kaeya’s most reliable F2P option, obtained from Kazuha’s Story Quest. Simple, reliable, and effective. Players should use a Normal Attack before casting Burst in order to properly snapshot the passive. |
| Aquila Favonia R1 | 100% | Aquila is mostly a stat stick on Kaeya because of its enormous Base ATK and decent passive; while not amazing, it is still usable if players have it leveled. |
| The Black Sword R1 | 98% | While The Black Sword’s passive is mostly useless for Kaeya, the weapon still serves as a decent choice. That said, it is not worth buying specifically for him given that Kagotsurube Isshin is free and slightly better. |
| The Alley Flash R1 | 96% | Similar to Lion’s Roar, Alley Flash benefits significantly from refinements; however, it is notably worse than Lion’s Roar. |
Iron Sting R5 | 95% | Assumes 1 stack. At R5, Iron Sting is a decent F2P option – that said, Isshin is better and Iron Sting is not particularly worth refining specifically for Kaeya. |
| Blackcliff Sword (no stacks) | 95% | Its stacks are incredibly difficult to gain and use effectively on Kaeya, especially considering that he snapshots his Burst. Without stacks, Blackcliff Sword is worse than his F2P options. |
| Amenoma Kageuchi R5 | 95% | Amenoma is rather pitiful as Kaeya does not need most of the Energy refund it gives in most cases. Still, its passive is useful and it is usable if Isshin is unavailable. |
Xiphos’ Moonlight R1 | 94% | Xiphos is fairly subpar; the Energy Recharge it provides for Kaeya and his team is minuscule because he does not build a lot of EM. |
| Iron Sting R1 | 93% | Without refinements, Iron Sting’s performance drops further, becoming the weakest of Kaeya’s craftable weapon options. |
Key of Khaj-Nisut R1 | 93% | Assumes second rotation onwards. While Key is theoretically outperformed by almost all of Kaeya’s other options, the EM buff it gives teammates can make it a good option for team damage. |
Artifacts
Assumptions: KQM Standards, Kagotsurube Isshin, 149% ER Requirement, Pyro Resonance, dynamic uptime on Cryo Resonance and 4pc NO, 2 Skills (both Melted), 14 Burst ticks, 5 Melts), no NA hits.
| Artifact | DPS% | Notes |
| 4pc Emblem of Severed Fate | 104% | 4pc Emblem of Severed Fate serves as Kaeya’s general BiS in Reverse Melt teams; while it drops in value at lower ER values, it consistently remains one of his best options — especially so if his ER needs are higher. |
4pc Lavawalker | 103% | Assumes full Pyro aura uptime on enemy except for 2nd Skill use per rotation. 4pc Lavawalker is one of Kaeya’s strongest options in Reverse Melt — that said, it is so close to more Resin-efficient options that farming or strongboxing for it can be inefficient. |
| 2pc NO + 2pc BS | 100% | 2pc NO + 2pc BS generally performs well on Kaeya and transfers easily to his other builds. |
4pc Gilded Dreams | 97% | Assumes 100 EM and 14% ATK on the 4pc effect. 4pc GIlded Dreams is a competitive option, but the EM bonus it provides is underutilized since Kaeya can only Melt a third of his damage. |
2pc BS/NO + 2pc ATK%/EM | 96% - 97% | The difference between these 2pc combinations is marginal, and often comes down to even a single substat. |
2pc ATK%/EM combinations | 92% - 93% | Similar to the 2pc combinations above, the difference between these set combinations is fairly negligible. |
Cryo Enabler
Kaeya’s fast Cryo application sees numerous other uses, such as helping maintain Superconduct, increasing the overall Dendro Core production with Dendro and Hydro application, or enabling Forward Melt. Though Kaeya still contributes a decent amount of damage and can snapshot significant buffs from Bennett and other sources, his investment may be less prioritized if there is an on-field character that is enabled by him. Gearing in these teams tends to have a higher focus on supportive weapons and artifacts such as Favonius Sword and 4pc Noblesse Oblige, though offensive gearing is viable as long as the team has good enough energy economy.
Enabling consistent Forward Melt requires strict rotations and specific characters. This, combined with Kaeya’s short base duration and Burst range, limits the number of characters that fully synergize with him and makes this playstyle overall niche.
Pros
- Has an unmatched rate of Cryo application at C6, making him a potent option where significant Cryo application is needed
- Enables other teammates to take advantage of Cryo application, such as letting Diluc Melt and increasing Dendro Core production
Cons
- The base duration of his Burst is rather short, with C2 extensions being inconsistent
- Provides no team buffs in a role that is largely supportive
- Faces stiff competition from Rosaria
Stat Priorities
Sands | Goblet | Circlet |
| ATK%/ER | Cryo DMG% | CRIT Rate/DMG |
Adjust main stats so that Kaeya can consistently Burst every rotation. EM is useless as when enabling Forward Melts, enemies will have Cryo aura and thus Kaeya will not Melt any hits.
Substat Priority:
ER% (until meeting requirement ) > CRIT > ATK%
Team Comps & Synergies
“He’s a mysterious character! He comes and goes like the wind, and is always occupied with important business.” - Noelle
Quickswap Freeze
Quickswap Freeze teams function around using Elemental Skills and Bursts in quick succession to maintain Freeze. A Hydro unit is included for Cryo units to reliably Freeze opponents and benefit from 4pc Blizzard Strayer, while an Anemo unit aids the rest of the team through VV Shred. Each Element has a wide selection of units that contribute utilities such as grouping, healing, or additional damage.
Team Structure
Cryo
 Rosaria | Rosaria is a common choice for a second Cryo unit as a result of her low field time, frequent particle generation, CRIT Rate buff, and high damage from her Elemental Burst. |
 Chongyun | Chongyun’s main utility lies with the CD Reduction from his C2, which is particularly useful if also using Xingqiu. With it, Xingqiu is able to maintain 100% uptime on his Burst and Hydro application from Sword Rain attacks and orbitals. Chongyun’s Burst also contributes a decent amount of damage. Additionally, players can use the Cryo Infusion from his Elemental Skill to switch Kaeya to an on-field role; while this is generally suboptimal with more balanced investment, it can be worth considering if players have hyperinvested into Kaeya. |
 Shenhe | Shenhe is a rather unique pick for a Cryo slot. She greatly empowers Kaeya through her A1 and A4 Talents, Elemental Burst, and Icy Quill. A noteworthy trait of her Icy Quill effect is that it gives Kaeya’s Burst more frontloaded damage, and can aid the team against enemies that cannot be Frozen or have limited DPS windows. Kaeya’s particle generation benefits Shenhe greatly, and the team will likely have opportunities for Shenhe to take the field and have his particles directly funneled to her, greatly reducing her ER requirements. |
 Qiqi | Qiqi can contribute to the team's damage by using 4pc Ocean-Hued Clam, which can easily reach the maximum damage if she takes the field for at least a few seconds. However, her main selling point in healing isn’t particularly necessary in quickswap Freeze teams, and her lack of particle generation is a downside if the rest of the team has high Energy demands. |
 Diona | While Diona is a unit who compresses a lot of roles in one character, shielding and healing aren’t desperately needed given the team’s nature, and the EM bonus from her C6 fails to do much aside from slightly boosting an Anemo character’s Swirl damage. Though she can buff the team using 4pc NO and Elegy for the End, there are often better substitutes when it comes to buffers. |
 Layla | Layla can maintain high shield uptime thanks to the flexibility of the rotation and buff the party with 4pc Tenacity of the Millelith(TotM), which is a rare buff for this archetype. However, her main utility of shielding is often unnecessary in this team archetype, and her low damage output makes her presence questionable over other units that have better personal damage or teamwide buffs. |
Hydro
 Sangonomiya Kokomi | Kokomi has many traits that this team appreciates greatly. Her short field time, long off-field Hydro application if able to Burst consistently, and other utilities, such as buffs from Thrilling Tales of Dragon Slayers(TTDS) and 4pc Tenacity of the Millelith are very helpful to any Cryo unit that this team chooses to use. Note that she may need high ER to consistently Burst to refresh her Skill. |
 Mona | Mona’s main niche comes from her Burst’s Omen debuff, which is one of the rare ways for this team to do a large amount of damage in a short time. Cryo units can Freeze enemies in conjunction with Mona's Hydro application, extending the debuff duration. Mona can use Prototype Amber to heal the team or TTDS to buff another unit, although the latter requires her to build high amounts of Energy Recharge. In addition, Mona’s low uptime for off-field Hydro application means she either has to switch in frequently and use her weak Normal Attacks or have an Anemo unit Swirl Hydro to keep enemies Frozen. |
 Xingqiu | Xingqiu almost always starts the rotation due to his long cooldowns. This can play in the team’s favor, however, as Xingqiu’s long off-field Hydro application through Sword Rain attacks and orbitals means Kaeya can easily utilize his A4 Passive. Though Xingqiu is a very contested unit and does not directly buff his teammates, his personal damage, Interruption Resistance, and small healing are sufficient to make him a good consideration. |
 Candace | Candace's Elemental Burst enables Freeze with Hydro-infused Normal Attacks and off-field Cryo application. Whether she is on-field or quickswap, Candace can lower her and other characters’ ER requirements with multiple uses of her Skill and Favonius Lance’s passive. Her Burst cooldown also lines up with characters like Kaeya and Rosaria. However, quickswap Freeze rarely uses characters that make use of Candace's Normal Attack buff, and the Burst has low uptime at C0. Her area of Hydro application is small and she knocks enemies far away with her Skill, though these two shortcomings can be remedied by using Anemo characters like Kazuha, who can absorb his Burst with Hydro and group enemies. |
 Yelan | Similarly to Xingqiu, Yelan contributes to the team with her strong personal damage and off-field Hydro application that requires frequent uses of Normal Attacks. A Cryo unit can also stay on-field to benefit from Yelan’s A4 Passive. Normal Attacks should be used frequently as Yelan lacks a consistent AoE Hydro application. |
 Kamisato Ayato | Thanks to his relatively short field time as an on-field DPS, Ayato can work well with this team by using his Elemental Skill to fill in downtime. Ayato can also use his Burst to continue applying Hydro when his Skill is on cooldown — in which case, the two Cryo units should Burst separately to maintain Cryo application throughout the rotation. While using Ayato’s Skill twice per rotation may increase Hydro uptime without needing to build high ER, this comes at the cost of increasing rotation length. |
 Barbara | Barbara is the most accessible Hydro unit who offers both healing and an ATK% buff with TTDS. Unfortunately, her long cooldown on Elemental Skill, lack of particle generation, short range of Hydro application, and nonexistent personal damage affect the team’s effectiveness to varying degrees. |
Anemo
 Kaedehara Kazuha | Kazuha’s grouping, Elemental DMG Bonus buff, and personal damage are greatly appreciated, though repeated casts of Kazuha’s Elemental Skill could cause Kaeya’s Burst to miss some of its hits. |
 Sucrose | Sucrose offers grouping through her Skill and Burst, and an Elemental DMG Bonus buff at C6. She can also equip TTDS to buff another unit or Prototype Amber to heal the team. This makes her a decent pick by condensing many utilities into one slot. While EM increases Sucrose's personal damage through Swirls, it is recommended that she focus on building ER to reliably Burst every rotation. |
 Shikanoin Heizou | Heizou can perform an overall similar role to Sucrose; he possesses higher personal damage, but worse grouping abilities. Heizou has passable grouping with C2 and depending on his weapon selection, he can either focus on his personal damage or bring utility by using TTDS or Prototype Amber. |
 Venti | While Venti’s strong grouping as well as Energy refund is useful, Kaeya’s Elemental Burst does not hit small enemies that are stuck inside Venti’s vortex unless they are close to the ground. However, playing around this shortcoming is quite easy since the team’s quickswap structure allows more freedom for customization. Teams with proper rotations can use offensive weapons on both Kaeya and the second Cryo unit with little concern about their Energy. It is recommended to plan the rotation so that Venti’s Burst ends when Kaeya is about to use his. |
 Jean & Sayu | Jean and Sayu compress utilities of 4pc VV Shred and healing. Jean’s tendency to push away enemies with her Elemental Skill and Elemental Burst can be counterproductive. |
 Anemo MC | Anemo MC is the most accessible Anemo character that one can opt for. Enemies can be Frozen beforehand to avoid being carried away by Anemo MC’s Elemental Burst. |
Example Teams
Quickswap Freeze teams have flexible rotations, as no characters demand extended field time. Even then, players should remember to use Elemental Skills off cooldown for maximum Energy generation, snapshot buffs like 4pc NO and Kazuha’s A4, and maintain good uptime on Cryo 4pc VV Shred. Hydro VV Shred should also be maintained if the team uses strong off-field Hydro units like Xingqiu or Yelan. In such cases, Normal Attacks should be used frequently to maximize their damage and maintain Freeze through consistent Hydro application.
There are numerous ways to run quickswap Freeze teams with different characters and rotations. A few teams below aim to exemplify how the aforementioned basics of the teams are fulfilled.
Kaeya — Chongyun — Xingqiu — Kazuha
Rotation:
Chongyun E -> Xingqiu E -> Xingqiu Q -> Kazuha Q -> Kazuha E -> Chongyun Q -> Kaeya E -> Kaeya Q -> Kazuha E -> Kaeya E -> Repeat
Rotation Video
by pweep#0150
Kaeya — Rosaria — Yelan — Kazuha
Rotation:
Kaeya E -> Yelan E -> Yelan Q -> Kazuha E -> Kazuha Q -> Rosaria E -> Rosaria Q -> Kaeya E -> Kaeya Q -> Kazuha E -> Rosaria E -> Repeat
Rotation Video
by Luno#1337
Kaeya — Rosaria — Mona — Venti

Rotation:
Kaeya E -> Venti E -> Venti Q -> Mona Q -> Mona E -> Rosaria E -> Rosaria Q -> Kaeya E -> Kaeya Q -> Venti E -> Rosaria E -> Repeat
Rotation Video
by Jdha#2508
Ayaka Freeze
While Kamisato Ayaka has many options to address her Energy issues, Kaeya stands out as an option to further lower her already low requirements through his excellent batterying. Her tendency to stay close to an enemy throughout the rotation means Kaeya’s Burst synergizes with her nicely as well. Kaeya can either fully commit to the role of a battery by using Favonius Sword or use a more offensive Sword while still functioning as a good Cryo battery. The team also consists of a Hydro unit to enable Freeze and an Anemo unit for grouping and 4pc VV Shred, all of which are vital for Ayaka’s personal damage.
Team Structure
Hydro
 Sangonomiya Kokomi | Kokomi’s combination of short field time, reliable off-field Hydro application, and healing can greatly benefit the team. To ensure that Ayaka snapshots the TTDS buff, Kaeya running 4pc NO should use his Burst then have Kokomi and Ayaka enter the field. Alternatively, Kaeya running 4pc BS can use his Burst after Ayaka’s, adding a substantial amount of damage for the team during downtime. Should the player desire to fully utilize Kaeya’s A4, they can run enough Energy Recharge on Kokomi so that she can refresh her Skill’s duration through her Burst. |
 Mona | Mona can perform similar roles to Kokomi if running Prototype Amber by amplifying damage through her Omen debuff and providing small yet sufficient healing. She can also run TTDS, though she will need very high Energy Recharge even with Kaeya enriching the team’s particle generation. Mona’s poor off-field Hydro application means the rotation will be quite tight if one desires to fit both Kaeya’s and Ayaka’s Burst in Omen debuff duration, and Kaeya’s A4 will be difficult to trigger consistently. Players can attempt to address this issue by absorbing Hydro with Bursts from characters like Kazuha or Sucrose or switching into Mona frequently to reapply Hydro with her Normal Attacks, though the latter may lengthen the rotation. |
 Xingqiu | Xingqiu almost always starts the rotation due to his long cooldowns. This can play in the team’s favor, however, as Xingqiu’s long off-field Hydro application through Sword Rain attacks and orbitals means Kaeya can easily utilize his A4 Passive. Though Xingqiu is a very contested unit and does not directly buff his teammates, his personal damage, Interruption Resistance, and small healing are sufficient to make him a good consideration. |
 Yelan | Yelan is able to boost Ayaka’s damage through her A4 Passive, but Ayaka needs to remain on the field to benefit from it. This may complicate rotations when players attempt to maintain 100% uptime on 4pc VV Shred and frequently utilize Kaeya’s A4 Passive. It should also be noted that unlike other Hydro characters mentioned in this section, Yelan’s off-field Hydro application strictly requires an active character to use Normal Attacks. |
Kamisato Ayato | While Ayato’s large area of off-field Hydro application through his Burst may look appealing, he wants to occupy enough field time to fit at least one use of his Elemental Skill. Not only does this lengthen the rotation, but it also limits how many times Kaeya can utilize his A4 Passive throughout the rotation. Kaeya can run Favonius Sword to reduce both Ayaka and Ayato’s ER requirements, as Ayato will have high ER requirements if the rotation allows only a single use of his Skill. |
 Barbara | Barbara is an effective F2P option for the team, especially when players lack alternatives. A combination of Kaeya, Barbara, and an Anemo character of choice is the most accessible Ayaka team composition due to Kaeya and Barbara being free and not reliant on Constellations to perform their main role. That said, Barbara’s long Elemental Skill cooldown does not line up with Ayaka’s rotations and can cause inconveniences from the second rotation onward. Her nonexistent personal damage and Hydro application on the active character are also notable downsides. |
Anemo
 Kaedehara Kazuha | Kazuha’s grouping, Elemental DMG Bonus buff, and personal damage are greatly appreciated. His buffs hold value even if Kaeya opts to run Favonius Sword, as this will lower both Ayaka and Kazuha’s ER requirements and allow them to run more offensive weapons and artifacts for greater overall team damage. |
 Sucrose | Sucrose’s grouping through her Skill and Burst, ability to use either TTDS to buff or Prototype Amber to heal, and additional Elemental DMG% buffs through her C6 make her a decent pick to condense many utilities into one slot. Sucrose will need high Energy Recharge to reliably Burst every rotation, though this problem is slightly remedied by Kaeya’s rich particle generation. She also has freedom to focus on Energy Recharge over EM, as her EM sharing is fairly useless in this archetype. |
 Venti | Venti’s strong grouping as well as Energy refund are useful, but Kaeya’s Elemental Burst cannot hit small enemies that are stuck inside Venti’s vortex unless they have already been Frozen on the ground. Kaeya can use 4pc BS so that he can deal damage once Venti’s Elemental Burst ends. Using 4pc NO forces Kaeya to either waste his Burst for Ayaka to snapshot the buff or waste the buff after everyone else in the team has used their Burst. |
 Shikanoin Heizou | Heizou can perform an overall similar role to Sucrose; he possesses higher personal damage, but worse grouping abilities. Heizou has passable grouping with C2 and depending on his weapon selection, he can either focus on his personal damage or bring utility by using TTDS or Prototype Amber. |
Jean & Sayu | Jean and Sayu compress utilities of 4pc VV Shred and healing. Jean’s tendency to push away enemies with her Elemental Skill and Elemental Burst can be counterproductive. |
Anemo MC | Anemo MC is the most accessible Anemo character that one can opt for. Enemies can be Frozen beforehand to avoid being carried away by Anemo MC’s Elemental Burst. |
Example Teams
A Freeze team around Ayaka plays similarly to quickswap Freeze, but places importance on funneling all Cryo particles into Ayaka and making sure that her Burst snapshots as many buffs as possible. Depending on how enemies spawn in Spiral Abyss, players can opt to use Ayaka’s and Kaeya’s Burst separately to deal with multiple waves of enemies that require different levels of damage output.
Ayaka — Kaeya — Kokomi — Kazuha

Rotation:
Ayaka D -> Ayaka E N1 CA -> Kazuha E -> Kazuha Q -> Kaeya E -> Kaeya Q -> Kokomi E -> Ayaka D N1 E Q -> Kazuha E -> Kaeya E -> Ayaka Dash -> Ayaka 2N2CA -> Repeat
Rotation Video
by castiel#0415
Reverse Melt
Do note that if using an Anemo unit as a second source of Pyro application, options other than Jean will be quite unreliable. Pyro aura will be very challenging to maintain especially with the two Cryo units frequently Melting their hits. Without any more sources of Pyro application outside of Bennett, players will have to rely on very strict timings to avoid losing Pyro aura. C6 Bennett helps alleviate this issue, but not to a great extent.
Team Structure
Cryo
 Rosaria | Rosaria contributes a large amount of damage in this team by Melting her Elemental Skill and Elemental Burst hits and utilizing a myriad of ATK and potential EM buffs that can be snapshotted. Rosaria can Melt most, if not all of her hits, so she will be the primary source of damage in the team. For this reason, building her should be prioritized over Kaeya, though Kaeya himself ends up dealing a good portion of the team’s damage when built and he should be given appropriate investment as well. |
Pyro
 Bennett | Bennett provides a significant boost to the team through his Elemental Burst, 4pc NO, potential contribution to Pyro Resonance, reasonable personal damage, and strong healing. When used with Xiangling, Bennett can also battery Xiangling more freely in comparison to other teams due to the lack of characters that demand extended, uninterrupted field time. |
 Xiangling | Xiangling is recommended to be paired with Bennett to alleviate her ER requirements and snapshot his Flat ATK buff. In this team archetype, she also benefits from Rosaria’s CRIT Rate buff that she can snapshot on her Burst and Skill. She is generally a common choice for a flex slot due to her high personal damage and long, consistent Pyro application that allows both Kaeya and Rosaria to Reverse Melt their damage at appropriate intervals. Due to Xiangling’s cooldowns, her presence in the team will lengthen the rotation past 20s. The downtime can be used to battery Xiangling with Bennett. |
Anemo
 Kaedehara Kazuha | Kazuha is an excellent pick to empower off-field damage sources through his A4 buff and 4pc VV Shred. He also provides the team with a strong grouping that can remedy the shortcomings of Kaeya’s Burst’s small radius and Rosaria’s stational Burst. Through Pyro Swirls, Kazuha also contributes sizable personal damage and Pyro application that Cryo units can take advantage of. That said, Swirling both Cryo and Pyro can be difficult past the first rotation as Cryo aura is removed very easily by Pyro. Additionally, unlike Xiangling’s Burst, Kaeya’s Burst follows the vertical movement of a user, so Kaeya’s damage potential can be compromised depending on the uses of Kazuha’s Elemental Skill. |
 Sucrose | Sucrose is a good substitute for Kazuha, as she provides an Elemental Mastery buff to the whole team that can be activated easily with her Elemental Skill thanks to her A4. This can be an advantage over Kazuha since his buffs require a specific Element to be Swirled, which may be difficult to do consistently for some players on subsequent rotations. Sucrose’s Burst has caveats of having a lengthy cooldown of 20s and tossing small enemies above Kaeya and Xiangling’s Burst, so TTDS is more commonly chosen as her weapon of choice instead of Sacrificial Fragments. |
 Jean | Jean’s Burst causes continuous Pyro Swirls in conjunction with Bennett’s Burst — an interaction that is known as Sunfire. Though Sunfire allows Kaeya and Rosaria to Melt their damage, the duration of the continuous Pyro Swirls is fairly short, so Bennett should still frequently take the field to apply Pyro with his Elemental Skill. |
Dendro
 Nahida | A Reverse Melt team with Nahida features Kaeya and Rosaria as DPS units, Bennett as a healer and Pyro source, and Nahida for EM buff and additional Pyro application through Burning. Maintaining Pyro aura for both Kaeya and Rosaria is very challenging with one Pyro unit, and this stays true if using Burning as a secondary source of Pyro application. C6 Bennett is strongly recommended to maximize Melts from Rosaria and Kaeya; otherwise, Bennett alone may not provide sufficient Pyro application. |
Example Teams
As previously mentioned, Reverse Melt teams are best played when Bennett and Rosaria use their Bursts before their teammates in order for other members to snapshot the ATK and CRIT Rate buffs.
Teams with Xiangling are able to easily maintain Pyro aura for both Kaeya and Rosaria to Melt their abilities. Using an Anemo unit instead to apply Pyro can also accomplish this with their Pyro-absorbed Bursts, but their duration is not very long. Bennett's Skill should be used to maintain Pyro aura after these Bursts expire. With C6 Bennett, frequent Normal Attacks can help maintain Pyro aura.
Kaeya — Rosaria — Xiangling — Bennett
Rotation:
Kaeya E -> Bennett Q -> Bennett E -> Rosaria E -> Rosaria Q -> Xiangling Q -> Xiangling E -> Kaeya E -> Kaeya Q -> Rosaria E -> Bennett E -> Xiangling -> Bennett E -> Xiangling -> Rosaria E -> Bennett E -> Xiangling -> Repeat
Rotation Video
by luno_
Other Potential Teams with Kaeya
“If you ever need me, let me know. Let’s not make this a transaction relationship.”
Kaeya makes a decent contribution in a good number of teams as long as they aren’t overly anti-synergetic with his Elemental Burst. His reasonable demand for Energy, flexible artifact options, and short field time mean that he can be an acceptable flex unit across many teams. A few niche uses of Kaeya are listed below.
Diluc Melt
Thanks to Kaeya’s fast off-field Cryo application, Diluc can Melt some of his attacks for significant damage. This team involves more intricacies in comparison to Diluc’s other teams and the rotation can differ depending on Kaeya and other units’ Constellations. Refer to Diluc Guide for more information.
Hu Tao Vapemelt

Hu Tao can Melt some of her attacks using Kaeya’s off-field Cryo application. It can also combine with off-field Hydro application — which Hu Tao frequently prefers to have — for occasional Freezes. Furthermore, Kaeya’s sprint Stamina cost reduction Passive also comes in handy for players that struggle to manage Hu Tao’s Stamina. It should be noted that Melt reactions across the rotation can happen at different timings depending on Hu Tao’s combos and the availability of Kaeya’s C6. In general, N1C combos tend to Melt more Charged Attacks than N2C.
Fridge
Kaeya can use his Cryo application to enable “Fridge”, where the interaction between Dendro, Cryo and Hydro auras allows for occasional Freeze uptime, making the team easier to play and allowing for increased Dendro Core production; this is especially useful for teams using auxiliary Bloom-related reactions such as Hyperbloom and Burgeon.
Mono Cryo

While Kaeya can be drafted into Mono Cryo teams, the lack of a Hydro unit to Freeze enemies makes him unable to utilize his unique A4 Passive. Shenhe Guide has further information regarding this archetype.
Credits
Writing:
.jdha - Introduction, Q&A, Playstyles, Team Comps Synergies, Example Teams, and Other Potential Teams with Kaeya
cuzimori - Playstyles and Gearing
alphaflyte - Playstyles(Kaeya & Rosaria table), Talents and Constellations
Calculations:
casdela & kolibri._. - Kaeya Normal Attack Combos
reddraegon - Freeze Kaeya Weapons
.pweep - Freeze Kaeya Artifacts
yolitme0 - Reverse Melt Kaeya Weapons & Artifacts
.jdha - Constellations
Rotation Videos:
.pweep, luno_, .jdha, castiel0415
Editing and Formatting:
latiwings - Formatting
casdela - Formatting, and comments
Leah - Editing and comments
idkanonymized - Editing and comments
nikatosaurus - Editing and comments
reddraegon - Editing
fourmana - Editing and comments
cuppacote - Editing and comments
References
Changelog
July 2023 - Updated for 3.8