
Updated for Version 7.1

Diona is a 4-star Cryo Bow character in Genshin Impact who provides defensive utility and, at C6, an EM and Stellar Glimmer DMG% buff. Learn about Diona’s best builds, best weapons, best artifacts, and best teams in this quick guide.
Note that the information given may change if new discoveries are made. More extensive testing is in progress.
Join our Discord to check on and participate in the theorycrafting process.
The full-length guide is available here.
Table of Contents
New Content
 Witch’s Revelation Buff | From Version Luna VIII onward, Diona can complete her “Witch’s Revelation” quest to receive a new Passive Talent and a buff to her C6. Witch’s Revelation Passive Talent After using Diona’s Skill, she fires additional Icy Paws when a teammate triggers Superconduct, Stellar-Conduct, Cryo Swirl, or Stellar Swirl. This has a cooldown of 3.5s, so its main purpose is to apply Cryo for Stellar Glimmer damage or maintain 4pc Tenacity of the Millelith’s set effect. C6 Buff In addition to a new Passive Talent, Diona’s C6 now grants further buffs. Characters within her Burst AoE receive a 40% DMG buff to Superconduct, Stellar-Conduct, Cryo Swirl, and Stellar Swirl. Additionally, her HP increases by 25%. |
 Breezeborne Refrain | Breezeborne Refrain is a weapon banner–exclusive 4-star Bow that Diona can use to grant the team Stellar Glimmer DMG Bonus. Diona can easily activate its passive every rotation with her Elemental Skill. Its passive also helps her reach her ER requirements. |
Infographic
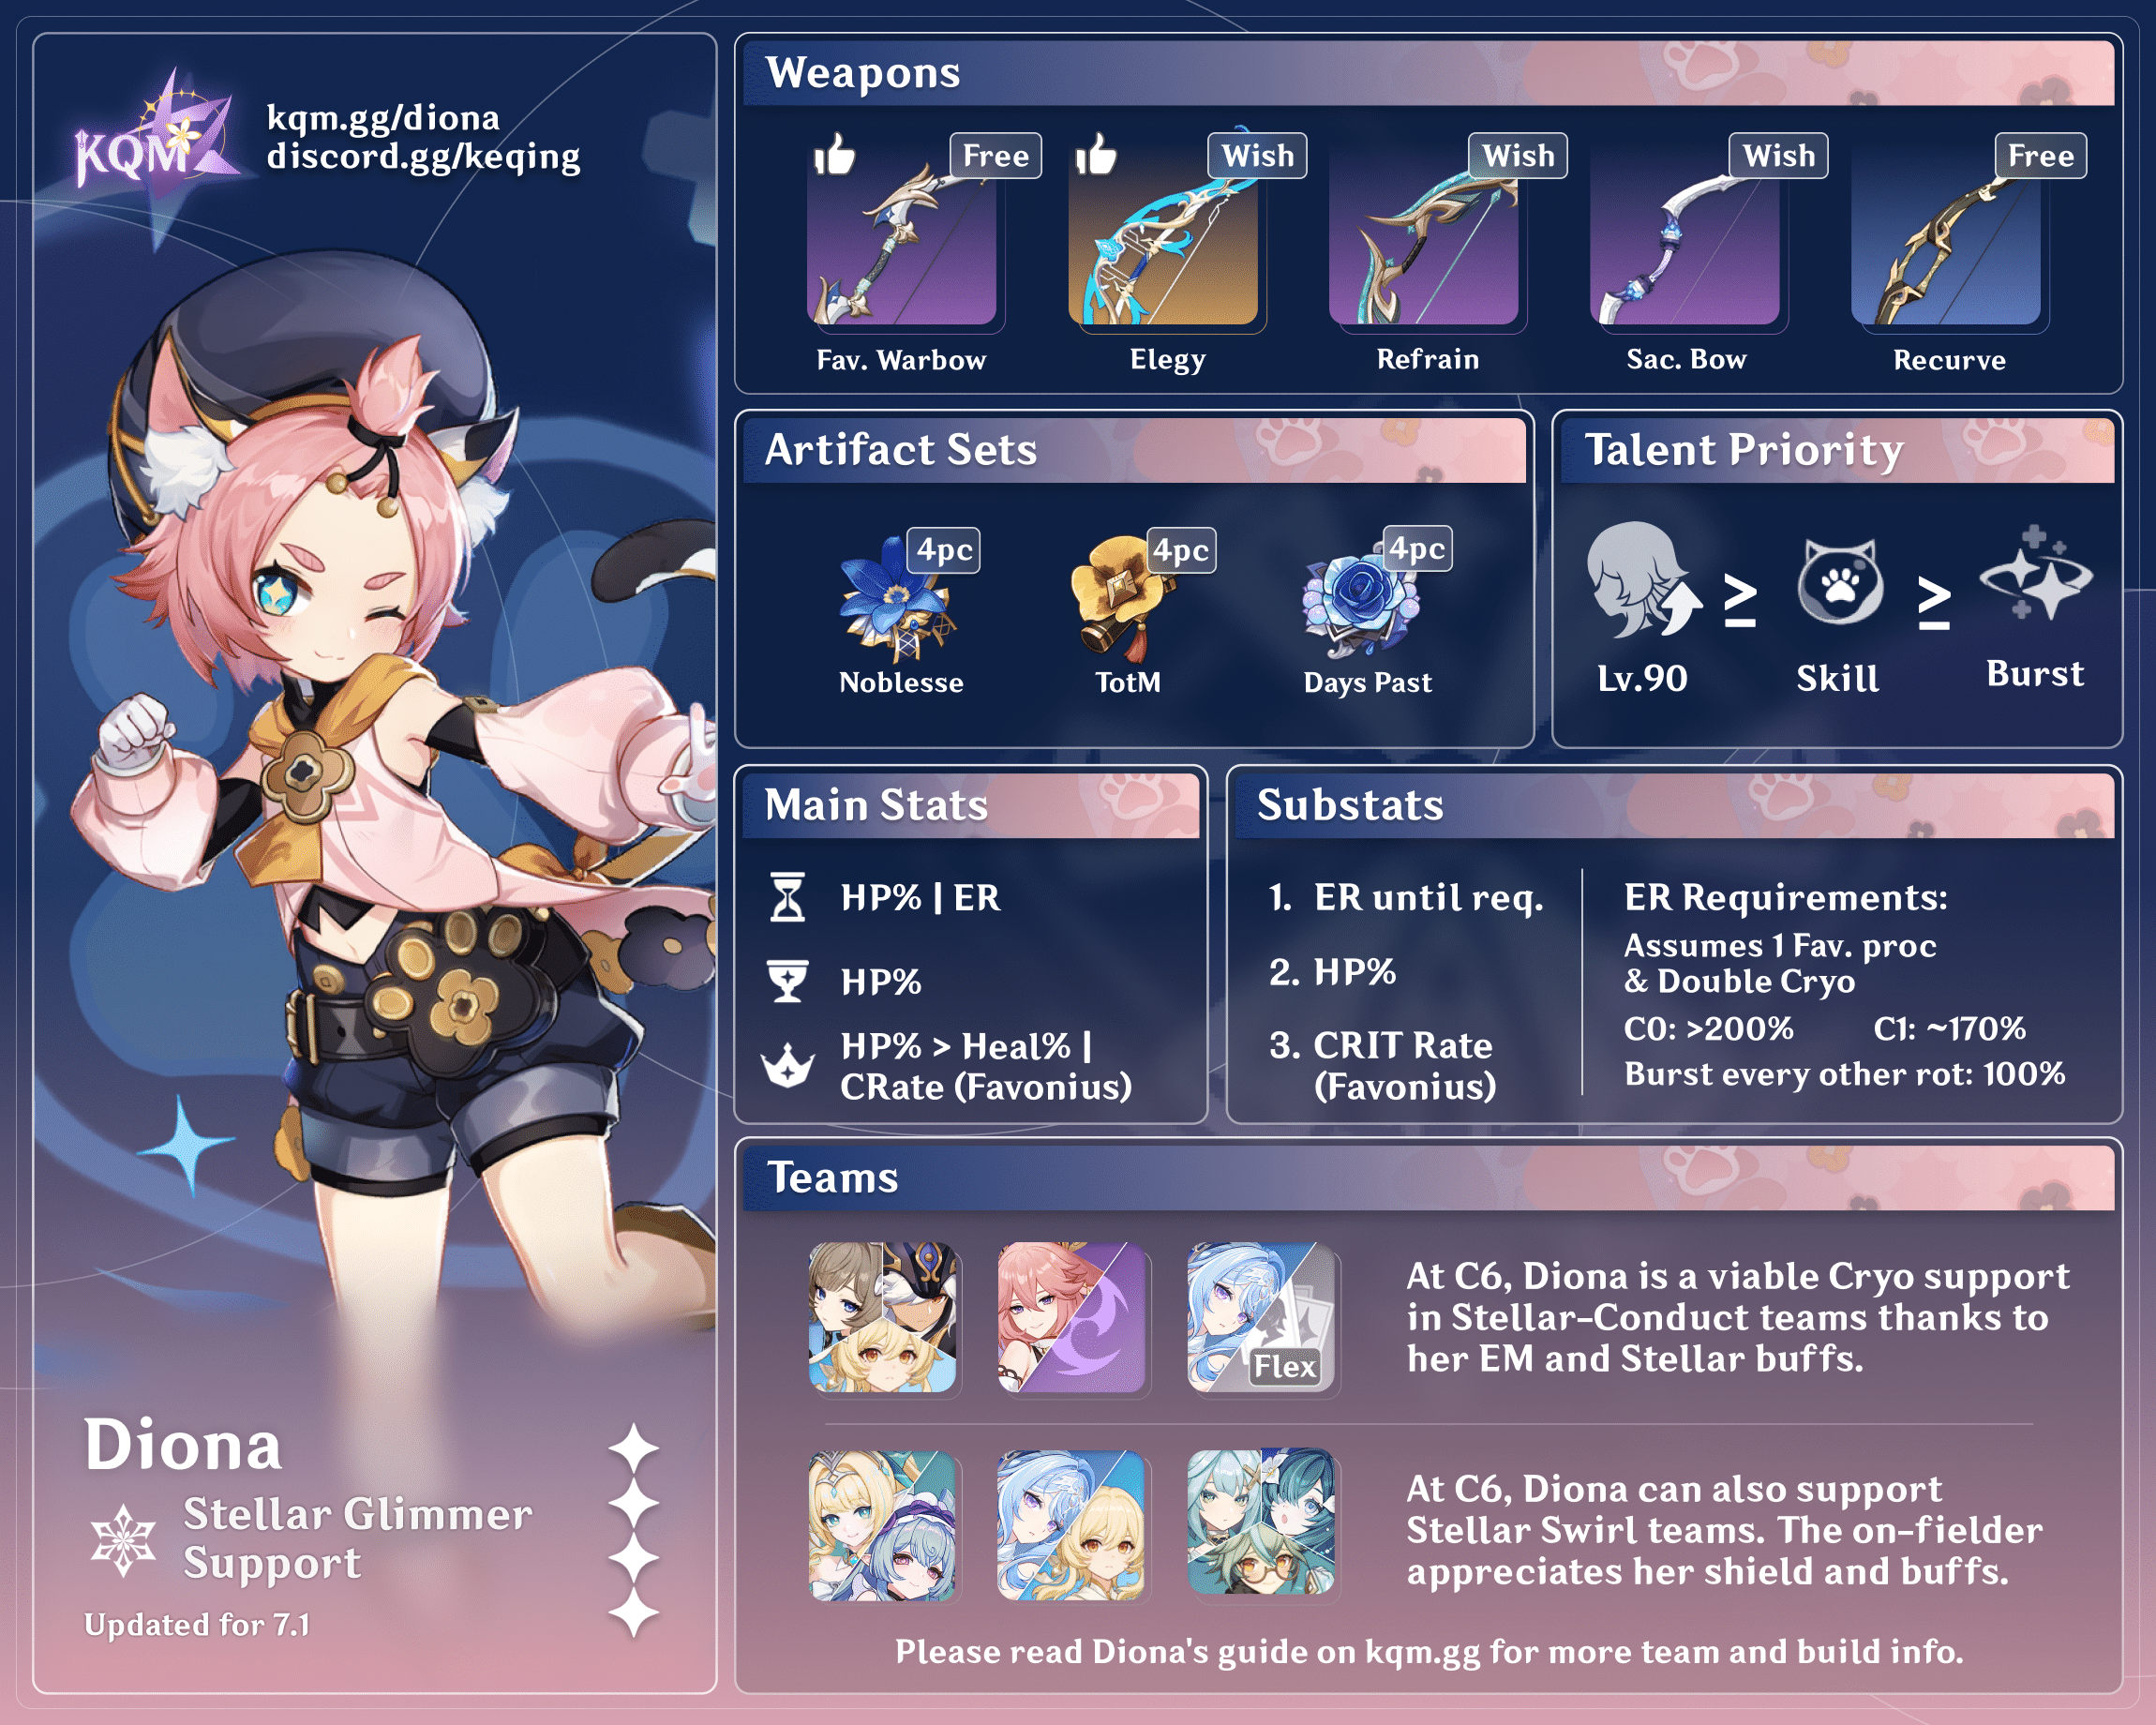
Credits to: cuppacote, icedsquid, laynnea, irokei, auntyplays, and KQM TC Staff
Character Overview
Pros
- Good combined sustain between her strong shield and decent healing.
- Increased meta relevance at C6 due to her EM and Stellar Glimmer buffs.
- Easy build requirements with several supportive artifact set options.
- Solid particle generation as a Cryo battery.
Cons
- Slower rate of Cryo application compared to other Cryo off-fielders.
- Near nonexistent personal damage.
Playstyles
Support
Diona supports the team with her shield, healing, and buffs. Her Hold Skill generates a shield and Cryo Particles to battery Cryo teammates if needed. Her Burst heals and provides additional buffs at C6 within its AoE. She also applies some Cryo to help maintain Cryo auras or trigger Elemental Reactions.
DPS
Diona can technically play as a Charged Shot or quickswap DPS unit. However, her low multipliers and scaling make it challenging to successfully clear endgame content with this playstyle. As such, this quick guide will only focus on her support playstyle.
Talents
Level and Talent Priority
Character Level ≥ Skill ≥ Burst
Diona appreciates character levels to maximize her HP for survivability; however, you should prioritize your DPS units and other supports before leveling your Diona.
Her Skill and Burst Talent levels increase the strength of her shield and healing, respectively. Diona’s shield duration maximizes at Talent Level 7.
Her Normal Attacks do not contribute to her support role and can be left unleveled.
Talent Overview
 Normal Attack | Kätzlein Style
Talent Description
Normal Attack
Performs up to 5 consecutive shots with a bow.
Charged Attack
Performs a more precise Aimed Shot with increased DMG.
While aiming, biting frost will accumulate on the arrowhead. A fully charged frost arrow will deal Cryo DMG.
Plunging Attack
Fires off a shower of arrows in mid-air before falling and striking the ground, dealing AoE DMG upon impact.
A lackluster set of Normal Attacks. They are occasionally needed to trigger Favonius Warbow’s passive.
 Elemental Skill | Icy Paws
Talent Description
Fires an Icy Paw that deals Cryo DMG to opponents and forms a shield on hit.
The shield’s DMG Absorption scales based on Diona’s Max HP, and its duration scales off the number of Icy Paws that hit their target.
(Press/Tap)
Rapidly fires off 2 Icy Paws.
Hold
Dashes back quickly before firing 5 Icy Paws. T
he shield created by a Hold attack will gain a 75% DMG Absorption Bonus.
The shield has a 250% Cryo DMG Absorption Bonus, and will cause your active character to become affected by Cryo at the point of formation for a short duration.
Diona’s Elemental Skill can be held or tapped. You should use her Hold Skill since it provides a stronger shield, lasts longer, and has better particle generation (~4 Cryo Particles).
Diona’s shield duration maximizes at Talent Level 7. Levels beyond that increase the Skill’s damage and the shield’s effective strength.
For more detailed information on Diona’s Skill, please see the Diona Extended Guide.
 Elemental Burst | Signature Mix
Talent Description
Tosses out a special cold brew that deals AoE Cryo DMG and creates a Drunken Mist in an AoE.
Drunken Mist
- Deals continuous Cryo DMG to opponents within the AoE.
- Continuously regenerates the HP of characters within the AoE.
Diona’s Burst grants rather mediocre healing, but it provides plenty of survivability combined with her shield. With Diona’s C6, her Burst grants additional buffs to the character within its AoE.
Her Burst applies Cryo once every 2s with standard ICD, so Diona by herself is not a reliable source of Cryo application to maintain a Cryo aura.
 Ascension 1 Passive | Cat’s Tail Secret Menu
Talent Description
Characters shielded by Icy Paws have their Movement SPD increased by 10% and their Stamina Consumption decreased by 10%.
Diona’s A1 Passive provides a minor quality-of-life buff. Reduced Stamina consumption helps characters who frequently use Charged Attacks (e.g. Hu Tao or Ayaka).
 Ascension 4 Passive | Drunkards’ Farce
Talent Description
Opponents who enter the AoE of Signature Mix have 10% decreased ATK for 15s.
Diona’s A4 Passive adds a negligible layer of survivability.
Witch’s Revelation Passive | Choice Treasures
Talent Description
Within 20s after using the Elemental Skill Icy Paws, Diona will also fire off three Icy Paws when party members trigger Superconduct, Stellar-Conduct, Cryo Swirl, or Stellar Swirl reactions. Icy Paws fired this way cannot generate Elemental Particles, nor will they generate a shield upon hitting opponents. This effect can occur once every 3.5s.
Additionally, Diona will also enter the Radiance: Stellar-Conduct state when she is inside a Polestar Field, or the Radiance: Stellar Swirl state for 8s after a nearby party member triggers a Stellar Swirl reaction.
With Diona’s Witch’s Revelation Passive, after using her Skill, she fires additional Icy Paws when a teammate triggers Superconduct, Stellar-Conduct, Cryo Swirl, or Stellar Swirl. This has a cooldown of 3.5s, so its main purpose is to contribute to Stellar Glimmer damage via its Cryo application or maintain 4pc Tenacity of the Millelith’s set effect.
Constellations
 Constellation 1 | A Lingering Flavor
Constellation Description
Regenerates 15 Energy for Diona after the effects of Signature Mix end.
Diona’s C1 effectively reduces her Burst Cost from 80 to 65, lowering her ER requirements.
 Constellation 2 | Shaken, Not Purred
Constellation Description
Increases Icy Paws’ DMG by 15%, and increases its shield’s DMG Absorption by 15%.
Additionally, when paws hit their targets, creates a shield for other nearby characters on the field with 50% of the Icy Paws shield’s DMG Absorption for 5s.
Diona’s C2 increases her effective shield strength and generates a shield for teammates in Co-Op Mode. In Co-Op Mode, it may be better to use Diona’s Tap Skill instead of her Hold Skill for better shield uptime.
 Constellation 3 | A—Another Round?
Constellation Description
Increases the Level of Signature Mix by 3.
Maximum upgrade level is 15.
+3 Talent levels to Diona’s Burst, boosting her healing.
 Constellation 4 | Wine Industry Slayer
Constellation Description
Within the radius of Signature Mix, Diona’s charge time for aimed shots is reduced by 60%
Diona’s C4 is insignificant in a support playstyle; however, this is the Constellation that enables Diona to play as a Charged Shot DPS.
 Constellation 5 | Double Shot, on the Rocks
Constellation Description
Increases the Level of Icy Paws by 3.
Maximum upgrade level is 15.
+3 Talent levels to Diona’s Skill, boosting her shield’s DMG Absorption.
 Constellation 6 | Cat’s Tail Closing Time
Constellation Description
Characters within Signature Mix’s radius will gain the following effects based on their HP levels:
- The Incoming Healing Bonus is increased by 30% when HP is at, or lower than, 50%.
- Elemental Mastery is increased by 200 when HP is above 50%.
Additionally, Diona’s Max HP is increased by 25%.
Radiance: Stellar Glimmer: Characters within the Signature Mix field deal increased DMG for the following reactions:
Radiance: Stellar-Conduct: Superconduct, Stellar-Conduct reaction DMG increased by 40%.
Radiance: Stellar Swirl: Cryo Swirl, Stellar Swirl reaction DMG increased by 40%.
Diona’s C6 is her most impactful Constellation. It grants a massive 200 EM buff to the on-field character, which is quite valuable for reaction-based teams. Moreover, upon completing her “Witch’s Revelation” quest, Diona’s C6 now grants further buffs. Characters within her Burst AoE receive a 40% DMG buff to Superconduct, Stellar-Conduct, Cryo Swirl, and Stellar Swirl. Additionally, her HP increases by 25%.
Artifacts
ER Requirements
Calcs for ER requirements can be found here (last updated for Version 6.7).
Use the Energy Recharge Calculator to determine exact requirements for your team and rotation. For more details on how Favonius weapons will affect your team, please use Ac1d’s Favonius Mastersheet.
Assumptions:
- Safe particle RNG and default enemy particles are assumed.
- These characters always hold Favonius weapons in the calculations: Aino, Beidou, Iansan, Qiqi, Rosaria, Xilonen, Xingqiu.
In most teams with another Cryo character, Diona can follow the general Double Cryo ER requirements below. A few specific team compositions that use C6 Diona are noted further below with outlier ER requirements.
Double Cryo (+1 Cryo Teammate)
| C1–C6 | C0 | |
| Sacrificial Bow | 120–135% | 145–165% |
| Favonius Warbow | 130–150% | 160–180% |
| Other Bow | 145–175% | 180–220% |
Sandrone Double Electro
| C6 | |
| Sacrificial Bow | 130–150% |
| Favonius Warbow | 145–165% |
| Other Bow | 170–200% |
Sandrone + Escoffier / Qiqi
| C6 | |
| Sacrificial Bow | 140–160% |
| Favonius Warbow | 160–180% |
| Other Bow | 190–210% |
Mavuika / Gaming — Citlali — Bennett
| C6 | |
| Sacrificial Bow | 170–180% |
| Favonius Warbow | 190–200% |
| Other Bow | 230–240% |
Artifact Stats
 Sands |  Goblet |  Circlet |
| HP% or ER | HP% | HP% > Healing Bonus or CRIT Rate (Fav.) |
Stat Priority: ER until requirement > HP% > CRIT Rate (Favonius) > Flat HP
Diona’s shield and healing both scale with her HP. A CRIT Rate Circlet lets Diona more consistently trigger Favonius Warbow’s passive. A Healing Bonus Circlet is also possible, but this only benefits Diona’s middling healing.
Artifact Sets
As a support with low personal damage, Diona makes great use of 4pc artifact sets that provide additional buffs to teammates.
Hover over artifact images for more information.
 4pc Noblesse Oblige (NO) | 4pc NO is Diona’s default set for ATK-scaling DPS teammates if no one else on the team can hold it. Often, if the team has another support, they can hold 4pc NO instead and let Diona hold one of the options below. |
 4pc Scroll of the Hero of Cinder City (Scroll) | 4pc Scroll is a viable option for teammates who care about Elemental DMG% buffs. While Diona cannot make full use of the 4pc set, a 12% Elemental DMG buff is better than nothing. |
 4pc Song of Days Past (SoDP) | 4pc SoDP is another option if a teammate can hold 4pc NO. While Diona doesn’t have the greatest healing, she can still use it to buff on-field DPS teammates. |
 4pc Tenacity of the Millelith (TotM) | 4pc TotM is only a viable option in Stellar-Conduct, Stellar Swirl, and Superconduct teams, or in teams where Cryo Swirl can trigger. Diona’s Witch’s Revelation Passive causes her Skill to hit enemies when teammates trigger Superconduct, Stellar-Conduct, Cryo Swirl, or Stellar Swirl. If another teammate can hold 4pc NO, Diona usually holds 4pc TotM in such teams. Note that 4pc TotM’s buff lasts 3s while Diona can only trigger her Witch’s Revelation Passive every 3.5s. While there is a very small gap in buff uptime, it is a non-issue in most scenarios. |
 4pc Deepwood Memories | In teams with Dendro damage (direct or from Bloom-related reactions), Diona can hold 4pc Deepwood Memories. |
 4pc Instructor | 4pc Instructor allows Diona to provide an additional 120 EM buff to her team at the expense of her shield strength and healing. |
Weapons
Diona’s most notable Bow options are listed below. However, she can benefit from any Bow that has an ER or HP% secondary stat.
Hover over weapon images for more information.
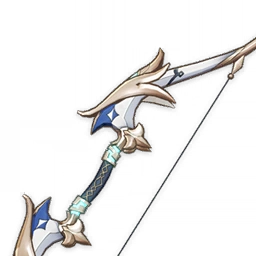 4★ Favonius Warbow | Favonius Warbow is Diona’s default weapon option. One copy is given for free after defeating Dvalin in the Mondstadt Archon Quest. It provides a healthy amount of ER for Diona and great particle generation for the team. Some CRIT Rate investment is necessary to consistently trigger its passive while Diona is on-field. |
 4★ Sacrificial Bow | Sacrificial Bow improves Diona’s ability to battery Cryo teammates. In teams where Diona can take the field twice per rotation, it also allows for higher shield uptime. Thanks to Diona’s multi-hit Skill, she consistently triggers Sacrificial Bow’s passive (>90% of the time at any refinement). Please note that depending on your refinement and team rotation, Diona may not be able to proc the passive every rotation. |
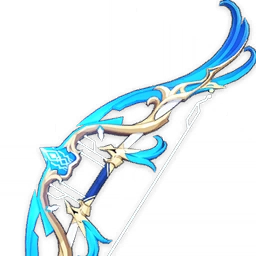 5★ Elegy for the End | Elegy for the End provides a nice EM and ATK% buff to the team when its passive activates. Diona also appreciates its high ER secondary stat. Despite this, its passive has variable uptime that is difficult to maintain. Please see the Diona Extended Guide for more information on potential issues with this Bow. |
4★ Breezeborne Refrain | Breezeborne Refrain is a weapon banner–exclusive 4-star Bow that Diona can use to grant the team Stellar Glimmer DMG Bonus. Diona can easily activate its passive every rotation with her Elemental Skill. Its passive also helps her reach her ER requirements. R1 Elegy is still typically better than low-refinement Breezeborne Refrain, but at high refinements, the weapon becomes a more competitive option. |
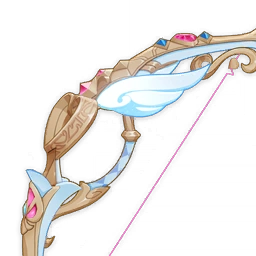 5★ Silvershower Heartstrings | Silvershower Heartstrings maximizes Diona’s HP thanks to its secondary stat and passive. Diona can consistently maintain 2 Remedy stacks with her Skill use and Burst healing. Please do not pull this weapon for Diona or frankly anyone. It is noted here simply if you have one available. |
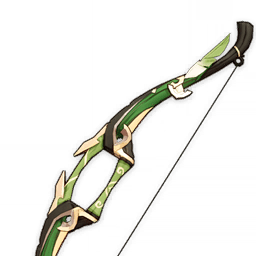 3★ Recurve Bow | Recurve Bow is randomly found in chests in Mondstadt. As one of the few Bows with an HP% secondary stat, Recurve Bow is a solid option to maximize Diona’s shield and healing. |
Teams
Rotation Notation
- N = Normal Attack
- C = Charged Attack
- A = Aimed Shot
- P = Plunging Attack
- E = Elemental Skill
- tE = Tap Skill
- hE = Hold Skill
- Q = Elemental Burst
- D = dash (cancel)
- J = jump (cancel)
- W = walk (cancel)
- > = switch character
- ( ) = these actions are optional; please refer to the notes below
- [ ] = repeat these actions the specified number of times
Teambuilding
- Diona slots into any team that appreciates a shield or single-ally healing.
- She has value as a Cryo battery for units like Ayaka or Eula.
- Diona also enables Cryo Resonance when paired with another Cryo teammate.
- At C6, Diona becomes more relevant as an EM or Stellar-Conduct buffer.
Stellar-Conduct

At C6, Diona becomes a relevant Stellar-Conduct support thanks to her EM and Stellar-Conduct DMG% buffs. She is the only character among those with Witch’s Revelation buffs who grants a reliable shield, which the on-field unit appreciates. Odette is a great dedicated support for Stellar-Conduct teams thanks to her personal damage and buffs.
Sandrone, Odette, or Cryo Traveler are required to enable Stellar-Conduct. At least one team member should hold 4pc Heart of the Furnace.
Notable Teammates
Stellar-Conduct DPS
 Sandrone ★ | Sandrone deals great on-field damage and appreciates Diona’s shield and C6 buffs. |
 Cyno ★ | Cyno is a solid on-field Stellar-Conduct DPS, especially with early Constellations. He appreciates Diona’s shield and C6 buffs. |
 Cryo Traveler ★ | Cryo Traveler is a fantastic free-to-play Stellar-Conduct DPS, especially with their accumulated buffs, Constellations, and Exaiphanes Blade. Traveler can also act as a quickswap DPS and Stellar-Conduct enabler if Odette is unavailable. |
 Wriothesley | Wriothesley and Diona have anti-synergy because Diona heals with her Burst. Wriothesley prefers to manage his own HP, so they should not play together. |
Electro
An Electro character is required to trigger Superconduct and Stellar-Conduct. Units with consistently Electro application, strong personal damage, and buffs to Stellar-Conduct are preferred.
 Yae Miko ★ | Yae Miko is the premier Electro option in Stellar-Conduct teams, especially at C1+. She provides great buffs, personal damage, and consistent Electro application. |
 Alyosha | Alyosha is a free Electro support in Stellar-Conduct teams thanks to his Stellar-Conduct–focused buffs to the on-fielder. He also provides defensive utility with his healing. |
 C6 Beidou | C6 Beidou is a solid Electro pick in Stellar-Conduct teams thanks to her personal damage (especially in multi-target scenarios) and C6 RES Shred and EM buffs. |






Cryo
Another Cryo character enables Cryo Resonance, helps reduce Diona’s ER requirements, and ideally provides buffs to Stellar-Conduct damage.
 Odette ★ | Odette is the preeminent Stellar-Conduct support thanks to her strong personal damage and Stellar-Conduct buffs. Odette enables Cyno to act as a Stellar-Conduct DPS. |
 Cryo Traveler ★ | Cryo Traveler is a free-to-play Stellar-Conduct enabler. They act as a quickswap DPS in Stellar-Conduct teams. They also give the active character 120 EM from their C2, and up to 40% Stellar-Conduct DMG Bonus to the entire team at C6. |
 Qiqi ★ | Qiqi is a top-tier teammate in Stellar-Conduct teams thanks to her buffs, Cryo application, particle generation, and personal damage. |
 Escoffier ★ | Escoffier provides consistent Cryo application, Cryo RES Shred, and strong personal damage. |








Example Teams
This is not a comprehensive list of teams. The inclusion or exclusion of any given team does not necessarily reflect its power level.

This is one of Sandrone’s best team options with C6 Diona. Diona and Odette / Qiqi / Escoffier help lower each other’s ER requirements.
Sample Rotation (Odette)
Yae 3[E] > Odette 2[E] > Diona hEQ > Sandrone combo
Sample Rotation (Qiqi)
Yae 3[E] > Qiqi E(Q)¹ > Diona hEQ > Sandrone combo
Sample Rotation (Escoffier)
Yae 3[E] > Escoffier E(Q)² > Diona hEQ > Sandrone combo
¹Use Burst if Qiqi is C6.
²Use Burst if Escoffier holds Symphonist of Scents.
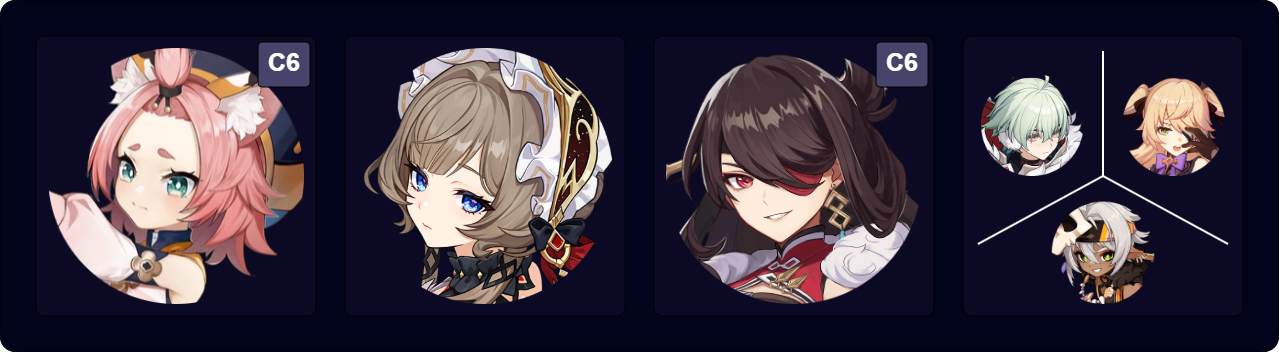
This is a more accessible Sandrone team. Alyosha provides great buffs to Sandrone. Fischl offers great Electro application, fine personal damage, and minor buffs, while Iansan focuses exclusively on buffing Sandrone.
Sample Rotation (Alyosha)
Alyosha EQ > Diona hEQ > Beidou EQ > Sandrone combo
Sample Rotation (Fischl)
Diona hEQ > Fischl Q / E > Beidou EQ > Sandrone combo
Sample Rotation (Iansan)
Diona hE > Iansan EQ > Diona Q > Beidou EQ > Sandrone combo

This is a solid Cyno team with C6 Diona providing buffs and defensive utility. Odette or Cryo Traveler are required to enable Cyno’s Stellar Passive. While Sandrone is possible in the last slot to enable Stellar-Conduct, she prefers to play on-field instead.
Sample Rotation (Odette)
Yae Miko 3[E] > Odette 2[E] > Diona hEQ > Cyno combo
Sample Rotation (Cryo Traveler)
Yae Miko 3[E] > Traveler¹ E N1C Q > Diona hEQ > Cyno combo
¹Traveler should skip N1C Q on the first rotation.
Limited Roster Alternatives
These teams are meant for newer players whose limited roster prevents them from using the teams above; as such, the teams below result in lower damage output.

This is a fine Cryo Traveler DPS team with Alyosha and Sucrose as free supports. Alyosha provides Electro application, buffs to Cryo Traveler, and additional healing. Sucrose shreds enemy Cryo RES with 4pc VV and can hold TTDS.
Sample Rotation
Diona hE > Alyosha E(Q)¹ > Diona Q > Sucrose ED N2 > Traveler combo
¹Use Alyosha’s Burst every other rotation with his C2 activated.
Stellar Swirl

At C6, Diona becomes a relevant Stellar Swirl support thanks to her EM and Stellar Swirl DMG% buffs. She is the only character among those with Witch’s Revelation buffs who grants a reliable shield, which the on-field unit appreciates. Stellar Swirl teams tend to run rotations around 15s if possible, so Diona can use her Burst every other rotation and decrease her ER requirements.
Vesna, Odette, Cryo Traveler, or Sandrone are required to enable Stellar Swirl. At least one team member should hold 4pc Heart of the Furnace.
Notable Teammates
Stellar Swirl DPS
Vesna and Mizuki are the preferred Stellar Swirl DPS units available. While other Anemo units can work, they perform considerably worse.
 Vesna ★ | Vesna is a Stellar Swirl DPS who can enable the reaction herself. She appreciates Diona’s shield and buffs. |
 Mizuki ★ | Mizuki is a strong Stellar Swirl DPS, but she cannot enable the reaction herself. She requires Odette or Cryo Traveler (or Sandrone) on the team. She appreciates Diona’s shield and buffs.Please note that C1 Mizuki is free-to-play and a fantastic DPS option in this archetype. |
Cryo
Another Cryo character enables Cryo Resonance, helps reduce Diona’s ER requirements, and ideally provides buffs to Stellar Swirl damage.
 Odette ★ | Odette enables and buffs Stellar Swirl damage. She also deals decent damage and applies off-field Cryo with her Skill. |
 Cryo Traveler ★ | Cryo Traveler is a free-to-play Stellar Swirl enabler that applies off-field Cryo with their Skill. They also give the active character 120 EM from their C2, and up to 40% Stellar Swirl DMG Bonus to the entire team at C6. The majority of Cryo Traveler’s damage comes from their Burst and enhanced Charged Attack that deal direct Stellar Swirl damage. |
 Qiqi | Qiqi gives a teamwide Stellar Swirl DMG Bonus and, at C6, an Additive Base DMG Bonus. |

Anemo
These Anemo units provide valuable buffs to Stellar Swirl damage via their buffs.
 C6 Faruzan ★ | C6 Faruzan is typically the best Anemo support, thanks to her Anemo RES Shred and Anemo CRIT DMG buffs.Faruzan holds 4pc HotF or, if another teammate already holds it, 4pc VV. |
 Sucrose ★ | Sucrose provides teamwide EM buff and can be a decent support choice if C6 Faruzan is unavailable. |
Flex
 Vodyanitsa ★ | Vodyanitsa is one of the best supports for Stellar Swirl teams thanks to her Cryo RES Shred, Anemo RES Shred, and Additive Base DMG Bonus. She typically holds 4pc TotM and TTDS. In teams with Mizuki, Vodyanitsa’s Hydro application can occasionally remove Cryo aura on enemies that cannot be Frozen or have Freeze resistance. This disrupts Mizuki’s Swirl patterns, which can result in fewer Witch’s Revelation Passive and C1 procs. However, this can be avoided with another Cryo character on the team with Diona. |
Example Teams
This is not a comprehensive list of teams. The inclusion or exclusion of any given team does not necessarily reflect its power level.
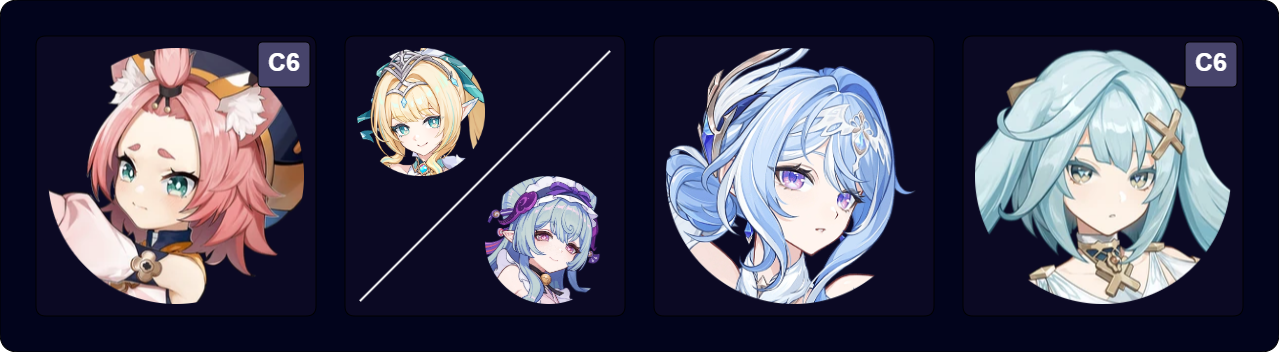
This is one of Vesna and Mizuki’s best teams with C6 Diona. Odette and Faruzan provide great combined buffs.
Sample Rotation (Vesna)
(Diona hE / Odette Q)¹ > Faruzan Q > Odette 2[E] > Diona hEQ > Vesna combo
Sample Rotation (Mizuki)
(Diona hE / Odette Q)¹ > Faruzan Q / EC² > Odette 2[E] > Diona hE(Q)² > Mizuki combo
¹The first rotation requires Cryo application to enable Faruzan to trigger a Cryo Swirl on-field for 4pc Viridescent Venerer, if she is holding the set.
²If you can run 15s rotations, alternate Faruzan Burst and Charged Shot every other rotation. Use Diona Burst every other rotation.

This is another competitive Stellar Swirl team with C6 Diona. Diona and Odette’s combined Cryo application should be enough for Mizuki to consistently trigger Stellar Swirl despite Vodyanitsa’s Hydro application.
Sample Rotation (Vesna)
Vodyanitsa E > Odette E (Q)¹ > Diona hE(Q)² > Vesna combo
Sample Rotation (Mizuki)
Vodyanitsa E > Odette E (Q)¹ > Diona hE(Q)² > Mizuki combo
¹Use Odette Burst every other rotation or when available.
²If you can run 15s rotations, use Diona Burst every other rotation.
Limited Roster Alternatives
These teams are meant for newer players whose limited roster prevents them from using the teams above; as such, the teams below result in lower damage output.

This is a free-to-play Mizuki team with Cryo Traveler enabling Stellar Swirl. Sucrose can hold an EM weapon or TTDS to buff Traveler.
Sample Rotation
Diona hE(Q)¹ > Sucrose ED N2 > Traveler² E N1C Q > Mizuki combo
¹If you can run 15s rotations, use Diona Burst every other rotation.
²Traveler should skip N1C Q on the first rotation.
Forward Melt
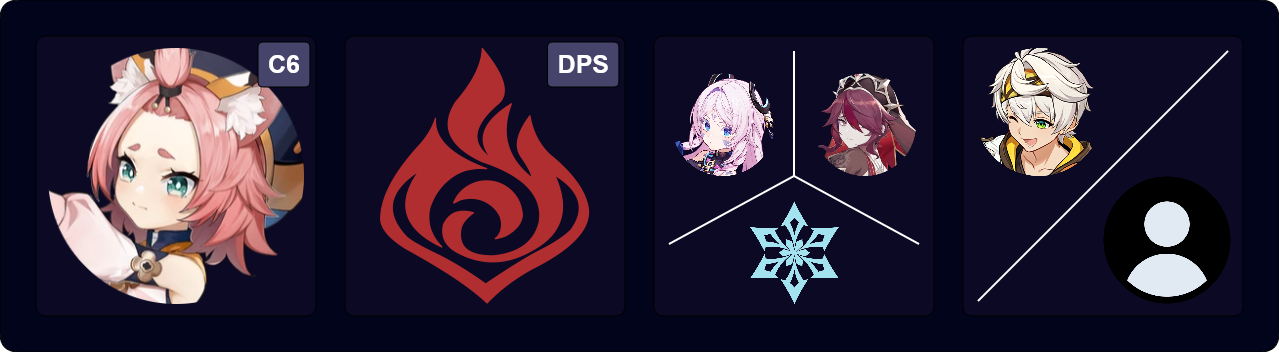
C6 Diona is a solid pick for certain Pyro DPS units. She provides a 200 EM buff, supplemental Cryo application, a shield, and 4pc artifact set buffs. While she does often take the place of an Anemo 4pc Viridescent Venerer support or Xilonen, she is still a competitive option who doesn’t require a specific enemy aura to function. Another Cryo teammate is required to enable a consistent Cryo aura; Diona cannot enable Melt by herself.
Notable Teammates
Pyro DPS





Cryo
Another Cryo teammate is required to enable a consistent Cryo aura; Diona cannot enable Melt by herself.
 Citlali ★ | Citlali is the premier Cryo teammate for Forward Melt thanks to her amazing Cryo application and plethora of buffs (including 4pc Scroll and TTDS). |
 Rosaria ★ | Rosaria is a strong 4-star option thanks to her consistent Cryo application and CRIT Rate buff. Her C2 is strongly recommended to allow longer Cryo application uptime. |




Example Teams
This is not a comprehensive list of teams. The inclusion or exclusion of any given team does not necessarily reflect its power level.

Mavuika appreciates C6 Diona’s EM buff and additional Cryo application for more consistent Melts. For support builds: Diona holds 4pc SoDP or NO; Citlali holds 4pc Scroll; and Bennett holds 4pc NO or Instructor.
Sample Rotation
Mavuika E > Bennett E N1 > Diona hEQ > Bennett Q > Citlali EQ N2 > Mavuika Q combo

Gaming greatly appreciates Diona’s C6 EM buff and supplemental Cryo application. For support builds: Diona holds 4pc NO, SoDP, or Scroll; Citlali holds 4pc Scroll; Rosaria holds 4pc NO or Scroll; and Bennett holds 4pc Instructor.
Sample Rotation (Citlali)
Diona hEQ > Bennett EQ > Citlali EQ > Gaming Q 6[EP] > (Bennett E N2)¹
Sample Rotation (Rosaria)
(Gaming EP)² > Diona hEQ > Bennett EQ > Rosaria EQ > Gaming Q 6[EP] > Rosaria E > Gaming E > Bennett E
¹To battery Bennett if necessary.
²First rotation only if Diona holds 4pc Scroll.
Freeze & Mono Cryo

Diona’s defensive utility may seem redundant against Freezable enemies, but it is still appreciated for extra comfort. Diona is also a great battery for a Cryo DPS unit. In most teams, Diona holds 4pc NO and Favonius Warbow or Sacrificial Bow.
Notable Teammates
Cryo DPS
Cryo DPS units (except Skirk) appreciate Diona for her Cryo Particle generation that reduces their ER requirements. Characters like Skirk, Ganyu, and Kaeya can act more as a quickswap DPS in certain teams.





Cryo Support
Cryo supports who grant the team’s primary DPS unit additional buffs are great choices in Freeze & Mono Cryo.
 Escoffier ★ | Escoffier is an ideal Cryo teammate. She deals amazing off-field damage, constantly shreds enemy Hydro and Cryo RES, and heals enough to offset Furina’s HP drain. Furthermore, her RES Shred occurs without the need to trigger reactions. With Escoffier, the team should only consist of Hydro and Cryo characters to maximize her RES Shred. Escoffier’s build should prioritize her personal DPS. |




Hydro
A Hydro teammate is necessary to Freeze enemies. Some Hydro characters (e.g. Neuvillette or Ayato) can act as the team’s primary DPS unit.
 Furina ★ | Furina is an excellent Hydro teammate. She provides a fantastic DMG% buff and deals great off-field damage. The team does require a healer to maintain Fanfare stacks through multiple rotations; Escoffier is the premium pairing in this regard. |
 Vodyanitsa ★ | Vodyanitsa is an incredible Hydro teammate thanks to her Skill’s Hydro and Cryo RES Shred and her other buffs. Her Skill also applies consistent off-field Hydro application. |










Example Teams
This is not a comprehensive list of teams. The inclusion or exclusion of any given team does not necessarily reflect its power level.

Diona offers a nice shield, provides buffs with 4pc artifact sets, batteries Ayaka, and supplements Escoffier’s or Xilonen’s healing.
Sample Rotation (Escoffier)
Furina ED Q > Escoffier EQ > Diona (Q)¹ hE > Ayaka combo
Sample Rotation (Xilonen)
Xilonen Q > Furina ED Q > Diona Q > Xilonen E N2 > Diona hE > Ayaka combo > Xilonen E N2 > Ayaka combo
¹Diona only needs to use her Burst here if she holds 4pc NO or 4pc SoDP.

A team that is known as “Morgana”. Mona provides buffing along with Hydro application and can hold 4pc Celestial Gift and TTDS. Venti provides grouping, shreds RES through 4pc VV, and reduces Ganyu’s and Diona’s ER requirement if his Burst absorbs Cryo. Diona sustains through her healing and shield while holding 4pc NO.
Sample Rotation
Diona hEQ > Ganyu EQ > Venti tEQ > Mona EQ N3 > Ganyu 2[C] > Venti tE > Ganyu 2[C]
Limited Roster Alternatives
These teams are meant for newer players whose limited roster prevents them from using the teams above; as such, the teams below result in lower damage output.

This team is effective against enemies that can be Frozen. Diona provides great defensive utility, buffs the team with 4pc NO, and helps battery Kaeya; her Stamina Consumption passive also helps Kaeya’s N2C combos. It is important to weave in Normal Attacks to maximize damage from Xingqiu’s Burst. Anemo Traveler provides 60% Cryo RES Shred via 4pc Viridescent Venerer and their C6.
Sample Rotation
Xingqiu EDQ N1 > Diona Q N1 hE > Kaeya QE N1 > Traveler shEQ N1 > Kaeya N2C E 2[N2C] > Traveler shE > Kaeya E N1
Flex Support

Diona can slot into any team that appreciates her shield, healing, Cryo application, or buffs associated with her C6. As a Cryo character, she can enable Cryo Resonance when paired with another Cryo character.
Example Teams
This is not a comprehensive list of teams. The inclusion or exclusion of any given team does not necessarily reflect its power level.
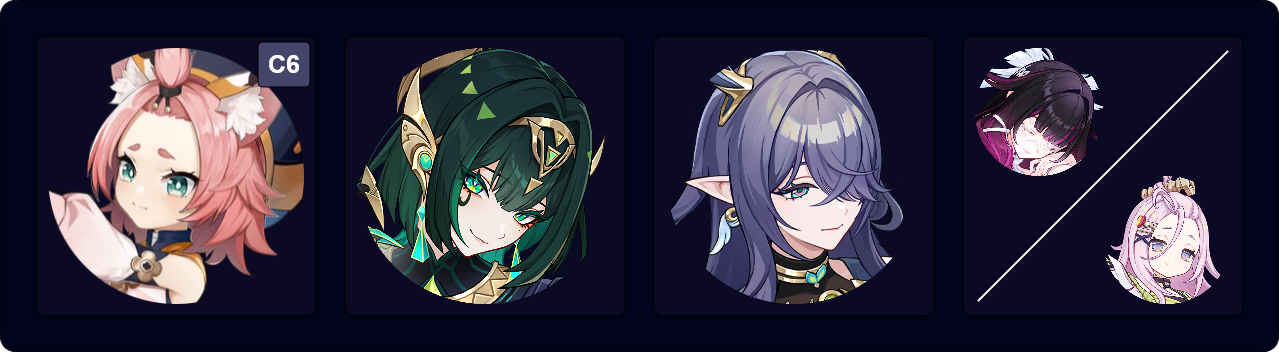
C6 Diona can buff EM-scaling units like Nefer, who also appreciates her shield and reduced Stamina consumption. However, Diona extends the team’s rotation due to her Burst’s 20s cooldown. This issue can be mitigated in one of two ways:
- With Columbina, Nefer can hold R5 Sacrificial Fragments. Columbina provides 3 additional Moonridge Dews every rotation, so Nefer can cast her Skill 1 additional time with Sacrificial Fragments’ passive.
- With Aino or Columbina, Diona can use her Burst every other rotation if Nefer holds a Catalyst other than Sacrificial Fragments.
Diona should hold 4pc Deepwood Memories and Favonius Warbow or Sacrificial Bow for her extremely high ER requirements.
Sample Rotation (Columbina — Nefer with Sacrificial Fragments)
Columbina EQ > Lauma hEQ > Diona hEQ > Nefer combo
Sample Rotation (Aino — Nefer with Other Catalyst)
Lauma hEQ > Aino EQ > Diona hE (Q)¹ > Nefer combo
¹Burst every other rotation.

C6 Diona only benefits the on-field character with her Burst’s AoE. As such, she can buff Hyperbloom DPS units like Raiden who can take the field while driving teammate abilities, like Xingqiu’s Burst.
Diona should hold 4pc Deepwood Memories in this team.
Sample Rotation
Raiden E > Xingqiu EDQ N1 > Lauma hEQ N1 > Diona hEQ N1 > Raiden combo
Limited Roster Alternatives
These teams are meant for newer players whose limited roster prevents them from using the teams above; as such, the teams below result in lower damage output.

Freminet appreciates Diona’s shield and Cryo Particle generation. With Diona’s Witch’s Revelation Passive, she can hold 4pc TotM in this team thanks to the Superconduct reactions, which allows Xingqiu to hold 4pc NO.
Sample Rotation
(Fischl E)¹ > Xingqiu EDQ N1 > Diona hE (Q)² N1 > Fischl N2 Q / E N1 > Freminet combo
¹First rotation only
²Burst if healing is needed or Diona holds 4pc NO or SoDP.
Credits
Updater: irokei
Contributors: luke_260, idkanonymized, mystathi, pkach404, acerbus114, haafr, antiguaa
Version 4.0: chasing_haze, ultimate.noob, nociii, idkanonymized, polomo, dejaroo, cinders_pear
Team images made with the KQM portrait generator.