A Mika Guide
Written by chasing_haze
Updated for Version 4.6

“I hope I’ll be able to provide more useful intelligence, and help take some weight off of your shoulders!”
Table of Contents
Introduction
Welcome Travelers, to the KQM guide on Mika – the Chocobo Surveyor of the Knights of Favonius!
Mika is a 4-star Cryo Polearm user who provides healing, as well as Physical DMG% and Attack SPD buffs for the on-field character. We hope this guide helps navigate you through Mika’s best builds, best weapons, best artifact sets, best teams, Talent priority, and more!
TL;DR

Content: alphaflyte, Design: cuppacote
Glossary
Terminology
| Driver | Refers to an on-field character whose main role is to trigger reactions and/or other characters’ abilities. |
| Energy (particles) | Energy particles are dropped by Elemental Skills and enemies. When collected, they “charge” Elemental Bursts. |
| Hitlag | An in-game phenomenon that gives a sense of “heaviness” when a character attacks — it briefly “freezes” the character for a few frames while the environment surroundings continue. |
| Hypercarry | Refers to a character who has long field time and deals a majority of the team’s damage — the purpose of hypercarry teams is to buff the hypercarry’s personal damage. |
| Snapshot | Abilities that snapshot deal damage based on the character’s stats on cast, even if changes occur (e.g., a buff wearing off) throughout the ability’s duration. |
| Talent Multiplier | The % values in the Talent description. |
Abbreviations and Acronyms
| A# | Ascension # Passive |
| ADC | ATK% Sands, Elemental DMG% Goblet, CRIT Circlet — refers to the common artifact build for damage dealers |
| ATK SPD | Attack Speed |
| C# | Constellation # |
| DMG | Damage |
| DMG% | Damage Bonus |
| ER | Energy Recharge |
| QoL | Quality of Life — refers to how much comfort or ease-of-play something provides |
| R# | Refinement Rank # |
| RES | (Elemental) Resistance |
| RNG | Random Number Generation — refers to things that happen by chance |
| TL | Talent Level |
Combo Notation
| N# | # number of Normal Attacks in a string |
| C(A) | Charged Attack |
| (t)E | Tap Elemental Skill |
| hE | Hold Elemental Skill |
| Q | Elemental Burst |
| D | Dash cancel |
| #[combo] | Repeat # number of times (e.g., 3[N2C] = repeat N2C three times) |
FAQ
Why play Mika?
Pros
- Unique Physical DMG% and Attack SPD buffs
- Strong healing via his Burst, both teamwide and over time
- Straightforward to build
- Buffs + good healing is just a nice combination
Cons
- Physical DMG% buff suffers in single-target
- Low Cryo application struggles to enable reactions or keep Cryo Resonance uptime
- Has many competitors who perform similarly if not better
- Personal damage is nonexistent
What is Mika’s role in a team?
Mika consolidates buffs and healing in one slot, but his buffs are rather niche, as he buffs Physical damage and Attack SPD. The characters who best take advantage of Mika’s kit are Eula and Freminet, since both are on-field Physical damage dealers who also appreciate Attack SPD due to their usage of Normal Attacks. Of course, they also appreciate Mika’s healing to help stay alive.
There are other units who can act as Physical damage dealers and benefit from Attack SPD, such as Zhongli and Keqing, but they have other preferred playstyles that do not need nor want Mika.
However, Mika can still fit into teams that do not necessarily take advantage of his entire kit. One example is Furina teams, where Mika’s large teamwide heal and smaller but periodic healing instances help maximize Furina’s DMG% buff (which is dependent on HP changes). Another example is Wanderer teams, which greatly benefit from Mika’s Attack SPD buff.
Please see the Teambuilding section for more information on Mika’s teams.
Does Mika "fix" Physical?
Unfortunately, no — Physical teams still have a lower damage ceiling compared to reaction-based teams. Mika’s kit simply does not provide enough to raise Physical teams to the same level, and he is generally considered a sidegrade to the Physical teams that existed before him. This does not mean Mika or Physical is unplayable, but players should be aware that they require significantly higher investment to 36-star the Spiral Abyss.
How valuable is Attack SPD?
The value of Attack SPD highly varies depending on the team and character.
Attack SPD only affects Normal Attacks, unless otherwise stated, and is most noticeable when there is little hitlag, such as with Catalyst or Bow users. Yoimiya and Wanderer are good examples of characters who appreciate Attack SPD buffs.
Eula — despite wielding a Claymore, a weapon with high hitlag — appreciates Attack SPD to gain more Lightfall stacks on her Burst (see the Eula Teams section for more details). Freminet, also a Claymore user, rarely has enough Attack SPD buffs to achieve a significant DPS gain (i.e., reach an additional Level 4 Shattering Pressure). However, it does make his Normal Attack combos more comfortable.
In teams involving reactions, it is possible to have “too much” Attack SPD. For example, too much Attack SPD on Yoimiya can desync her Vaporized attacks, meaning her strongest hits (N3 and N5) will not receive the x1.5 damage multiplier. With Mika alone, it is rare to reach the point of “too much” Attack SPD, but it is still something to keep in mind.
Please see the Attack SPD Teams section for teambuilding details.
DPS Mika?
Mika is not a great damage dealer. His Talent damage multipliers are lackluster, and his low Cryo application makes him unable to take advantage of Melt or Freeze. Players should focus on Mika’s support capabilities since his personal damage is negligible.
DPS Mika mains, lovers, and memers are free to build him with the traditional ADC build. However, this guide will not cover that.
Talents
 Normal Attack | Spear of Favonius - Arrow's Passage
Talent Description
Normal Attack
Combos up to five strikes, alternating between the crossbow and polearm.
Charged Attack
Consumes a certain amount of Stamina to lunge forward, dealing damage to enemies along the way.
Plunging Attack
Plunges from mid-air to strike the ground below, damaging opponents along the path and dealing AoE DMG upon impact.
An unimpressive set of Normal Attacks that should not be leveled.
Normal Attacks can be weaved into rotations to trigger Favonius Lance’s passive or abilities such as Xingqiu’s Burst.
 Elemental Skill | Starfrost Swirl
Talent Description
Mika uses his crossbow to attack, granting all characters in your party Soulwind. When characters in the Soulwind state are on the field, their ATK SPD will be increased. Will take effect in different ways if Tapped or Held.
Press
Fires a Flowfrost Arrow that can pierce though opponents, dealing Cryo DMG to enemies it comes into contact with.
Hold
Enters Aiming Mode, locking on to an opponent and firing a Rimestar Flare at them, dealing Cryo DMG. When the Rimestar Flare hits, it will rise before exploding, launching Rimestar Shards into a maximum of 3 other opponents, dealing Cryo DMG.
Mika’s Skill generates 4 Cryo Particles and is his only source of Cryo application. It is unfortunately gated by a 15s cooldown, making him a subpar Cryo applier and battery.
Mika’s Tap Skill fires in a straight line, making it inconsistent at hitting multiple enemies. For this reason, Mika’s Hold Skill is preferred — especially for his A1 Passive’s Physical DMG% buff — although it cannot hit the same enemy twice. Do note that there is a small delay between when the Hold Skill button is let go and when the Rimestar Shards hit opponents; swapping off too early can cause issues with triggering Favonius Lance’s passive.
The Attack SPD buff from Mika’s Skill lasts for 12s and is dependent on his Skill’s Talent level.
 Elemental Burst | Skyfeather Song
Talent Description
Derives the ability to spur his teammates on from the recited prayers of the knightly order, regenerating HP for all nearby party members. This healing is based on Mika's Max HP and will grant them the Eagleplume state.
Eagleplume
When the Normal Attacks of active characters affected by Eagleplume hit an opponent, Mika will help them regenerate HP based on his Max HP.
Characters affected by this state can only regenerate HP in this way once per short interval of time.
Mika’s Burst provides an initial teamwide heal, followed by periodic “coordinated” heals when the on-field character hits enemies with Normal Attacks. Said Normal Attacks do not necessarily have to deal damage (e.g., against a shield), but Charged and Plunging Attacks cannot trigger the coordinated heals.
The interval between coordinated heals is relatively long — 2.5s without C1, triggering a maximum of 6 times — and can fluctuate since they trigger on Normal Attack hit. However, this is made up for by their good multipliers.
Neither the initial heal nor the coordinated heals deal damage or apply Cryo; this also means Mika’s Burst cannot trigger effects that require a “hit” (e.g., Primordial Jade Winged-Spear, Baizhu’s C2, etc.).
When there are fewer than 4 enemies, Burst uptime is important to maximize Mika’s Physical DMG% buff through his A4 Passive.
 Ascension 1 Passive | Suppressive Barrage
Talent Description
Per the following circumstances, the Soulwind state caused by Starfrost Swirl will grant characters the Detector effect, increasing their Physical DMG by 10% when they are on the field.
- If the Flowfrost Arrow hits more than one opponent, each additional opponent hit will generate 1 Detector stack.
- When a Rimestar Shard hits an opponent, it will generate 1 Detector stack. Each Rimestar Shard can trigger the effect 1 time.
The Soulwind state can have a maximum of 3 Detector stacks, and if Starfrost Swirl is cast again during this duration, the pre-existing Soulwind state and all its Detector stacks will be cleared.
For every additional enemy — not including the initial target — hit by Mika’s Skill (both Tap and Hold), the on-field character gains one Detector stack that buffs their Physical DMG by 10%. The maximum number of Detector stacks is 3 at a baseline, but increases to 4 with Mika’s A4 and 5 with his C6. Detector stacks remain constant between character switches and expire when the Soulwind state expires (i.e., when the Attack SPD buff expires).
Notably, in single-target, Mika cannot generate any Detector stacks without his A4 Passive or C2.
 Ascension 4 Passive | Topographical Mapping
Talent Description
When an active character affected by both Skyfeather Song's Eagleplume and Starfrost Swirl's Soulwind at once scores a CRIT Hit with their attacks, Soulwind will grant them 1 stack of Detector from Suppressive Barrage. During a single instance of Soulwind, 1 Detector stack can be gained in this manner.
Additionally, the maximum number of stacks that can be gained through Soulwind alone is increased by 1.
Requires Suppressive Barrage to be unlocked first.
Mika’s A4 Passive increases the maximum number of Detector stacks from 3 to 4. CRIT Hits to trigger this Passive do not necessarily have to be Normal Attacks.
Pre-C2, Mika’s A4 Passive is his only source of Detector stacks in single-target. However, if there are enough enemies, maximum Detector stacks can still be gained without utilizing Mika’s A4 Passive (i.e., without using his Burst).
If using Mika’s Burst, it is slightly more beneficial to Burst before Skill so that Mika’s Skill has a chance to crit and trigger this Passive. This pairs well with the fact that Mika often holds Favonius Lance and therefore wants to build some CRIT Rate anyways.
 Utility Passive | Demarcation
Talent Description
Displays the location of nearby resources unique to Mondstadt on the mini-map.
Mika’s Utility Passive is useful for exploring and farming Character Ascension Materials in Mondstadt. It is the same as Klee’s Utility Passive.
Level and Talent Priority
Mika’s healing is the only part of his kit that scales with his HP, and while it is usually sufficient at Level 80, players can choose to raise him to Level 90 for maximum heals.
 ≥
≥  =
= ![]()
Burst ≥ Skill = Character Level
Mika’s healing is usually sufficient at Level 80 and with reasonable Burst Talent levels — minimum Level 6, which is relatively cheap. Players can choose to raise him to Level 90 and increase his Burst Talent levels for maximized healing, particularly in Furina teams.
Note that Mika’s Physical DMG% buff is NOT affected by Talent levels; leveling his Skill only affects his Attack SPD buff. If the team has a specific breakpoint at which Attack SPD is most useful (e.g., 10% Attack SPD for an extra stack on Eula’s Burst), then it is recommended to level Mika’s Skill past that breakpoint for comfort and consistency.
It is not recommended to level Mika’s Normal Attacks since they are an insignificant part of his kit.
Constellations
 Constellation 1 | Factor Confluence
The Soulwind state of Starfrost Swirl can decrease the healing interval between instances caused by Skyfeather Song's Eagleplume state. This decrease percentage is equal to the ATK SPD increase provided by Soulwind.
A QoL Constellation that increases the frequency of coordinated heals for the on-field character. The interval decrease is based on the Attack SPD buff from Mika’s Skill; for example, a 20% Attack SPD buff (Talent Level 8) decreases the healing interval to 2.0s instead of 2.5.
In practice, this Constellation is relatively minor and usually only increases the maximum number of coordinated heals by one (unless you plan to crown your C5 Mika’s Skill) — see the table below.
| Situation | Maximum # of Coordinated Heals |
| C0 | 6 |
| C1 + Talent Level 3 (15% Attack SPD) | 7 |
| C5 + Talent Level 13 (25% Attack SPD) | 8 |
While Talent Level 3 (15% Attack SPD) is the minimum to see practical use of Mika’s C1, additional Talent levels are recommended for comfort, since it is rare for Normal Attacks to hit — and therefore trigger the coordinated heals — perfectly in time with the healing interval.
 Constellation 2 | Companion's Ingress
When Starfrost Swirl's Flowfrost Arrow first hits an opponent, or its Rimestar Flare hits an opponent, 1 Detector stack from Passive Talent "Suppressive Barrage" will be generated.
You must have unlocked the Passive Talent "Suppressive Barrage" first.
Allows a Detector stack to be gained from the initial hit of Mika’s Skill. This does not actually increase the maximum number of Detector stacks, so it is only significant when facing fewer than 4 enemies.
 Constellation 3 | Reconnaissance Experience
Increases the Level of Skyfeather Song by 3.
Maximum upgrade level is 15.
A simple +3 Talent levels to Mika’s Burst, increasing his healing capabilities.
 Constellation 4 | Sunfrost Encomium
When Mika's own Skyfeather Song's Eagleplume state heals party members, this will restore 3 Energy to Mika. This form of Energy restoration can occur 5 times during the Eagleplume state created by 1 use of Skyfeather Song.
Effectively reduces Mika’s Burst Cost from 70 to 55, significantly lowering his Energy needs. C4 is particularly notable since Mika does not always catch his own particles and can have rather high ER requirements as a result.
 Constellation 5 | Signal Arrow
Increases the Level of Starfrost Swirl by 3.
Maximum upgrade level is 15.
Increases the Attack SPD buff from Mika’s Skill by 3% — noticeable for comfort but generally negligible.
 Constellation 6 | Companion's Counsel
The maximum number of Detector stacks that Starfrost Swirl's Soulwind can gain is increased by 1. You need to have unlocked the Passive Talent "Suppressive Barrage" first.
Additionally, active characters affected by Soulwind will deal 60% more Physical CRIT DMG.
Mika’s C6 increases the maximum number of Detector stacks to 5 while providing an additional 60% Physical CRIT DMG. It is around a 10% overall damage increase to Physical teams.
Although C6 is Mika’s best Constellation, it is not recommended to actively go for this Constellation because (a) the gap between C6 Mika and his competitors is not large, (b) C1–5 are lackluster, and (c) pulling for a C6 4-star can be incredibly expensive due to the lack of a 4-star guarantee.
Builds

ER Requirements
Mika’s ER requirements greatly vary depending on the team and context. See this sheet for more details. For a more accurate estimate of your ER requirements, please use the Energy Recharge Calculator.
Eula Teams
Assumptions: Mika uses one Skill and one Burst per rotation, one Favonius proc per rotation from a Cryo teammate, Mika does not catch his own particles.
| Mika's Weapon | Pre-C4 ER Requirment |
| Desert Sages R5 | 105–110% |
| Rightful Reward R1 | 170–180% |
| Favonius Lance (1 proc/rotation) | 175–185% |
| Other | 190–200% |
Freminet Teams
Assumptions: Mika uses one Skill and one Burst per rotation, one Favonius proc per rotation from a teammate, Mika does not catch his own particles.
| Mika's Weapon | Pre-C4 ER Requirment |
| Desert Sages R5 | 110–140% |
| Rightful Reward R1 | 180–225% |
| Favonius Lance (1 proc/rotation) | 180–230% |
| Other | 200–230% |
Other Teams
Assumptions: Mika uses one Skill and one Burst per rotation, one Favonius proc per rotation from a teammate.
| Mika's Weapon | Pre-C4 ER Requirment |
| Desert Sages R5 | 120–140% |
| Rightful Reward R1 | 190–220% |
| Favonius Lance (1 proc/rotation) | 190–220% |
| Other | 210–250% |
Additional Notes
- Mika’s C4 lowers his ER requirements by roughly 40–60%.
- Raiden lowers Mika’s ER requirements by roughly 60–70%.
- Every additional Favonius holder on the team lowers Mika’s ER requirements by roughly 10–20%.
- Every additional refinement on Rightful Reward lowers Mika’s ER requirements by roughly another 5%.
It is recommended to build slightly higher ER than is required due to the RNG nature of Energy particles. This is generally not an issue since Mika is not a stat-hungry unit.
Does Mika Have to Burst Every Rotation?
Mika does not need to use his Burst and can ignore ER if:
- Maximum Detector stacks are not necessary or can be gained without triggering Mika’s A4 Passive.
- Mika is not holding 4pc Noblesse Oblige.
- His healing is not needed every rotation (non-Furina teams).
Artifact Stats
 Sands |  Goblet |  Circlet |
| ER / HP% | HP% | Healing Bonus > HP% CRIT Rate (Favonius) |
Substats: ER (until requirements) > CRIT Rate (Favonius) > HP%
Mika does not need much investment since his personal damage is negligible. He only requires ER to Burst, Healing Bonus/HP to keep the team alive, and CRIT Rate to proc Favonius (if using Favonius). Building damage-oriented stats such as CRIT DMG and ATK% is neither necessary nor recommended.
Use the Genshin Optimizer to compare your personal artifacts.
Artifact Sets
4pc Noblesse Oblige | Provides a strong ATK% buff for the team and is Mika's most recommended option if his teammates scale with ATK. Using this set encourages Mika to Burst every rotation. |
4pc Ocean-Hued Clam | A viable option if no teammates can take advantage of 4pc Noblesse’s ATK% buff or there is already a better 4pc Noblesse holder on the team. Mika easily maximizes Clam damage (“Clamage”) on his initial Burst cast, but his smaller coordinated heals struggle to take full advantage of it. Mika’s Physical DMG% buff does not affect Clam damage. However, teams with a Physical damage dealer often include sources of Physical RES Shred (e.g., Superconduct), which do increase Clam damage. |
4pc Song of Days Past | Another viable option if no teammates can take advantage of 4pc Noblesse’s ATK% buff or there is already a 4pc Noblesse holder on the team. This set provides Healing Bonus with its 2pc effect and Additive Base DMG Bonus with its 4pc effect. Unfortunately, the buff’s trigger quota can be used up quite fast, especially in multi-target. It is also not available in the Artifact Strongbox and its domain is relatively Resin-inefficient, so it is not recommended to farm over 4pc Clam. |
4pc The Exile | The Exile is a support set that refunds Energy to all teammates except Mika himself. As a 4-star set, it gives fewer stats compared to a 5-star set. However, this is generally not an issue since Mika is not stat-hungry. If necessary, a 5-star ER Sands or CRIT Rate Circlet will suffice as an off-piece. |
Mixed 2pc Sets | 2pc Options: Energy Recharge, Healing Bonus, HP% Lackluster compared to the above options, but provides flexibility with stats while being Resin-efficient. Use whichever combination best balances Mika’s healing with his ER requirements. |
Weapons
Favonius Lance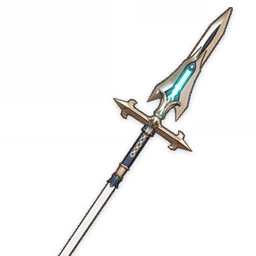 | Mika’s most recommended weapon to help with team Energy while also providing ER as its secondary stat. It requires Mika to build CRIT Rate to reliably trigger its passive, but this is usually not an issue since Mika is not a stat-hungry unit. Note that because Mika’s Hold Skill has a small delay between hits, it may be beneficial to linger on-field and make sure Favonius procs. |
Dialogues of the Desert Sages | If Favonius Lance’s teamwide Energy generation is not needed, this weapon is a very good option for those who obtained it in the Version 4.5 Event. The HP% secondary stat improves Mika’s healing, and its passive provides 16 Flat Energy per proc at R5. Because Mika triggers the passive twice per rotation, this weapon effectively gives a whopping 32 Flat Energy and drastically reduces Mika’s ER requirements. |
Rightful Reward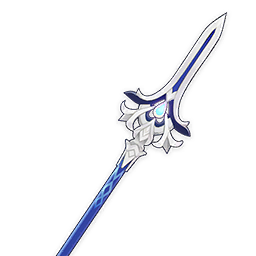 | A craftable Polearm that is essentially the same as Dialogues of the Desert Sages, but with less HP% and a less Flat Energy. Like Desert Sages, each passive proc provides 16 Flat Energy at R5. Unlike Desert Sages though, Mika only procs the passive once per rotation — except in the rare cases where Furina’s A1 Passive can proc it a second time. Lower refinements make this weapon less noteworthy. |
Prototype Starglitter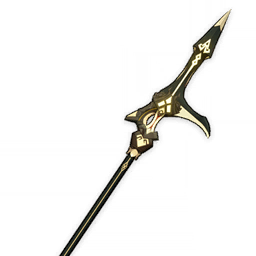 | A craftable ER stat stick if the above options are not available. |
Other ER Polearms | Viable ER stat sticks include Engulfing Lightning, Skyward Spine, and the Catch. However, these weapons are often more valuable on other characters. |
Black Tassel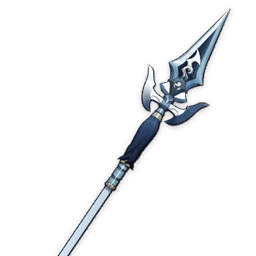 | An HP% stat stick to boost Mika’s healing. Should only be considered if Mika’s ER requirements are met and Favonius is not necessary for the team. |
Teambuilding
Mika's Competitors
Bennett

TLDR: Both characters buff and heal. Bennett is overall more convenient and recommended, but he is also a highly contested unit. If Bennett is C6 or otherwise unavailable for your Physical team, Mika is a viable option.
In terms of team damage, Bennett pulls ahead of Mika until Mika is C6, where they are roughly on-par with one another. Bennett’s Flat ATK buff can be snapshot and is more universal compared to Mika’s strict Physical DMG% buff. However, if the on-field damage dealer indeed deals Physical damage, then a Physical DMG% buff tends to be more valuable.
In terms of healing, Mika may be more comfortable since he has a teamwide heal, whereas Bennett only heals the on-field character and stops healing past 70% HP. This is most notable in Furina teams, which greatly value a strong healer due to her DMG% buff being dependent on HP change.
It is also worth mentioning that Bennett jails players in his Burst (“Circle Impact”), whereas Mika strictly buffs only the on-field character. Pick your poison.
Diona, Layla, and Charlotte


Diona, Layla, and Charlotte are all Cryo defensive slots who are competitive with Mika, but there are situational differences between them.
In terms of defensive utility, some units such as Yoimiya or Arlecchino prefer the shields from Diona and Layla. In Furina teams, Charlotte and Mika provide the strongest healing with both a teamwide healing and healing over time.
In terms of buffs, Diona provides a hefty 200 EM at C6; Layla has a minor Normal and Charged Attack DMG% buff at C4; and Charlotte can hold Thrilling Tales of Dragon Slayers for a significant ATK% buff if her ER requirements are met. Mika’s buffs are more niche — Attack SPD and Physical DMG% — but they are not reliant on Constellations or weapons and are very valuable if used by the right characters
In terms of Cryo application and damage, Charlotte and Layla tend to have higher personal damage than Diona and Mika. Mika also has the lowest Cryo application out of the four, which can be either useful (e.g., no accidental Melts instead of Vapes) or detrimental (e.g., not absorbing Cryo for Wanderer’s A1 Passive) depending on the team.
Kuki Shinobu

Mika’s kit only provides Physical DMG% buffs rather than Physical RES Shred, with the latter generally being more valuable. If there is no other off-field Electro applier to enable Superconduct (usually Fischl or Raiden), Kuki Shinobu is recommended over Mika as the healer slot.
Yun Jin

Both Mika and Yun Jin synergize with on-field characters who use Normal Attacks. Mika’s coordinated heals trigger on Normal Attacks, while Yun Jin buffs Normal Attack damage.
Mika has the added benefits of buffing all Physical damage (e.g., Eula’s Burst) and being the team’s healer. On the other hand, Yun Jin is not strictly tied to Physical teams (e.g., Yoimiya teams). Both provide an Attack SPD buff, although Yun Jin’s is a constant 12% that is locked behind C6 and her enormous ER requirements.
Yun Jin is particularly relevant in Physical Zhongli (“Pikeli”) teams for Geo Resonance and Wanderer teams for her Normal Attack buff.
Off-Field Damage Dealers


Mika contributes to team damage through his buffs rather than personal damage, but it is sometimes better to replace him with an actual damage dealer. Usually, the damage dealer brings additional benefits such as Elemental application or battery utility.
In Physical teams, Shenhe and Rosaria are notable options for their Physical RES Shred, Cryo batterying, off-field Cryo application, and other buffs (DMG% and CRIT Rate, respectively).
Other Healers for Furina Teams


In Furina teams where Mika’s main role is to heal, he is relatively unobtrusive thanks to his lack of on-field presence and minimal Cryo application. However, this also means he is easily replaceable by another healer that is more synergistic with the team. For example, Jean provides strong healing but can also hold 4pc Viridescent Venerer.
Alternative healer options for Furina teams include: Jean, Baizhu, Yaoyao, Charlotte, Kokomi, Noelle, and more.
Eula Teams
It is impossible to discuss Mika’s teams without mentioning the Physical hypercarry Eula. Mika provides Physical DMG% and Attack SPD buffs, as well as much-appreciated healing.
At Talent Level 1, Mika’s Skill provides 13% Attack SPD — already enough for Eula to comfortably gain an extra Lightfall stack on her Burst (13 -> 14). Additional investment into Mika’s Skill may be nice for improved comfort.
The table below outlines Attack SPD thresholds and recommended combos for Eula. These are based on Ruin Guard levels of hitlag and represent a worst case estimate.
| Attack SPD | Eula Burst Combo | Practical Lightfall Stacks |
| 0% | N4 hE N4 | 13 |
| ~10% | N4 hE N4 | 14 |
| ~40% | N3 hE N4 D N2 | 15 |
Mika and Eula Synergy
In a vacuum, Mika boosts Eula personal damage so that she can hit those satisfying damage-per-screenshot numbers. In actual team gameplay, however, he has some caveats to keep in mind:
- Mika is not a viable battery for Eula due to his poor particle generation and long cooldowns.
- His low Cryo application alone cannot keep good uptime on Cryo Resonance or Superconduct.
- Because of the previous two points, another Cryo unit is still highly recommended.
- He does not provide Physical RES Shred, so an Electro unit for Superconduct is still necessary.
- His Physical DMG% buff is good for Eula, but not applicable for other teammates (e.g., Raiden).
- Maximizing his Physical DMG% buff requires multiple enemies.
- His Physical DMG% buff only affects the on-field character.*
*An important part of playing Eula is learning when to swap off early and detonate her Burst. It is unfortunate that doing so causes Eula’s massive Lightfall Sword damage to lose Mika’s Physical DMG% buff, but it is better than wasting her Burst to an invincibility phase or missing a CRIT because Rosaria’s A4 Passive expired (for example).
TLDR: Mika sacrifices overall team utility for increased personal damage from Eula.
Example Eula Teams

Fischl E/Q > Rosaria E > Eula tE > Mika Q (h)E > Rosaria Q > Eula Q Combo* > Rosaria E > Eula [N4 hE N4]*
*Eula’s optimal combo will depend on how much Attack SPD she has (see table from earlier).
Mika — Eula — Fischl — Rosaria Rotation Video

Raiden E > Eula tE N2 > Mika Q > Shenhe tE Q > Mika (h)E > (N1) Eula Q [N4 hE N4]* > Shenhe tE N1 > Raiden Q 3[N3C]
*Eula’s optimal combo will depend on how much Attack SPD she has (see table from earlier).
Mika — Eula — Raiden — Shenhe Rotation Video

Raiden E > Furina E (D) Q > Mika Q (h)E > Eula tE Q [N4 hE N4]* > Raiden Q 3[N3C]
*Eula’s optimal combo will depend on how much Attack SPD she has (see table from earlier).
Mika — Eula — Raiden — Furina Rotation Video
Freminet Teams

As a Physical damage dealer, Freminet appreciates Mika’s Physical DMG% buff and healing. Mika’s Attack SPD buff also makes Freminet’s combos feel more comfortable, although it generally does not allow Freminet to achieve more Pressure Level 4 hits. Only at very high Attack SPD levels — i.e., greater than 30% Attack SPD, requiring refinements on Song of Broken Pines and invested Talent Levels in Mika’s Skill — is it theoretically possible for Freminet to move from 3 -> 4 instances of Pressure Level 4 hits.
During Freminet’s Burst, he can choose to use either the [E N2 E] or [E N3] combo to trigger Pressure Level 4. Since Mika’s Attack SPD buff only affects Normal Attacks, [E N3] may be more appealing. However, it does not matter which combo players choose to use since they are essentially the same in practice.
It is noteworthy that Freminet’s Cryo application allows him to keep Cryo Resonance uptime on his own, making up for Mika’s lackluster Cryo application. Additionally, due to Freminet’s unique synergy with Shatter via his A4 Passive and C4, an off-field Hydro applier is recommended along with an off-field Electro applier for Superconduct.

Fischl E/Q > Yelan E Q (N1)* > Mika Q (N1*) (h)E > Freminet (N1*) E Q N3 2[E N3 (N1)]
*Normal Attack weaving increases Yelan Burst procs.
Mika — Freminet — Fischl — Yelan Rotation Video
Other Physical Teams (Pikeli)
Mika struggles to find a place outside of teams for a dedicated Physical damage dealer like Eula While there are other Physical damage dealers such as Keqing or Razor, they all have reaction-based playstyles that give more damage for your investment.
Among the non-Eula Physical teams, “Pikeli” is one of Mika’s more notable options. Pikeli is centered on Zhongli’s naturally fast Normal Attacks, which can be used to drive reactions and units such as Xingqiu, Yelan, Beidou, etc.
Mika in Pikeli teams is relatively unorthodox since it places more emphasis on Pikeli’s raw Physical damage, and this is generally subpar compared to, for example, the team damage of a Pikeli Hyperbloom driver team. There is also slight anti-synergy where Mika’s Physical DMG% buff prefers multi-target scenarios but Zhongli’s Normal Attacks prefer single-target. However, it is still a fun build and Pikeli takes good advantage of Mika’s Attack SPD buff and healing. This is especially true considering not all Pikeli builds have strong shields (due to building more damage-oriented stats rather than HP).

Zhongli hE > Fischl E/Q > Mika Q hE > Rosaria Q E > Zhongli N5D-spam > Rosaria E > Zhongli N5D-spam
Mika — Fischl — Rosaria — Zhongli Rotation Video
Attack SPD Teams (Wanderer)

Although not particularly Abyss-friendly, a more fun way to use Mika is to ignore his Physical DMG% buff and go purely for Attack SPD. His healing and lack of Cryo application allow him to slot into most teams with a three-unit core. As a general rule, Catalyst and Bow characters take better advantage of Attack SPD buffs since their Normal Attacks have no hitlag.
Wanderer is a great example of a character who appreciates Attack SPD buffs. NA (N3) spam is preferred over N2C or CA spam since Mika’s Attack SPD buff only affects Normal Attacks. Mika’s Skill at TL1 plus 4pc Desert Pavilion Chronicle is already a comfortable amount of Attack SPD (23%) for Wanderer to do an extra ~3 Normal Attacks. Extra Attack SPD from leveling Mika’s Skill can be nice in case you are interrupted or have to dodge, but it is not necessary.

Faruzan (E CA) Q > Mika tE (Q*) > Bennett tE Q > Wanderer (CA) E NA-spam (Q) > Bennett tE
*Mika’s Burst is optional since Bennett already heals and often holds 4pc Noblesse Oblige.
Mika — Wanderer — Bennett — Faruzan Rotation Video

Faruzan (E CA) Q > Mika Q > Yun Jin tE Q > Mika tE (N1) > Wanderer (CA) E NA-spam (Q)
Mika — Wanderer — Yun Jin — Faruzan Rotation Video
General Healer (Furina)

Mika provides healing via his Burst, which has a strong initial teamwide heal on cast followed by smaller but periodic healing instances for the on-field character. While it is locked behind a 70 Energy Cost, there is only 3s of downtime if used off-cooldown. His low field time and minimal Cryo application mean he rarely interferes with reaction timings. Of course, being able to hold 4pc Noblesse Oblige and Favonius Lance is a nice bonus.
Mika’s healing is particularly appealing for Furina teams, which greatly desire a strong healer due to Furina’s Skill draining team HP and her Burst’s buff being dependent on HP changes.
Overall, Mika is a viable flex slot when there is already a strong three-unit core. However, he is rarely the best choice outside of Physical teams when there are other characters who provide better Elemental application, battery utility, additional buffs… Or maybe you just don’t want to farm the Wenut for Mika.

Raiden E > Furina E (D) Q > Nahida (h)E (Q) > Mika Q tE (N1) > Raiden Q 3[N3C] N1C*
*With enough Attack SPD, Raiden’s last N1C can be changed to an N2C or N3C.
Mika — Furina — Raiden — Nahida Rotation Video
Afterword
“Please allow me to always travel alongside you, and survey the land around us!”
Credits
Writing: chasing_haze
Calculations: kbphan, chasing_haze, .athene.
Readability Editing: idkanonymized, kolvii, rafael0055
TC Editing: sew, nikatosaurus
Transcription: irokei
Special Thanks: twce_, dreamlai, charliex3000, erisdc
Thank you to everyone who has contributed to this guide!
References
- Mika Eula Calcs by KB
- Mika Teams Sims by Chase
- Mika ER Calcs by Chase
- Eula Attack SPD Frames by TWICE
Changelog
- 16 July 2023: Published for Version 3.8
- 11 August 2023: Updated Attack SPD Teams
- 9 April 2024: Updated for Version 4.6
- Added Song of Days Past (artifact set), Rightful Reward (weapon), Dialogues of the Desert Sages (weapon), Freminet teams, and Furina teams
- Updated “What is Mika’s role in a team?”
- Updated ER Requirements