Updated for Version 5.3
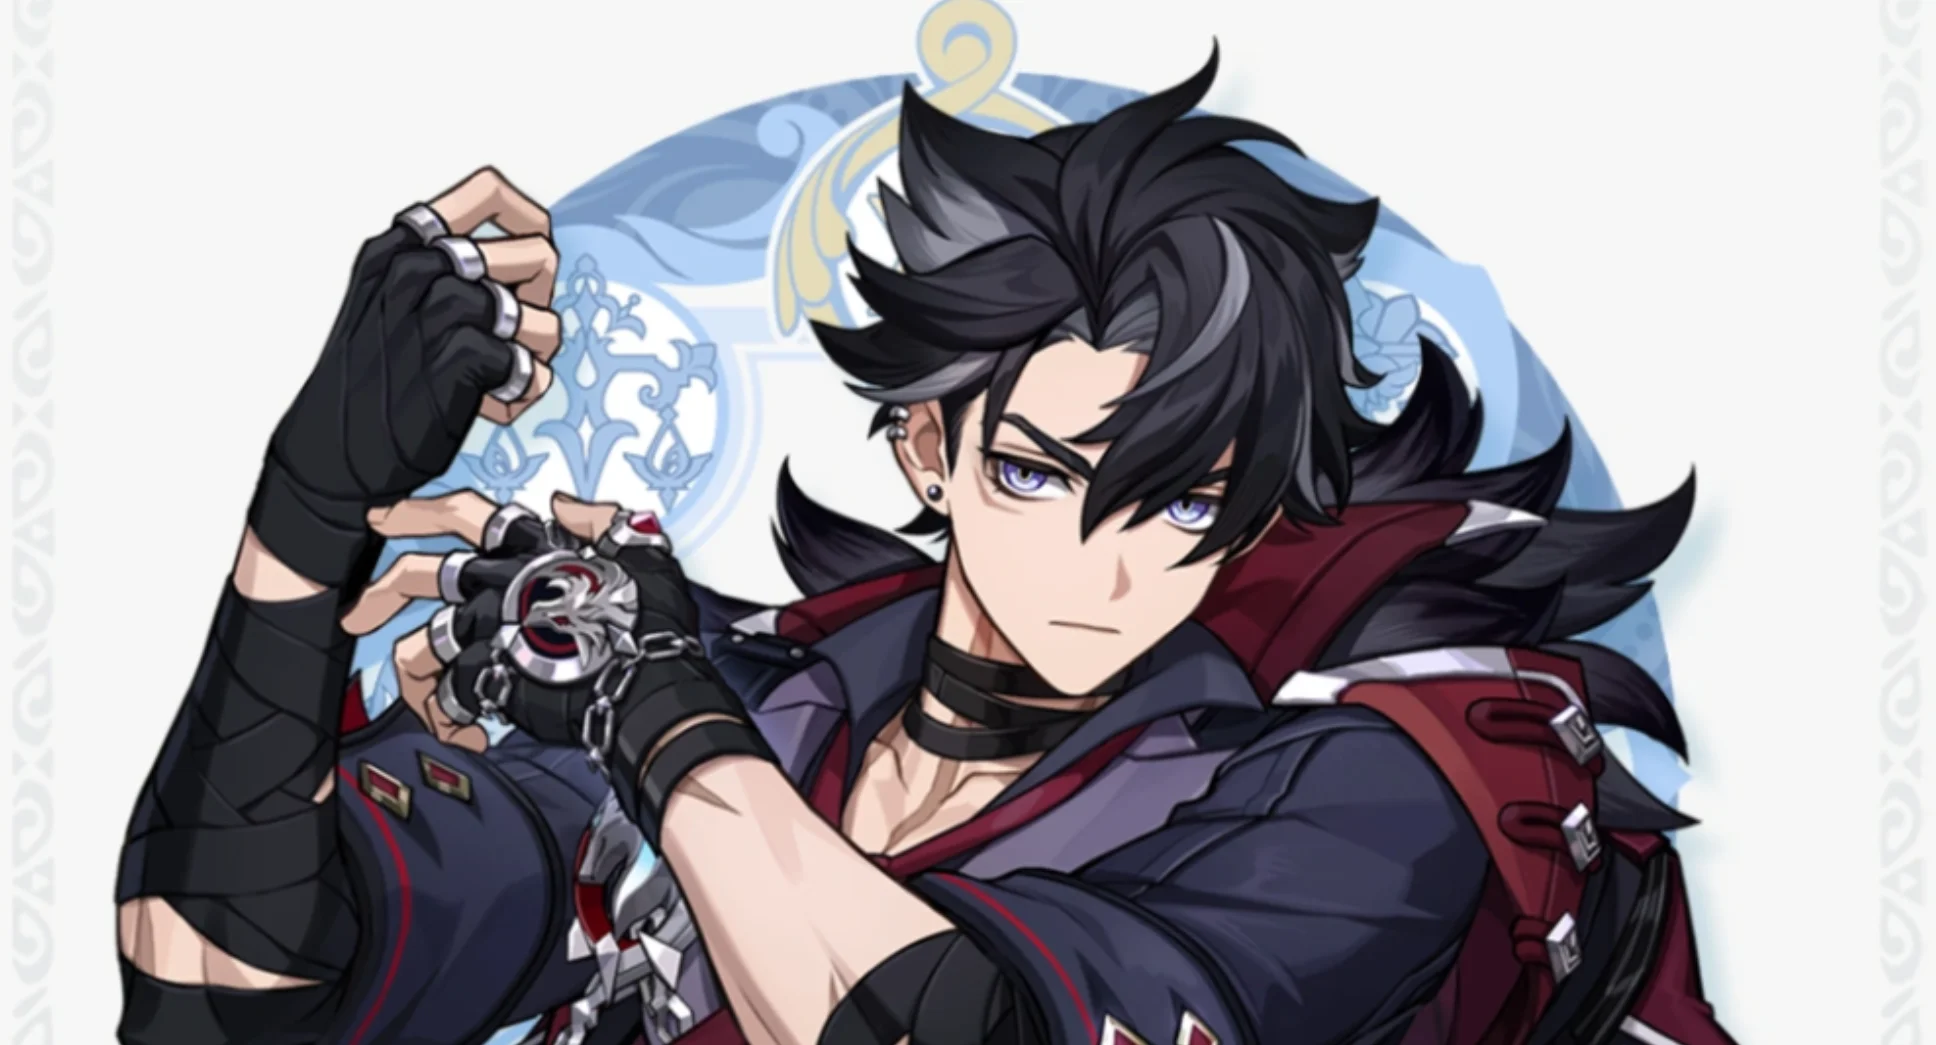
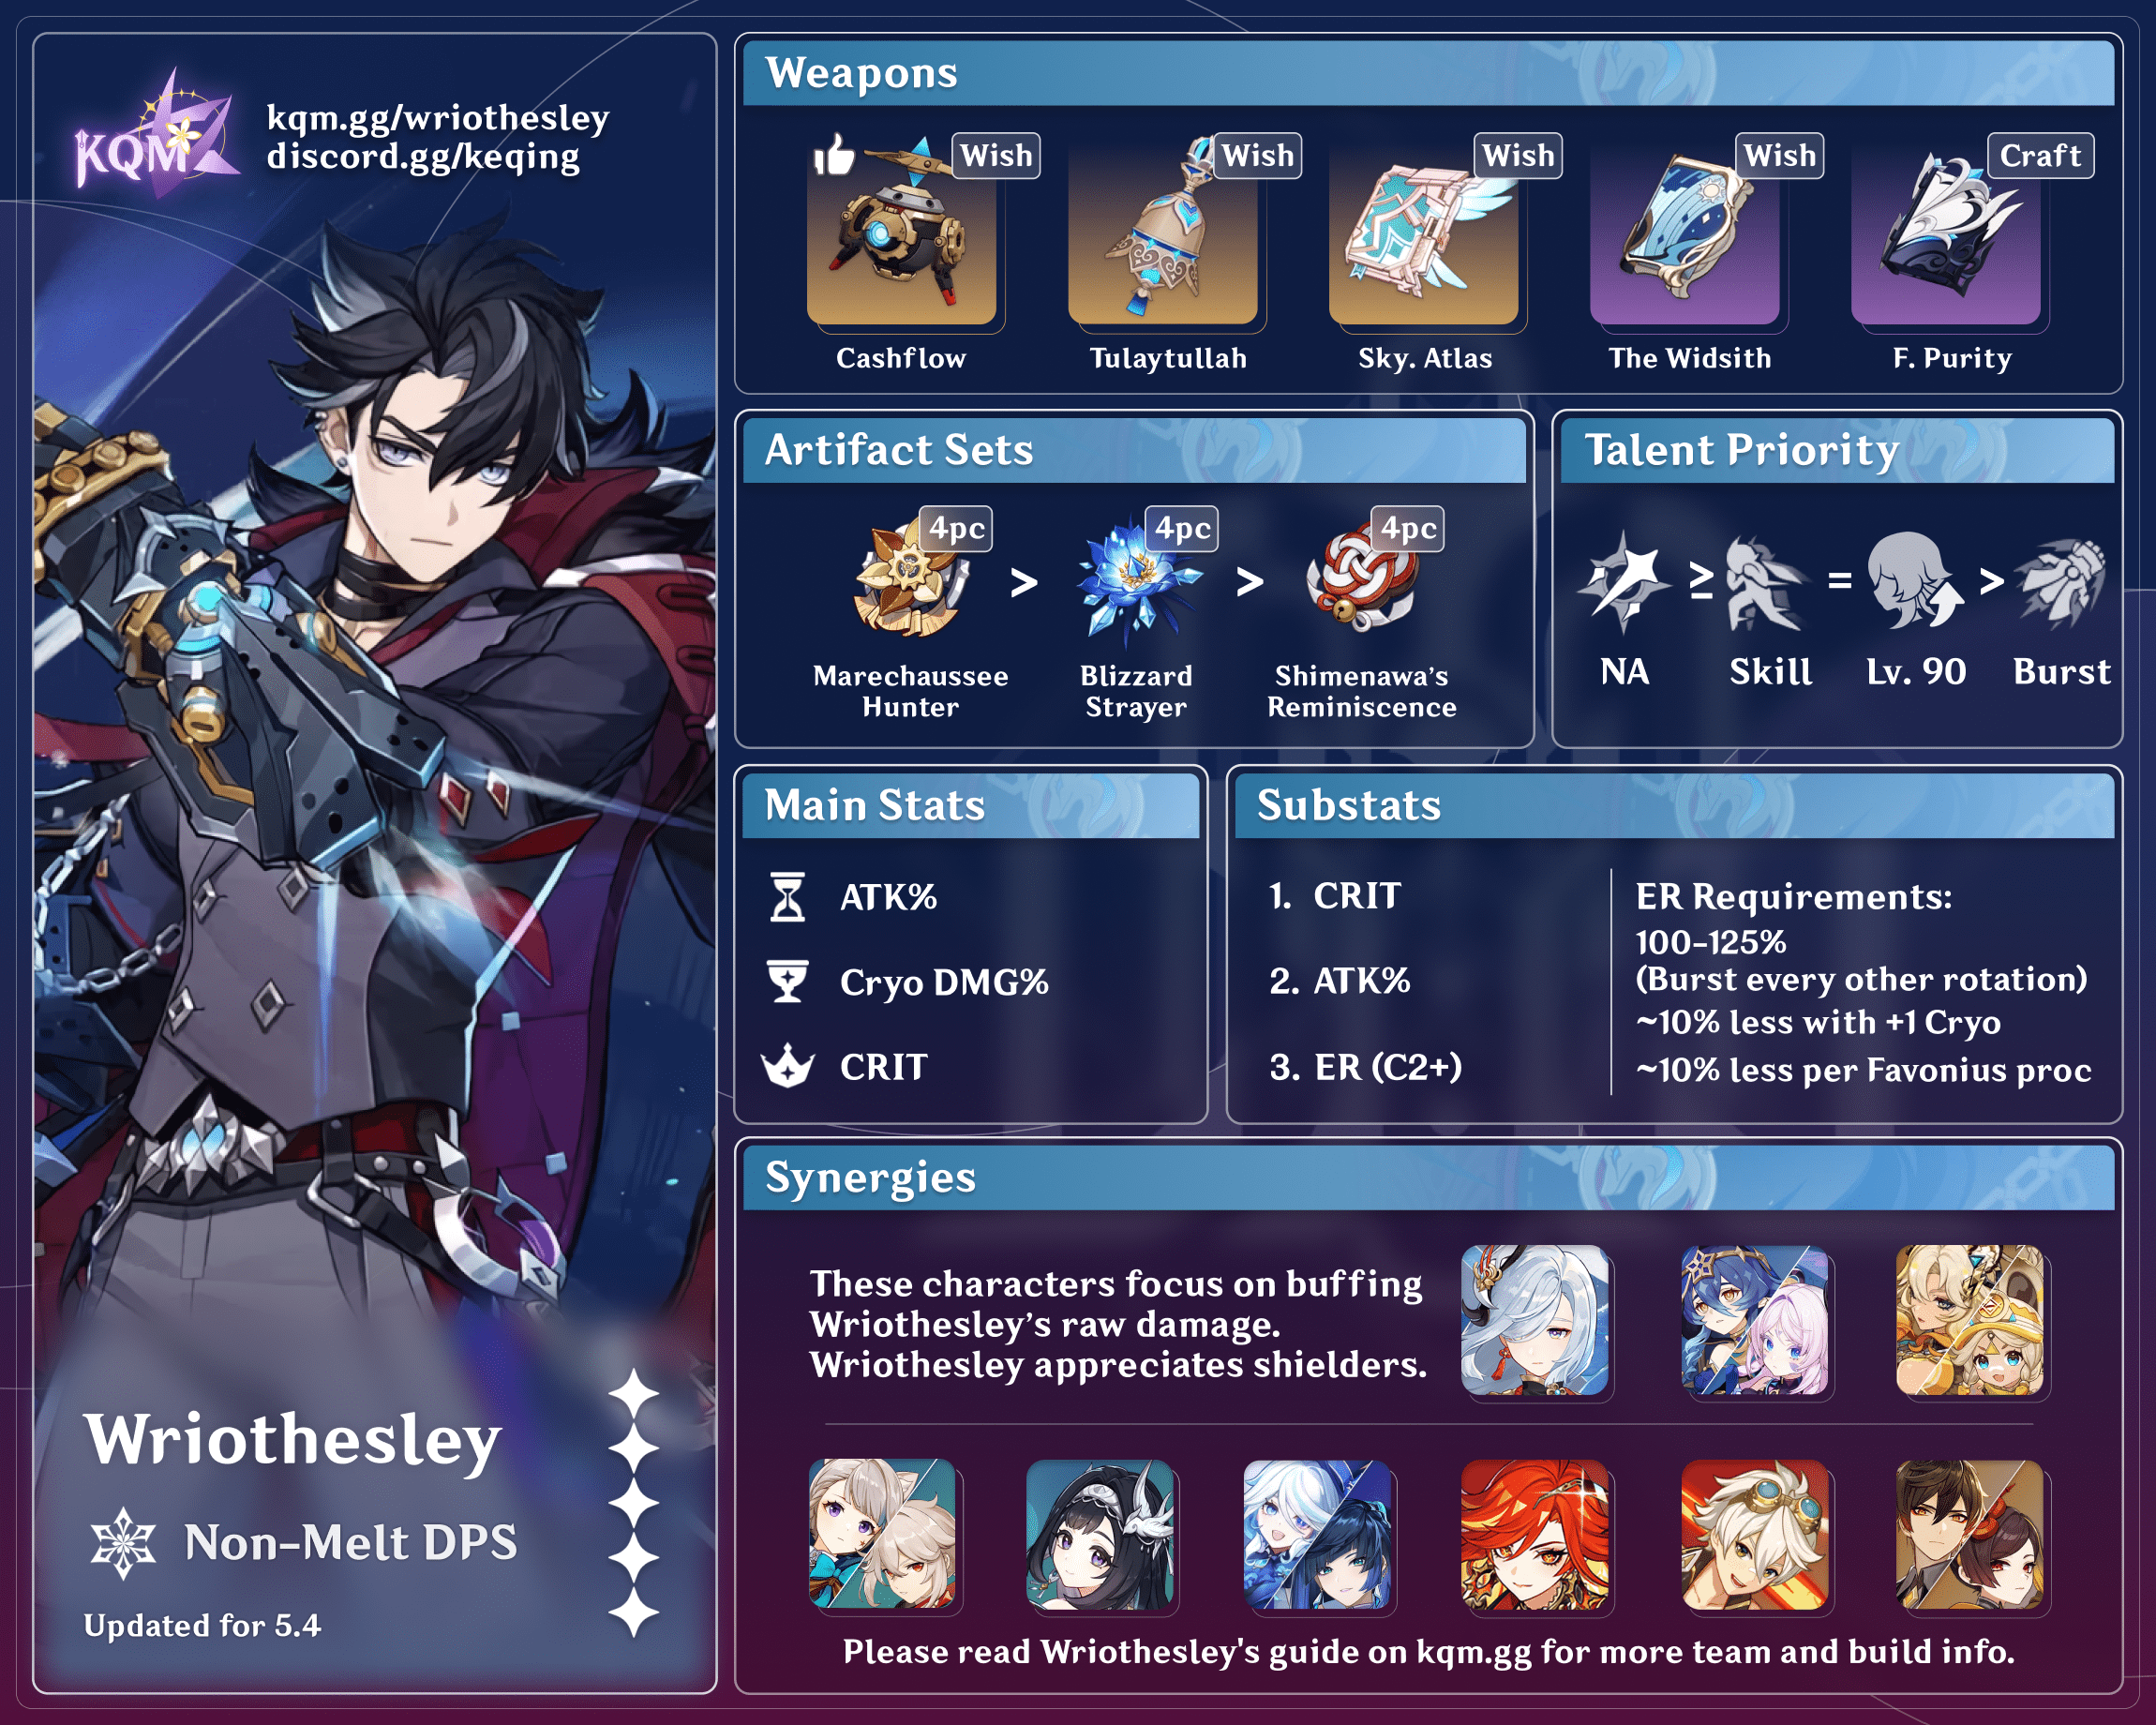
Wriothesley is a 5-star Cryo Catalyst character in Genshin Impact who deals damage through his enhanced Normal and Charged Attacks. Learn about Wriothesley’s best builds, Talent priority, best weapons, best artifacts, and best teams in this quick guide.
Note that the information given may change if new discoveries are made. More extensive testing is in progress.
Join our Discord to participate in the theorycrafting process.
Table of Contents
New Content
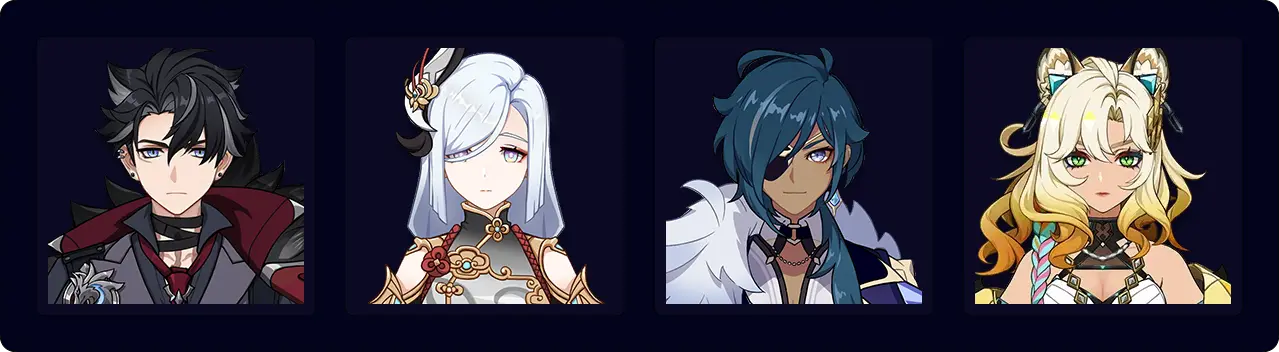
 Furina | Furina provides a hefty DMG Bonus buff to the team while also dealing good damage herself. She can be used in Wriothesley’s Freeze and Vapemelt teams. |
Charlotte, Sigewinne | Healer options for Mono Cryo and Freeze teams. |
 Xianyun | Xianyun can open up new Plunge playstyles for Wriothesley, while also providing strong healing and VV Shred. |
 Chiori | Chiori is an off-field damage dealer who can occupy the flex slot in Wriothesley’s Mono Cryo and Reverse Melt teams. |
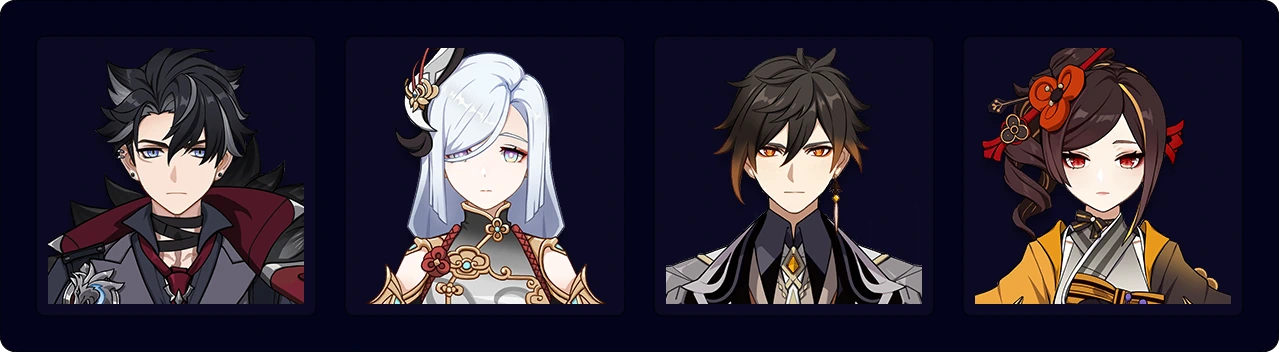
 Emilie | Emilie deals good off-field damage and enables Wriothesley to consistently Melt his attacks with the help of off-field Pyro units. |
 Kachina | Kachina contributes to Geo Resonance and can equip the 4pc Scroll of the Hero of Cinder City set to provide additional buffs. |
Xilonen | Xilonen is a powerful buffer with her RES Shred and ability to use the 4pc Scroll of the Hero of Cinder City set. Her healing is also appreciated by Wriothesley. |
 Mavuika | Mavuika provides off-field Pyro damage and application through her Skill. Her Burst gives the active character DMG Bonus and deals good damage. |
Citlali | Citlali provides a shield and buffing capability through 4pc Scroll of the Hero of Cinder City and Thrilling Tales of Dragon Slayers. |
Pyro Traveler (PMC) | PMC serves as the F2P off-field Pyro applier for Burnmelt team. Can run 4pc Scroll of the Hero of Cinder City. |
Lan Yan | Lan Yan is a shielder who has access to supportive gear such as 4pc Viridescent Venerer and Thrilling Tales of Dragon Slayers. |
 Unfinished Reverie | Wriothesley’s second-best set in Burnmelt teams. 4pc Marechaussee Hunter is still his Best-in-Slot in Burnmelt, and is still recommended to farm for. |
 Surf’s Up | A decent stat stick for Wriothesley. Very fitting of his shark theme. |
Infographic
Melt

Freeze and Mono Cryo
Credits to: euphorysm, cuppacote, irokei, and KQM Staff
Character Overview
Playstyles
Wriothesley is an on-field DPS in all of his playstyles. He wants to execute his combos uninterrupted, encouraging the use of shielders in the team. A healer is also recommended to maximize his damage output at C0.
Reverse Melt DPS
Off-field Pyro appliers allow Wriothesley to Melt a portion of his damage, particularly his enhanced Charged Attacks. This archetype is the strongest among his intended playstyles but can suffer from positioning issues due to Bennett’s limited Burst AoE.
Burnmelt teams with Emilie or Nahida are also viable in conjunction with Pyro application from units like Thoma and Dehya or Kazuha’s Pyro-absorbed Burst.
Mono Cryo / Freeze DPS
This team aims to buff Wriothesley’s personal damage through Cryo Resonance and 4pc Viridescent Venerer RES Shred. An off-field Hydro applier maintains Freeze.
Hyperbloom
Wriothesley can be used as an on-field driver in Hyperbloom teams (with a healer) as a cheap and accessible way to clear content. While this is not his intended playstyle, it is noted here since it is viable in Spiral Abyss.
Talents
Talent Priority
Normal Attack ≥ Skill > Burst
The majority of Wriothesley’s damage is dealt by his Normal Attacks and Charged Attacks, so these have priority for leveling. His Skill and Burst can be leveled afterwards.
Talent Overview
 Normal Attack | Forceful Fists of Frost
Talent Description
Normal Attack
Coalescing frost about his fist, Wriothesley will unleash powerful Repelling Fists, performing up to 5 rapid attacks that deal Cryo DMG.
Apart from this, Normal Attack combo count will not reset for a short time after using Icefang Rush or sprinting.
Charged Attack
Consumes a fixed amount of Stamina to leap and unleash a Vaulting Fist, dealing AoE Cryo DMG.
Plunging Attack
Plunges from mid-air to strike the ground below, damaging opponents along the path and dealing AoE Cryo DMG upon impact.
Wriothesley’s Normal and Charged Attacks are the main focus of his kit, dishing out the majority of his damage. His attacks are short-ranged and hit in a small AoE, so he performs best against single-target scenarios.
Wriothesley’s Normal Attack string has a total of six hits, and does not automatically reset after dashing or using his Skill. However, the attack string can still reset with a jump cancel, walk cancel, or if a short duration has elapsed between Normal Attacks. In contrast to most other Catalysts, his Normal Attacks have considerable hitlag, reducing the effectiveness of Attack SPD buffs.
Wriothesley’s Charged Attacks are considered Blunt damage, and they will Shatter Frozen enemies. This is not a huge concern in Freeze teams as his Charged Attacks immediately reapply Cryo. However, his unenhanced Charged Attack has a large 50 Stamina cost, making it difficult to fully utilize after consuming Stamina by dodging enemy attacks.
 Elemental Skill | Icefang Rush
Talent Description
Adjusting his breathing, rhythm, and pace, Wriothesley sprints forward a short distance, entering the Chilling Penalty state and unleashing more powerful attacks than before.
Chilling Penalty
- Increases Wriothesley’s interruption resistance
- When his HP is above 50%, it will enhance the Repelling Fists of Normal Attack: Forceful Fists of Frost and increase its DMG. When such an attack hits, it will consume a fixed amount of Wriothesley’s HP. HP can be lost this way once every 0.1s.
This effect will be canceled should Wriothesley leave the field.
Wriothesley’s Skill has several functions:
- Increasing the damage dealt by his Normal Attacks.
- Causing enhanced Normal Attacks and Charged Attacks to generate a Cryo Particle every 2s.
- Slightly reducing his HP with every Normal Attack hit. This HP drain allows him to consistently activate buffs that require HP changes such as 4pc Marechaussee Hunter’s set effect.
- Increasing his interruption resistance; however, he is still vulnerable to stagger from heavier enemy attacks. A shielder can help alleviate the need to dash to avoid getting staggered.
The first three effects only apply if Wriothesley is above 50% HP, so healing from his teammates or A1 Passive is required for his Skill to fully function over multiple rotations. His combos can be HP-negative without C1, so a healer is necessary to maintain 100% Skill uptime over multiple rotations at C0.
The Skill duration ends if he swaps off-field, incentivizing teammates with consistent off-field damage and application, long-lasting buffs, and short field time requirements. Due to hitlag, the Skill duration may be extended to ~12s at C0 if continuously hitting enemies.
Note that this Skill does not buff Wriothesley’s Charged Attacks. It also does not deal damage, preventing him from triggering effects such as Solar Pearl’s passive.
 Elemental Burst | Darkgold Wolfbite
Talent Description
Activating his boxing gloves, Wriothesley strikes out with an icy straight, then uses Icicle Impact to cause multiple instances of AoE Cryo DMG in a frontal area.
Arkhe: Ousia
After Icicle Impact ends, a Surging Blade will descend upon the opponent’s position, dealing Ousia-aligned Cryo DMG.
A straightforward Burst of AoE damage that hits 5 times. It is generally best to use it towards the end of Wriothesley’s field time to benefit from his A4 Passive (and C2) and to not waste buff uptime on his Skill. However, this means that the Burst usually does not benefit from buffs, making it less important to overall damage.
This Talent also deals a single hit of Ousia-aligned damage, which can be helpful against Pneuma-aligned enemies or constructs.
 Ascension 1 Passive | There Shall Be a Plea for Justice
Talent Description
When Wriothesley’s HP is less than 60%, he will obtain a Gracious Rebuke. The next Charged Attack of his Normal Attack: Forceful Fists of Frost will be enhanced to become Rebuke: Vaulting Fist. It will not consume Stamina, will deal 50% increased DMG, and after hitting will restore HP for Wriothesley equal to 30% of his Max HP.
You can gain a Gracious Rebuke this way once every 5s
If Wriothesley’s HP falls below 60%, his next Charged Attack has increased damage, no Stamina cost, and a self-healing effect. While these effects are useful, they are held back by several restrictions.
In teams with consistent healers, Wriothesley’s HP is unlikely to fall below 60%, which prevents this passive from activating. This passive can still act as an emergency heal at C0 in case Wriothesley receives too much damage.
Teams without a healer are still limited by the passive’s 5s cooldown — at C0, it is unlikely to activate more than twice per Skill use. Thus, the HP drain from Wriothesley’s enhanced Normal Attacks can occasionally overtake his A1’s healing, causing him to fall below the 50% HP threshold required for his Skill. This issue is worsened if he receives any other HP loss. However, using an N3C combo and a shielder can mostly negate this problem by reducing his HP drain rate with Charged Attacks (which don’t consume HP), some of which are enhanced by this passive.
This passive becomes much more impactful with Wriothesley’s Constellations, particularly C1.
 Ascension 4 Passive | There Shall Be a Reckoning for Sin
Talent Description
When Wriothesley’s current HP increases or decreases, if he is in the Chilling Penalty state conferred by Icefang Rush, Chilling Penalty will gain one stack of Prosecution Edict. Max 5 stacks. Each stack will increase Wriothesley’s ATK by 6%.
A simple but effective 30% ATK buff. This passive further incentivizes using Wriothesley’s Burst at the end of his field time.
Constellations
Wriothesley is a solid character at C0. He has Constellations that are good improvements at every step, providing strong value for those looking to enhance his performance.
 Constellation 1 | Terror for the Evildoers
The Gracious Rebuke from the Passive Talent “There Shall Be a Plea for Justice” is changed to this:
When Wriothesley’s HP is less than 60% or while he is in the Chilling Penalty state caused by Icefang Rush, when the fifth attack of Repelling Fists hits, it will create a Gracious Rebuke. 1 Gracious Rebuke effect can be obtained every 2.5s.
Additionally, Rebuke: Vaulting Fist will obtain the following enhancement:
• The DMG Bonus gained will be further increased to 200%.
• When it hits while Wriothesley is in the Chilling Penalty state, that state’s duration is extended by 4s. 1 such extension can occur per 1 Chilling Penalty duration.
You must first unlock the Passive Talent “There Shall Be a Plea for Justice.”
This Constellation slightly alters Wriothesley’s playstyle and provides a sizable DPS increase. If you have C1, add a Charged Attack to the end of each 5 consecutive Normal Attack string.
It allows Wriothesley’s A1 Passive to trigger by completing a Normal Attack chain in his Skill state, regardless of his HP, making it possible to use his enhanced Charged Attacks while still having healers on the team. He can also feasibly maintain his HP above 50% solely through his enhanced Charged Attacks, assuming he doesn’t take damage from other sources. Furthermore, enhanced Charged Attacks receive a significant damage boost; this also makes Reverse Melt teams more effective.
This Constellation’s increase to Skill duration is not particularly useful as most buffs expire well before reaching the end of the extended duration. Outside of finishing off the last enemies of Spiral Abyss wave or chamber or overworld combat, Wriothesley should follow his normal team rotations.
 Constellation 2 | Shackles for the Arrogant
When using Darkgold Wolfbite, each Prosecution Edict stack from the Passive Talent “There Shall Be a Reckoning for Sin” will increase said ability’s DMG dealt by 40%.
You must first unlock the Passive Talent “There Shall Be a Reckoning for Sin.”
Grants a massive DMG Bonus to Wriothesley’s Burst that scales with his A4 stacks. Greatly incentivizes using his Burst at the end of his combo before the Skill uptime runs out. It also incentivizes building ER% if Wriothesley is close to reaching his ER requirements for Bursting every rotation.
 Constellation 3 | Punishment for the Frauds
Increases the Level of Normal Attack: Forceful Fists of Frost by 3.
Maximum upgrade level is 15.
A simple damage increase to Wriothesley’s most important Talent (his Normal Attacks).
 Constellation 4 | Redemption for the Suffering
The HP restored to Wriothesley through Rebuke: Vaulting Fist will be increased to 50% of his Max HP. You must first unlock the Passive Talent “There Shall Be a Plea for Justice.”
Additionally, when Wriothesley is healed, if the amount of healing overflows, the following effects will occur depending on whether he is on the field or not. If he is on the field, his ATK SPD will be increased by 20% for 4s. If he is off-field, all of your own party members’ ATK SPD will be increased by 10% for 6s. These two methods of increasing ATK SPD cannot stack.
Increases the healing from enhanced Charged Attacks, making healerless teams more comfortable. It also grants a decent Attack SPD buff for Wriothesley if he receives excess healing. The team Attack SPD while Wriothesley is off-field is not very significant.
 Constellation 5 | Mercy for the Wronged
Increases the Level of Darkgold Wolfbite by 3.
Maximum upgrade level is 15.
A decent buff for his Burst, leading to a minor damage increase overall.
 Constellation 6 | Esteem for the Innocent
The CRIT Rate of Rebuke: Vaulting Fist will be increased by 10%, and its CRIT DMG by 80%. When unleashed, it will also create an additional icicle that deals 100% of Rebuke: Vaulting Fist’s Base DMG as Cryo DMG. DMG dealt this way is regarded as Charged Attack DMG.
You must first unlock the Passive Talent “There Shall Be a Plea for Justice.”
Wriothesley’s C6 is his highest damage increase, as his enhanced Charged Attacks now hit twice and receive substantial CRIT buffs. Each hit of the enhanced Charged Attack has a separate ICD, which allows both hits to trigger Melt assuming sufficient Pyro application.
Combos
N# = Corresponding number of consecutive Normal Attacks
C = Charged Attack
E = Elemental Skill
Q = Elemental Burst
J = Jump Cancel
D = Dash Cancel
Note that it is still possible for Wriothesley’s Normal Attack string to reset after dashing if enough time has passed between Normal Attack inputs. Be especially wary at C1+, as you may accidentally delay or cancel the last hit of his Normal Attack, in turn losing out on an enhanced Charged Attack.
| N3C(J) | A strong combo at C0, allowing Wriothesley to stay above 50% HP without healers for much of his Skill uptime. However, it consumes more Stamina. A shielder or a character who can provide interruption resistance is recommended to prevent spending Stamina on dodging enemy attacks. A jump cancel at the end of each N3C chain lets Wriothesley start the next chain faster than not doing any cancel, although only by a small margin. Dash cancels can also be used for even greater speed, but it drains Stamina in turn and prevents him from executing the maximum number of Charged Attacks over the course of the rotation. Therefore, dash cancels are not recommended. Players should opt for either 5 or 6 consecutive chains of N3C within a skill usage at C0. With good execution, all attacks will benefit from the A4 Passive except the final Charged Attack. For both combo chains, replace the final N3C with Q every other rotation. Casting Q and swapping out takes less time then executing N3C, so it is possible to weave in 2 or 3 Normal Attacks before casting Q for the same timeframe as N3C. This combo favors healerless teams for A1 procs, but it is still strong with healers in the team. |
| N5C(D) | His most reliable combo at C1+ as he can use an enhanced Charged Attack after every completed Normal Attack string. The Charged Attack should be canceled with a dash slightly before it hits to skip the long recovery animation. It can also be used as a simpler alternative combo at C0 with healers, or to drive Xingqiu or Yelan’s coordinated attacks more effectively. This combo favors C6 buffs and Normal Attack DMG% coupled with Attack SPD buffs. |
Artifacts
ER Requirements
Wriothesley’s Burst should only be used when it is available (typically every other rotation).
| Solo Cryo | Double Cryo | Triple Cryo | |
| Recommended Burst every other rotation | 100–125% | 100–115% | 100% |
| Not Recommended Burst every rotation | 220%+ | 150–180% | 130–150% |
Favonius weapons reduce Wriothesley’s ER requirements by 20–25% with each passive proc. However, pre-C2 it may not be worth building enough ER to Burst every rotation, as this takes away substats that could have instead benefited his Normal and Charged Attacks. With his C2, it can be optimal to build enough ER to Burst every rotation.
Use the Energy Recharge Calculator to determine exact requirements for your team and rotation.
Artifact Stats
 Sands |  Goblet |  Circlet |
| ATK% or Elemental Mastery (Reverse Melt) | Cryo DMG Bonus | CRIT DMG or CRIT Rate |
Stat Priority: CRIT > ATK% = EM (Reverse Melt) > ER
If using either 4pc Marechaussee Hunter or 4pc Blizzard Strayer, especially in conjunction with Cryo Resonance and/or CRIT Rate weapons, a CRIT DMG circlet is preferred due to the abundance of CRIT Rate buffs.
It is generally not worth building ER to Burst every rotation without C2, as this weakens his Normal and Charged Attacks which contribute more damage overall. He often does not need more than a few ER substats to cast it every two rotations.
Artifact Sets
 4pc Marechaussee Hunter | Wriothesley’s Best-in-Slot set that works in all playstyles, granting him a sizable 36% CRIT Rate buff along with Normal and Charged Attack DMG%. Farm this set unless you already have strong pieces of the sets below. |
4pc Unfinished Reverie | In Burnmelt teams, this set performs better than 4pc Shimenawa’s due to 4pc Reverie’s longer buff uptime and no restriction on Wriothesley’s Energy. However, 4pc Marechaussee Hunter is still better in every scenario, including in Burnmelt teams. |
 4pc Blizzard Strayer | Provides slightly more CRIT Rate than MH against Frozen enemies. However, it is generally not worth farming over 4pc Marechaussee which is much less restrictive. This set performs on par with 4pc Shimenawa’s in Mono Cryo teams. It is worth noting that Frozen uptime is reduced by Shatter from Wriothesley’s Charged Attacks, so this set loses value in teams without a fast Hydro applier to reapply the Frozen status on enemies quickly. |
4pc Shimenawa’s Reminiscence | A strong generalist set for Wriothesley in all playstyles if you have a good set lying around. Due to the Energy drain from the 4-piece effect, Wriothesley will use his Burst even less frequently. If Wriothesley is at C2+, this set is not recommended since the value of his Burst increases at those Constellations. |
2pc Mixed Sets | 2-piece combinations of Marechaussee Hunter, Blizzard Strayer, and ATK% sets. Placeholders while farming for 4pc Marechaussee Hunter |
Weapons
 Cashflow Supervision | Wriothesley’s signature weapon is his Best-in-Slot, providing a plethora of useful buffs. The Attack SPD buff can reduce Wriothesley’s field time and allows more attacks to benefit from team buffs. Use a CRIT DMG Circlet to avoid overcapping on CRIT Rate. This weapon makes it more difficult to build Wriothesley in Freeze and Mono Cryo teams since you can easily overcap on CRIT Rate due to Cryo Resonance. |
 Tulaytullah’s Remembrance | A close second after his signature weapon, granting similar Normal Attack and Attack SPD buffs. |
 5-Star Options | Tome of the Eternal Flow / Surf’s Up / Lost Prayer to the Sacred Winds / Skyward Atlas / A Thousand Floating Dreams / Memory of Dust Various stat sticks that share similar performance. Memory of Dust is worth using only if you are playing with a reliable shielder. Thousand Floating Dreams is only viable in Reverse Melt teams. |
 The Widsith | Wriothesley’s best 4-star weapon in all playstyles after its first refinement. It still performs well in Freeze and Mono Cryo teams when averaging out its buffs, including the useless EM buff. Widsith at high refinements can be competitive with 5-star options. |
 Flowing Purity | Flowing Purity is Wriothesley’s best free weapon, granting a potent DMG% buff. At high refinements, it is comparable with some of his 5-star options. However, Flowing Purity should be used with a healer before Constellation 4. Without a healer, The Bond of Life will block a healing instance from an enhanced Charged Attack every rotation, eventually causing Wriothesley to fall below 50% HP. |
 Mappa Mare | A sidegrade weapon to Flowing Purity in Reverse Melt teams, but does not work for Wriothesley’s other team archetypes as the EM substat is rendered useless and the passive can be inconsistent. |
 Ballad of the Boundless Blue | A decent event weapon that provides useful buffs and helps fulfill Wriothesley’s ER requirements. You should really only consider this if you do not have 5-star options and do not want to use billets for Flowing Purity. |
 Dodoco Tales | Another decent Event weapon like Ballad of the Boundless Blue. Dodoco Tales’ passive incentivizes using combos with more Charged Attacks on Wriothesley. You should really only consider this weapon if you do not have 5-star options and do not want to use billets for Flowing Purity. |
 Frostbearer | Only consider this weapon if none of the above Catalysts are available and you have previously made the mistake of forging Frostbearer. |
| Other Weapons | Weapons not listed in this table are not worth using on or getting for Wriothesley over Flowing Purity or Widsith. Solar Pearl should not be considered for Wriothesley as his Skill cannot trigger the weapon’s passive effect, and using Burst every rotation at the start of his field time is not recommendable. |
Teams
Teambuilding
- Shielders or interruption resistance buffs are much appreciated to prevent Wriothesley from getting staggered or depleting his Stamina by dodging; in particular, getting interrupted before his final Normal Attack hits can prevent his C1 from taking effect. Wriothesley’s higher ceiling combo at C0 — N3CJ — also heavily incentivizes a shield or interruption resistance in his teams.
- If using the N5C combo at C0, a healer is recommended to offset Wriothesley’s HP drain and keep his HP above the 50% threshold needed for his Skill. While not necessary at C1+, healers are still a safe choice.
- Wriothesley’s long, uninterrupted field time requirement encourages teammates with long-lasting buffs and off-field damage, along with short field time requirements of their own.
- Wriothesley’s short range makes teammate abilities that are mobile or have very large AoEs much more valuable. Unfortunately, many of his best teammates such as Bennett, Shenhe, or Diona do have restrictive AoEs (aka “Circle Impact”); be mindful about positioning and enemy behavior if using such units.
- Cryo teammates help reduce his ER requirements and (outside of Reverse Melt teams) enable Cryo Resonance.
Notable Teammates


Shielders
Shielders are recommended to allow consistent performance on Wriothesley with his Stamina-hungry C0 combo (N3C).
 Zhongli | Zhongli boasts the strongest shield in the game that also provides Universal RES Shred. |
Lan Yan | Lan Yan consolidates shielding and buffing (via 4pc Viridescent Venerer and Thrilling Tales of Dragon Slayer) into one slot, which makes her a valuable 4-star option. Her C4 also gives 60 EM, which is useful for Wriothesley’s Reverse Melt teams. |
 Thoma | Thoma provides slow off-field Pyro application and a good shield that lasts for a long time and can be restacked if broken. The small buff to Normal and Charged Attacks from his C6 also benefits Wriothesley. |
 Layla | Layla provides a strong shield, off-field particle generation, decent personal damage, and buffs through 4pc Tenacity of the Millelith and her C4. |
 Diona | Diona provides healing and can funnel plenty of Cryo Particles to Wriothesley using Sacrificial Bow. Her shield is also greatly appreciated, and her C6 can become valuable for Wriothesley in Reverse Melt teams. Diona is also a good Elegy for the End wielder, allowing her to give more buffs. However, many of Diona’s strengths are tied to her Burst, which is a stationary field that tends to miss if enemies move unexpectedly. |
Citlali | Citlali is a potent buffer with the ability to hold Thrilling Tales of Dragon Slayers and 4pc Scroll. Her shield is also appreciated by Wriothesley. |
Kirara | Kirara offers a strong shield for Wriothesley. She can use Key of Khaj-Nisut or Sapwood Blade to give him additional buffs. Her C6 also provides a small DMG Bonus. |
 Baizhu | Baizhu’s off-field Dendro application is slower than Nahida’s, but he consolidates healing and a little interruption resistance via his Burst’s small shields. His slow Dendro application makes him more suitable for Burnmelt teams rather than Hyperbloom. Note that Baizhu’s A4 buff is useless on Wriothesley. |
 Dehya | While not a shielder, Dehya’s interruption resistance buff provides the same effect as a shield to Wriothesley. She can also enable Burnmelt teams and hold 4pc Tenacity of the Millelith to provide an ATK% buff. |
Healers
Healers are recommended to maintain enhanced Normal Attacks uptime at C0 with the N5C combo and are still advisable at higher Constellations. Teamwide healers gain more value with Furina.
 Bennett | Bennett provides a sizable Flat ATK buff and continuous healing within his Burst. He is practically mandatory in Reverse Melt teams for enabling either Xiangling or Jean. |
Xilonen | Xilonen can shred enemy RES with long-lasting uptime, and she also heals the active character, making her a good teammate for Wriothesley. She can also use 4pc Scroll of the Hero of Cinder City for more buffing capability. |
Diona | Diona provides healing and can funnel plenty of Cryo Particles to Wriothesley using Sacrificial Bow. Her shield is also greatly appreciated, and her C6 can become valuable for Wriothesley in Reverse Melt teams. Diona is also a good Elegy for the End wielder, allowing her to give more buffs. However, many of Diona’s strengths are tied to her Burst, which is a stationary field that tends to miss if enemies move unexpectedly |
 Mika | Mika is a Cryo healer who also provides an Attack SPD buff, but due to Wriothesley’s high hitlag, the Attack SPD buffs are not as impactful. |
Charlotte | Charlotte has good teamwide healing and is able to hold Thrilling Tales of Dragon Slayers to give a large ATK% buff to Wriothesley. |
 Jean | Alongside teamwide healing and 4pc Viridescent Venerer RES Shred, Jean can rapidly apply Pyro from off-field in conjunction with Bennett (read more). However, this is very limiting in terms of duration and range. |
Xianyun | Xianyun creates a new viable Plunge playstyle for Wriothesley. She also consolidates the roles of teamwide healer and 4pc Viridescent Venerer user, and she can hold Thrilling Tales of Dragon Slayers to further buff Wriothesley. However, as Wriothesley’s Skill does not buff Plunging Attacks, he may not have the best synergy with this playstyle. |
 Sayu | Sayu is an alternative Anemo healer and 4pc Viridescent Venerer holder. |
  Kokomi, Barbara | Kokomi and Barbara are Hydro healers who can carry Thrilling Tales of Dragon Slayers and provide some off-field Hydro application, but they can only heal the active character without taking up valuable field time. Kokomi can also use 4pc Tenacity of the Millelith for an additional ATK% buff. |
Sigewinne | Sigewinne provides good teamwide healing from off-field, making her a notable healer for Furina teams. While she can’t use Thrilling Tales of Dragon Slayers to buff Wriothesley, her passive increases Furina’s damage. |
 Kuki Shinobu | Kuki Shinobu consolidates the role of Hyperbloom trigger and healer in Wriothesley’s Hyperbloom teams. |
 Baizhu | Baizhu’s off-field Dendro application is slower than Nahida’s, but he consolidates healing and a little interruption resistance via his Burst’s small shields. His slow Dendro application makes him more suitable for Burnmelt teams rather than Hyperbloom. Note that Baizhu’s A4 buff is useless on Wriothesley. |
Cryo
 Shenhe | The premier Cryo buffer; Shenhe provides Cryo DMG%, Normal and Charged Attack DMG%, Cryo RES Shred, and additional damage via her Icy Quill. You should use her Skill’s Hold version. Using her Skill twice extends the rotation to around 25s, which can lower DPS. However, her C1 allows her to cast the Skills twice during the first rotation of every chamber, potentially reducing her Energy needs. Shenhe’s C6 makes her absurdly effective at buffing Wriothesley. |
  Rosaria, Kaeya | Cryo off-field damage dealers and batteries. Rosaria notably buffs team CRIT Rate. |
 Ganyu | Ganyu deals decent off-field damage, and her Burst gives a small Cryo DMG Bonus to the on-field character. |
Citlali | Citlali is a potent buffer with the ability to hold Thrilling Tales of Dragon Slayers and 4pc Scroll. Her shield is also appreciated by Wriothesley. |
Mika | Mika is a Cryo healer who also provides an Attack SPD buff, but due to Wriothesley’s high hitlag, the Attack SPD buffs are not as impactful. |
Layla | Layla provides a strong shield, off-field particle generation, decent personal damage, and buffs through 4pc Tenacity of the Millelith and her C4. |
Diona | Diona provides healing and can funnel plenty of Cryo Particles to Wriothesley using Sacrificial Bow. Her shield is also greatly appreciated, and her C6 can become valuable for Wriothesley in Reverse Melt teams. Diona is also a good Elegy for the End wielder, allowing her to give more buffs. However, many of Diona’s strengths are tied to her Burst, which is a stationary field that tends to miss if enemies move unexpectedly. |
Charlotte | Charlotte has good teamwide healing and is able to hold Thrilling Tales of Dragon Slayers to give a large ATK% buff to Wriothesley. |
Anemo
 Kazuha | Kazuha is the premier Anemo support for Wriothesley because of his A4 Cryo DMG buff, grouping, and low cooldowns. Since Wriothesley must remain on-field during his entire Skill duration, Kazuha should Swirl Cryo as late as possible in the rotation for higher uptime on 4pc Viridescent Venerer’s RES Shred. |
  Sucrose, Heizou | Other Anemo units can be used in lieu of Kazuha to provide 4pc Viridescent Venerer RES Shred along with other buffs or utility. Sucrose and Heizou can hold Thrilling Tales of Dragon Slayers to further buff Wriothesley. |
 Lynette | Aside from the ability to hold 4pc Viridescent Venerer and give an ATK% buff from A1 Passive, Lynette can assist a slow Pyro applier or Dendro character in enabling Melt reactions for Wriothesley. |
Lan Yan | Lan Yan consolidates shielding and buffing (via 4pc Viridescent Venerer and Thrilling Tales of Dragon Slayer) into one slot, which makes her a valuable 4-star option. Her C4 also gives 60 EM, which is useful for Wriothesley’s Melt teams. |
Jean | Alongside teamwide healing and 4pc Viridescent Venerer RES Shred, Jean can rapidly apply Pyro from off-field in conjunction with Bennett (read more). However, this is very limiting in terms of duration and range. |
Xianyun | Xianyun creates a new viable Plunge playstyle for Wriothesley. She also consolidates the roles of teamwide healer and 4pc Viridescent Venerer user, and she can hold Thrilling Tales of Dragon Slayers to further buff Wriothesley. |
Sayu | Sayu is an alternative Anemo healer and 4pc Viridescent Venerer holder. |
Pyro
Bennett | Bennett provides a sizable Flat ATK buff and continuous healing within his Burst. He is practically mandatory in Reverse Melt teams for enabling either Xiangling or Jean. |
 Xiangling | Xiangling offers long-lasting off-field Pyro application and damage, but she generally requires Bennett to alleviate her high ER requirements. |
Mavuika | Mavuika’s Elemental Skill can apply enough Pyro for Wriothesley to Melt with some adjustment in combo. She also deals good personal damage via her Elemental Skill and Burst. Buff-wise, Mavuika boosts Wriothesley with her A4 Passive and 4pc Scroll. |
 Thoma | Thoma provides slow off-field Pyro application and a good shield that lasts for a long time and can be restacked if broken. The small buff from his C6 to Normal and Charged Attacks also benefits Wriothesley. |
 Dehya | While not a shielder, Dehya’s interruption resistance buff provides the same effect as a shield to Wriothesley. She can also enable Burnmelt teams and hold 4pc Tenacity of the Millelith to provide an ATK% buff. |
 Pyro Traveler | Pyro Traveler’s Pyro application is only usable for Wriothesley with the aid of Burning. They can provide 6% DMG Bonus from C1 and 40% DMG Bonus from 4pc Scroll of the Hero of Cinder City to Wriothesley. |
Hydro
Furina | Furina provides massive DMG Bonus to all teammates, while also putting out good personal damage. Without Wriothesley’s C4, a healer (preferably a teamwide one) is required to maintain Wriothesley’s Skill uptime and help with Furina’s Fanfare generation. |
  Xingqiu, Yelan | Off-field Hydro appliers who deal good single-target damage and enable Freeze or Hyperbloom teams. Xingqiu provides some defensive utility while Yelan grants a DMG Bonus. Wriothesley can use the N5C combo to drive Xingqiu and Yelan’s coordinated attacks more effectively. |
Kokomi, Barbara | Kokomi and Barbara are Hydro healers who can carry Thrilling Tales of Dragon Slayers and provide some off-field Hydro application, but they can only heal the active character without taking up valuable field time. Kokomi can also use 4pc Tenacity of the Millelith for an additional ATK% buff. |
Sigewinne | Sigewinne is a good substitute for Kokomi in Furina Double Hydro teams, thanks to her teamwide healing capabilities and buffs to Furina. She is not recommended for any other team composition, however. |
 Candace | Candace is usable in Freeze teams as an AoE Hydro applier at C6. She also provides Normal Attack DMG Bonus to Wriothesley via her Burst and A4 Passive. |
Dendro
 Emilie | Emilie provides high off-field damage with permanent uptime that is not reliant on Burst. She also acts as a Burning enabler in Wriothesley’s Burnmelt teams. |
 Nahida | Nahida’s unique 1.5U Dendro application can be used to sustain Burning in Burnmelt teams in conjunction with other (slower) sources of off-field Pyro application. She also provides a sizable EM buff. |
 Kirara | Kirara offers a strong shield for Wriothesley. She can use Key of Khaj-Nisut or Sapwood Blade to give him additional buffs. Her C6 also provides a small DMG Bonus. |
 Baizhu | Baizhu’s off-field Dendro application is slower than Nahida’s, but he consolidates healing and a little interruption resistance via his Burst’s small shields. His slow Dendro application makes him more suitable for Burnmelt teams rather than Hyperbloom. Note that Baizhu’s A4 buff is useless on Wriothesley. |
Geo
 Zhongli | Zhongli boasts the strongest shield in the game that also provides Universal RES Shred. |
Xilonen | Xilonen can shred enemy RES with long-lasting uptime, and she also heals the active character, making her a good teammate for Wriothesley. She can also use 4pc Scroll of the Hero of Cinder City for more buffing capability. |
Kachina | In Mono Cryo teams, Kachina can easily trigger the 4pc Scroll of the Hero of Cinder City effect, giving Wriothesley a whopping 40% Cryo DMG Bonus with full uptime and little field time required. |
 Yun Jin | Yun Jin buffs Normal Attacks but suffers from very high ER requirements without another Geo unit present. A respectable amount of Wriothsley’s damage also comes from his Charged Attacks, decreasing Yun Jin’s value as a whole. |
 Chiori, Albedo | Flex options in Mono Cryo and Reverse Melt teams. Chiori’s damage increases in a team with another Geo character who can summon a Geo Construct (e.g., Zhongli, Kachina). Albedo provides EM from his A4 Passive, increasing Wriothesley’s damage in his Reverse Melt teams. |
Reverse Melt

A sustained off-field Pyro application is necessary for consistent Reverse Melts, particularly for Wriothesley’s C1+ enhanced Charged Attacks. This usually means bringing Bennett and either Xiangling or Jean. Nahida or Emilie (via Burning) can be used to supplement slower methods of off-field Pyro application such as Thoma’s Burst or Dehya’s Skill.
It is very difficult to trigger Cryo Swirls for VV Shred while off-field Pyro application is active. Swirling Cryo before deploying Pyro abilities results in poor uptime on 4pc Viridescent Venerer RES Shred, so Anemo units may not be as practical in this archetype.
Example Teams
This is not a comprehensive list of teams. The inclusion or exclusion of any given team does not necessarily reflect its power level.

Xiangling deals off-field damage and applies Pyro for Wriothesley to trigger Melts. Bennett provides healing, lowers Xiangling’s ER requirements, and grants a Flat ATK buff for both Wriothesley and Xiangling (which her Burst snapshots). Zhongli’s shield provides additional survivability, interruption resistance, and Cryo and Pyro RES Shred without needing complicated setups.
Sample Rotation
Zhongli hED > Bennett Q E > Xiangling Q E1 > Wriothesley E combo > Bennett E > Xiangling E N22
1First rotation only.
2Use Normal Attacks while waiting to catch Bennett’s particles.

A good Melt team where Wriothesley’s damage is boosted by Mavuika’s DMG Bonus (A4) and Xilonen’s RES Shred and 40% Cryo DMG Bonus (from 4pc Scroll). N5C combo is recommended for Wriothesley to make sure he does not outrun Mavuika’s Pyro application. As such, Wriothesley’s C1 value increases considerably for this team.
Sample Rotation
Wriothesley N11 > Xilonen E N2 > Bennett EQ > Mavuika EQ > Wriothesley E 3[N5CD] N3C/Q2
1First rotation only.
2Use Wriothesley Burst when it is available; otherwise, use a N3C chain. This is necessary to clear out the Pyro aura and reapply Cryo for Xilonen to trigger 4pc Scroll in the next rotation.
Nahida can maintain Burning with the help of Pyro application from Pyro Traveler’s Burst, which allows Wriothesley to trigger Reverse Melt. Nahida buffs the on-field character’s Elemental Mastery with her Burst, while PMC gives a total of 46% DMG Bonus with their C1 and 4pc Scroll effects.
Sample Rotation
Wriothesley N11 > Nahida E Q > PMC tEQ > Bennett EQ > Wriothesley E 5[N3CJ] N3C/Q2
1First rotation only.
2Use Wriothesley Burst when it is available; otherwise, use a N3C chain. This is necessary to clear out the Burning/Pyro aura and reapply Cryo for Pyro Traveler to trigger 4pc Scroll in the next rotation.
Another Burnmelt variant. Emilie deals good personal damage and maintains Burning together with Thoma. Thoma’s shield with high uptime and 15% Normal and Charged Attack DMG Bonus are welcome by Wriothesley.
Sample Rotation
Thoma EQ > Bennett EQ > Emilie E/Q1 > Wriothesley E combo (> Bennett E)2
1Using Emilie’s Burst takes off Bennett’s buff uptime for Wriothesley. Thus, players should alternate between their Burst.
2To battery Thoma if he does not get his burst back.
Adding Furina into Wriothesley’s Reverse Melt team creates a mix of aura and reactions: Pyro, Cryo, and Hydro auras alternate chaotically over the rotation, allowing for each teammate to have their share of Melt and Vape reactions. Wriothesley’s HP fluctuation helps to stack Furina’s Fanfare, making it possible to maximize her DMG Bonus even with a healer that only heals the active character (like Bennett).
Sample Rotation
Furina ED Q > Bennett Q E > Xiangling Q (E)1 > Wriothesley E combo > Bennett E > Xiangling E N22
1First rotation only.
2Use Normal Attacks while waiting to catch Bennett’s particles.
Mono Cryo

This playstyle revolves around buffing Wriothesley’s raw damage with synergistic supports and other Cryo characters to enable Cryo Resonance. Anemo units are preferred to provide VV Shred and grouping. Teams with two Geo units can also perform well.
3 Cryo + 1 Anemo variations are particularly effective with Shenhe since every teammate can proc her Icy Quill.
Example Teams
This is not a comprehensive list of teams. The inclusion or exclusion of any given team does not necessarily reflect its power level.
Layla delivers a strong shield, 4pc Tenacity of the Millelith’s ATK% buff, and decent personal damage. Shenhe provides further buffs and her Icy Quill, which every teammate here can trigger effectively.
Sample Rotation
(Wriothesley N1)1 > Kazuha tEPQ > Layla Q E > Shenhe hEQ > Kazuha tEP > Wriothesley E combo
1First rotation only.
Bennett provides a large Flat ATK buff and consistent healing. Lynette’s Burst can easily absorb Cryo to trigger Shenhe’s Icy Quill; it can also taunt melee enemies to keep them within Bennett’s Burst AoE. Note that Lynette’s Burst can be moved by enemy attacks, does not affect Bosses, and may be detrimental for luring in ranged enemies.
Sample Rotation
Shenhe hEQ > Lynette EQ > Bennett EQ > Wriothesley E combo > Bennett E
Both Wriothesley and Kaeya deal good damage in this team thanks to Shenhe and Xilonen’s buffs and debuffs. Xilonen also gives strong healing to maintain Wriothesley’s Skill uptime.
Sample Rotation
Shenhe hEQ > Xilonen E Q N2 > Kaeya EQ > Wriothesley E combo > Kaeya E
A simple yet effective team with a Double Geo core. Chiori (together with Zhongli) enables Geo Resonance and deals good damage while requiring little field time. Zhongli provides the strongest shield in the game, which makes the on-field experience comfy, while also giving Universal RES Shred.
Sample Rotation
Zhongli hED > Chiori (Q)1 2[E] > Shenhe hE(Q)2 > Wriothesley E combo
1Use whenever available.
2Use every other rotation.
Freeze

Freeze makes enemies stay still and eases the need for defensive utility in the team. Hydro units such as Furina, Yelan, or Xingqiu can deal good damage themselves as well. However, Freeze can be detrimental against enemies that cannot be Frozen (e.g., Bosses), since it makes triggering Cryo Swirl to set up 4pc Viridescent Venerer substantially harder in some teams.
Example Teams
This is not a comprehensive list of teams. The inclusion or exclusion of any given team does not necessarily reflect its power level.
Kazuha and Yelan provide buffs and off-field damage, while Diona offers a shield and some healing to keep Wriothesley above 50% HP. Kazuha’s grouping and decent personal damage can come in handy in multi-target scenarios.
Sample Rotation
Yelan EQ N1 > Diona Q > Kazuha N1 hEPQ > Diona hE > Wriothesley E combo
Kokomi’s application is more reliable at keeping enemies Frozen in AoE. Not only does Ganyu deal respectable damage in multi-target scenarios, but she also buffs Wriothesley with the Cryo DMG Bonus from her A4 Passive.
Sample Rotation
(Wriothesley N1)1 > Kazuha tEP > Ganyu EQ > Kazuha Q hEP > Kokomi E > Wriothesley E combo
1First rotation only.
A Wriothesley Freeze team where he takes advantage of all the buffs from Xianyun, Shenhe, and Furina. However, the team can be lackluster in AoE scenarios due to the lack of strong grouping.
Sample Rotation
Furina ED Q > Shenhe hEQ > Xianyun EPQ N1 > Wriothesley E 4[N3CJP] N3CD (Q)
Alternative Wriothesley combo: E N3C 8[N1JP] (Q)
An accessible Freeze team. Furina and Xingqiu’s joint Hydro Particle generation significantly decreases each other’s ER requirements. Wriothesley can punch enemies comfortably with Xingqiu’s interruption resistance buff and healing from Charlotte or Mika.
Sample Rotation (Charlotte)
Furina ED Q > Xingqiu EDQ N1 > Charlotte EQ N1 > Wriothesley E combo
Sample Rotation (Mika)
Furina ED Q > Xingqiu EDQ N1 > Mika EQ N1 > Wriothesley E combo
Hyperbloom

Wriothesley can act as an on-field driver who contributes his personal damage and enables some Freeze uptime in Hyperbloom teams. While his Cryo application can be used to trigger slightly more Blooms (via the Freeze Bloom interaction), it still does not generate as many Dendro Cores compared to using an additional Dendro, Electro, or Hydro unit instead. Since these teams usually lack buffers, Wriothesley’s personal damage is much lower, with Hyperbloom making up the vast majority of team damage.
Example Teams
This is not a comprehensive list of teams. The inclusion or exclusion of any given team does not necessarily reflect its power level.
Nahida, Kuki Shinobu, and Xingqiu create a powerful off-field Hyperbloom core that dishes out high damage. Xingqiu can be substituted with either Yelan or Kokomi, though they reduce the amount of Dendro Cores generated. Kokomi also allows Kuki Shinobu to be replaced with Raiden.
Sample Rotation
Nahida E > Xingqiu EDQ N1 > Shinobu E N1 > Wriothesley E combo > (Shinobu Q)
Credits
rafael0055, nikatosaurus, leifa, .athene., polomo, irokei, miannes, fritzzes, reens, casdela, acerbus114, sefseftostos, clevernt, caxia5, haafr, colaspores, idkanonymize, ausshuu.
Team images courtesy of the KQM portrait generator.
