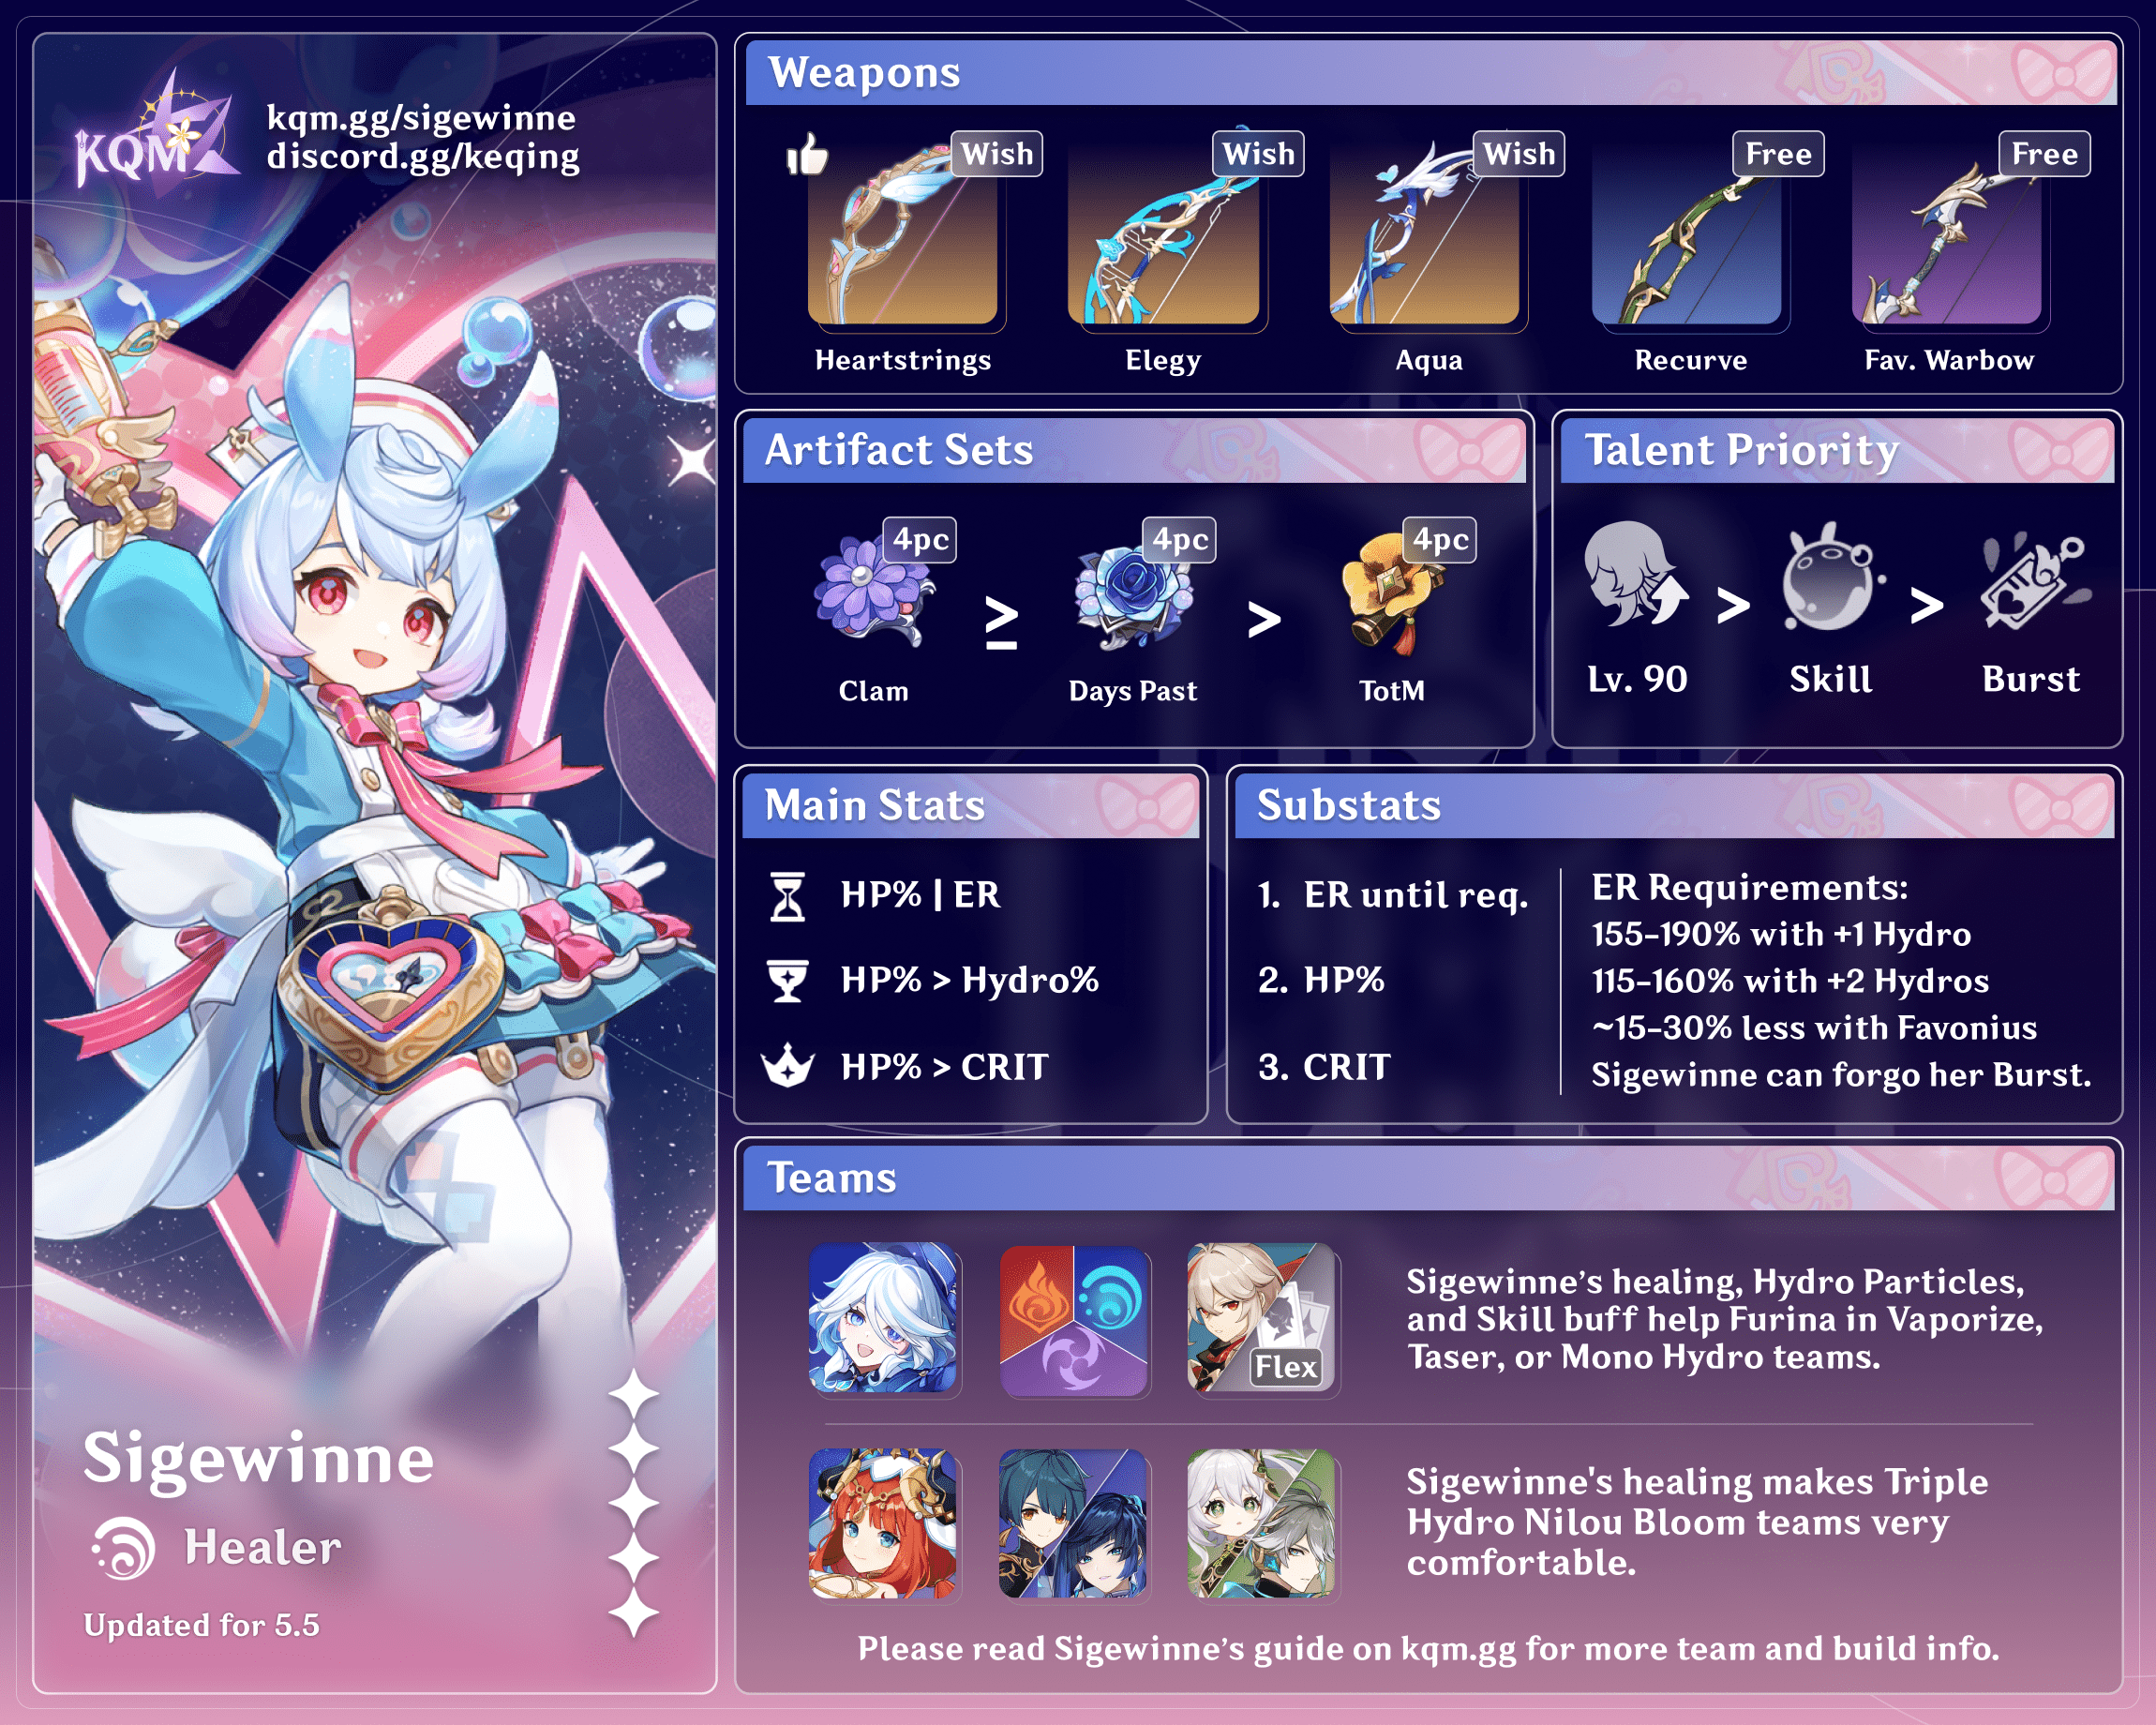
Updated for Version 4.7

Sigewinne is a 5-star Hydro Bow character in Genshin Impact who provides healing, a buff for off-field Skill damage, personal damage, and cuteness! Look at her pink gun and say she’s not cute. You can’t. She told me to write this guide or else I’ll lose my 50/50. Learn about Sigewinne’s best builds, best weapons, best artifacts, and best teams in this quick guide.
Note that the information given may change if new discoveries are made. More extensive testing is in progress.
Join our Discord to participate in the theorycrafting process.
Table of Contents
New Content
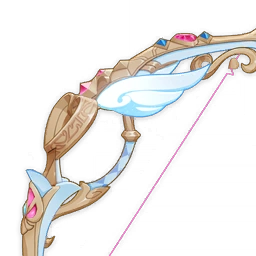 Silvershower Heartstrings | Sigewinne’s signature weapon and one of her best Bows. Its full passive requires Sigewinne to acquire Bond of Life through her Sourcewater Droplets. Its high HP% secondary stat greatly increases Sigewinne’s own damage and her A1 Passive’s buff. |
Infographic
Character Overview
Pros
- Strong healing
- Buffs to off-field Skill damage dealers
- Non-negligible personal damage
Cons
- Longer field time requirements than other healers if she uses her Burst
- Little buffing utility past her A1 buff
- Lower off-field Hydro application than other Hydro characters
Playstyles
Off-Field Healer
Sigewinne uses her Tap Skill and forgoes her Burst. She heals and buffs the team, but loses personal damage in exchange for using less field time.
Quickswap DPS
On top of her healing and buffing, Sigewinne uses her Burst to fill downtime and deal some damage. She can also hold her Skill for more damage. This playstyle is used in teams without a dedicated on-fielder or with some downtime in their rotations.
Talents
Level and Talent Priority
Character Level > Skill > Burst
It is heavily recommended to raise Sigewinne to Level 90 as her damage, healing, and A1 buff all scale with her Max HP. Her Normal Attack is irrelevant to the majority of her playstyles.
Talent Overview
 Normal Attack | Targeted Treatment
Talent Description
Normal Attack
Performs up to 3 consecutive attacks.
Charged Attack
Performs a more precise Aimed Shot with increased DMG.
While aiming, the power of Hydro will continually accumulate on the arrow. After fully charging, Sigewinne will periodically fire slow-moving Mini-Stration Bubbles toward the target, dealing Hydro DMG. When released, an arrow imbued with torrential energy will deal Hydro DMG to the opponent hit.
Plunging Attack
Fires off a shower of arrows in mid-air before falling and striking the ground, dealing AoE DMG upon impact.
Sigewinne has a special Charged Attack that periodically fires heart-shaped bubbles, dealing continuous Hydro damage. Despite its uniqueness, it is not particularly useful.
 Elemental Skill | Rebound Hydrotherapy
Talent Description
Blows a Bolstering Bubblebalm that can stimulate blood flow and help patients drift off to sleep using a bubblegun specially made in the Fortress of Meropide.
Bolstering Bubblebalms will bounce between nearby opponents, dealing Hydro DMG based on Sigewinne’s max HP to opponents it hits. When it bounces, it will restore HP to all nearby party members except Sigewinne herself. The amount healed is based on Sigewinne’s max HP.
After bouncing 5 times, the Bolstering Bubblebalm will disappear and restore HP to Sigewinne based on her max HP value.
When no opponents are present, the Bolstering Bubblebalm will bounce nearby. Only one Bolstering Bubblebalm created by a Sigewinne may exist at once.
When Held, the Bolstering Bubblebalm can be boosted to an even bigger size.
Hold
Enter Aiming Mode to begin blowing an even bigger, even more breathtaking Bolstering Bubblebalm!
The Bolstering Bubblebalm will grow bigger the longer the skill is Held, until it grows up to two tiers in size. Each tier it grows increases its DMG by 5% and healing by 5%. When a Bolstering Bubblebalm bounces, it will drop down a tier in size, until it returns to being a normal Bolstering Bubblebalm.
After weaker opponents are hit by big Bolstering Bubblebalms, they will be imprisoned and will be unable to move.
In addition, 2 Sourcewater Droplets will be created near Sigewinne when she uses this Skill. Each Sourcewater Droplet Sigewinne collects will grant her a Bond of Life worth 10% of her Max HP.
When Sigewinne’s Bond of Life is cleared, she regains 1 Elemental Energy for every 2,000 HP worth of the Bond of Life that was cleared. Sigewinne can regain up to 5 Elemental Energy in this way.
Arkhe: Ousia
Bolstering Bubblebalms periodically call down a Surging Blade on the position they hit, dealing Ousia-aligned Hydro DMG based on Sigewinne’s max HP.
Sigewinne’s Tap and Hold Skills deploy a bubble which bounces between enemies and deals Hydro damage. This bubble:
- heals all party members other than Sigewinne on hit
- heals Sigewinne for 50% of her Max HP on its final bounce
- bounces 5 times with an interval of ~1.7s at base, usually targeting a different enemy every bounce
- triggers an Ousia attack every 10s
- generates 4 particles on its first hit.
The bubble’s ICD of 2s means that normally every other bounce applies Hydro, thus on the 1st, 3rd, and 5th hits. However, if enemies are far away from each other, the time between bounces can exceed 2s, allowing 2 consecutive bounces to apply Hydro.
Holding Sigewinne’s Skill increases the size of the bubble by up to two additional tiers. Each tier grants increases the bubble’s damage and healing, but the bubble’s tier is reduced after each hit. This bubble still bounces the same amount of times. When smaller opponents such as Hilichurls are hit by the bigger bubble from the Hold Skill, they will be trapped until the bubble bounces again.
Sigewinne generates 2 Sourcewater Droplets per Skill; these Sourcewater Droplets are identical to those created by Neuvillette and Hydro Traveler. Picking up a droplet with Sigewinne grants her 10% Bond of Life, which she can clear to receive up to 5 Energy.
 Elemental Burst | Super Saturated Syringing
Talent Description
Take out a special Fortress of Meropide-made syringe and assault the area in front with waves of kindness and medicine, dealing AoE Hydro DMG based on Sigewinne’s max HP.
In addition, Sigewinne absorbs up to 2 nearby Sourcewater Droplets within a certain range right before using the skill.
Sigewinne’s Burst allows her to shoot from a syringe for 2.5s, dealing 6 instances of Hydro damage and applying Hydro twice. Additionally, she collects up to 2 nearby Sourcewater Droplets when using her Burst. Sigewinne cannot be interrupted while her Burst is active, but she can jump to prematurely end its duration.
Sigewinne’s Burst provides a decent burst of damage, but it does not provide buffs or healing. Thus, it is usually not worth using Sigewinne’s Burst unless the team does not have a dedicated on-fielder or needs to fill downtime.
 Ascension 1 Passive | Requires Appropriate Rest
Talent Description
Sigewinne grants herself the “Semi-Strict Bedrest” effect for 18s after using Rebound Hydrotherapy: Sigewinne gains an 8% Hydro DMG Bonus and 10 stacks of Convalescence. When the Elemental Skills of your nearby off-field party members other than Sigewinne deal DMG, consume 1 stack of Convalescence, and increase the DMG dealt by this instance of Elemental Skill DMG. Every 1,000 Max HP Sigewinne has above 30,000 increases the DMG by 80. The maximum DMG increase for Elemental Skills that can be gained in this way is 2,800.
This passive grants a Base DMG Bonus to Sigewinne’s teammates upon using her Skill. This buff applies only to Skill damage dealt from off-field and can be activated 10 times. She needs 65,000 HP to max out this passive.
 Ascension 4 Passive | Detailed Diagnosis, Thorough Treatment
Talent Description
When Sigewinne performs healing, the amount healed for this instance is increased based on the total current value of the Bonds of Life on all party members: For each 1,000 HP worth of Bonds of Life, the outgoing healing is increased by 3%. The amount of healing provided can be increased by up to 30% in this way.
Sigewinne’s healing is increased by the amount of Bond of Life possessed by party members. She can gain Bond of Life herself by picking up her own Sourcewater Droplets. This passive requires 10,000 HP’s worth of Bond of Life to maximize, which means having 50,000 HP with Sigewinne considering 2 droplets.
 Utility Passive | Emergency Dose
Talent Description
While underwater, heal your active character over 2.5s when their HP falls under 50%. The amount healed is equal to 50% of their Max HP, and their All Elemental and Physical RES will be decreased by 10% for 10s. This effect can be triggered up to once every 20s.
Dehya, now as a cute Melusine: Sigewinne trivializes underwater combat with automatic healing for characters under 50% HP when underwater.
Constellations
Sigewinne’s first and second Constellations improve her buffing potential. However, her Constellations are much less impactful to team damage compared to those of her teammates (such as Furina). Her Constellation 2 is a recommended stopping point unless going for C6.
 Constellation 1 | “Can the Happiest of Spirits Understand Anxiety?”
Rebound Hydrotherapy’s Bolstering Bubblebalm can bounce 3 extra times, and the first 3 bounces will not cause big Bubblebalms to become smaller.
The Passive Talent “Requires Appropriate Rest” is enhanced: Each Bubblebalm bounce adds 1 stack to her Convalescence tally, and the values for the Convalescence stacks’ DMG bonus will be modified to: Every 1,000 max HP Sigewinne has above 30,000 increases the DMG by 100. The maximum DMG increase for Elemental Skills that can be gained in this way is 3,500. You must first unlock the Passive Talent “Requires Appropriate Rest.”
One of Sigewinne’s strongest Constellations, as it increases her buffs, healing, and damage.
Sigewinne’s bubbles now bounce for an additional 3 times, and the bubble’s tier is not reduced until the 4th bounce. This greatly increases the bubble’s healing and damage, allows more bounces to trap small enemies if the Skill is held, and grants an additional instance of Hydro application.
Each bubble hit also adds a stack to Sigewinne’s A1 Passive, resulting in 8 more activations per Skill. Additionally, the Base DMG Bonus provided by each stack increases by 25%, improving her buffing potential.
 Constellation 2 | “Can the Most Merciful of Spirits Defeat Its Foes?”
When using Rebound Hydrotherapy and Super Saturated Syringing, Sigewinne can create a Bubbly Shield worth 30% of her Max HP that absorbs Hydro DMG with 250% efficiency. The Bubbly Shield will persist until Sigewinne finishes using relevant skills.
Additionally, after Rebound Hydrotherapy’s Bolstering Bubblebalm or Super Saturated Syringing hits an opponent, that opponent’s Hydro RES will be decreased by 35% for 8s.
The shield from this Constellation is not particularly impactful as it only applies to Sigewinne herself, and she is already immune to interruption during her Burst. However, the Hydro RES Shred is very useful for Sigewinne and other Hydro damage dealers in the team.
 Constellation 3 | “Can the Healthiest of Spirits Cure Fevers?”
Increases the Level of Rebound Hydrotherapy by 3.
Maximum upgrade level is 15.
Increases Sigewinne’s Skill damage and healing. Not particularly impactful.
 Constellation 4 | “Can the Loveliest of Spirits Keep Decay at Bay?”
The duration of Super Saturated Syringing is extended by 3s.
Increases the duration of Sigewinne’s Burst to 5.5s, for an additional 8 hits. While this raises Sigewinne’s Hydro application and damage in teams where she uses her Burst, it exacerbates the issue of her extending the rotation. This Constellation is strong in conjunction with her C6.
 Constellation 5 | “Can the Most Joyful of Spirits Alleviate Agony?”
Increases the Level of Super Saturated Syringing by 3.
Maximum upgrade level is 15.
Improves Sigewinne’s Burst damage. Not particularly impactful until C6.
 Constellation 6 | “Can the Most Radiant of Spirits Pray For Me?”
When Sigewinne performs healing, she will increase the CRIT Rate and CRIT DMG of her Super Saturated Syringing based on her Max HP. Every 1,000 Max HP she has will increase CRIT Rate by 0.4% and CRIT DMG by 2.2% for 15s. The maximum increase achievable this way is 20% CRIT Rate and 110% CRIT DMG.
This Constellation greatly increases Sigewinne’s personal damage by giving her Burst additional CRIT stats based on her Max HP. She needs 50,000 HP to max out the CRIT buffs.
Artifacts
ER Requirements
Calcs for ER requirements can be found here (last updated for Version 4.7).
Skill Particles Caught by Sigewinne
| No Energy Weapon | Funneled Favonius Bow (1 Proc) | |
| Triple Hydro | 115–160% | 105–140% |
| Double Hydro | 155–190% | 135–160% |
| Solo Hydro + Double Electro | 145–195% | 130–160% |
Skill Particles Caught by a Teammate
| No Energy Weapon | Funneled Favonius Bow (1 Proc) | |
| Triple Hydro | 125–180% | 115–155% |
| Double Hydro | 175–220% | 150–180% |
| Solo Hydro + Double Electro | 160–225% | 140–190% |
Assumptions:
- Sigewinne uses 1 Skill per Burst.
- She catches her own Favonius particles.
Sigewinne does not usually cast her Burst in Solo Hydro teams without Electro Resonance, so these teams are not listed. Use the Energy Recharge Calculator to determine exact requirements for your team and rotation.
Artifact Stats
 Sands |  Goblet |  Circlet |
| HP% or Energy Recharge | HP% > Hydro DMG Bonus | HP% > CRIT |
Stat Priority: ER% (until requirement) > HP% > CRIT
A Healing Bonus Circlet can be used for more healing, but Sigewinne’s healing is already sufficient without it. An HP% Circlet provides increased healing while also increasing her damage and buffing.
Artifact Sets
 4pc Ocean-Hued Clam | This set deals unconditional Physical damage, due to Sigewinne’s strong healing. This makes it her generally best set for personal and team damage. Her intervals between healing characters reduce healing wasted compared to characters like Jean. It is also easy to acquire from the Artifact Strongbox. |
 4pc Song of Days Past | This set is competitive with 4pc Clam in single-target and in teams with large amounts of DMG% and/or CRIT buffs. Though Sigewinne’s teams often have these buffs, the set’s buff is consumed inconsistently and its Domain may be inefficient to farm. Sigewinne should not use this set if she is played on-field. |
 4pc Emblem of Severed Fate | 4pc Emblem is the best for Sigewinne’s personal damage, which mostly comes from her high-cost Burst. However, 4pc Ocean-Hued Clam outdamages this set at C0. |
 4pc Tenacity of the Millelith | Sigewinne can keep 4pc Tenacity’s passive active for 8–10s per use of her Skill at C0. At C1, this buff lasts for 16–19s. The Shield Strength is not particularly relevant, but the 2pc bonus is appreciated. |
 4pc Noblesse Oblige | This set provides the same buff as 4pc Tenacity, but Sigewinne prefers the latter’s 20% HP over 20% Burst DMG Bonus. |
 2pc Mixed Sets | • HP% • Energy Recharge • Hydro DMG Bonus Viable 2pc combinations. 2pc HP% is the best, especially if Sigewinne does not use her Burst. |
 4pc Fragment of Harmonic Whimsy | Sigewinne’s Bond of Life from Sourcewater Droplets allows her to utilize this set, but it still falls behind 4pc Emblem and 2pc combinations in terms of personal damage. If her Burst is not used, her personal damage is not a major consideration and a supportive set or 4pc Clam should be used. It is not worth farming this set just for Sigewinne. |
Weapons
 Silvershower Heartstrings | Sigewinne’s signature weapon and one of her best options. The full passive requires Sigewinne to acquire Bond of Life through her Sourcewater Droplets. Its high HP% secondary stat greatly helps Sigewinne’s own damage and her A1 Passive’s buff. However, pulling this weapon for Sigewinne is usually a smaller increase to team damage than other characters’ Constellations and weapons. |
 Elegy for the End | One of Sigewinne’s best options if the Sigewinne uses her Burst and the team can utilize the weapon’s buffs. Sigewinne can quickly stack the passive during her Burst, but it takes much longer when using only her Skill. Consider moving her Skill earlier in the rotation. |
 Aqua Simulacra | The CRIT DMG, DMG Bonus, and HP% from this Bow are all useful for Sigewinne, making this Bow her second best option for personal damage. It does lose a lot of value if Sigewinne does not use her Burst. |
 Recurve Bow | The HP% secondary stat is very useful for Sigewinne’s damage and buff, even though the passive is useless. |
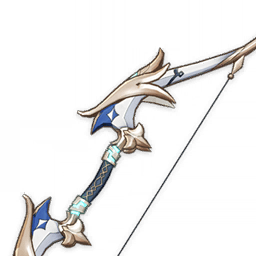 Favonius Bow | Significantly worse for Sigewinne’s healing and A1 buff, but its passive helps lower team ER requirements. However, Sigewinne’s tendency to run with other Hydro units and units with lower need for Energy makes its Energy less useful than usual. |
 Sacrificial Bow | Sacrificial Bow’s Skill cooldown reset can come in handy for teams that want increased Hydro application or more procs of Sigewinne’s A1 buff. However, it is typically not worth the increased field time. |
Teams
Rotation Notation
- N = Normal Attack
- C = Charged Attack
- A = Aimed Shot
- P = Plunging Attack
- E = Elemental Skill
- tE = Tap Skill
- hE = Hold Skill
- Q = Elemental Burst
- D = dash (cancel)
- J = jump (cancel)
- W = walk (cancel)
- > = switch character
- ( ) = these actions are optional; please refer to the notes below
- [ ] = repeat these actions the specified number of times
Teambuilding
- Sigewinne’s healing allows her to slot into many teams.
- Many of her teams employ Furina due to their strong synergy together.
- Sigewinne cannot enable Bloom-based and Vaporize teams by herself, but she is a strong pairing for a second Hydro character.
- She has additional synergy with off-field Skill damage dealers, whom she can buff with her A1 Passive.
Notable Teammates


Hydro 
Hydro teammates reduce ER requirements and provide Hydro Resonance.
 Furina | Furina is Sigewinne’s best teammate. Sigewinne’s healing stacks Fanfare, while Furina makes great use of Sigewinne’s A1 buff due to having high DMG Bonus and CRIT. |
 Yelan | Yelan can serve as an off-field Hydro DPS in Double or Triple Hydro teams. Sigewinne’s Burst cannot trigger Yelan’s coordinated attacks |
 Xingqiu | Xingqiu fulfills the same niche as Yelan, providing off-field Hydro damage and application. At C2, he shreds enemy Hydro RES. However, Xingqiu’s defensive utility is less relevant as due to Sigewinne’s abundant healing, but his interruption resistance is still appreciated. |
 Nilou | Sigewinne’s healing allows her to fit well in Nilou’s Bloom teams. Sigewinne’s lacking Hydro application means she is best used in Triple Hydro teams. She can act as the on-field character in Double Hydro teams, but her Hydro application is still on the lower side. Nevertheless, her healing makes her a very comfy pick. |
 Ayato | Ayato serves as a driver for Mono Hydro, Electro-Charged, Hyperbloom, and Burgeon teams. Sigewinne can use her Burst during his downtime. |
 Neuvillette | Sigewinne is not particularly useful for Neuvillette, since he already generates enough Sourcewater Droplets for himself. She is also not useful as a healer in teams with Furina, since she does not contribute to his A1 Passive. She has some limited utility in providing Hydro Resonance and team healing. |
Electro 
 Fischl | Fischl contributes significant off-field damage. She quickly consumes Sigewinne’s A1 procs due to Oz, her A4, and C6 all being Skill damage. Fischl is extremely strong in Dendro teams due to her constant A4 procs applying high amounts of Electro. Although she is not the most reliable Hyperbloom trigger, Sigewinne’s slow rate of Hydro application means Fischl can keep up. |
 Yae Miko | Yae can efficiently utilize Sigewinne’s A1 buff. She slots well into Electro-Charged teams and can be the on-field character for Quickbloom teams. |
 Raiden | Raiden either deals damage on-field in Electro-Charged teams or triggers Hyperbloom from off-field. Her Skill can use up Sigewinne’s A1 procs. |
 Kuki Shinobu | An alternative to Raiden as a Hyperbloom trigger. |
Pyro 
Sigewinne’s Double Hydro teams enable Vaporize and Burgeon for Pyro units. She can also Vaporize alongside Furina to increase her and Furina’s damage.
 Klee | Klee’s overpowering Pyro application and flexible uptime make her the best option for a Furina Vaporize team using Sigewinne. Additionally, Klee allows Furina to make use of all of Sigewinne’s A1 procs without having to contest with another off-field unit, while Sigewinne herself can still come on-field to use her Burst. Klee’s A4 Passive helps lower team ER requirements. |
 Xiangling | Xiangling’s high off-field Pyro application enables Vaporizes for Sigewinne and Furina. Even as the only Pyro character, Xiangling can contribute decent damage. She can also serve as a Burgeon trigger. |
 Yoimiya | Furina alone does not usually apply enough Hydro for Yoimiya to Vaporize, but Vaporize is consistent when combined with Sigewinne’s Hydro application. |
 Other Pyro DPS Units | Other Pyro units are not very synergistic with Sigewinne; they much prefer other healers like Bennett or Xianyun, or do not need Hydro application to supplement Furina’s Skill. |
 Thoma | Thoma is a reliable off-field Burgeon trigger. He also provides a strong shield when built for it. |
 Arlecchino | While Arlecchino’s Bond of Life mechanics may seem to synergize with Sigewinne’s A4 Passive, they should not be used together since Arlecchino cannot be healed by teammates and does not benefit from Sigewinne’s buffs. |
Anemo 
Dendro 
 Nahida | Nahida’s unparalleled Dendro application makes her ideal for any Dendro team. She consumes some of Sigewinne’s A1 procs, but she is not the most ideal user due to lacking high CRIT, DMG Bonus, and access to Amplifying Reactions. |
 Alhaitham | Alhaitham is a great driver for Bloom and Quickbloom teams due to his personal damage and high Dendro application. |
  Dendro Traveler, Collei | Dendro Traveler and Collei serve as alternatives for players without Nahida. |
Geo 
Cryo 
 Wriothesley | Wriothesley appreciates Sigewinne’s extra healing for more Fanfare stacks earlier in the rotation, especially if lacking units like Shenhe or Xianyun who could be used in that slot. However, Sigewinne doesn’t directly offer anything to him; only his teammates benefit. |
  Ayaka, Ganyu | Sigewinne is not an ideal Hydro teammate for either Ayaka or Ganyu due to her single-target application and lack of buffs. |
Furina Forward Vaporize

These teams focus on amplifying Furina’s damage through Sigewinne’s A1 buff and Vaporize. Vaporize and Furina’s DMG% buff further amplify the value of Sigewinne’s Base DMG Bonus. Units in these teams tend to have flexible field times, so Sigewinne can use her Burst for her personal damage.
Kazuha stands out because of his DMG% buff, grouping, and ability to hold 4pc Viridescent Venerer, but other Anemo units can also replace him. Klee and Xiangling are the only Pyro units able to consistently provide the Pyro application necessary for Furina and Sigewinne to Vaporize.
Example Teams
This is not a comprehensive list of teams. The inclusion or exclusion of any given team does not necessarily reflect its power level.

Furina and Sigewinne can consistently Vape while Klee is on-field. Klee’s A4 Passive reduces ER requirements across the entire team. Double Swirl setups can be unreliable, so Hydro Swirl should be prioritized.
Sample Rotation
Furina ED Q > Klee E > Kazuha tEPQ > Sigewinne tEQ > Klee Q (E) 4[N1C]

Xiangling’s off-field application allows more time for Kazuha and Sigewinne to use their Skills. Energy Recharge requirements are extra low if Xiangling and Kazuha both hold Favonius. Xiangling’s Skill should be used earlier than Sigewinne’s so that Guoba does not steal A1 procs. Kazuha should absorb Pyro with his Burst for more consistent Vapes. Still, Xiangling may Vape instead of Furina when neither Xiangling’s Skill nor Kazuha’s Burst are active.
Sample Rotation
Furina ED > Xiangling E > Kazuha tEPQ > Sigewinne tE > Furina Q > Xiangling Q N2 > Kazuha tEP > Sigewinne Q

This team focuses more on Xiangling’s damage and enables more consistent Vapes for Furina, especially with Bennett’s C6. Xiangling’s higher personal damage comes in exchange for 4pc VV and grouping.
Sample Rotation
Furina ED > Bennett Q E > Xiangling Q E > Sigewinne tE > Furina Q > Bennett E > Xiangling N2 > Bennett E > Xiangling E > Sigewinne Q

This team features a mixture of Burgeon damage and Vaporized Hydro damage. Xiangling triggers Burgeon and enables Vaporize for Furina and Sigewinne. Nahida takes the field during rotation downtime to help Furina continue Vaping consistently.
Sample Rotation
Xiangling E > Nahida E Q > Furina ED > Sigewinne tE > Furina Q > Nahida N2C > Xiangling Q E > Sigewinne Q > Nahida E 2[N4D]
Reverse Vaporize

Sigewinne supports a Pyro DPS alongside another Hydro character. Her Hydro application is not very high so another Hydro character is required. Furina is the best choice for the slot, but her lower Hydro application does not suffice for some DPS units. Sigewinne’s healing allows for a more offensively aligned flex character, and she can battery the second Hydro unit.
Example Teams
This is not a comprehensive list of teams. The inclusion or exclusion of any given team does not necessarily reflect its power level.

Furina’s Hydro application by itself is typically not enough to allow Yoimiya to Vaporize, but Sigewinne’s supplemental application alleviates this. Sigewinne’s healing stacks Fanfare and opens up flexibility in the last slot. Zhongli can be replaced with other shielders such as Thoma, Layla, or Kirara; Yun Jin can be replaced with other damage amplifiers such as Bennett or an off-field DPS such as Fischl.
Sample Rotation (Zhongli)
Furina ED > Zhongli hED > Sigewinne tE > Furina Q > Yoimiya E 3[N5D] (Q)
Sample Rotation (Yun Jin)
(Yun Jin E)1 > Furina ED > Sigewinne tE > Furina Q > Yun Jin Q E > Yoimiya E 3[N5D] (Q)
1At C1, Yun Jin can use an additional Skill at the start of the rotation.

Sigewinne’s healing lets you run Sucrose as an offensive support while still letting Yanfei trigger Vaporize. Sucrose Swirls Hydro, but she buffs Yanfei’s ATK and EM with Thrilling Tales of Dragon Slayers and her A4 Passive, respectively.
Sample Rotation (Furina)
Furina ED > Sigewinne tE > Furina Q > Sucrose ED(Q)1 > Yanfei combo
Sample Rotation (Xingqiu or Yelan)
Sigewinne tE > Xingqiu/Yelan EQ > Sucrose ED(Q)1 > Yanfei combo
1Use Sucrose’s Burst when available.
Electro-Charged

Electro-Charged teams (also known as Taser) rely on the strong personal damage of off-field Electro and Hydro units. An Anemo character can deal high reaction damage through Swirling Electro-Charged enemies. The lower field time requirements on teammates allow Sigewinne to have time for her Burst. The team can be a quickswap team consisting of many off-field units or one with a dedicated on-fielder.
Example Teams
This is not a comprehensive list of teams. The inclusion or exclusion of any given team does not necessarily reflect its power level.

A flexible team that keeps Skills active and utilizes both Sigewinne and Kazuha on-field. Sigewinne’s A1 procs are split between Furina and Fischl. This team does not need to keep to a set rotation.
Sample Rotation
Fischl E > Furina ED > Kazuha tEP > Sigewinne tE > Furina Q > Kazuha tEP > Fischl N2 Q > Kazuha N2 Q tEP > Sigewinne Q > Kazuha tEP > Fischl N2
Weave in Normal Attacks between character abilities if you have Fischl’s C6.

A flexible team that swaps between refreshing Skills, on-fielding Sigewinne, and on-fielding Kazuha. Sigewinne’s A1 procs are split between Yae Miko and Fischl. This team does not need to keep to a set rotation. Kazuha’s is the best option due to his DMG% buff, grouping, and high Anemo application, but other Anemo characters like Lynette can replace him.
This team has a flexible rotation; time used for Sigewinne’s Burst and Yae’s Normal Attacks can be replaced with any character on-field.
Sample Rotation (Kazuha)
Yae 3[E] > Kazuha tEP > Sigewinne tE > Fischl E > Kazuha Q tEP > Yae Q E 2[N1 E] > Kazuha tEP > Fischl E > Sigewinne Q > Kazuha tEP
Sample Rotation (Lynette)
Yae E 2[(N1)¹ E] > Lynette E > Sigewinne tE > Lynette Q > Fischl E > (Sigewinne Q)2 > Yae Q 3[N1 E] > Fischl N2 Q > Lynette E > Yae 2[N3]
1From the second rotation and above.
2Use Burst if available.

Heizou acts as the on-fielder in this fully 4-star team. He can hold Hakushin Ring or TTDS to buff the team.
Sample Rotation
Fischl E > Sigewinne tE > Heizou Q > Beidou EQ > Heizou N2C E N2C > Fischl N2 Q > Beidou E N2 > Heizou N2C N2 E > (Sigewinne Q)1
1Alternatively, keep Heizou on-field instead of using Sigewinne’s Burst.

A very comfortable team. Raiden deals damage on-field and reduces the team’s ER requirements. Sigewinne should use her Burst to increase Raiden’s Resolve stacks, but it is optimal to cancel it with a jump.
Sample Rotation (Furina)
Raiden E > Furina ED > Kazuha tEP > Sigewinne QJ tE > Furina Q > Kazuha Q tEP > Raiden Q combo
Sample Rotation (Xingqiu / Yelan)
Raiden E > Sigewinne tE QJ > Kazuha tEPQ > Yelan/Xingqiu EQ > Kazuha tEP N1 > Raiden Q combo

This team has very low ER requirements for Sigewinne due to its long rotation and Fischl’s high particle generation.
Sample Rotation (Kazuha)
Sigewinne tE > Fischl E > Kazuha tEPQ > Ayato Q E N15 > Kazuha E > Fischl Q > Sigewinne Q > Ayato E N15
Sample Rotation (Lynette)
Sigewinne tE > Fischl E > Lynette EQ > Ayato Q E N15 > Fischl Q > Lynette E > Sigewinne Q > Lynette E > Ayato E N15
Mono Hydro

Mono Hydro teams deal high Hydro damage and have low ER requirements. Furina can be replaced with another Hydro unit, but her buffing and damage are invaluable. Sigewinne’s healing allows using more offensive units. Since Sigewinne can’t trigger Yelan or Xingqiu’s Bursts, she does not need to use her Burst. It’s possible to fit it during rotation downtime, but that’s a very short window.
Example Teams
This is not a comprehensive list of teams. The inclusion or exclusion of any given team does not necessarily reflect its power level.

This team utilizes Ayato as a Hydro driver and on-field DPS.
Sample Rotation
Furina ED > Lynette/Kazuha Q > Sigewinne tE > Furina Q > Lynette E / Kazuha tEP > Ayato Q E N15 > Kazuha tEP > (Sigewinne Q)¹ > Ayato E N15
1Sigewinne’s Burst is optionally used starting in the second rotation. It can be canceled early using a jump cancel.

A true mono Hydro team that capitalizes on lower Energy requirements and Hydro RES Shred from Xingqiu’s C2. Sigewinne’s Burst can fill the downtime when Xingqiu’s Burst is not active, but it is a tight squeeze.
Sample Rotation
Furina ED Q > Sigewinne tE(Q)1 > Yelan Q N1 E N1 > Xingqiu Q N1 E N1 > Yelan2 2[N4] E N3
1Sigewinne’s Burst is optionally used starting in the second rotation. It can be canceled early using a jump cancel.
2Either Xingqiu or Yelan can be on-field here, depending on who benefits most from Yelan’s A4 Passive given your investment.
Nilou Bloom

Sigewinne brings the most off-field healing of any Hydro character, which is great for counteracting Bloom self-damage. However, her short on-field duration and low Hydro application puts her behind other Hydro healing options. Thus, she works best in Triple Hydro teams where she can levy her immense healing to make a very comfortable team.
Example Teams
This is not a comprehensive list of teams. The inclusion or exclusion of any given team does not necessarily reflect its power level.

Sample Rotation
Nilou E N2 E > Sigewinne tE > Yelan/Xingqiu EQ > Nahida combo > Yelan E > Nahida combo

Sample Rotation (Yelan)
Nilou E N2 E > Yelan EQ > Alhaitham Q > Sigewinne tE1 > Alhaitham 2[N3D] N2C N3C N3 > Yelan E > Alhaitham hEP N3D N3
1Sigewinne can move before Alhaitham’s Q for a more comfortable rotation.
Sample Rotation (Xingqiu)
Nilou E N2 E > Xingqiu EQ N1 > Alhaitham Q > Sigewinne tE1 > Alhaitham N2D 2[N3D] N1E N3D N3CD N3D N2
1Sigewinne can move before Alhaitham’s Q for a more comfortable rotation.

This team trades Bloom generation for raw Hydro and Dendro damage.
Sample Rotation
Nilou E N2 E > Furina ED Q > Alhaitham Q > Sigewinne1 tE > Alhatiham N2D 2[N3D] N1E N3D N3CD N3D N2
1For a more comfortable rotation, act with Sigewinne before Alhaitham’s Burst.

A Double Dendro team that allows playing Sigewinne on-field. Nahida is best, but Collei can be a cheap alternative. This team generally performs worse than Triple Hydro teams.
Sample Rotation (Nahida)
Nilou E N2 E > Nahida E > Sigewinne tE > Nahida Q > Traveler EQ > Sigewinne Q > Nilou Q > Traveler E > Sigewinne C
Sample Rotation (Collei)
Nilou E N2 E > Collei E1Q > Sigewinne tE > Traveler EQ > Sigewinne Q > Collei E > Nilou Q > Traveler E
1If not using Sacrificial Bow, skip Collei’s Skill and use an extra Charged Attack with Sigewinne after her own Burst.
General Furina Support

Sigewinne’s strong synergy with Furina allows them to slot together into many teams to provide a core of healing, off-field damage, and buffing.
Example Teams
This is not a comprehensive list of teams. The inclusion or exclusion of any given team does not necessarily reflect its power level.

Sigewinne and Furina provide Hydro application for Navia and Chiori to generate Crystallize shards.
Sample Rotation
Furina ED Q > Sigewine tE > Navia Q > Chiori (Q)1 2[E] > Navia E N3D N2 > Sigewinne Q > Navia E N3D N2
1Use Chiori’s Burst when available.

Faruzan requires C6 due to Xiao’s ER requirements. She can be replaced with another Anemo character who generates more Energy, like Sucrose.
Sample Rotation
Furina ED Q > Sigewine tE > Faruzan Q > Xiao 2[E]Q combo
Hyperbloom and Burgeon

By herself, Sigewinne does not apply quite enough Hydro for Hyperbloom or Burgeon, but she provides supplemental application and healing. Her healing is extra valuable in Burgeon teams due to the lack of Burgeon triggers who also provide sustain.
Example Teams
This is not a comprehensive list of teams. The inclusion or exclusion of any given team does not necessarily reflect its power level.

Nahida is the on-field character in this team while Xingqiu or Yelan provide Hydro application from off-field.
Sample Rotation (Xingqiu)
Nahida E Q > Sigewinne tE > Raiden E > Xingqiu Q N1 > Nahida N3 E N3D N3 > Xingqiu N1 E N2 > Nahida N3D N3
Sample Rotation (Yelan)
Nahida E Q > Yelan EQ N1 > Raiden E > Sigewinne tE > Nahida N3 E N3D N3 > Yelan E > Yelan E N1 > Nahida N3D N3

Due to Raiden’s slow Electro application, this team maintains low Quicken uptime: most of the team’s damage comes from Hyperbloom and unreacted Talents. Shinobu is an option for players without Raiden.
Sample Rotation (Shinobu)
Furina ED Q > Sigewinne tE > Alhaitham Q > Shinobu E > Alhaitham N2D 2[N3D] N1E N3D N3CD N3D N2
Sample Rotation (Raiden)
Raiden E > Furina ED Q > Alhaitham Q > Sigewinne tE > Alhaitham N2D 2[N3D] N1E N3D N3CD N3D N2

Sigewinne’s healing allows Ayato to run with Raiden, who allows for much smoother rotations than Shinobu. Nahida does not need to use her Burst as Ayato does not benefit from EM.
Sample Rotation
Ayato Q > Raiden E > Nahida E > Ayato E N15 > Nahida E > Sigewinne tEQ > Ayato E N15

Nahida stays on-field in this team while Xingqiu or Yelan provide Hydro application from off-field. Sigewinne’s healing makes this a very comfortable team.
Sample Rotation (Xingqiu)
Nahida E Q > Sigewinne tE > Thoma EQ > Xingqiu Q N1 > Nahida N3 E N3D N3 > Xingqiu N1 E N2 > Nahida N3D N3
Sample Rotation (Yelan)
Nahida E Q > Yelan EQ N1 > Thoma EQ > Sigewinne tE > Nahida N3 E N3D N3 > Yelan E > Yelan E N1 > Nahida N3D N3

Ayato drives this Burgeon team. Collei serves as a free alternative to Nahida.
Sample Rotation
Ayato Q > Sigewinne tE > Collei EQ > Thoma EQ > Ayato E N15 > (Thoma E)1 > Sigewinne Q > Collei E > Ayato E N15
1With Thoma’s C1, he can use his Skill twice in the rotation.
Quickbloom

Sigewinne is a healer option for Quickbloom teams. Her A1 Passive’s buff is useful for common characters in this archetype such as Fischl, Yae, or Nahida. Her healing allows you to run more offense-oriented Electro and Dendro characters. Due to the team’s low Hydro application, Electro and Dendro characters can easily maintain Quicken.
Example Teams
This is not a comprehensive list of teams. The inclusion or exclusion of any given team does not necessarily reflect its power level.

Fischl and Nahida utilize Sigewinne’s A1 buff. Sigewinne’s low volume of Hydro application means that Fischl’s inconsistent ability to trigger Hyperbloom does not matter.
Sample Rotation
Nahida E Q > Fischl E > Sigewinne tE > Alhaitham hEP 2[N3D] N3 > Nahida E > Alhaitham Q > Fischl Q > Alhaitham N3D N3C 2[N3D] N4

Raiden’s Aggravates trigger Fischl’s A4 Passive. Sigewinne should use her Burst and cancel it with a jump to generate more of Raiden’s Resolve stacks.
Sample Rotation
Raiden E > (Fischl E)1 > Nahida E Q > Sigewinne tE Q2J > Fischl Q > Raiden Q 4[N4D]
1Fischl uses her Skill every other rotation, starting in the first rotation.
2Sigewinne can stay on-field for longer in rotations that don’t use Fischl’s Skill.
Freeze

Sigewinne is outclassed by other units in Freeze teams with Ayaka and Ganyu, as her Hydro application is single-target and she lacks buffs. Nevertheless, she is still viable for being able to heal and apply Hydro. Using Sigewinne’s Burst is not recommended; that time should instead be spent batterying the Cryo DPS unit or using their attacks. Wriothesley works better than Ayaka or Ganyu due to his synergy with Furina and lack of need for a Cryo battery.
Sigewinne should equip Favonius Warbow in Ayaka and Ganyu teams, since Ayaka and Ganyu are very Energy-hungry and neither Sigewinne’s personal damage nor her A1 buff are relevant in those teams.
Example Teams
This is not a comprehensive list of teams. The inclusion or exclusion of any given team does not necessarily reflect its power level.

Wriothesley does not need a Cryo battery, allowing him to run both Furina and Sigewinne for their strong synergy. Lynette’s Burst prioritizes absorbing Cryo, which makes it easier to Swirl Cryo. All of this makes for a nice Fontainian-only team. The Cryo Swirl in this team is only reliable against Freezeable targets.
Sample Rotation
Sigewinne tE > Lynette E > Furina Q E > Wriothesley N1C > Lynette Q > Wriothesley combo

This is not the most optimal Ayaka team, but it works. Sigewinne’s Hydro application is only able to Freeze consistently in single-target combat.
Sample Rotation
Shenhe tEQ > Kazuha tEPQ > Sigewinne tE > Ayaka D E (N1) Q > Kazuha tEP > Shenhe tE > Ayaka D N2C > Kazuha tEP > Ayaka D N1 E N1C
Credits
Contact: baloopy
Contributors: baloopy; nikatosaurus, rafael0055, haafr, polomo, alehannita
Team images made with the KQM portrait generator.

