Updated for Version 5.4
Navia is a 5★ Geo Claymore character in Genshin Impact who deals damage through her powerful Elemental Skill empowered via the Crystallize reaction. Learn about Navia’s best builds, best weapons, best artifacts, and best teams in this quick guide.
Note that the information given may change if new discoveries are made. More extensive testing is in progress.
Join our Discord to check on and participate in the theorycrafting process.
Table of Contents
New Content
 Scroll of the Hero of Cinder City | When the holder triggers a reaction, they provide an Elemental DMG% buff to the Elements involved in that reaction. Non-Natlan characters cannot trigger the full 4-piece effect, providing a weaker buff. |
Kachina | Kachina deals low off-field damage but is a good battery and can reliably trigger the full effect of 4pc Scroll of the Hero of Cinder City (Scroll) to buff Navia’s damage. |
 4★ Earth Shaker | A solid craftable weapon for Navia if a Pyro character is in the team. |
 4★ Talking Stick | A decent weapon for Navia when paired with Bennett but is outclassed by Serpent Spine. |
 Fang of the Mountain King | This is a decent stat-stick for Navia. She gets 0 stacks of its passive on her 1st Skill and 2 stacks on her 2nd Skill. |
Xilonen | Xilonen provides healing, great particle generation if 2 Skills are cast, buffing via 4pc Scroll and RES Shred for Geo and other PHEC Elements in the party. She is Navia’s best teammate, even without off-field Geo application to increase Navia’s Crystal Shrapnel stacks. |
 Mavuika | Mavuika deals decent off-field AoE damage and has a good nuke on her Elemental Burst cast. She provides Navia with consistent off-field Pyro application and a decaying DMG% buff. |
Citlali | While Citlali cannot buff Navia via 4pc Scroll or her RES Shred passives, she can still hold Thrilling Tales of Dragon Slayers, another buffing set like 4pc Noblesse Oblige and provide a shield for better Geo Resonance uptime. If a Pyro or Hydro character is in the team, Citlali can also improve their damage. |
 A Thousand Blazing Suns | A very strong weapon that performs on par with Navia’s signature if she can keep full uptime on its passive. The weapon discourages early Burst cast in rotations. |
Infographic
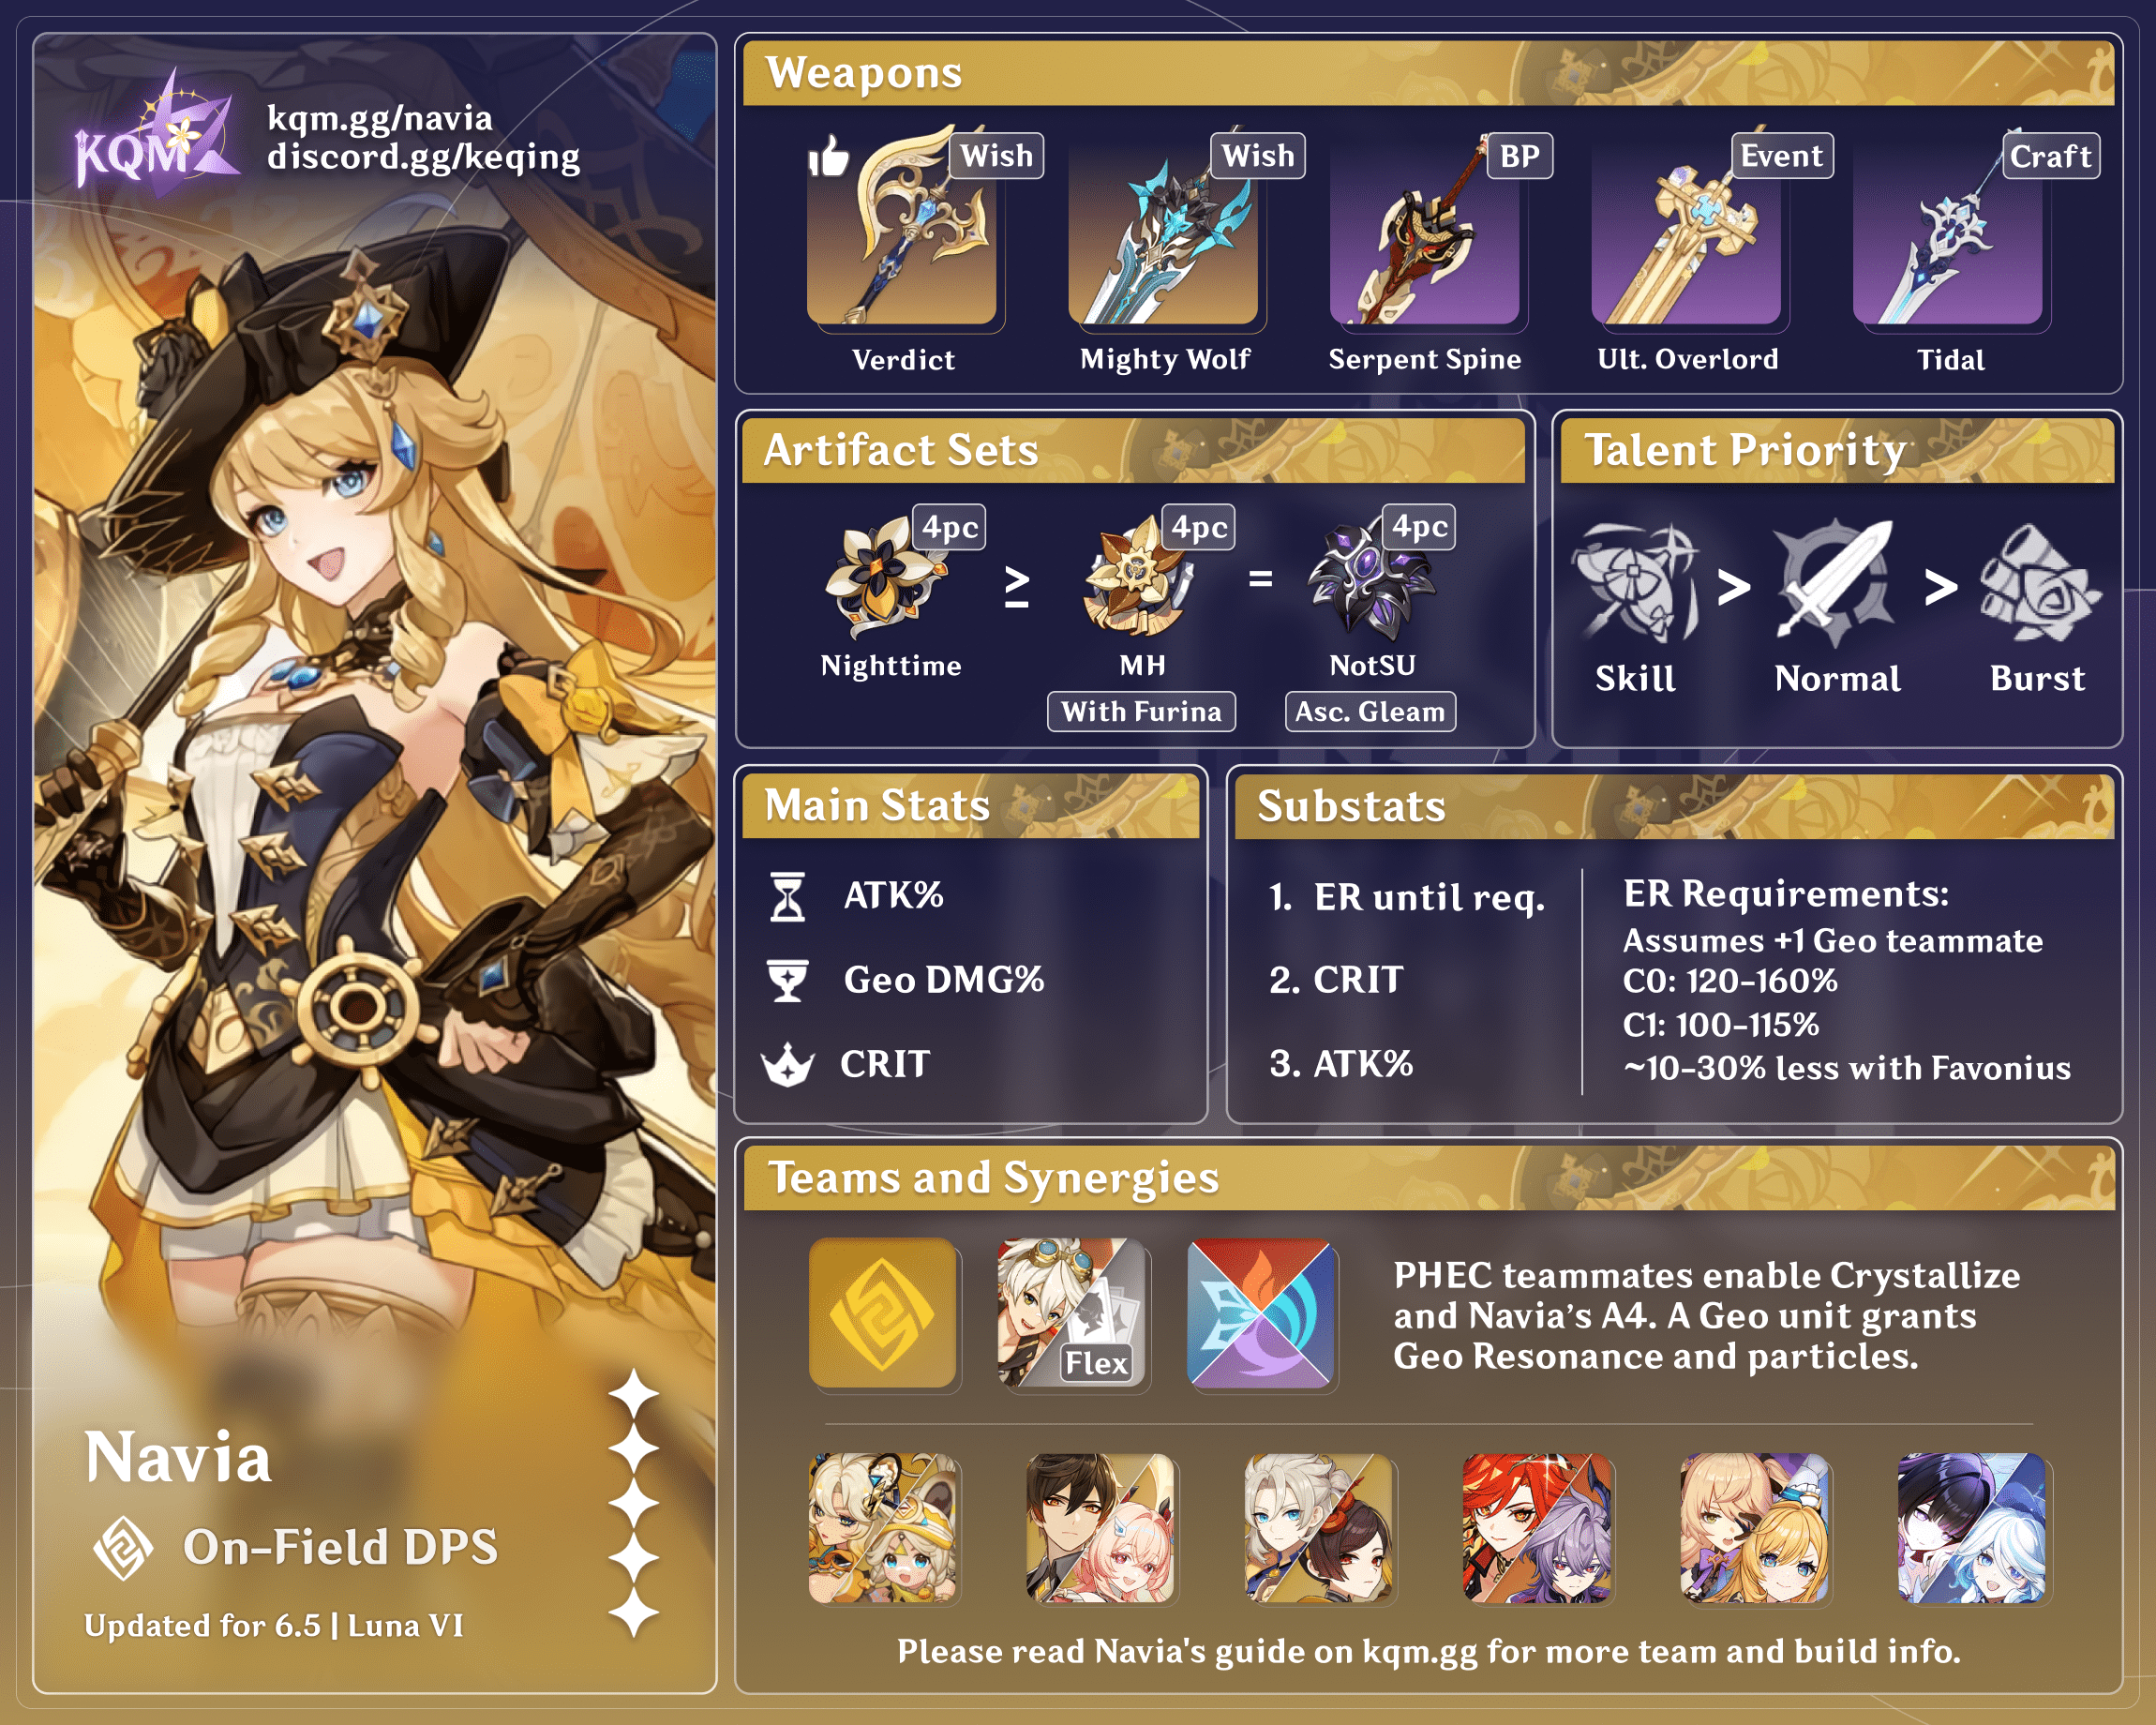
Credits to: euphorysm, cege, auraolis, chasing_haze, and KQM Staff.
Character Overview
Playstyles
On-Field DPS
Navia’s primary playstyle is an on-field Geo DPS whose main source of damage is her Elemental Skill. The damage dealt by her Skill is increased via Crystal Shrapnel stacks, which are gained through the Crystallize reaction and her Elemental Burst. Although Navia’s damage is focused on her Skill, the rest of her kit is also important as her Burst provides off-field Geo application and her A1 Passive provides Geo Conversion to her Normal Attacks.
In practice, this means that Navia should open with her Burst, swap off so her teammates can use their abilities, and swap back on-field to use her Skill and Normal Attack combos.
Pros
- Unique kit that utilizes the Crystallize reaction
- Good, front-loaded damage with her Skill
- ATK scalings mean Navia can benefit from many buffs like Bennett’s Burst, 4pc Noblesse Oblige, and 4pc Tenacity of the Millelith
- “Elegant yet lethal Gunbrella”
Cons
- Navia’s kit does not have much AoE
- Some supports — Zhongli and Geo Traveler — may require some practice with construct placement
- Short rotations (16.5s) can be awkward for buffs and teammate abilities with longer cooldowns, such as Thrilling Tales of Dragon Slayers and Furina (20s)
Quickswap DPS
Navia has little field time as a quickswap DPS, only swapping in to cast her Burst and later her Skill. In teams where the on-field DPS is not Geo, Crystal Shrapnel stacks are mostly dependent on Navia’s Burst. Additionally, Navia’s ER requirements are quite high and she does not gain as many Crystal Shrapnel stacks compared to her on-field playstyle (2–3 instead of 4–6).
While quickswap teams with on-field units, such as Noelle and Arlecchino, are viable, they do not make the best use of Navia’s kit and will not be covered in this quick guide.
Talents
Talent Priority
Skill > Normal Attack ≥ Burst
Navia’s Elemental Skill makes up the majority of her damage, so leveling her Elemental Skill should be prioritized. Her Normal Attack and Elemental Burst contribute less damage, but they are still relevant in her damage profile and should still be leveled.
Talent Overview
 Normal Attack | Blunt Refusal
Talent Description
Normal Attack
Performs up to 4 consecutive strikes.
Charged Attack
Drains Stamina over time to perform continuous spinning attacks against all nearby opponents.
At the end of the sequence, performs a more powerful slash.
Plunging Attack
Plunges from mid-air to strike the ground below, damaging opponents along the path and dealing AoE DMG upon impact.
With her A1 Passive, Navia gains a Geo Conversion and a buff to her Normal Attacks, allowing them to trigger Crystallize and obtain Crystal Shrapnel stacks. Outside of the Geo Conversion, Navia’s Normal Attacks deal mediocre Physical damage.
 Elemental Skill | Ceremonial Crystalshot
Talent Description
When a character in the party obtains an Elemental Shard created from the Crystallize reaction, Navia will gain 1 Crystal Shrapnel stack. Navia can have up to 6 stacks of Crystal Shrapnel at once. Each time Crystal Shrapnel gain is triggered, the duration of the Crystal Shrapnel stacks you already have will be reset.
When she fires, Navia will consume all Crystal Shrapnel stacks and open her elegant yet lethal Gunbrella, firing multiple Rosula Shardshots that can penetrate opponents, dealing Geo DMG to opponents hit.
When 0/1/2/3 or more stacks of Crystal Shrapnel are consumed, 5/7/9/11 Rosula Shardshots will be fired respectively. The more Rosula Shardshots that strike a single opponent, the greater the DMG dealt to them. When all 11 Rosula Shardshots strike, 200% of the original amount of DMG is dealt.
In addition, when more than 3 stacks of Crystal Shrapnel are consumed, every stack consumed beyond those 3 will increase the DMG dealt by this Gunbrella attack by an additional 15%.
Hold
Enter Aiming Mode, continually collecting nearby Elemental Shards created by Crystallize reactions. When released, fire Rosula Shardshots with the same effect as when the skill is Tapped.
Two initial charges.
Arkhe: Ousia
Periodically, when Navia fires her Gunbrella, a Surging Blade will be summoned, dealing Ousia-aligned Geo DMG.
Navia’s Elemental Skill is her main method of dealing damage. It possesses a stacking mechanic called Crystal Shrapnel, where Navia can hold up to 6 Crystal Shrapnel stacks at a time. Stacks are obtained via any teammate picking up Crystallize shards or granted periodically when Navia’s Burst hits an enemy.
Her Tap Skill consumes all Crystal Shrapnel stacks to fire a ranged shot of Rosula Shardshots, dealing Geo damage which pierces through enemies in its path. Her Hold Skill causes her to enter aiming mode, absorbing nearby Crystallize shards before consuming all Crystal Shrapnel stacks to fire the Rosula Shardshots. Navia’s Hold Skill absorbs nearby Crystallize shards fairly quickly and in waves of three. If there are Crystallize shards nearby and Navia does not have max Crystal Shrapnel stacks, a brief Hold Skill should be used. Note that Navia may struggle to hit aerial enemies as her Hold Skill cannot aim upwards. Both the Tap and Hold variations generate 3–4 Energy Particles.
The damage from Navia’s Skill is based on how many Rosula Shardshots hit the enemy. Each additional Shardshot that hits is a multiplicative increase to the base multiplier listed on the Talent description (671.16% at Talent Level 9) — see the table below. At 0/1/2/3 Crystal Shrapnel stacks, Navia fires 5/7/9/11 Rosula Shardshots. If all 11 Shardshots land, her Elemental Skill deals 200% of the base damage. For 4/5/6 stacks, she will gain an additional 15/30/45% Geo DMG Bonus for the used Skill.
| Shrapnel Stacks | Rosula Shardshots | Damage Dealt (% of Base Damage) |
| 0 | 5 | 120% |
| 1 | 7 | 140% |
| 2 | 9 | 166.6% |
| 3 | 11 | 200% |
| 4 | 11 | 200% + 15% Geo DMG Bonus |
| 5 | 11 | 200% + 30% Geo DMG Bonus |
| 6 | 11 | 200% + 45% Geo DMG Bonus |
Navia’s Skill has a cooldown of 9s and 2 charges (uses); only 1 Skill charge recovers cooldown at a time. Her Skill also summons a Surging Blade that deals Ousia-aligned Geo damage on a 7s cooldown.
 Elemental Burst | As the Sunlit Sky’s Singing Salute
Talent Description
On the orders of the President of the Spina di Rosula, call for a magnificent Rosula Dorata Salute. Unleashes a massive cannon bombardment on opponents in front of her, dealing AoE Geo DMG and providing Cannon Fire Support for a duration afterward, periodically dealing Geo DMG to nearby opponents.
When cannon attacks hit opponents, Navia will gain 1 stack of Crystal Shrapnel. This effect can be triggered up to once every 2.4s.
Navia’s Elemental Burst deals initial AoE Geo damage and afterwards provides Fire Support, which deals AoE Geo damage periodically for 12 seconds. Fire Support persists even if Navia swaps off and hits once every ~0.7s for a total of 17 hits over its duration. It also grants Navia 1 Crystal Shrapnel Charge when it hits enemies, with a 2.4s cooldown.
Navia’s Elemental Burst has a 15s cooldown and 60 Energy Cost. Fire Support has non-standard Internal Cooldown — every 3 hits — and is a dynamic ability (e.g., it will lose Bennett’s buff when Navia swaps off-field). While the damage is fine, Navia’s Burst is more important for increasing Crystal Shrapnel stacks, either directly by hitting enemies or by triggering Crystallize via its Geo application.
 Ascension 1 Passive | Undisclosed Distribution Channels
Talent Description
For 4s after using Ceremonial Crystalshot, the DMG dealt by Navia’s Normal Attacks, Charged Attacks, and Plunging Attacks will be converted into Geo DMG which cannot be overridden by other Elemental infusions, and the DMG dealt by Navia’s Normal Attacks, Charged Attacks, and Plunging Attacks will be increased by 40%.
Navia’s Normal Attacks, Charged Attacks, and Plunging Attacks receive Geo Conversion for 4s after using her Elemental Skill, while also granting her a 40% DMG Bonus to Normal, Charged, and Plunging Attacks. This allows Navia to trigger Crystallize and therefore gain Crystal Shrapnel stacks while she is on-field. Because of its low duration, Navia generally does not stay on-field as long as other on-field DPS units.
 Ascension 4 Passive | Mutual Assistance Network
Talent Description
For each Pyro/Electro/Cryo/Hydro party member, Navia gains 20% increased ATK. This effect can stack up to 2 times.
Navia naturally wants to team with Pyro/Electro/Cryo/Hydro characters for Crystallize, so this is a small but welcome damage buff. Note that the two Elements do not need to be unique (e.g., two Hydro characters still grant two stacks).
Constellations
Calcs for Constellation comparisons can be found here (last updated for Version 4.3).
 Constellation 1 | A Lady’s Rules for Keeping a Courteous Distance
Each stack of Crystal Shrapnel consumed when Navia uses Ceremonial Crystalshot will restore 3 Energy to her and decrease the CD of As the Sunlit Sky’s Singing Salute by 1s. Up to 9 Energy can be gained this way, and the CD of “As the Sunlit Sky’s Singing Salute” can be decreased by up to 3s.
As Navia nearly always uses 2 Skills per rotation, each with ~6 Crystal Shrapnel stacks, this Constellation effectively reduces her Burst cost from 60 to 42 and drastically lowers her ER requirements.
The Burst cooldown reduction is unfortunately insignificant since Navia’s rotations generally do not support using her Burst more than once, not to mention the increase in ER needed to do so.
 Constellation 2 | The President’s Pursuit of Victory
Each stack of Crystal Shrapnel consumed will increase the CRIT Rate of this Ceremonial Crystalshot instance by 12%. CRIT Rate can be increased by up to 36% in this way.
In addition, when Ceremonial Crystalshot hits an opponent, one Cannon Fire Support shot from As the Sunlit Sky’s Singing Salute will strike near the location of the hit. Up to one instance of Cannon Fire Support can be triggered each time Ceremonial Crystalshot is used, and DMG dealt by said Cannon Fire Support this way is considered Elemental Burst DMG.
This Constellation effectively provides Navia’s Skill with a 36% CRIT Rate boost. In addition, it calls 1 shot of Fire Support when she uses her Skill, which can directly provide a Crystal Shrapnel Charge and potentially trigger Crystallize.
 Constellation 3 | Businesswoman’s Broad Vision
Increases the Level of Ceremonial Crystalshot by 3.
Maximum upgrade level is 15.
A decent damage increase, boosting the Talent levels of Navia’s main source of damage — her Elemental Skill.
 Constellation 4 | The Oathsworn Never Capitulate
When As the Sunlit Sky’s Singing Salute hits an opponent, that opponent’s Geo RES will be decreased by 20% for 8s.
A good damage increase. C4 decreases enemy Geo RES by 20% for 8s after Navia’s Burst hits. Since her Burst lasts 12s, this effectively provides 20s of Geo RES Shred, which benefits both Navia and her Geo teammates. Combined with Geo Resonance, this is roughly equivalent to 4pc Viridescent Venerer’s RES Shred but for Geo.
 Constellation 5 | Negotiator’s Resolute Negotiations
Increases the Level of As the Sunlit Sky’s Singing Salute by 3.
Maximum upgrade level is 15.
A minor damage increase. Navia’s Burst only makes up a small portion of her damage profile.
 Constellation 6 | The Flexible Finesse of the Spina’s President
If more than 3 stacks of Crystal Shrapnel are consumed when using Ceremonial Crystalshot, each stack consumed beyond the first 3 increases the CRIT DMG of that Ceremonial Crystalshot by 45%, and any stacks consumed beyond the first 3 are returned to Navia.
A very powerful capstone Constellation that provides large benefits to Navia’s Skill.
Navia’s Constellation 6 refunds any Crystal Shrapnel stacks consumed past 3, effectively making the max stacks consumed 3 instead of 6. For each stack consumed beyond the first 3, Navia’s Skill will gain 45% CRIT DMG (additive). In other words, when C6 Navia fires her Skill with 6 Crystal Shrapnel stacks:
- 11 Rosula Shardshots will be fired.
- Her Skill deals 200% the base damage + 45% Geo DMG Bonus (same as C0).
- Her Skill gains an additional 135% CRIT DMG.
- The net number of stacks consumed is 3.
Overall, C6 is around a ~40% increase to her Skill’s damage, and the refund mechanic helps smoothen rotations while making it far easier for Navia to gain and maintain max stacks on her Skill.
Combos
N = Normal Attack
D = dash cancel
| N3D N2 | This is the default recommended combo. It is both easy to execute and can provide the highest DPS for Navia if the third Normal Attack is cancelled fast enough. |
| 3[N2D] | This combo is a small damage gain but is harder to execute and increases Navia’s field time (which lowers overall DPS). It can be used if you need more damage to finish off an enemy. |
For more information on how to use Navia’s combos within her team rotation, please see the Teambuilding section.
Artifacts
ER Requirements
Calcs for ER requirements can be found here (last updated for Version 5.3).
It is important to build sufficient ER on Navia so she can Burst every rotation. Her Burst provides Crystal Shrapnel stacks and triggers Crystallize, helping strengthen her Elemental Skill.
The following table assumes Favonius procs when applicable. Each additional Favonius trigger lowers Navia’s ER requirements by ~10–30%.
| C0 | C1 | |
| Xilonen, Geo Traveler, Ningguang (C2+) | 100-130% | 100-110% |
| Chiori, Kachina, Albedo, Zhongli, Ningguang (pre-C2) | 130-150% | 110-130% |
| Kachina (C2+) short rotations, Zhongli broken pillar | 155-180% | 135-150% |
Use the Energy Recharge Calculator to determine exact requirements for your team and rotation. For more details on how Favonius weapons will affect your team, please use Ac1d’s Favonius Mastersheet.
Artifact Stats
 Sands |  Goblet |  Circlet |
| ATK% / Energy Recharge | Geo DMG Bonus | CRIT Rate / CRIT DMG |
Stat Priority: ER (until requirement) > CRIT > ATK%
Navia works best on a standard ADC build — ATK% Sands, Geo DMG% Goblet, CRIT Circlet. If you cannot reach Navia’s ER requirements through substats alone, an ER Sands is acceptable as well.
Artifact Sets
Calcs for artifact set comparisons can be found here (last updated for Version 4.3).
 4pc Nighttime Whispers in the Echoing Woods | Navia’s best-in-slot artifact set provides ATK% and good Geo DMG Bonus. Against stronger enemies, the second part of the 4-piece effect may be lost if your Crystallize shield breaks. Even with reduced uptime, 4pc Whispers is still Navia’s best set and this issue can be mitigated by faster Elemental application. |
 4pc Marechaussee Hunter | A strong option if Navia can reliably take advantage of the 4-piece effect, which is currently only possible with Furina. Note that Navia usually has only 0–1 stack(s) on her first Skill use. |
 4pc Golden Troupe | Golden Troupe provides a strong buff to Navia’s Elemental Skill. However, her Burst and Normal Attacks still make up a sizable portion of her total damage, thus, 4pc Golden Troupe is only slightly better than her 2pc + 2pc options. Even when Navia is used as a quickswap DPS, this set is out-damaged by 4pc Whispers. It is recommended to swap out before Navia’s second Skill use to gain the extra 25% Skill DMG Bonus. |
 2pc Mixed Sets | 2pc Set Bonuses: Skill DMG Bonus, Geo DMG Bonus, ATK%, Energy Recharge Viable and unconditional options, especially if you do not want to farm 4pc Whispers. Pick whichever artifacts have better substats. |
Weapons
Calcs for weapon comparisons can be found here (last updated for Version 4.3).
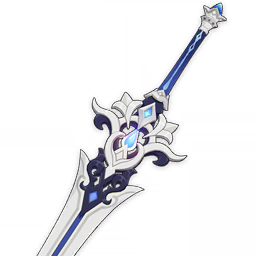
 5★ Verdict | Navia’s signature provides her with ATK% and Skill DMG%. However, these stats are not significant enough to make it vastly superior over other 5-star weapons or Serpent Spine. |
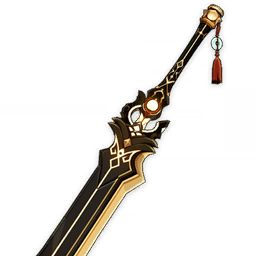
5★ A Thousand Blazing Suns | A very strong option that performs on par with Navia’s signature if she can keep full uptime on its passive. It has a high Base ATK at the expense of lower CRIT Rate and provides CRIT DMG and ATK% buffs through its passive. In teams where Navia casts her Burst early in the rotation, she might only get half uptime on the weapon passive. |
 4★ Serpent Spine | An excellent choice for Navia since it provides an abundance of DMG%. It competes with other 5-star options at lower refinements and may overcome Verdict at R5. |
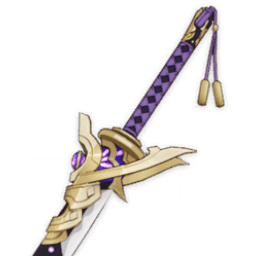
5★ Beacon of the Reed Sea | Despite more than half of the passive being useless for Navia, Beacon is still an excellent option because of its CRIT Rate secondary stat and ATK% passive. Navia’s kit revolves around shields, making it nigh impossible to gain 2 stacks on the weapon passive. Even then, this weapon performs very well. |
 5★ Redhorn Stonethresher | Redhorn provides 88% CRIT DMG, which makes it a solid choice for Navia. The DEF to Normal Attack DMG Bonus from its passive is only slightly useful for Navia since she scales on ATK, but it helps nonetheless. |
5★ Fang of the Mountain King | This weapon provides a very high Base ATK at the expense of lower CRIT Rate. Navia usually gets 0 stacks of its DMG% passive on her 1st Skill and 2 stacks on her 2nd Skill (the 2nd stack coming from the Surging Blade hit). |
 5★ The Unforged, Wolf’s Gravestone | These weapons provide a generous amount of ATK%, which pair especially well with Navia’s high Base ATK. Navia’s synergy with Crystallize provides high uptime on The Unforged’s ATK% buff. However, Navia’s first Skill use does not usually have max stacks on the weapon passive. Wolf’s Gravestone provides a consistent ATK% buff for Navia, with an additional teamwide buff when enemies are at low health. |
 5★ Skyward Pride | Skyward Pride provides a high Base ATK and an ER secondary stat to help meet Navia’s ER requirements. It also provides a small DMG% buff through its passive. |
4★ Talking Stick | A decent weapon for Navia when paired with Bennett. This weapon is not recommended to get from the Battle Pass over Serpent Spine. |
 4★ Ultimate Overlord’s Mega Magic Sword | This Event weapon has an ER secondary stat which should cover most, if not all, of Navia’s ER requirements. Depending on the Melusine quest progress, the weapon provides 12–24% ATK at R1. |
 4★ Tidal Shadow | This weapon’s passive requires Navia to be healed, which may be difficult when played with Bennett as the sole healer. However, if she is able to consistently gain the passive’s ATK% buff (such as in Furina teams), this weapon is her best craftable option. |
4★ Earth Shaker | A solid craftable option if a Pyro character is in the team. Even in a team where the passive is triggered once per rotation, this weapon outperforms Prototype Archaic. |
 4★ Prototype Archaic | A simple and decent craftable option if available, but not recommended to craft just for Navia. |
 4★ Katsuragikiri Nagamasa | The ER secondary stat can be helpful in teams where Navia has high ER requirements. This weapon also provides Skill DMG%, which is a helpful boost to her damage. |
Teams
Rotation Notation
- N = Normal Attack
- C = Charged Attack
- P = Plunging Attack
- hP = High Plunge
- lP = Low Plunge
- E = Elemental Skill
- tE = Tap Skill
- hE = Hold Skill
- Q = Elemental Burst
- D = dash cancel
- J = jump cancel
- W = walk cancel
- > = switch character
- ( ) = “these actions are optional; please refer to the notes below”
- [ ] = “repeat these actions the specified number of times”
Teambuilding

Navia’s A4 and Skill take advantage of the Crystallize reaction, so she is incentivized to run with at least 1 off-field Pyro, Hydro, Electro, or Cryo (PHEC) teammate. A Geo unit is highly appreciated to reduce Navia’s ER requirements and also enable Geo Resonance; Navia has high uptime on the Geo Resonance buffs and debuffs due to all the Crystallize shields. Note that these Crystallize shields are not good as the sole form of survivability, so one of the teammates should be a healer or shielder.
Although Navia is an on-field DPS, she does not have extremely long field time. Because her Skill has 2 charges (uses), one of her Skills’ cooldowns is always counting down during the rotation, meaning she can shorten the rotation time to 16.5s. This desynced Skill cooldown catches up after ~4 rotations, where Navia then swaps to 18s rotations. While shorter rotations increase DPS, it is often awkward to accommodate buffs and teammates with 20s cooldowns — such as Thrilling Tales of Dragon Slayers and Xingqiu — into Navia’s teams.
General Guide to Rotations
Geo Unit E1 > Navia Q > cycle through teammates’ abilities > Navia 2[E combo]2
¹Funnel the particles from the Geo teammate’s Skill to Navia, if possible.
2Navia can freely swap out before the 2nd E combo to use teammate abilities.
Navia’s very first Skill use usually has ~4 Crystal Shrapnel stacks. Her second Skill and all later rotations should have 6 Crystal Shrapnel stacks. Use a brief Hold Skill if there are nearby Crystallize shards and Navia does not have max Crystal Shrapnel stacks. Otherwise, Tap Skill is perfectly fine.
Depending on the rotation, Navia may want to swap out between her Skill uses (e.g., for Geo Traveler to funnel more particles to Navia). Also note, if Navia is using her N3D N2 combo, the last [D N2] after Navia’s second Skill can be omitted for a tighter rotation, if preferred.
Notable Teammates
Geo
Xilonen | Xilonen is Navia’s best teammate in teams with 2 other PHEC characters. She provides healing, great particle generation if 2 Skills are cast, buffing via 4pc Scroll of the Hero of Cinder City (Scroll) and RES Shred for Geo and other PHEC teammates. Compared to some other options, she does not apply Geo from off-field, leading to a lower amount of Crystal Shrapnel stacks. However, the benefits mentioned earlier can outweigh such loss. Quickswap Navia teams with 2 other PHEC characters are way more viable with Xilonen in the team as she can buff both Navia and the secondary on-fielder. |
 Zhongli | Zhongli provides a strong shield for survivability and Universal RES Shred. He can also generate particles with Favonius Lance and his pillar, but note that missing or breaking his pillar is detrimental to Navia’s ER needs. |
 Chiori | Chiori is a solid pick for Navia teams. She offers good personal damage and particle generation without being vulnerable to enemies breaking her Tamato doll(s). Even at C0, Chiori is a part of Navia’s strongest teams, and Chiori’s C1 further cements her as one of Navia’s best teammates. |
Kachina | Kachina is a great Navia teammate. She provides good off-field particle generation, off-field Geo application and she can hold 4pc Scroll and trigger its full effect. In teams with rotations shorter than 20s, Kachina’s C2 allows her to alternate between her Skill and Burst to maintain 4pc Scroll uptime at the expense of lower particle generation. |
 Geo Traveler | Geo Traveler is very good at generating particles with their Skill, and they provide a CRIT Rate buff at C1. Proper placement of their constructs requires practice. For information on Geo Traveler’s mechanics and construct placement, please see the Geo Traveler Extended Guide. |
 Albedo | Albedo is easy to use and also has good particle generation, provided that his flower construct does not break. Although ATK buffs for Navia will not benefit Albedo’s DEF scalings, his personal damage is still respectable. |
 Ningguang | Ningguang offers a small Geo DMG% buff with her A4 Passive and Geo Particles with her Skill. She can either build for personal damage or sacrifice her damage to hold Thrilling Tales of Dragon Slayers, with DPS builds performing better but requiring more investment. Although Ningguang’s C2 gives her a second charge on her Skill, her 6s particle cooldown prevents her from being a better Geo battery than the other options. |
Elemental Flex
 Bennett | Bennett condenses healing and buffing in one slot. His ATK buff is a massive benefit to Navia and potentially her teammates. The other flex unit should have consistent off-field Elemental application (for Crystallize) and damage since Bennett does not provide much of his own. |
 Furina | Due to Furina’s HP mechanics, a strong healer is necessary to take full advantage of Furina’s buffs (see Notable Teammates in Furina’s Quick Guide). Furina’s Skill also has an awkward 20s cooldown and 30s duration, forcing you to either extend the rotation to 20s or cast Furina’s Skill every other rotation (with some downtime). Nevertheless, if you can work around these caveats, Furina provides a very useful DMG% buff as well as some off-field Hydro application and damage. |
 Off-Field PHEC Units | Navia appreciates any PHEC character who provides good off-field Elemental damage and application. Some characters who fulfill this role include Mavuika, Fischl, Xiangling, Yelan, Xingqiu, Rosaria, and Yae Miko. Fischl is particularly notable since her cooldowns synergize well with Navia’s. |
Emilie | While Geo does not react with Dendro to trigger Crystallize, Emilie can still help sustain a strong Burning aura alongside another Pyro character while providing strong off-field damage herself. Geo can react with the Burning aura and create a Pyro Crystallize shard. If Bennett is used as the Pyro character, it is advised to refresh Pyro using his Skill between Navia’s field time. |
 Xianyun | Although Navia does not benefit from Anemo units, Xianyun’s buffs to Plunging Attacks are powerful enough to make Plunge a solid playstyle for Navia. Xianyun also provides teamwide healing, making her a good partner for Furina. |
Example Teams
This is not a comprehensive list of teams. The inclusion or exclusion of any given team does not necessarily reflect its power level.

Furina provides a significant DMG% buff while Bennett provides a massive Flat ATK buff. Xilonen provides healing to counteract Furina’s HP drain, good Geo Particle generation, DMG% buffs via 4pc Scroll and RES Shred for both Geo and Hydro. Zhongli provides a comfortable shield at the expense of providing smaller buffs, via his RES Shred and artifact set, while also having inconsistent Geo Particle generation. Without Xilonen, Bennett should use a healer build so that he can overheal and proc Furina’s A1 Passive.
Sample Rotation (Xilonen)
Furina ED Q > Xilonen EQ N2 > Navia Q > Bennett EQ > Navia hE combo > Xilonen E N2 > Navia hE combo
Sample Rotation (Zhongli)
Bennett E > Zhongli hED > Furina ED Q > Bennett Q E > Navia Q hE combo > Zhongli N2 tE > Navia hE combo

Fischl’s short cooldowns and field time allow Navia to run a tight 16.5s rotation with her short N3D N2 combo. While team building, make sure Chiori is placed before Navia so she can swap to her seamlessly using her Skill. Geo Traveler can shortly hold his Skill for a faster animation cast.
Sample Rotation (Chiori)
Navia (tE)1 Q > Bennett EQ > Fischl E/Q > Chiori 2[E] > Navia hE combo > Bennett E > Navia hE combo
1First rotation only.
Sample Rotation (Geo Traveler)
Navia Q > Bennett EQ > Fischl E/Q > Geo Traveler Q shE > Navia hE combo > Bennett E > Geo Traveler shE > Navia hE N1

Xilonen and Bennett are amazing teammates for both Navia and Mavuika. Bennett gives a Flat ATK Buff and Pyro Resonance to both, while Xilonen RES Shreds both Geo and Pyro and buffs both Elements via 4pc Scroll. Moreover, Xilonen helps charge up Mavuika’s Burst every rotation. Mavuika can be utilized as a dual carry by doing some Charged Attacks if preferred.
Sample Rotation
Mavuika E > Navia Q > Bennett EQ > Xilonen E N2 > Navia hE combo > Mavuika Q > Xilonen E N2 > Navia hE combo

An accessible four star team with free units such as Kachina and Xiangling. Kachina provides Geo Particle generation and holds 4pc Scroll to buff both Geo and Pyro damage. Xiangling contributes personal damage, provides Pyro application for Crystallize, and enables Pyro Resonance.
Sample Rotation
(Bennett E)1 > Kachina Q E > Navia Q > Bennett Q E > Xiangling Q E > Navia hE combo > Bennett E > Navia hE combo > Bennett E > Xiangling N2
1First rotation only.

This premium Double Hydro composition reduces Navia’s damage share to make up for it with Furina and Yelan’s off-field damage. Furina provides a significant DMG% buff to the team, while Yelan provides a ramping DMG% buff to Navia. Xilonen heals the team to counter Furina’s HP drain and act as a great battery for Navia. Since Navia has access to a lot DMG% buffs while missing out on Bennett’s Flat ATK buff and Pyro Resonance, an ATK% Goblet is viable.
Sample Rotation
Xilonen Q > Furina ED Q > Xilonen E N2 > Navia Q > Yelan Q E N1 > Navia hE combo > Xilonen E N2 > Navia hE N3 > Yelan E N2

Xianyun allows Navia to perform Plunging Attacks during her Geo Infusion. Chiori helps battery Navia and does solid off-field damage while Furina and Bennett buff the team. If Bennett is used, he should cast his Skill to reapply Pyro once Navia’s Geo Infusion expires. Executing 4 Geo Plunges is quite tight; hence it’s advisable, to perform 3 Plunges instead.
Sample Rotation (Furina)
Navia Q > Chiori 2[E] > Furina ED Q > Xianyun EPQ > Navia hE 3[JhP] hE 3[JhP] > (Chiori Q)
Sample Rotation (Bennett)
Navia Q > Chiori 2[E] > Xianyun EPQ > Bennett EQ > Navia hE 3[JhP] > Bennett E > Navia hE 3[JhP]
Credits
chasing_haze, edisonsmathsclub, sew, alix, Leifa, Emiliabyss, Ac1d, Duckfero, whalein, Rare Possum, mocha_biscuit, polomo, irokei, casdela, caramielle., haafr, plumetra, Lesterberne, caxia5, baloopy, colaspores, idkanonymized, cinders_pear
Team images made with the KQM portrait generator.