Updated for Version 4.0

Tighnari is a 5-star Dendro Bow character in Genshin Impact who deals significant Spread damage through his Charged Shots and Burst in quickswap playstyles.
Note that the information given may change if new discoveries are made.
The full-length guide is available here.
Table of Contents
Infographic
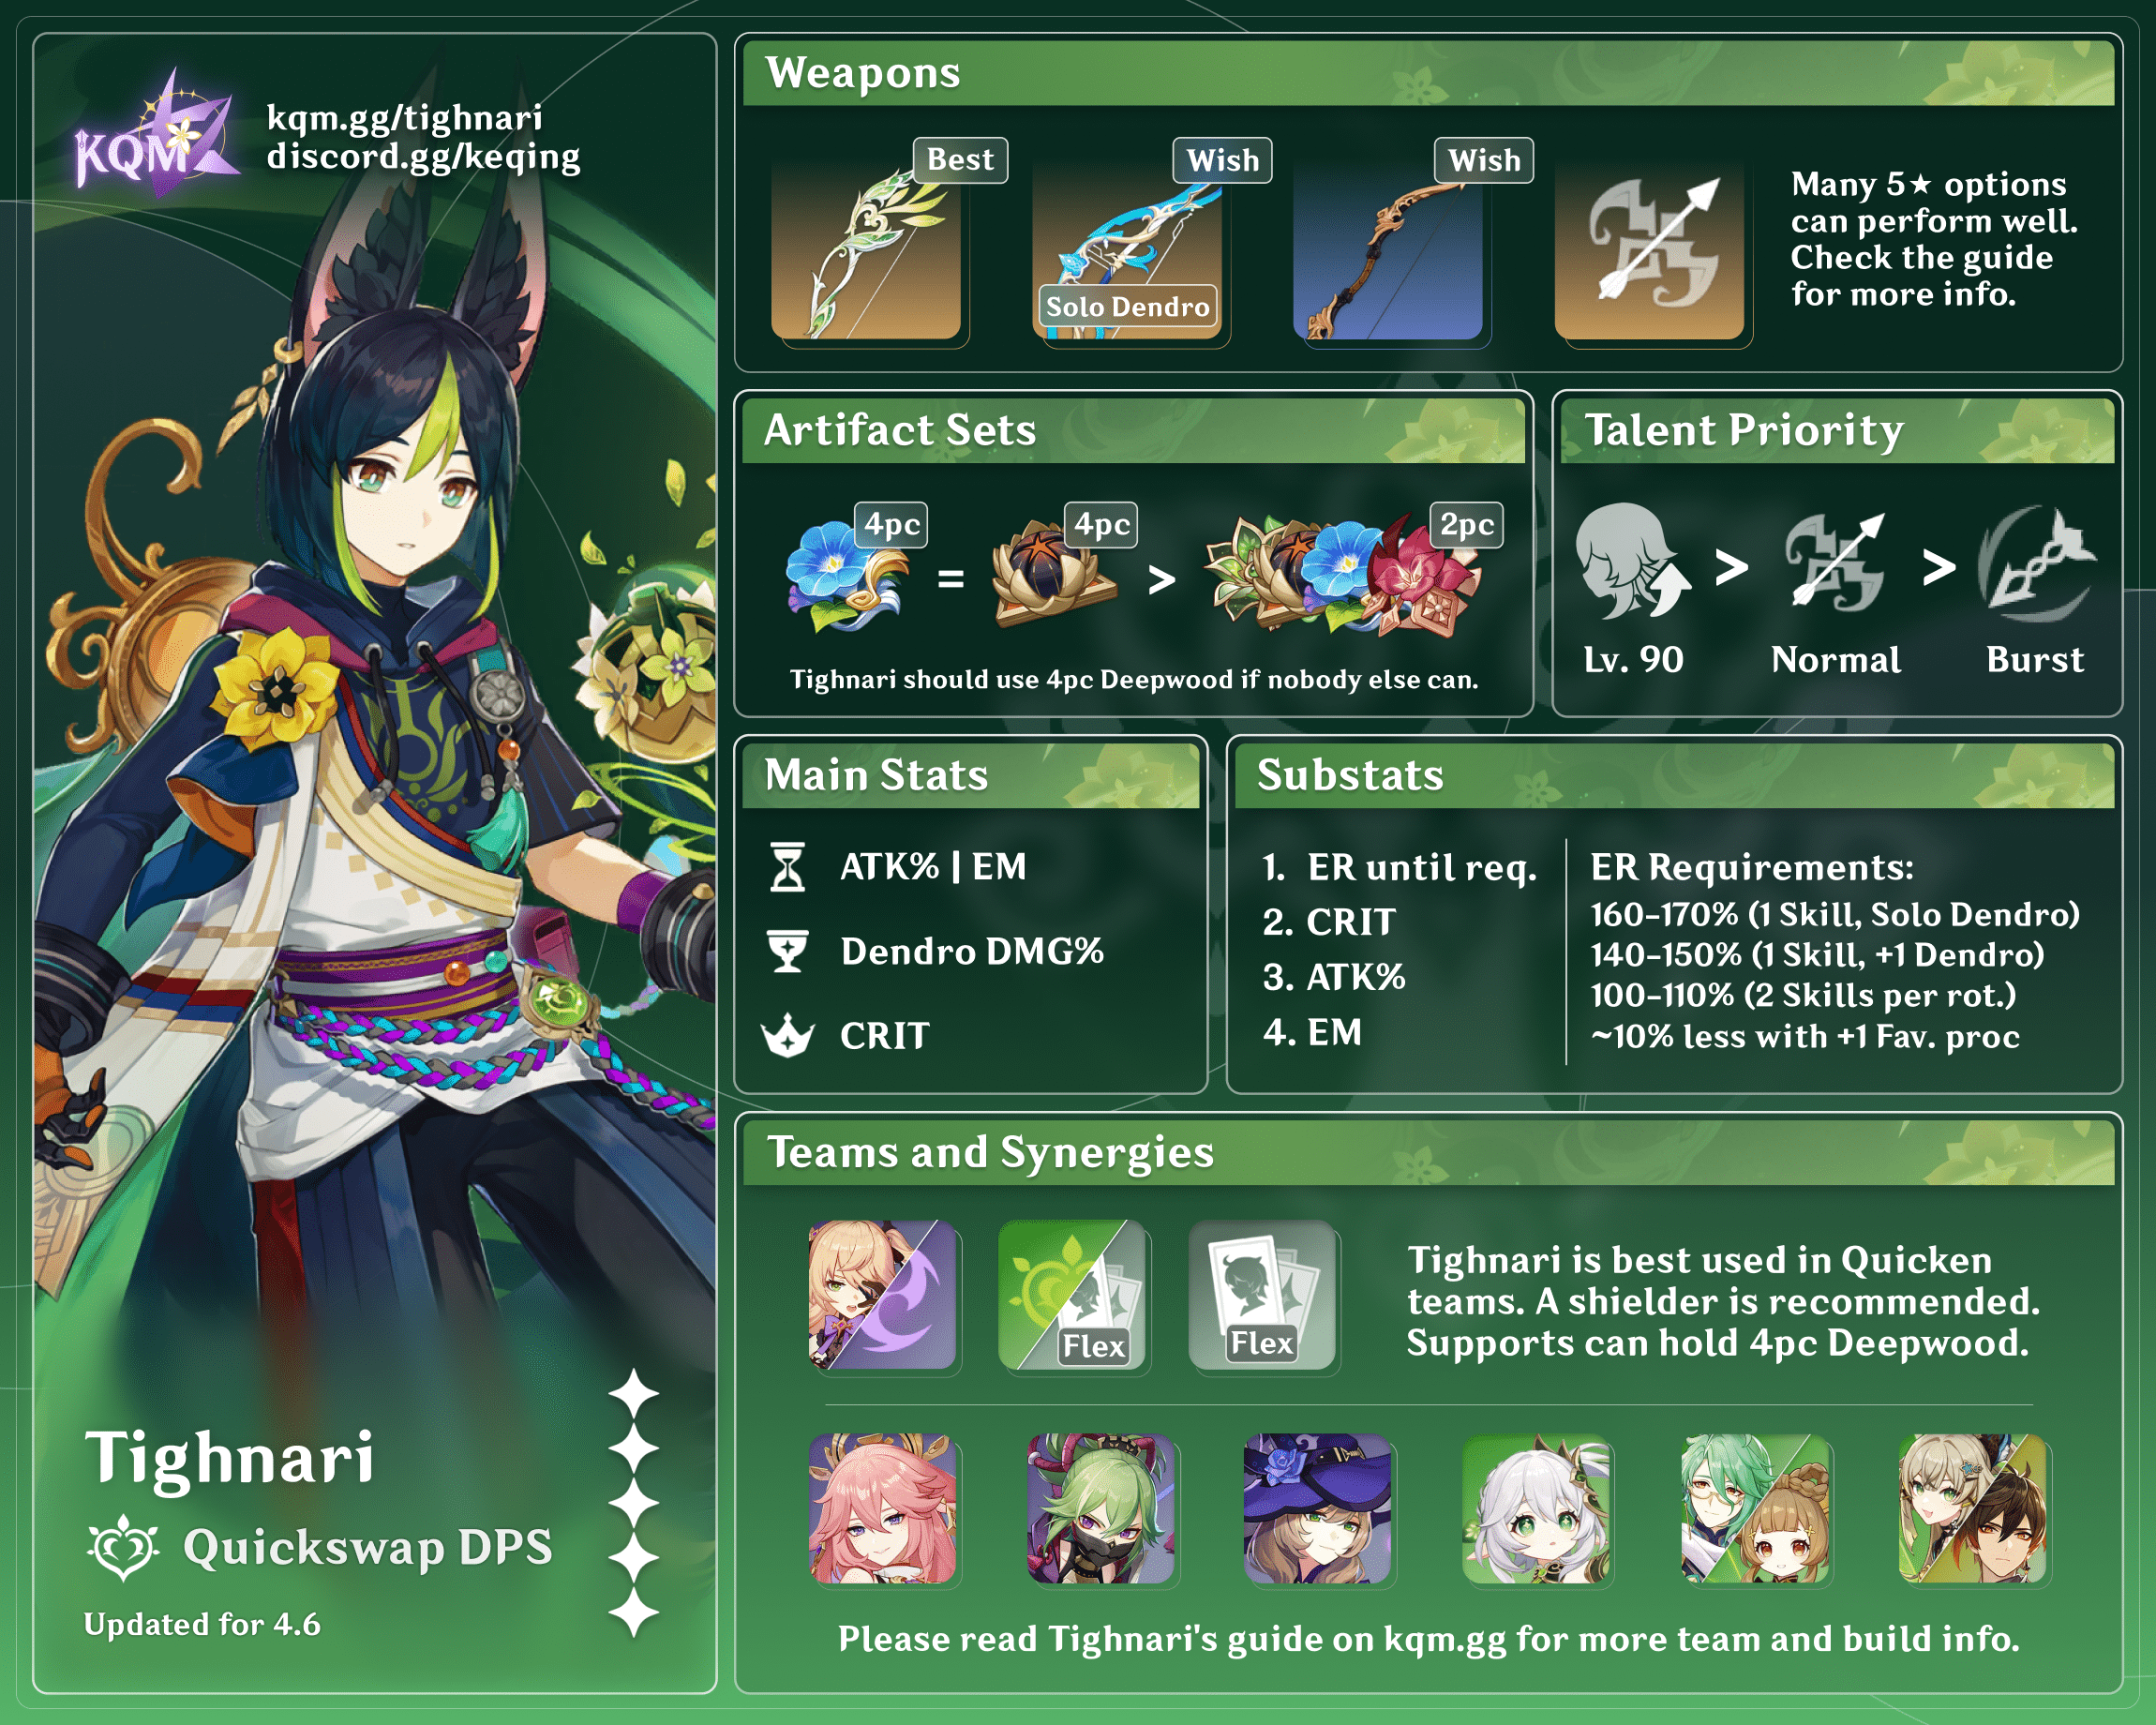
Credits to: cuppacote, snowwwwww.
Character Overview
Playstyles
Quicken
Tighnari’s best teams by far are Quicken teams, as his kit’s EM scaling and frequent Dendro application takes advantage of Spread reactions. Thus, this playstyle will be the focus of this Quick Guide.
Talents
Level and Talent Priority
Talent Priority
Normal Attack > Burst >> Skill
Level 90 is highly recommended to maximize Tighnari’s Spread damage. His Skill contributes minimally to his overall DPS and may remain unleveled.
Talent Overview
 Normal Attack | Khanda Barrier-Buster
Talent Description
Normal Attack
Performs up to 4 consecutive shots with a bow.
Charged Attack
Perform a more precise Aimed Shot with increased DMG.
While aiming, the power of Dendro will accumulate on the arrowhead before the arrow is fired. Has different effects based on how long the energy has been charged:
Charge Level 1: Fires off an arrow carrying the power of flora that deals Dendro DMG.
Charge Level 2: Fires off a Wreath Arrow that deals Dendro DMG. Upon hit, the Wreath Arrow will create 4 Clusterbloom Arrows that will track nearby opponents automatically and deal Dendro DMG.
Plunging Attack
Fires off a shower of arrows in mid-air before falling and striking the ground, dealing AoE DMG upon impact.
Tighnari’s Normal and Plunging Attacks do not find any use in his rotation and are largely irrelevant. In contrast, his Charged Shots are a major aspect of his playstyle, so his overall damage scales well with increasing his Normal Attack Talent level.
 Elemental Skill | Vijnana-Phala Mine
Talent Description
Tighnari throws a Vijnana Stormheart ahead of him that deals AoE Dendro DMG and creates a Vijnana-Khanda Field, which summons strange illusions to taunt enemies and draw their fire.
Additionally, Tighnari gains the Vijnana Suffusion effect, which will decrease the Wreath Arrow’s charging time by 2.4s. This effect will dissipate once the skill duration ends or after Tighnari has fired 3 Wreath Arrows.
Tighnari’s Elemental Skill is a key part of his quickswap playstyle, as it allows him to rapidly fire off three Wreath Arrows with minimal charging time. This ability also comes with a useful mob taunt, making it an overall indispensable part of Tighnari’s rotation.
However, the actual damage from Tighnari’s Skill is negligible and does not benefit as much from Talent levels as the rest of his abilities.
 Elemental Burst | Fashioner’s Tanglevine Shaft
Talent Description
Combines the power of all seeds to fire 6 Tanglevine Shafts that can track opponents and deal Dendro DMG.
After they hit, the Tanglevine Shafts will create a secondary wave of Tanglevine Shafts that can also track nearby opponents and deal Dendro DMG on hit.
A rapid-fire barrage with good damage and some Spread potential. While his Burst damage is not as impactful as his Charged Attack damage, it still provides a significant contribution to his overall DPS.
 Ascension 1 Passive | Keen Sight
Talent Description
After Tighnari fires a Wreath Arrow, his Elemental Mastery is increased by 50 for 4s.
The EM increase from Tighnari’s A1 is a welcome addition to his kit, bumping up his Spread damage. To maximize this Passive, it is recommended to use his Burst after having fired a Wreath Arrow.
 Ascension 4 Passive | Scholarly Blade
Talent Description
For every point of Elemental Mastery Tighnari possesses, his Charged Attack and Fashioner’s Tanglevine Shaft DMG are increased by 0.06%.
The maximum DMG Bonus obtainable this way is 60%.
Tighnari’s A4 further incentivizes players to build EM.
Constellations
 Constellation 1 | Beginnings Determined at the Roots
Tighnari’s Charged Attack CRIT Rate is increased by 15%.
A straightforward, minor damage increase.
 Constellation 2 | Origins Known From the Stem
When there are opponents within the Vijnana-Khanda Field created by Vijnana-Phala Mine, Tighnari gains 20% Dendro DMG Bonus.
The effect will last up to 6s if the field’s duration ends or if it no longer has opponents within it.
Similar to C1, a straightforward and minor damage increase.
 Constellation 3 | Fortunes Read Amongst the Branches
Increases the Level of Fashioner’s Tanglevine Shaft by 3.
Maximum upgrade level is 15.
Although Tighnari’s Burst contributes significantly to his overall DPS, the level increase doesn’t provide a great improvement to his damage.
 Constellation 4 | Withering Glimpsed in the Leaves
When Fashioner’s Tanglevine Shaft is unleashed, all nearby party members gain 60 Elemental Mastery for 8s. If the Fashioner’s Tanglevine Shaft triggers a Burning, Bloom, Quicken, or Spread reaction, their Elemental Mastery will be further increased by 60. This latter case will also refresh the buff state’s duration.
A teamwide EM buff; very useful in Tighnari’s typical Quicken-oriented teams. The trigger condition being tied to his Burst encourages short rotations using 1 Skill per Burst, but it is not worth changing his optimal rotations for.
 Constellation 5 | Comprehension Amidst the Flowers
Increases the Level of Vijnana-Phala Mine by 3.
Maximum upgrade level is 15.
Tighnari’s Skill provides little damage, so this level increase doesn’t contribute much to his DPS.
 Constellation 6 | Karma Adjudged From the Leaden Fruit
Wreath Arrow’s charging time is decreased by 0.9s, and will produce 1 additional Clusterbloom Arrow upon hit. This arrow deals 150% of Tighnari’s ATK as DMG.
Tighnari’s C6 shortens the time needed to execute his typical 3 Charged Shot combo by about 2s, and provides some extra damage in the form of an additional Clusterbloom Arrow per Wreath Arrow fired. This additional Clusterbloom Arrow has no ICD, and will trigger Spread every time. The extra arrow increases Tighnari’s damage significantly, but the value of the shortened combo time is more difficult to determine.
Tighnari’s rotation lengths are typically determined by other team members’ cooldowns, so this Constellation cannot reduce his rotation lengths. As such, the actual value of this Constellation depends on how well other members of the team can take advantage of their newly-gained field time.
Combos
CS = Charged Shot
E = Elemental Skill
Q = Elemental Burst
| E Q 3CS | The simplest but weakest combo, as Tighnari’s Burst does not benefit from his A1 Passive. |
| E 3CS Q | Allows Tighnari’s Burst to benefit from his A1 Passive, but does not allow casting his Burst before the particles from his Skill are absorbed (“pre-funneling”). |
| E CS Q 2CS | This combo uses a Skill followed by a quick Charged Shot and Burst before the particles reach Tighnari. This allows for both pre-funneling and an A1-boosted Burst, but may be mechanically difficult to execute. |
Artifacts
ER Requirements
Note that the given ER values were determined using Zakharov’s Energy Recharge Calculator with Default Safe assumptions and 1 Favonius weapon proc per rotation in all teams. With no Favonius-wielding teammates, ER requirements tend to increase by about 10% if using Burst every Skill, with no change otherwise.
| 2 Skills per Burst | 100-110% |
| 1 Skill per Burst, no Dendro teammate | 150-160% |
| 1 Skill per Burst, 1 Dendro Teammate | 130-140% |
Use the Energy Recharge Calculator to determine exact requirements for your team and rotation.
Artifact Stats
 Sands |  Goblet |  Circlet |
| ATK% or EM | Dendro DMG% | CRIT Rate% or CRIT DMG% |
Substats:
ER% (until requirement) > CRIT Rate% = CRIT DMG% > EM = ATK%
If using Hunter’s Path, EM Sands take priority. EM or ATK% substats may be preferred depending on the Sands and weapon chosen.
Artifact Sets
 4-piece Deepwood Memories (4DM) | Generally recommended to have a support unit hold 4DM while Tighnari uses one of the sets below. However, it’s recommended that Tighnari hold 4DM if no other teammate does. |
 4-piece Wanderer’s Troupe (4WT) | Provides an unconditional buff to his Charged Shots. Furthermore, WT can be passively farmed and is easier to access early-game. |
 4-piece Gilded Dreams (4GD) | Comparable to 4WT; 4GD is slightly better than 4WT when Tighnari is equipped with Hunter’s Path. |
 2-piece Combos (15% Dendro DMG Bonus / 80 EM / 18% ATK ) | Tighnari can make use of 2-piece combinations with Dendro DMG Bonus, EM, ATK%, and NA/CA DMG. While generally weaker than the above sets, they act as good transitionary sets and can make up for the poorer passives with good substat rolls. |
Weapons
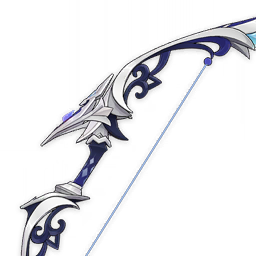
 Hunter’s Path | Tighnari’s uncontested BiS. |
 Aqua Simulacra | A good generalist bow; drops off slightly in long range scenarios. |
 Polar Star | Strong option but requires an NA to be fired when Tighnari enters the field. |
 The First Great Magic | Great pick with a CRIT DMG secondary stat and a useful buff to Charged Attacks. As Tighnari is usually played in either Solo or Double Dendro teams, he will gain two ATK% stacks at most. |
 Elegy for the End | Good for team damage; its value shoots up in scenarios where Tighnari has high ER needs. |
 Thundering Pulse / Skyward Harp / The Viridescent Hunt | Stat sticks; their passives offer little. Viridescent Hunt is weaker than its 5* counterparts. |
 Prototype Crescent | Strong when Tighnari can utilize its passive, but drops off significantly when Tighnari is unable to hit weak points. |
 Windblume Ode | A free EM-based event weapon from Version 1.4. A decent choice if available. |
 Song of Stillness | An ATK% Fontaine craftable weapon. Its DMG% passive has full uptime potential, but requires Tighnari’s team to have an off-field healer. |
 Slingshot | A 3-star weapon that performs very well on Tighnari. A great F2P option. |
 Scion of the Blazing Sun / Ibis Piercer | Despite these weapons having much appreciated secondary stats and passive buffs, Slingshot still outperforms them due to its much higher CRIT Rate secondary stat and great passive. |
Teams
Teambuilding
- Tighnari’s teams favor a quickswap playstyle — cycling through teammates with short on-field needs, with DPS distributed between them. He does not synergize well with characters who have long field time requirements, like Cyno.
- Tighnari functions best in Quicken teams. Characters that may interrupt Spread uptime are not recommended.
- Tighnari relies entirely on Charged Shots and his Burst; characters that rely on Normal Attacks to proc their abilities (such as Xingqiu or Thoma) are not recommended.
Quicken

Generally worth aiming for either Dendro or Electro Resonance at least; double Electro compositions often pull ahead when Fischl is included, as her A4 requires Electro-related reactions (which includes Quicken and Aggravate, but not Spread) to trigger.
Notable Teammates
TotM = Tenacity of the Millelith
TTDS = Thrilling Tales of Dragon Slayers
DM = Deepwood Memories
VV = Viridescent Venerer
NO = Noblesse Oblige
  Fischl / Yae Miko | Fantastic off-field Electro damage dealers, with Fischl generally being Tighnari’s best partner. While not necessary, Yae enjoys a second Electro as a battery — both Fischl and Kuki Shinobu can fulfill this role. Yae can make use of Tighnari’s low field time to perform Normal Attacks in between her Skill casts, helping to drive Fischl’s A4. |
 Kuki Shinobu | Provides off-field Electro application and healing. Shinobu can proc the set effects of 4pc Instructor, 4pc DM, and 4pc TotM reliably. |
 Raiden Shogun | Can work well with Tighnari, offering some synergy with her reliable range-agnostic Electro application. That said, the two units compete for field time, making the pairing unideal for both of them in most situations. |
 Lisa | Functions well due to her Electro application, 15% DEF shred, and excellent personal damage – the last of which is accentuated by her ability to comfortably cast her Hold Skill in these teams. She can also opt to provide further buffs by using Hakushin Ring or occasionally TTDS over using weapons better for personal damage. |
 Nahida | Can buff Tighnari with 4DM, provide personal damage, and improve Energy generation; however, Nahida is a highly-contested unit. Note that it may be harder to consistently Swirl Electro in a team with Nahida. |
  Yaoyao / Baizhu | Provide healing and Dendro Resonance; can hold 4DM. Baizhu’s A4 helps buff Spread damage, and his pseudoshields provide a small level of resistance to interruption. |
  DMC / Collei | Can hold 4DM and provide off-field damage. However, both generally do little for Tighnari teams. Between the two, Collei’s short cooldowns are more suited for Tighnari’s quickswap playstyle. |
 Zhongli / C6 Diona / Kirara | Create shields to avoid Charged Shot interruption. Zhongli simultaneously shreds Electro and Dendro RES with his hold Skill, C6 Diona buffs EM and provides healing, and Kirara provides Dendro Resonance and additional particles. |
 Kazuha / Sucrose / Venti | Strong 4VV holders. Kazuha provides a greater boost to Electro damage and brings higher personal damage, while Sucrose shares EM and can carry TTDS. Venti has less buffing capability, but offers unmatched crowd-control, and Tighnari can still hit enemies lifted by his Burst. Depending on your rotation, it may be difficult to reliably Swirl Electro. |
 Sayu | Provides healing in addition to 4VV. Her Hold Skill can be used to occupy spare time in rotations to deal decent damage. |
 Bennett | Provides healing and buffs. His limited Pyro application allows him to be used in Quicken teams without disrupting reactions, though he cannot be played alongside Anemo units that could potentially absorb the Pyro from his Burst. |
Example Teams
This is not a comprehensive list of teams. The inclusion or exclusion of any given team does not necessarily reflect its power level.

Tighnari — Fischl — Yae Miko — Yaoyao

Tighnari — Fischl — Kuki Shinobu — Kazuha
Tighnari — Fischl — Kuki Shinobu — Kazuha

Tighnari — Fischl — Nahida — Zhongli
Tighnari — Fischl — Nahida — Zhongli
Credits
jukoist, cuppacote, arbutus_unedo, kolvii, cuzimori, idkanonymized, nociii, yukiyafuyu, dejaroo, alix.sh, uhinf1999
Team images courtesy of the KQM portrait generator.