by Athena#2444, Cyn#0962 & Erk_kimbo#2028
Updated for Version 4.0
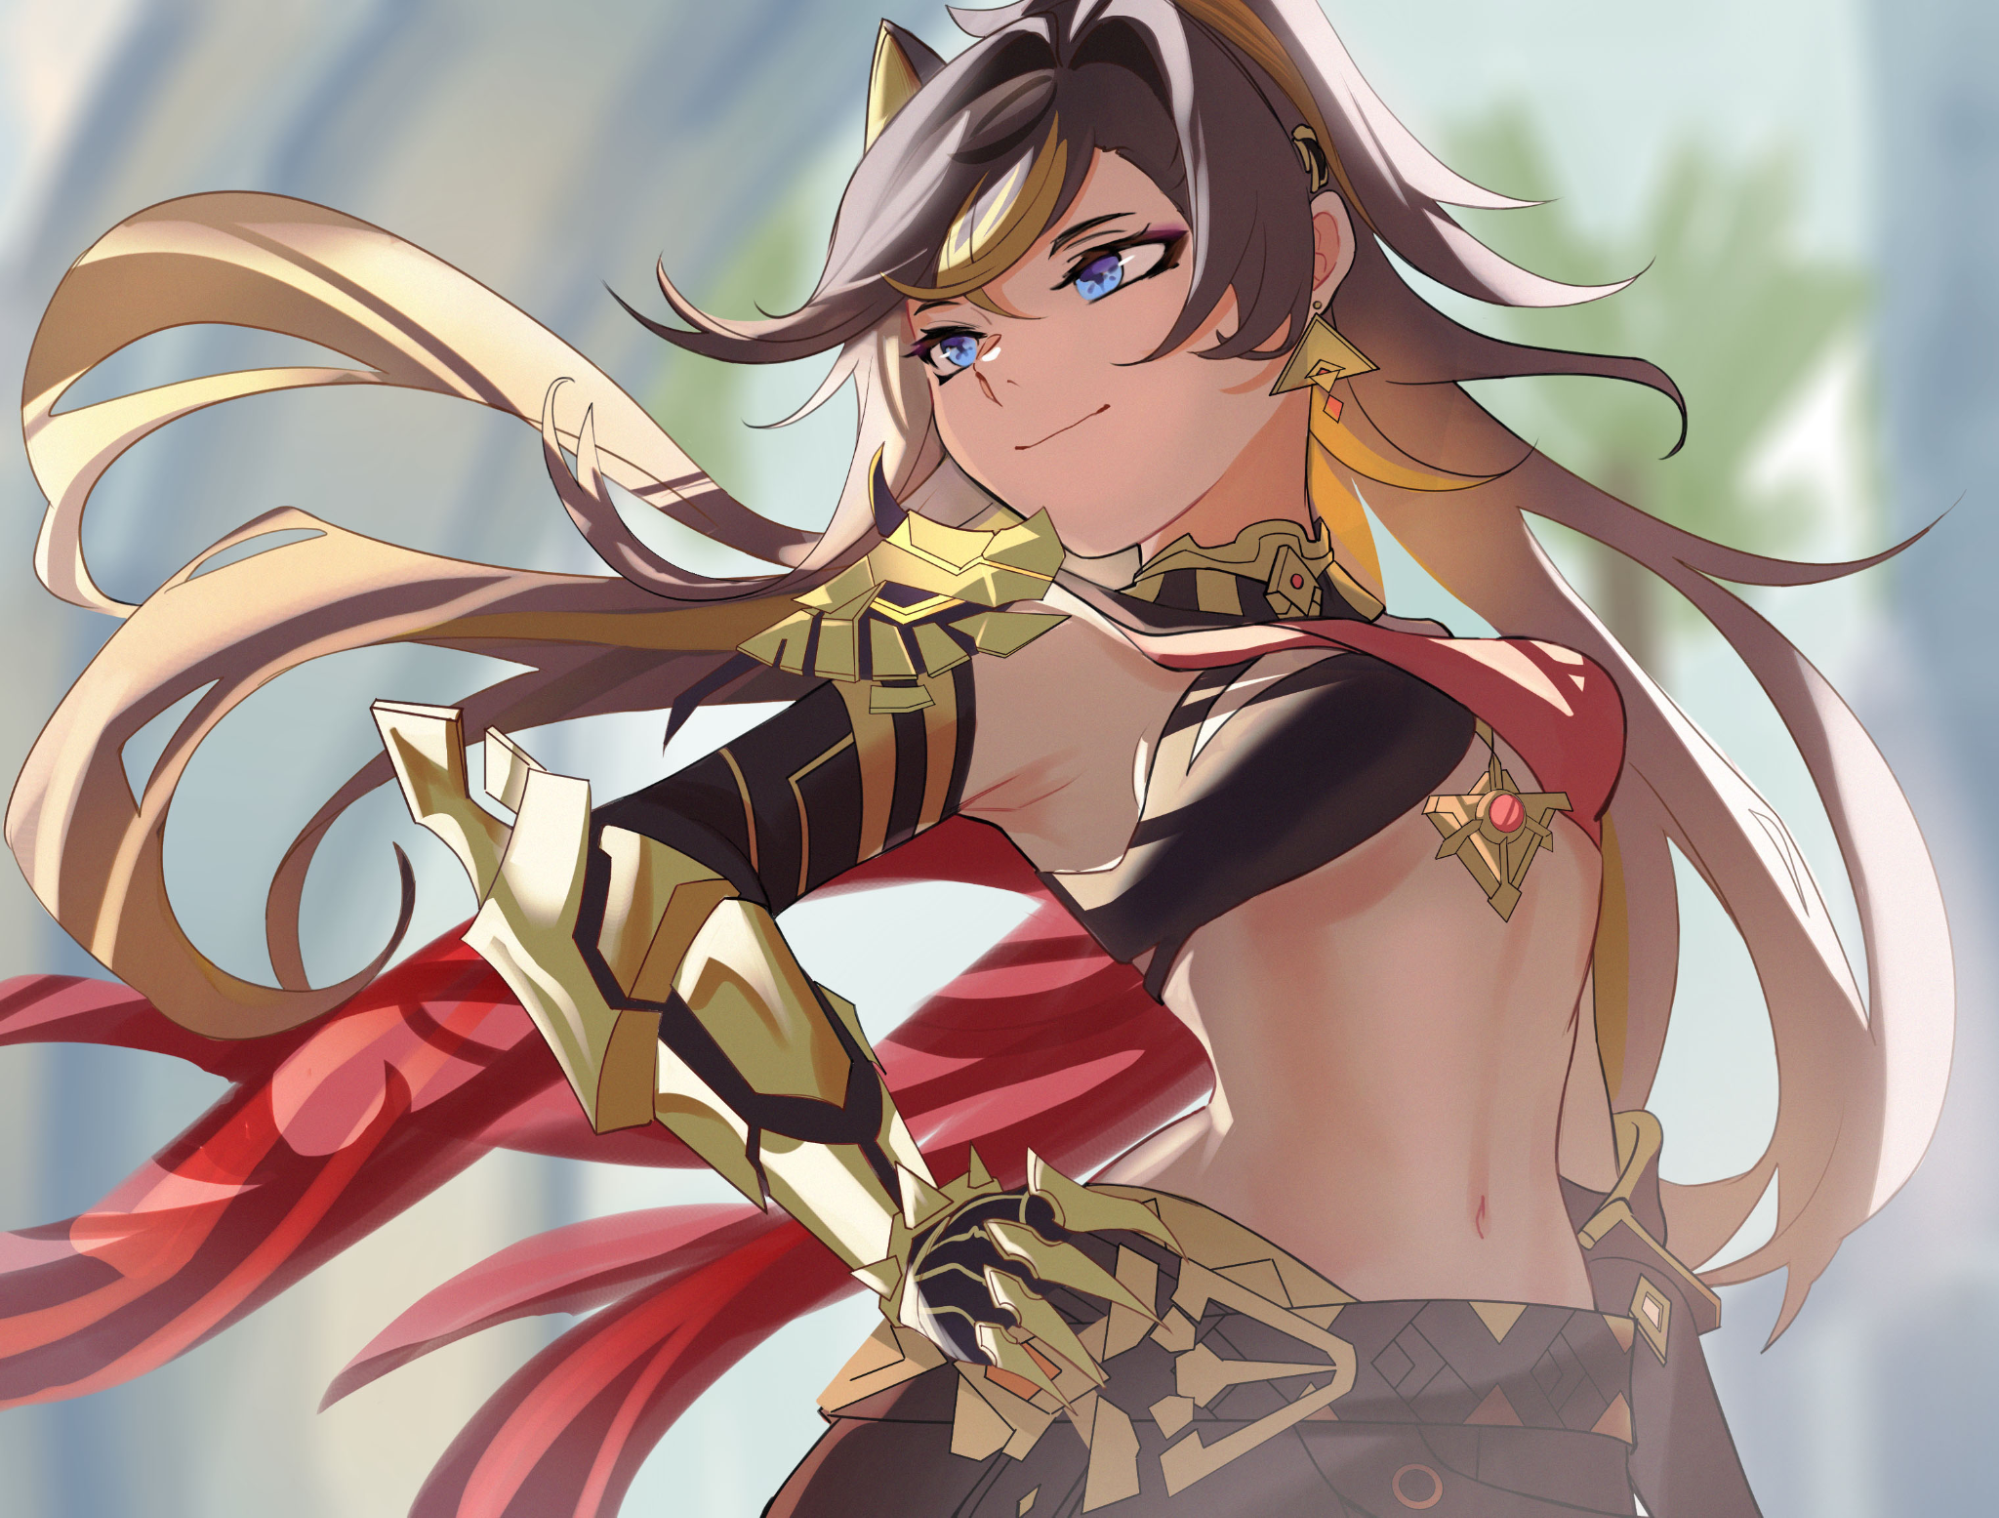
My name’s Dehya. I’m the merc you hired. So what you got for me? A commission? A fight? Armed escort? Whatever it is — you know where to find me.
Table of Contents
Introduction
This guide will review Dehya’s best weapons, artifact sets, teams, Talent priority, combos, preferred artifact stats, and more!
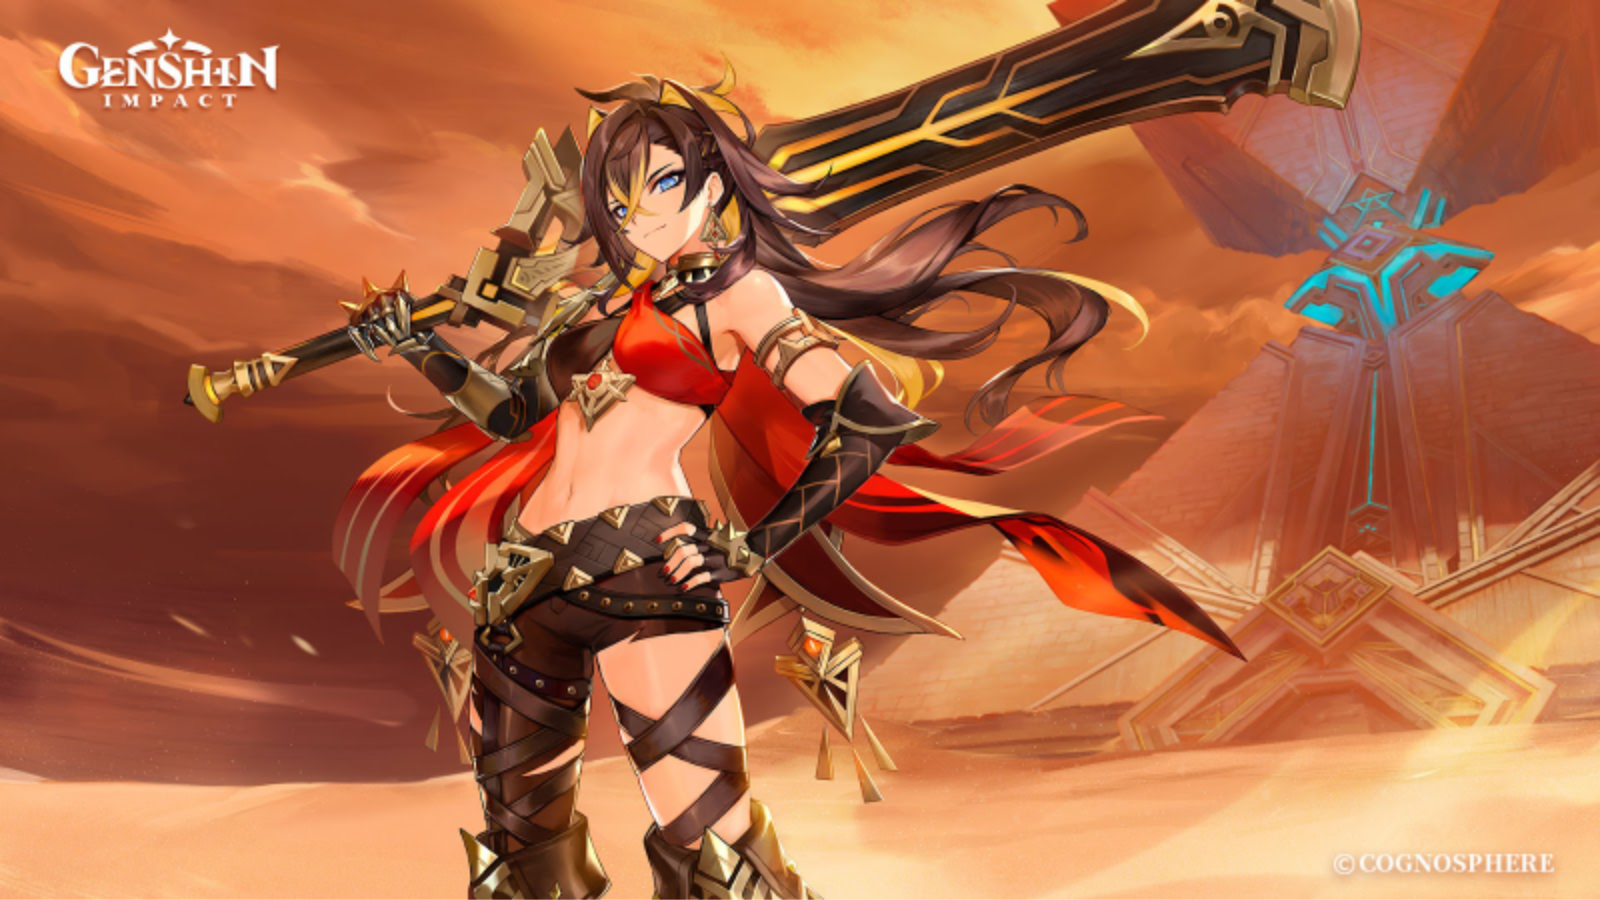
Dehya is a 5-star Pyro Claymore character who was released in Version 3.5. While her release was not without controversy, Dehya’s unique blend of on-field capabilities and off-field utility still presents a useful tool for appreciators of the aptly named Flame-Mane.
Glossary
“Stay close, no going off on your own. The desert doesn’t take prisoners.”
Why Play Dehya?
Pros
- Provides a unique damage mitigation mechanic alongside interruption resistance to improve the whole team’s survivability
- Has a variety of playstyles including on-field, off-field, and hybrid options
- Her off-field Pyro application enables certain teams and playstyles
- Self-sustain helps her stay alive both on and off the field
- Her Burst looks extremely cool
Cons
- Only available on the Standard Banner following Version 3.6, so obtaining her and her Constellations is more difficult than most
- Her lack of personal damage at C0 leads to an often underwhelming on-field experience
- The slow rate of her off-field Pyro application means she may require help from other characters to enable reactions in certain teams
- Her damage mitigation on its own is usually not enough survivability for the team, so a healer will still be necessary
- In rare situations, the redirected damage from Dehya’s Skill can outpace her self-heal, especially if she takes additional damage while on-field — causing her to die, even when Dehya is off-field.
FAQ and Common Misconceptions
Is Dehya "unusable"?
Dehya is a character who has had her fair share of controversy upon release. There is still much to her kit that “does work,” despite the large amount of valid complaints about “what doesn’t.” While Dehya’s personal damage at C0 leaves a lot to be desired compared to other on-field DPS characters, she is still usable in both on-field and off-field team comps, both of which will be elaborated further in this guide.
At the end of the day, the decision to use a unit comes down to the individual player, and those who choose to play Dehya should find that, with proper guidance, she is still more than capable for not only general use but also in endgame content.
Do Dehya’s HP scalings warrant building HP for damage?
At C0, when playing Dehya as an on-field DPS, it is not recommended to pursue HP over other stats (such as ER/CRIT/ATK). Her HP scalings are not high enough to warrant doing so, with ATK% increasing her Burst damage more than three times compared to the equivalent amount of HP%. At C1+, her HP scalings see a big boost, and subsequently HP becomes much more valuable. Mainstat and Substat prioritization will be further broken down in this guide.
It should be noted that for survivability and general support, building HP can still be valuable for C0 Dehya, as it improves both her own survivability and the amount of damage she can mitigate for her teammates.
TL;DR
On-Field DPS

Off-Field Support
Design: kolvii, cegewinne, cuppacote
Content: snowwwwww. & lesterberne
Talents
Level and Talent Priority
Off-field
 ≥
≥ 
Skill ≥ Burst = Character Level
Since both Dehya’s damage and defensive utility scale with her Max HP, it is recommended to level her to 90. When played as a Burgeon trigger, it is particularly important to level her as it provides a significant increase to reaction damage.
Dehya’s Burst disables her Normal Attacks, making them unnecessary to level. Dehya’s Skill does not contribute a significant portion of damage, and should mainly be leveled to increase her damage mitigation.
For Burgeon, Dehya’s Skill is generally the only relevant part of her kit to level for the purpose of additional damage mitigation.
On-field
>
Burst > Skill ≥ Character Level
Talent Overview
 Normal Attack | Sandstorm Assault
Talent Description
Normal Attack
Performs up to 4 consecutive strikes using her Claymore and her martial arts.
Charged Attack
Drains Stamina over time to perform continuous slashes.
At the end of the sequence, performs a more powerful slash.
Plunging Attack
Plunges from mid-air to strike the ground, damaging opponents along the path and dealing AoE DMG upon impact.
Dehya’s Normal Attacks, despite having great animations, do not deal much damage. You usually never use them except for weaving, making investment into them inadvisable.
Dehya’s Normal Attack by cynematic
Elemental Skill | Molten Inferno
Talent Description
This art of Dehya's own invention changes its method of use depending on the combat situation.
Indomitable Flame
This skill will be unleashed should there be no Fiery Sanctum field created by Dehya herself present at the time.
Deals AoE Pyro DMG, and creates a field known as Fiery Sanctum.
Ranging Flame
This skill will be unleashed should a Fiery Sanctum field created by Dehya herself already exist.
Dehya will perform a leaping attack, dealing AoE Pyro DMG before recreating a Fiery Sanctum field at her new position.
A Fiery Sanctum field created this way will inherit the remaining duration of the previous field.
Ranging Flame can be used only once throughout a single Fiery Sanctum field's duration.
Fiery Sanctum
When an opponent within a Fiery Sanctum field takes DMG, the field will unleash a coordinated attack, dealing AoE Pyro DMG to them based on Dehya's ATK and Max HP. This effect can be triggered once every 2.5s.
Active characters within this field have their resistance to interruption increased, and when such characters take DMG, a portion of that damage will be mitigated and flow into Redmane's Blood. Dehya will then take this DMG over 10s. When the mitigated DMG stored by Redmane's Blood reaches or goes over a certain percentage of Dehya's Max HP, she will stop mitigating DMG in this way.
Only 1 Fiery Sanctum created by Dehya herself can exist at the same time.
When used, Dehya deploys Fiery Sanctum, which deals AoE Pyro damage every time enemies take damage, in 2.5s intervals. This DoT effect generates one Pyro Particle on each hit. If the enemy is shielded, no damage will be dealt and no particles will be generated. The 2.5s tick rate of Dehya’s Skill is very slow; while this ensures that no accidental Burning happens in certain Burgeon team compositions, it is also usually too slow to maintain Pyro aura on enemies.
Fiery Sanctum snapshots on both the initial cast and the re-cast. However, it deals minimal damage and the buff uptime on her Burst should not be sacrificed for the cast.
While staying in Dehya’s Fiery Sanctum, the damage taken by the active character is reduced by 30-50% and redirected to Dehya. This makes her an option as an additional defensive and comfort unit.
One of the biggest flaws of Dehya's Skill is the hitbox of her coordinated DoT attack. It procs a small AoE in the center of the enemy's hitbox, which makes it unable to trigger Dendro Cores against large enemies like Ruin Graders.
Dehya’s Skill by cynematic
Elemental Burst | Leonine Bite
Talent Description
Unleashing her burning anger and casting her inconvenient blade aside, Dehya enters the Blazing Lioness state and increases her resistance to interruption.
In this state, Dehya will automatically and continuously unleash the Flame-Mane's Fists, dealing Pyro DMG based on her ATK and Max HP, and when its duration ends, she will unleash an Incineration Drive, dealing AoE Pyro DMG based on her ATK and Max HP.
If a Fiery Sanctum field created by Dehya's own Elemental Skill "Molten Inferno" exists when this ability is unleashed, Dehya will retrieve it, and then create another field once Blazing Lioness's duration expires. This field will take on the retrieved field's duration at the moment of its retrieval.
In this state, Dehya will be unable to cast her Elemental Skill, or perform Normal, Charged, and Plunging Attacks. "Normal Attack: Sandstorm Assault" and Elemental Skill "Molten Inferno" will be replaced by "Roaring Barrage."
Roaring Barrage
Unleashing Roaring Barrage within 0.4s after each Flame-Mane's Fist strike will increase the speed at which the next Flame-Mane's Fist strike will be triggered.
Dehya's Burst retrieves her Fiery Sanctum field if there is one present and triggers the Blazing Lioness state, replacing her Normal Attacks with Flame-Mane’s Fists. It automatically unleashes 6 attacks, but with proper timing (or just mashing the Normal Attack button), it can reach up to 10 attacks (15 at C6, more info in the Constellations section). Dehya’s Burst ends with her finisher, the Incineration Drive Kick.
Leonine Bite scales with both ATK and HP. At C0, ATK scales much better than HP, meaning that players should prioritize ATK for more damage. At C1, however, the stats are interchangeable.
Dehya has a 70 Energy Cost Burst, and her kit does not encourage staying on-field outside of when she Bursts. Not being able to reliably catch her own particles results in very high ER requirements.
It should be noted that players should NOT jump while Dehya’s Burst is active. Doing so cancels her Burst and puts it on cooldown. However, this can also be used to the player’s advantage if they need to cut Dehya’s Burst short, and with a dash into a jump, they can skip straight into the finisher. Dehya can also be Frozen while using her Burst, which also results in her Burst getting cut short.
Furthermore, Dehya’s Flame-Mane’s Fists are not considered Normal Attacks; therefore, they cannot trigger various off-field abilities such as Xingqiu’s Sword Rain attacks or Beidou’s Lightning discharge, limiting her potential teammates.
Dehya’s Burst by cynematic
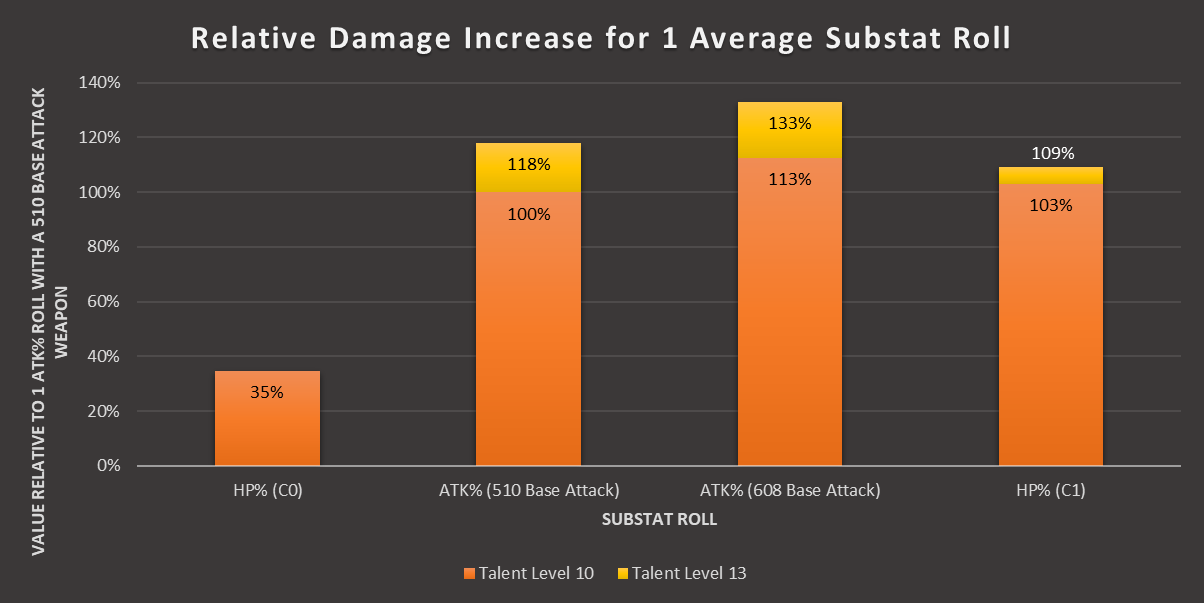
Graph by rarepossum
The figure above illustrates how ATK% Sands is demonstrably better for damage than HP% at C0, but a C1 Dehya with HP% Sands can outpace C0 Dehya with ATK% Sands.
 Ascension 1 Passive | Unstinting Succor
Talent Description
Within 6 seconds after Dehya retrieves the Fiery Sanctum field through Molten Inferno: Ranging Flame or Leonine Bite, she will take 60% less DMG when receiving DMG from Redmane's Blood. This effect can be triggered once every 2s.
Additionally, within 9s after Dehya unleashes Molten Inferno: Indomitable Flame, she will grant all party members the Gold-Forged Form state. This state will further increase a character's resistance to interruption when they are within the Fiery Sanctum field.
Gold-Forged Form can be activated once every 18s.
Dehya’s Ascension 1 passive grants further interruption resistance for 9s after the initial Skill cast for active characters in Fiery Sanctum. This can act as a nice defensive bonus for characters that want some form of interruption resistance, such as Yoimiya or Hu Tao.
Her A1 also reduces damage taken from Dehya’s Redmane Blood after she retrieves Fiery Sanctum, allowing her to tank more damage even when Fiery Sanctum is not on the field while also boosting her survivability during her Burst.
Do note that the cooldown for her A1 is separate from her Skill cooldown, meaning that using Sacrificial Greatsword can only increase its uptime from 9/20 seconds to 9/18 seconds — a minor difference.
 Ascension 4 Passive | Stalwart and True
Talent Description
When her HP is less than 40%, Dehya will recover 20% of her Max HP and will restore 6% of her Max HP every 2s for the next 10s. This effect can be triggered once every 20s.
The healing from her A4 acts as an emergency backup for Dehya whenever her HP drops from taking damage, either from enemies or Redmane Blood. However, Dehya can still die off-field in rare instances even with this Passive.
Do note that this Passive only heals herself, so a shielder or healer is often still recommended for the team.
 Utility Passive | The Sunlit Way
Talent Description
Increases the Movement SPD of your own party members by 10% during the day (6:00 – 18:00).
Does not take effect in Domains, Trounce Domains, or Spiral Abyss. Not stackable with Passive Talents that provide the exact same effects.
A nice Passive for exploring during the day.
Constellations
Most of Dehya’s Constellations focus on increasing damage from her Burst by either increasing Talent levels or adding additional scalings and functionality.
Assumptions: KQMS, 4pc EoSF, C0, ER% or ATK%/Pyro%/CRIT, C6 Bennett 997 ATK, C6 Xiangling, 793EM Kazuha. Extensive analysis can be found in the Dehya mastersheet.
 Constellation 1 | The Flame Incandescent
Dehya's Max HP is increased by 20%, and she deals bonus DMG based on her Max HP when using the following attacks:
- Molten Inferno's DMG will be increased by 3.6% of her Max HP.
- Leonine Bite's DMG will be increased by 6% of her Max HP.
C1 gives Dehya a much-needed damage boost. This Constellation is a good stopping point for those who wish to play Dehya as an on-field carry. At C1, ATK% and HP% Sands are comparable (if you are not running ER% Sands), and the difference in damage between the two is determined mostly by substats.
| DPS Increase from C0: 34.8% |
 Constellation 2 | The Sand-Blades Glittering
When Dehya uses Molten Inferno: Ranging Flame, the duration of the recreated Fiery Sanctum field will be increased by 6s.
Additionally, when a Fiery Sanctum exists on the field, DMG dealt by its next coordinated attack will be increased by 50% when active character(s) within the Fiery Sanctum field are attacked.
While this Constellation might not be a big DPS increase at first glance, the bonus duration on her Skill is amazing for teams which use her as an off-field support, as it provides additional Pyro Particles and tankiness — resulting in less ER requirement for the whole team, especially Dehya. Do note that despite having a longer duration, it does not increase the duration of her Ascension 1 Passive. The bonus damage on her Skill is negligible and inconsistent, since it requires getting attacked to proc.
| DPS Increase from C1: 19.76% |
| Total DPS Increase from C0: 62.02% |
 Constellation 3 | A Rage Swift as Fire
Increases the Level of Leonine Bite by 3.
Maximum upgrade level is 15.
Nice increase to Dehya’s damage output.
| DPS Increase from C2: 9.14% |
| Total DPS Increase from C0: 76.83% |
 Constellation 4 | An Oath Abiding
When Flame-Mane's Fist and Incineration Drive attacks unleashed during Leonine Bite hit opponents, they will restore 1.5 Energy for Dehya and 2.5% of her Max HP. This effect can be triggered once every 0.2s.
This Constellation reduces Dehya’s ER needs by giving her Flat Energy during her Burst. It allows her to run ATK% or HP% Sands rather than ER% in most teams. Great quality of life Constellation, but doesn’t truly shine until C6.
| DPS Increase from C3: 3.92% |
| Total DPS Increase from C0: 83.76% |
 Constellation 5 | The Alpha Unleashed
Increases the Level of Molten Inferno by 3.
Maximum upgrade level is 15.
Negligible DPS increase due to Dehya’s damage output being tied to her Burst. Also increases a small amount of damage mitigation.
| DPS Increase from C4: 4.0% |
| Total DPS Increase from C0: 91.12% |
 Constellation 6 | The Burning Claws Cleaving
The CRIT Rate of Leonine Bite is increased by 10%.
Additionally, after a Flame-Mane's Fist attack hits an opponent and deals CRIT Hits during a single Blazing Lioness state, it will cause the CRIT DMG of Leonine Bite to increase by 15% for the rest of Blazing Lioness's duration and extend that duration by 0.5s. This effect can be triggered every 0.2s. The duration can be extended for a maximum of 2s and CRIT DMG can be increased by a maximum of 60% this way.
This Constellation is a massive DPS increase for Dehya. The number of stacks you can reliably obtain is tied to Dehya's CRIT Rate, therefore it is recommended to maximize the buff by prioritizing CRIT Rate over CRIT DMG until ~55% CRIT Rate (as her CRIT Rate increases by 10% from C6) to maximize the number of additional Leonine Bite (up to 5). At C6, Dehya can make full use of her fourth Constellation, lowering her ER requirements even further. For a small DPS increase, 4pc EoSF can now be swapped for 4pc Vourukasha or 4pc Lavawalker (if played in a Mono Pyro team).
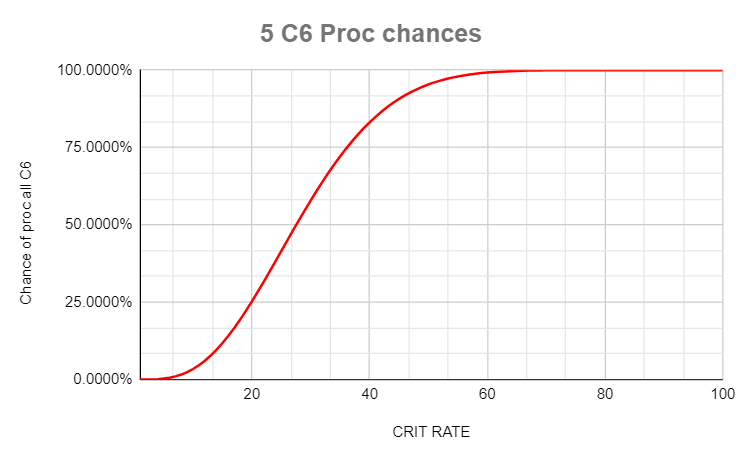
Chances of proccing all C6.
| DPS Increase from C5: 55.40% |
| Total DPS Increase from C0: 196.99% |
“Ah, sun’s out, guns out, hehe… Just sucks that I got so much work to do.”
Playstyles and Gearing
ER Requirements
On-field Dehya requires her to Burst every rotation; as a result, her ER requirements are tremendously high. The table below depicts the approximate thresholds for various situations. Use the Energy Recharge Calculator to determine exact requirements for any specific team and rotation.
| Scenario | ER Requirements |
| Double Pyro (w/ Bennett) | 230% |
| Triple Pyro | 180–200% |
Dehya’s ER requirements are so high largely because her Elemental Skill cannot generate particles during her Burst state. As such, it is always recommended to run on-field Dehya with other Pyro characters who can provide her with additional Pyro Particles.
Each Favonius proc reduces her ER requirements by 10-30%. C4 can reduce Dehya’s ER requirements by ~40% ER and up to ~60% ER at C6.
Burgeon and Support
Dehya should not use her Burst when she is played as a Burgeon trigger, meaning that she has no ER requirement.
Stat Priorities
On-field Damage Dealer
 Sands |  Goblet |  Circlet |
| ATK% / ER% / HP% (C1) | Pyro DMG% | CRIT |
Substats: ER until requirements > CR or CD > ATK% >(≈ at C1) HP%
Outside of Mono Pyro teams, before C4, and without external ER buffs, Dehya struggles to use her Burst every rotation without an ER Sands. At C0, Dehya scales better with ATK than HP, even with ATK buffs. At C1, HP and ATK are almost the same; however, HP provides additional utility, which makes it generally better.
Burgeon/Overload
Sands | Goblet | Circlet |
| EM / HP% | EM | EM |
Substats: EM > CR (for Favonius proc) = HP%
If more defensive utility is needed, an HP% Sands can be a viable option. In other cases, stacking as much EM as possible is much more preferred to make Burgeon/Overload deal more damage.
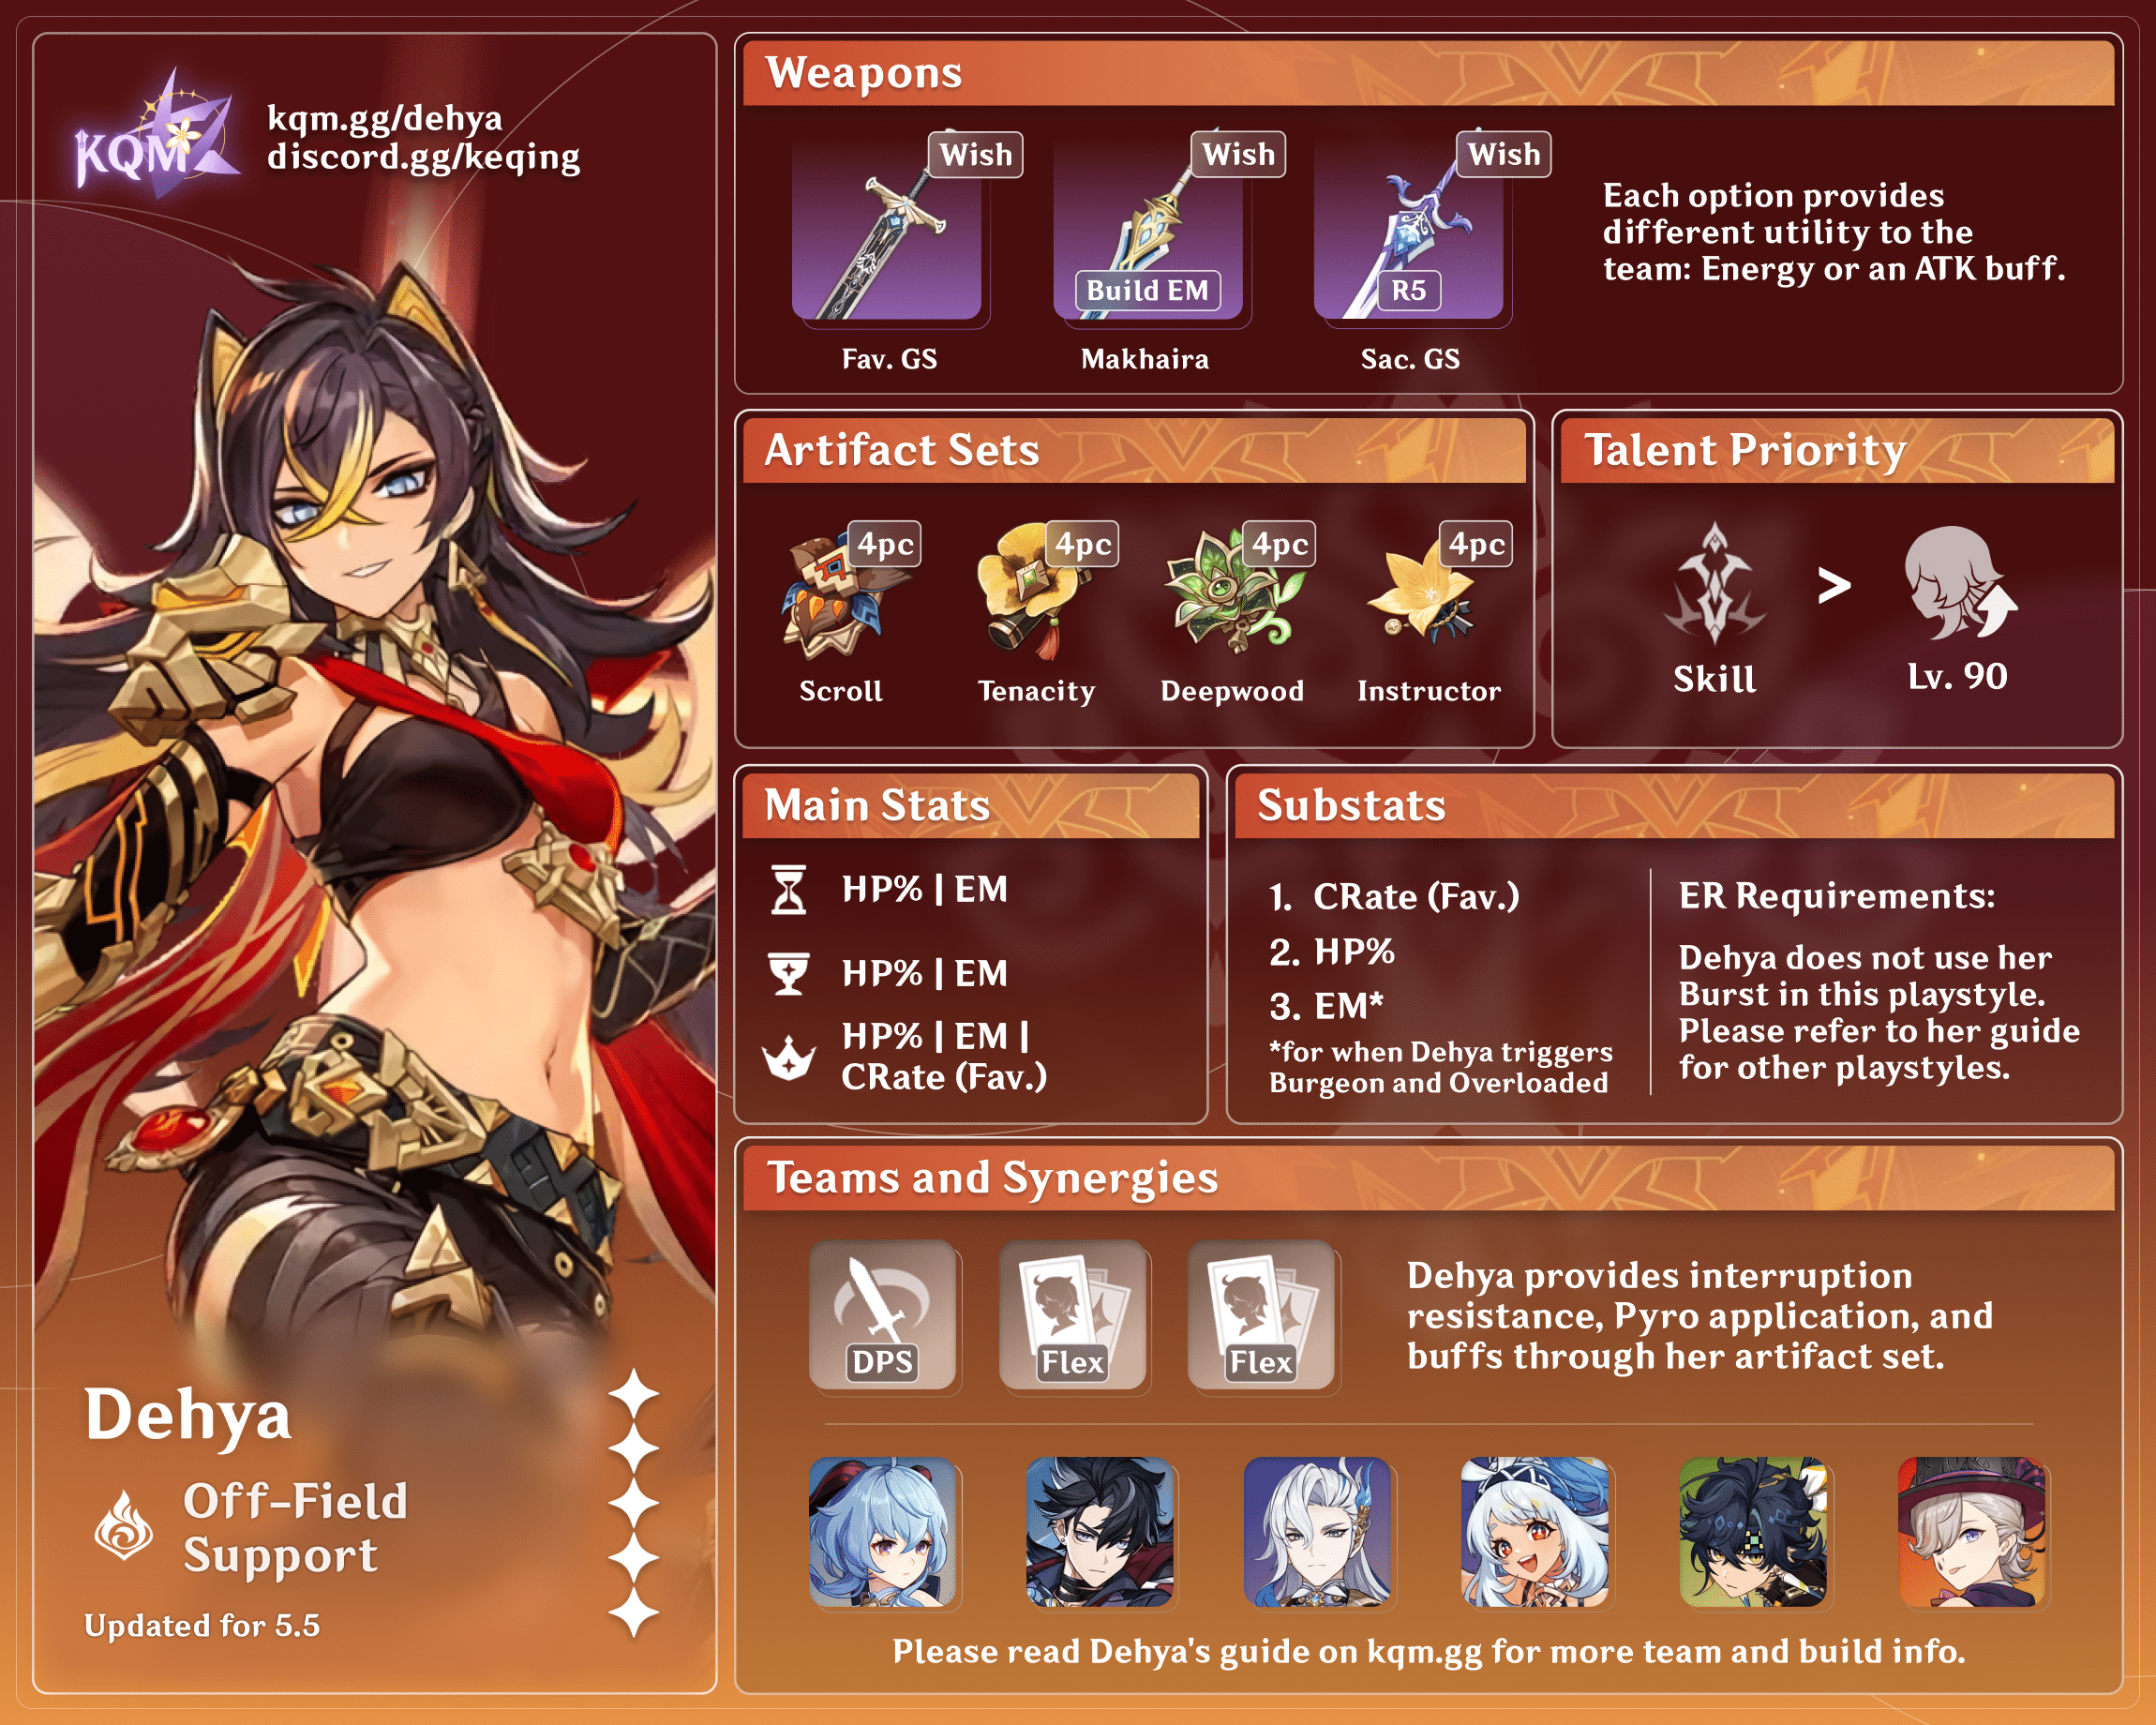
Off-field Support
Sands | Goblet | Circlet |
| HP% | HP% | HP% / HB% |
Stacking HP on an off-field support Dehya helps her tank more damage. Surprisingly, with Dehya’s Ascension 4 Passive, she can also use a Healing Bonus Circlet, especially in scenarios that drain her to 40% of her Max HP every 20s.
Weapons
On-field DPS
Assumptions: KQMS, 4pc EoSF, C0, ER% or ATK%/Pyro%/CRIT, Dehya/Bennett/Kazuha/Xiangling for Mono Pyro. Extensive analysis can be found in the Dehya Mastersheet.
| Weapon | % of LSR R1 | Notes |
| Beacon of the Reed Sea R1 | Fully stacked: 124.20% Unstacked: 108.48% | Dehya’s BiS for general on-field use. Its passive encourages players to forgo a shielder in the team to further buff Dehya with ATK% and HP%. Note that the passive only lasts 8s after the wielder’s Skill hits enemies, which means that on C6 Dehya, its uptime may not last throughout her extended Burst duration. |
Redhorn Stonethresher R1-5 | 113.00% | Mainly a CRIT stat stick. Refinements are useless. Still a very competitive option if you insist on using it on Dehya as an on-field carry. BiS for drip and fashion. |
Akuoumaru R5 (270 Energy) | R5: 111.2% R1: 101.9% | Strong 4-star option if Dehya can meet her ER requirements. Nevertheless, it is not recommended to pull this weapon specifically for Dehya as it is locked behind the weapon banner gacha. |
Wolf’s Gravestone (WGS) R1 (30% Passive uptime)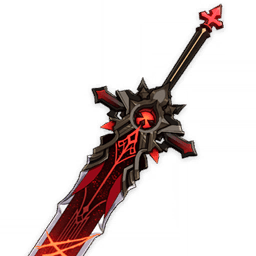 | 30% passive uptime: 109.7% No passive: 106.2% | Usable 5-star option that gives lots of ATK% and provides a useful teamwide ATK% buff if the enemy’s HP is low. However, the buff uptime is rather short and inconsistent. Contested BiS for drip. |
Skyward Pride R1 | 104.26% | The only 5-star Claymore with ER as its secondary stat, which may allow Dehya to use an ATK%/HP% Sands. |
The Unforged R1 (3 stacks) | Shielded: 109.7% Unshielded: 105.20% | Similar to WGS, but with a more consistent passive for Dehya’s personal damage in place of an occasional teamwide ATK% buff. |
Blackcliff Slasher (no stacks) | 100.50% | It is not recommended to use Starglitter to exchange this weapon specifically for Dehya. |
Serpent Spine R1-5 | No stacks: 100.10% | Dehya’s Redmane Blood makes maintaining stacks difficult, making refinements useless. However, it still provides a decent amount of CRIT Rate. |
Luxurious Sea-Lord R5 | 100.00% | Best F2P option if you have it. It provides ATK% and Burst DMG%. |
Tidal Shadow R5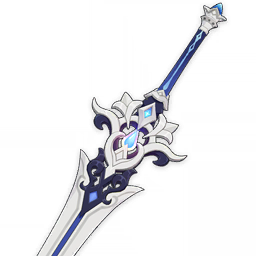 | 99.50% | Fontaine’s craftable weapon is an accessible option for Dehya. She can easily trigger its passive with her A4 or in teams with Bennett. |
Katsuragikiri Nagamasa R5 | 99.50% | Inazuma’s craftable weapon lowers Dehya’s ER requirements, but it also makes rotations stricter in some scenarios. |
Favonius Greatsword | 96.50% | Reduces Dehya’s personal ER requirements by approximately 15% per proc. With high refinements, it can increase team DPS by proccing multiple times while Dehya uses her Burst, allowing for better substats on other characters and even Dehya herself. |
Prototype Archaic | 92.80% | A highly accessible downgrade if Luxurious Sea-Lord isn't available. |
Burgeon
Assumptions: KQMS, R5 Mailed Flower, C0, EM/EM/EM. Extensive analysis can be found in the Dehya mastersheet.
| Weapon | % of Bloodtainted Greatsword | Notes |
Mailed Flower R5 | 102.30% | BiS for Burgeon Dehya; it gives a total of 206 EM with good uptime. |
Makhaira Aquamarine R5 | 100.50% | This weapon gives Flat ATK to other characters based on the wielder's EM, which may make it better than Mailed Flower if the team has good ATK-scaling characters. |
Rainslasher R5 | 100.50% (passive active) | A 4-star option that gives less EM than both Mailed Flower and Bloodtainted Greatsword, but has a better passive if there is a consistent Hydro aura on enemies. |
Bloodtainted Greatsword | 100.00% (passive inactive) | A decent and widely accessible 3-star EM weapon that is available on any banner. |
Off-field General Support
| Weapon | Notes |
| Favonius Greatsword | Dehya can proc Favonius’ passive and funnel the particles to another character, lowering that character’s ER requirements and allowing them to build more offensive stats. Stacking CRIT Rate with this weapon is optimal to provide a higher proc chance. Note that Dehya’s Skill cannot proc the Favonius passive while she’s off-field. |
| Makhaira Aquamarine R5 | This weapon gives Flat ATK to other characters based on the wielder's EM while also giving Dehya EM for reaction damage. |
The Bell | HP% stat stick for additional sturdiness. Nothing more. |
Artifacts
On-field DPS
Assumptions: KQMS, Beacon of the Reed Sea R1, C0, ER% or ATK%/Pyro%/CRIT, Dehya/Bennett/Kazuha/Xiangling for Mono Pyro. Extensive analysis can be found in the Dehya mastersheet.
| Artifact | % of Emblem (Mono Pyro) | Notes |
4pc Emblem of Severed Fate (EoSF) | 100% | Dehya’s BiS artifact set as the majority of her damage comes from her Burst. The 2pc effect also helps her fulfill ER requirements. |
4pc Vourukasha's Glow (VG) | 99.4% | Assumes 100% uptime. Due to Dehya’s large ER requirement before C4, 4pc EoSF will tend to outperform 4pc VG. Even in the rare cases where 4pc VG outperforms 4pc EoSF before C4 due to a lower ER requirement (such as with Favonius), it is not recommended to farm this set specifically for her. At C4, it performs similarly to 4pc EoSF, and at C6 it is ~10% better than 4pc EoSF in teams where her ER requirements are lower. |
4pc Lavawalker | 92.2% | Decent alternative for 4pc Emblem of Severed Fate in Mono Pyro teams. However, it is not recommended to farm this set exclusively for Dehya. |
4pc Marechaussee Hunter | 93.7% | Despite having a great passive that looks similar to 4pc Vourukasha's Glow, the CRIT Rate effect cannot proc when Dehya is off-field while setting up other characters. This, on top of the ER issues mentioned previously, makes it fall behind EoSF and Vourukasha's Glow. If Dehya uses a non-CRIT Rate weapon, 4pc Marechaussee Hunter performs closer to 4pc VG. |
4pc Crimson Witch of Flame | 87.2% | This set shines more when Dehya is in a Vaporize team, with the caveat of requiring C4 to help ease her ER requirements. |
2pc combination (ATK%/Pyro DMG%/Burst DMG%) | 86.1 – 90.2% | Despite falling behind other options by quite a large margin, using a 2pc/2pc combination with the best available substats is an option. |
C6 On-field DPS
| Artifact | % of Emblem (Mono Pyro) | Notes |
| 4pc Emblem of Severed Fate (EoSF) | 100% | Despite having lower ER Requirement at C6 due to Energy regeneration at C4 and more Pyro Particles at C2, 4pc EoSF is still Dehya’s baseline artifact set at C6, as the majority of her damage comes from her Burst. The 2pc effect also helps her fulfill ER requirements. |
| 4pc Vourukasha's Glow | 112.3% | Assumes 100% uptime. Dehya’s personal ER requirements are reduced significantly with constellations, pushing 4pc Vourukasha’s Glow ahead of 4pc EoSF. |
| 4pc Marechaussee Hunter | 103.2% | 4pc Marechaussee Hunter performs similarly to 4pc Emblem of Severed Fate, although it is important to ensure you do not overcap on CRIT Rate. The 4pc set effect does not trigger off-field, so make sure you are on-field during healing. If Dehya uses a non-CRIT Rate weapon, 4pc Marechaussee Hunter performs closer to 4pc VG. |
Burgeon
Assumptions: KQMS, R5 Mailed Flower, C0, EM/EM/EM. Extensive analysis can be found in the Dehya mastersheet.
| Artifact | % of 2pc EM + 2pc EM | Notes |
4pc Gilded Dreams | 105.75% | Providing an ATK% buff for Dehya’s Skill and EM for Burgeon (and potentially Burning and Overload), this set is an alternative if you do not have access to 4pc Flower of Paradise Lost. It is also in the same Domain as Deepwood Memories, the best set for Dendro-related team comps, making it generally more Resin-efficient than 4pc Flower of Paradise Lost. |
4pc Flower of Paradise Lost | 105.42% | This tailor-made set for Bloom is BiS for Dehya if she triggers more Burgeon than other reactions. However, Dehya does not proc Burgeon frequently enough to make this set significantly better than 4pc Gilded Dreams. |
2pc EM + 2pc EM | 100.00% | The bare minimum for a Burgeon playstyle. |
4pc Tenacity of the Millelith | 91.34% | Gives Dehya less EM in exchange for an ATK% buff for other ATK-scaling characters. |
Off-field General Support
| Artifact | Notes |
| 4pc Tenacity of the Millelith | Dehya’s Elemental Skill sends a coordinated attack every 2.5s, allowing the set to maintain relatively high uptime while Dehya’s Skill lasts, for a total of 16s out of a 20s rotation. The 20% HP aids Dehya’s tanking capabilities as well. |
4pc Instructor | Provided that Dehya procs reactions with her Skill cast, this artifact set buffs any reaction-based team comp. However, 4-star artifacts give less stats overall for Dehya, which may affect her defensive utility. |
4pc Deepwood Memories | Dehya can use 4pc Deepwood and keep a relatively high uptime, allowing other characters to equip more offensive artifact sets. |
4pc Ocean-Hued Clam | Dehya heals with her Ascension 4 Passive, thus she can proc 4pc OHC’s set effect, allowing her to deal additional damage while increasing her defensive potential with the set’s Healing Bonus. While Dehya’s healing is only for herself, the increased personal survivability helps in her support role by making her a more reliable tank. |
4pc Maiden’s Beloved | Same as 4pc OHC, but trades some damage for even more defensive utility by increasing her own survivability. |
“Ready to roll? Good. Then let’s pack up and move out.”
Team Comps and Synergies
On-Field Mono Pyro DPS

Mono Pyro is a tried and tested team where Dehya can fit comfortably as an on-field DPS. This team provides more Pyro Particles than her other teams, which helps lower her high Energy requirements.
Bennett is vital in Mono Pyro teams as he provides Dehya and other DPS units with a large Flat ATK buff and additional Pyro Particles. An Anemo unit in the last slot is needed to provide Pyro RES Shred with 4pc VV, along with other buffs to boost the entire team’s damage.
When Dehya is played as the on-field DPS, her rotations generally proceed as follows: Dehya’s Skill is first cast to provide teammates with interruption resistance, Energy and damage mitigation. Then, buffs and debuffs are applied, namely Bennett’s Flat ATK buff and 4pc VV’s Pyro RES Shred. The abilities of any off-field DPS (such as Xiangling) are used, and the rotations end with a recast of Dehya’s Skill and the use of her Burst.
 Bennett | A requirement for Mono Pyro teams to function, Bennett provides a massive Flat ATK buff to the on-field character while also supplementing Dehya’s defensive abilities with strong healing. His high particle generation and low Skill cooldown greatly contribute to lowering ER requirements across the board. |
 Xiangling | Xiangling is the best off-field DPS option for this team, as she can snapshot Bennett’s Burst buff and provide a large amount of AoE Pyro DMG. She also benefits from the high amount of particles Mono Pyro teams generate, allowing her to focus less on ER and more on damage stats. Her C1 provides useful Pyro RES shred through Guoba, while her C6 provides a nice Pyro DMG Bonus buff to other Pyro characters after she uses her Burst. |
 Klee / Hu Tao / Yoimiya | These options can take the primary on-field Pyro DPS role, letting Dehya focus on her off-field defensive utility. |
 Kazuha Kazuha | The best Anemo unit for Mono Pyro teams is Kazuha, as he can provide his team with an Elemental DMG Bonus based on his Elemental Mastery via his A4 Passive. Kazuha’s strong grouping also contributes significantly to his value in Mono Pyro, allowing AoE abilities like Xiangling’s Pyronado to hit multiple targets at a time. His short cooldown on his Tap Elemental Skill allows rotations to be a bit more flexible as well, which is always appreciated. |
 Sucrose Sucrose | Sucrose’s buffing potential in Mono Pyro teams is quite limited. Characters in this team composition generally focus on dishing out raw damage rather than triggering an abundance of Elemental reactions — hence, Sucrose’s EM buff is mostly wasted. However, Sucrose has access to TTDS, which gives the next on-fielder a 48% ATK buff and, at Sucrose’s C6, the Elemental Absorption on her Burst can give the corresponding Element a 20% Elemental DMG Bonus. |
Venti | Venti’s grouping capabilities and Energy refund for all Pyro teammates are much appreciated, since he allows them to build more offensive stats and Burst more reliably. Note that for some smaller, lighter enemies, Dehya’s Leonite Bite may miss if the enemies get sucked up too high. |
Example Teams
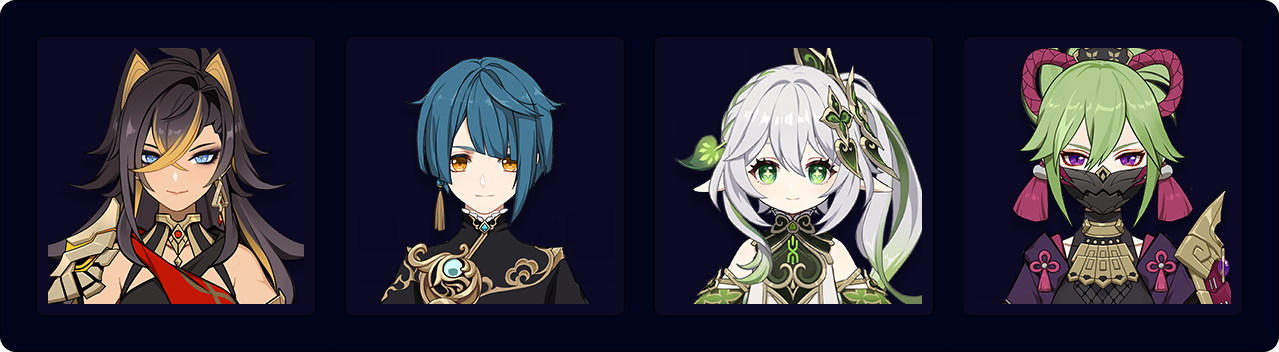
Dehya — Bennett — Xiangling — Kazuha

Rotation
Dehya E > Kazuha E hP Q > Bennett Q E > Xiangling Q E > Bennett N1 E > Dehya Q > Bennett N1 E > Dehya E N1
by crimson__
by crimson__
Reverse Melt (Melt Ganyu)

Melt Ganyu teams with Dehya primarily focus on Dehya’s off-field defensive utility. Since Ganyu’s main weakness in Melt teams is her vulnerability to interruption, Dehya’s Skill can supply her with enough defensive utility and interruption resistance to justify her inclusion. Dehya is generally used as a 4pc Tenacity of the Millelith holder to boost the team's ATK.
Bennett | Ganyu appreciates Bennett’s Flat ATK buff and healing, especially without a shielder. By having Ganyu within the radius of Bennett’s Burst, she is comfortably able to Melt her Charged Shots (assuming there is a Pyro aura) while fully taking advantage of his huge Flat ATK buff. |
 Xiangling | Xiangling should generally only be run with Bennett so she can comfortably meet her ER requirements while snapshotting Bennett’s Flat ATK buff. Her Pyro application can easily enable Ganyu to Melt her Charged Shots, with Xiangling also dealing significant damage. |
 Kazuha Kazuha | With proper setup and rotations, Kazuha is able to Swirl Cryo while absorbing his Burst with Pyro, providing Ganyu with buffs for her Charged Shots while also enabling Melts. However, Kazuha variations of this team are stricter and more difficult to play than the Xiangling and Nahida variations. |
 Nahida Nahida | Nahida’s 1.5U Dendro application allows for what is known as “BurnMelt”. She is able to use the Pyro from Bennett/Dehya to trigger Burning on the enemy, which serves as a source of Pyro aura for Ganyu to Melt her Charged Shots off of. Nahida’s Burst also gives Ganyu up to 250 EM to further boost her Melt damage. |
Example Teams
Dehya — Ganyu — Bennett — Xiangling

Rotation
Bennett Q E > Xiangling Q E > Dehya E > Ganyu E 5CA E > Bennett N1 E
by idkanonymized
Dehya — Ganyu — Bennett — Nahida

Rotation
Nahida E Q > Bennett E Q > Dehya E N1 > Ganyu 6CA E
by crimson__
Hyperburgeon

Hyperburgeon teams use both Hyperbloom and Burgeon. Burgeon Dehya uses her coordinated attacks from her Elemental Skill to apply Pyro onto Dendro Cores. Enemies can only take at most 2 instances of Burgeon damage every 0.5s. Due to the long 2.5s intervals between each Pyro application from Dehya’s Skill, it’s possible to accumulate many unreacted Dendro Cores between her Skill procs. Triggering Burgeon on all of them at once with her next proc wastes many of them, since enemies will only take damage from 2. Having an Electro teammate to trigger Hyperbloom between Dehya’s Skill procs allows for more reactions overall and, consequently, more damage.
 Xingqiu | Xingqiu’s single-target damage and fast Hydro application make him a premier choice as a Hydro option for Hyperburgeon teams, as he is able to keep up with the high demand for Dendro Cores. He also provides additional defensive utility in the form of chip healing and damage reduction in combination with Dehya’s damage reduction and interruption resistance. |
 Yelan | Yelan’s Hydro application allows her to keep up with the amount of Dendro Cores consumed by both Dehya and the Electro unit, making her a strong candidate for the Hydro slot. Her A4’s ramping DMG% buff sees less value in this team archetype since most of its damage stems from Transformative Reactions, to which her DMG% buff does not apply. |
 Kokomi | Despite having slower off-field Hydro application than other units, Kokomi consolidates the role of healer and Hydro applier which is especially valuable due to Burgeon self-damage. Assuming you have fast enough off-field Dendro application, you can run Kokomi on-field to increase her Hydro application and produce more Dendro Cores for your team. Kokomi’s ability to generate Cores also increases quite significantly in AoE situations. |
 Ayato | Ayato provides both on and off-field Hydro application in a large area. If you find yourself needing someone to spend time on-field, Ayato can work quite well. When he is on-field with both his Burst and Skill active, his Hydro application can be quite fast, with the caveat of requiring lots of ER in situations where he can only use his Skill once. |
 Nahida Nahida | Whether you need on-field or off-field Dendro application, Nahida is almost always the best choice for Hyperburgeon teams. With her long-lasting, 1.5U intermittent Dendro application from her Elemental Skill, Nahida’s ability to create Dendro Cores is a step above the rest. Her Elemental Burst does not aid most teams significantly, as a majority of Burgeon and Hyperbloom triggers are off-field units and thus do not benefit from Nahida’s EM share. |
 Yaoyao Yaoyao | Yaoyao’s value mainly comes from her ability to double as a healer and Dendro applier. Her Dendro application in single-target is pretty lackluster due to her downtime on her Elemental Skill and its ICD. However, this issue can be somewhat circumvented when fighting against AoE content where her Skill can target multiple enemies, as Yuegui’s ICD is target-dependent and Yuegui will prioritize targets that haven’t been hit yet. |
 Baizhu Baizhu | Baizhu also acts as a healer and a Dendro applier, with an additional utility that increases the Bloom, Hyperbloom, and Burgeon reaction DMG when Baizhu heals an ally. |
 Dendro Traveler | Dendro Traveler’s ease-of-access and relatively long, off-field Dendro application make them a good contender for the Dendro slot. It is important to keep enemies inside of the Lea Lotus Lamp’s radius to maintain a Dendro aura. Note that in Burgeon teams, the first Element their Burst comes into contact with must not be Pyro. If this happens, the Lea Lotus Lamp will immediately explode, causing the Traveler’s Burst to end. |
 Alhaitham | Alhaitham has good on-field Dendro application and high personal damage, but he lacks off-field presence. When run as a solo Dendro unit, he will have much higher ER requirements, which forces you to either sacrifice damage stats for additional ER or simply cast his Burst every other rotation. |
 Collei | Collei’s Burst lacks consistent Dendro application and has a relatively long downtime, making her a suboptimal Dendro pick. |
 Raiden | Raiden’s Elemental Skill is arguably the best ability in the game for triggering Hyperbloom. The short intervals between each of her Skill hits and her long 25s Skill duration makes rotations extremely easy. When using Raiden in this playstyle, it is important to build her with full EM to maximize her Hyperbloom damage. |
 Kuki Shinobu | Similar to Raiden, Kuki’s Elemental Skill is also very good at triggering Hyperbloom. Despite Kuki’s slower Hyperbloom trigger rate, she is able to heal the on-field character, which can be quite beneficial in Burgeon teams due to the self-inflicted damage. |
Example Teams
Dehya — Xingqiu — Nahida — Kuki
Rotation
Nahida E Q > Dehya E E > Xingqiu Q N1 E D > Kuki Q (if available) E N1 > Nahida Attack spam
by crimson__
Off-field Support
Dehya’s interruption resistance and damage mitigation allow her to slot into a multitude of teams as an off-field support. Her Burst is usually entirely ignored for such teams, allowing Dehya to take up minimal field time by just casting her Elemental Skill.
Dehya provides easy Double Swirl setups for both Hu Tao and Yoimiya in their VV Vape team compositions, while also being usable as a general defensive support for Double Hydro teams. She can also be used for vulnerable characters who appreciate her interruption resistance, such as Wanderer, who additionally benefits from absorbing Pyro for his A1 Passive.
Example Teams
Dehya — Hu Tao — Yelan — Kazuha

Rotation
Yelan Q N1 > Dehya N1 E > Kazuha Q E hP > Yelan E N1 > Hu Tao Combo > Kazuha hE hP N1
by crimson__
Yoimiya — Xingqiu — Yelan — Dehya

Rotation
Xingqiu E Q > Yelan Q E > Dehya E > Yoimiya E 3N5 > Yelan E N2
by crimson__
Wanderer — Faruzan — Bennett — Dehya

Rotation
Faruzan E CA Q > Bennet E Q > Dehya E E > Wanderer Combo
by Athena
Lyney — Bennett — Kazuha — Dehya

Rotation
Bennett EQ > Kazuha tEP > Dehya E > Lyney CAx3 Qc E > Bennett E > Lyney CA
On-Field DPS (Vape or Melt)

On-field DPS Dehya teams focus on maximizing the damage from Dehya’s Burst through buffs and reactions (Vaporize or Melt).
Please note that playing Dehya as an on-field DPS unit is strongly discouraged without heavy investment into both Dehya and her supports (including but not limited to Constellations and signature weapons). This team composition maximizes Dehya’s personal damage for fun. Without the high investment mentioned above, Dehya struggles to deal enough damage for the Spiral Abyss.
Units
Bennett | Bennett is the best ATK buffer in the game, and he also provides valuable healing. His ability to battery Dehya is especially important since a lot of the team’s damage comes from her Burst. |
 Mona | Mona not only buffs Dehya’s damage via her Omen debuff but also allows Dehya to Vaporize a significant portion of her Burst. Although Mona is the best Hydro option for enabling Dehya to Vaporize her Burst, it can be difficult to meet Mona’s ER requirements since she is the sole Hydro character on the team and her particle generation is subpar. As a Catalyst user, Mona can also hold Thrilling Tales of Dragon Slayers (TTDS) to further buff Dehya. |
 Rosaria | Rosaria provides off-field Cryo application and a valuable CRIT Rate buff. C2+ Rosaria is highly recommended for the extended Burst duration. Rosaria alone does not provide enough Cryo application for Dehya to consistently Melt her Burst, so you should use another Cryo unit or an Anemo unit such as Kazuha that can absorb Cryo with their Burst. |
  Ayaka / Ganyu | In this archetype, Ayaka and Ganyu are both built with high ER to Burst off cooldown for additional Cryo application when paired with Rosaria, which ensures Dehya can Melt her Burst hits consistently. The caveat of using Ayaka and Ganyu as Burst supports, however, is that this results in much lower damage output from the two of them compared to their optimal teams. |
 Kazuha | The premier Anemo unit for buffing Dehya’s damage. Kazuha’s ability to shred enemy Pyro RES with 4pc VV and provide a Pyro DMG Bonus through his A4 allows Dehya to substantially increase her damage. With the proper setups, Kazuha can also absorb Hydro or Cryo with his Burst to let Dehya more easily Vaporize or Melt her Burst damage. In on-field Vaporize DPS teams, It’s worth noting that Mona’s Hydro application is enough for Dehya to Vaporize, so it isn’t required to absorb Kazuha’s Burst with Hydro. Using Kazuha’s Burst when not necessary may interfere with the Hydro Aura, lower Bennett’s buff duration, extend the rotation with more swaps, or make it more difficult to apply Mona’s TTDS buff to Dehya. In on-field Melt DPS teams, Kazuha should absorb his Burst with Cryo so that Dehya can consistently Melt. Since Cryo is the lowest of Kazuha’s Burst absorption priority, this requires careful aura management. |
 Sucrose | Sucrose is an overall downgrade to Kazuha but is still a strong choice nonetheless. Getting Sucrose’s Burst to absorb the proper Element can be quite the headache, so she is not recommended for Melt. In Vaporize, this is less of an issue since Mona is sufficient as a standalone Hydro applier for Dehya. Sucrose’s EM share provides a good amount of value here as Dehya is Vaporizing part of her Burst. |
Example Teams
Dehya — Bennett — Mona — Kazuha

Rotation
Dehya E > Bennett Q E > Kazuha tE > Mona Q E > Dehya Q E > Kazuha tE Q > Bennett E > Dehya E
by itsjaeyou
Dehya — Bennett — Rosaria — Kazuha

Rotation
Dehya E > Rosaria E Q > Kazuha Q > Bennett Q E > Kazuha tE > Dehya Q E > Rosaria E > Kazuha tE > Bennett E > Dehya E
by itsjaeyou
Afterword
“I never once imagined I could get to this level... All credit goes to you. What next? Do you have a job for me? Whatever it is, just say the word and I'll be there.”
Hopefully this Dehya guide has been enough to convince you to use her. You can find us in Keqing Mains server if you need an answer for any question. We will also keep updating the guide for new content, but for now, enjoy her to the fullest.
Credit
Authors:
.athene., cynematic, erk_kimbo#2028
Writing:
.athene., cynematic, .reimu., erk_kimbo#2028
Calculations:
.athene, Emiliabyss, NatC, Sew, snowscliped, erk_kimbo#2028
Editing:
reddraegon, sew, arbutus_unedo , cuppacote, idkanonymized, nociii
Infographic:
angtahimik
Trancription:
chasing_haze
Special Thanks:
crimson__, kolvii, rarepossum, chasing_haze, Leah
References
Changelog
- 25/06/2023: Finish the 3.7 guide
